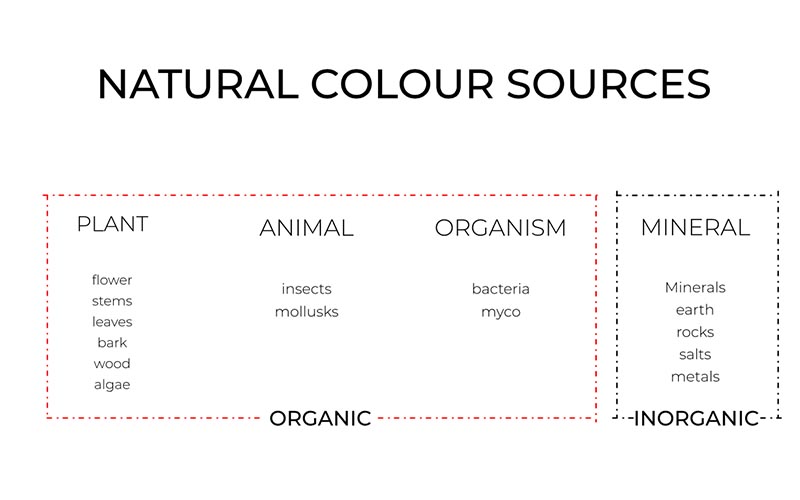
04. Biochromes
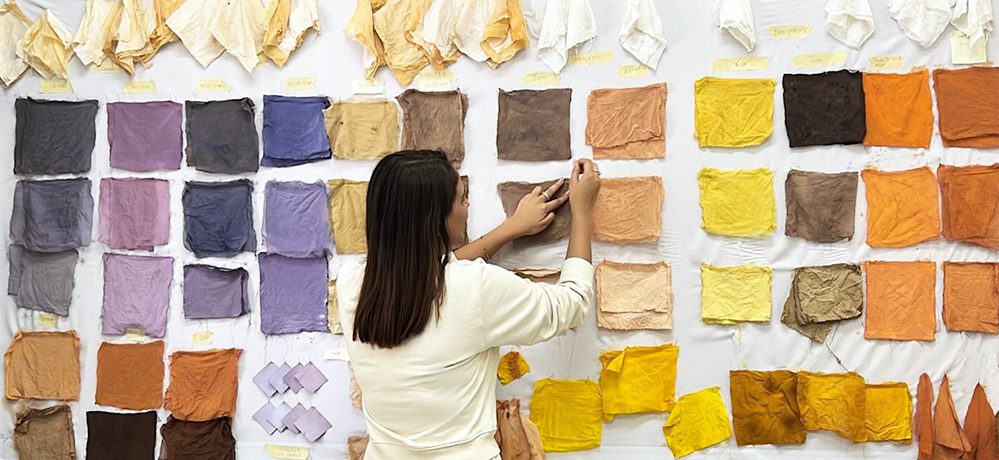
This week we worked with natural dyes, pigments and bacterial dyes. This week was super exciting and fun for me as I have worked with natural dyes before for my graduation project design collection, Using beet-roots, turmeric and onion peels. This week I wanted to explore a bit more, So i chose to work with Avocado pits, Something with which i have never worked before. I do have an experience with making organic dyes but I had a very DIY approach, this week gave me a clear picture and neccesity of scouring the fabrics, using mordants to change pH level, which in turn changed the colour of dyes (depending on the material).
Research
As we all know, fashion industry is the second most polluting industry, chemical dyes and toxic mordants used in the process contribute to the pollution. The textile dyes significantly compromise the aesthetic quality of water bodies, increase biochemical and chemical oxygen demand (BOD and COD), impair photosynthesis, inhibit plant growth, enter the food chain, provide recalcitrance and bioaccumulation, and may promote toxicity, mutagenicity and carcinogenicity.
The world loses an astounding quantity of food every year. A third of all food for human consumption in the world is lost or wasted. Kitchen leftovers like onion peels, Avocado pits and skins, pomegranate peels etc. can be used to make organic dyes, pigments or inks.
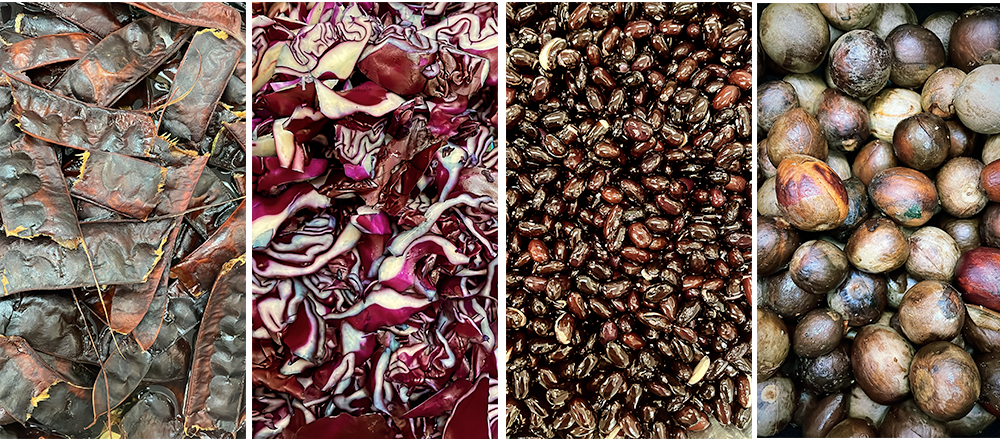
This week we as a team explored different organic wastes/materials to extract dyes:
- Avocado pits
- Pomegranate peels
- Onion peels
- Eucalyptus
- Tara pods
- Red cabbage
- Black beans
- Turmeric
- Annoto seeds
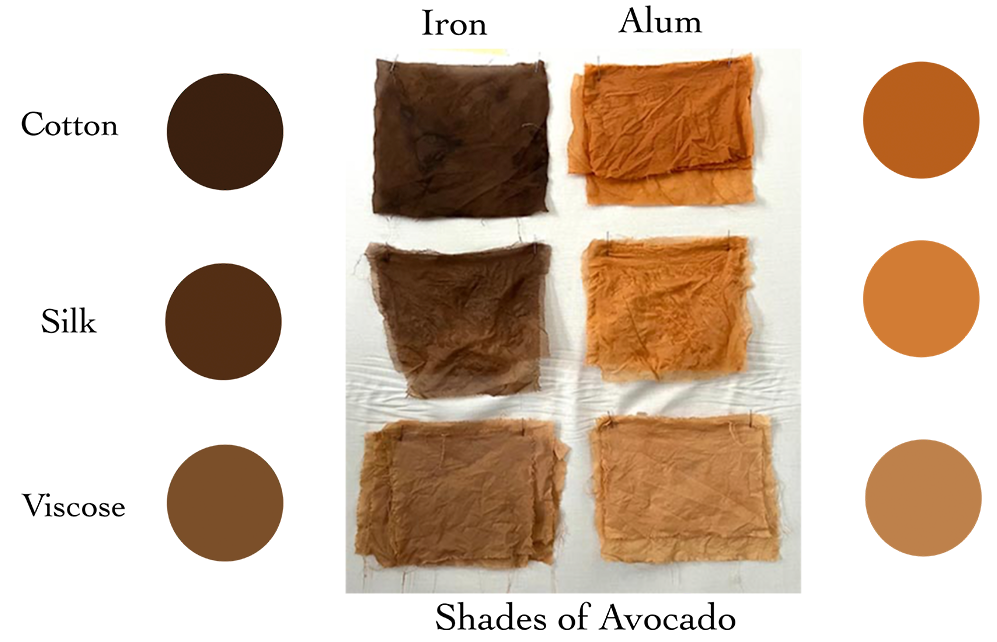
We were working with three types of fabrics, to see which fabric works best with which dyes:
- Animal based - Silk
- Vegetal/Plant based - Cotton
- Cellulose based/man-made - Viscose/Rayon
The Process table that we are going to follow-
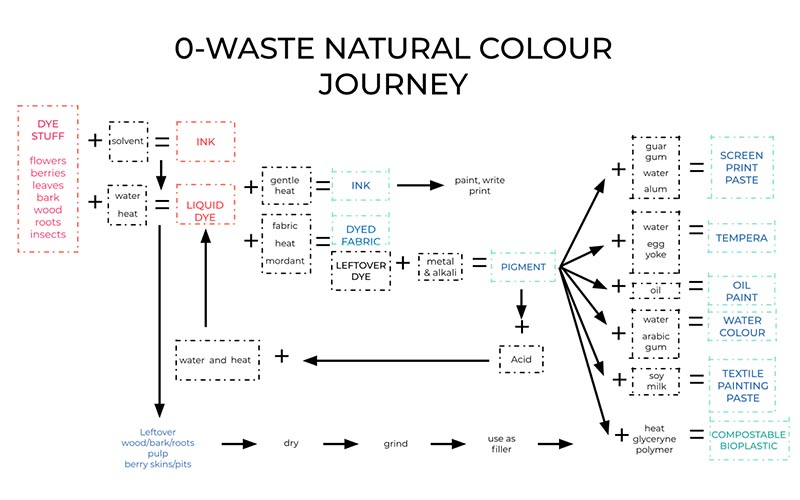
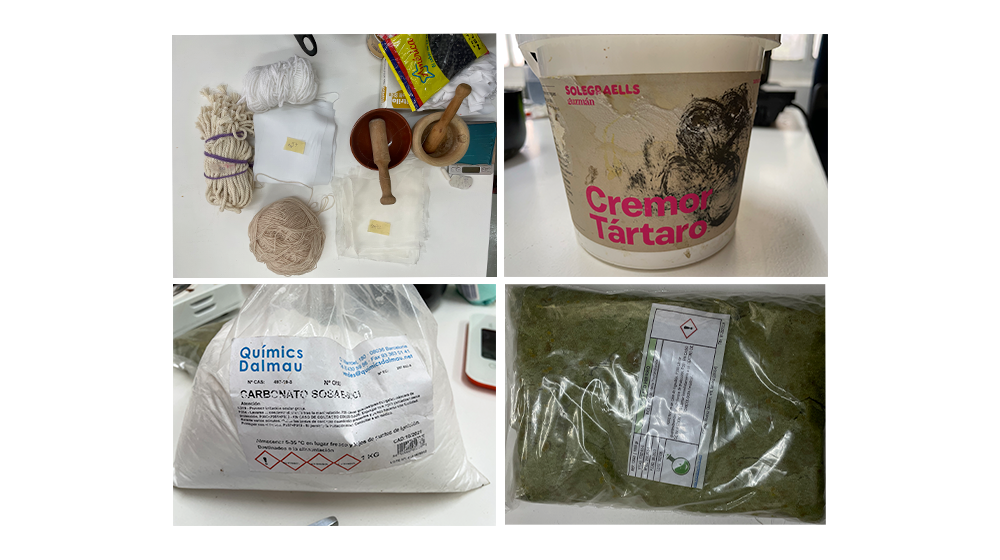
Tools
- Fabrics (silk, cotton and viscose)
- Pots
- Spatula
- Yarns
- Weighing scale
- Measuring scale
- Scissors
Process
-
WOF - Weight of fabric Cut the fabric into small equal pieces and weigh them on a weighing scale.
-
Scouring Put the fabrics seprately in different pots and wash them adding 2% of soda ash of the total WOF and let them simmer for an hour, - this is an important step to remove all the oil and treatment that had been done on the fabric to protect from dirt during transportation.
-
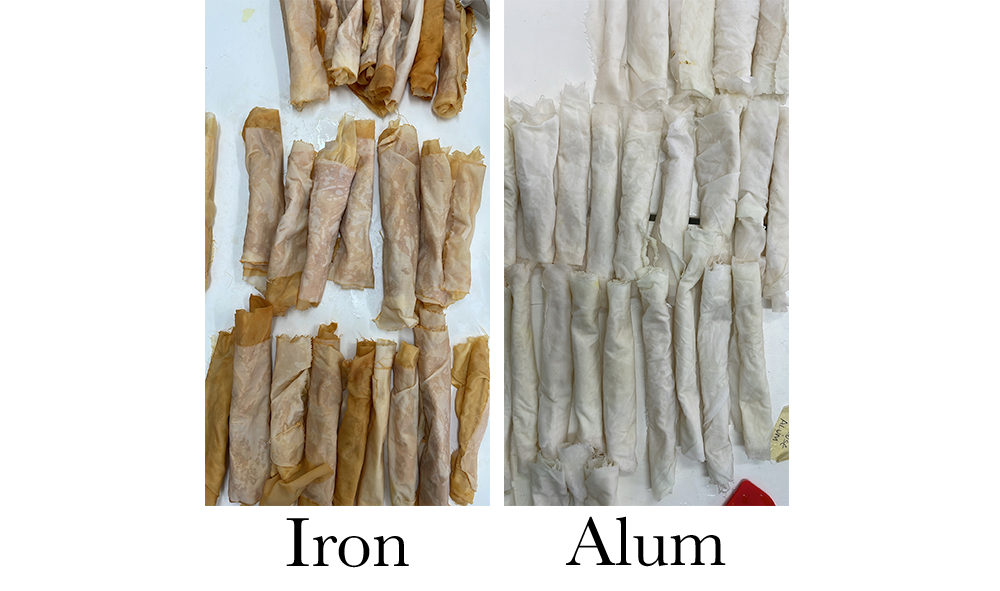
Mordanting the fabric This step opens up the chemical structure of fibres so that they can absorb all the dyes. we are gonna try two different types of mordants - Alum (for brighter tones) and Iron (for darker tones). Alum (12% of the WOF) and iron sulphate (1 % of the WOF).
- SILK
- Silk - 52 x g
- Alum - 0.6x g
- Iron sulphate - x g
- COTTON
- Cotton - 238 g
- Alum - x g
- Iron sulphate - 2,38 g
- VISCOSE
- Viscose - 125 g
- Alum - 6,3 g
- Iron sulphate - 1,25 g
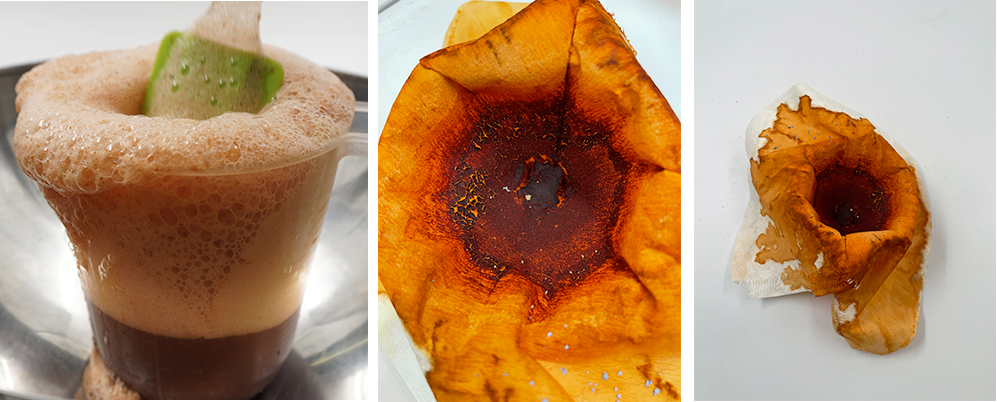
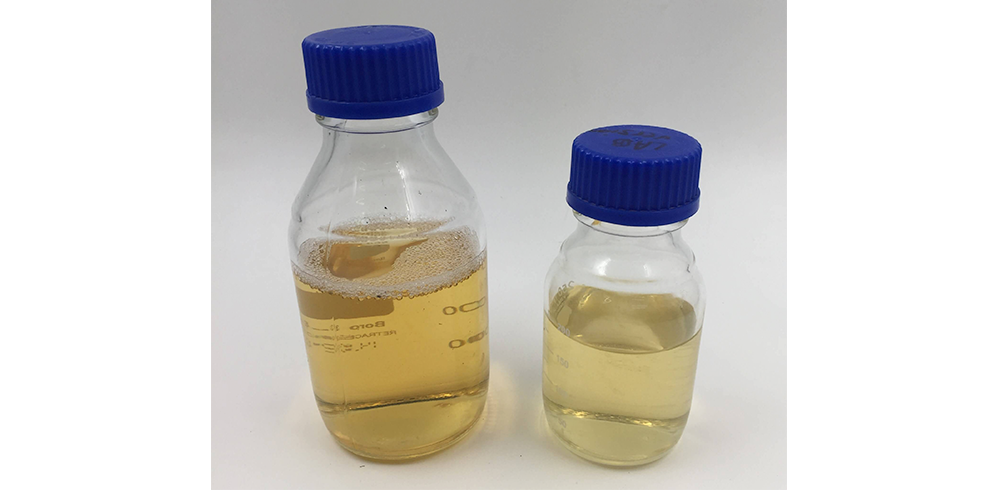
- Now we will do some research about the material and prepare dye bath depending of the WOF. Add avocado pits to one pot. Then fill the pots with water and slowly heat to about 70 – 85 degrees Celsius. Avocado dye is heat sensitive; boiling will cause the dye to turn brown so be very careful not to boil the dye.
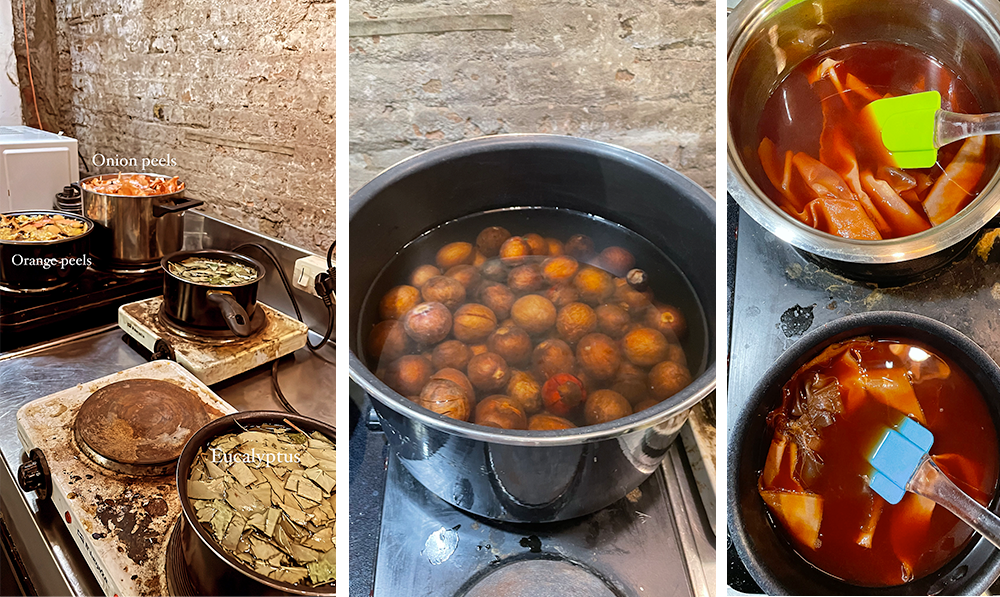
Once it gets up to temperature don’t walk away and leave it as the temperature is likely to increase. Turn the heat down and monitor it to make sure it doesn’t boil. Hold at this temperature for an hour or so, then turn off the heat and let the dye bath soak over night with the dyestuffs in it.
- Strain the dye bath To avoid bits of avocado in your fabric, you must strain the dye bath. To strain, place a colander over a bucket and slowly pour your dye solution into the bucket.

Now the avocado dye is ready to use. Take your wet mordanted fabric place it in the dye pot. Remember the dye solution and your wool should be the same temperature. Just like the pre-mordant process, bring it very slowly to a gently simmer (do not boil at this stage either). Here we are using two pots, one with alum and one with iron.
After simmering for a few hours, turn off the stove and let the dyebath soak. The fiber will take up as much dye as it possibly can. If the dyebath still has colour to it, you can add more fiber and simmer it for a few hours for a second dye bath. The first dye bath will have the deepest colour, compared to subsequent uses.
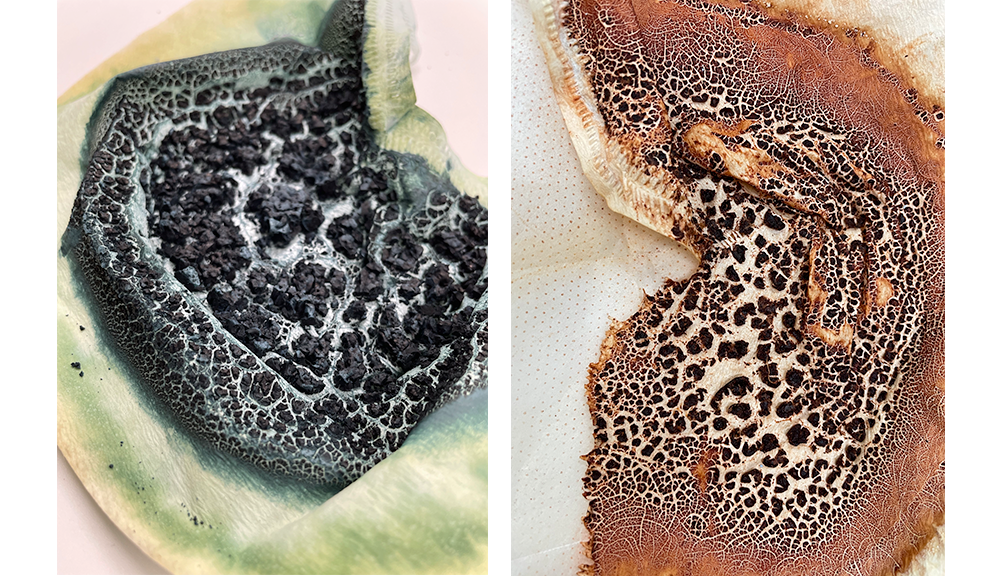
We did not get a lot of results after adding modifiers, it only made deeper colours or no change at all. But I tried sprinkling iron fillings on the fabric, the sample was quite interesting..
Pigments from dyes
-
Once we have done our experimentation with the dyes, we move on to the phase of making our own pigments with our leftover dye bath.
-
The leftover dye bath (of Avocado)
- Alum as a mordant to bind (2 parts of alum) 10 gr.
-
Sodium to precipitate the compound (1 part of soda) 5 gr.
-
Dissolve alum with hot water.
-
Dissolve soda with hot water.
-
Add alum to dye bath.
- Add soda, carefully little by little and mix, pigments will start separating.
-
Let rest, so the pigment comes down. When there’s no more bubbles we can filter the solution. Filtering takes a lot of time, so we left it for quite sometime.
-
Let the pigment dry, Once dry grinding pigment by hand with grinder or with a mixer.
-
To dissolve dry pigment => add vinegar.
-
we can also make oil paint or watercolors with the pigment.
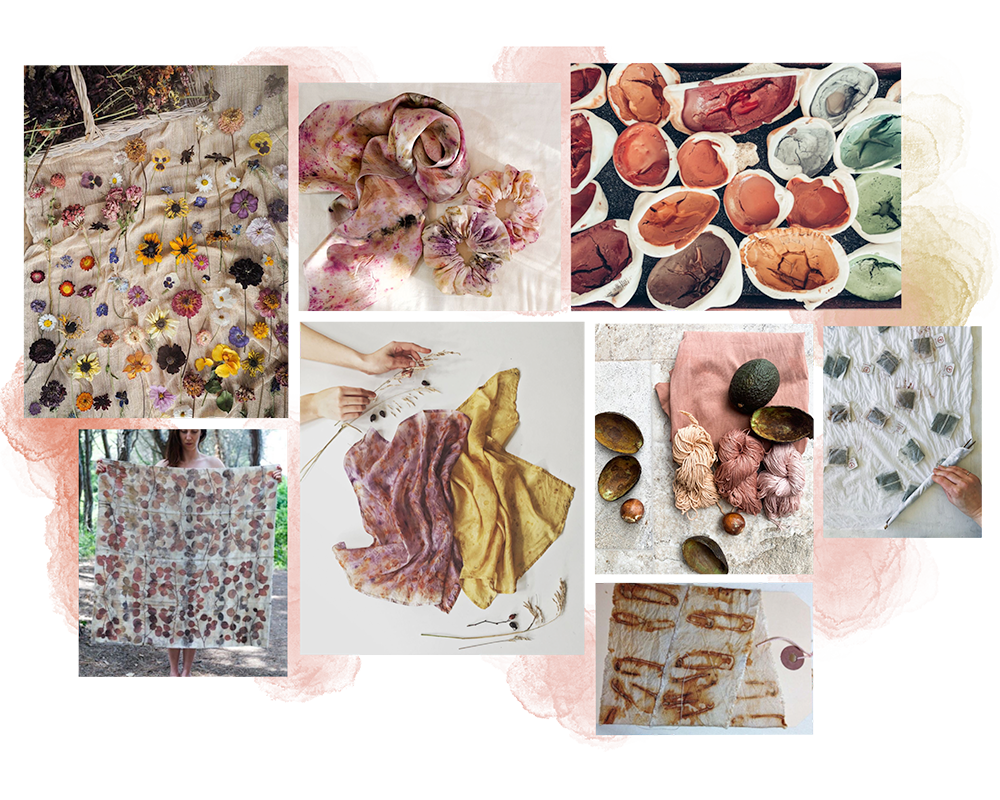
 textures created while the pigments were drying, was super interesting to look at.
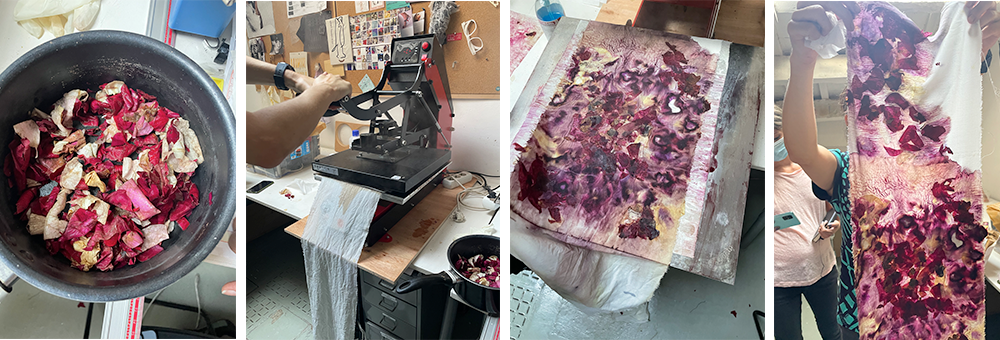
Heat pressed rose petals
We also tried to create some interesting things with rose petals and annoto seeds in a heat press machine.
Bacterial Dyeing
First of all, we have to prepare our substrates where we are going to grow the bacteria, we have two ways to make this type of substrate:
Liquid Medium: To be able to grow the bacteria on the fabric Medium Agar: To be able to reproduce the bacteria on several plates Once the substrates are made, we must make sure that they are well sterilized to avoid any type of contamination, that is why we are going to use a pressure cooker to clean the substrates.
In this case we use the Luria medium to feed the bacteria Serratia marcescens, this substrate is rich in Glycerol, that is why bacteria grow so well in it.
Once we have our substrates sterilized, it is time to sterilize our plates to be used and our fabric to be dyed. The idea is that the bacteria will stain the fabric in a pattern to obtain faster results since the bacteria will not have to grow all over the surface.
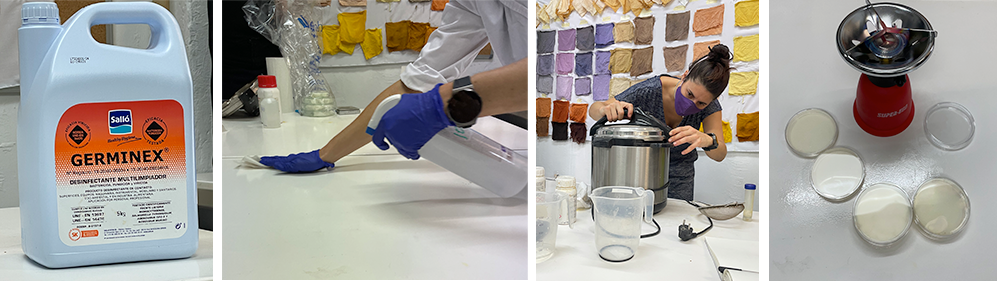
Once the fabric is sterilized, we can inoculate the bacteria in our working sample, this is where we start our process:
-
First, we prepare our workspace, cleaning with ethanol and lighting the lighter, leaving a radio or a sterile environment bubble.
-
Then we put the petri dishes near the burner where we are going to arrange the agar medium to be able to inoculate the bacteria. we continue with putting a little of agar medium on each of the plates so till it solidifies. Then we let it dry with the lid up to avoid contamination.
-
Once our fabrics are sterilized, we wait until the plate is at room temperature and we begin the process of inoculating the bacteria.
-
In order to "seed" the bacteria in our environment, we have to work again in sterile space. We open our plate with the fabric and soak the piece of fabric with liquid medium.
-
Then, with a special tool, we take samples of the bacteria plate to pass them to the cloth plate, we spread it well to make sure it grows around the entire cloth.
- Once our plate with the cloth is ready, we inoculate one of the petri dishes with agar medium with bacteria in order to reproduce our bacteria and make sure we have material for the future.
Finally, we leave the plates in a place where it has a constant average temperature for at least 48 hours, to allow our bacteria to grow.
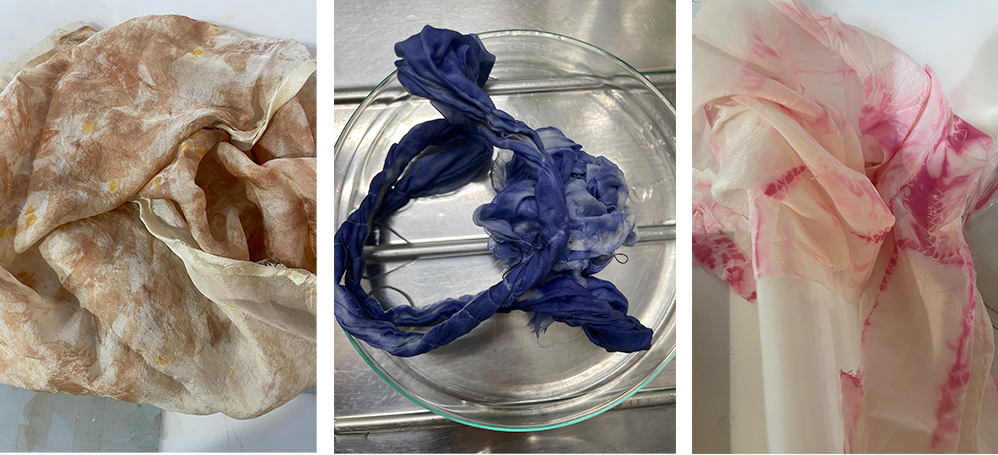 The sample with purple colour was done during the biochromes week, other two samples were there in the textile lab, The brown one is tie-dye with onion peels and pink was using another strain of bacteria.
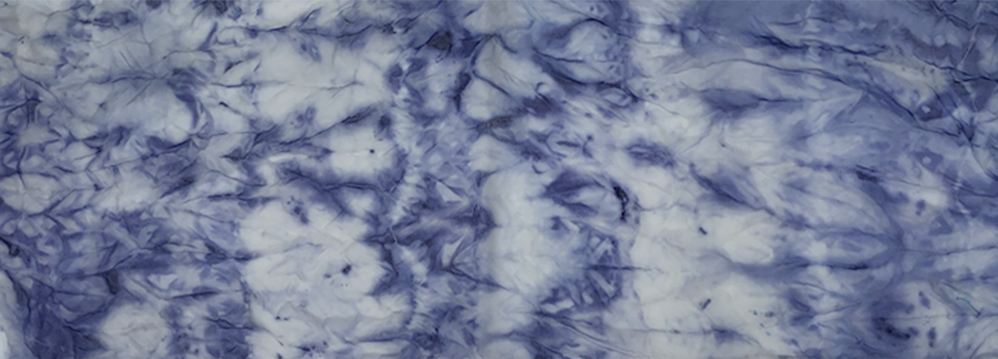
Final result of bacteria dye!!
Thank you for reading! Hope you liked it!!