6. BioFabricating Materials
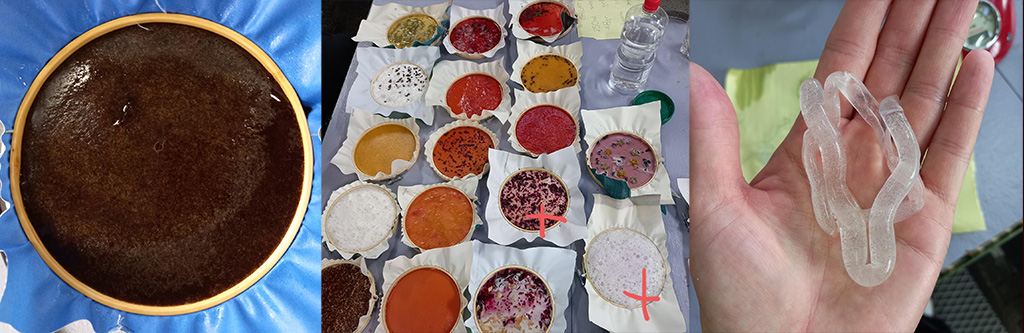
I really enjoyed the experience at the Boot Camp in Geneva, I think I can serenely say that we all felt like little chemists who were free to experiment! Here you see some pictures of the final samples made with different recipes.
Whereas this week I wanted to start understanding the processes and building a core archive of bioplastics and take my time for pure learning. This will give me the tools to understand how to apply them in my design project. Since my tools were little and I really missed a group to work with, I decided to start from the basics and play with plasticisers quantities to test different outcomes.
Tools
- Bioplastic Cook book by Margaret Dunne
This is the one one I followed for receipts, it was the gift given at the end of the bootcamp - Class notes by C.Raspanti
- pots, jars, measuring cup (graduated)
- spoon, whisk and electric whisk
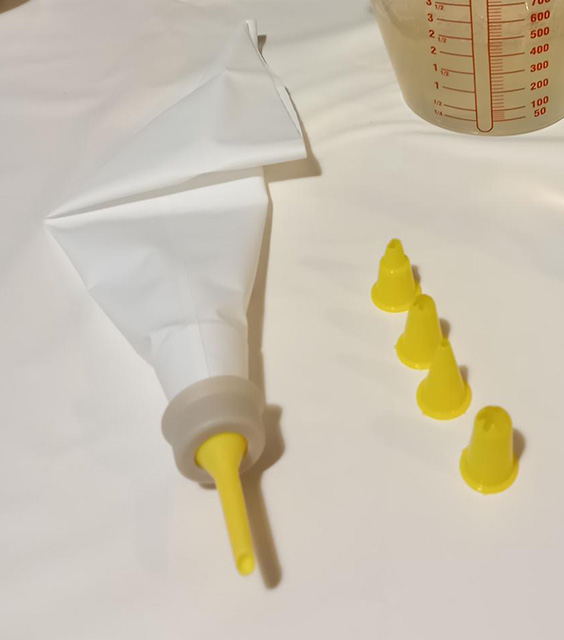
- sac a poche
- embroidery frames with plastic fabric as molds

- plastic dishes
- linen burlap 10x10 cm, linen tops
- scale (the kitchen scale that I use is not enough, a precision scale sensitive to tenths of a gram would be better or alternatively increase all the doses)
- thermometer (I haven't one but don't follow my example, buy one,it's essential)
Goals
My goal was to prepare at least three recipes with GELATINE, secondly three recipes with AGAR AGAR and lastly three with ALGINATE closing with an extrusion.
GELATINE as leather, the material I have mainly worked with in my work experience, is a byproduct of the food industry and I have managed to find one type that comes from beef, used to make puddings or jellies. It comes in powder and it has a straw color.
AGAR AGAR was quite easy to find on supermarket shels but in very small quantities (pockets of 2 gr), it has all the characteritics described above of gelatine but it's plant based (extracted from Rhodophyta , a red algae specie).
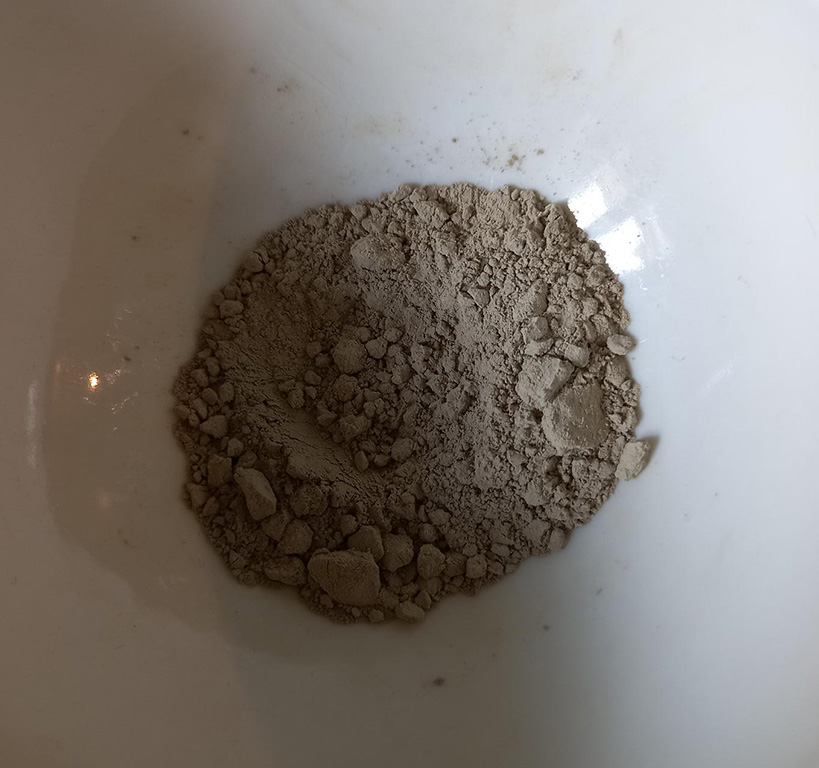
ALGINATE, is a polysaccharide found in brown algae and it was quite funny to see the suspicious face of the pharmacist when I ordered it.It comes in powder made of little cristals.
RECIPE 1: "3 GELATINE BASED BIOPLASTICS AND 1 GELATINE FOAM"
Prepare this recipes 1 by collecting the ingredients necessary, to be found in the list below:
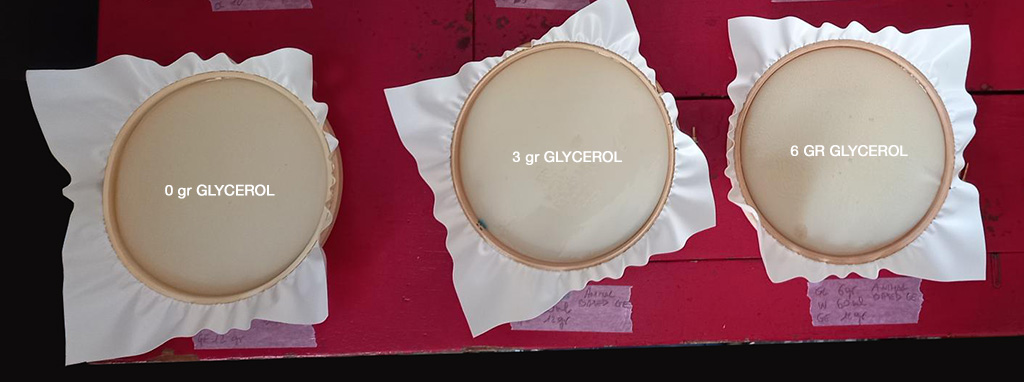
* 0/3/6 gr GLYCEROL
* 60 ml WATER each
* 12 gr GELATINE each
* a teaspoon of green soap for the extra version of foam bioplastic
* cooker or stove
* measuring cup
* scale
* teaspoon
* whisk/electric whisk
* thermometer
* Mix all of the ingredients together in a pot in the amounts above, I suggest to mix glycerine with water first and then to add the gelatine powder slowly until dissolved.
* Put the pot on the stove and heat the mixture to just below boiling (you can use the thermometer to check t°). Keep stirring until the solution starts to thicken.
* At this stage you can add half teaspoon of green soap (for dishes) and whisk the solution until it            becomes foam
* Except for the gelatine foam, remove the froth with a spoon from the surface.
* Pour liquid onto the embroidery frame mold.
* Let it dry for 24/48 hours ( depending on temperature and humidity levels) and unmold.
Documenting and comparing experiments
TEST SERIE BIO-PLASTIC
| Material name | polymer | plastifier | solvent |
|---|---|---|---|
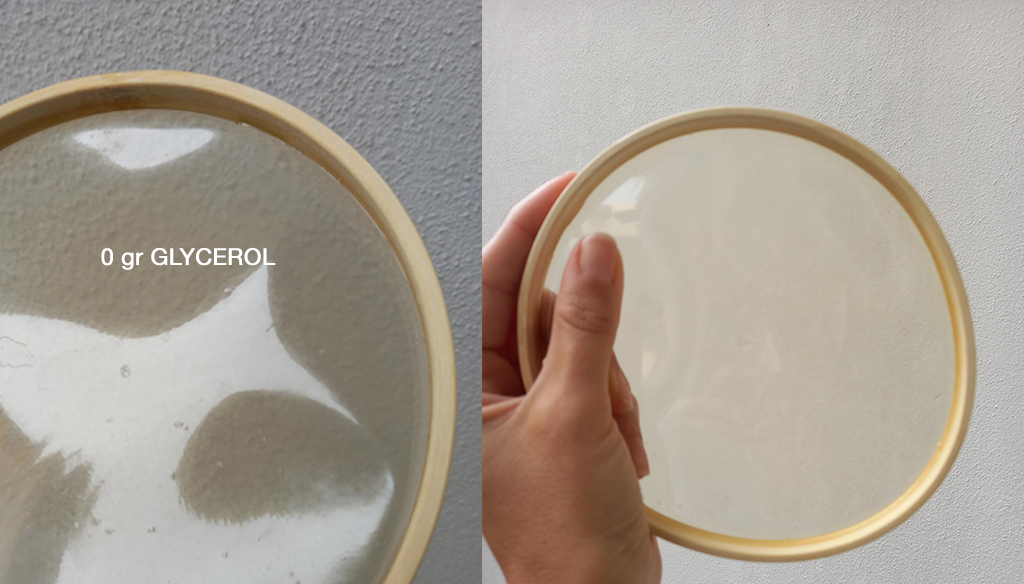
| gel-bioplastic | gelatine 12 gr | glycerol 0 gr | tap water 60 ml |
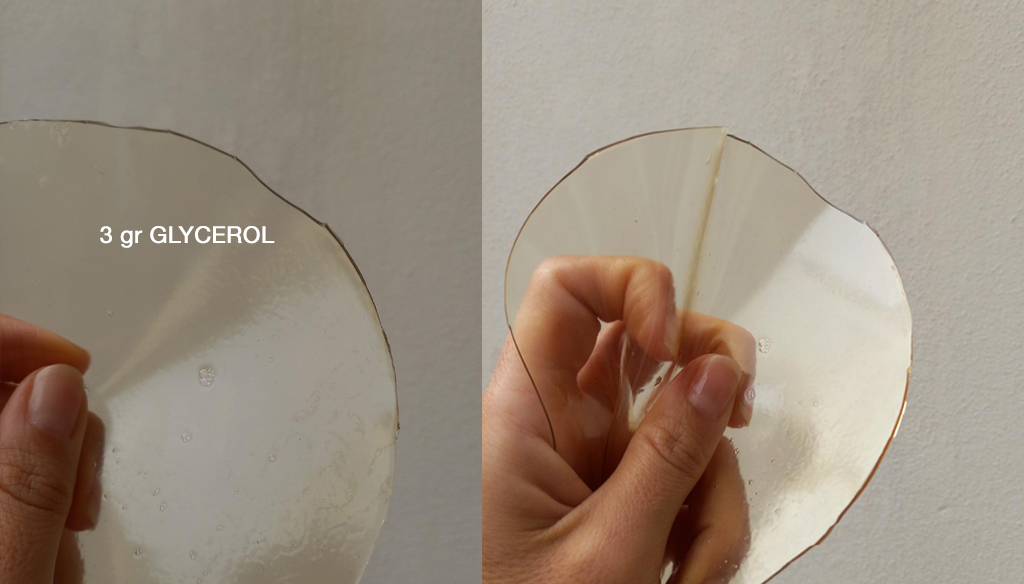
| gel-bioplastic 2 | gelatine 12 gr | glycerol 3 gr | tap water 60 ml |
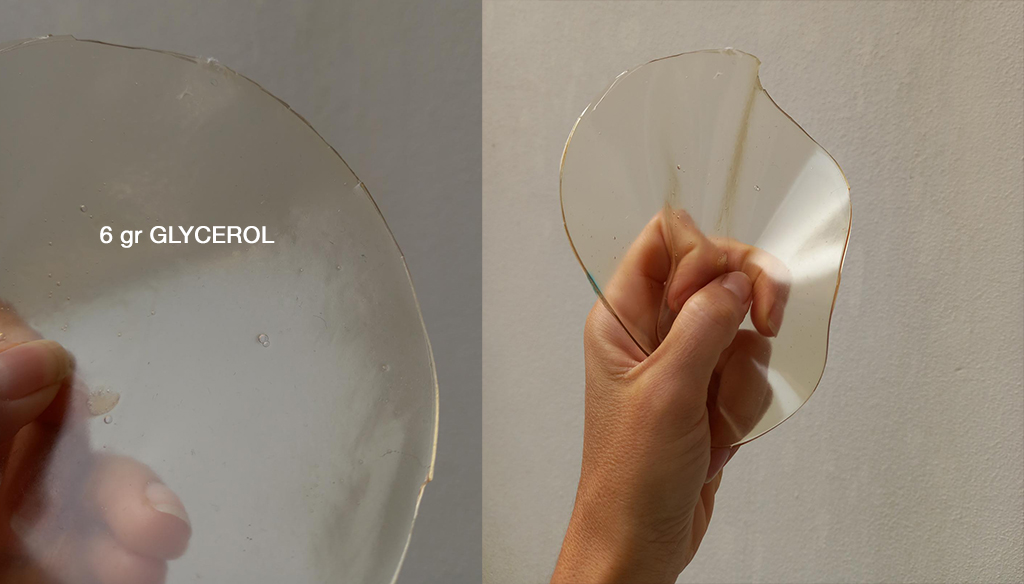
| gel-bioplastic 3 | gelatine 12 gr | glycerol 6 gr | tap water 60 ml |
RESULTS AND OBSERVATIONS
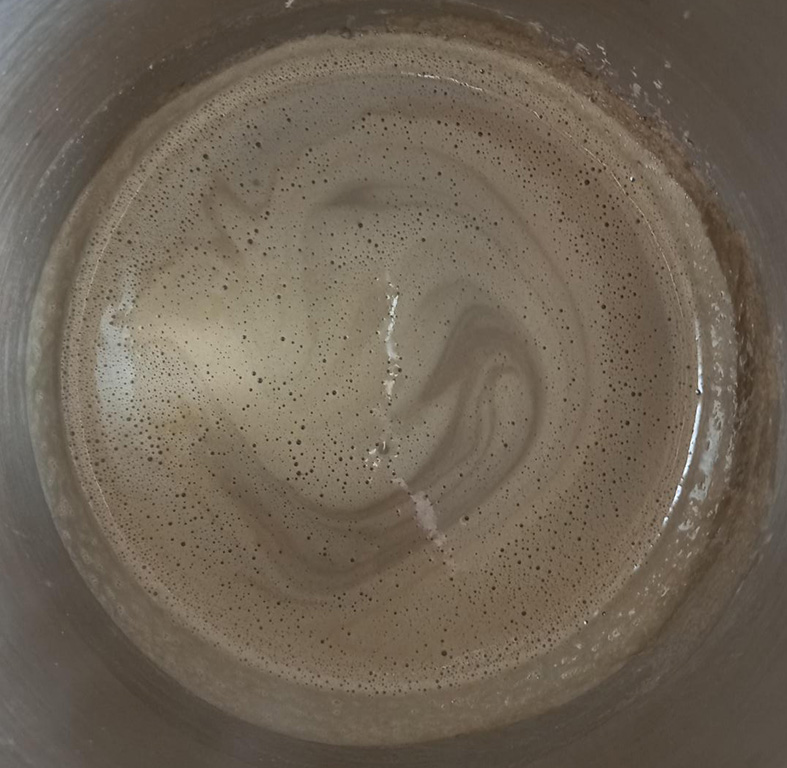
All the solutions turns immediately matt when ingredients are mixed and those with gelatine when heat up form a foam. There is an acrid "wet dog" smell that intensifies with heat as well as the colour. Below an image of the fresh molds, differences between the three samples are minimal. They will dry flat for 24 hours.
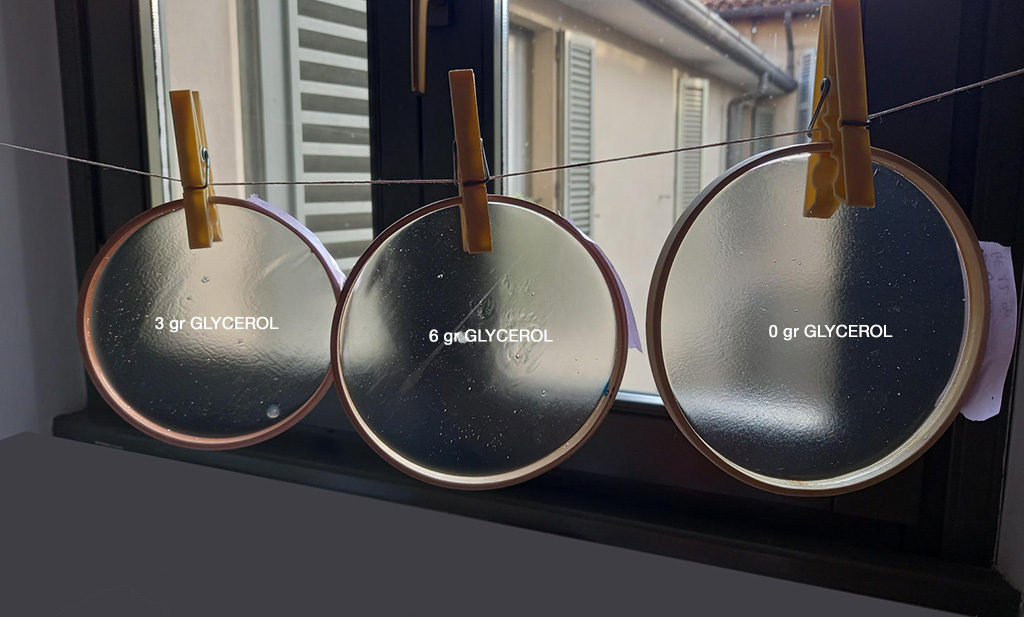
Above, an image of the same molds I left hanging for 24 hours more. Differences in term of texture and feeling are more evident.
Here are the samples after being totally dried.
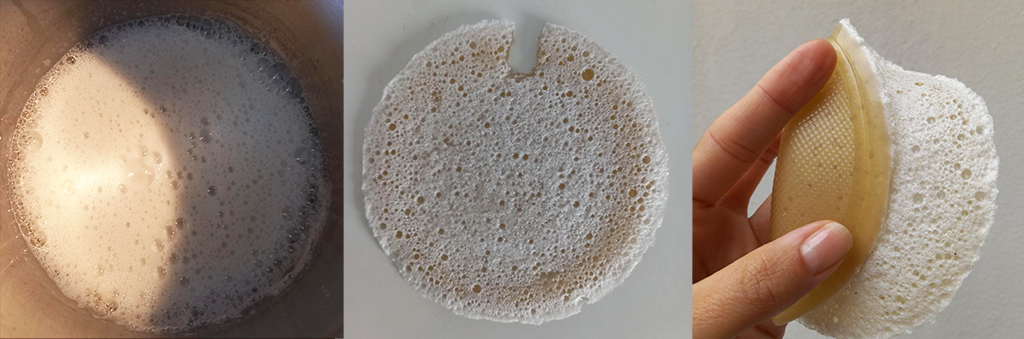
And, yes, there is of course also gelatin foam! Here's a little 3-step story from the pan to my hands. You can see that the front is foamy and the back is gelatinous and transparent, two different layers have formed. The back has a nice texture thanks to the plastic plate I used as a mold.
RECIPE 2: "3 AGAR AGAR (PLANT BASED) BASED BIOPLASTICS"
Prepare this recipes 2 by collecting the ingredients necessary, to be found in the list below:
* 0/2/4 gr GLYCEROL
* 60 ml WATER each
* 2,5 gr AGAR AGAR each
* cooker or stove
* measuring cup
* scale
* teaspoon
* whisk
* thermometer
* Mix all of the ingredients together in a pot in the amounts above, I suggest to mix glycerine with water first and then to add the agar agar powder slowly until dissolved.
* Put the pot on the stove and heat the mixture to just below boiling (you can use the thermometer to check t°). Keep stirring until the solution starts to thicken.
* Remove the froth with a spoon from the surface.
* Pour liquid onto the embroidery frame mold.
* Let it dry for at least 48 hours or more ( depending on temperature and humidity levels) and unmold.
Documenting and comparing experiments
TEST SERIE BIO-PLASTIC
| Material name | polymer | plastifier | solvent |
|---|---|---|---|
| agar-bioplastic | agar agar 2,5 gr | glycerol 0 gr | tap water 60 ml |
| agar-bioplastic 2 | agar agar 2,5 gr | glycerol 2 gr | tap water 60 ml |
| agar-bioplastic 3 | agar agar 2,5 gr | glycerol 4 gr | tap water 60 ml |
RESULTS & OBSERVATIONS
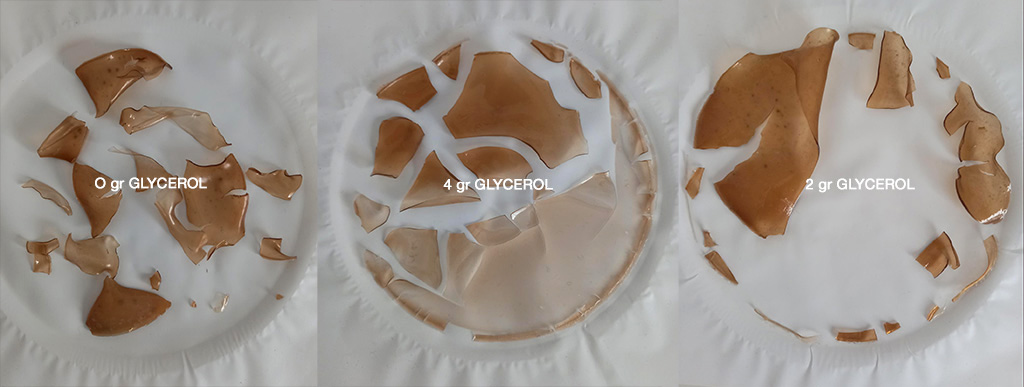
Below an image of the fresh molds, differences between the three samples are visible. They will dry flat for 48 hours.
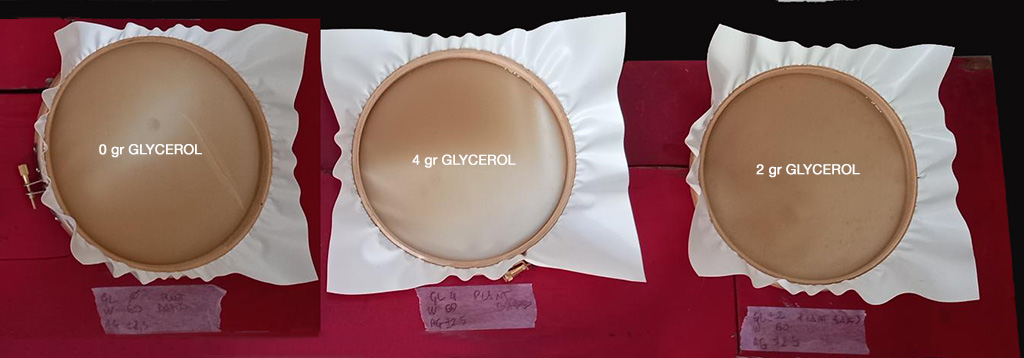
Here are the samples after being totally dried.
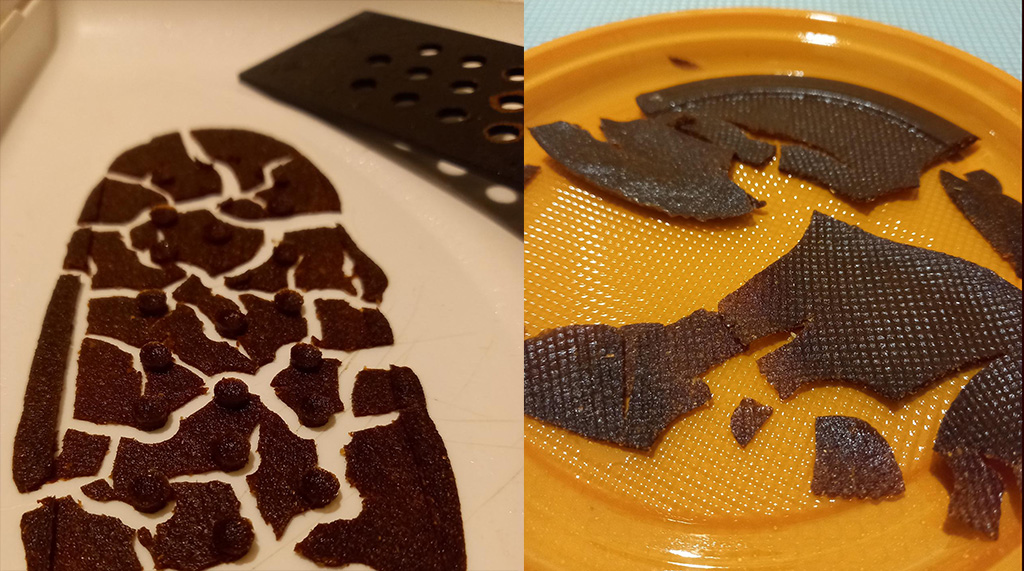
RECIPE 3: "ADDING GREEN CLAY"
To both gelatine based (a) recipe as well as the agar agar one (b), I added a green super fine clay that I had at home to make face masks. Here are the recipes3:
* 5 gr GLYCEROL
* 80 ml WATER
* 3 gr AGAR AGAR
* 5 gr CLAY
* 6 gr GLYCEROL
* 120 ml WATER
* 24 gr GELATINE
* 10 gr CLAY
* cooker or stove
* measuring cup
* scale
* teaspoon
* whisk
* thermometer
* The process is the same used for the bioplastic [^1] and [^2] :mix all of the ingredients together in a pot in the amounts above, I suggest to mix glycerine with water first and then to add the agar agar powder slowly until dissolved and finally the clay.
* Put the pot on the stove and heat the mixture to just below boiling (you can use the thermometer to check t°). Keep stirring until the solution starts to thicken.
* Remove the froth with a spoon from the surface.
* Pour liquid onto the embroidery frame mold.
* Let it dry for at least 48 hours or more ( depending on temperature and humidity levels) and unmold.
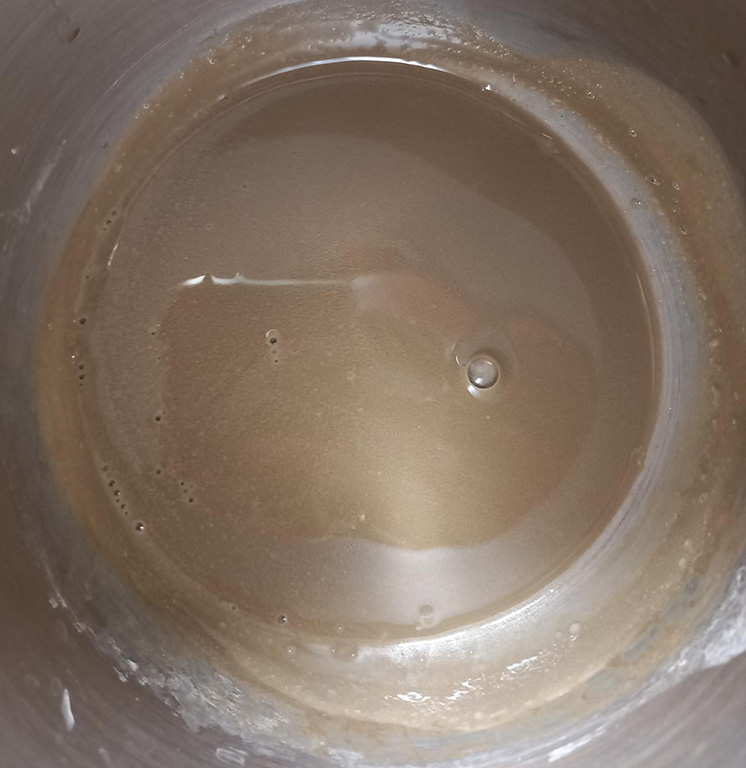
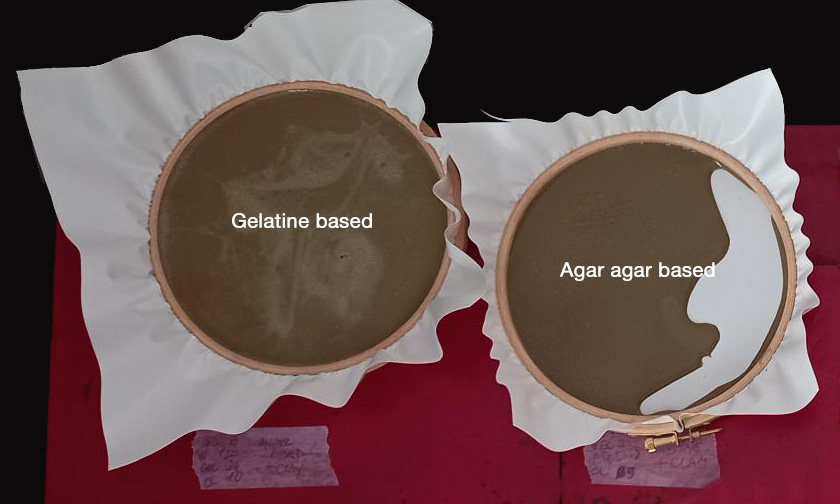
Below two pictures of the solutions during the preparation phase: on the left the gelatine based, on the right the agar agar based.
RESULTS & OBSERVATIONS
Below an image of the fresh molds, differences between the three samples are visible. They will dry flat for 48 hours.
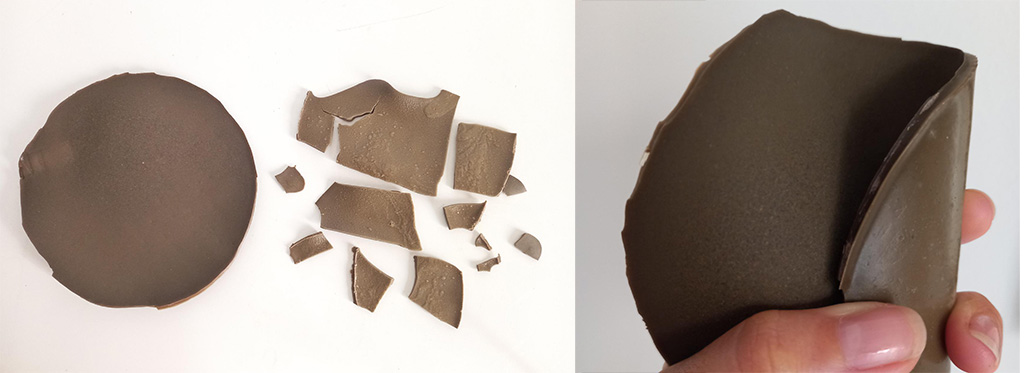
And here are the samples after being totally dried.
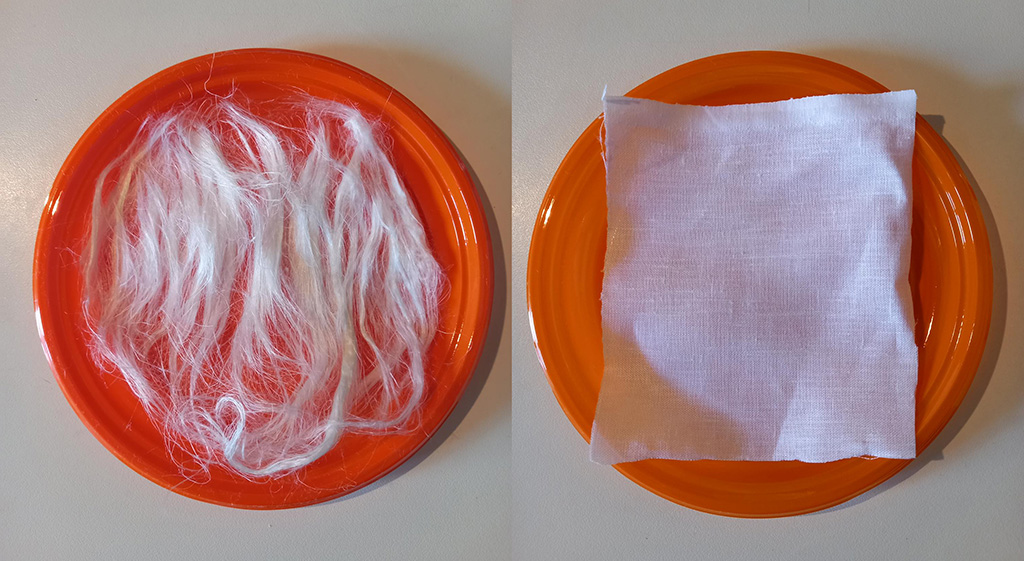
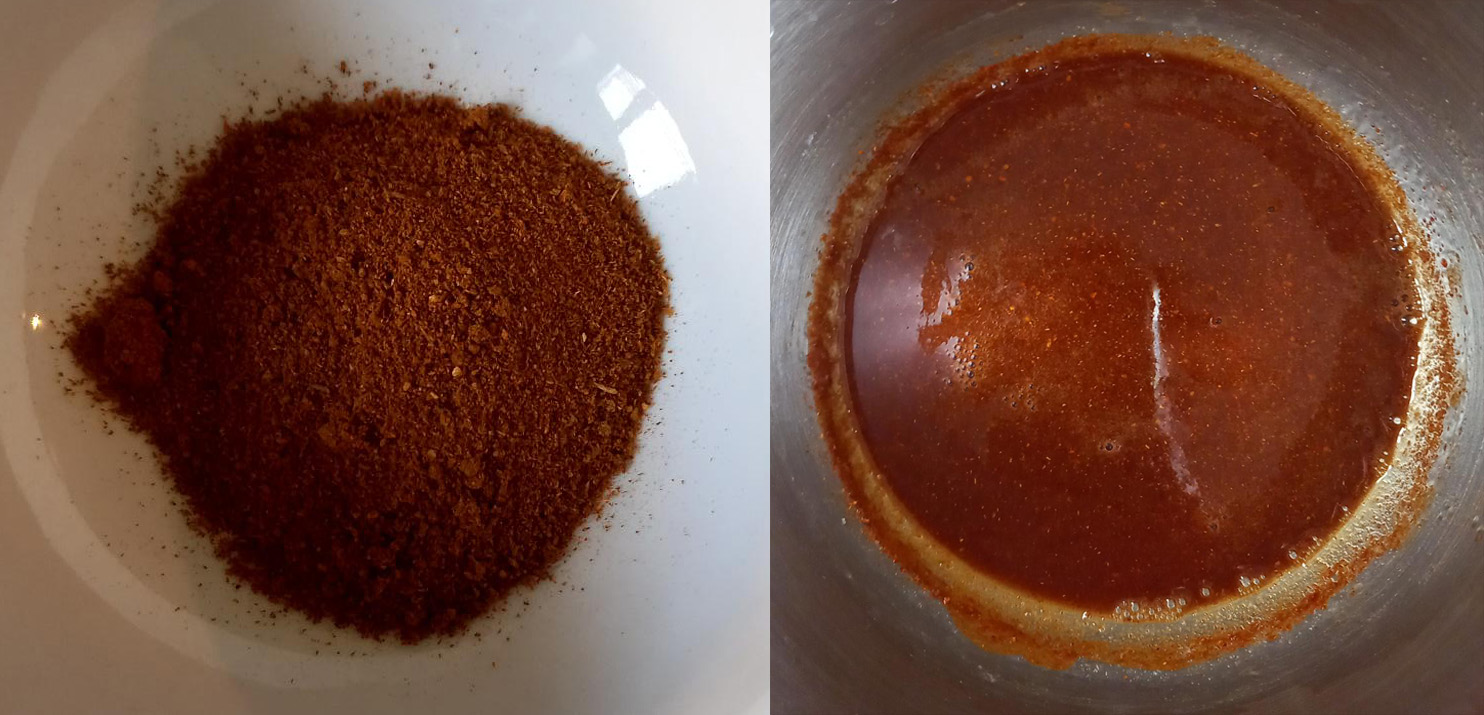
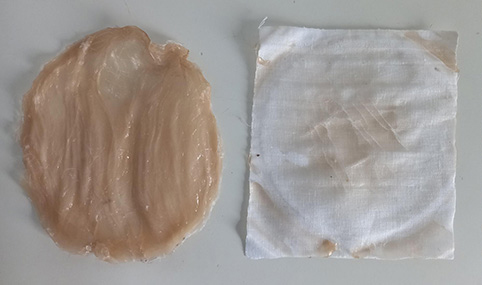
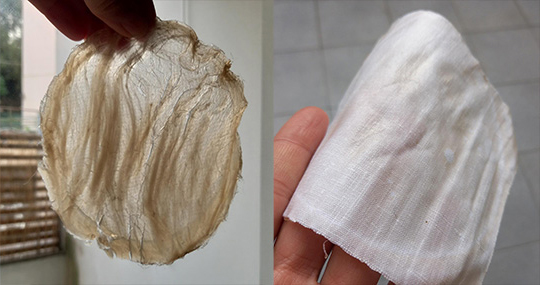
RECIPE 4: VARIOUS FILLERS (LINEN BURLAP, LINEN TOPS, PAPRIKA POWDER)
Inspired again by Bioplastic Cook book by Margaret Dunne I experimented with bleached linen tops (a),linen burlap (b), fine sweet paprike powder (c). Here are the recipes[^4]:
* 11 gr GLYCEROL
* 160 ml WATER
* 6 gr AGAR AGAR
* The process is the same used for the bioplastic [^1] and [^2] :mix all of the ingredients together in a pot in the amounts above, I suggest to mix glycerine with water first and then to add the agar agar powder slowly until dissolved and here you can add paprika (c).
* Put the pot on the stove and heat the mixture to just below boiling (you can use the thermometer to check t°). Keep stirring until the solution starts to thicken.
* Remove the froth with a spoon from the surface.
For (a), place the linen tops onto the mold to cover it entirely . For (b), place the fabric sample onto the mold. * Pour liquid onto the embroidery frame mold to cover the filler. * Let it dry for at least 48 hours or more ( depending on temperature and humidity levels) and unmold.
Below two pictures of the two molds with linen fillers.
Below the one with the paprika powder.
RESULTS & OBSERVATIONS
And here are the samples after being totally dried.
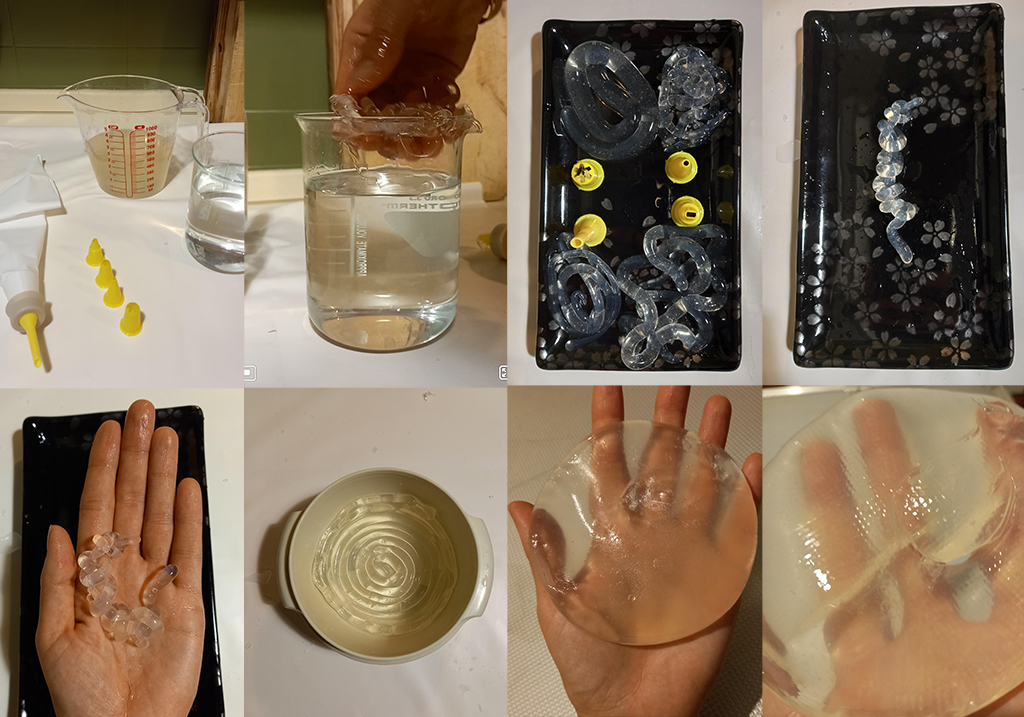
Last but not least...the ALGINATE
I used the basic receipt given by C.Raspanti during her lecture.
Below a roundup of images with my mainly aesthetic experiments, in which through the use of various spouts of sac a pochè I extruded the solution obtained in the solution of water and calcium chloride.
I will archive my experiments with a talking label ( see Bioplastic Cook book by Margaret Dunne )
It was super interesting, fun and challenging to make all of these recipes. I can't wait to try others and find the right material to laser the bag prototype I'm working on.