6. Computational Couture
References & Inspiration
For this new week, I was inspired by sportswear textiles and organic patterns. I was really interested in this new technique, so I thought, “Okay, let’s go, let’s try and see what happens!”. Sorry Rico, but Blender wasn’t really my cup of tea, so I decided to start experimenting in other ways first and give Blender another try later!
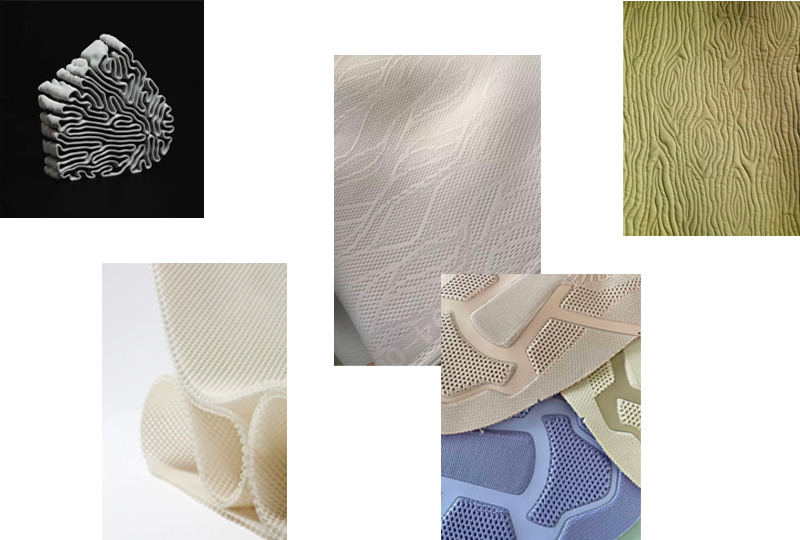
I also looked at what had been done in previous years, and I loved the work of Ainhoa, Jeanne, and of course, Stephanie. It was really inspiring to discover the different interpretations and approaches.
Tools
- Grasshopper
- Rhino3D
- Blender
- Prusa Slicer
- Inkscape
- 3D Printer
- Light fabrics like tulle
- Stretch fabrics like lycra
- USB stick
Technical Setup & Initial Test
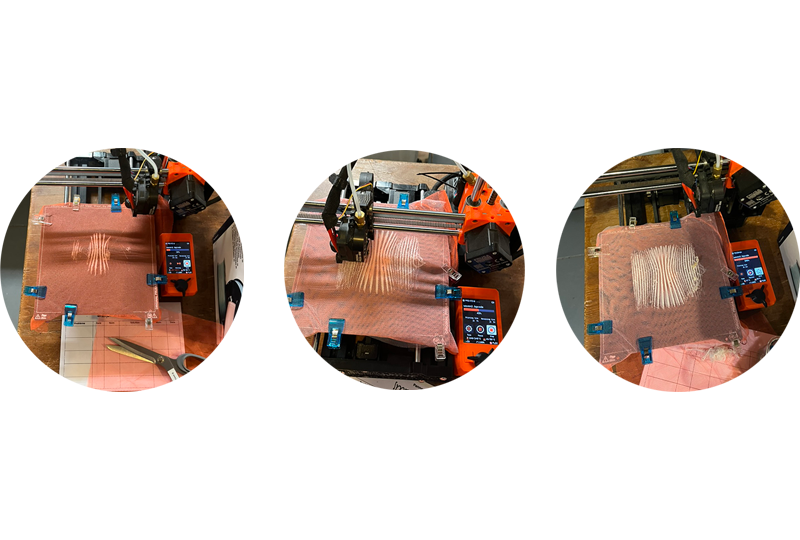
First, we did an initial test with Stephanie to understand how the 3D printer works, as well as the different types of filament and the settings to adjust in PrusaSlicer.
Our Machine Setup : - 3D Printer: Original Prusa i3 MK3S+ - Slicing Software: PrusaSlicer (v2.6+)
We trapped a sheer fabric between 3D-printed rings, and right away we could see the potential of this technique to add both structure and flexibility to textiles. For this and the following PLA tests, we used a 0.20mm layer height with a standard 0.4mm nozzle, a nozzle temperature of 210°C, and a bed temperature of 60°C. We used a thin layer of PLA (usually 4 to 6 layers total, so around 0.8mm to 1.2mm thickness), which helps maintain the fabric’s flexibility while giving it more structure.

2D Vector Patterns: From Inkscape SVG to PrusaSlicer
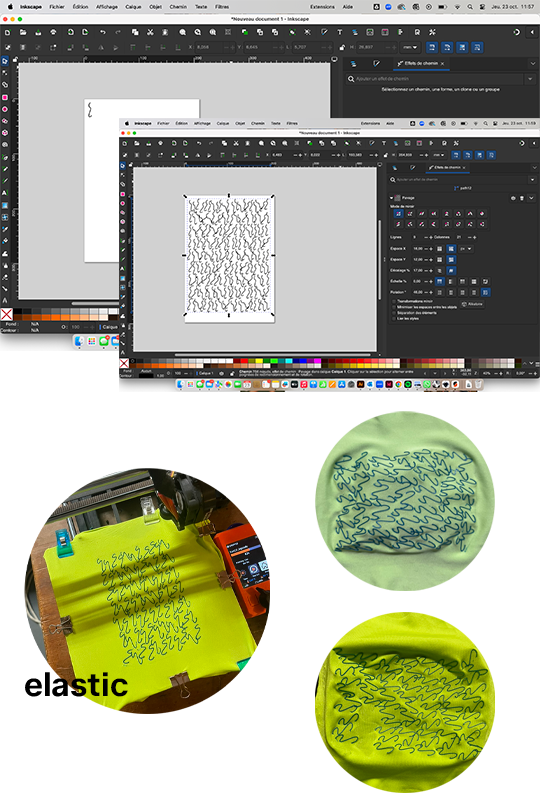
Since I wasn’t fully comfortable using Blender, I decided to adapt the exercise by working with Inkscape to generate geometric patterns similar to “geometry nodes”. After creating a 2D shape, I went to Path > Path Effects and selected the Tiling mode. This tool provides access to various transformation options that allow you to duplicate, shift, and modify the shape by adjusting the X and Y parameters. By combining multiple path effects and experimenting with their values, I was able to obtain more organic and material-like surface effects.
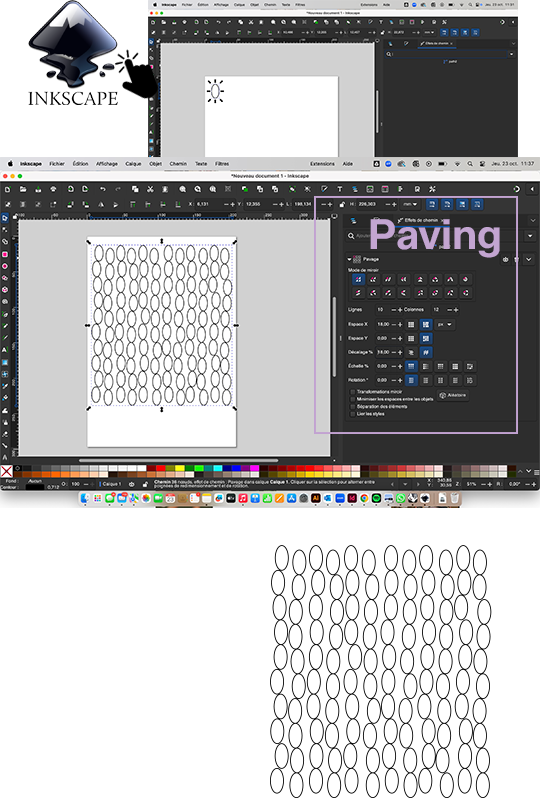
How to process the SVG in the Slicer:
- Export the pattern from Inkscape as a standard .svg file.
- Open PrusaSlicer and drag-and-drop the SVG file directly onto the bed.
- PrusaSlicer automatically prompts you to define the Extrusion Thickness (height) of the SVG. I set it to 1.0 mm to ensure it would be thick enough to trap the fabric but thin enough to remain flexible.
- Scale and position the pattern on the virtual bed as needed.
Material & Textile Experiments (PLA)
Test 1: Tulle & Pause Technique
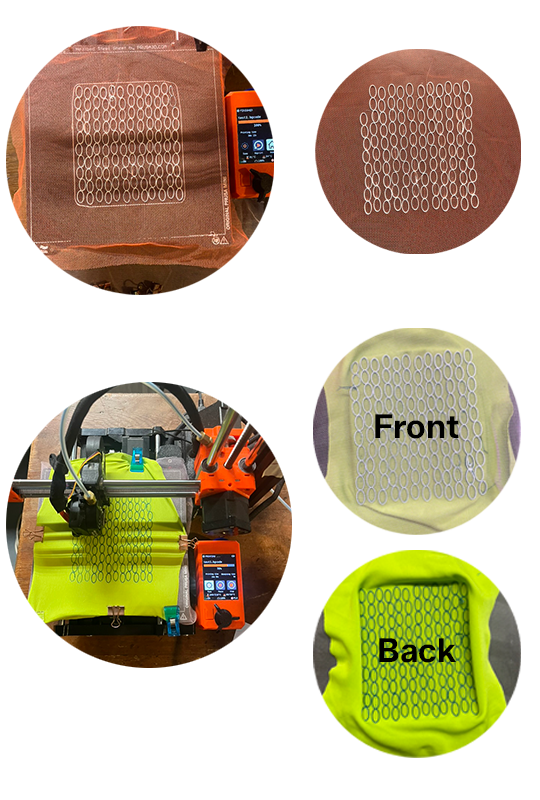
I did a first printing test with this pattern on tulle using white PLA. To insert the fabric, I used the Color Change / Pause feature in PrusaSlicer :
- In the slicing preview, find the layer corresponding to 50% of the total height (e.g., at 0.6mm for a 1.2mm print).
- Right-click on the layer slider and select Add color change (M600) or Add pause print (M25).
- When the printer automatically paused, I placed the tulle tightly stretched across the print bed, secured it firmly with binder clips on the edges, and then resumed the print.
Test 2: Double Fabric & Color Change
Using the same pattern, I made a second test. I inserted tulle at the first pause (50%), resumed the print, and then programmed a second pause a few layers later to stretch a piece of Lycra, hoping it would retract and create small “bubble” effects. I also took this opportunity to switch from white PLA to a turquoise PLA. Once finished, the “bubble” effect didn’t work as expected because the PLA was too rigid to let the Lycra snap back, but I ended up with a nice double-sided (front/back) multi-color result.
Test 3: The Wave Shape
I wanted to try the elastic effect again with a new shape, this time less rigid and more freeform, inspired by a wave to achieve a more organic result. Once again, the outcome was not exactly what I expected, despite the tension applied to the fabric. I only obtained a sort of “shell,” but there was no small volume forming between the elements.
Advanced Textures & Technical Fabrics (FLEX)
For this sample, I chose to draw an organic but solid shape, using the same process as before with the Tiling tool in Inkscape. Once my shape was saved as an SVG, I transferred it to PrusaSlicer.
Here, I decided to experiment with the infill to create a new texture : - Infill Density: 15% - Infill Pattern: Concentric (this leaves open structural lines that reveal the fabric beneath). - Filament: FLEX (TPU 98A) - FLEX Settings: Nozzle at 240°C, Bed at 50°C, and printing speed reduced to 25 mm/s to prevent the flexible filament from jamming.
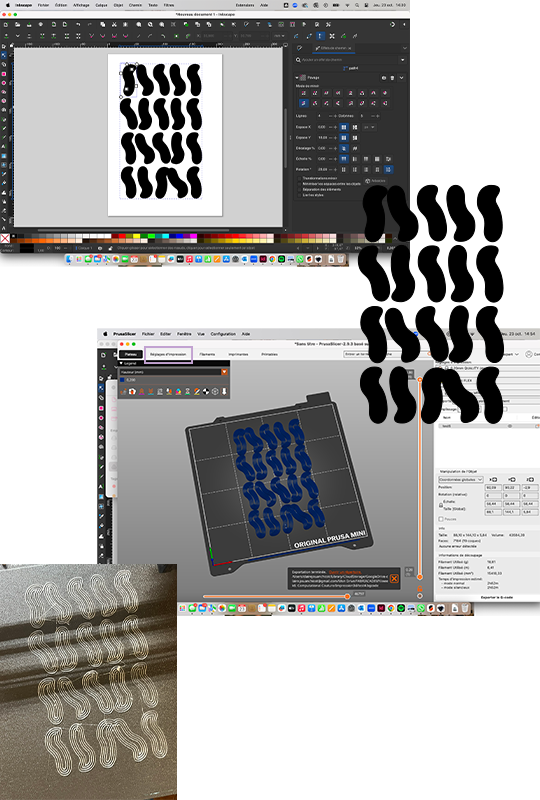
During the print, I paused it at 50% to insert a K-WAY / GORE-TEX-like technical fabric, then resumed. Unfortunately, once finished, the textile was only integrated on one side of the print. However, I really like this effect, as the pattern is revealed depending on the light, remains soft, and gives a slightly anti-slip, technical texture.
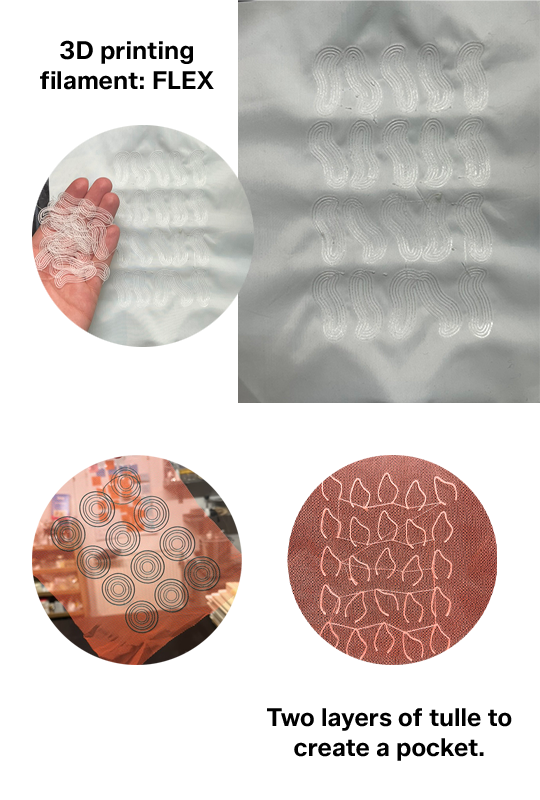
After that, I carried out new material tests using circles, experimenting with the repetition of circles of varying thicknesses. I also created an open shape that traps two layers of tulle to form pockets that can be filled. The superposition of two tulles in different colors creates a beautiful moiré effect on the textile.
Computational Design: Grasshopper Workflow
I decided to reproduce the Grasshopper tutorial I saw on Ainhoa’s site because it matched the aesthetic I like, which reminds me of the beach where I grew up, with ocean waves and endless sand dunes.
I followed the tutorial to understand the pre-built tree structure and adjusted the parameters. I experimented with them to obtain two shapes I liked: one with larger waves and another with more details.
Grasshopper Downloads
Some tips for following the tutorial that aren’t mentioned:
- To change a parameter, make sure to select the circle next to the number and drag it.
- Experiment with different wave effects to achieve varied results.
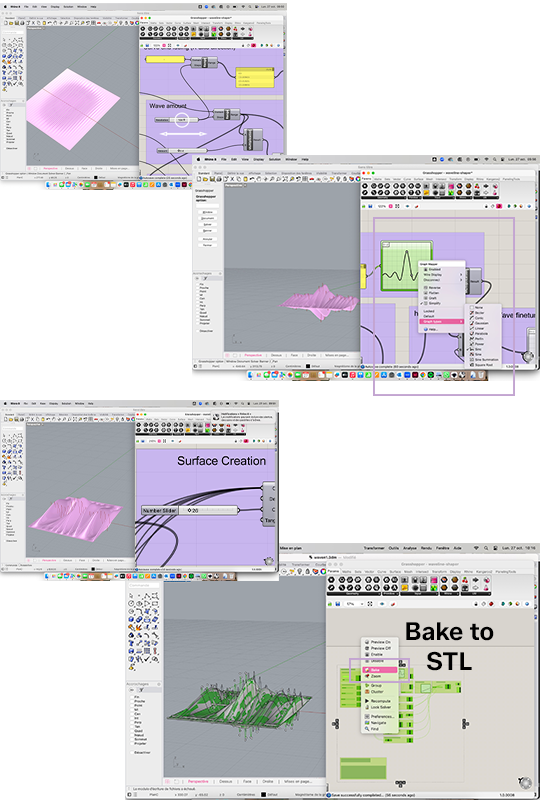
- At the end, you need to click Bake to save your file as an STL.

Unspoken Tips for the Tutorial :
- Adjusting Slider : To change a parameter smoothly, make sure to double-click or select the handle next to the number and drag it carefully.
- Baking the Geometry : At the end of the script, you need to right-click on the final mesh component and click Bake to turn the parametric data into a real Rhino geometry. Then, select the geometry and go to File > Export Selected as an STL file.
Wavy Results
Troubleshooting Mesh Issues with Meshmixer
When I imported my exported STL into PrusaSlicer, I got a warning saying the file was "not watertight" (open mesh). Since a slicer needs a closed solid volume to compute layers, I used Autodesk Meshmixer to fix it :
- Import the model: File → Import (.STL).
- Check for holes: Go to Analysis → Inspector. Open boundaries and holes automatically appear as red or blue lines.
- Automatic Repair: Click Auto Repair All. This automatically seals the mesh and closes the volume.
- Manual Fix (If needed): If any holes remain, select them individually and click Close.
- Double Check: Run Analysis → Inspector again to ensure there are zero open edges left.
- Export: File → Export to get a perfectly closed, watertight STL mesh ready for slicing.
Now I can successfully import my clean STL file into PrusaSlicer! For this final piece, I chose to use FLEX filament (0.20mm layer height, 240°C) combined with two layers of tulle of different colors to achieve a gorgeous, flexible, and interactive moiré textile effect.