E-textiles
1. Objective
To design, construct, and document at least one digital and one analogue soft sensor using various materials and techniques, integrating them into textile swatches through reliable hard-to-soft connections. This project aims to validate sensor behavior via Arduino code readings, provide complete circuit schematics, and present video evidence of functional electronic textiles.To design, construct, and document at least one digital and one analogue soft sensor using various materials and techniques, integrating them into textile swatches through reliable hard-to-soft connections. This project aims to validate sensor behavior via Arduino code readings, provide complete circuit schematics, and present video evidence of functional electronic textiles.
2. References, research & inspiration
When I first started to search for inspiration I thought of lamp shades and visual effects, so I visited Pinterest to watch some beautiful models. There, I saw this one that made me feel curious about how can a lamp shade have texture and what if I put some crazy light effects inside.
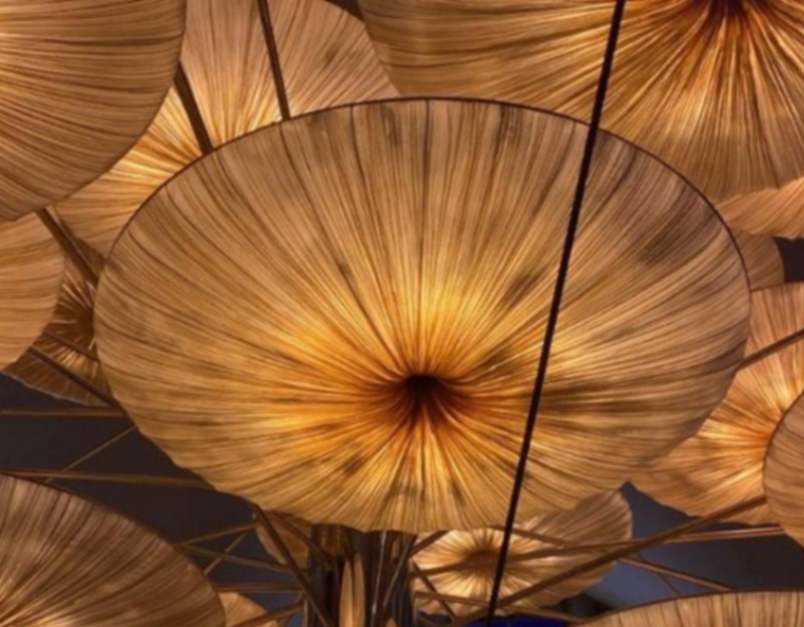
Then I watched a tutorial on Wren Haven HOME YouTube channel to learn how to make custom gathered lamp shade:
Also, I researched another style like this one from DIY Victorian Lampshade Set Into The Grimmwood, on YouTube:
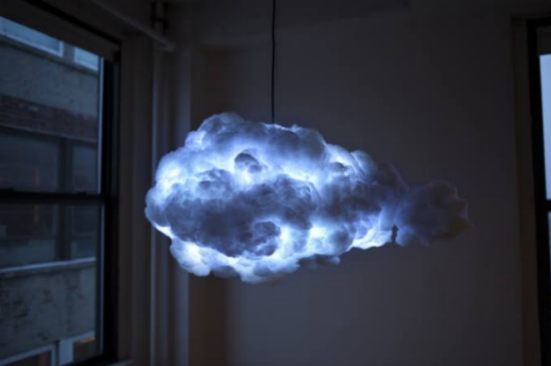
For lights, I took inspiration on this lamp called Cloud from artist Richard Clarkson.
3. Tools
3.1 Materials
- Velostat
- EVA foam
- LED 5 mm
- Conductive thread
- Needle
- USB old cable
- Electrical tape
- Sew-on snap fastener
- Jumpers
- Power bank
- Current limiting resistance
- Vinyl
- An old dress
- Nest shaped structure for lamp
- HC-SR04 ultrasonic distance sensor
- MB102 Breadboard
- Steren MODLED-105-DIG Digital pixel multicolor LED
- Charger
- Seeed Studio XIAO RP2040
- Hot silicone
4. Process and workflow
4.1 Digital sensor
Digital sensor process:
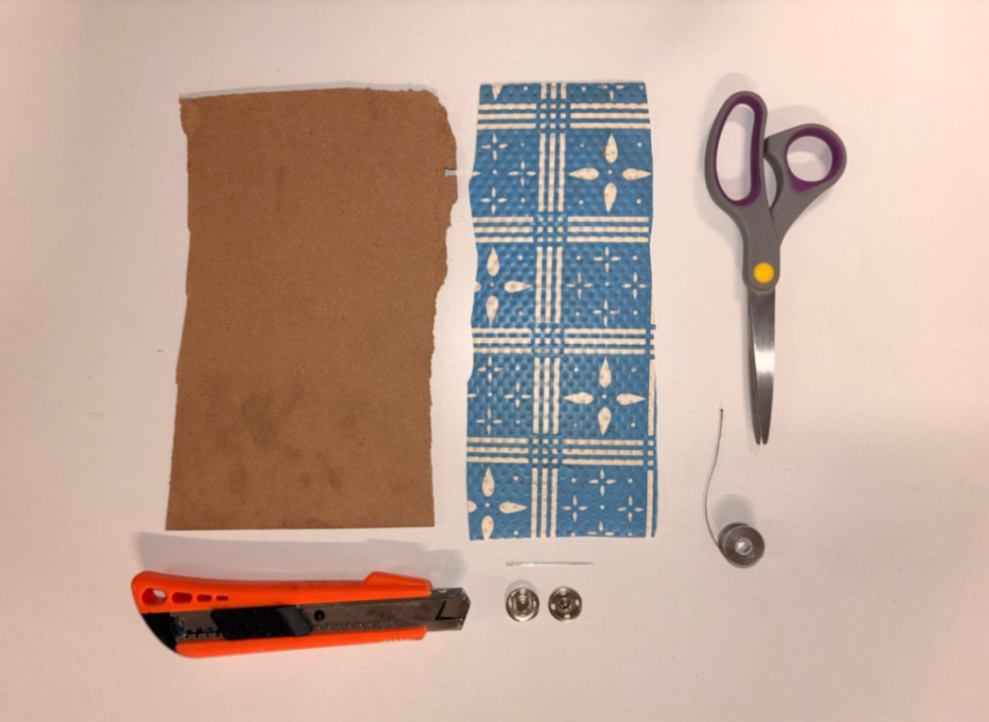
I cut the EVA Foam into two 15 x 3 cm strips, and one of them in half pieces.
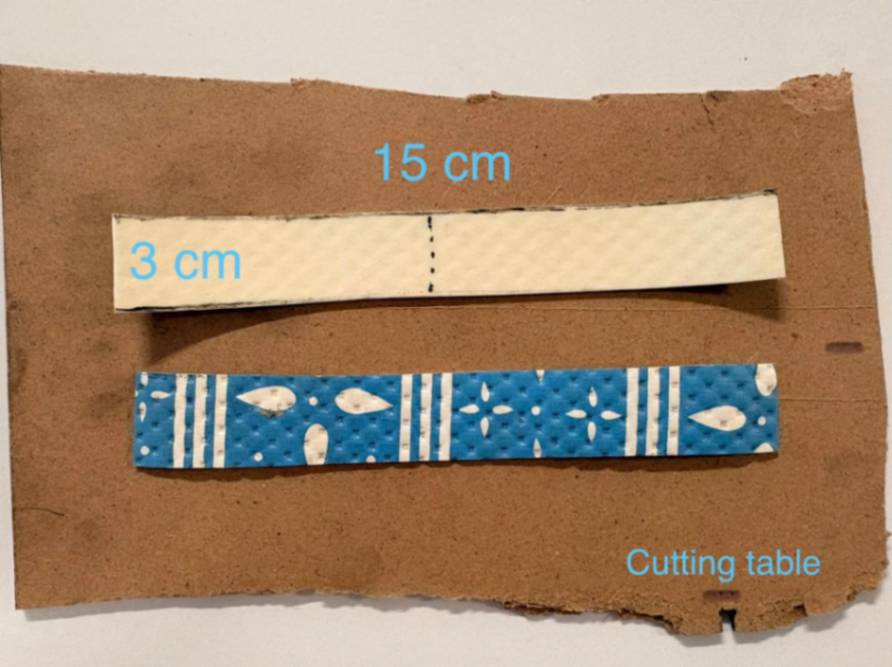
Then, starting with the longer strip, which I hadn't cut in half. I began making a French knot in it and traced with dots the following knots.
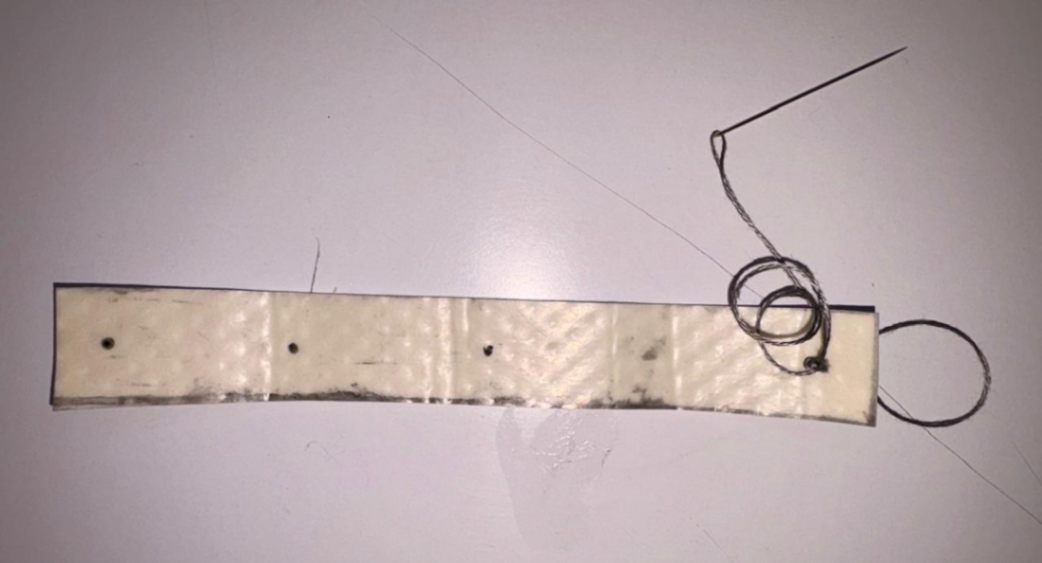
Once finished, I tied a final knot.
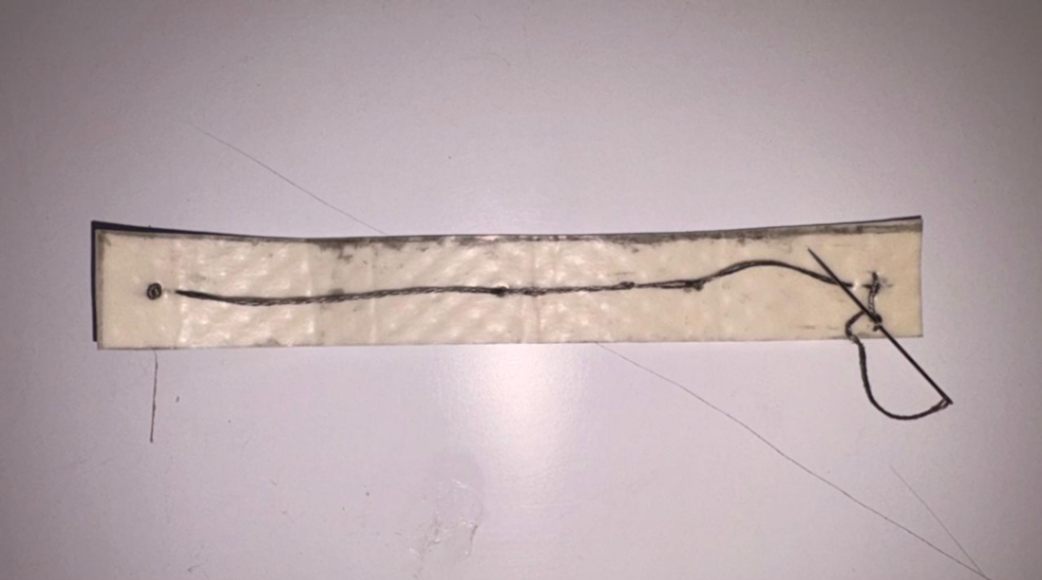
I had to leave a bit of conductive thread hanging out so it could be the connection point for the negative pole of the 5 mm LED.
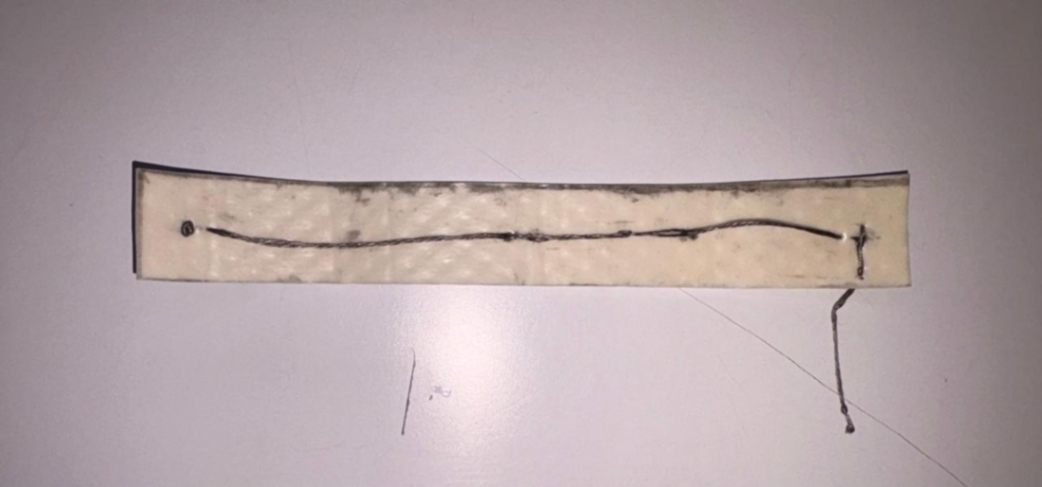
I did the same with the rest of the short strips, with the difference that where I made the cut, I also tied the two pieces of the Sew-on snap fastener.
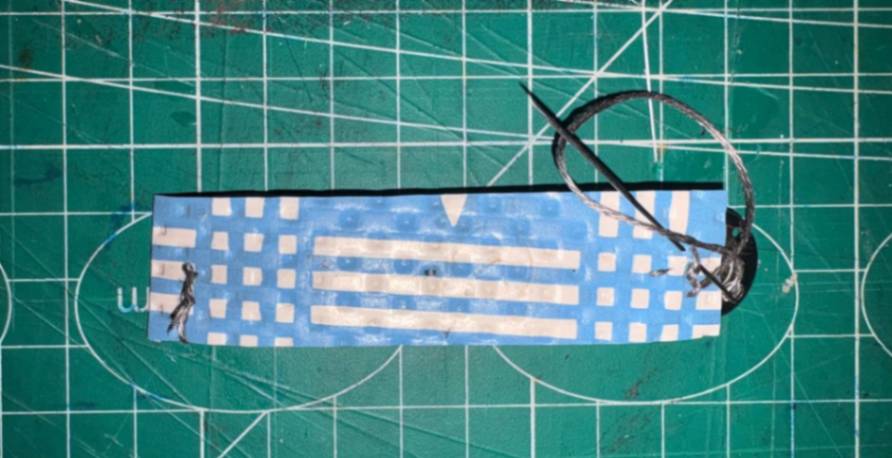
The short strips would be the positive pole and the long one would be the negative.
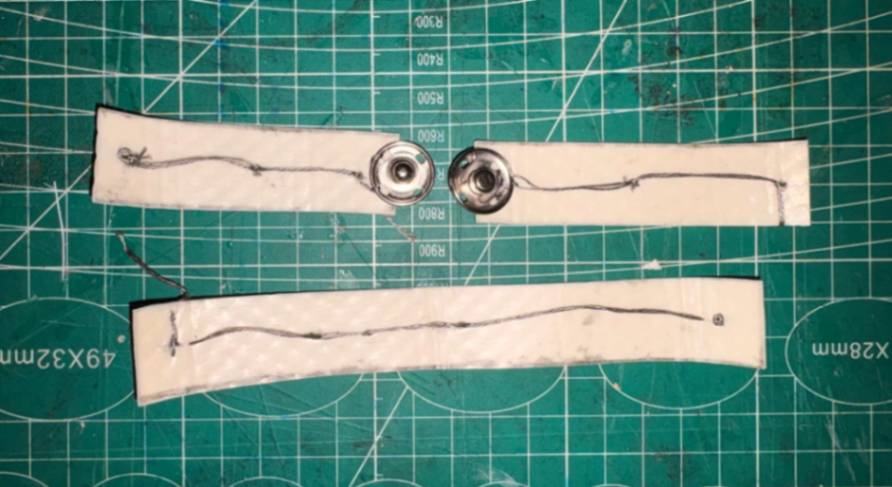
Then I put electrical tape and insulated the current flowing through the negative pole so it wouldn't touch the positive and cause a short circuit.
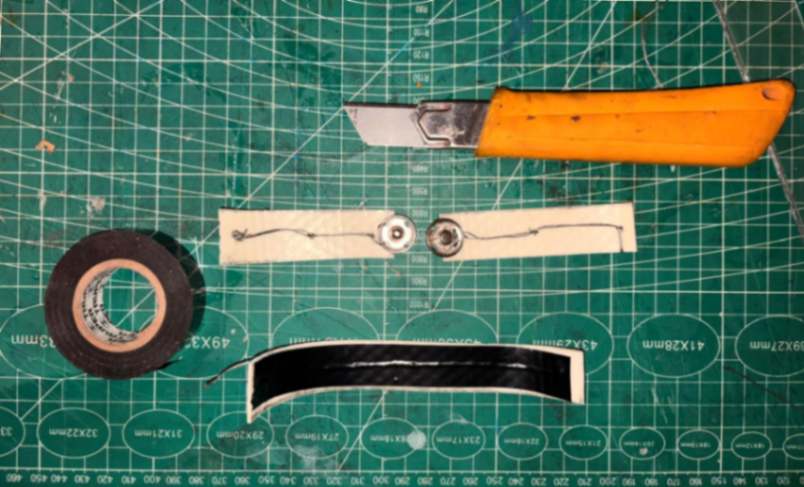
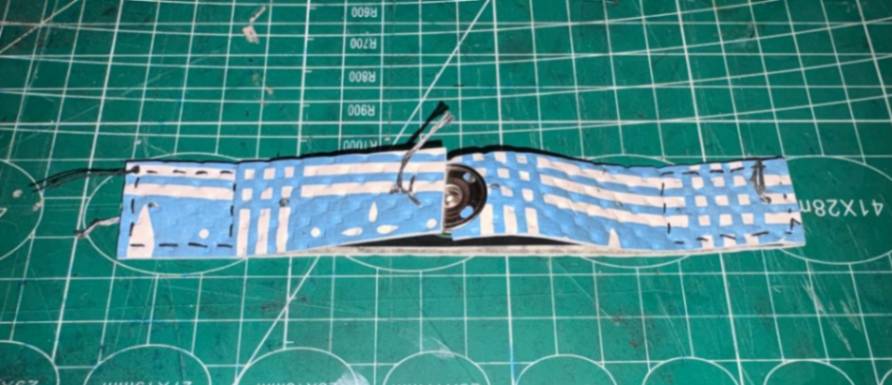
Carefully, I joined the end of the short strips with the ends of the long strip by making a square of stitches so they wouldn't separate anymore, while making sure they didn't touch the conductive thread.
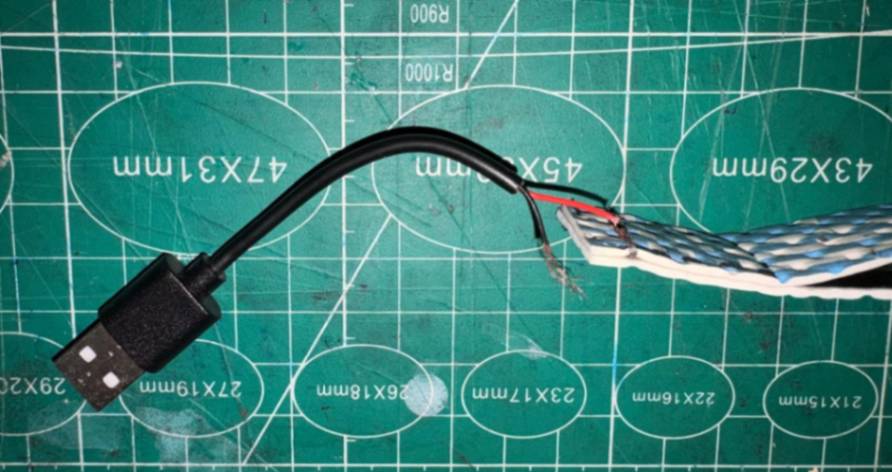
Using wire cutters, I stripped one end of a USB cable to expose the positive and negative wires.
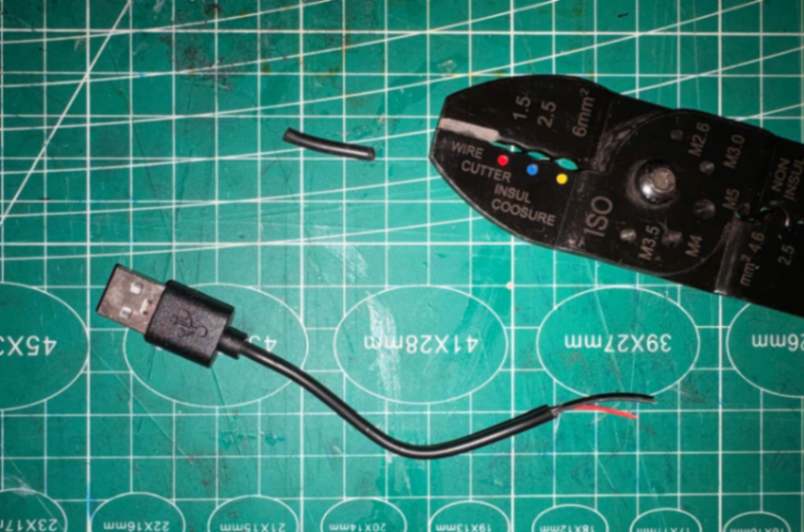
I connected the positive end of the USB cable to the end of the short strip, and the negative end of the USB cable to the end of the long pole strip.
Finally, I did the connection to the LED on the other side of the strips. When the sew-on snap were pressed the current would power the LED, and the USB would be connected to the power bank.
Result of the digital sensor
4.2 Analog sensor
Analog sensor process:
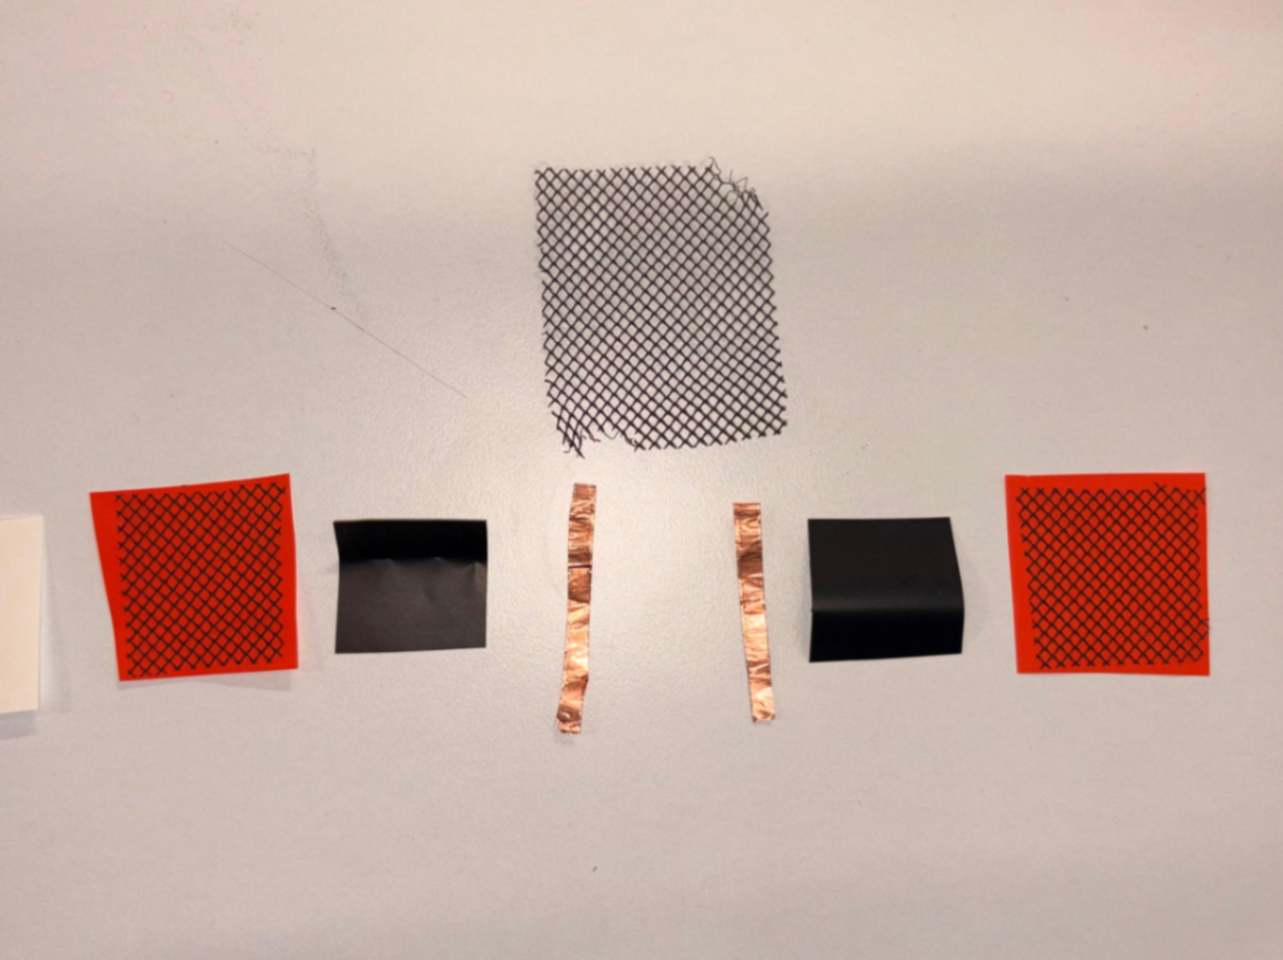
I layered the vinyl first, then a mesh, then a piece of rolled-up copper tape, and finally the velostat square to make two halves of the same sandwich.
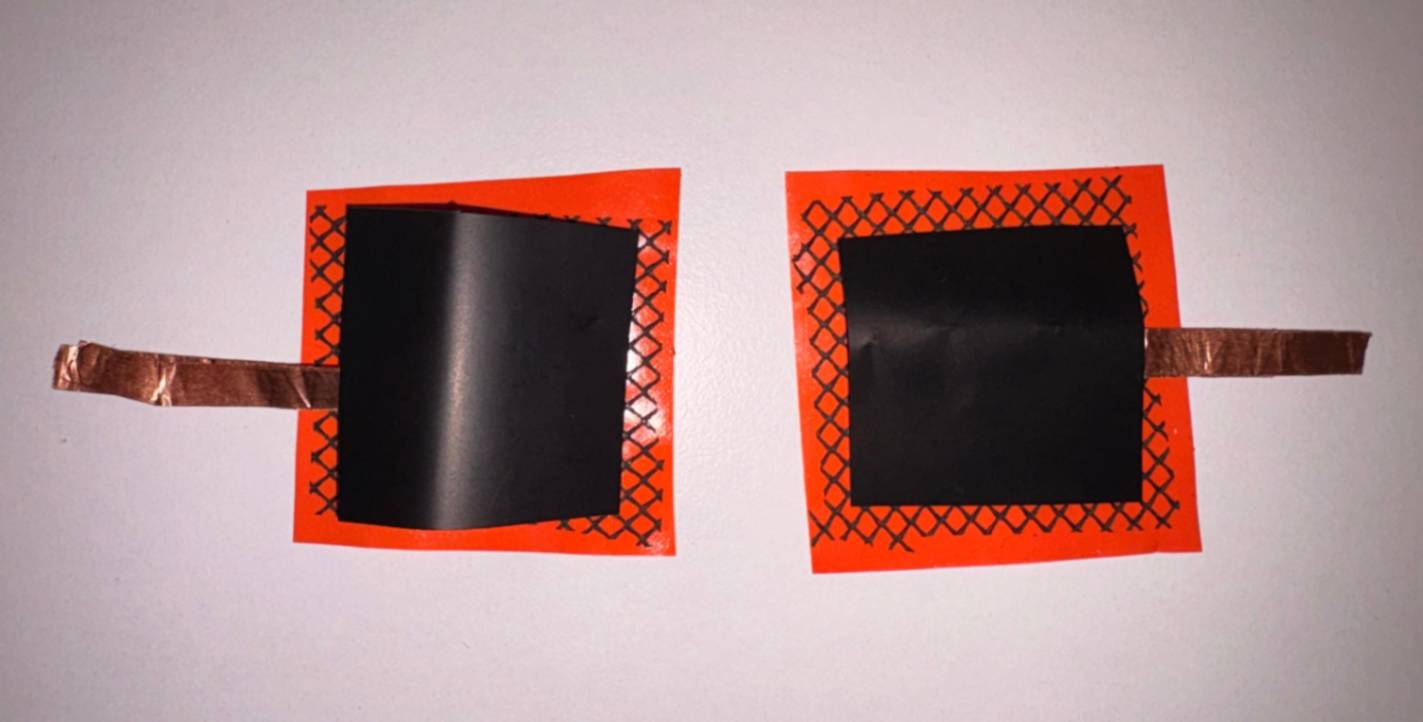
Once joined, the copper tapes had to be in opposite directions without touching each other, as each one would represent a negative and positive pole.
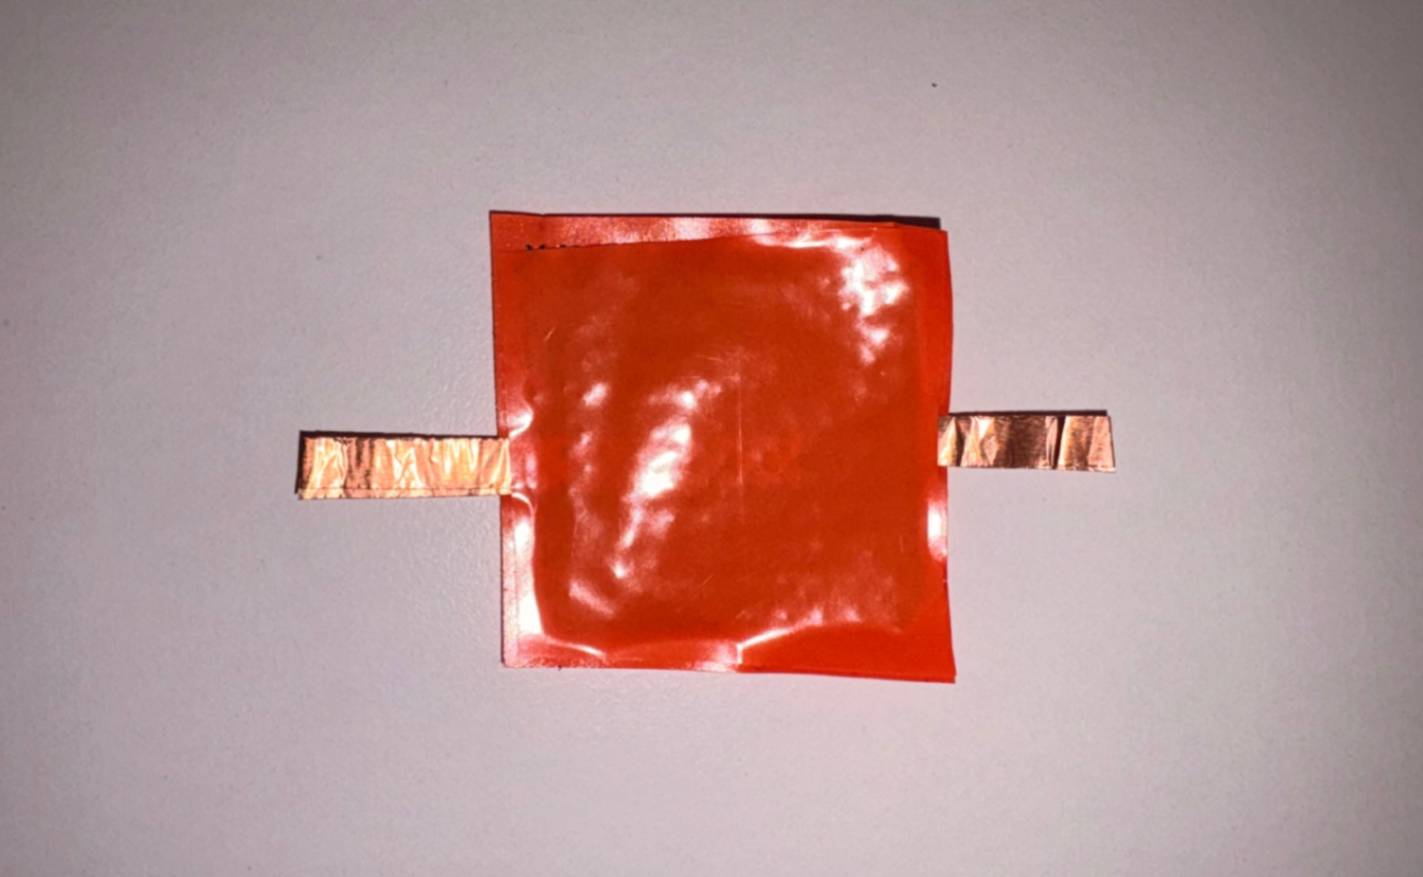
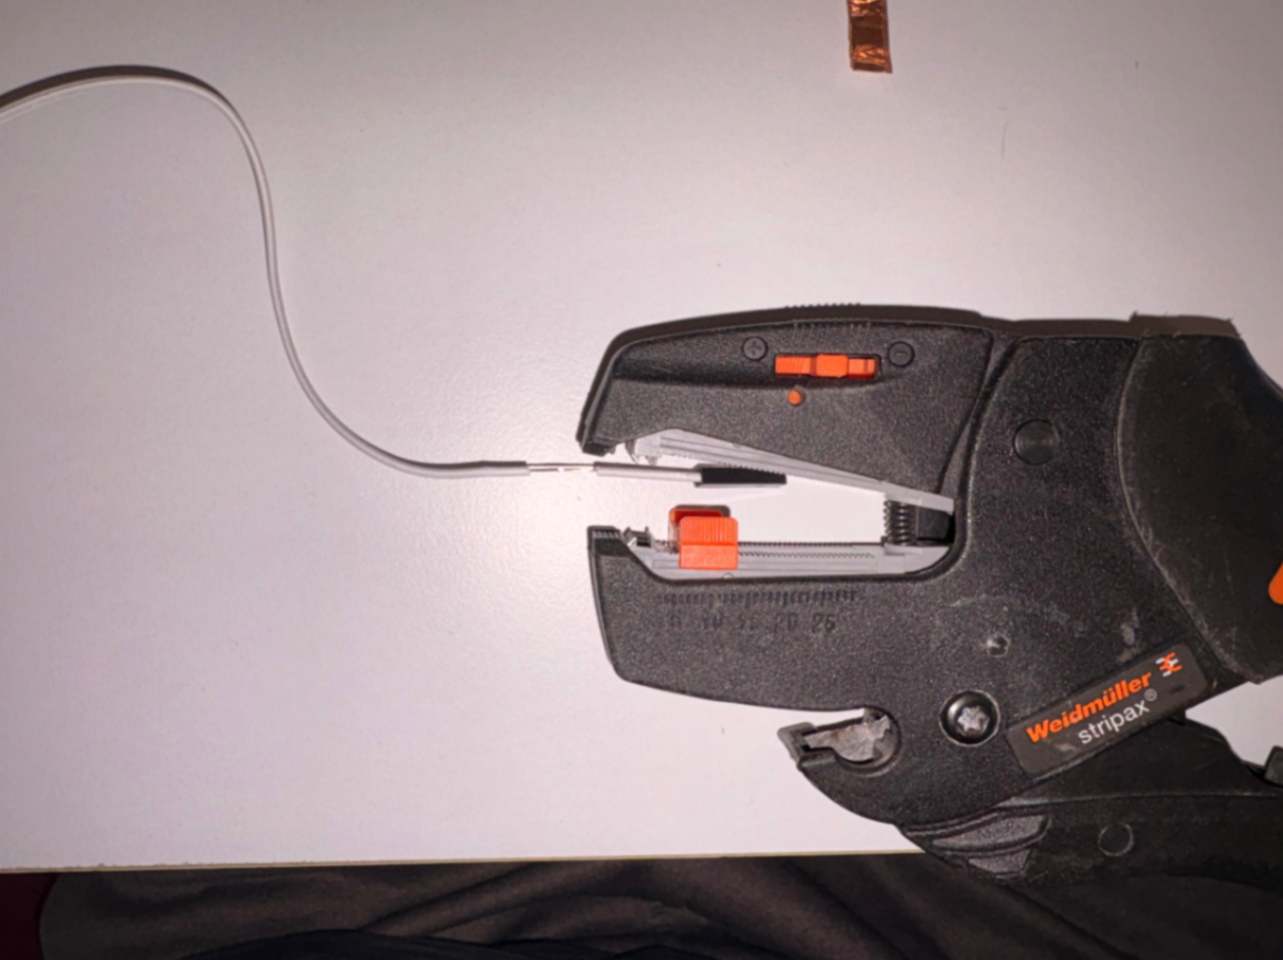
Using wire cutters, I cut one end of the jumpers so I could connect and solder them to the ends of the copper tape using the filaments of the jumper.
Using my soldering iron and a little bit of solder, I attached the end of the positive pole of the sensor and connected It to the SEEED XIAO RP2040 terminal. As well as the negative end, which would be connected to a resistor before running to the negative terminal of the 5 mm LED.
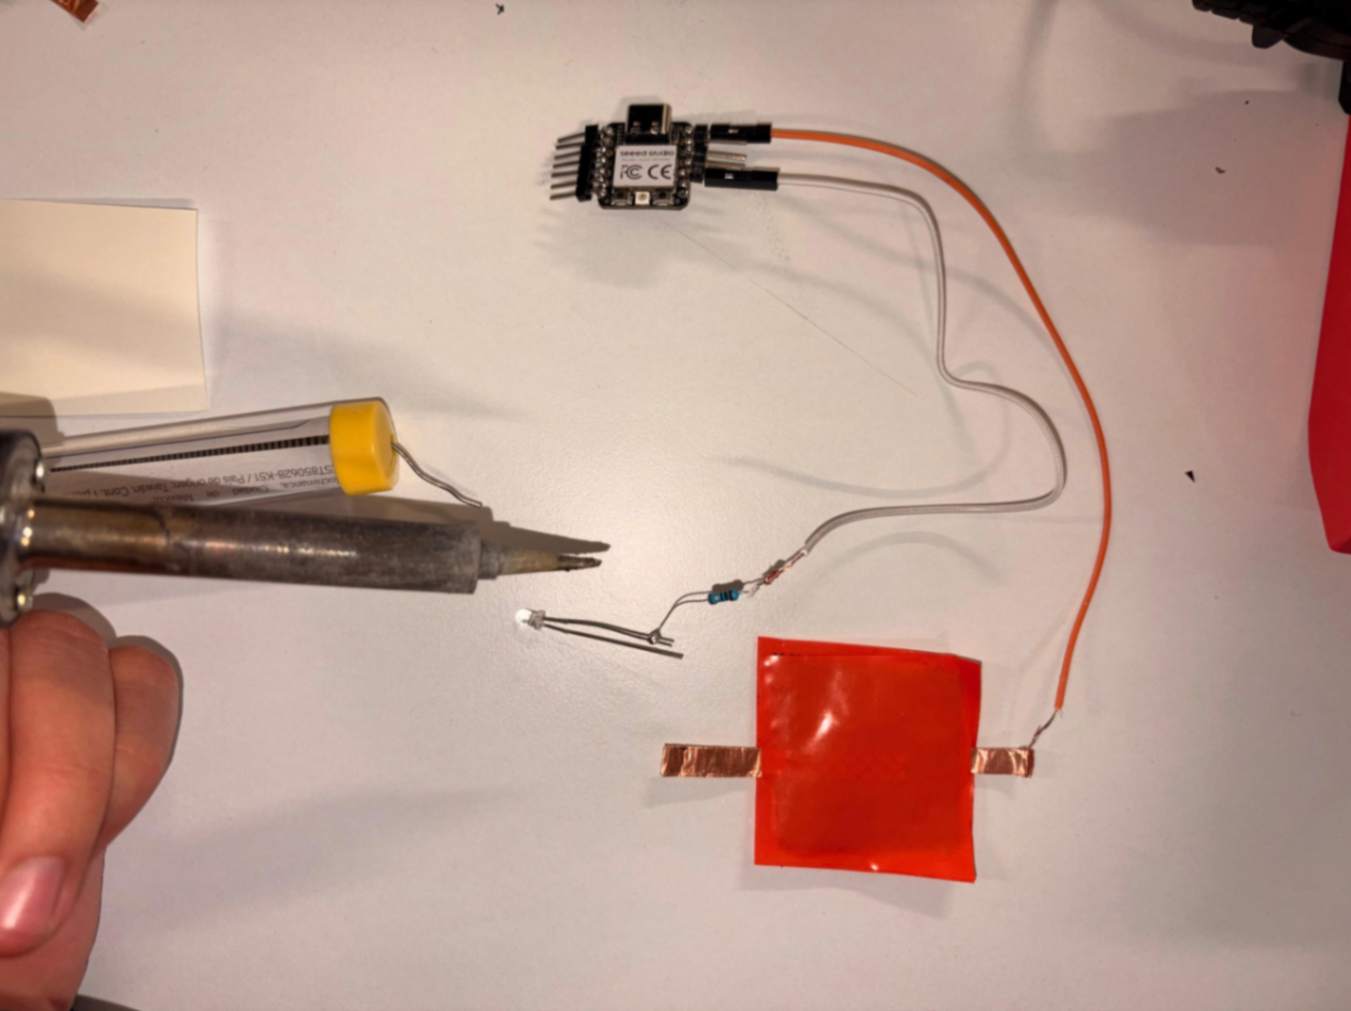
Then I connected a jumper from the XIAO to the positive pole of the LED to another resistor that would be connected to the negative end of the sensor. In turn, that end would be connected to the ground going to one of the pins of the Seeed XIAO RP2040.
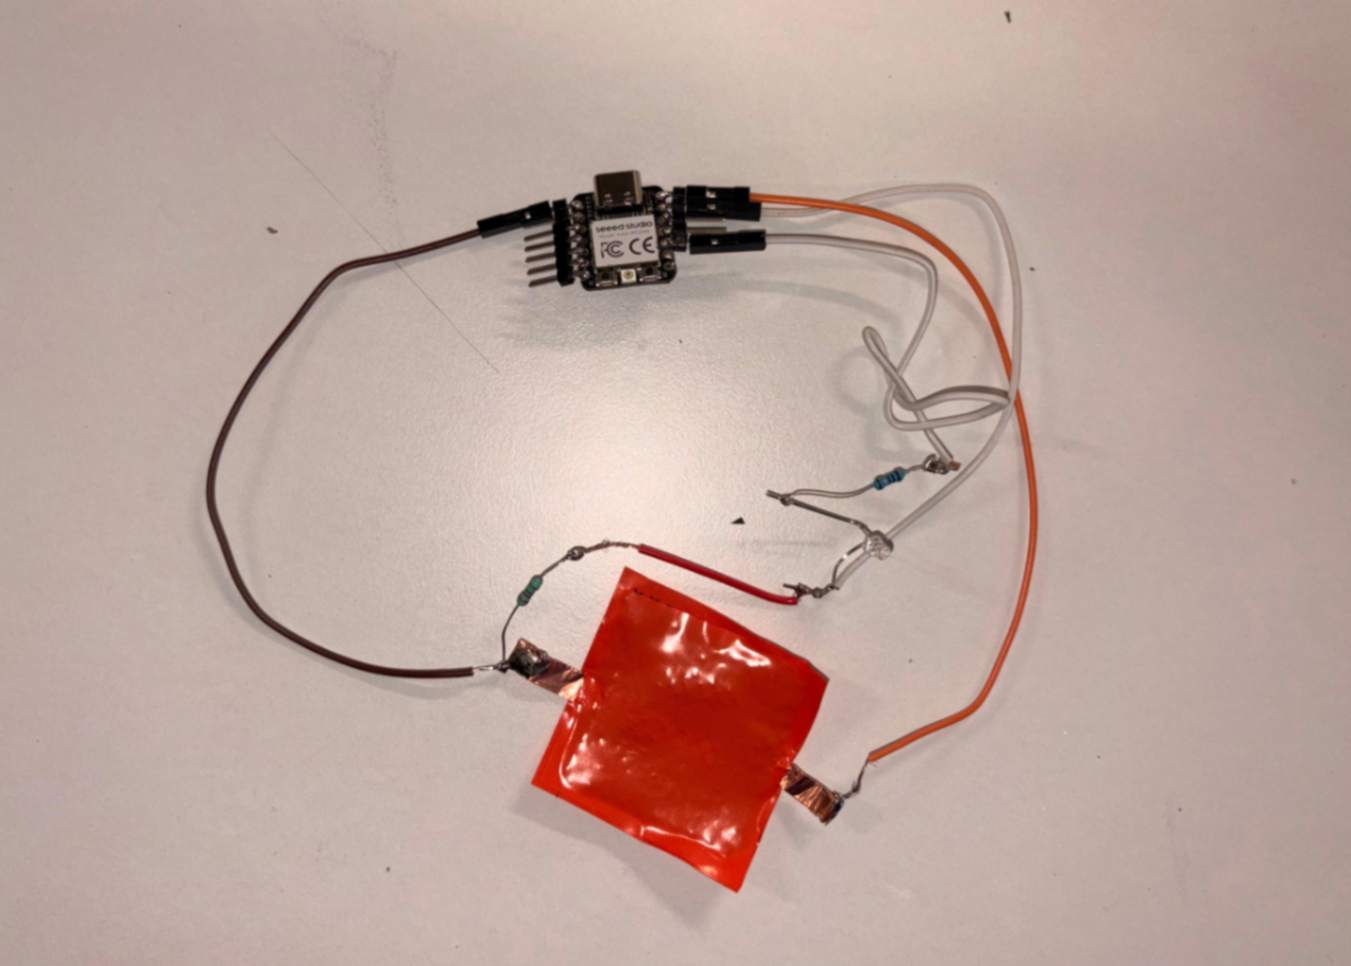
Upon connecting the XIAO to the computer, all that was left was to configure the code that would make it, based on the pressure applied to the sensor, light up gradually from lower to higher intensity depending on the amount of force exerted on the sensor.
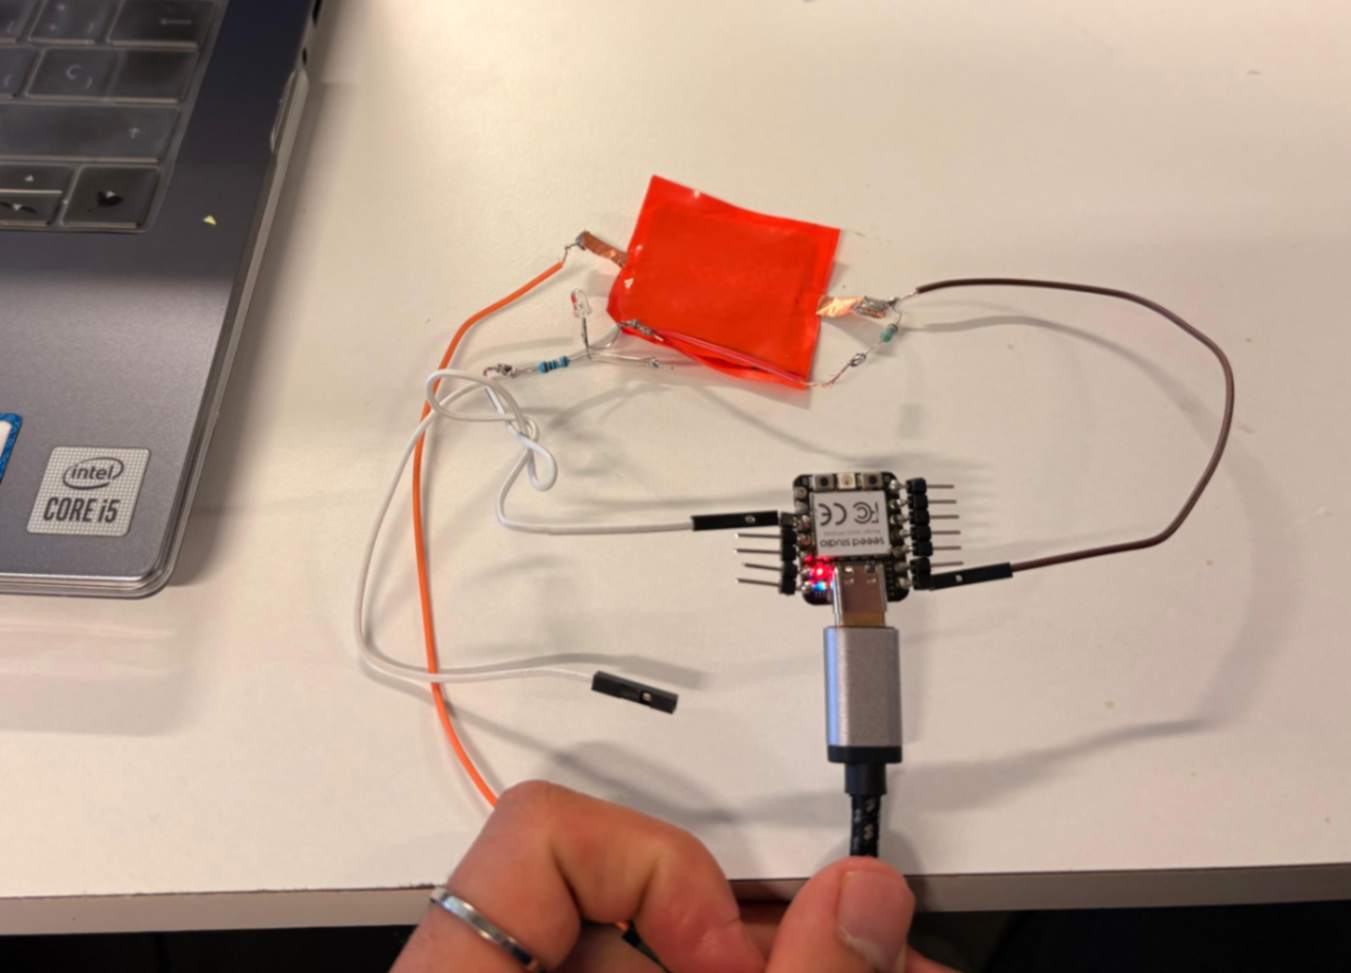
The Arduino code from Raúl Babines:
const int sensorPin = A0;
const int ledPin = D1;

int forceSensor = D0;
int led = D7;
int reading;
int brightness;

void setup()
{
  pinMode(led, OUTPUT);
  Serial.begin(9600);
}

void loop()
{
  reading = analogRead(forceSensor); // Resistance equals sensor reading (Analog 0)
  Serial.print("Analog Reading = ");
  Serial.println(reading);
  // Change the analog reading range (500-1023)
  // We use 8-bit analogWrite (0-255) configured in the map function
  brightness = map(reading, 500, 1023, 0, 80);
  analogWrite(led, brightness);
  delay(100); // One hundred "ms" wait on each reading
}
Result of the Analog sensor
4.3 The Nebula lamp process
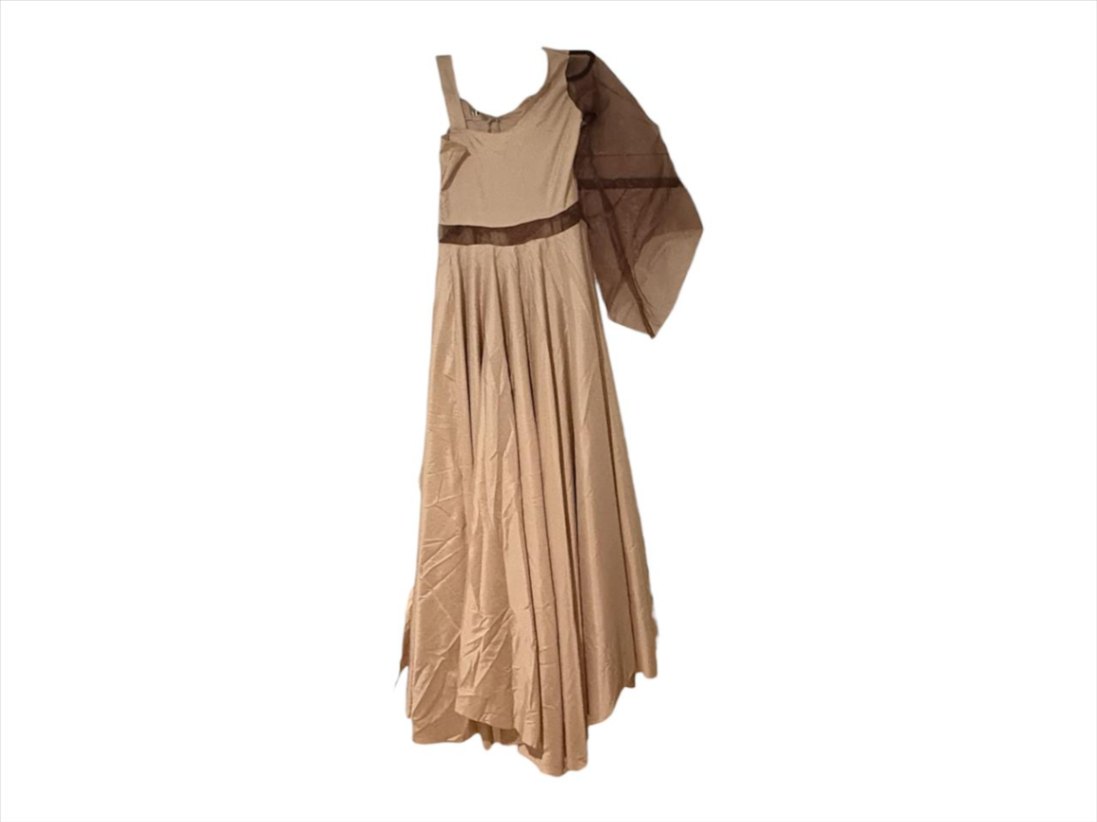
In the search for the textile that would help me make the lampshade, I came across this dress that I had used before because it was textile waste from my university. However, I didn't know this was a dress until I used it again.
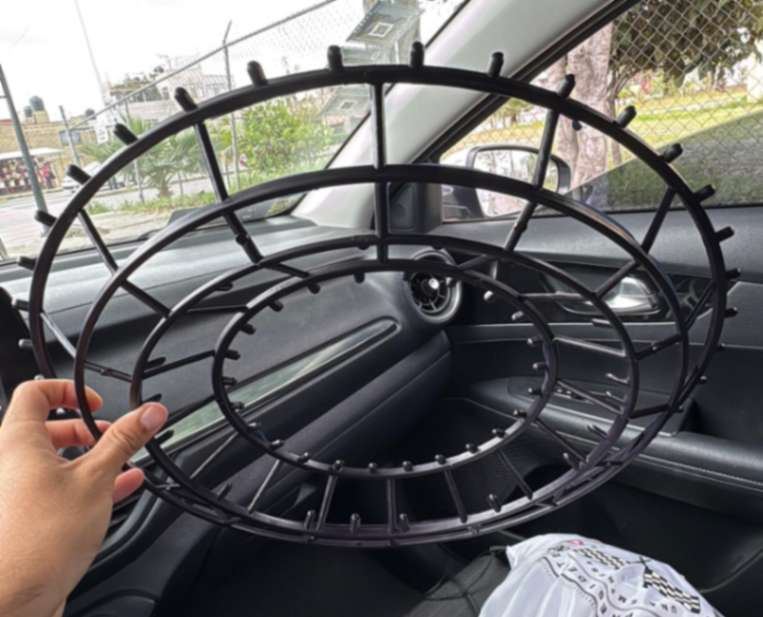
I found this plastic structure that was used for a Halloween decoration. It had the exact outer and inner circumference needed to achieve the effect I wanted.
Then, with the help of ribbon, I started wrapping the upper edge all around the circumference to create a place to use the thread to secure the textile, which I will explain later.
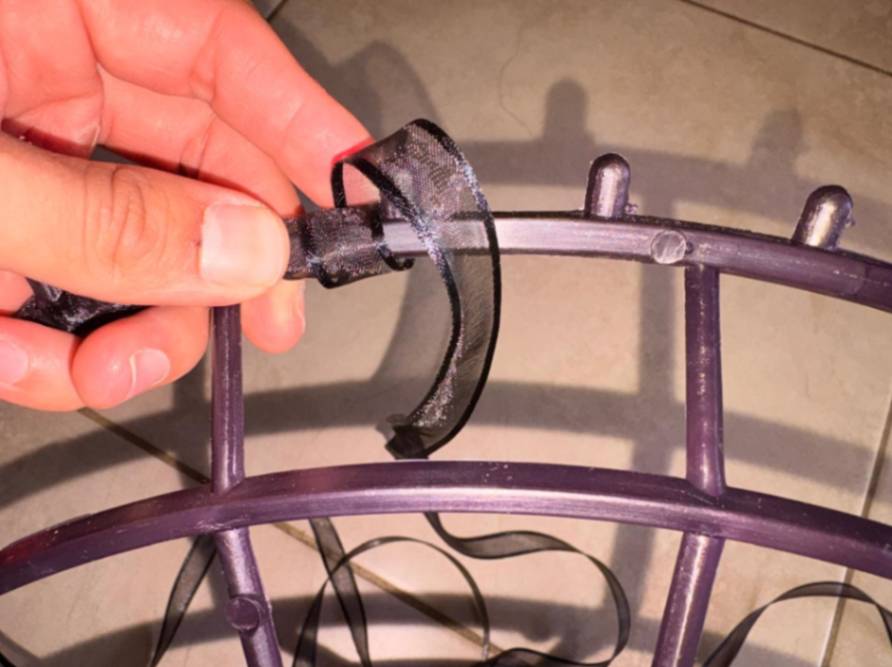
Using clothespins, I held it firmly in place. Additionally, I also wrapped the inner circumference with ribbon.
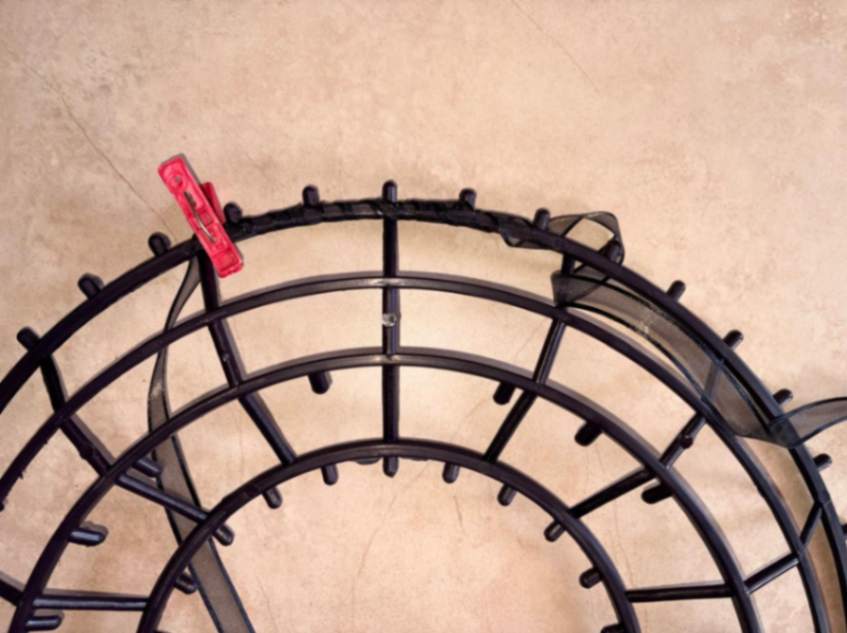
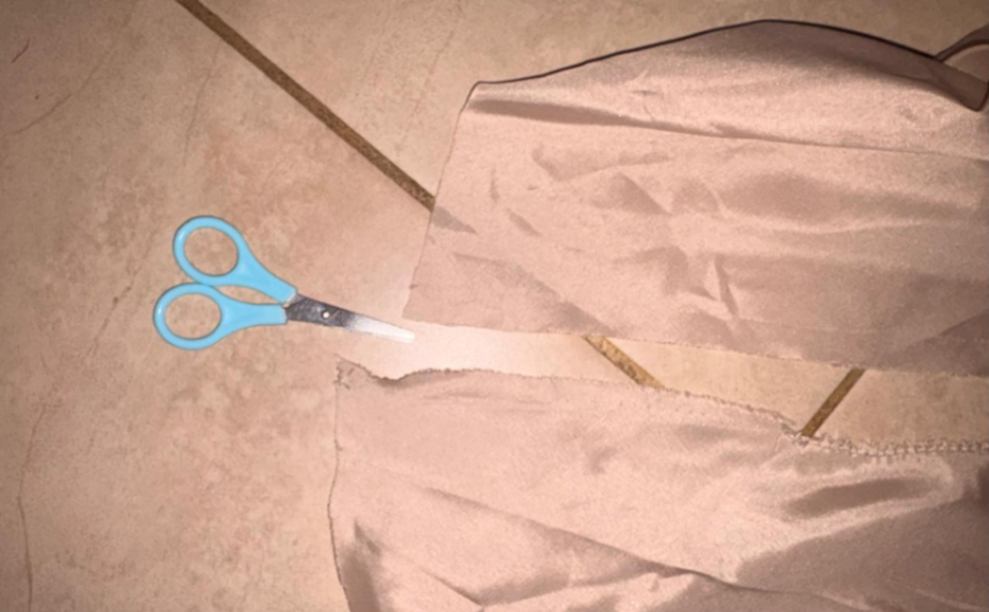
I cut the dress with scissors so that only the part from the waist to the bottom of the dress remained, giving that drape the volume I needed.
Using clothespins, I secured the entire waist part of the dress to the inner circumference of the plastic structure.
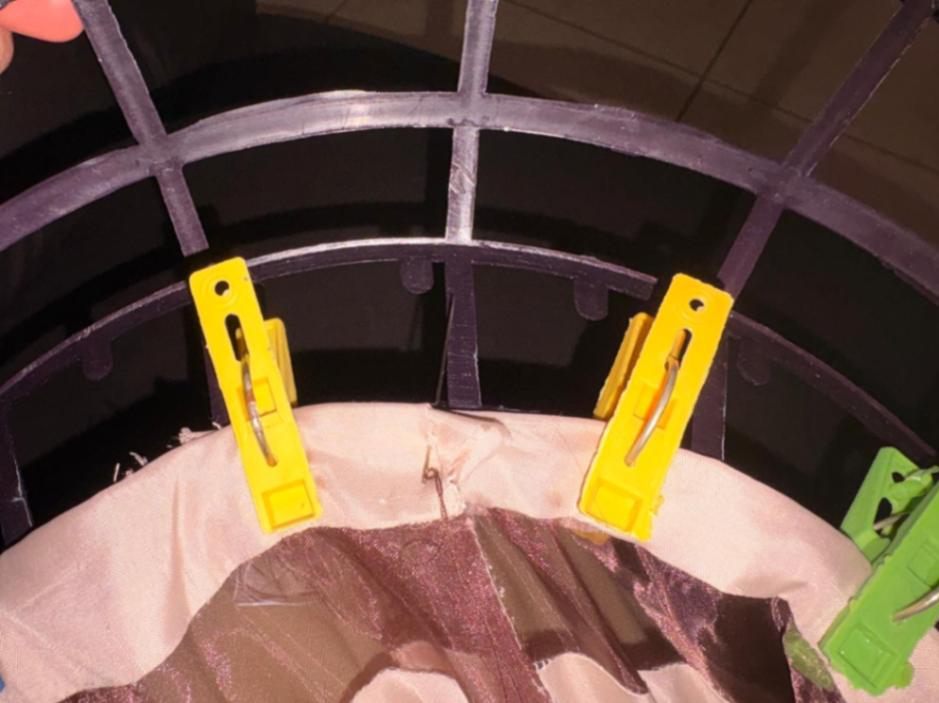
I started sewing with long stitches over the dress and the ribbon to make sure they were securely joined.
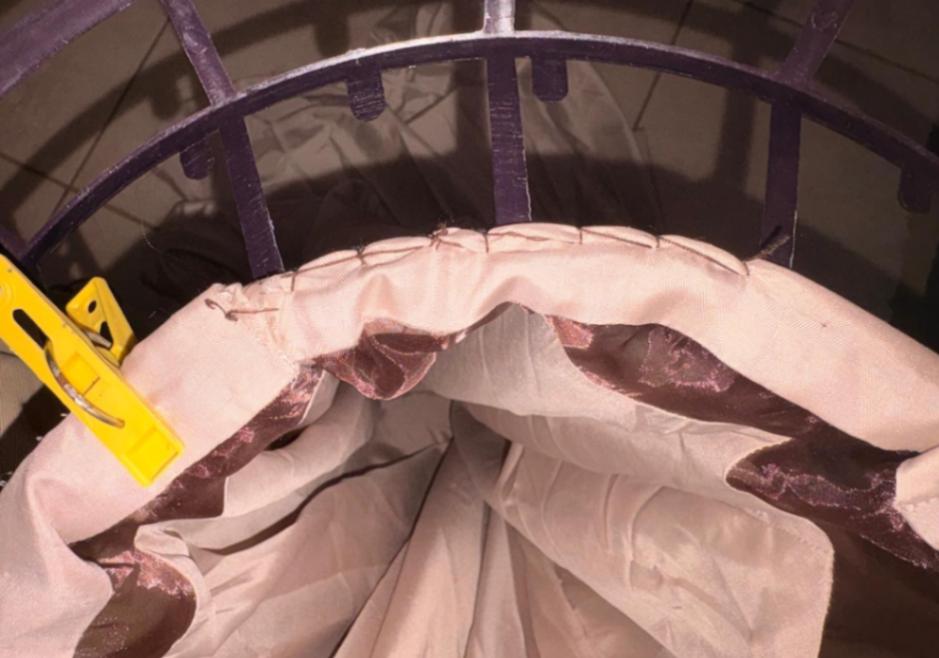
Once the inner circumference was joined to the waist of the dress, I started with the outer circumference and the bottom of the dress, leaving a gentle drape.
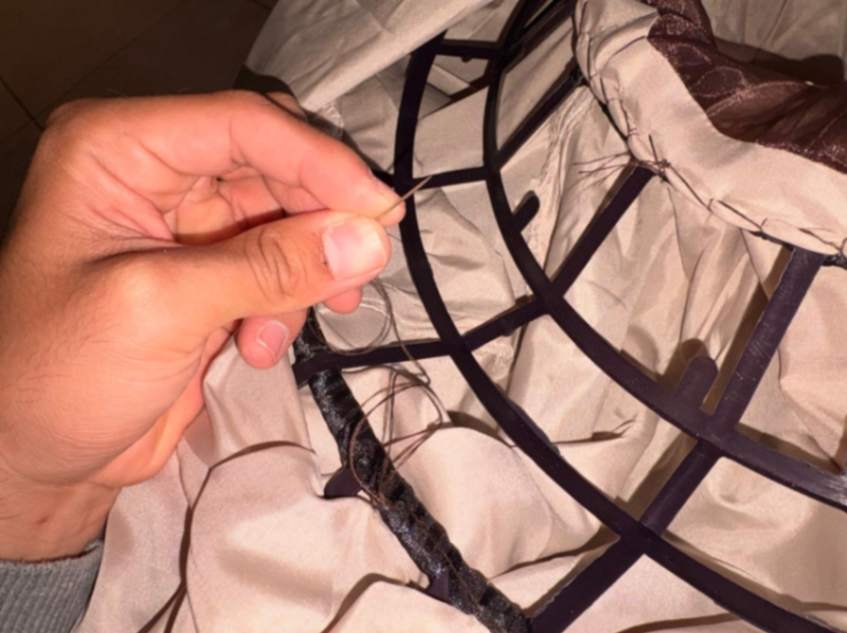
Thanks to the excess fabric, I could make certain folds to gradually give it the texture I wanted from the beginning.
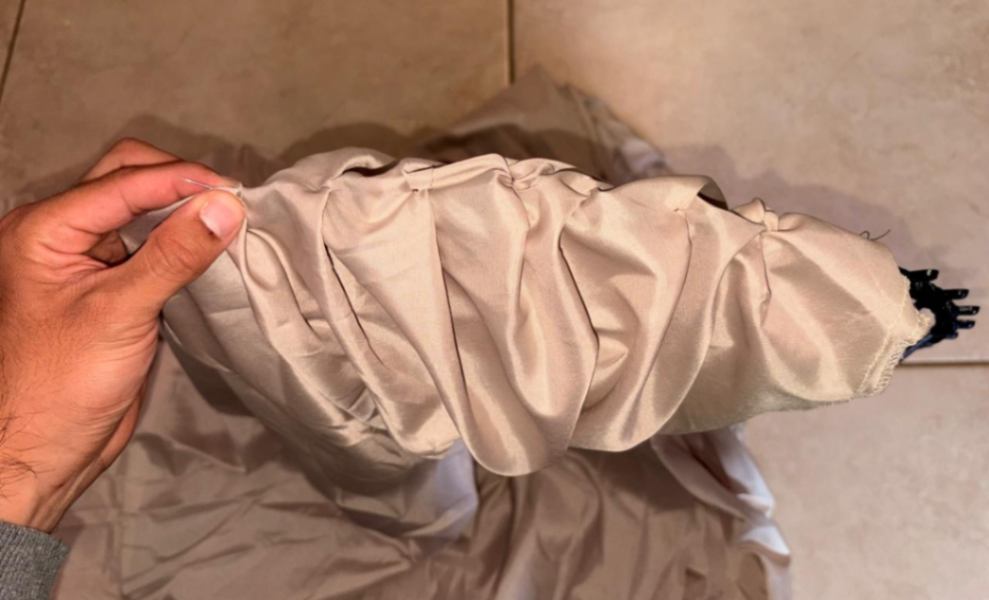
Once both circumferences were joined, it looked like this; however, there was a lot of excess fabric left to trim.
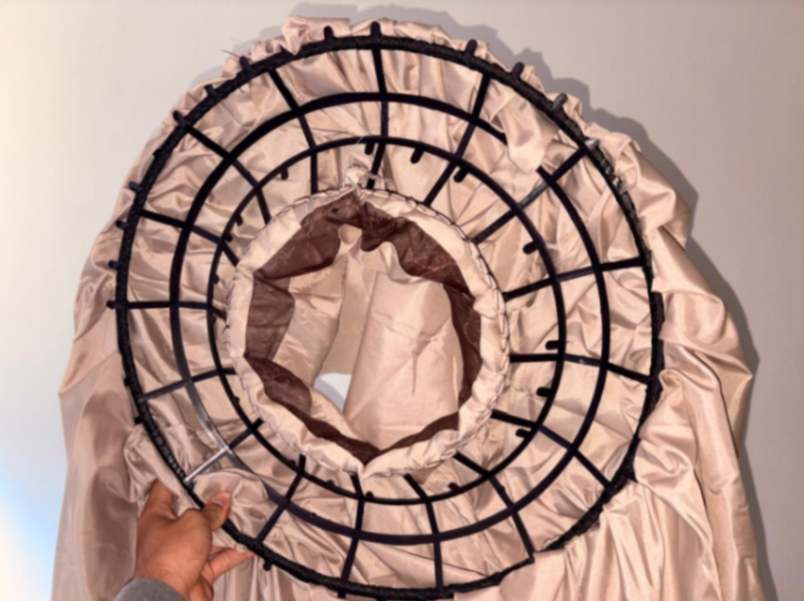
Upon trimming it and viewing it from the front, I didn't really like the way the texture had settled.
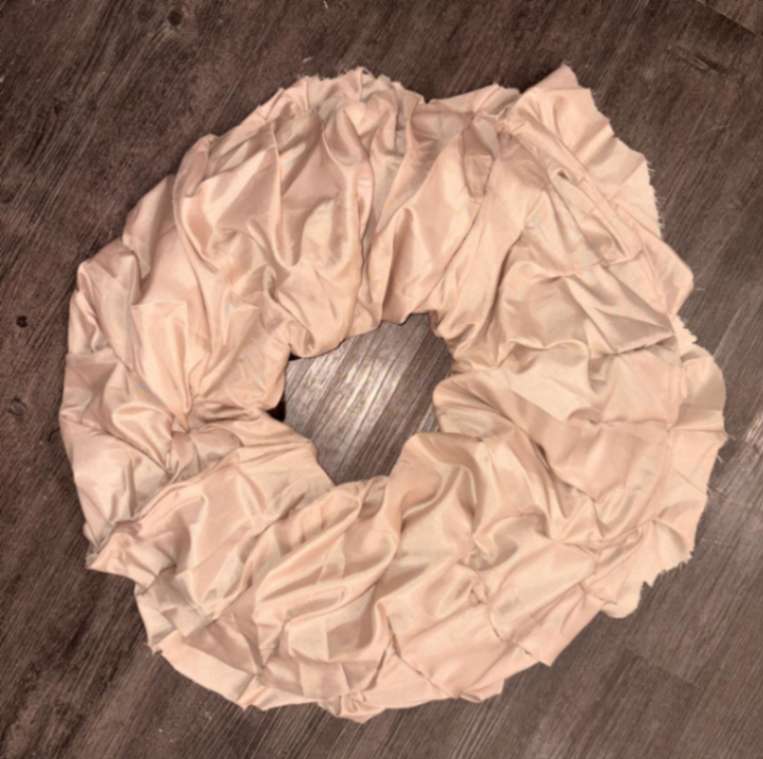
But I continued gluing the excess fabric inward with hot silicone.
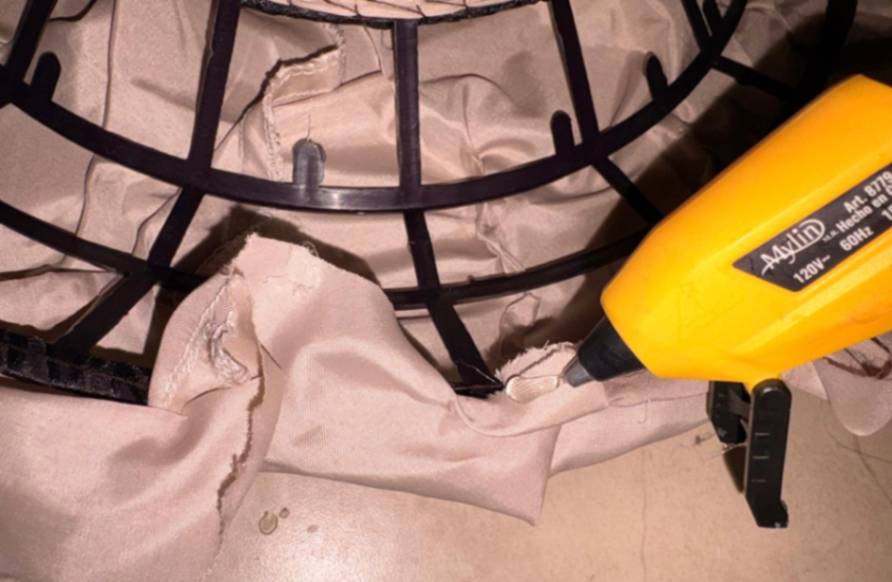
Likewise, I glued several more folds in the middle section of the fabric drape to give the folds different directions and a better appearance.
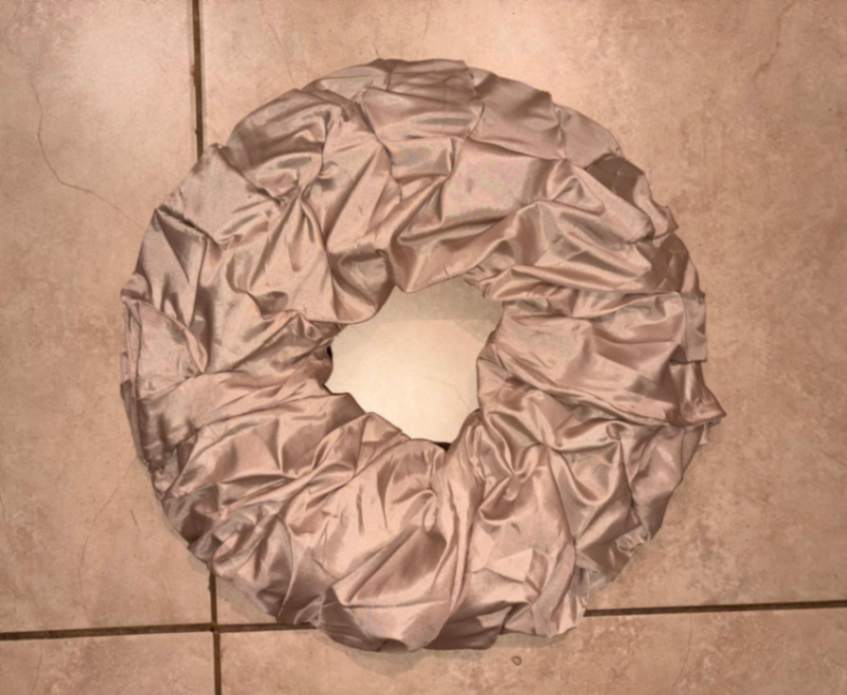
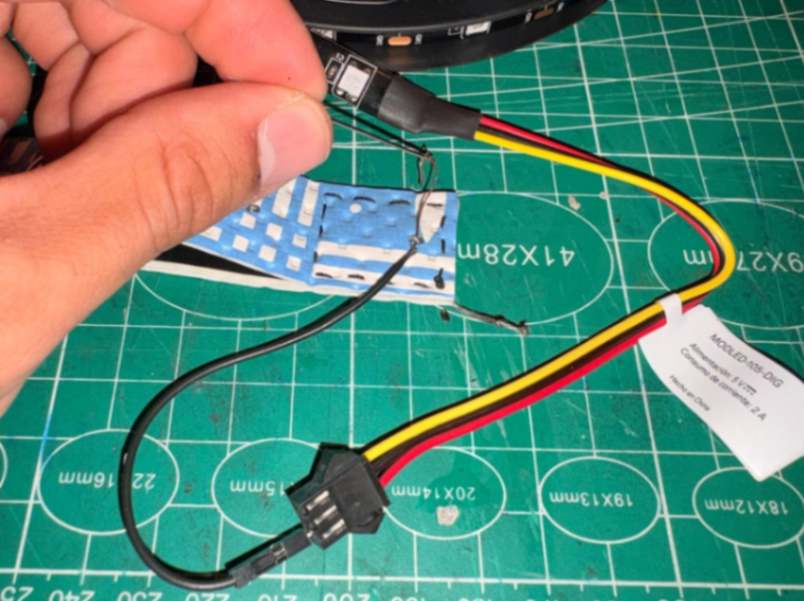
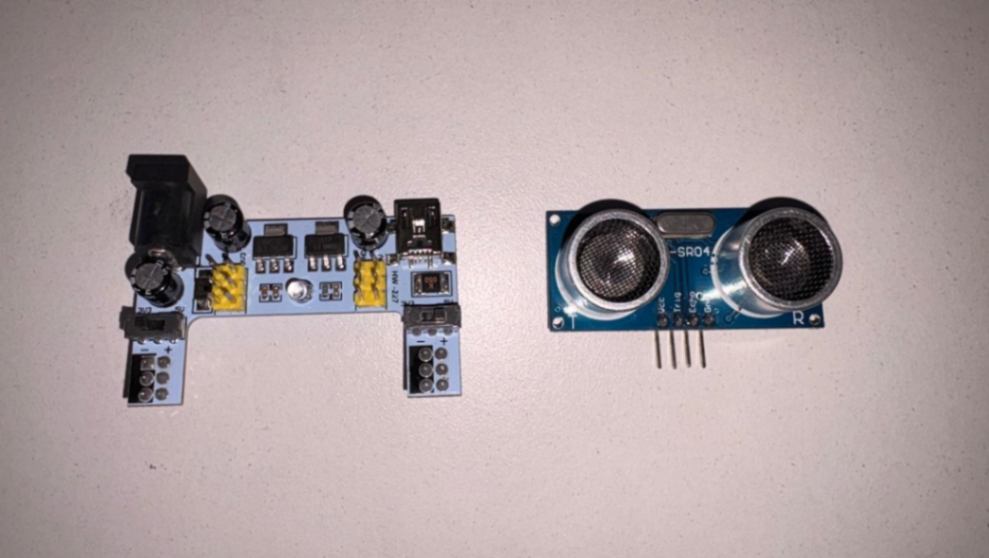
With the previous result ready, I moved on to the next electronic components, which would be the most important ones. The first is the power supply, from which the charger would come out, and the second is the ultrasonic distance sensor.
I proceeded by connecting the voltage terminal of the distance sensor to the positive pole of the breadboard's power supply and making a jumper bridge to the positive pole of the LED lights.
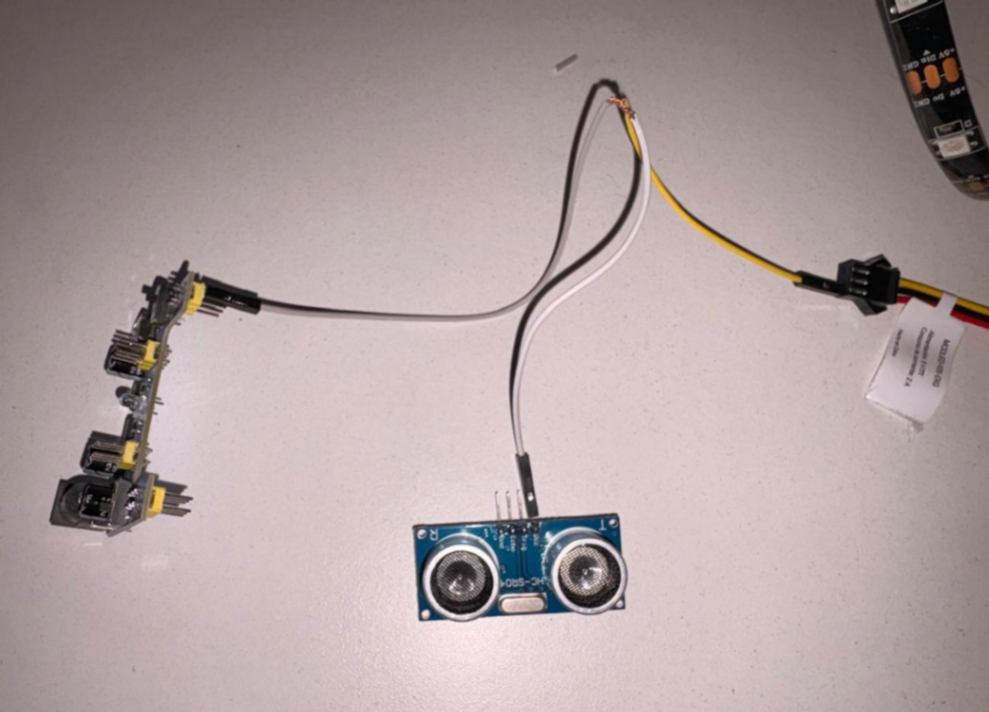
I connected one jumper to the negative pole of the XIAO's ground, and made a bridge because I only had M/F jumpers.
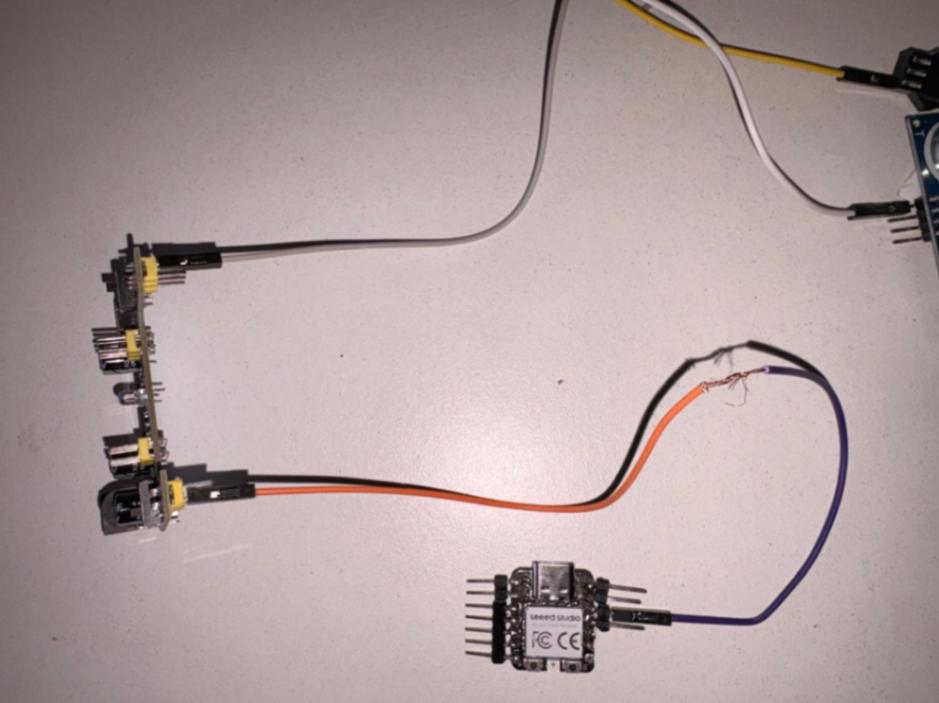
Then I connected the trig and echo ports of the distance sensor to terminals five and six of the XIAO.
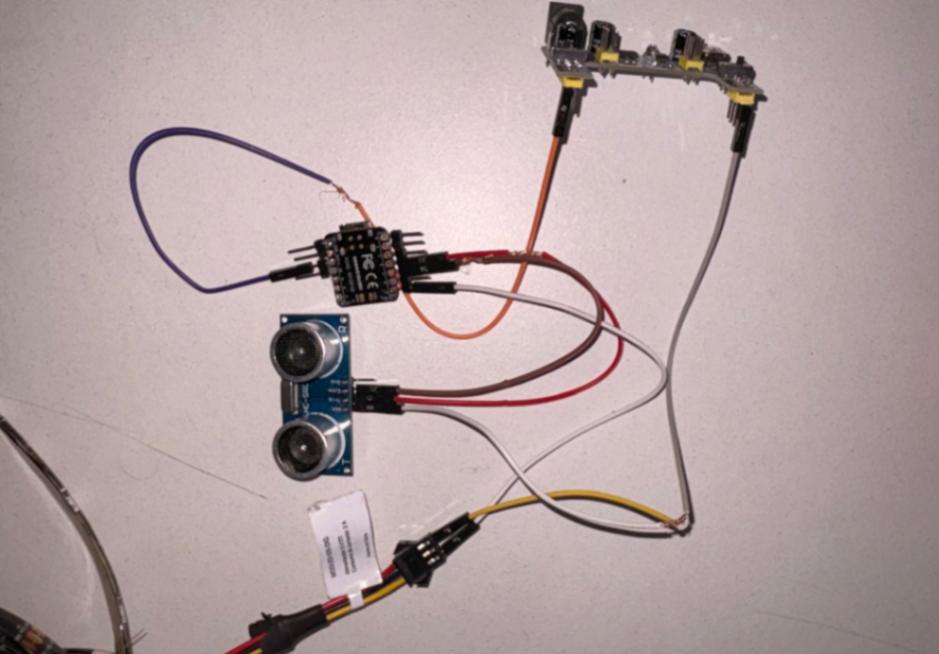
I connected the zero port of the XIAO to the DIN cable of the LED lights, and connected ports 3V3 and GND of the XIAO; 3V3 to the positive rail of the breadboard, and GND as the ground, which would be connected to the breadboard's negative rail and in turn linked via a jumper to the ground port of the distance sensor.
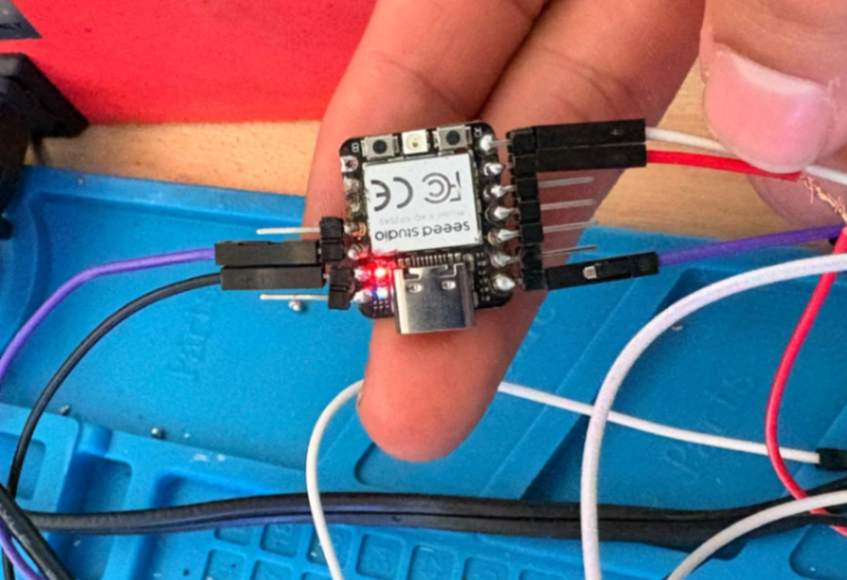
With every terminal connected, it was time to start wrapping the 5m LED strip around the plastic structure.
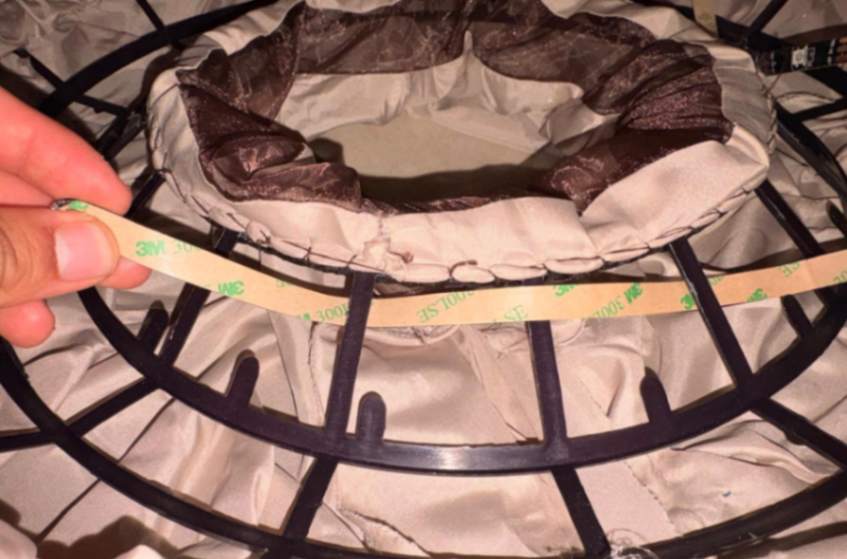
With the code properly configured, I used the charger to supply power and verify that the light could turn on.
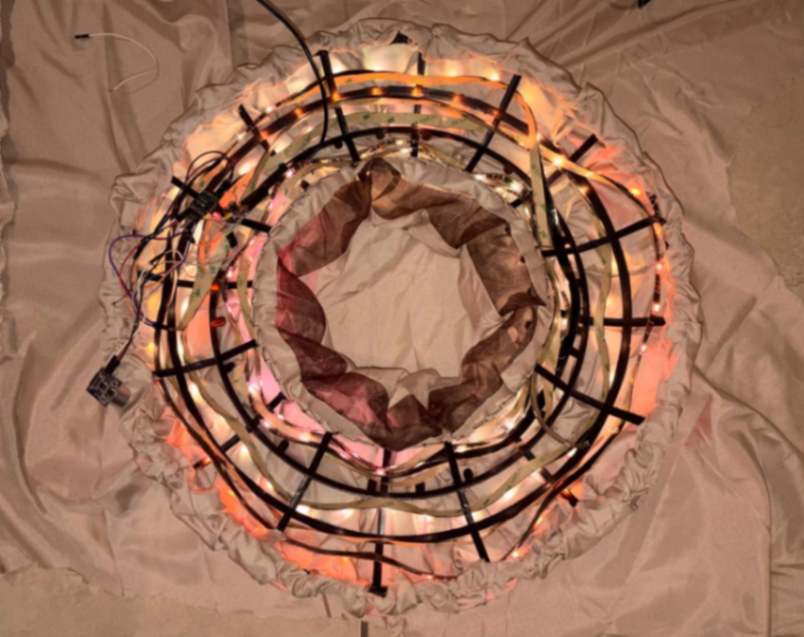
Before you see the result...
Experimentations:
The Nebula Result
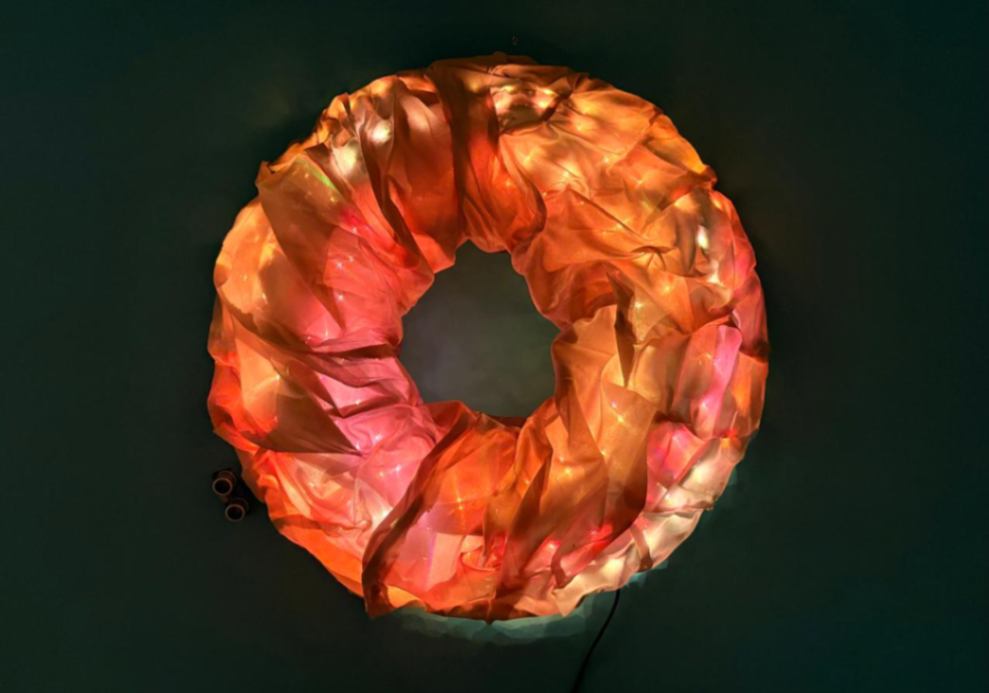
...
5. Gemini AI Prompt for Claude AI
const int sensorPin = A0;
const int ledPin = D1;

Act as an expert engineer in creative coding, embedded systems, and interactive lighting design. I need you to help me develop and explain an Arduino IDE code optimized for a Seeed Studio XIAO RP2040 board, a strip of 100 NeoPixels (connected to pin D0), and an HC-SR04 ultrasonic sensor (Trig on D5, Echo on D6).

The project consists of simulating a rainstorm and lightning effect with an exclusively warm-toned atmosphere (amber, fire, terracotta hues, and golden flashes). The lighting behavior should feel extremely organic, natural, and fluid based on the distance measured by the sensor:

Far (> 40 cm): Active storm, fast and frequent lightning, and high frame rate.

Close (15 to 40 cm): Moderate, steady, and fluid storm.

Very close (< 15 cm): Extremely slow, calm, paused, and intimate transition.

Please provide me with:

A technical and expert explanation breaking down the fundamental role of each delay and stochasticity (random probability) to make the effect look natural rather than robotic.

The architecture of the warm color palette used in the RGB channels of the Adafruit_NeoPixel library.

The complete, clean, commented code ready to compile without syntax errors or memory overflow: #include
#define LED_PIN D0         // Changed from PIN_LED to LED_PIN to avoid conflict with the XIAO
#define NUM_LEDS 100       // Your 100 NeoPixels
#define TRIG_PIN D5        // HC-SR04 Trig pin on D3 [Note: matches D5 per text]
#define ECHO_PIN D6        // HC-SR04 Echo pin on D4 [Note: matches D6 per text]
Adafruit_NeoPixel strip(NUM_LEDS, LED_PIN, NEO_GRB + NEO_KHZ800);

void setup() {
  Serial.begin(9600);
  pinMode(TRIG_PIN, OUTPUT);
  pinMode(ECHO_PIN, INPUT);

  strip.begin();
  strip.setBrightness(85); // Moderate brightness for electrical safety
  strip.show();            // Initialize everything turned off
}

void loop() {
  // 1. Send a 10-microsecond ultrasonic pulse
  digitalWrite(TRIG_PIN, LOW);
  delayMicroseconds(2);
  digitalWrite(TRIG_PIN, HIGH);
  delayMicroseconds(10);
  digitalWrite(TRIG_PIN, LOW);

  // 2. Read the time it takes for the echo to return (with a 30ms timeout)
  long duration = pulseIn(ECHO_PIN, HIGH, 30000);

  // 3. Convert time to centimeters
  int distance = duration * 0.034 / 2;

  // If there's no valid reading, assume it is far
  if (distance <= 0 || distance > 100) {
    distance = 100;
  }

  // 4. Debugging in the Serial Monitor
  Serial.print("Measured distance: ");
  Serial.print(distance);
  Serial.println(" cm");

  // 5. Define colors based on distance using the correct uint32_t type:
  // - White: Very close (less than 15 cm)
  // - Purple: Close (between 15 cm and 40 cm)
  // - Blue: Far (more than 40 cm)

  uint32_t selectedColor;
  if (distance < 15) {
    // Very close -> White
    selectedColor = strip.Color(255, 255, 255);
  }
  else if (distance >= 15 && distance < 40) {
    // Close -> Purple
    selectedColor = strip.Color(150, 0, 255);
  }
  else {
    // Far -> Blue
    selectedColor = strip.Color(0, 100, 255);
  }

  // 6. Apply the color to the entire 100-LED strip
  for(int i = 0; i < NUM_LEDS; i++) {
    strip.setPixelColor(i, selectedColor);
  }

  strip.show();
  delay(50); // Brief pause for sensor stability
}
5.1 Arduino Claude Code
const int sensorPin = A0;
const int ledPin = D1;

/*
  Warm storm (rain + lightning) controlled by distance
  Board   : Seeed XIAO RP2040 (Earle Philhower core)
  LEDs    : 100 NeoPixels, Din -> D0
  Sensor  : HC-SR04, Trig -> D5, Echo -> D6

  > 40 cm   : active storm (fast, frequent lightning, high FPS)
   15-40 cm : moderate, steady, and fluid storm
  < 15 cm   : very slow, calm, and intimate transition
*/

#include
#include

// ---------------- HARDWARE ----------------
#define LED_PIN          D0
#define NUM_LEDS         100
#define TRIG_PIN         D5
#define ECHO_PIN         D6

// ---------------- SETTINGS -----------------
#define BRIGHTNESS       85      // Same as your original code
#define NEAR_CM          15      // "Very close" threshold
#define FAR_CM           40      // "Far" threshold
#define HYST_CM          2       // Hysteresis on thresholds
#define MAX_CM           100     // Invalid or greater readings = far
#define ECHO_TIMEOUT_US  8000UL  // ~137 cm; limits pulseIn blocking
#define MEASURE_MS       50      // Interval between measurements
#define DEBUG_MS         150     // Serial print interval
#define MAX_DROPS        20      // Max simultaneous drops
#define RAIN_FROM_END    false   // true: rain falls from LED 99 to 0


// ---------------- WARM PALETTE ------------
const uint8_t DROP_COLORS[4][3] = {
  {255, 120, 10},   // amber
  {255,  60,  5},   // fire
  {200,  75, 30},   // terracotta
  {255, 170, 30}    // gold
};
const uint8_t EMBER_COLOR[3]    = {110, 28, 8};          // dark terracotta ember
const uint8_t BOLT_COLORS[2][3] = {{255, 175, 40},       // gold lightning
                                   {255, 215, 120}};     // light amber lightning

// ---------------- GLOBALS ----------------
Adafruit_NeoPixel strip(NUM_LEDS, LED_PIN, NEO_GRB + NEO_KHZ800);

uint8_t fb[NUM_LEDS * 3];      // drops and trails framebuffer (300 bytes)
uint8_t ember[NUM_LEDS];       // ember brightness per LED (100 bytes)

struct Drop {
  float   pos;                 // distance traveled (in LEDs)
  float   speed;               // LEDs per second
  uint8_t bright;
  uint8_t color;
  bool    active;
};
Drop drops[MAX_DROPS];
int activeDrops = 0;

// Lightning
float flashLvl   = 0;          // current flash level (0-255)
float flashPeak  = 0;
int   flashStart = 0;
int   flashLen   = 0;

int   strikesLeft = 0;
int   boltIdx    = 0;
unsigned long nextStrikeMs = 0;

// Sensor and zones
int distBuf[3];
int distIdx   = 0;
int rawDist   = MAX_CM;
int filtDist  = MAX_CM;
int zone      = 1;             // 0 very close, 1 close, 2 far
float energy  = 128;           // 0 (calm) .. 255 (storm), smoothed
float energyTarget = 128;
unsigned long frameMs = 22;

unsigned long lastMeasure = 0;
unsigned long lastFrame   = 0;
unsigned long lastDebug   = 0;

// ============================================================
//  UTILITIES
// ============================================================
static inline uint8_t sat(float v) { return v > 255.0f ? 255 : (v < 0 ? 0 : (uint8_t)v); }

// Interpolates between 3 profiles based on energy (0..255)
float lerp3(float calm, float mod, float act, float e) {
  if (e < 128.0f) return calm + (mod - calm) * (e / 128.0f);
  return mod + (act - mod) * ((e - 128.0f) / 127.0f);
}

// Converts "distance traveled" into physical LED index
static inline int idxOf(int p) {
#if RAIN_FROM_END
  return NUM_LEDS - 1 - p;
#else
  return p;
#endif
}

// Takes the maximum per channel (prevents brightness buildup when repainting drop head)
void maxPx(int i, uint8_t r, uint8_t g, uint8_t b) {
  if (i < 0 || i >= NUM_LEDS) return;
  uint8_t *p = &fb[i * 3];
  if (r > p[0]) p[0] = r;
  if (g > p[1]) p[1] = g;
  if (b > p[2]) p[2] = b;
}

// ============================================================
//  HC-SR04 SENSOR
// ============================================================
int readDistanceCm() {
  digitalWrite(TRIG_PIN, LOW);
  delayMicroseconds(2);
  digitalWrite(TRIG_PIN, HIGH);
  delayMicroseconds(10);
  digitalWrite(TRIG_PIN, LOW);

  unsigned long dur = pulseIn(ECHO_PIN, HIGH, ECHO_TIMEOUT_US);
  int d = (int)(dur * 0.0343f / 2.0f);
  if (d <= 0 || d > MAX_CM) d = MAX_CM;   // no valid reading = far
  return d;
}

// Median of the last 3 readings (discards ultrasound spikes)
int medianOf3(int a, int b, int c) {
  if (a > b) { int t = a; a = b; b = t; }
  if (b > c) { int t = b; b = c; c = t; }
  if (a > b) { int t = a; a = b; b = t; }
  return b;
}

// Zone with hysteresis to prevent threshold jitter
void updateZone(int d) {
  int nearT = (zone == 0) ? NEAR_CM + HYST_CM : NEAR_CM - HYST_CM;
  int farT  = (zone == 2) ? FAR_CM  - HYST_CM : FAR_CM  + HYST_CM;
  if (d < nearT)       zone = 0;
  else if (d >= farT)  zone = 2;
  else                 zone = 1;

  energyTarget = (zone == 0) ? 0.0f : (zone == 1 ? 128.0f : 255.0f);
}

// ============================================================
//  BACKGROUND EMBERS (random walk per LED)
// ============================================================
void updateEmbers() {
  for (int i = 0; i < NUM_LEDS; i++) {
    if (random(100) < 8) {
      int v = ember[i] + random(-12, 13);
      ember[i] = constrain(v, 50, 255);
    }
  }
}

// ============================================================
//  RAIN
// ============================================================
void spawnDrop(float e) {
  for (int i = 0; i < MAX_DROPS; i++) {
    if (!drops[i].active) {
      drops[i].active = true;
      drops[i].pos    = 0;
      drops[i].speed  = lerp3(10, 40, 90, e) * random(70, 131) / 100.0f;
      drops[i].bright = (uint8_t)(lerp3(90, 190, 255, e) * random(60, 101) / 100.0f);
      drops[i].color  = random(4);
      return;
    }
  }
}

void updateRain(float e, float dt) {
  // 1) Channel-based fading: R slow, G medium, B fast
  //    -> the trail "cools down" its color: gold -> orange -> red -> terracotta
  float tauR = lerp3(0.90f, 0.30f, 0.18f, e);
  uint16_t fR = (uint16_t)(256.0f * expf(-dt / tauR));
  uint16_t fG = (uint16_t)(256.0f * expf(-dt / (tauR * 0.55f)));
  uint16_t fB = (uint16_t)(256.0f * expf(-dt / (tauR * 0.30f)));
  for (int i = 0; i < NUM_LEDS; i++) {
    fb[i * 3]     = ((uint16_t)fb[i * 3]     * fR) >> 8;
    fb[i * 3 + 1] = ((uint16_t)fb[i * 3 + 1] * fG) >> 8;
    fb[i * 3 + 2] = ((uint16_t)fb[i * 3 + 2] * fB) >> 8;
  }

  // 2) Stochastic spawning: probability = rate * dt (no fixed rhythm)
  float spawnPerSec = lerp3(1.2f, 6.0f, 14.0f, e);
  if (random(10000) < (long)(spawnPerSec * dt * 10000.0f)) spawnDrop(e);

  // 3) Advance and draw drops (fills covered LEDs in the frame)
  activeDrops = 0;
  for (int i = 0; i < MAX_DROPS; i++) {
    if (!drops[i].active) continue;
    activeDrops++;

    float newPos = drops[i].pos + drops[i].speed * dt;
    int a = (int)drops[i].pos;
    int b = (int)newPos;
    const uint8_t *c = DROP_COLORS[drops[i].color];
    float k = drops[i].bright / 255.0f;
    for (int p = a; p <= b; p++) {
      if (p >= 0 && p < NUM_LEDS) {
        maxPx(idxOf(p), (uint8_t)(c[0] * k), (uint8_t)(c[1] * k), (uint8_t)(c[2] * k));
      }
    }
    drops[i].pos = newPos;
    if (newPos >= NUM_LEDS) drops[i].active = false;
  }
}

// ============================================================
//  LIGHTNING
// ============================================================
void triggerLightning(float e) {
  int maxLen = constrain((int)lerp3(40, 60, 100, e), 10, NUM_LEDS);
  flashLen    = random(maxLen / 2, maxLen + 1);
  flashStart  = random(0, NUM_LEDS - flashLen + 1);
  flashPeak   = lerp3(90, 200, 255, e);
  int maxStrikes = (int)lerp3(1.0f, 2.0f, 4.0f, e);
  strikesLeft  = random(1, maxStrikes + 1);
  nextStrikeMs = millis();
}

void updateLightning(unsigned long now, float e, float dt) {
  // New sequence: only if none is currently running
  if (strikesLeft == 0 && flashLvl < 8.0f) {
    float perSec = lerp3(0.05f, 0.35f, 1.8f, e);
    if (random(100000) < (long)(perSec * dt * 100000.0f)) triggerLightning(e);
  }

  // Next flash in the sequence
  if (strikesLeft > 0 && now >= nextStrikeMs) {
    flashLvl  = flashPeak * random(70, 101) / 100.0f;
    flashPeak = flashPeak * 0.75f;                  // each flash is weaker
    if (flashPeak < 50.0f) flashPeak = 50.0f;
    boltIdx = random(2);
    strikesLeft--;

    int minGap = (int)lerp3(400, 120, 45, e);
    int span   = (int)lerp3(300, 120, 60, e);
    nextStrikeMs = now + minGap + random(0, span + 1);
  }
}

void decayLightning(float e, float dt) {
  if (flashLvl > 0) {
    float tau = lerp3(0.55f, 0.14f, 0.07f, e);       // calm: long and smooth glow
    flashLvl *= expf(-dt / tau);
    if (flashLvl < 4.0f) flashLvl = 0;
  }
}

// ============================================================
//  RENDER: drops + embers + lightning -> strip
// ============================================================
void renderFrame(float e, unsigned long now) {
  float emberLevel = lerp3(0.45f, 0.22f, 0.10f, e);   // more visible in calm
  float breathAmt  = lerp3(0.35f, 0.10f, 0.0f, e);    // slow breathing (~6 s)
  float breath     = 1.0f - breathAmt + breathAmt * (0.5f + 0.5f * sinf(now * 0.00105f));
  float eb         = emberLevel * breath / 255.0f;

  const uint8_t *bc = BOLT_COLORS[boltIdx];

  for (int i = 0; i < NUM_LEDS; i++) {
    float k = ember[i] * eb;
    float r = fb[i * 3]     + EMBER_COLOR[0] * k;
    float g = fb[i * 3 + 1] + EMBER_COLOR[1] * k;
    float b = fb[i * 3 + 2] + EMBER_COLOR[2] * k;

    // Lightning is added on top (not stored in framebuffer)
    if (flashLvl > 0 && i >= flashStart && i < flashStart + flashLen) {
      float v = flashLvl * random(75, 101) / 100.0f / 255.0f;   // crackle effect
      r += bc[0] * v;
      g += bc[1] * v;
      b += bc[2] * v;
    }

    strip.setPixelColor(i, sat(r), sat(g), sat(b));
  }
  strip.show();   // each frame: keeps the strip active
}

// ============================================================
//  SETUP
// ============================================================
void setup() {
  Serial.begin(115200);
  unsigned long t0 = millis();
  while (!Serial && (millis() - t0 < 2000)) { }

  pinMode(TRIG_PIN, OUTPUT);
  pinMode(ECHO_PIN, INPUT);
  randomSeed(micros() ^ analogRead(A0));

  strip.begin();
  strip.setBrightness(BRIGHTNESS);
  strip.clear();
  strip.show();

  // Self-test: amber sweep confirming all 100 LEDs respond
  for (int i = 0; i < NUM_LEDS; i++) {
    strip.setPixelColor(i, strip.Color(120, 40, 0));
    strip.show();
    delay(3);
  }
  strip.clear();
  strip.show();

  memset(fb, 0, sizeof(fb));
  for (int i = 0; i < NUM_LEDS; i++) ember[i] = random(80, 200);
  for (int i = 0; i < MAX_DROPS; i++) drops[i].active = false;

  // Pre-fill filter with first reading and set initial zone
  int first = readDistanceCm();
  for (int i = 0; i < 3; i++) distBuf[i] = first;
  rawDist = filtDist = first;
  updateZone(first);
  energy = energyTarget;

  Serial.println(F("=== Warm storm ready ==="));
}

// ============================================================
//  LOOP (no delay(): everything runs on millis())
// ============================================================
void loop() {
  unsigned long now = millis();

  // 1) Distance measurement + filter + zone
  if (now - lastMeasure >= MEASURE_MS) {
    lastMeasure = now;
    rawDist = readDistanceCm();
    distBuf[distIdx] = rawDist;
    distIdx = (distIdx + 1) % 3;
    filtDist = medianOf3(distBuf[0], distBuf[1], distBuf[2]);
    updateZone(filtDist);
  }

  // 2) Frame (interval depends on energy: higher FPS during storm)
  frameMs = (unsigned long)lerp3(50, 22, 12, energy);
  if (now - lastFrame >= frameMs) {
    float dt = (now - lastFrame) / 1000.0f;
    if (dt > 0.25f) dt = 0.25f;
    lastFrame = now;

    // Energy chases its target with distinct time constants:
    // rises in ~1.2 s, drops to "moderate" in ~1.8 s, and to "calm" in ~5 s
    float tau = (energyTarget > energy) ? 1.2f : (energyTarget == 0.0f ? 5.0f : 1.8f);
    energy += (energyTarget - energy) * (1.0f - expf(-dt / tau));

    updateEmbers();
    updateRain(energy, dt);
    updateLightning(now, energy, dt);
    renderFrame(energy, now);
    decayLightning(energy, dt);
  }

  // 3) Serial debugging (115200 baud)
  if (now - lastDebug >= DEBUG_MS) {
    lastDebug = now;
    const char *zn = (zone == 0) ? "VERY CLOSE" : (zone == 1 ? "CLOSE" : "FAR");
    Serial.print(F("Raw distance: ")); Serial.print(rawDist);
    Serial.print(F(" cm | filtered: "));  Serial.print(filtDist);
    Serial.print(F(" cm | zone: "));      Serial.print(zn);
    Serial.print(F(" | energy: "));      Serial.print((int)energy);
    Serial.print(F(" | frame: "));        Serial.print(frameMs);
    Serial.print(F(" ms | drops: "));     Serial.print(activeDrops);
    Serial.print(F(" | lightning: "));     Serial.println((int)flashLvl);
  }
}
6. Weekly reflection & critical thinking
- This week I learned different technical criteria regarding materials that conduct electric current, the mathematical considerations for voltage usage, and the selection of resistors according to the available power capacity for a circuit. I found the ability to imagine different functions for handling current and its flow very interesting, especially using materials not commonly thought of for conventional circuits, along with the components and code configurations to program them for a specific use.
- There were various failures during my experimentation, ranging from connections to different ports to issues where the Arduino code wouldn't work even without throwing errors. What I would do differently is that, from the beginning, I should have used an AI for prompt generation to help another AI produce specialized code to fulfill the functions I wanted. I ended up using Claude due to its capability for generating complex code, but Gemini helped me structure my ideas in a professional manner.
- This week will help me execute mechanical functions and think about experimenting with various materials to develop a complex final project that reflects the knowledge I have acquired so far. It really helped me express my personality and structure my workflow to incorporate these techniques into future projects.
- Due to the materials used, there was very little waste; however, many of the materials this week were recycled—like the dress—which leads me to imagine endless possibilities for utilizing waste materials to work on soft electronic circuit projects.
7. References
Reference: Neoprene Bend Sensor