Development Timeline
-
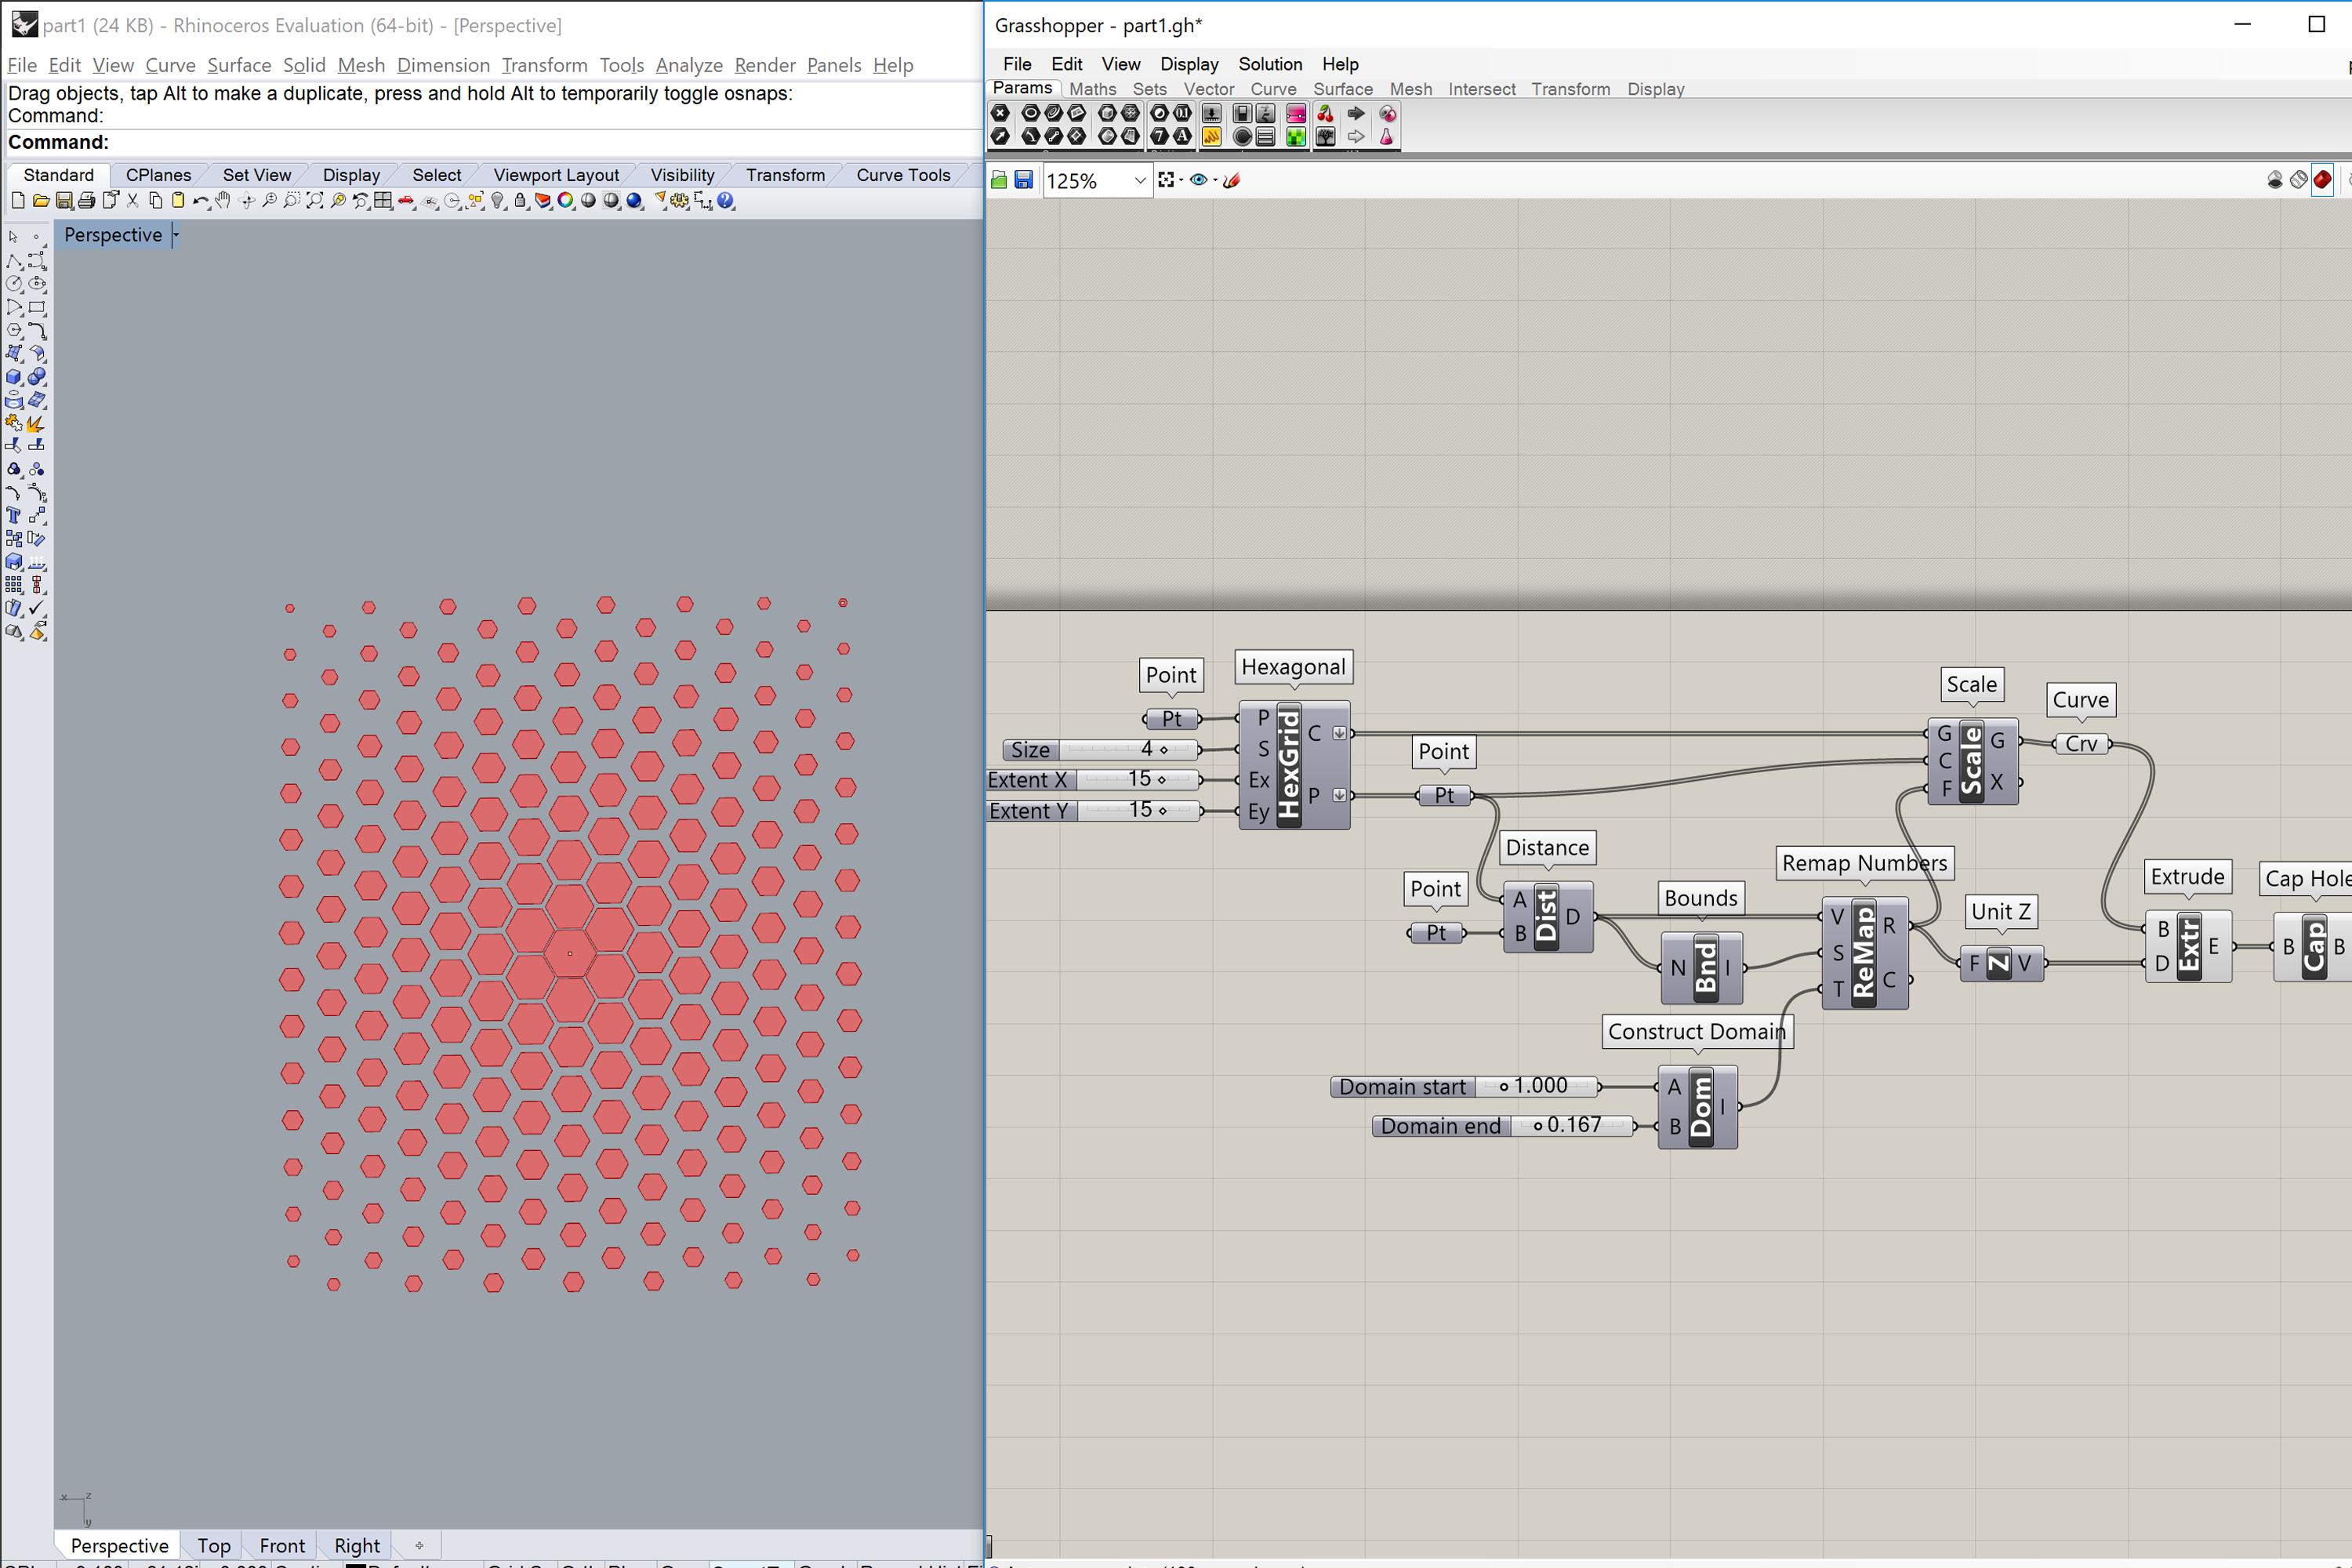
1. Design Concept
Working with Hexagrids is integral to 4d Printing from my understanding of 4D printing and therefore, beeing able to first get a general understanding of attractor points and how we can influence a grid's size and therafter make it conform to a UV mapped flat design of a 3d object can help predict the right pattern for 4d Printing. Here, am just setting up the script for a simple hexagrid to be adjusting its size according to the distance between each hexagon and a set point.
-
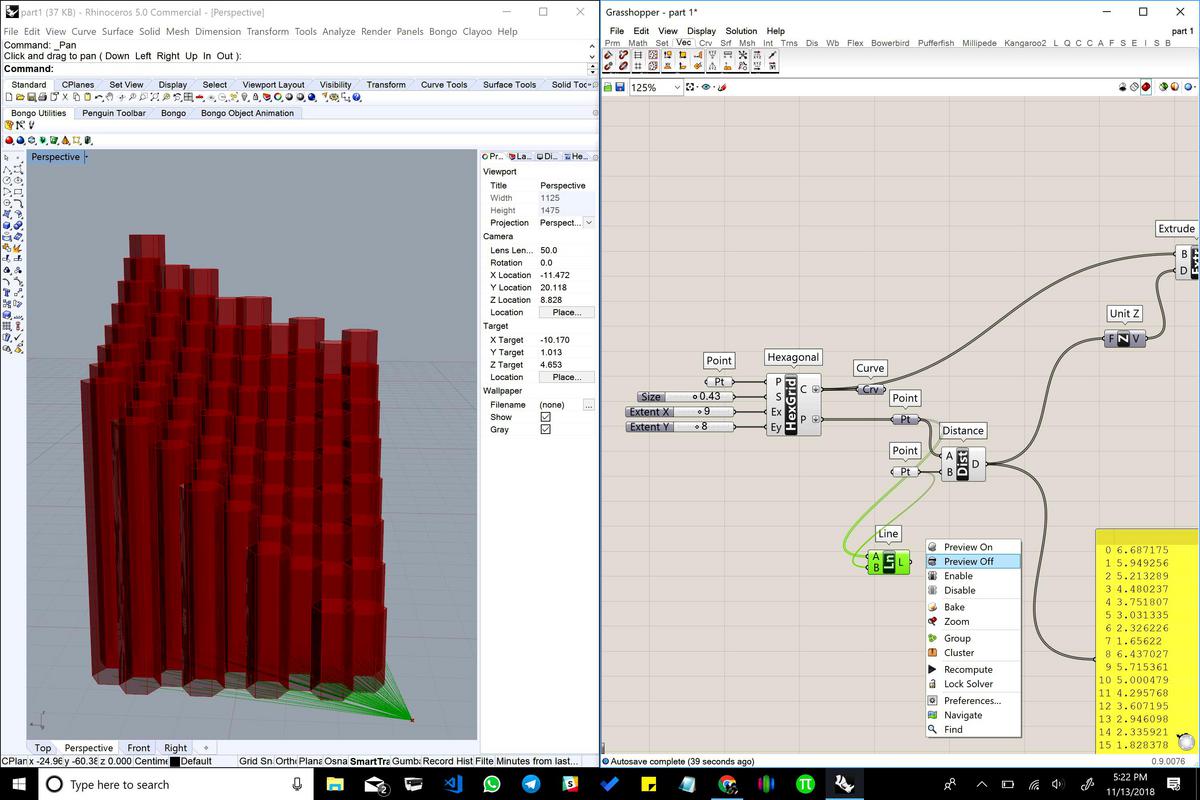
2. Introducing more Points
The next step was to limit the height to a desired level as in 4d printing we just need enough height for the fabric to cath onto the print. Thicker heights will only make the print fall off. So after limiting the height set of data points, i moved to the next step. Introduction of multiple attractor points while bounding the main design to set of points via construct domain
-
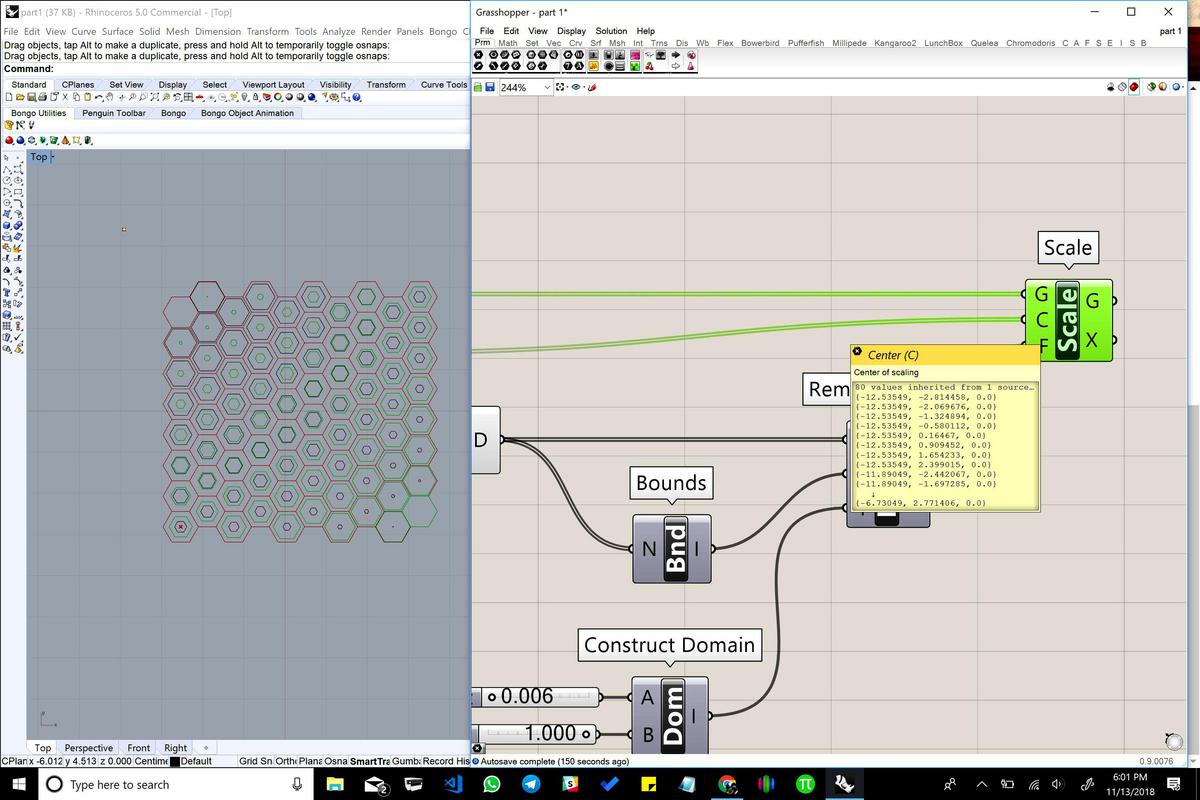
3. Baking
I just had some fun baking the first design and thereafter shifting the set of integers and point further to get these organic offsets. I can keep baking and shifting to get more non-structureal, non-uniform patterns. Right now am just doing it for the fun sake of it. It has nothing to do with the main design.
-
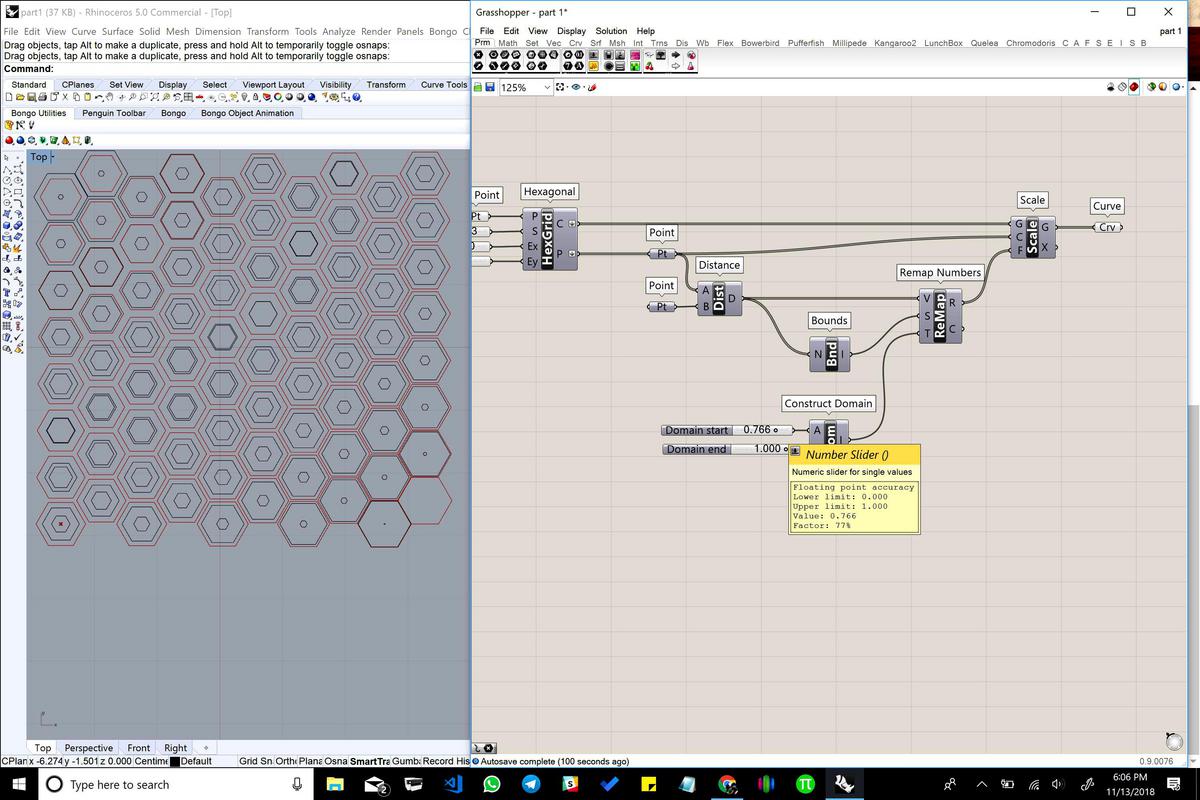
4. Script without needed Parameters
So the script is now ready. Its pretty simple, All it does is increase/decrease the size and height of each hexagon within the grid in relation to the distance between that hexagon and a fixed point. In this example i have laid it in the centre.
-
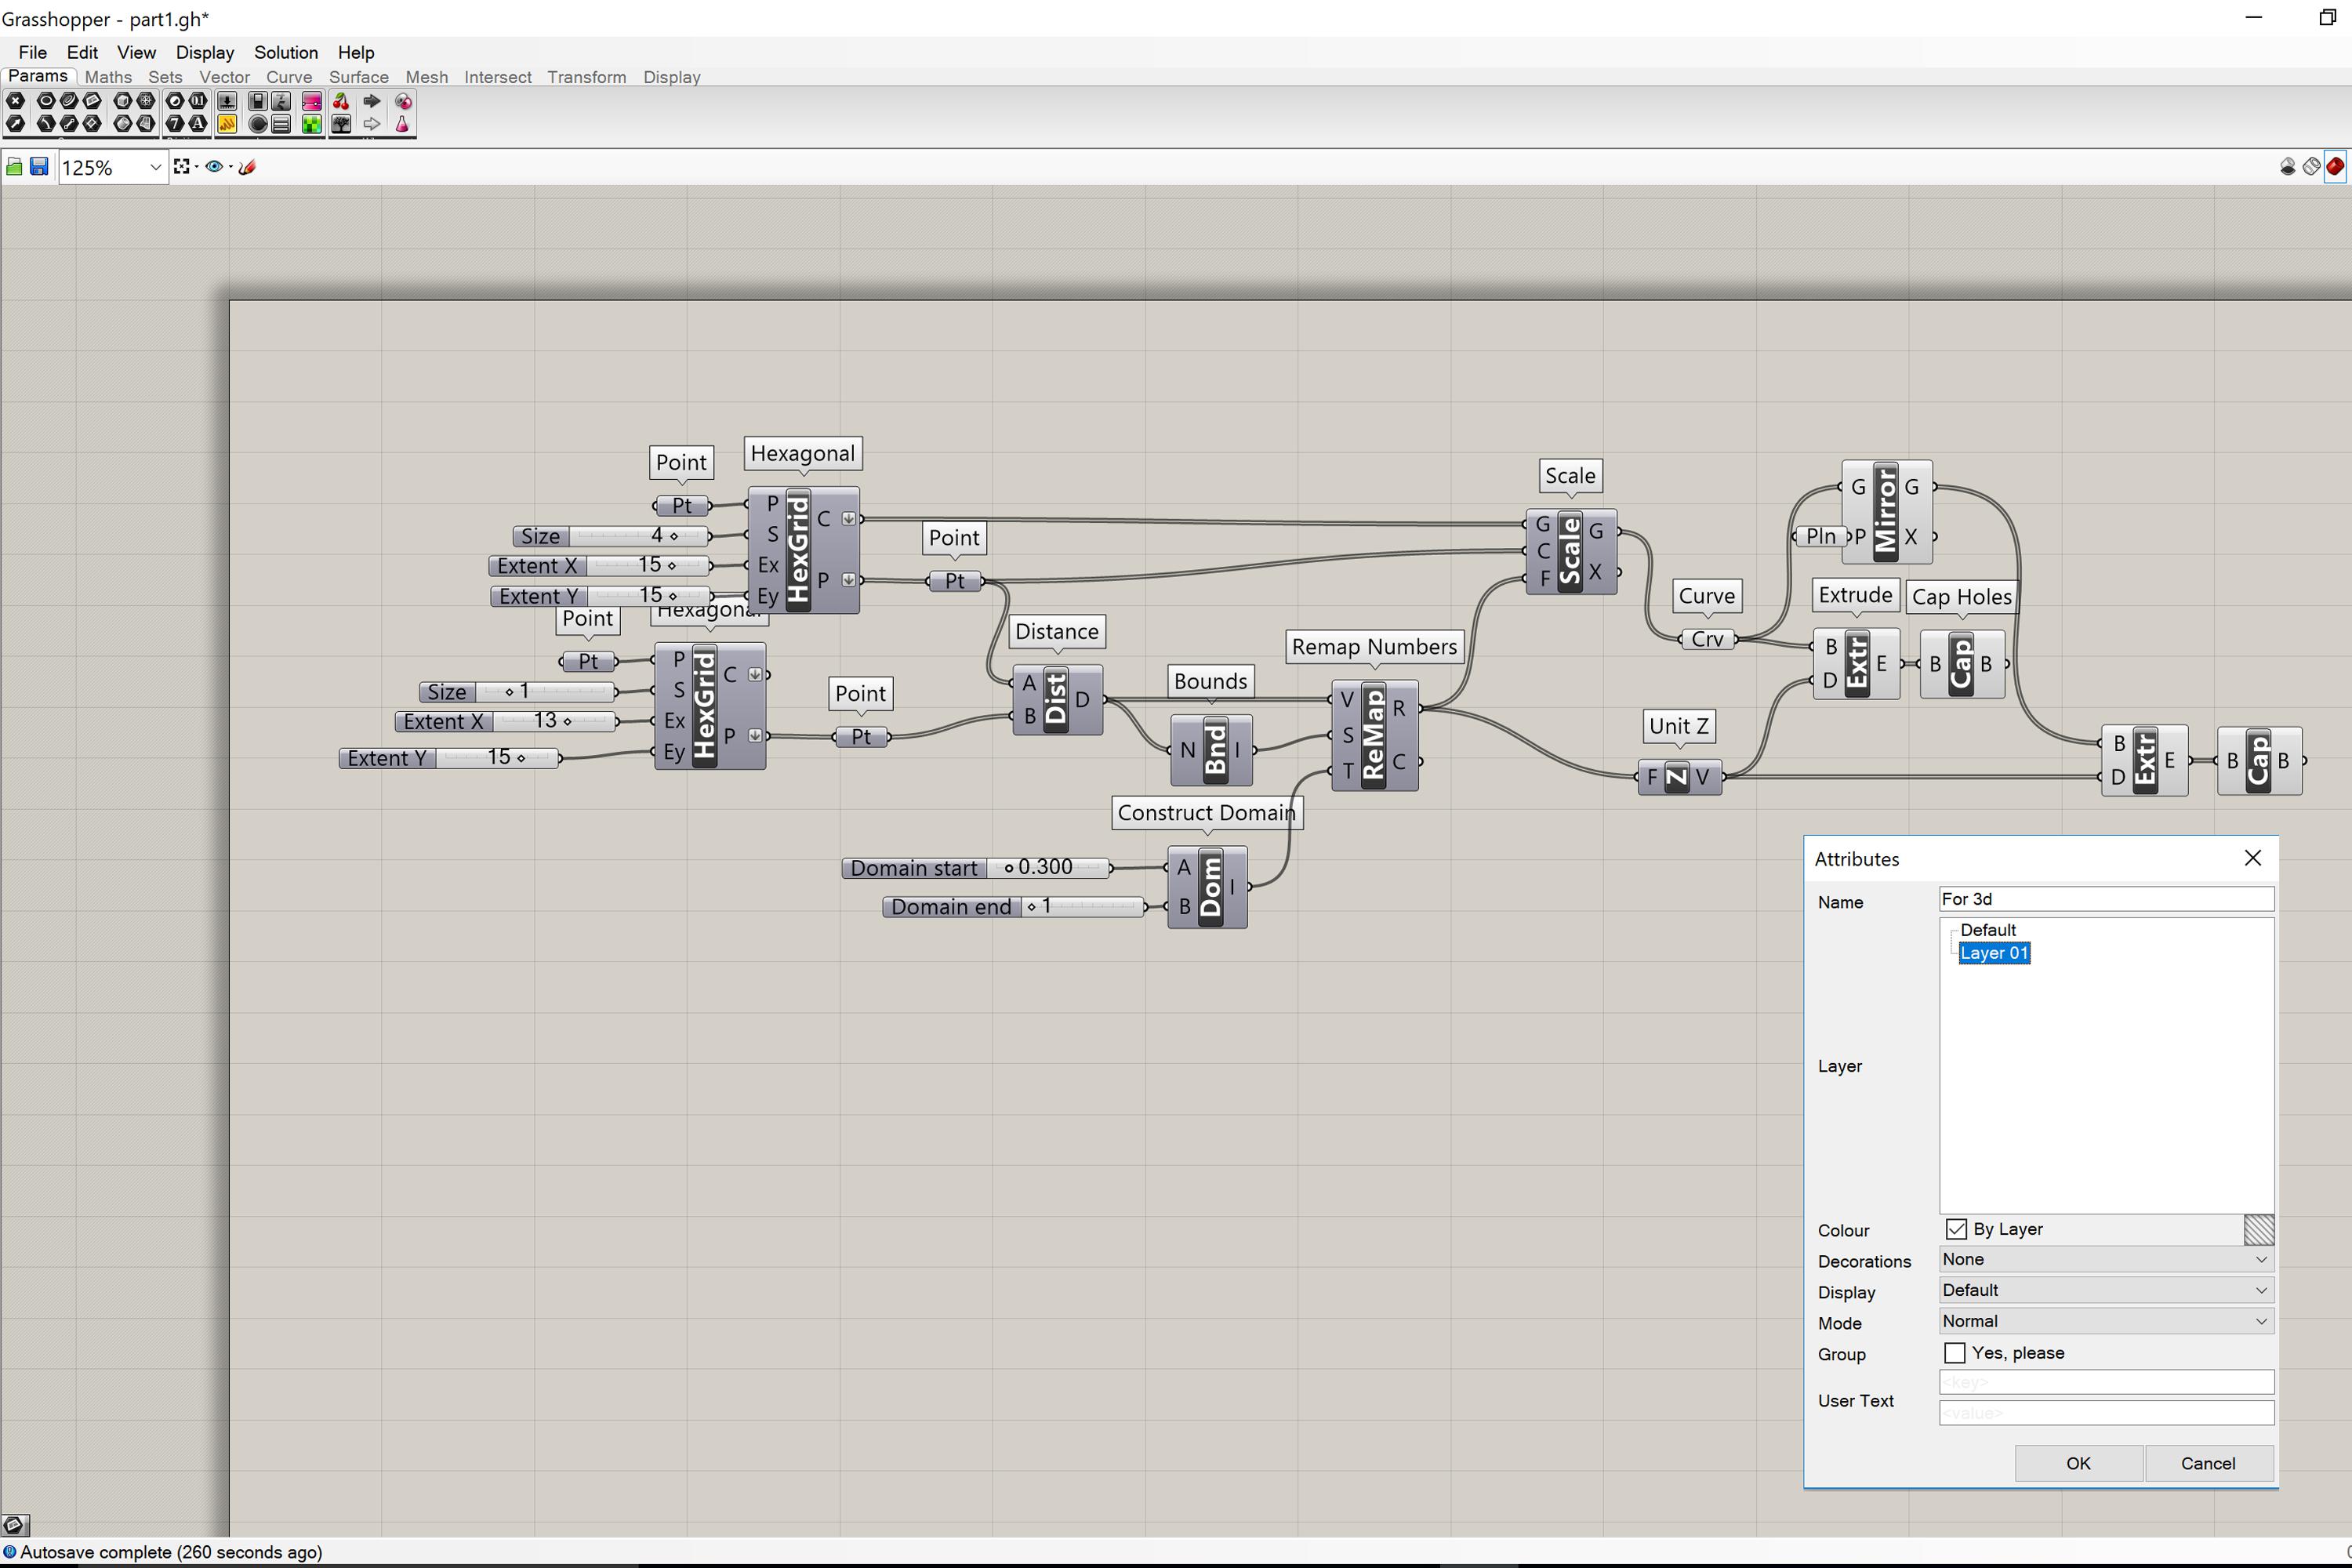
5. Final Script with final parameters
I now head over to mirroring the piece as my final step to give a direction to th design and now am preparing to export this layer. You can find the .gh file for downloading underneath. However, this is not the script for 4d Printing a 3d object and generating the right pattern for it.
-
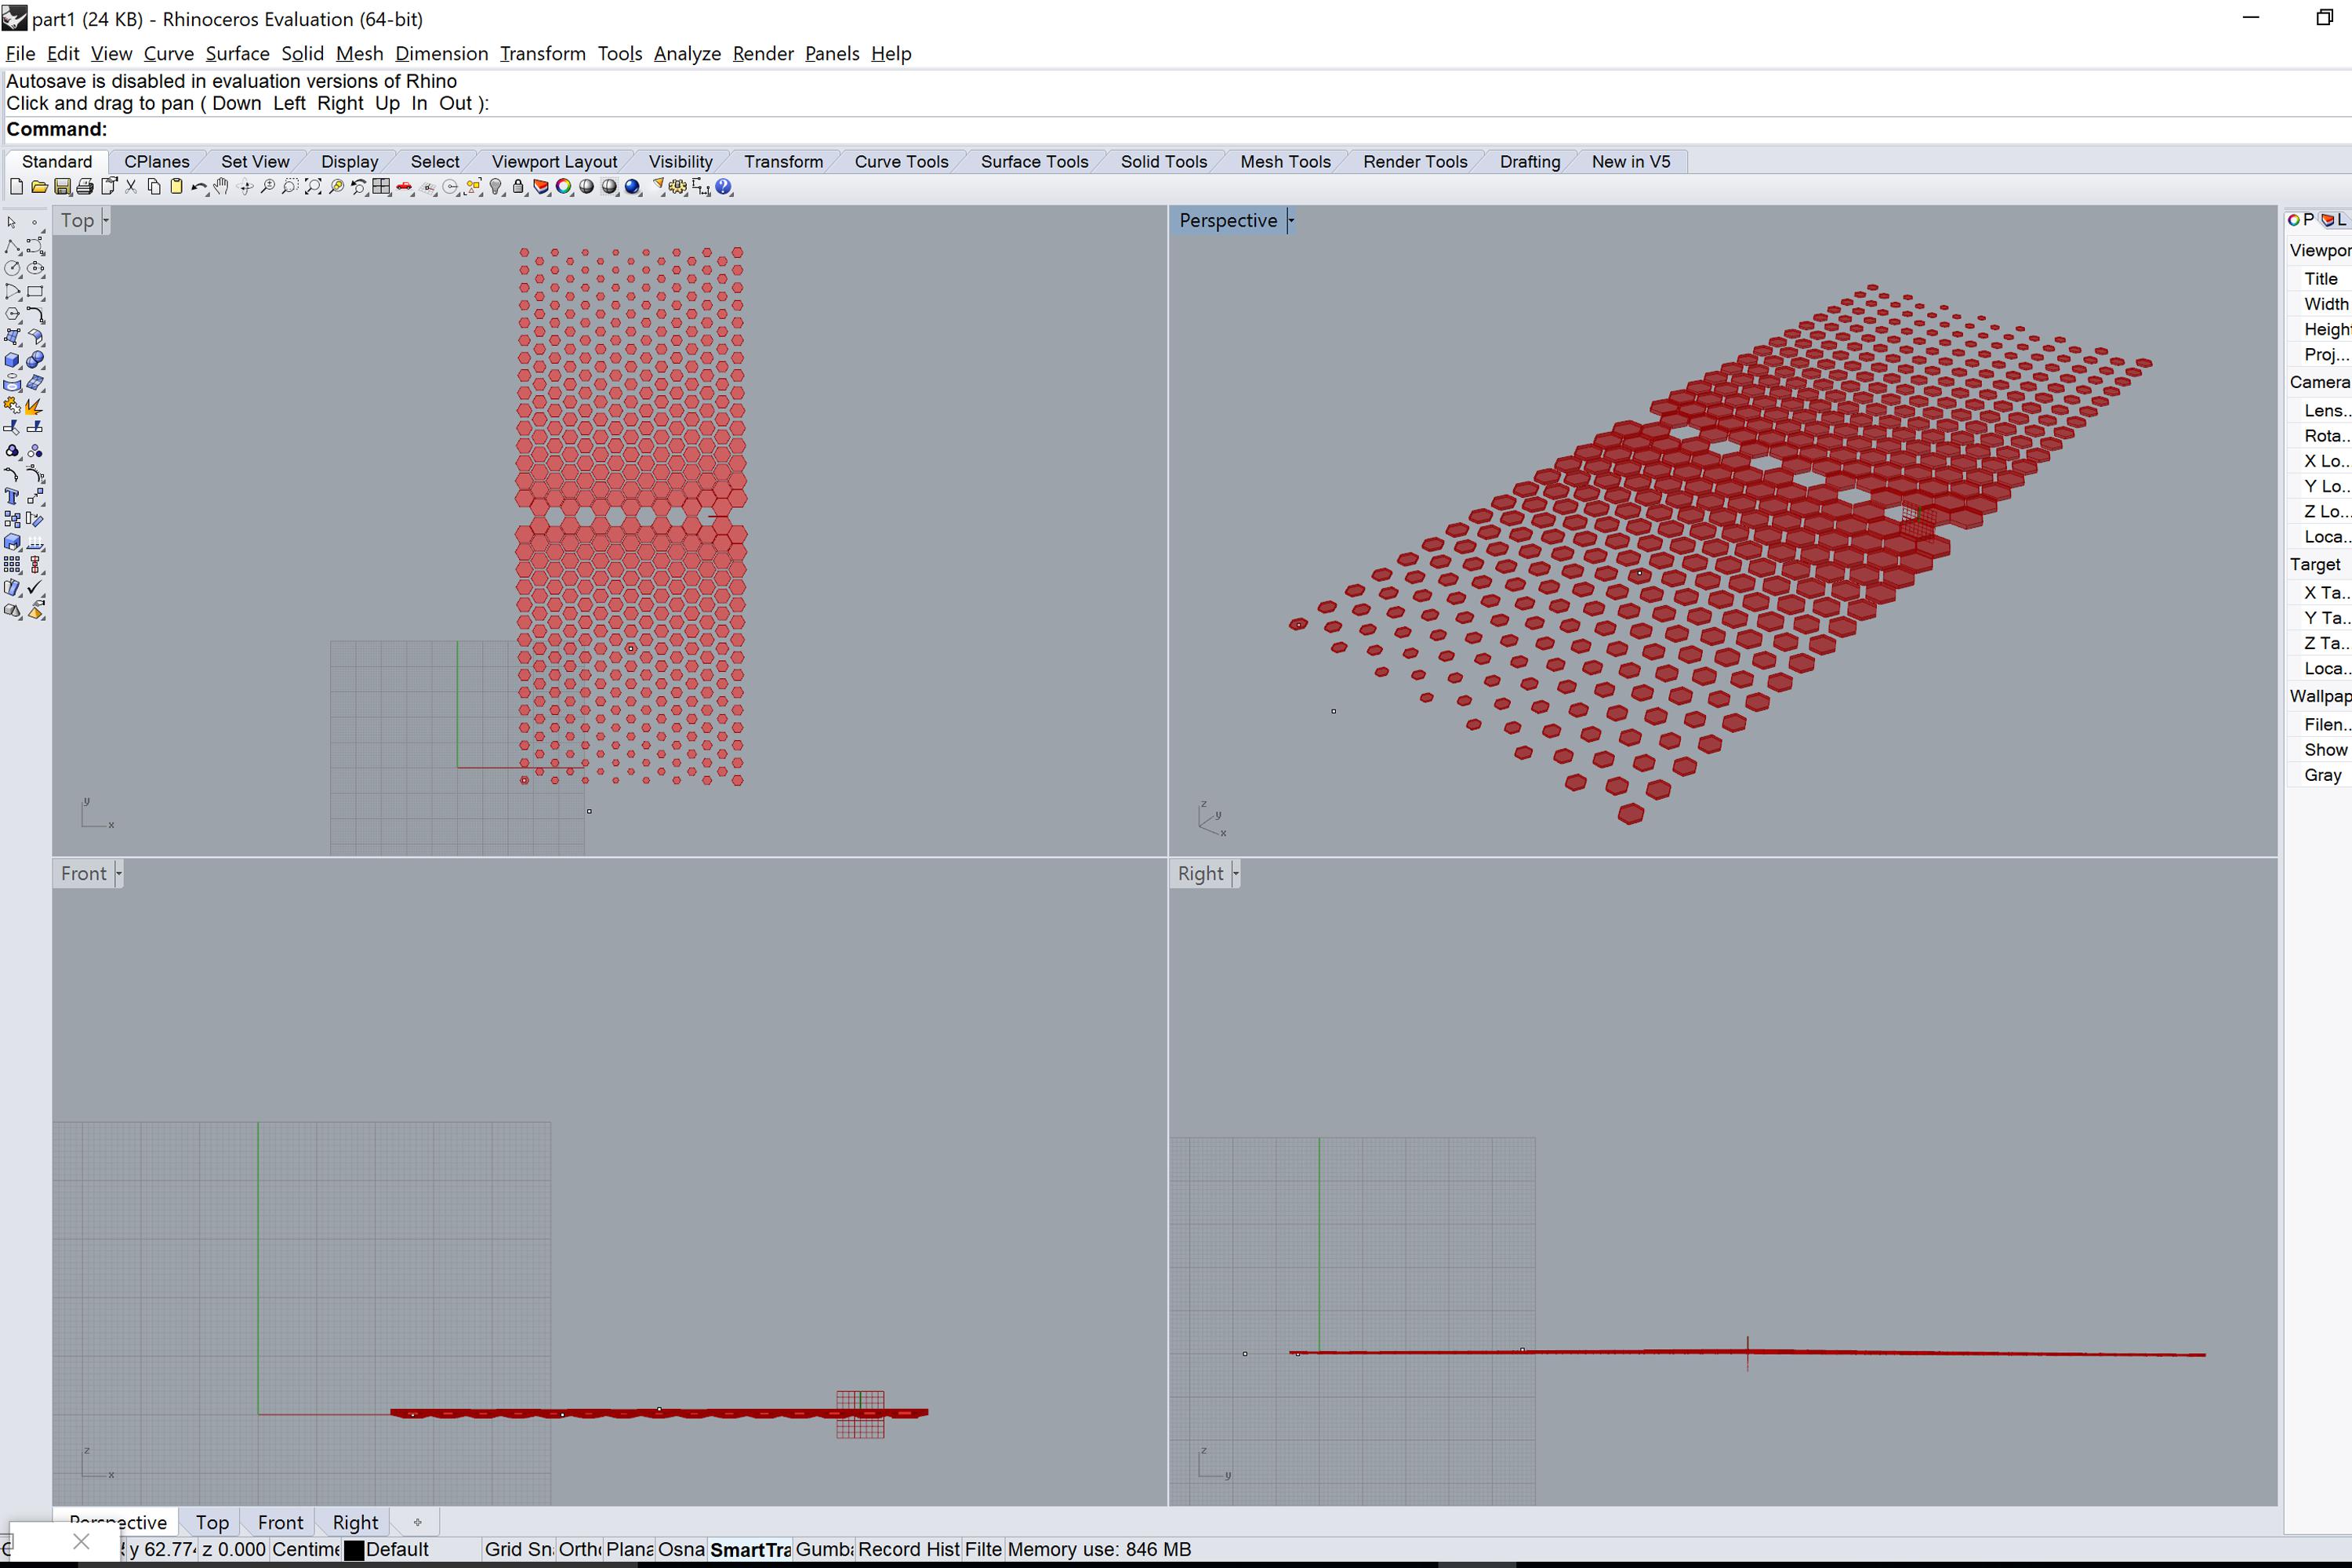
6. Top-Iso-Side views
Time to export the design. No, I dont plan to use RHINO CAM yet.
-
7. Baking
Baked both mirrored patterns-the final design.
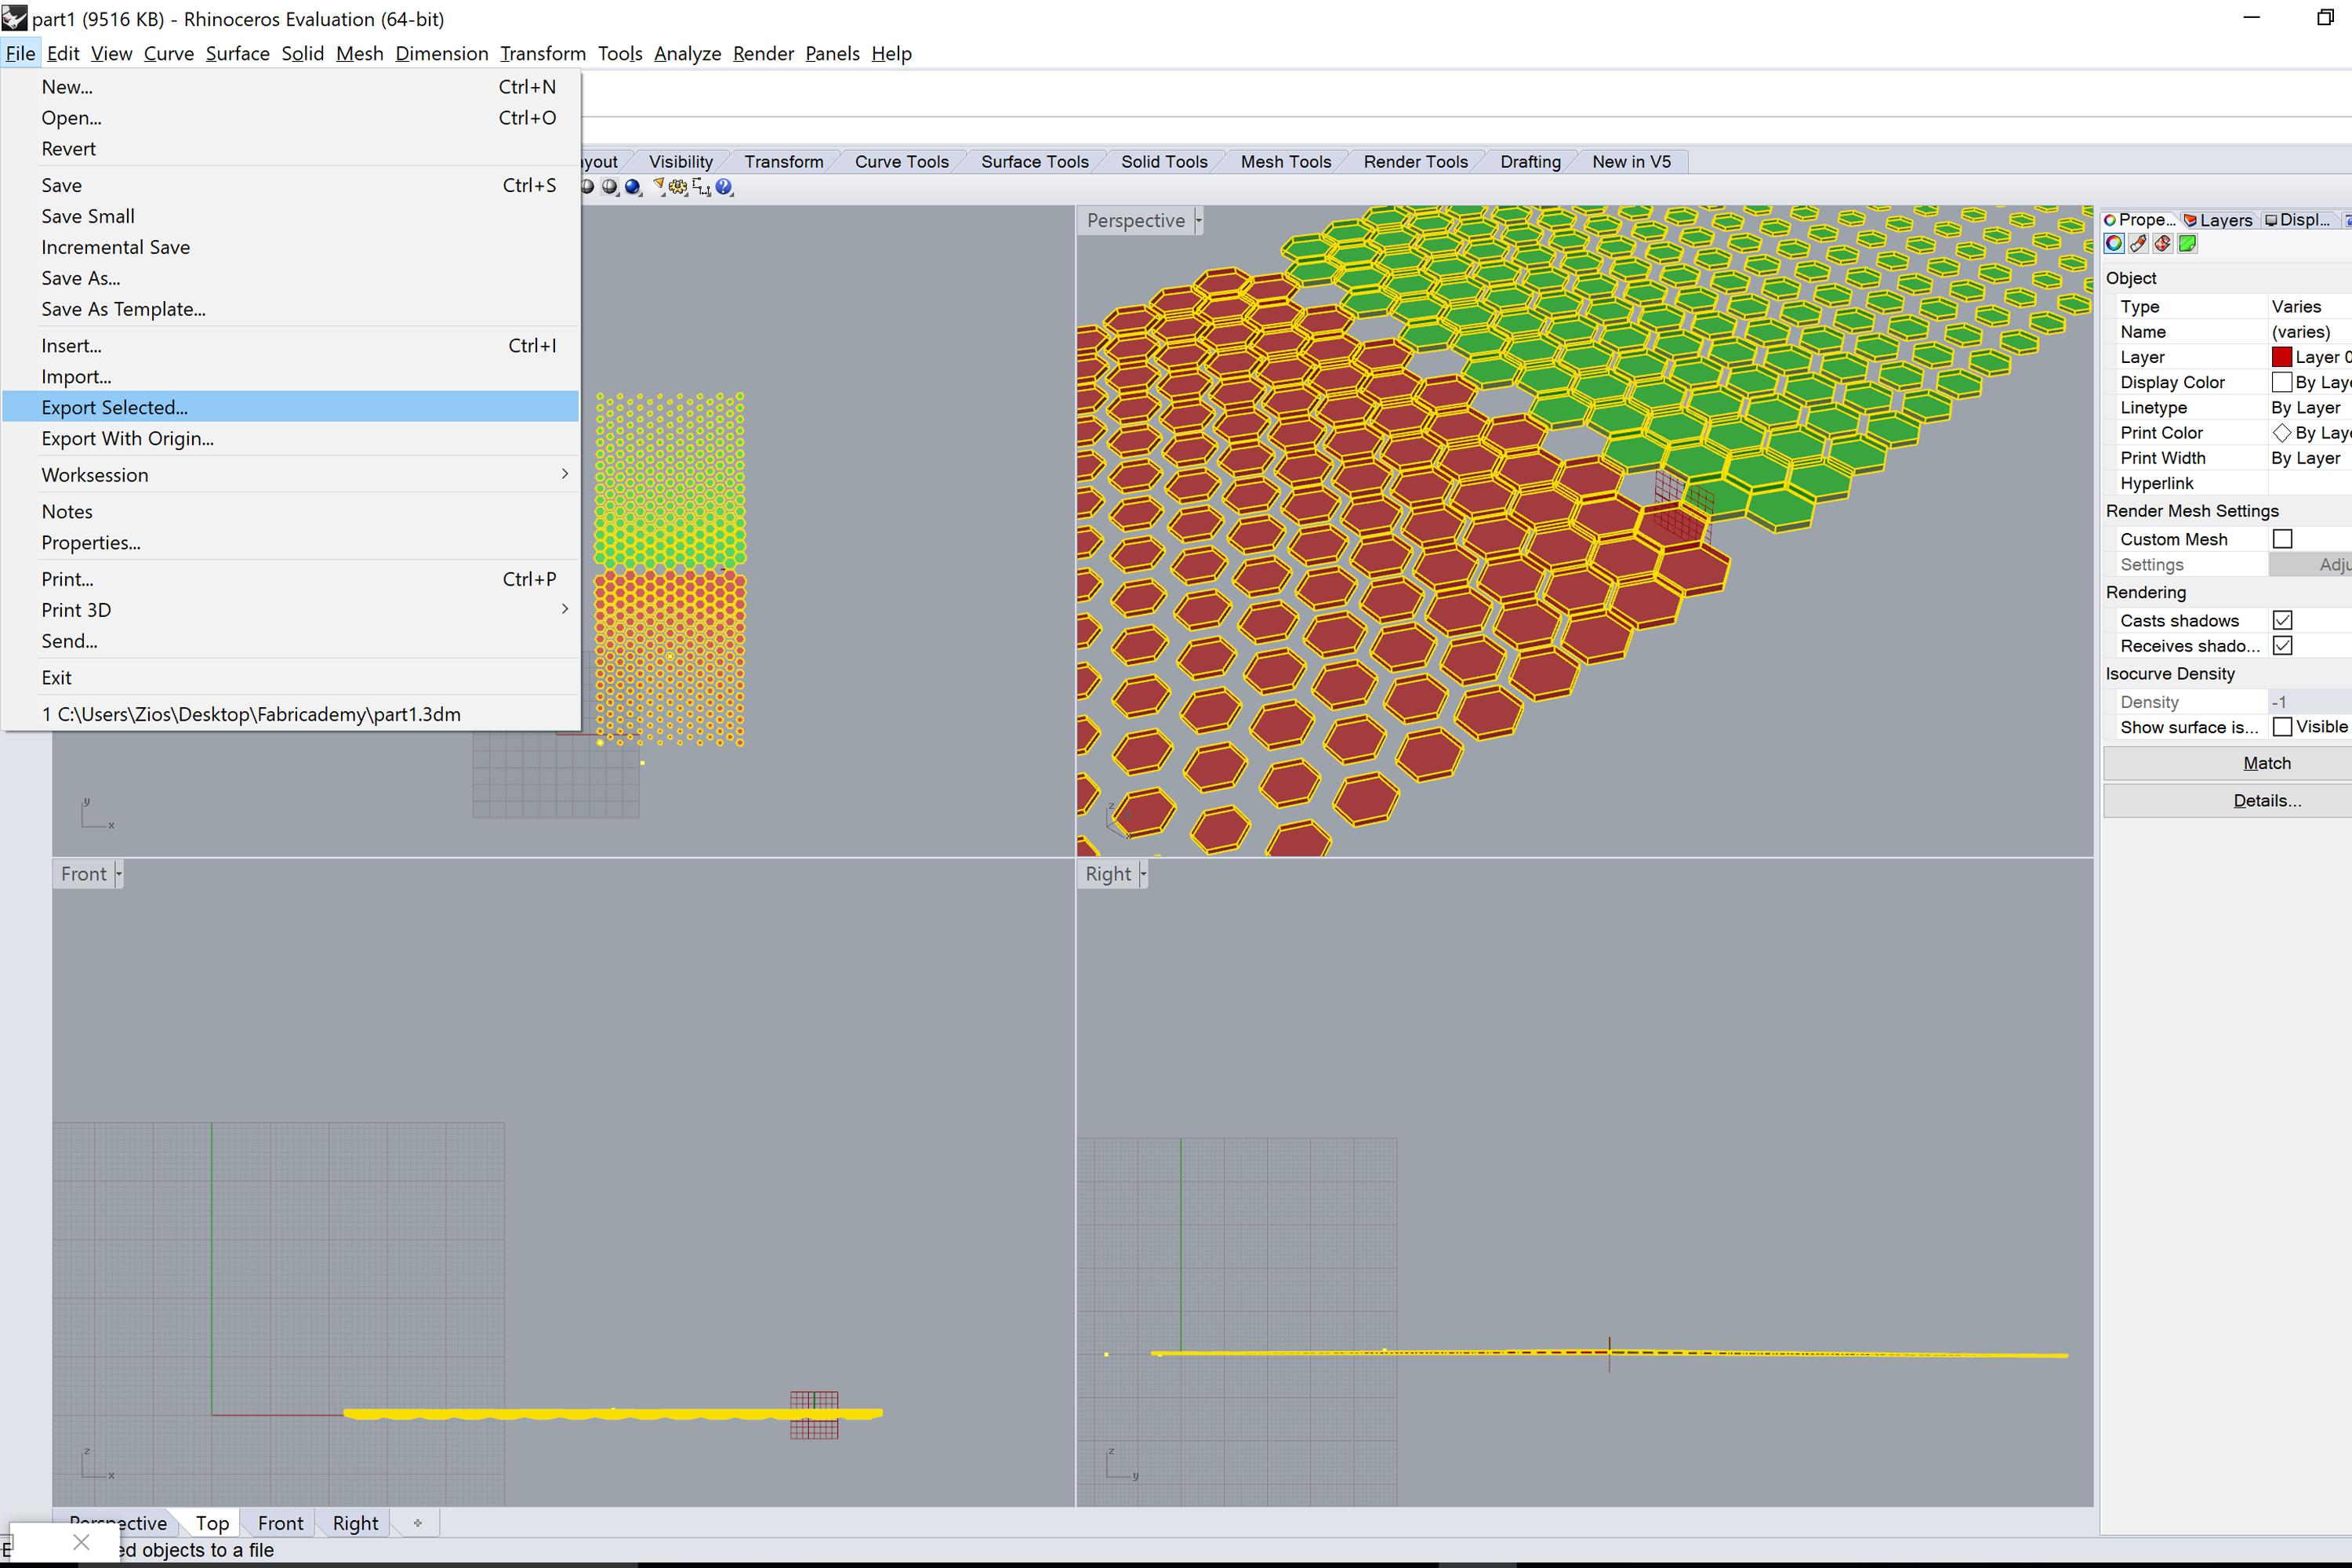
CTRL + A ----> File-----> Export Selected. -
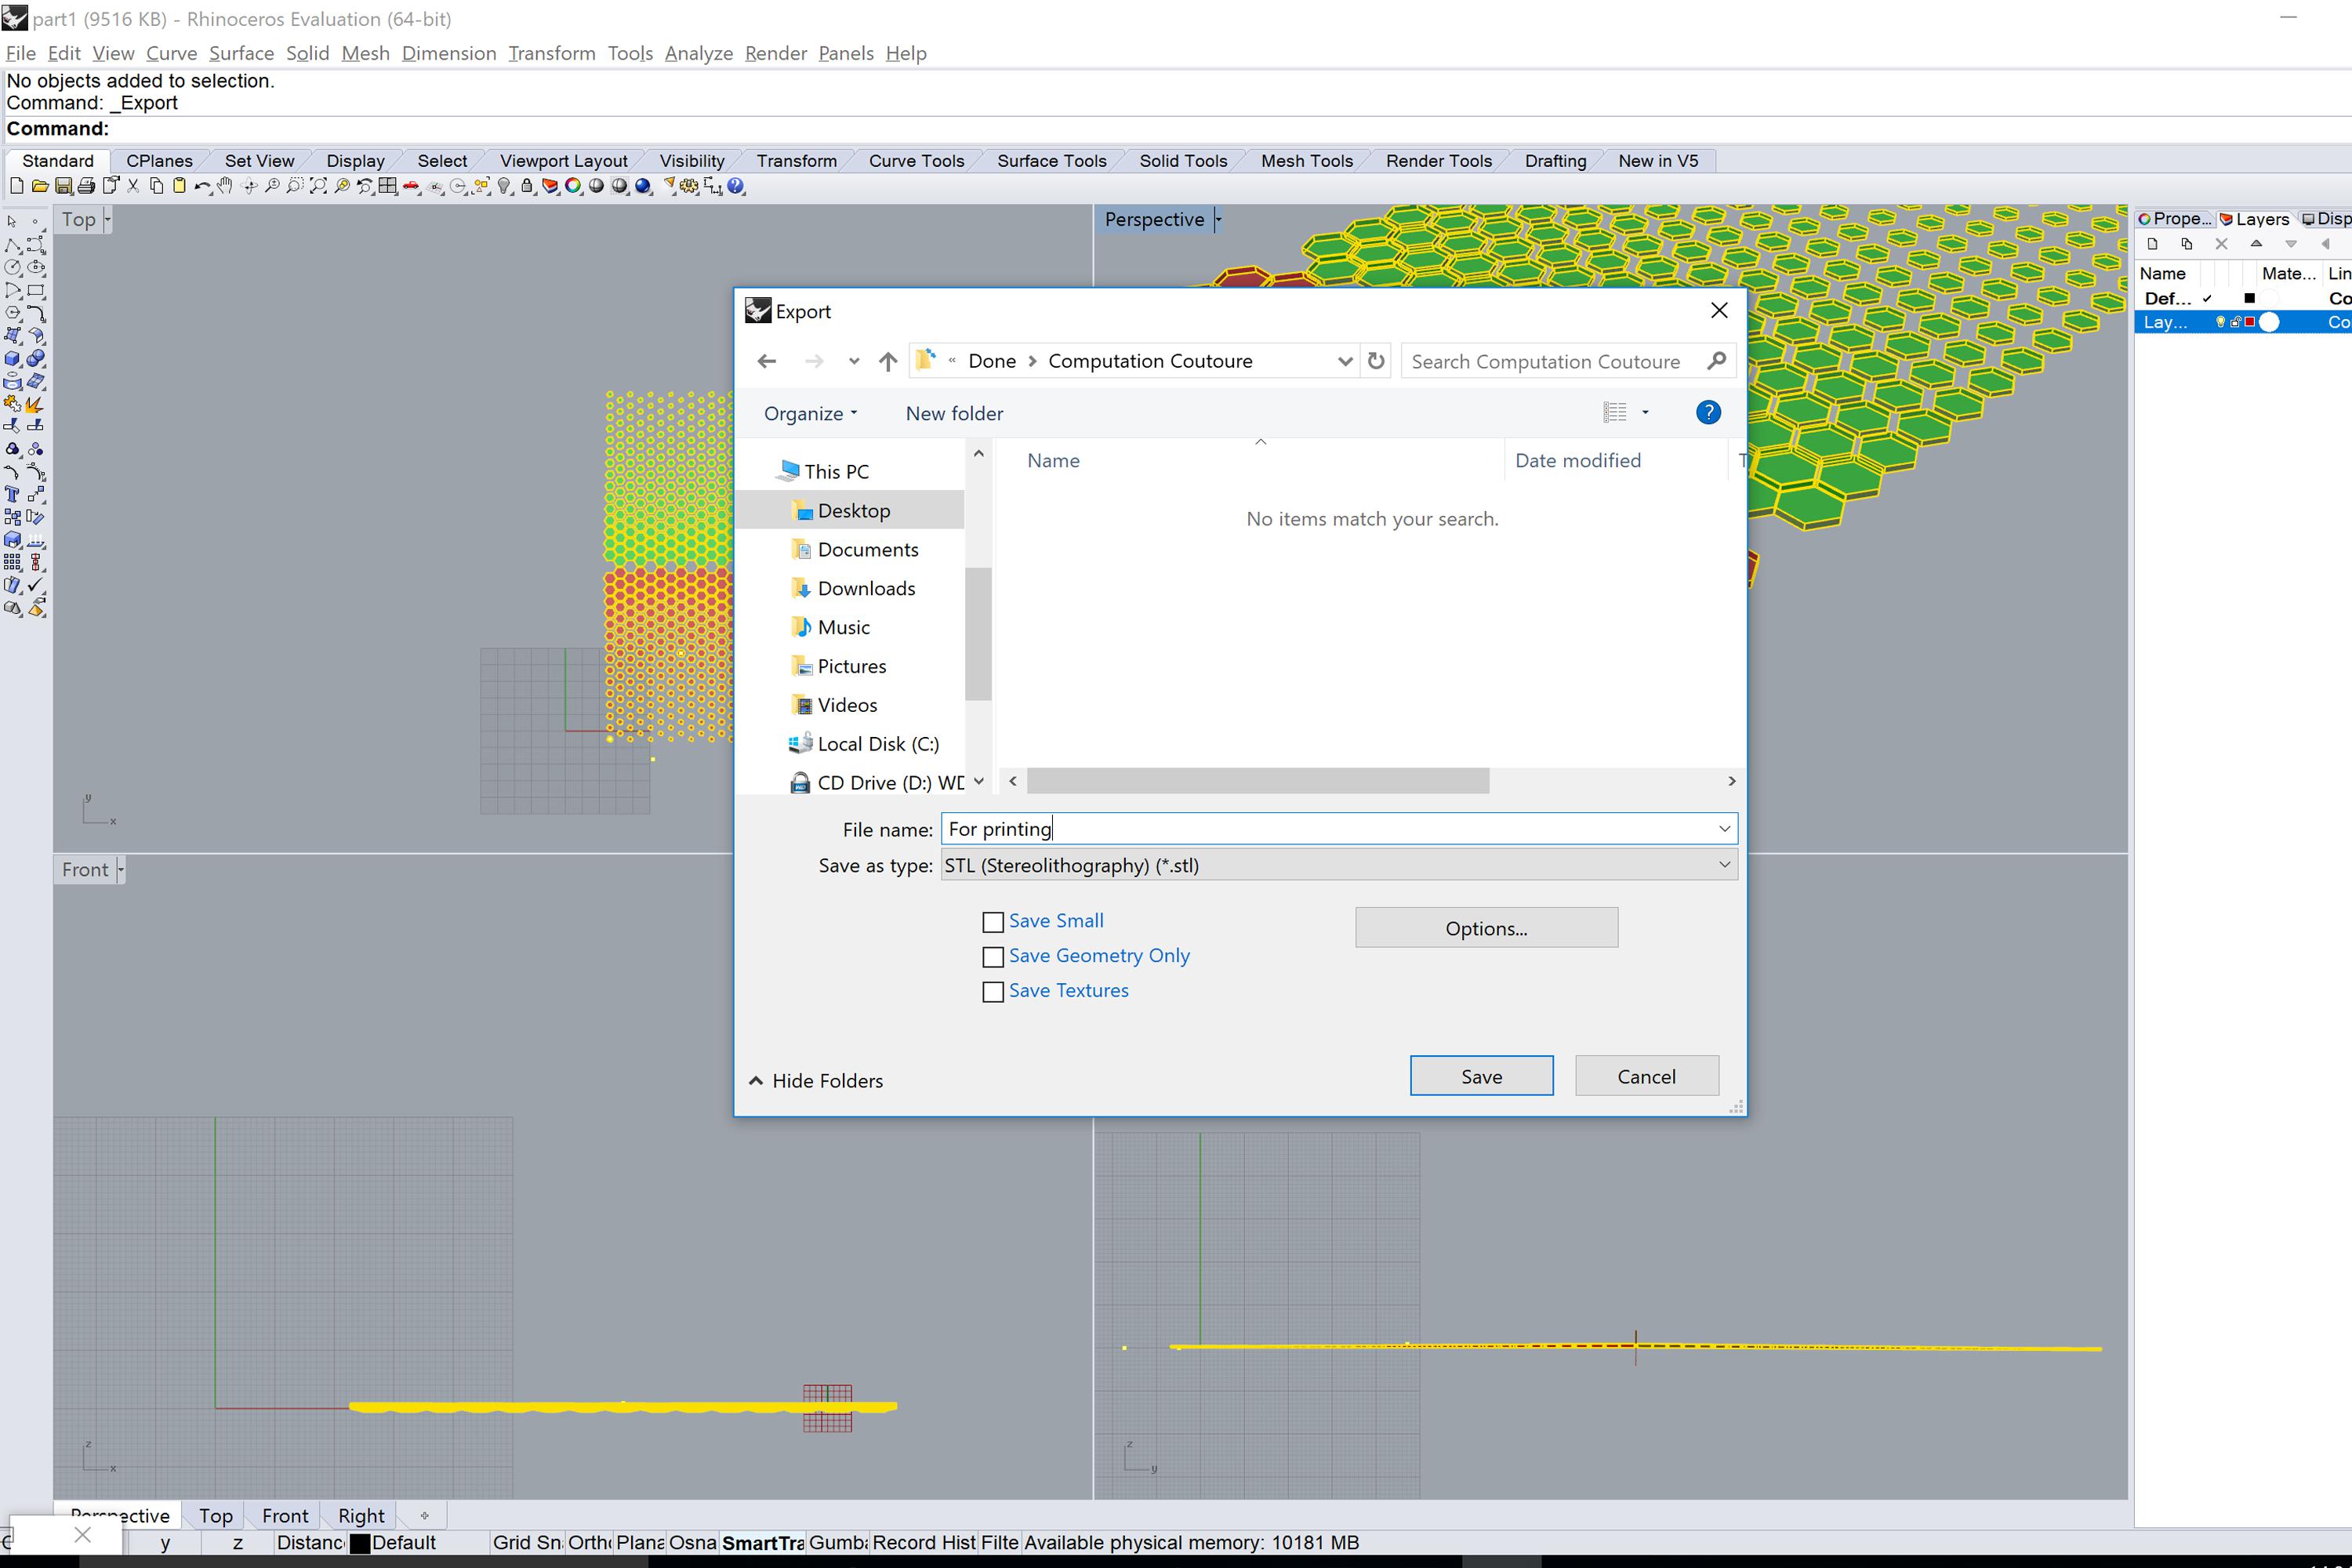
8. Export
Name the file----> STL (*.STL)-----> Save
-
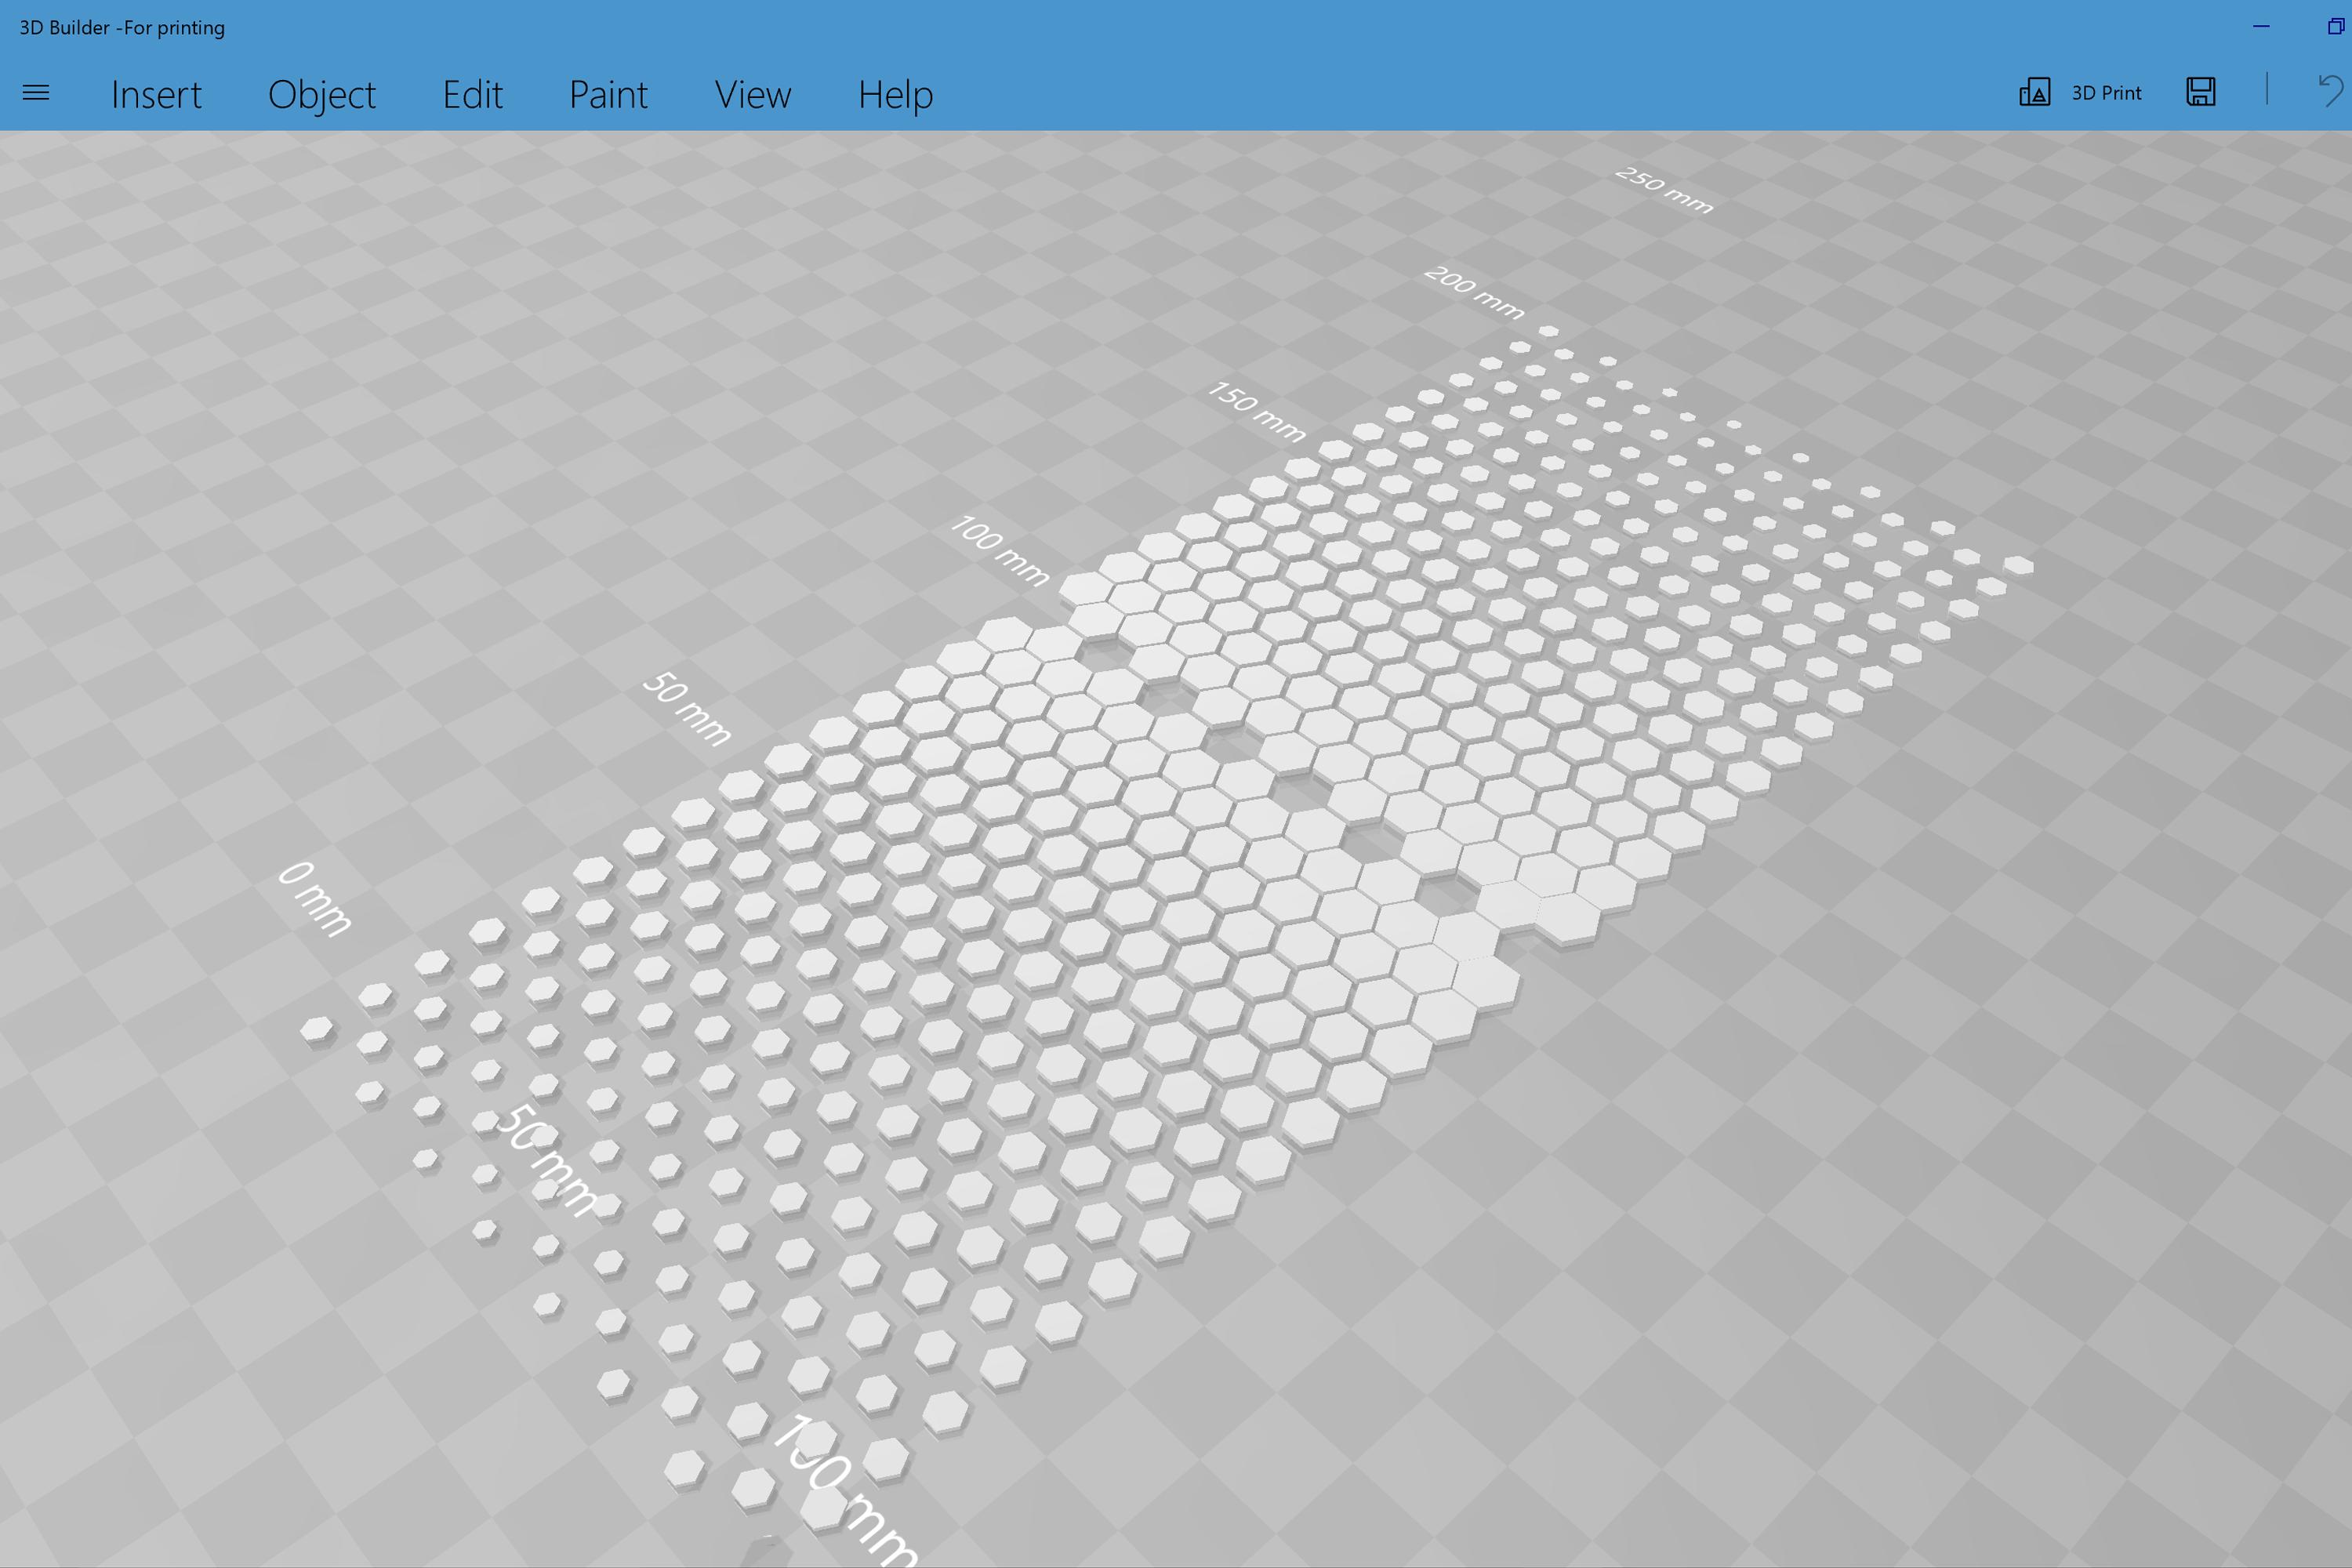
9. Check with naked eye in 3D Builder
Just inspected with naked eye for any Surface issues
3D printing: 34 mins (Simplify 3d ETA, very quick to print)
Am however, skipping the print portion as I now head over to printing the Final project design file designed later over stretched fabric. -
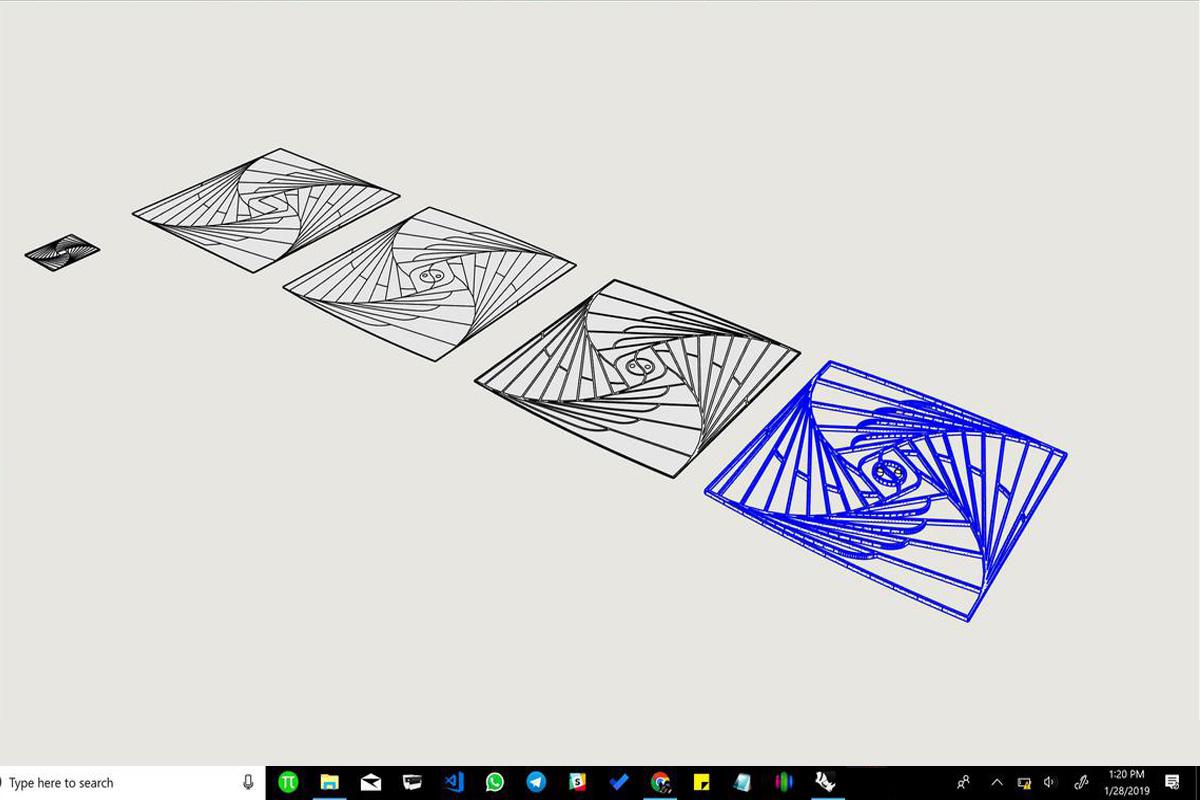
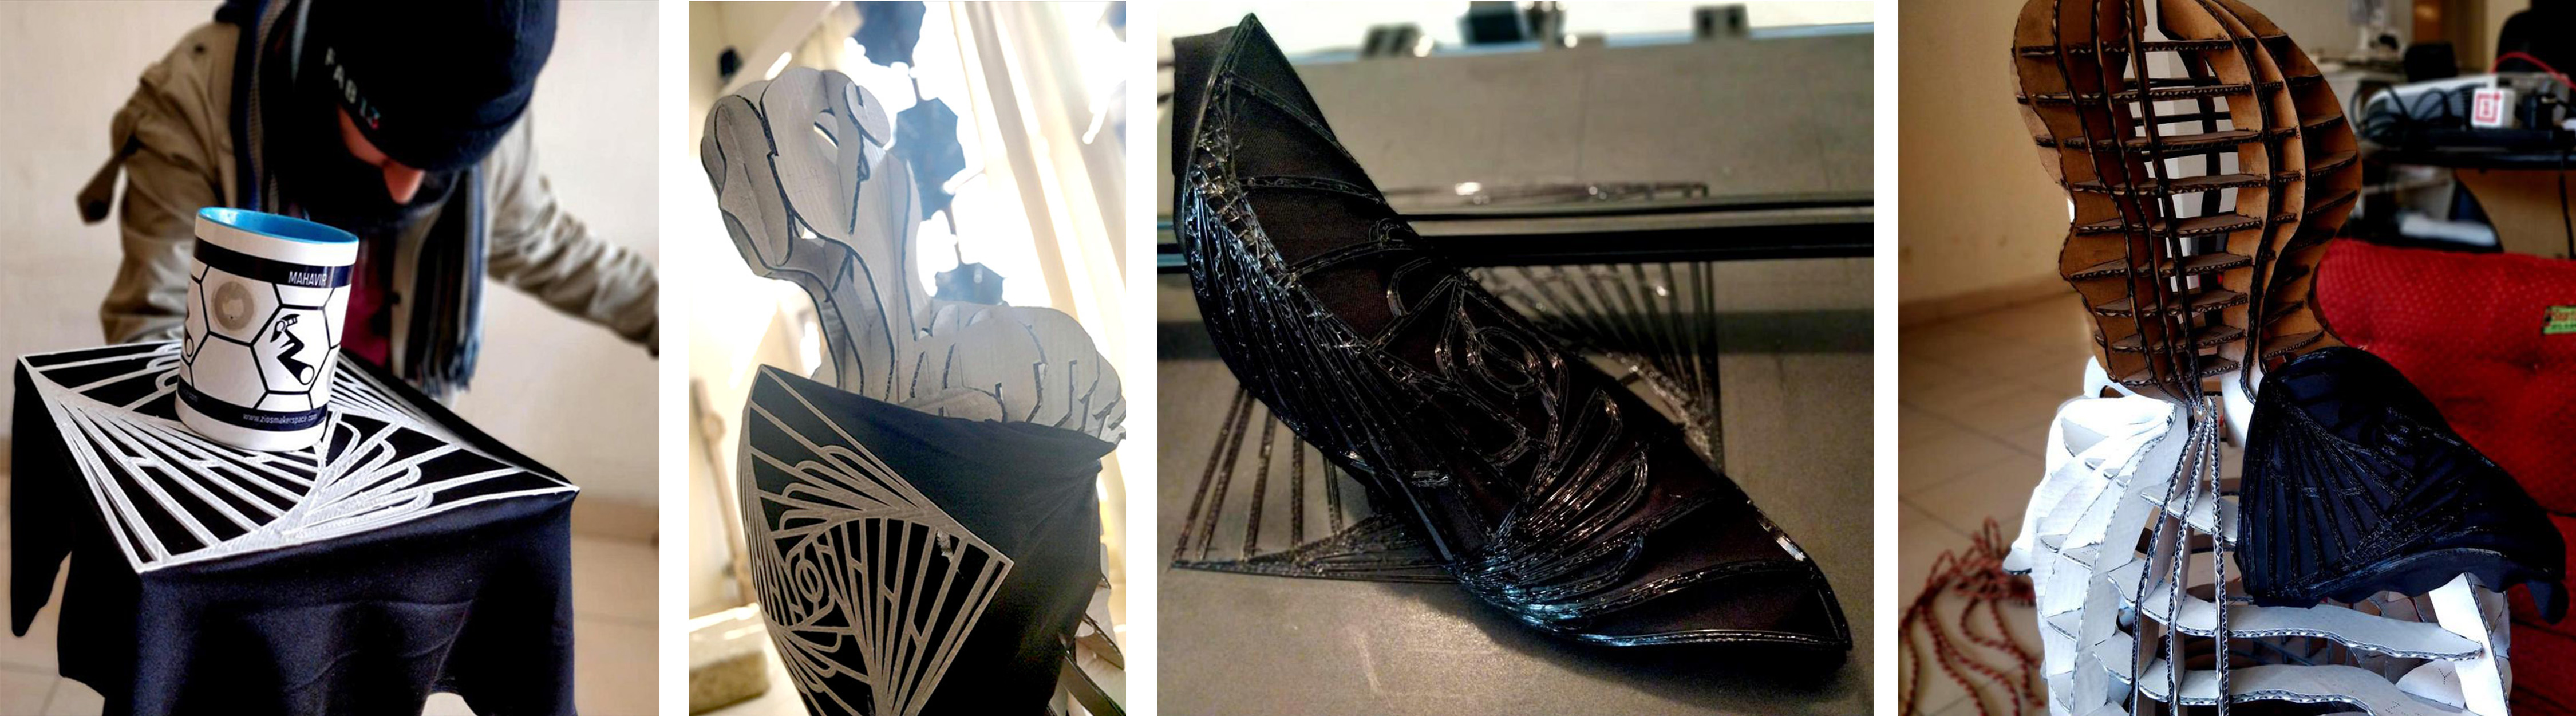
10. Reconfigurable
As you can see (left), there are quite a few ways to arrange for the print over the garment.
The print process is challenging yet intuitive.
To the left, I have put together a few configurations I could think of in 3d before proceeding to give them some depth (for 3D) -
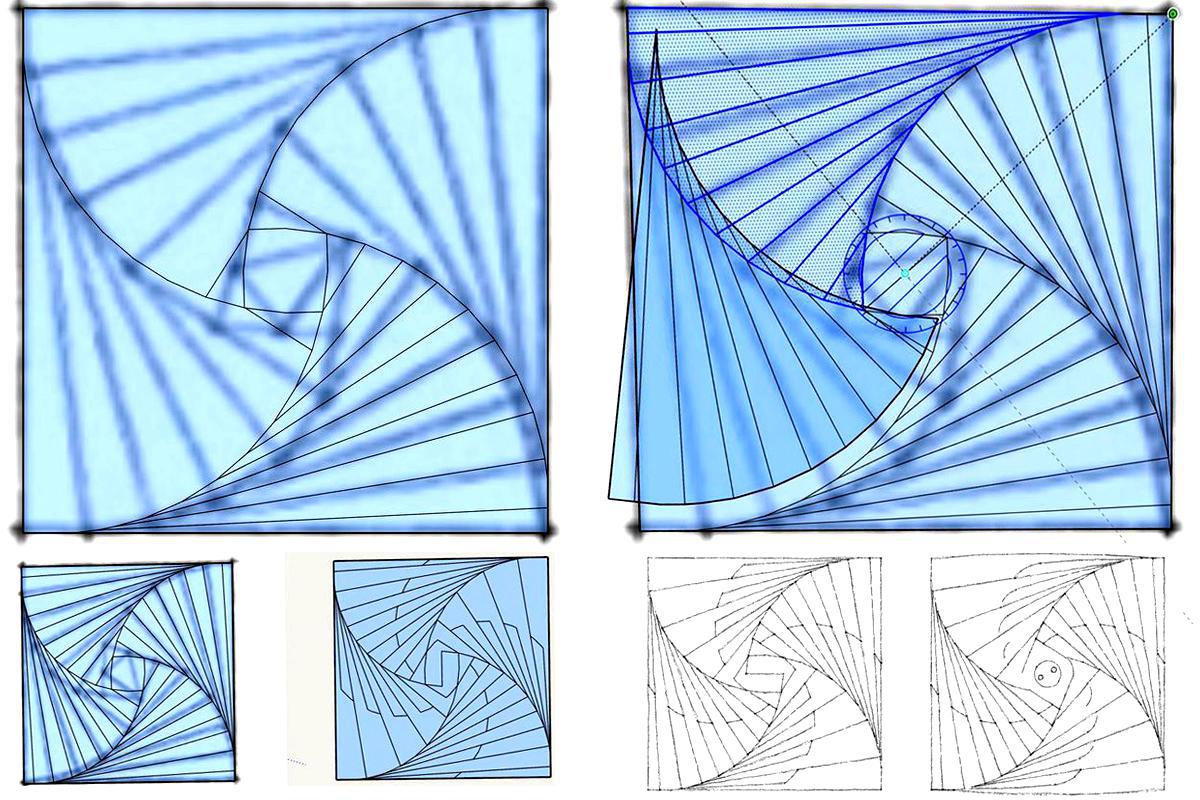
11. Concept
This small montage of images show how the design evolved from a four way spiral to what the final design was.Alternate spirals have Lateral supports to make the print bend along one direction only rather than bending bi-directionally.
-
12. Print Time
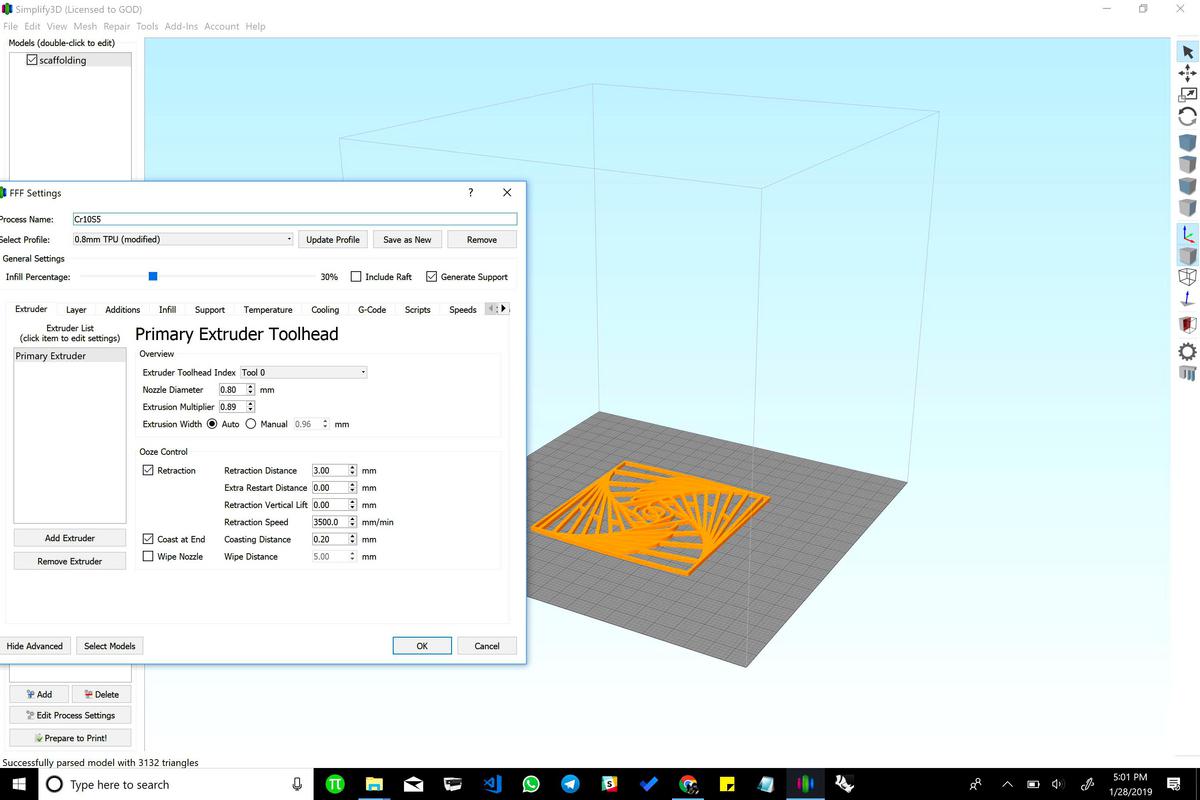
Simplify 3D is my prefferred way to print. Am currently experimenting with a a new slicing portal ICESL an online slicer over the web with a standalone portable version as well. More on this later.
Coming back to Simplify 3D, settings between TPU and PLA remain the same, The only major diffrence is the retraction, keeping retraction off is the key to TPU printing as the stretchy filament getting pulled and pushed doesnt really help except introducing gaps or slowing down print time. In depth advanced 3d print settings can be found burried somewhere in my other assignments. -
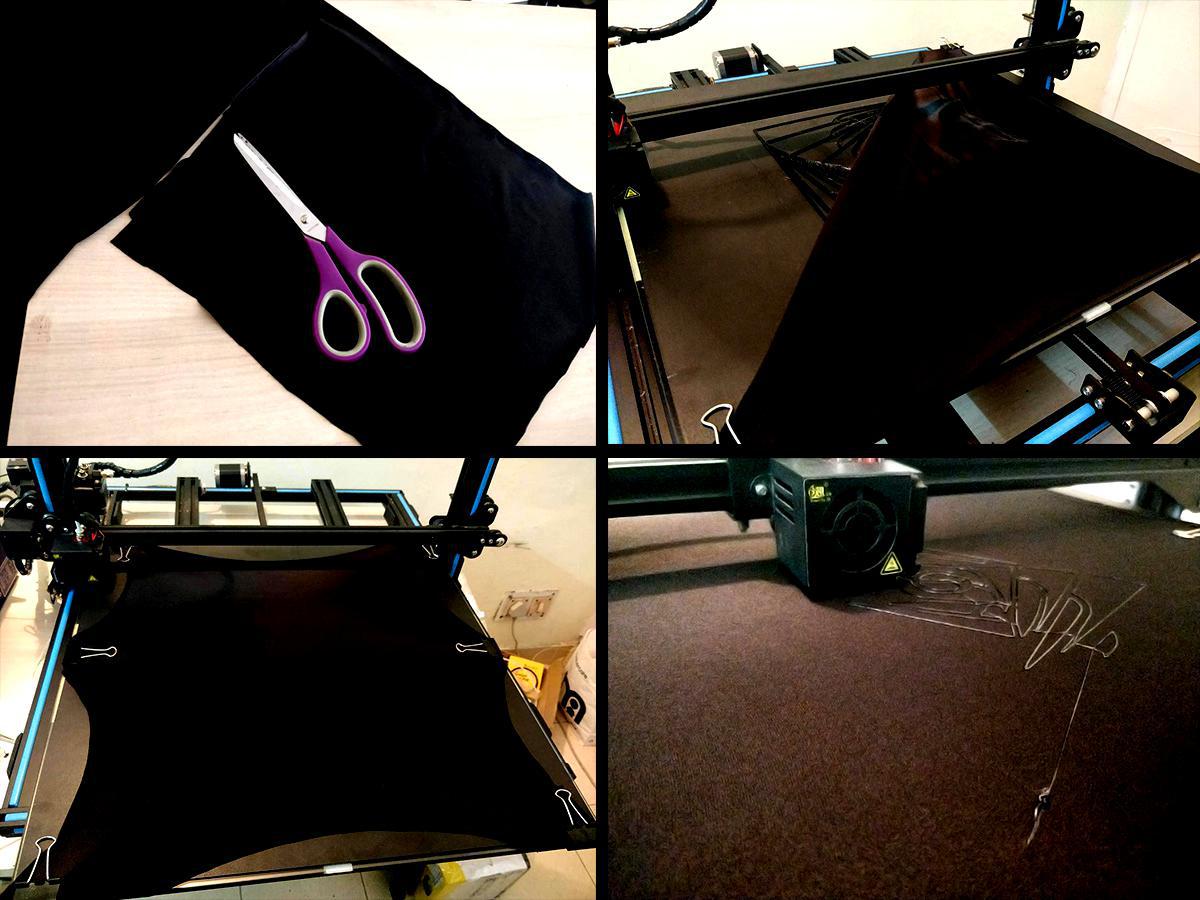
13. Fabric Print Time
As you can see (left), The garment beeing a 200% stretch garment was cut as a 25*25 cm fabric for our 50*50*50 cm volument printing 3d printer.Post printing the first 2 layers in TPU, the fabric was stretched over this paused print and resumed. The first print resumed was at 20% speed to help it adhere better before returning back to full speed printing. TPU has a better tendency to stick to fabric than PLA, however, It is less controllable for 4D printing due to its nature of flexible materiality.
-
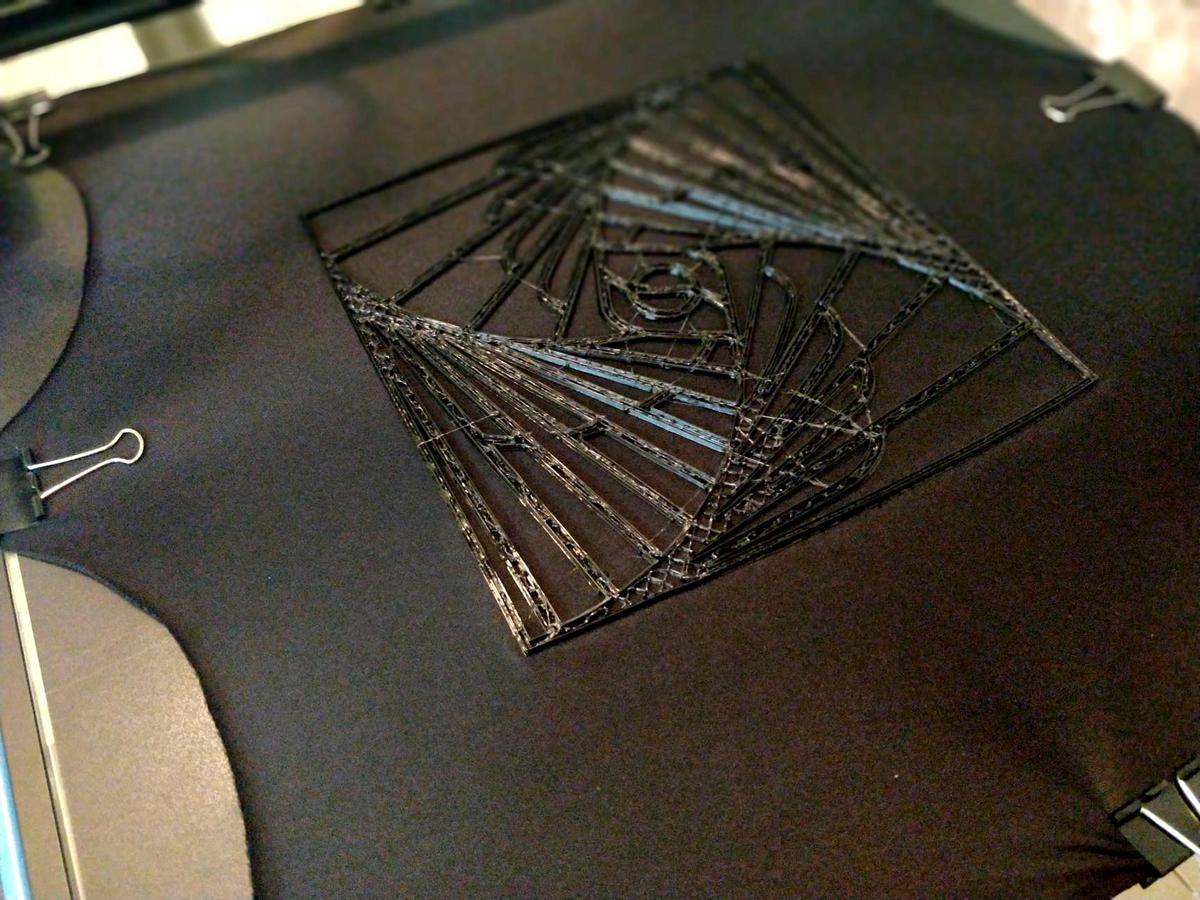
14. Moment of Truth
Once the print completed, I made a timelapse of its reaction. Same i did for the print in PLA as well (White). THe TPU immediately conformed and as I hoped for, the PLA print after a few tries stayed without conforming to shape. Thankgod it worked as I plan to have the design retain its shape and be controlled by the user to shape shift rather than shape shifting the moment its released. My final project is finally coming alive.
-
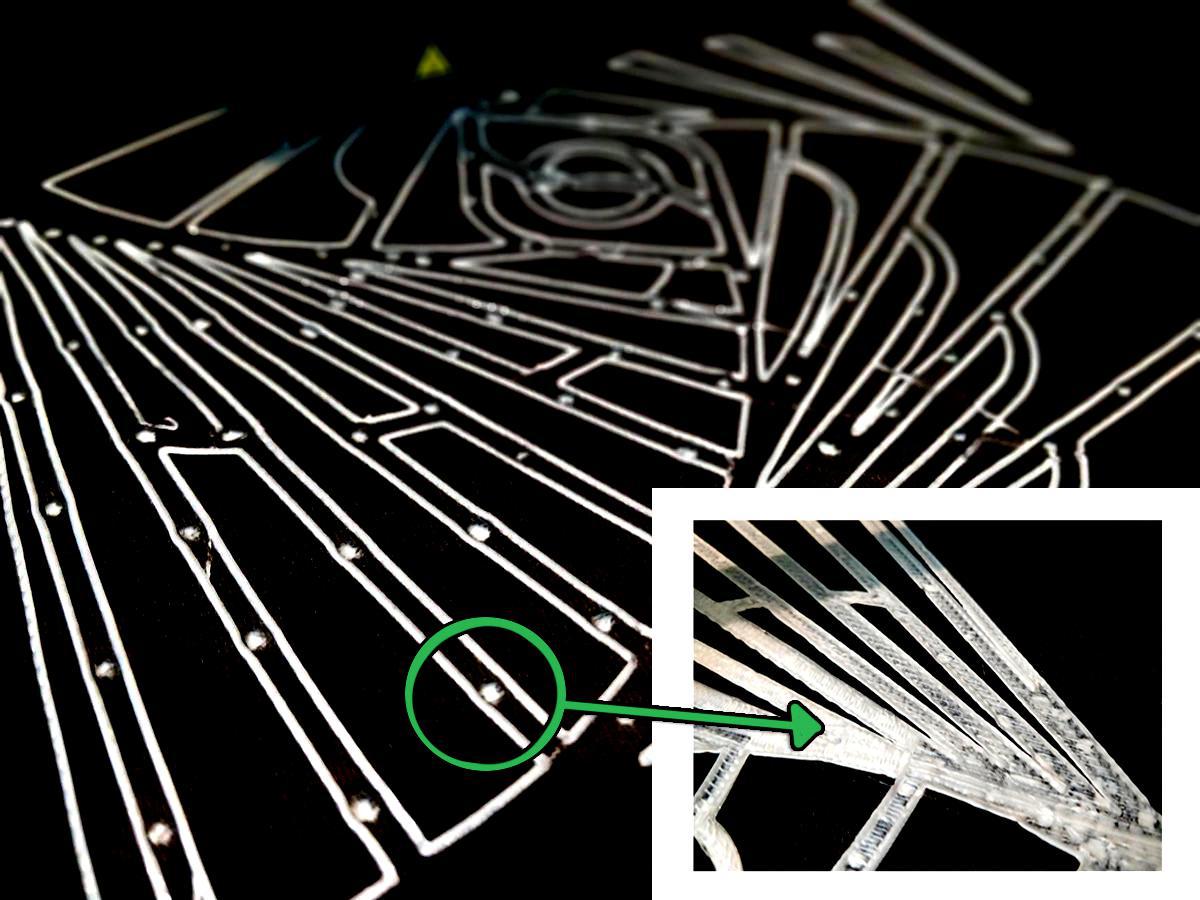
15. This is how I did it.
The trick as you can see is to introduce a series of holes on the fabric so that when 3d printed over, the PLA/TPU binds with the printed layer underneath resulting in a double sided print on fabric. This ensures, the print does not come off the fabric even if boiled to extreme temperatures.
)
)
)
)
)
)
)
)
)
)
)
)
)
)
)
Command Line used for image editing
                        Not related to this assignment in specific but generally towards my documentation. For this website, am using ImageMagick.
                        Its strong command line (Can be done using GIMP too) is beeing typed within the BASH TERMINAL.
                        Its a combination of a few command's from Neil's Fab Academy lecture on Image Encoding


                        ziosm@SurfaceBook MINGW64
                        $ cd

                        ziosm@SurfaceBook MINGW64 ~
                        $ cd fabricademy_website

EITHER:
a)                      ziosm@SurfaceBook MINGW64 ~
                        $ mogrify -format jpg *.png -density 200 -units PixelsPerInch -resize 1200

OR

b)                      ziosm@SurfaceBook MINGW64 ~
                        gm mogrify +profile "*" -size 1200x900 *.png -format png *.jpg

                        ziosm@SurfaceBook MINGW64 ~
                        gm mogrify -level 15%,1,92% -units PixelsPerInch -density 200 *.jpg -resize 1200 *.jpg
Tips and Tricks
Info Panel
Warning Notes
Danger Panel
Success Panel
F.A.Q.
I usually ask the Global team or myself questions relevant to the week's task.I plan to use this section to help me document for our lab's next batch of students important questions and their answers discussed during Global review/Recitation.
Apologies for not linking it above.
Objectives | Tasks at hand
For this week, I will be creating a design script which will generate a hexagonal array whose height, size and offset is proportionate to a few attractor points I set within my 3D workspace. The next focus (not beeing attached) will be on 3d printing a design I made for my final project directly due to limited availability of 4-way stretched Lycra so it will take 4D form. Before that, I also need to experiment with a few manual shapes and techniques of printing on fabric in a double sided environement as well as part of my final project.
EXTRA: Below shown is my grasshopper's Firefly extension script used to read Atmega 328's inputs.
Reffered Links
Nov 07, 2018
Nov 07, 2018
Nov 07, 2018
Nov 08, 2018