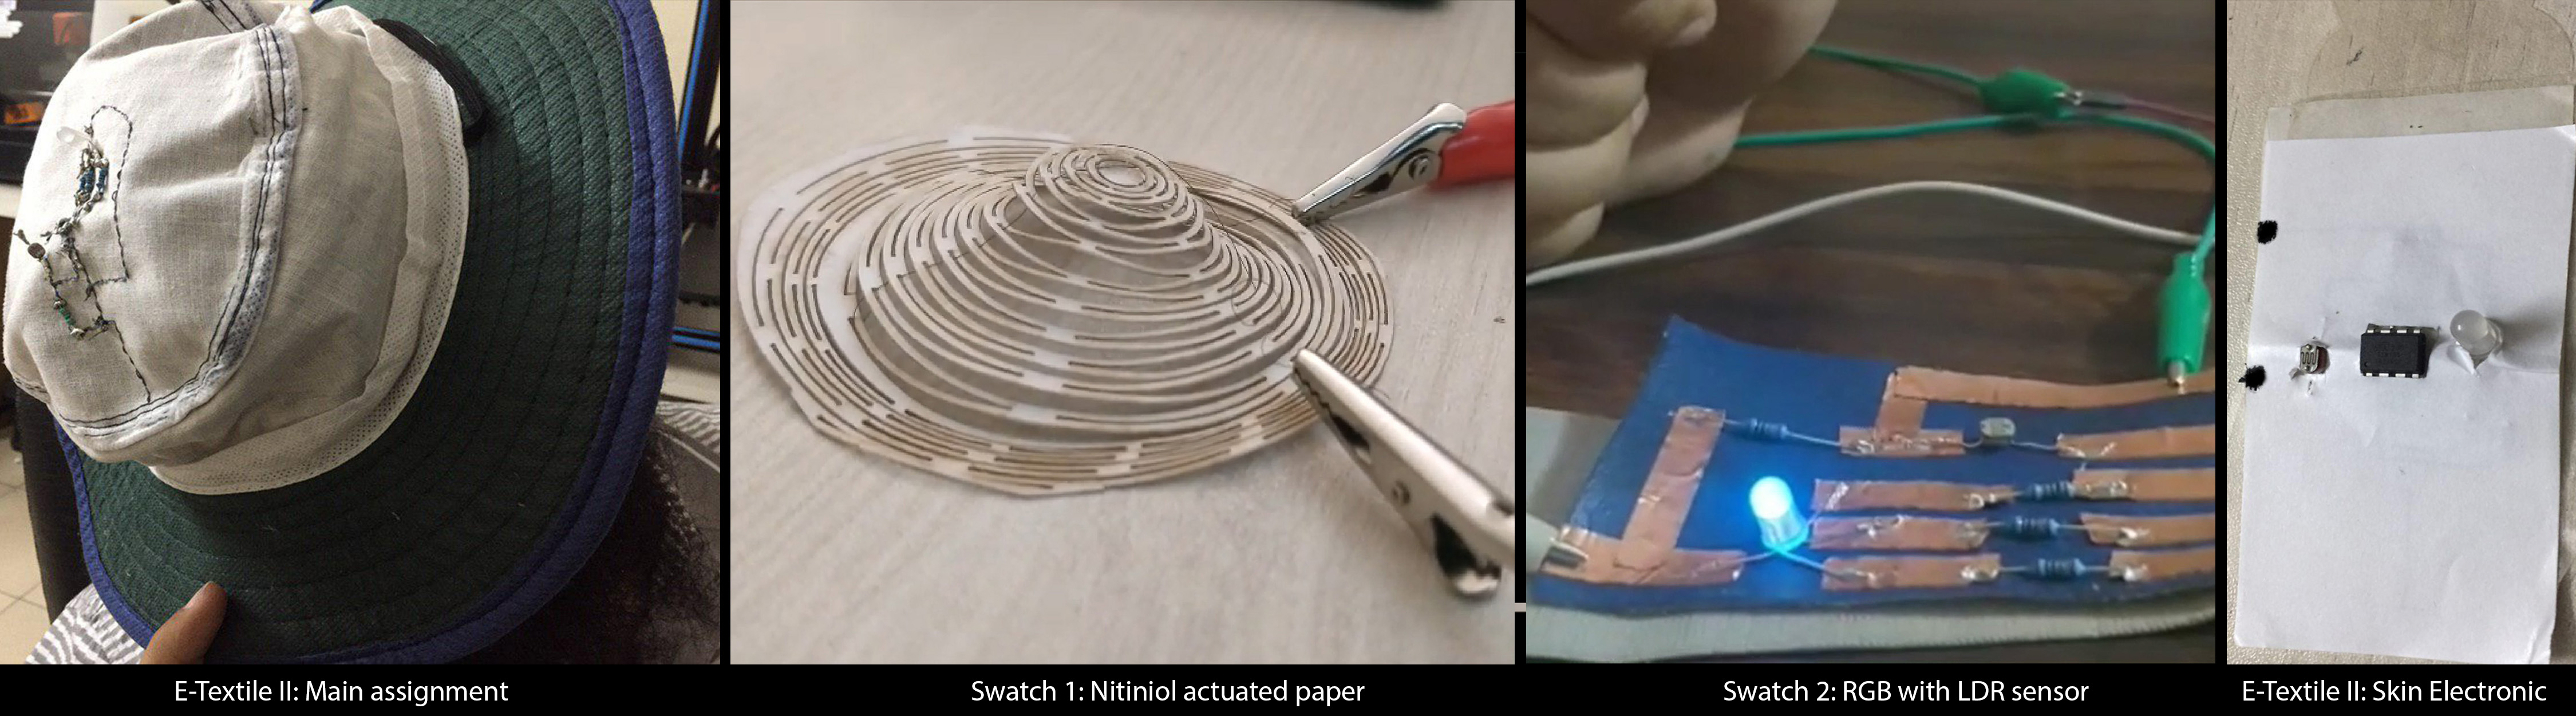
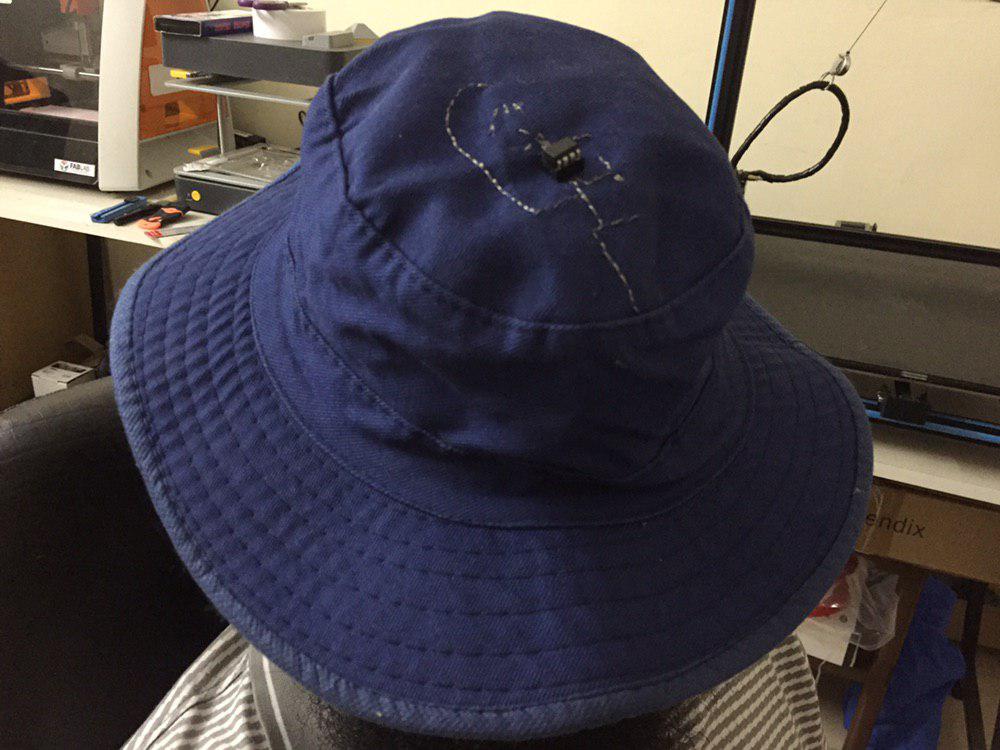
Final Weekly Result
Development Timeline
-
1. Concept
Its just fun to have blinking LEDs. Initially the concept was to charlie-plex the leds onto a cap and run it with an Attiny 44. Later on, we had issues with the sewing machine(seing is new for me). So, I settled for a simpler RGB led +LDR version of it like my earlier assignment. The code was changed to have three states-> Red when analog input is = 200, rgbCMY when input >=350 and off in any other state.The code is different from the other assignment, the fabric is different and it is sewn with a conductive thread. The attiny is held into an IC holder which was sewn into the fabric.
-
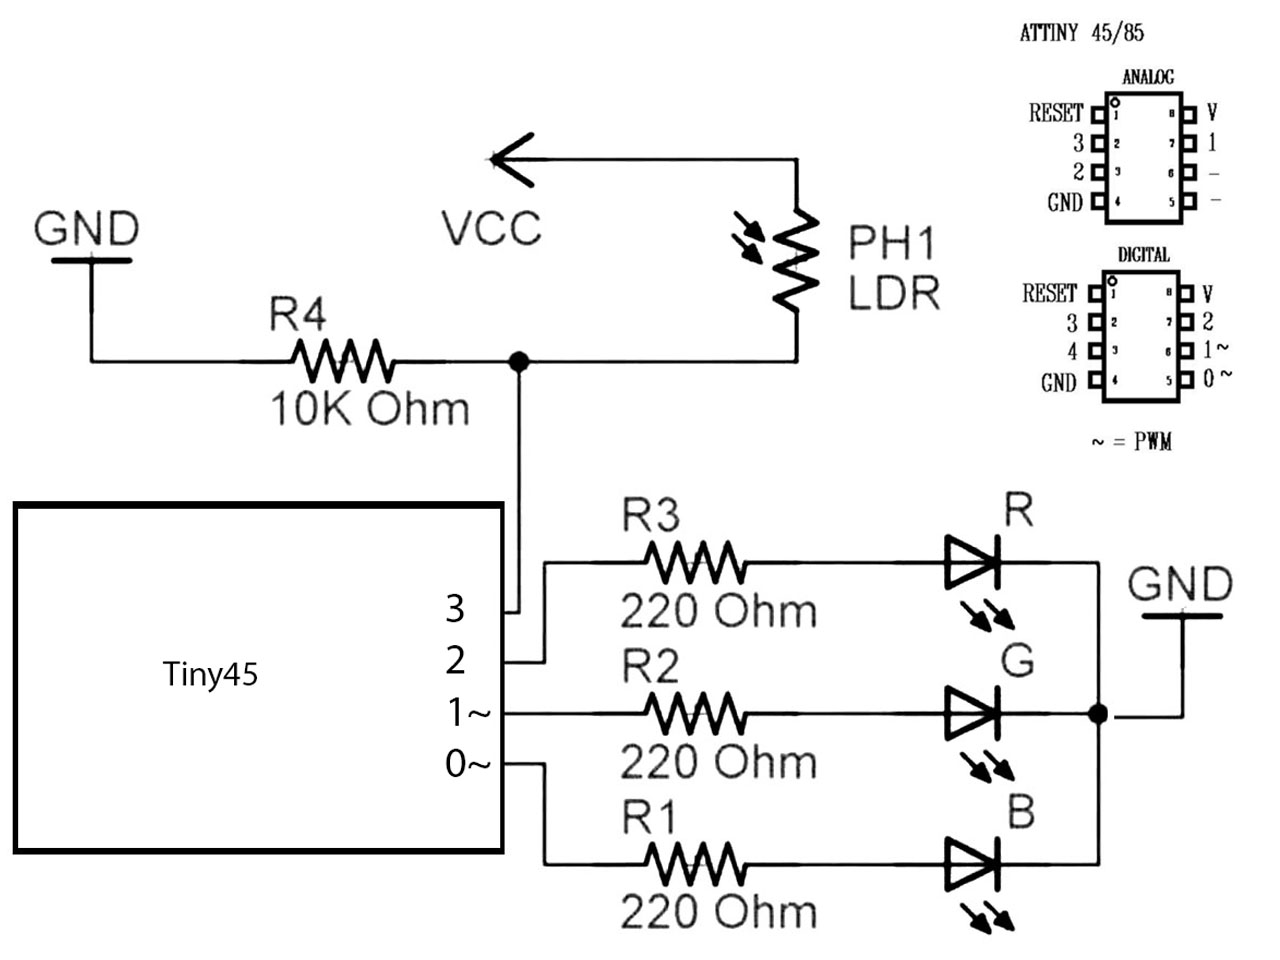
2. Schematic
PIN 0,1 and 2 are taken as our input pins with two of them beeing PWM.
Pin 3 is taken as our analog input.
All three leds are connected to a 220 ohm resistor each. if RED led is needed to be brighter, lwoer the resistor value for red.
10k Ohm resistor to LDR. -
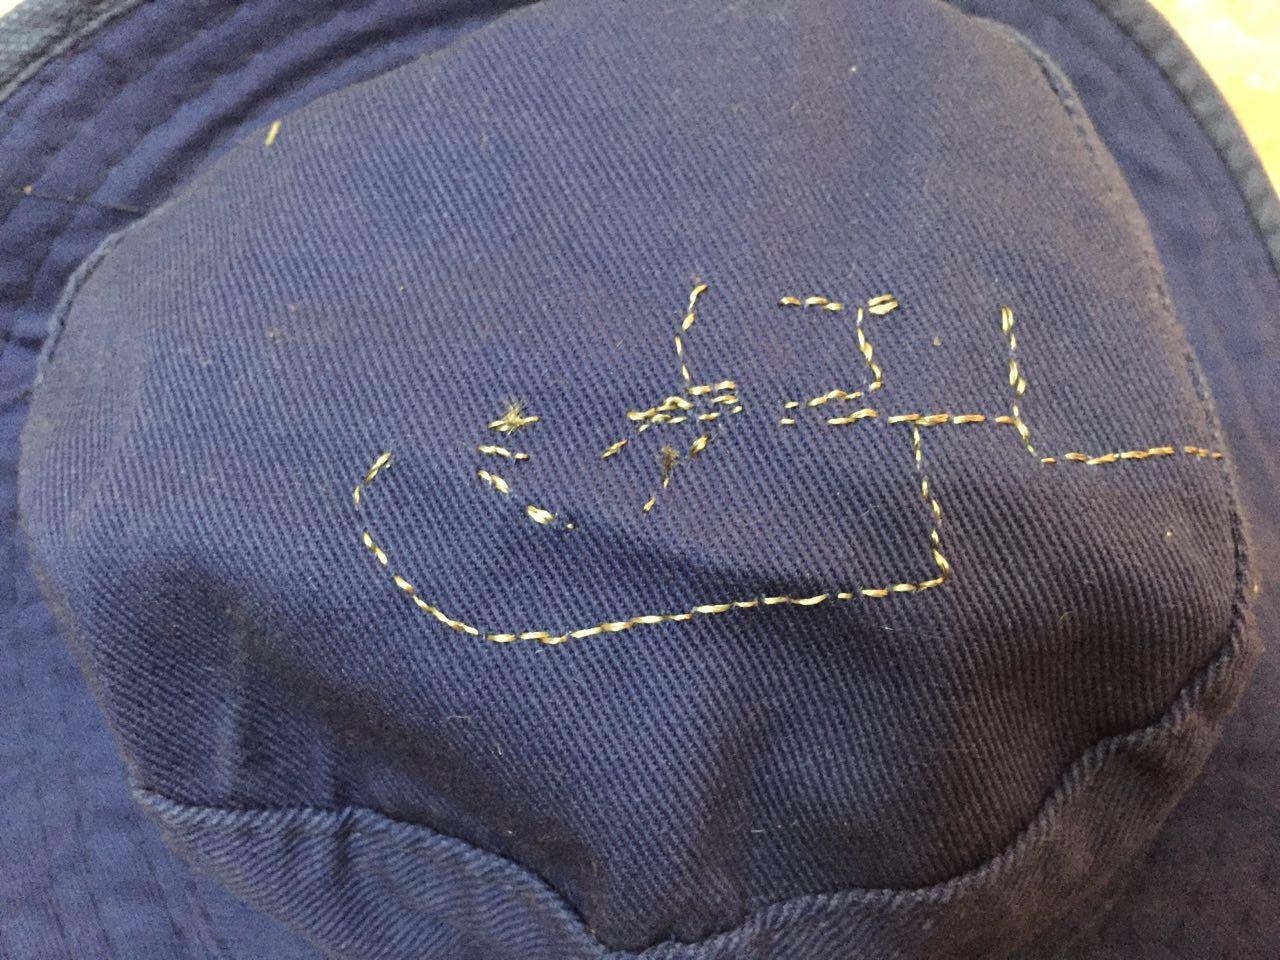
3. Sewed circuit
The conductive thread was sewed onto a hat along the lines of the schematic.
BIG MISTAKE: I swewed the circuit on the wrong side of the HAT. My led glows inside the Hat now.
Tip: leave a slightly longer piece of thread loose on the ends-do not knot them as is conventional in sewing. Will be easier to solder later. -
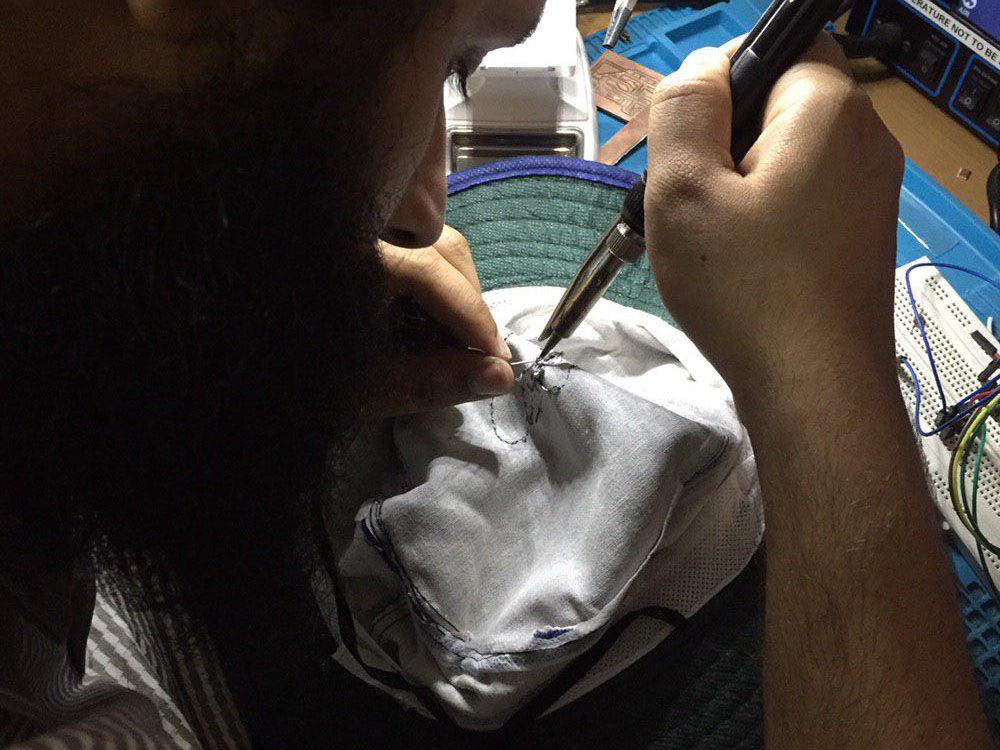
4. Soldering components
This is a first for me, though I managed to solder but not without difficulty. The solder does not like sticking onto the conductive thread easily. Its like when we try to bring solder to stick the epoxy of a PCB-It just wont bond. I am yet to find a better way of making solder easily grab on to the conductive thread. We have three different batch types of conductive thread coming in as well in two months. Will test later if there is any specific conductive thread that bonds well with solder.
-
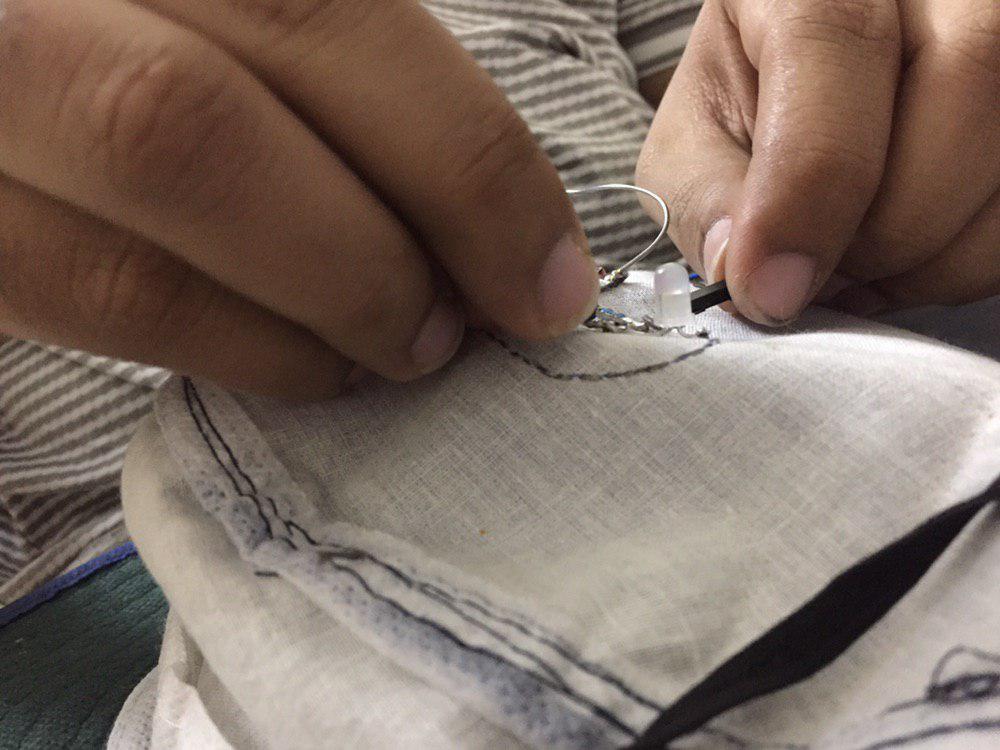
5. Populating the hat
Eventually, what worked for me was to use throughole components and dump their legs(after trimming it to the right size) in between the sewed portion of the thread before i began soldering. You can see me trying to lift a sewed thread with the end of a female lead wire head.
-
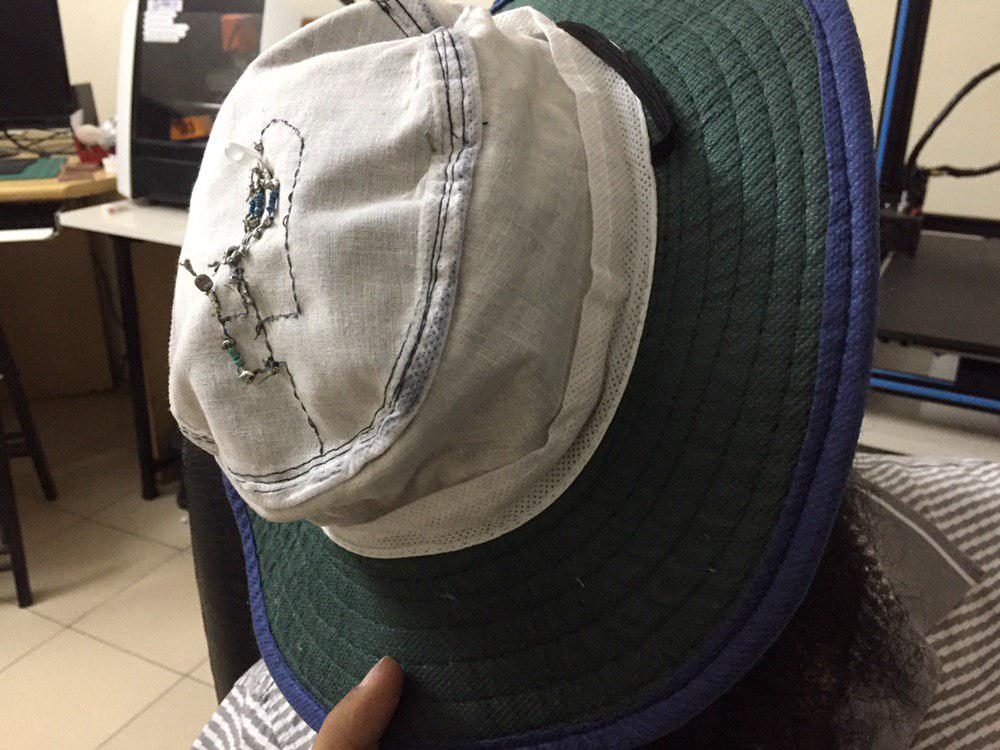
6. Wrong side up
I sewed the circuit on the wrong direciton so yes-the result is, I need to flip the hat in order to bring the LED outside. On the other hand, at night it actually works the right side up as then you have an led glowing from underneath.>D
-
7. IC is reprogrammable
Because I used an IC holder, I am able to take out the IC and reprogram it or directly plug in the specialised IC programming connector cables to reprogram it.
Note: We do not have that cable in the FabLab yet.
Note the extra thread trace coming towards the end of the wire-Thats to connect with external peripherals if needed to add some other input sensor. -
8. Firefly Set up
This is a different way to program an IC. What if we wanted to try codes in realtime live without constantly reembedding code in it. Firefly lets you do that using a GUI on RHINO. It also spews out code for you. So to make anything possible through Firefly, first we have to upload a Firmata sketch to the board we want to talk through. The limitation of Firmata is that it only works with Arduino boards and their ICs for now. That means one needs to make a arduino compatible board using atmega 328P to upload firmata onto it. For now, I am proceeding with an Arduino Uno to understand FIREFLY which is one more skill to learn for me now.
-
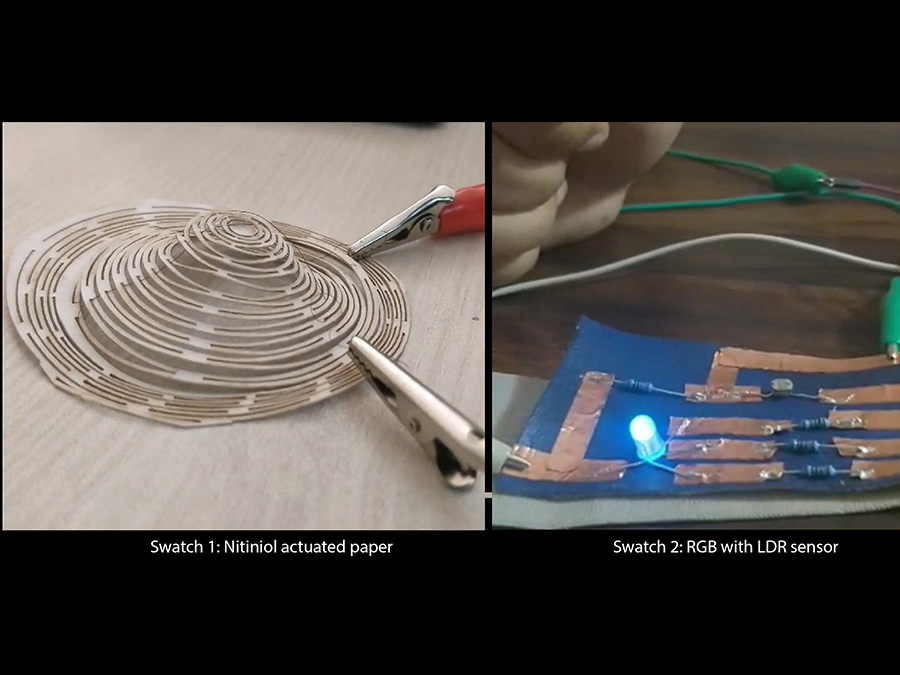
10. Swatches
During the Week 5 E-textile I, I had made a copper tape RGB actuator with an LDR Sensor. The same patch was made to fulfill the swatch criteria also of E-Textiles II as it is connectable to an aruduino to be run. This week, for research purposes I seperately laser cut on paper a living hinge which was conformed onto an organic shape so it behaves as an auxetic in the z direction. Based on the length of the nitinol, could calculate the current needed to be passed through in order for the nitinol to get activated. a 1 m length of nitinol is given a curernt rating 20 ma in this case. and has a resistance equivalent for the 1 m. Based on the length you take, you can proporationately ratio out the values and give it that current either from a 5 v or 3.3v or a combo of transistor/ voltage multiplier circuit if needed.I then wove nitinol of the desired length onto this lasercut paper.
)
)
)
)
)
)
)
                                                    Codes tested on Arduino before embeddeding
            Code: RGB LED with Photo resistor


            Code 2


            Code: FIRMATA | Firefly
Tips and Tricks
Info Panel
Warning Notes
Danger Panel
Success Panel
F.A.Q.
I usually ask the Global team or myself questions relevant to the week's task.I plan to use this section to help me document for our lab's next batch of students important questions and their answers discussed during Global review/Recitation.
Objectives | Tasks executed
Microcontroller: Atmel Attiny45
Input sensor: LDR sensor as an input
Output Devices
- RGB LED
- LED with PIR and IR
Using Firefly and Arduino, managed to make the LED blink directly through a firefly Interface without encoding the IC. The control of the IC was realtime and from the grasshopper UI of Rhino. Note: Board used was Arduino Uno for this one case.
Actuatorsa) When the board's LDR detects exactly 200 input level, the Red LED of the RGB lights up.
b) When a specific higher level of light at 350 + is reached, the RGB goes for a 6 color transformation pattern. c) Any other Light level, and the RGB LED stays off.
Swatch 1 (Nitinol+ Laser Cut)
Swatch 2 (RGB + Copper Tape) Extra Credit (Firefly+ Gh)-Part 1 | Arduino Uno Extra Credit (Firefly+ Gh)-Part 2 | Arduino Uno
Reffered Links
Nov 20, 2018
Nov 21, 2018
Nov 22, 2018
Nov 22, 2018