12. Skin Electronics
Research & Ideation
This week I wanted to focus on enhancing human-human interaction with individualized reactions using NFC tags on skin. To me, the skin is the interface of the body with the outside world. We sense the world through our skin and create a reaction according to our senses. Light Up for You is a human-human interaction glove that lights up different colors for different people. It is a conversation starter to bring people together if they haven't met before or it is a cute way of showing that you know a person and you have assigned a specific color for them.
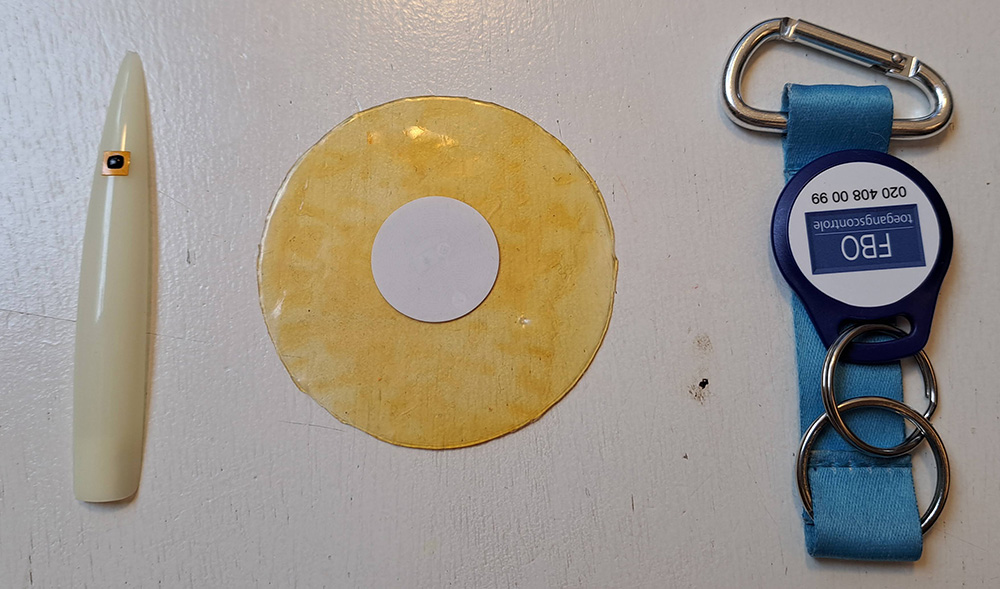
The project requires two people's interaction. The first person is the wearer of the glove with the RFID tag reader and NeoPixel. The other person has different NFC tags on them: on their nails, on their skin or it could be a key to their workplace.
References & Inspiration
SkinMarks project is very influential in terms of categorically looking at sensory inputs you can create through the skin. They categorize the sensory inputs as: touch, squeeze, bend and EL display.
More Than Touch delves into empirical study of the skin inputs. How we manipulate the skin to communicate different emotions:
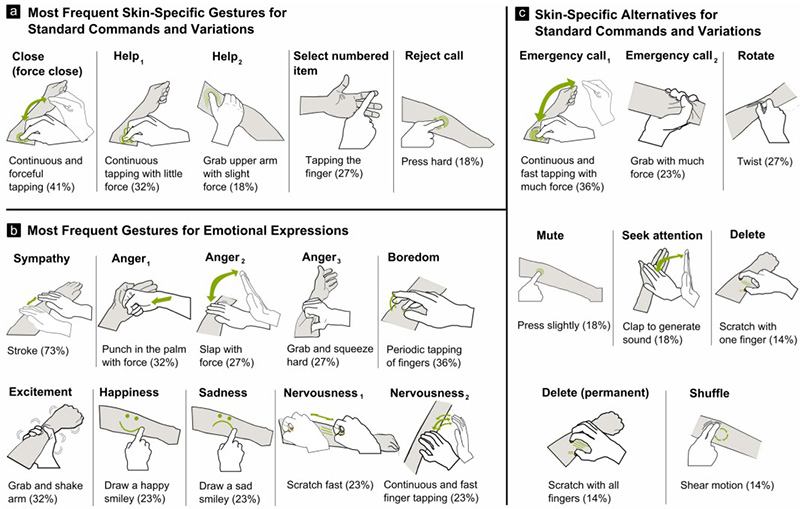
DuoSkin demonstrates three types of skin interaction using gold metal leaf circuits on temporary tattoos that are applied directly on the skin: sensing touch input, displaying output, and wireless communication.
Tools
- Arduino NANO
- Arduino IDE
- Breadboard
- Adafruit NeoPixel Digital RGB LED strip
- NFC stickers
- Micro FPC NFC Ntag
- RC522 RFID Reader
- Resistors of varying values
- Capacitors of varying values
- LEDs
- Jumper wires
- Wire stripper
- Solder iron
- Solder
- Pre-vulcanized latex (liquid)
- Copper Tape (150mm wide)
- Cricut Maker 3
- Cricut Design Space
- Yarn
- Crochet hook (that is suitable for the yarn thickness)
- Battery
- Battery pack
- Fake nails
- Rhinoceros
Process and workflow
This week was a combination of digital and the physical medium. For the electronic part, I did prototyping on a breadboard with jumper wires and then slowly, I migrated the circuit design to a standalone state. For physical body parts, I cast latex and also crocheted a glove. For the temporary circuit tattoos test, I designed the circuit in Rhinoceros and cut the cooper tape on Cricut Maker 3.
Temporary Circuit Tattoos
I was really intrigued by the temporary circuit tattoos that use gestures and actions that interact with the tattoo.
Here are informative tutorials on how to make your own circuit tattoo using tattoo paper:
- DuoSkin
- Wearable electronics
- LED temporary tattoo tutorial
- An ornate neck garment using temporary tattoos
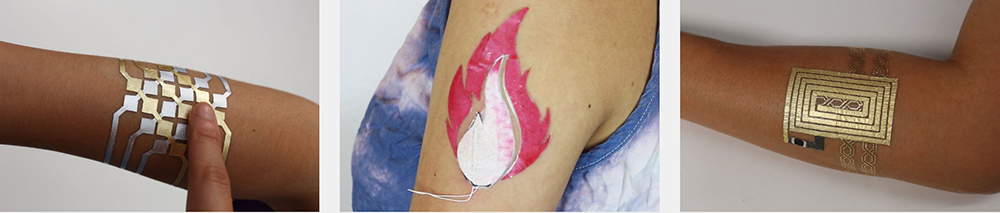
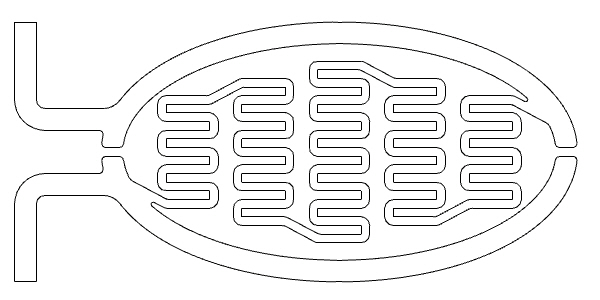
I did not have time to explore more about tattoo making but I made a mockup LED circuit bracelet in copper tape and latex. the idea was to increase LED brightness by squeezing the bracelet harder. Since the copper has already very low resistance, squeezing it did not make different. But I imagine that with a temporary tattoo with gold metal leaves, it would create a difference.
I prepared the design in Rhinoceros and cut it in Cricut Maker 3 on copper tape.
I stuck the copper tape on a thin cast of latex and wrapped it around a wrist.
NFC Tags - Communication
I started the second project by looking into what NFCs and RFIDs are. The following definitions are taken from this website:
RFID: The RIFD technology (radio-frequency identification) is the predecessor of NFC. RFID tags are most commonly known from anti-theft systems attached to the more expensive products in stores. RIFD has been successfuly used to track inventory in a variety of sectors and industries, e.g., manufacturing, healthcare, automotive, or apparel — wherever there's a need to track items.
NFC: Near-field communication technology allows two devices to communicate wirelessly. The technology can be embedded in a small tag to facilitate data transfer between nearby mobile phones, laptops, tablets, and other electronics. NFC is part RFID (radio-frequency identification) and part Bluetooth. Unlike RFID, NFC tags work in close proximity, giving users more precision. NFC also doesn’t require manual device discovery and synchronization as Bluetooth Low Energy does. The biggest difference between RFID and NFC is the communication method. RFID tags have only a one-way communication method. NFC devices have a one- and two-way communication capability, which gives the NFC technology an upper hand in use cases where transactions are dependent on data from two devices.
First trials I made with NFC tags were via using my phone to read and write NFC tags to take certain actions using this tutorial.
Light up for you
A human-human interaction glove that creates individual colors for people who have met before and invites them to meet if they haven't met before. The project requires two people's interaction. The first person is the wearer of the glove with the RFID tag reader and NeoPixel. The other person has different NFC tags on them: on their nails, on their skin or it could be a key to their workplace.
Preparing the Arduino IDE and the Circuit
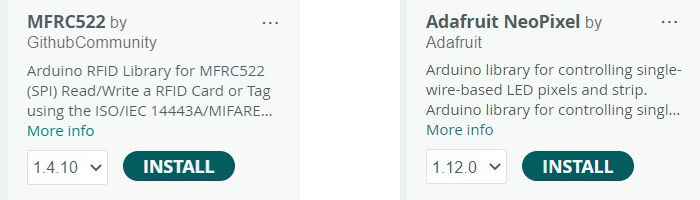
You need to download two libraries to work with NFC/RFID tag readers and neopixels:
- MFRC522 by GithubCommunity
- AdaFruit NeoPixel by Adafruit
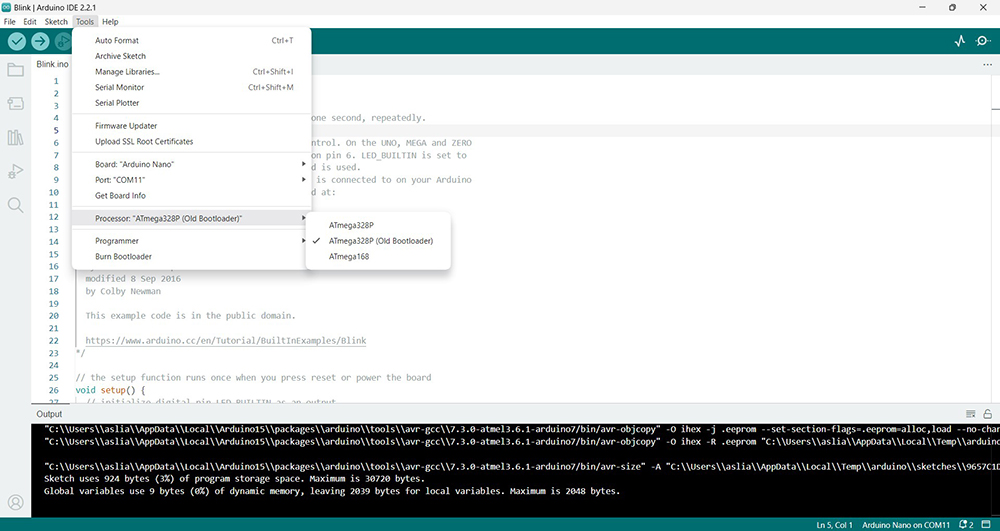
It is always important to choose the correct board type and port from the Arduino IDE. What I figured out (the hard way, after an hour of struggle), if your Arduino Nano is old, you need to also choose the old bootloader from the processor.
INPUT - RC522 RFID Reader with NFC tags I started looking into sample wiring and codes for tag readers. I used this tutorial which was very useful. Since, I was using an Arduino NANO instead of Arduino UNO, I adapted the wiring for NANO board.
This tutorial had a code bit for reading the tag UID and assigning authorization for specific tags. I used this code as my foundation to assign specific colors for different tags.
OUTPUT - Neopixel Next on the agenda was using Neopixels. I followed the tutorial on arduino's website to get started. This tutorial helped with obtaining correct components and wiring.
Then, I combined two codes to streamline the process of input-microcontroller-output together.
THE ARDUINO CODE
/* call NeoPixel */

#include <Adafruit_NeoPixel.h>
#ifdef __AVR__
#include <avr/power.h>  // Required for 16 MHz Adafruit Trinket
#endif

#define PIN_NEO_PIXEL 4  // Arduino pin that connects to NeoPixel
#define NUM_PIXELS 6    // The number of LEDs (pixels) on NeoPixel
const uint8_t BRIGHTNESS = random(0,255); //0-255 scale
const uint8_t NEUTRAL = 255;

#define DELAY_INTERVAL 1000  // 1000ms pause between each pixel

Adafruit_NeoPixel NeoPixel(NUM_PIXELS, PIN_NEO_PIXEL, NEO_GRB + NEO_KHZ800);

/* call MFRC522 */

#include <SPI.h>
#include <MFRC522.h>
#define SS_PIN 10
#define RST_PIN 5
MFRC522 mfrc522(SS_PIN, RST_PIN); // Create MFRC522 instance.


void setup()
{
Serial.begin(9600); // Initiate a serial communication
SPI.begin(); // Initiate SPI bus
mfrc522.PCD_Init(); // Initiate MFRC522
Serial.println("Bring your card close to the reader...");
Serial.println();

NeoPixel.begin();  // INITIALIZE NeoPixel strip object (REQUIRED)
}


void loop()
{
    NeoPixel.show();
    NeoPixel.clear();  // set all pixel colors to 'off'. It only takes effect if pixels.show() is called
// Look for new cards
if ( ! mfrc522.PICC_IsNewCardPresent())
{
return;
}
// Select one of the cards
if ( ! mfrc522.PICC_ReadCardSerial())
{
return;
}
//Show UID on serial monitor
Serial.print("UID tag :");
String content= "";
byte letter;
for (byte i = 0; i < mfrc522.uid.size; i++)
{
Serial.print(mfrc522.uid.uidByte[i] < 0x10 ? " 0" : " ");
Serial.print(mfrc522.uid.uidByte[i], HEX);
content.concat(String(mfrc522.uid.uidByte[i] < 0x10 ? " 0" : " "));
content.concat(String(mfrc522.uid.uidByte[i], HEX));
}
Serial.println();
Serial.print("Message : ");
content.toUpperCase();
if (content.substring(1) == "04 87 97 C3 79 00 00") //change here the UID of the card/cards that you want to give access
{
Serial.println("I know you!");
// turn pixels to green one by one with delay between each pixel
    for (int pixel = 0; pixel < NUM_PIXELS; pixel++) {           // for each pixel
      NeoPixel.setPixelColor(pixel, NeoPixel.Color(0, 255, 0));  // it only takes effect if pixels.show() is called
      NeoPixel.setBrightness(BRIGHTNESS);
      NeoPixel.show();                                           // send the updated pixel colors to the NeoPixel hardware.
      delay(DELAY_INTERVAL);  // pause between each pixel
    }
    NeoPixel.show();
    NeoPixel.clear();  // set all pixel colors to 'off'. It only takes effect if pixels.show() is called
    return;
Serial.println();
delay(3000);
return;
}

if (content.substring(1) == "04 88 97 C3 79 00 00") //change here the UID of the card/cards that you want to give access
{
Serial.println("I know you!");
// turn pixels to green one by one with delay between each pixel
    for (int pixel = 0; pixel < NUM_PIXELS; pixel++) {           // for each pixel
      NeoPixel.setPixelColor(pixel, NeoPixel.Color(0, 0, 255));  // it only takes effect if pixels.show() is called
      NeoPixel.setBrightness(BRIGHTNESS);
      NeoPixel.show();                                           // send the updated pixel colors to the NeoPixel hardware.
      delay(DELAY_INTERVAL);  // pause between each pixel
    }
    NeoPixel.show();
    NeoPixel.clear();  // set all pixel colors to 'off'. It only takes effect if pixels.show() is called
Serial.println();
delay(3000);
return;
}

else {
Serial.println("I do not know you, let's meet!");
NeoPixel.setPixelColor(2,NEUTRAL,0,0);
NeoPixel.setPixelColor(3,NEUTRAL,0,0);
NeoPixel.show();
delay(3000);
NeoPixel.clear();
delay(3000);
return;
}
}
CIRCUIT DIAGRAM

Skin Interaction
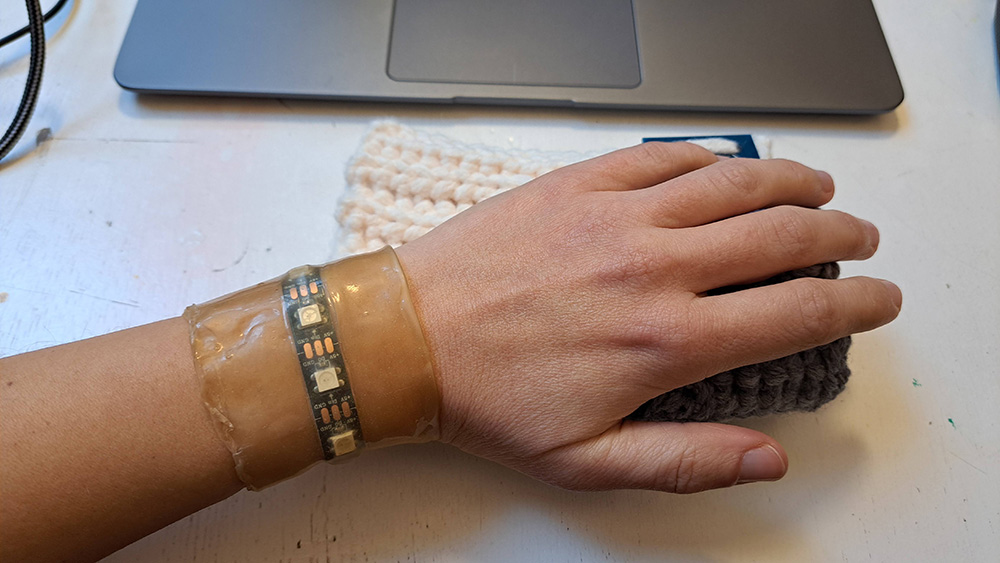
I put the NeoPixel strip in a thin cast latex to wrap around a wrist.
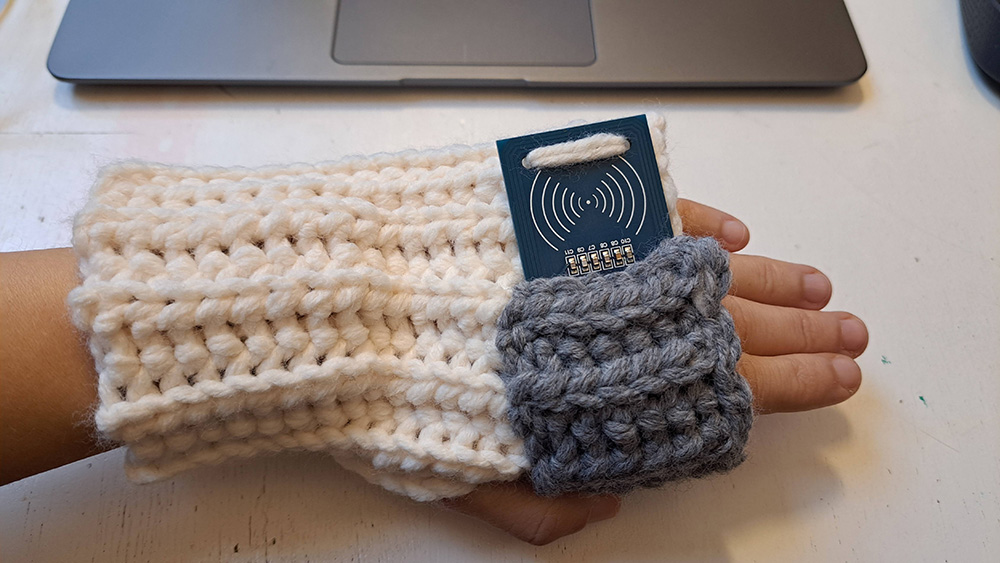
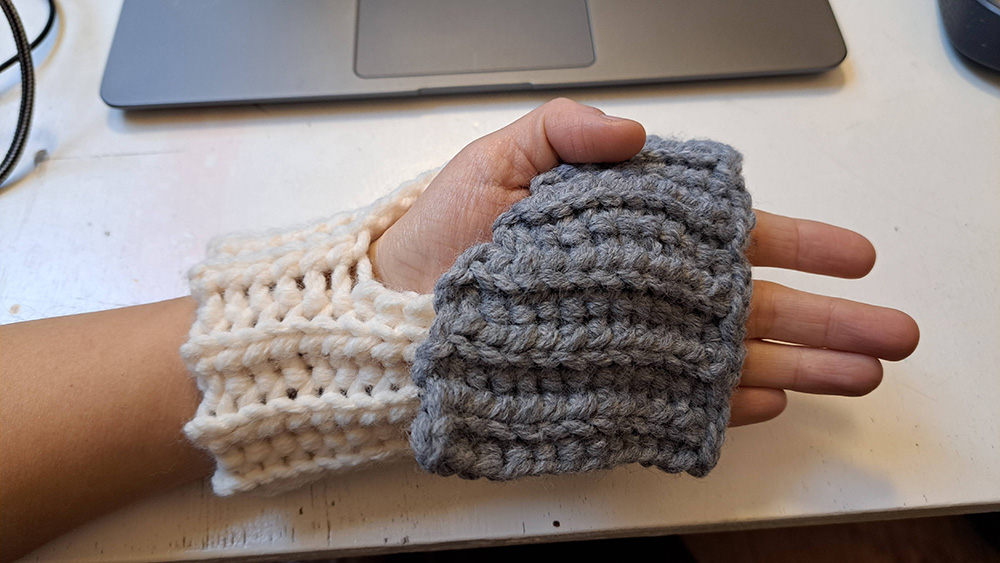
I crocheted a glove to hide all the wiring and electronic parts. The glove was crocheted with double crochet slip stitch. It has a soft touch on the skin rather than having all the spiky edges and bits of components biting into the skin. I also insert the latex wrapped NeoPixel bracelet inside the glove so that light diffuses through the crocheted fabric softer.
Input Methods
FINISHED PROJECT
Notes from the Classroom
notes from the classroom
SKIN ELECTRONICS lecture by Katia Vega
- Beauty technology: electronics & skin
- Gestures & the skin
- Biosensors & body fluids
Beauty technology: conductive makeup (conductive ink), chromoskin project, hairware (conductive hair extensions as a capacitive touch sensor device), technail rfid reader
Gestures: affordances and gestures (philipp schoessler et. al.), Duoskin (temporary golden leaf tattoo - kao et. al. mit media lab), M. Weigel - More than Touch 2014, Gemini (frown the eyebrows gemstones), Eslucent (micro-gesture + AI - eyelid adhesives)
Colorimetric biosensors, fluorescence biosensors, electrochemical biosensors.
LECTURE by Michelle
NFC chips, RFID, RFID reader, LDR, ultrasonic sensors
Mask, Jewellery/prosthetics, makeup, hair, tattoo, touch/touchless (input), sound (input/output), light (output), motion (output)