10. Open Source Hardware
Research & Ideation
I was very curious about hacking the shopbot. CNC milling machines had been always a little scary for me. I have had two incidents in 14 years, one was my fault and the other was my student's fault (I should have checked the file better though). In either case, I observed closely the powerful monster that is the CNC milling machine. So hacking it to become the delicate drawing machine was very intriguing.
During my internship at the FabLab, I wrote custom g-code for variable filament extrusion and nonplanar printing for 3D printers. I also designed a pen holder for Creality Ender 3 as well as wrote its g-code to make nonplanar drawing traces. I used Rhinoceros and Grasshopper to generate the g-codes.
Going into this week, my main focus was:
- Creating a workflow of file generation for CNC milling machines for drawing/painting.
- Eliminating the use of the VCarve Pro software for generating toolpaths in order to create effects that are not possible with the available software and feeding the machine custom shopbot codes.
My secondary focus was on the design of the hardware that would connect several brushes and electronics components to the milling head.
References & Inspiration
The projects and work of Diego Garcia Cuevas and ControlMad were my first introduction into circumventing slicer softwares for 3D printers.
Following Cuevas' tutorial, I learned the basics of how to write custom gcode for 3D printers in Rhinoceros, Grasshopper.
Further exploring into what the possibilities could be, I wrote the gcodes for variable extrusions and nonplanar extrusions:
I took the exploration of writing custom gcodes one more step further and delved into making a penholder for Creality Ender 3 and subsequently writing the gcode for actuating it. I explored nonplanar movements, moving the print head up and down for discrete geometries:
Process
Hacking a machine is a big task that needs to be broken down to smaller managable tasks and various iteration spirals that can elevate the project to the desired complexity level.
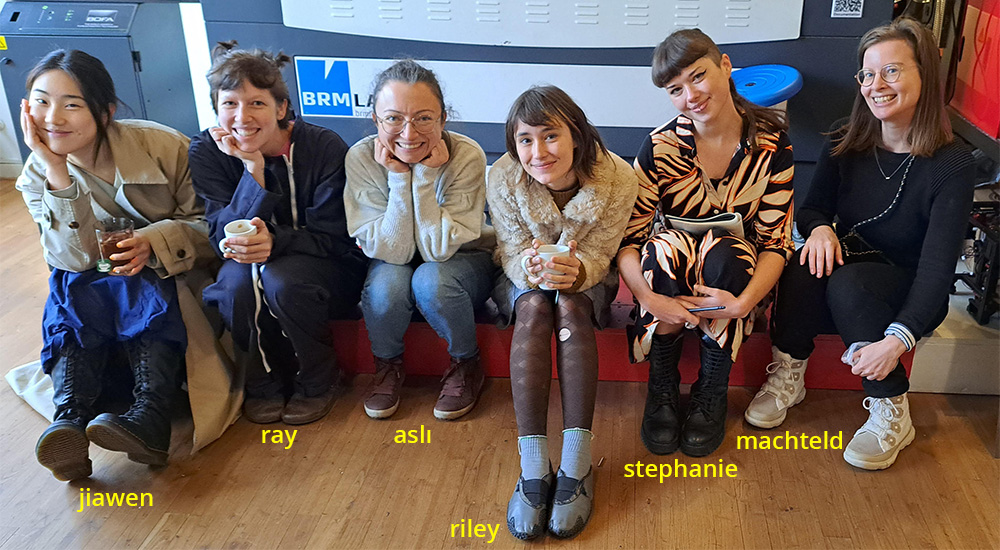
We divided the work into into various tasks and teamed up as such:
- Hardware = Stephanie Johnson & Aslı Aydın Aksan
- Electronics = Riley Cox & Michelle Vossen
- Brush Design = Jiawen Gong & Ray Formilli
- Ink / Surface = Ray Formilli & Jiawen Gong
- Working with the CNC machine / shopbot code generation / design files = Aslı Aydın Aksan & Jiawen Gong
- Documentary = Ray Formilli & Machteld Zee
- Project Management = Machteld Zee & Michelle Vossen
On my documentation page, I will explain working with the machine and shopbot code generation, hardware development in detail while talking briefly over the other tasks. Please visit my fellow participants' pages to read more about their tasks in detail. Before going into the detail of my part of the project, I would like to summarize the bill of materials and the project growth chart that we have created together.
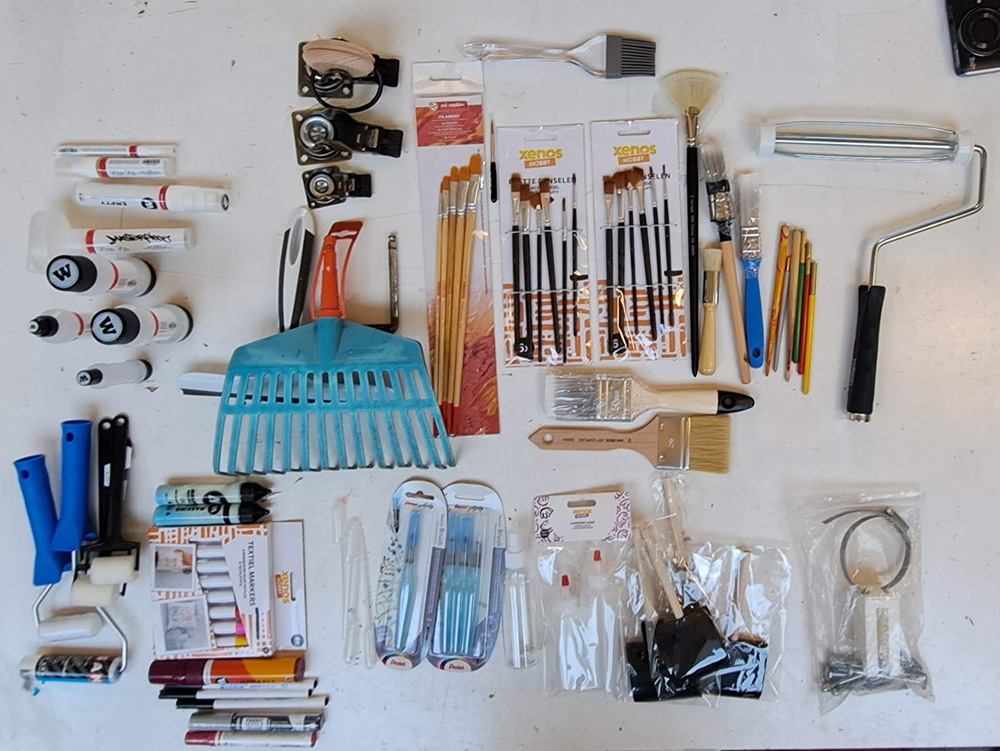
Bill of Materials (BoM)
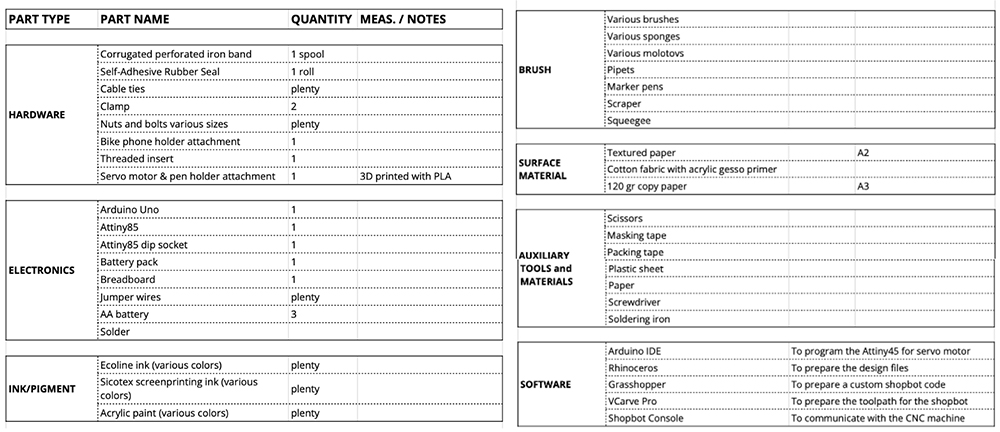
google sheet of the bill of materials
Project Growth
We decided to work with spiral growth to be able to achieve a complex drawing machine at the end.
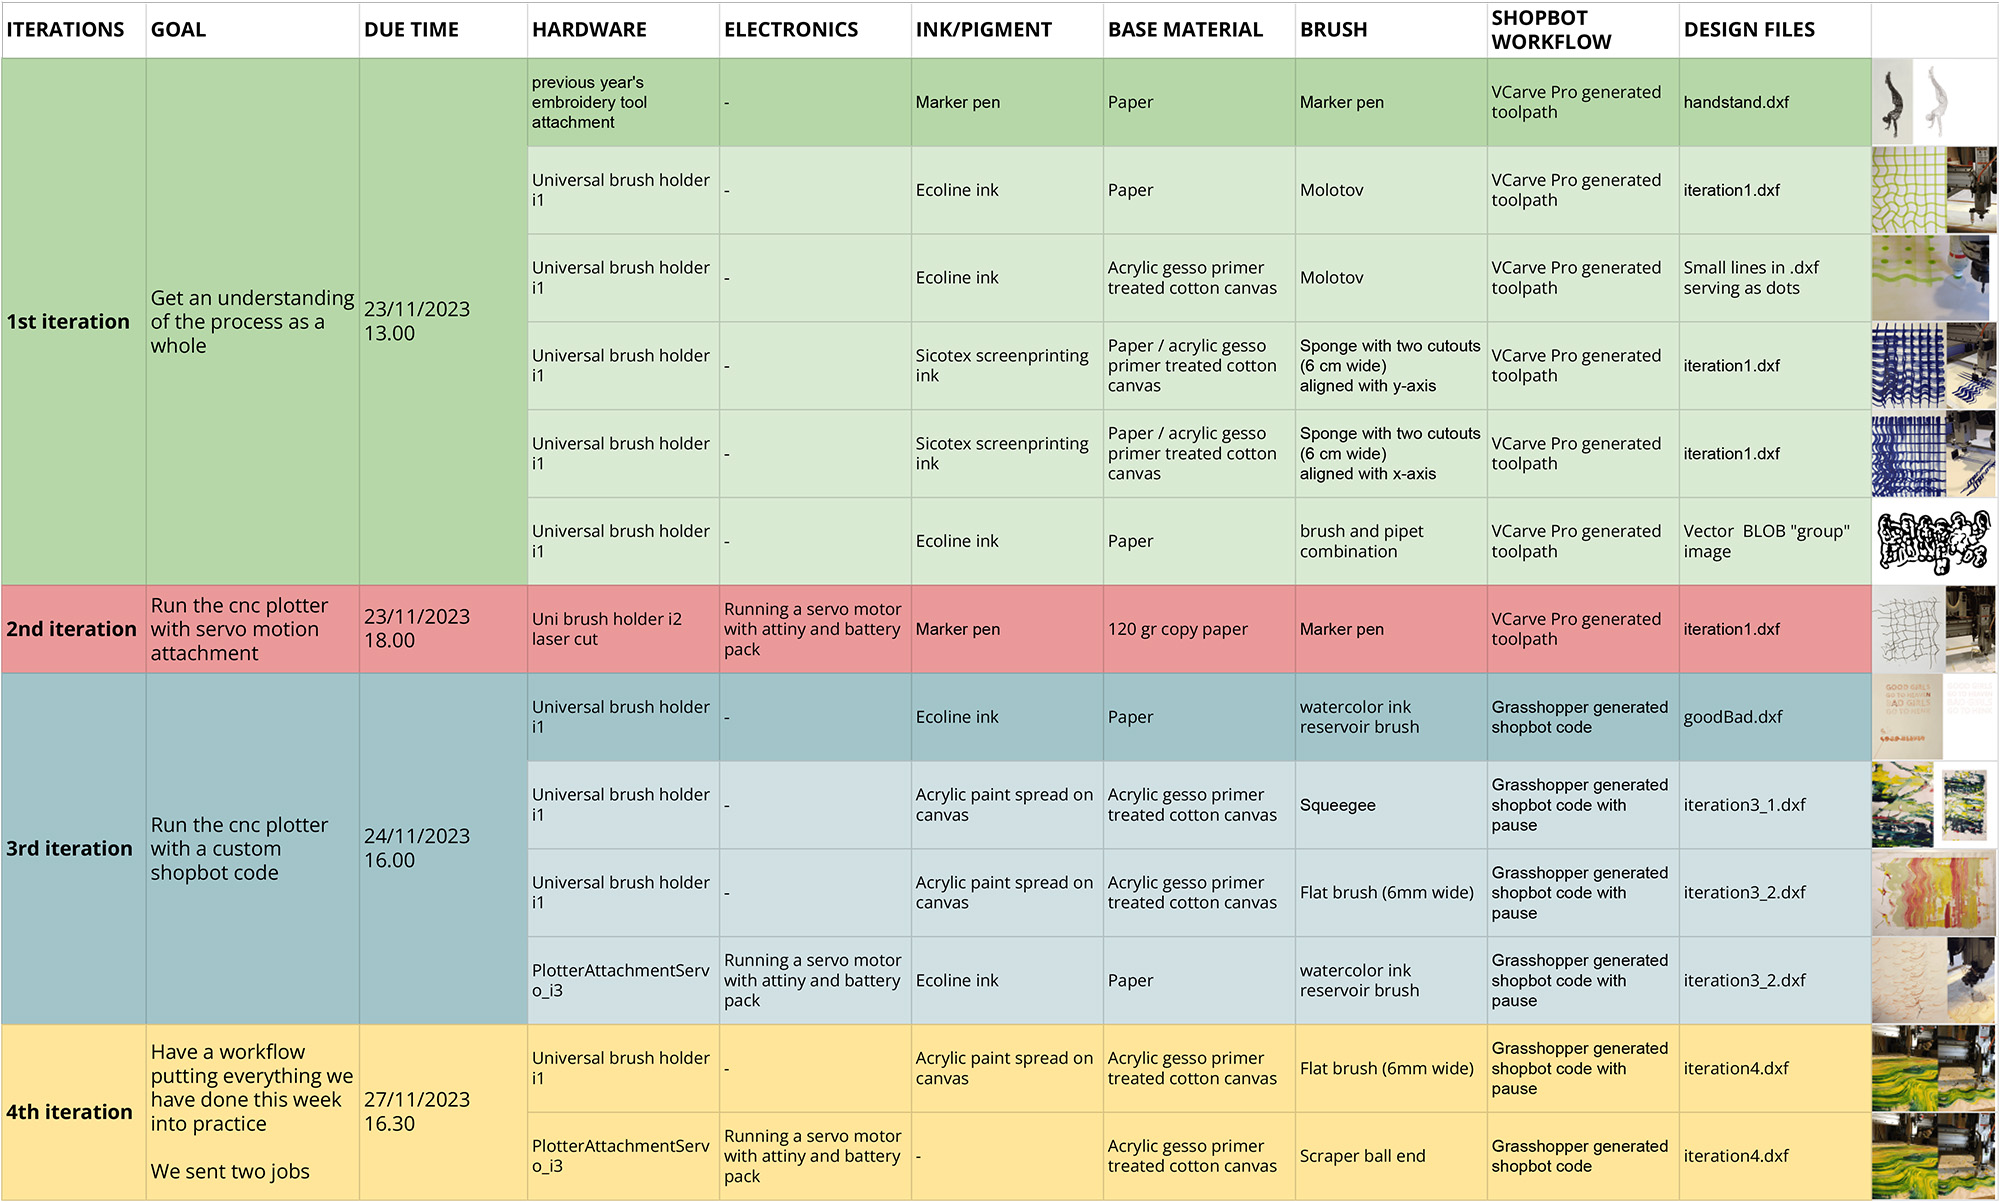
google sheet of the project growth
Personal contribution to the project
Working with the CNC machine / conventional workflow
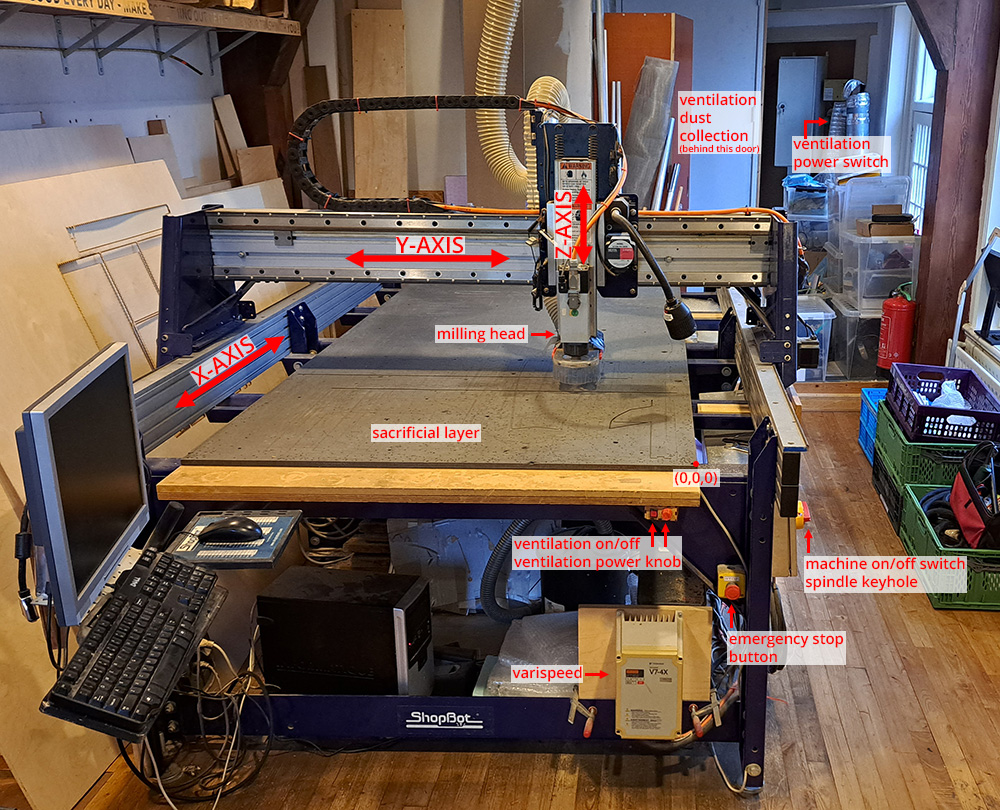
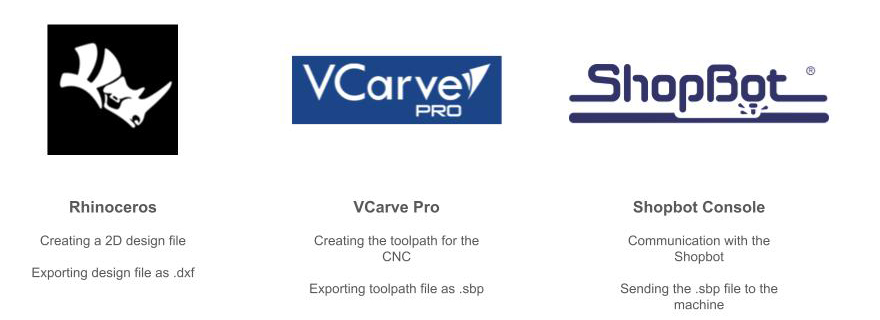
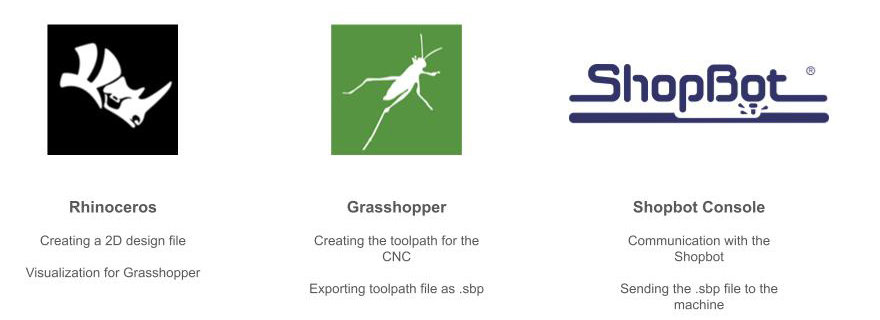
The common workflow of working with 2D drawing in Shopbot involves the following steps:
- Making your design in your favorite choice of drawing software. Mine is Rhinoceros
- Exporting your drawing as .dxf file
- Opening your .dxf file in VCarve Pro software to create toolpaths and Shopbot Code
- Sending your Shopbot Code to Shopbot Console software to communicate with the CNC machine and to send the shopbot code to the machine.
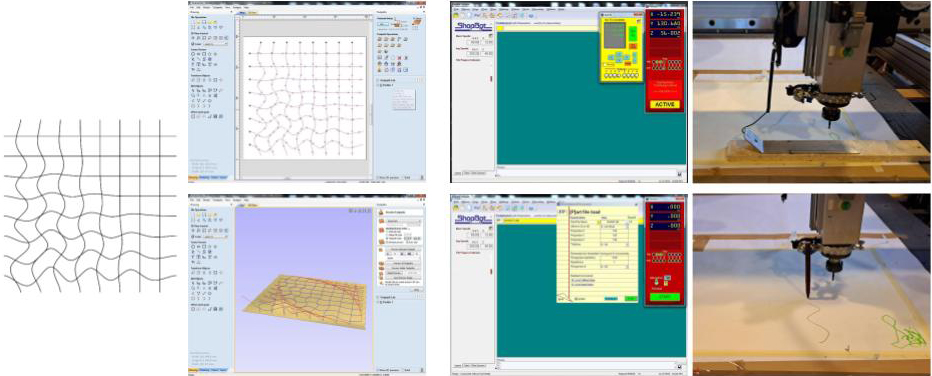
The steps of the working with VCarve Pro and Shopbot Console with regard to this project is explained visually step-by-step in the following presentation:
Working with the CNC machine / custom shopbot code
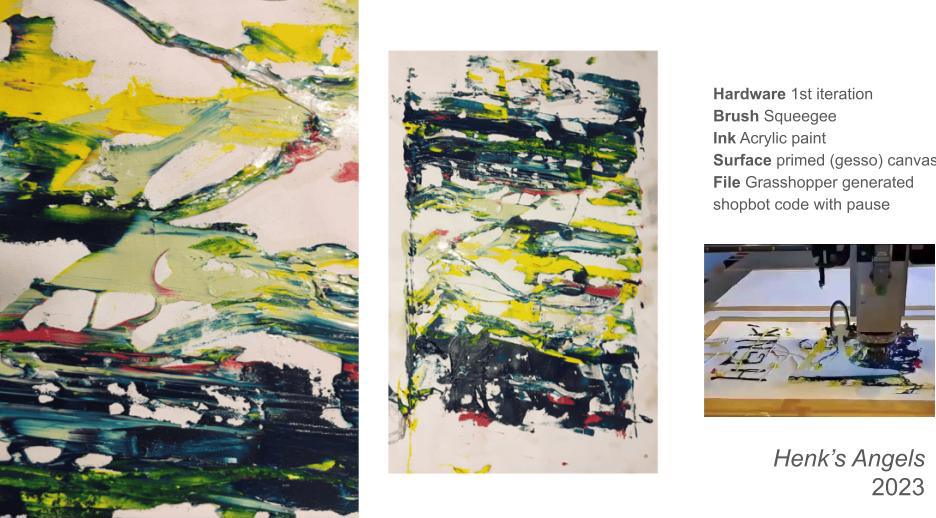
Creating custom shopbot codes has the benefit of being more in control of the fabrication process and adding more functions that are not there with the conventional workflow (such as adding pauses at intervals).
Understanding the shopbot code
Shopbot code language is similar to gcode language. Every line is a specific command for the machine to execute. It has the following parts:
- Starting code: Defines the material size, starting coordinates, tool size, material depth, travel speed, etc.
- Main body of the code: Defines the travel coordinates (x,y,z coordinates) of the shopbot head.
- Ending code: Travels the head of the shopbot to the starting coordinates and turns of the router.
To be able to understand more about the commands, please refer to this document: Shopbot Code
The Grasshopper definition
What the grasshopper codes does for the main body of the code:
- Brings in any design from Rhinoceros (make sure to draw them in mm and locate them in reference to (0,0,0) coordinates),
- Divides each curve with certain number of points,
- On a single curve: creates a sequence of the points that are on the surface of the material,
- Brings the milling head higher at the end of a curve,
- Travels to the next curve’s starting point,
- Brings the milling head down to draw the next curve.
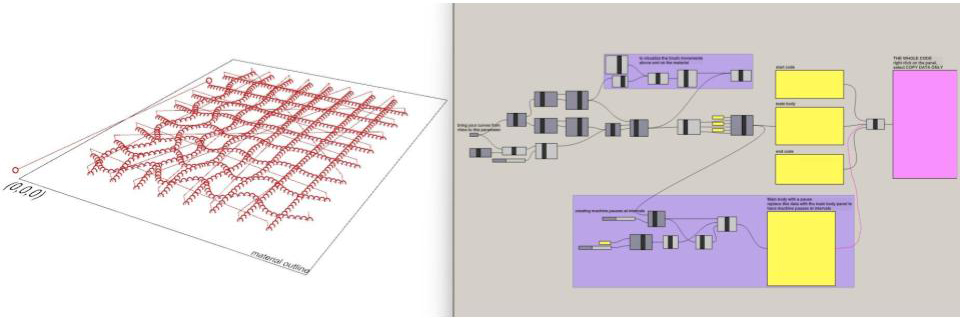
You can see the detailed code below and download the file here1:

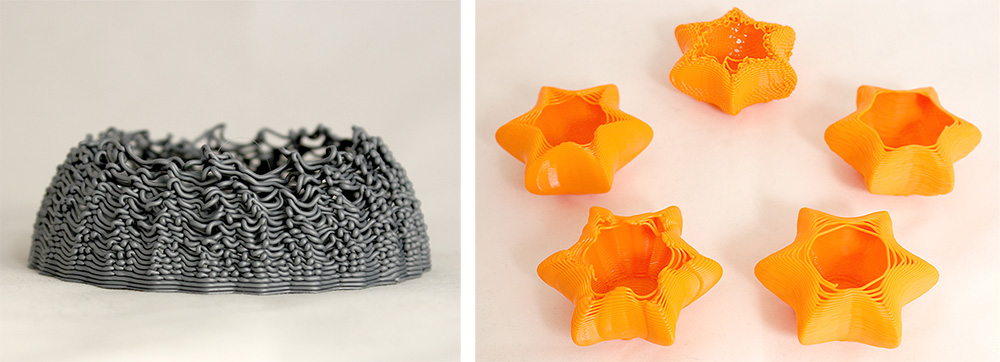
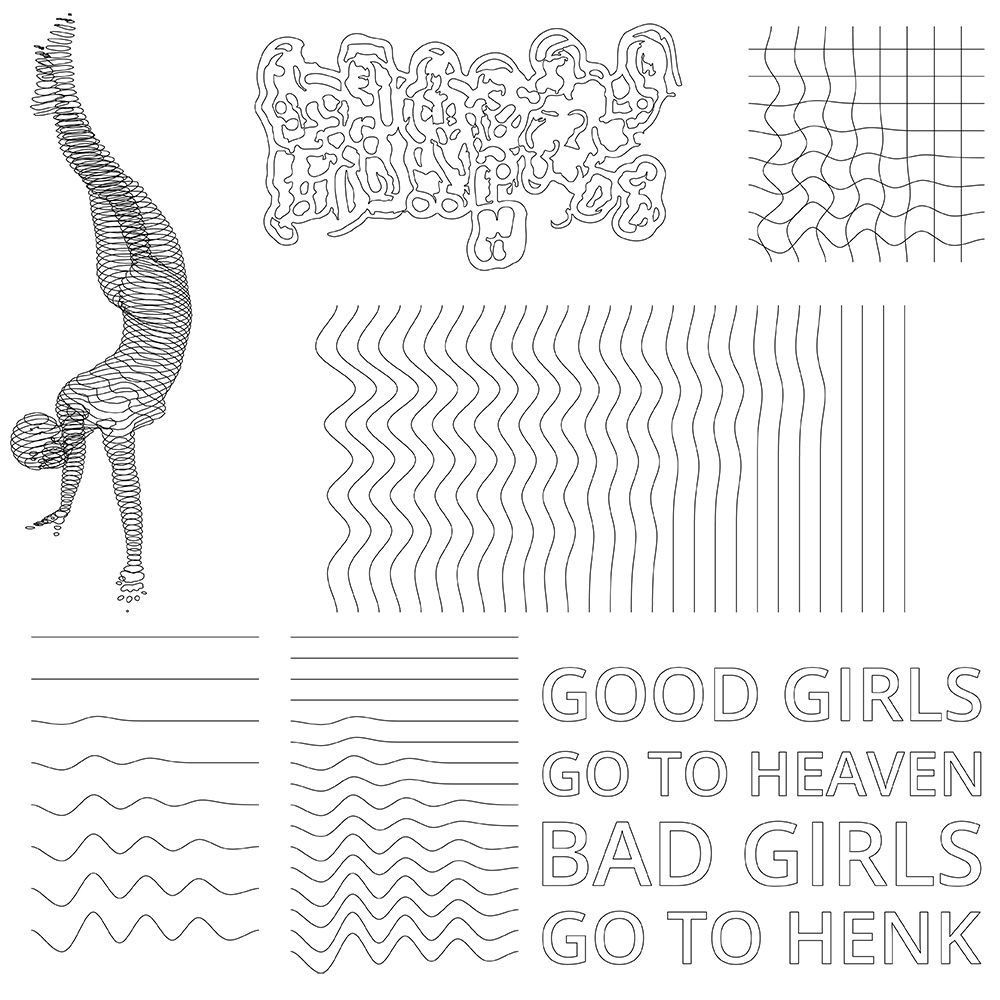
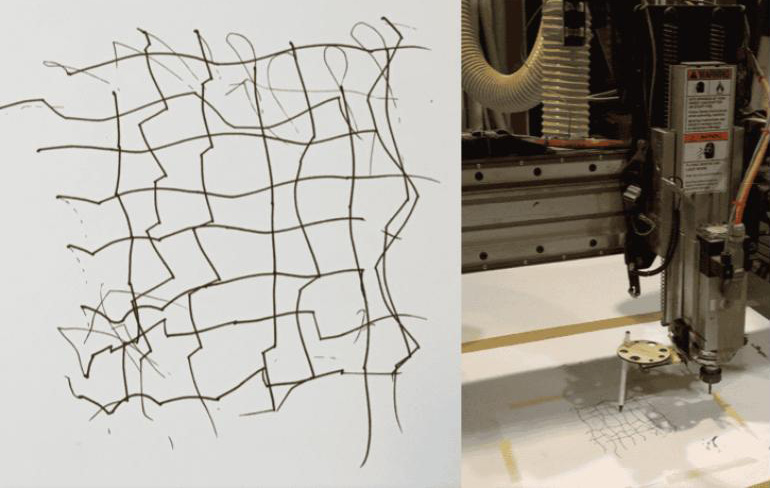
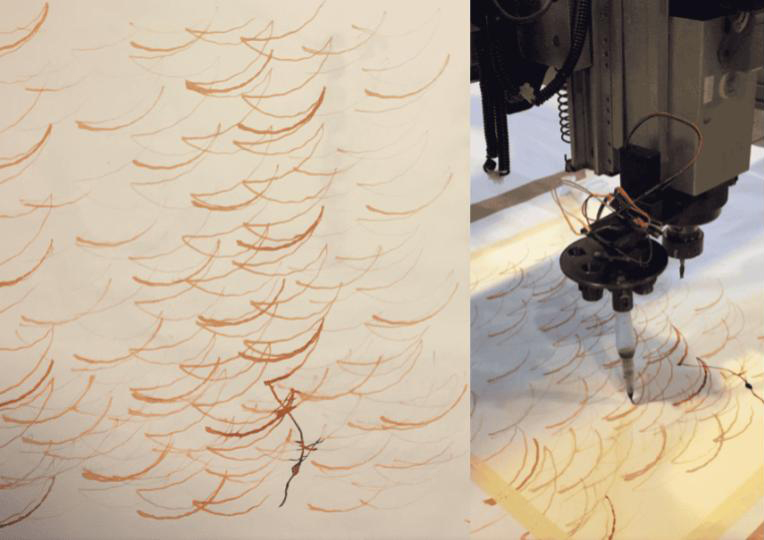
Design files
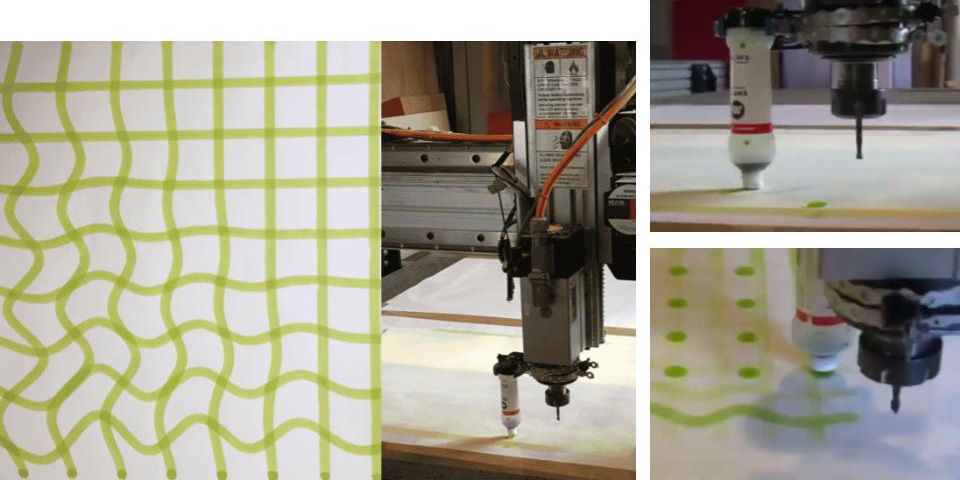
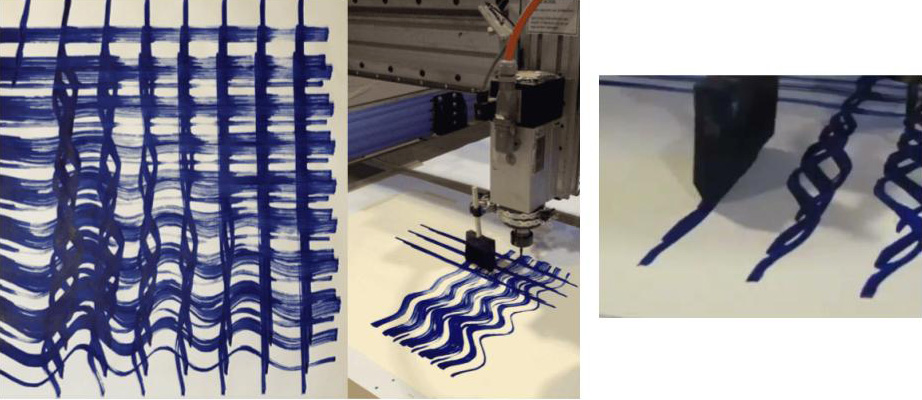
The design files were kept very simple to see the effects of brush ends, their alignment, their interaction with the ink and surface material, as well as how they interact according to servo motor movements and machine pauses. You can download these designs here2.
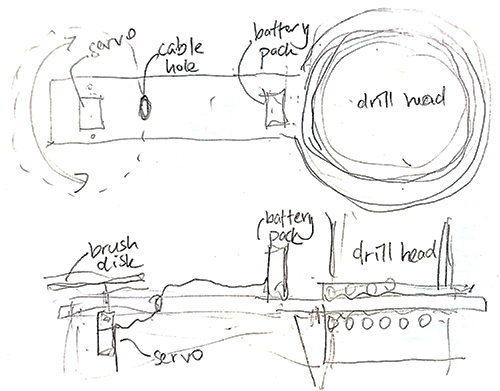
Hardware development
Stephanie led the hardware development and Riley led the electronics development. In connection to mostly Stephanie's part, I got involved in the hardware development too.
Hardware development cosisted of designing/devising an attachment tool to fix several types brushes to the head of the shopbot.
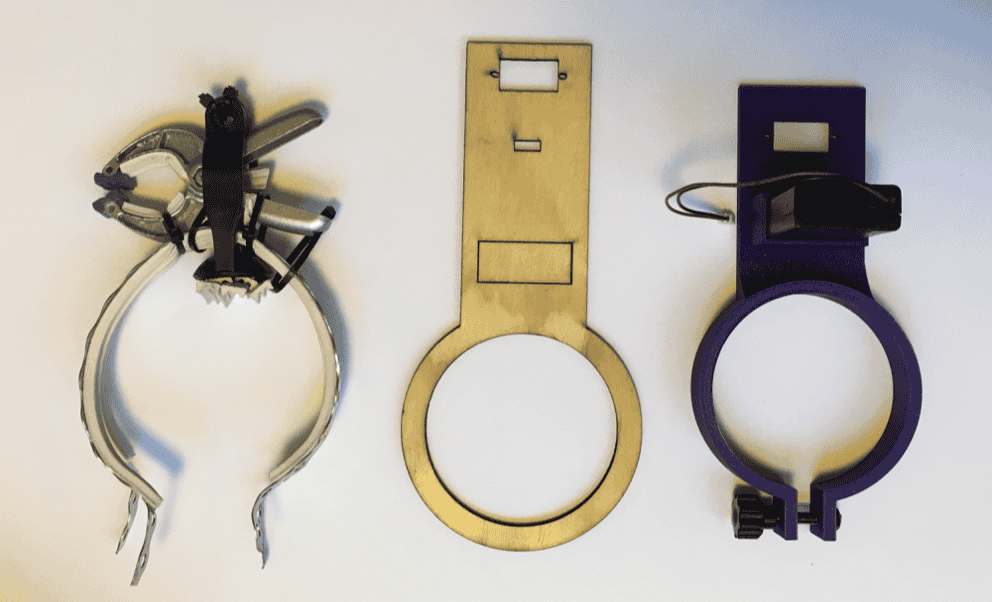
The evolution of this attachment tool was as follows:
- i0. The use of an attachment tool from a previous year's research to attach a simple felt tip pen to the shopbot for the first iteration where the aim was to get the first workflow running.
- i1. Stephanie made a very versatile assemblage tool to fix very different kinds of brushes and pens to the milling head.
- i2. The design of a simple lasercut attachment tool in relation to Riley's rotating brush study.
- i3. A redefined 3D printed attachment tool that can hold a rotating brush holder. The rotating brush holder was designed by Michelle and Riley.
I took part in the design of the second and third iterations.
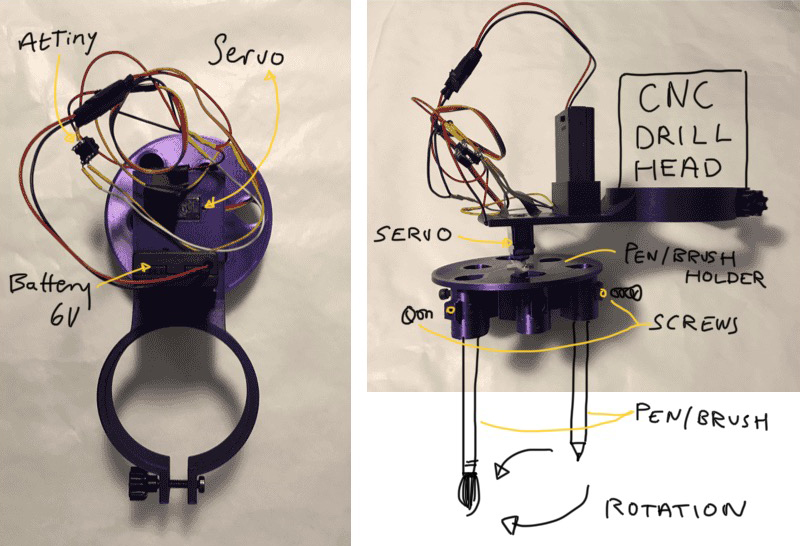
Hardware iteration 3's 3D model can be found here 3.
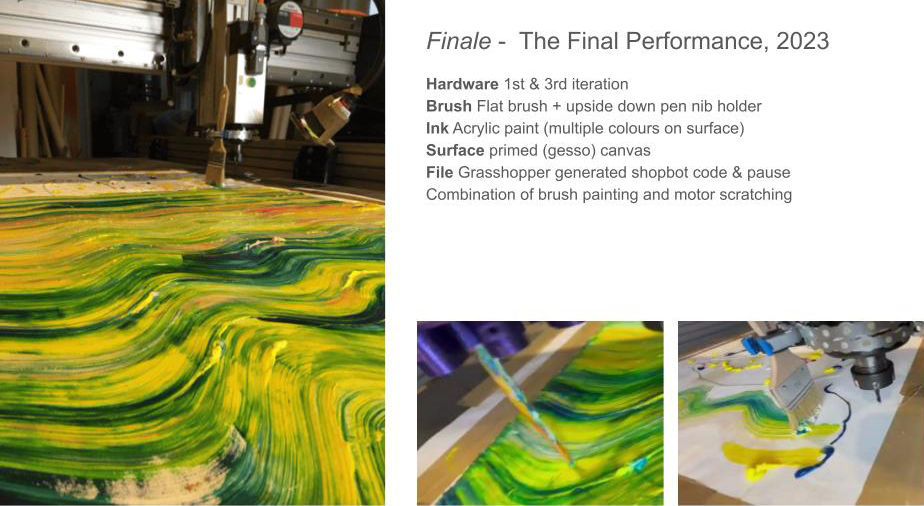
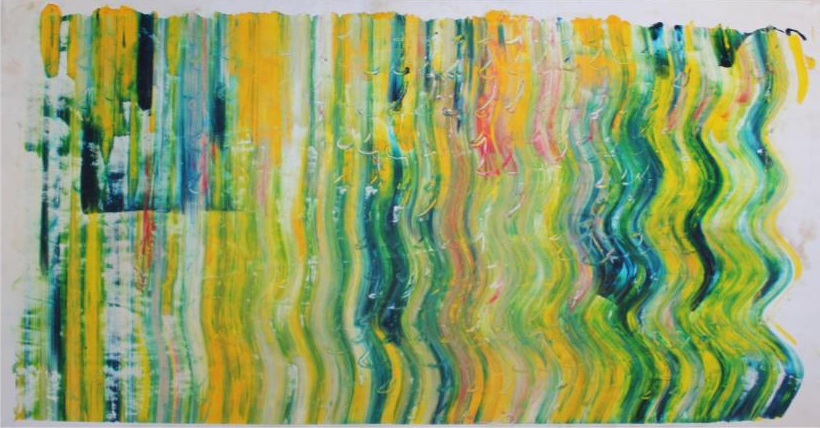
Results

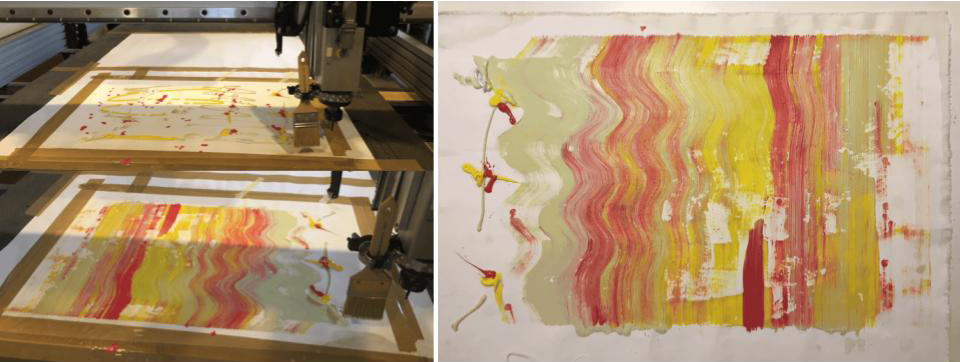
Finale - The Final Performance
Notes from the Classroom
notes from the classroom
OPEN SOURCE HARDWARE lecture by Sara Diaz Rodriguez
How to work with open source hardware
- Understand how existing machines work
- Get to know and overcome your knowledge gap
- Practice user testing and impact analysis
- ...
Documentation
- Create a list of materials, an estimate cost, add datasheets
- Design bluprints, drawings, shcematics, source codes, assembly guides
- Separate the process into steps and write a summary of the overview of the process
- Use universal file formats like pdf, dxf, stl. Formats of open software
- Take pictures in white background and make step by step instructions and gifs
- Create a video showing the machine functioning....
- ...
HACKING THE SHOPBOT presentation by Michelle
Safety
Brave hacker, whatever you do..
- Don't start without Henk, Michelle or Asli
- Always first z-level the machine
- Don't turn on the spindle
- Never leave the machine running
- Clean up ink spills immediately (pause the machine)
- If unsure, do a test run in the air
- No material near the rails/gears of the machine
- Keep it simple stupid (kiss)
References & examples
Plotters:
- drawing machines
- Axidraw or open source variants like 4xiDraw & Blot
- Arnaud Pfeffer (axidraw expert)
- Block printing with shopbot - making the job of block printers easier
- Brachiograph - easy low tech diy plotter
Hacking Machines:
- Hacking the shopbot in 2017: a needle punching machine
- Creality ender pen plotter - asli
Motions:
- Dragging a brush (flat or on an angle), a roller
- Servo motor attachment
- Cam follower principle
- Multiple brushes
- Custom stamps
How to get ink on the tool:
- External reservoir: going back and forth to paint in gcode
How to attach fabric and tool to shopbot
Teams:
- Hardware
- Electronics
- Brush, roller and stamp design
- Bio pigments / inks and techniques
- Design file & gcode
- Documentation
- Project manager
Fabrication files
-
File: grasshopper definition ↩
-
File: design files ↩
-
File: hardware iteration 3 ↩