2. Digital bodies
Research
Sun-Hyuk Kim
Antony Gormley
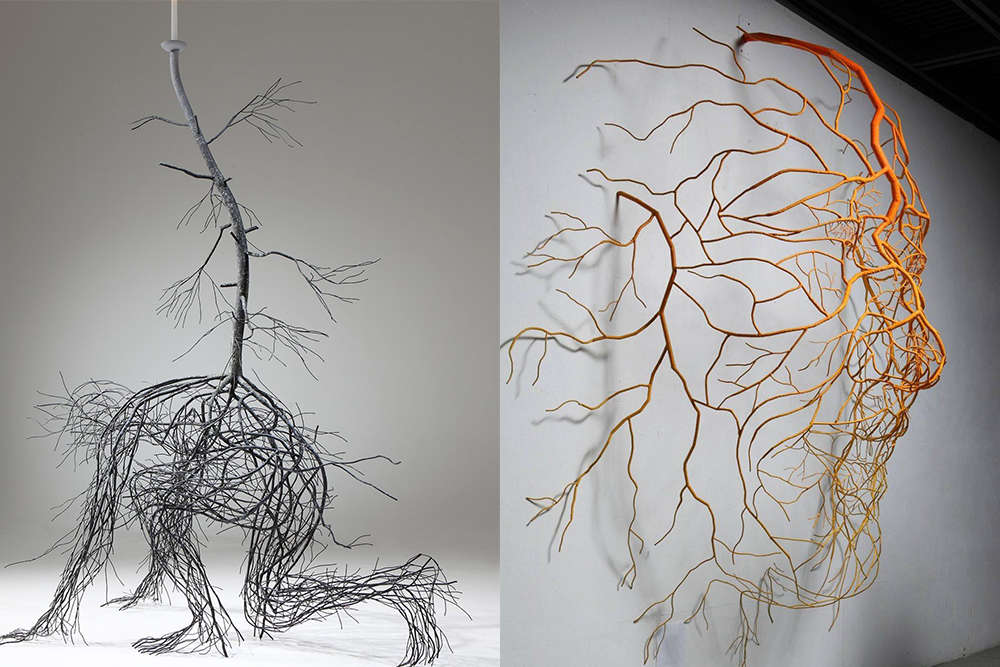
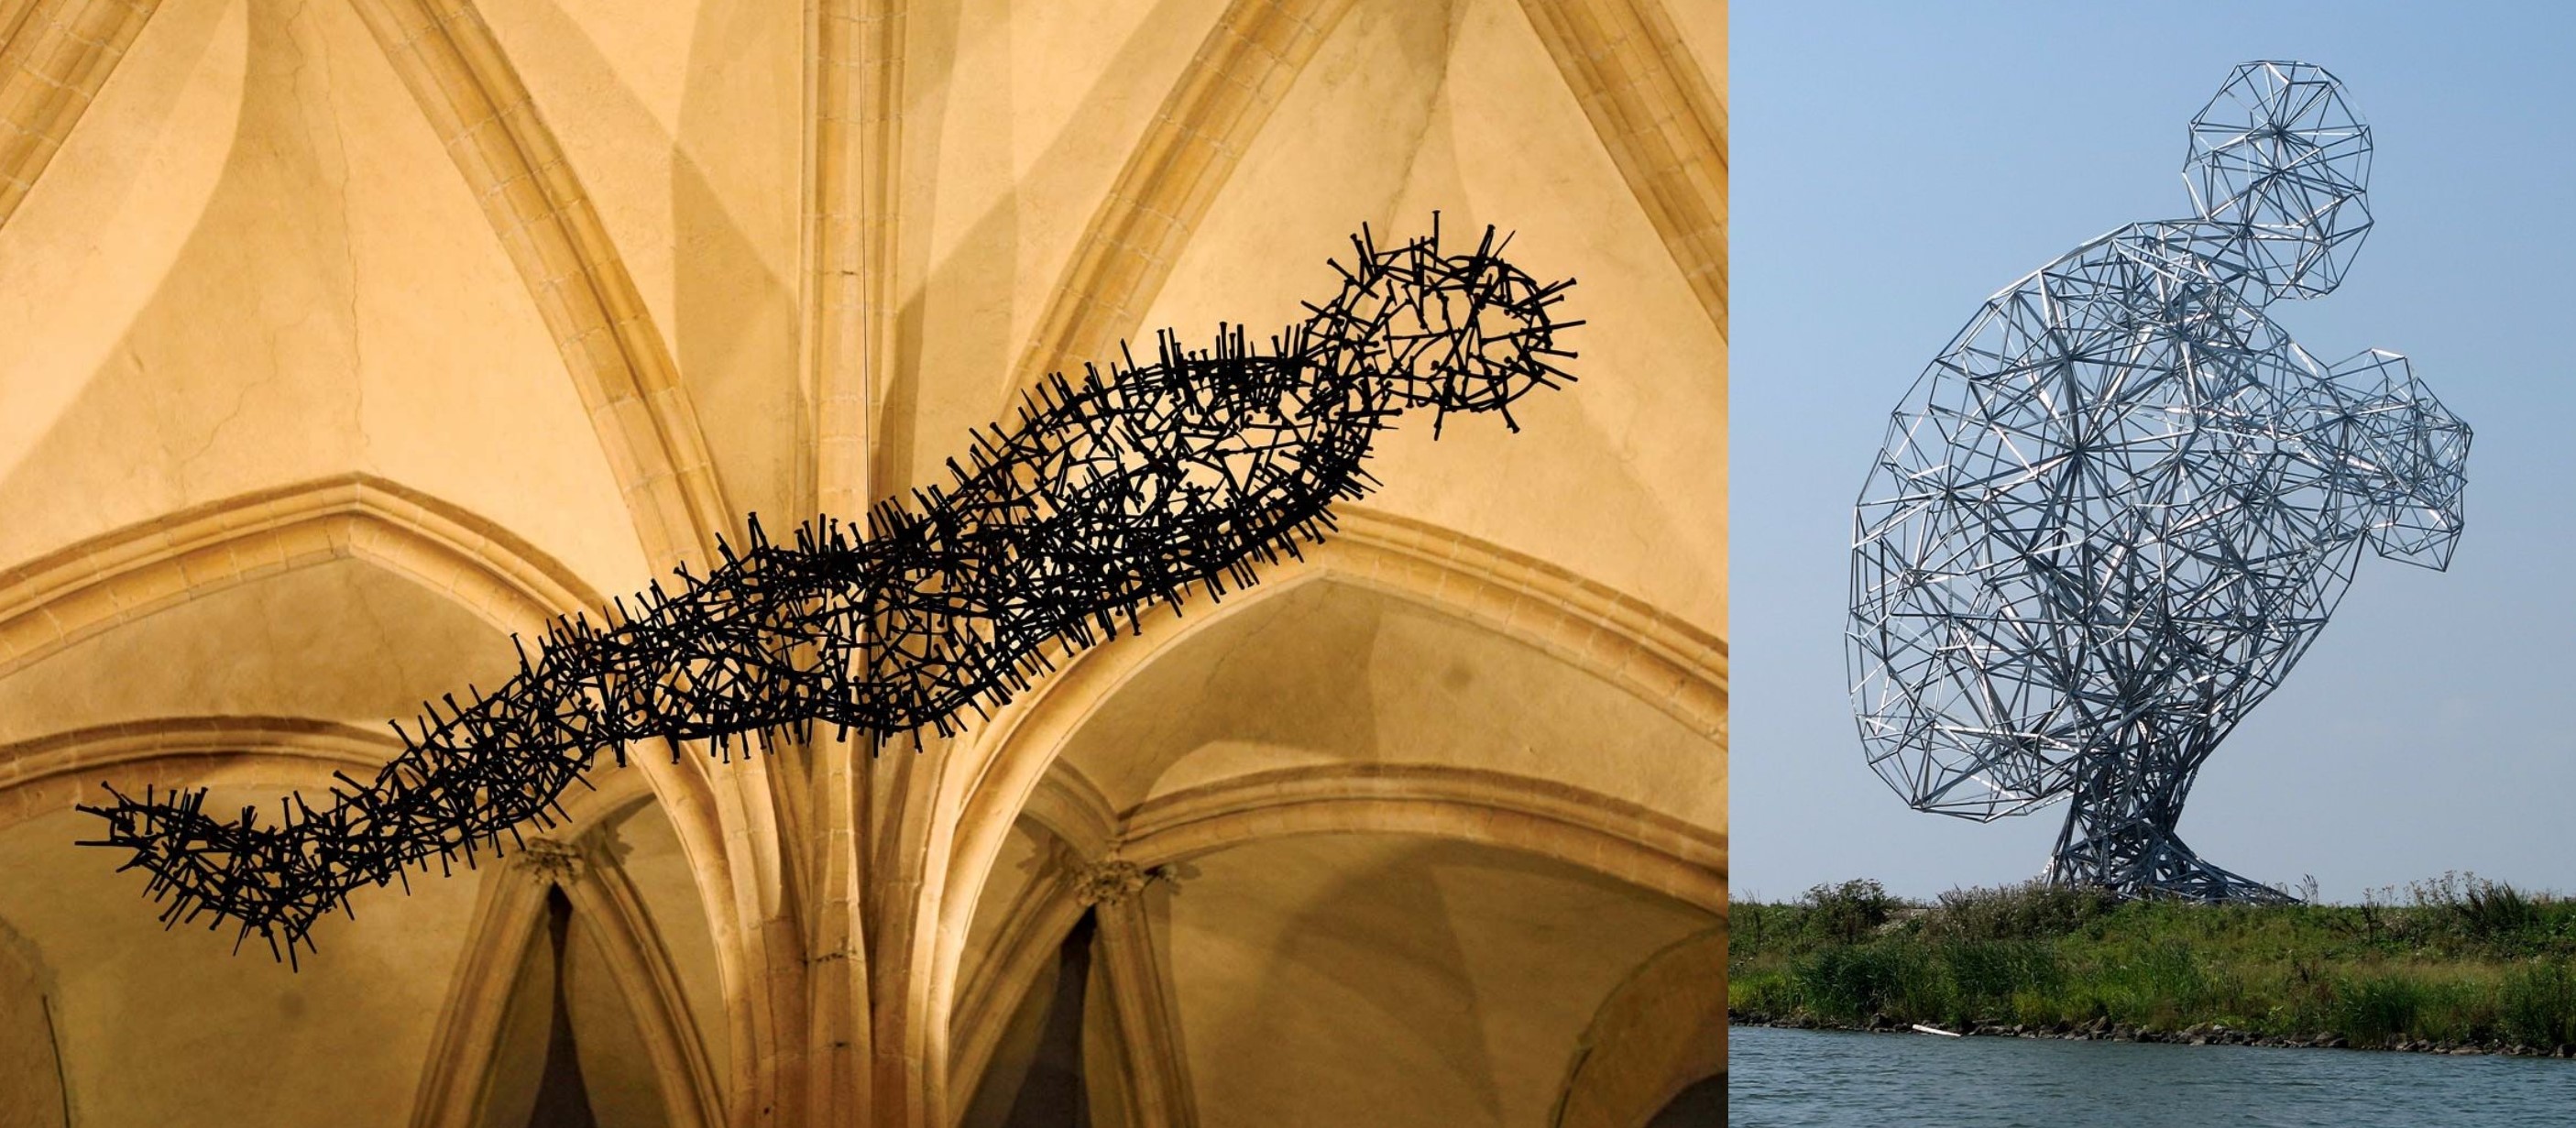 I like how these examples of Sun-Hyuk Kim and Antony Gormley's work take advantage of the negative space to represent a form. I think this is really interesting to find what the minimum is required to represent a form or find how a form can be abstracted from itslef.
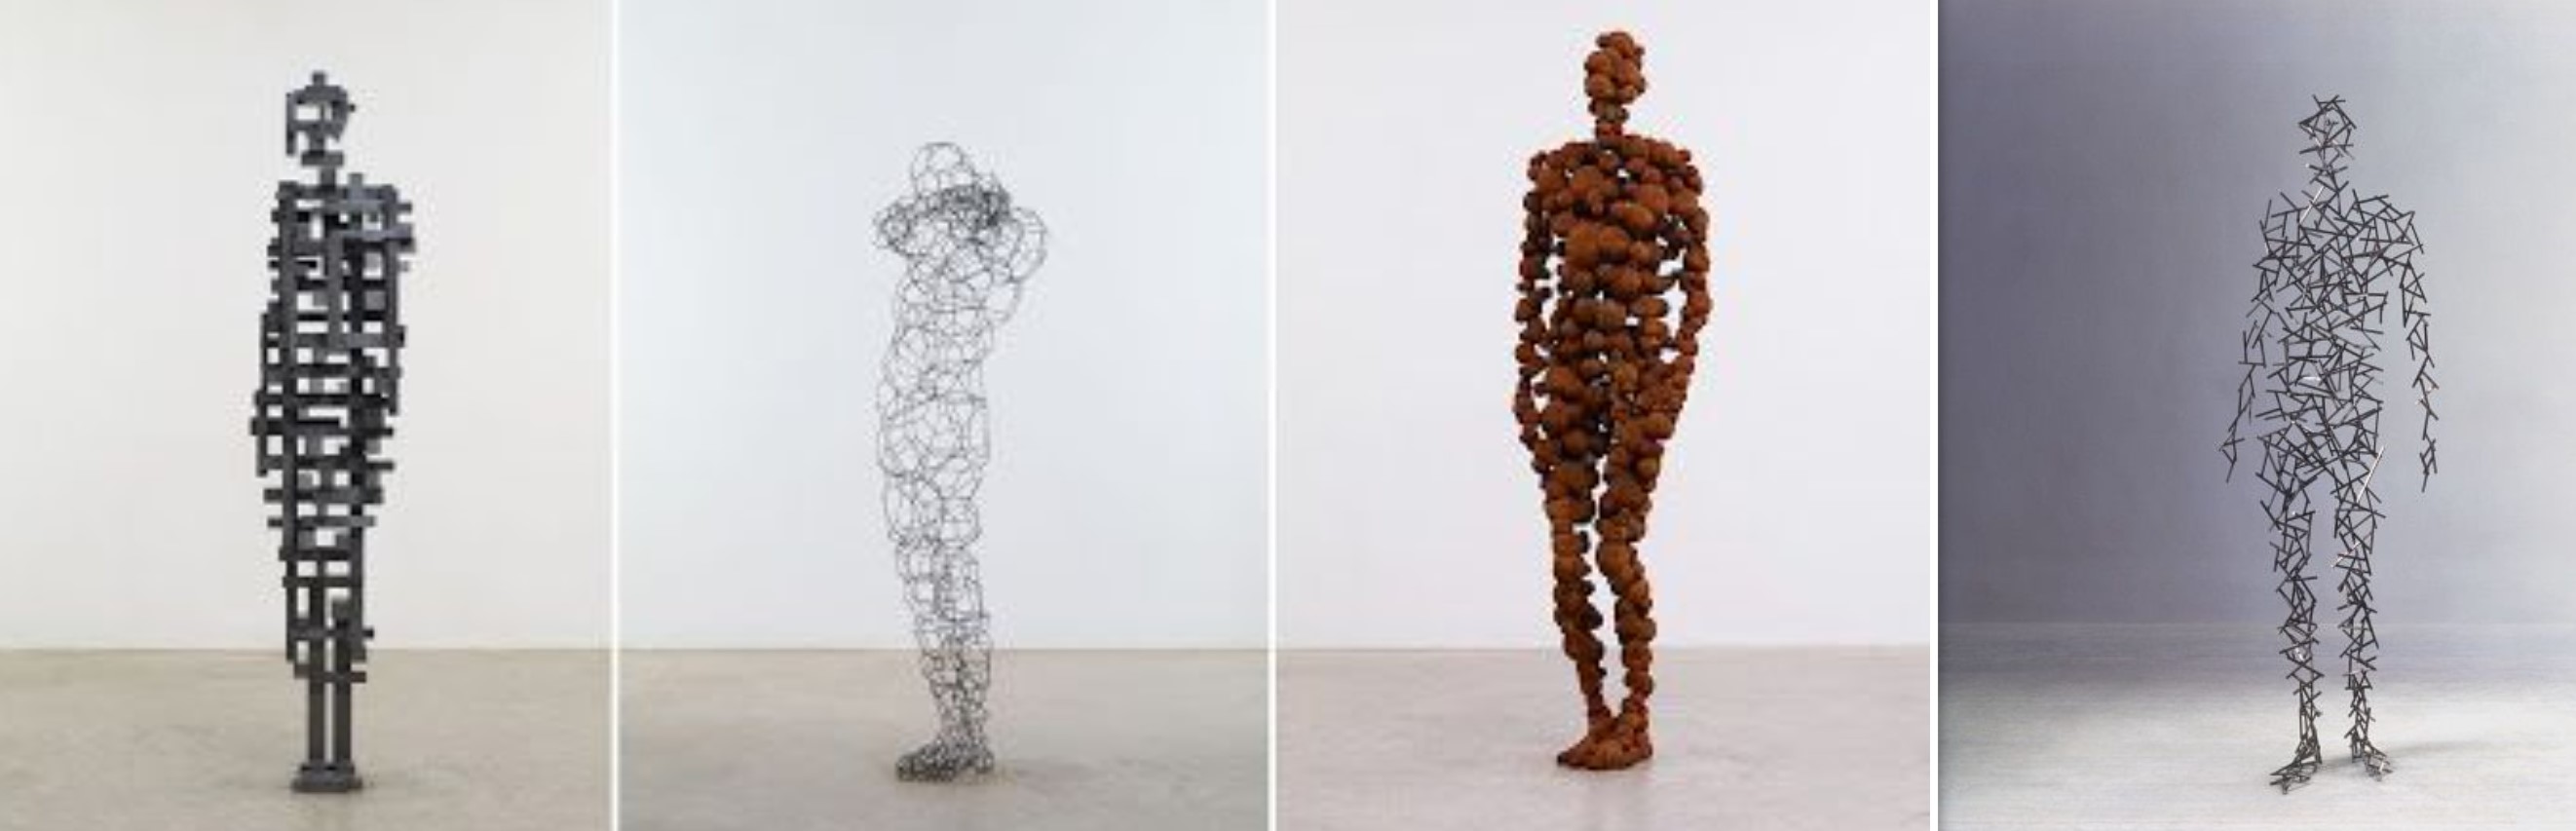 I also like how Anthony Gormley represents the human form as pieces and I will have a play with some grashopper plugins to make this.
Katie Grinnan
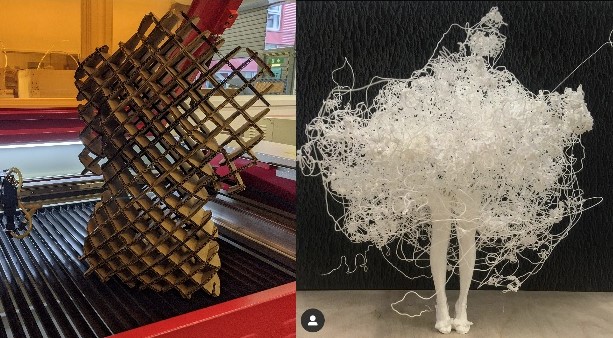
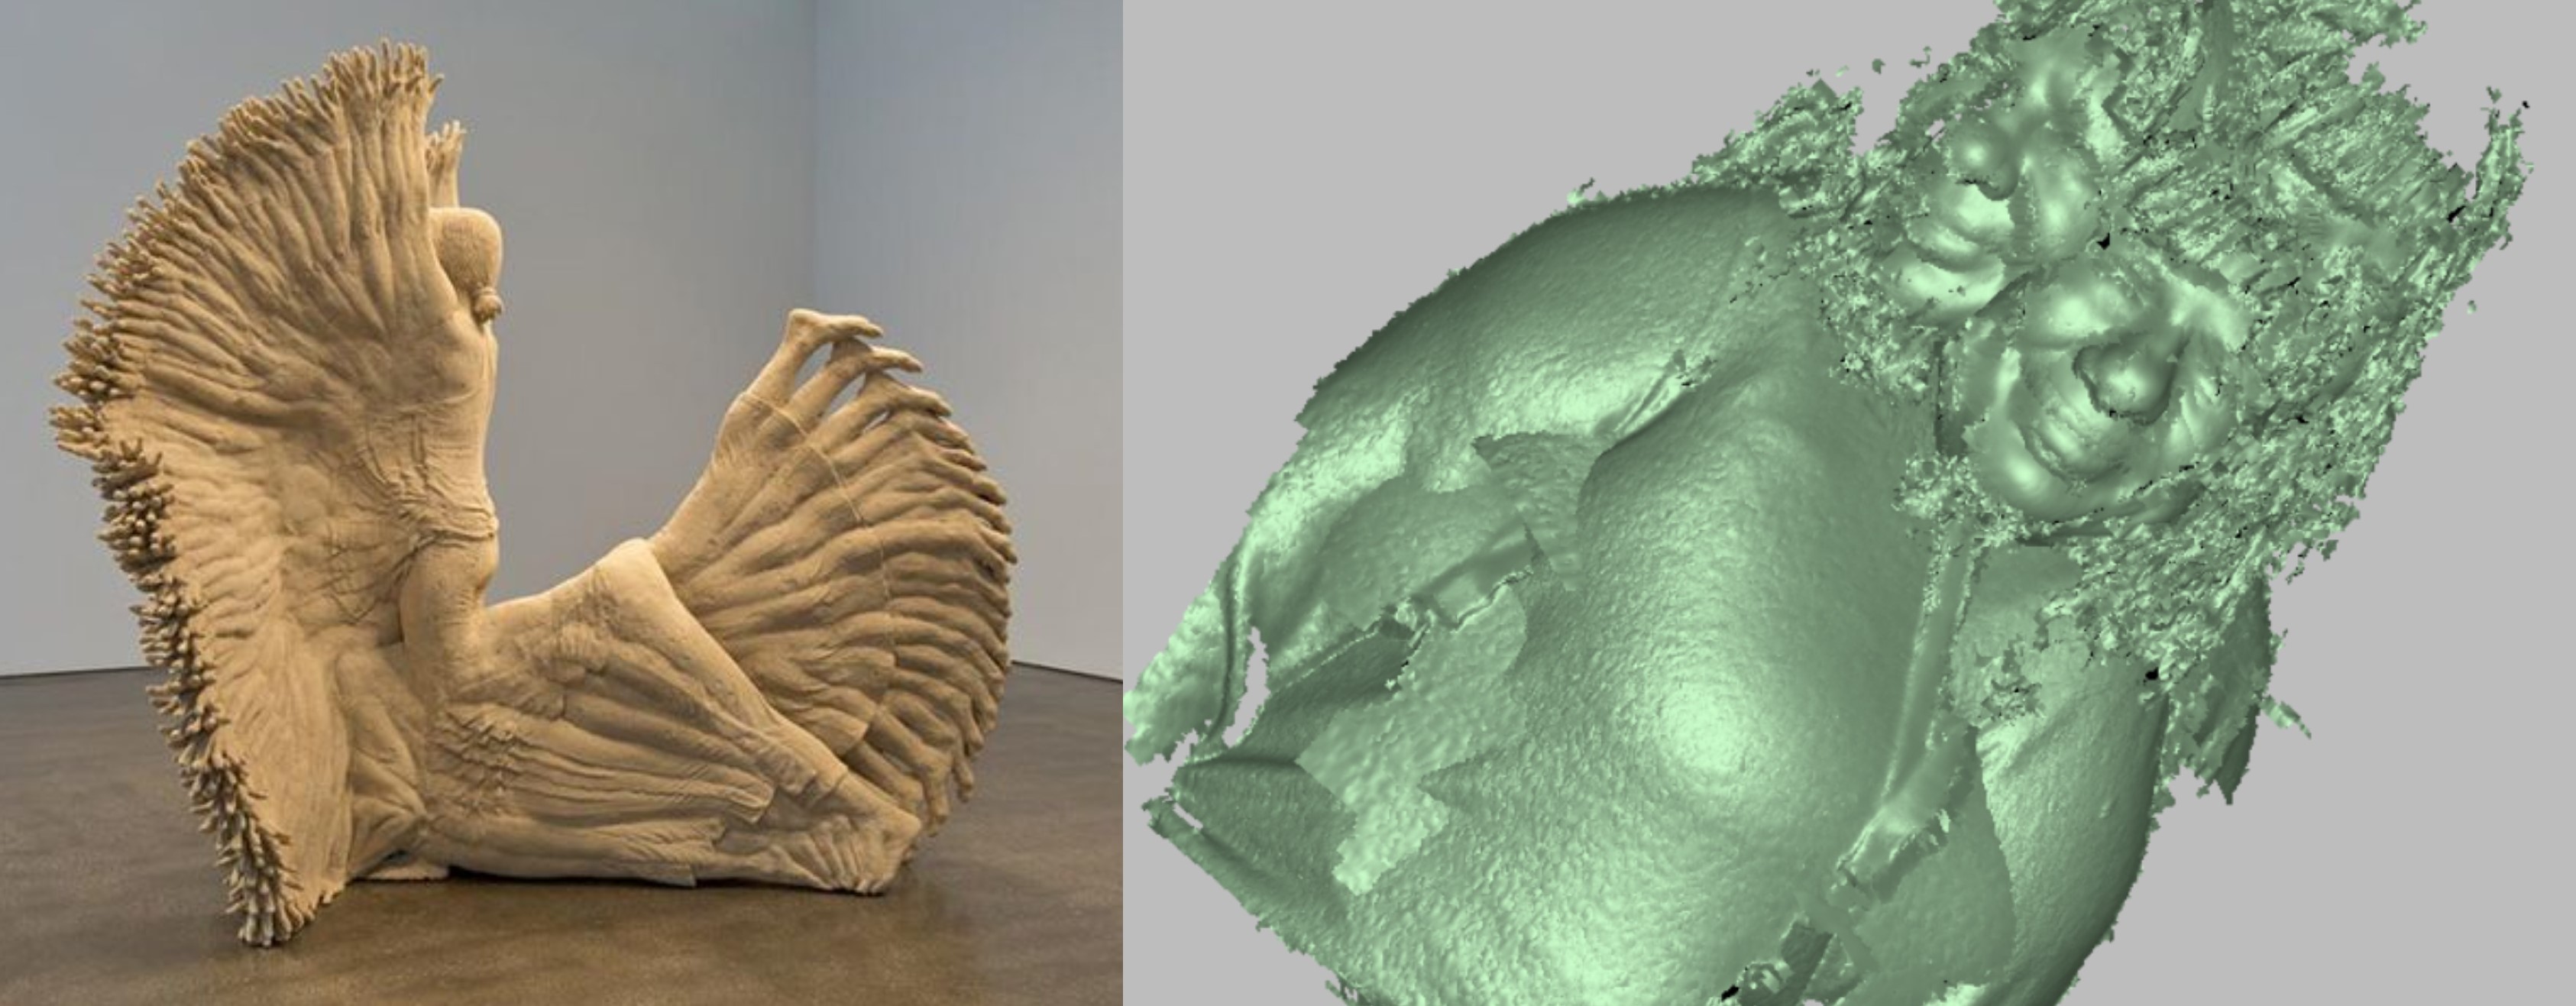 I really like how Katie Grinnans work makes use of motion to create her art. I have experienced capturing geometry like this (right) by accident, but have never done anything with it. I think it would also be interesting to manipulate captured geometry to create lots of duplicates ontop of each other.
A great example of capturing motion is this mesmerising zoetrope by Akinori Gotto. As far as I understand this was made using SLS 3D printing technology.
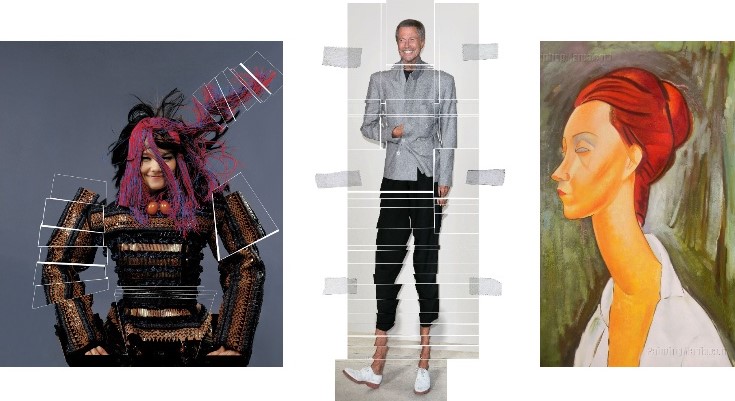
Following on from the previous thought, this work from Jean Paul Goude and Amedeo modigliani I find really interesting; I would like to see how to apply this technique of deformation/elongation to manipulate the human body.
//Digital Bodies exhibition - maria immaculata done in different ways - tinkerCAD for lego bricks mannequineo polypropylene mannaquin Victoria Modesta - Prosthetic legs art4legs.com
Project
I will use an Artec 3D Scanner to scan a colleague in various positions. From this I will clean the file and produce the different forms using different fabrication techniques using the Laser Cutter and 3D printers.
I have an idea to use our clay printer to print a mold, creating the negative space of my scan. This will require a bit more work than this week will allow, but watch this space!
01_Scanning
I am fortunate enough to have access to an Artec Eva scanner. Previosuly I have used the Kinect which uses 2 cameras and IR light to calculate the distance of projected dots on a geometry. I have also had a go with photogrametry using the phone apps, but never had very succesful outcomes.
The Artec scanner I have been using for a year. Until recently we only had the ability to capture geometry rather than texture. Here are some fabricated outcomes I made from the scan of a student. I perhaps put the printspeed for the 3D print a little too fast... anyway, I ended up with this happy accident:
Over the summer we upgraded to include texture. We immideately had the opportunity to take advantage of this new feature to scan Fine Art MA students' work. This was for a virtual exhibition, in place of the one which is usually held in a physical space.
I find it a great tool to bring those who work in an anolog way into the digital world. It was great to see the students explore scale and curation in a way they had never been able to before.
I did two scans, one a very basic scan of my model standing up straight and the other an awquared pose that was clear hard to hold as you will see in the scan.
The process I go through involves capturing the raw data - this is initially misaligned, there is no concept of up or down for the scanner (normally) so the scans are just orientated in 'space' no in relation to each other. The initial data is super messy, lots of artifacts and outliers and holes. This program has an excellent 'autopilot' option, which I use for the majority of scans, unless they are particularly difficult. The stages are Editing (manual) Alignment (manual or auto) fusion
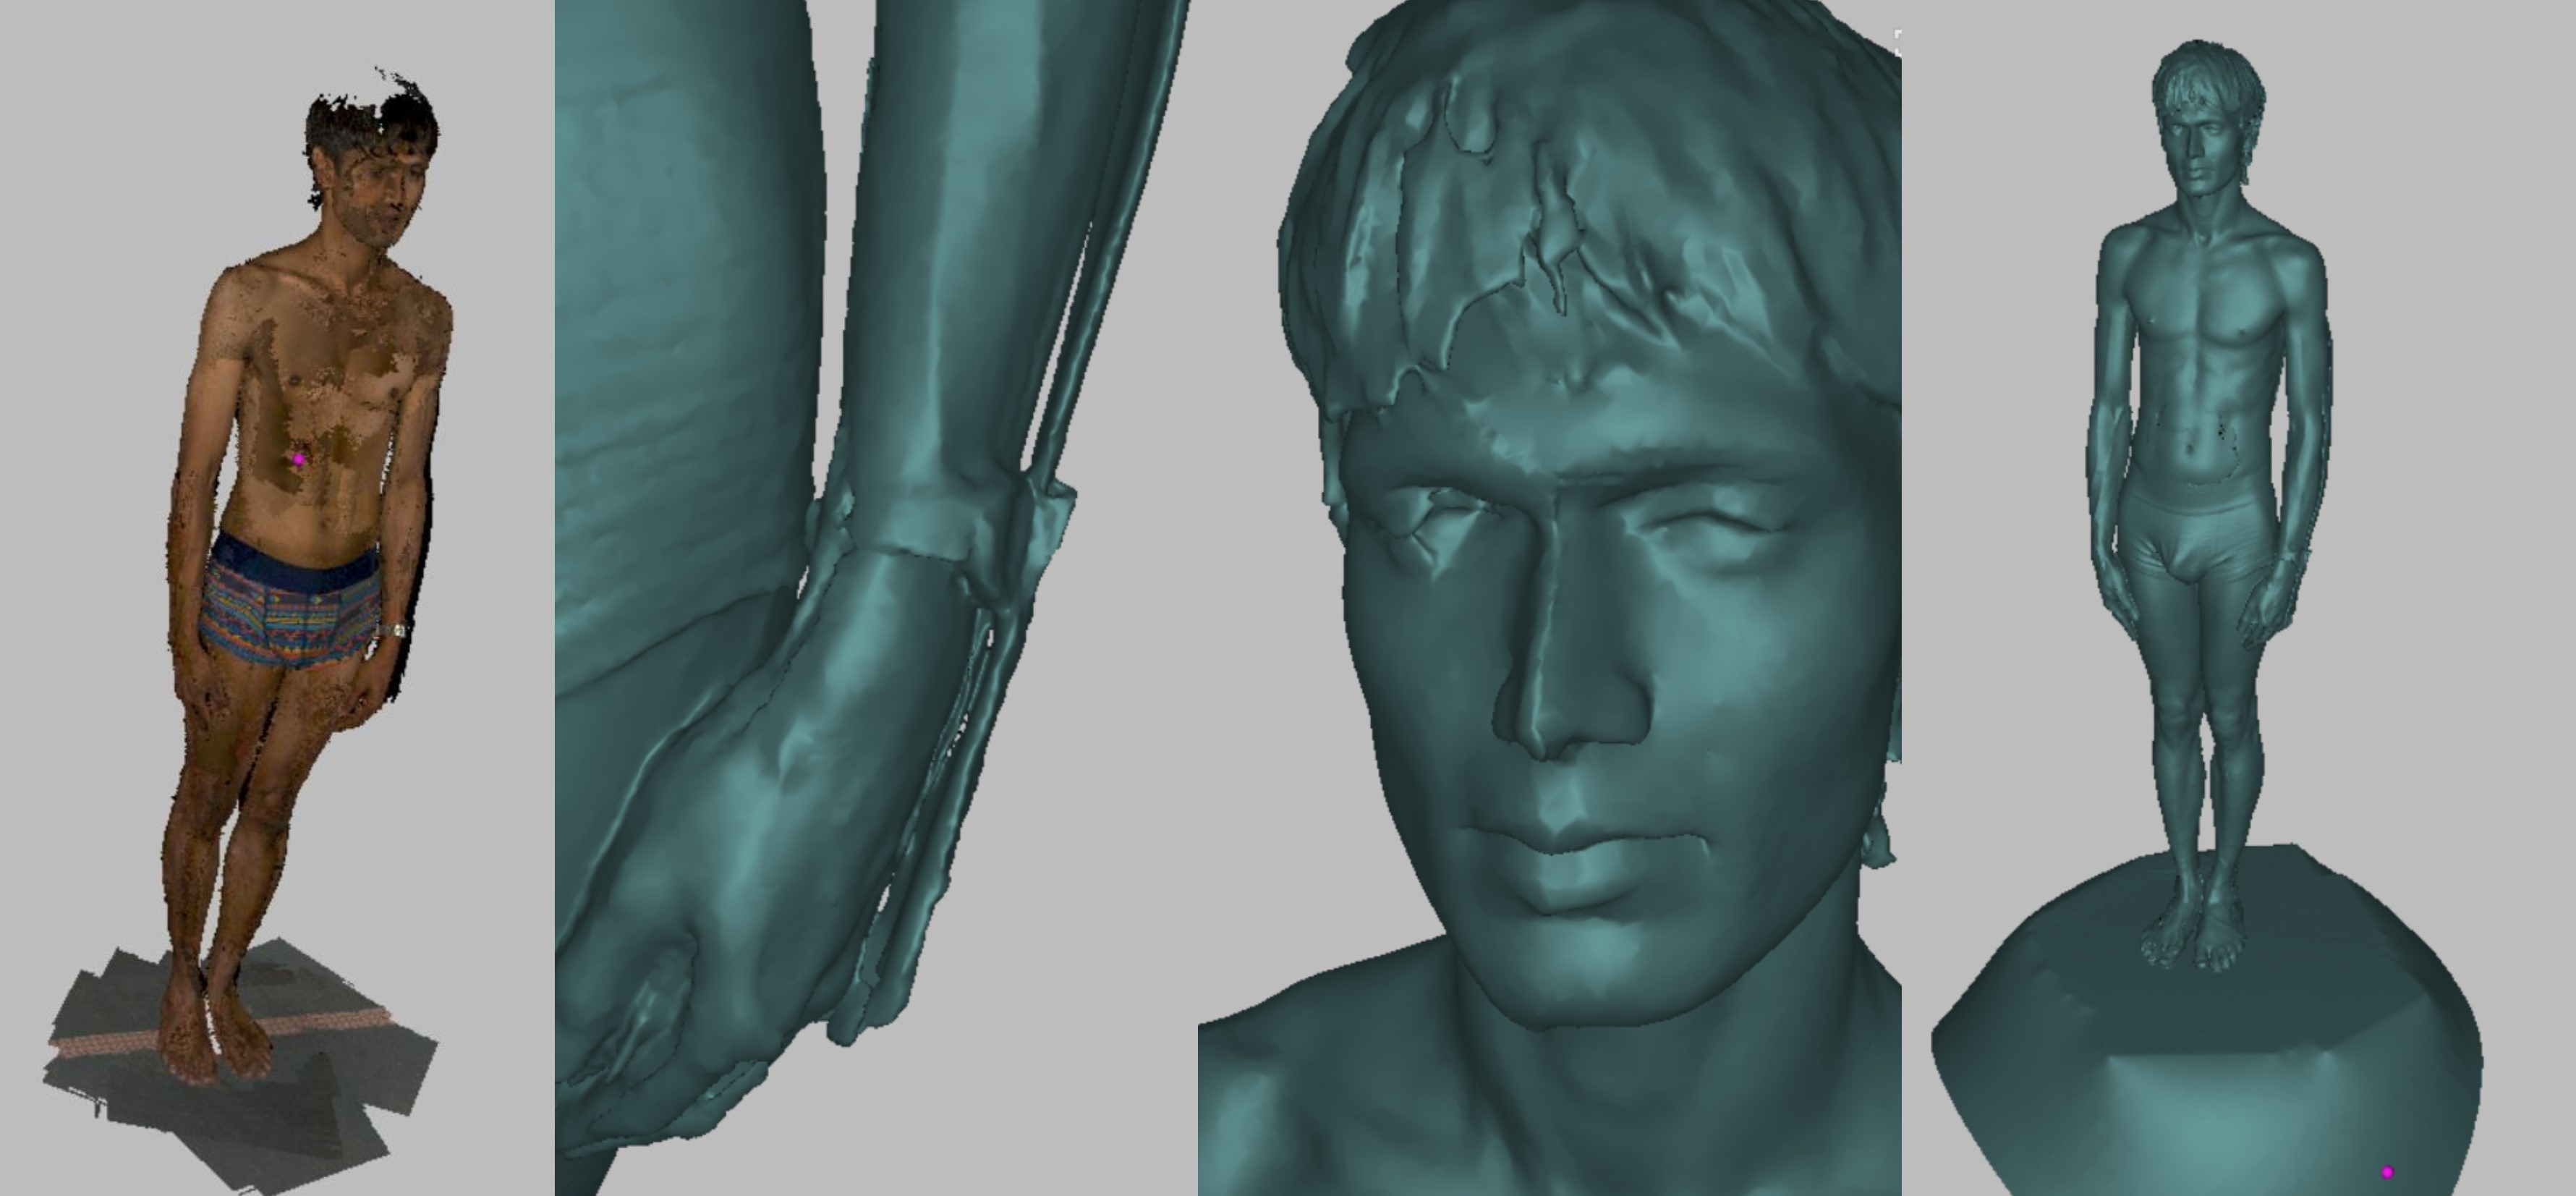
This can take a good 10 minutes depending on the model or if you are using texture, but the results are more than worth the wait. There are also some artifacts to cleanup which can be shown in the middle images. The editing tools in this program are simple but effective. They are all subtractive, so there is no adding additional material and comprise of: Positioning, Transformation, Smoothing, Eraser and Defeature. Once the model is edited to satisfaction, just a few algorythims to run which for 90% of the time are: Remove small objects, Hole filling and finally export. There are options to reduce the mesh or run an isotropic remesh algorythm, but for the purposes I have used these scans for, this has not been necessary.
The best thing about this program is once you have completed the above you will be exporting.. ready for this... a watertight non-manifold mesh. Perfect for further editing and fabrication!
Here is an example of the second scan I took and the process I did to align it manually
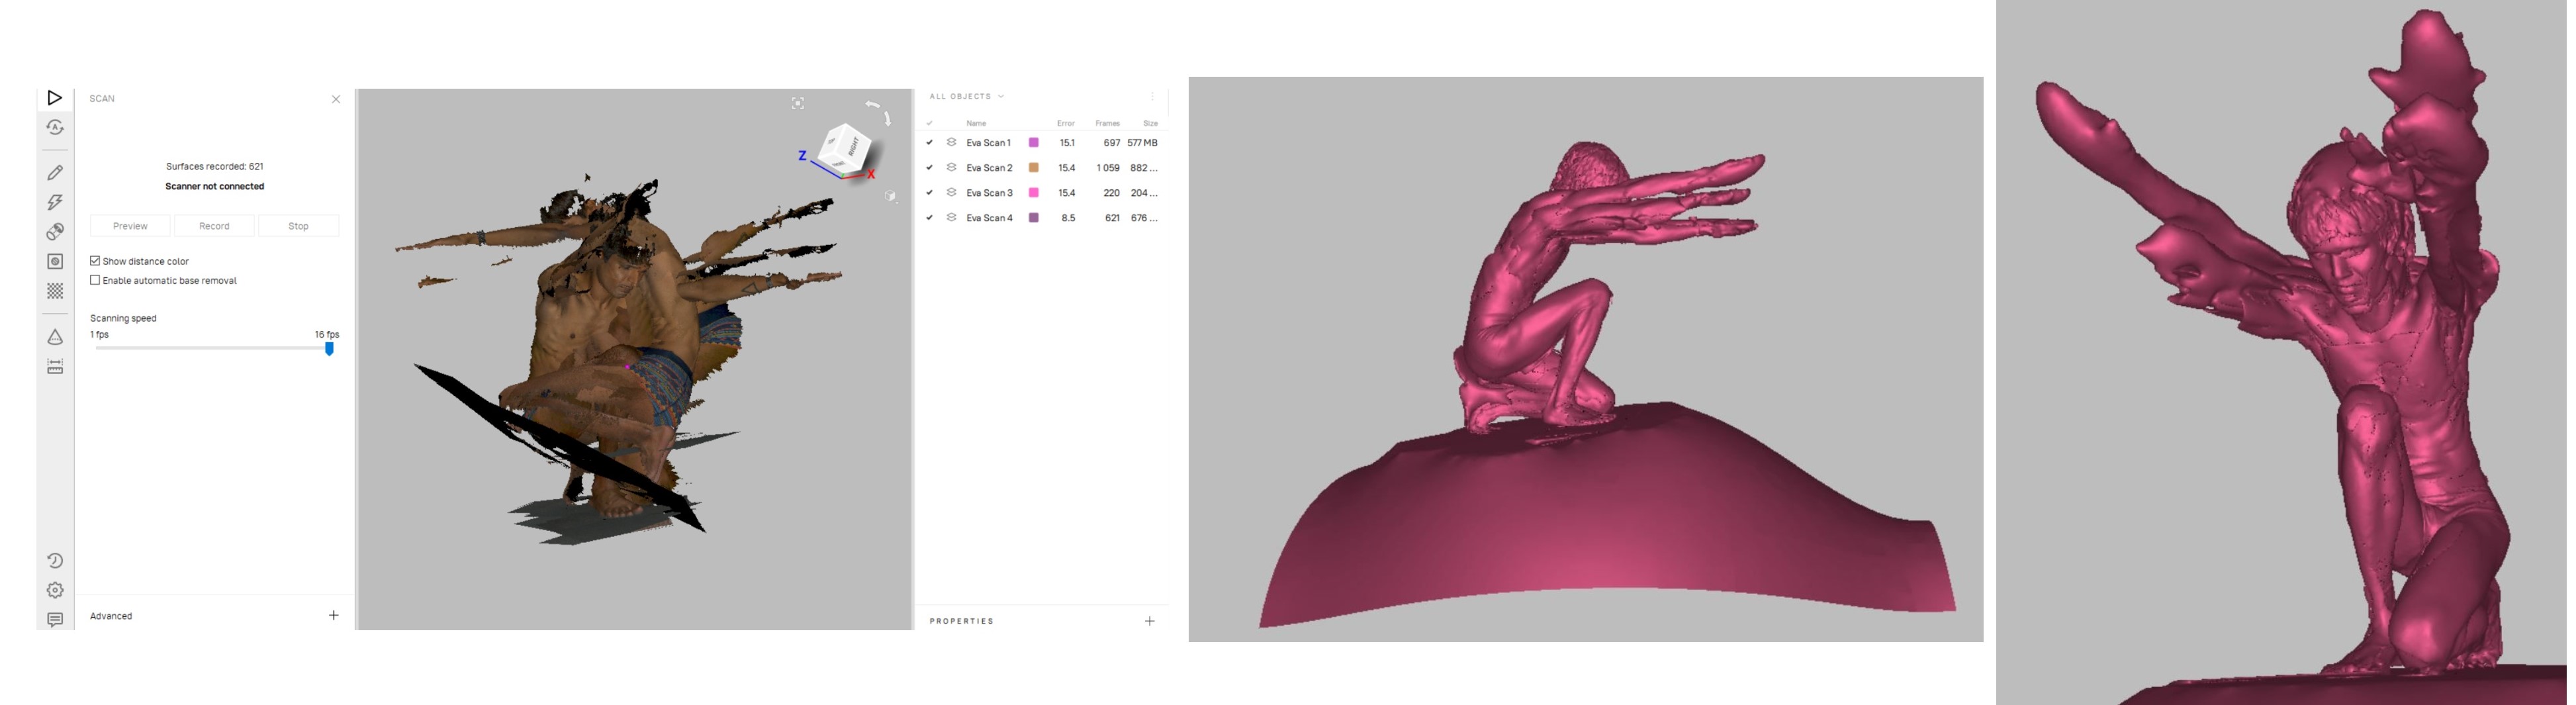
The scans I got were not great, if I had managed to capture more of the under arms, I might have a look at saving and using this model as it is quite interesting, but for the state it is in, I will leave it.
02_Fabrication
Firstly - token 3D print totem:
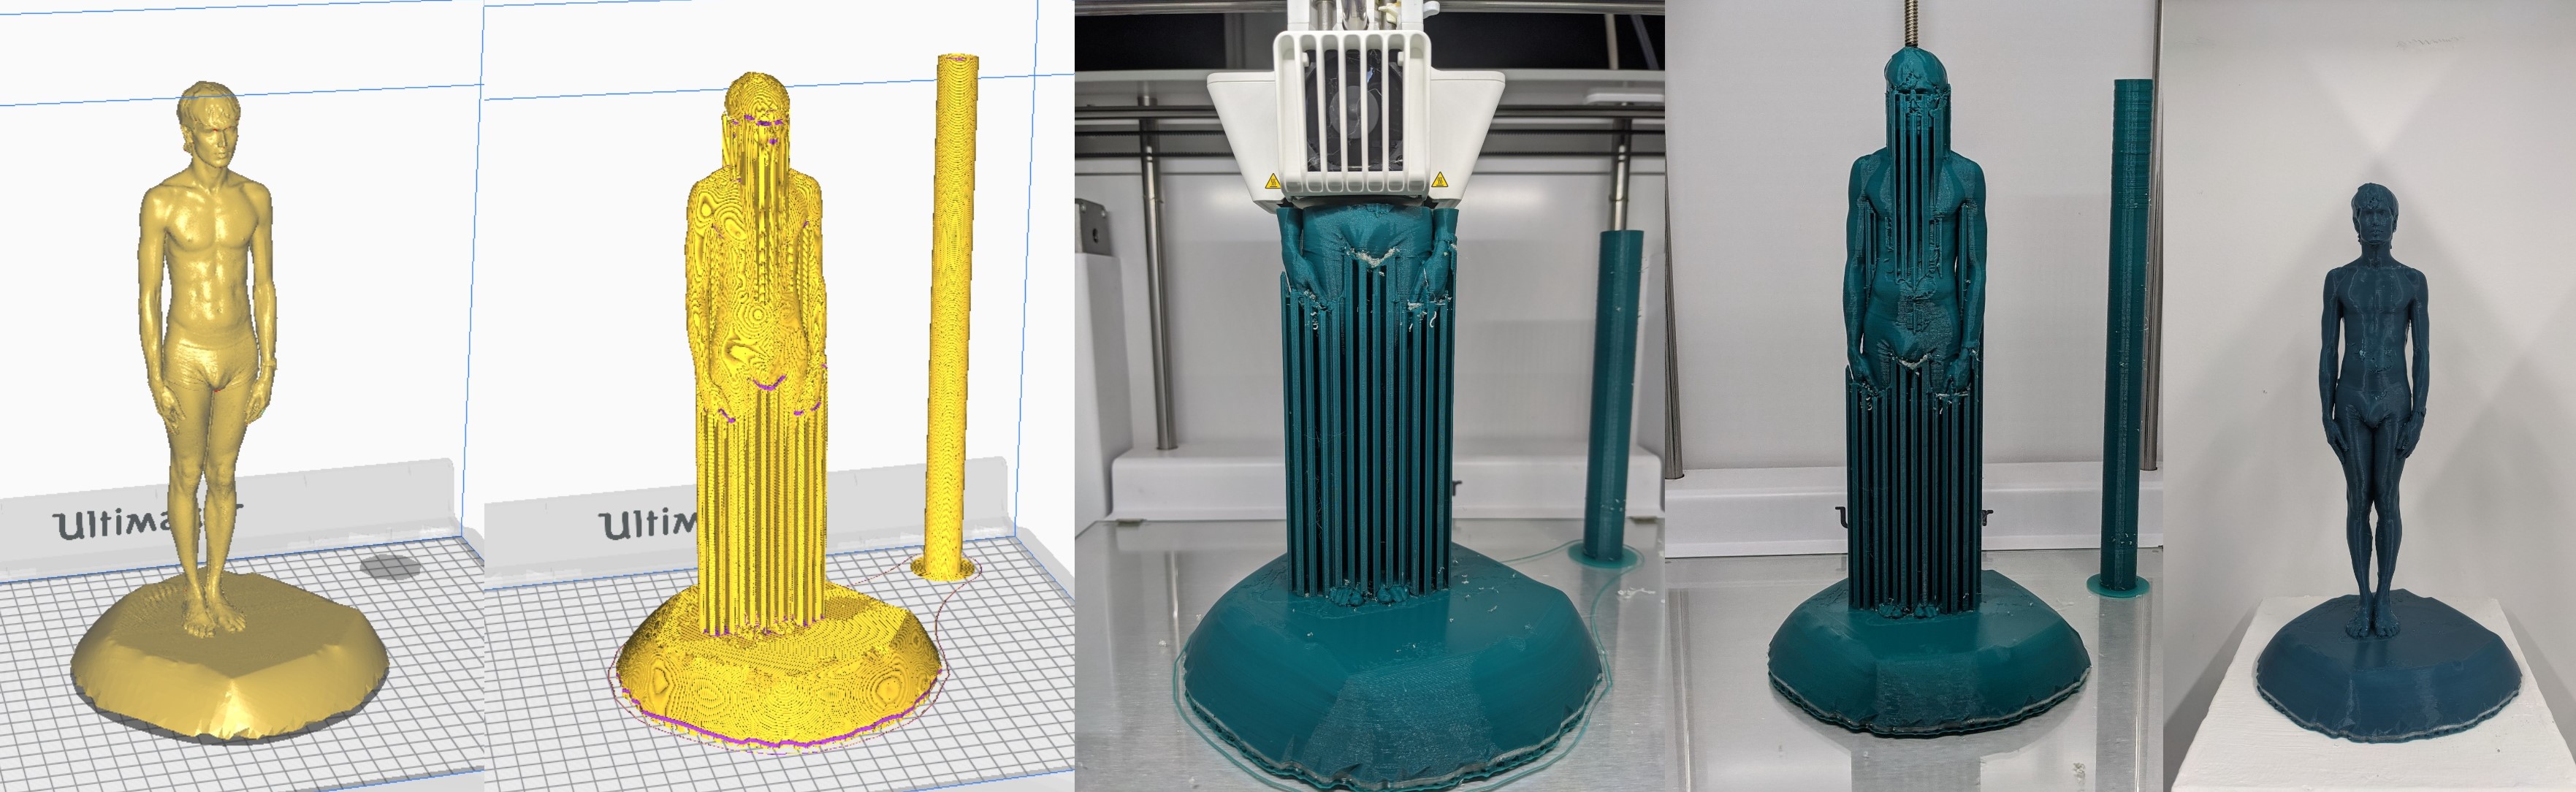
I used the ultimaker S5 to make this at 0.15mm layer height and took advantage of it's dual material capabilities, using PVA material as the interface. I have trouble with the nozzle getting blocked with this material and I think the reson for this is allowing moisture to be absorbed by the material. Always store your material correctly! I believe it clogged about half way through which meant there were some collapses of geometry and some of the geometry was attached to the supports which left a rougher finish in places.
On to the main project. I wanted to use card to make a full size model. I love this material as it is so cheap and flexible when it comes to tolerances. I also really like how the light passes through the corrugation.
I would like to make a 'stack' model, but with a gap between each 'stack' allowing for even more light to pass through. I also want to split the model up into sections and then have the stack running orthagonally to surrounding stacks.
For this I will use an excellent program called Luban3D. It is a relatively new program, it is pay to play, but if you have a student email you can get a recurring free 6month licence. It is a tool truly for fabrication and you can speak to the developer directly on the various facebook groups, which hold a great community. It has many different functions, some of which quite unusual and specific and there are always updates as the developer responds to user requests.
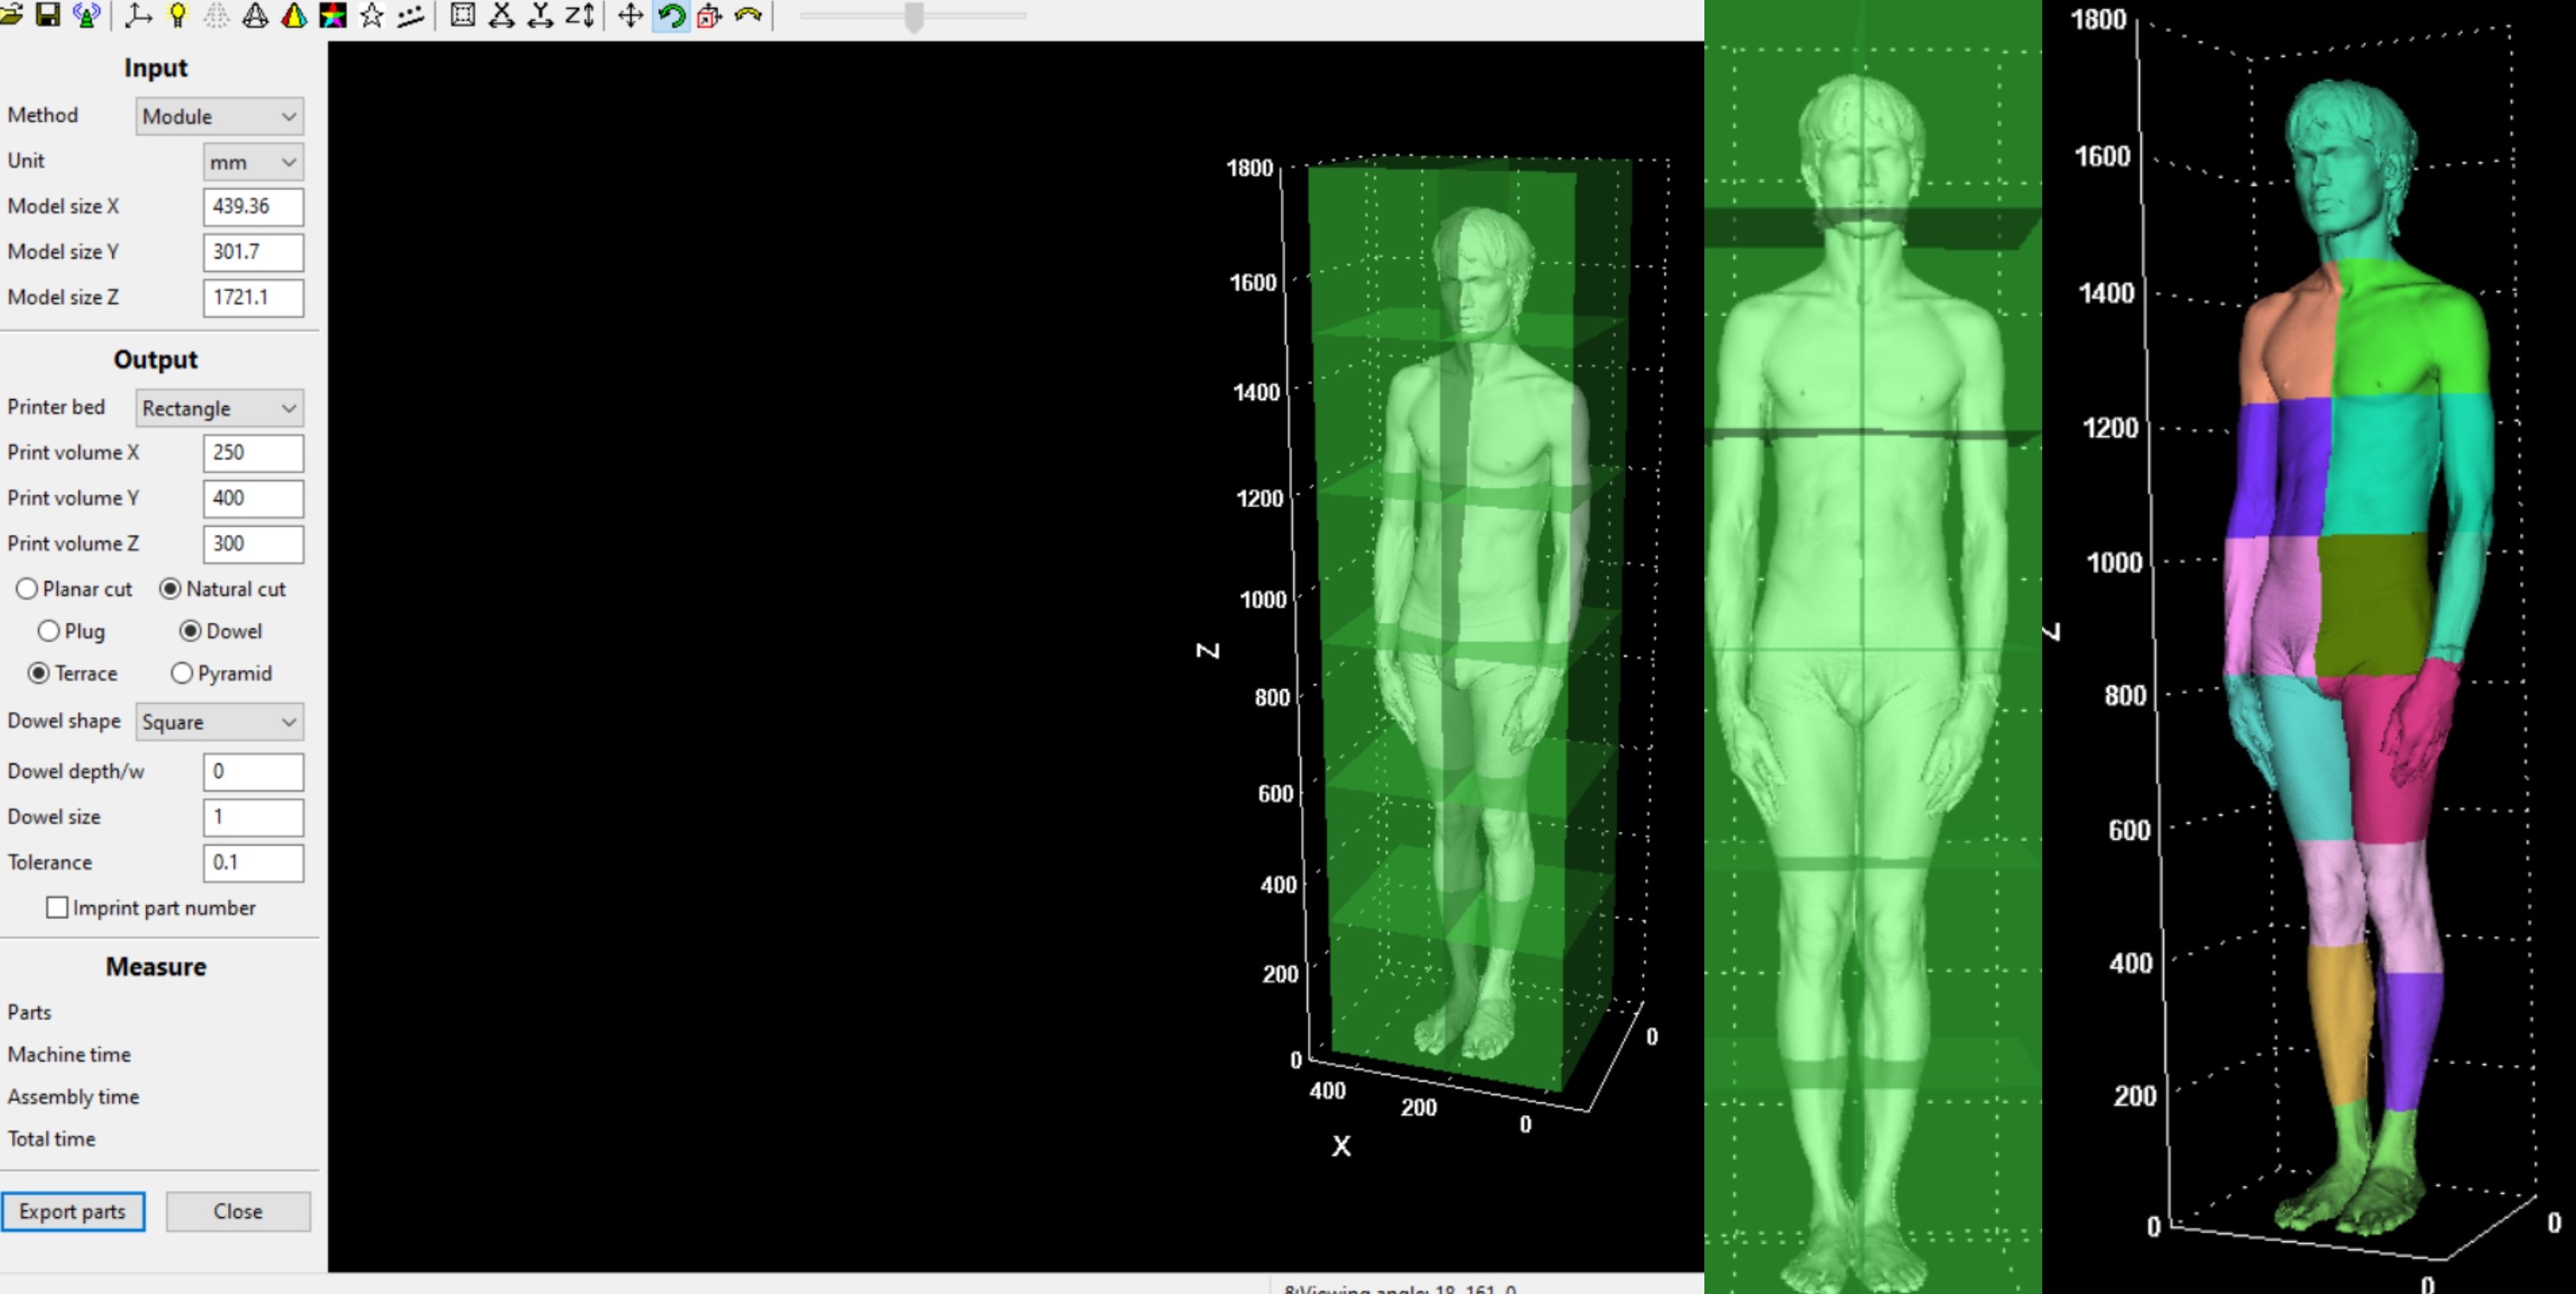
First I loaded to file into Luban to split the mesh into chunks. This is a function that is used to split large meshes to fit into a 3D printer usually.
I wanted to use this program again to make my 'stack' model. Unfortunately it would have been a solid stack which wasn't what I was looking for. So with this, I took my efforts to Grasshopper. As usual, this is a rabbit hole that I enjoy spending too much of my time in. It was more of a challenge than I first anticipated, but that is fine.
PICTURES AND FILES TO FOLLOW
Once I had the grasshopper definition down, I went to the layers to test the tolerance. I am using 9mm dowel to hold this model together (ideally 2 rods per piece for ease of alignment of the layers). I tested several diameters of the spacer and also the laser speed and power for this card. The card is advertised as 3-5mm, but seems to be relatively uniformly 4mm.
Speed 40 Power 35 diameter - 8.6mm
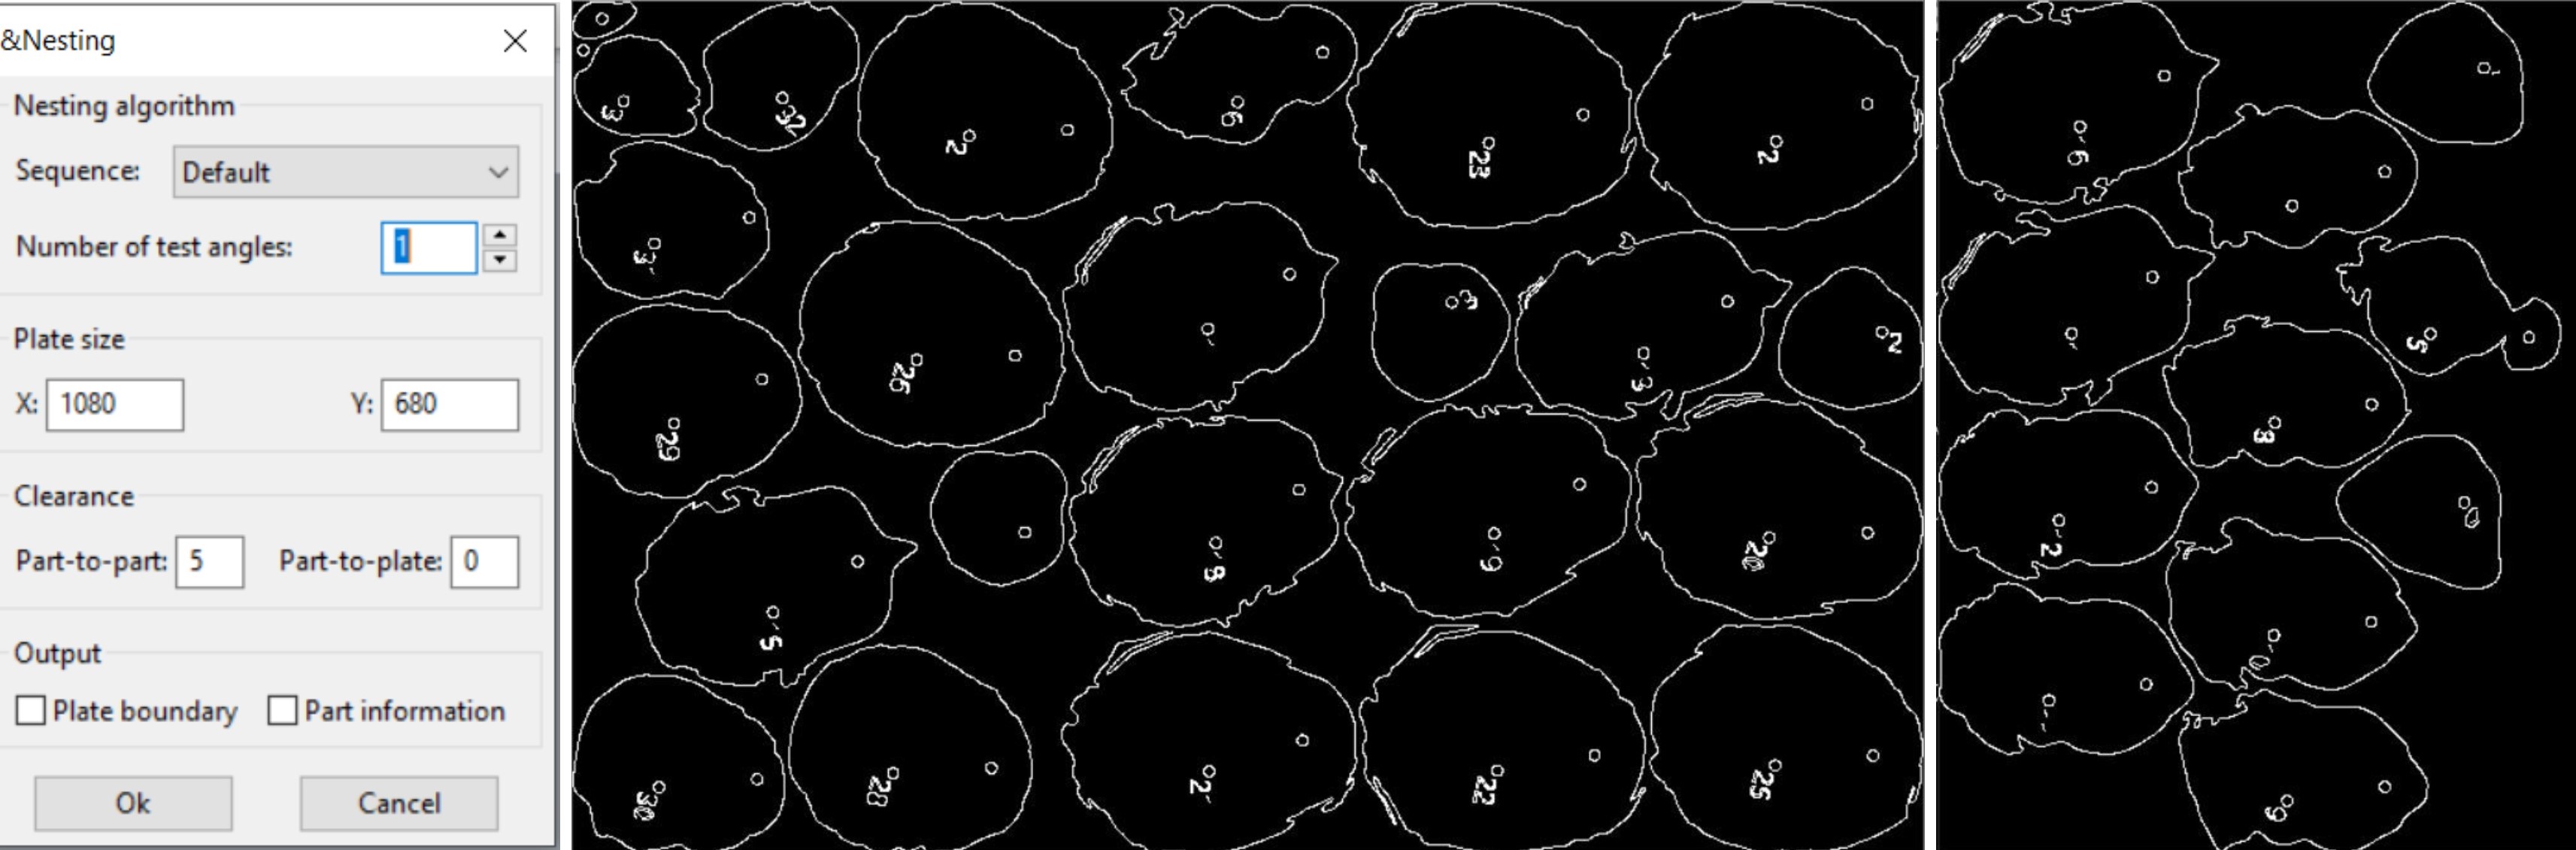
After updating my grasshopper definition with the diameter and material thickness I baked and saved out the vectors as a .dxf file. From here I went into Luban to nest my pieces. Just having this feature blew my mind for this program, I had searched for a long time for an affordable nesting program and this fits the bill perfectly. I can choose the number of different angles that are used in the algoryhtim. I want the corrugation of the card to all be orientated the same way so I used '1' for this value.
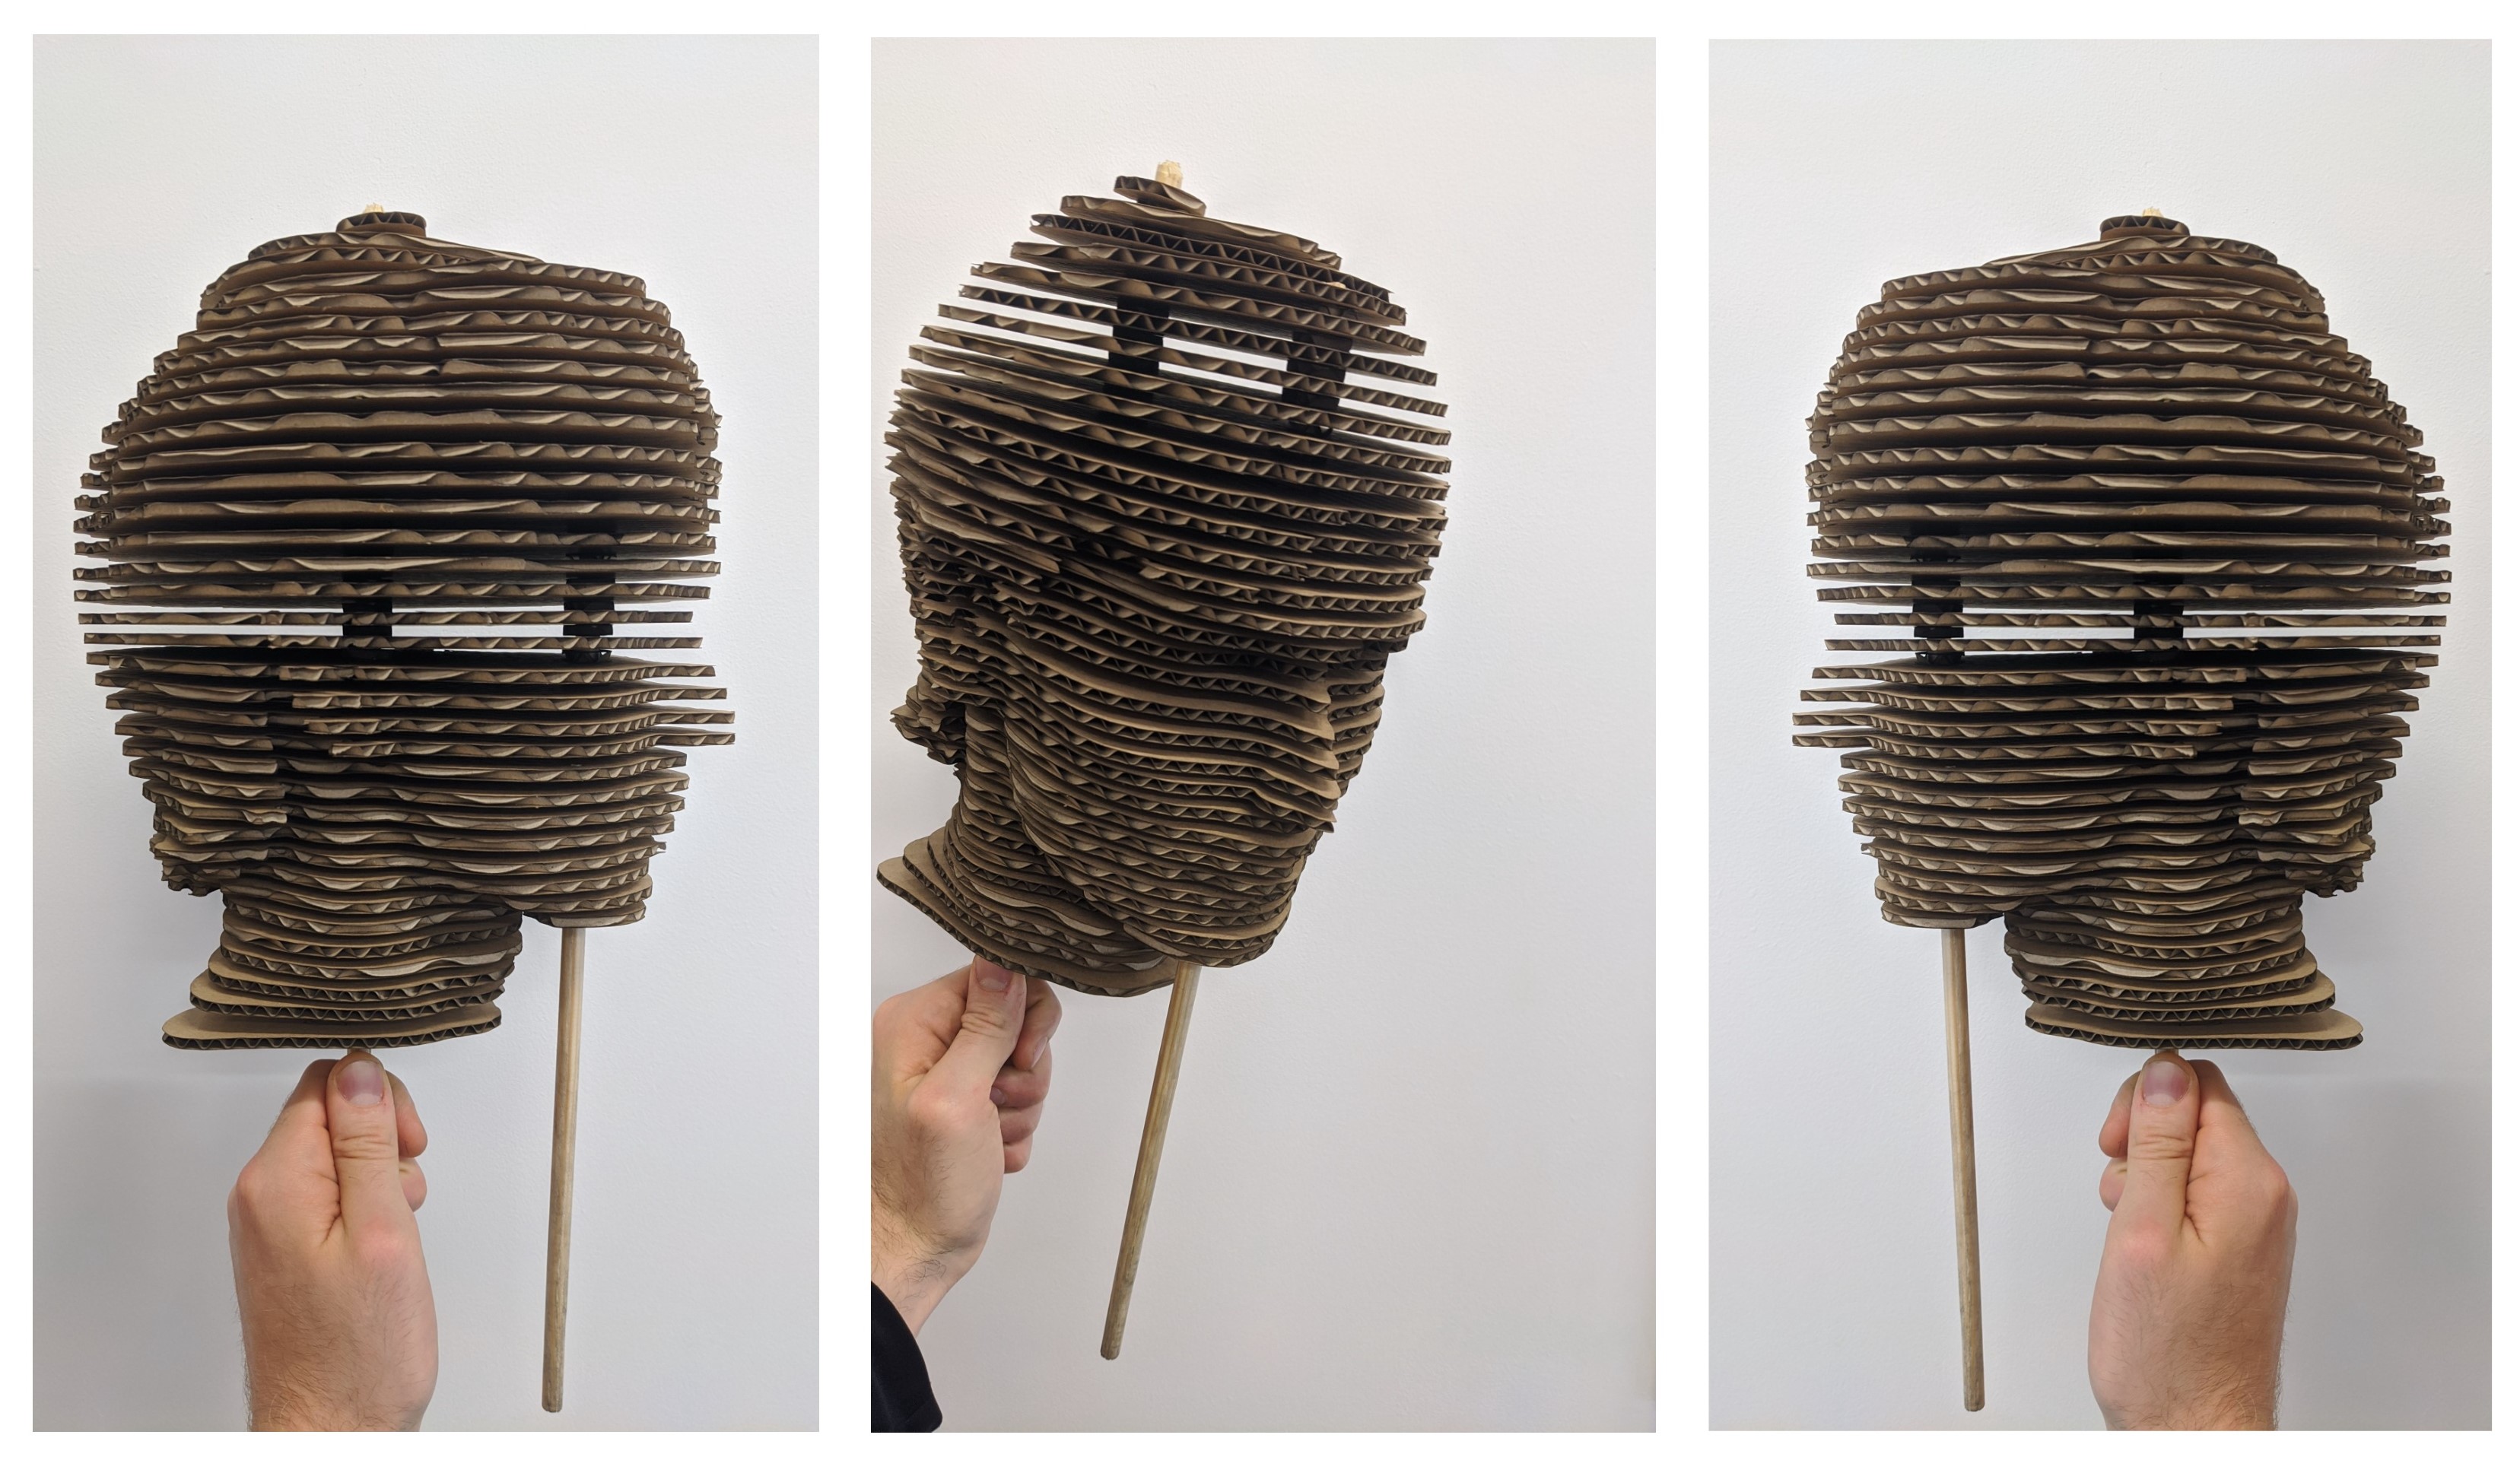
At the time of writing I have only managed to code the head, but I will continue with this for the rest of the body and upload the file.
Other Experiments.
I used the grasshopper plugin Fox to simulate filling the body with a modular piece. The stature of the body meant the algorythim had to run many times with small pieces. An interesting render, but 7000 pieces is my limit (this totem would require 7006).

I also had a play with this on TinkerCAD. I recommend this to students who have zero knowledge of 3D CAD as it is browser based and has great online tutorials. It has been a fun program to learn and although basic, you can make some interesting shapes with a simple set of tools.
Also you can make stuff out of lego
IMG LEGO TINKER CAD