2. Digital bodies
How complex is our body? This week I worked through the concept of the human body, starting from the idea of digitalizing the body itself.
How could we digitalize a body? What does even mean?
The digitalization of a human body, as every digitalization process, take some steps and obviously some risks. Clearly nothing regarding the human health, but just the process itself and mostly the results we're expecting from this procedure.
INSPIRATION
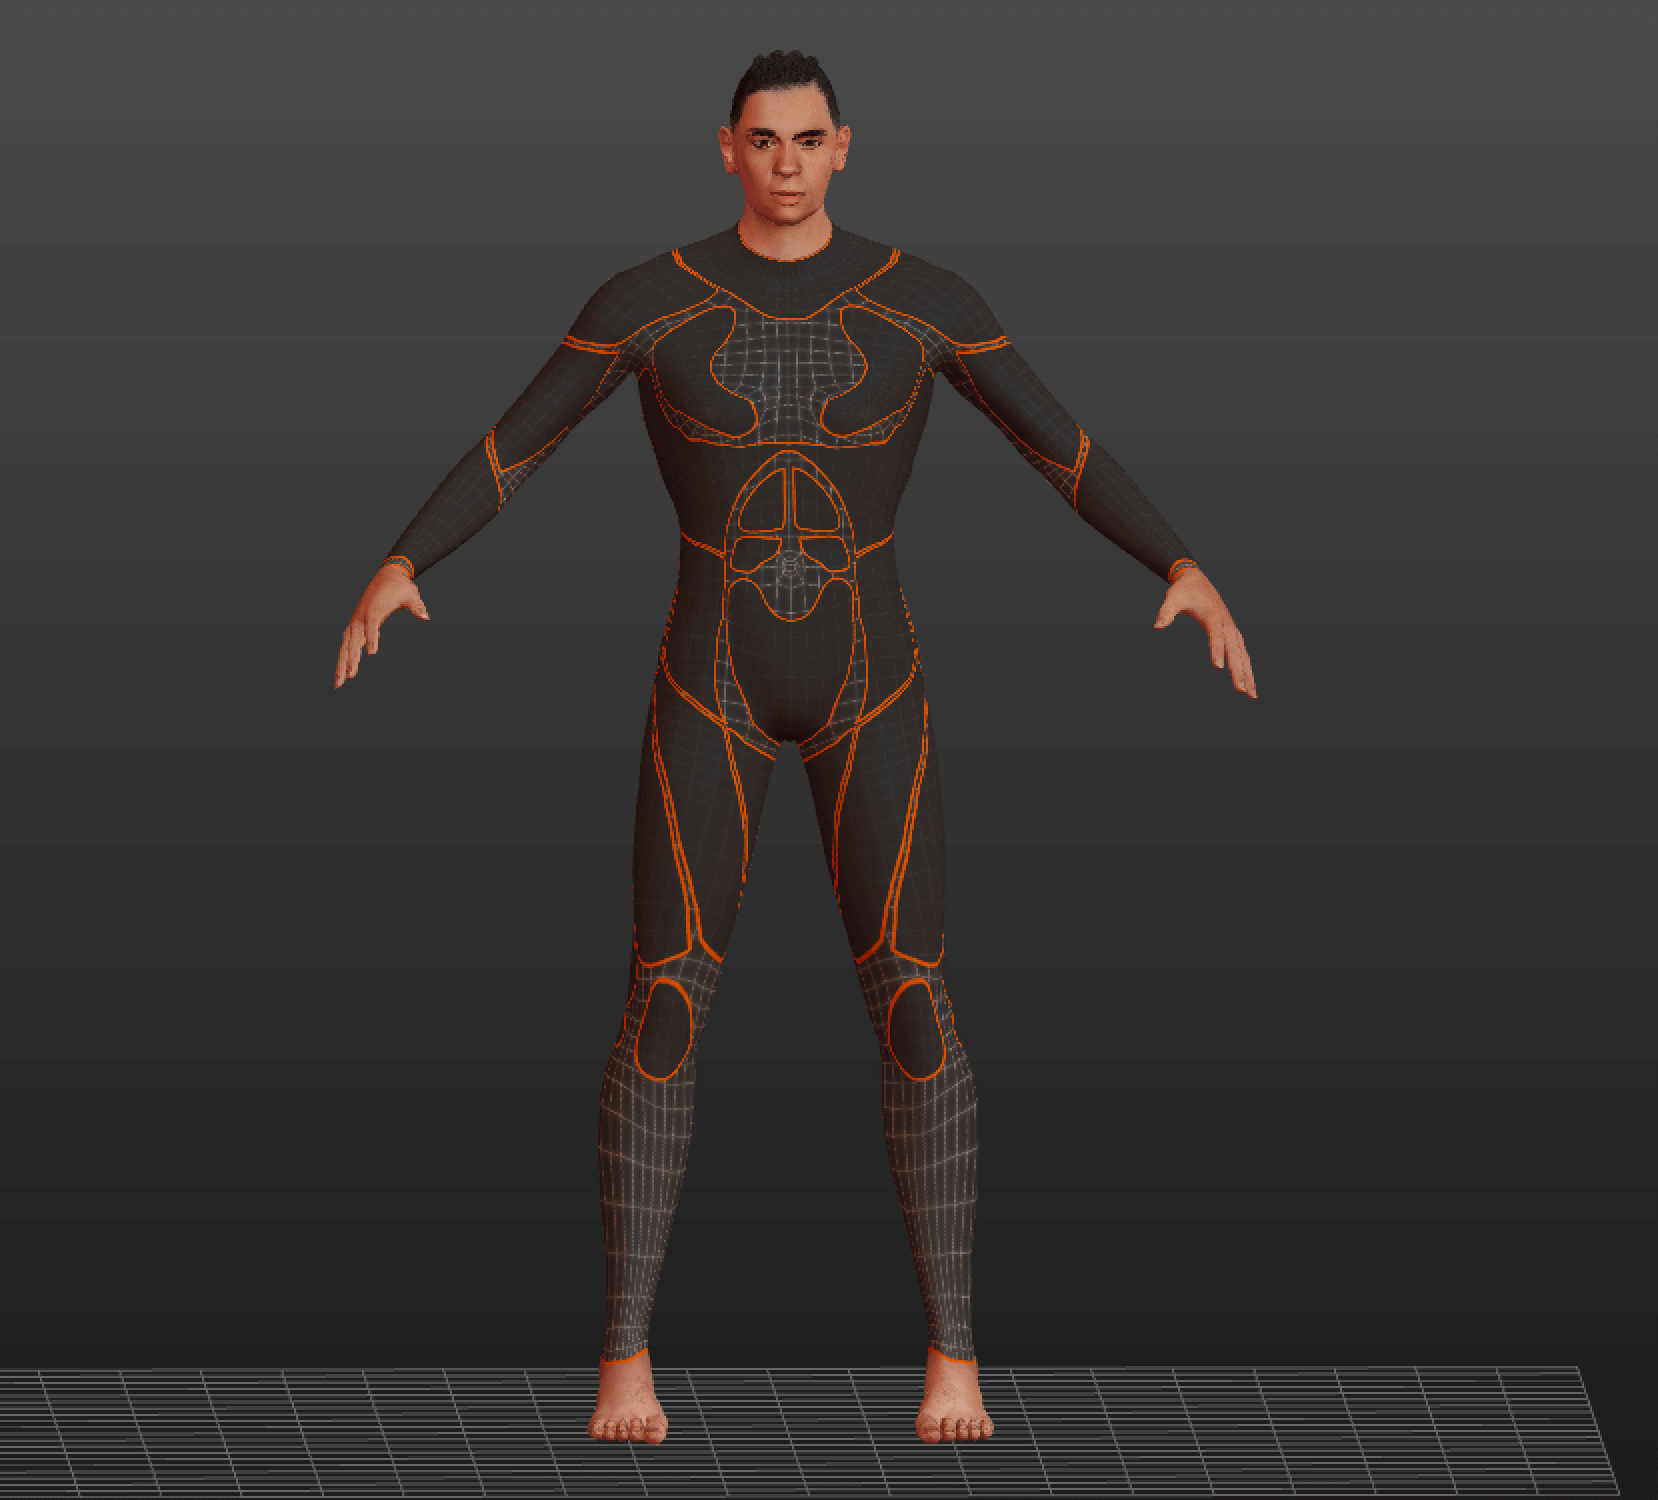
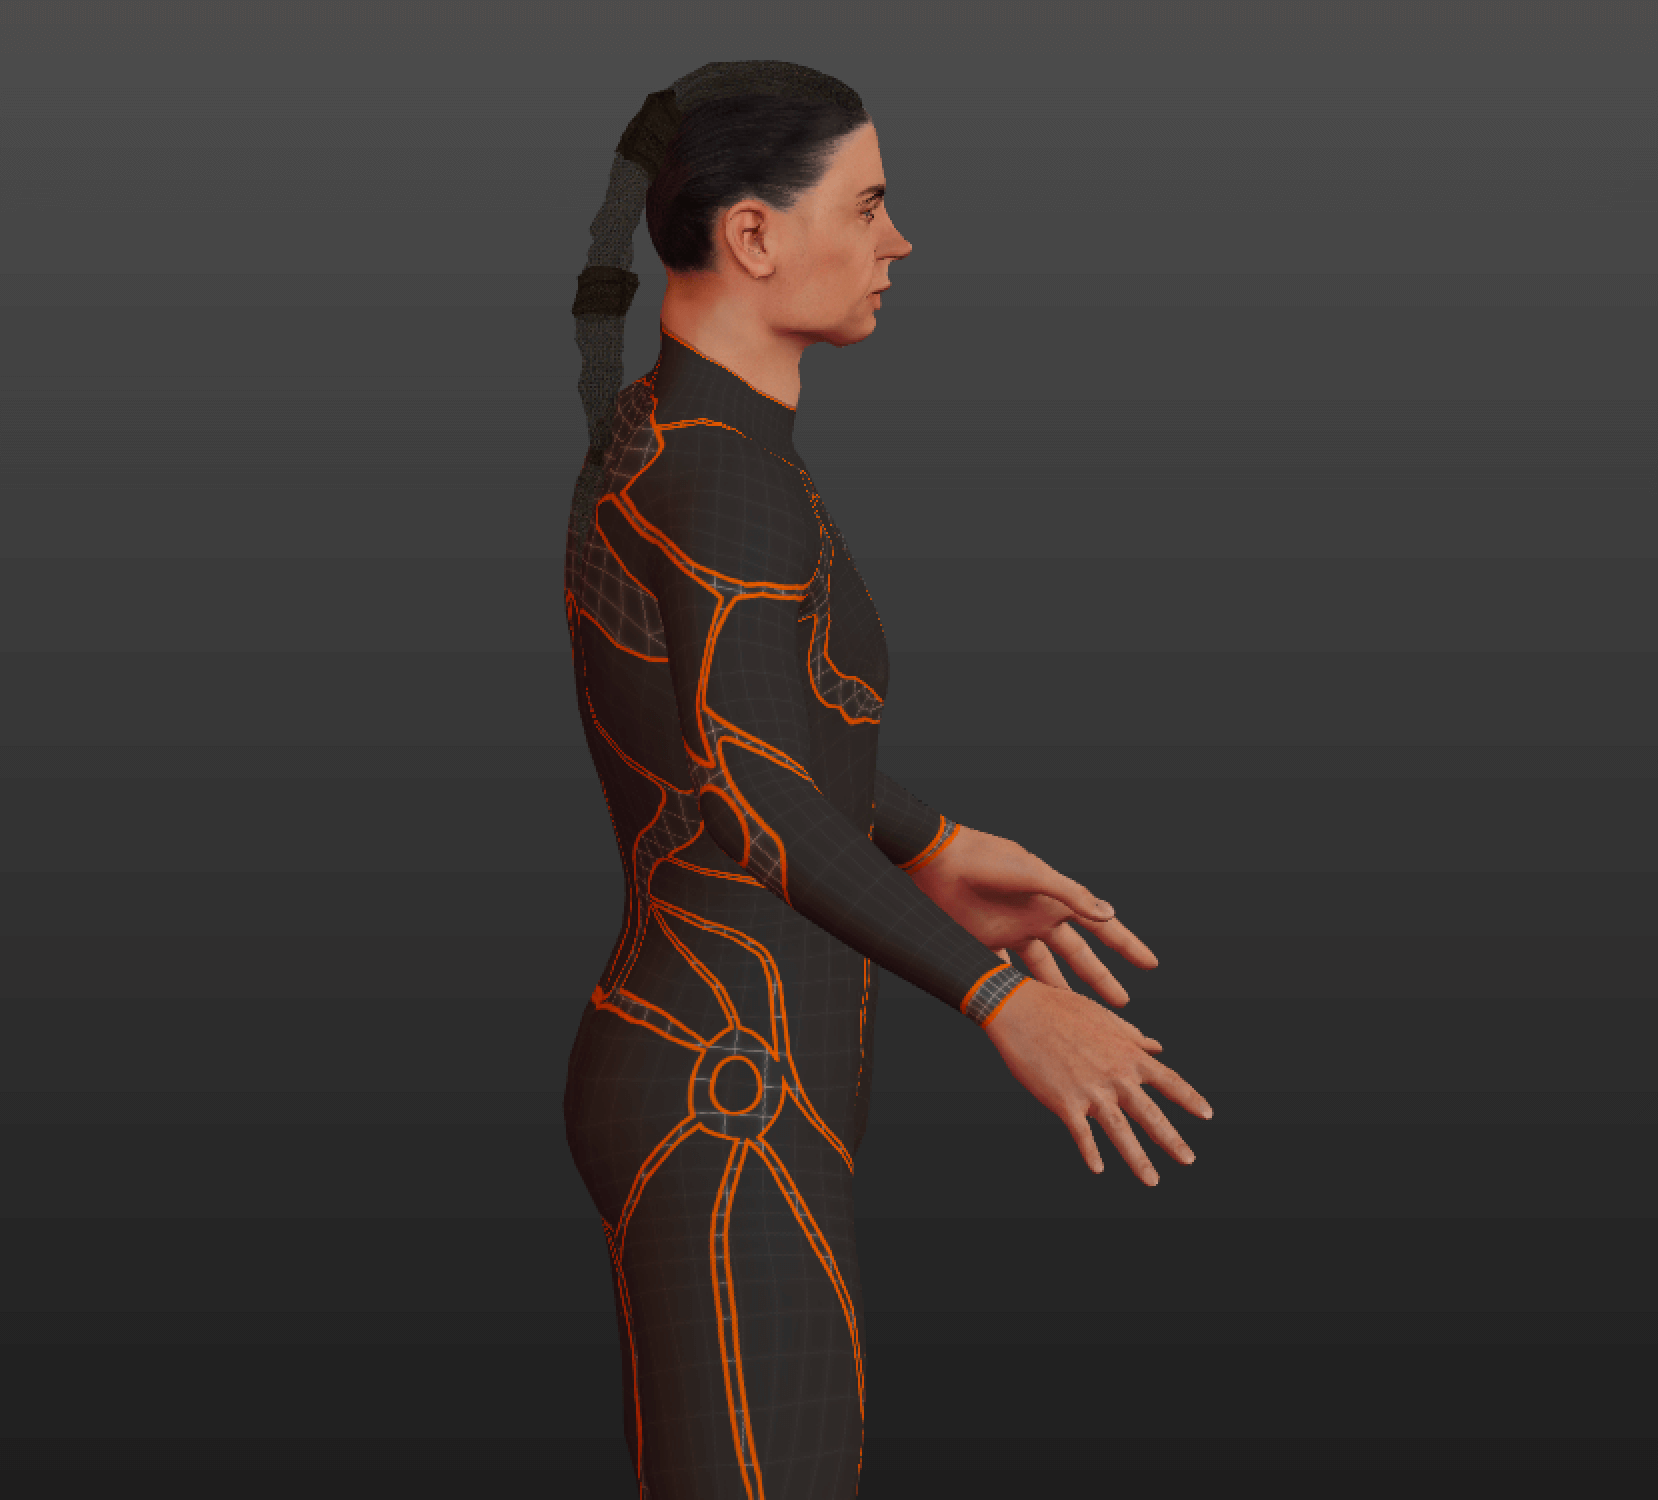
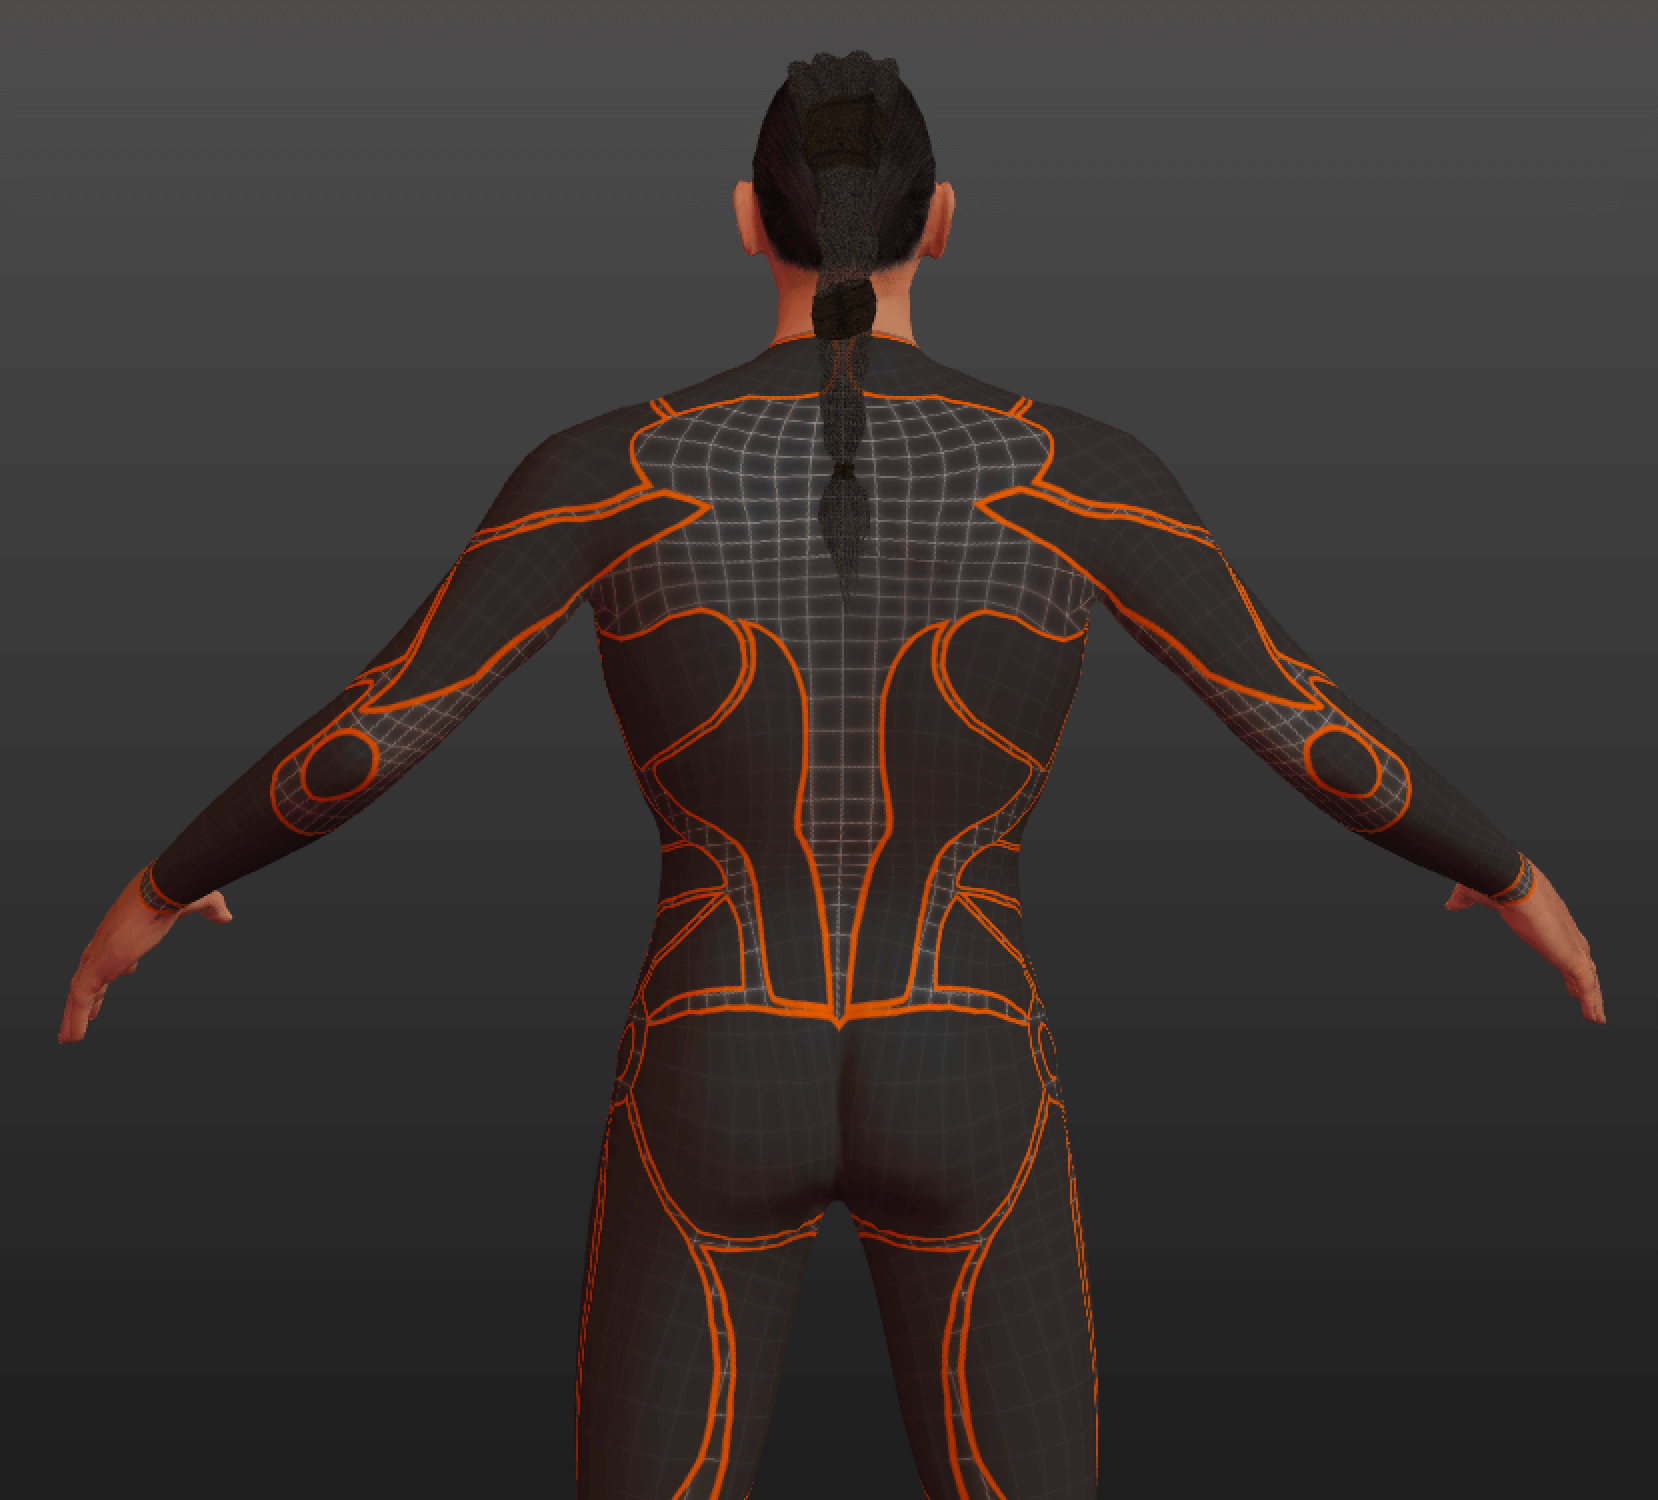
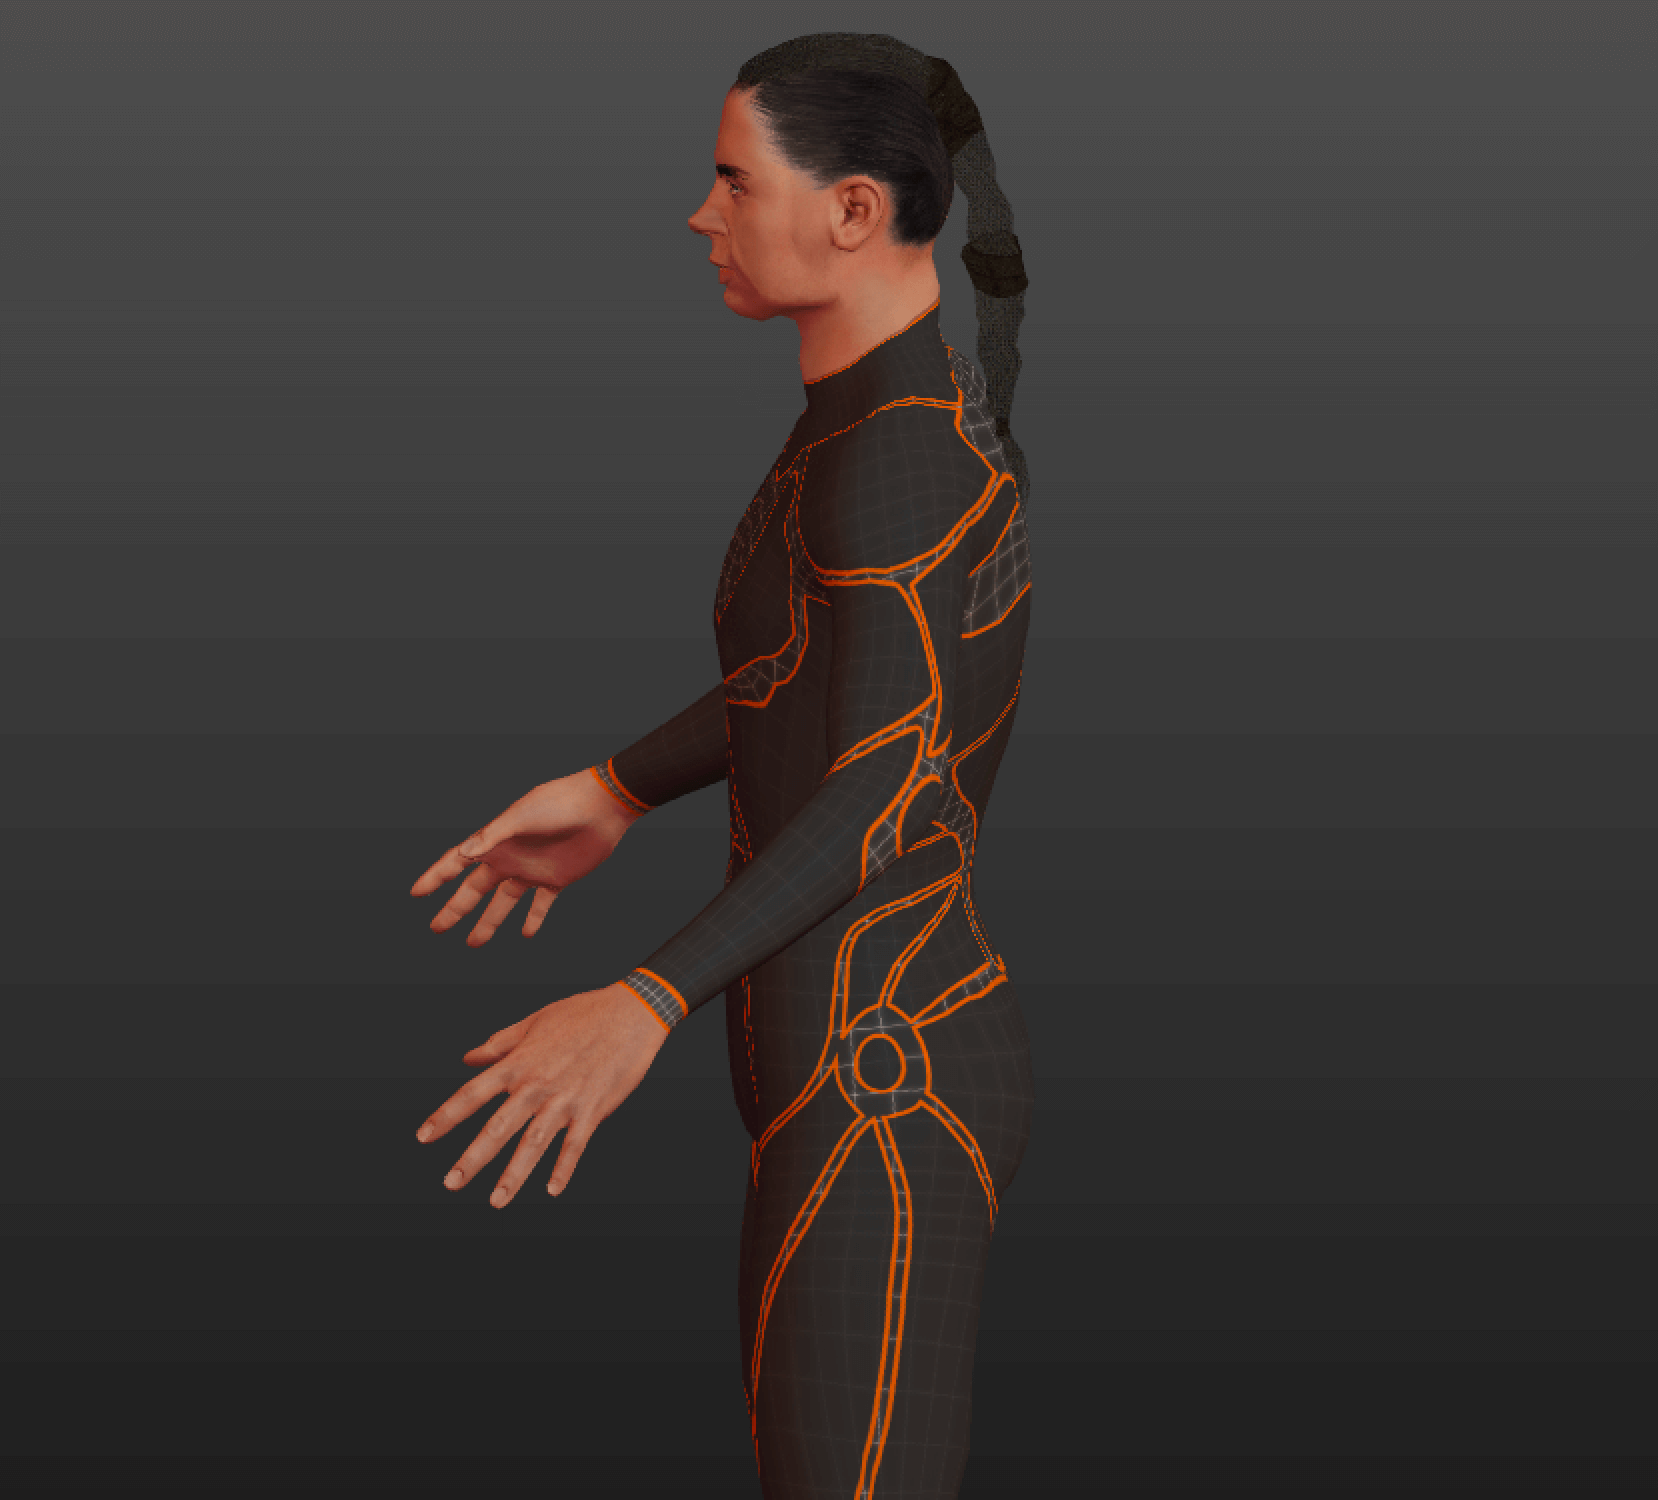
The human body, especially in the art sector is mostly being chanted or statuary. My goal was working with a body that has asimmetrical proportions, with deformed details and shapes. I was try to mold and build a duality physique, to symbolize the opposites with exaggerated and provocative forms.
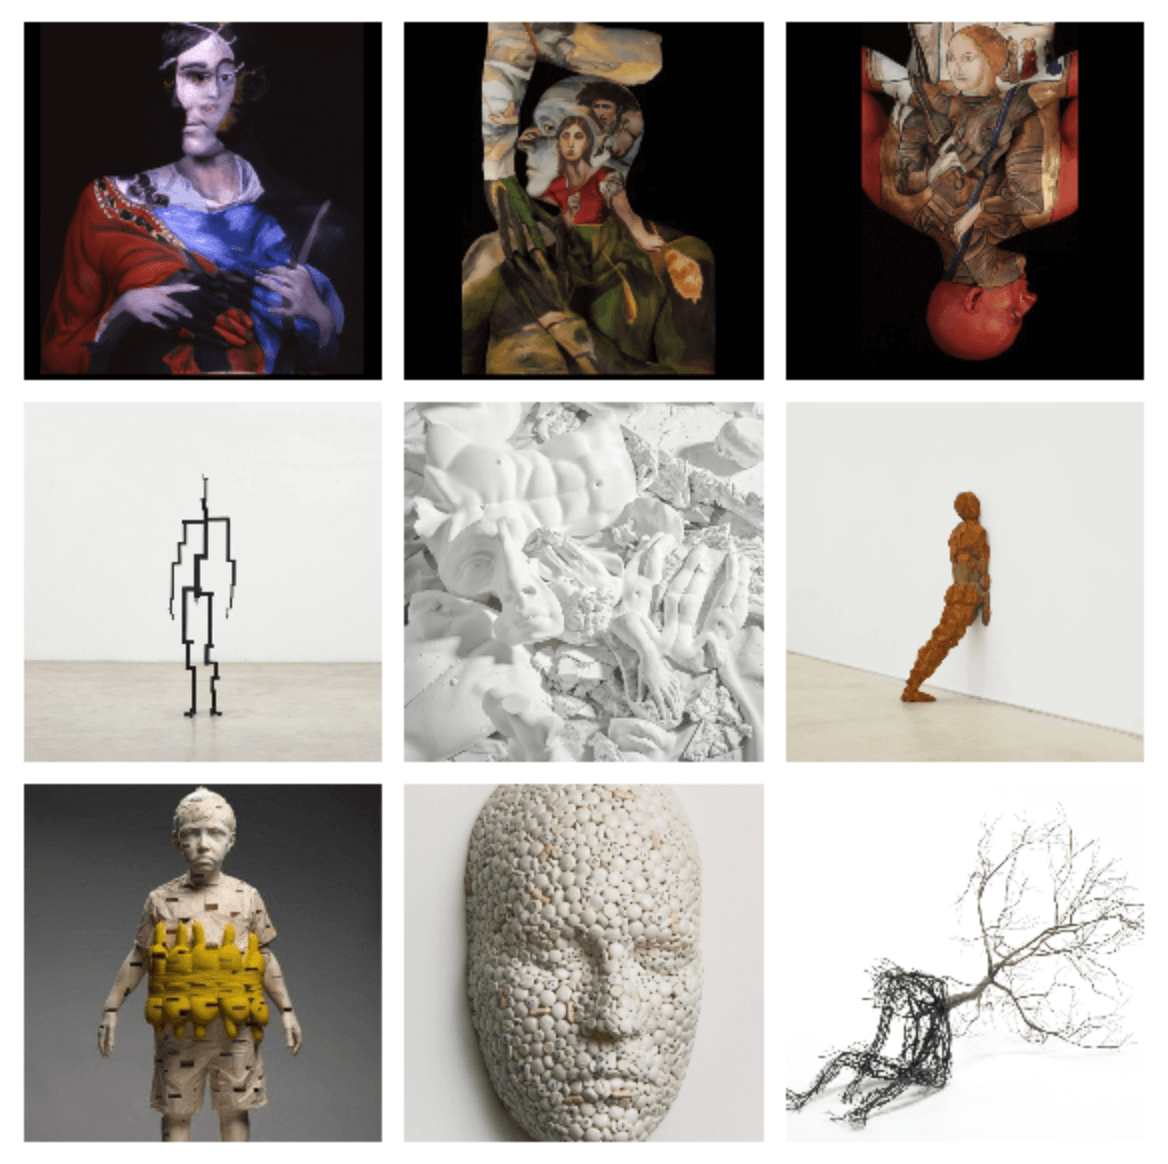
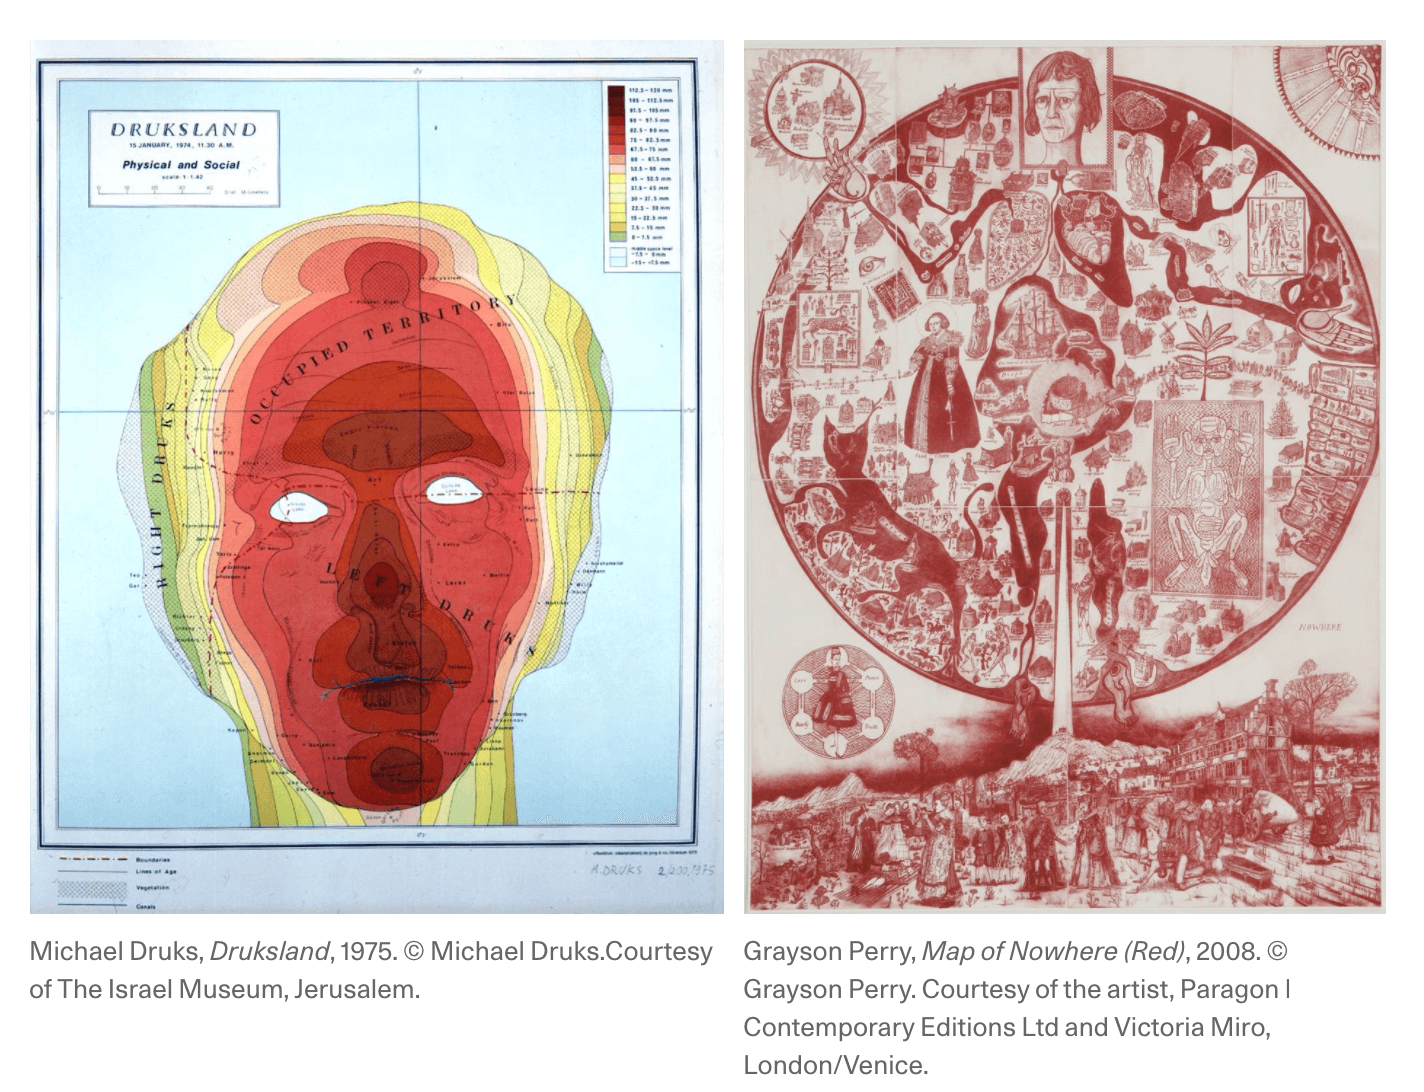
credits:
Anders Krisar Eugene Thirion Gehard Demetz Ryah Hopkinson Antony Gormley Sun Hyuk Kim Michael Druks Grayson Perry
STEP ONE (SCANNING):
HOW TO SCAN A BODY
1. 3D SENSE: for a "high quality and resolution scanning" (there will be always some imperfections)
2. MILKSCANNER: WHATTHEFREAK?! YES! Exactly, a milk scanner is a scanning process where the milk (liquid) would be used as the "negative part" of the object we're scanning,so basically the liquid "slices" the item in layers.
3. 3D SCANNING APPS :
SCANN3D :
I tried to scan myself, with my girlfriend's help.
This was the result 
QLONE : I couldn't try it because you need to print a special black and white paper mat. The mat looks like a QR code and is used by the app as a marker.
4. PHOTOGRAMMETRY :
Here you can find some apps to download for FREE, either for 3D SCAN and PHOTOGRAMMETRY :
-3D SCANNING APPS for IOS/ANDROID
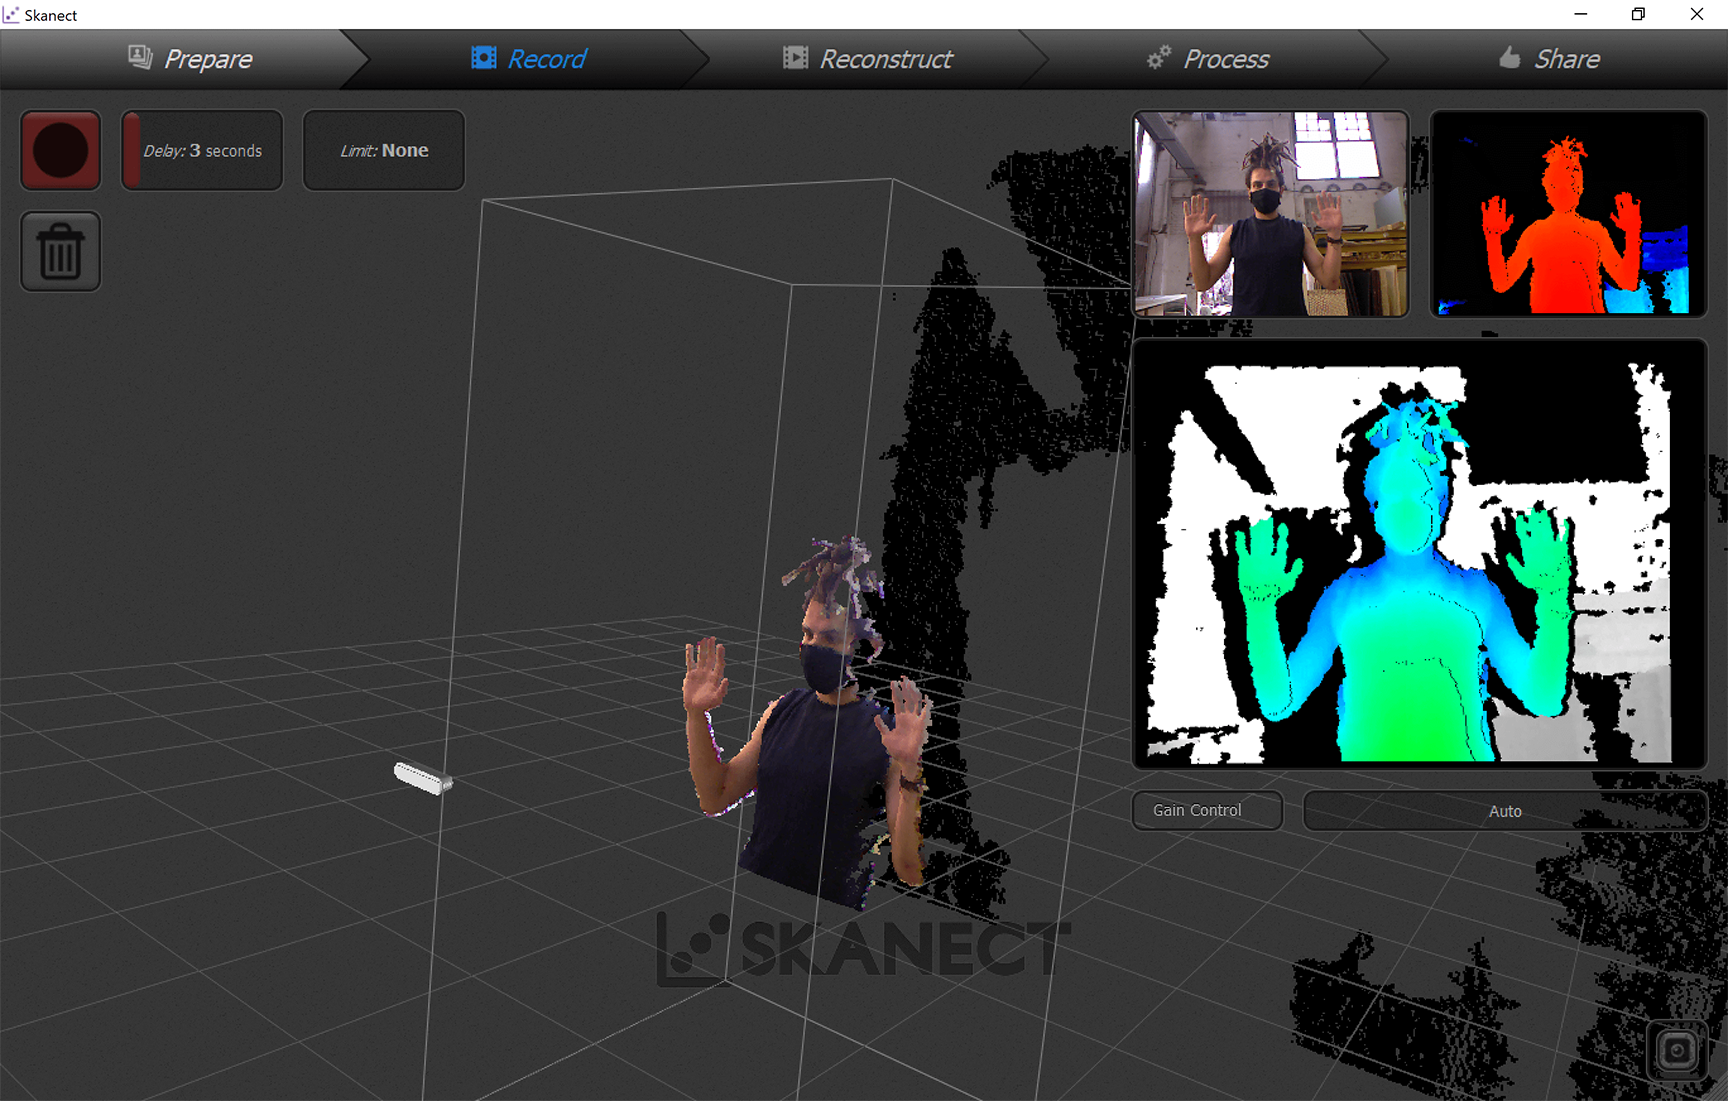
5. KINECT device from XBOX + SKANECT software for processing the scans.
As well as other processes of scanning, the Kinect procedure requires a lot of steadiness and patience to get the best result
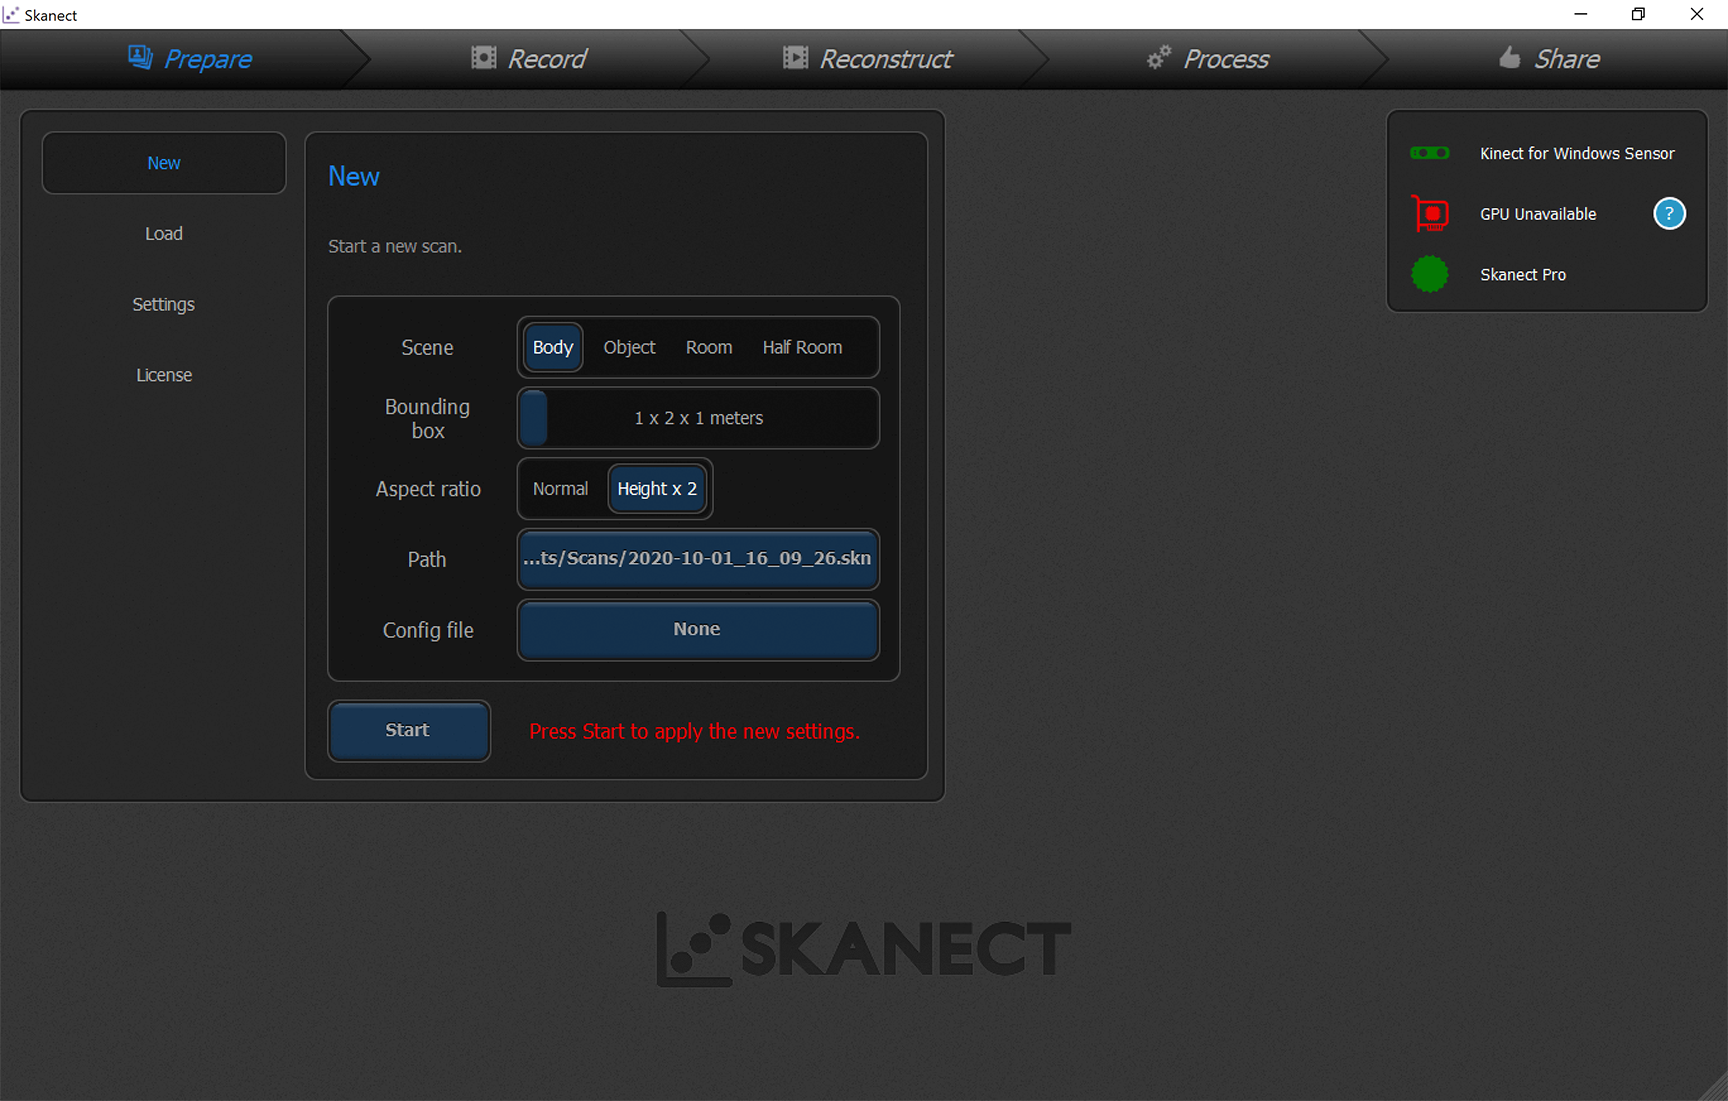 a. set up the dimension of the object you want to scan
 b. place the object inside the box so that the object is GREEN on the window of the screen
 c. start the scan and move around the object.
( you can either move around the object holding the kinect or keep the kinect still and rotate the object.)
c. start the scan and move around the object.
( you can either move around the object holding the kinect or keep the kinect still and rotate the object.)
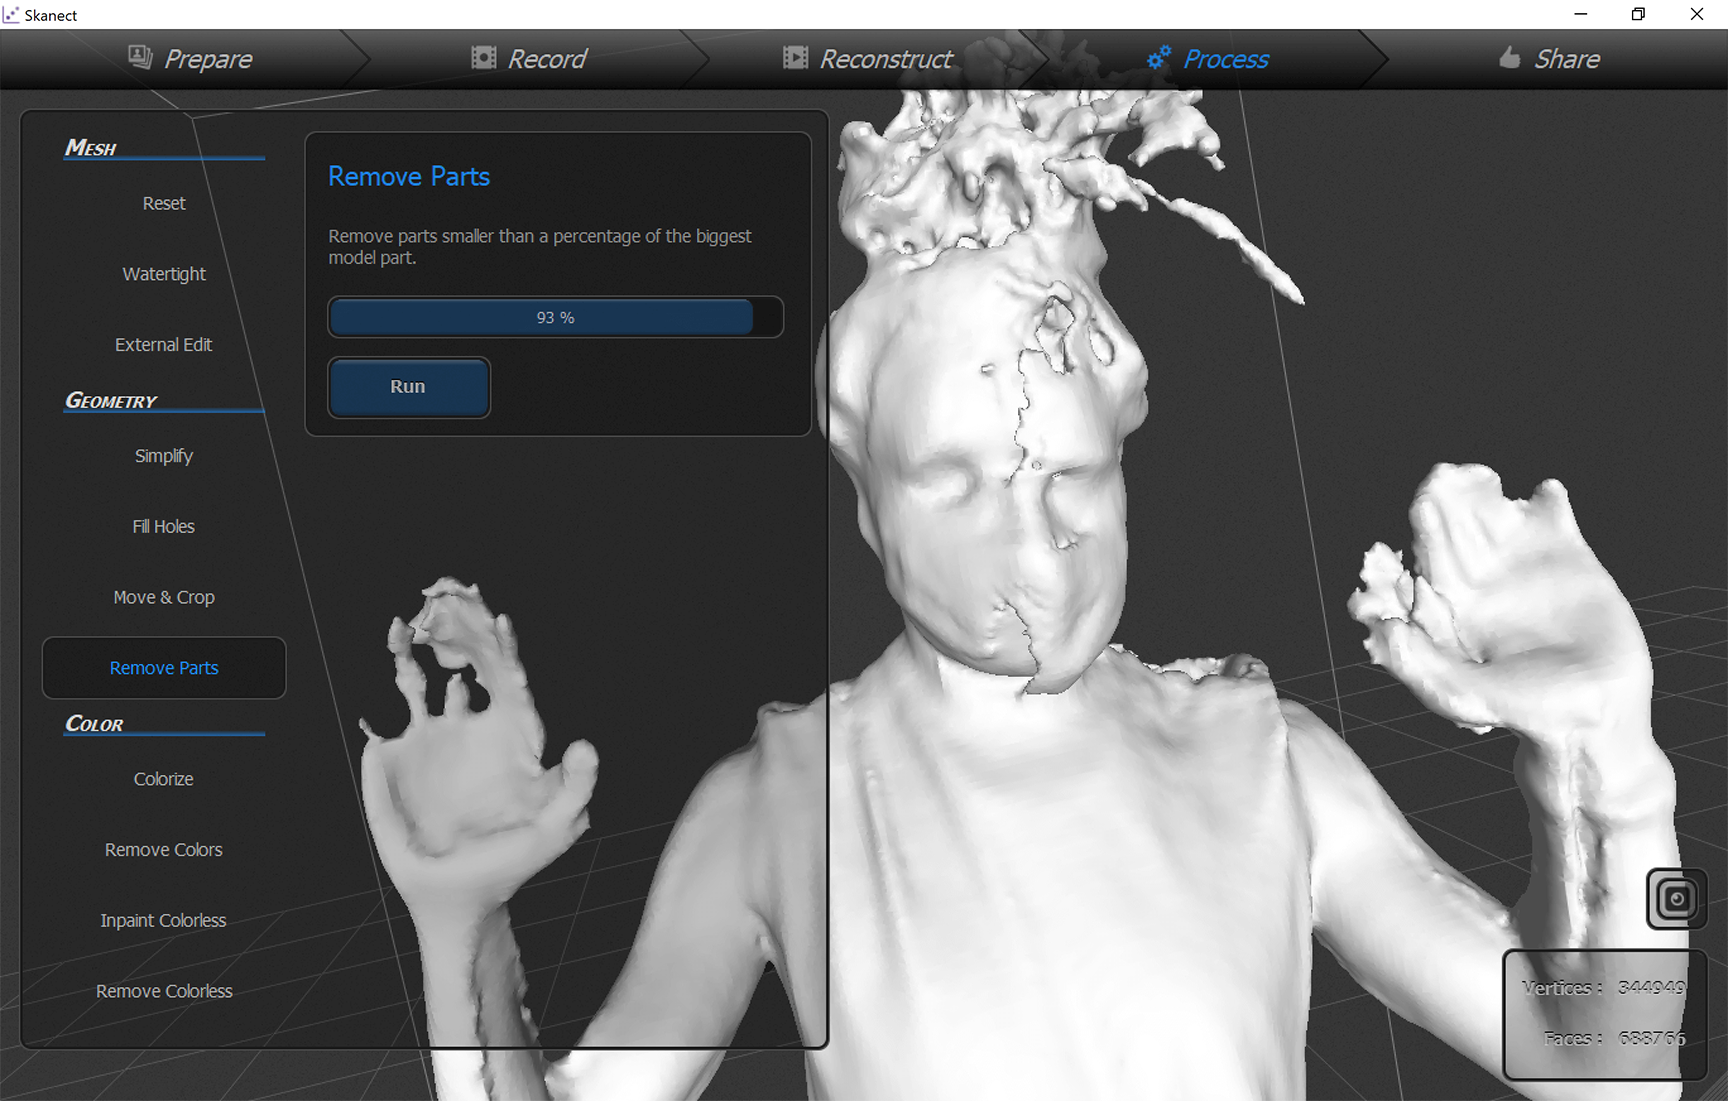 d. finish scanning - remove small parts
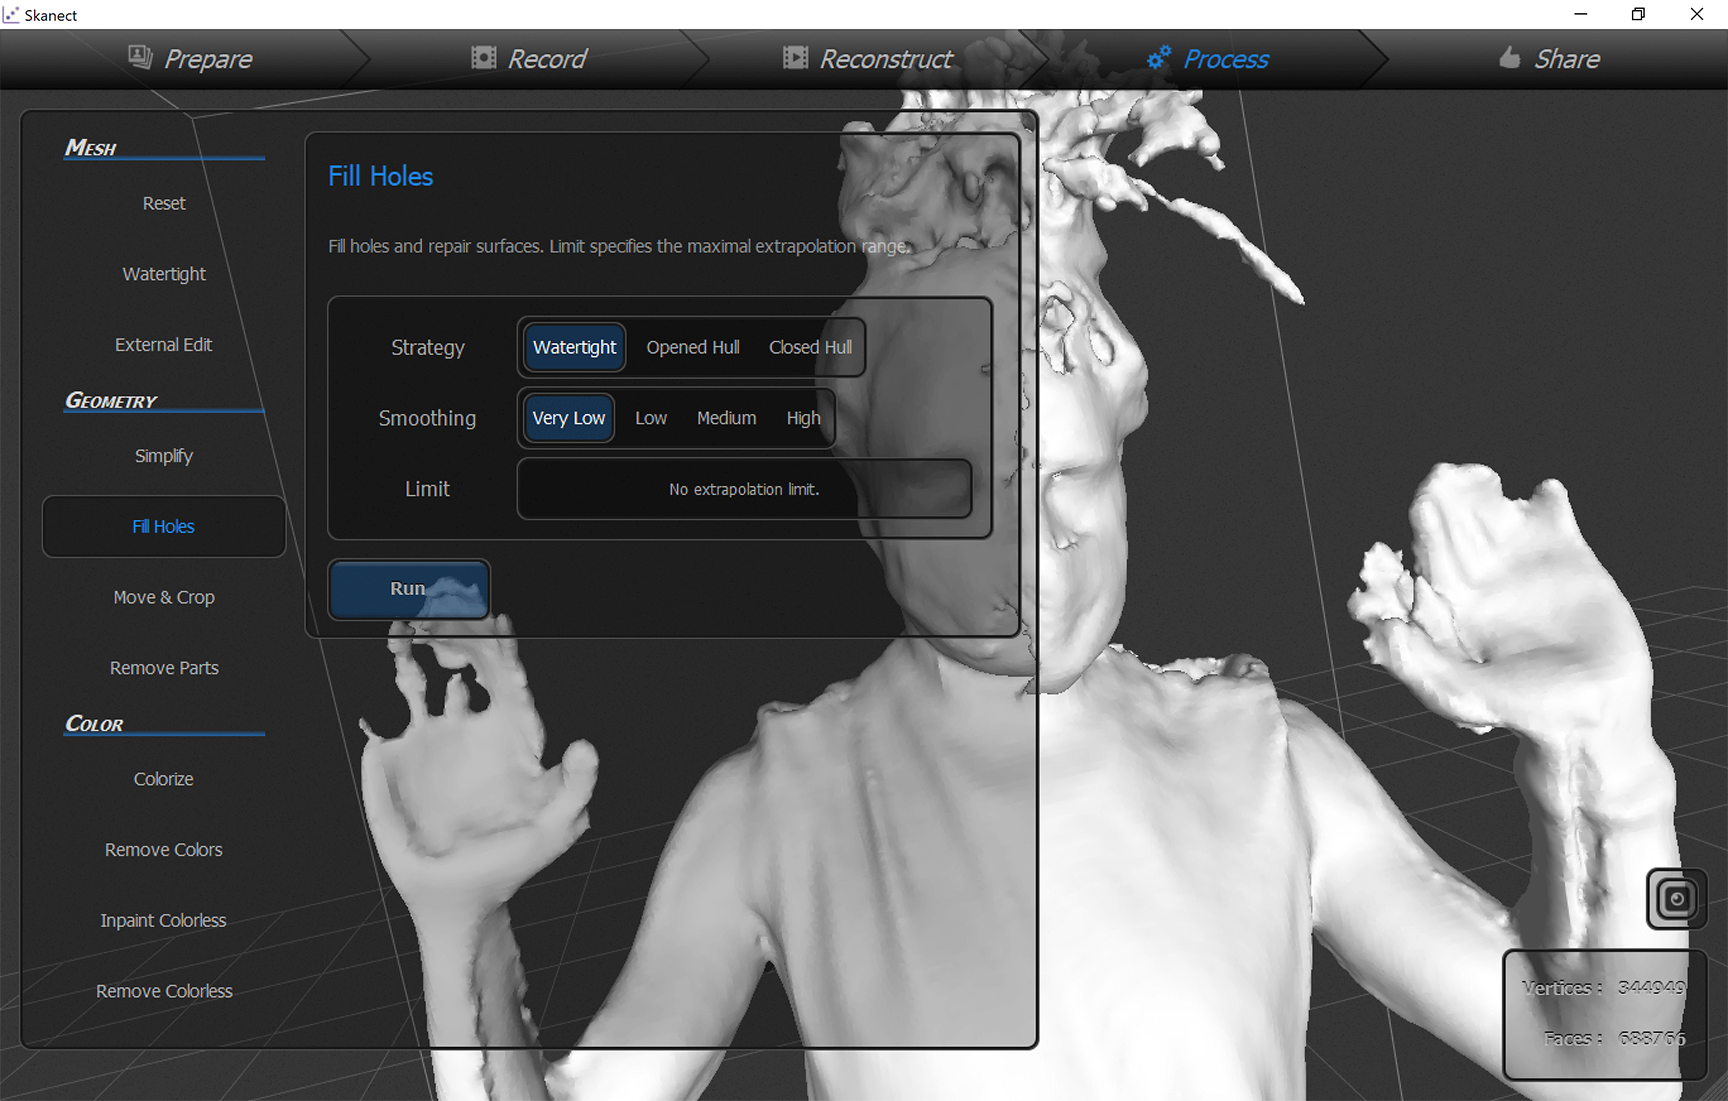 e. finish scanning - fill holes
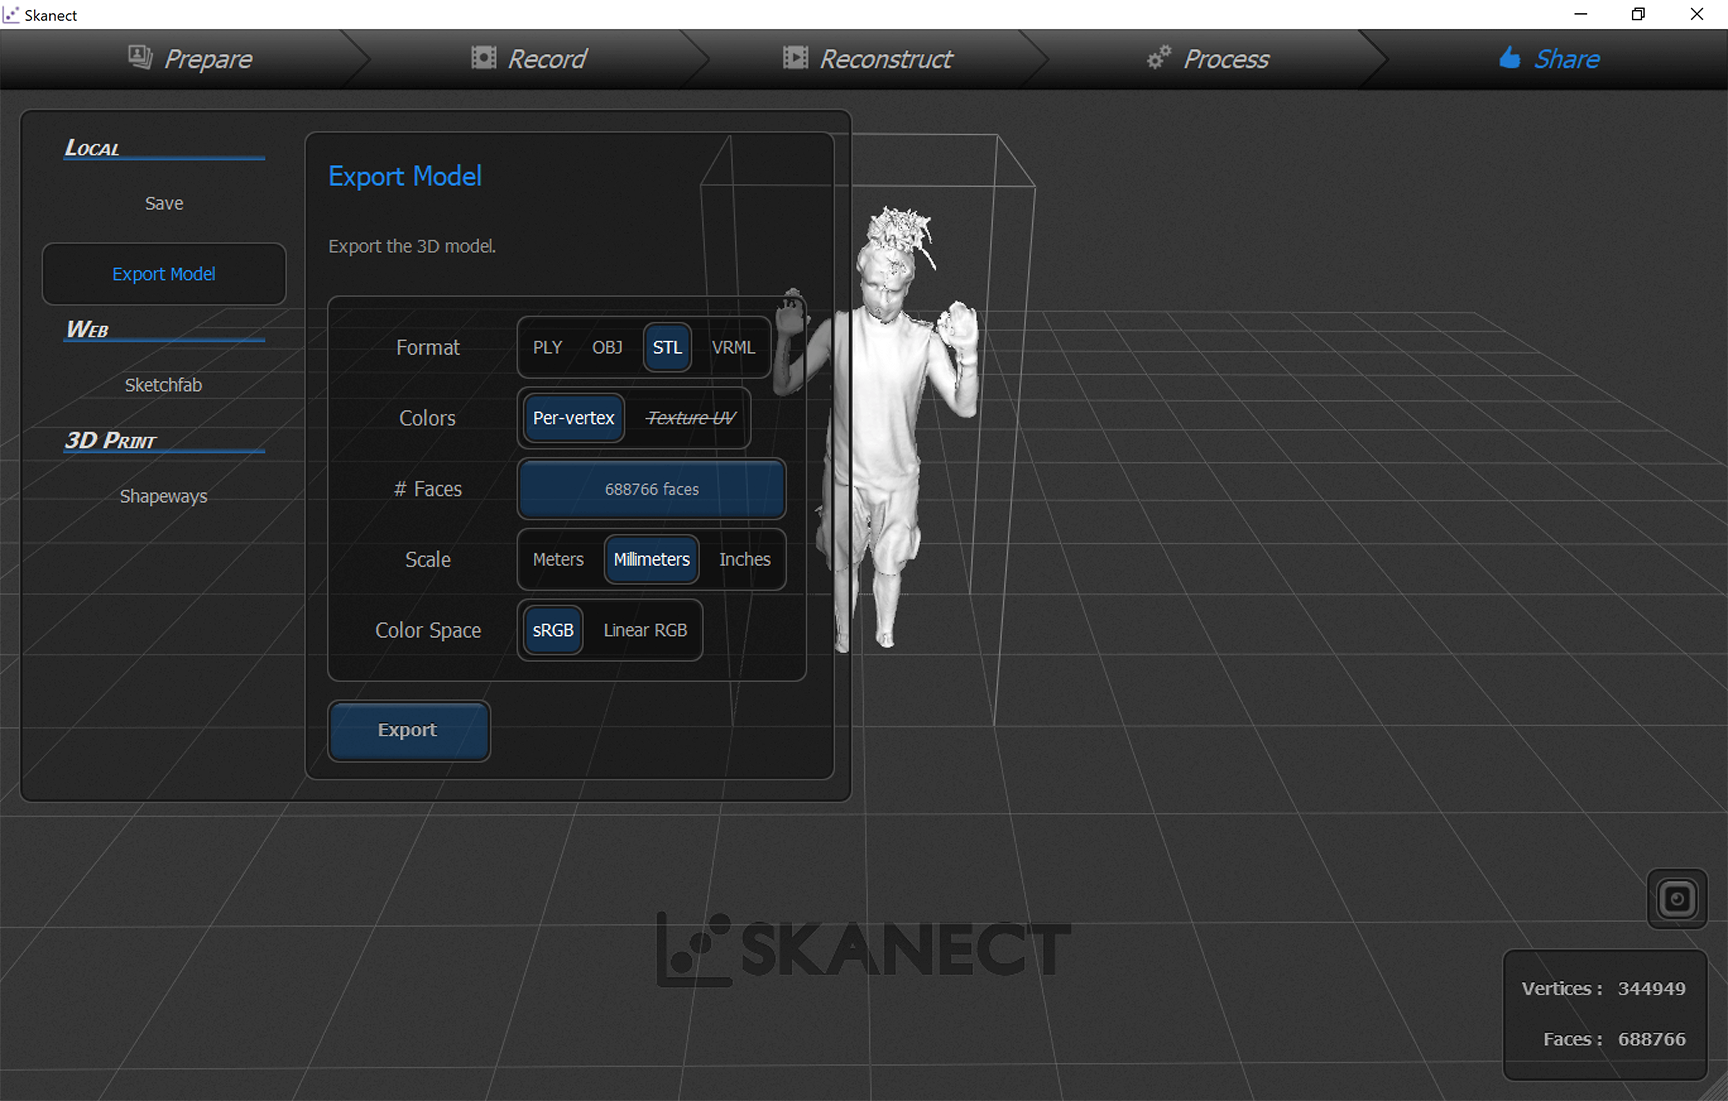 f. finish scanning - export as obj and stl
We've had some problems of steadiness, mostly due to a lack of physical excercise 
Indeed we decided to go further with MAKEHUMAN software to manipulate and mold a better figure.
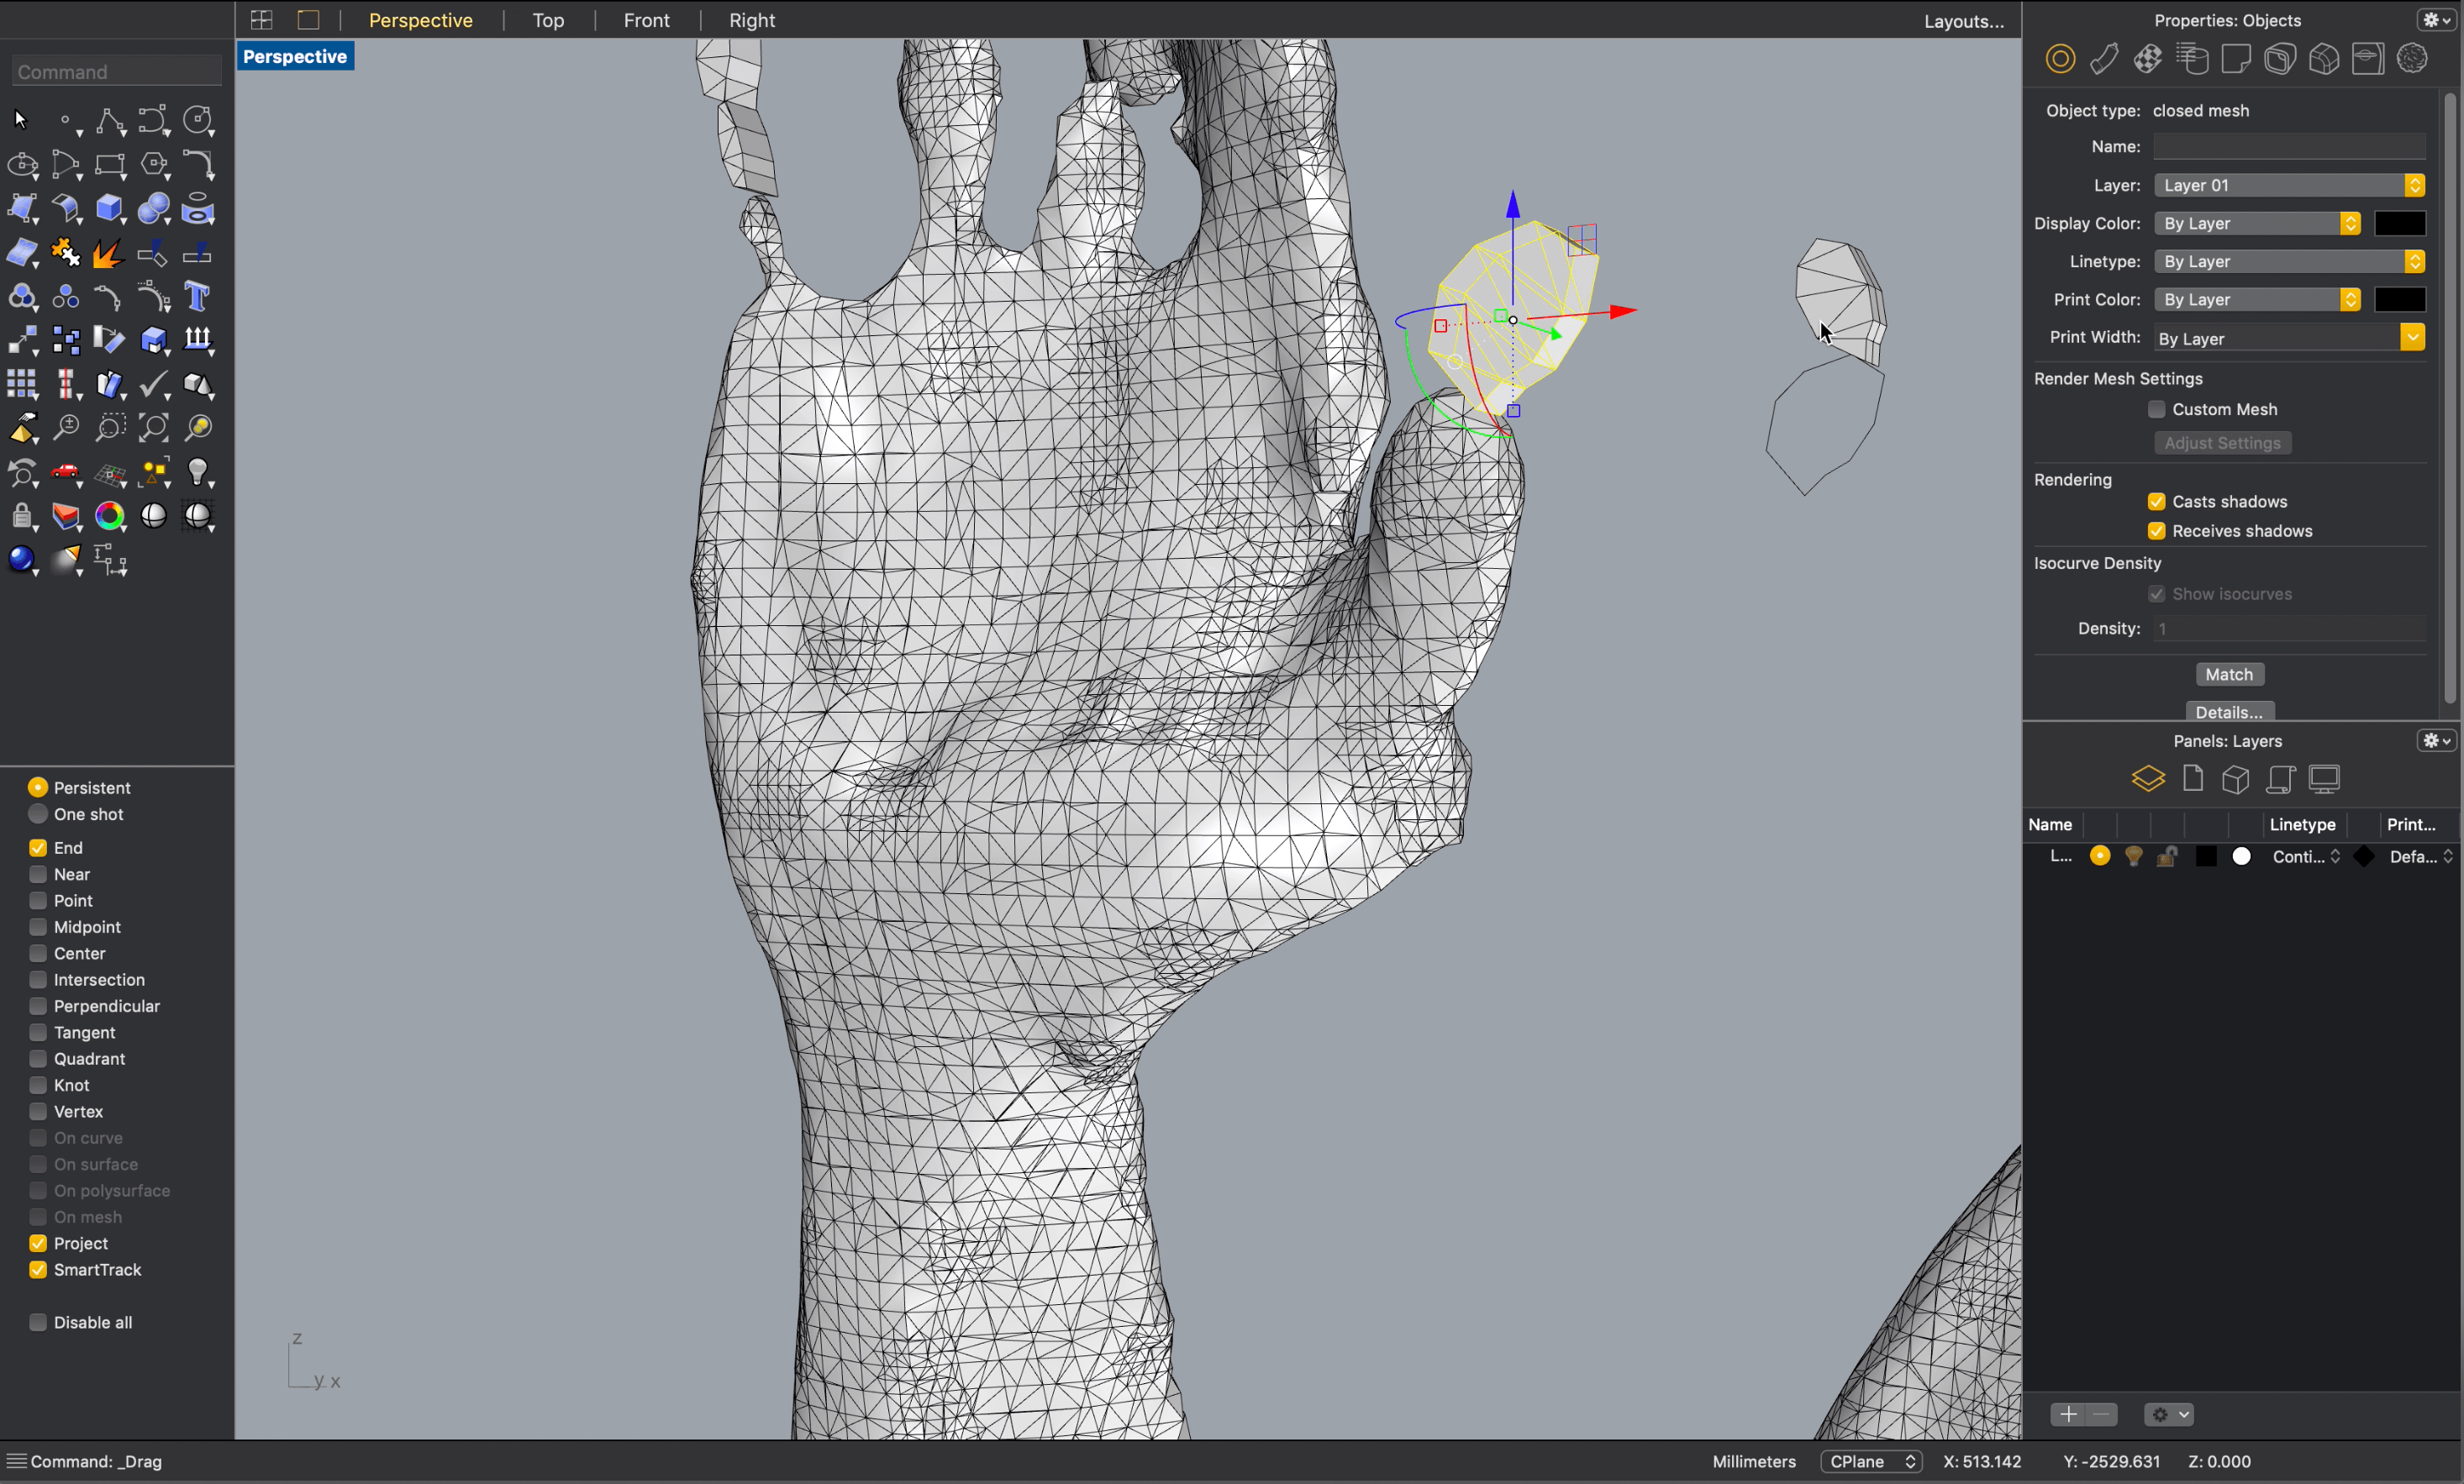
Otherwise you could also try to fix your mesh with RHINO, following these tutorials:
MESH REPAIR with RHINO tutorial
or using MESHMIXER instead!
or maybe not? 
STEP TWO (MOLDING & MANIPULATE)
SOMETIMES I'VE HAD PROBLEMS BETWEEN A PROGRAM AND THE OTHER....ZOOMING AND VIEWING BLEW MY HEAD OFF !!!
1.MAKEHUMAN
I chose MakeHuman for my mannequin form as it is a 3D modeling software which allows you to customize and animate your human form and leaves a smooth mesh to work with for printing and laser cutting. After downloading the software:
- Choose your figure (you can customize gender, ethnicity, height, weight, facial expressions and poses)
- To make a close replica of your own, insert your body measurements under the measure tab (the program will give you a visual of where to take the measurement)
- To finish, I exported the file (option under save tab) in “wavefront” OBJ and “stereolithography” STL formats.
First of all I played a bit with the settings of the program to get familiar with the commands.
Then my attitude to make things worse...get me over here  :
:
I've tried also to edit it on Rhino:
But in the end these shapes were too complex and exaggerated for the assignment,
so I came back on MakeHuman and I tried to get a body like mine.
More or less. Maybe I've cheated a bit with my measures. 
2.RHINO
-
Import OBJ file :
-
Open Rhino and choose your scale (i.e. mm, cm, inches)
- It will open as a mesh
- Under the viewport tab choose to render or shade
- Double check watertight mesh: command= SelectShow Edges → Naked Edges (use command “FillHoles” to repair open/naked edges)
- Convert your mesh to a polysurface (NURBS) model: command= MeshToNURB (you will have a wider variety of commands using NURBS rather than a mesh model)
-
Choose the maximum amount of triangles if you want a more detailed/textured model (this will however make the file heavier)
-
Split limbs:
-
You can split limbs from a mesh but it is easier to work with NURBS
- Make a box and encompass the head circumference to split the head
- Make a shape and extrude it to a flat surface to split arms Note: You will have to: command= Cap open surfaces after splitting if you use NURBS to make a watertight polysurface; if working with mesh: command= MeshBooleanSplit automatically makes watertight trims
- Delete unwanted limbs
- Convert to Mesh model
- Export as Rhino file, OBJ and STL formats
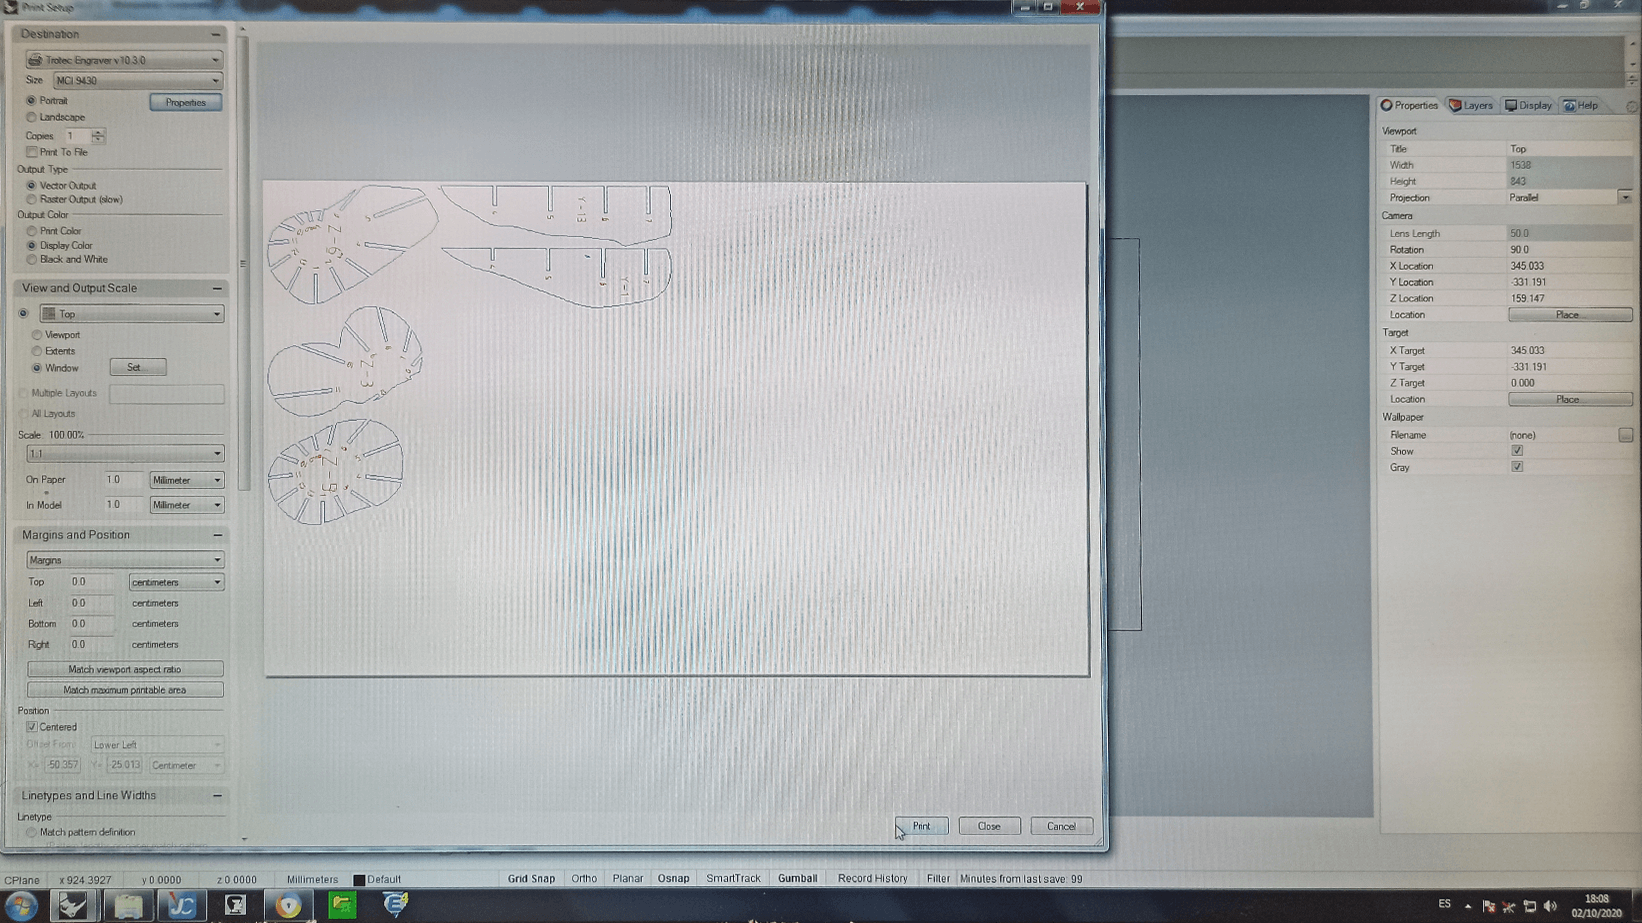
3.SLICER
- Import STL file
- Open Slicer and choose original scale from the drop menu on the left (pay attention to scale in: mm, cm, inches)
- Define manufacturing settings: choose (mm, cm, inches) the size parameters of your material: length, width, thickness (in my case: L=212mm, W=127.147mm, T=3mm)
- Define the slot offset: the allowance for the notching system so that the pieces interlock with ease (in my case: 0.5mm)
- Choose construction technique: radial slices
- Slicer will convert your 3D form into many interlocking 2D parts
- You will need to pay around with each interlocking slice until you see no red pieces (red means a flaw in the design)
- You can shift each slice around and add or remove slices to achieve a fully functioning model ready to laser cut
- Export to DXF (to re-open in Rhino to prepare for laser cutter)
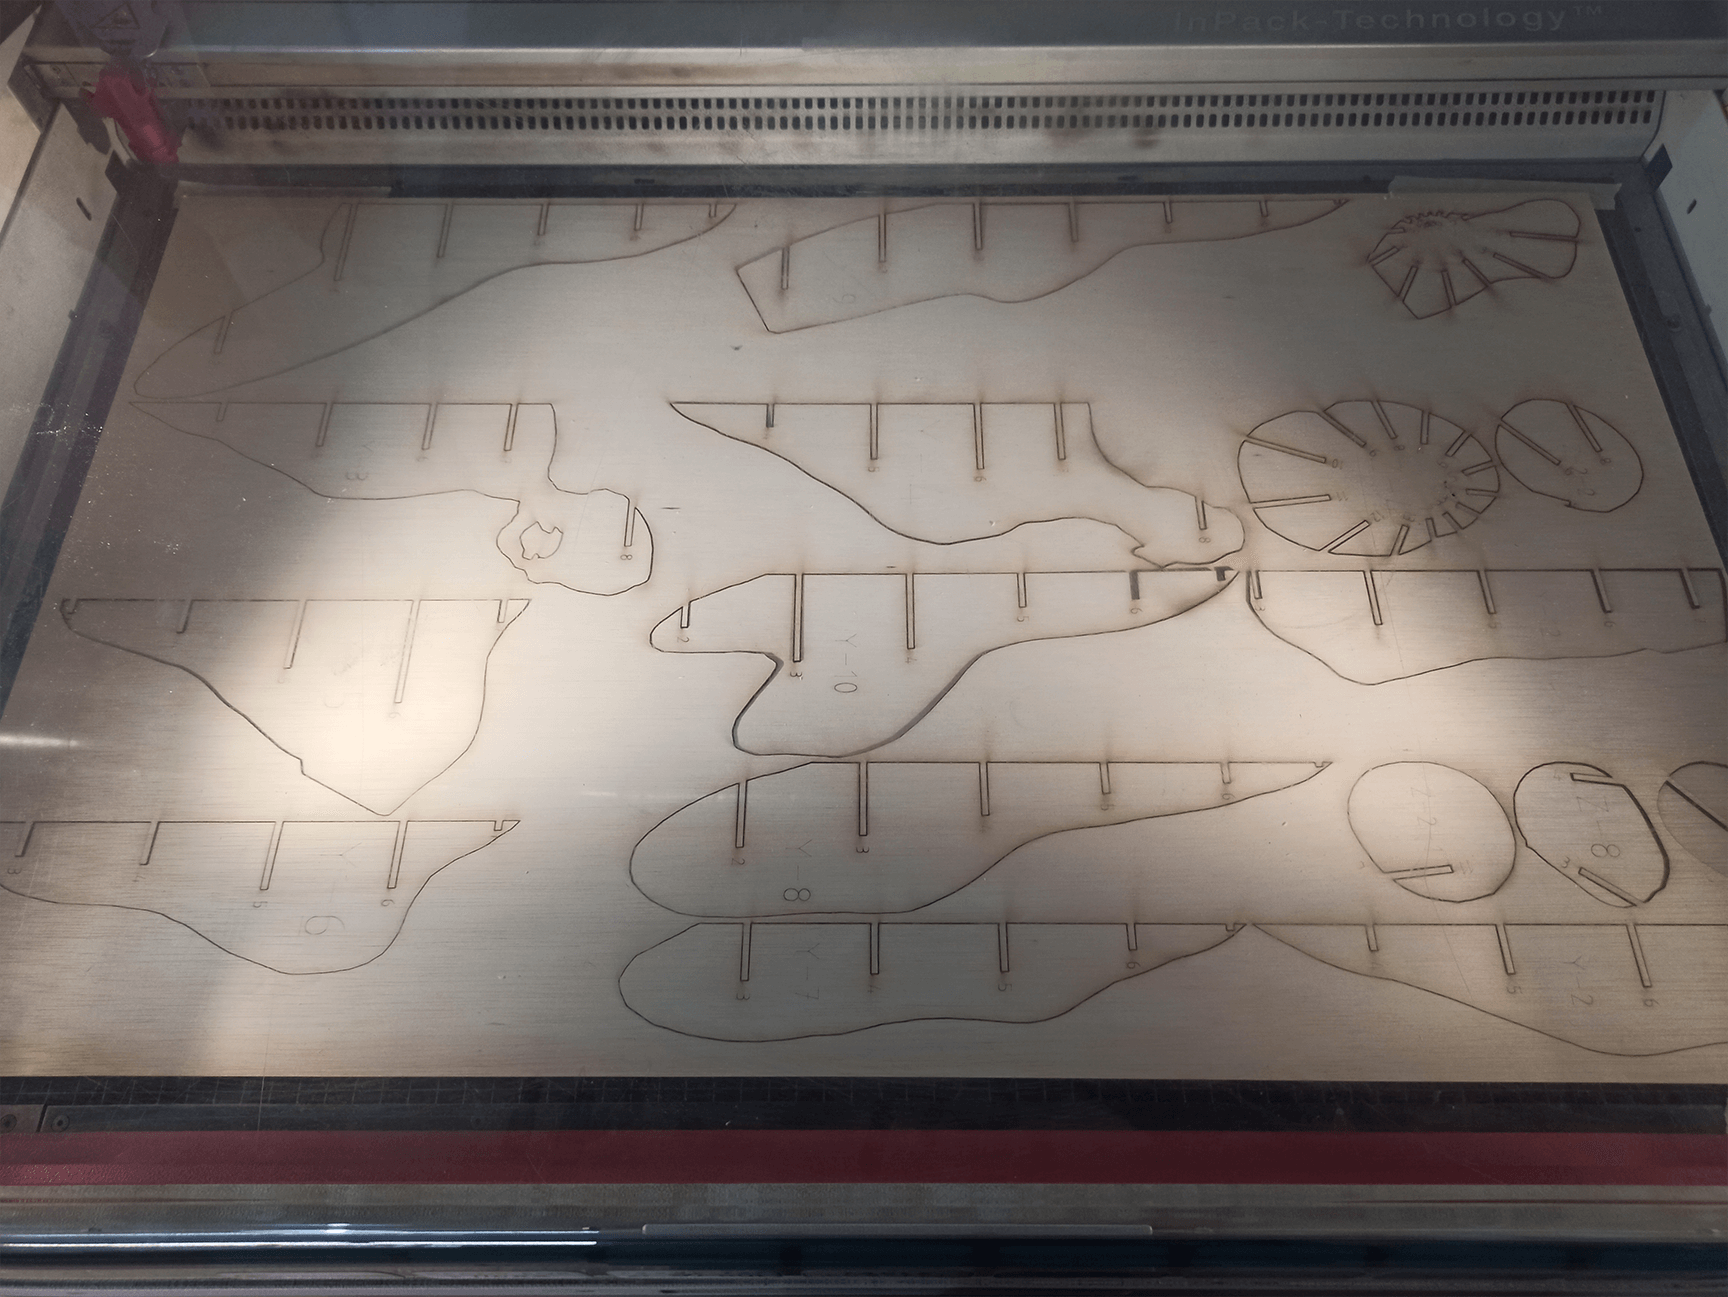
STEP THREE (LASER CUTTING)
Laser cutting was amazing! Even the lefties of the acrylic panel were cool. The model of the machine in my case was TROTEC SPEEDY 400.
- Import DXF file to Rhino
- Work in the Top viewport
- Select all and convert to 2D
- Join each piece separately as they will be imported as individual curves
- Group each piece separately so that the outline (blue) and the assembly numbers (red) will under one grouped piece
- Nest your pattern pieces so that the maximum amount of space is used
- Rotate the piece to that the legth runs horizontally
- Move each board to point zero
- Select the area (board) to be printed
- Select the material parameters (to do the mannequin I used 2 panels of 3mm Plywood 1000x600)
to cut:
SPEED 1.5 POWER 60 PPI/Hz 1000 in 2 passages.
To engrave the parts with a letter + number to identify them, the parameters were:
SPEED= 100
POWER= 60
PPI/Hz = 1000
before placing the material is necessary to adjust the focus of the laser, to do this just follow this tutorial video:
STEP FOUR (ASSEMBLE & REPAIR)
STEP FIVE (PHOTO-SHOOTING)

3D MODELS
FAILS
CUTTING FAIL :
MESH BOOLEAN FAIL :
TOOLS
These are platforms where you can find a bunch of objects and stuff already 3D Scanned or Molded