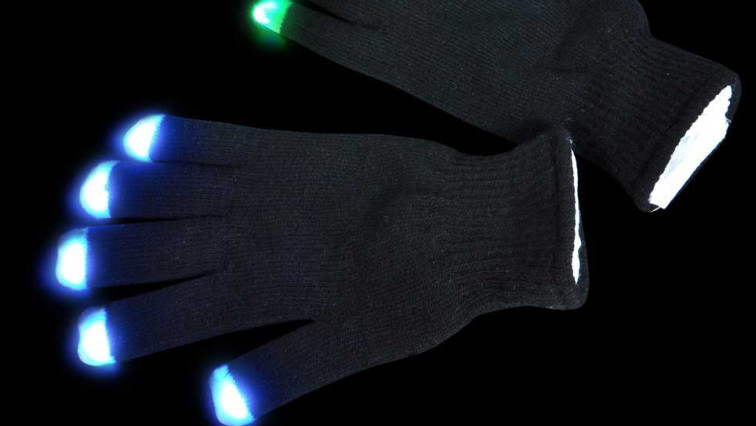
5. E-textiles
Electronic textiles or e-textiles are fabrics that enable electronic components such as batteries, lights, sensors, and microcontrollers to be embedded in them. They are not to be confused with smart textiles, which are fabrics that have been developed with new technologies that provide added value. Many smart clothing, wearable technology, and wearable computing projects involve the use of e-textiles.
Soft and Comfortable E-Textiles that Can be Used to Measure Photoplethysmography
Read more: https://statnano.com/news/68789/Soft-and-Comfortable-E-Textiles-that-Can-be-Used-to-Measure-Photoplethysmography#ixzz7Y8jzyr6L
Research
Downloads
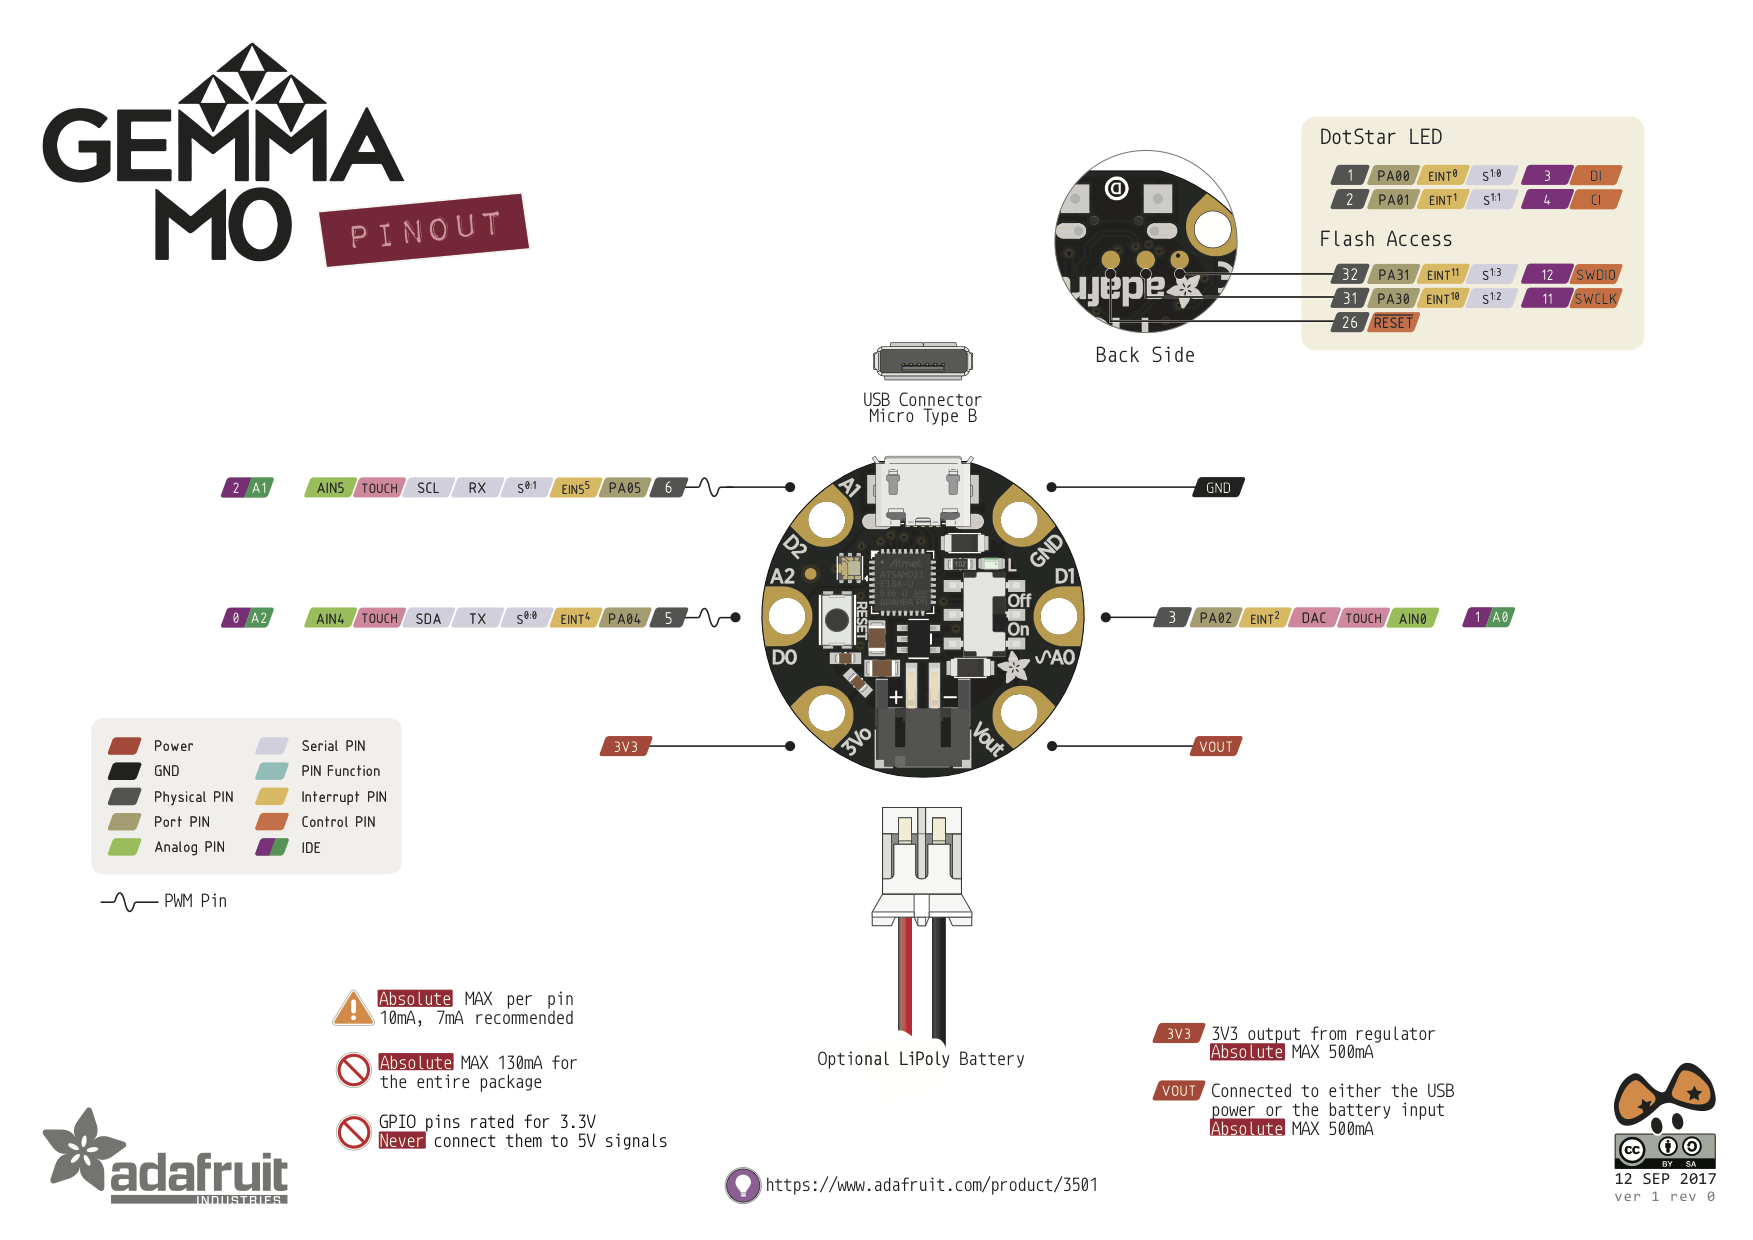
Arduino + Gemma M0
Adafruit Gemma M0 Pinout to get familiar with and here is the Datasheet to get started Adafruit Gemma M0 DataSheet
Arduino IDE Setup
- Downloaded and installed the latest version of Arduino IDE
- Afrer opening IDE and navigate to the Preferences menu. Accessed it from the File menu in Windows
- A dialog will pop up, Pasted URL to the new Additional Boards Manager URLs option.
https://adafruit.github.io/arduino-board-index/package_adafruit_index.json
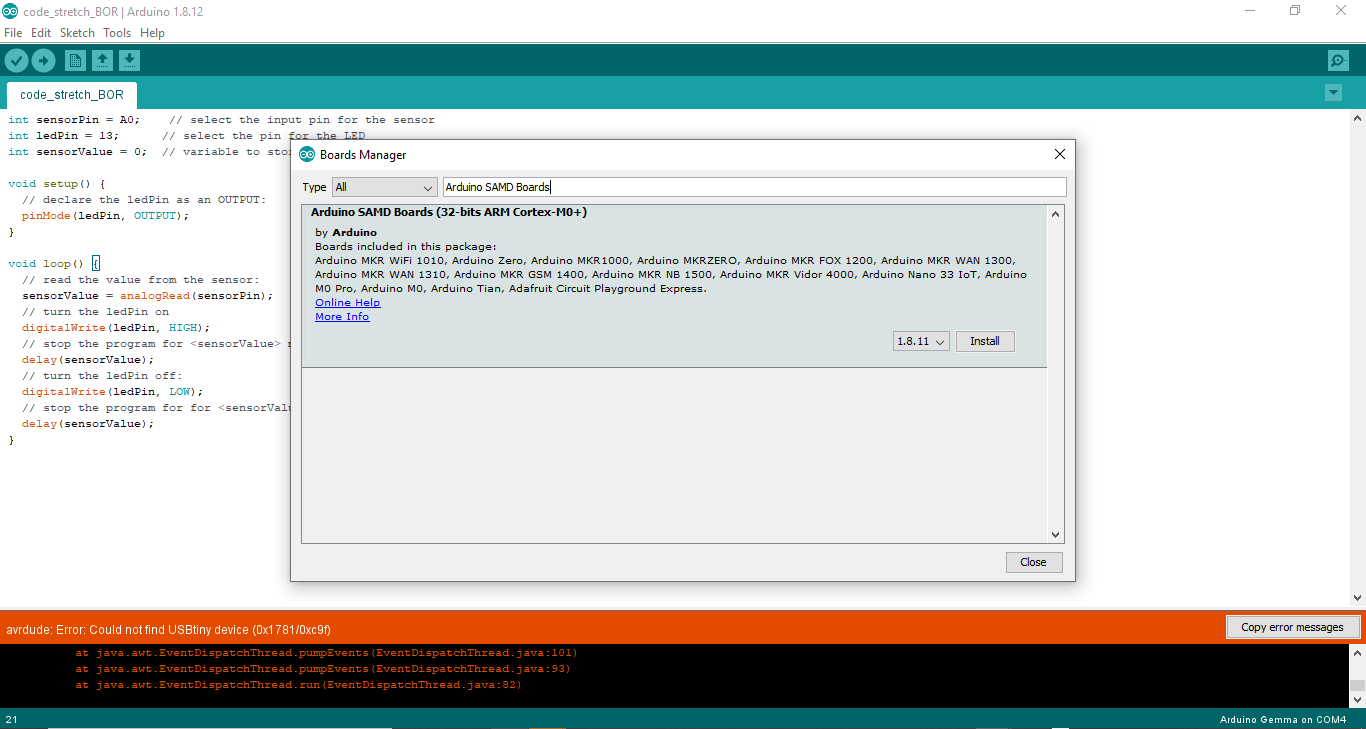
Using with Arduino IDE
- Opened the Boards Manager from Tools->Board menu.
- Installed the latest Arduino SAMD Boards (version 1.6.11 or later). Just typed Arduino SAMD in the top search bar, then saw the entry, clicked Install
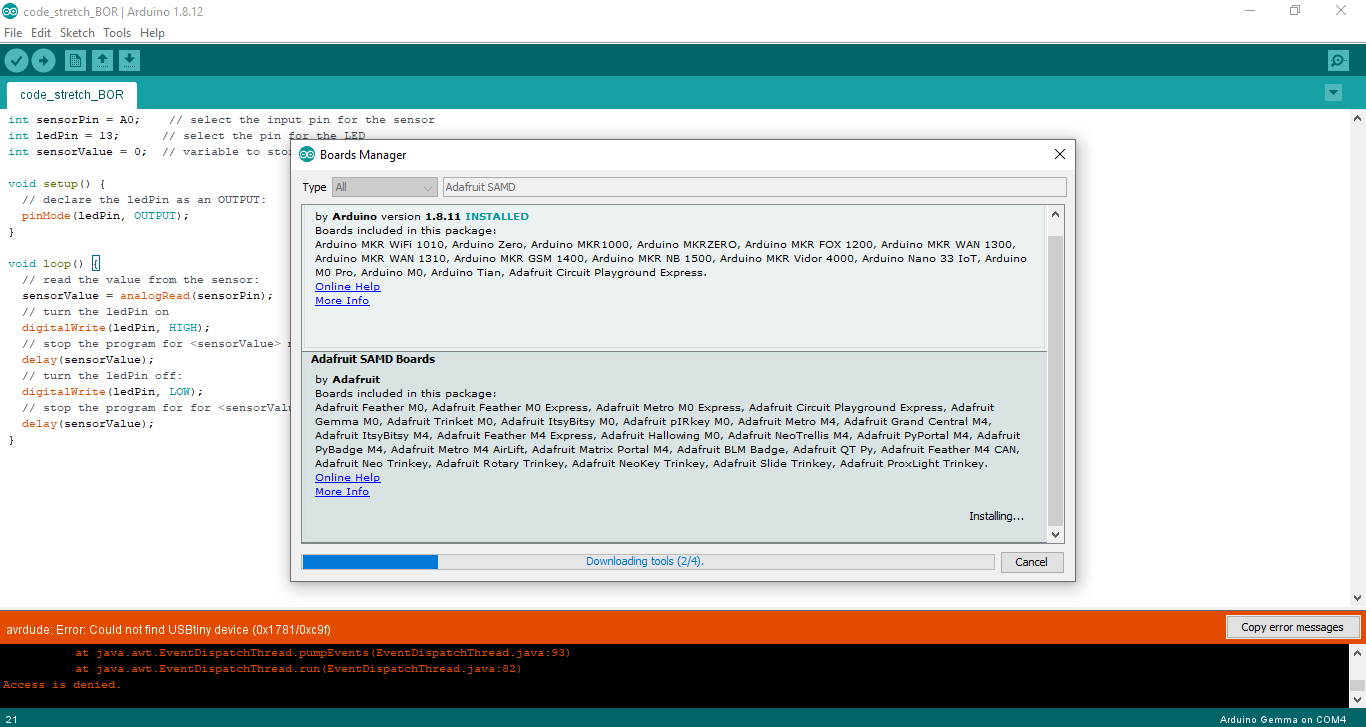
- Installed the Adafruit SAMD package to add the board file definitions (Make sure you have Type All selected to the left of the Filter your search... box), typed Adafruit SAMD in the top search bar, clicked Install
Digital
quick & dirty prototype
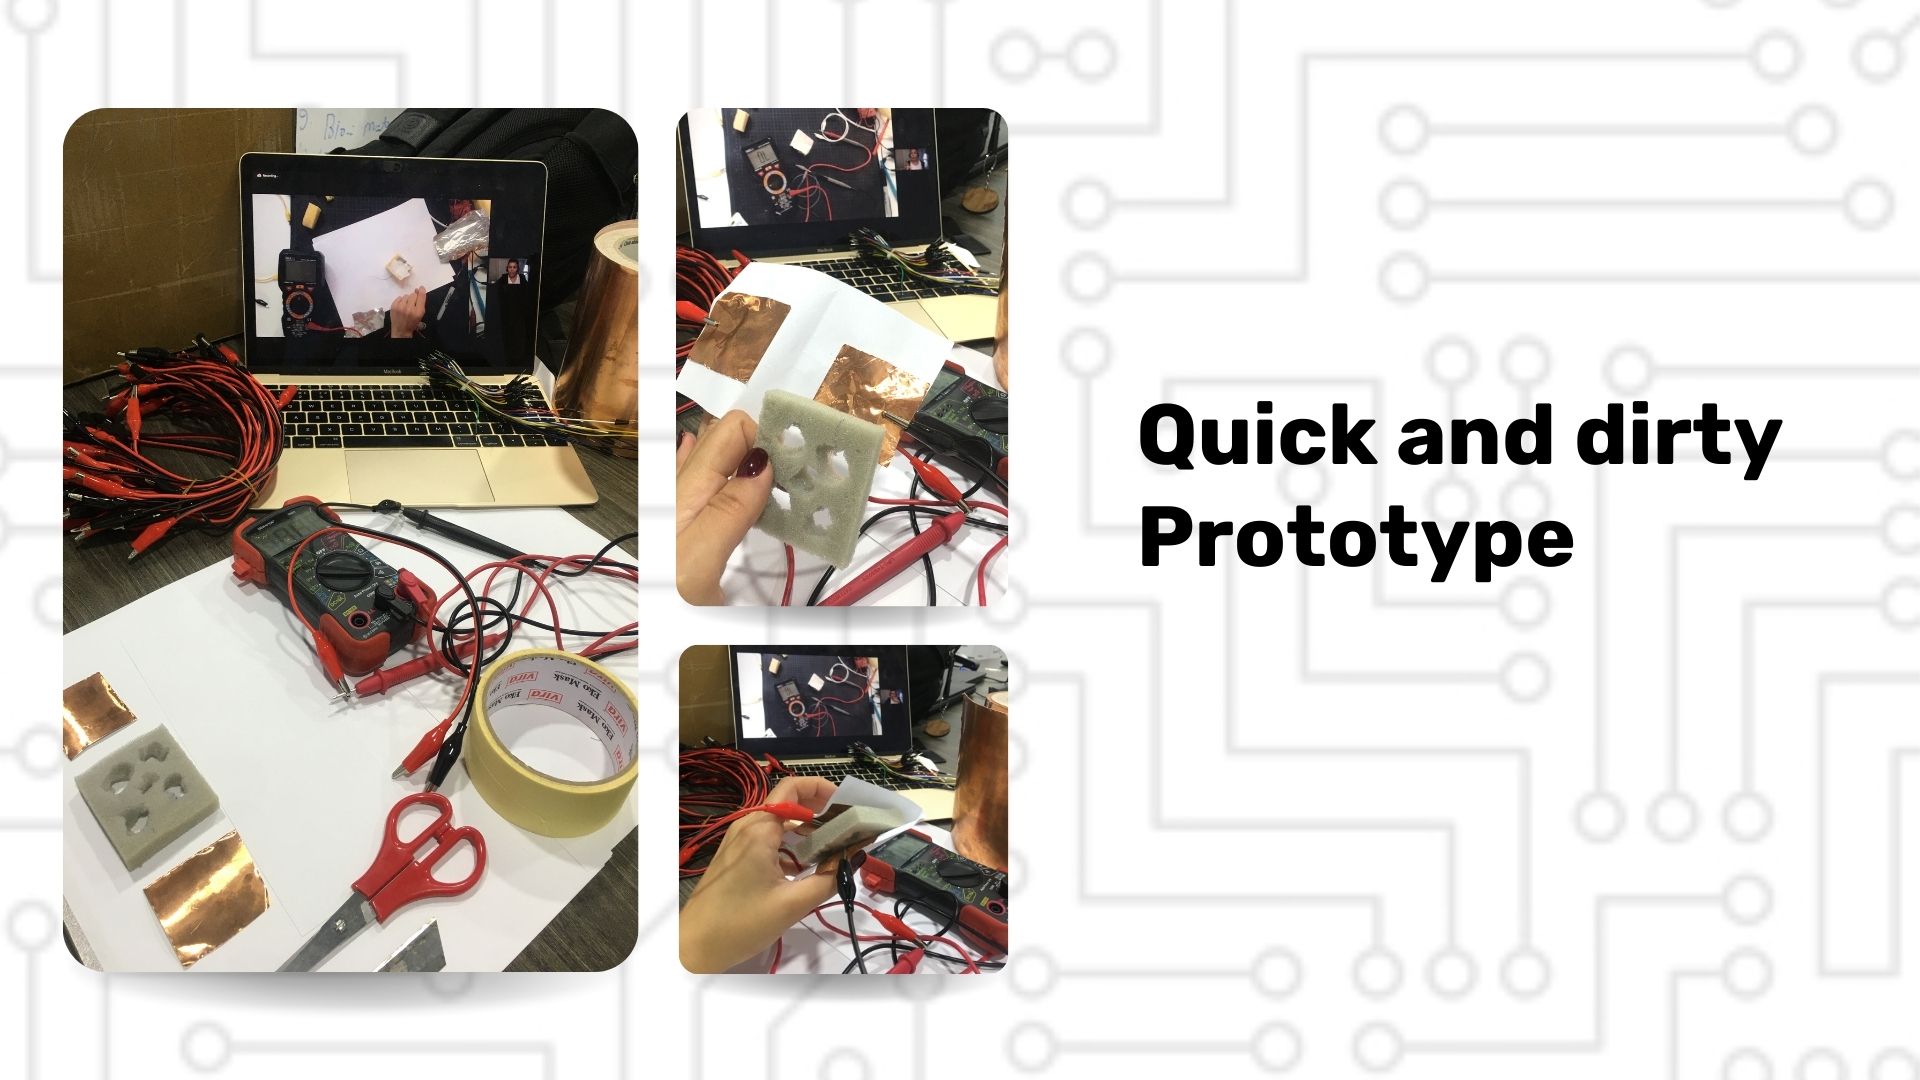
Here was trying to make quick, dirty and easy momentary switch (AKA push buttons) - say open as long as you hold them by pressing conductive materials into contact.
so it was an easy kick start to understand the concept of soft circuits
All what was needed sponge, copper tape, paper, crocodile Wires, multi meter
Digital-Islamic Pattern Bracelet
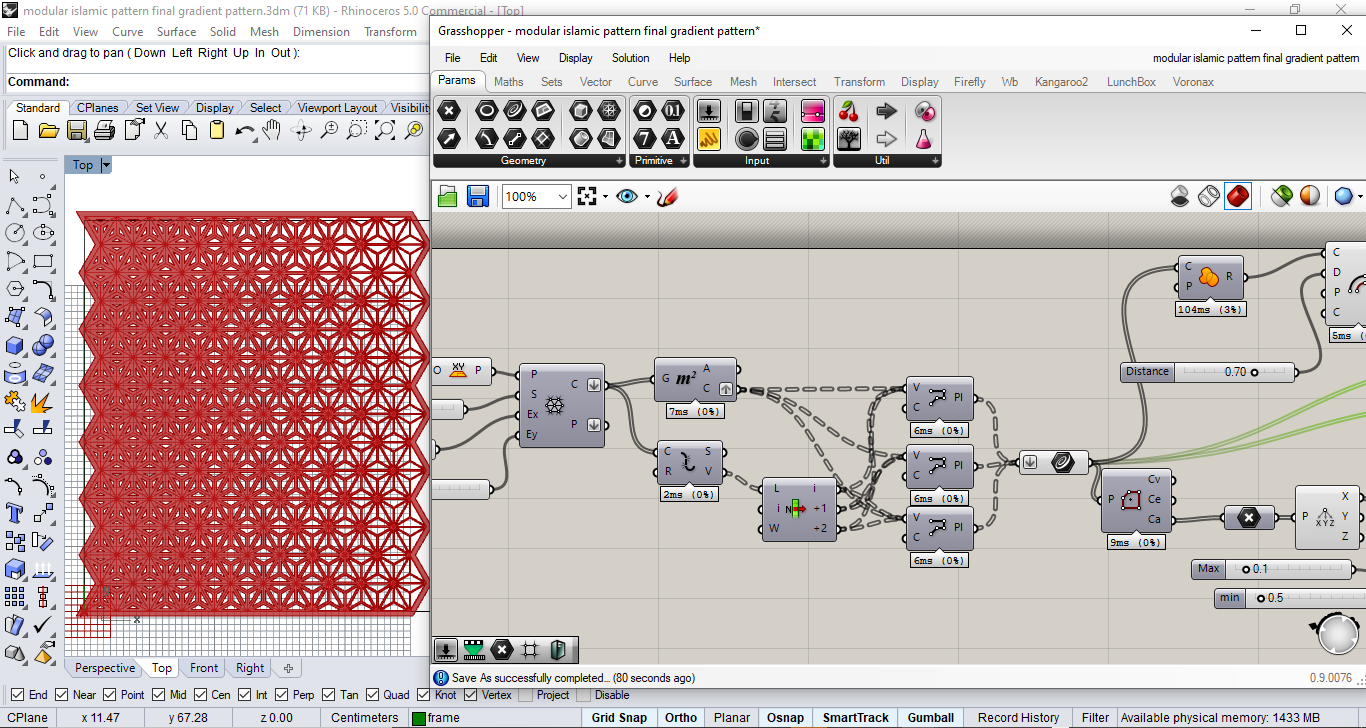 so I used the same grasshopper parametric design file I did for week 03 to make this Islamic Pattern Bracelet
 I measured my hand and did assessment regarding the size to fit me, I wanted to concentrate the Pattern more in the middle
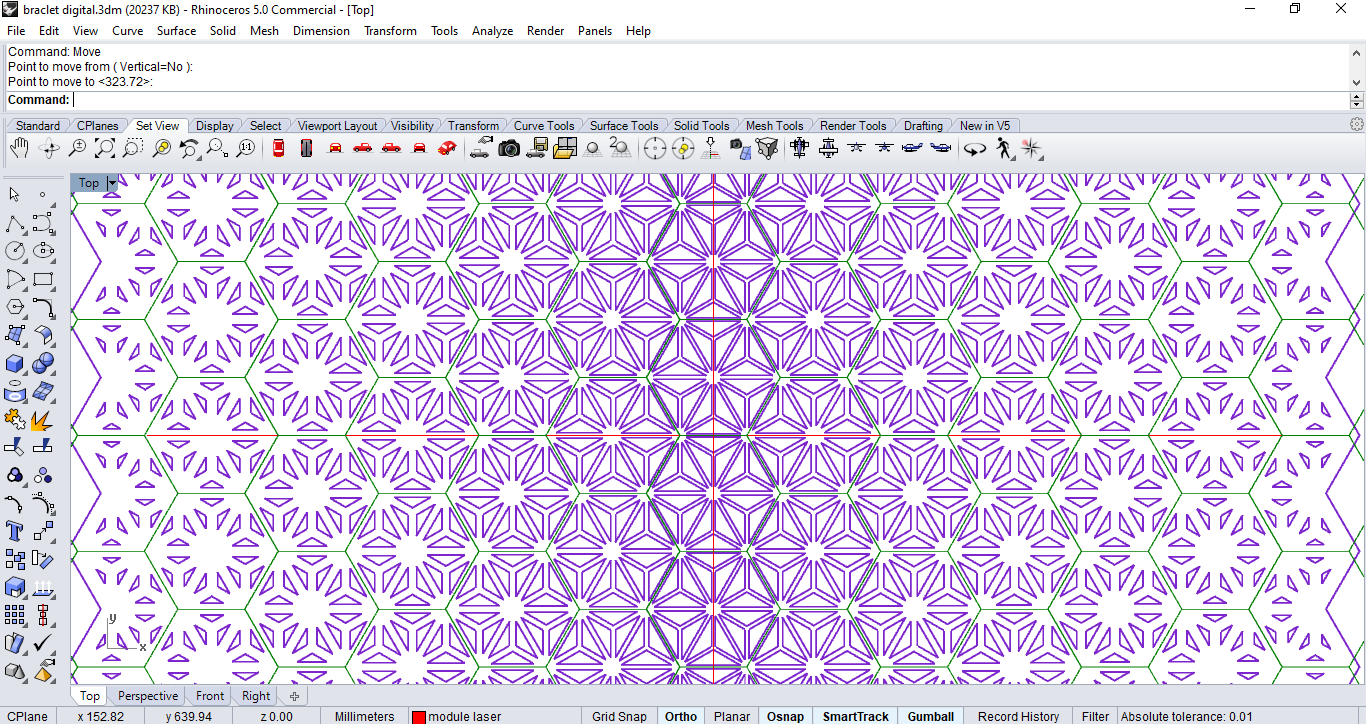
 then I started to trim the excess to have clean edges to laser cut
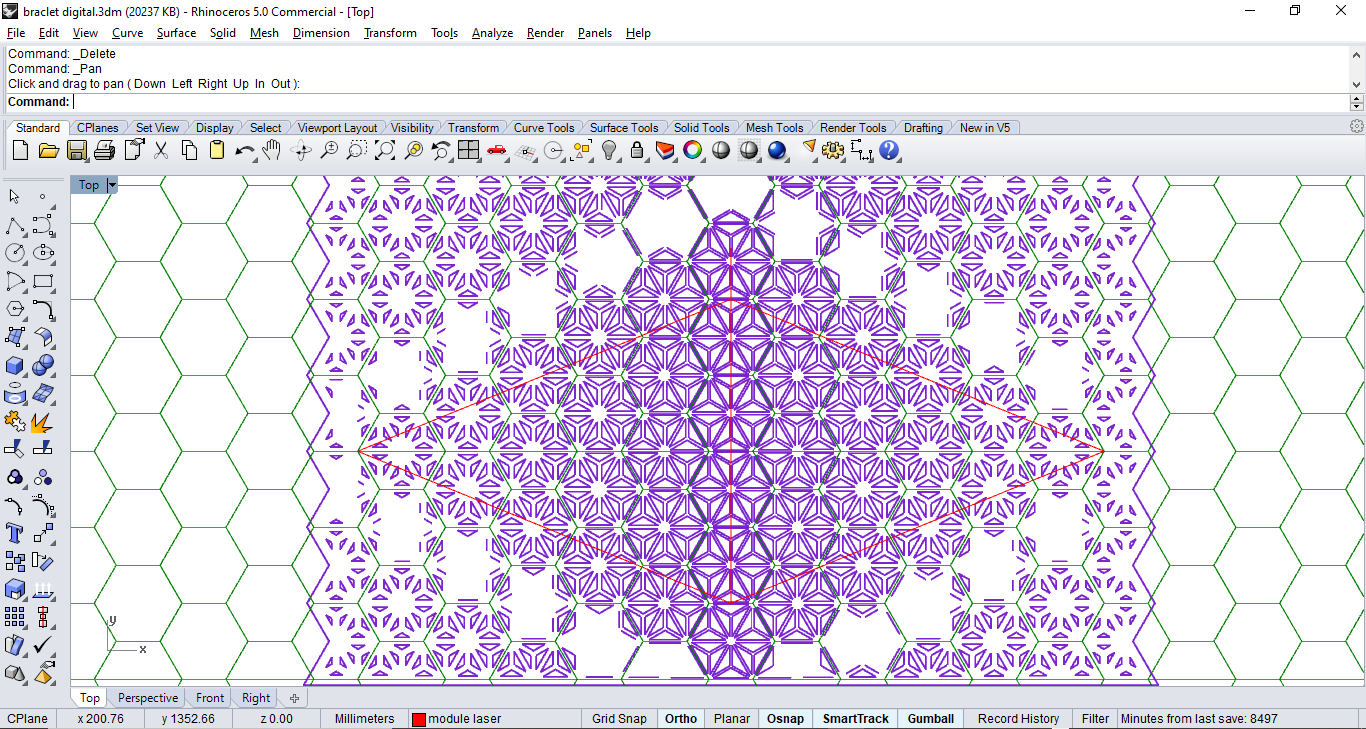
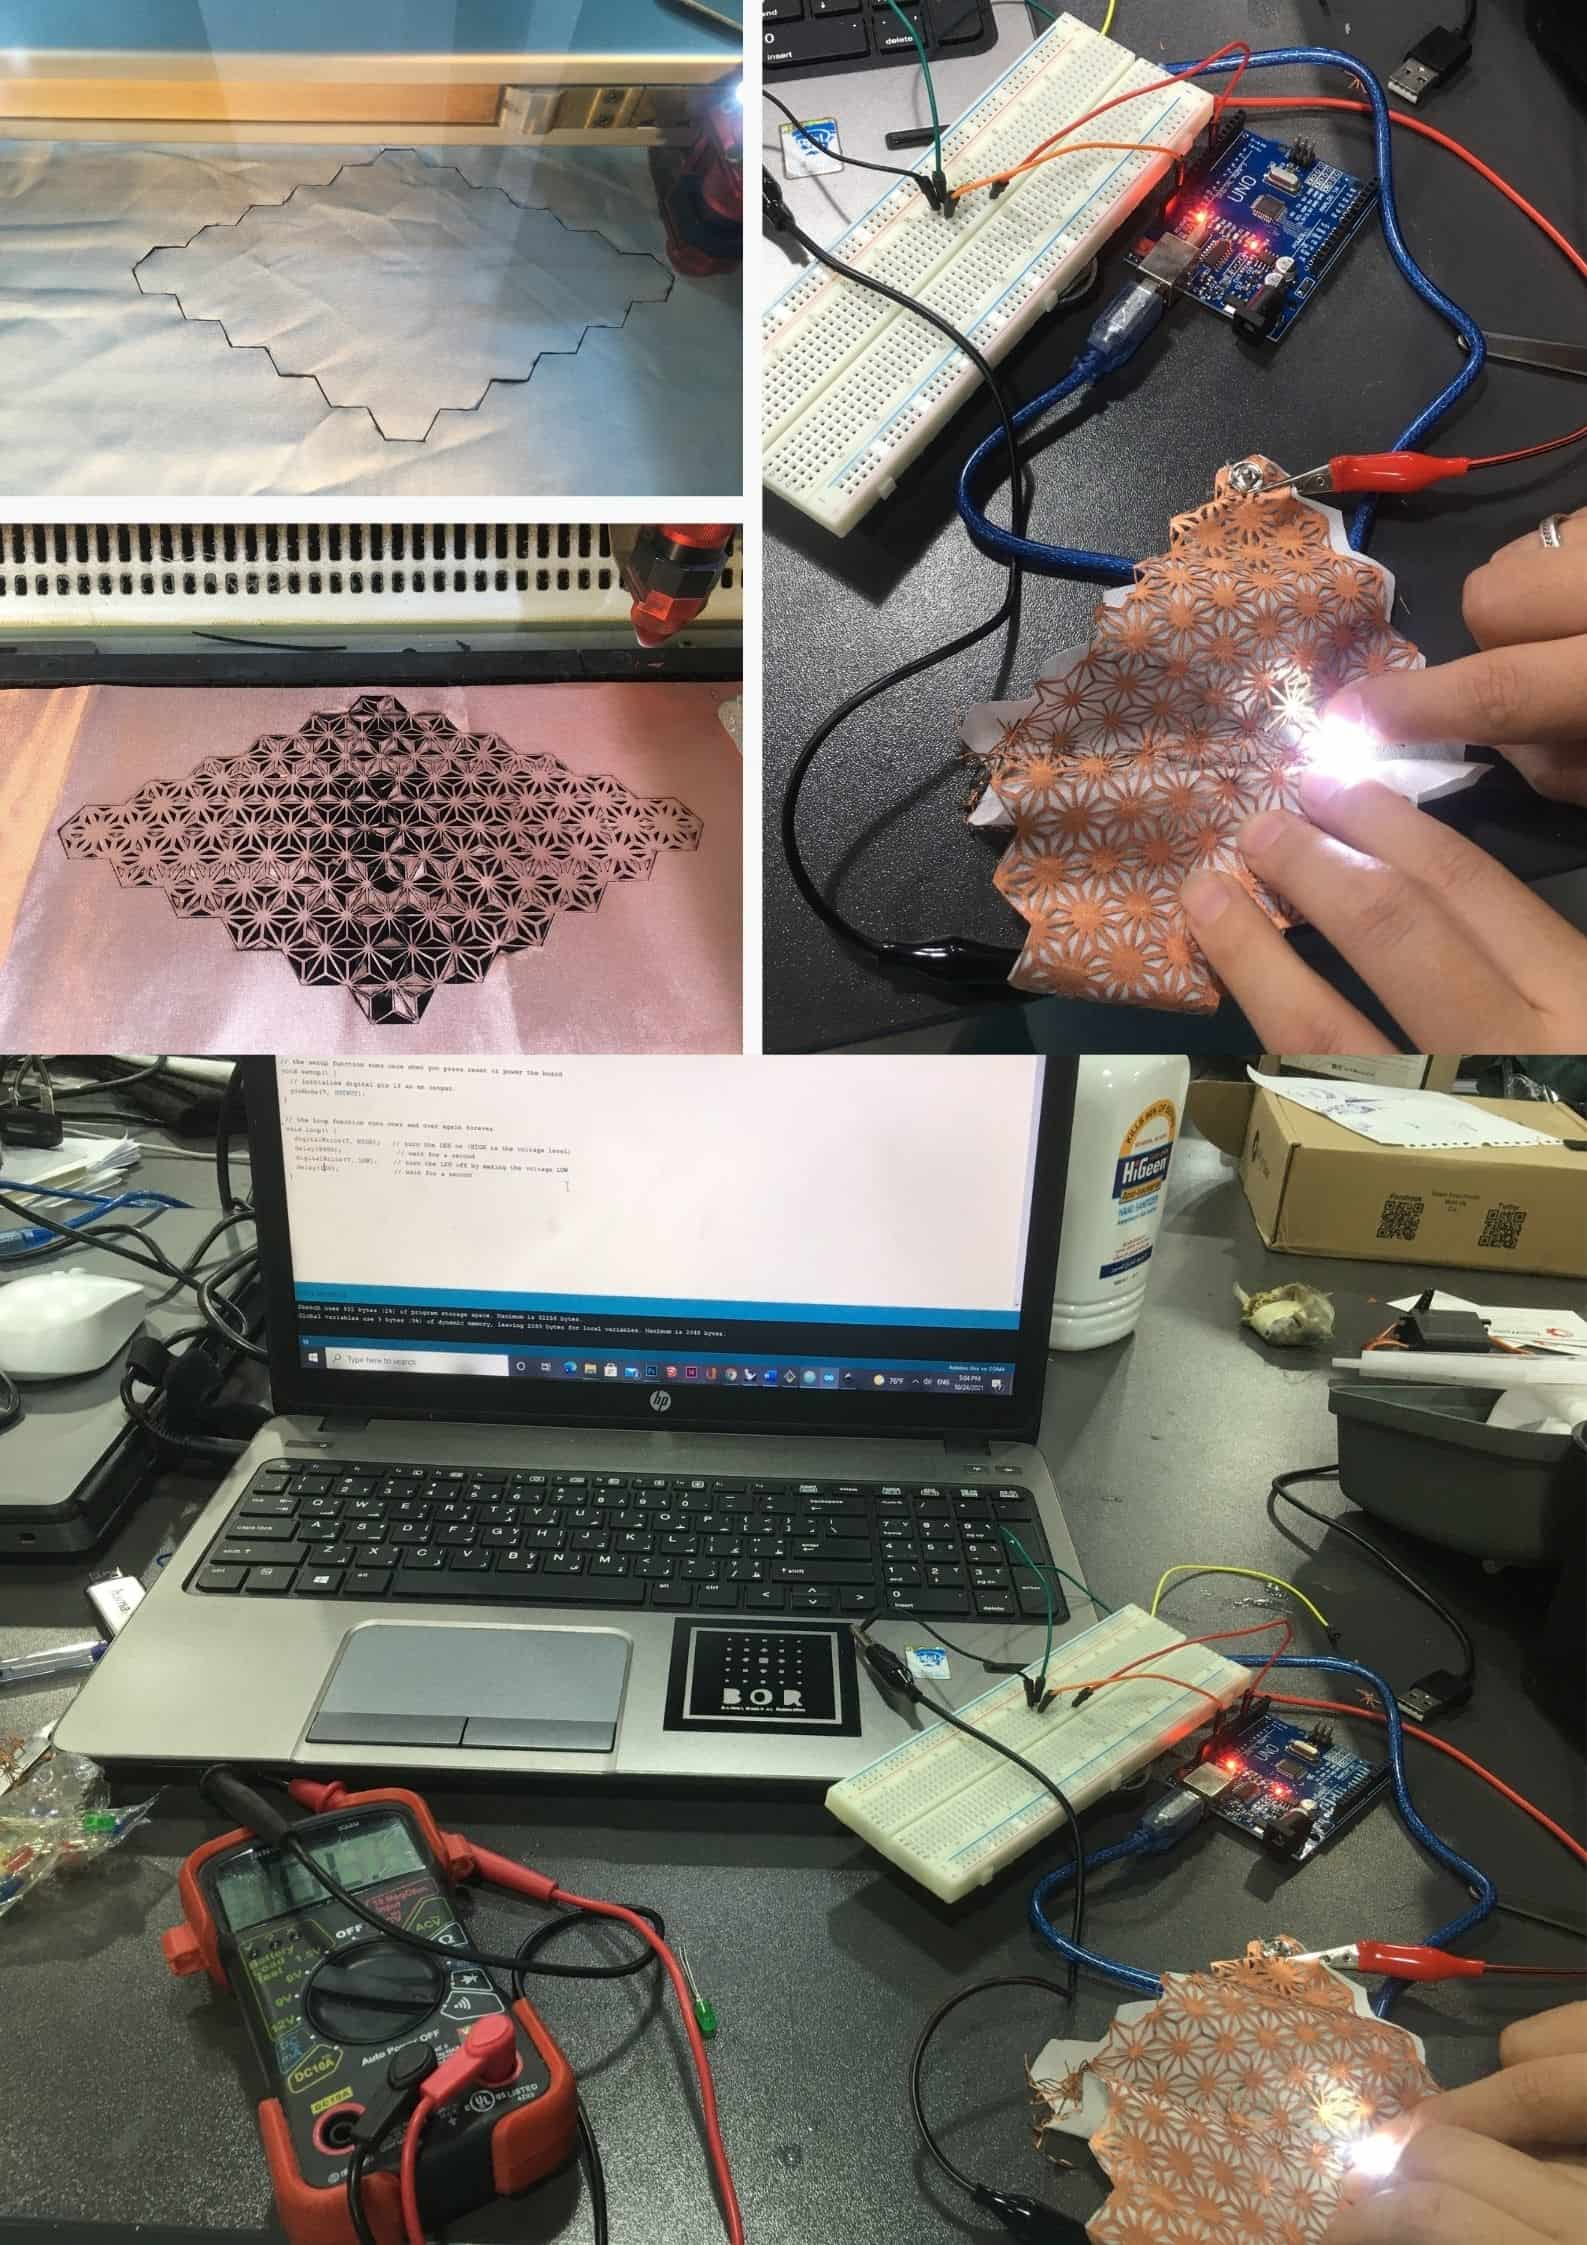
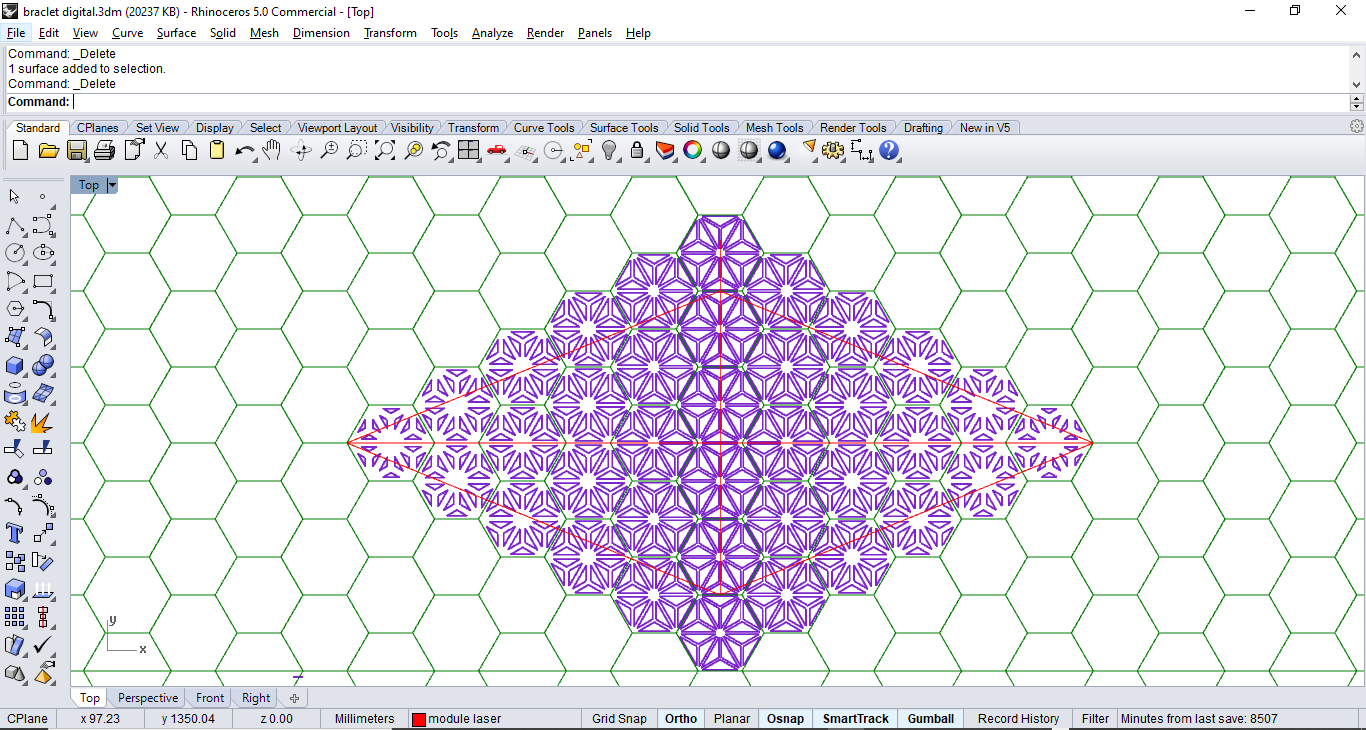 The Islamic Pattern in purple was laser cut on copper fabric with these settings
Conductive Fabric laser settings
| Output | Power | Speed | Frequency | Passes | Color |
|---|---|---|---|---|---|
| Cut | 60 | 5 | 1000 Hz | 1 | Red |
The Green Pattern lines/edges were laser cut on cotton fabric (to isolate and place the copper on top) with these settings
Cotton Fabric laser settings
| Output | Power | Speed | Frequency | Passes | Color |
|---|---|---|---|---|---|
| Cut | 40 | 2 | 1000 Hz | 1 | Red |
Electronics
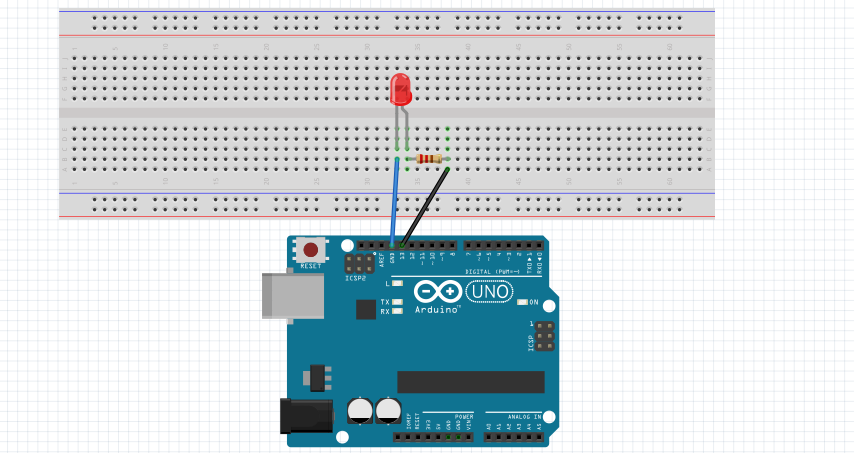
so Firstly I followed this basic Blinking LED with Arduino uno Circuit to create this digital soft sensors. The main idea was to make the connection towards the LED act as switch so using the " " you close and open the circuit.
Components needed: Arduino UNO , Breadboard (generic), LED (generic), Jumper wires (generic), Resistor 220 ohm
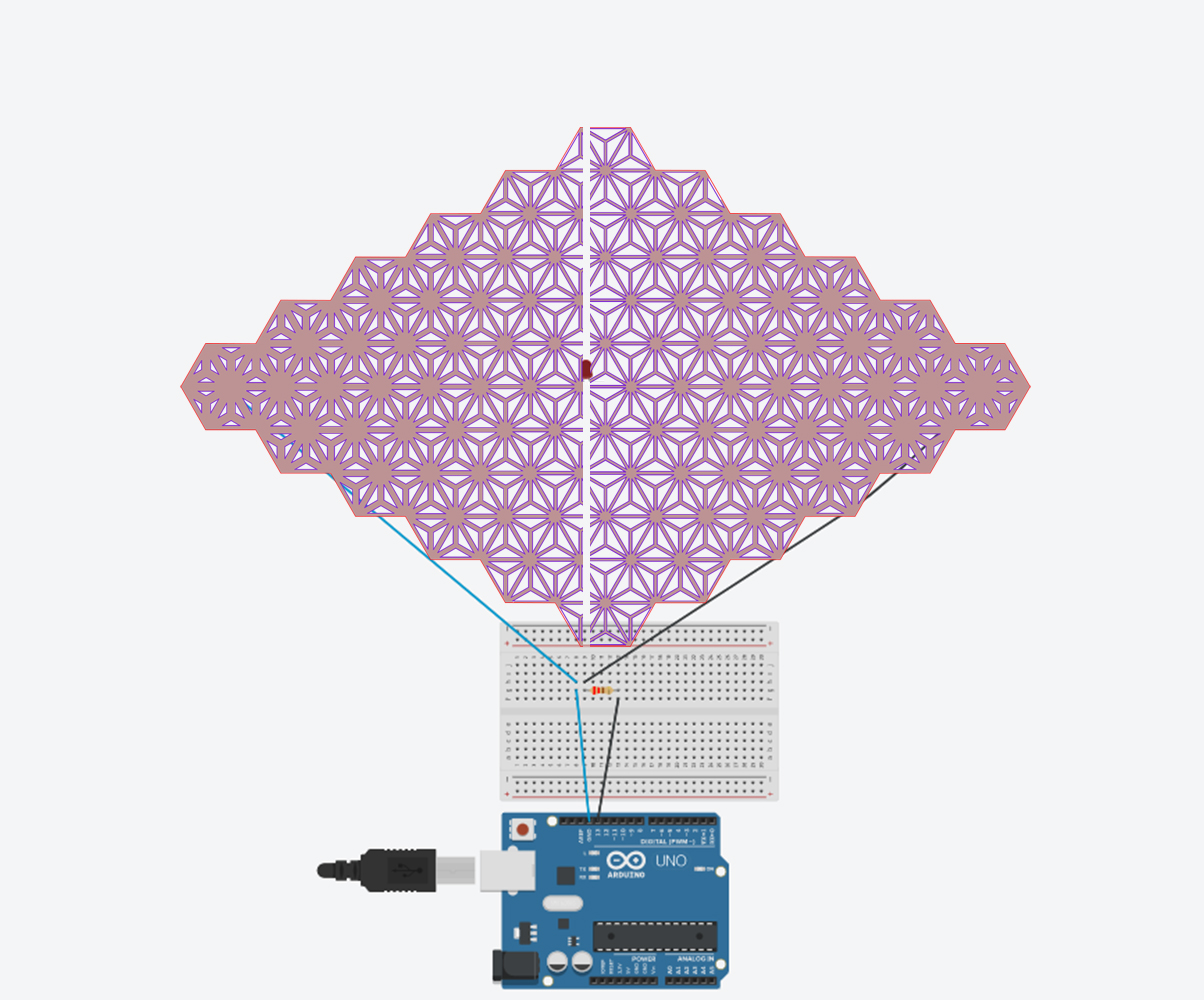
internal wires between the LED and the resistor been replaced with the copper conductive fabric (laser cut in a specific Islamic Pattern)
/*
  Blink

  Turns an LED on for one second, then off for one second, repeatedly.

  Most Arduinos have an on-board LED you can control. On the UNO, MEGA and ZERO
  it is attached to digital pin 13, on MKR1000 on pin 6. LED_BUILTIN is set to
  the correct LED pin independent of which board is used.
  If you want to know what pin the on-board LED is connected to on your Arduino
  model, check the Technical Specs of your board at:
  https://www.arduino.cc/en/Main/Products

  modified 8 May 2014
  by Scott Fitzgerald
  modified 2 Sep 2016
  by Arturo Guadalupi
  modified 8 Sep 2016
  by Colby Newman

  This example code is in the public domain.

  https://www.arduino.cc/en/Tutorial/BuiltInExamples/Blink
*/

// the setup function runs once when you press reset or power the board
void setup() {
  // initialize digital pin LED_BUILTIN as an output.
  pinMode(LED_BUILTIN, OUTPUT);
}

// the loop function runs over and over again forever
void loop() {
  digitalWrite(LED_BUILTIN, HIGH);   // turn the LED on (HIGH is the voltage level)
  delay(1000);                       // wait for a second
  digitalWrite(LED_BUILTIN, LOW);    // turn the LED off by making the voltage LOW
  delay(1000);                       // wait for a second
}
Analogue
Stretch sensor Research
I had been researching through out the years regarding stretch sensors and I had been always fascinated how it can be developed via various materials (I previously tried replicating some but wanted to try a new mechanism of making it)
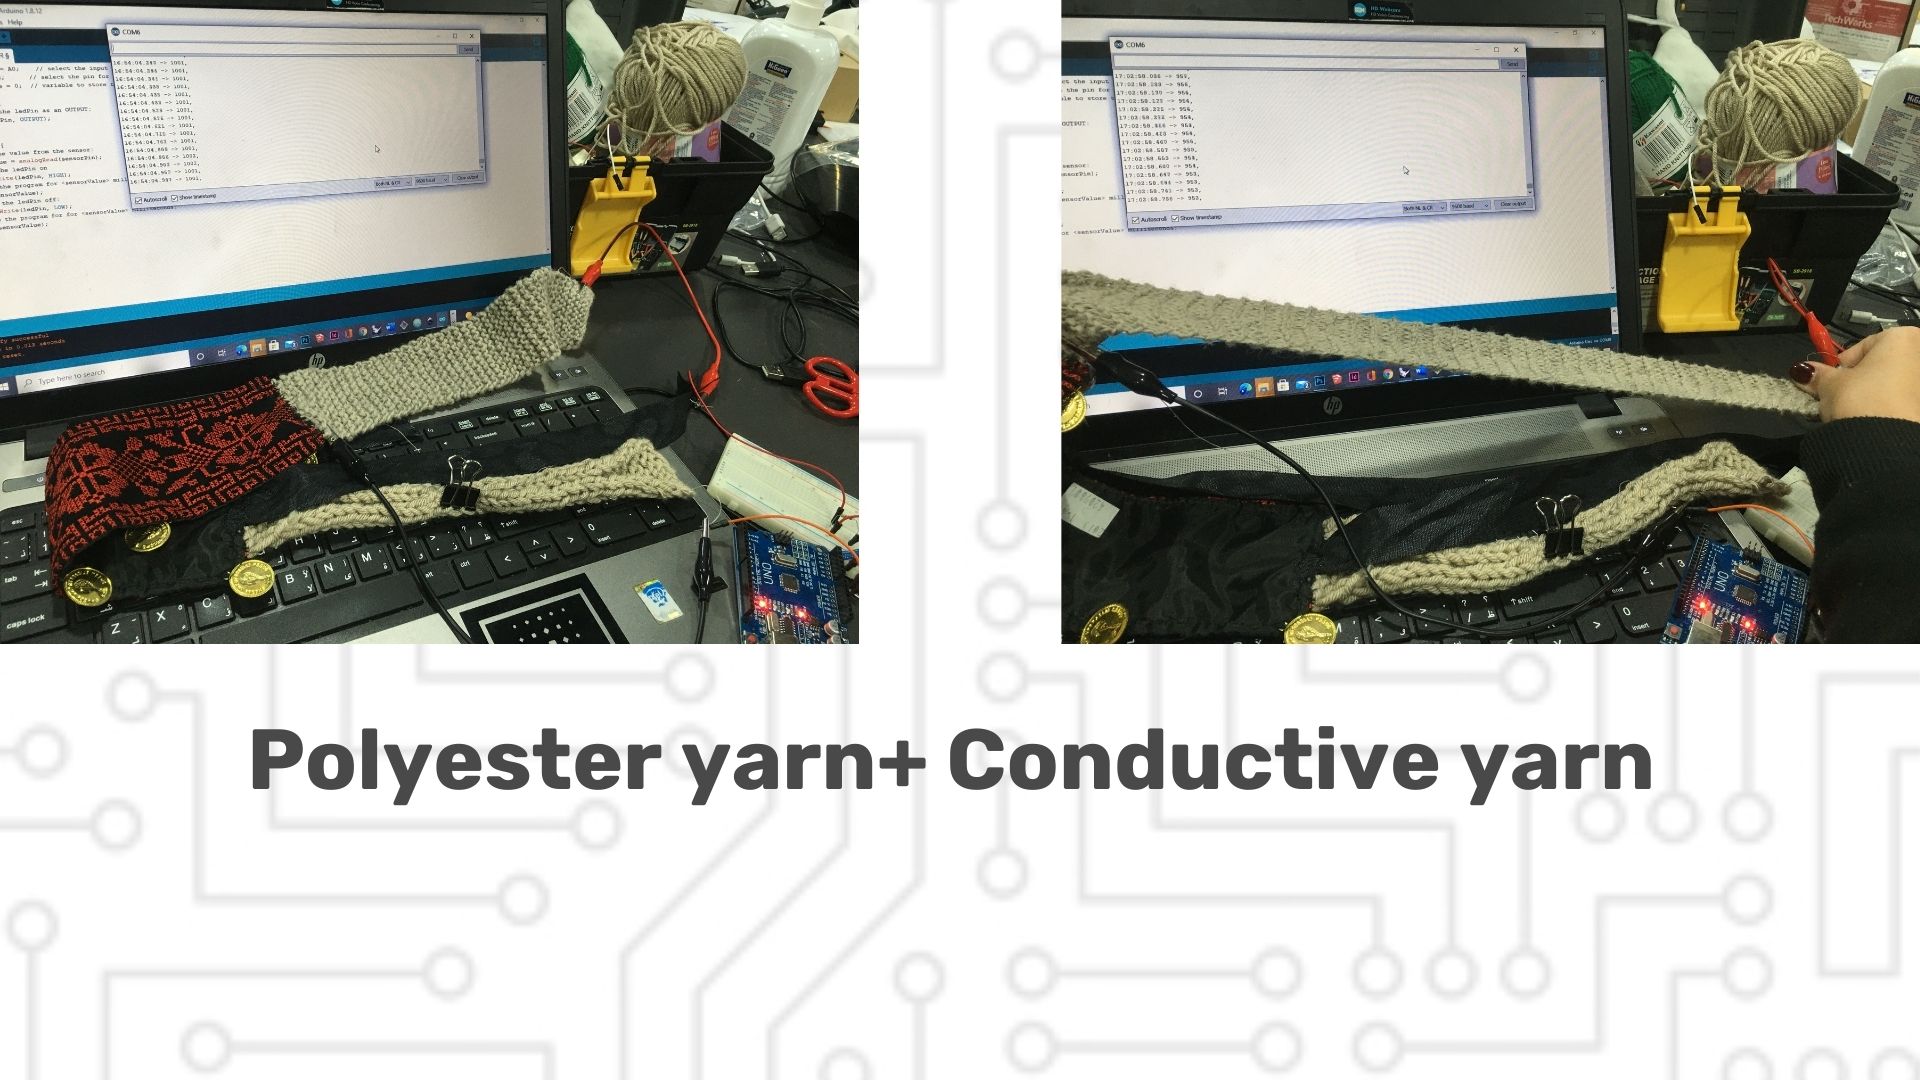
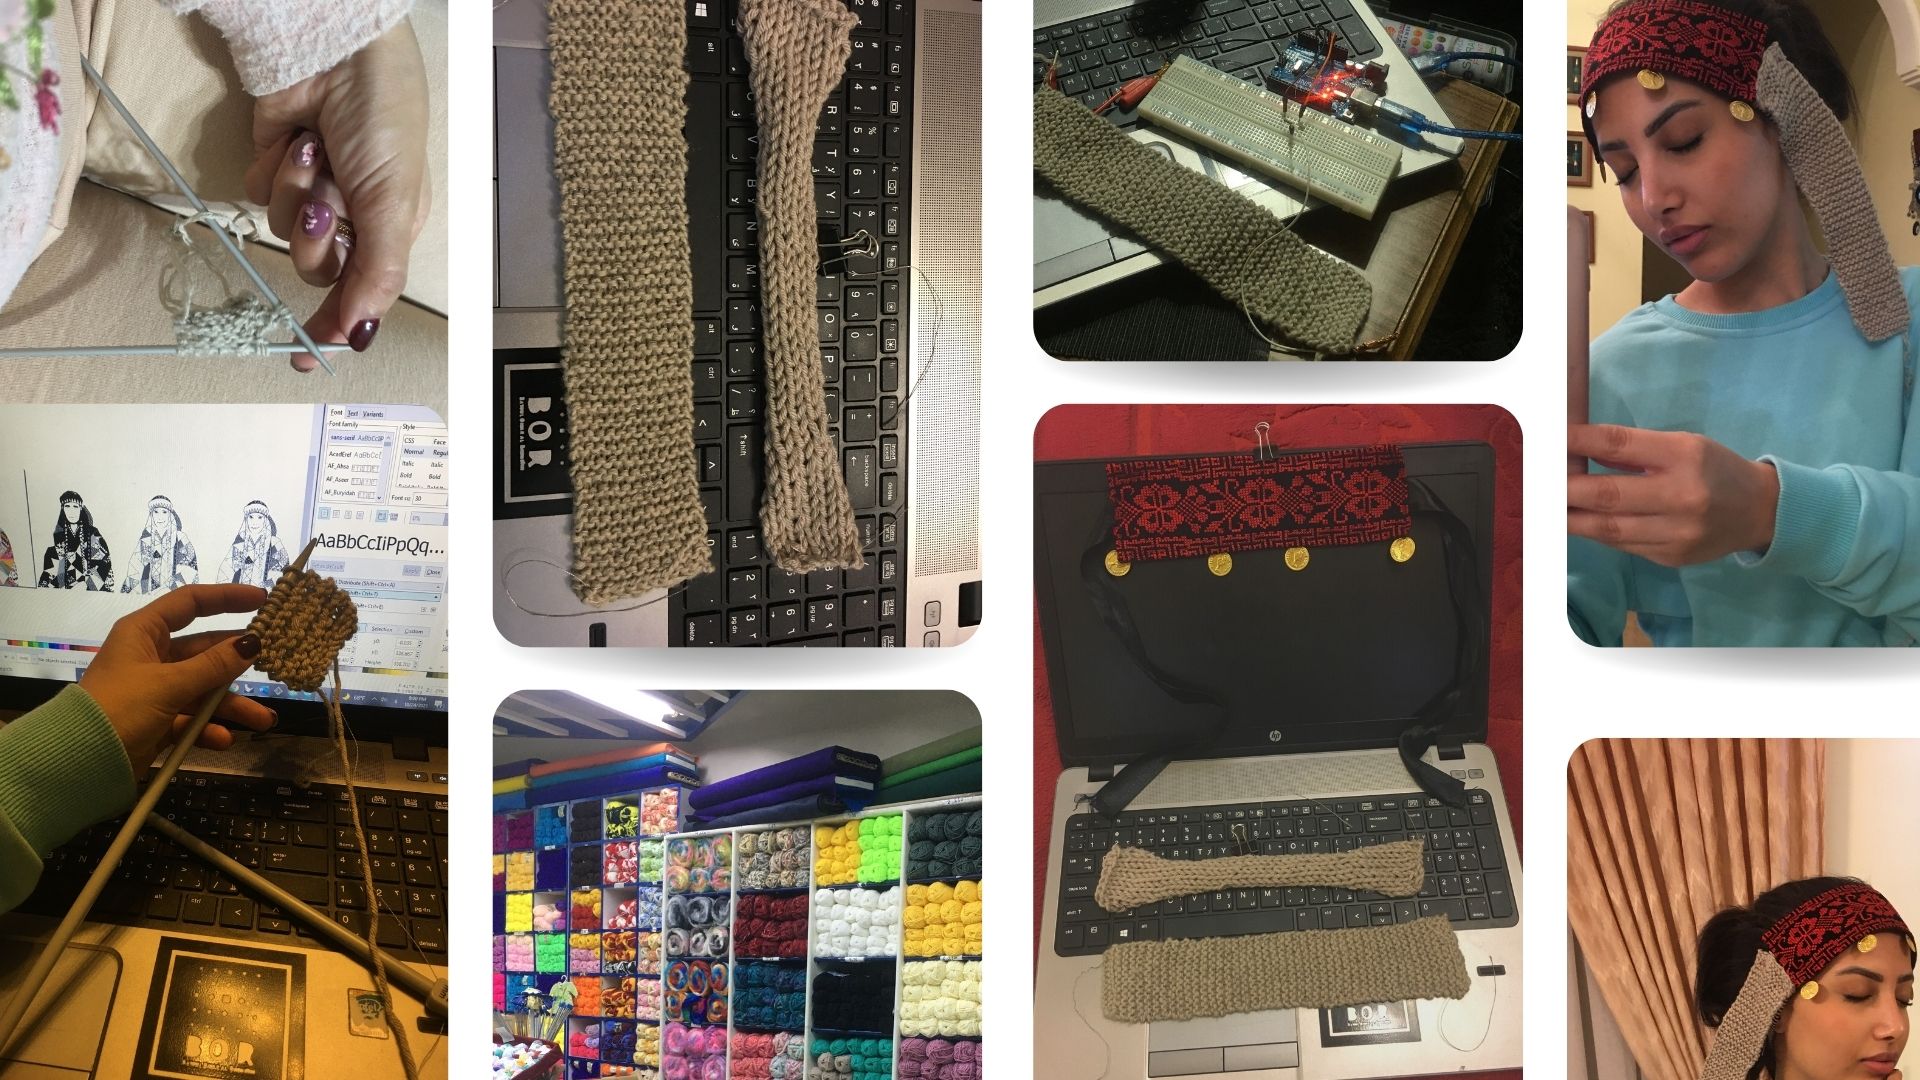
Another form can be the knitted one where I found it doable and it's materials/ components found easily so decided to go with completely knitted version
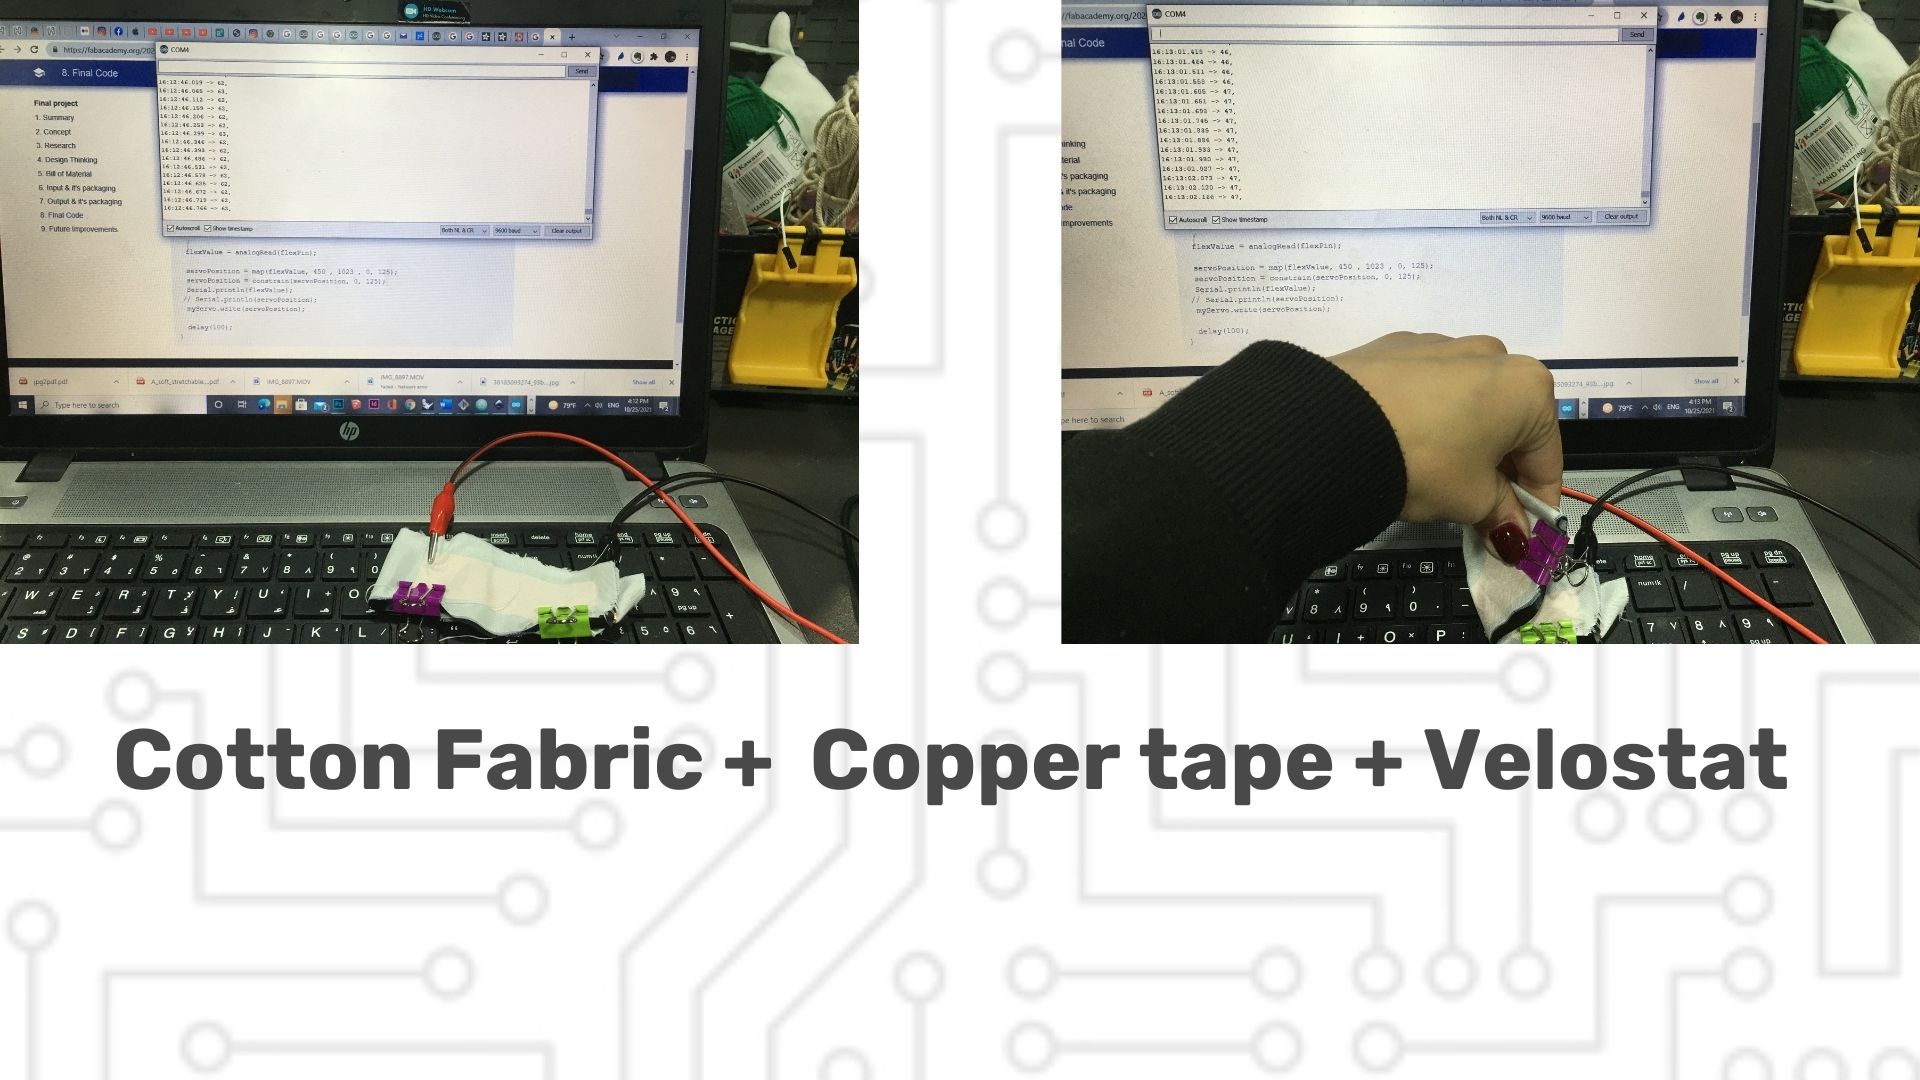
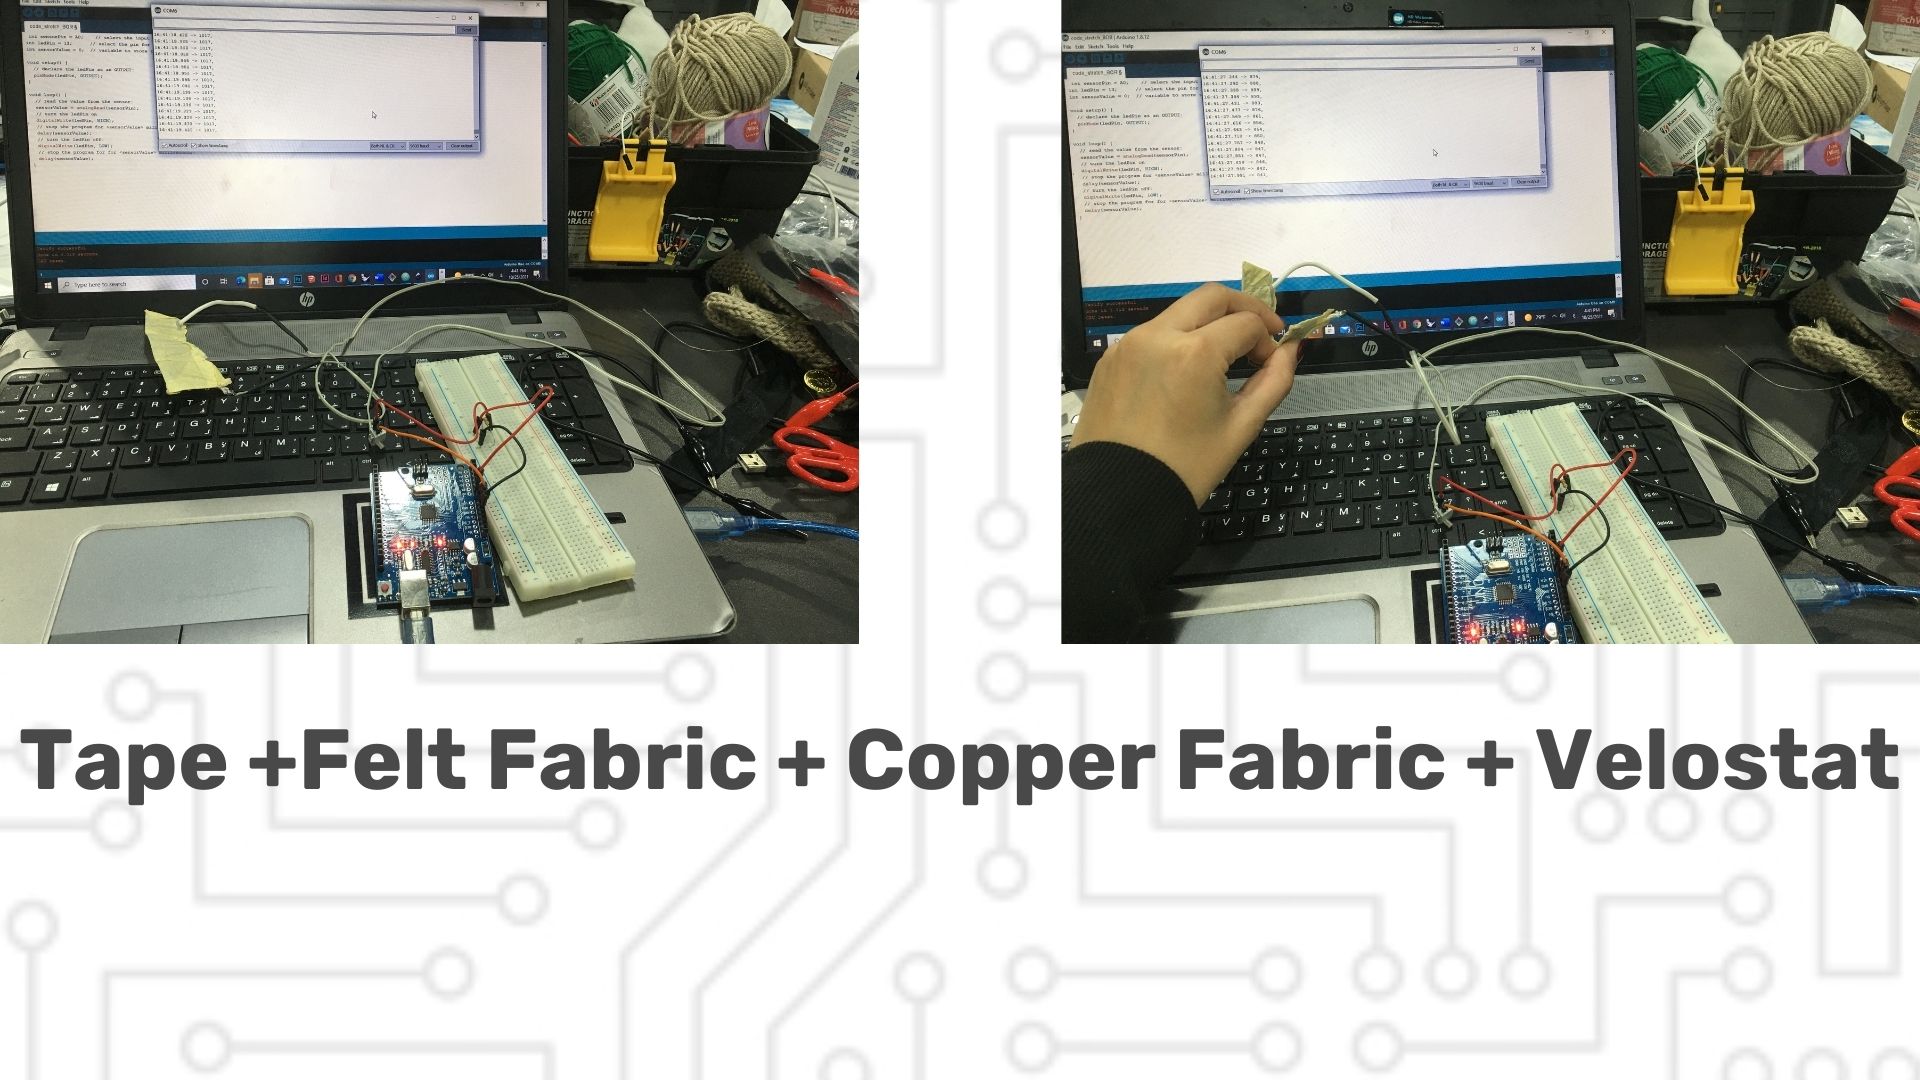
Comparison between DIY sensors
as I have done few different sensors I wanted to compare the change/variation the give in the reading as the most efficient one would be the one giving more range in the reading change
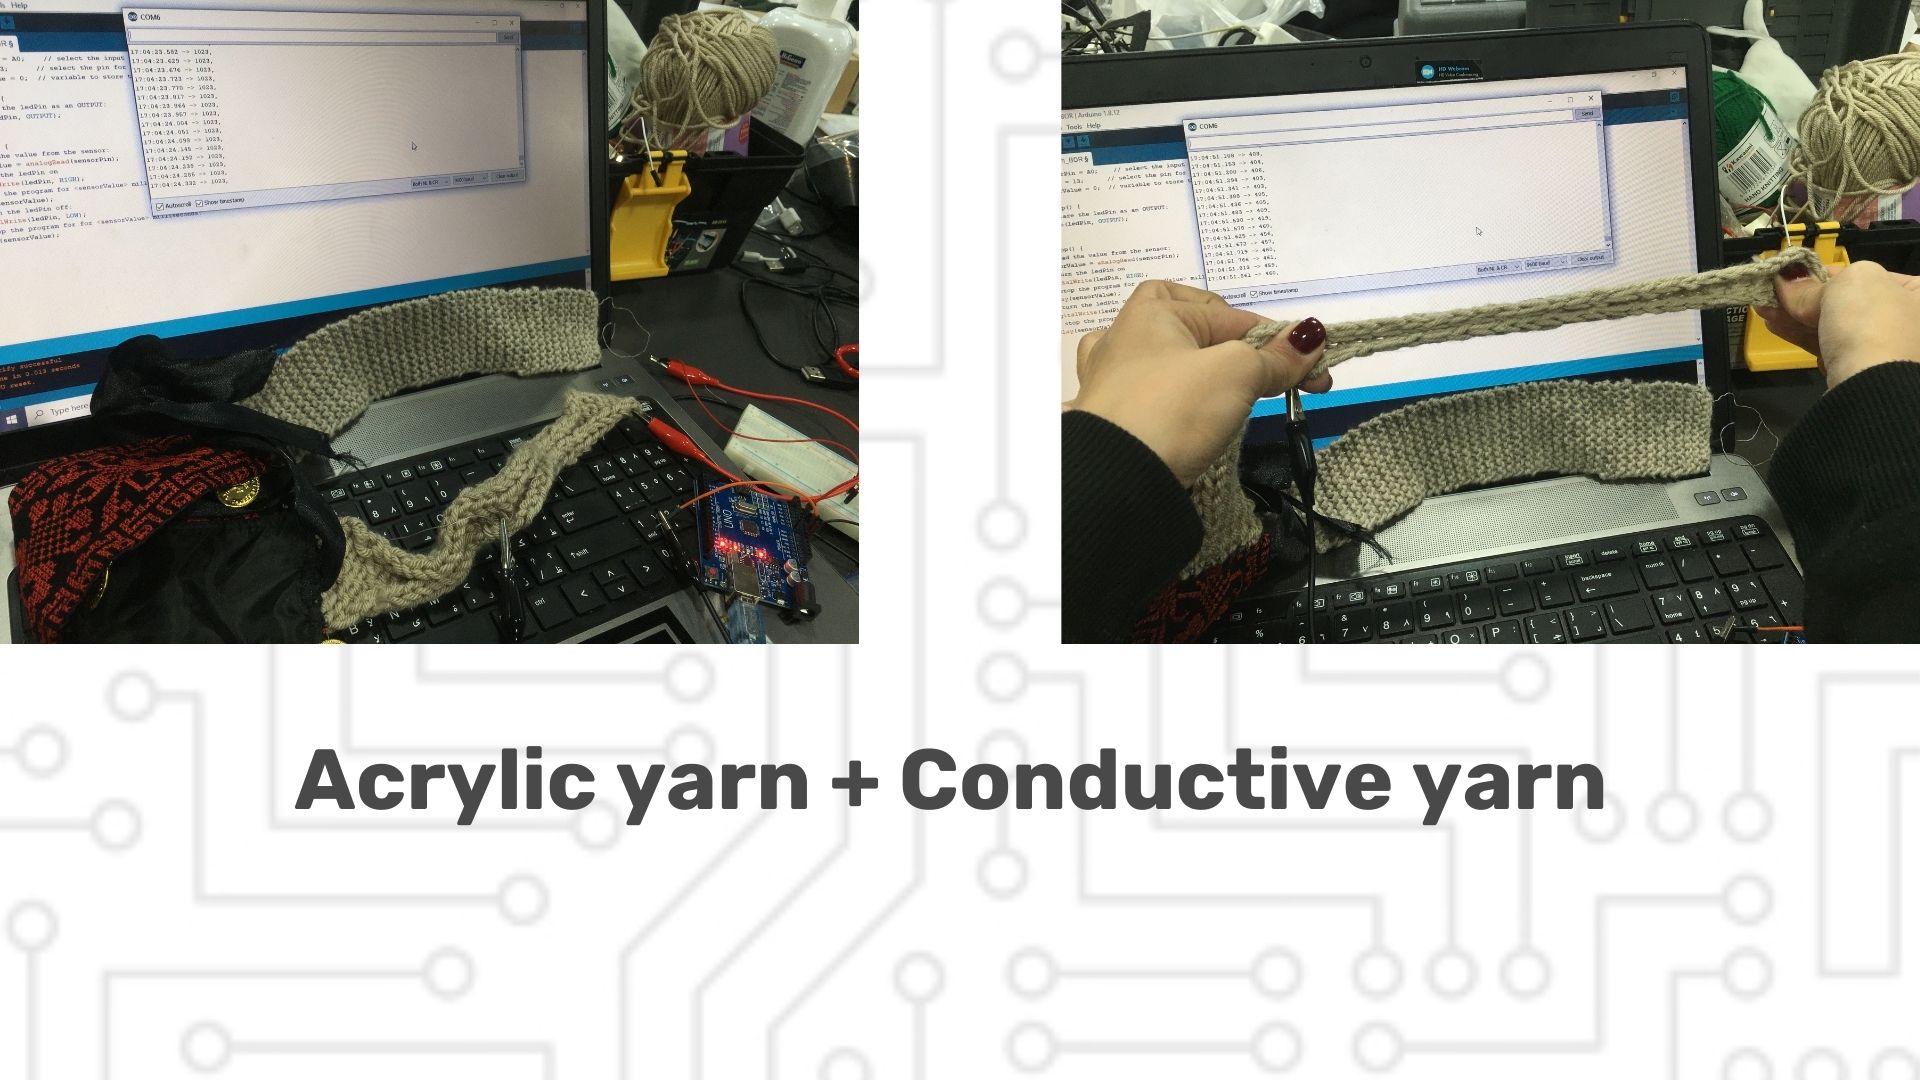
Cultural Knit Stretch Sensor
What I have created inspired from Jordanian culture and heritage
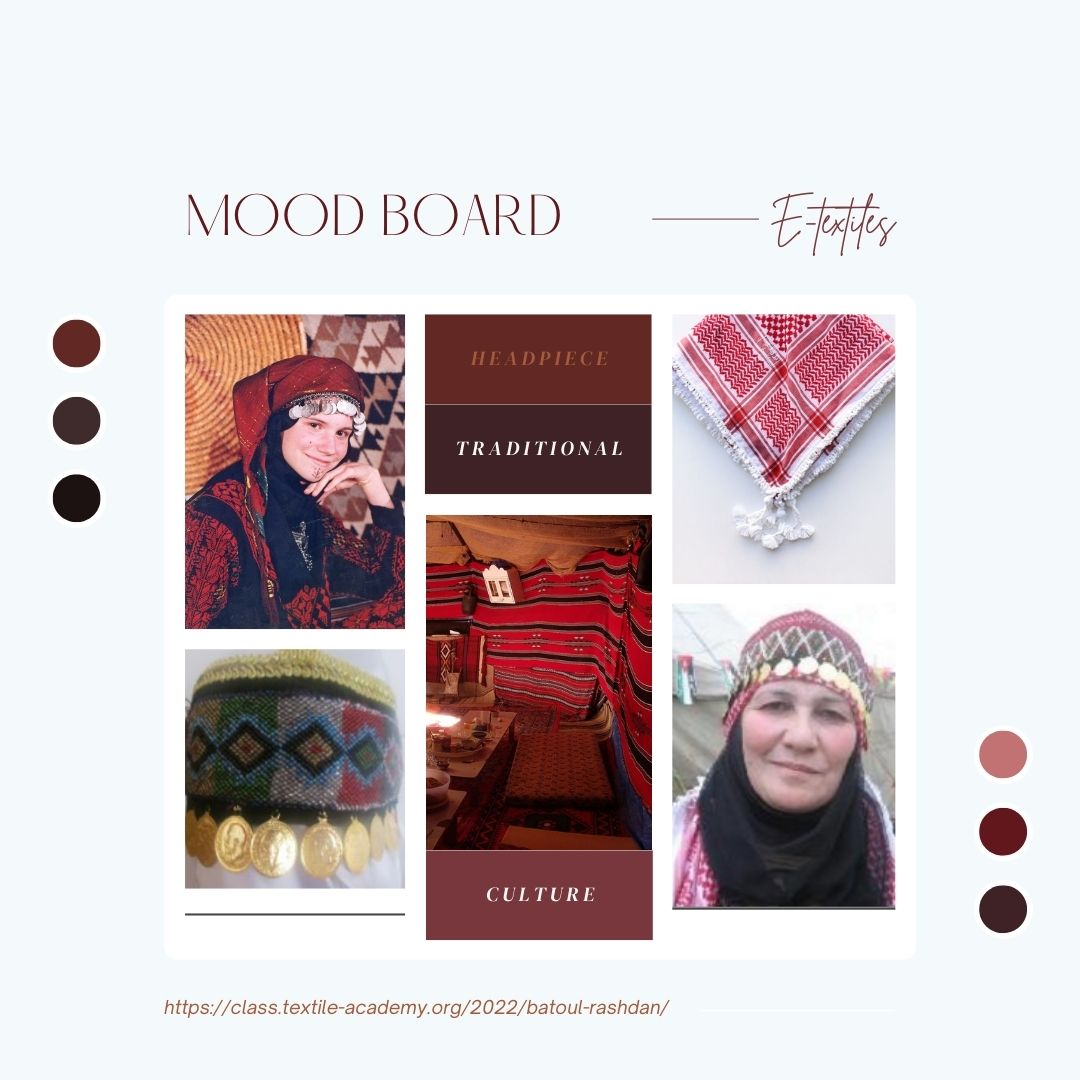
Inspiration
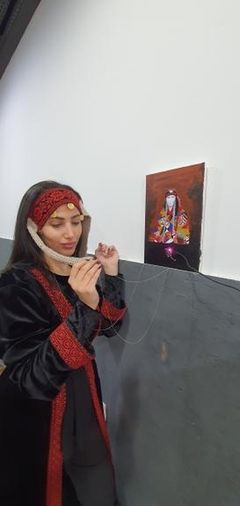
I was inspired from this Embroidered Head Band With Coins Jordanian Traditional "Ousbeh/ 3osbeh/ عصبة الرأس" part from the traditional Jordanian clothing with motifs.
Process
Cultural Knit Stretch Sensor: an analog textile sensor that changes its resistivity when it is pulled and stretched. It is useful for creating variable voltage divider that can be easily read by an Arduino.
The value read will change the blinking frequency of the LED.
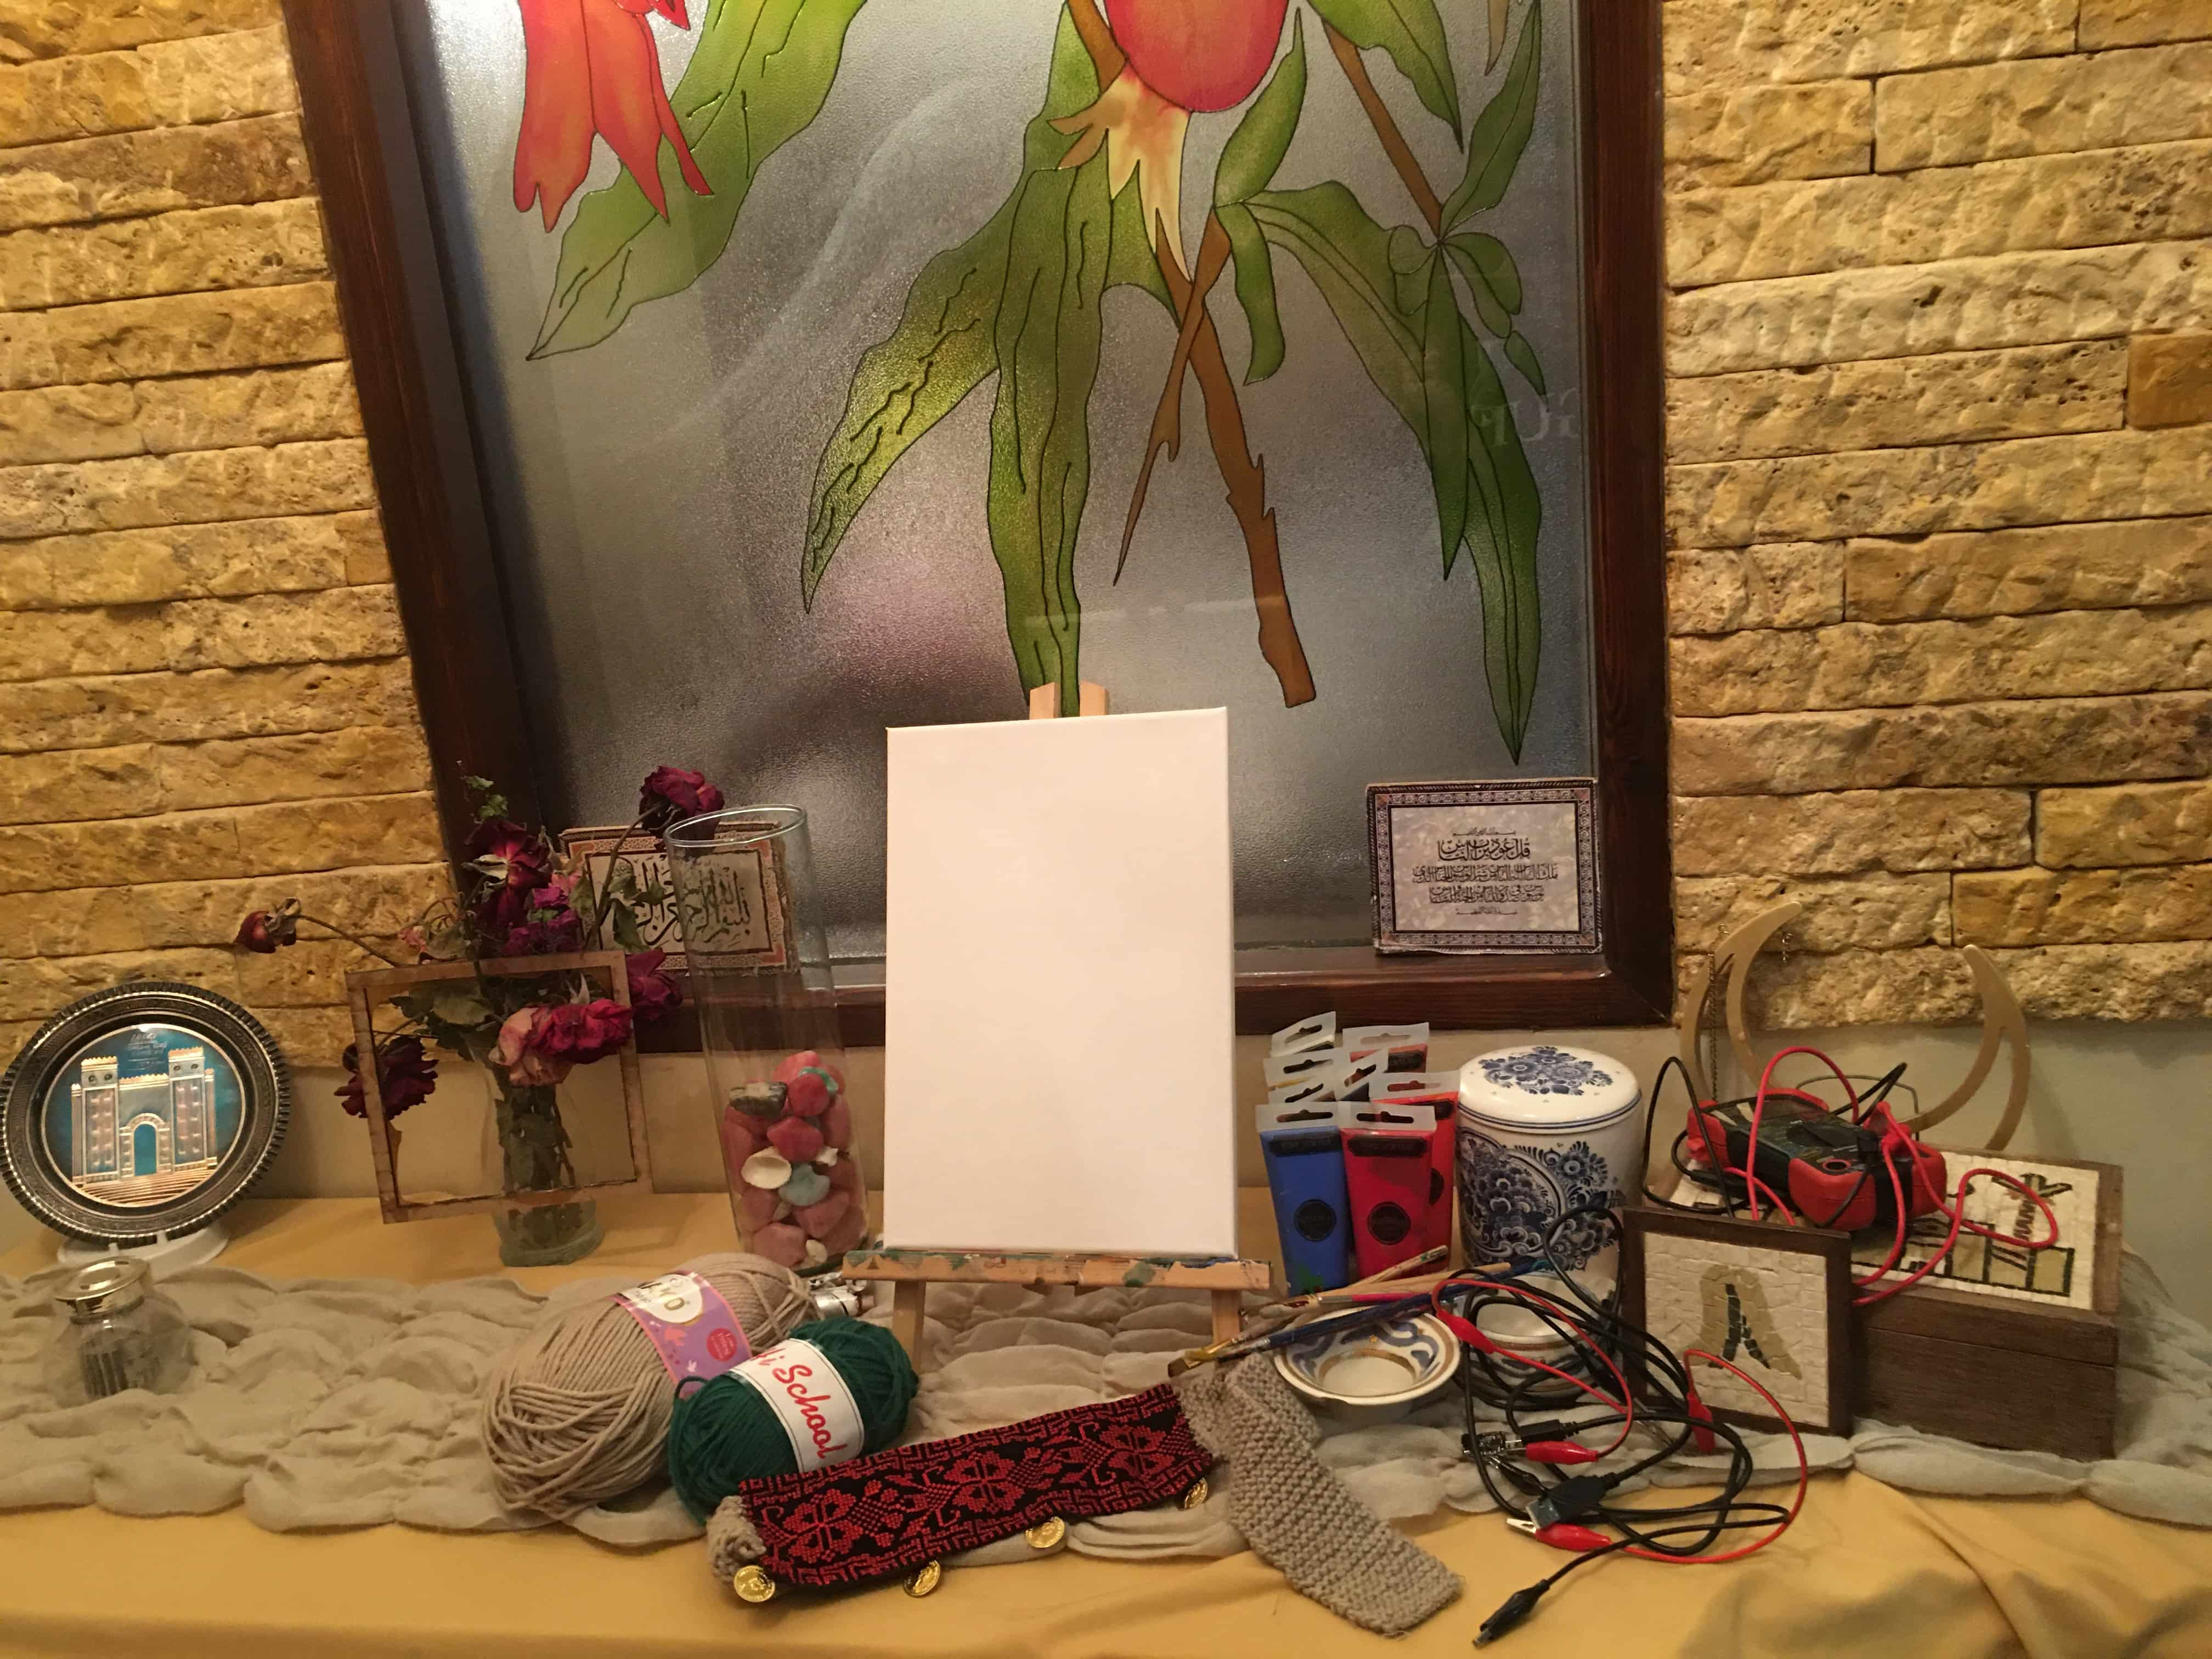
so here you see the sensor as input is ready … time to prepare the output (the actual painting) to attach the LED on
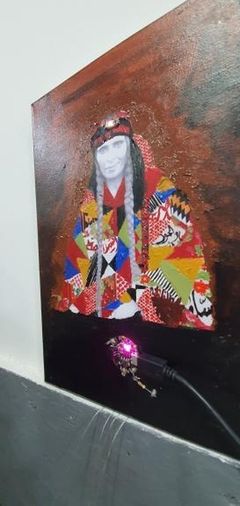
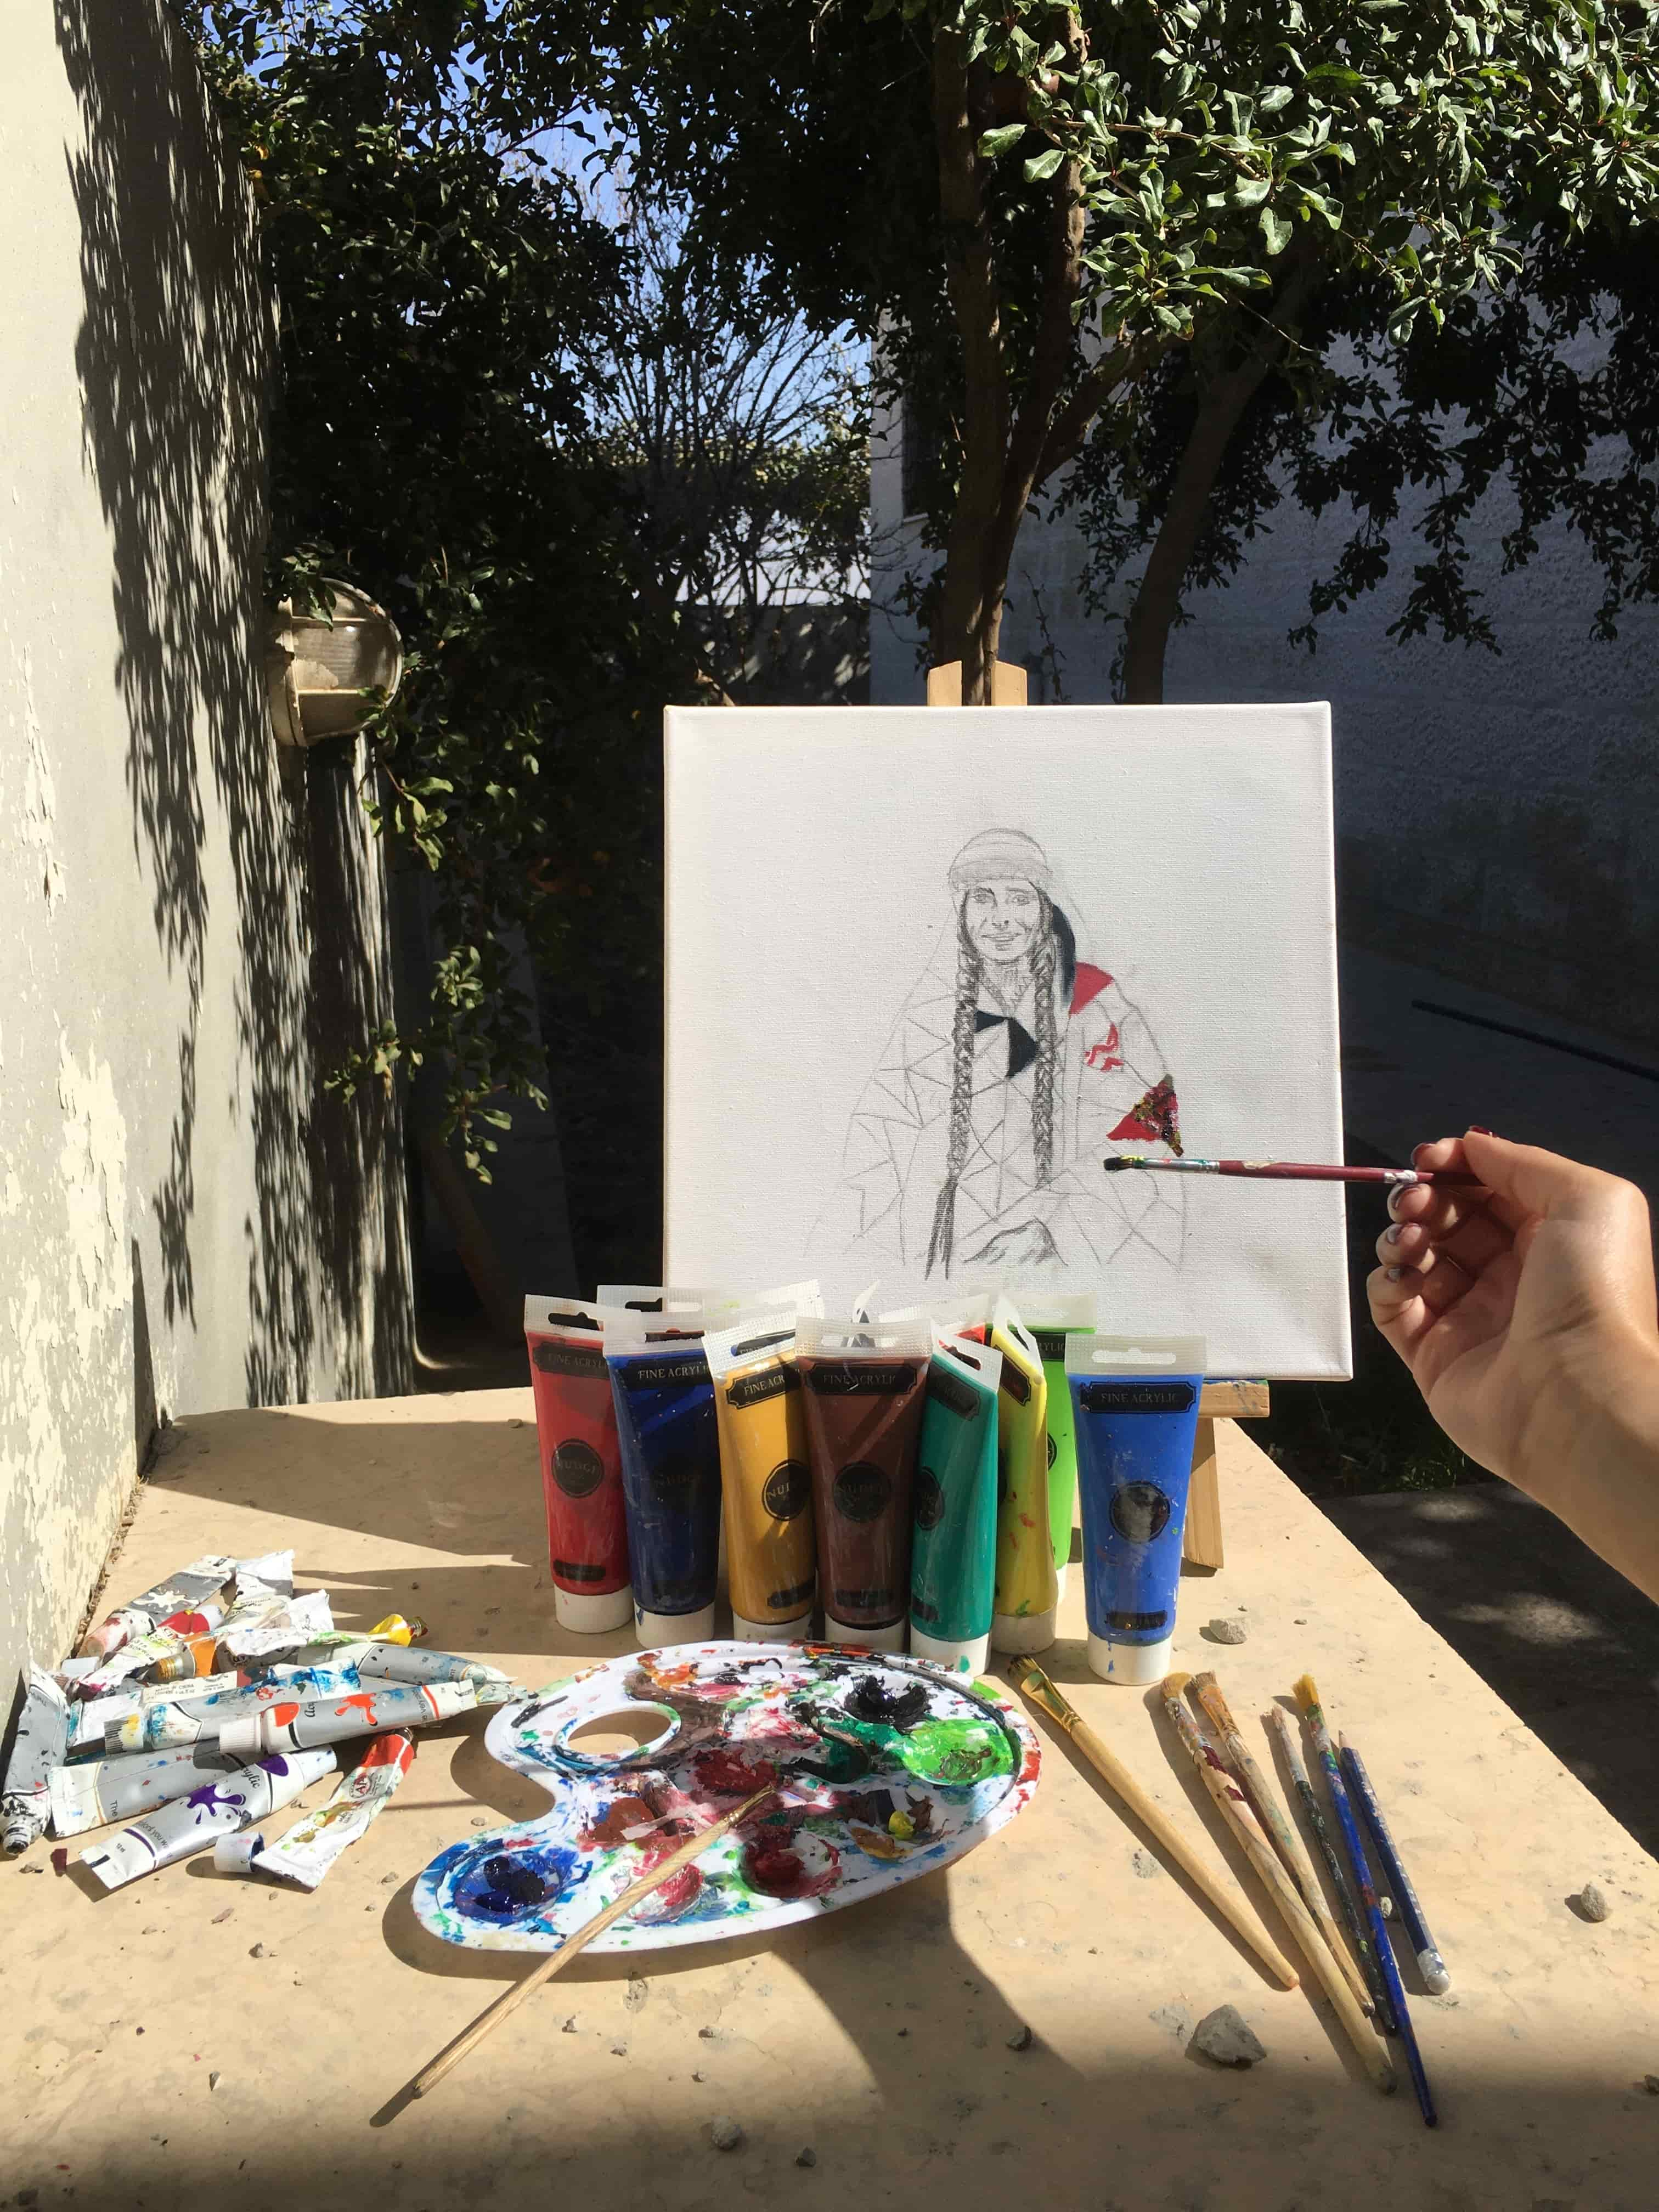 Started painting a cultural painting of a Jordanian Bedouin woman wearing traditional "Ousbeh/ 3osbeh/ عصبة الرأس" with collage style of different Patterns that remind me about Jordan's culture and heritage
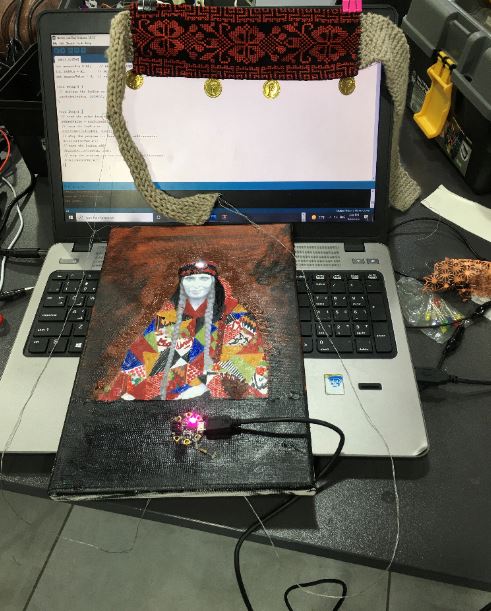
Then Placed an LED on the headband of the painting! and made the connection via conductive thread to my knitted stretch sensor
Electronics
-
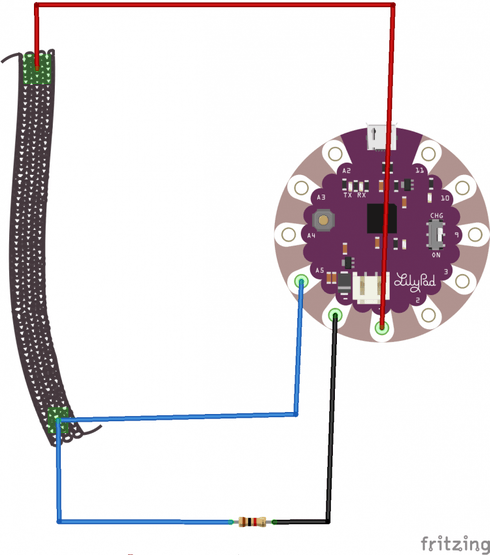
Connect one end of the sensor to the 3V pin of the Adafruit Gemma M0. Then you need to connect the other end to ground through a 1 kOhm resistor like shown.
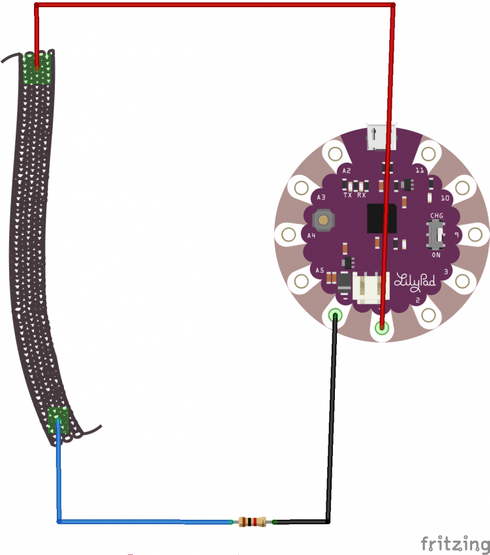
-
Now connect the analog input pin A5 of the Arduino to the end of the sensor connected to the resistor.
Application
usually there's a cultural head peace women in Jordan have so i wanted to modify it merging heritage, culture and technology
Code
I used this code
int sensorPin = A0;    // select the input pin for the sensor
int ledPin = A1;      // select the pin for the LED
int sensorValue = 0;  // variable to store the value coming from the sensor

void setup() {
 // declare the ledPin as an OUTPUT:
 pinMode(ledPin, OUTPUT);
}

void loop() {
 // read the value from the sensor:
 sensorValue = analogRead(sensorPin);
 // turn the ledPin on
 digitalWrite(ledPin, HIGH);
 // stop the program for <sensorValue> milliseconds:
 delay(sensorValue);
 // turn the ledPin off:
 digitalWrite(ledPin, LOW);
 // stop the program for for <sensorValue> milliseconds:
 delay(sensorValue);
}
Previously
Previously done DIY stretch sensor that led to the final project on my fabacademy page if you wanna see more of the process!