6. BioFabricating Materials
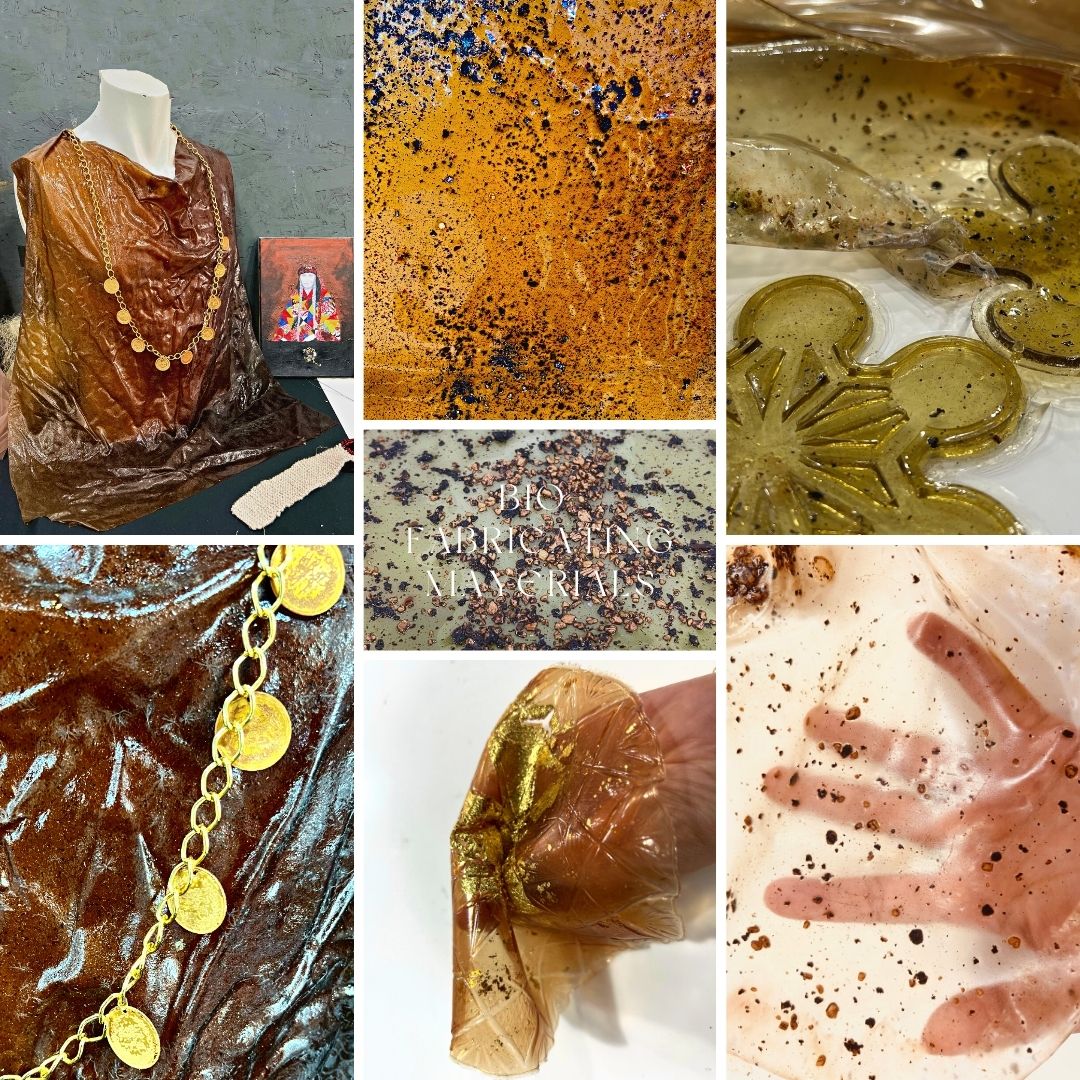
In this last century, we have been crafting, designing, and growing materials independently from their future use. This has caused major design flaws in our daily lives, where we find ourselves surrounded by plastics, while observing knowledge about local materials and techniques disappear and left unused even when in abundance.
This research focused on exploring material alternatives to the current ones. By bridging craftsmanship techniques and today's easier access to technologies, exploring alternative material resources to craft their processing and develop products and materials hand in hand.
Inspiration
- The Rich Culture of the Bedouins of Jordan

What is bio fabricating material? Material experimentation (start by understanding the materials around us and maybe recycle them... wonder where they came from and documenting all these materials - creating a library )
What are biomaterials?
- Bio-Based (level one of biomaterials)
- Biodegradable (degrade in a certain context) (level 2)
- Bio-composite (this is the real deal- fully digested by nature within 180 days)(level premium)
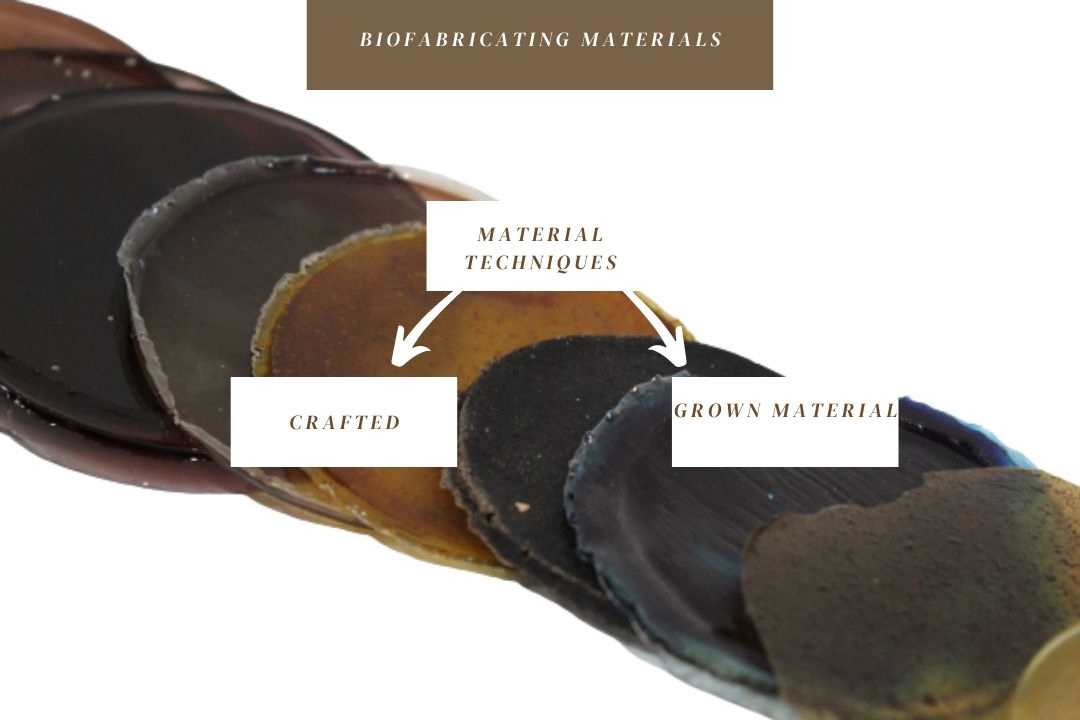
differs in their way of creation and their applications...
-
crafted ->foils, bricks & yarns
-
grown ->leathers
What are plastics? pliable and easily shaped
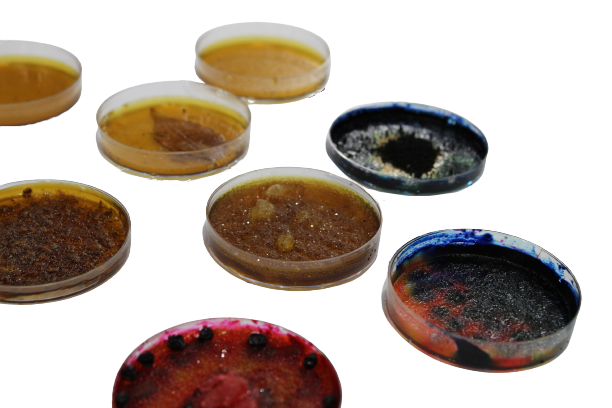
To start with I started with the leftovers I kept safe in the fridge from the biochromes weeks plus more waste...
1. Crafted
Bioplastics
Ingredients and tools for All:
-
Pots
-
Wooden stick to stir
-
Textiles molds or casting surfaces
-
Pigments / natural dyes
-
Fillers of choice (egg shells, ...etc)
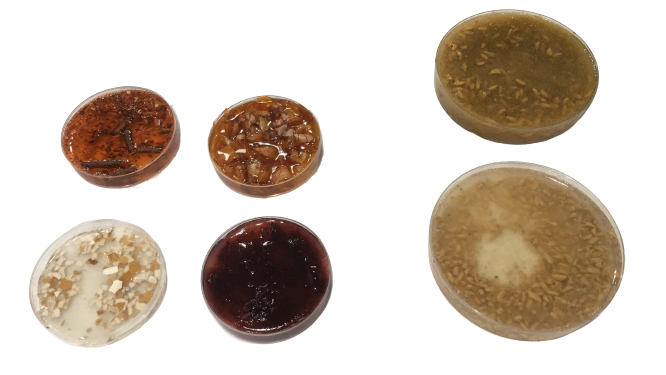
I tried to recreate the golden coins on the inspo above by trying different bio recipes
Gelatine Based
unlike agar and alginate ... Gelatine isn't Vegan animal-driven ingredient made of collagen present in animal parts comes in different forms Jelly, dry thin flat sheets, or powder in all cases is a translucent material
waste resource and material comes from industry
Glycerine helps to create elastic materials!
maximum elasticity DO NOT EXCEED ratio 1:1 between gelatine and glycerine otherwise you would end up with a very sticky substance hard to cure!
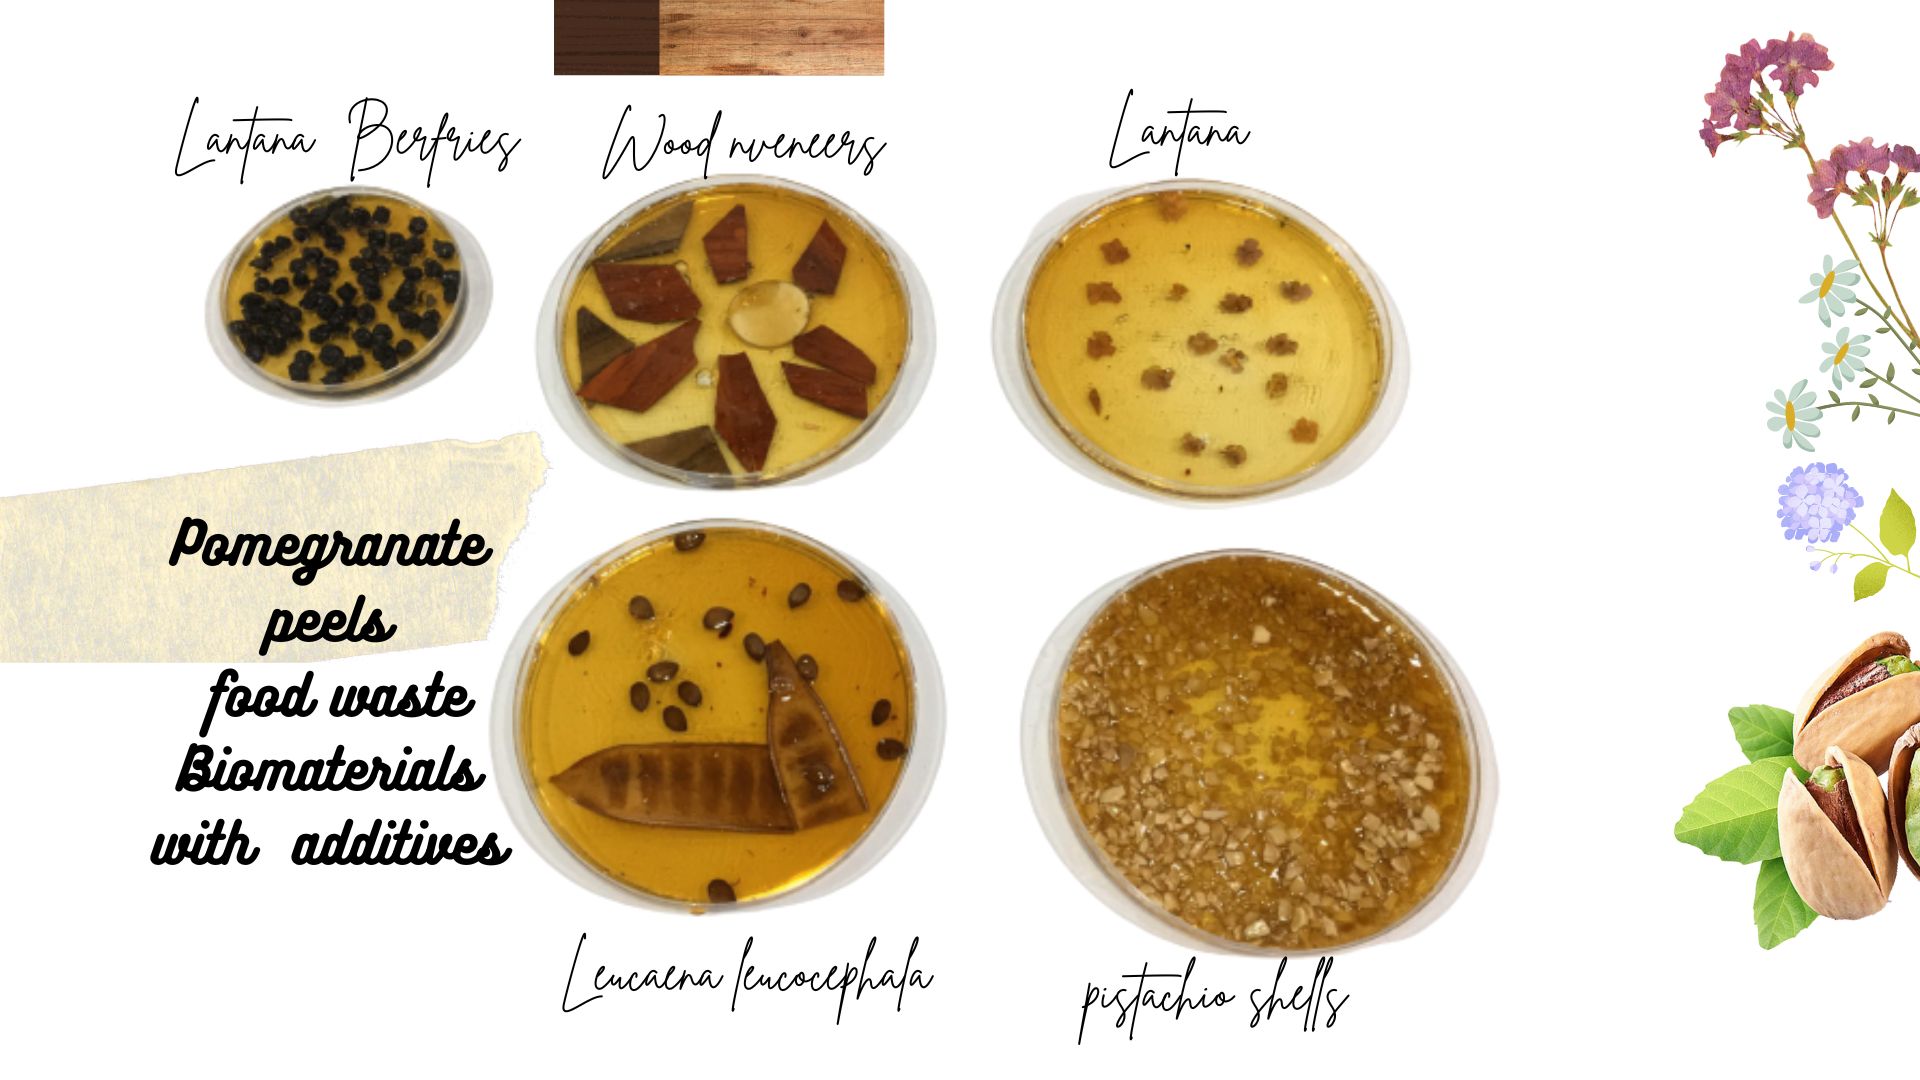
Gelatine Bio-Silicone (Pomegranate dye-bath)
 Ingredients and tools:
- Pots
- Gelatine
- Glycerine
- Petri dishes
- water (so in this recipe used a pomegranate dye bath I was saving from the biochromes assignment)
- Fillers of choice: Lantana, Leucaena Leucocephala "coffee Bush", Wood Veneers, Crushed Pistachio, Lantana(flowers).
Ingredients:
pre-weight ingredients:
- 2 gr Agar
- 6 gr Glycerine
- 200 ml of water
Procedure:
- Warm up the water until warm (maximum 8o C)
- Add Plasticizer Glycerine
- Add Agar
- Mix on the heat for 7~10 minutes (since half of the amount of the original recipe)
Gelatine Bio-Resin (with gold )

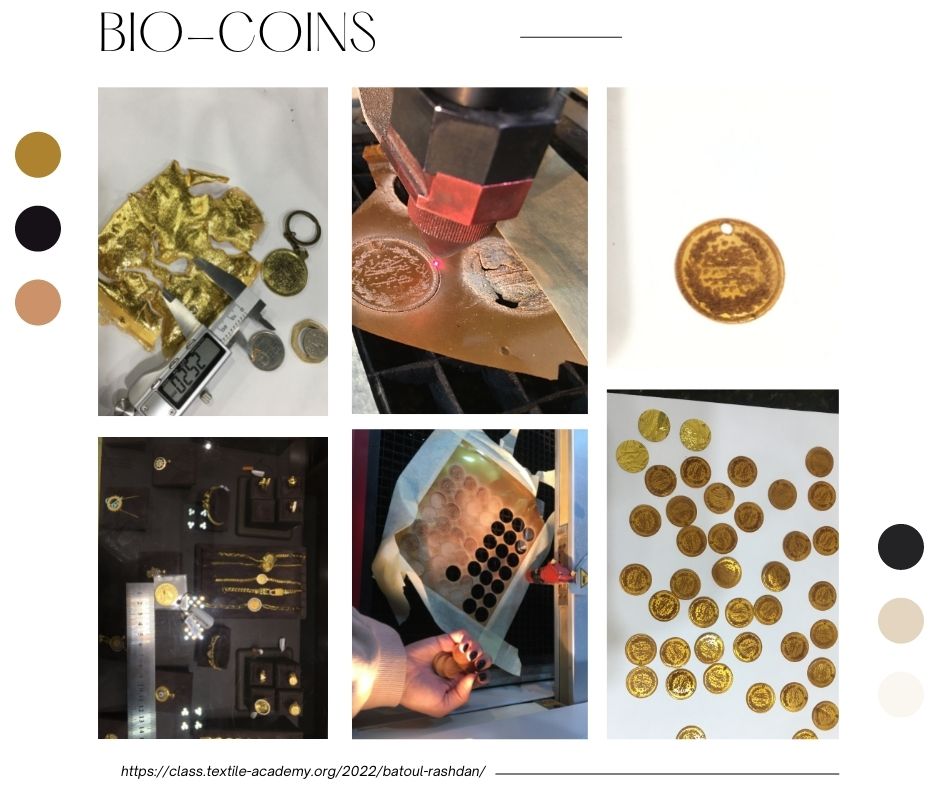 Ingredients:
pre-weight ingredients:
Ingredients:
pre-weight ingredients:
- 48 gr Gelatine
- 24 gr Glycerine
- 130 ml of water
Procedure:
- Warm up the water until warm (maximum 6o C)
- Add Plasticizer Glycerine
- Add Gelatine
- Mix on the heat for a few minutes
- Pour on the surface (in this case a glass shelf with MDF wasted food as boarders fixed with tape)
- added gold leaves on the sides
Laser settings
Engrave
Power 14 Speed 10 Frequency 1000
Cut
Power 70 Speed 1.6 Frequency 1000
Gelatine Bio-Silicone (olive seeds + dye-bath)
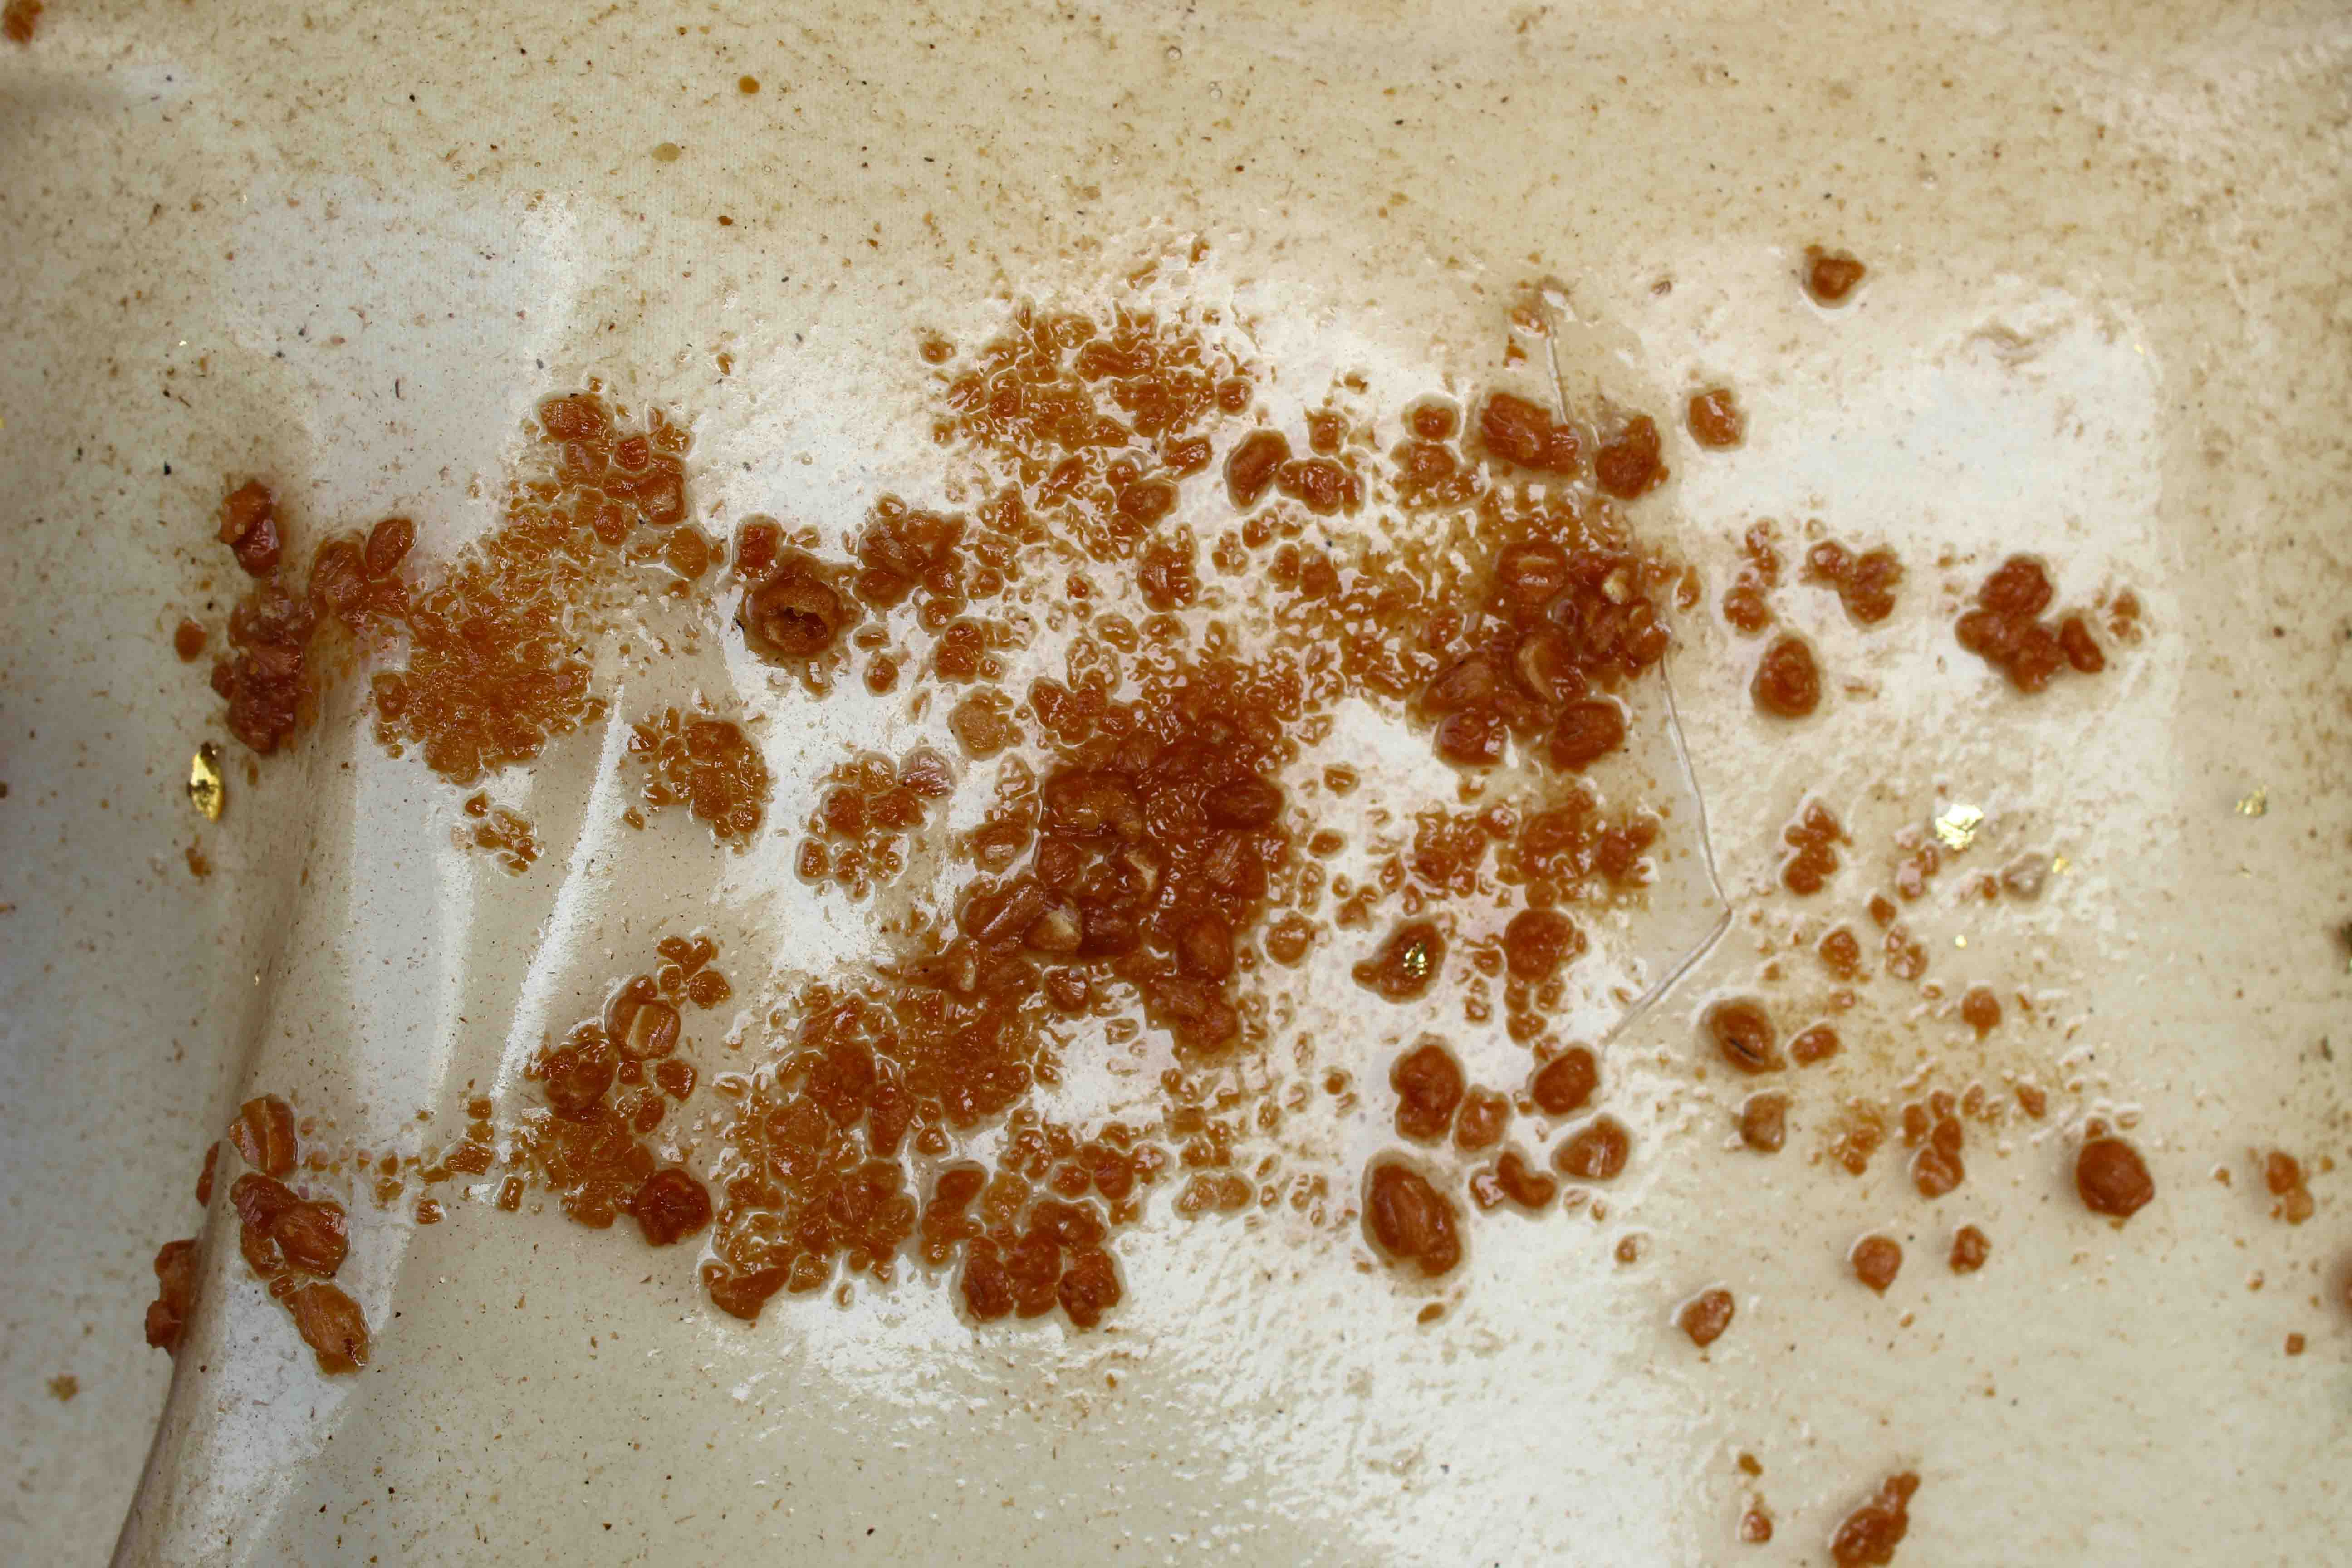 Ingredients:
Pre-weight ingredients:
- 48 gr Gelatine
- 24 gr Glycerine
- 17 gr Olive Seeds
- 110 gr olive Seeds dye-bath
- 130 ml of water
Procedure:
- Mix and Warm up the water and dye bath together until warm (maximum 8o C)
- Add Plasticizer Glycerine
- Add Gelatine
- Mix on the heat for a few minutes
- Pour on the surface (in this case a glass shelf with MDF wasted food as boarders fixed with tape)
- added gold leaves on the sides
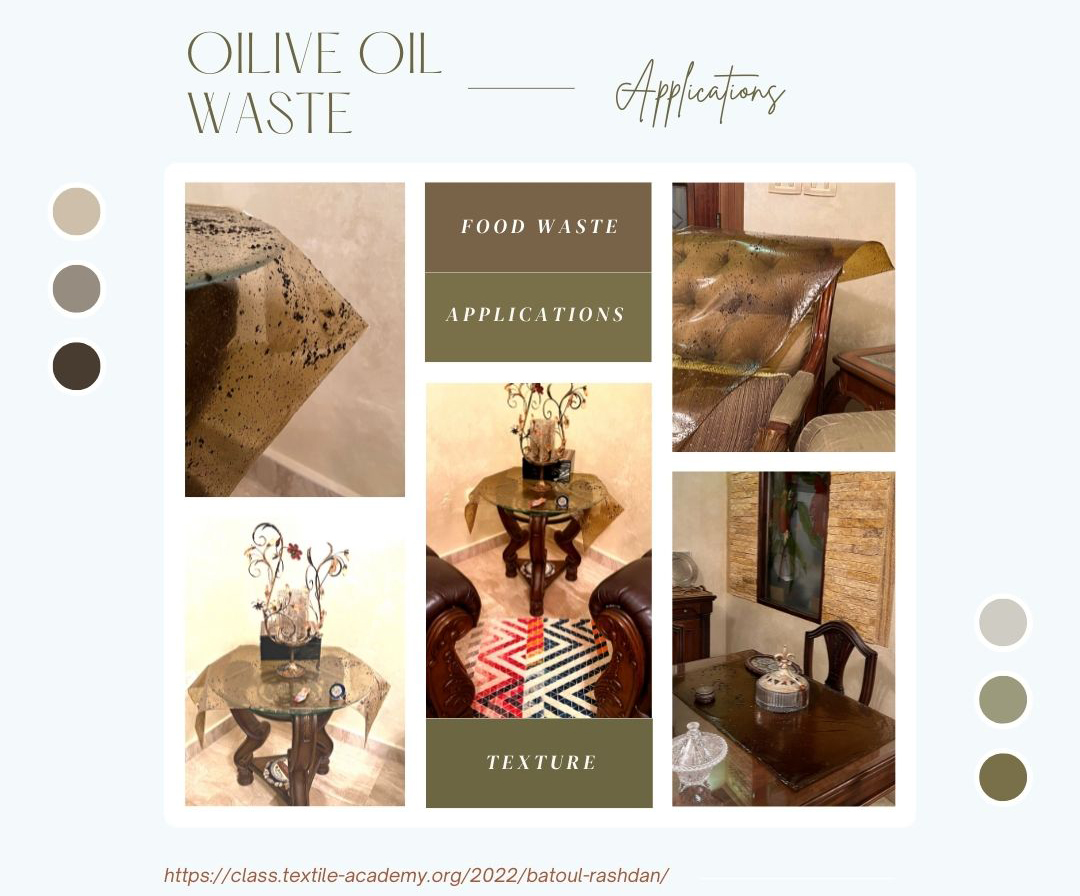
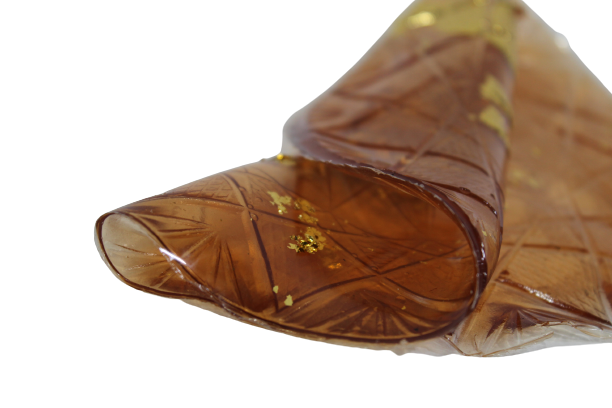
Gelatine Bio-Silicone (Olives waster after making oil from farms )
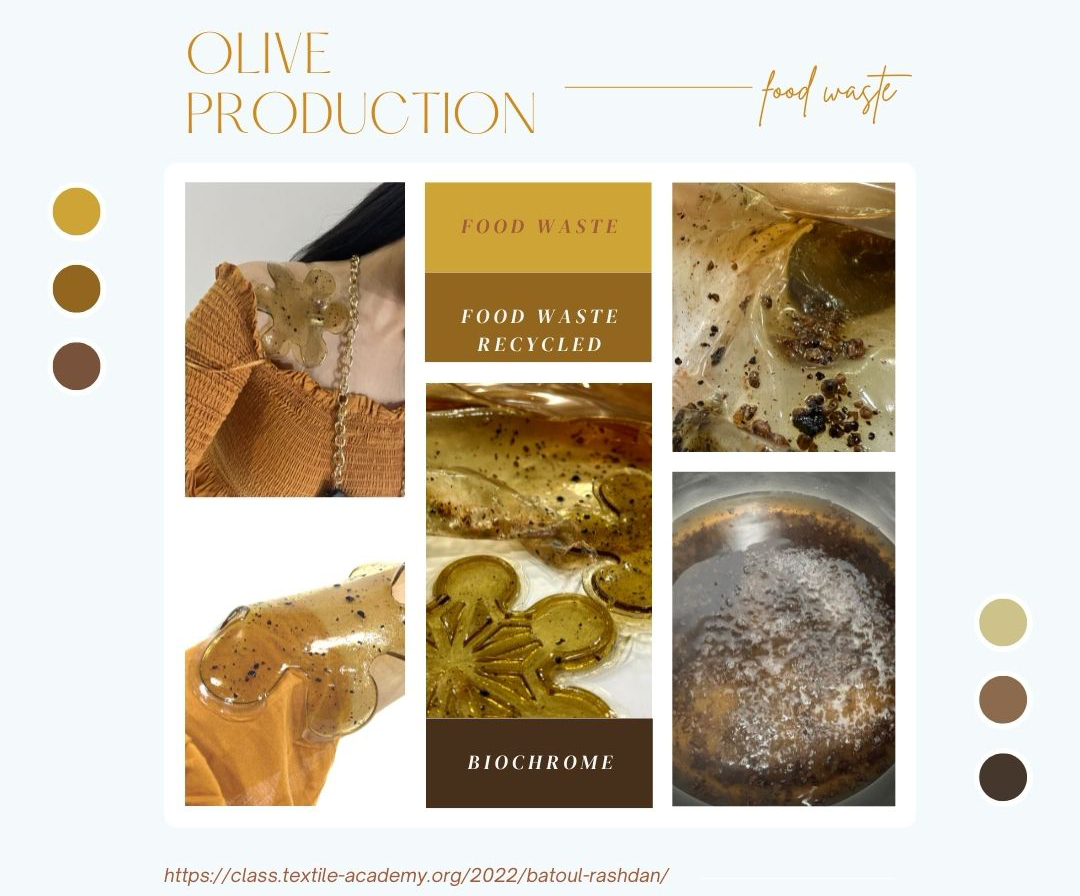
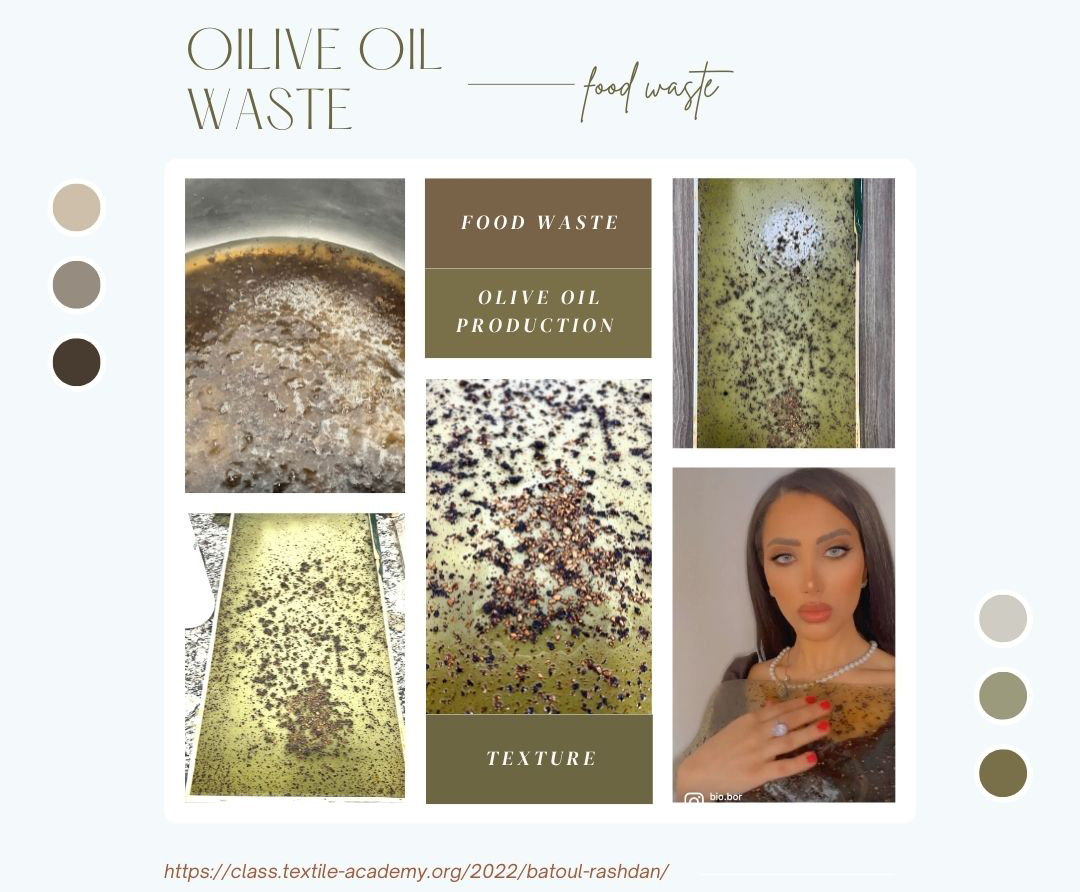
Ingredients:
pre-weight ingredients:
-
gr Gelatine
-
gr Glycerine
-
4 tablespoons of the waste of olives
-
1000 + 300 ml water
Procedure: 1. Mix and Warm up the water and dye bath together until warm (maximum 8o C) 2. Add Plasticizer Glycerine 3. Add Gelatine 4. Mix on the heat for 5~10 minutes 5. Pour on the surface (in this case an acrylic big white acrylic mold)
Gelatine Bio-Silicone (Onions dye-bath) Islamic Pattern
pre-weight ingredients: - 24 gr Gelatine - 12 gr Glycerine - 120 water
- coaster with wooden frame here I used the wood as a frame and Granite Stone Kitchen Granite Slab as a surface (cuz I wanted to test how thin the biomaterial would end up as it would )
wasn't the best mold ever so I have bubbles yup

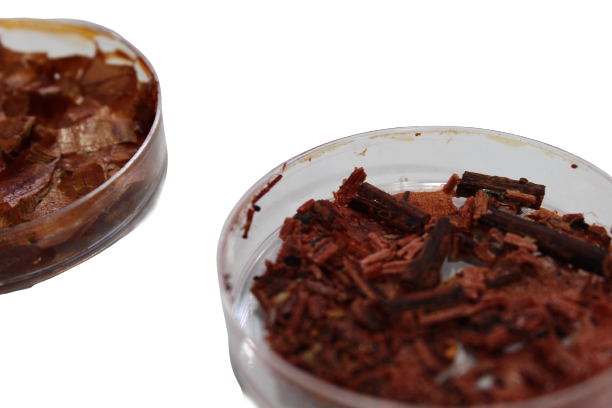
Gelatine Bio-Silicone (Beetroot Peels + its dye bath)
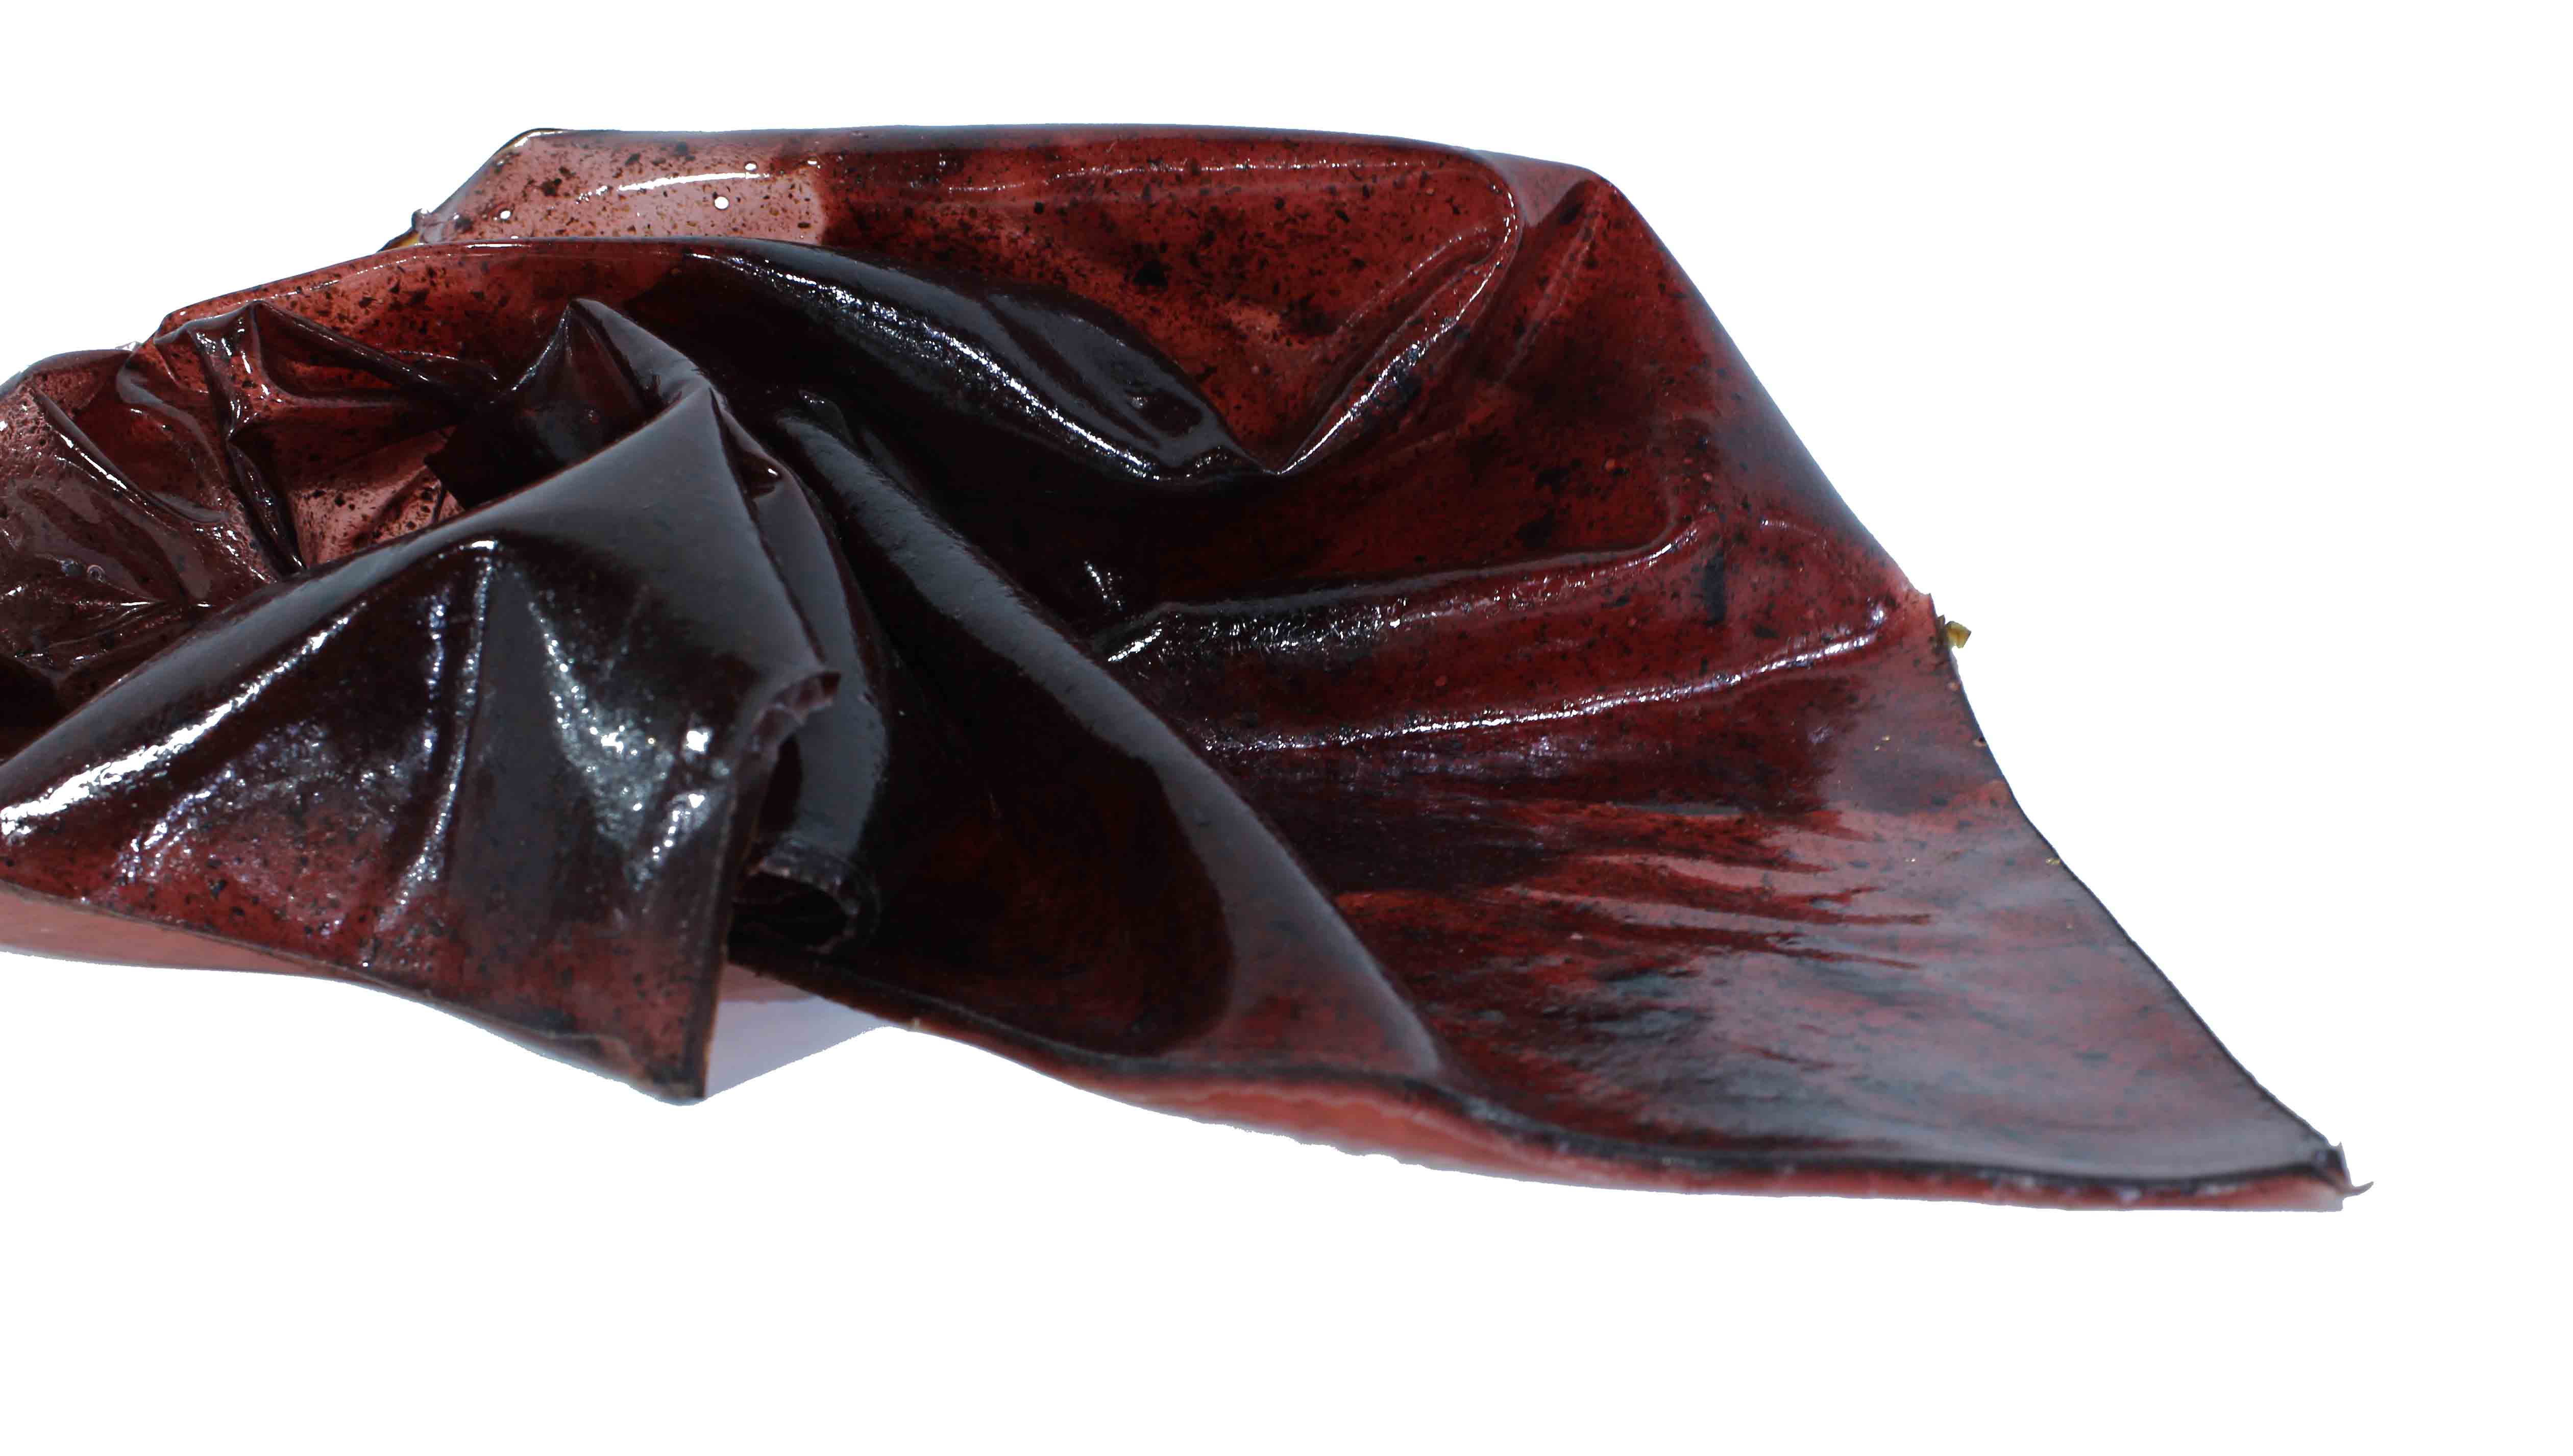
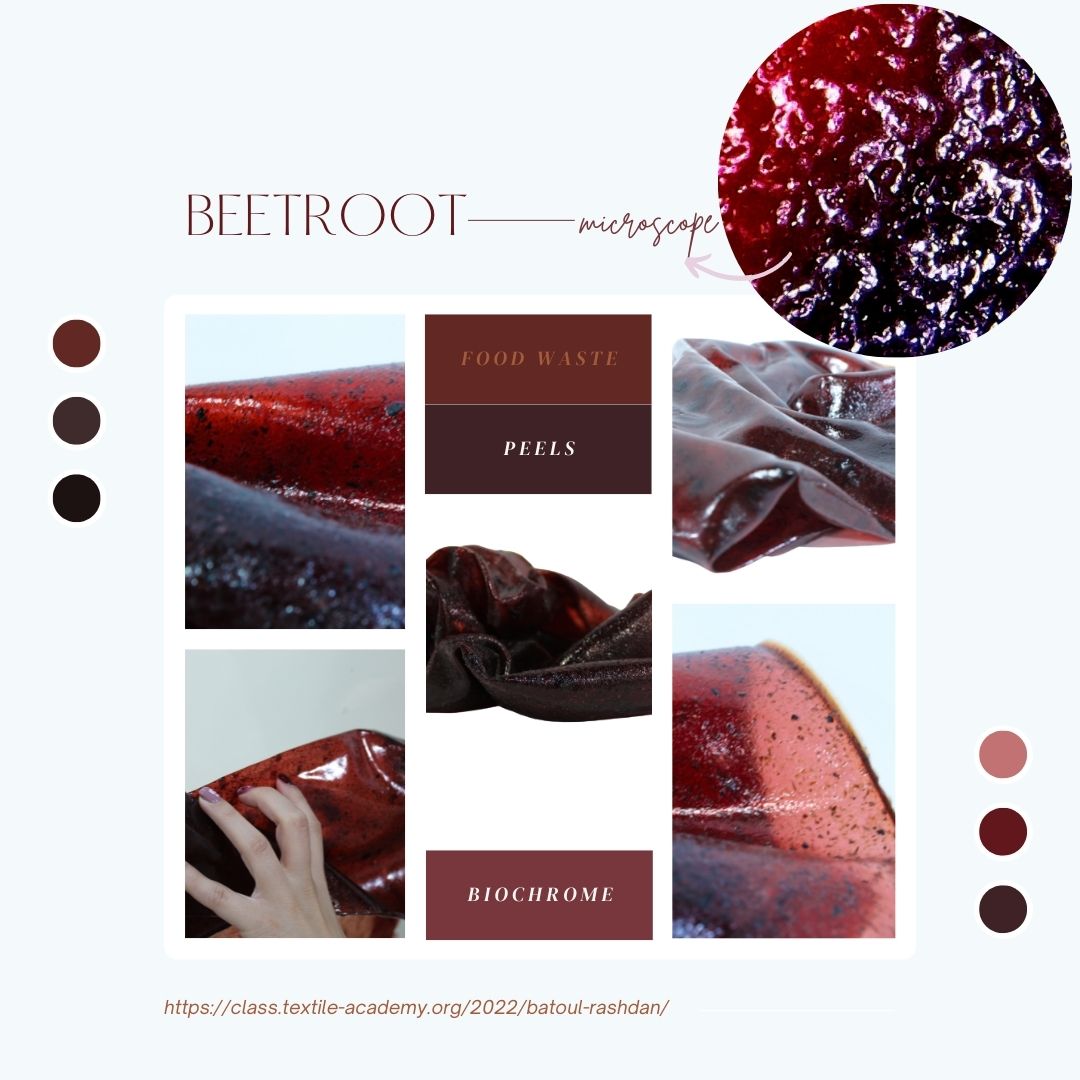
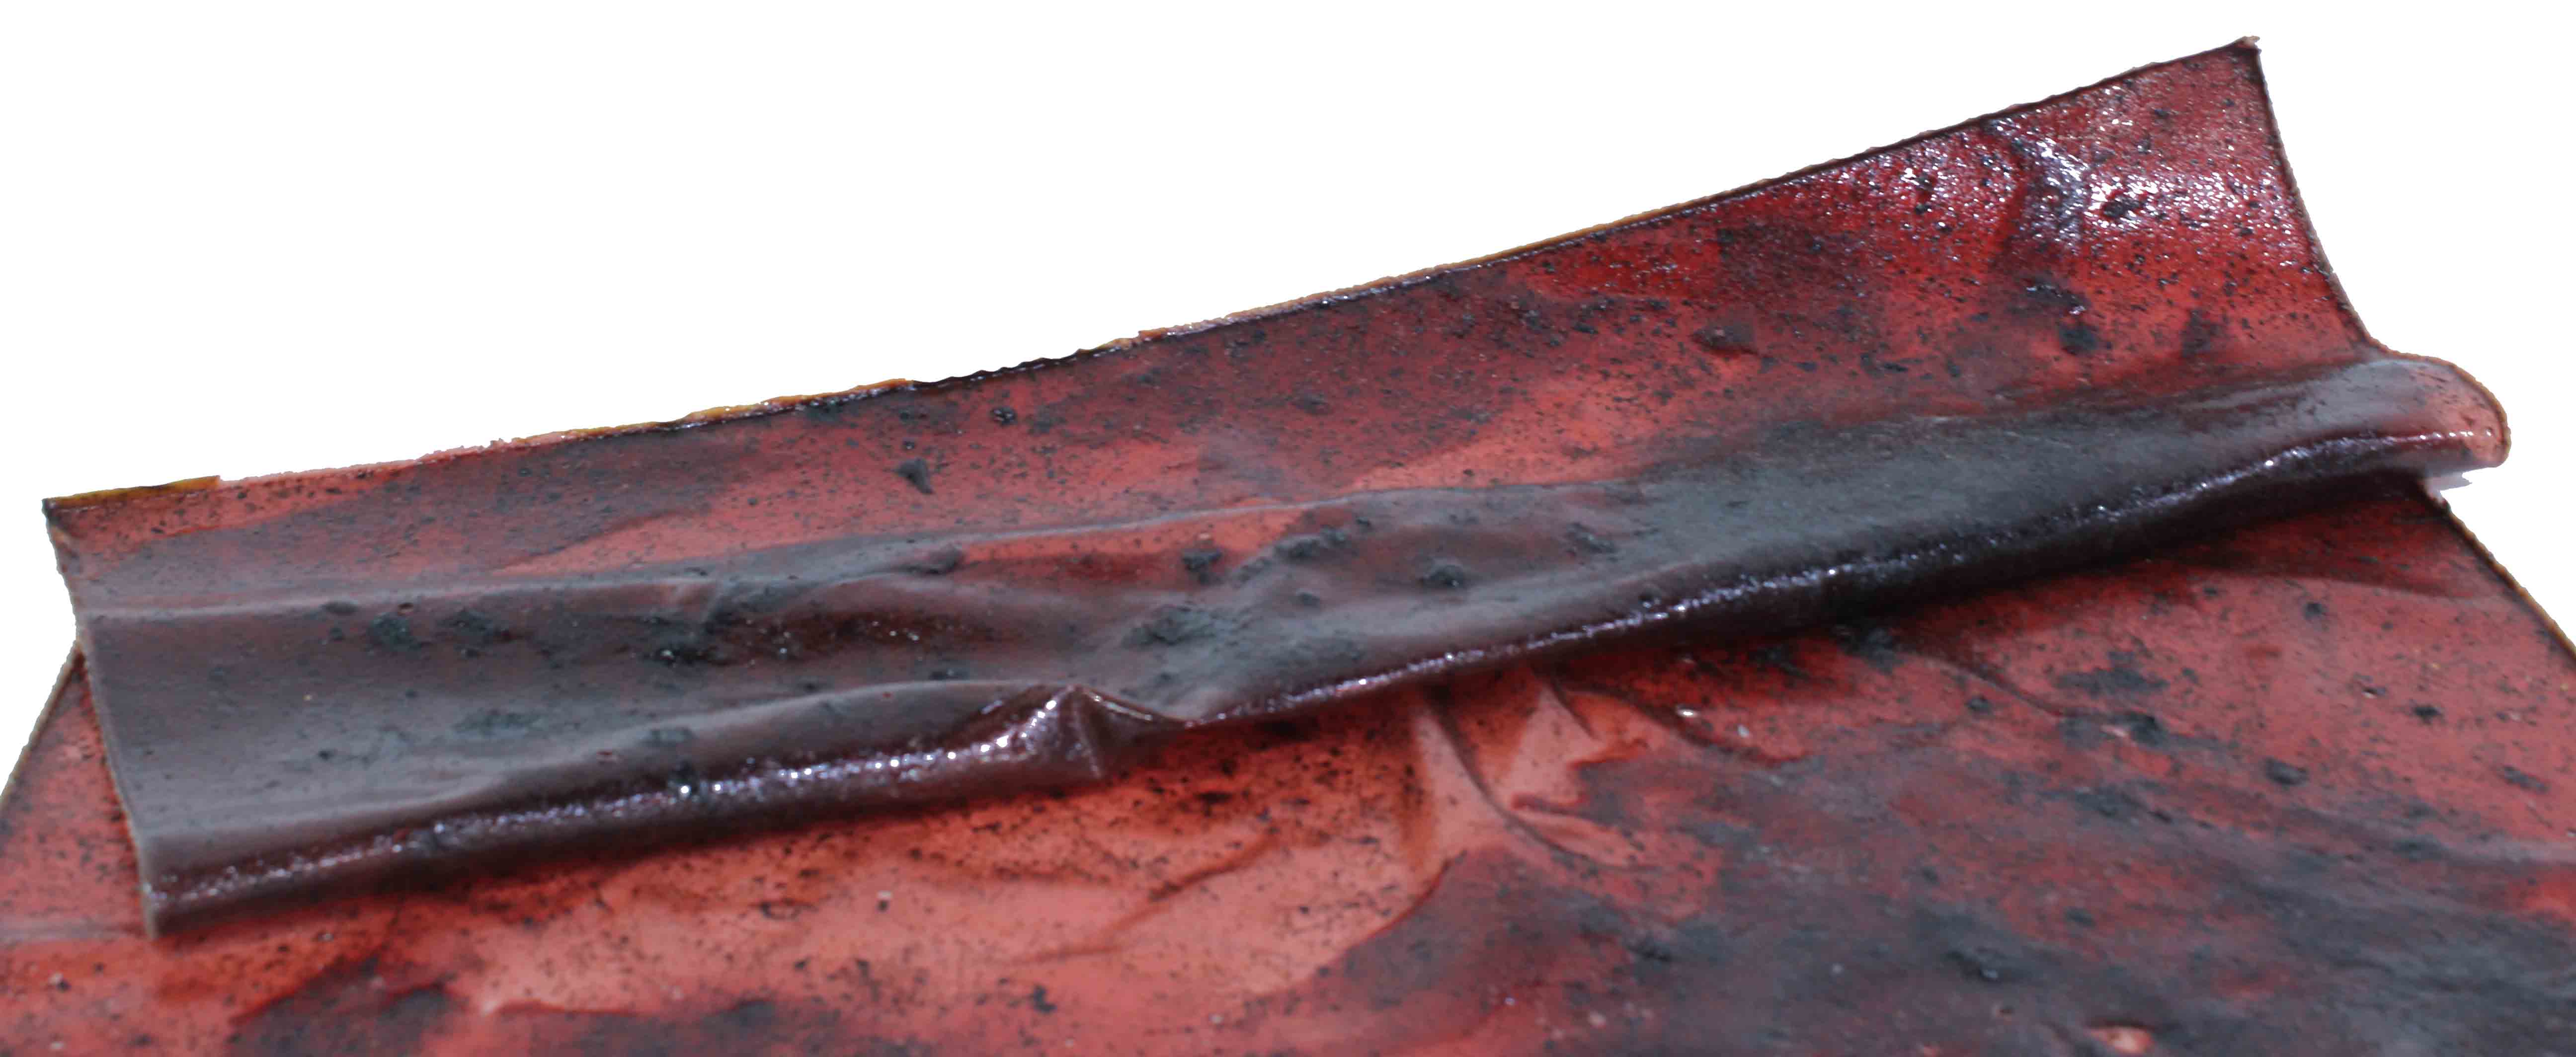
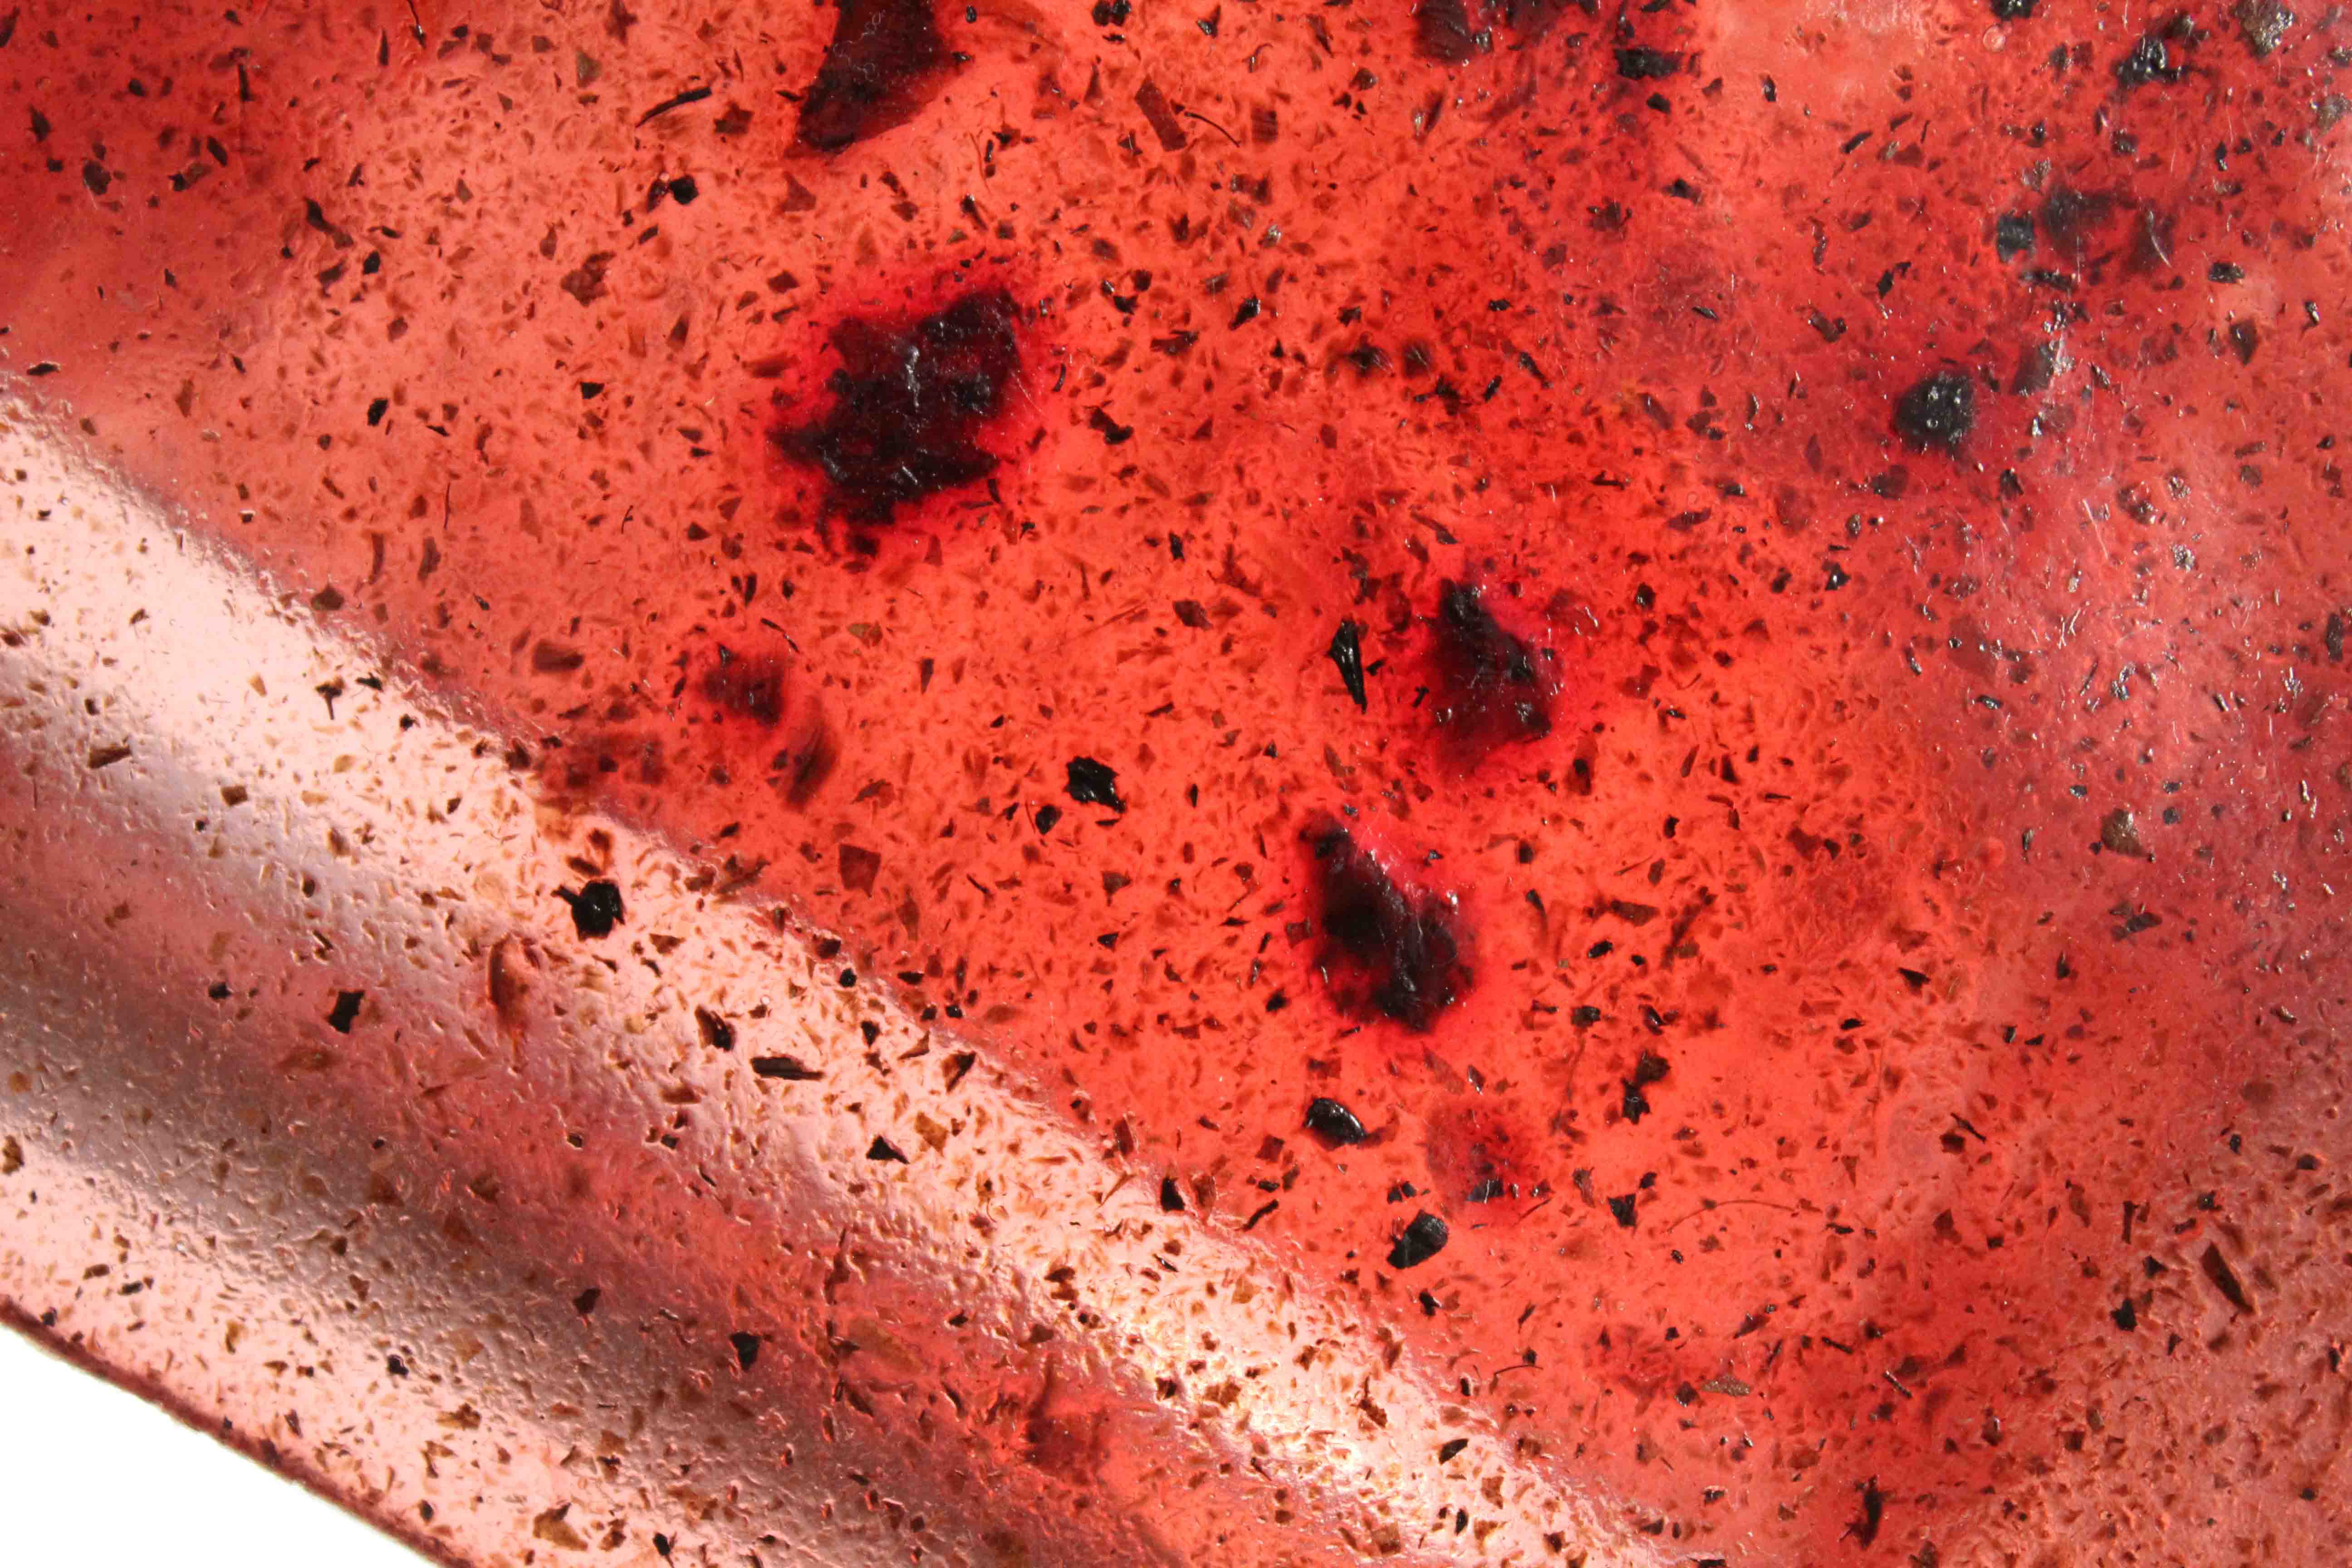
Ingredients: pre-weight ingredients:
- 110 gr Gelatine
- 100 gr Glycerine
- 17 gr Olive Seeds
- 110 gr olive Seeds dye-bath
- 130 ml of water
Procedure: 1. Mix and Warm up the water and dye bath together until warm (maximum 8o C) 2. Add Plasticizer Glycerine 3. Add Gelatine 4. Mix on the heat for 5~10 minutes 5. Pour on the surface (in this case an acrylic transparent mold)
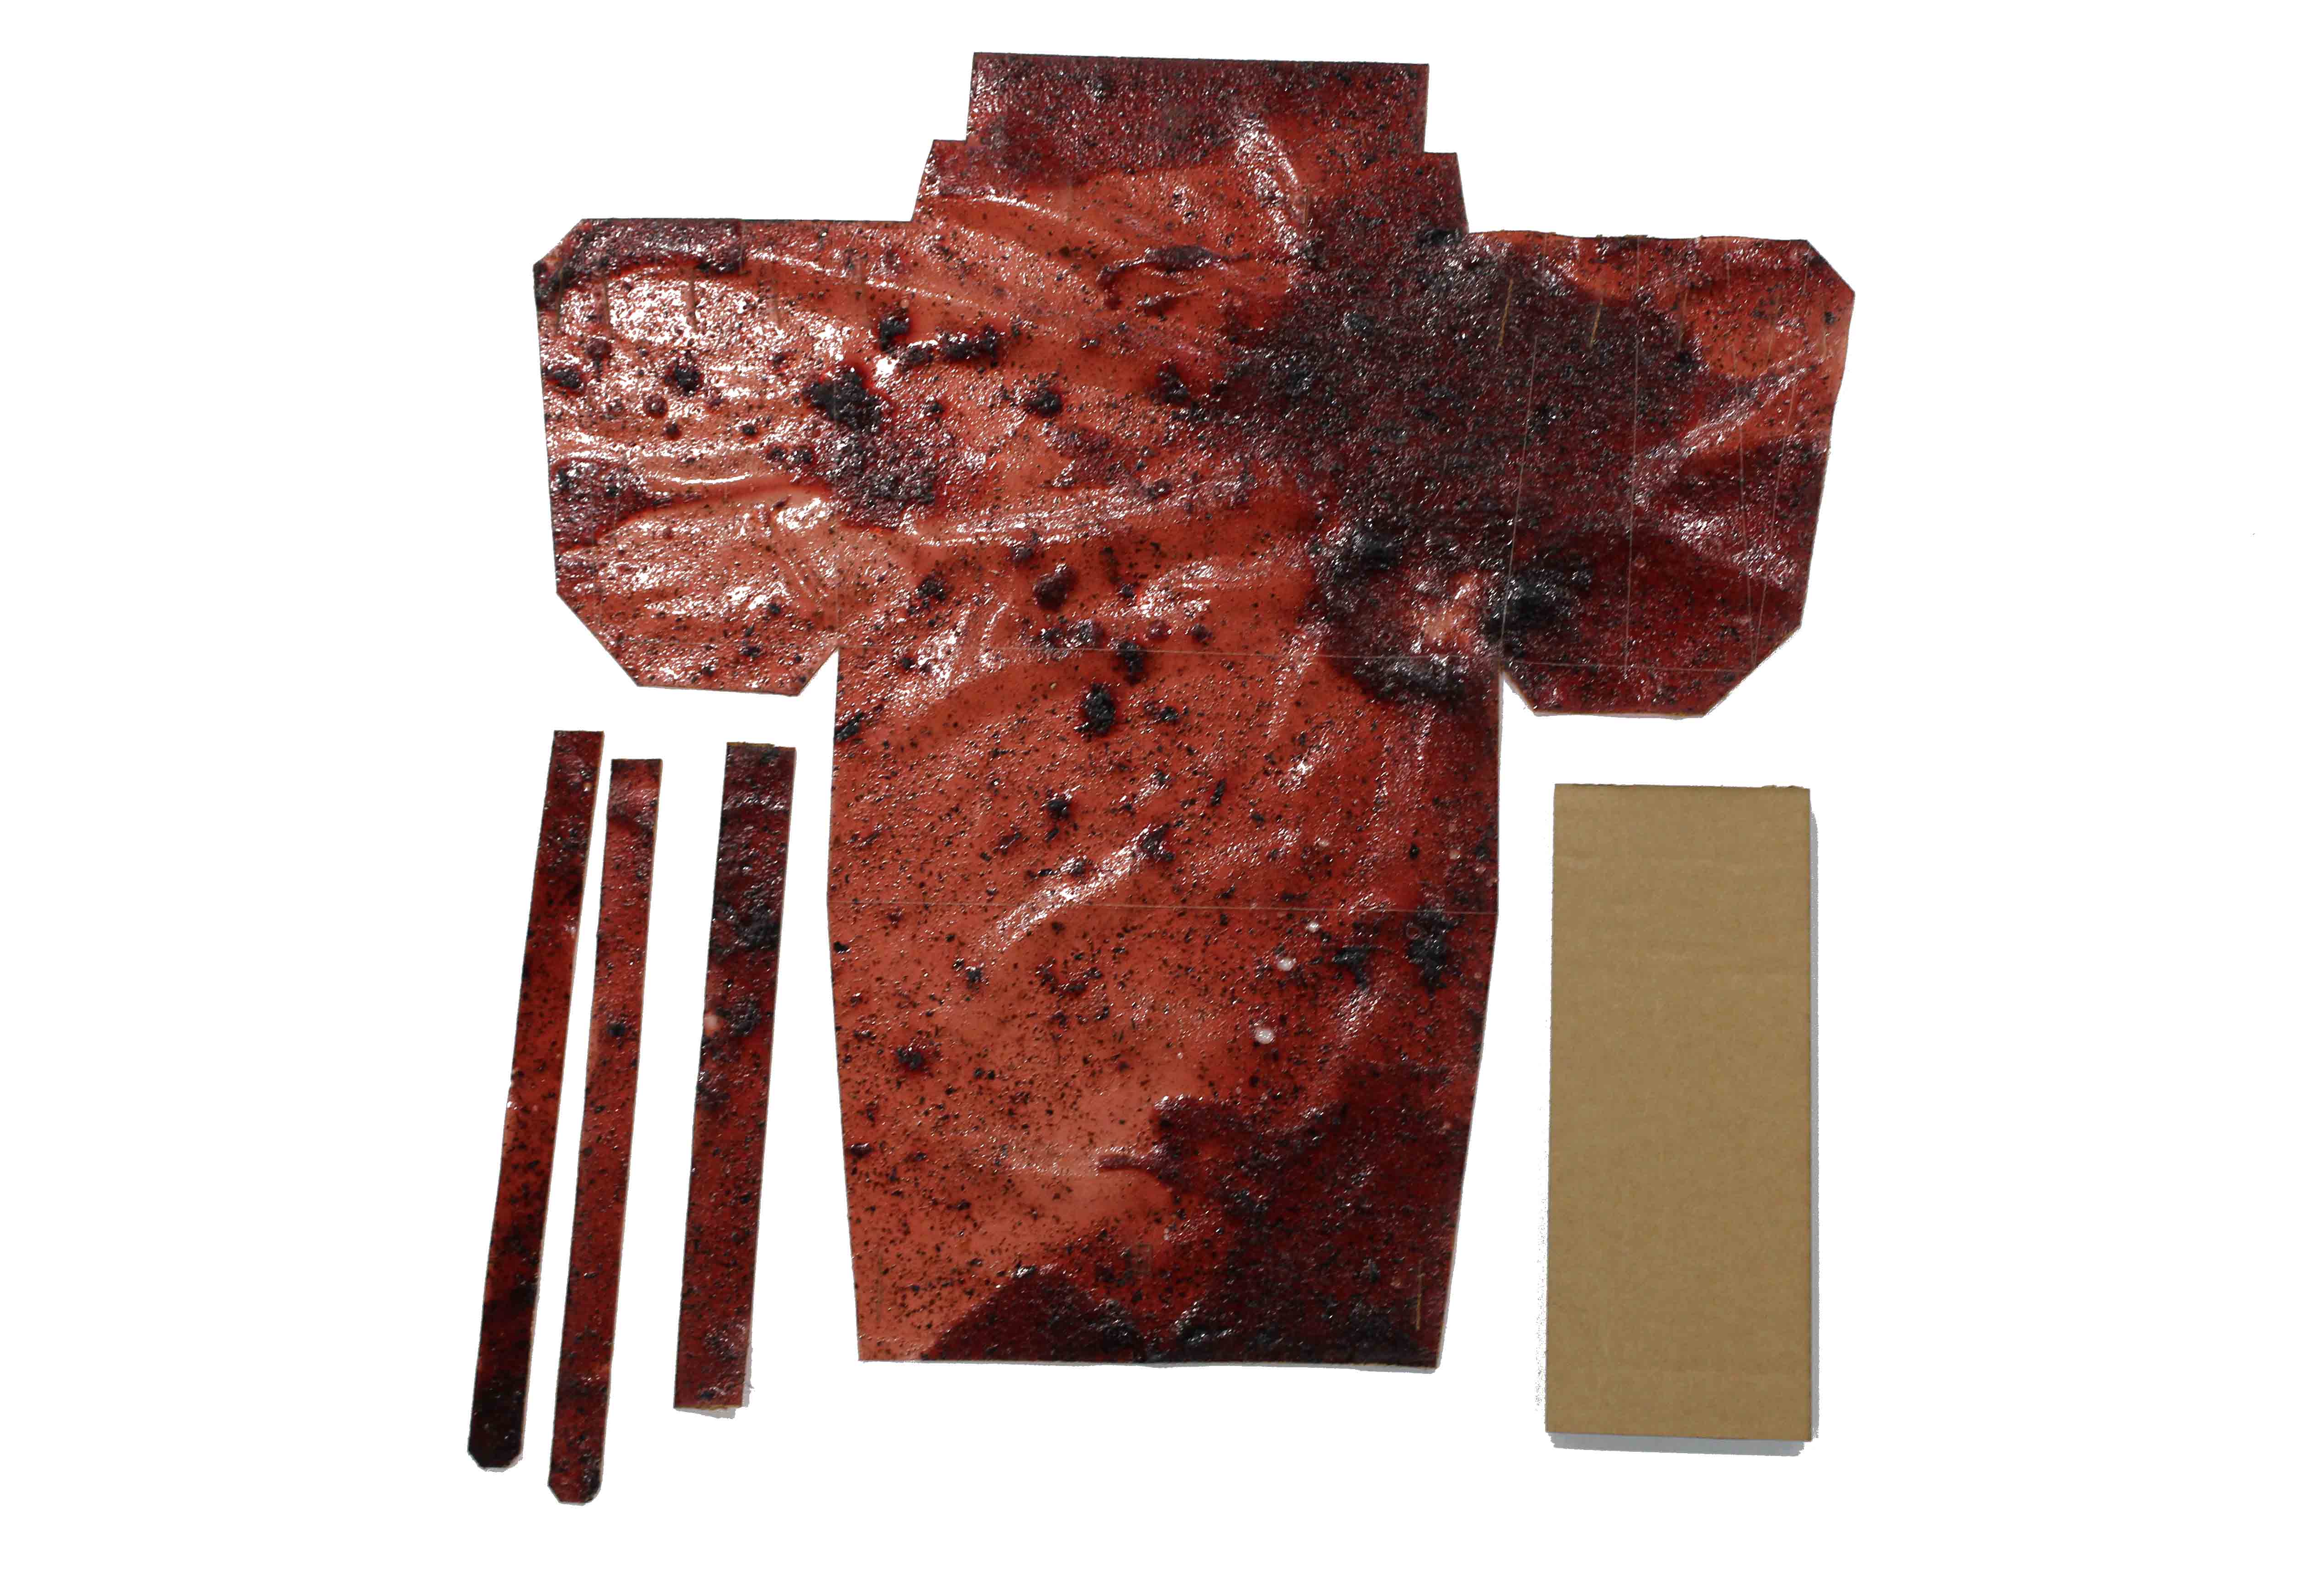
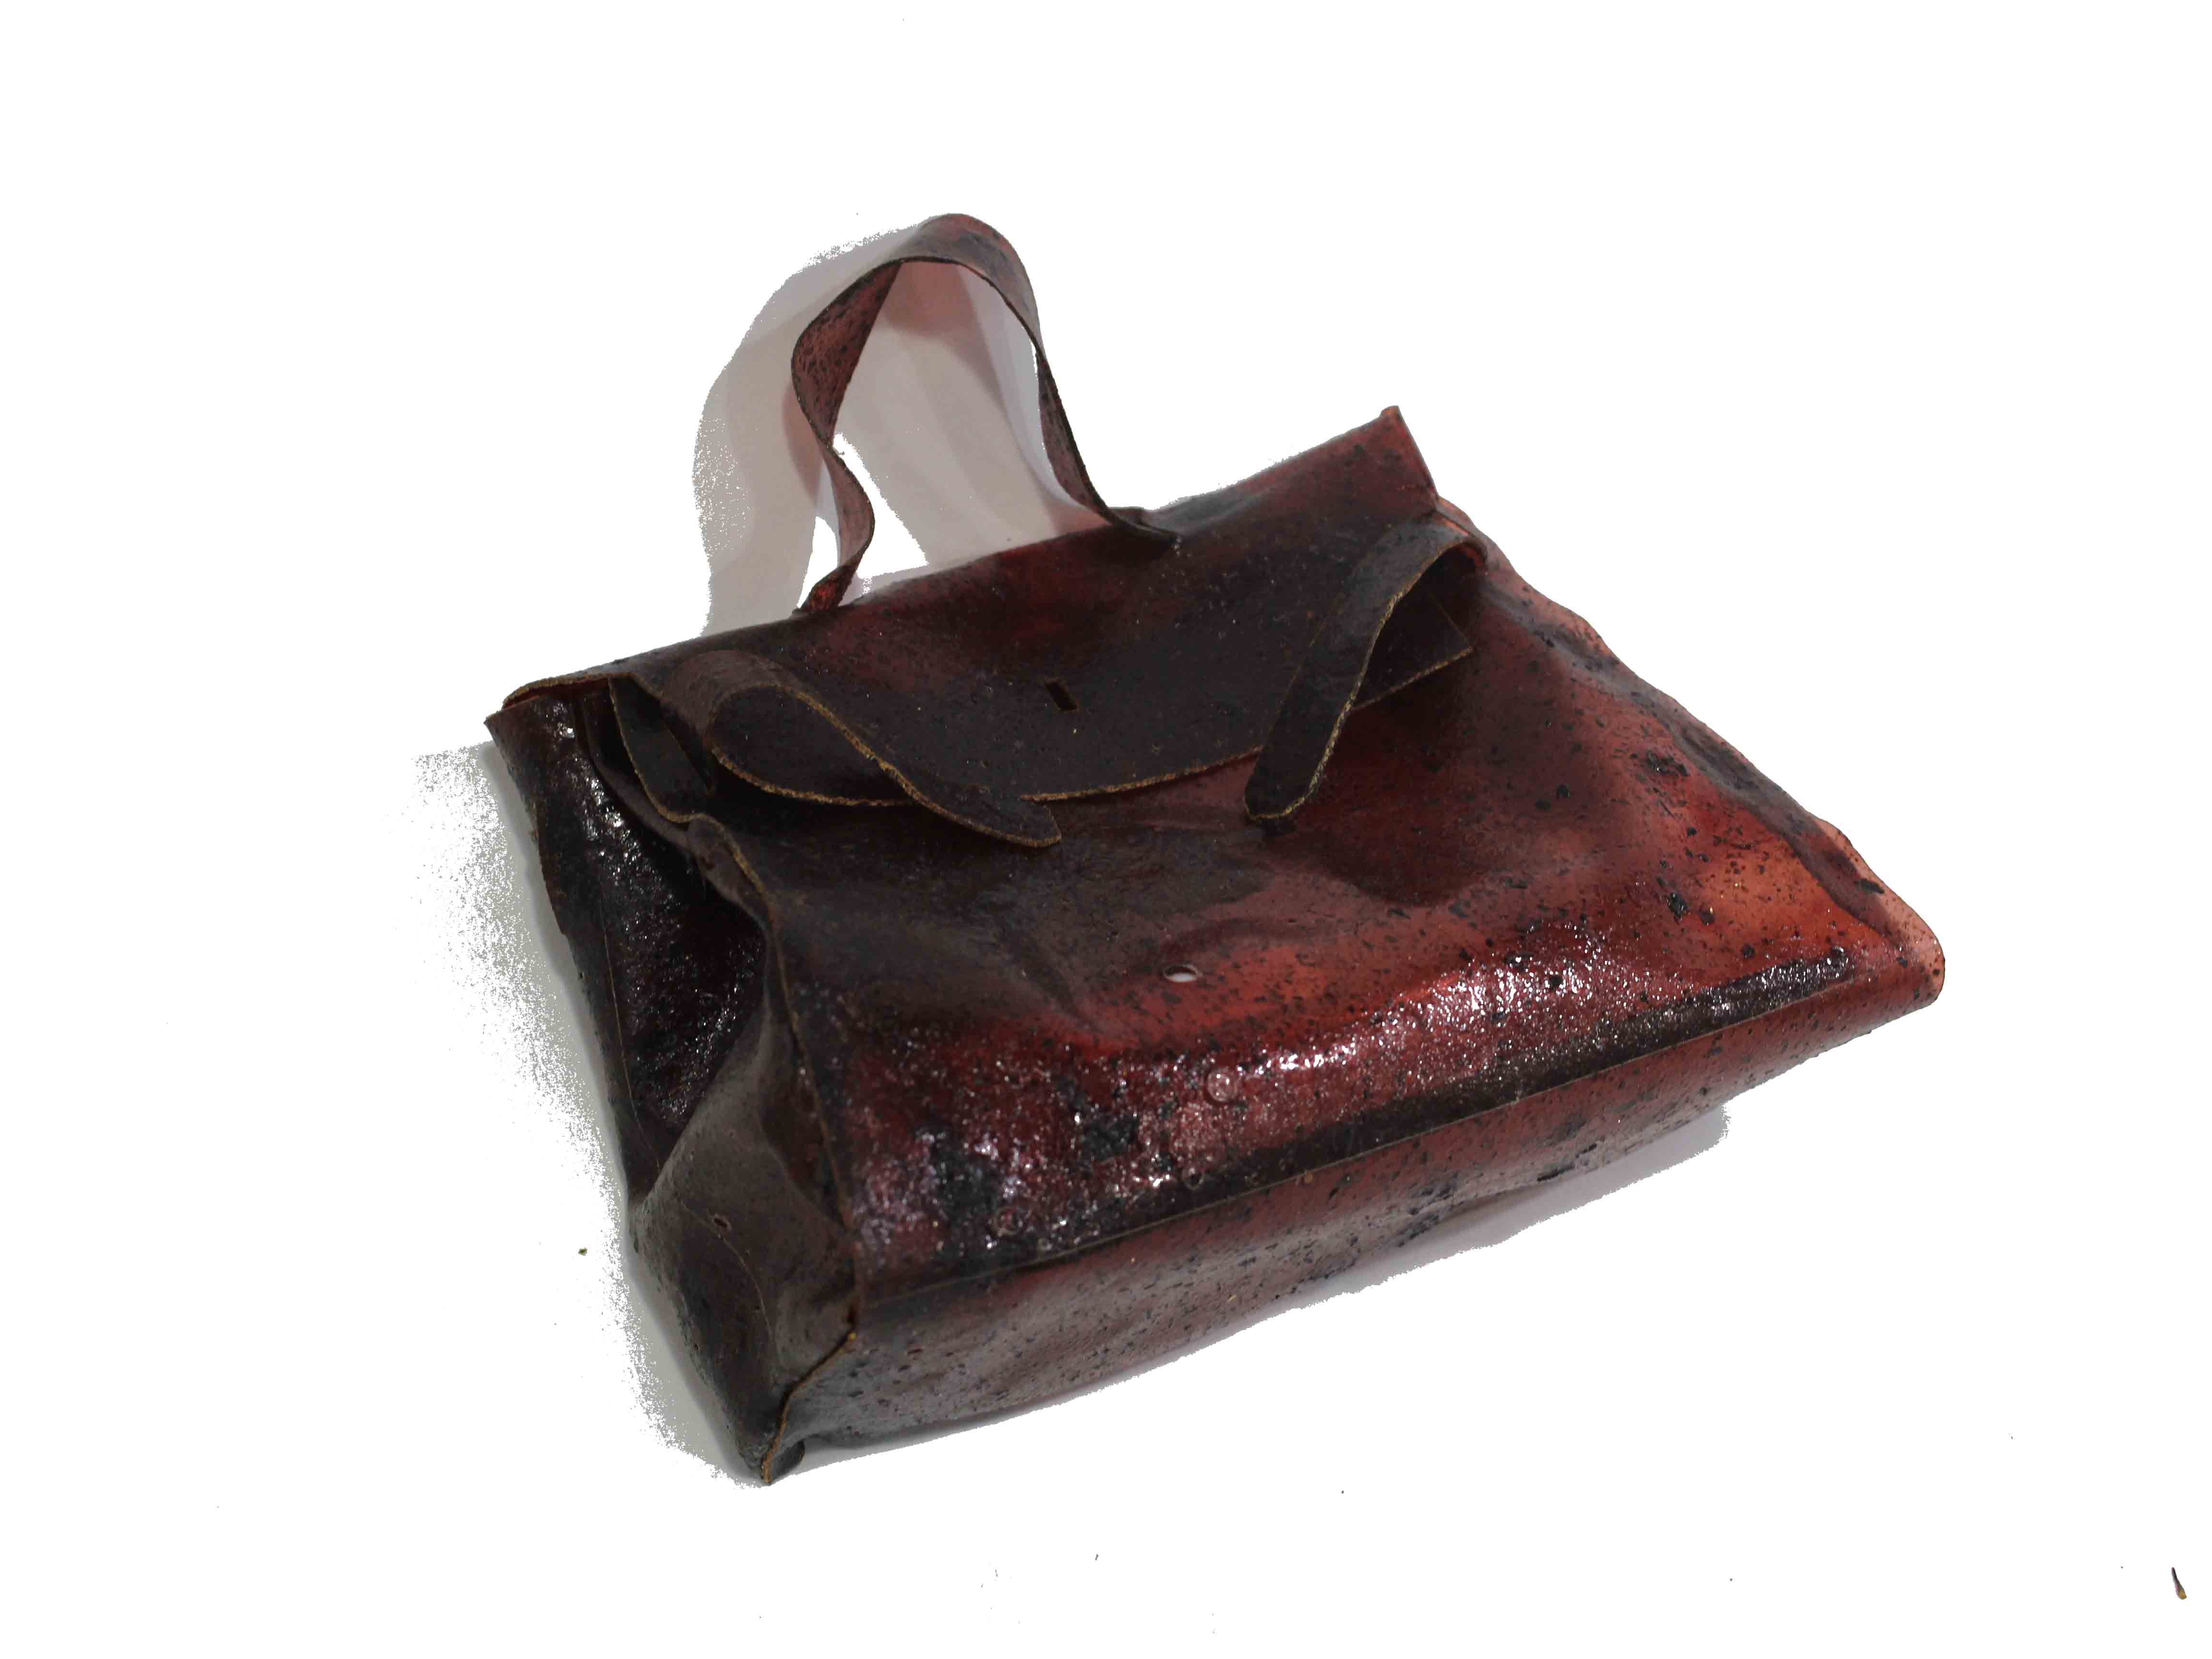
the quantity was half less than the mold that's why after poring I tried to re-orient most of the mixture to one side to at least get half fully covered but already the mixture got dried partially so I didn't get the best flat surface however it created a lovely texture fit the bloody Halloween theme
after full 2 days, demold so on the third day I brought it to laser cut it using the following settings after testing
then after making sure everything is cool I applied the setting to the Hermès Kelly Bag's famous design
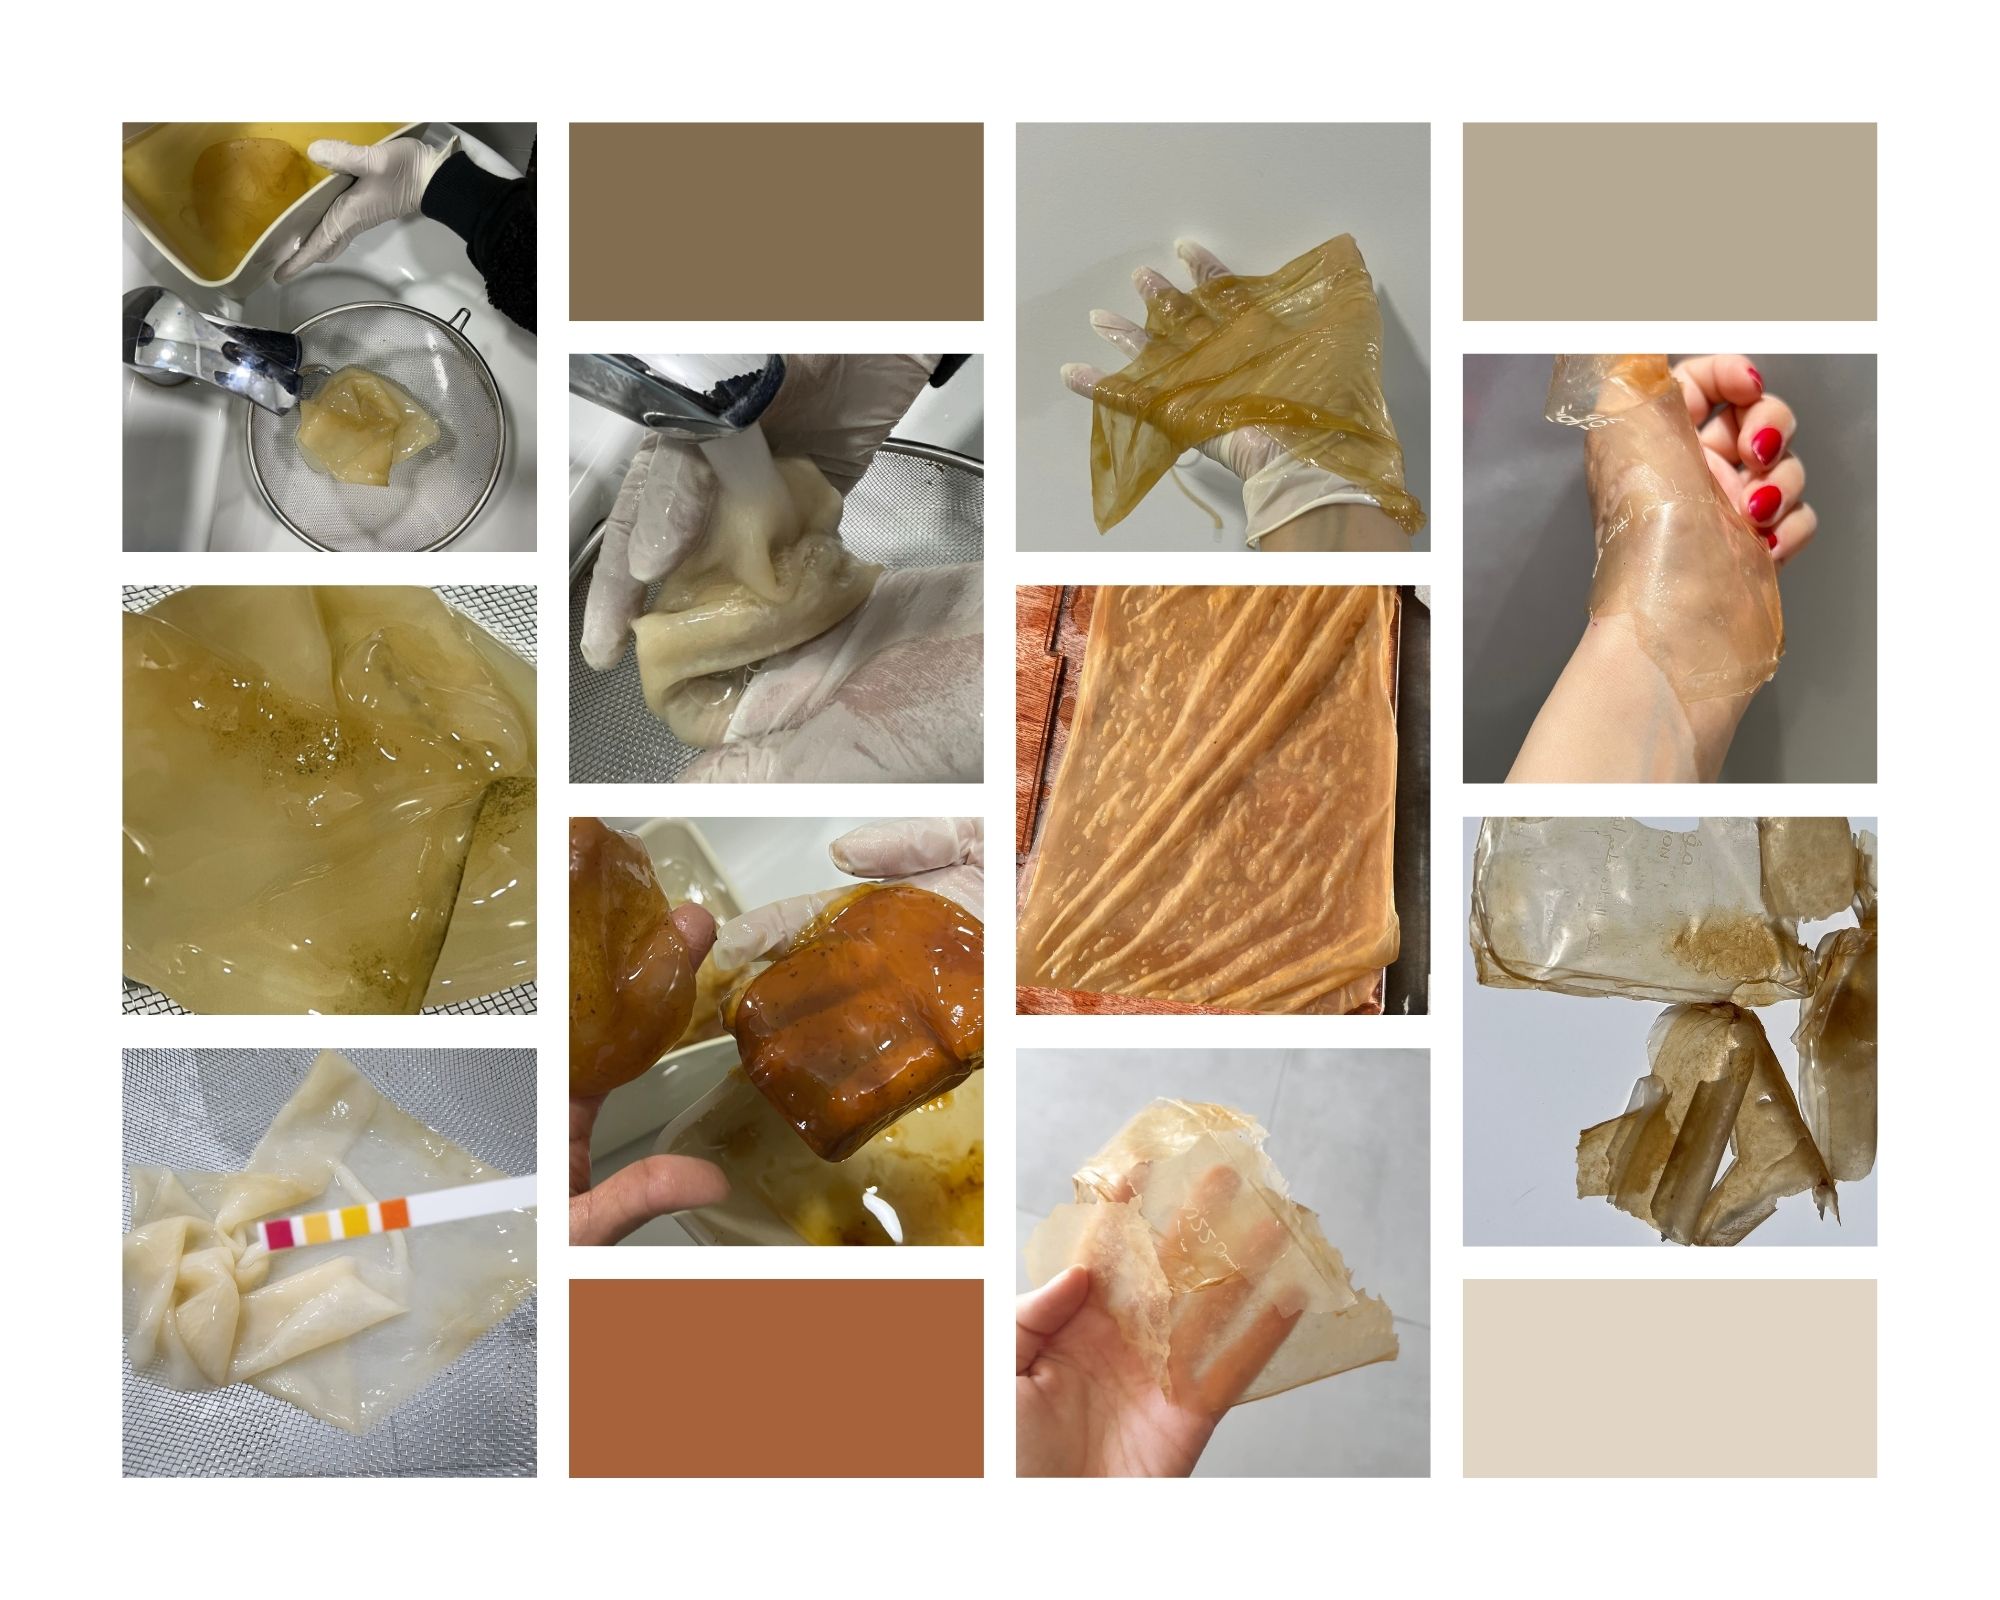
Agar
Agar: is a jelly-like substance, obtained from red algae. It is a mixture of 2 components: the linear polysaccharide agarose & heterogeneous mixture of smaller molecules called agaropectin Agar bioplastics 2.
(usually not very elastic unless mixed with Glycerin)
Agar bioplastic 2:
Ingredients and tools:
- Pots
- Agar
- Glycerine
- Petri dishes
- water (so in this recipe I made the solvent transparent any additive of color is due to fillers added later on dishes after cooking and none was cooked with the recipe)
- Fillers of choice: Madar roots, Onion Peels, Pomegranate white/light pink Seeds with their ink (from previous biochromes assignment), eggshells, Beetroot (filtered from previous biochromes assignment and saved for this week), Pomegranate Red Seeds with their ink (from previous biochromes assignment).
Ingredients: Pre-weight ingredients:
- 2 gr Agar
- 6 gr Glycerine
- 200 ml of water
Procedure:
- Warm up the water until warm (maximum 8o C)
- Add Plasticizer Glycerine
- Add Agar
- Mix on the heat for 7~10 minutes (since half of the amount of the original recipe)
1. I realized this recipe is very fragile which makes sense as its the recipe with the least amount of Glycerine
2. I got fungi on the beetroot sample (it can be because of fibers already existing plus temperature and left wet for long enough so ill modify this in the upcoming recipes)
Stretch BIO-FOIL
This is called stretch referring to the upper statement from Cecilia and I quote "(usually not very elastic unless mixed with Gelatin)" as a result, this explains why we see gelatine added here to the ingredients…
Ingredients: Pre-weight ingredients:
- 3 gr Agar
- 20 gr Gelatine
- 15 gr Glycerine
- 200 ml of water
Procedure:
- Warm up the water until warm (maximum 8o C)
- Add Plasticizer Glycerine
- Add Agar
- Mixed on the heat for 55 minutes (the original recipe says plus-minus 45 minutes)
Alginate
is the sodium salt of alginic acid and gum mainly extracted from cell walls of brown algae?
- We usually mix it with calcium chloride to transform it from sodium alginate to create calcium alginate
(interestingly, it's water-resistant! and withstands heat! )
- the more water you have you harder it to maintain its shape- so look for thick materials
- once you prepare the solution you cure it by spraying calcium chloride and water
- it would start shrinking (from a couple of hours to a day) until it's room temperature when you touch it not cold
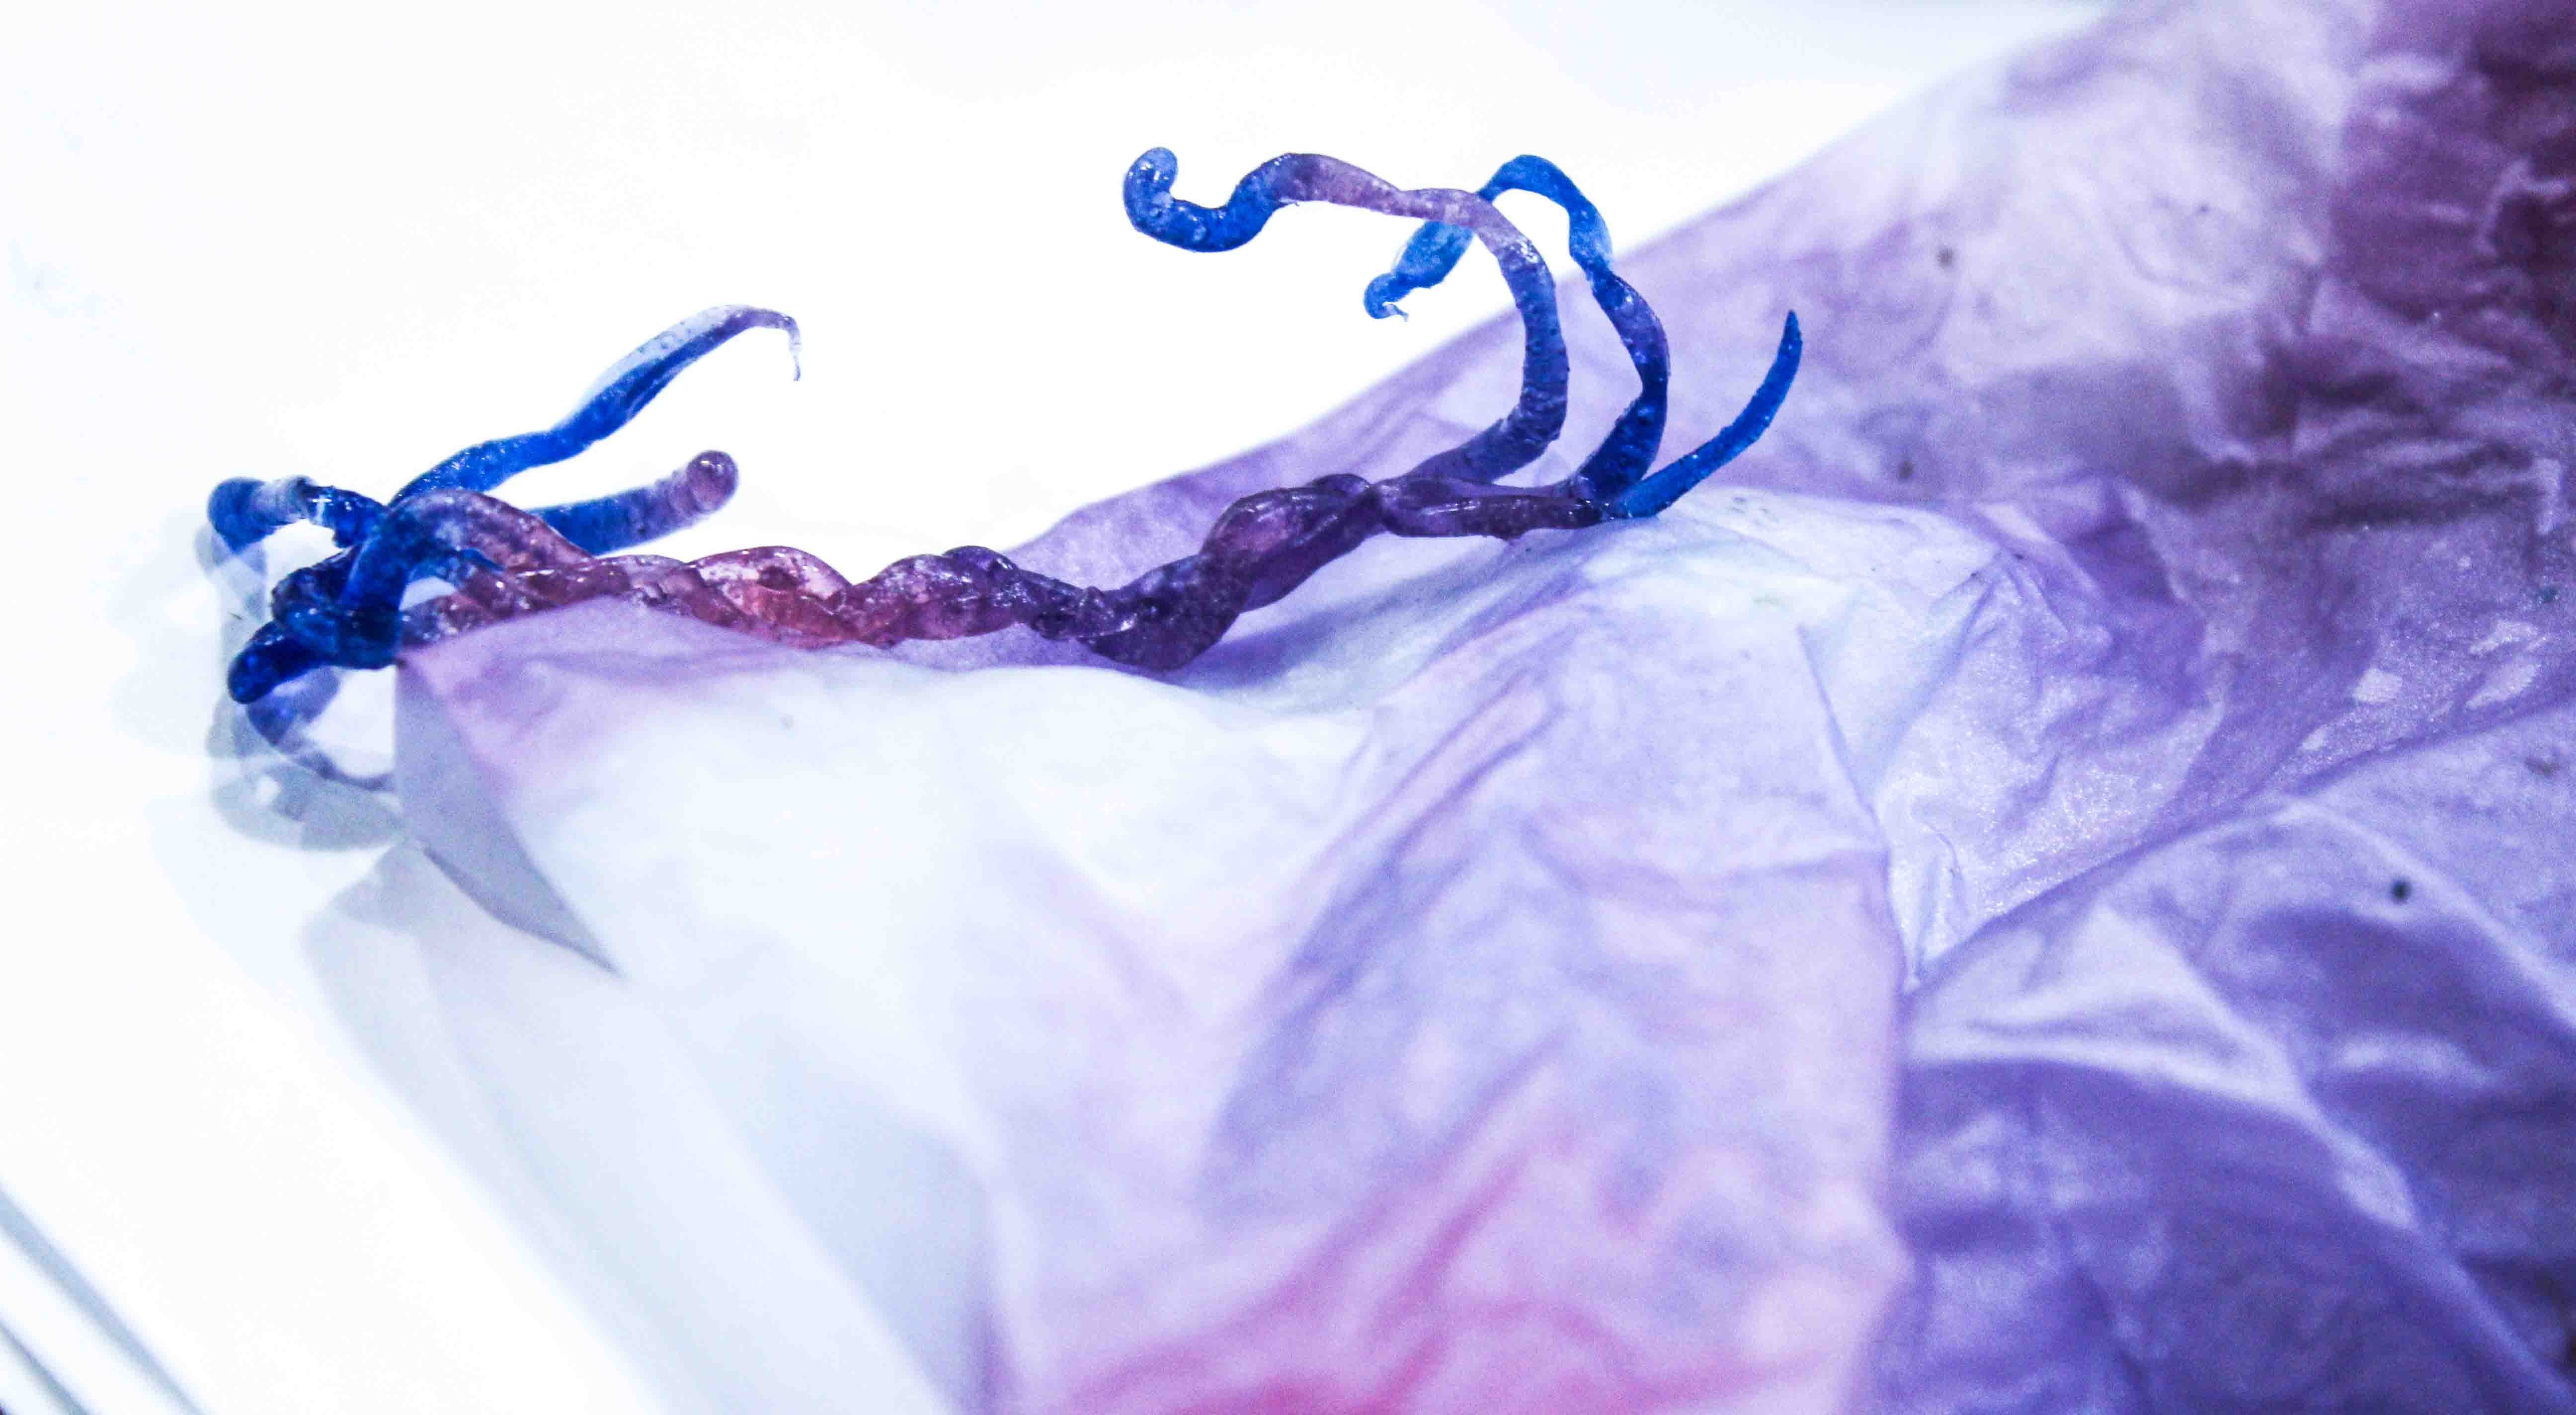
Alginate flexible thin BIO-FOIL /yarn
 Ingredients:
- 12 gr Sodium alginate powder
- 20 gr Glycerine
- 400 ml/gr Water we tried with transparent water then added coloring
-10% Calcium chloride solution (40 gr calcium chloride + 400 gr water)
Ingredients:
- 12 gr Sodium alginate powder
- 20 gr Glycerine
- 400 ml/gr Water we tried with transparent water then added coloring
-10% Calcium chloride solution (40 gr calcium chloride + 400 gr water)
is the curing agent: calcium chloride attracts moisture very strongly: spraying it onto the alginate plastic starts the curing process.
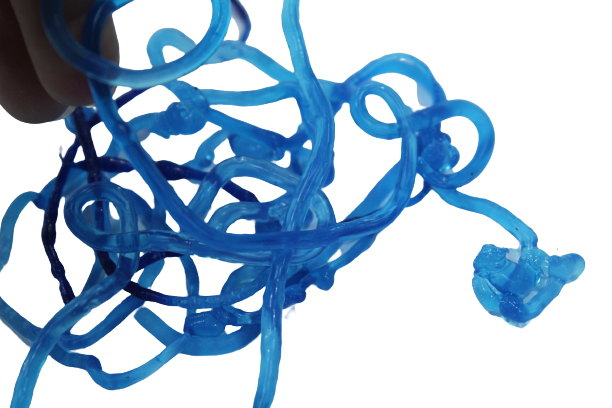
Procedure: 1. Weigh your ingredients for the alginate plastic (alginate, glycerine, water,) 2. Put the alginate and glycerine in a blender and add water. Blend into a thick and homogenous paste. Then added food coloring. 3. better to Leave the mixture overnight (but we only left it a few minutes in the picture above and couldn't resist trying). 4. Make the calcium chloride solution by dissolving 40 gr in 400 gr of hot water. Put it in a container. 5. Put the paste in a syringe 6. Use a syringe to produce the yarns inside the calcium chloride solution (use quite a lot) Let it sit for a few minutes, then try harvesting the yarn with a wooden stick. here I tried to style 3 yarns together to get this look and play with coloring
Alginate flexible BIO-plastic (first trial)
 Ingredients: ~ based on slides "Lecture notes"
- 12 gr Sodium alginate powder "the polymer (so it becomes solid)"
- 20 gr Glycerine (the plasticizer that bonds with the alginate (makes it flexible)).
- 200 ml/gr Water (to dissolve and mix the polymer and plasticizer)
(I used hibiscus natural dye instead for a colored plastic)
- 10 gr Sunflower oil (filler to reduce shrinkage)
-10% Calcium chloride solution (10 gr calcium chloride + 100 gr water)
Ingredients: ~ based on slides "Lecture notes"
- 12 gr Sodium alginate powder "the polymer (so it becomes solid)"
- 20 gr Glycerine (the plasticizer that bonds with the alginate (makes it flexible)).
- 200 ml/gr Water (to dissolve and mix the polymer and plasticizer)
(I used hibiscus natural dye instead for a colored plastic)
- 10 gr Sunflower oil (filler to reduce shrinkage)
-10% Calcium chloride solution (10 gr calcium chloride + 100 gr water)
is the curing agent: calcium chloride attracts moisture very strongly: spraying it onto the alginate plastic starts the curing process.
Procedure:
- Weigh your ingredients for the alginate plastic (alginate, glycerine, water, sunflower oil). (used natural dye instead of water in the same amount for a colored plastic)
- Put the oil, alginate, and glycerine in a blender and add a dash of the water. Blend into a thick and homogenous paste. Then add the rest of the water and blend again.
- Leave the mixture overnight to allow the bubbles to come to the surface and pop.
- Make the calcium chloride solution by dissolving 10 gr in 100 gr of hot water. Put it in a spray bottle.
- Prepare the surface to cast on, Pour the alginate onto the surface.
- Spray the sheet with the calcium chloride solution (use quite a lot) Let it sit for a few minutes, then spray again if you see the liquid is starting to get out respraying until dry further.
Alginate flexible BIO-plastic (second trial)
Ingredients: ~ based on research and how crumbled the first one was ...
- 12 gr Sodium alginate powder "the polymer (so it becomes solid)"
- 20 gr Glycerine (the plasticizer that bonds with the alginate (makes it flexible)).
- 200 ml/gr Water (to dissolve and mix the polymer and plasticizer)
(I used hibiscus natural dye instead for a colored plastic)
- 10 gr Sunflower oil (filler to reduce shrinkage)
-10% Calcium chloride solution (10 gr calcium chloride + 100 gr water)
is the curing agent: calcium chloride attracts moisture very strongly: spraying it onto the alginate plastic starts the curing process.
Procedure:
- Weigh your ingredients for the alginate plastic (alginate, glycerine, water, sunflower oil). (used natural dye instead of water in the same amount for a colored plastic)
- Put the oil, alginate, and glycerine in a blender and add a dash of the water. Blend into a thick and homogenous paste. Then add the rest of the water and blend again.
- Leave the mixture overnight to allow the bubbles to come to the surface and pop.
- Make the calcium chloride solution by dissolving 10 gr in 100 gr of hot water. Put it in a spray bottle.
- Prepare the surface to cast on, Pour the alginate onto the surface.
- Spray the sheet with the calcium chloride solution (use quite a lot) Let it sit for a few minutes, then spray again if you see the liquid is starting to get out respraying until dry further.
2. Grown
I tied to grow Kombucha - making of Grown Leather -
Kombucha Leather is a flexible bio-material alternative to leather made from cellulose nanofibrils spun by bacteria and yeast. This material grows thicker over time and can become paper-thin or leather-like.
Equipment required For production:
- Rubber gloves- 1 pair
- Spray the bottle with rubbing alcohol
- tape
- Non-porous container with lid
- Tightly woven cloth patch
- Measuring cup
- Wooden board or any other absorbent board to dry the leather on
Ingredients required - 1 SCOBY mother or a bottle of Kombucha tea to start growing one from zero - raw kombucha from a previous brew to be used as a starter tea - white sugar - freshwater- unchlorinated - black tea bags or green (I used black) - (OPTIONAL) Water-based dye
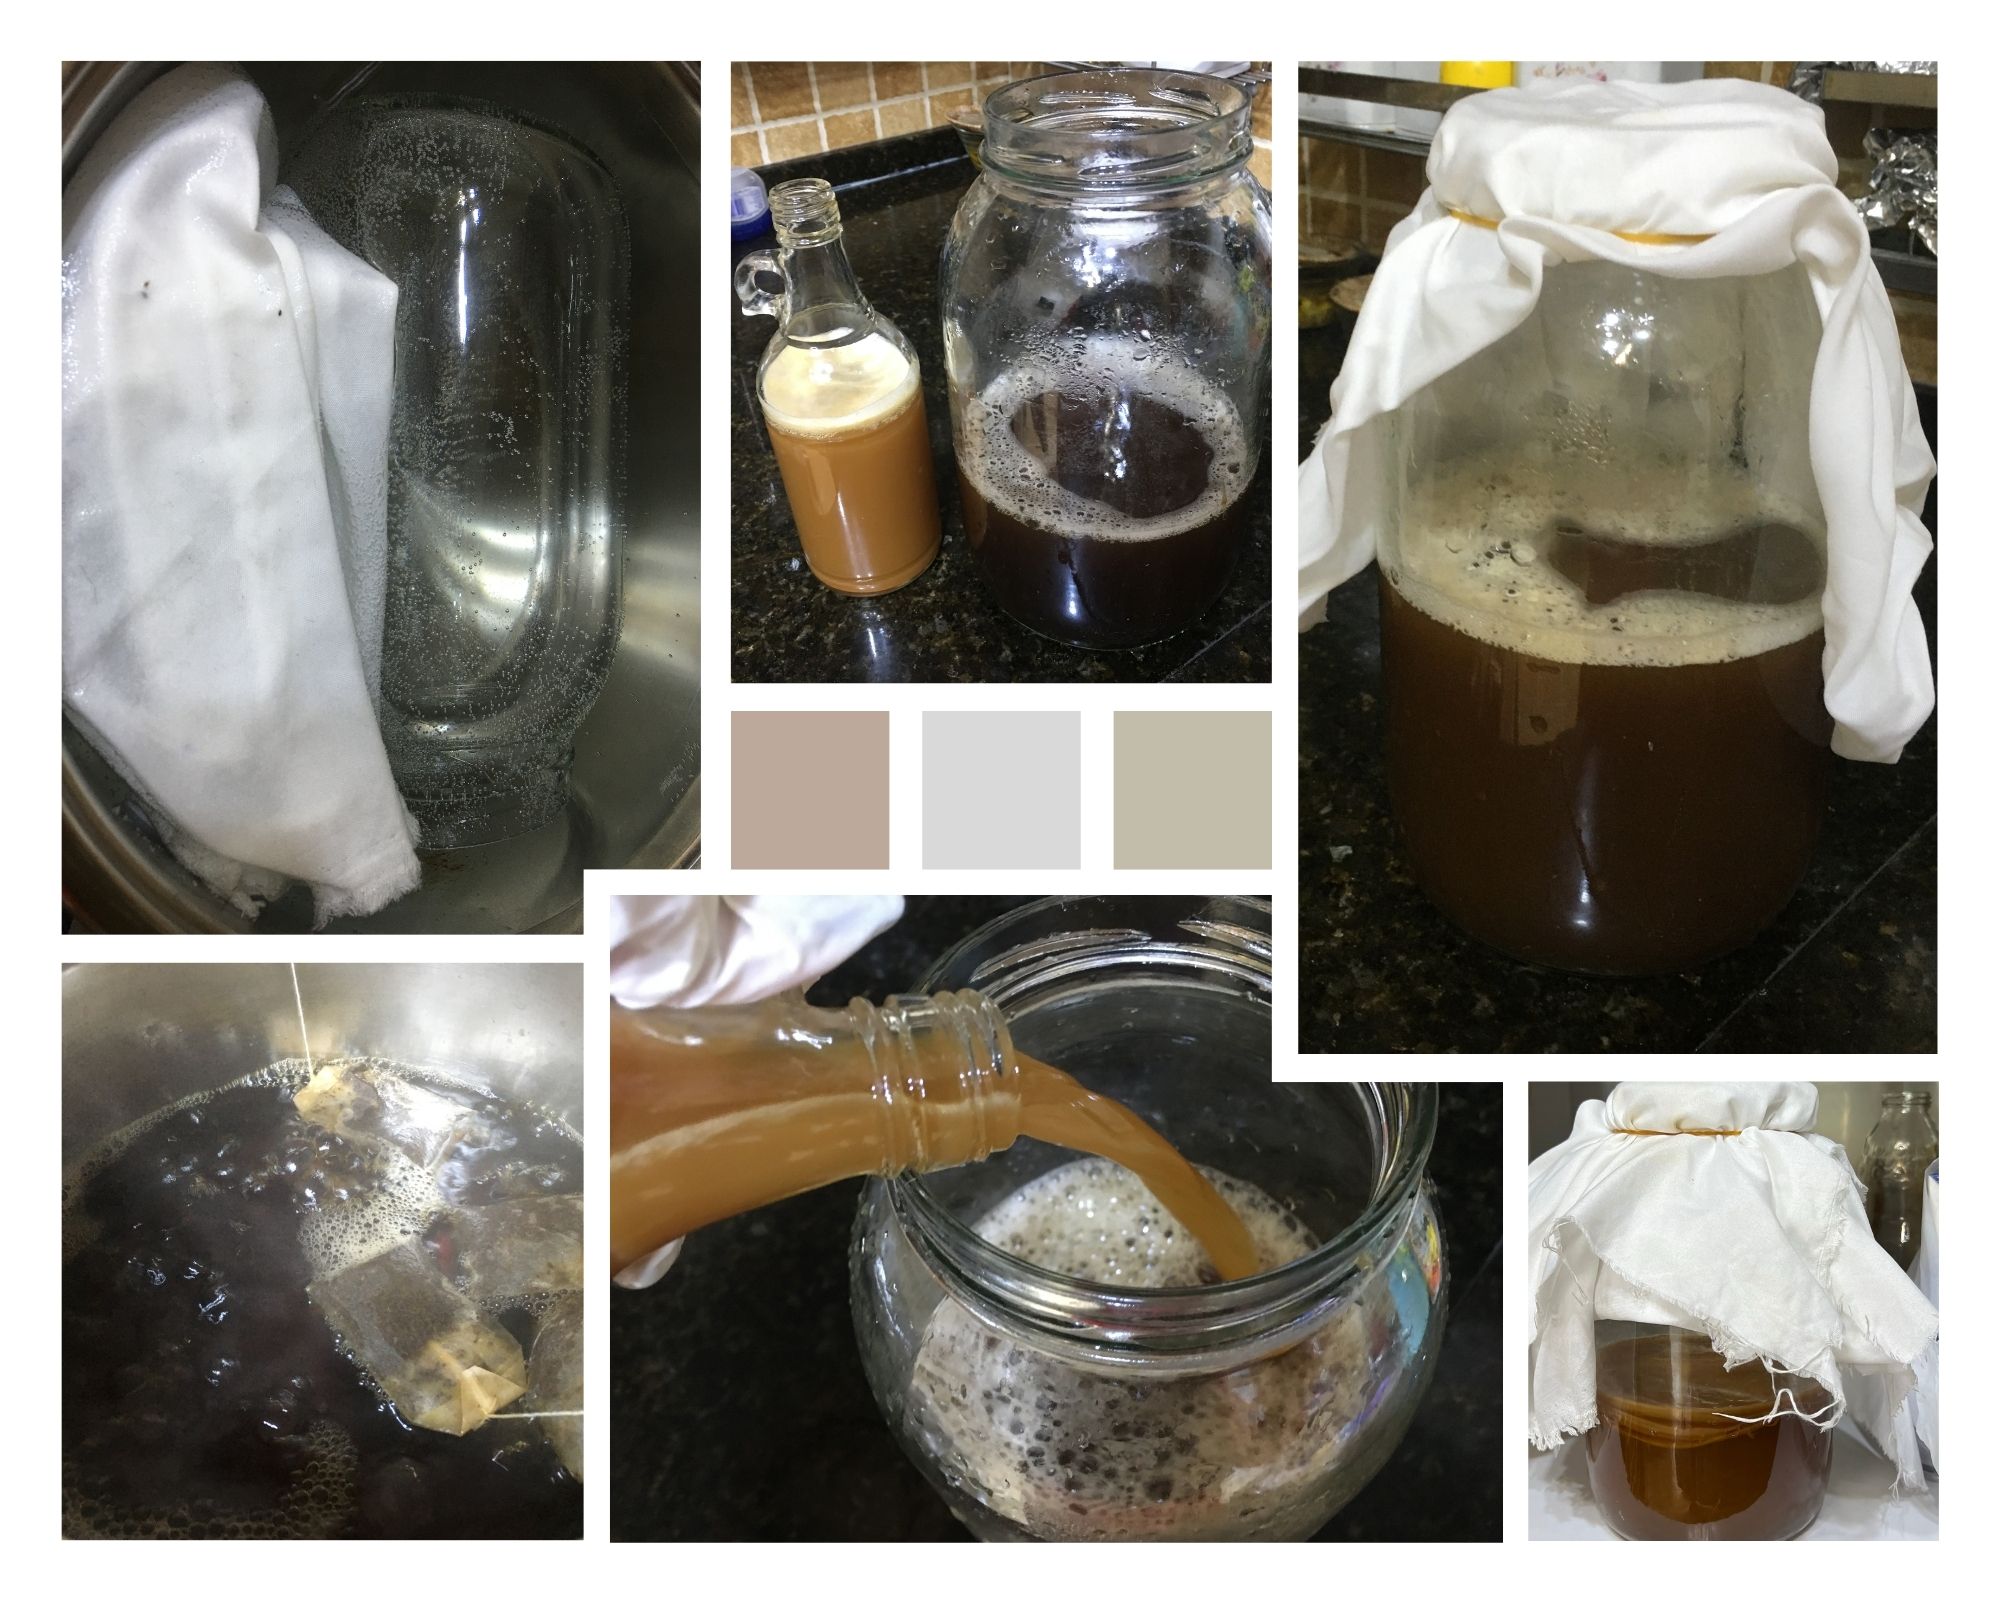
- Synthesizing all instruments/equipment y putting them in a water bath.
- Add sugar and tea bag to boiling water and let them boil for a few minutes together then switch off the heat source and let them cool (as wanted to synthesize but avoid killing the bacteria with my high temperature).
- Add some of the Kombucha tea from the bottle bought locally from a supermarket to the previously sterilized glass jar in step one (after left to cool down and dry).
- Cover the jar with the sterilized cotton cloth from step one and add rubber around to keep it in place.
- leave it in a dry place (I left it near the rice in the cabinet to avoid any humidity AKA mold) then I started to see my SCOBY mother after a few days.
- moved the mother SCOBY out of the jar in another tea solution to grow bigger
- Took the bigger SCOBY and washed it with moderate temperature water then out on a wooden surface to industry
It took one day only to have this very thin leather sheet so next time I will let it grow more before harvesting.