7. Computational Couture
The parametric model is dynamically transformed by simply shifting the values of a few variables.
References & Inspiration
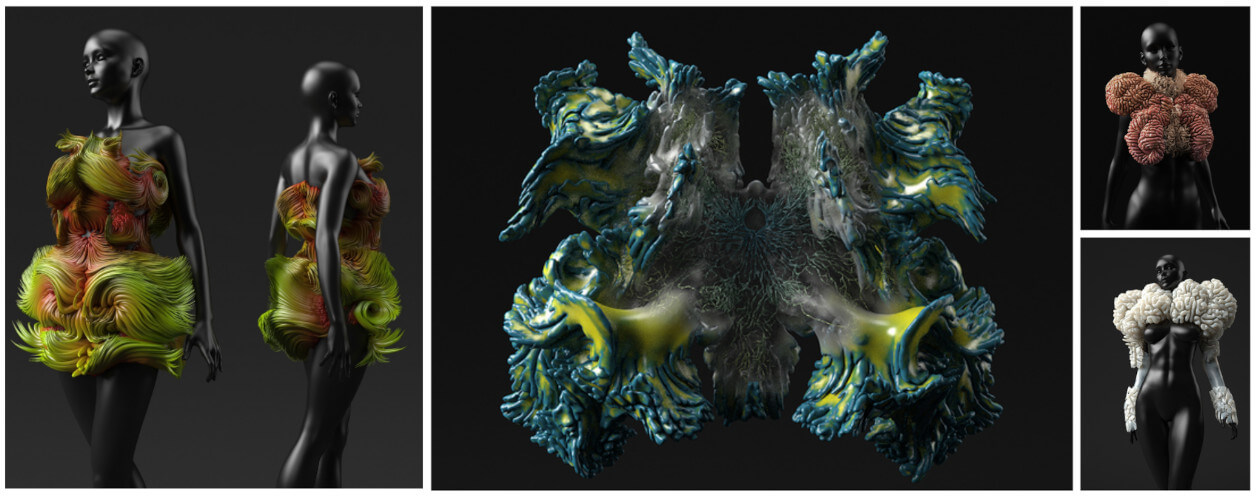
The Neri Oxman' projects combine computational design, digital fabrication, materials science and synthetic biology.
| Nervous System | Behnaz Farahi | Iris Van Herpen |
Nervous System is a generative design studio that works at the intersection of science, art, and technology. Drawing inspiration from natural phenomena, it create computer simulations to generate designs and use digital fabrication to realize products. It made several project including kynematics, a system for creating custom fit 3D printed clothing.
Behnaz Farahi has created an interactive 3D printed wearable which can detect other people’s gaze and respond accordingly with life-like behavior.
Iris Van Herpen has designed multiple pieces which are very fluid and move according to the model's gait.
Research & Ideation
I'm going to take two ways : the growing curve and the origami folding and also computational design for the design of a wearable.
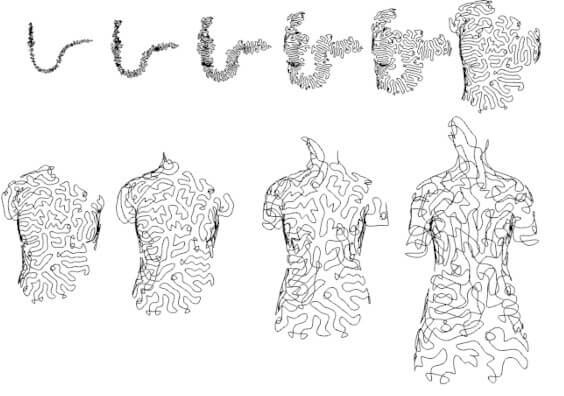
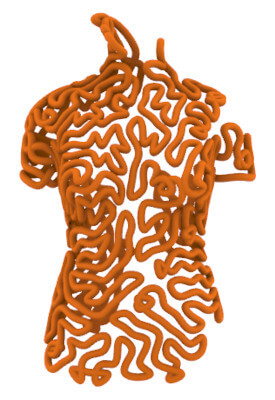
Growing curve
Growing curve: Gradually increasing the length of a curve, while keeping it constrained to a surface, with self-collisions.
Wearable
Process and workflow
Tools
- CAO software: Rhino3D
- Parametric CAO software: Grasshopper
- 3D printing software: Ultimaker Cura
- Design community for discovering, making, and sharing 3D printable things :Thingiverse
Grasshopper is an advanced algorithmic modeling tool. It is a Plug-in for Rhinoceros. It exists a lot of plug-in developped for Grasshopper and available in the Food4Rhino Website and an huge community, especially on the Grasshopper forum. The Grasshopper editor always works in parallel with the Rhinoceros 3D modeling environnement.
Each Grasshopper logic sequence is built with compoments and read from left to right. A sequence is called a "definition". A wire in a Grasshopper script represent the flow of informations between components. The extension for Grasshopper's files is .gh. To edit one of the possible configurations generated by an algorithm, user have to bake the Grasshopper preview into the Rhino environment (right click on it and select bake)
Literature
Digital 3D model - STL file with Rhinoceros and Grasshopper
Grasshopper exploration
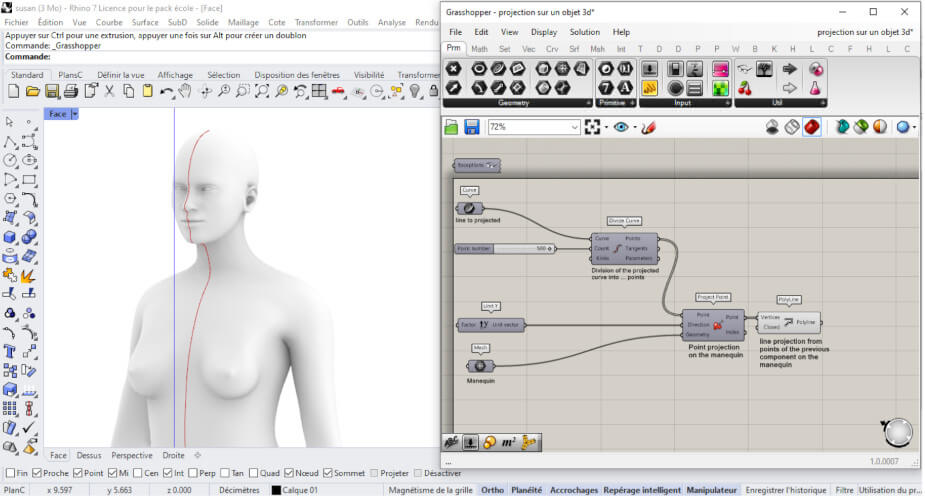
After exploring the Grasshopper software, I chose to print a simple polygon. The 3D digital design is saved as STL file.
3D model movie with Grasshopper (optional)
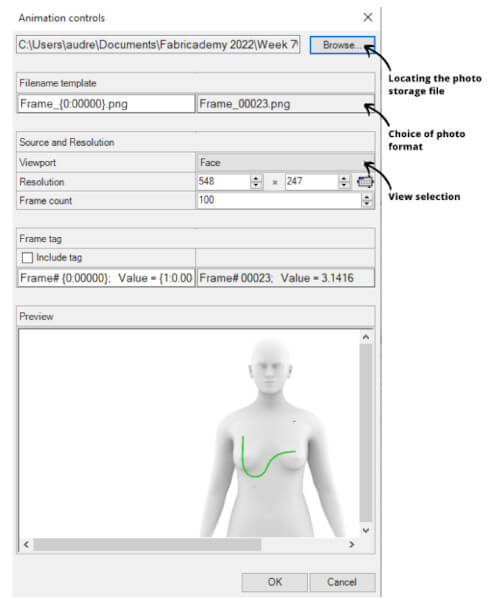
It is possible to make an animation with the Grasshopper software. To do this, in the Grasshopper definition, right click on the number slider of interest, then on animate. Images are taken during the automatic scrolling of the number slider value (frame rate to be defined).
| Growing curve | Polygone folding |
|---|---|
To model the folding of the polygon, I followed this tutorial:Simple Origami Fold using Kangaroo Plugin | Parametric Model
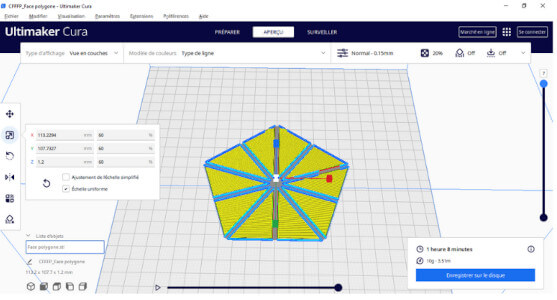
'Slicing' the STL file into G-Code with Cura
Slicing software transforms the file into a series of commands that tell the printer how to move the print head and extrude the plastic.
Open the Cura software, select the printer and the STL file.
 |
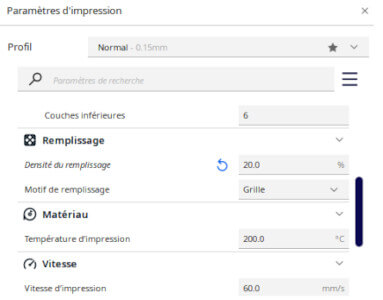 |
| Ultimaker cura software | Slicing parameters |
The choice of slicing parameters is essential for successful 3D printing. The most important parameters are the 3d filament print used, its temperature, print speed, and the fill rate.
| Filament 3d: | PLA - usual for initial test |
| Extrusion temperature: | 200°C - within the temperature range given by the manufacturer |
| Print speed: | 60 mm/s - within the speed range given by the manufacturer |
| File rate: | 20% - Choose the filling rate according to the usefulness of the object. In this case, it will not be subjected to high pressures, so a 20% filling is sufficient. |
Once all the settings are correct, click on the Slice button. This action informs about the printing time and the amount of material that will be used. Save the G-code file on the SD card of the 3D printer.
3D Printing Process as indicated in the G-code file - Fused Deposition Modelling particularly
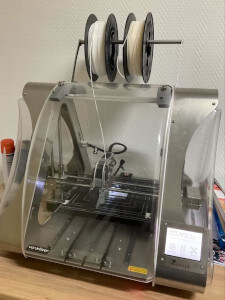
| 3D printer | Zmorph |
| Buse | 0.4 mm |
| Filament | 1.75 mm |
Load the filament into the 3D printer and then calibrate the printer to choose the best print quality for the nozzle height being tested.
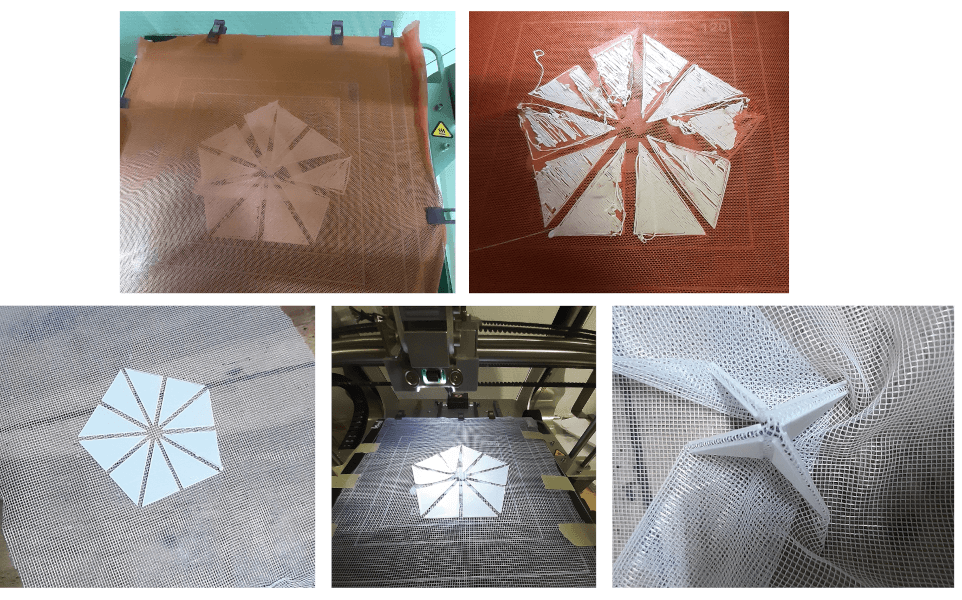
There were adhesion problems with the Zmorph 3D printer during the first test (orange fabric). For the second test, the printing was done completely after stretching the mesh fabric on the plate.
Comments
* For future prints, strips of painter's tape were placed on the printing plate for better adhesion.