E-textiles
 This week is an introduction to the field of e-textiles, example projects in the field, and the materials & technical developments that make these projects possible. We will go into detail on different techniques for making soft/flexible/fabric circuits.
The assignements are:
This week is an introduction to the field of e-textiles, example projects in the field, and the materials & technical developments that make these projects possible. We will go into detail on different techniques for making soft/flexible/fabric circuits.
The assignements are:
- Build at least one digital and one analogue soft sensor, using different materials and techniques.
- Document the sensor project as well as the readings got using the AnalogRead of Arduino
- Integrate the two soft sensors into one or two textile swatches using hard soft connections
- Document the circuit and its schematic
- Document your swatches / samples
- Upload your arduino code as text
- Upload a small video of the swatches functioning
- Integrate the swatch into a project (extra credit)
Textile swatch
Planning the circuit
For this week, we need a textile swatch to make hard and soft connections. I choose to make this LEDs circuit, wich can be close by connecting individually or in parallel to a 3V battery or plug seperatly on a board.
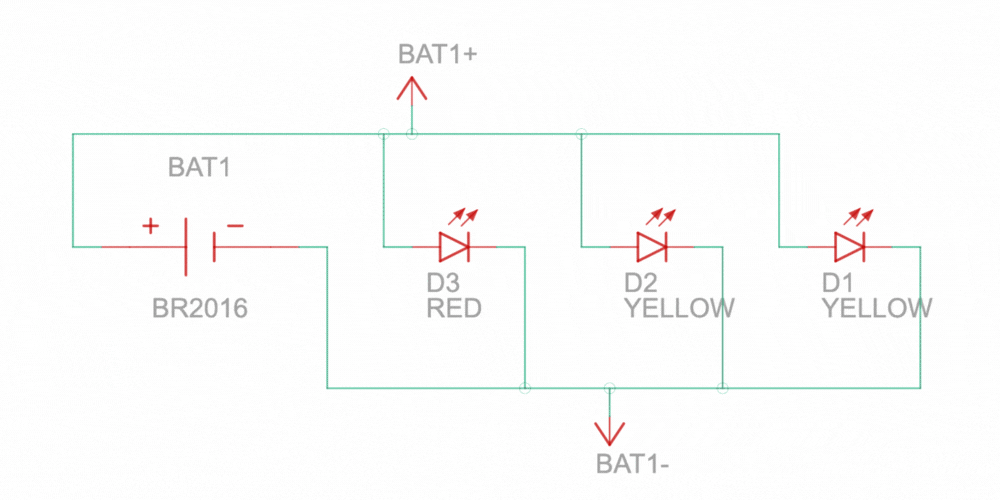 Ideally, to avoid the LEDs' duration being reduced, a resistor should probably be added when using with a 3V battery. I don't have a multimeter to measure the resistance of the components of this circuit and present an accurate project. My goal was to have a sample that was flexible enough to meet the needs of both digital and analog sensor and this swatch can do the job.
Sew and embroider
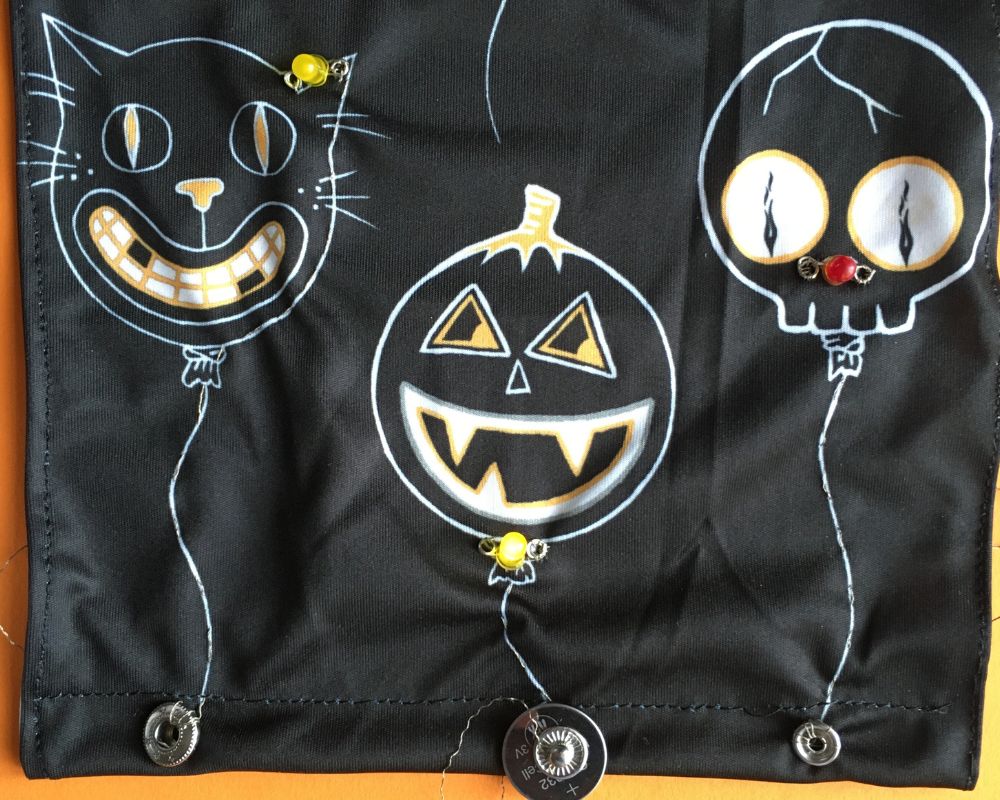
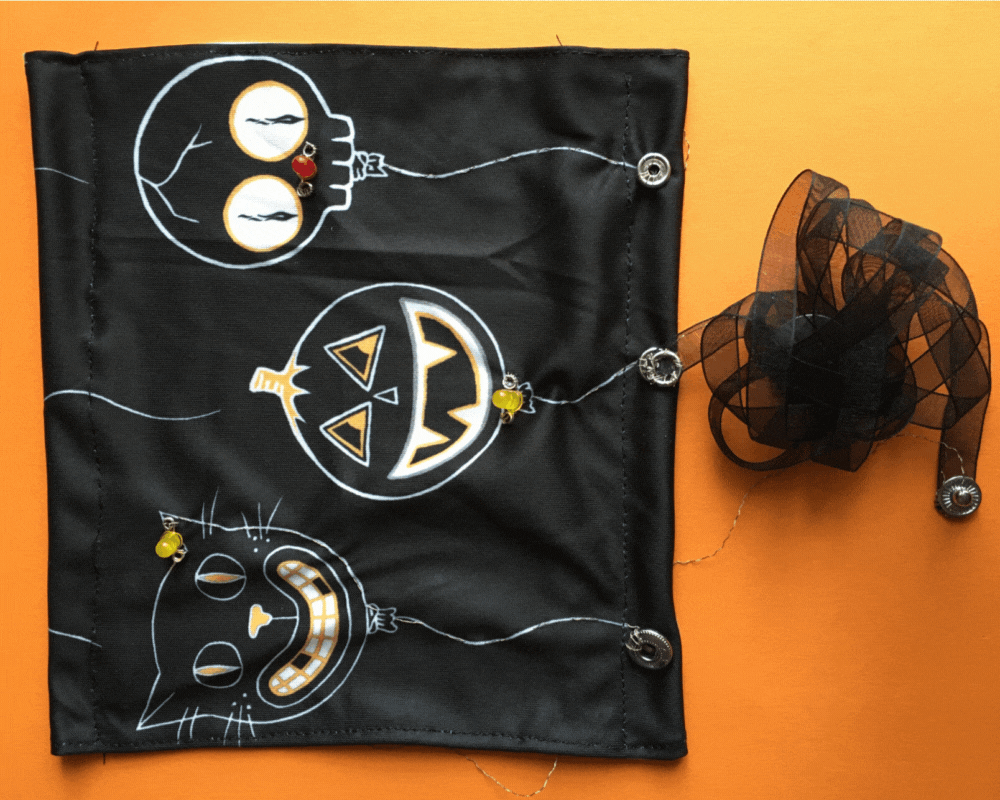
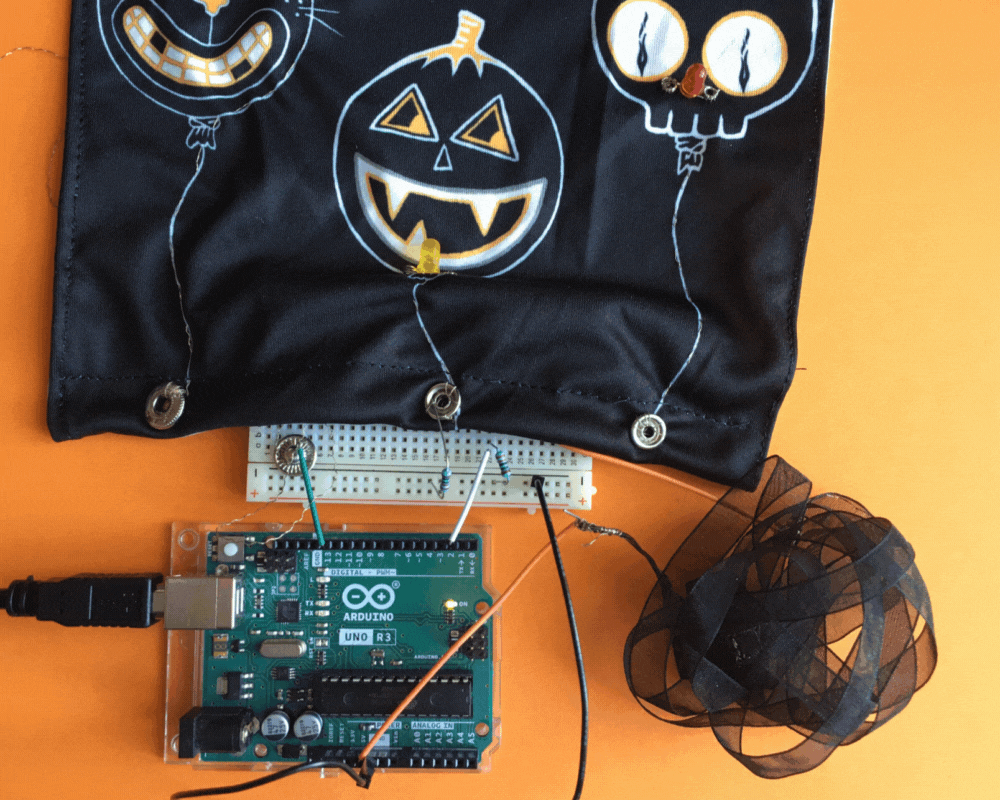
I got a old swatch sample Halloween themed, perfect for this season.
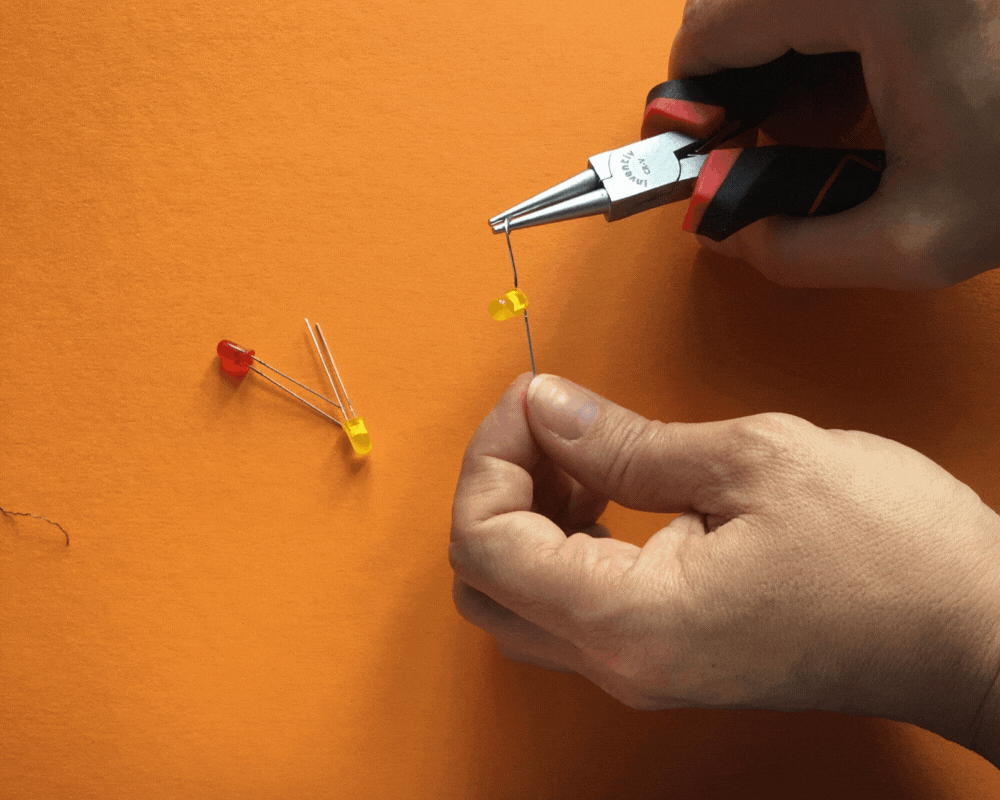
I first prepared the LEDs, then fixed them and added some points of embroider and snaps for simple connection points. The thread is a 100% polyamide silver plated.
Functioning
After some sewing to finish the border properly, what I should have done first, the swatch is lighting!
Digital grumpy mood soft sensor
Project
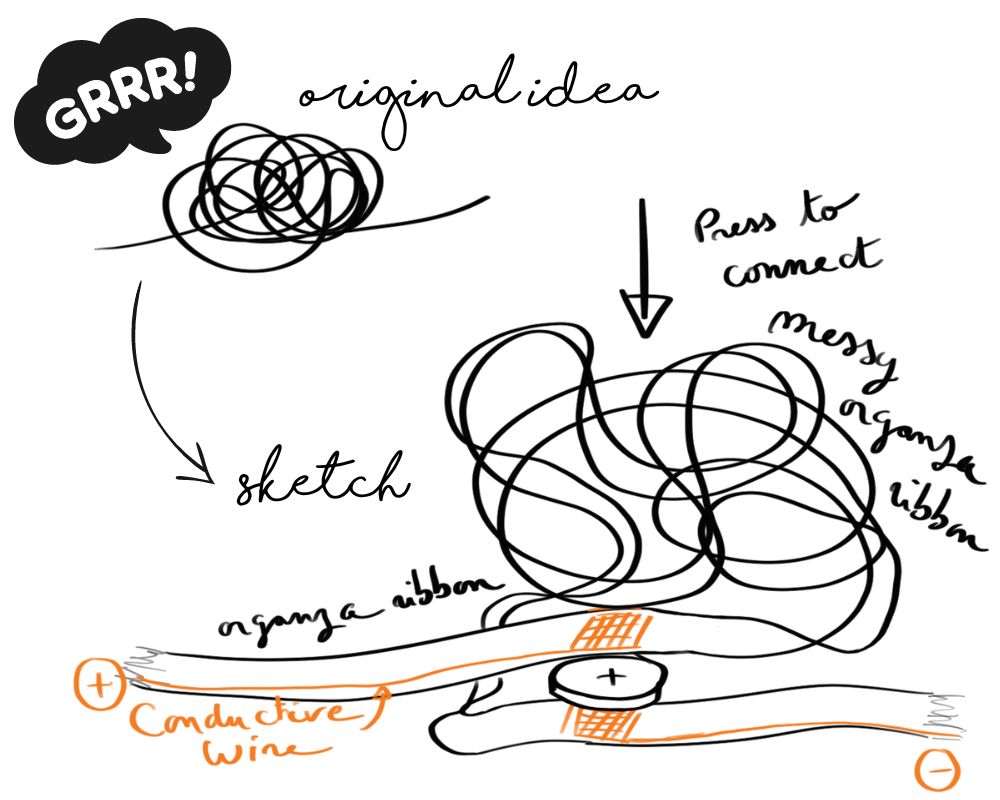
I made a digital soft sensor that looks like my mood of the week.
 The battery can be put inside the sensor or it can be plug to other devises.
What I need to build it:
The battery can be put inside the sensor or it can be plug to other devises.
What I need to build it:
* 1 organza black ribbon
* black sewing thread
* 1 battery
* 1 LED for testing
* conductive embroidery thread
* scissors
* a sewing needle
* go beyond my grumpy mood
Achieved grumpy mood soft sensor
bugging
reason of the bug and debugging
- I thought my digital grumpy mood didn't work, until I tested the battery :/
- Problem solved by changing the battery
- However I was still grumpy...
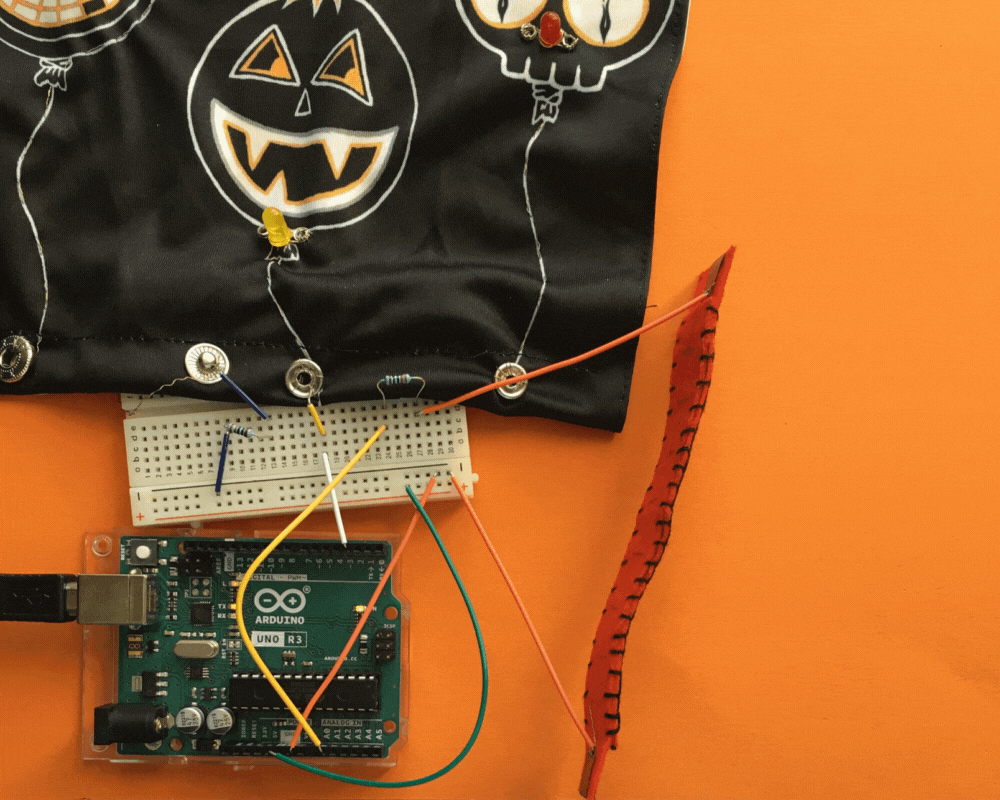
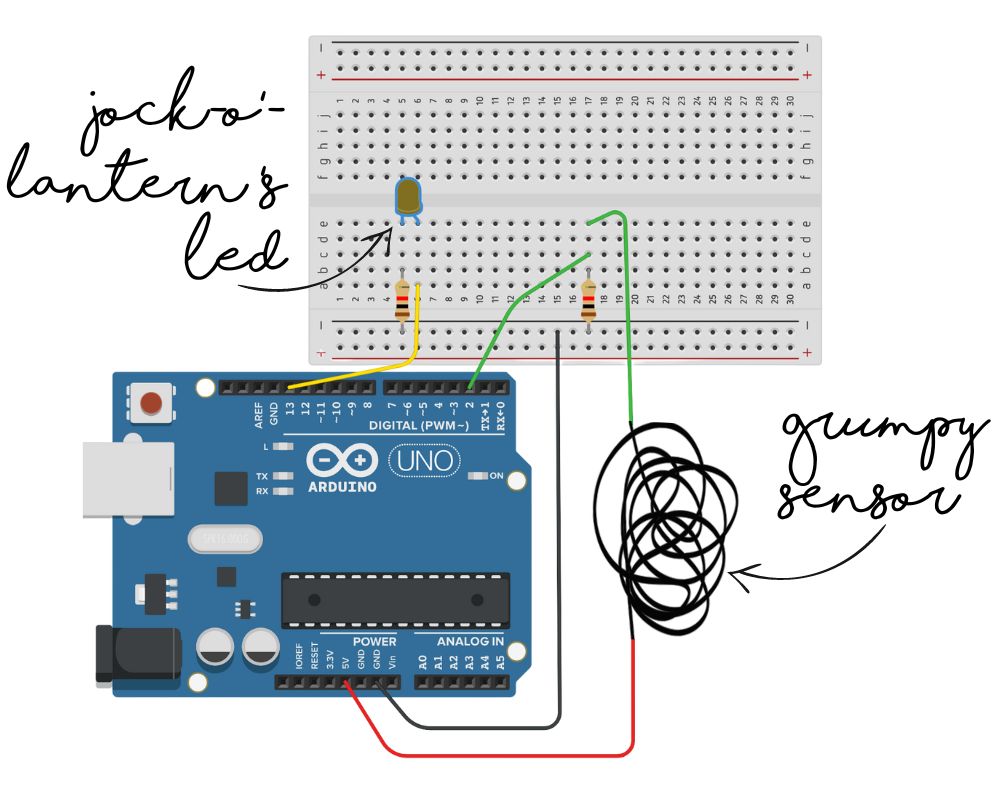
Connecting to the textile swatch:
 Here is the code used in monday 25 of octobre tutorial to read digital sensors and the result:
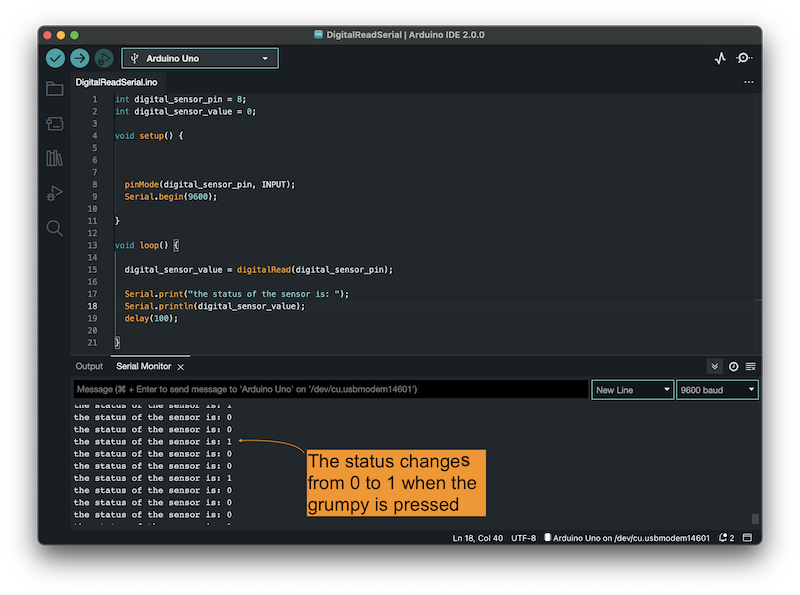
To make it works, it is necessary to take of the battery and use the sensor as a switch. Even if heavier, using Arduino is much less empirical than testing on an LED.
Code grumpy
I would have liked to put a growling sound but I only had LEDs so I use the halloween textile swatch again. The code assigned is : when you crush the grumpy mood, the LED switch on or off oposite to its previous state.
int buttonState ;

bool lightOn = false;

void setup()
{
  pinMode(2, INPUT);
  pinMode(13, OUTPUT);
}

void loop()
{
  buttonState = digitalRead(2);
  delay(100);

  if (buttonState == HIGH)
  {
    lightOn = !lightOn;

    if (lightOn == true){
    lightOn == false;
    digitalWrite(13,HIGH);
    }
    else {
      lightOn == true;
      digitalWrite(13,LOW);
    }
  }
}
Make work the grumpy!
* resistors
* A shield
* Some wires
* the grumpy mood soft sensor
* Arduino and its connection wires
* the Halloween test swatch
* fingers
* patience
* perseverance
Analogic bend soft sensor
Project
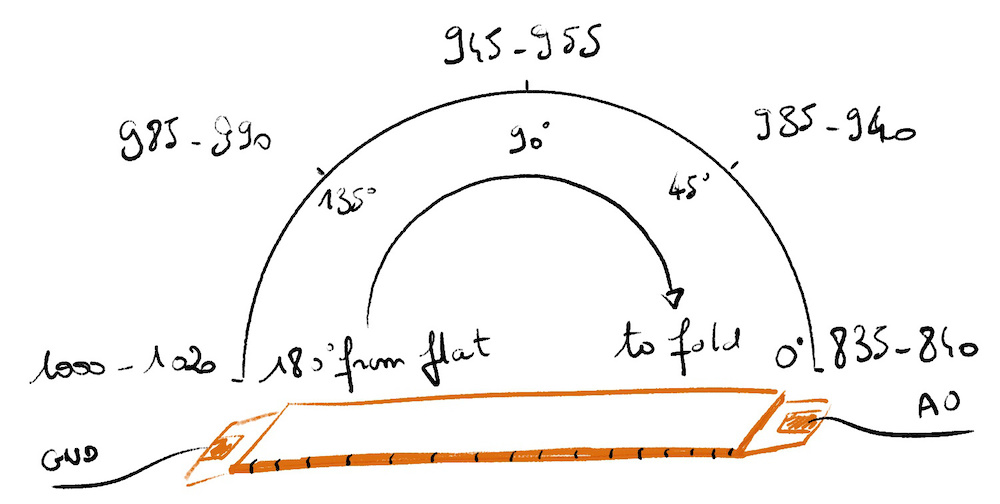
I made a Bend Sensor found in KOBAKANT with a step by Step explanation. because I have no neoprene, I replaced it by felt.
* Felt
* Conductive thread
* Conductive fabric
* Velostat
* Needle
* Fabric scissors
* Fabric pen

Reading and result
This is the circuit to can read the bend sensor
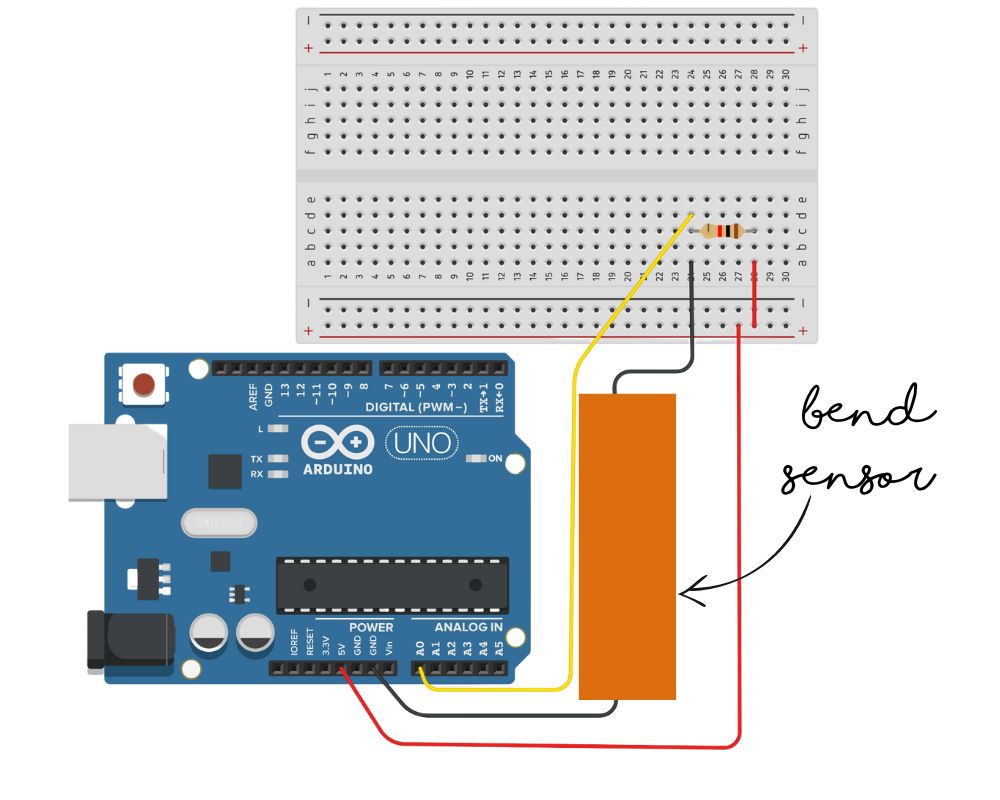
Here is the code used in monday 25 of octobre tutorial to read analog sensors:
int analog_sensor_pin = A0;   //change the pin, where the sensor is connected?
int analog_sensor_value = 0;

void setup() {
// put your setup code here, to run once:
pinMode(analog_sensor_pin, INPUT);
Serial.begin(9600);

}

void loop() {
// put your main code here, to run repeatedly:
analog_sensor_value = analogRead(analog_sensor_pin); //read the Voltage of the pin sensor

Serial.println(analog_sensor_value); // print the value on the Serial monitor
delay(100);

}
Light a LED with the bend sensor
To associate the value of the sensor to the LED, I done this circuit:
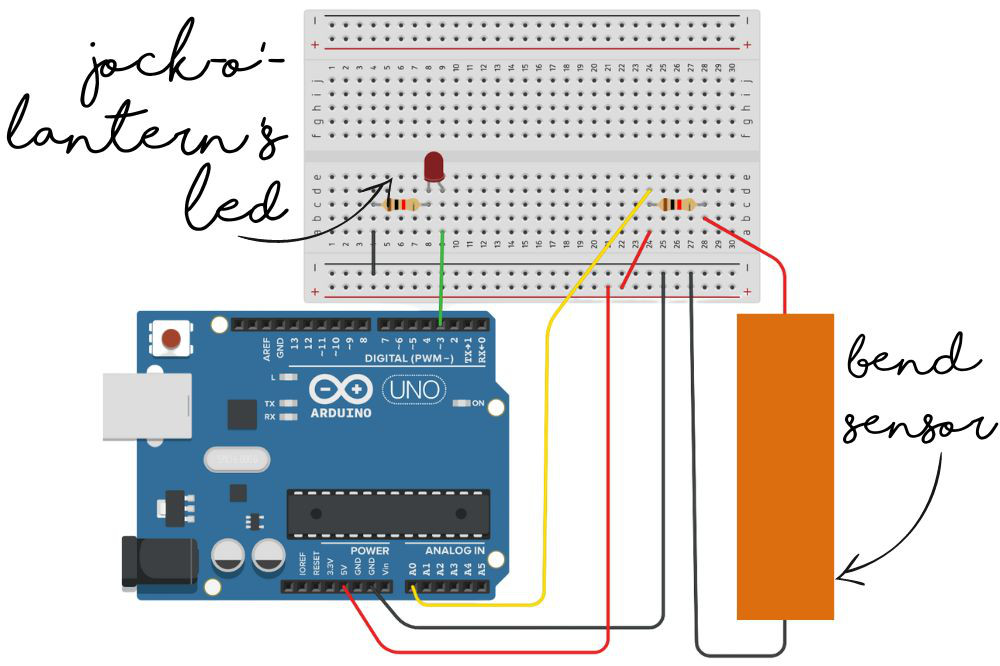
and a code
int led_pin = 3;
int analog_sensor_pin = A0;
int readValue = 0;
int ledValue = 0;


void setup() {

pinMode(analog_sensor_pin, INPUT);
pinMode(led_pin, OUTPUT);

}

void loop() {
// put your main code here, to run repeatedly:
readValue = analogRead(analog_sensor_pin); //read the Voltage of the pin sensor

ledValue = map(readValue, 961, 1020, 0, 960); //we change the range

analogWrite(led_pin, ledValue);  //we use the mapped value to control the Led

}