Textile Scaffold
 Technical textiles have various applications, among which agrotech, building, clothes, geotech, sports, healthcare. This class broadens the perspective of the techniques, processes and applications of technical textiles with references and inspiration of various disciplines. These week assignements are :
- Document the concept, sketches, references also to artistic and scientific publications
- Produce 2 techniques of textile scaffold
- Document the process from CAD to CAM, the step-by-step instructions for CNC milling, mold making, vaccum forming and textile composites
- Upload your design and fabrication files, including the 3D model and CAM file
- Document at least 2 processes from design to prototyping, fabrication, materials used, document your achievements and unexpected outcomes
- Make a stop motion of your crystal growth or use 3D modeling software to simulate your design (extra credit)
This week was all about saving for me :)
Saving energy with mycellium
This week, at Le textil Lab a mycellium pack arrived. For more consistency I choose to put it on the biomaterail week.
Saving fabric from trash to do paper
This project was done with Tess Larquemin and Laora Guillerm. They both work on paper from fabric the day before I joined them.
Preparing the mould
Before opening the mycelium preparations, we thought that they were malleable enough to be put into a mould representing a leaf with only the veins. After opening the bags, given the thickness of the straw, the support for the mycelium, we decided that the project did not make sense. However, I had already done some engraving tests.
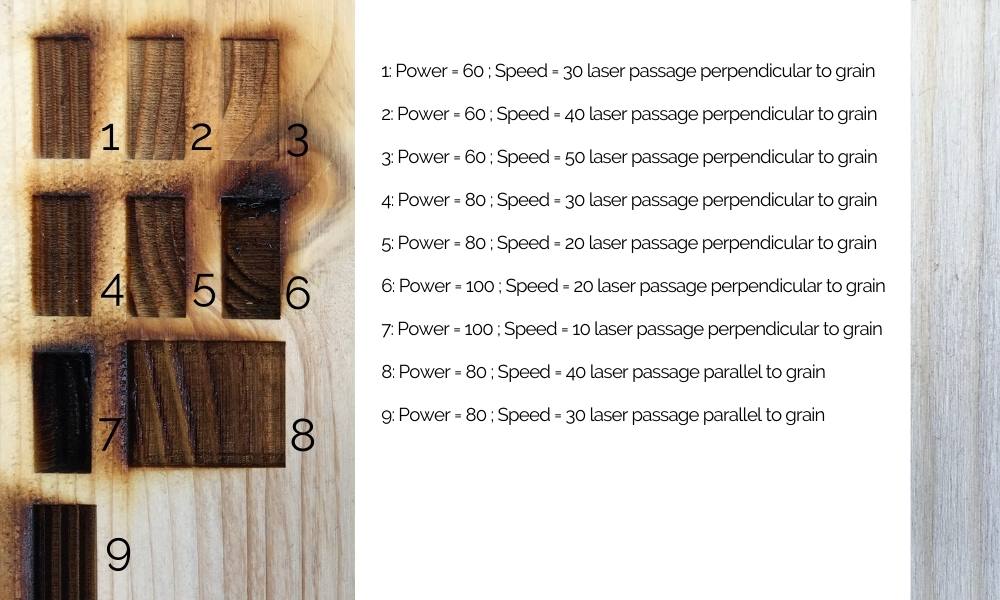 The rendering of the striations of the pine wood seemed interesting to try a mould on a sheet of paper. We choose to power the Trotec laser cut at 40 with a speed at 30% to can see the wood grain without burn. We send to engraving two squares measuring 15 cm and 20 cm respectively.
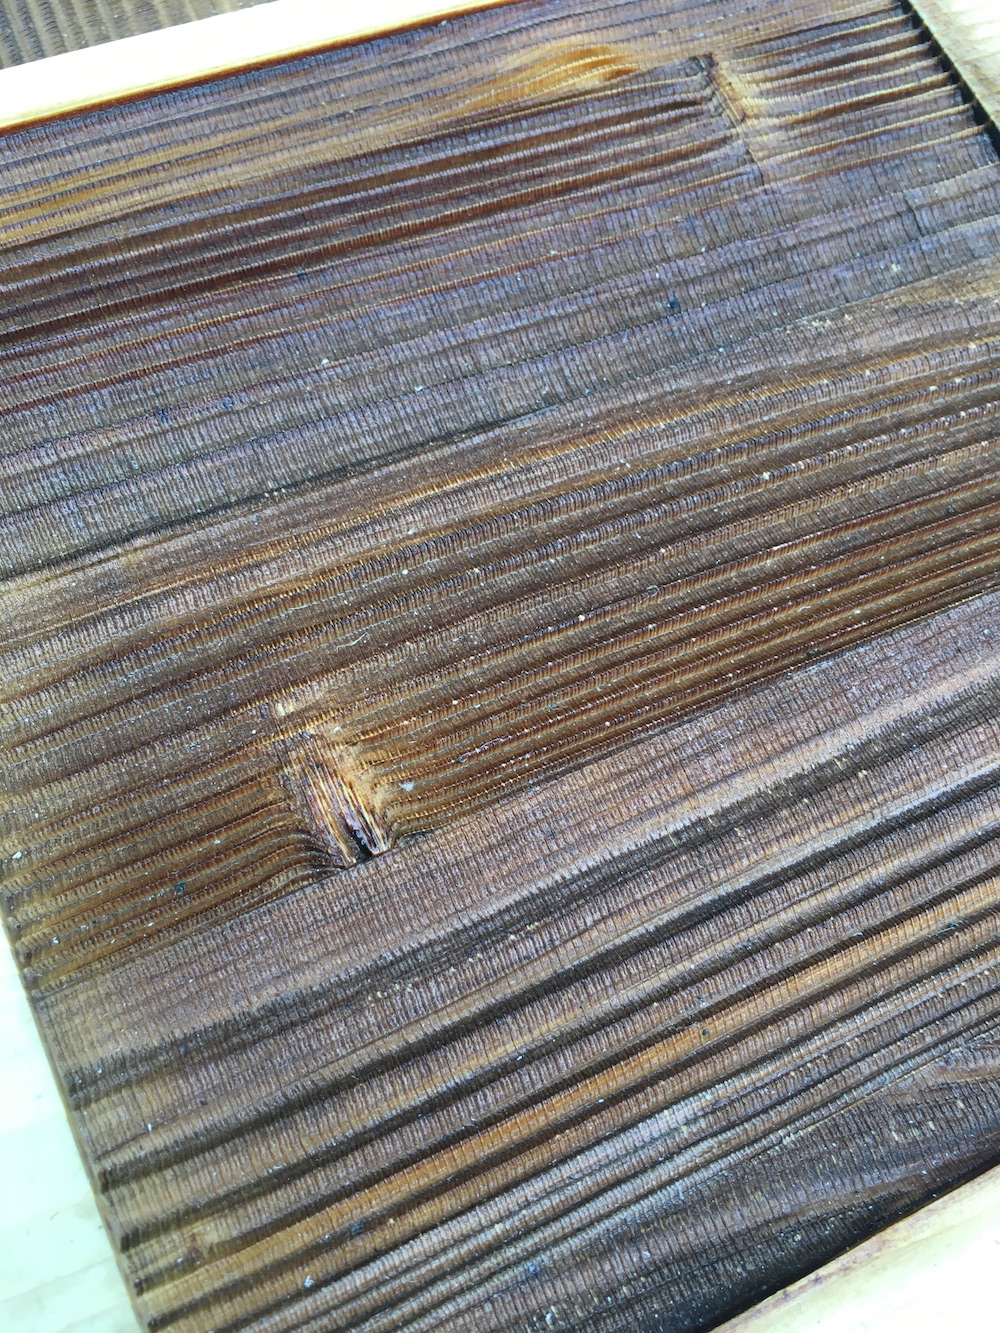 To finish both moulds, I varnished them with a water resistant varnish.
How to do paper from fabric
* celulosic fabric scraps
* 110g of corn starch
* 1L of hot water
* a large basin
* a small sieve
* a screen sieve
* a drying rack or mould
* grind the fabric scraps
* sift them in order to separate the dust from the larger fibers
* mix the corn starch with the water
* add as much dust as necessary
* distribute equally the mixture on the screen sieve
* pour it over the mould
* repeat if necessary to get a thicker layer

Result
We only use the 20cm square mould. After 4 days of drying, we got the result:
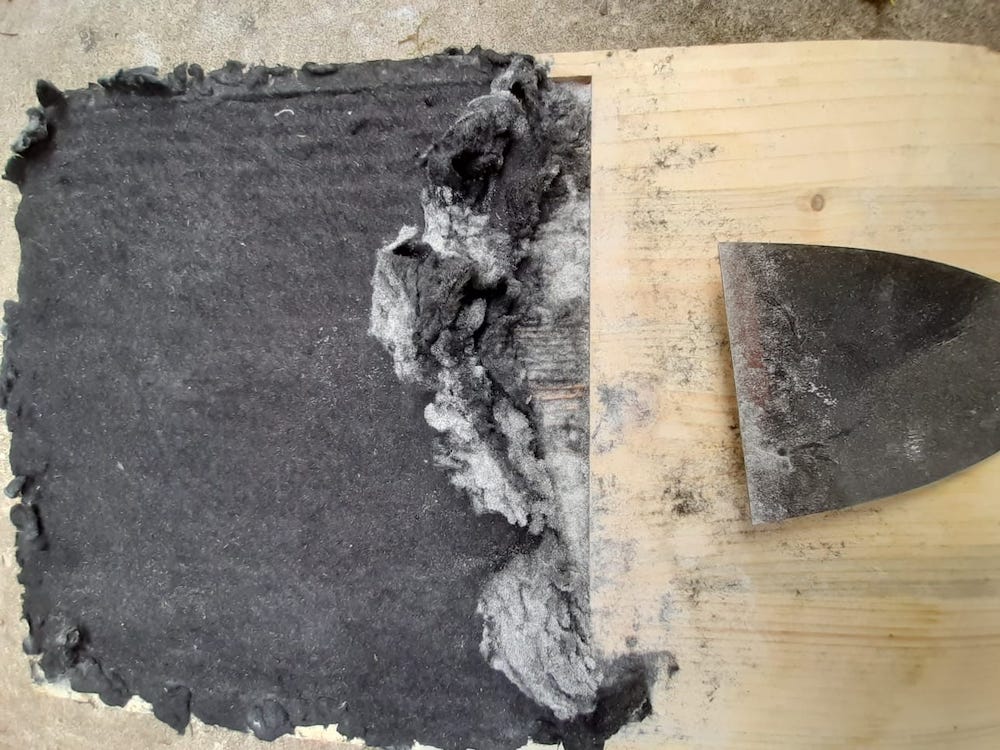 As you can see it's a total fail, dusty, fragil and impossible to get out of the wood mould... we underestimated the importance of having an absorbent surface under the paper to ensure its dryness.
Saving a disliked design
Cotton, ...
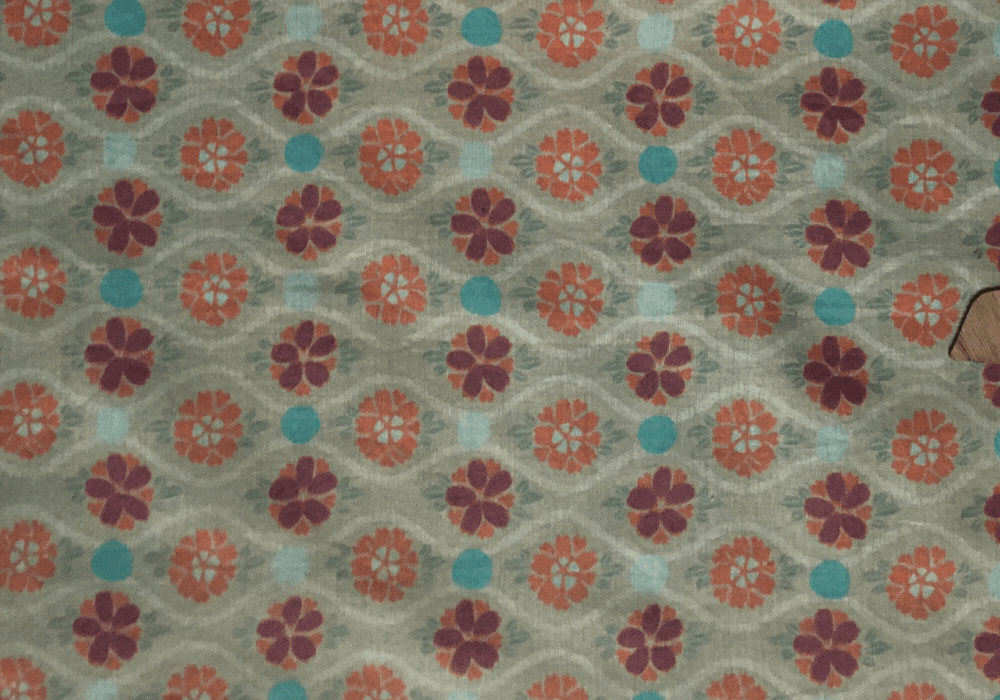
I got this fabric at home (I don't know from where)
 I dislike the pattern, most for the flower part. I thought it could be a solution to cover them and keep visible the curves shapes.
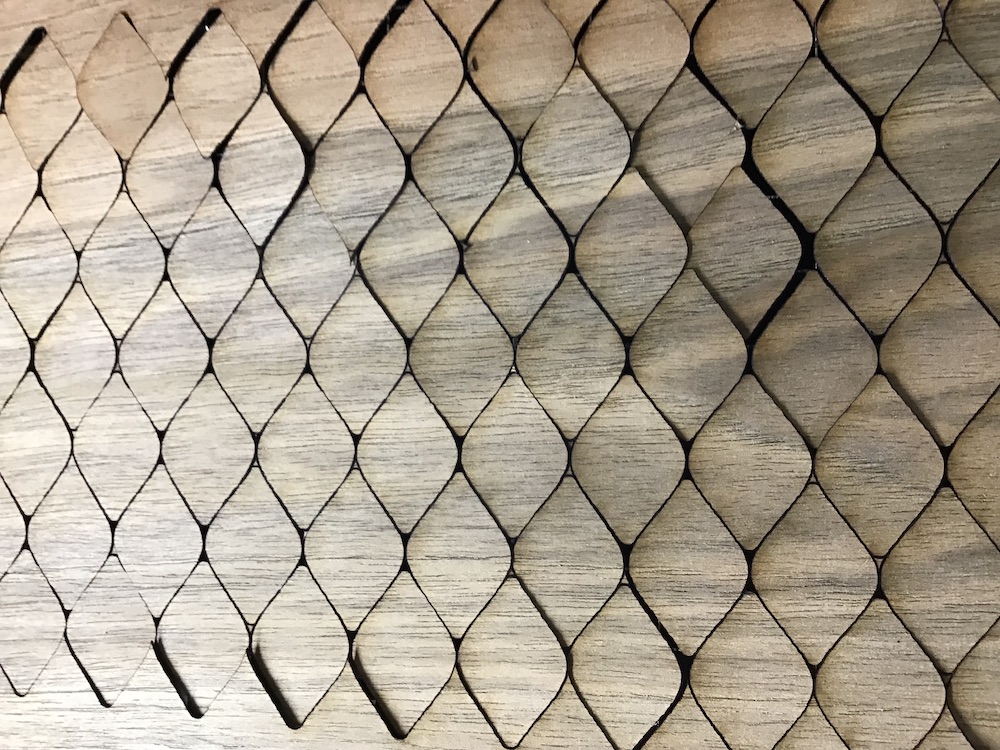
... Walnut, ...
I made a module design 1 with inskape as a reminder of week 3 and getting that time the goal of very few wastes. They were lasercuted on walnut veneer :
... and glue,
If the design was a tiny challenge the collage is a more consequent one. I chose to use classic wood glue.
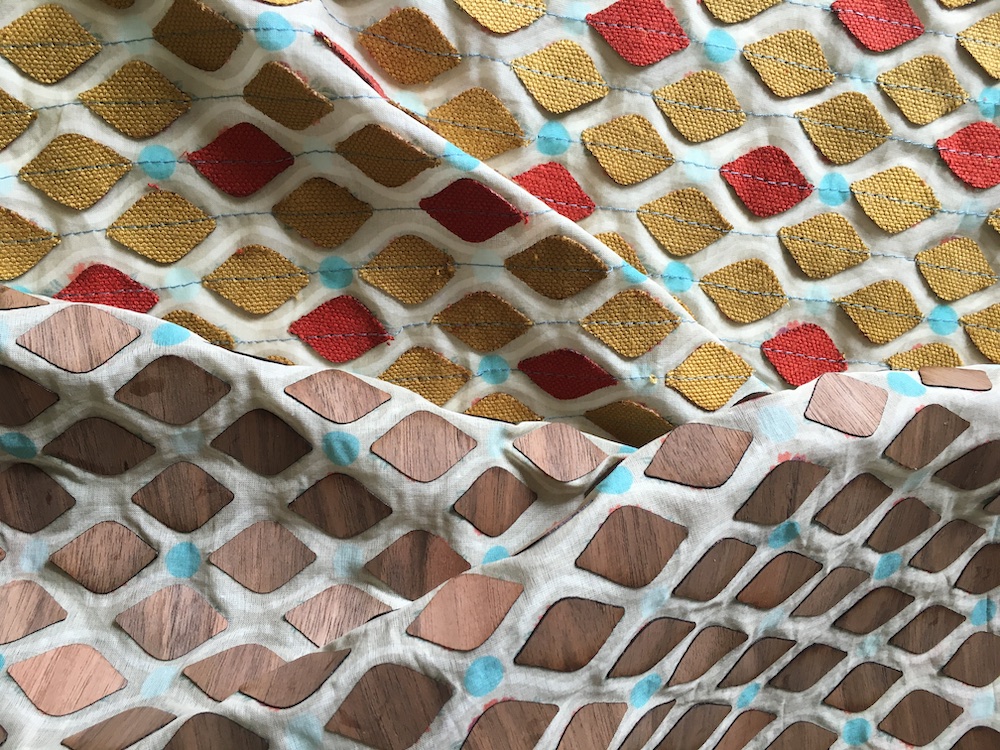
 Obviously, due to the presence of wood, the fabric could not be washed, and I find it pretty difficult to use. It probably could be better with some triangle shapes.
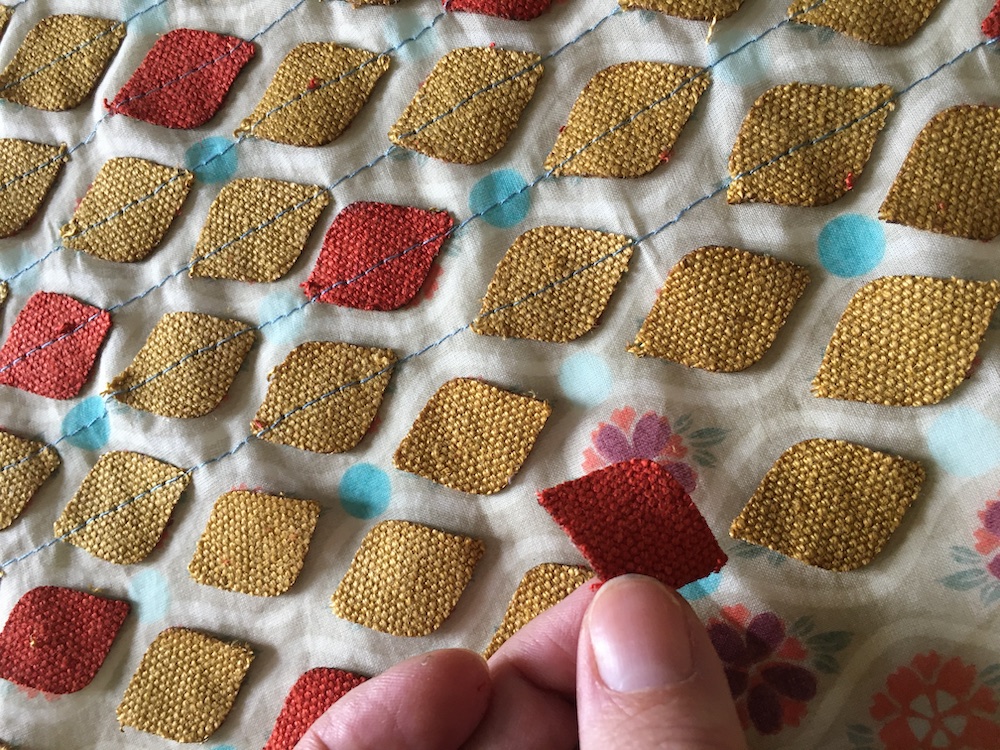
and what about linen wastes ?
This week I also prepare the laser to cut some scrap of linen from le Textile Lab. I tested the cut with the same shapes, and finaly decide to sew them on my disliked fabric.
I got two new fabrics!
My week review for instagram
Files
-
Walnut veneer modules (svg) ↩