7. Computational Couture
Research & Ideation
This week it has been an interesting exploration for me to dive into exploring softness and flexibility with 3d printing.
References & Inspiration
My inspirations come from two different sources this week:
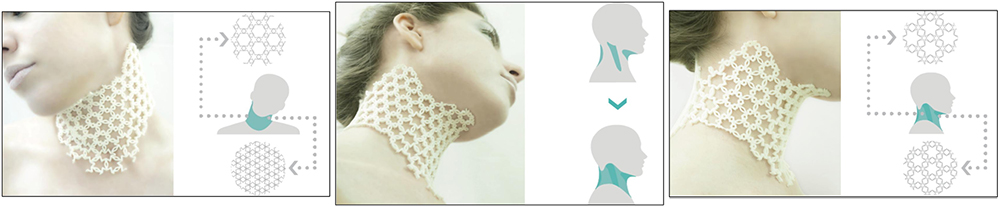
- Attractors: I have worked with this concept and also on Grasshopper many times before. I wanted to test it with a textile perspective this time.
- Auxetic metamaterials: This is a very new concept to me but very exciting and interesting. I want to come back to auxetic materials again.
Attractors
The concept of attractors originates from the field of dynamical systems and chaos theory in mathematics and physics. In simple terms, an attractor is a set of values or states in a dynamic system toward which the system tends to evolve over time. It is a fundamental concept used to understand the behavior of complex systems, ranging from physical systems like weather patterns to abstract systems like economic models. A nerdy note: the Butterfly Effect is also explained with "strange attractors" in chaos theory.

In the context of design, attractors are used to influence and guide the generation of forms, patterns, and structures. Designers often use attractors to create responsive and adaptive designs that are influenced by specific conditions or criteria. Attractors in design refer to specific points, lines, or areas within a design space that exert influence on the elements around them. These elements can include shapes, patterns, or any other design components.
Attractors play a significant role in Grasshopper by allowing creation of algorithms that respond to specific inputs. The following are the basic attractors used in Grasshopper:
- Point attractors
- Curve attractors
- Surface attractors
- Numeric attractors
Basic tutorials for understanding attractors within Rhinoceros and Grasshopper:
- First and foremost, from the Grasshopper Bible, "The Grasshopper Primer". This is one of the first books that I read to learn Grasshopper.
- Materiability
- TU Delft
- Youtube tutorial by Andrew Friedenberg
- Youtube tutorial by Fereshteh khojastehmehr
- Last but not least, a tutorial from my colleague Tuğrul Yazar from Istanbul Bilgi University, on his wonderful website Design Coding
Auxetic metamaterials
Auxetic metamaterials are a special class of materials characterized by their unique mechanical properties, specifically their negative Poisson's ratio. Unlike most conventional materials, which exhibit positive Poisson's ratios (meaning they contract laterally when stretched longitudinally and expand laterally when compressed longitudinally), auxetic materials behave differently. When stretched, auxetic materials expand laterally, and when compressed, they contract laterally. This counterintuitive behavior is what sets auxetic materials apart and makes them particularly interesting for various applications.
The design and fabrication of auxetic metamaterials involve complex geometric structures or unit cells that enable the material to exhibit its auxetic behavior.
This paper summarizes the unit cells as:
- Re-entrant structures: Re-entrant refers to something “directed inward” or having a negative angle.
- Chiral structures: A typical chiral unit comprises a central cylinder encapsulated in tangentially attached ligaments.
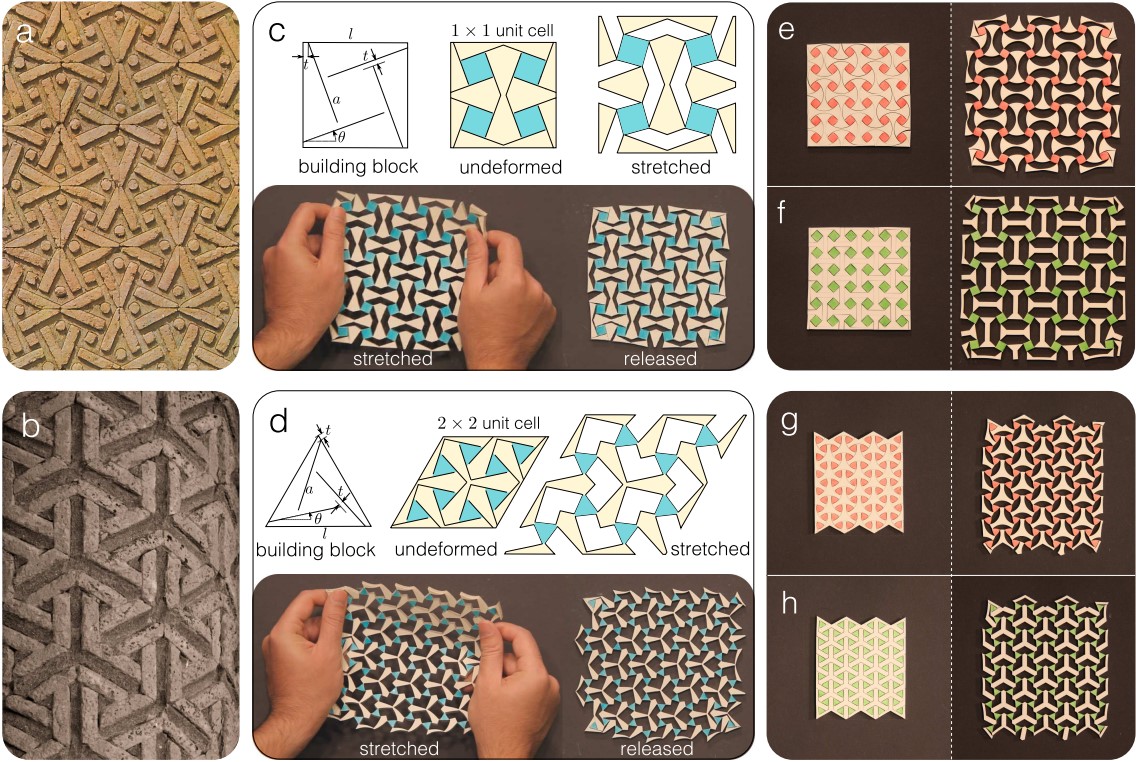
- Rotating (semi-) rigid structures: An idealized rotating structure contains rigid squares connected through simple hinges. When loaded, the squares will rotate at the vertices, either expanding or contracting depending on the loading type. The concept has been widely implemented using squares, rectangles, triangles, rhombi, and parallelograms.
More resources for auxetic metamaterials:
- Another Materiability summary
- (https://www.youtube.com/watch?v=Syn7TaX90Ik&ab_channel=HiroyaTanaka)
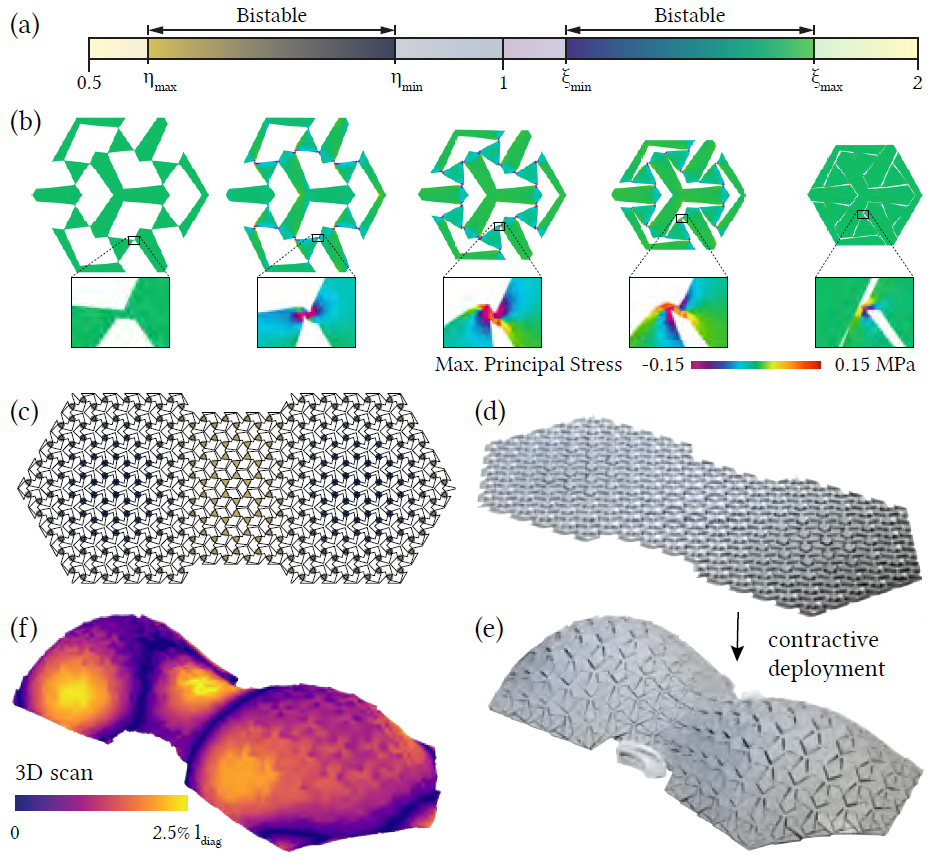
- A youtube video about bistable auxetic structure with variable expansion
- A popular science video about bistable auxetic materials
- Linketix plugin for Grasshopper has components for simulating auxetic structures. Here is a tutorial on how to use it. As my aim was to create an algorithm for changing the design of the system not simulating it, I did not use the plugin.

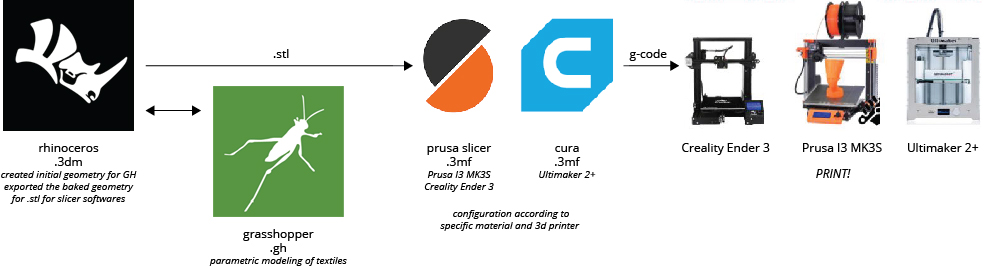
Tools
3D modeling
- Rhinoceros
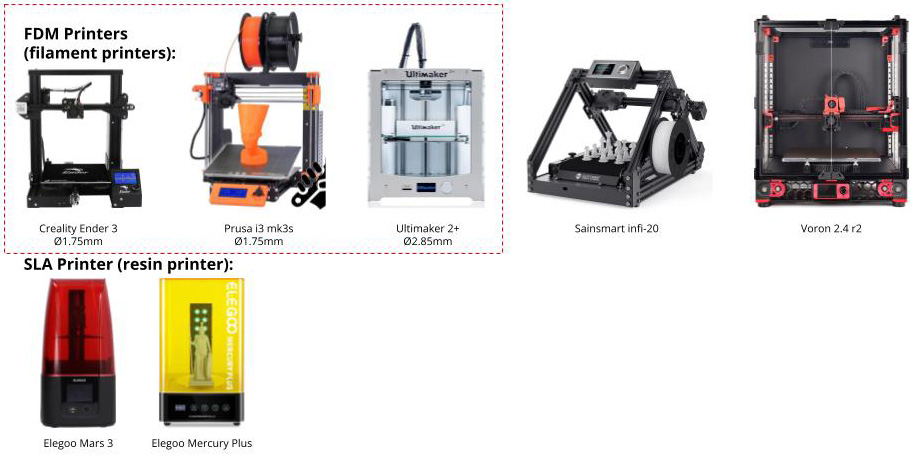
3D printing
- Prusa I3 MK3S
- Creality Ender 3
- Ultimaker 2+
Materials to print on
- Holographic foil
- Synthetic mesh/tulle
Printing Materials
- TPU filament
- PLA filament
We have various 3D printers at the lab. This week we focused on the printers outlined by the dashed red rectangle in the below image:
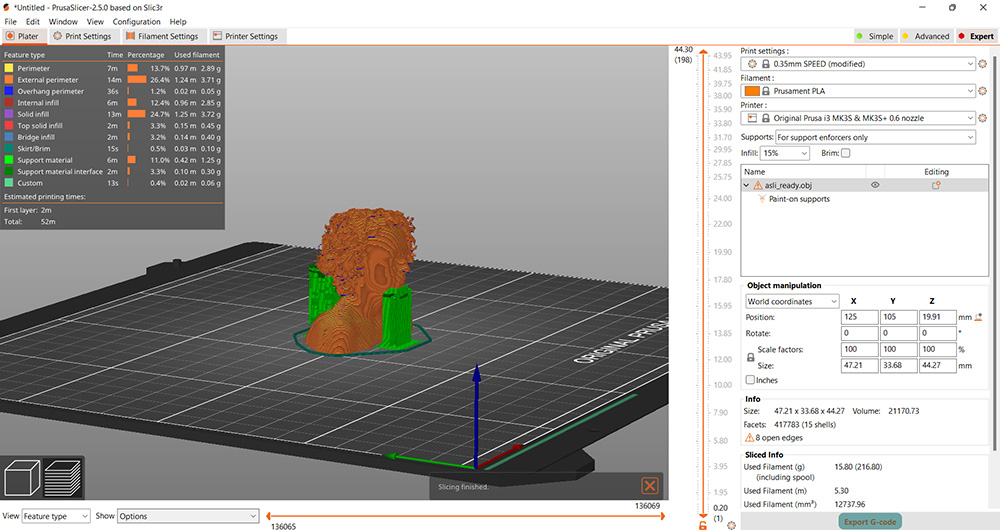
3D printing with Prusa Slicer and Prusa I3 MK3S
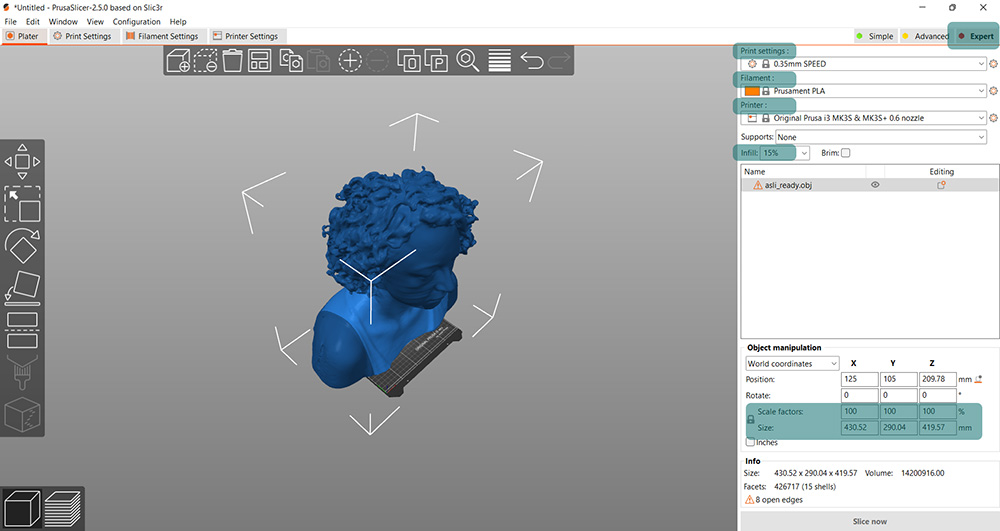
Open .stl file in Prusa Slicer.
Go to EXPERT SETTING (we will use the tools available under this setting).
Adjust Print Settings (you can choose a preset, which affects the length of print. Of course a detailed print gives better results but it is more time comsuming. Determine your needs and choose accordingly). In my case, I used draft printing for a quick print.
Pick the correct Filament and Printer
Infill determines how solid or hollow the inside of the model will be. The more hollow the object is, the quicker it will print and the less material you will use. However, you might need a sturdier model, then you need to choose higher infill percentage.
Adjust Scale factors or Size to make sure your digital model fits in the bed and printable volume of the 3D printer.
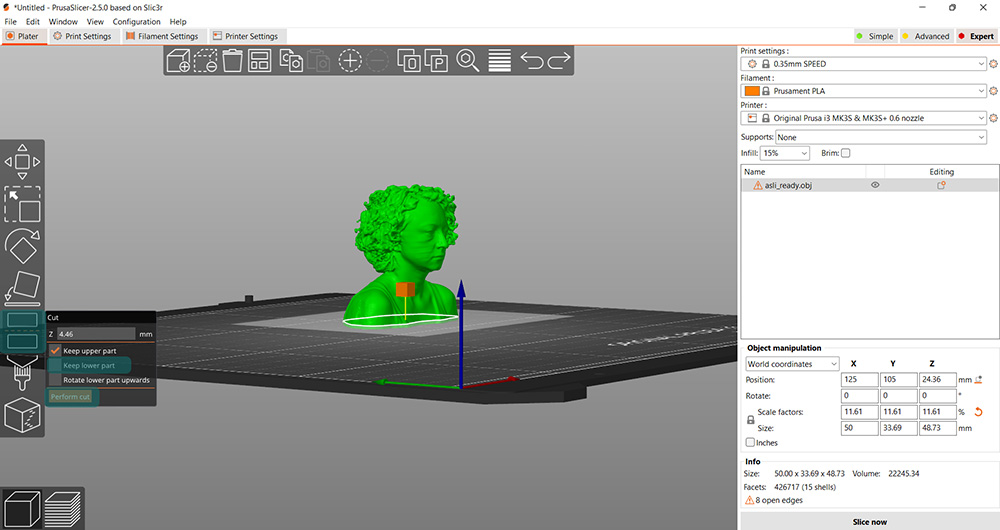
Rotate your model around to see if it is in contact with the printer bed. If it is not, it means that there is an object that makes your model hover above the bed. You can remedy this by CUT tool. It creates a cutting plane which you can move up and down on the z-axis. Adjust the plane visibly closer to where you want your model to contact the bed. Make sure to uncheck the keep the lower part. Then hit cut. If you modelled the object yourself, I suggest to go back to modelling program and solve the issue there. Because cutting the model without precision alters the final measurements of the printed model. In most cases, the exact dimensions are essential.
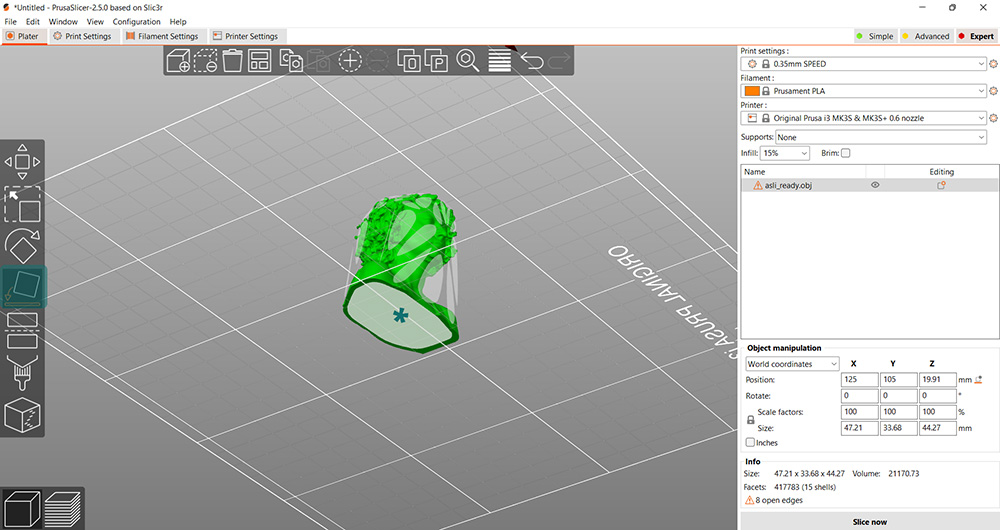
If the model is not in right side up, then use PLACE ON FACE tool to select the face which would be your base*.
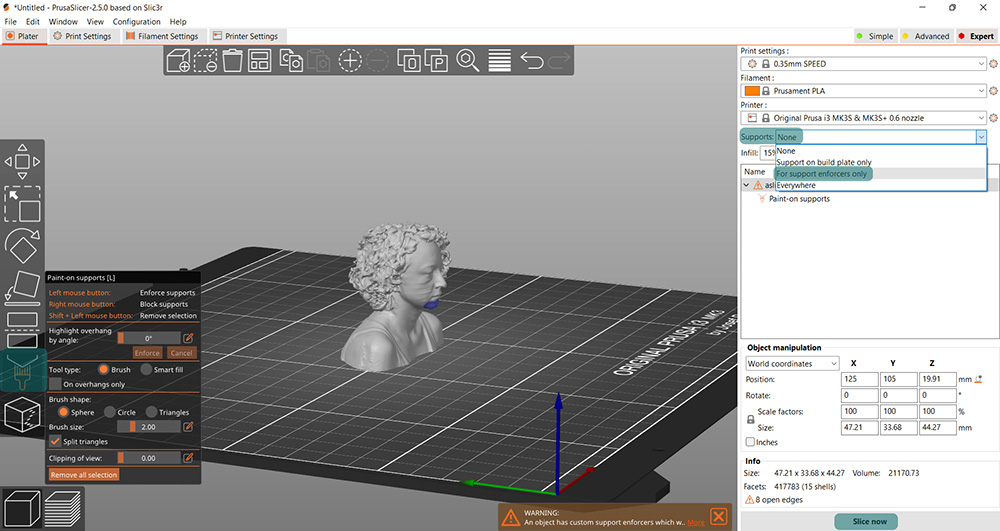
If there are overhangs, which you think would need support, you can specify the places of these supports with PAINT-ON-SUPPORTS tool. Then, you need to select Support enforcers only under the Supports dropdown menu. Once your model is ready, you can hit SLICE NOW to see a preview of the printjob.
EXPORT the .gcode file and save it on a Mini SD card. You will use the SD card to trasfer your file to the printer.
Prusa i3MK3S interface is very easy to use with the knob. Rotate the knob to scroll through the options and click on the knob to select one. There is a Mini SD card slot to the left of the box.
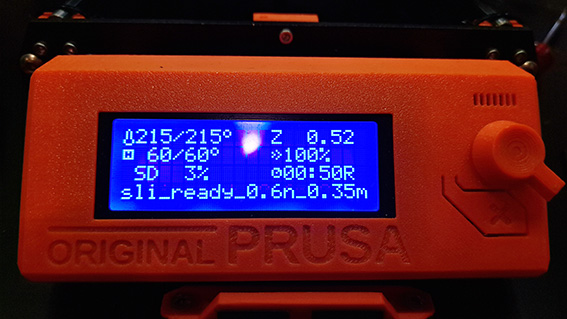
Preheat > PLA filament
Load filament
Start print
Troubleshooting: The first few layers of printing is very important. You need to observe this part closely to see if the job starts without problems. - You might observe there is extra material at the nozzle. You need to remove this material. - The material might not be sticking to the bed. One of the reasons for this is the bed height. Adjust bed height with enter here.
Process and workflow
3D printing samples as a group
We made three samples as a group. We explored two of the options of creating textiles with 3D printing: 3D printing as fabric and 3D printing on fabric. We wanted to vary the machines, the filaments as well.

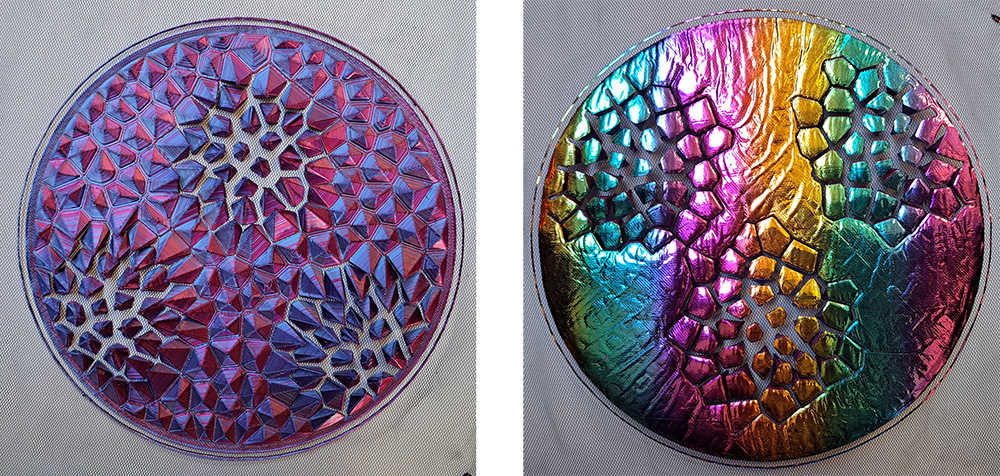
Attractor sample
This model uses the grasshopper file4 and the initial rhinoceros model5.

The sample that I printed has the following parameter values:
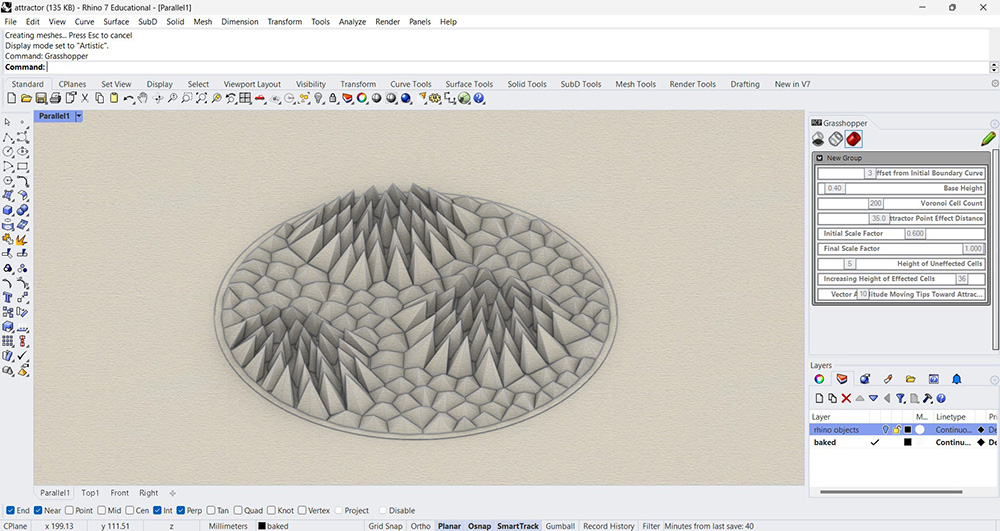
The layers of printing are as follows:
- Holographic foil
- Printing a few layers
- Mesh
- Printing the rest of the sample

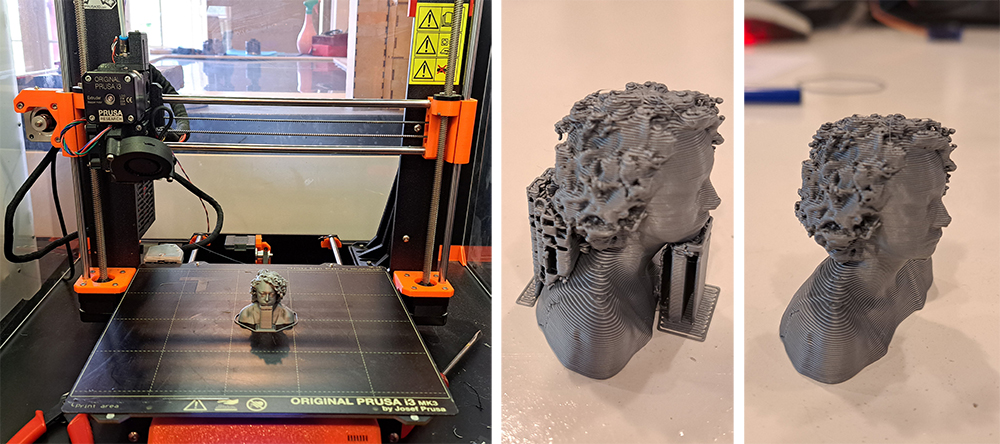
I encountered clogging in the printer that I did not realize at the time. I immediately stopped the print job, tried to estimate at which layer it went wrong. I changed the gCode manually to delete all the lines coming before without touching the starting setup of the print. I only deleted the mesh calibration command from this part of the gCode.

I continued printing only observing that I may have skipped a few parts of one layer, success.
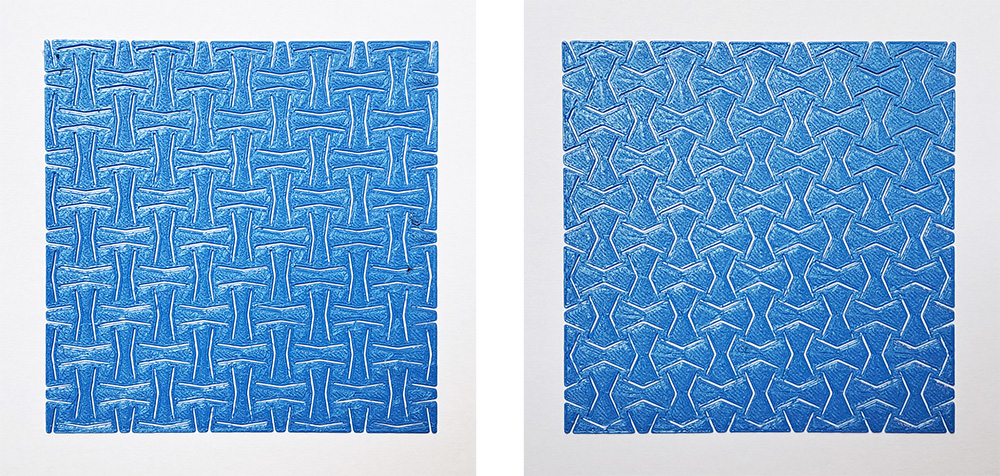
Auxetic metamaterial sample
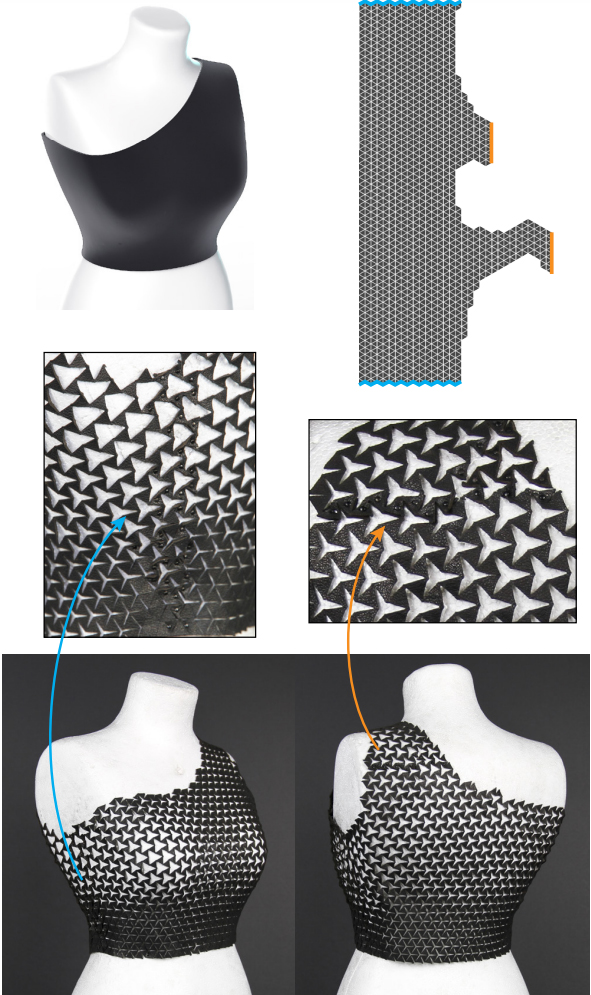
I wanted to test the Rotating (semi-)rigid structures with square unit cells as my starting point of exploration in auxetic metamaterials.
I created a grasshopper definition that does not simulate the movement of the fabric but changes the parameter values of the design itself. I used TPU 98A filament for printing and only printed in 3 layers.
This model uses the grasshopper file4 and the initial rhinoceros model5.

Sample 1
I printed an initial sample print, called auxetic sample 1, with TPU filament on Prusa I3 MK3S.
Sample 1 uses the following parameters in grasshopper:
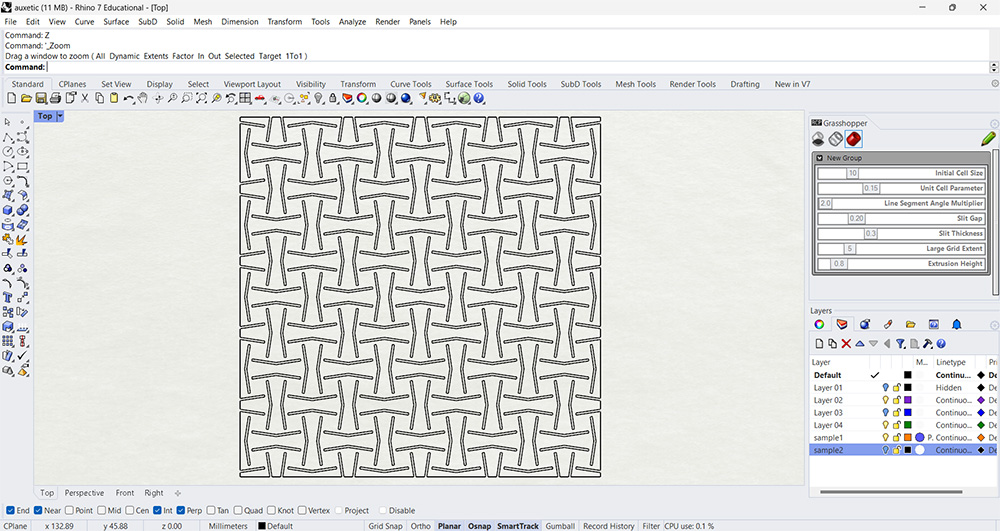
You can download the .obj file6 of sample 1 via sketchfab.
Sample 2
I discovered that there was not much extention on Sample 1. I guessed that this was due to having not enough room for rotation so I increased the Line Segment Angle Multiplier and decreased the Slit Gap parameters in grasshopper definition.
Sample 2 uses the following parameters in grasshopper:
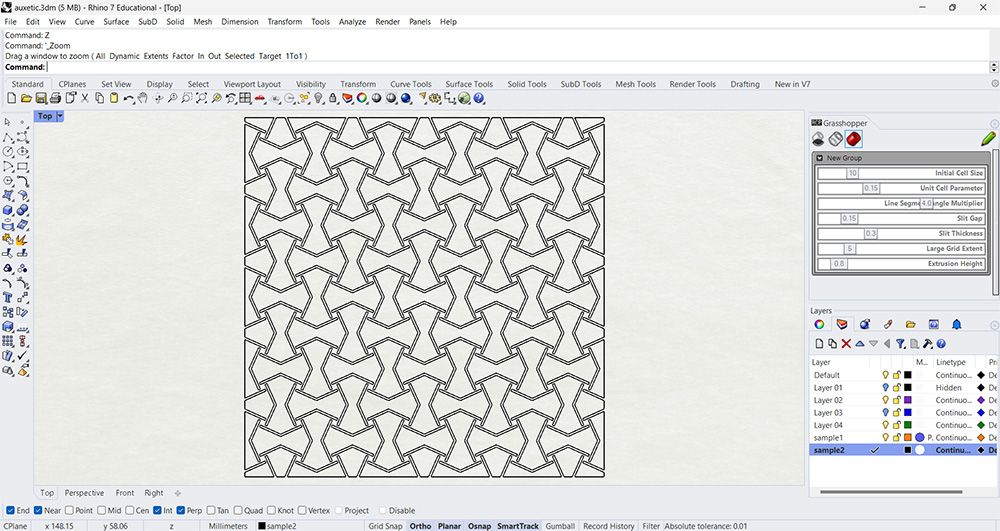
You can download the .obj file7 of sample 1 via sketchfab.
Sample 1
Sample 2
Notes from the Classroom
notes from the classroom
COMPUTATIONAL COUTURE lecture by JULIA KOERNER
Mammoth Stereolithography large scale resin printing, collaboration with Iris Van Herpen (she also collaborated with Daniel Widrig, Isaie Bloch, Neri Oxman, Niccolo Casas - all architects)
Digitally creating smocking technique (from stitching)
Polyjet - collaboration with Stratasys. Wasteful (support material goes to waste) and uses oil-based materials.
Selective Laser Sintering
Fused Deposition Modeling (FDM)
Fused Filament Fabrication - with glass
TIME's FIGURE lecture by Brigitte
Print material --> plastic
This Changes Everything --> book by Klein, 2014
3d printed fabrics - slicer program (infill), chain maille, 3d model of "yarns", code generated
Sublimation works with synthetic fabrics in fashion. A transparent or light filament (the lightest color will be/can be the filament color), stick the sublimation paper on the build plate and print on it. Brigitte works with TPU, but she has seen someone starting to work with PLA.
3d printing failures --> book by Sean Aranda