Rhizome, the final project
Video
Rhizome, Everything intersects
Drawings: Annabel Fournier
- Imagine a world where every thread, every material, and every story intertwines to create something NEW.
This is RHIZOME
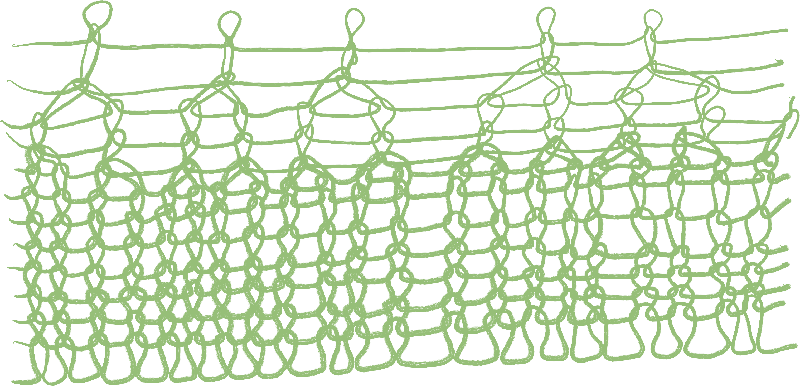
- Rhizome*… it’s a metaphor for the invisible connections that link heritage, savoir-faire, geography, people, infrastructures, and so on…
Rhizome is a philosophical concept created by Gilles Deleuze and Felix Guattari, in the book 'A Thousand Plateaus' in 1980
-
Who am I? As someone who has lived in multiple places, I’ve always asked myself questions about identity and Territory.
-
Have you ever felt disconnected from a place, or wondered how you fit into the story of a territory? That’s where my journey begins.
-
Today, I invite you to explore how the concept of Rhizome comes to life in my work.
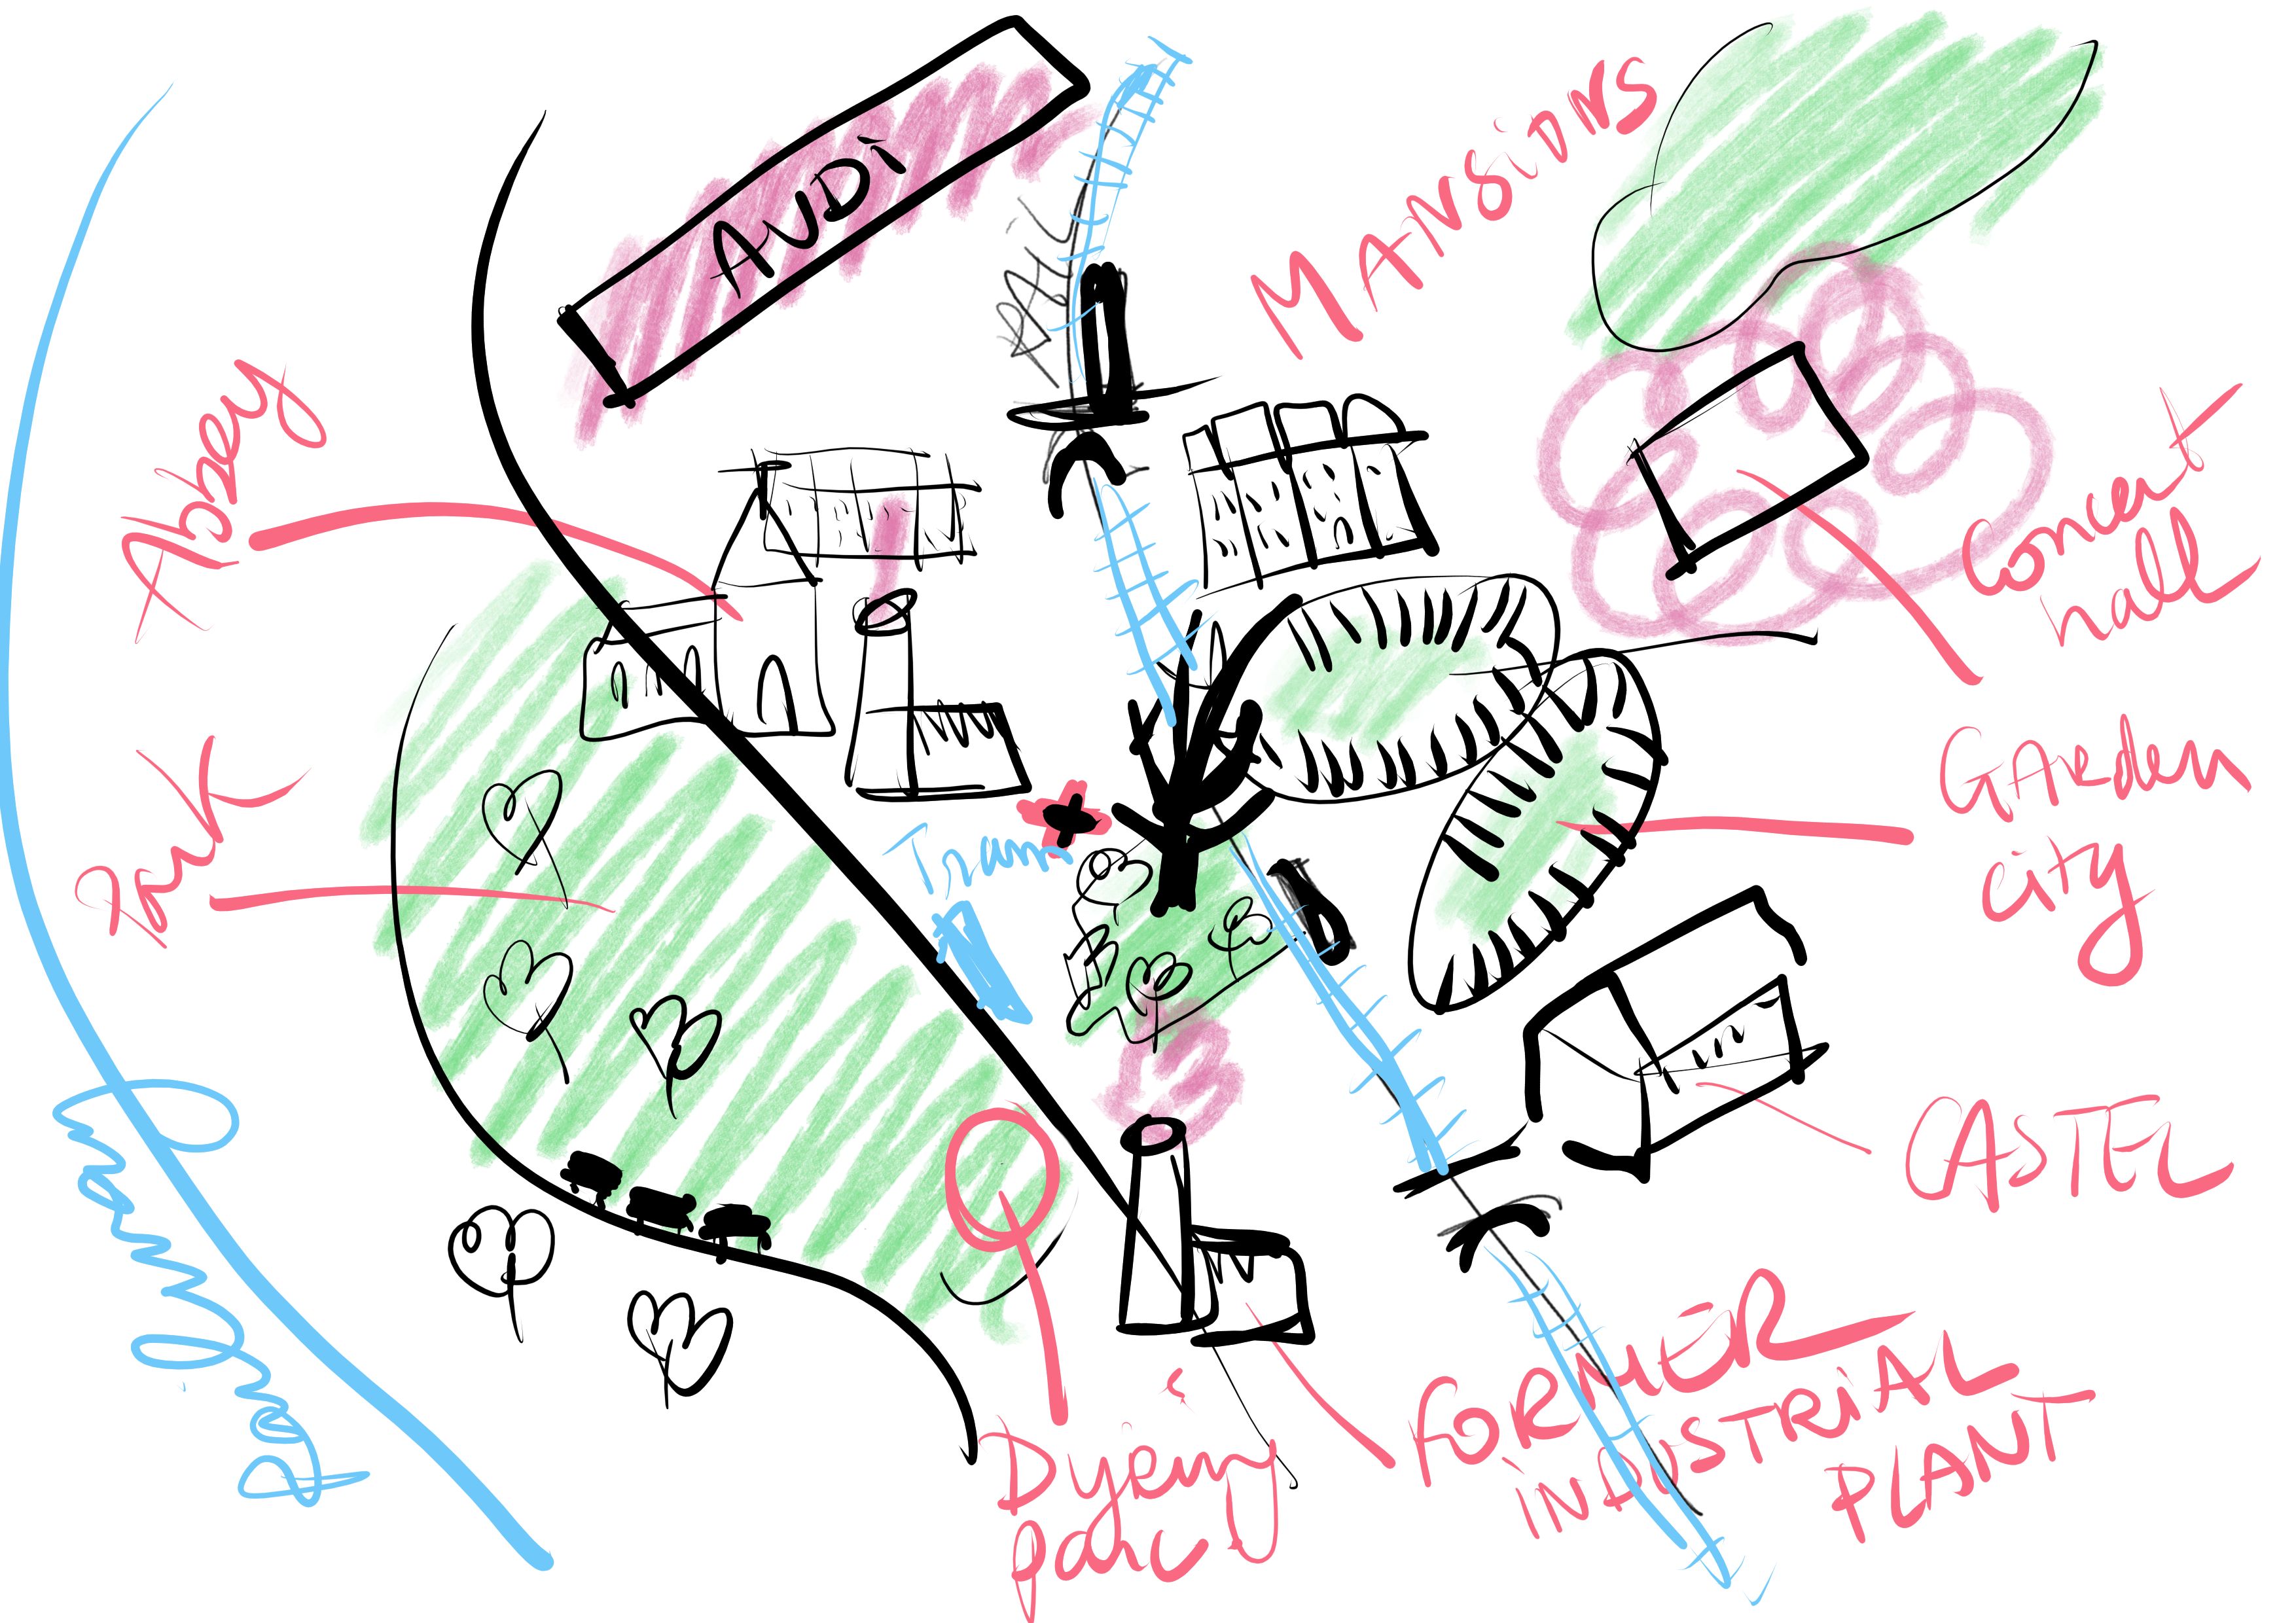
-
Let’s explore my current home: Brussels, and specifically, the vibrant community at Green Fabric.
-
When I first arrived I was struck by how this space brought together technology, craftsmanship, resources and community. It felt like the perfect place to explore the idea of Rhizome—where everything is connected.
-
GreenFabric – A Living Territory: It’s more than just a workspace— it’s a third place that connects the textile and FabLab communities. It’s where I began my artcraft transformation.
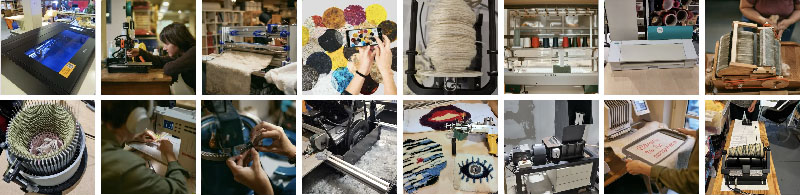
-
It’s where ideas, skills, and materials intersect to create something greater than the sum of its parts.
-
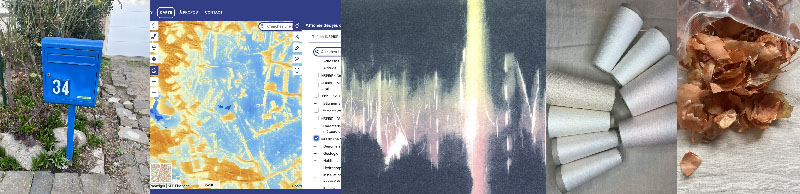
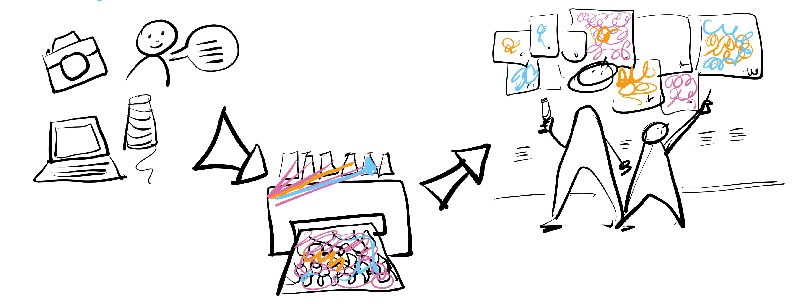
Rhizome in Action – Collecting: I gathered resources from the territory : photos, maps and geographic data, drawings and stories, textile resources and waste.
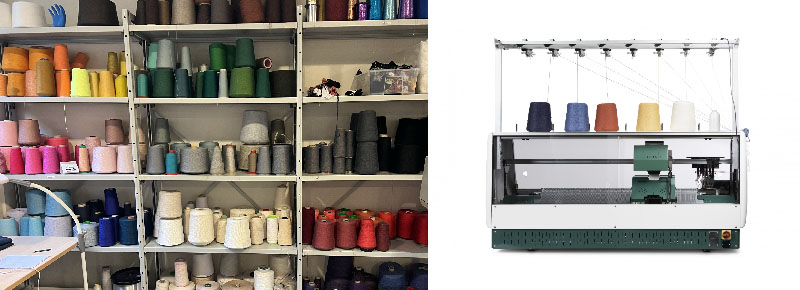
- Rhizome in Action – Blending: To blend these resources into something interwised, I use many Green Fabric’s tools, like the Kniterate®, a digital knitting machine.
- Rhizome in Action – Creating: I aimed to create connections between people and their territory through these creations.
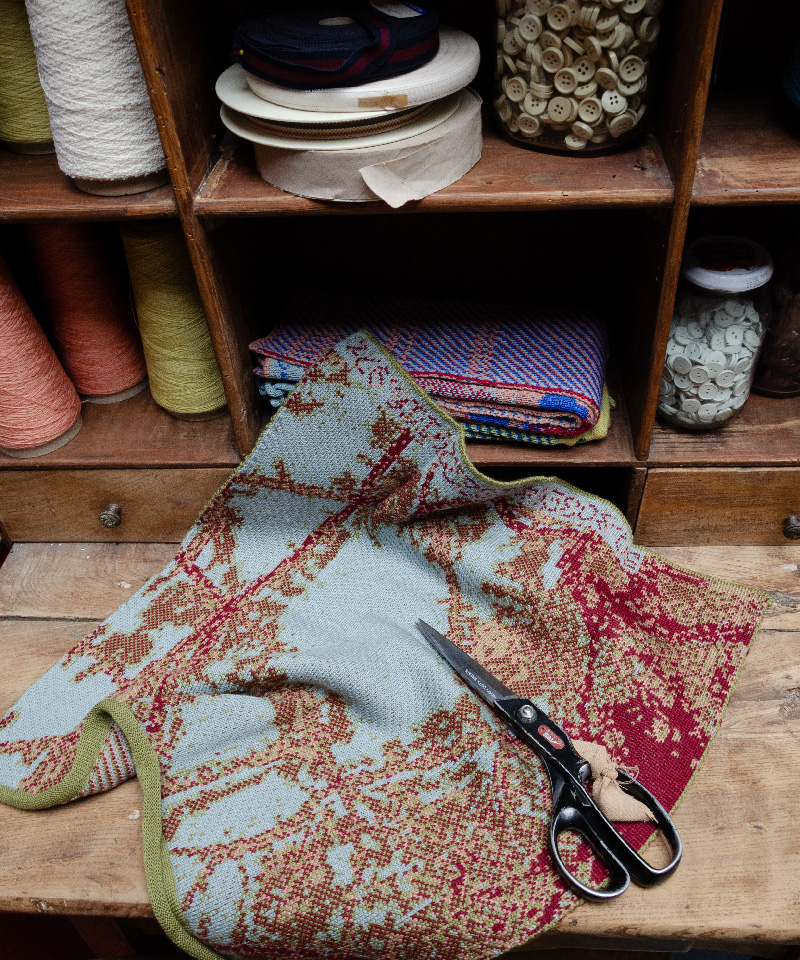
- Maps: In my work with maps, I explored dithering and transformed urban data into textiles—using the colors of the threads to tell the story of the territory.
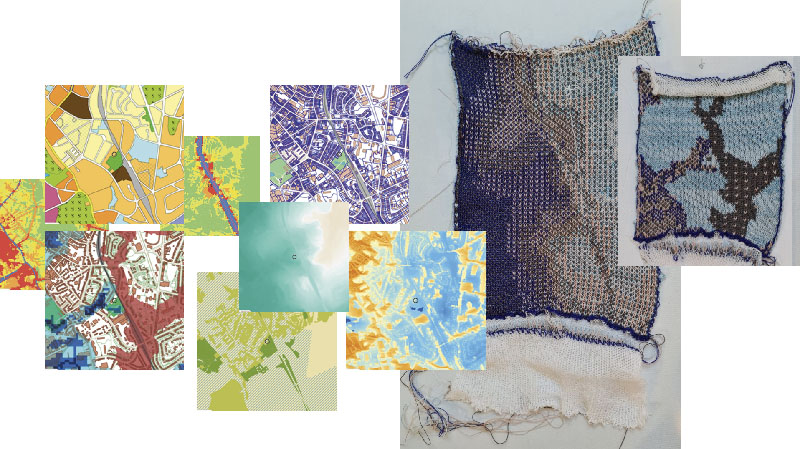
First test oj jacquard
Results
'Air pollution', 50 x 50 ex, 100% Merino whool
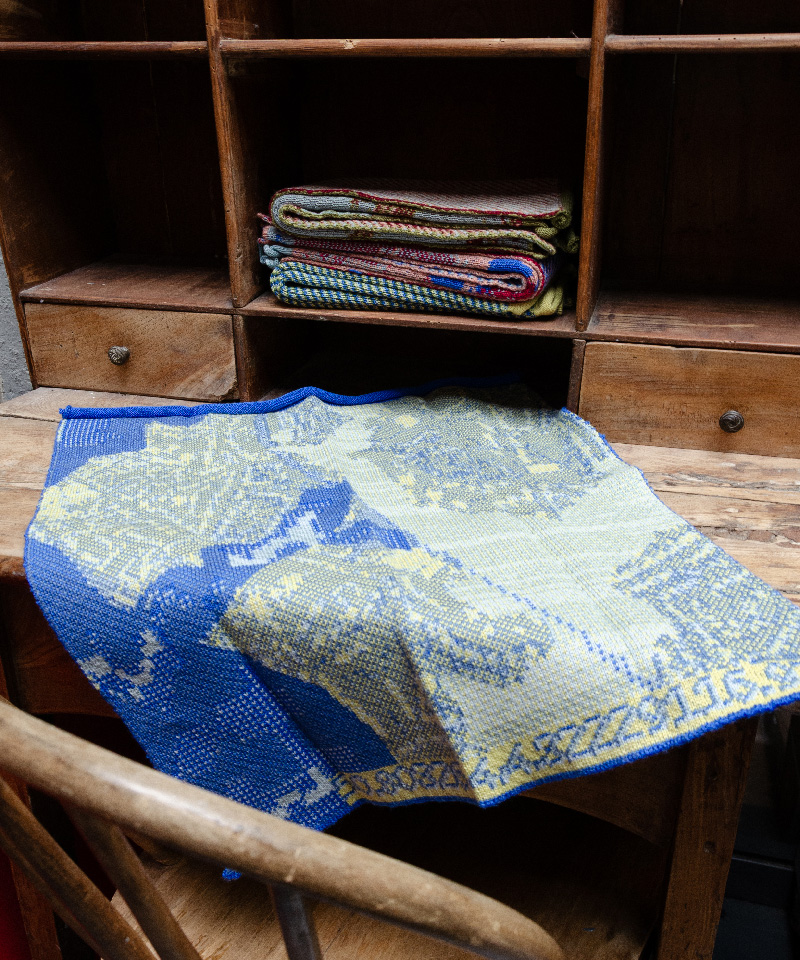
'Flood 2019', 50 x 50 cm, 100% Merino whool
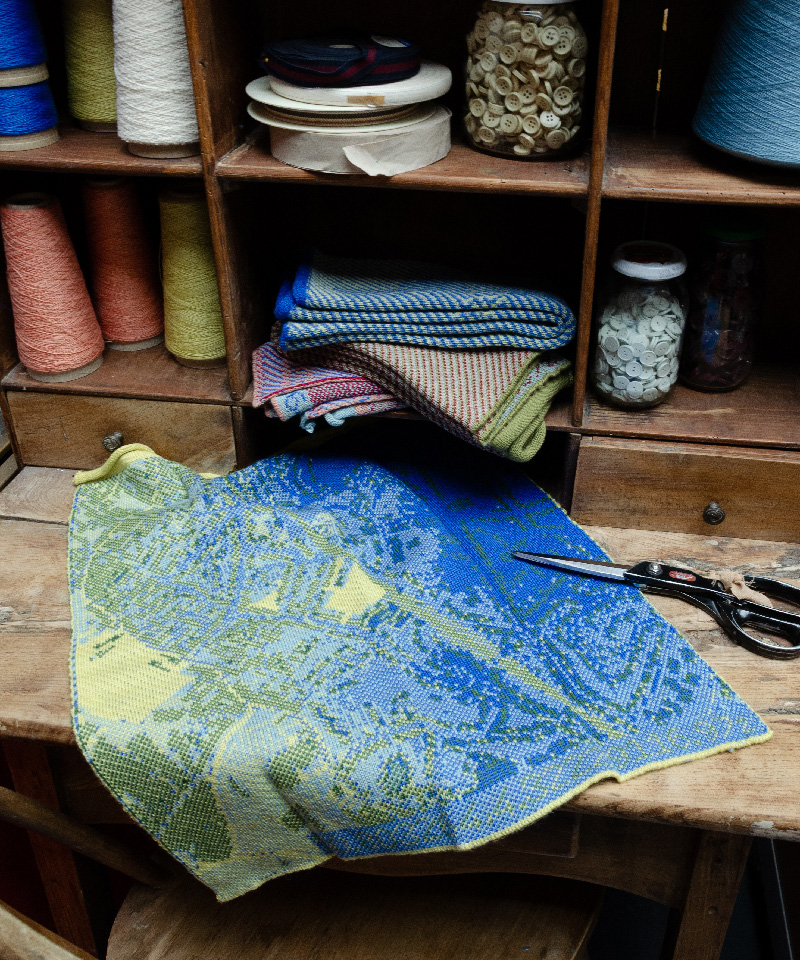
'Urbanization', 50 x 50 cm, 100% Merino whool
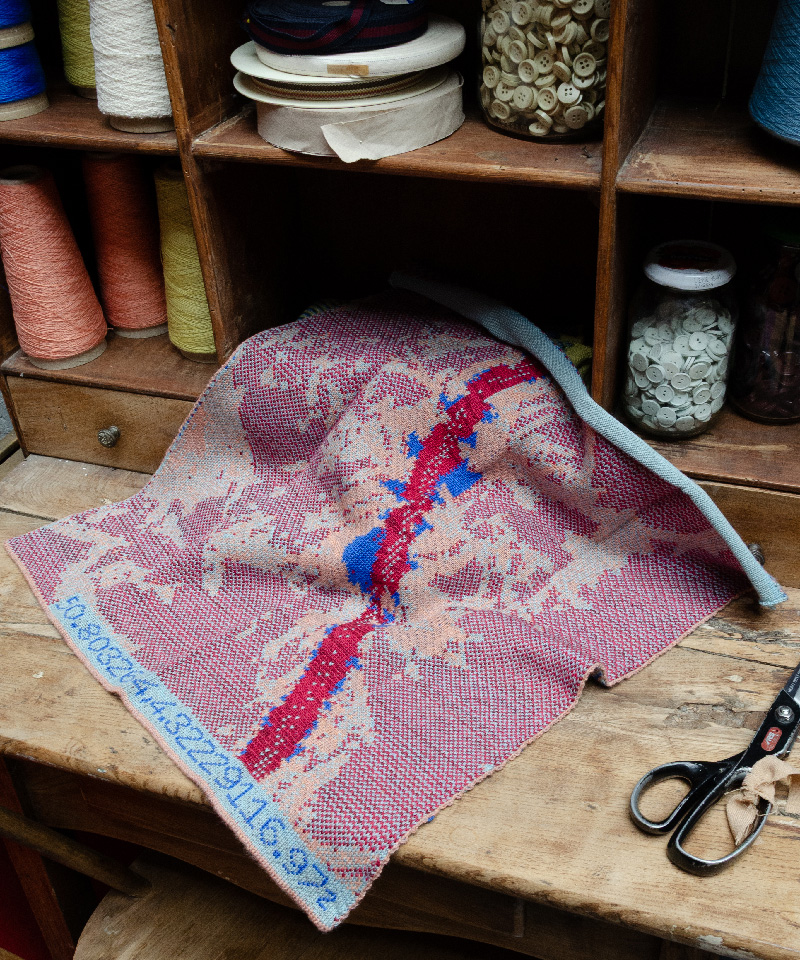
'Noise of the train', 50 x 50 cm, 100% Merino whool
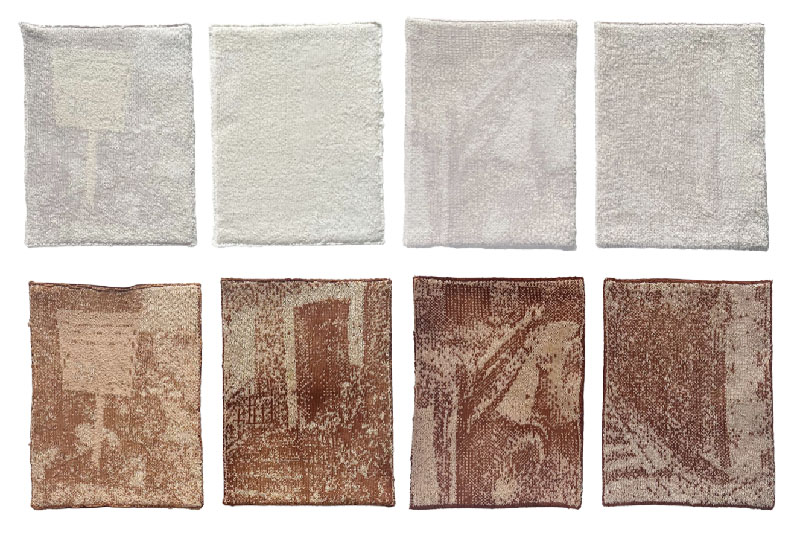
- Photo-report: I took photos of the area and transformed them into jacquard knits with only 4 colors. Natural dyeing: I dye knited yarns of different materials to see how to use local natural dyes in knitting.
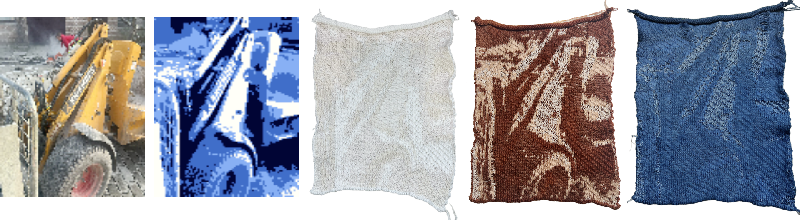
Photography + Dithering + Whool, cotton, tencel and polyesther + Dyed with Oignons + Dyed with Indigo
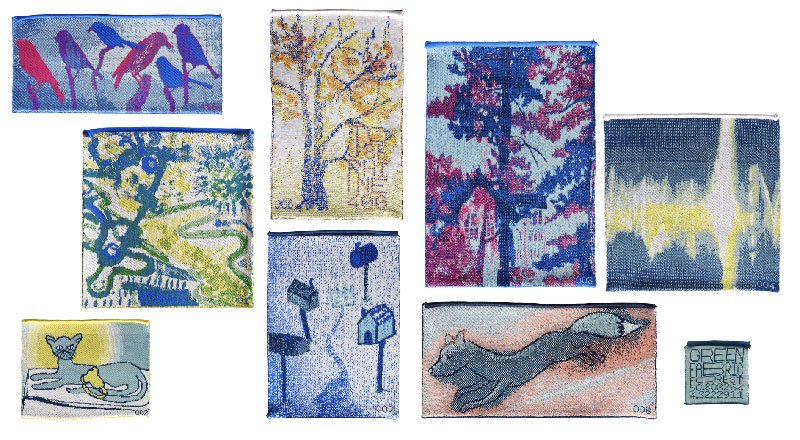
- Participary: I invited people—inhabitants, workers, visitors—to draw what this territory means to them, and then I turn their drawings into knits.
Thanks to: Carmen, Laia, Eleonord, Romane, Valérie, Claire, Frédo
- Thanks ou for you attention, Next time, I come to you to connect your territories to your resources!
A concept to link terretories to Greenfabric
Here is my presentation, enjoy!
Rhizome, a final project in 3 months
My project is to connect a place to its territory by using the resources and know-how available. I had planned to demonstrate the RHIZOME concept with 3 techniques. 1. Kniterate + maps, drawings 2. Textiles fibers + photographies 3. Embroderies...
Given the tight schedule, 1 month of learning and numerous tests, 1 month of production and 1 month of making the keynote and the video, I kept the concept by focusing on the Kniterate.
Story telling script
In the project, I developed 3 sub-projects: The maps, the revelation of colors by natural dyeing and the collective fresco.
I managed to script my video by creating chapters for my video: 1. Incarnation 2. Technical 3. Chapter 1: maps 4. Chapter 2: natural dye 5. Chapter 3: collective fresco.
Here is my first idea for maps. Using a knitted map like a map, in 4 different places in the neighborhood :
Kniterate, a digital knitting printer
BoM bill of materials
I bought my Merino wool for its quality at Bart & Francis in Courtrai, Belgium. Bart & Francis are 2 people who work on the creation of threads for haute couture and test the threads. It’s a bit like an Ali-baba cave of the thread! I chose this supplier because it is available to advise on each thread. It is also possible to buy 100 grs coils, mix a very large number of colors, in order to make tests or small quantities.
It is possible to find more accessible prices elsewhere.
Every jacquard samples are made in 4 colors, 2 threads each. Here are my favorite whool:
Jacquard
• Mérinos SuperKnit - 2 threads 100 gram 100% extra fine 19 micron super soft merino felt resistant 100gr = 1500mt 9,50 euros VAT
• Invisible thread - 1 thread 1000 meter/cone special for invisible knit & embroidery structures perfect transparence illusion invisible 100%PES 3 euros VAT / 1000 meters
Dyeing project
• Invisible thread - 1 thread 1000 meter/cone special for invisible knit & embroidery structures perfect transparence illusion invisible 100%PES 3 euros VAT / 1000 meters
• Cotton Boucletty - 1 thread 100gram = 700mt 82% west indian sea island cotton 18% core binder PA 3,5 euros VAT
• Tencel - 1 or 2 threads2500mt=100gram EU produced tencel VORTEX SPUN vortex single ply = more torsion!!! 3 euros VAT
• The polyester yarn comes from a spool of sewing thread, which is quite thick (800 meters per 100 grams). It doesn’t react very well during knitting; I would have to find a more suitable alternative.
Links
- Kniterate
- Kniterate courses
- Bart and Francis' whool
- Dithering pictures
- Gimp to prepare PNG in 4 colors
- OJolly's whool
Knitting on Kniterate is a tricky way. . It's how I resume 3 methods and I add my own tips: - 1. Birdeye Jacquard for 2 to 4 colors jacquard - 2. Creating a Stitch Image Knit - 3. Editing from a TXT Jacquard Knit
At the Greenfabric we use a PLA thread for the wast yarn. We have recovered these unused PLA coils. We use a lot of it, so we shouldn’t use an expensive thread. The cast-on thread is a nylon thread. Easy to removed! Finally, at the Greenfabric, we have only 4 colors left for jacquard.
One color means, 1, 2 or 3 threads together. Testing and own settings are essential, it takes time but it is indispensable.
Creating a Birdseye Jacquard Knit
Creating the Jacquard Image
- Design the image for the jacquard.
- Scale the image to 1 pixel = 1 stitch.
- Maximum width: 252 pixels (= stitches)
- Account for vertical distortion of about 120%. Test it by knitting a test! It's never the same!
- Save the image as
.pngor.jpg.
How to Dither an Image
- Import the already scaled image to www.dithermark.com.
- Choose the number of colors (2 to 4 max).
- Modify the color palette.
- Select a dithering algorithm.
- Export as PNG (not
.jpg).
Tip 1: Use the "Image" tab to adjust settings. Only use "Filters (pre-dither)" settings. Tip 2: Apply settings to multiple images using "Batch convert Image files."
- You can modified pixels by using GIMP, and ajust the colors number. Export in png. Photoshop is not as good as GIMP.
Tip 3: be sure all colors apears in the last row. It prepares the transfert from rear to front easely.
Programming on editor.kniterate.design
Menu Options:
Part 1: - Move work - Select - Edit - Edit by line - Add image
Part 2: - Stitch Types
Part 3: - numbers of the carriage (now you can change the color of the whool!)
Tip: Click the mouse button to move the image on the screen.
Create a New File
- Rename/save the file: Unlock the padlock.
- If you duplicate, the editor saves the current file first.
Tip: Name your file with significante informations (Ribs, technics, size…)
Sizing Your Work
- In LAYER, the CANVAS appears by default.
- Hover to see icons (Pencil/Eye/Trash).
- Click the PENCIL.
- Enter the number of stitches in SHAPE (width x height).
- Click anywhere on the window to validate your choices.
Casting On Stitches
- In LAYER, click + and select Waste + Cast-on.
- Select the location.
- Select Pick selection.
- Select row 1 with the selection tool (right-click, set selection/course wise).
- The cast-on rows appear at the bottom.
Adjust:
- Waste yarn: YARN 2 (PLA thread)
- Body yarns: Use carriages, e.g., 3, 4, 5, 6
- Check IS JACQUARD
- In interlock, write: stitch 4 (tension applied to thread 2 in PLA)
Creating a Double Jacquard
- In LAYER, click on + and select Birdseye Jacquard.
- Click Location/Pick selection, select the 4th yellow row above the waste yarn: select the darkest row.
- Click the black window to upload the
.pngimage. - If there's an error, check that the pixel format and number of colors match the CANVAS image.
- Yarn order: Add '3 4 5 6'
Assign each color to a yarn guide:
- Yarn 3 / Yarn 4 / Yarn 5 / Yarn 6
Important: - For 2-color jacquard: Check Invert colors. - For 3 or 4-color jacquard: Check Full needle if you want to have a crisscross knit.
[Tip: Birdseye Backs in Jacquard Knitting] (https://www.kniterate.com/2025/05/21/birdseye-backs-in-jacquard-knitting/)
Editing Block Parameters (Optional)
- In LAYER, click + and select Edit option columns.
- Adjust parameters for the entire block.
- Fill in stitch 4 for thread tension in the image. (my settings for my whool!)
Finishing the Jacquard
- In LAYER, click + and select Front <> rear transfers.
- Select the last rows (top), ensuring all colors are present.
- You should get 2 staggered rows of arrows so all stitches are transferred to the front bed.
Changing Previous Block Parameters
- In LAYER, click + and select Free Edit.
- To facilitate binding off with a crochet hook, change the tension to 10 on the front bed and choose the same yarn color as the cast-on.
Finishing the Knit with Waste Yarn
- Ensure there are 10-30 rows of waste yarn 2.
- Fill in Interlock: "Stitch 4". I preferred to knit in 30-row jersey and close the stitches by hand. I wanted to keep the rolled look of the jersey.
Dropping Stitches
- In Free Edit, delete the last 2 rows and place DROP stitches on the front bed alternately with tension 6.
References:
Improving Straight Edges
- In SETTINGS/COMPILAR OPTION, reduce carriage spacing to 1 and 1.5.
Starting the Knit
- Export Knit to a
.kcfile (place on the SD card, replace the file systematically). - Check: Yarn guides are placed at the start of the row.
Creating a Stitch Image Knit
Creating a Double Jacquard
- In LAYER, click + and select Stitch image.
- Select your 2-color image.
- Assign front/back stitch types.
Adding Rows
- Add 1 row of jersey stitch on the front bed at the bottom and top of the work.
Adding Transfers
- In LAYER, click + and select Front <> rear transfers.
- Select all rows and apply.
- Fill option: roller 0 stitch 0 speed 120.
Casting On Stitches
- In LAYER, click + and select Waste + Cast-on.
- Select the location.
- Select Pick selection.
- Select row 1 with the selection tool (right-click, set selection/course wise).
- The cast-on rows appear at the bottom.
- Add: Stitch 4.
Adding End Stitches
- In LAYER, click + and select Resize workspace.
Changing Previous Block Parameters
- In LAYER, click + and select Free Edit.
- To facilitate binding off with a crochet hook, change the tension to 10 on the front bed and choose the same yarn color as the cast-on.
Finishing the Knit with Waste Yarn
- Ensure there are 10-30 rows of waste yarn 2 with tension 4.
Dropping Stitches
- In Free Edit, delete the last 2 rows and place DROP stitches on the front bed alternately with tension 6.

References: - 3 Ways of Finishing Your Knit - Alternative Bind-offs
Improving Straight Edges
- In SETTINGS/COMPILAR OPTION, reduce carriage spacing to 1 and 1.5.
Creating a TXT Jacquard Knit
Creating the Black & White File
- Create your black & white file in KRITA or GIMP.
- Export the image as
.XPM(Windows text file). - Download from GitLab: kniterate-tools.
- Place the image in the unzipped folder.
- Use the tab to suggest previously used names.
Open Application/Utilities/Terminal
- Type the Python script (case-sensitive):
(
python3 cleanXPM.py image.xpm -c2-c2= 2 colors)
Create an Image File
- Run a Bash script:
bash xpm2jacquard-2colors.sh image.txt - This creates a file named
image....txt.
Select the File in Layer/TXT Image
- Select the stitch type (Front, Back/MISS).
Note: - For empty stitches, use a horizontal dash to limit kicks.
Tip: Test in reversible mode. Tip: Reduce the length of dropped stitches by creating a dot pattern. Tip: Adjust the vanishing.
Thank you!