General Process
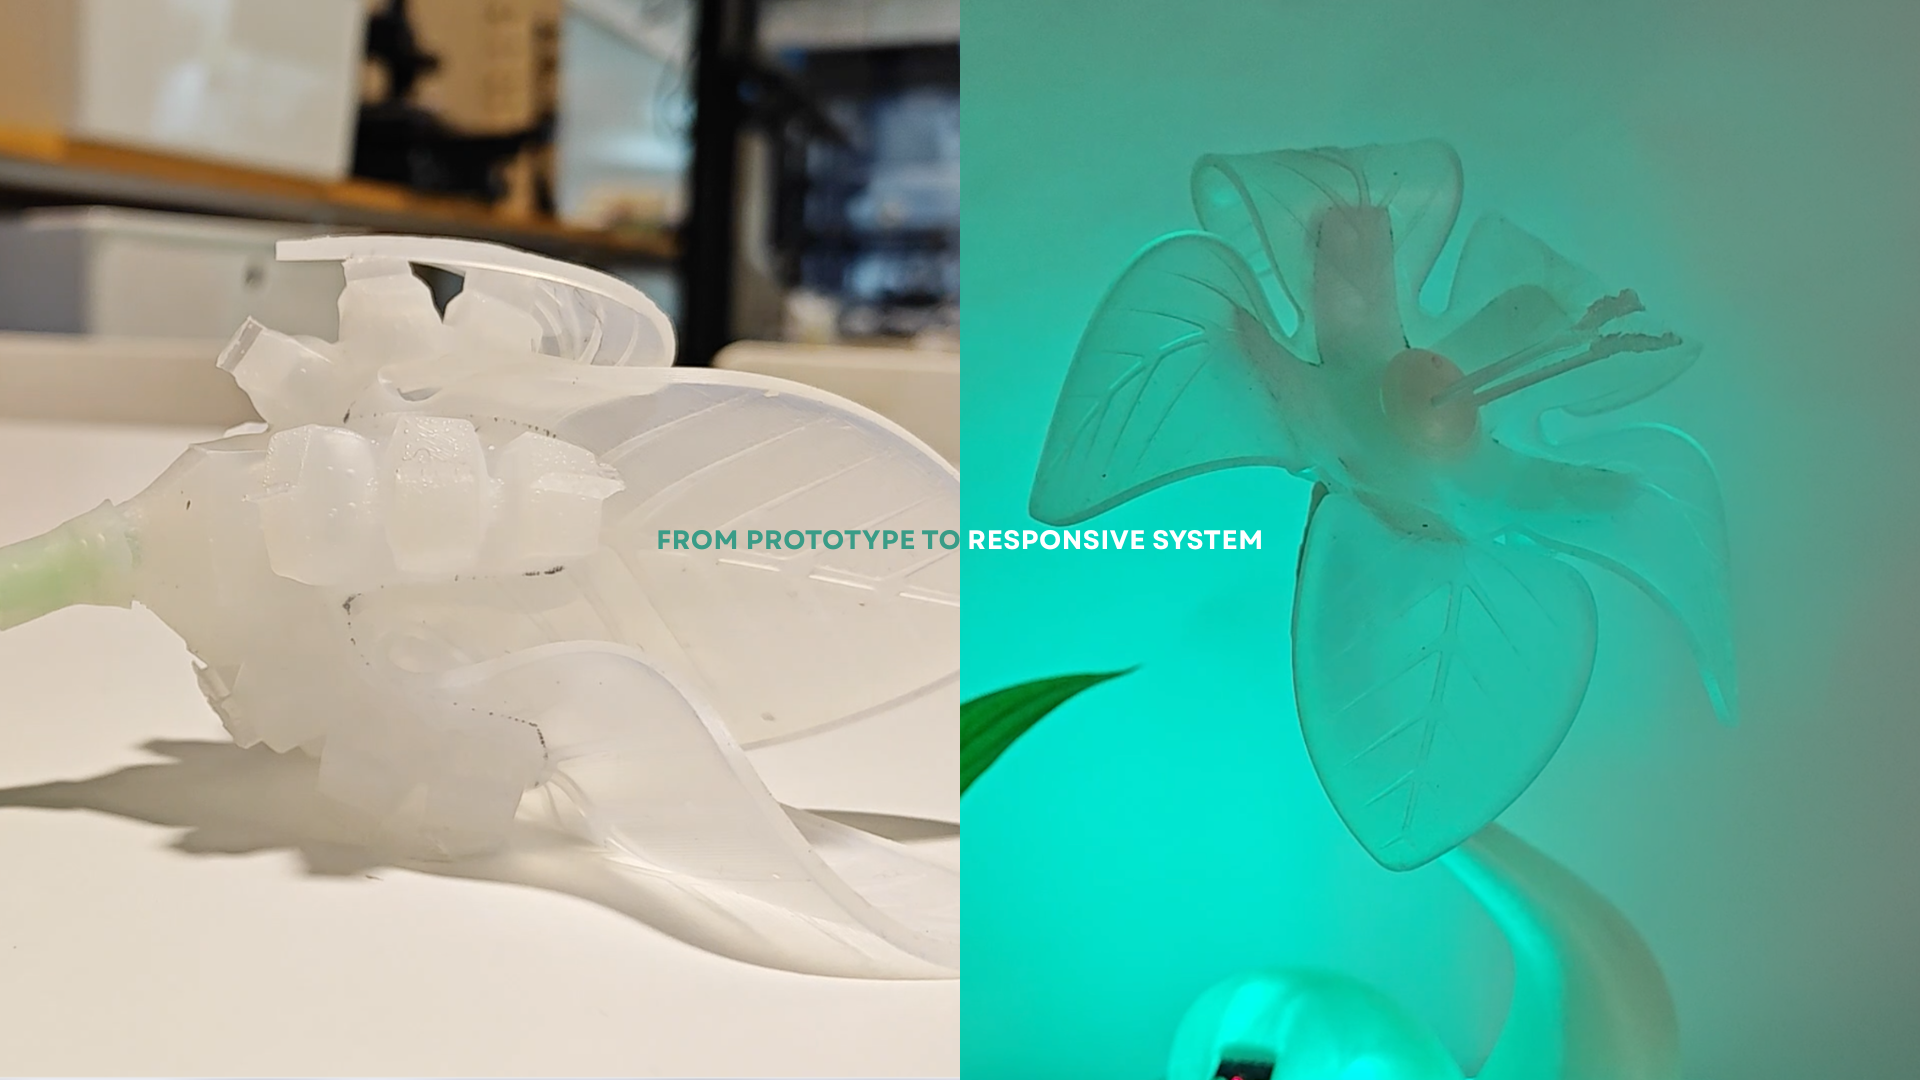
From prototype to responsive system, Radical EcoSystem. Carlotta Premazzi, 2026.
This page documents the development process of Radical EcoSystem, from early conceptual sketches to material experiments, electronic tests, pneumatic prototypes and final system integration.
The process was intentionally exploratory. Rather than following a fixed linear plan, the project evolved through iterative testing, technical failures, material behaviour and feedback from the living system itself.

Development process, Carlotta Premazzi.
Ideation and Sketches
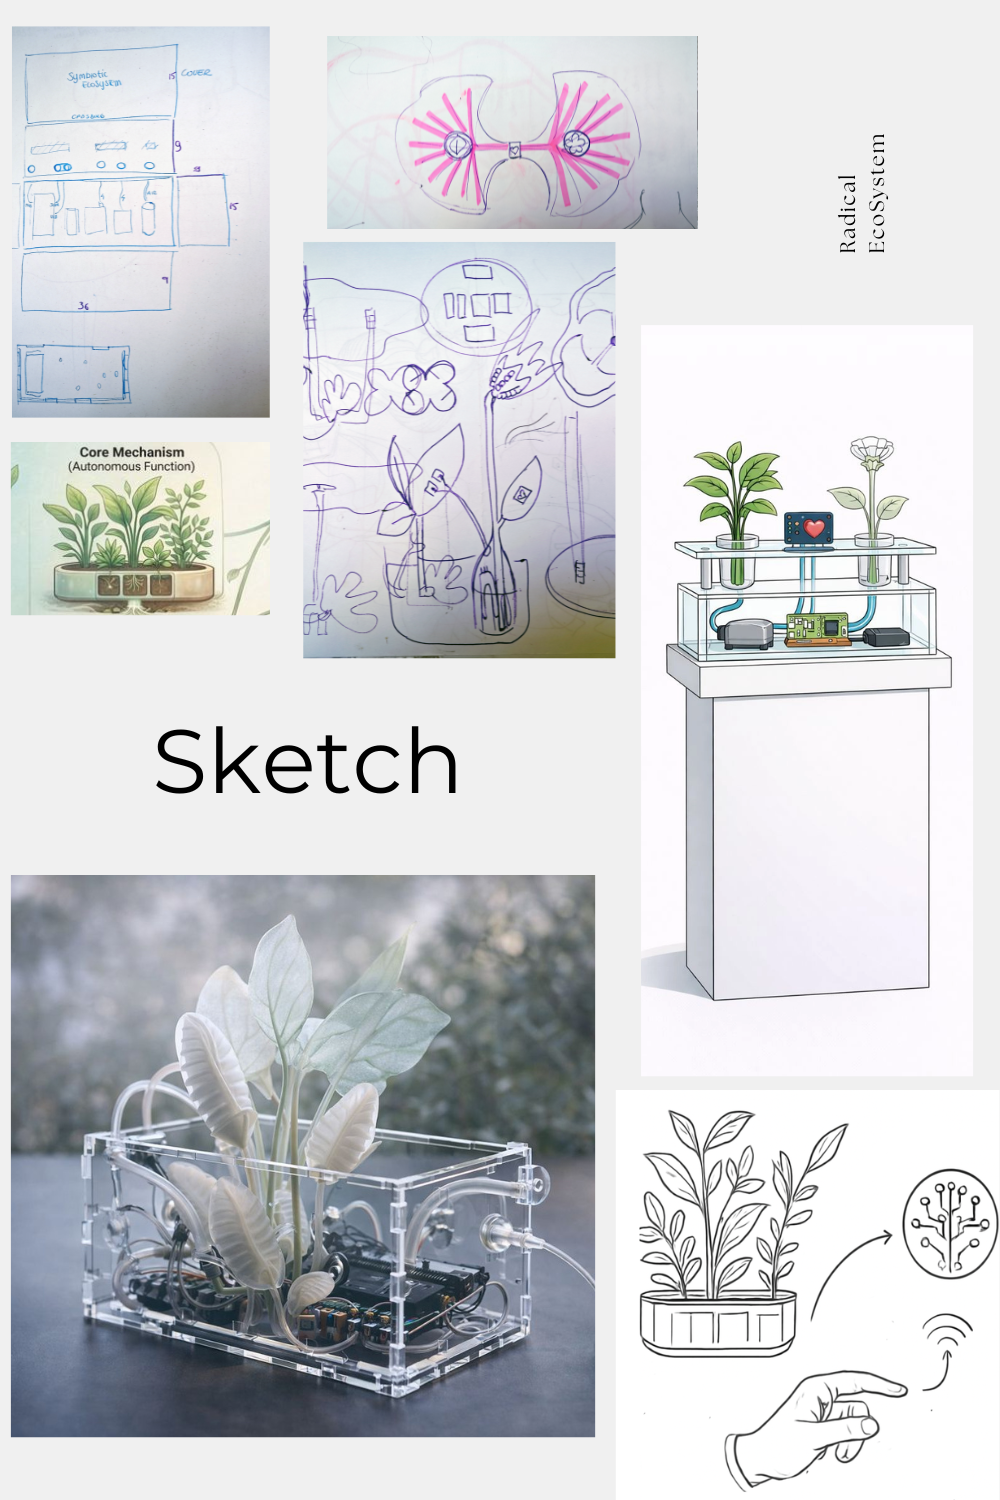
Sketching process, Carlotta Premazzi, 2026.
Initial sketches explored relationships between human presence, plant sensing, pneumatic movement, light and sound. The drawings were used to think through possible system architectures and interaction dynamics before defining the technical structure.
Early ideas focused on:
- a shared biological and technological system;
- the human body as a temporary influence rather than a controller;
- the translation of invisible signals into visible movement and sound;
- breathing, pulse and delay as temporal structures.
At this stage, sketches were not used as precise technical plans. They functioned as tools for imagining how living signals, material behaviour and technological outputs could interact.
The project was gradually divided into functional modules. This helped transform the initial concept into a testable system.
- plant sensing — soil moisture and bioelectrical activity;
- human input — heartbeat sensing;
- soft robotic actuation — pneumatic movement of the artificial flower;
- light output — LED behaviour linked to environmental states;
- sound output — plant signal and system behaviour translated into audio;
- control logic — Arduino and computational mapping.
Digital Fabrication Workflow
The digital fabrication process focused on translating the soft robotic flower into a physical system that could be cast, inflated and assembled. The main fabrication workflows included:


Digital Fabrication Workflow, Carlotta Premazzi, 2026.
Prototypes and Iterations
The prototype phase was used to test how the soft robotic flower could physically behave before integrating it into the final system.
Each test helped clarify how air pressure, silicone thickness, textile reinforcement, sensor readings and electronic timing affected the behaviour of the installation.
Early prototypes focused on:
- pneumatic responsiveness;
- inflation and deflation timing;
- sensor readings;
- LED behaviour;
- data transmission;
- interaction delay;
- unexpected instability.
Pneumatic Prototypes
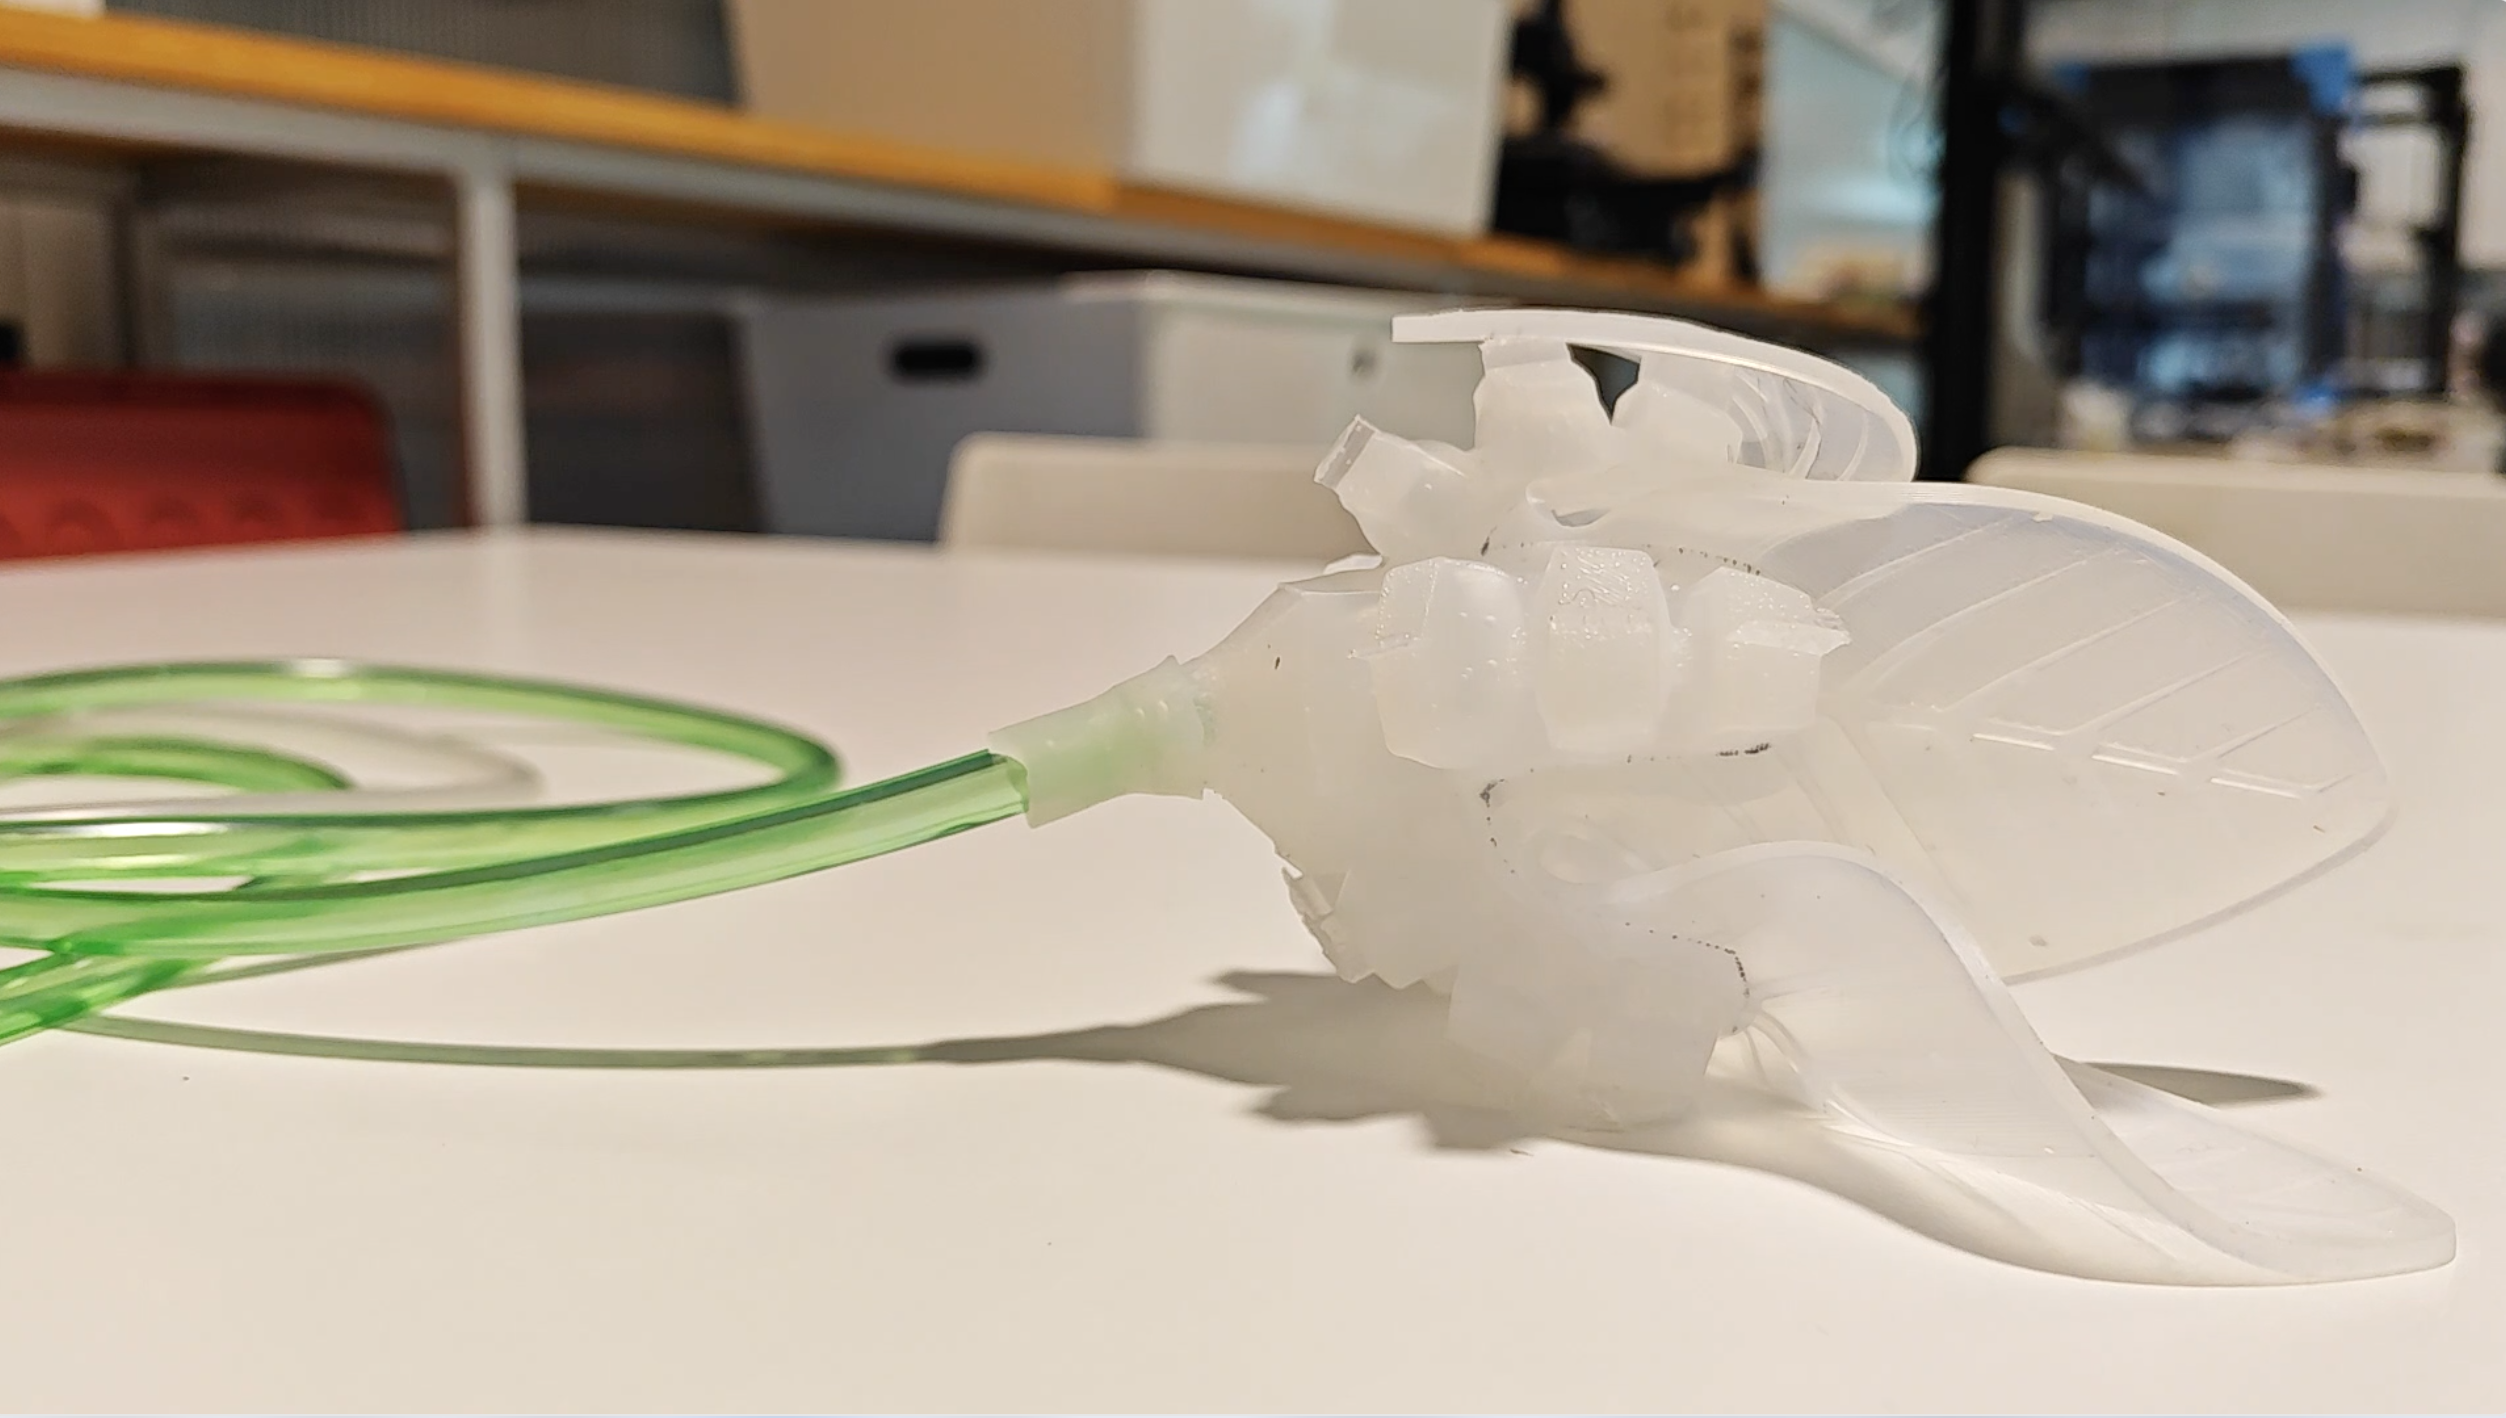
Inflation test, Carlotta Premazzi, BioLab Lisbon, Fabricademy 2026. First test developed during the Soft Robotics assignment, exploring pneumatic movement for an artificial plant. Carlotta Premazzi, BioLab Lisbon, Fabricademy 2026.
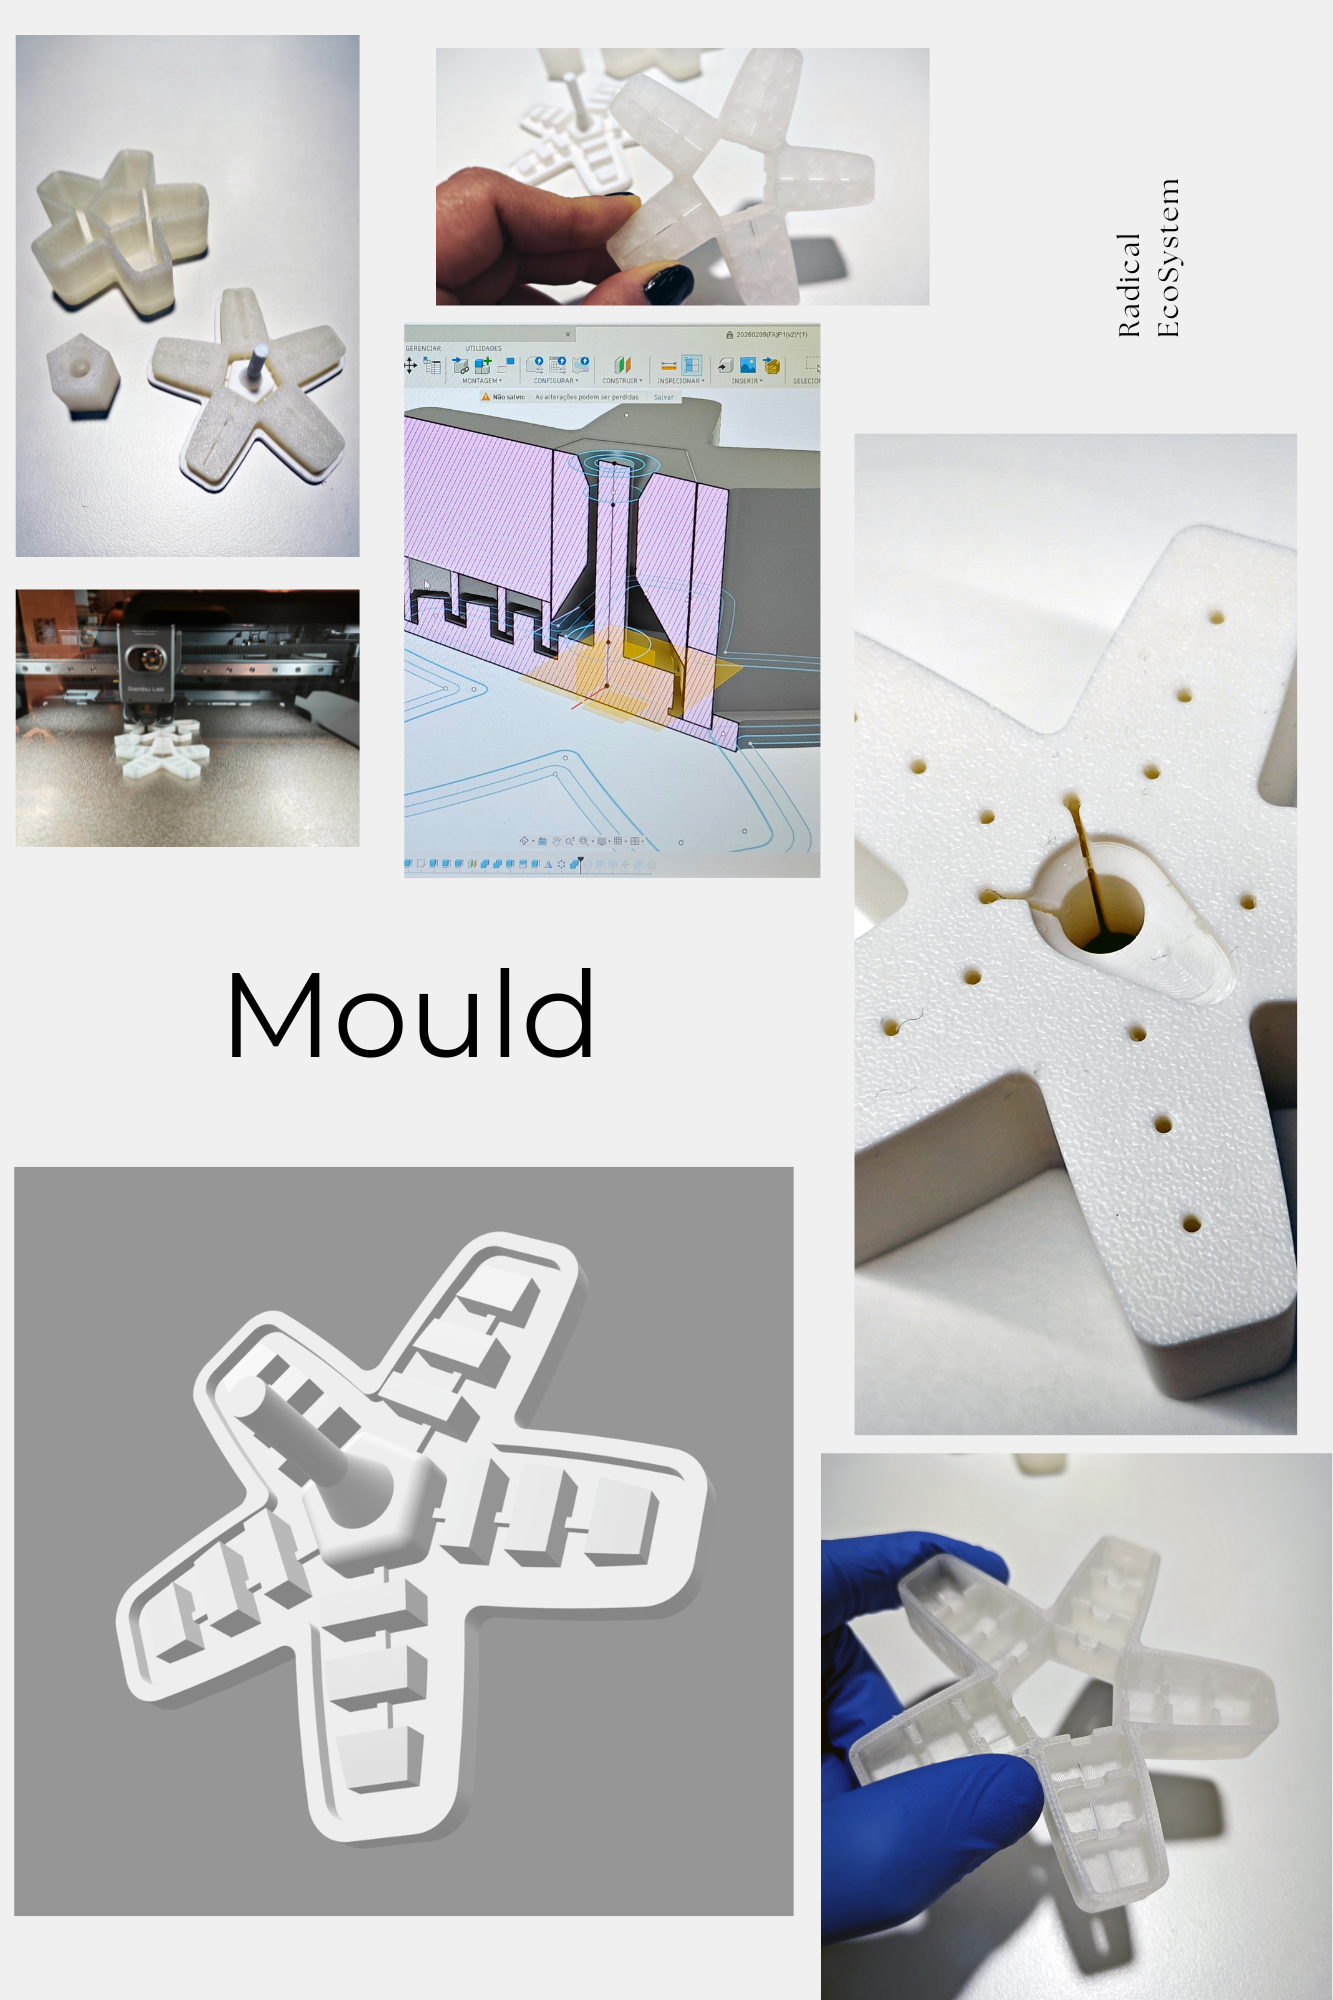 Mould development: early pneumatic muscle tests, mould design iterations, 3D printing and silicone casting.
The first pneumatic tests explored how air pressure could generate organic movement.
These early tests helped define:
- the relation between chamber geometry and deformation;
- the importance of silicone thickness;
- the role of textile reinforcement;
- the limits of air pressure;
- the need for gradual inflation and controlled deflation.
The pneumatic flower evolved through repeated tests, ruptures, blocked channels and changes in mould geometry.
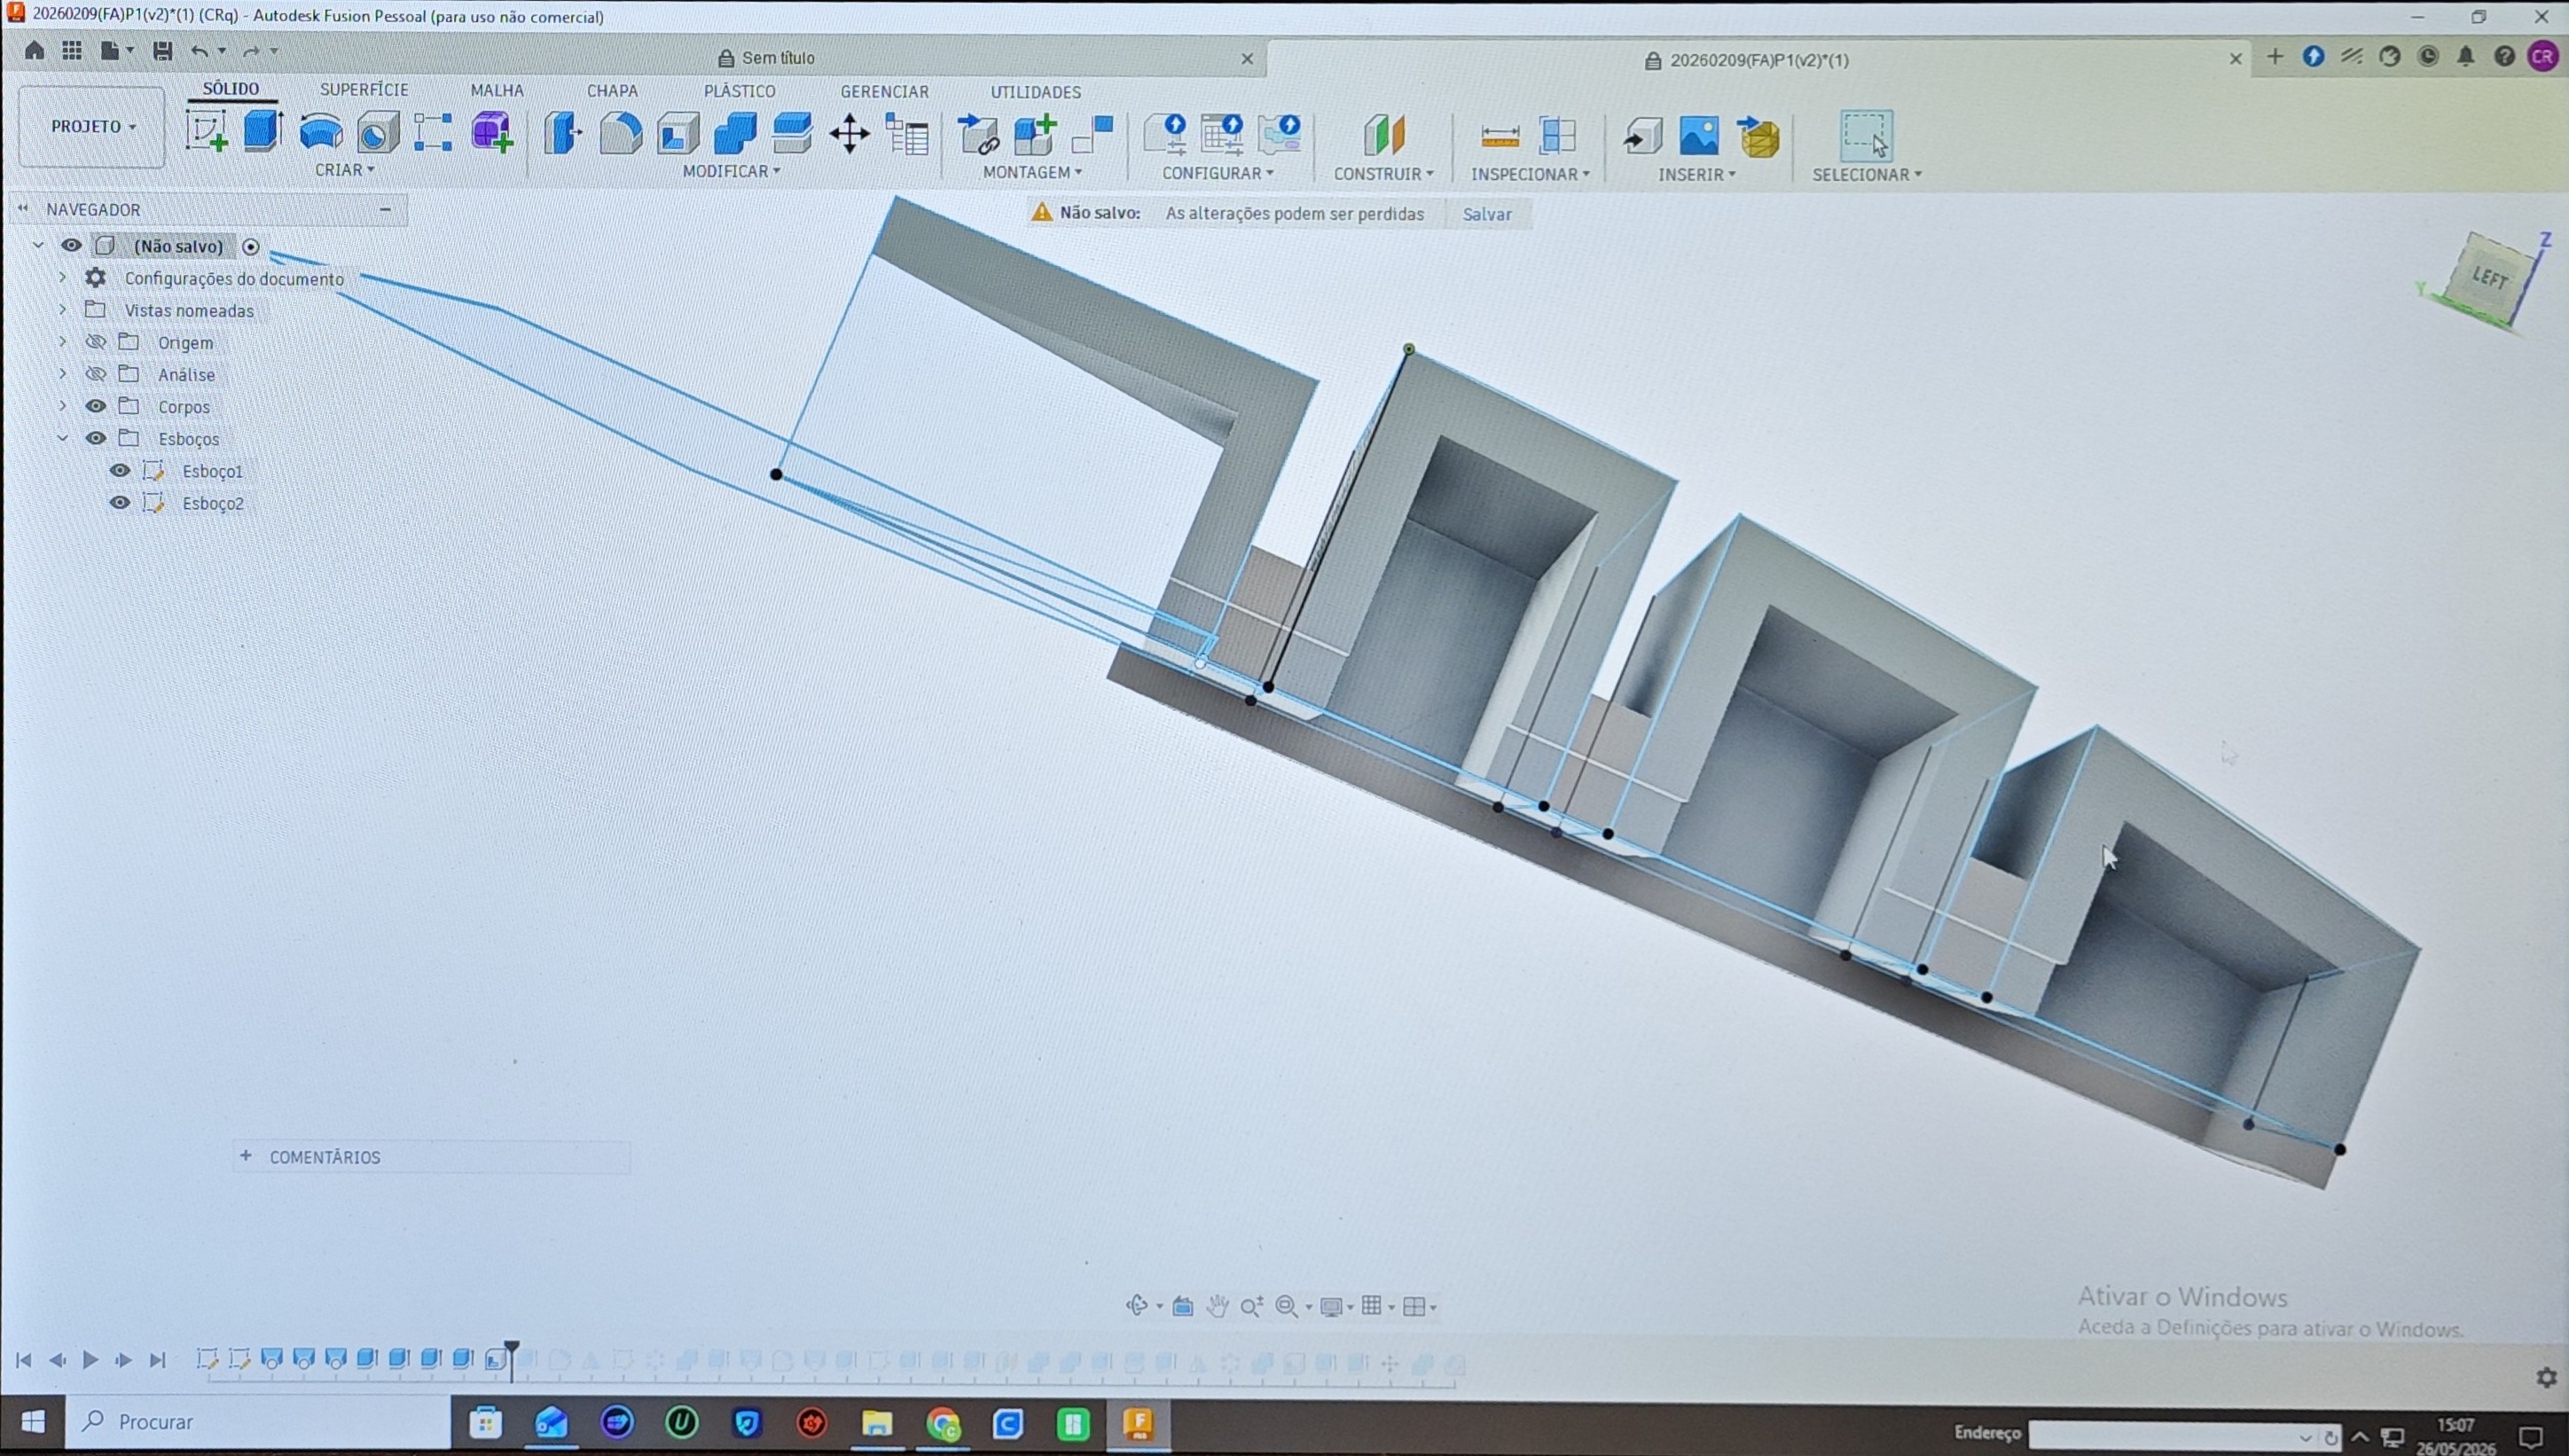
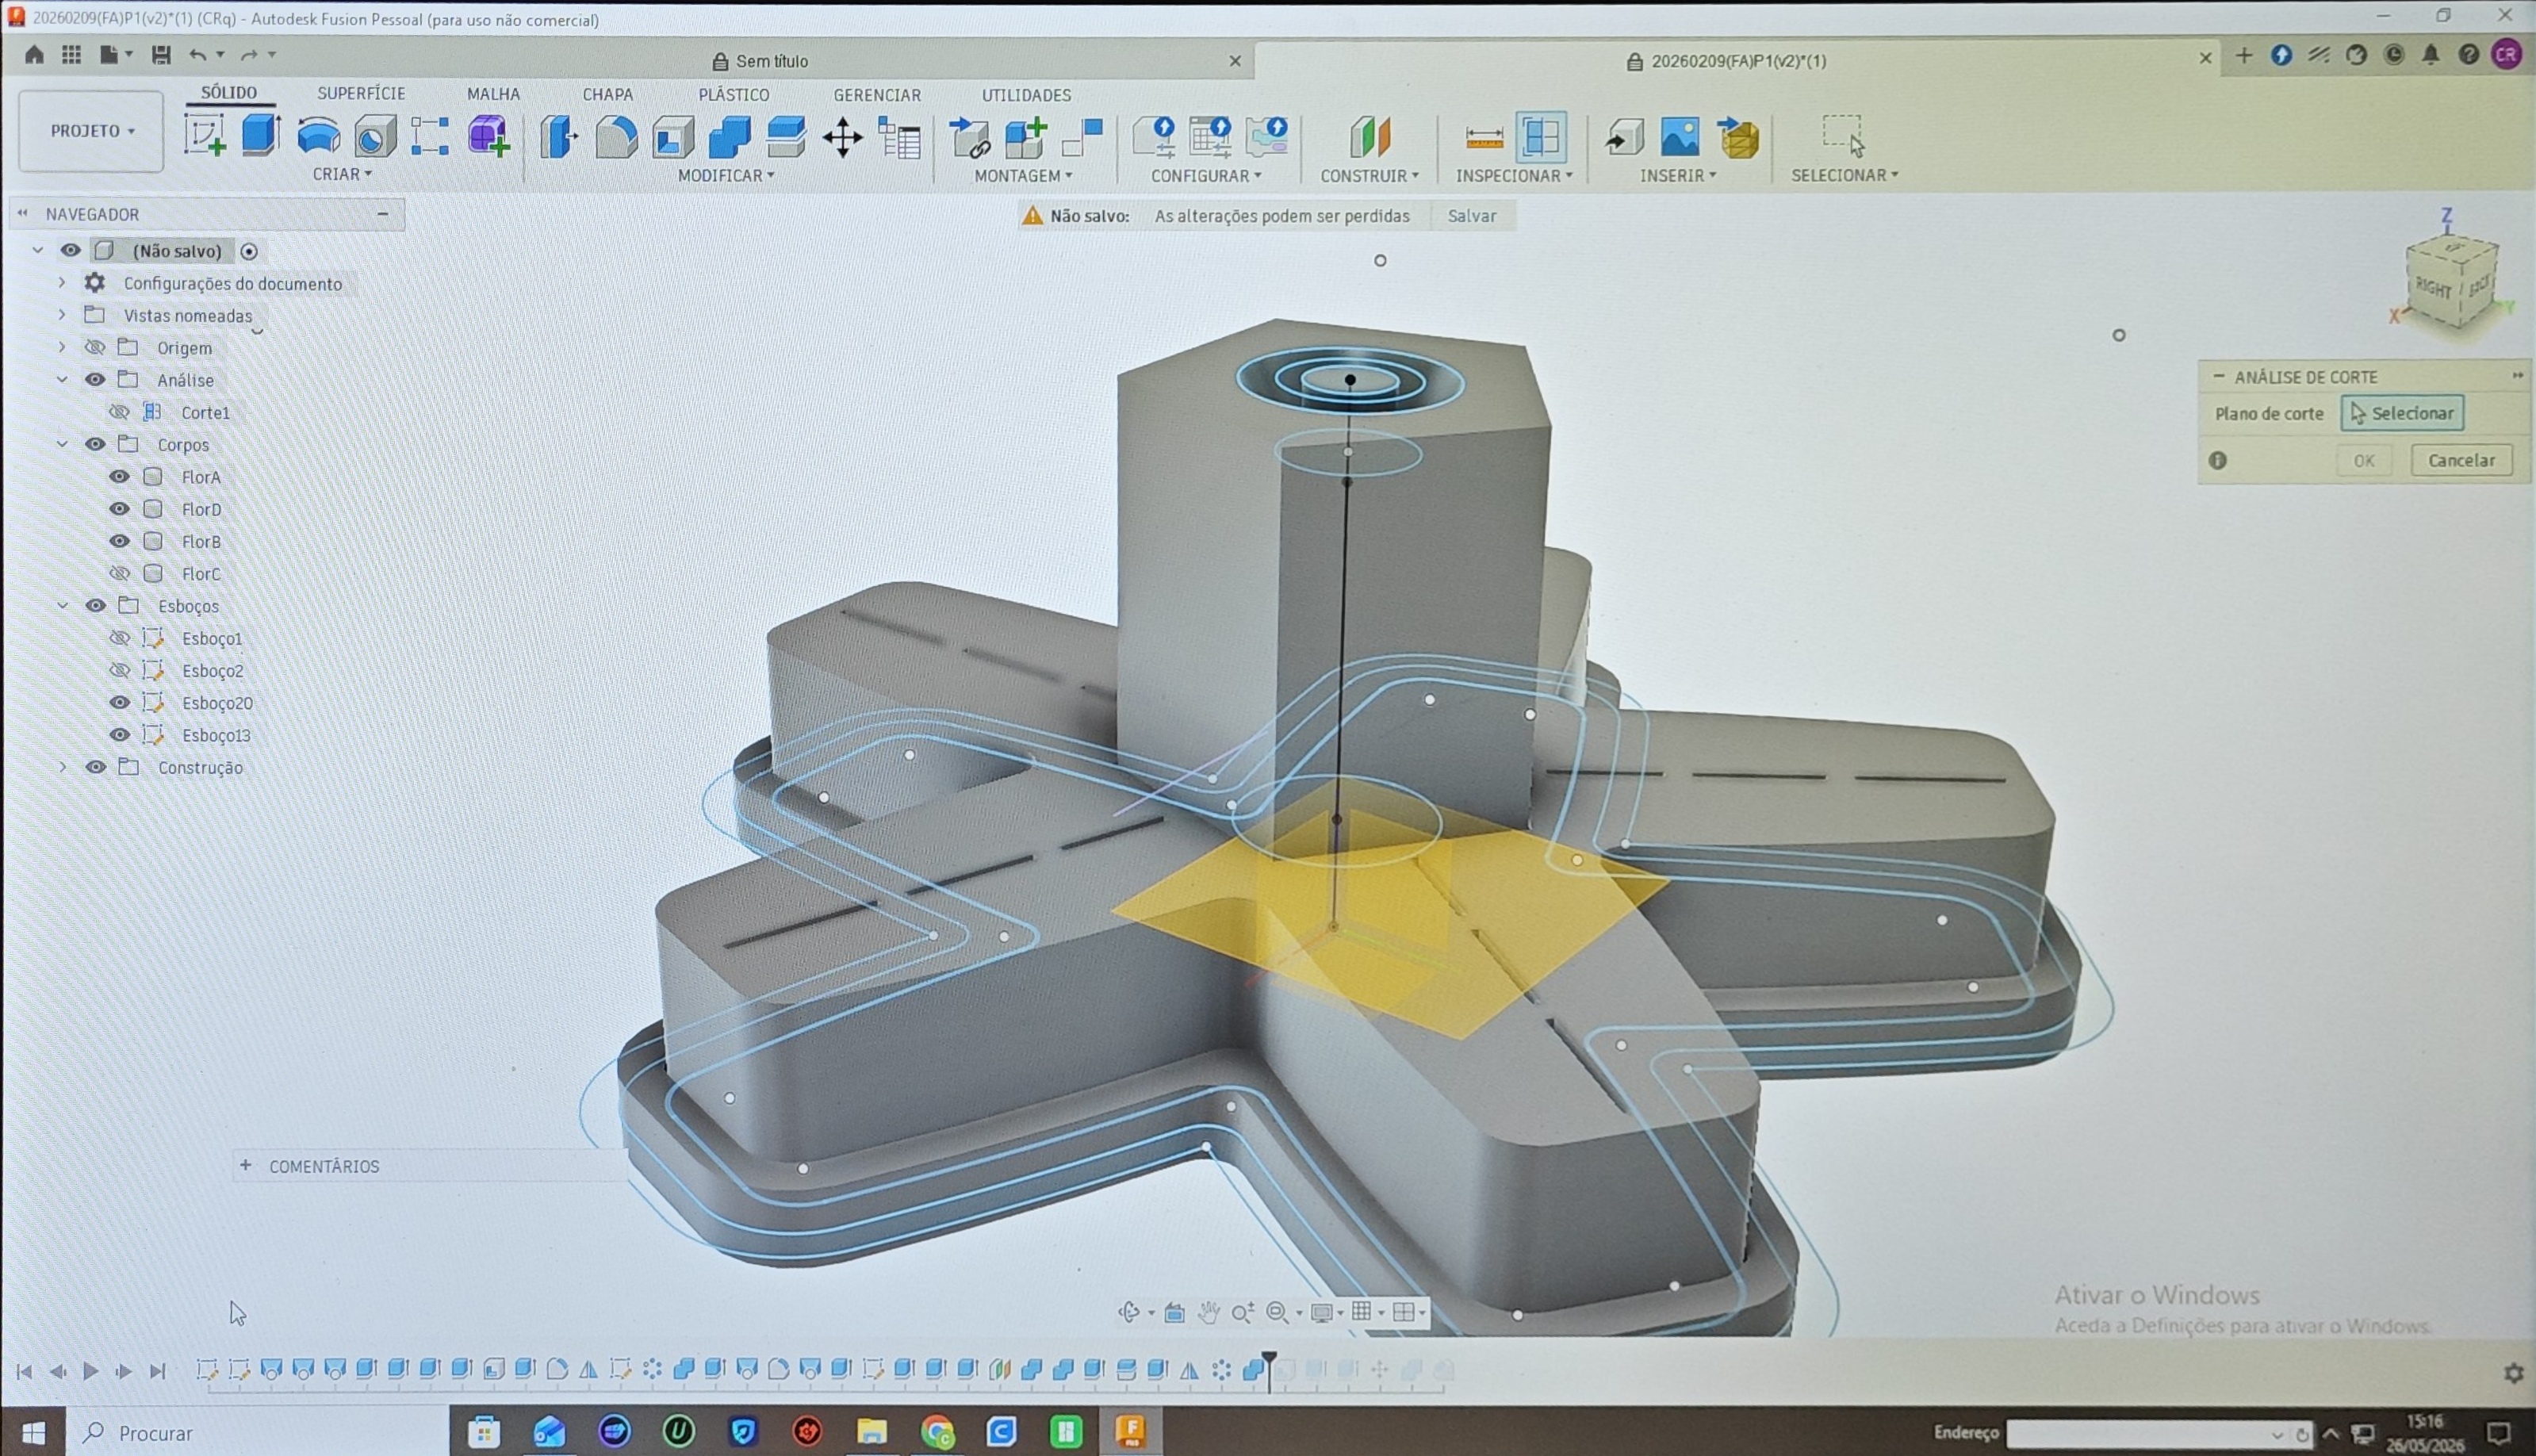
Fusion 360 mould development, Carlotta Premazzi with Carlos Roque, BioLab Lisbon, 2026.
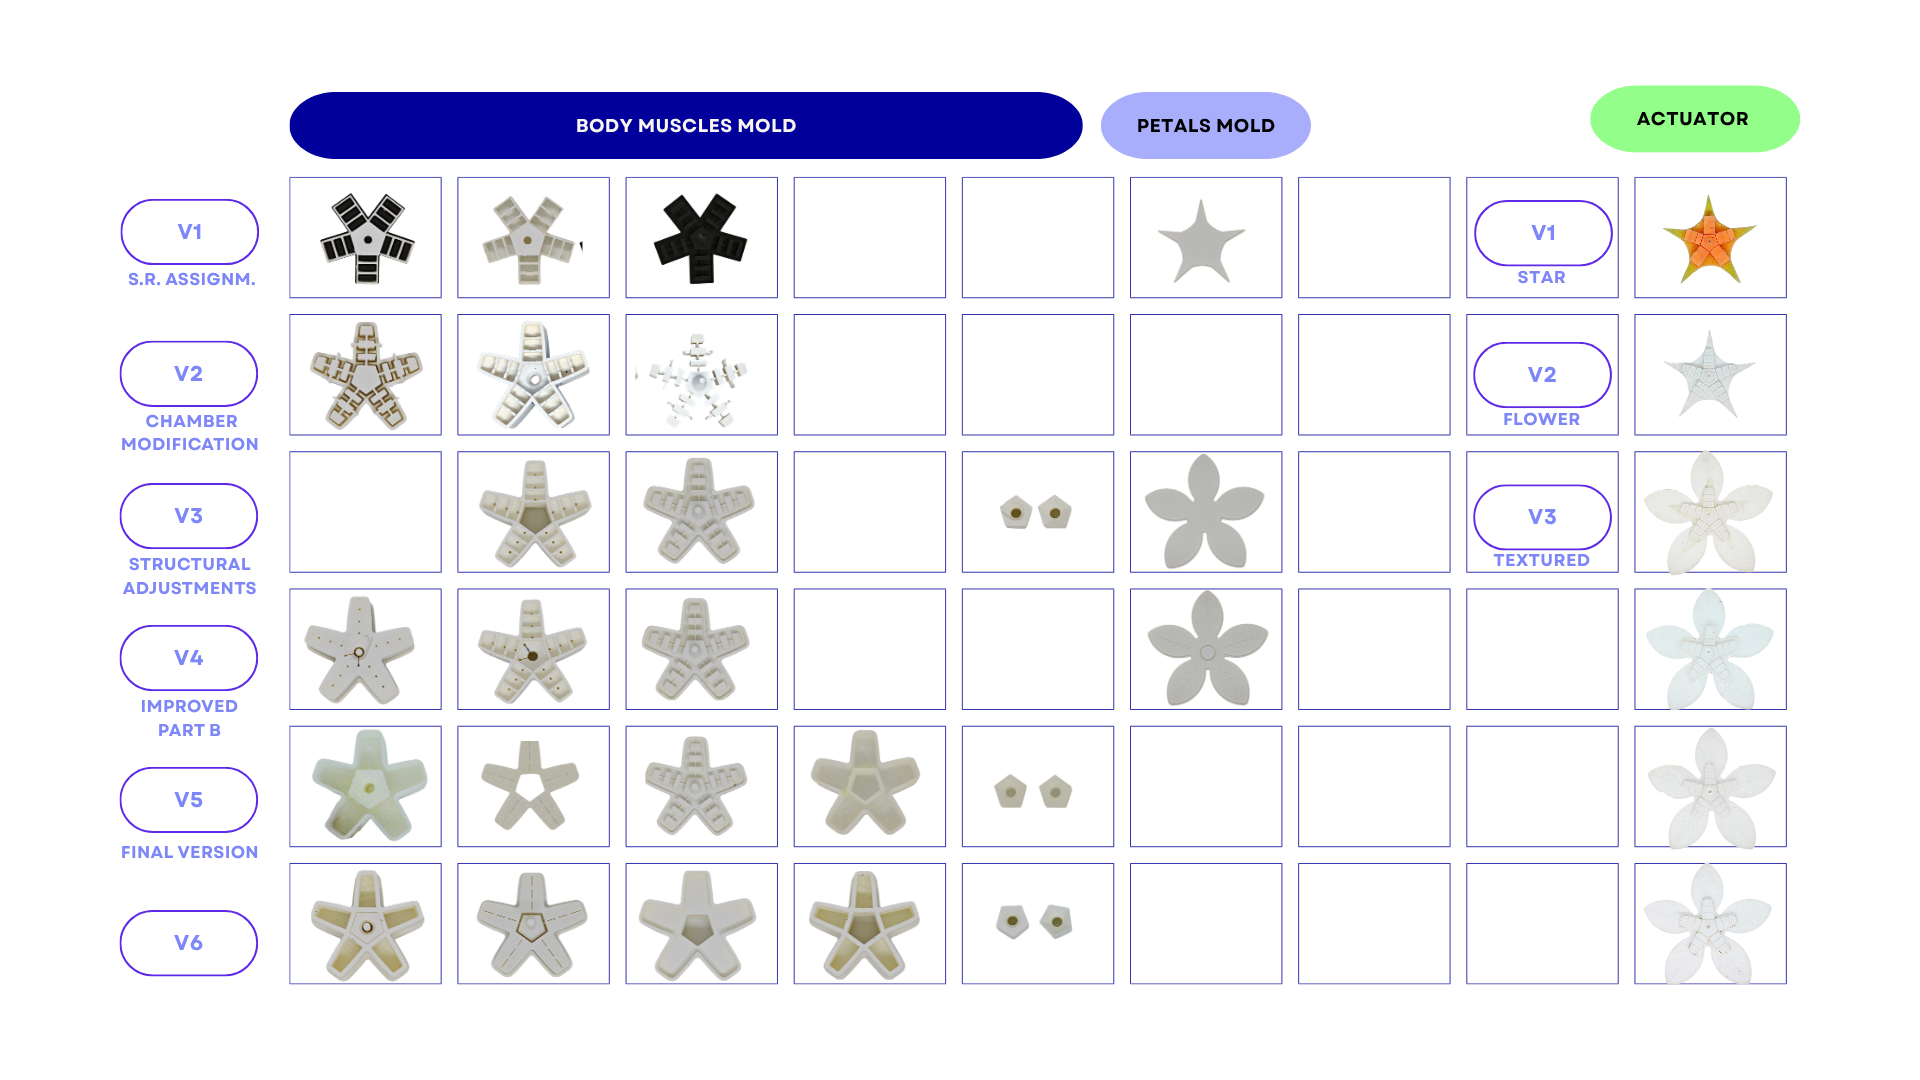 Mould iteration timeline showing the evolution from early tests to later mould versions.
Mould Fabrication Issues
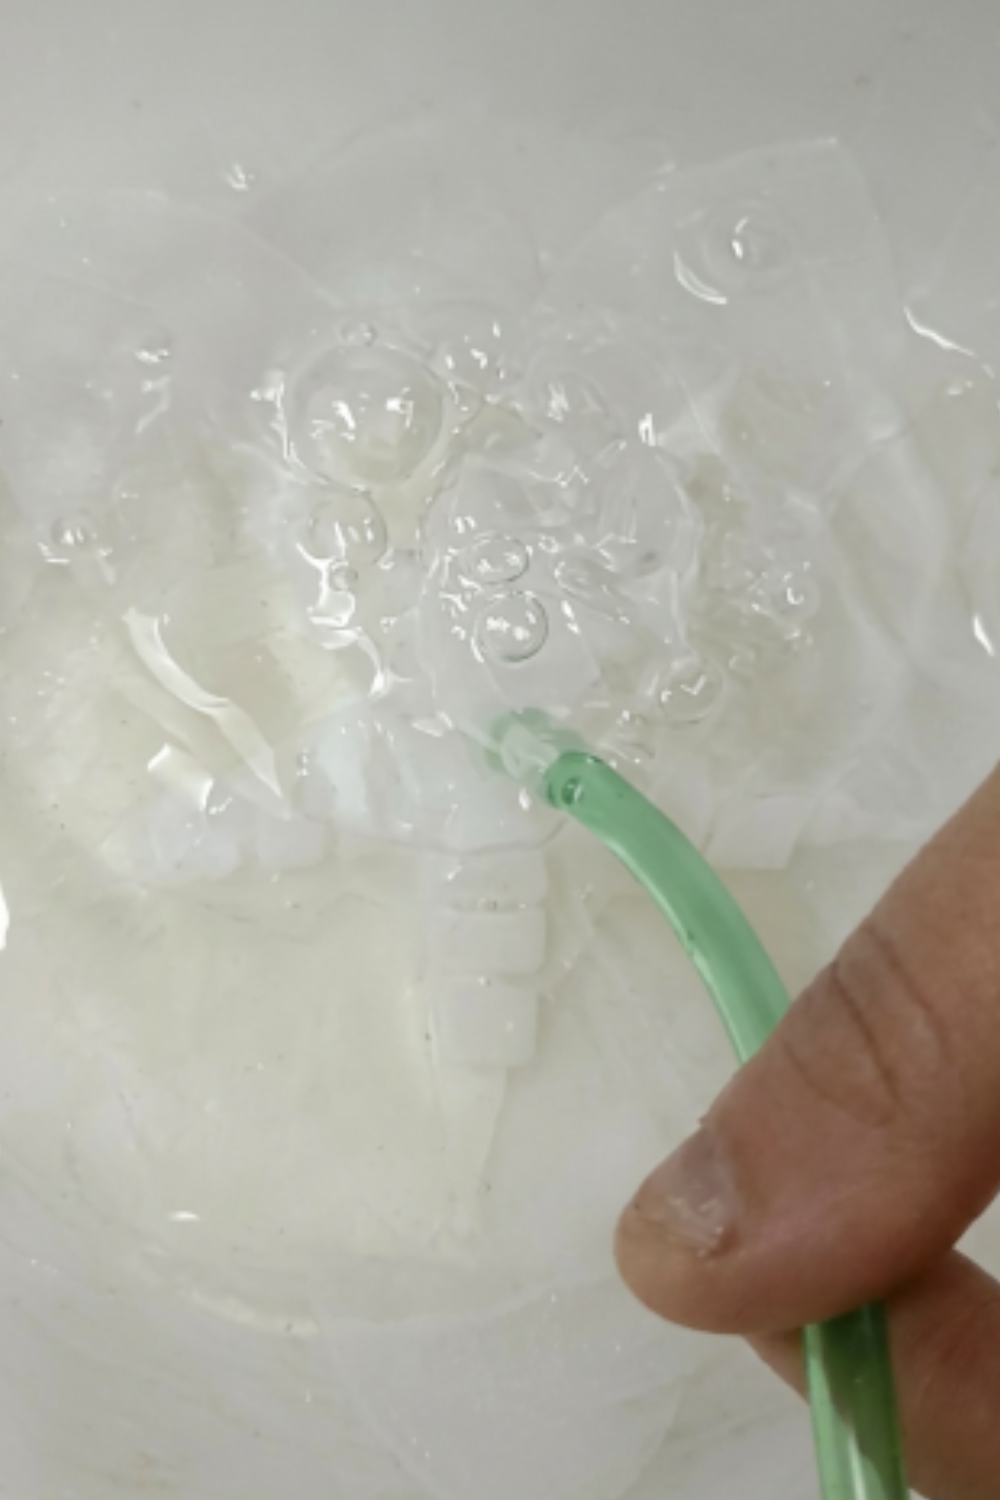
Air leakage test in water: bubbles revealed small leaks between the two bonded silicone layers.
During the silicone casting process, one of the main issues appeared during the sealing phase. The actuator was produced in two silicone parts: the first layer formed the internal air chambers, while the second layer closed and sealed the pneumatic structure.
Because the two silicone layers were bonded together using additional silicone, small air bubbles and irregularities sometimes appeared between the layers. These imperfections affected the surface quality and, in some cases, reduced the reliability of the pneumatic channels.
This step showed that the sealing phase was one of the most critical parts of the fabrication process. The silicone had to be applied carefully, the two layers had to be aligned correctly, and the channel openings had to remain clear to allow air circulation.
Calyx Fabrication Issues
 Calyx development: 3D modelling, print tests, structural iterations and final illuminated prototype.
The main problems observed were:
- fragile thin geometries collapsing during printing;
- excessive support structures that were difficult to remove;
- loss of detail in organic branching elements;
- weak connection points;
These issues led to adjustments in:
- wall thickness;
- geometry simplification;
- structural reinforcement;
- infill settings;
Through these iterations, the calyx evolved from a decorative botanical form into a functional structural interface for tubes, wires, sensors and the soft robotic actuator.
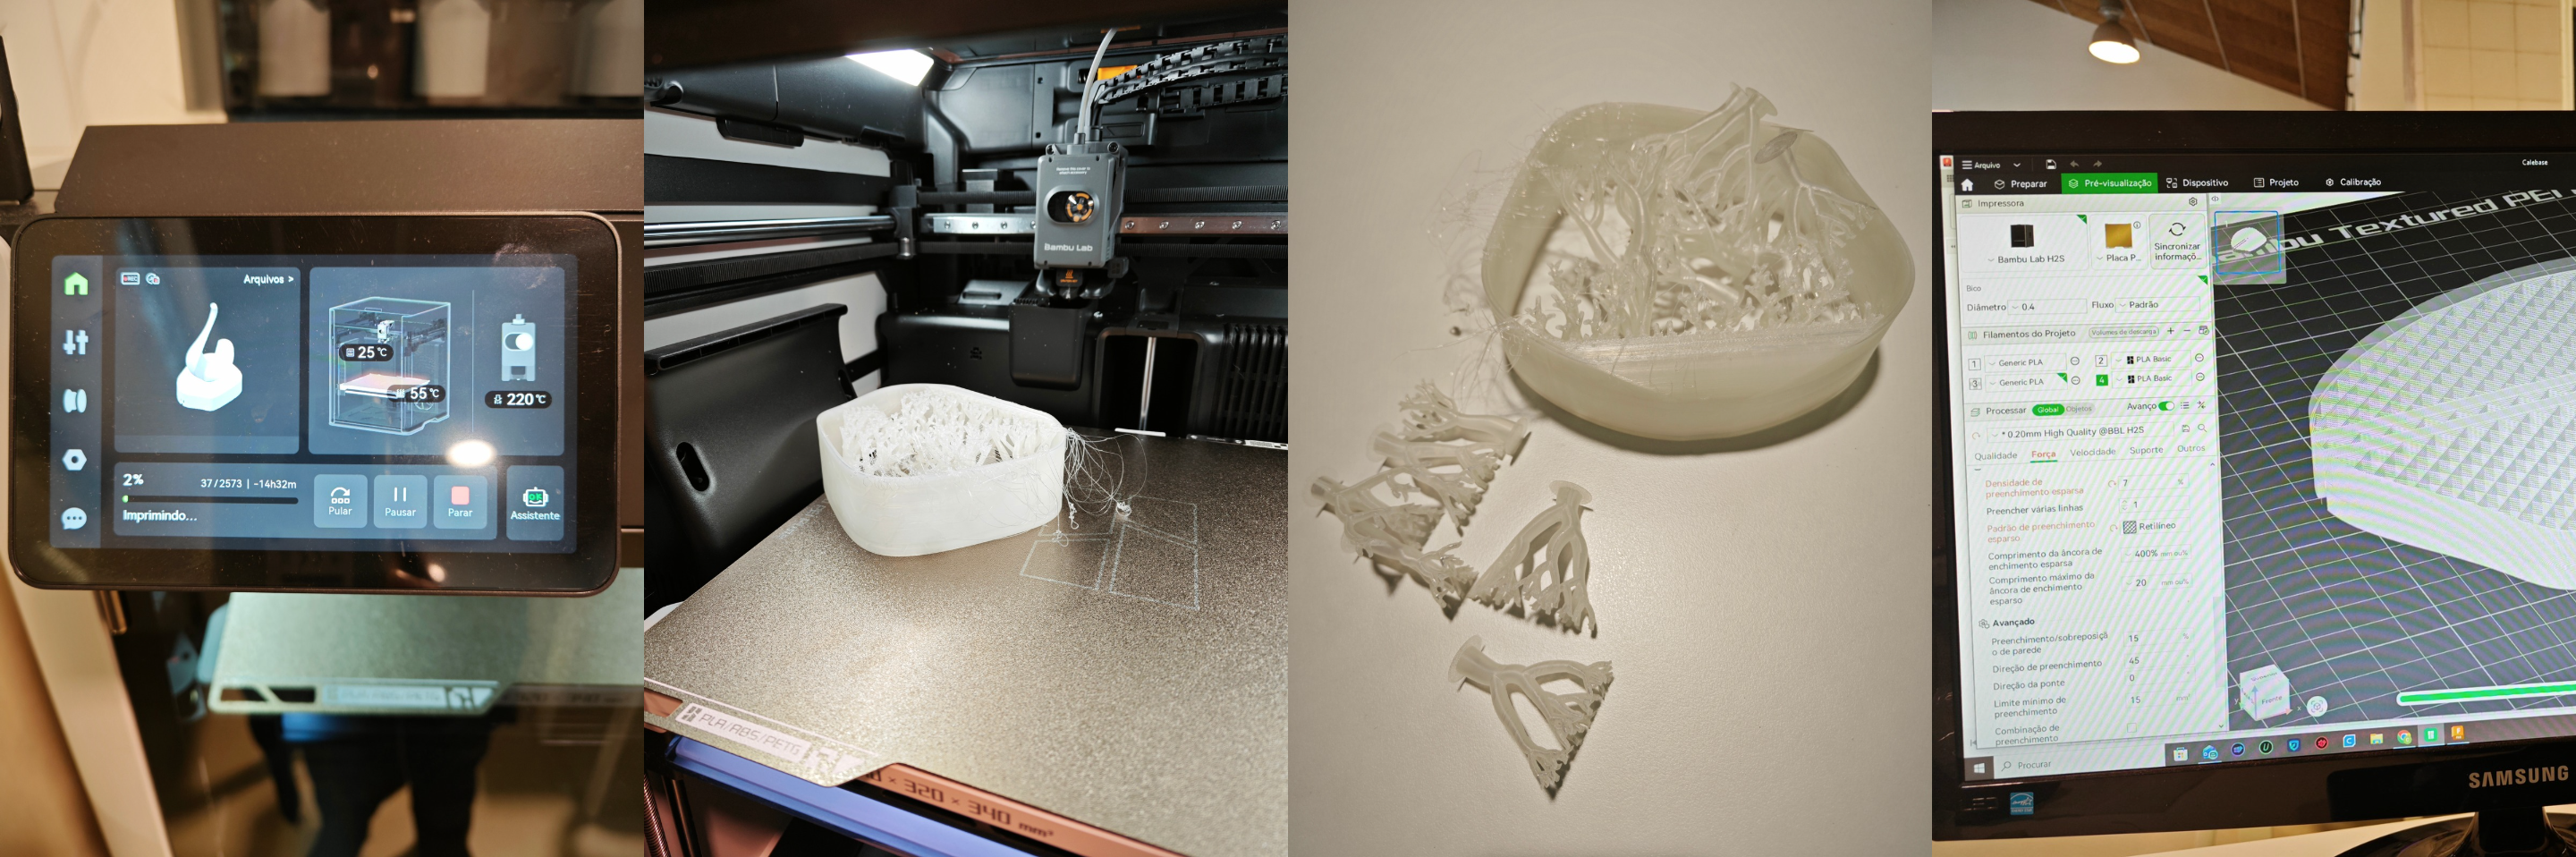 Early fabrication tests revealed structural and printing issues in the calyx components.
Sensing and System Integration
Soil Moisture Sensing
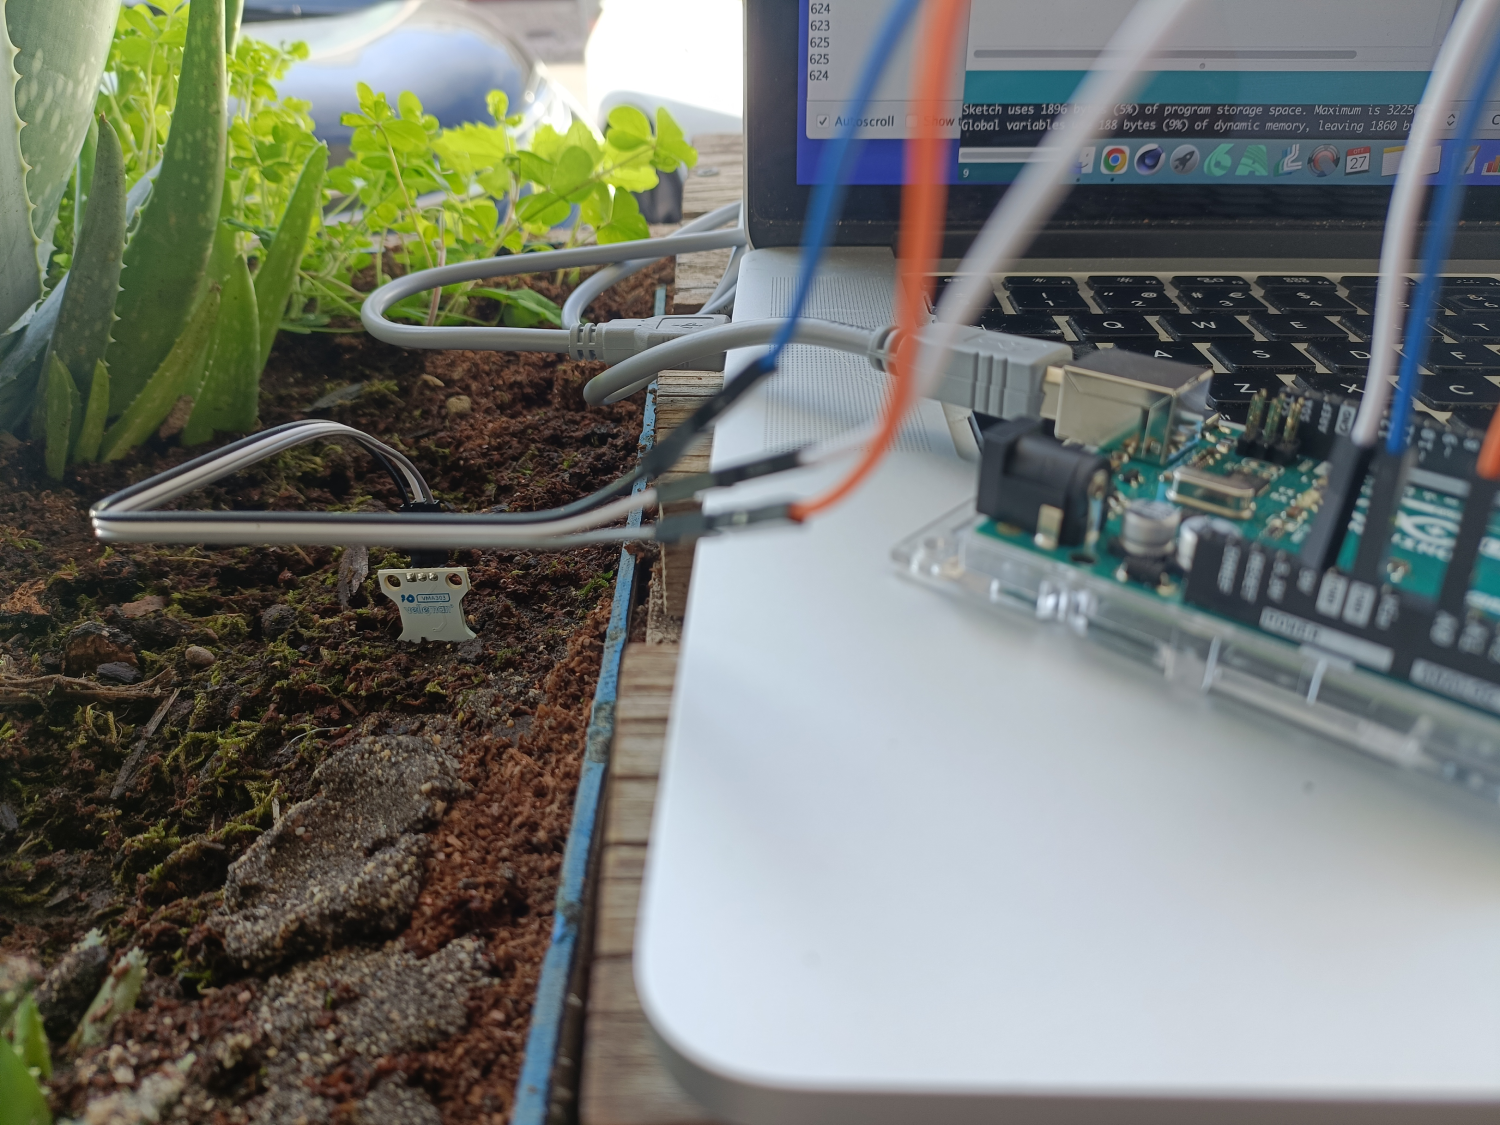
First sensor testing, Carlotta Premazzi, 2026
The system uses a capacitive soil moisture sensor connected to an analog input of the microcontroller.
The sensor measures variations in the capacitance of the surrounding soil. As moisture increases, the dielectric properties of the soil change, affecting the sensor output.
This produces an analog signal that can be read in real time and mapped into behavioural states.
Sensor Behaviour
- Dry soil → lower capacitance → higher analog values.
- Wet soil → higher capacitance → lower analog values.
Values depend on calibration, substrate, sensor orientation and water distribution.
Sensor Calibration
Before being used in the system, each soil moisture sensor was tested in reference conditions:
- air as a dry condition;
- water as a wet condition;
- real soil as the final working condition.
This calibration helped estimate the approximate sensor range and define thresholds for the system.
The signal was then mapped into three behavioural states:
- DRY → values above the dry threshold;
- OK → intermediate range;
- WET → values below the wet threshold.
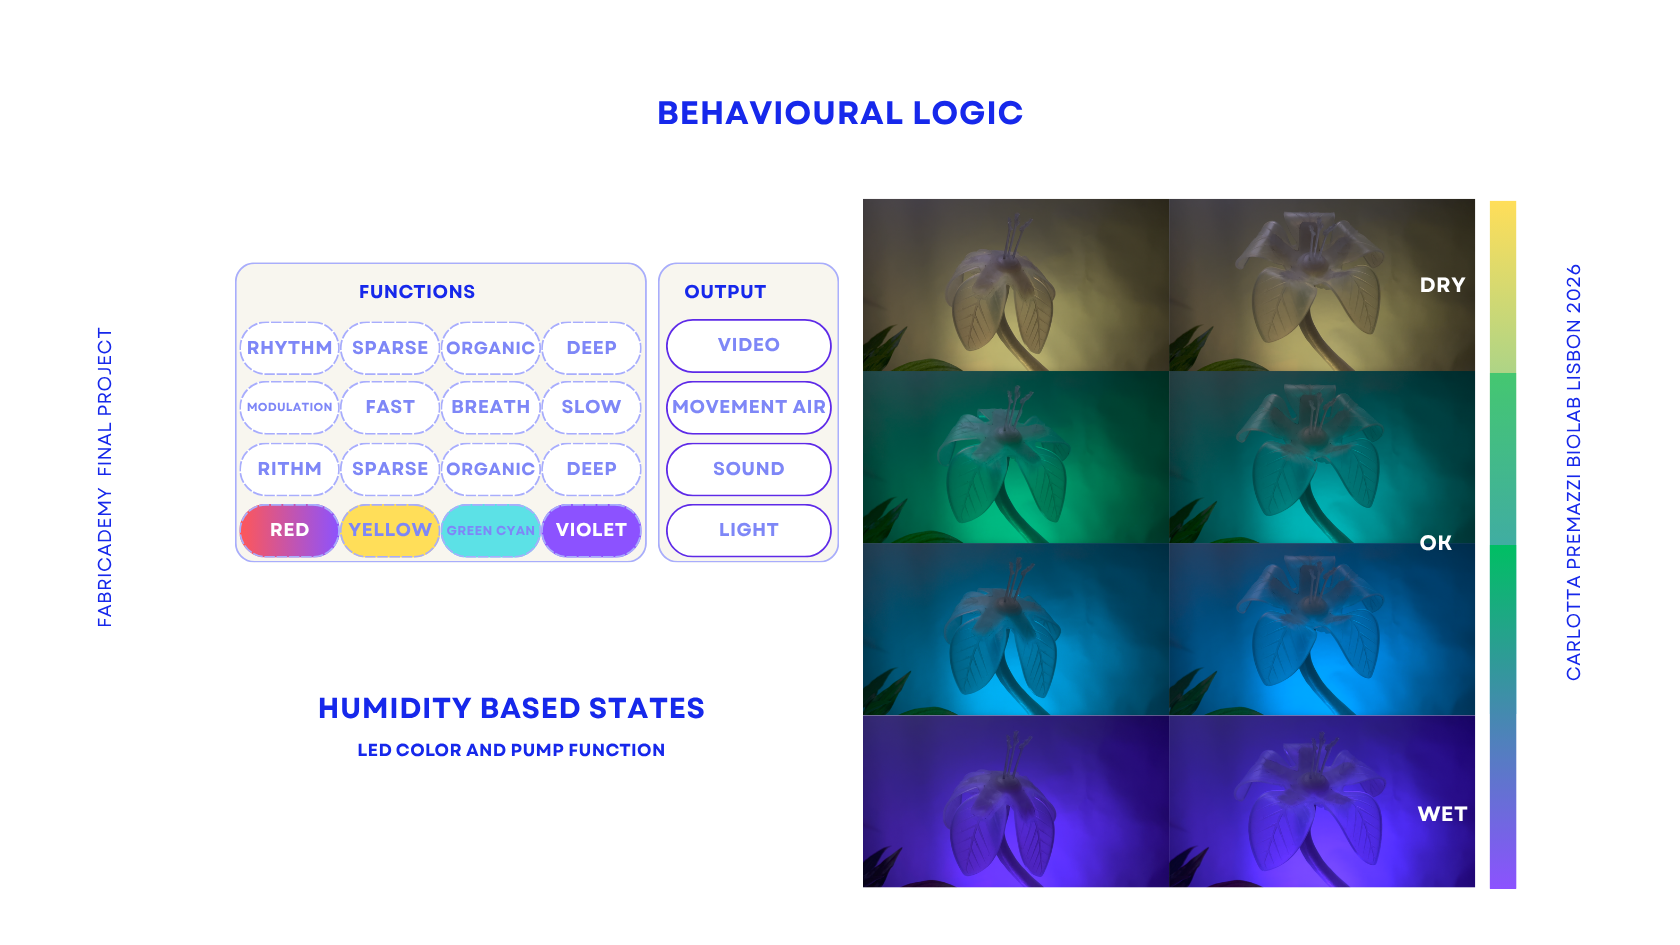
Humidity-based states and corresponding system behaviours.
An initial resistive soil moisture sensor was tested but later discarded.
The sensor produced unstable readings over time and introduced interference when used with the Pocket Scion bioelectrical sensing system. This instability was related to oxidation effects, shared power noise and interference with plant bio-signal acquisition.
For this reason, the resistive sensor was replaced with a capacitive soil moisture sensor, which provided a more stable and consistent signal within the bio-hybrid system.
System Integration
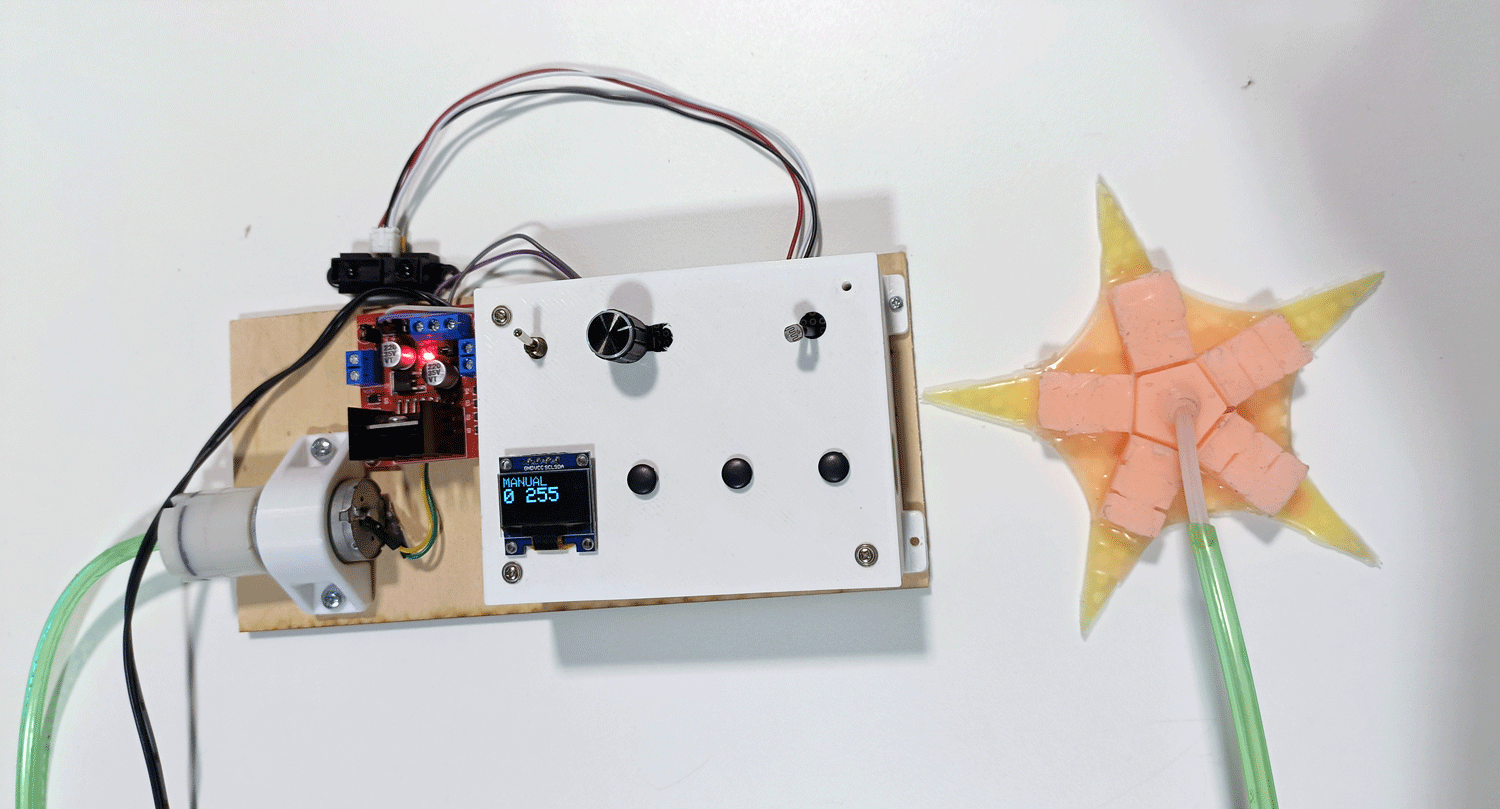
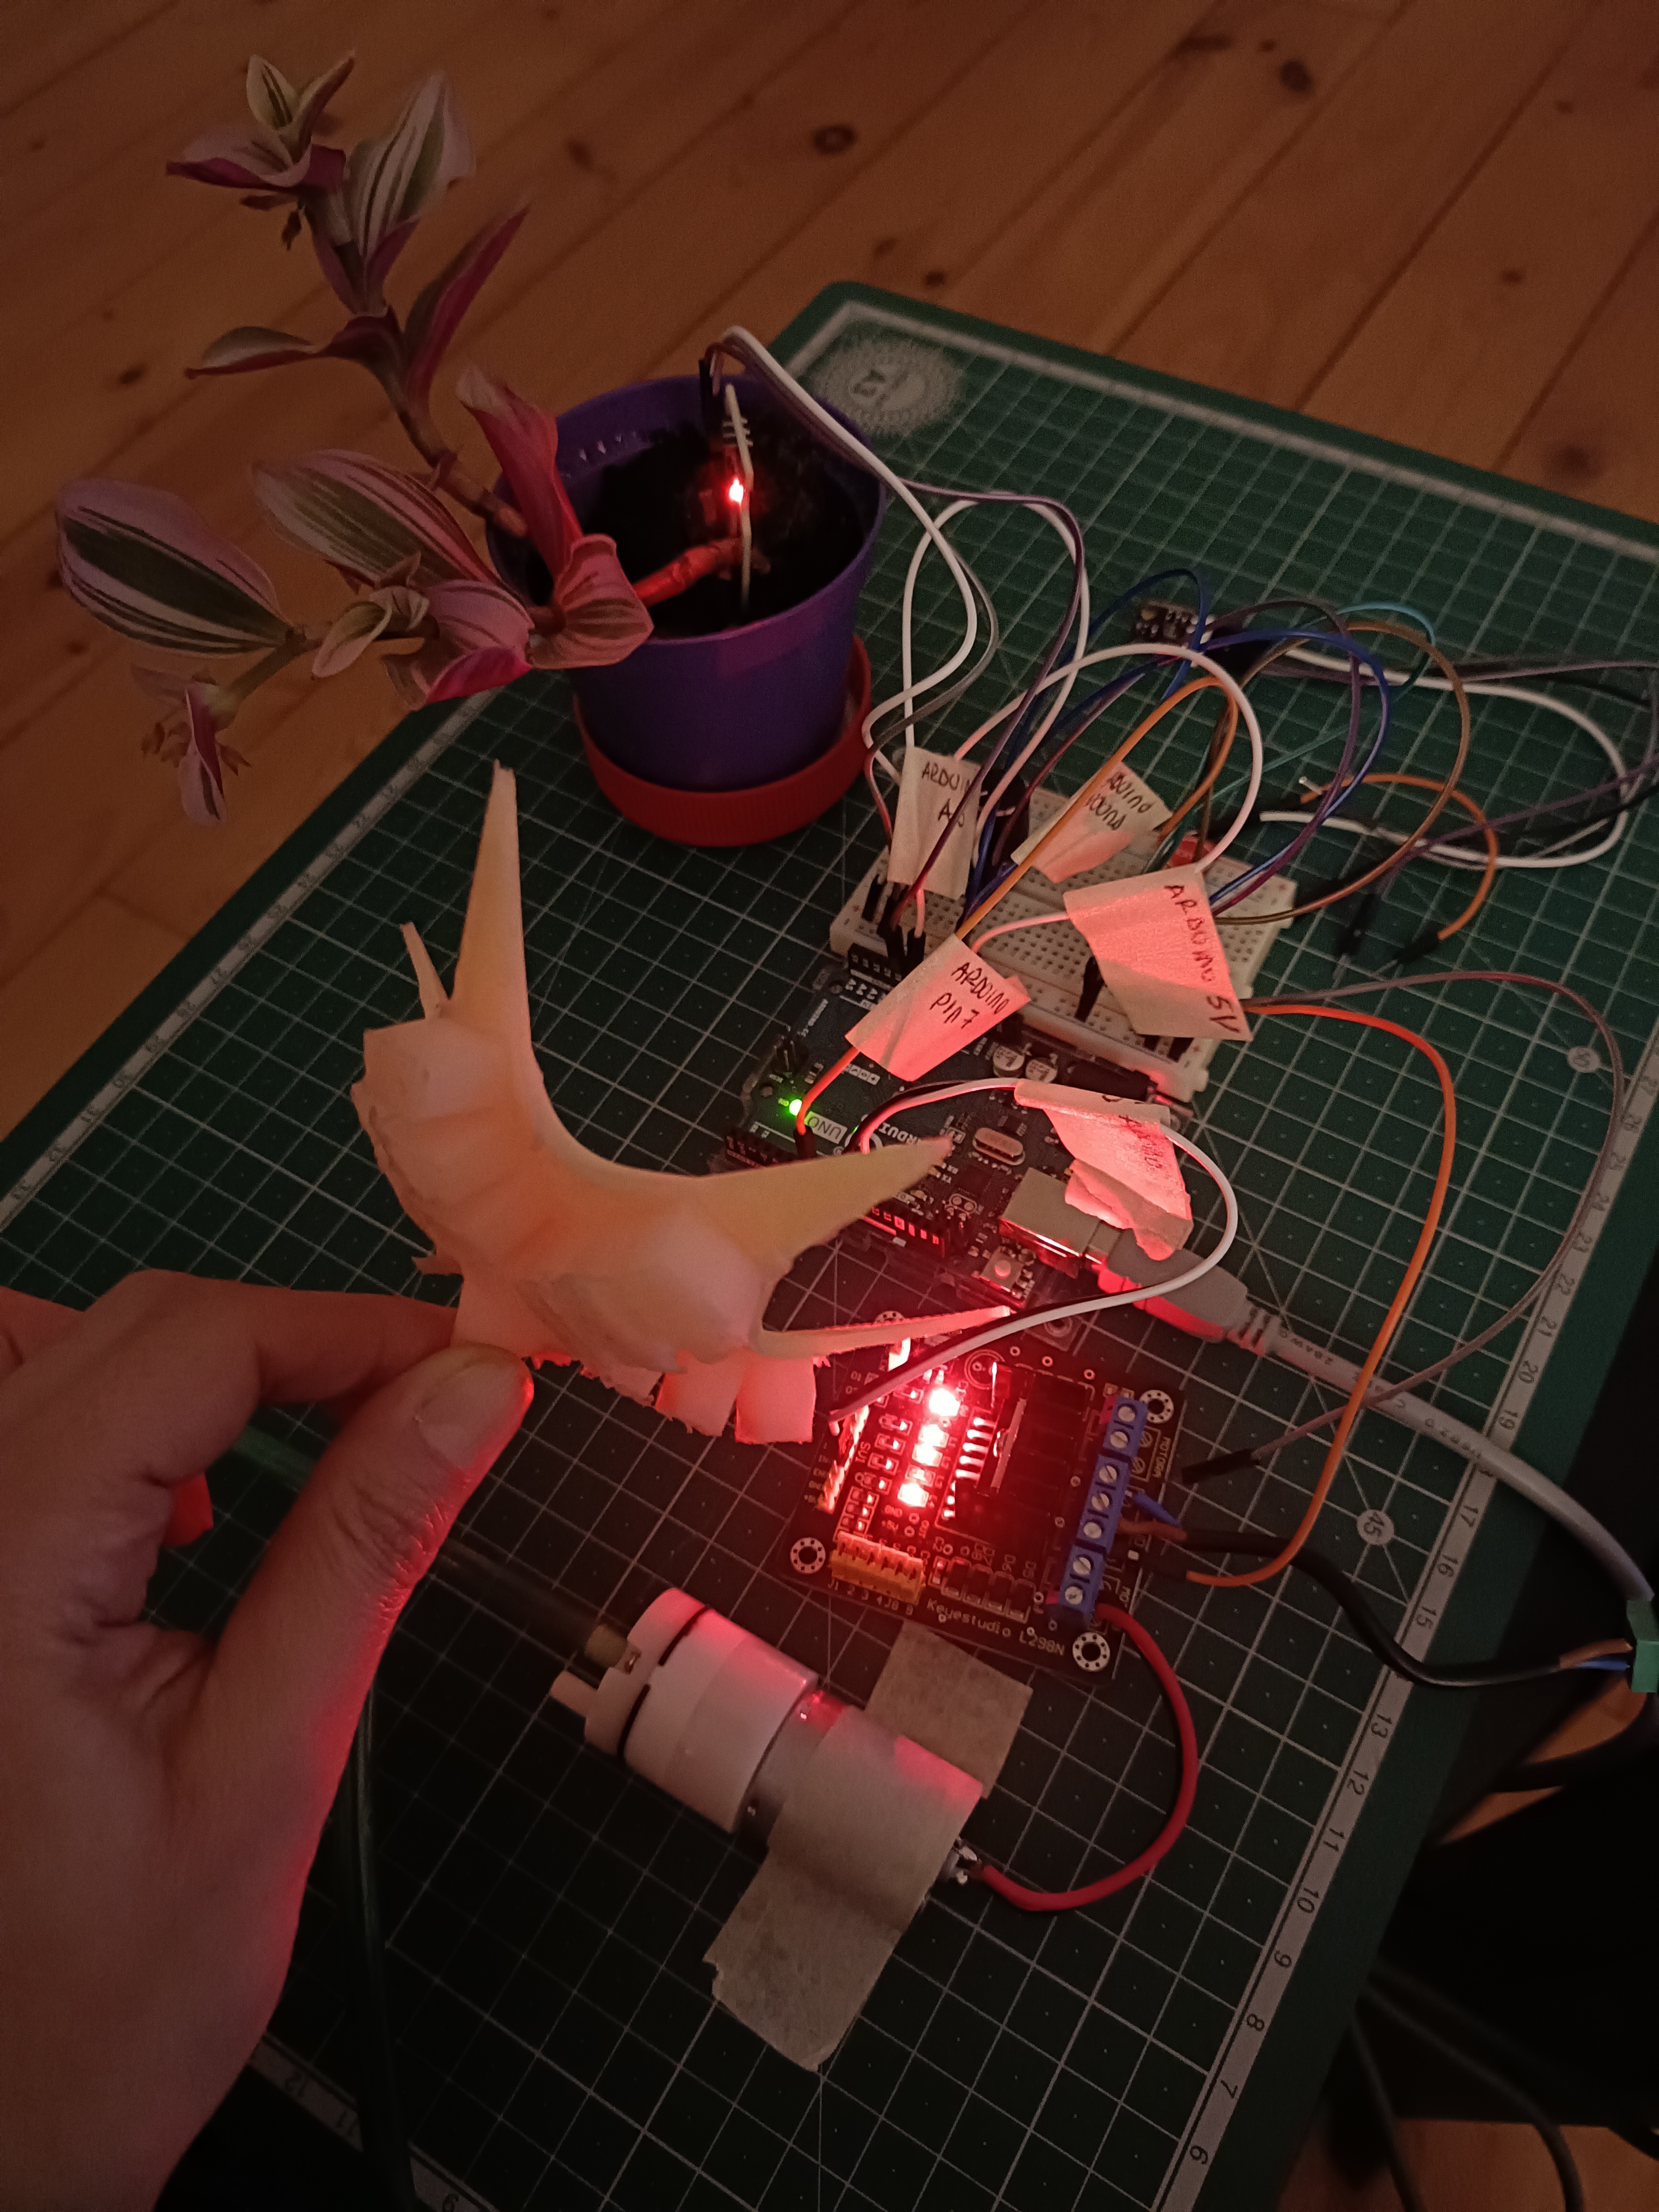
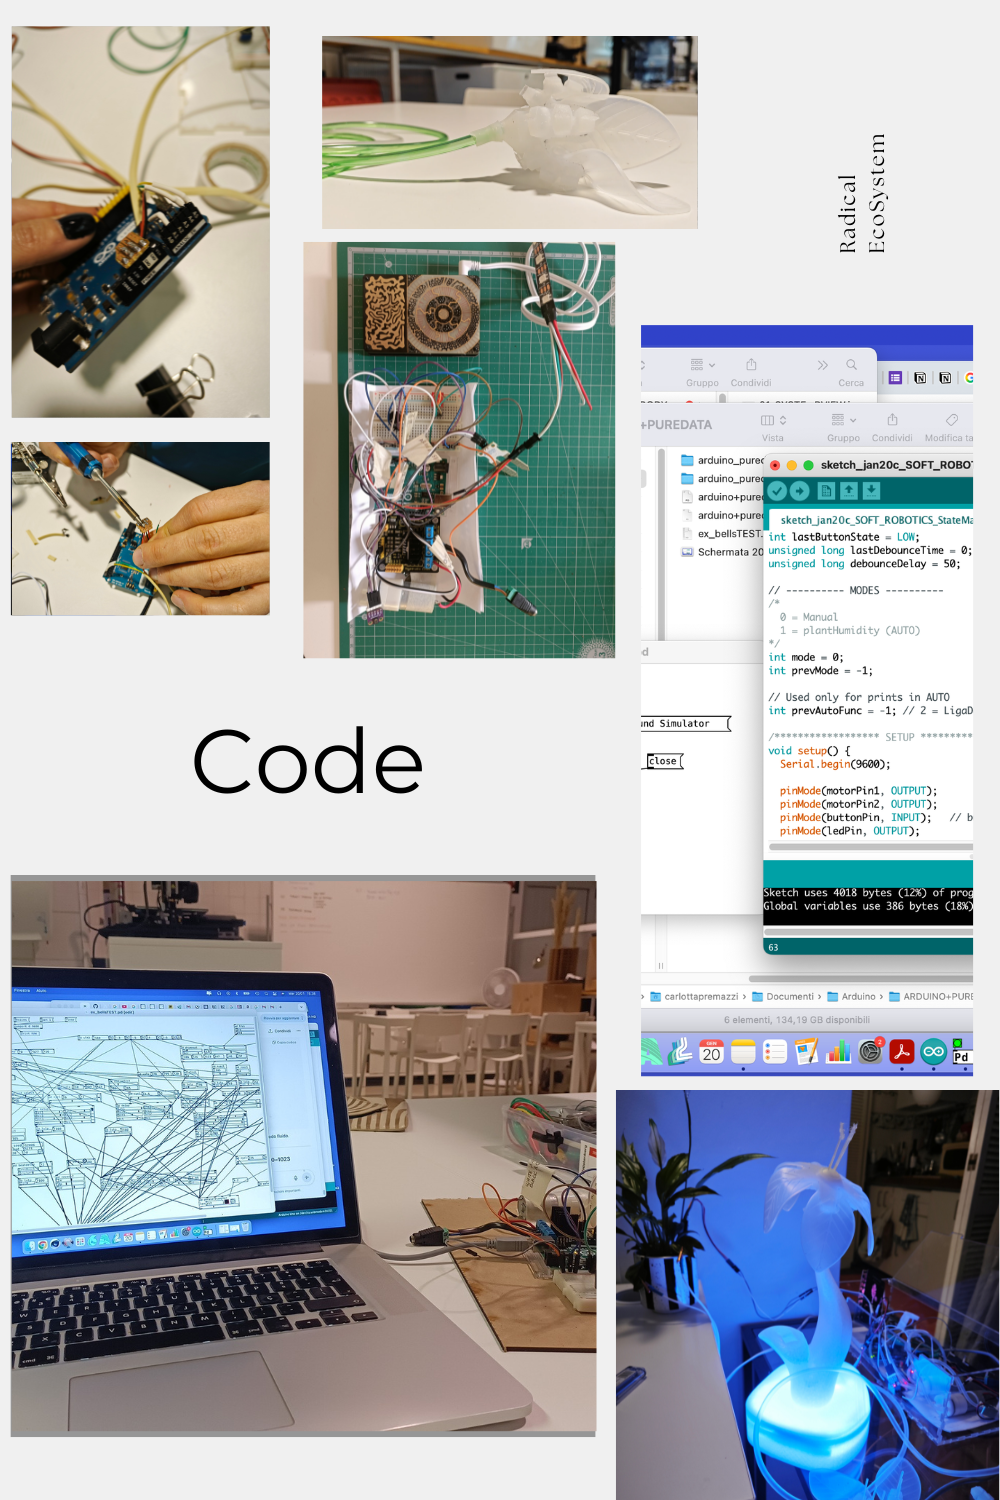 Code and electronics integration: sensor testing, Arduino code, Pure Data patching and final system behaviour.
The integration phase focused on connecting the different technical modules into one working bio-hybrid prototype.
The system was assembled progressively, starting from isolated tests and moving toward a combined setup where plant sensing, heartbeat input, pneumatic actuation, LEDs and sound could work together.
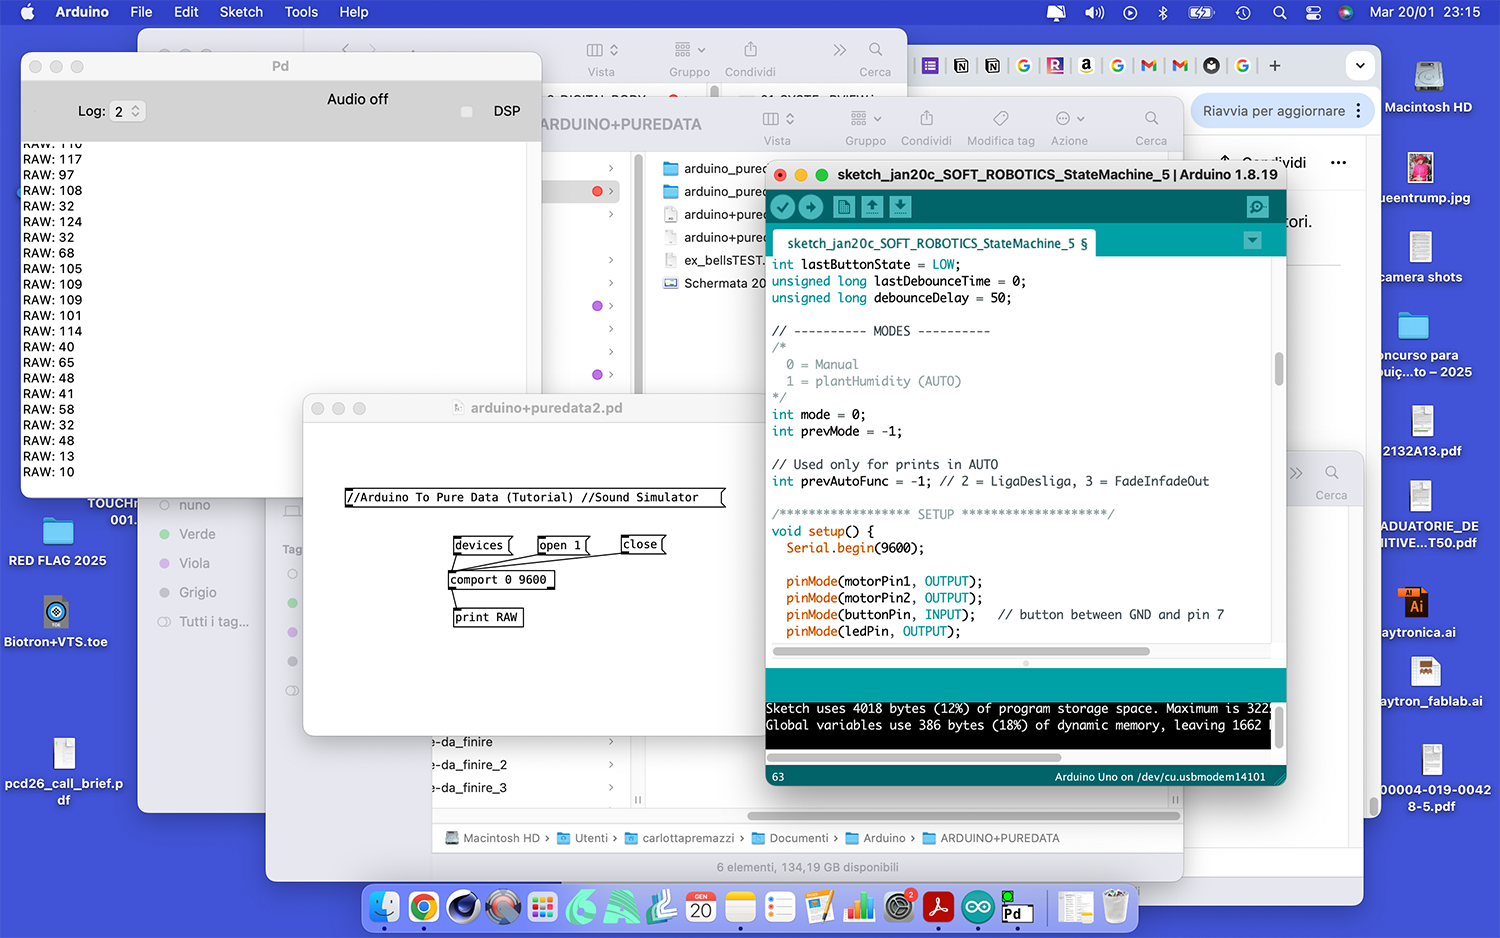
Testing real-time data transmission between Arduino and Pure Data.
System Architecture
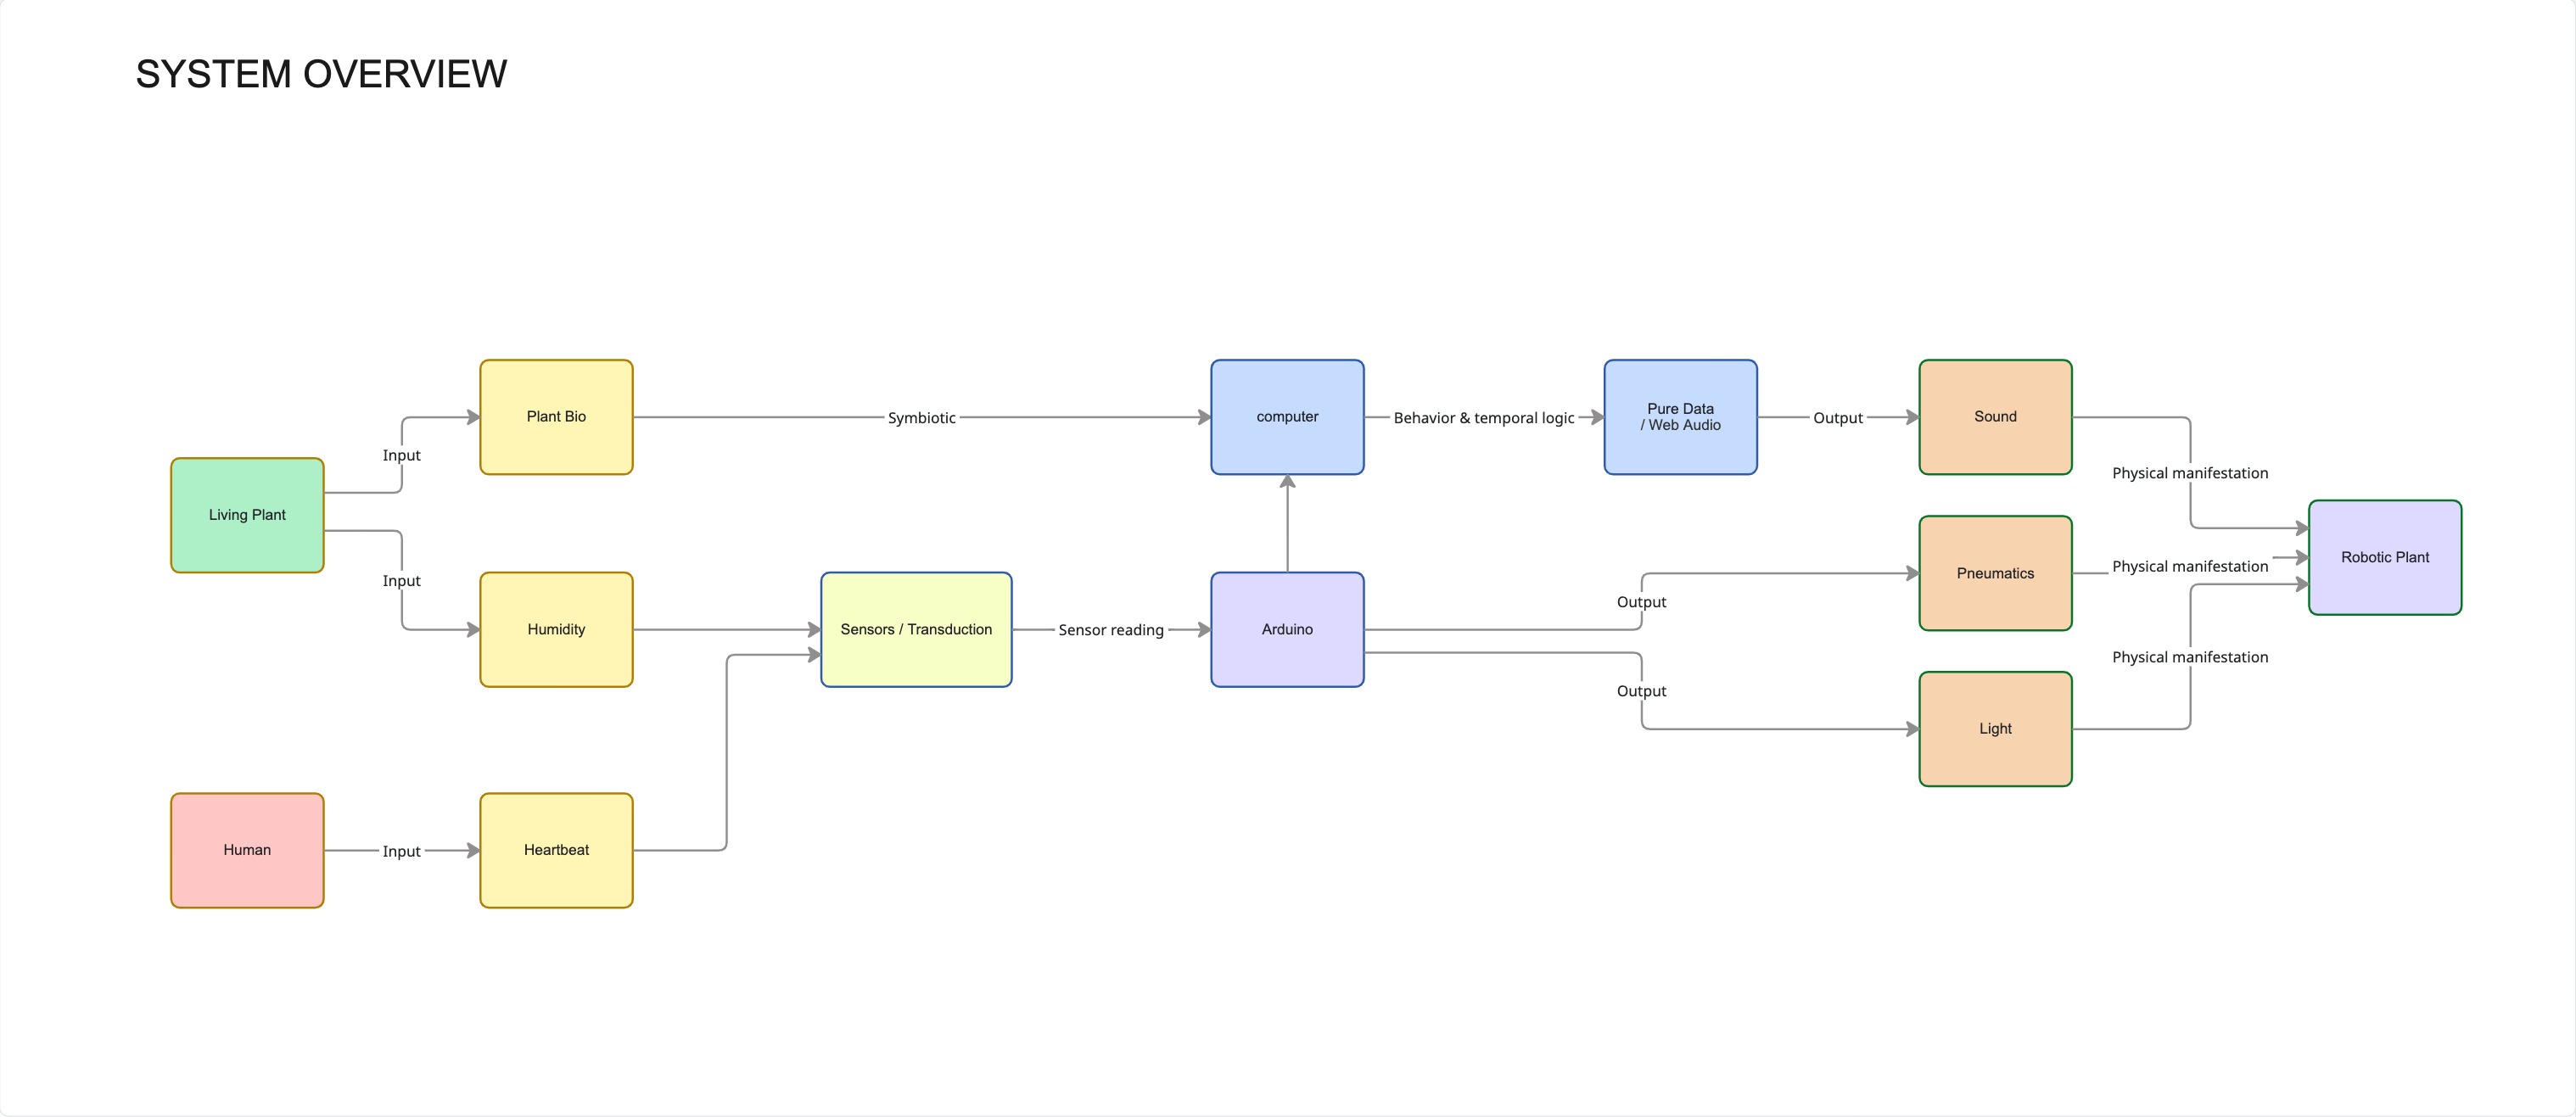
System overview diagrams made in Miro, Carlotta Premazzi, BioLab Lisbon, Fabricademy 2026.
The system integrates biological inputs, electronic control and physical outputs.
The main components are:
| Component | Role |
|---|---|
| Living plant | Source of environmental and bioelectrical signals |
| Soil moisture sensor | Reads the condition of the soil |
| Pocket Scion | Captures plant bioelectrical activity and provides sound output |
| Heartbeat sensor | Detects human physiological input |
| Arduino | Reads sensors and controls behavioural logic |
| Pumps and valve | Control pneumatic inflation and deflation |
| Soft robotic flower | Transforms air pressure into movement |
| LEDs | Visualize moisture states and heartbeat accents |
This architecture allowed the project to move from separate prototypes toward a single responsive system.
Functional Behaviour
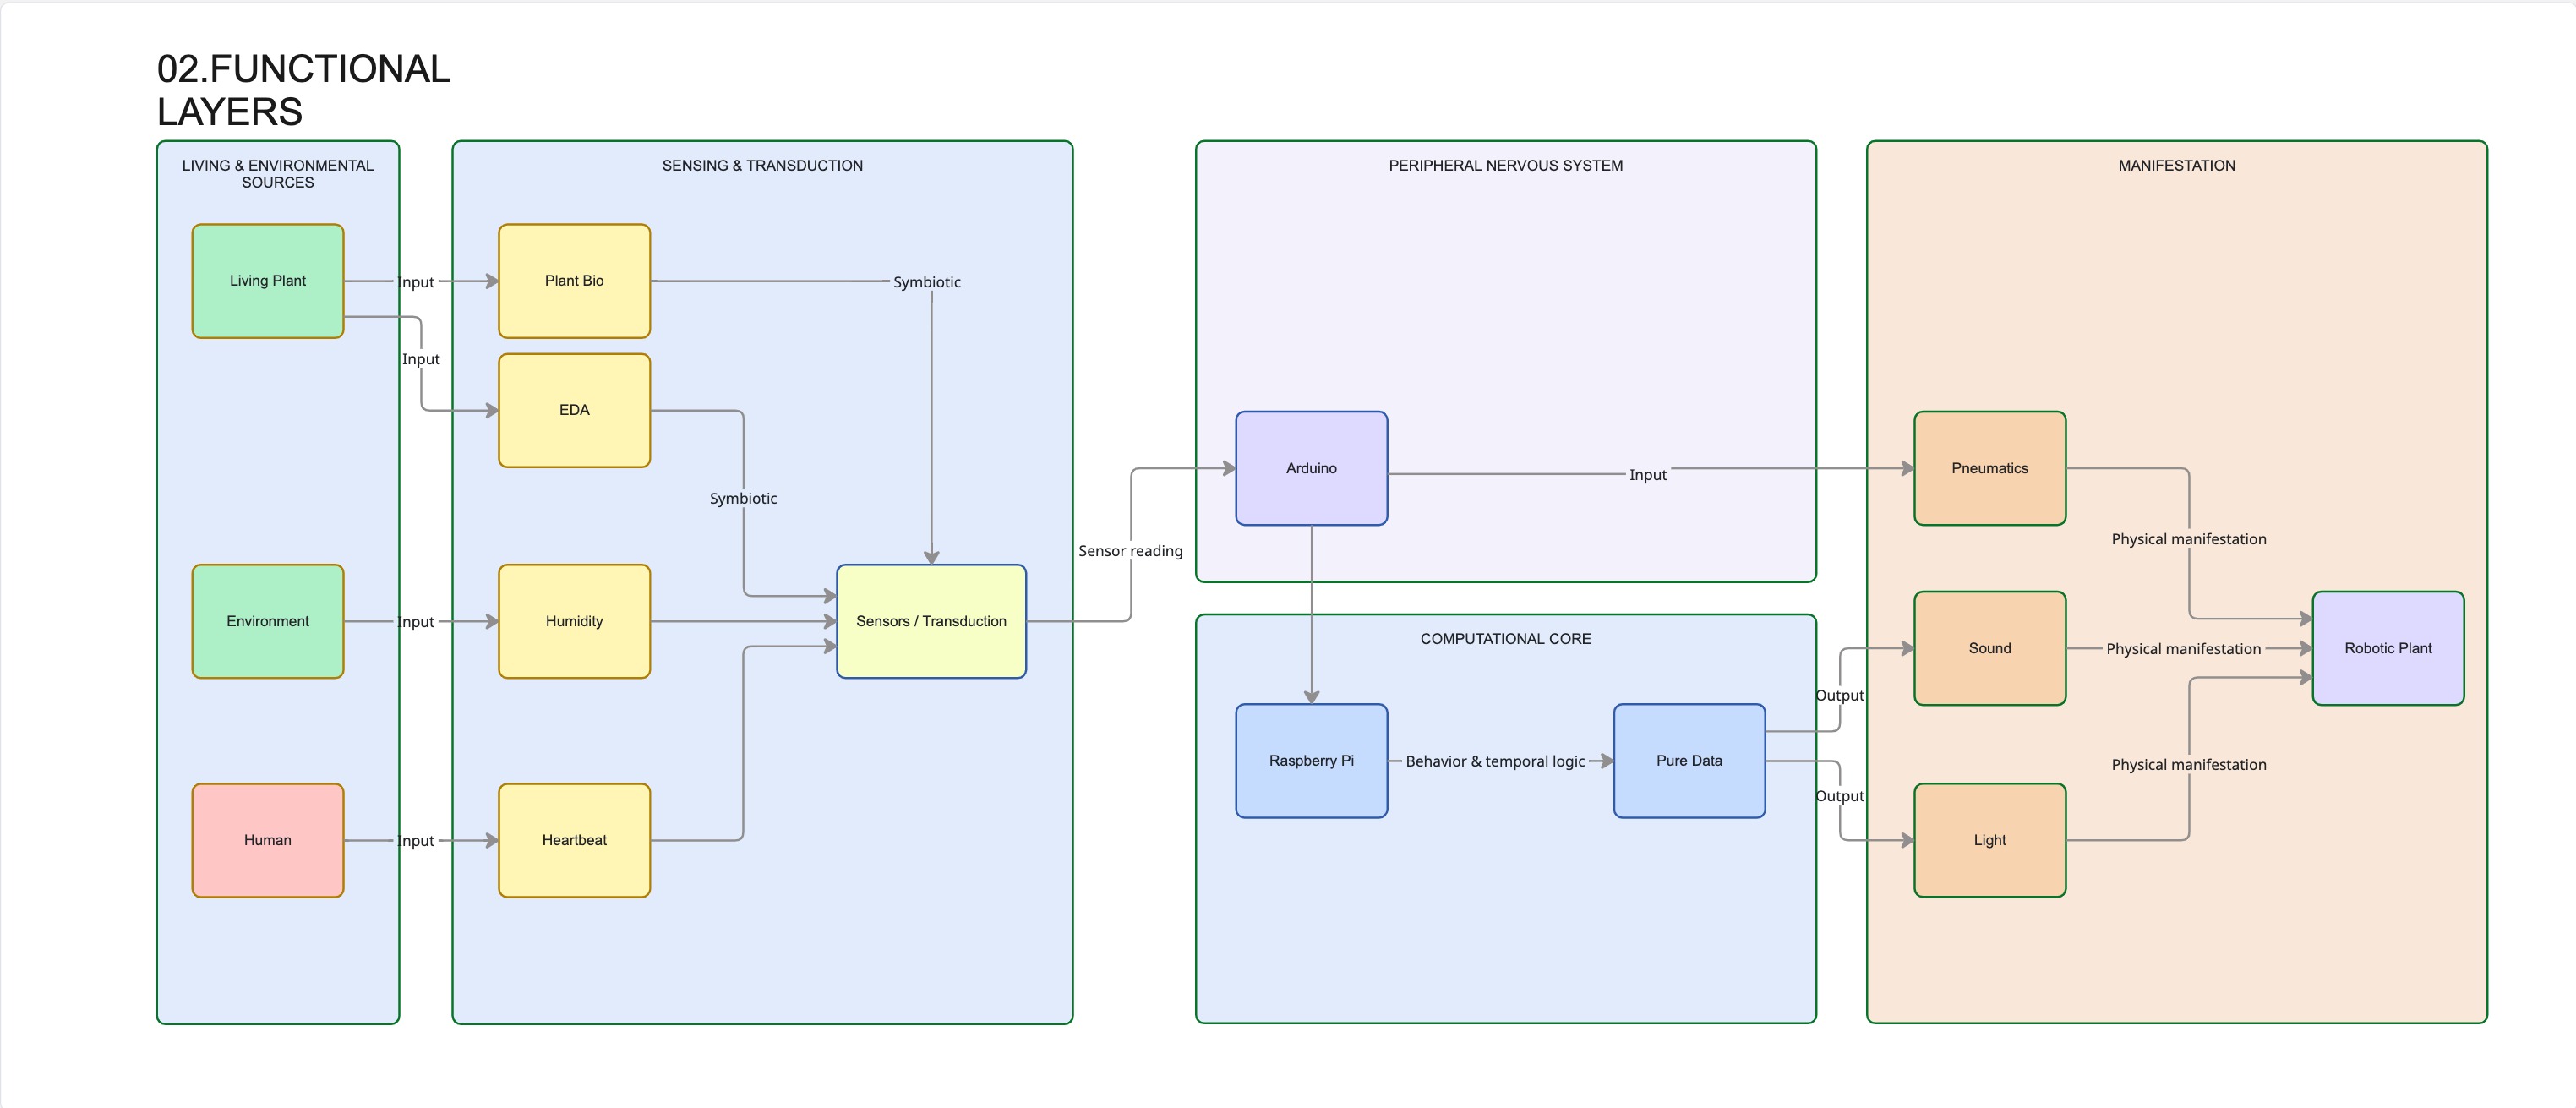
Functional layers diagram made in Miro, Carlotta Premazzi, BioLab Lisbon, Fabricademy 2026.
The final behaviour is based on three main input layers:
- soil moisture defines the environmental baseline;
- plant bioelectrical activity adds continuous variation through sound;
- human heartbeat introduces temporary pulse accents.
These inputs are translated into three types of output:
- pneumatic movement of the artificial flower;
- LED colour and pulse behaviour;
- sound response from the plant signal.
The system required continuous calibration between sensor values, moisture thresholds, pneumatic timing, pump pressure, LED states and the physical limits of the silicone actuator.
Integration Challenges
The main challenge was balancing code-based behaviour with physical material behaviour.
The final response of the system depended on several technical variables:
- soil moisture sensor instability;
- changing plant and soil conditions;
- pump pressure and airflow speed;
- valve timing;
- silicone thickness;
- chamber geometry;
- air leakage;
- LED power stability;
- serial data communication.
For this reason, the system could not be calibrated only in software. Each adjustment had to be tested physically, observing how the actuator inflated, how the LEDs responded and how the plant-related sound behaved in the complete setup.
From Interface to Responsive System
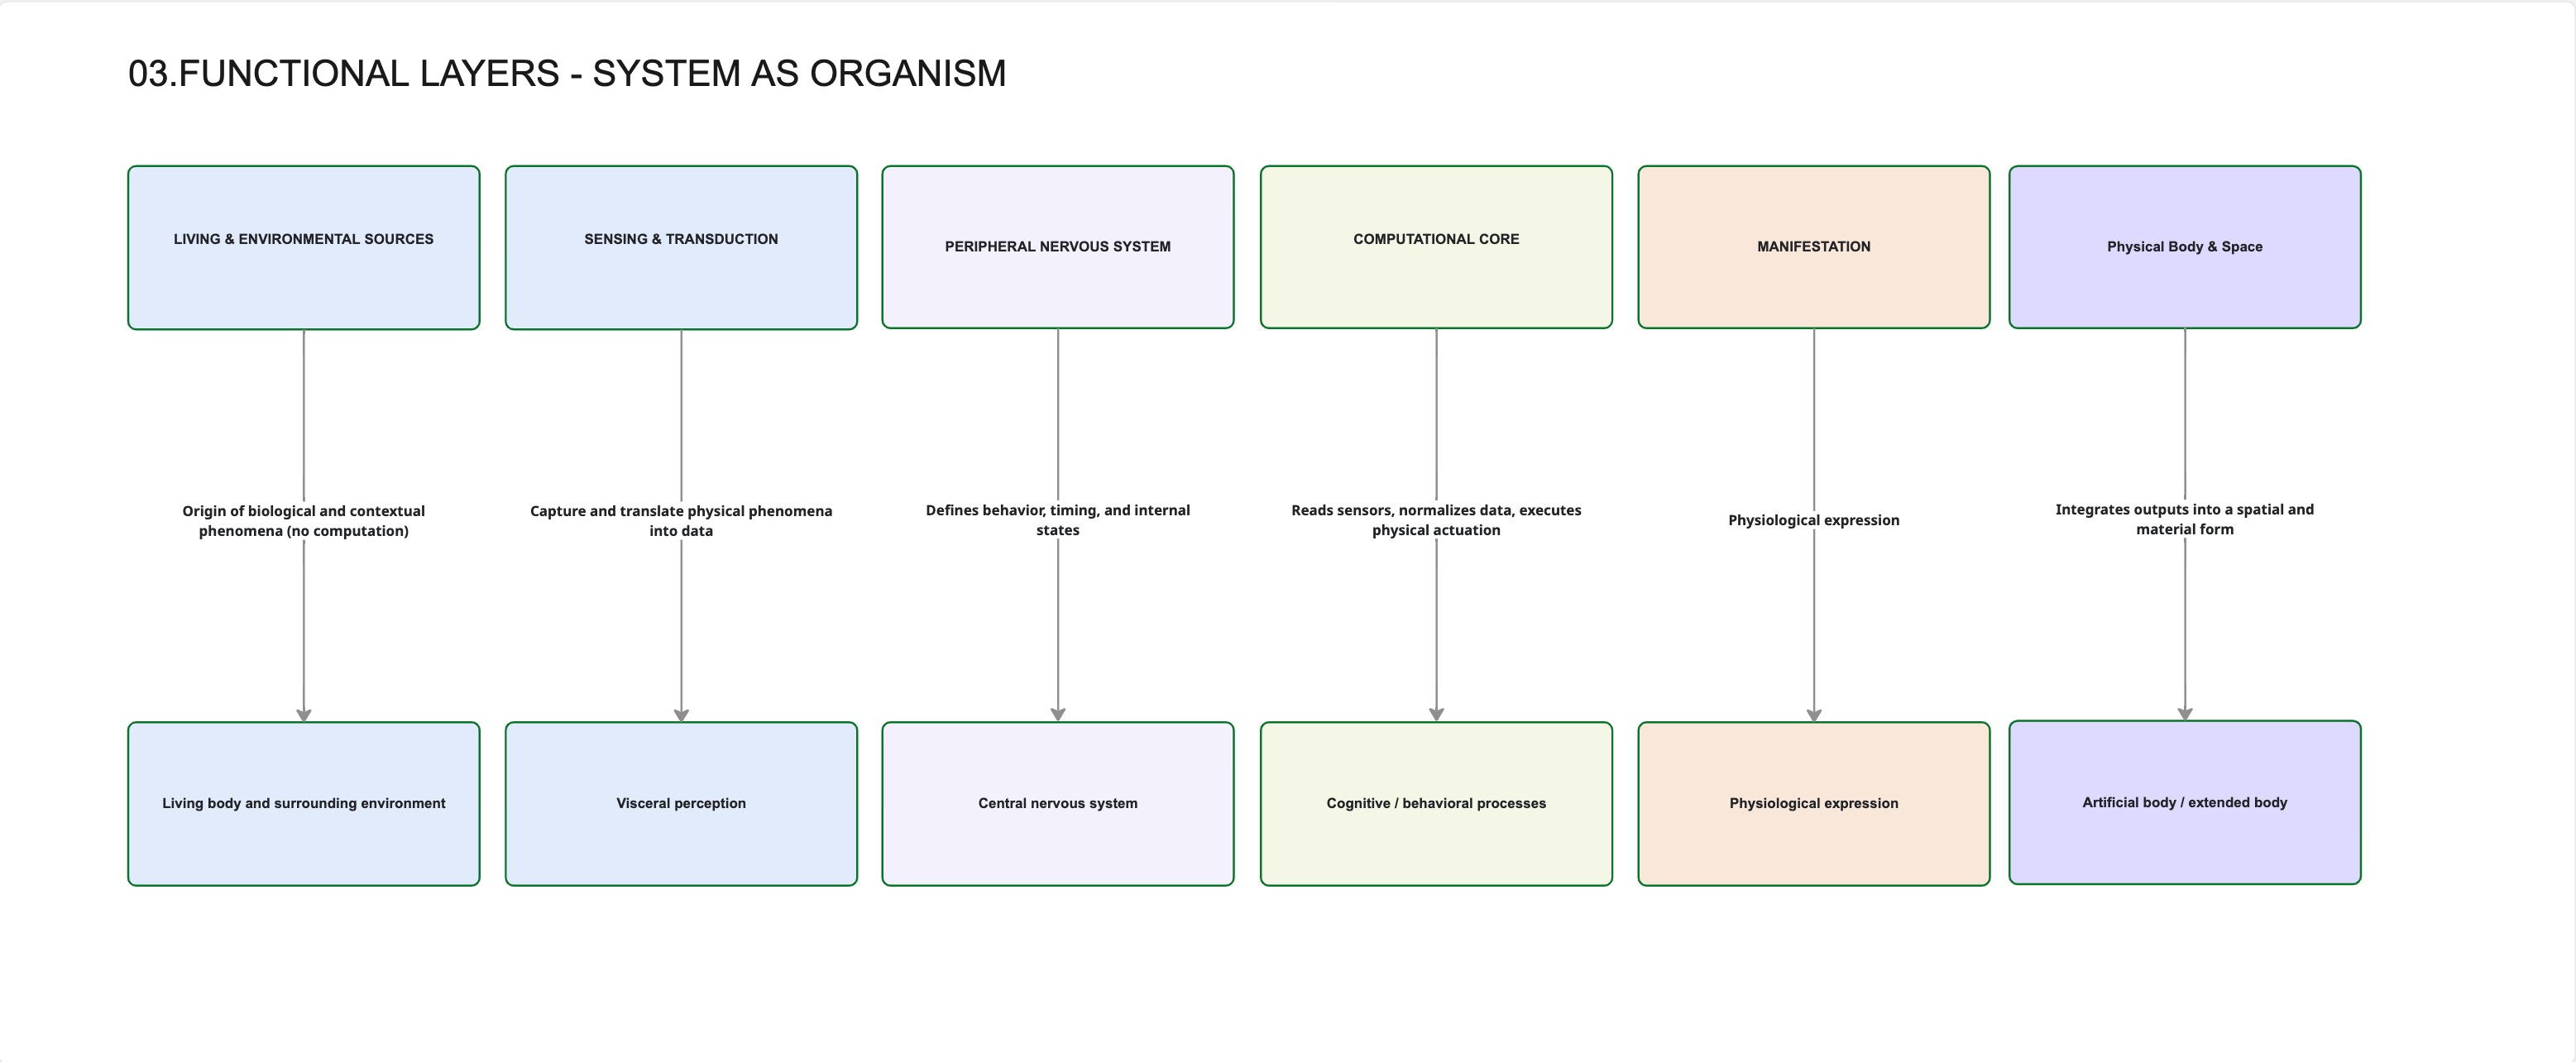
System as organism diagram made in Miro, Carlotta Premazzi, BioLab Lisbon, Fabricademy 2026.
Through integration, the project moved from a simple input-output interface toward a layered responsive system.
The final prototype does not use the plant as a switch or controller. Instead, plant condition, human heartbeat and material behaviour influence the system together.
This approach helped define the installation as a small bio-hybrid ecosystem, where living signals affect technological behaviour through movement, light and sound.
Main Process Learnings
The development process highlighted several technical constraints related to soft robotics, sensing, fabrication and system integration.
- Mould geometry directly affects movement.
Small changes in chamber shape, wall thickness and air channel position produced different inflation behaviours. - Silicone thickness must be controlled.
Uneven silicone layers created weak points, bubbles or uncontrolled deformation during inflation. - Textile reinforcement improves deformation control.
The fabric scaffold helped reduce ballooning and supported a more directional pneumatic movement. - Air pressure needs gradual calibration.
High pressure caused ruptures in the silicone actuator, while low pressure produced weak movement. - Demoulding must be considered from the design stage.
The mould needed to be divided into multiple parts to remove the silicone piece without damaging the air chambers. - Sensor readings require calibration.
Soil moisture values changed depending on sensor position, soil condition and water distribution, so thresholds had to be tested and adjusted. - Power distribution affects system stability.
Pumps, LEDs and sensors needed careful wiring and stable power supply to avoid voltage drops or unstable behaviour.
Early Prototype Files
Download STL files — First Star Mold
Download STL file — First Soft Robotics Base
🔗 Research skills-Student checklist
- the participant has acquired knowledge through references: concept development, research, where does the project innovate
- Design skills: the participant has learnt through making a mood board, sketches/preliminary designs
- Process skills: the participant is able to define their project in Who, What, When, Where, Why
- Fabrication skills: the participant learnt via simple quick prototypes or (material) samples
- Final outcome: Personal Final Project page, sketch of project planning & first Gantt chart
- Originality: Has the design and innovation been thought through and elaborated?
- [ ] Document the concept, sketches, references and the fundamental steps/processes involved
- [ ] Create a process /work flow chart (a more detailed planning calendar, including machines and steps)
- [ ] Create a quick prototype of the product, custom tool or electronics involved (physical, digital, collage or render)
- [ ] Upload all necessary files