Deliverables
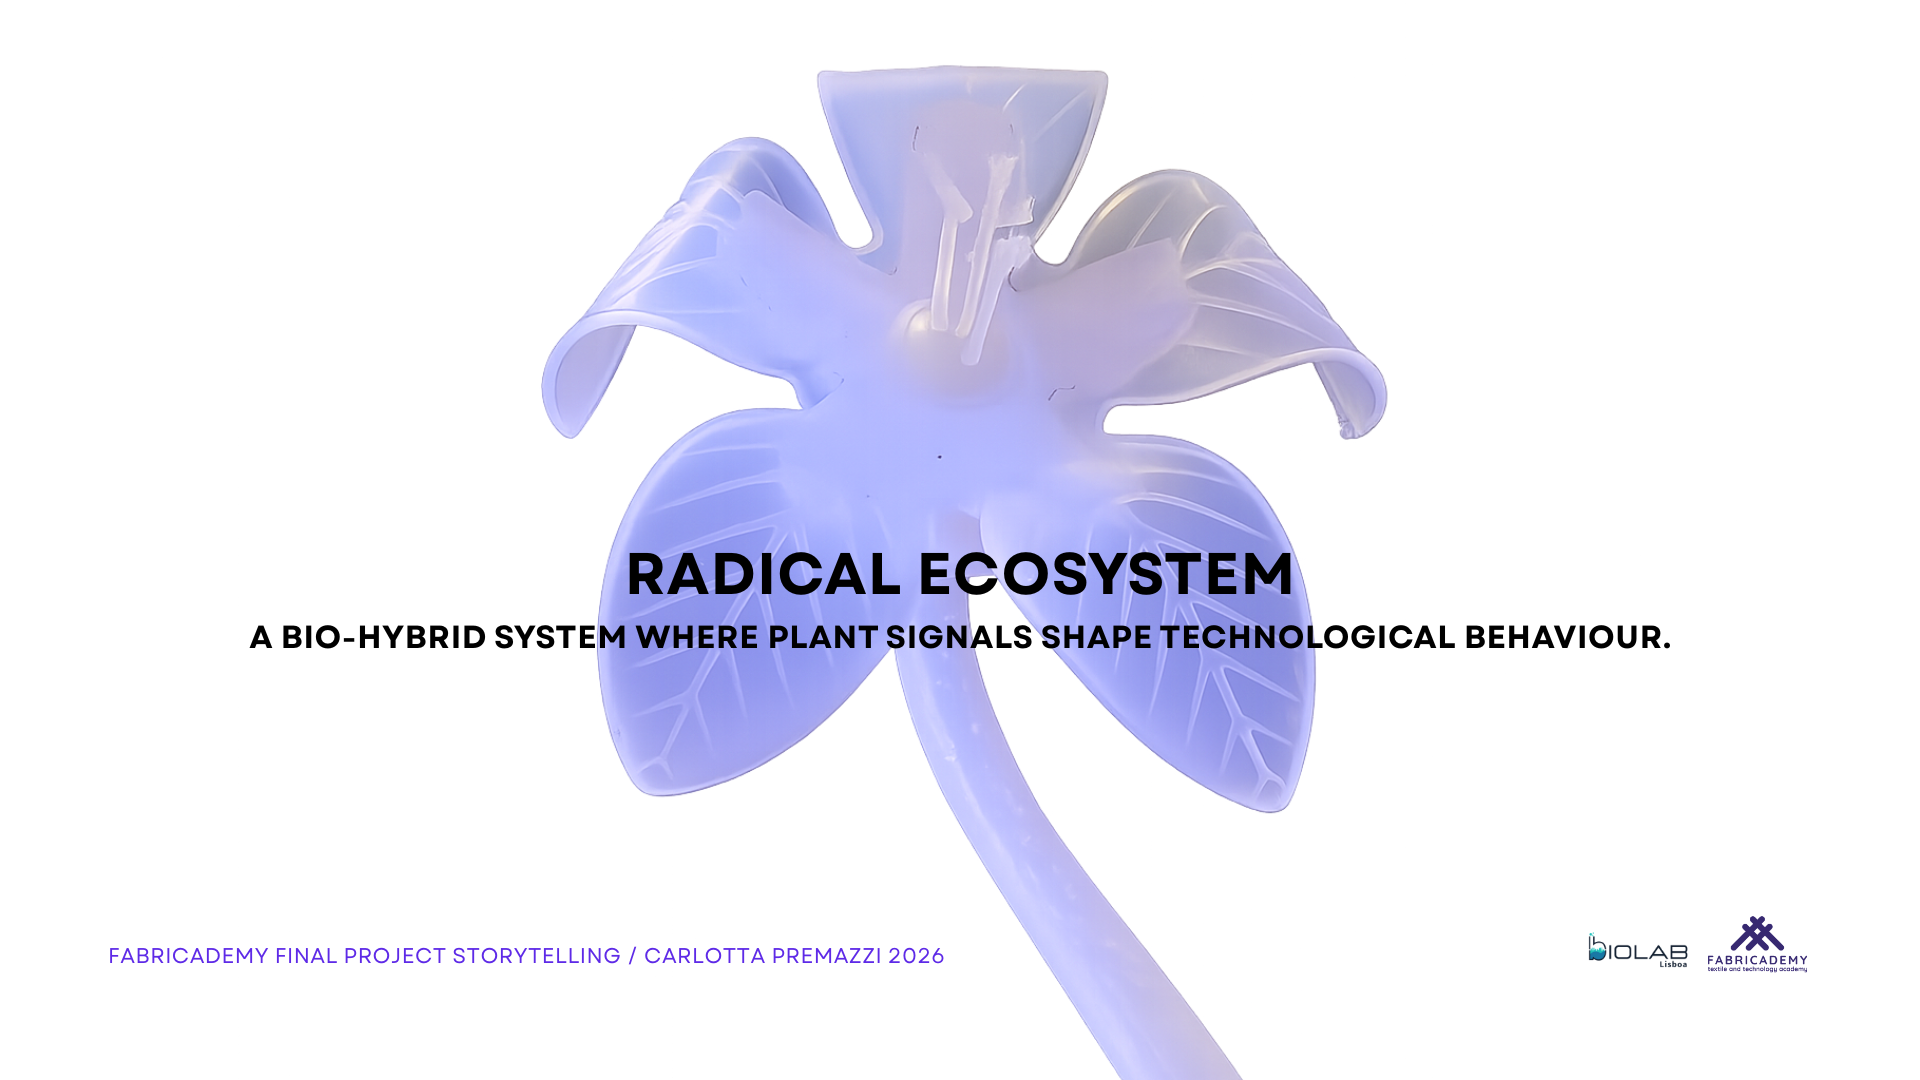
 Radical-EcoSystem Carlotta Premazzi
This section outlines the planned deliverables for the project Radical EcoSystem, including timeline, materials, documentation and supporting files.
The deliverables are intended as living documents, evolving together with the project development.
GANTT
The project development is planned over the three-month Fabricademy period, following an iterative workflow that allows testing, failure and adaptation. After the Christmas bio-break, the project follows a 10-week timeline, starting on January 17 and concluding with the final presentation at the end of March.
Rather than a rigid schedule, the timeline is structured around phases that can overlap depending on technical discoveries and material constraints.
Project Timeline (January 17 – March 31)
First Proposal Timeline Diagram by Carlotta Premazzi here
Tools currently in use:
- Google spreadsheets for quick tables
- Notion for first task tracking and research organisation
- Miro for system diagrams and conceptual mapping
BoM — Bill of Materials
The Bill of Materials is evolving alongside the project.
Components are selected based on availability, experimentation needs and compatibility with the Textile Academy inventory when possible.
Materials
| Qty | Description | Estimated Price | Link | Notes |
|---|---|---|---|---|
| 1 | Microcontroller (Arduino UNO) | 29,52€ | mauser.pt | owned / lab kit |
| 1 | Arduino USB Cable (USB A–B) | 1,11€ | ptrobotics.com | owned / lab kit |
| 1 | Plant sensing electrodes + Sensor Cable | € 147,85 | thomann.pt | received |
| 1 | USB Cable for Pocket Scion | € | received | |
| 1 | Moisture Sensor | 2,46€ | ptrobotics.com | received |
| 1 | GY-MAX30102 module | 5.77€ | amazon.es | received |
| 1 | L293D Motor Driver Shield (Keyestudio) | 4,70€ | mauser.pt | owned / lab kit |
| 1 | 12V 3A Power Supply (for pumps / motor shield) | 13€ | amazon.es | received |
| 2 | Mini Vacuum Pump | 10,30€ | mauser.pt | owned / lab kit |
| 1 | Mosfet Module | 4€ | ptrobotics.com | owned / lab kit |
| 3 | Tubes | 7,71€ | amazon.es | received |
| 1 | Valve | 4,67€ | ptrobotics.com | received |
| 1 | Soft material (silicone / textile) | 35,31€ | amazon.it | received |
| 2 | PLA | 36€ | amazon.es | received |
| 1 | Acrylic sheet (PMMA) 65x65cm, 4mm | 12€ | dagol | received |
| 1 | Sound output (speaker / interface) | 15€ — | — | to be ordered |
| — | Misc. cables, solder wire, small electronics, hot glue sticks | — | mauser.pt, amazon | 21 |
| Total spent: €396,70 |
Tools / Fabrication Equipment
| Qty | Description | Estimated Price | Link | Notes |
|---|---|---|---|---|
| 1 | Laptop | — | — | owned |
| 1 | soldering iron | 78€ | amazon | received |
| 1 | power source for sold iron | 21,92 € | mauser, | received |
| 1 | 3D printer | — | Biolab | |
| 1 | Laser cutter | — | Fablab | |
| Total spent: €99,92 |
State of the Art / Concept Development
This project builds upon the initial proposal presented in the Implication and Application assignment (Week 13).
The project evolved through several conceptual stages during the research and prototyping process.
- Interactive Garden (initial idea) - Presentation Proposal The project initially explored the idea of an interactive environment where plants could communicate their internal states through responsive elements such as pneumatic flowers, light and sound.
The aim was to make invisible biological processes perceptible through sensory interaction.
Project Presentation Proposal SlideshowCarlotta Premazzi, 2025/2026 BioLab Lisbon.
- Radical Signals/Symbiotic EcoSystem (system perspective) - Mid Term Project Presentation As the research progressed, the installation began to be framed not as a simple interface but as a system composed of multiple interacting agents.
The focus shifted toward the relationships between plant signals, human physiological input and technological behaviours such as movement, light and sound.
Mid Term Project Presentation SlideshowCarlotta Premazzi, 2026 BioLab Lisbon.
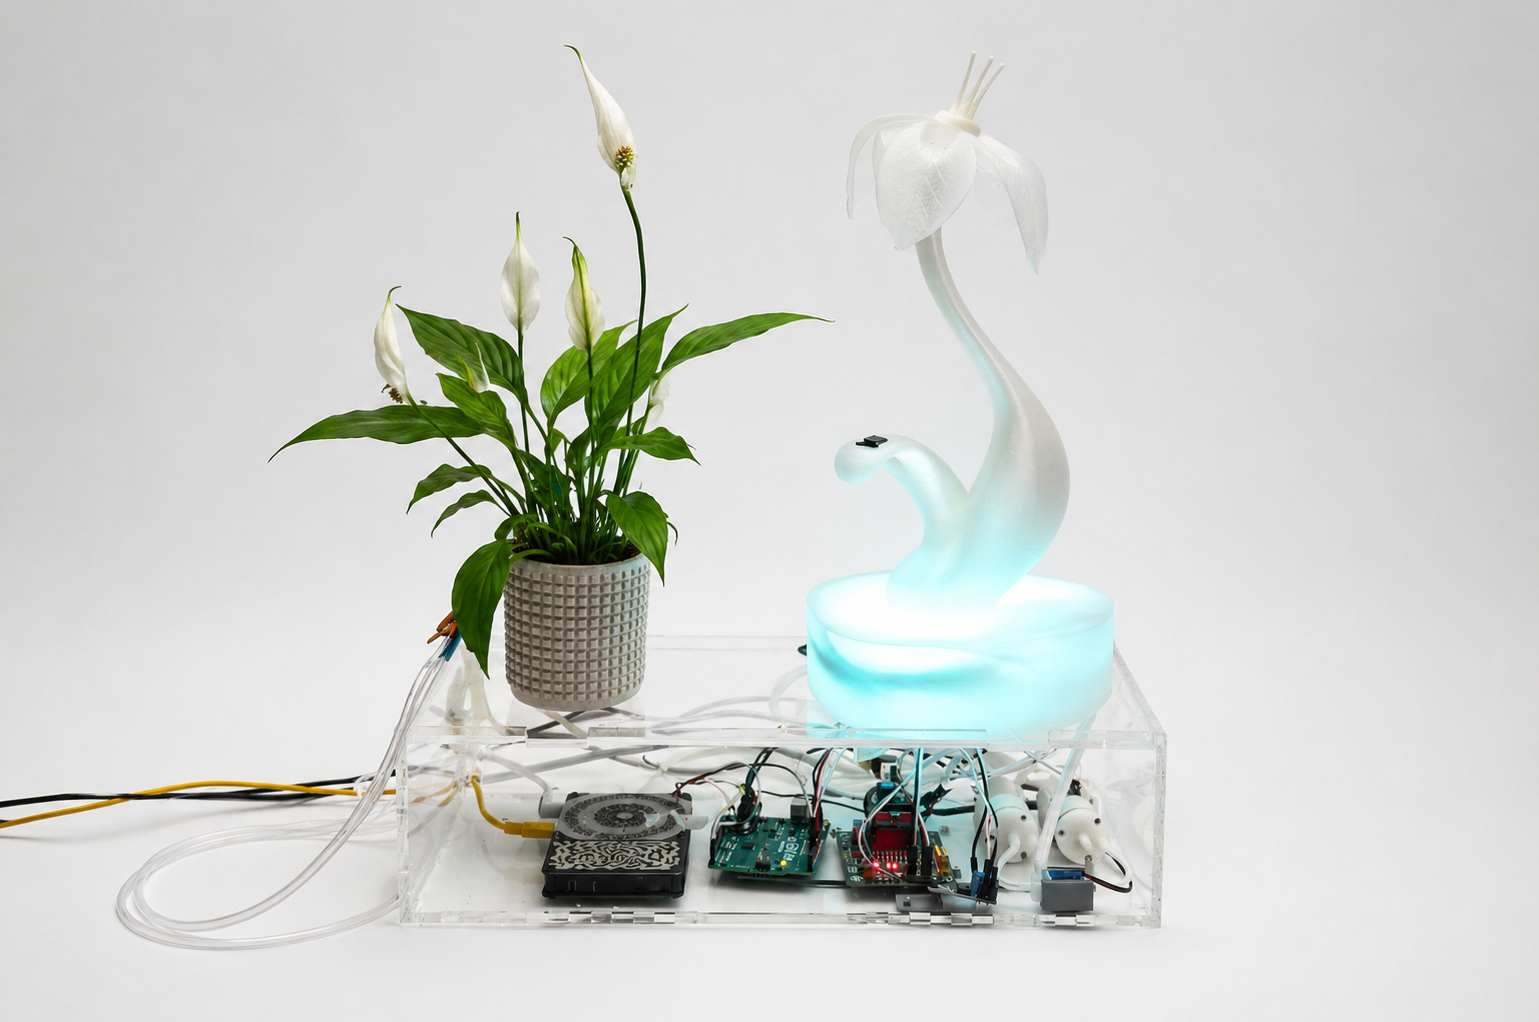
- Radical EcoSystem (current concept) - Final Presentation The project is developed into a bio-hybrid system exploring a more-than-human perspective.
Rather than using technology to monitor or control nature, the installation investigates how plant activity can influence technological behaviour.
Within this small ecosystem, plant signals shape the responses of artificial components, while human presence introduces additional subtle modulations of the system.
Final Presentation Project SlideshowCarlotta Premazzi, 2026 BioLab Lisbon.
Feedback & Mentoring notes
Feedback & Mentoring notes Project Presentation Proposal
- OSCAR — try to work on the mapping with the human and non-human data and the interaction possibilities. Select a place to work on to try it.
- ANASTASIA — there is a lot of work coming from Ars Electronica. have a look at the final project of gabriela lotaif. you can think of making the flowers with bioplastic, you can also add essence/fragrance. https://3dprintingindustry.com/news/1st-3d-printed-inflatable-flower-just-gimmick-22868/ https://starts.eu/hungryecocities/ppe/le-terre-di-zoe-betiana-pavon/ https://koyne.org/Betiana-Pavon explore the option of making the flowers yourself, with biomaterials, they are hydroscopic and you can use this property to create a semi-artificial landscape. logistics wise it will be easier
- CECILIA — Carlotta, i love the topic - the project is very ambitious! i am happy you made 3 plans - to ensure its happening. I will send you some links later, i think you may enjoy the work of Spela Petric > projects such as Pl'AI and breathing garden & also the work of …
- CLAUDIA — lovely concept and topic. nice presentation and mood! Great idea of making the interactive installation with other beings. The installation is going to be tailor made for the plants in Portugal? Check the project by the teamlab and the one in Osaka there is also bioluminiscence. what will be the most challenging part in the project?
- LOUISE — it looks like you have thought quite thorough about your project already! I am wondering how you can tackle the ecological aspect of the soft robotics to have a vertuous loop from the plant to biodegradable soft robotics. As reference, a great exhibition around plants: https://www.fondationcartier.com/en/programme/exhibition/trees
- CAROLINA — Carlotta, great research and presentation. Next time, consider limiting presentations to a maximum of 20/25 slides so you move faster and focus on the essentials. We need to visit other green locations and choose plants to work with. Good work! Congratulations!
- DIANE — Love this idea of an interactive garden installation! Depending on the size of the installation you will need to have the necessary power supply for your system, and it can be very different depending on how/if you connect this all together; you will need to test that every interaction works, but also the whole circuit, to-size
- ANNIE — Reconnecting humans with living systems, I feel exactly the same… “All my relations”… everything is connected (wind, humidity, air particles, fungi, etc.). the Brazilian forest is partly fertilized by microparticles from an old lake in Africa picked up by the wind. I think your project can highlight those invisible interrelations. congratulations — it is really fun
- PORPLA — Plant intelligence and human interaction is very intriguing, love that you bring up energy and frequency as well, really interested to see how your project evolve
Feedback & Mentoring notes Mid Term Presentation" on February
- ANASTASIA — I had difficulty following your presentation for two reasons: first, you were reading and introducing more abstract concepts; second, you fragmented the system into different aspects, so it was difficult to have an overview of the project.
- CECILIA — I think you went deeply into your methodology and the role of each element. I invite you to make this into one comprehensive map — mind map, flow, overview, whichever you like. It is important for you, and eventually the viewer of your installation needs to experience these roles and meanings. Start translating these into audio segments or a visual map. I hope to see more of your design process soon, there were some beautiful things that we saw very quickly. I know you like to explore new things, but also play to your strengths — make a mix between new skills and your background knowledge in audio/visuals.
- CLAUDIA — Keep the presentation focused and interesting, where did the nice visuals and images go? i would have put these experiments at the beginning- what you did is very interesting, deserves to be showcased properly. what if a system responded like a living body? like a plant? slowly, imperfectly, independently? humans inputs as something temporary..
- NURIA — Carlota, your project presents a beautifully poetic interaction between plants, humans, and technology. However, the complexity of the system risks diluting the core experience. I suggest prioritizing one primary biosignal at first and defining more clearly how it will be translated into the soft-robotic actuator. It would also help to clarify the final form of the installation and how the audience will interact with it. I recommend dividing the next steps into achievable tasks for the next 3 weeks. Time really flies.
- CAROLINA — Carlotta, I would like to see your final scheme. You have a lot to say, but maybe you can shorten the information and focus more on the final design. Congratulations on the big pictures!
Story telling script
The storytelling session translates the project into a narrative experience, guiding the audience through the system while explaining it technically.
Presentation Video Storyboard
| Image / Clip | Type | Num. | Duration | Text / Visual Content | Atmosphere |
|---|---|---|---|---|---|
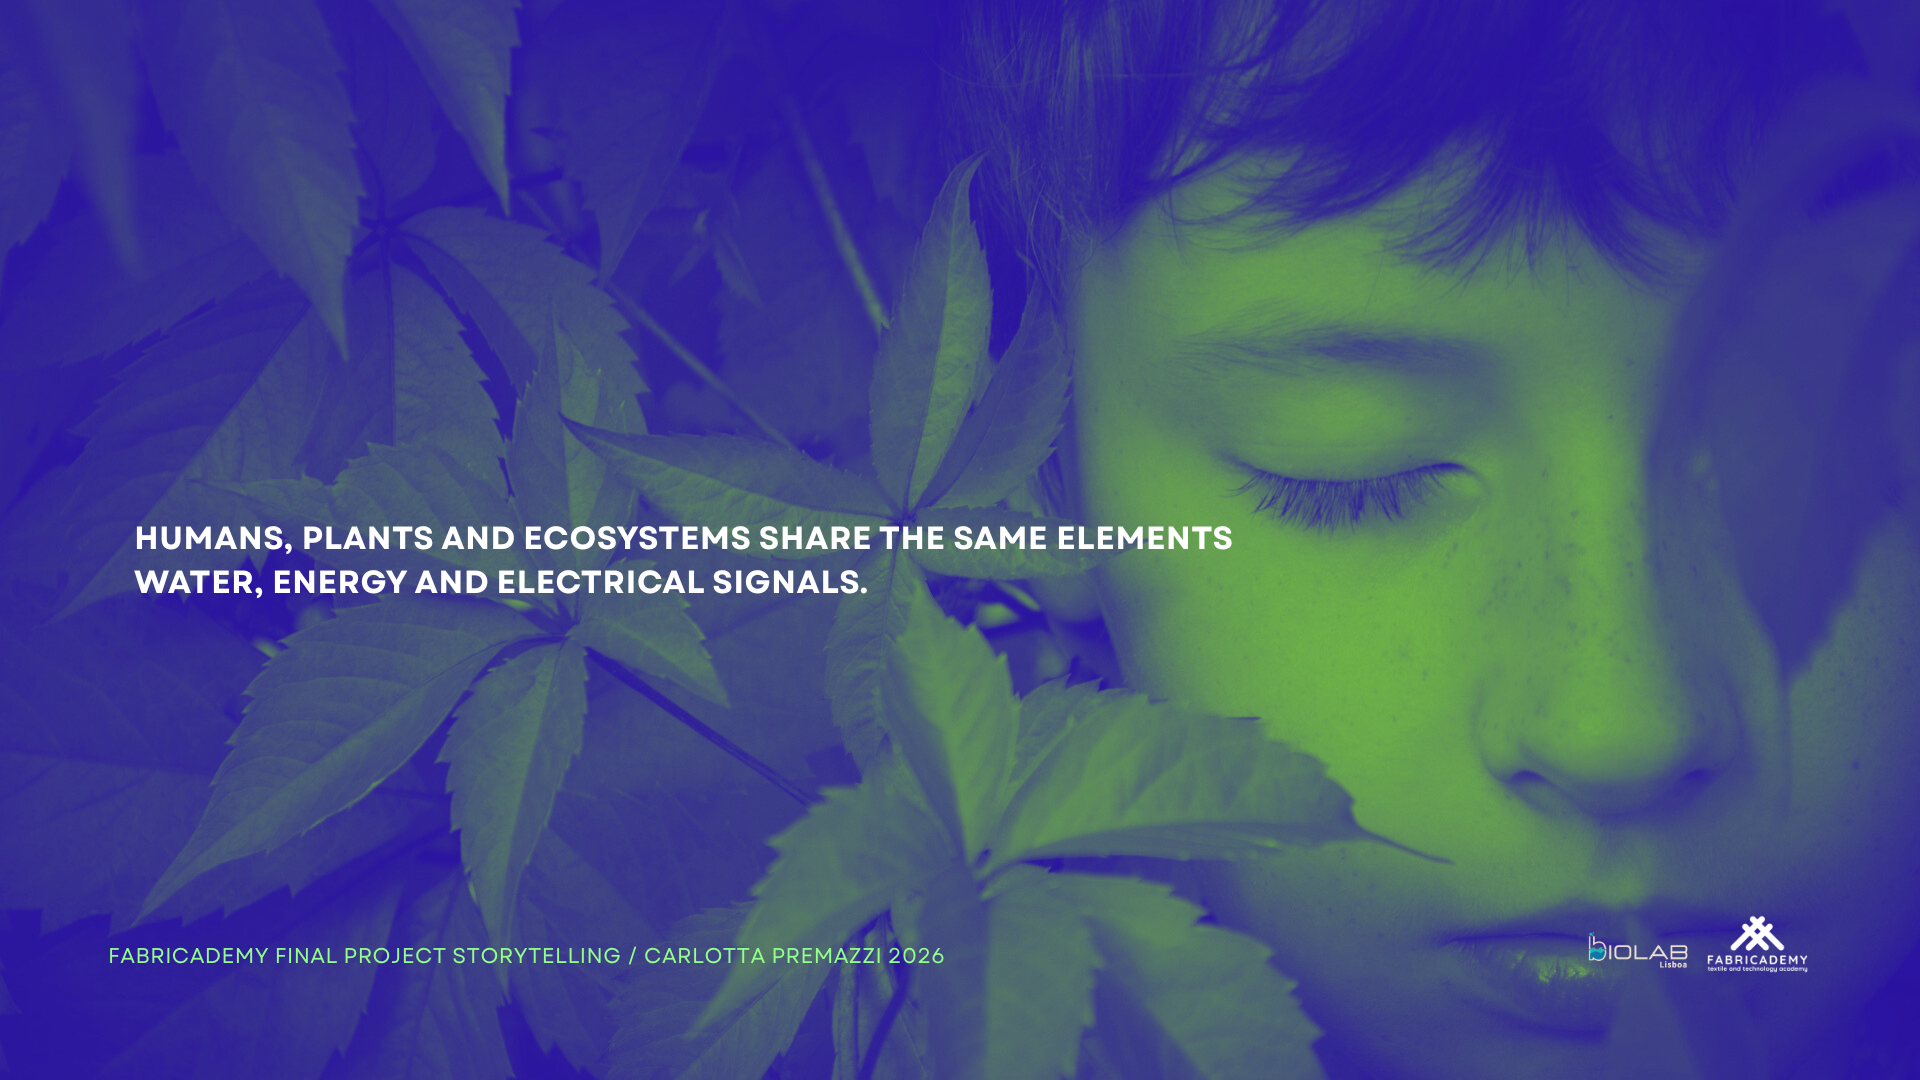 |
Scene | 1 | 8 s | Humans, plants and ecosystems share the same elements: water, energy and electrical signals. | Forest atmosphere, water movement, light through leaves |
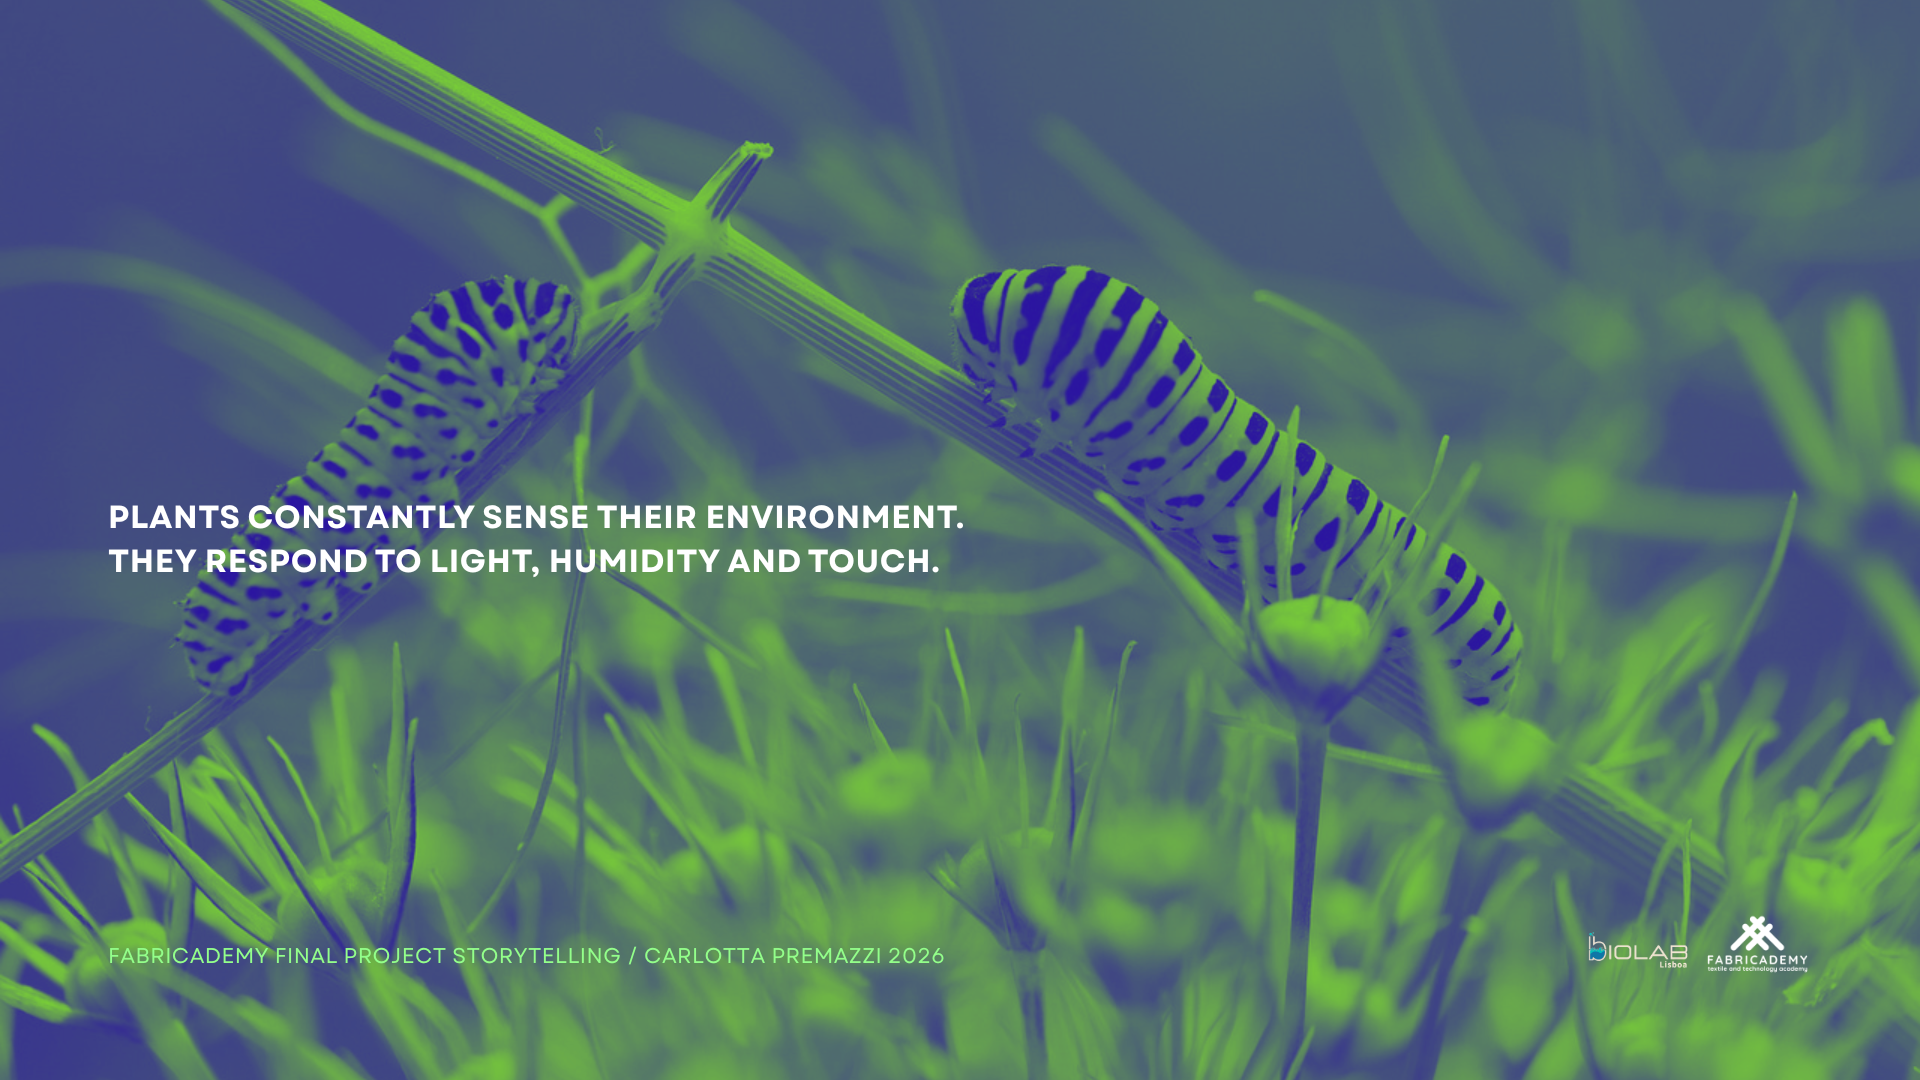 |
Scene | 2 | 8 s | Plants constantly sense their environment. They respond to light, humidity and touch. | Close-up leaves, droplets, subtle movement |
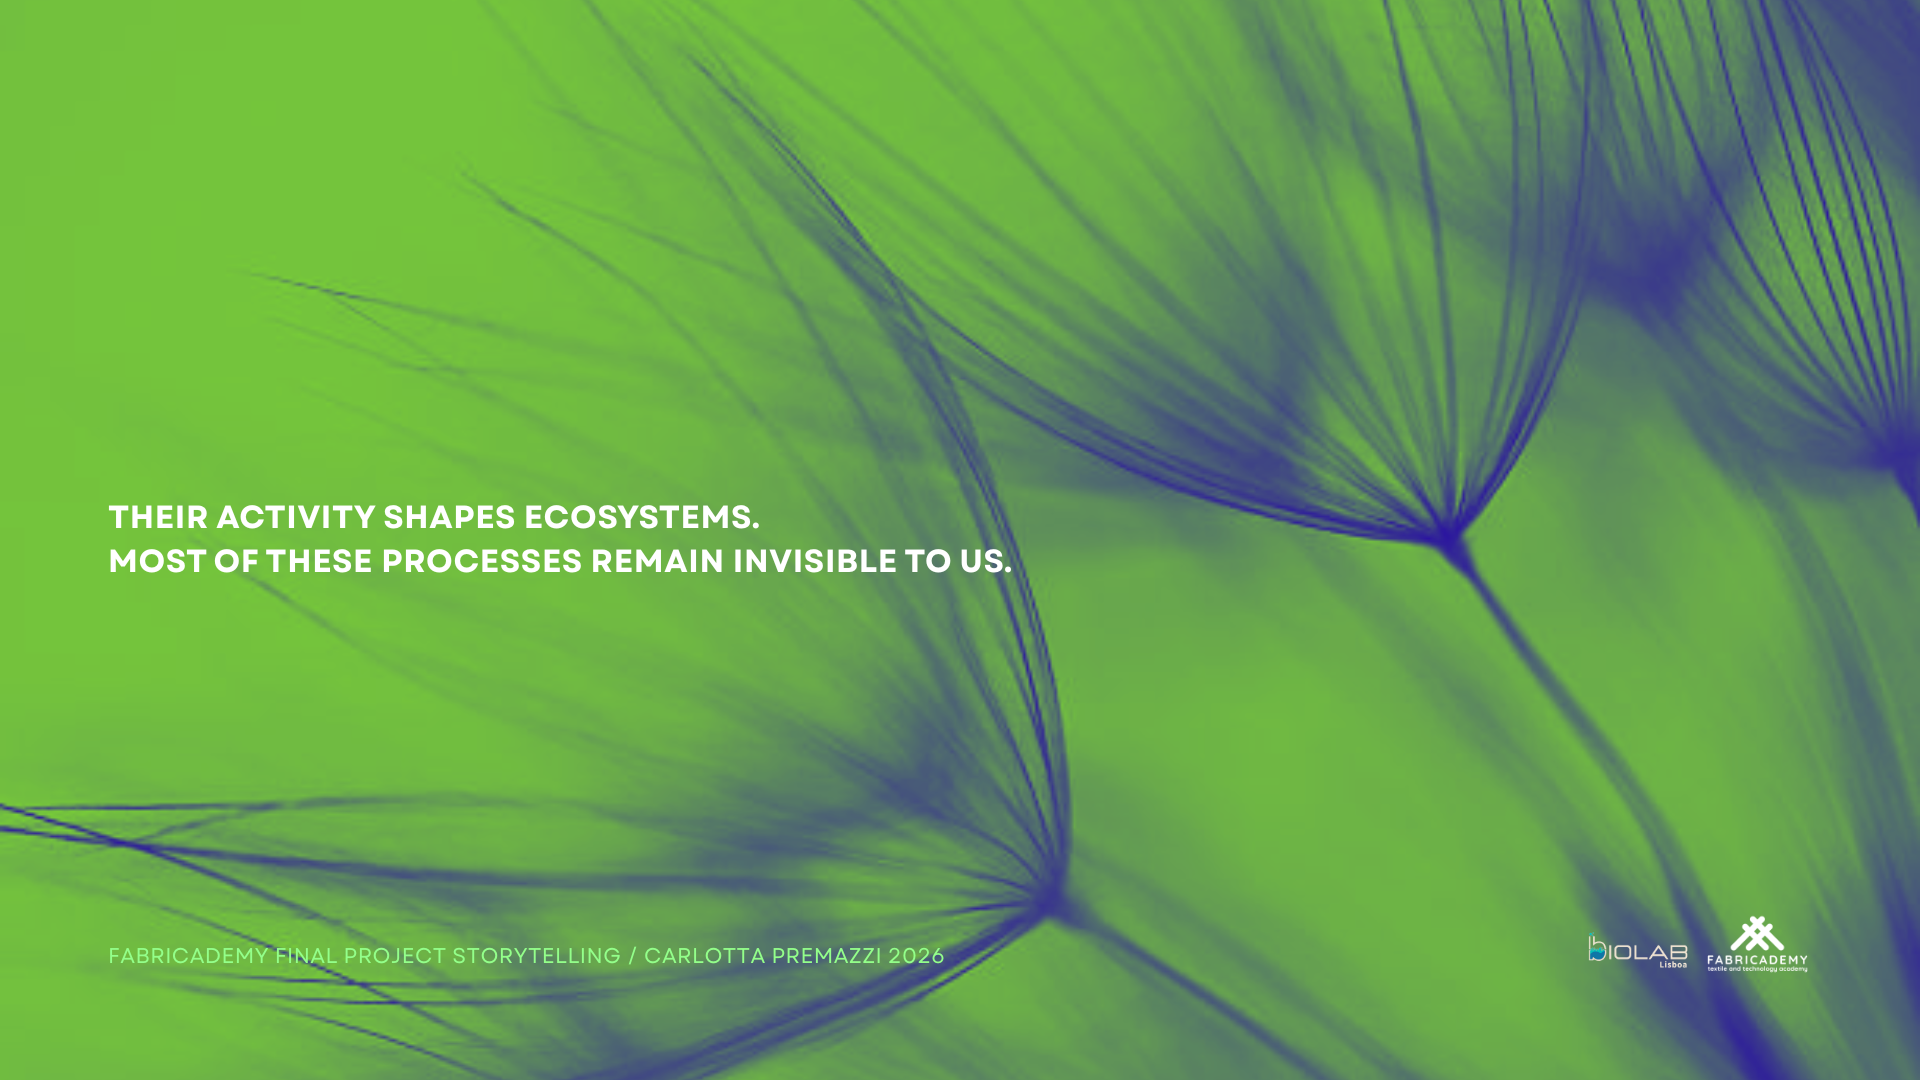 |
Scene | 3 | 7 s | Their activity shapes ecosystems. Most of these processes remain invisible to us. | Macro nature, slow organic rhythms |
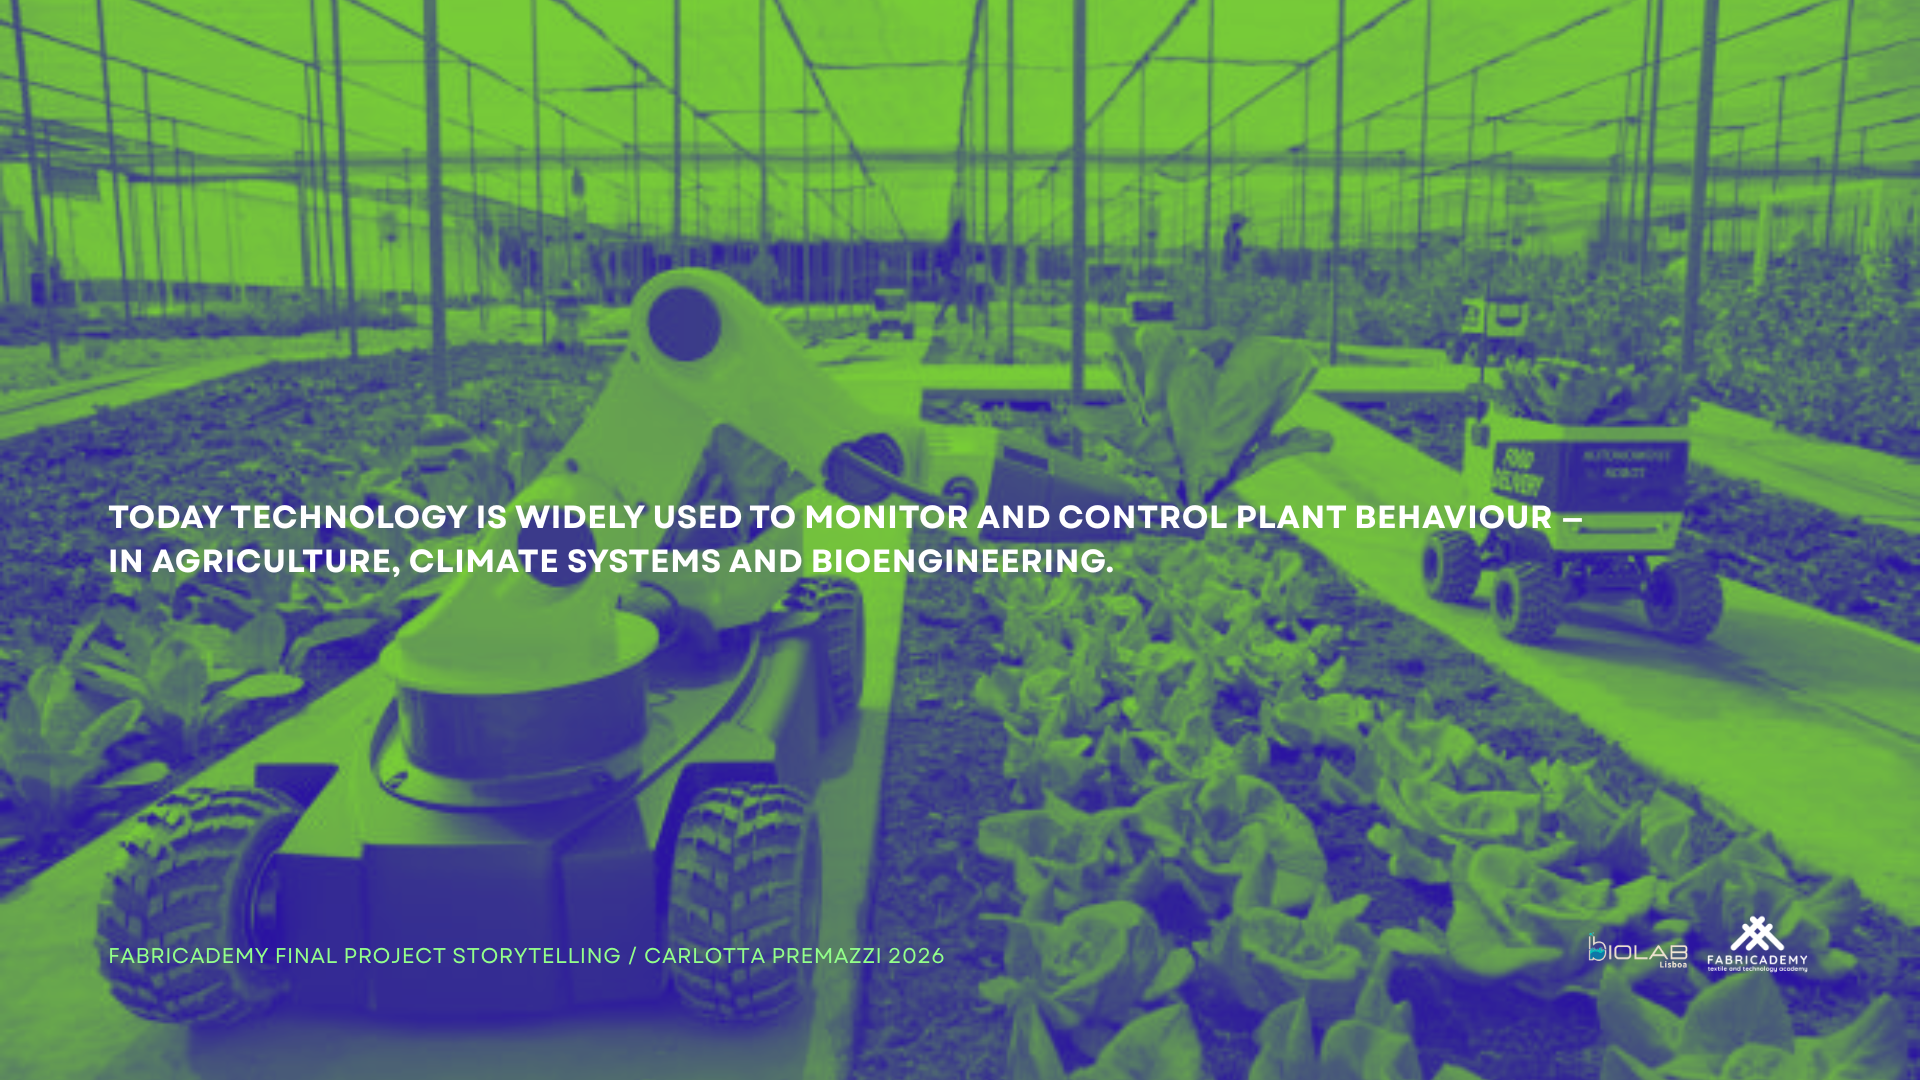 |
Scene | 4 | 8 s | Today, technology is widely used to monitor and control nature — in agriculture, climate systems and bioengineering. | Greenhouses, sensors, technological landscapes |
| Pause | 5 | 5 s | But what happens if we reverse this relationship? | Darker transition, slower rhythm | |
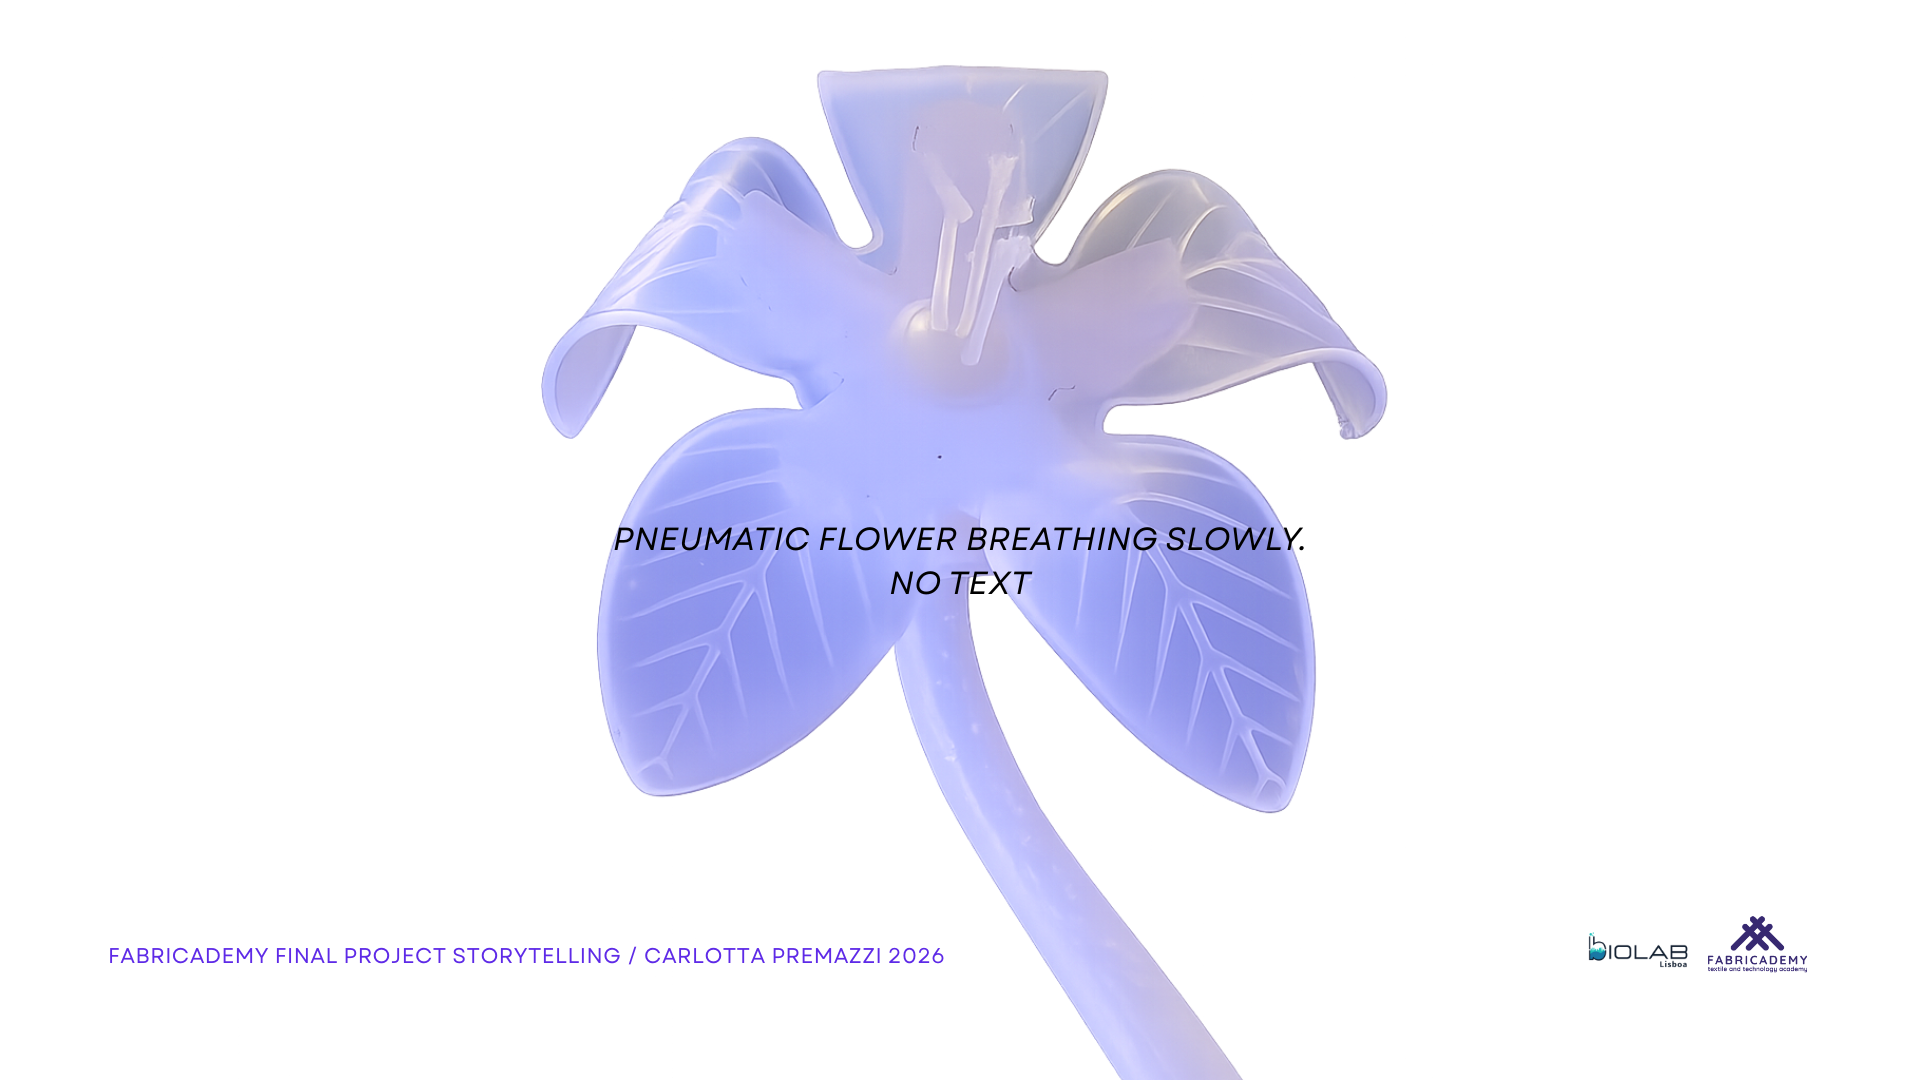 |
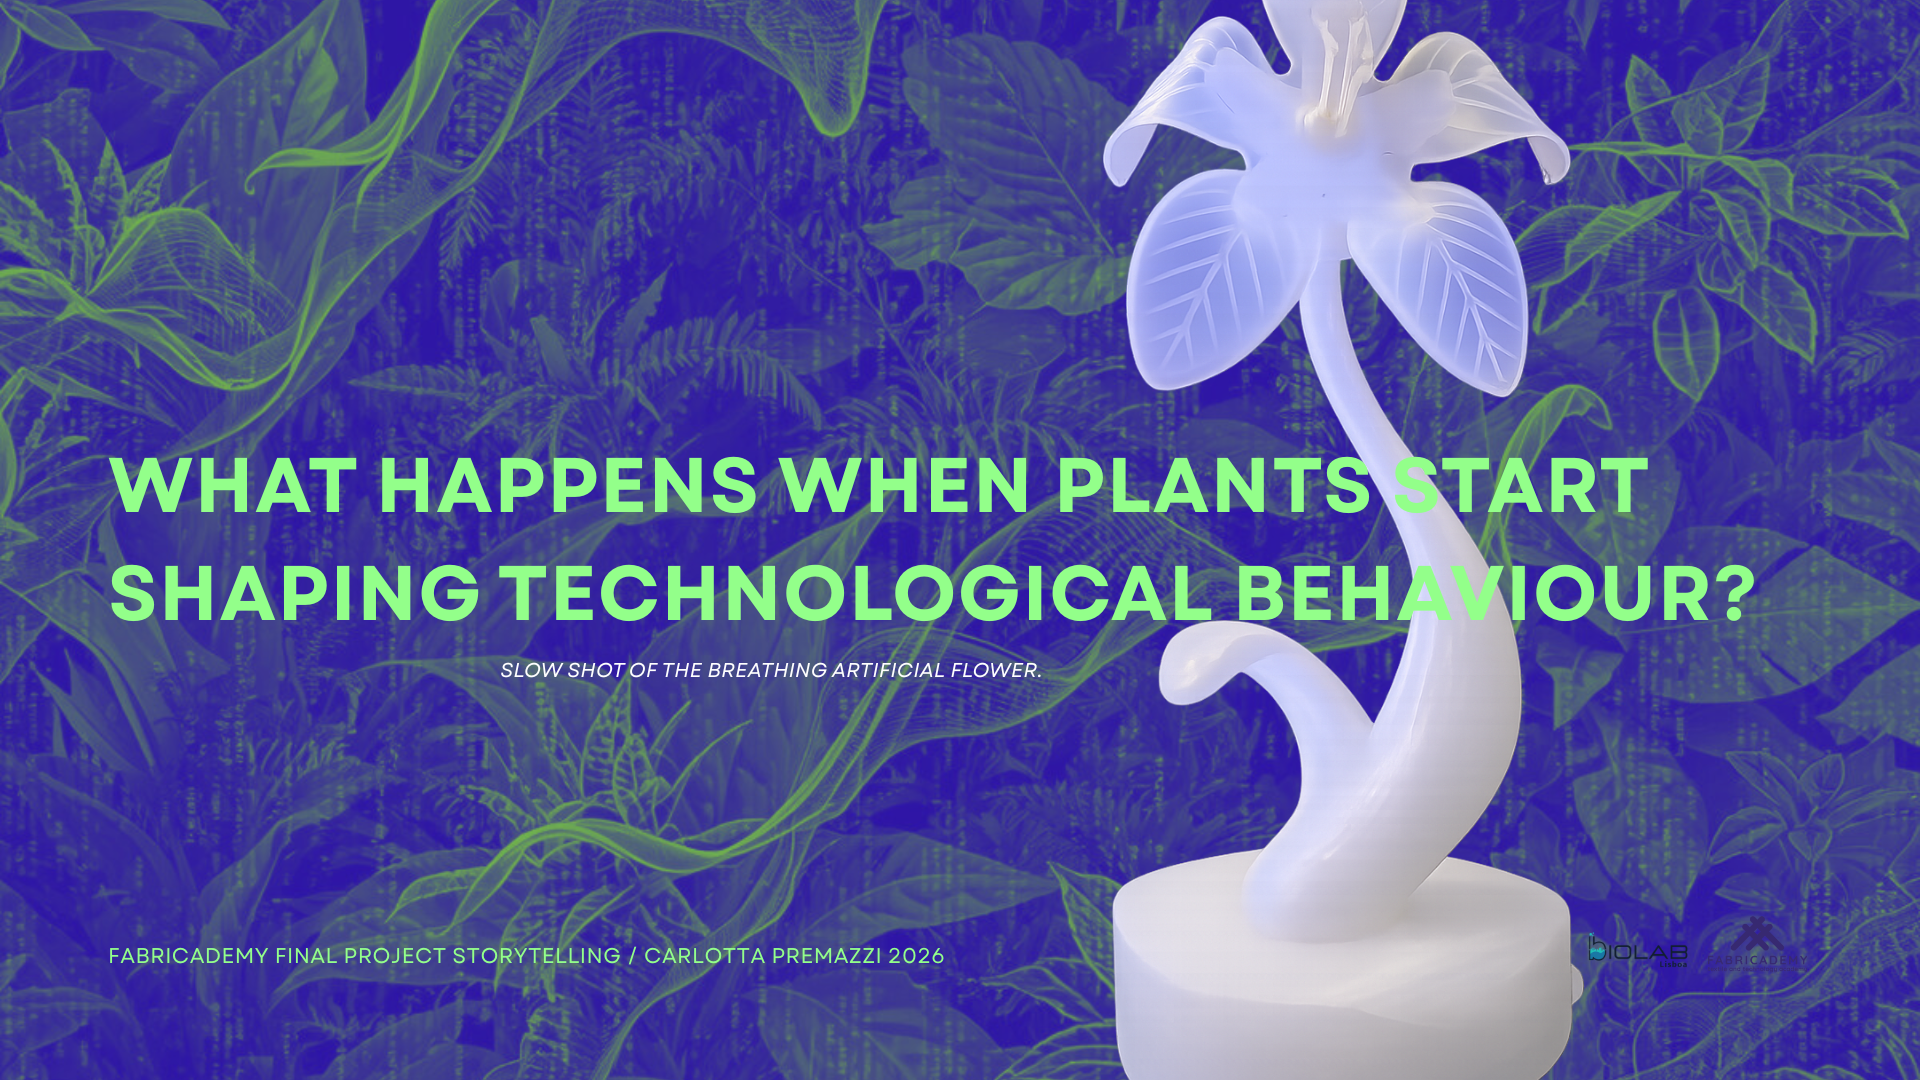
Scene | 6 | 7 s | What if plant signals could shape technological behaviour? | First reveal of installation, artificial flower breathing |
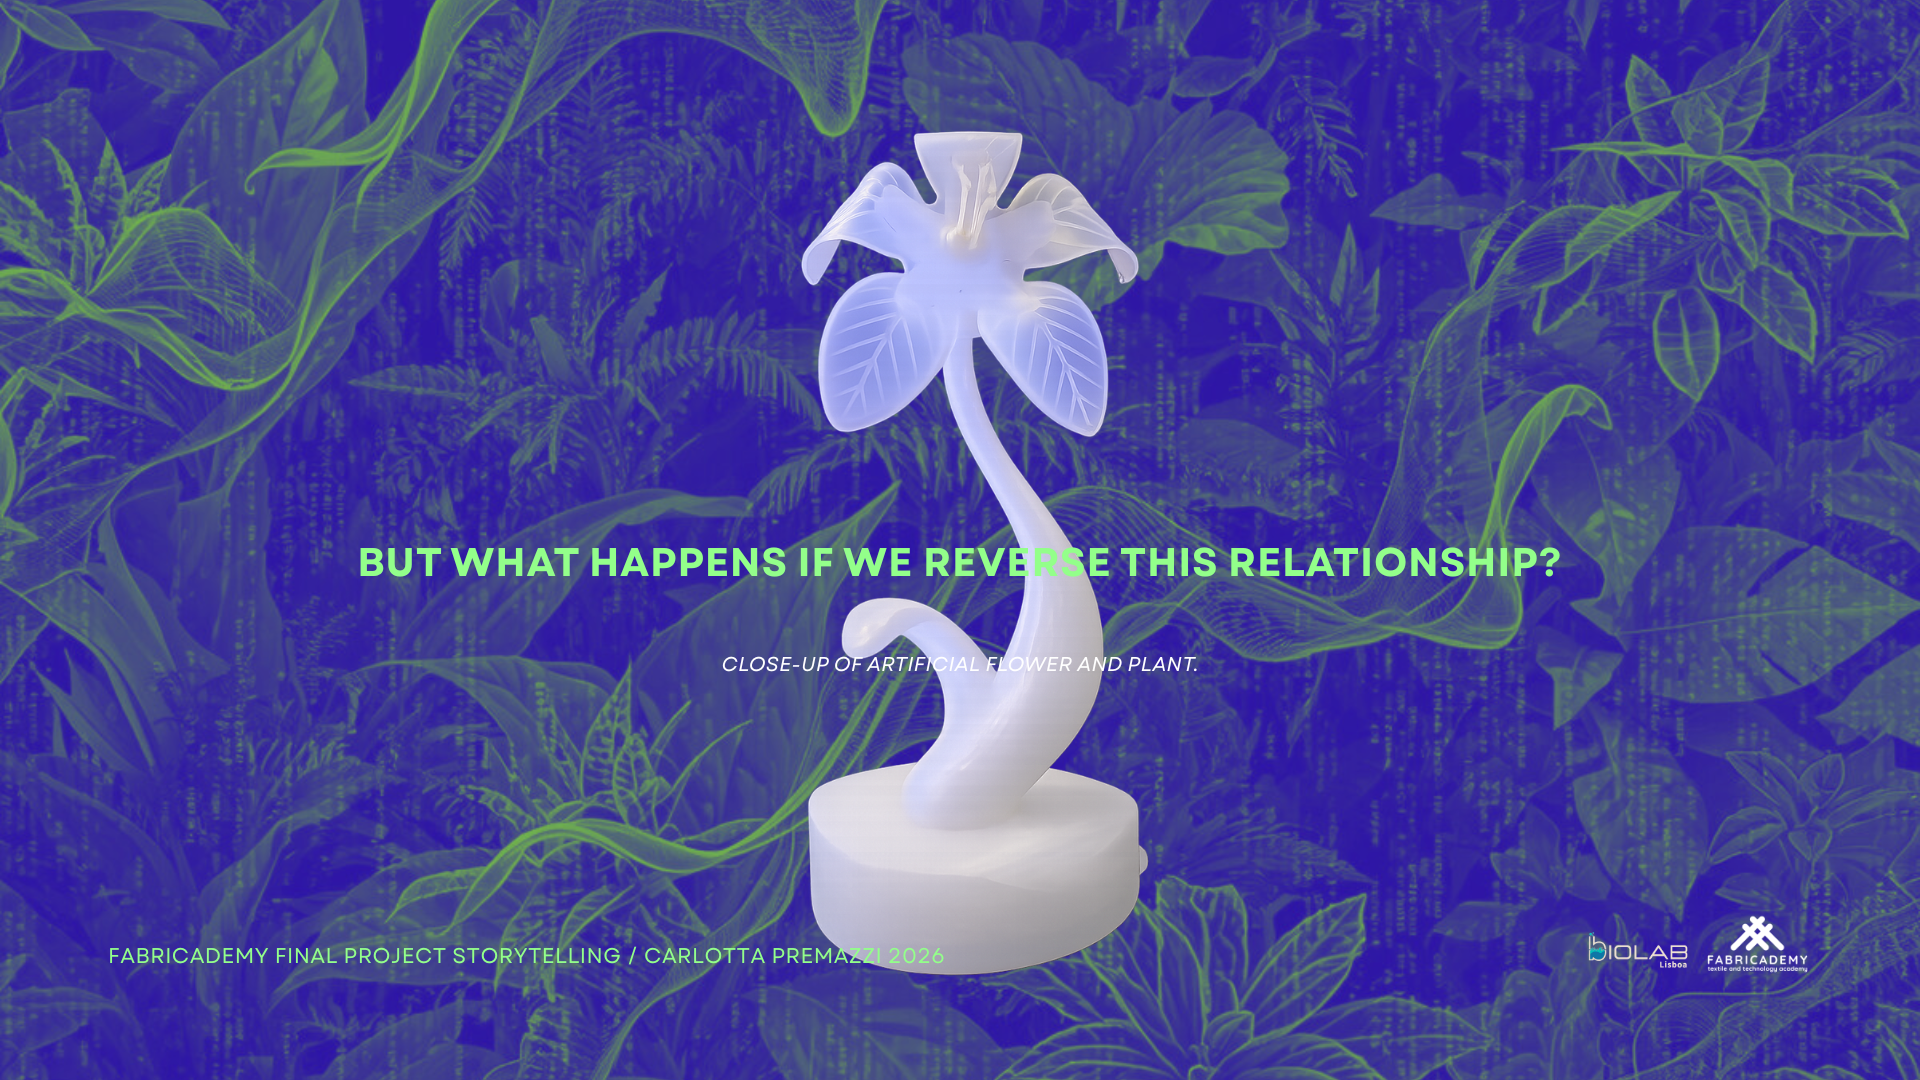 |
Scene | 7 | 6 s | Radical EcoSystem is a bio-hybrid system where plant activity influences movement, light and sound. | Close-up of plant + artificial flower |
 |
Scene | 8 | 6 s | A living plant, a human heartbeat and a soft robotic flower enter the same responsive system. | Breathing flower, LEDs, slow pulse |
 |
Scene | 9 | 6 s | In this project, plant signals influence the behaviour of a technological system. | Final prototype shot |
| Question | 10 | 5 s | What happens when plants start shaping technological behaviour? | Large text question | |
| Slide | 11 | 60–70 s | HPI Context: Human–Plant Interaction explores how plants, humans and technologies exchange signals and form shared responsive ecosystems. | HPI diagram | |
| Slide | 12 | 70–80 s | System: Radical EcoSystem combines soil moisture, plant bioelectrical activity, human heartbeat, soft robotics, LEDs and sound. | Bio-hybrid feedback loop | |
| Slide | 13 | 60 s | Behaviour: Soil moisture defines DRY / OK / WET states. Plant signals modulate the system. Heartbeat adds pulse accents. | Behavioural logic diagram | |
| Slide | 14 | 60 s | Anatomy: The artificial flower is composed of silicone petals, pneumatic chambers, textile scaffold, LED integration, tubing, calyx and base. | Anatomy diagram | |
| Slide | 15 | 60–70 s | Architecture: Inputs are processed through Pocket Scion, Arduino and computational layers, producing movement, light and sound. | System architecture | |
| Slide | 16 | 60 s | Process: The project developed through material tests, mould iterations, silicone casting, electronics and pneumatic integration. | Prototype photos / fabrication | |
| Slide | 17 | 35–45 s | Demo: The system in action: plant condition and human heartbeat influence the artificial body. | Demo video | |
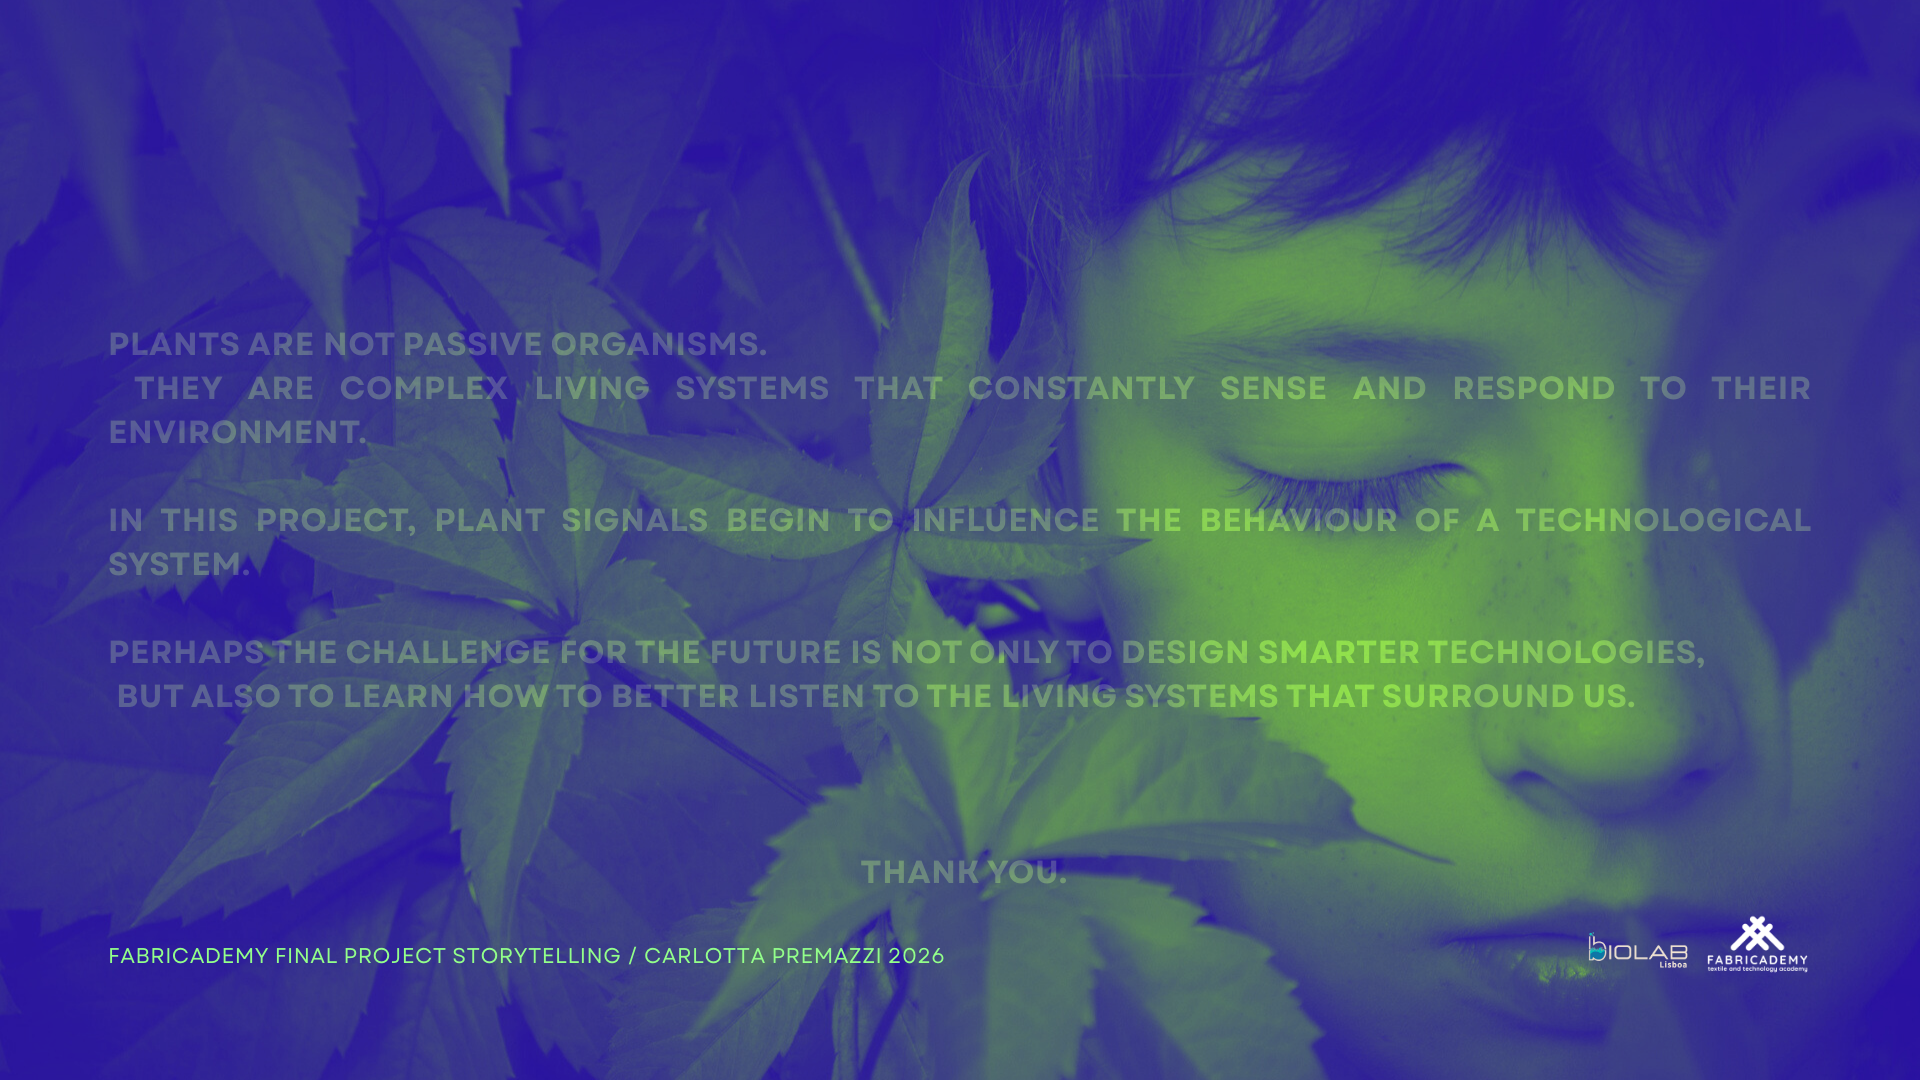 |
Closing | 18 | 25–30 s | Perhaps the challenge for the future is not only to design smarter technologies, but to learn how to listen to the living systems that surround us. Thank you. | Nature / final calm image |
Fabrication Files and Documentation
This section collects the files necessary to reproduce the main components of Radical EcoSystem.
The files are organized by production area: system documentation, digital fabrication, code, presentations and complete documentation.
| Category | File | Format | Download |
|---|---|---|---|
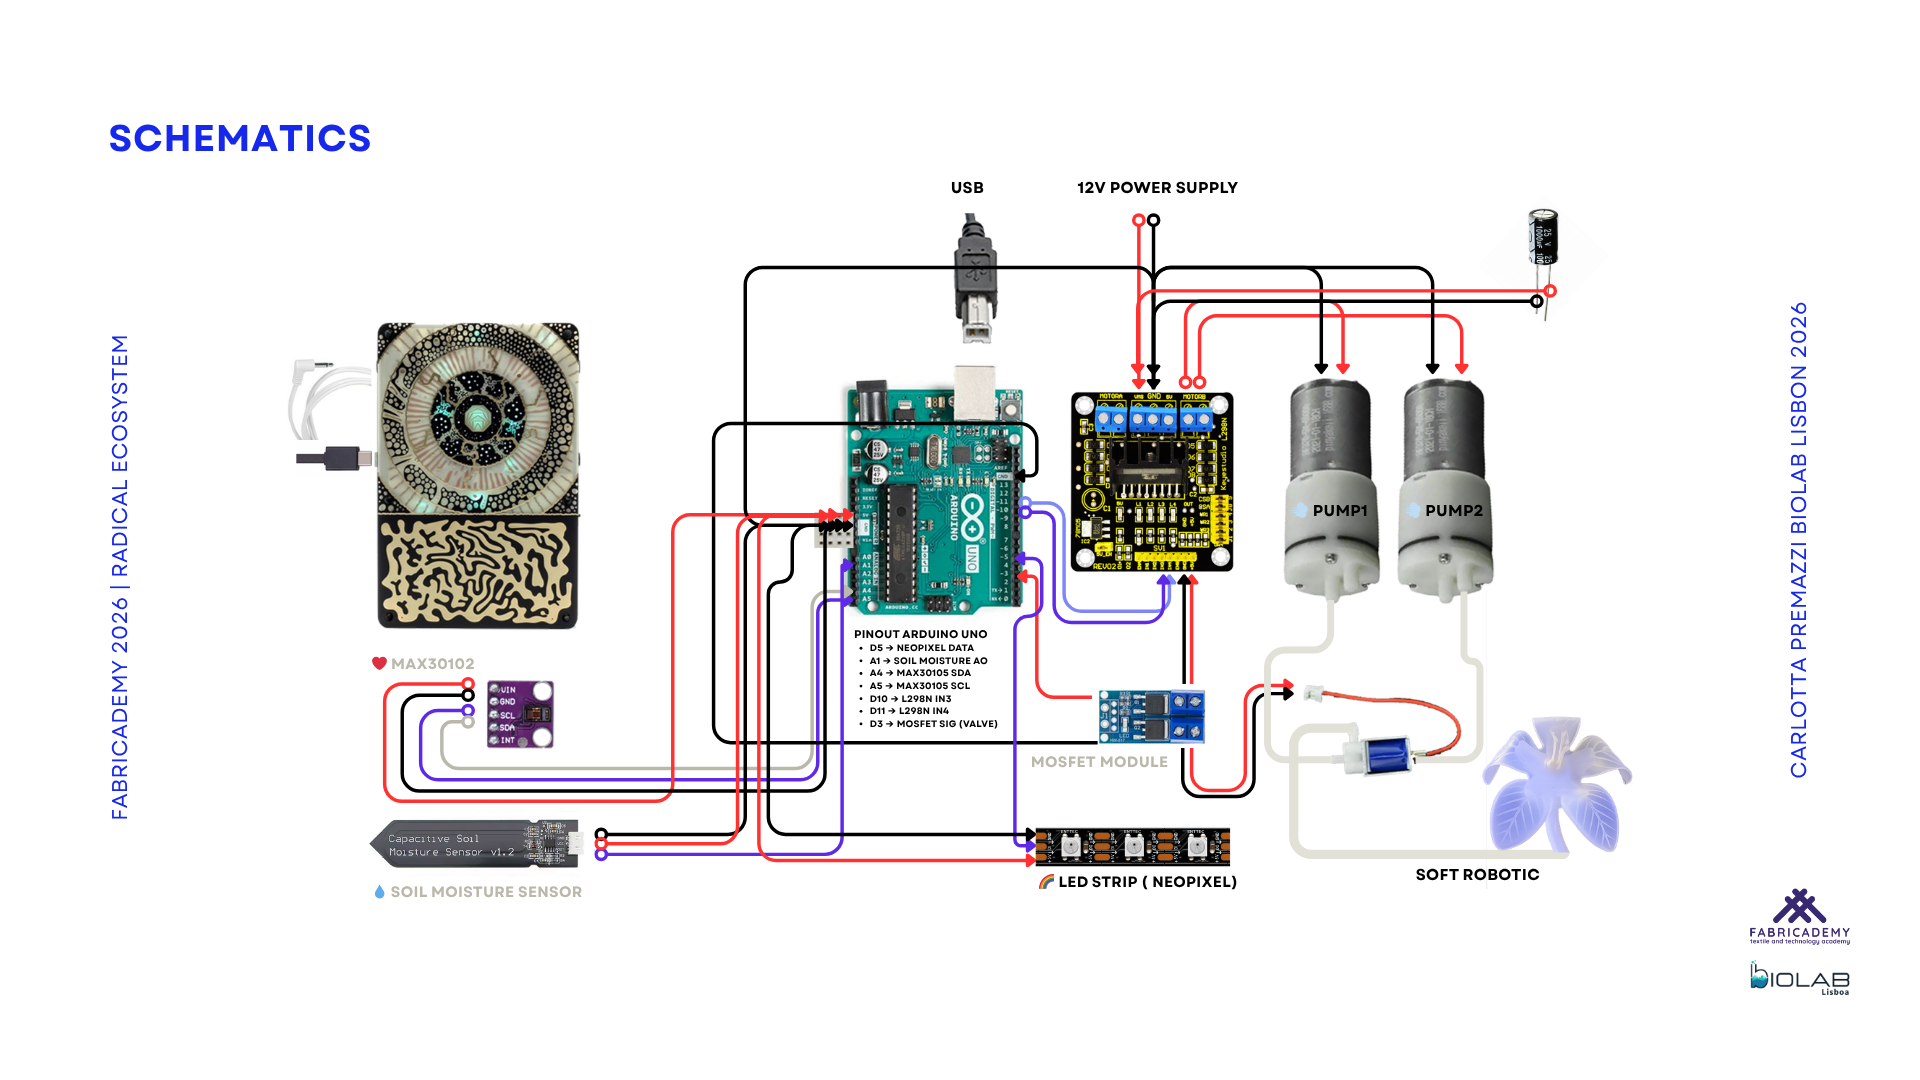
| System Documentation | System Architecture Diagram | TXT | Download |
| System Documentation | Electronic Schematic | PNG | Download |
| System Documentation | README Fabrication Notes | TXT | Download |
| Digital Fabrication | Laser-cut Control Box | Download | |
| Digital Fabrication | Final STL Flower Mold | ZIP / STL | Download |
| Digital Fabrication | Final STL Calyx | ZIP / STL | Download |
| Digital Fabrication | Final STL Pistil Flower | STL | Download |
| Code | Arduino Code Example | INO | Download |
| Workflow | Fabrication Workflow | Download | |
| Workflow | Mould Design Workflow | Download | |
| Project Presentation | Project Presentation Proposal | Download | |
| Project Presentation | Mid Term Project Presentation | Download | |
| Project Presentation | Final Project Presentation | Download | |
| Complete Documentation | Radical EcoSystem Thesis | Download |
Code example
Custom code for sensing, mapping and interaction logic will be documented and added during the development phase.
CODE – RadicalEcoSystem Moisture Threshold Patch
/*
  Radical EcoSystem — Moisture Threshold Patch

  Author: Carlotta Premazzi
  Program: Fabricademy 2025/2026
  System Type: Bio-Hybrid Installation

  Description:
  This patch reads soil moisture values from an analog sensor and classifies them
  into three environmental states: DRY, OK, and WET.

  Two thresholds define the system:
  - dryThreshold → above this value, the system is considered DRY
  - wetThreshold → below this value, the system is considered WET
  - values in between define the OK state

  The current state and raw sensor value are printed to the Serial Monitor,
  allowing calibration and real-time observation of environmental conditions.

  This simple logic forms the base layer for behaviour in the installation.
*/

const int moisturePin = A1;

int moistureValue = 0;

// Thresholds to be calibrated
int dryThreshold = 600;
int wetThreshold = 300;

void setup() {
  Serial.begin(57600);
}

void loop() {
  moistureValue = analogRead(moisturePin);

  if (moistureValue > dryThreshold) {
    Serial.print("State: DRY | Value: ");
    Serial.println(moistureValue);
  }
  else if (moistureValue < wetThreshold) {
    Serial.print("State: WET | Value: ");
    Serial.println(moistureValue);
  }
  else {
    Serial.print("State: OK | Value: ");
    Serial.println(moistureValue);
  }

  delay(500);
}
Fabrication Workflow / Tutorials and How-Tos
The following tutorials document the fabrication process of the system, from structural components to soft robotics and electronics integration.
Each tutorial is included as a collapsible how-to section to keep the documentation readable while making the workflow reproducible.
Mould Design Workflow Tutorial

Fusion 360 workflow used to design the pneumatic mould, from the initial geometry to the final interlocking casting system.
Tools: computer, Fusion 360 modelling workspace
Material: digital 3D model for mould fabrication
Software: Fusion 360
Process: 3D modelling, pneumatic chamber design, airflow development and mould segmentation
Output: 3D printable mould parts for silicone casting
Fabrication steps — Mould Design Workflow
- Define the overall dimensions of the pneumatic flower actuator.
- Model the initial flower geometry and chamber layout in Fusion 360.
- Design the internal pneumatic chambers that will create the inflation behaviour.
- Develop the airflow paths and air distribution areas.
- Adjust the chamber geometry to move from a more mechanical shape toward a softer and more organic deformation.
- Divide the mould into multiple parts to support casting and demoulding.
- Add alignment and interlocking features so the mould parts can stay in place during casting.
- Check the final mould structure before exporting.
- Export the mould parts as files for 3D printing.
- Use the printed mould as the fabrication tool for the silicone actuator.
3D Print Fabrication Tutorial
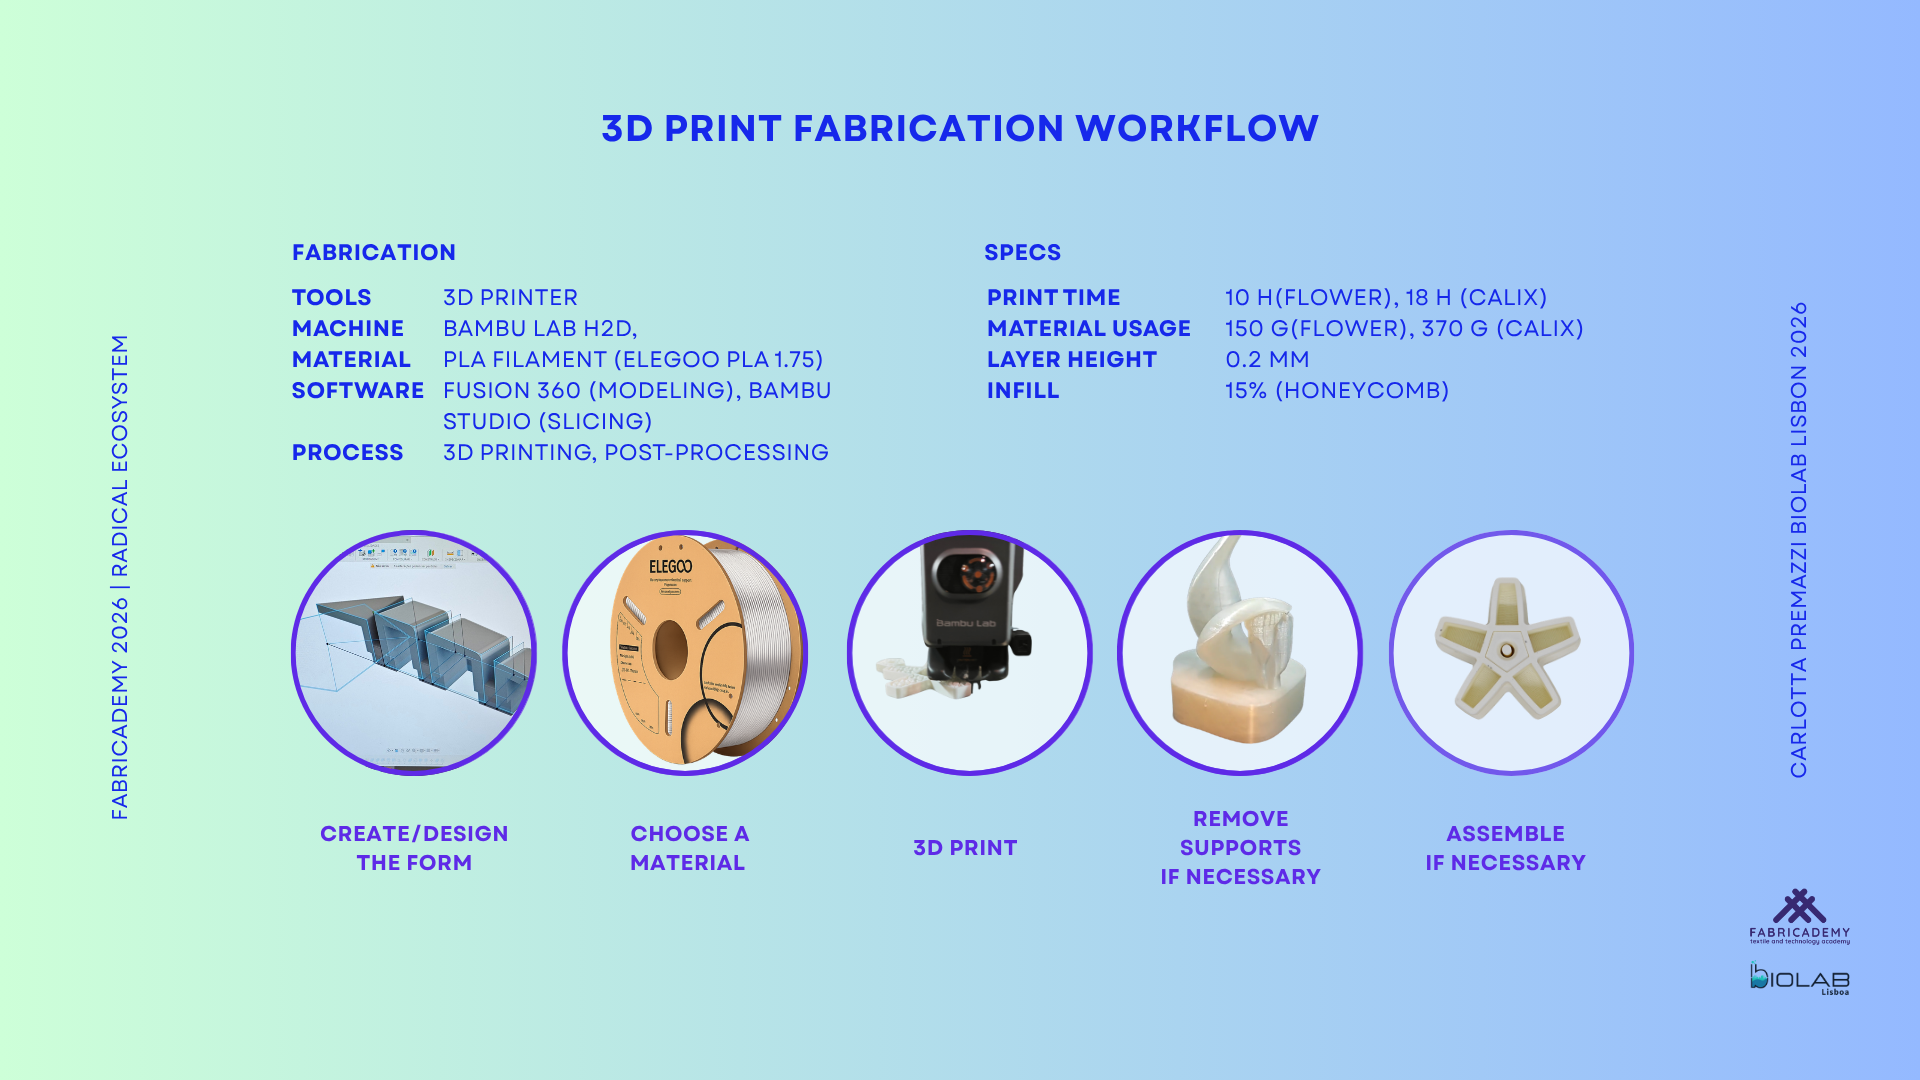
3D printing workflow used to fabricate the rigid components and mould parts for the soft robotic flower.
Tools: 3D printer, Bambu Lab H2D, BioLab Lisboa
Material: PLA filament, ELEGOO PLA 1.75 mm
Software: Fusion 360 for modelling, Bambu Studio for slicing
Process: 3D printing and post-processing
Print time: approximately 18 h
Material usage: approximately 100 g for multiple parts
Output: 3D printed mould parts and rigid flower components
Fabrication steps — 3D Print Fabrication
- Export the final 3D models from Fusion 360.
- Import the files into Bambu Studio.
- Check the scale, orientation and position of each part.
- Prepare the slicing settings according to the PLA material.
- Slice the files and verify the estimated print time and material usage.
- Print the mould parts and rigid flower components using the Bambu Lab H2D.
- Remove the printed parts from the build plate.
- Clean the parts and remove support material if present.
- Test the fit between interlocking mould parts.
- Use the printed mould parts for silicone casting and the rigid PLA parts for final assembly.
Silicone Pneumatic Actuator Fabrication Tutorial
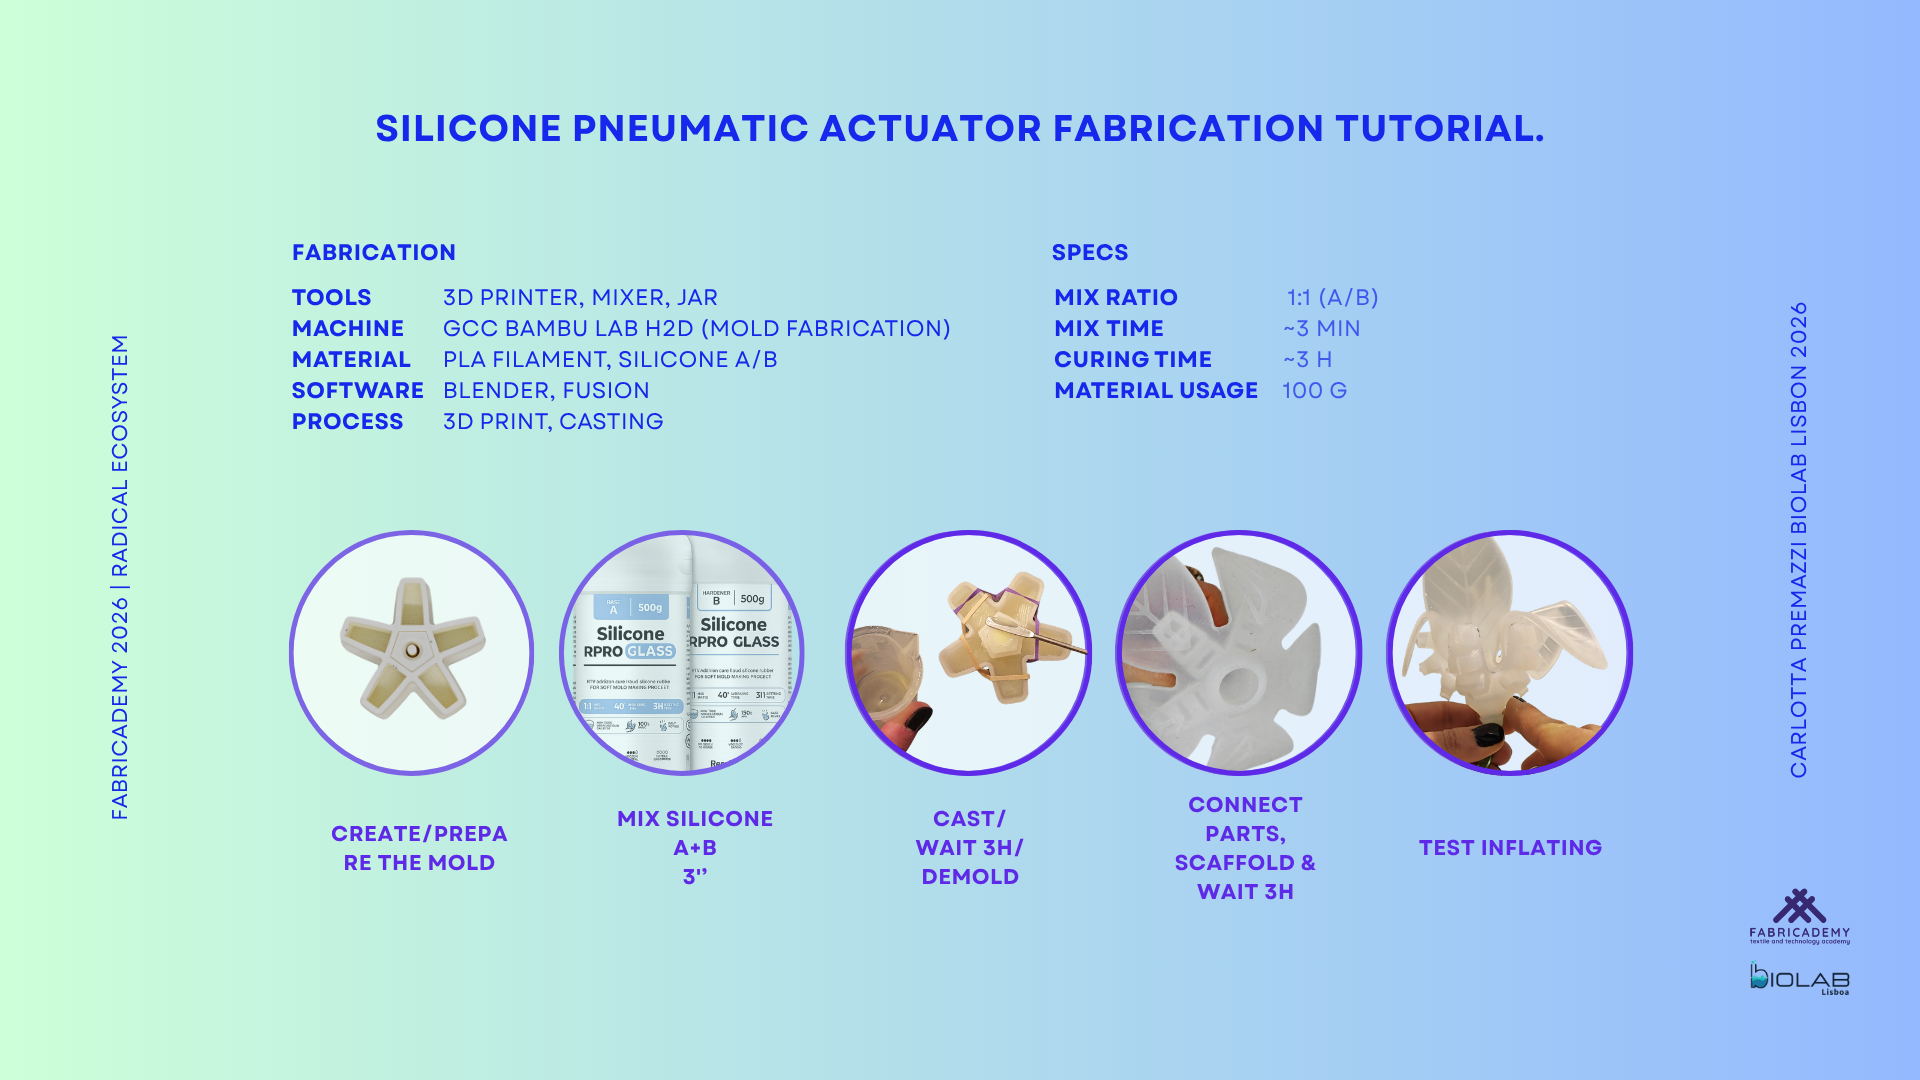
Silicone casting process used to fabricate the soft pneumatic actuator, combining 3D printed moulds and flexible materials.
Tools: 3D printed mould, mixer, containers
Material: silicone A/B, fabric scaffold
Software: Fusion 360 for mould design
Process: mould preparation, silicone casting, textile reinforcement and assembly
Mix ratio: 1:1 A/B
Mix time: approximately 3 min
Curing time: approximately 3 h
Material usage: approximately 20 g
Output: transparent silicone pneumatic actuator with textile reinforcement
Fabrication steps — Silicone Pneumatic Actuator
- Prepare the 3D printed mould parts.
- Assemble the mould and check that the parts are aligned.
- Mix silicone part A and part B in a 1:1 ratio.
- Stir the silicone mixture for approximately 3 minutes.
- Pour the first silicone layer into the mould to form the pneumatic chambers.
- Check that the silicone reaches the chamber areas and air paths.
- Place the fabric scaffold as a reinforcement layer.
- Cast the second silicone layer to seal the actuator.
- Keep the pneumatic tube connection area open and functional.
- Let the silicone cure for approximately 3 hours.
- Carefully demould the actuator.
- Check the air chambers, junction areas and pneumatic channel openings.
- Connect the pneumatic tube and prepare the actuator for air testing.
Soft Robotics Silicone Casting Tutorial | Pneumatic Flower Actuator by Carlotta Premazzi
Soft Robotics Silicone Casting Tutorial | Pneumatic Flower Actuator by Carlotta Premazzi
Electronic Assembly Tutorial
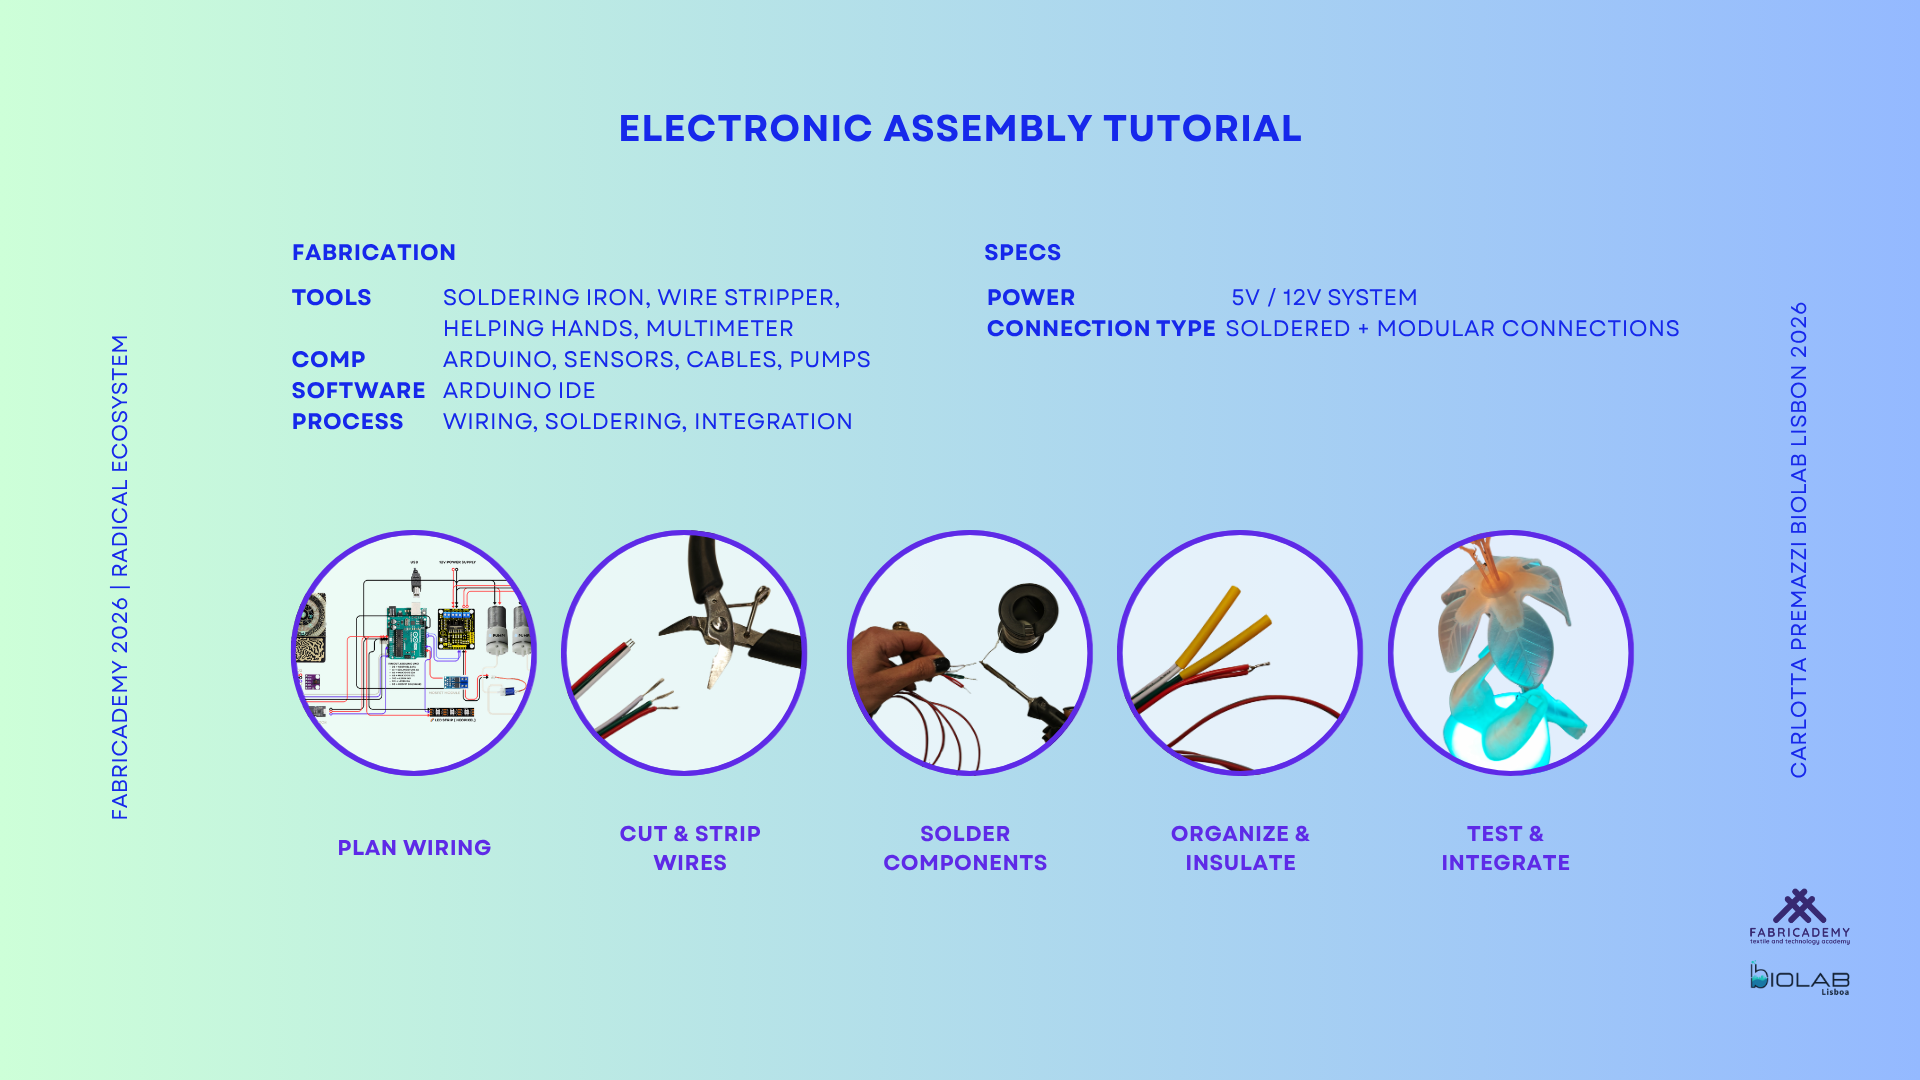
Electronic system assembly including wiring, soldering and integration of sensors, actuators and control unit.
Tools: soldering iron, wire stripper, helping hands, multimeter
Components: Arduino, sensors, cables, pumps
Power: 5V / 12V system
Connection type: soldered and modular connections
Output: electronic control system for sensing, mapping and actuator behaviour
Fabrication steps — Electronic Assembly
- Prepare the Arduino and the electronic components.
- Organize the sensor cables, pump cables and LED connections.
- Connect the soil moisture sensor to the control system.
- Connect the heartbeat sensor to the system.
- Connect the pumps and pneumatic actuation components.
- Connect the LED system.
- Separate the 5V logic/sensor line from the 12V power line used for actuation.
- Check the common ground connection between the different parts of the system.
- Use the multimeter to verify the main power connections.
- Test the sensors before connecting the full actuator system.
- Upload the Arduino code example.
- Read the sensor values through serial communication.
- Calibrate the moisture thresholds for DRY, OK and WET states.
- Test the complete electronic behaviour with the pneumatic flower.
Laser-Cut Control Box Tutorial

Laser-cut acrylic enclosure fabricated at FabLab Lisbon using a GCC LaserPro Spirit LS laser cutter.
Tools: GCC LaserPro Spirit LS laser cutter, FabLab Lisbon
Material: 4 mm transparent acrylic sheet
Kerf: 0.15 mm
Joint type: finger joints / press-fit
Output: transparent acrylic control box for electronics and cable organization
Fabrication steps — Laser-Cut Control Box
- Prepare the 2D file for the control box panels.
- Design the panels with finger joints for press-fit assembly.
- Apply 0.15 mm kerf compensation.
- Add the necessary openings for cables, tubes and ventilation.
- Export the file for laser cutting.
- Cut the parts from 4 mm transparent acrylic.
- Remove the laser-cut parts from the acrylic sheet.
- Test the fit between the finger joints.
- Assemble the acrylic box.
- Place the electronic components inside the control box.
- Route cables and tubes through the dedicated openings.
- Use the transparent enclosure to keep the electronics visible and accessible during testing.
🔗 Research skills-Student checklist
- GANTT : sketch of a project planning and first Gantt chart
- BoM: Bill of Materials (BOM) necessary to reproduce the project, including costs and links were possible
- Showcase: Collection of evolving and work in progress * slide shows, ppts or presentations about the project
- Story board: draft and sketches of a story telling script for video production
- Fabrication files: all necessary files for project production are collected here
-
Tutorials: Collection of tutorials, how-tos generated during the research process.
-
[ ] Create a GANTT chart (planning calendar)
- [ ] List and (if possible) budget of all foreseen materials and machines required
- [ ] Upload all sets of slides produced during the various presentations
- [ ] Upload story board drawings
- [ ] Upload all necessary files
- [ ] Update how-tos generated