Digital bodies
In this unit, we explore digital design and fabrication tools that complement hand tools to design, represent, fabricate and modify the human figure as a creative canvas. We go through the fabrication process from physical to digital, and back to physical.
1. References, research & inspiration
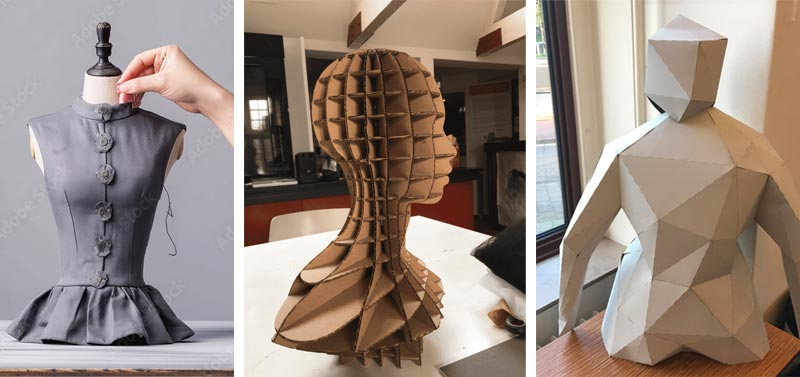
The horrifying photo below, top right, of a mountain of “dead” Mannakins highlights the problem of waste. I am inspired by the work of Hans Boodt, who addresses this by creating mannequins to order. The abstracted sculptures photo, top left, as well as his “performance” series, make me think of the potential utility of stylized mannequins as a base for prototyping slow improv dance solutions.

Working with a half size mannequin is useful for rapid prototyping ideas (Adobe stock). I would like to scan my body and fabricate it at half scale for this purpose. I love the look of cardboard and artistic waffle patterns such as the one done by Stephanie Johnson (photo 2), and appreciate the way Loes Bogers portrays and elevates more realistic body shapes (photo 3).
Assignment
- Research artists or projects that work with the human body
- Document the use of 3D scanner and softwares to acquire a 3D model
- Document the process of repairing and/or manipulating a 3D mesh and slicing it
- Create a ready to cut file for laser cutting, learn how to use the laser cutter and document the workflow and upload your 3D and 2D files
- Learn about the fab lab processes, booking system, usage, machine demos, tools and safety rules
- Build and/or assemble a mannequin or body parts
- Extra credit: Create a stop motion / step-by-step assembling process
2. Tools and tutorials
- Tools used for the process of creating a digital body:
- PolyCam - 3D scanning mobile phone app
- Blender
- Slicer for Fusion 360
- Adobe Illustrator - to clean up the vector file
- xTool Studio - to control the xTool P3 laser cutter
- Additional tools for an alternative AI ideation > design > fabrication workflow
Tutorial: How to cut a model in Blender
These are the basic steps, and some details are supported with screenshots below:
- Install 2 add-ons: 3d print toolbox (helps prep model for print) and Bool Tool (helps cut into pieces)
- Add a plane > add modifier / generate / solidify (thicker), apply
- Add modifier > generate > boolean (difference, operant is object, select plane with eyedropper, apply, delete plane
- Split: select object, A - , p to separate by root parts, x to delete part
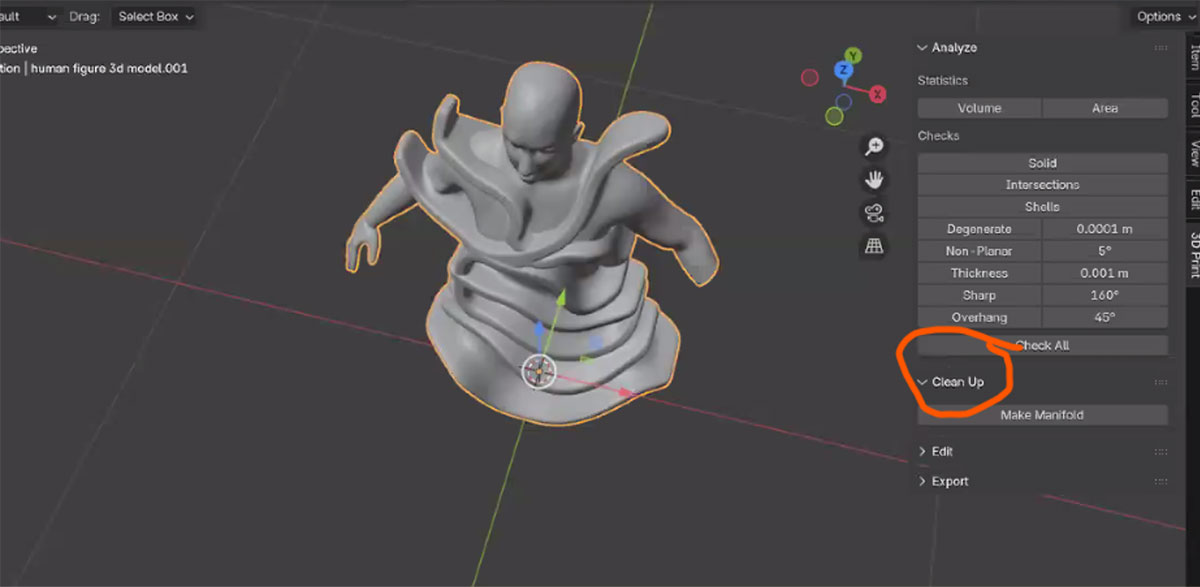
- Check to 3D print: N 3D print tab, analyze / clean up / make manifold (0 edges and 0 faces = model is closed)
- Water tight means no holes, manifold means no faces not attached
- Modify > decimate to decrease density/resolution > apply > export as stl
Install 3d print toolbox and Bool Tool add-ons in the File > Preferences window. If they are not present, search and add them in the Get Extensions tab.
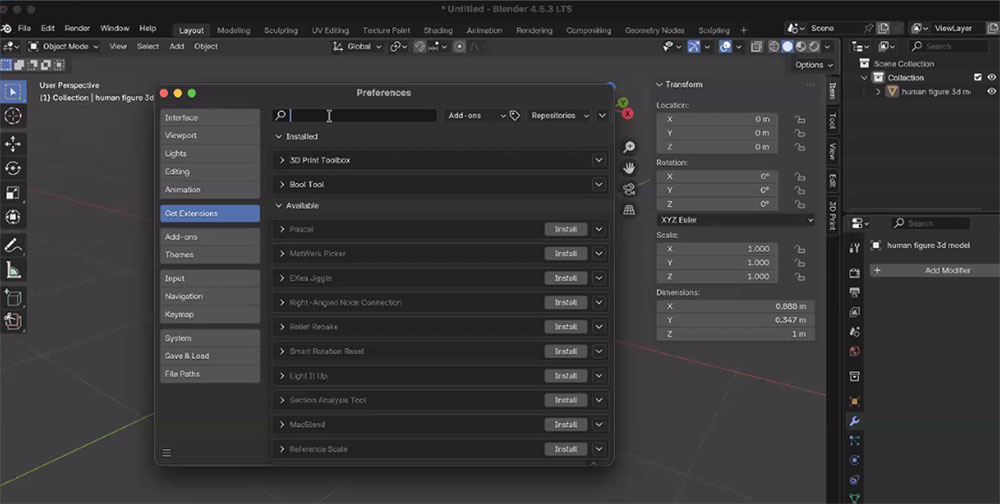
Add a plane
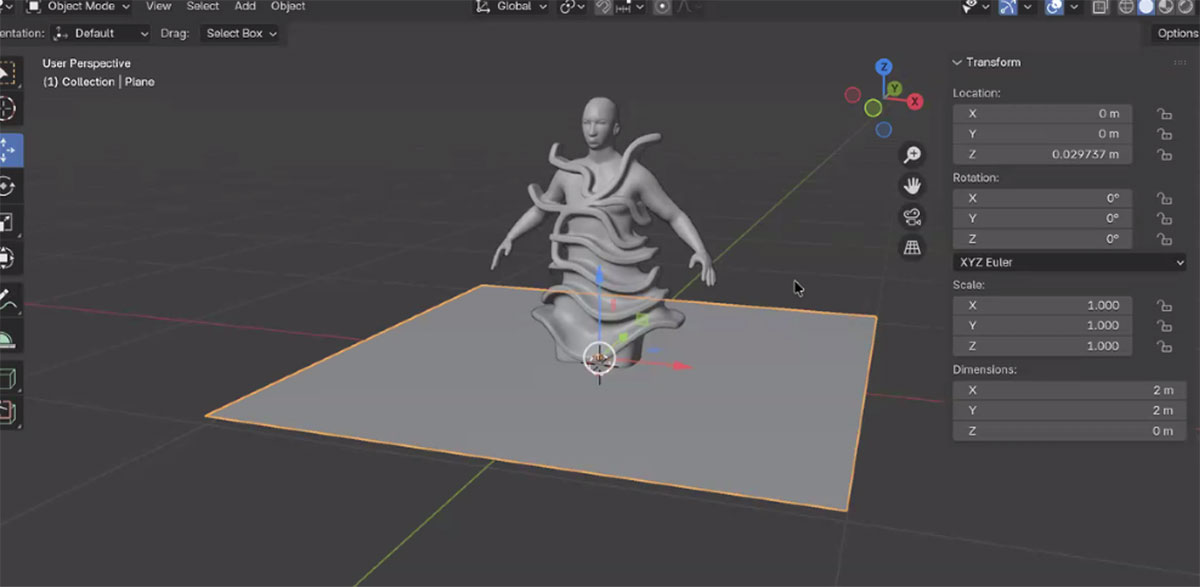
Add boolean modifier
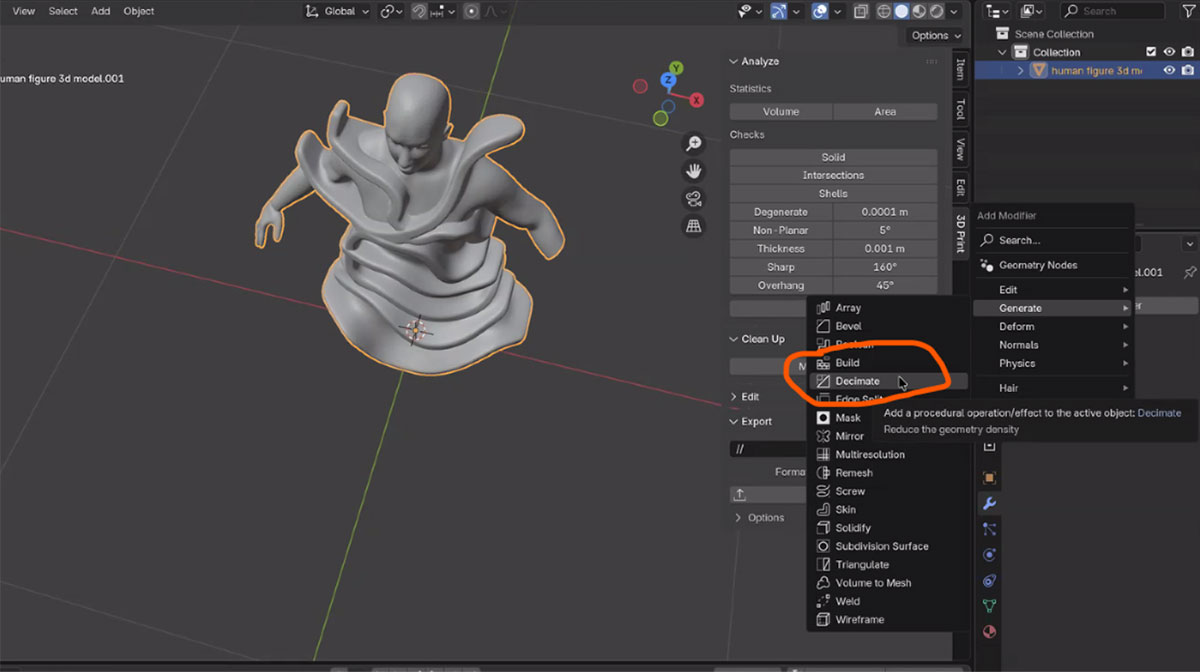
Clean up
Tutorial: Slicer for Fusion 360
Steps
- Import model
- Define laser cutter at manufacturing settings, change imported model’s orientation to z margin
- Choose fabrication method: stacked slices, interlock, or radial slices, or folded panel.
- Modify: change slide direction, make hollow, add remove slices
- Choose type of slices (e.g. waffle), red = eros, move slides, reset
- Simulate to see the assembly steps
- Export your files as an eps vector file, as pdf, and also export mesh as an stl to upload in Sketchfab
Tutorial: AI ideation to design to fabrication
I chose to not use the AI ideation > design > fabrication workflow. You can learn about it in this tutorial, which includes details on how to incorporate Gemini, Tripo 3D, Blender, and FormSlice into your workflow: Fabricademy 10th Edition - AI to Fabrication Tutorial
Tutorial: Laser cutter
Safety first: Don’t leave the laser cutter while it’s on, don’t look at a laser beam, and turn off the power if you see a fire that is not going out. If fire persists, get Jack! (and be ready to use the fire extinguisher or fire blanket to put it out)
Steps:
- Import a vector file into xTool Studio, or create a shape directly in the software.
- Adjust power and speed settings based on material. Higher power results in a hotter laser beam, slower speed. Always test your material before committing to cut a full project!
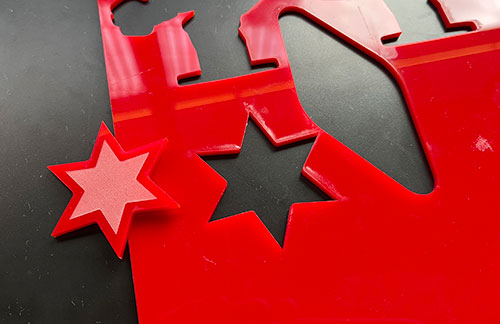
- Set score, engrave, and cut tabs separately. (you can see an example of engraving on the inner part of the red star)
- Turn on laser cutter and exhaust.
- Lift hood and place material on laser bed being careful not to cover guide circles.
- Click start button in software interface, then on machine. Press pause and restart as needed.
- Lift hood and remove piece when finished.
- Clean out lower bed of loose pieces and turn off machine.
3. Creating a digital body
Step 3.1: 3D scan a body
- Download the Polycam app.
- Do a 3D scan.
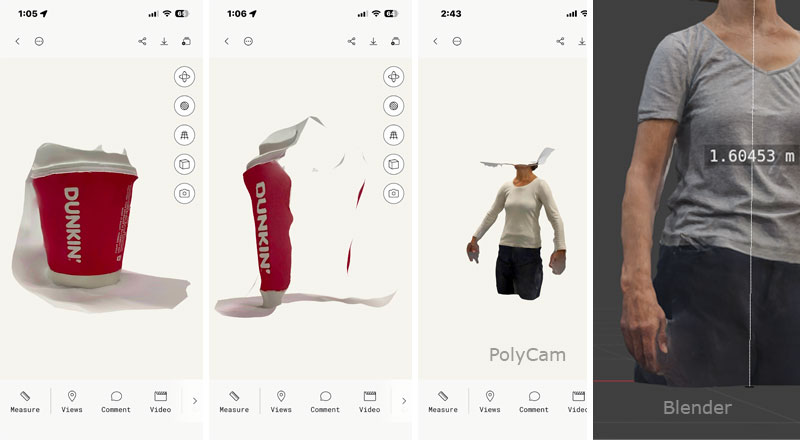
The PolyCam app did not do well at capturing this cup, but did okay with both body scans. Wear smooth clothes for better results.
Step 3.2: Clean up model in Blender
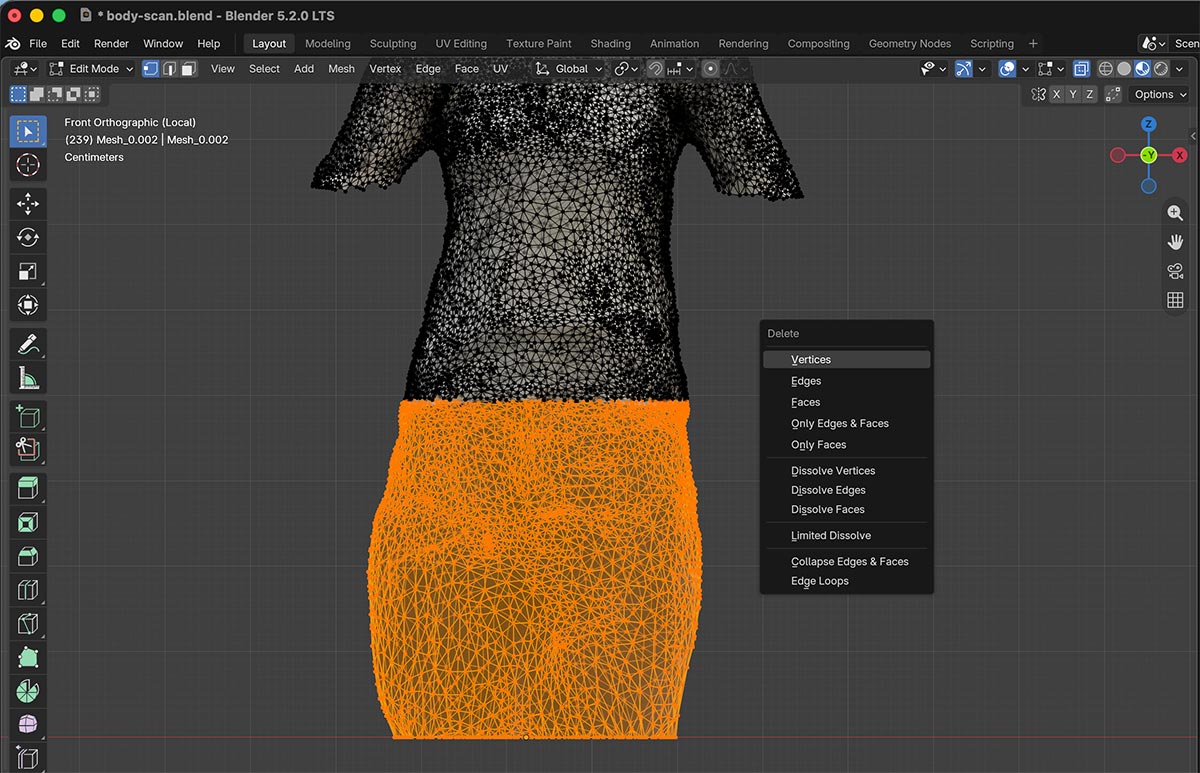
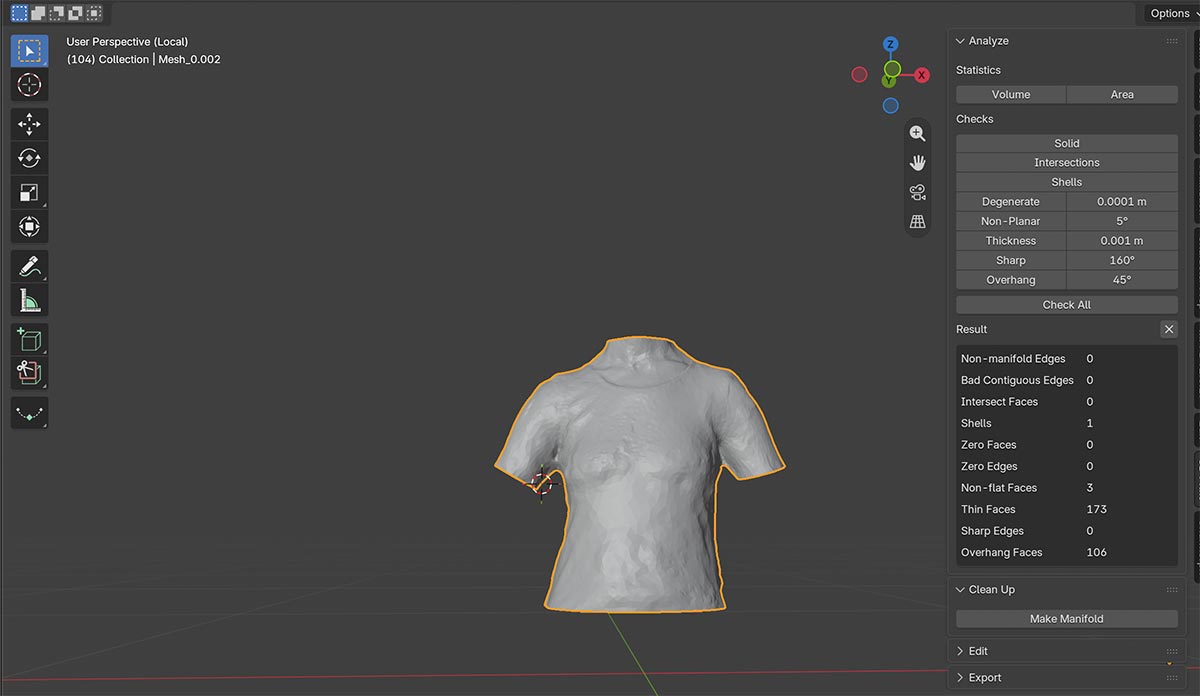
Import the model into Blender to clean it up.
- Smooth it out.
- Create planes to make clean edges on neck, bottom, and arms.
- As a last step, Analyze > Check all to ensure model is closed (non-manifold edges and faces are at 0).
Step 3.3: Slice
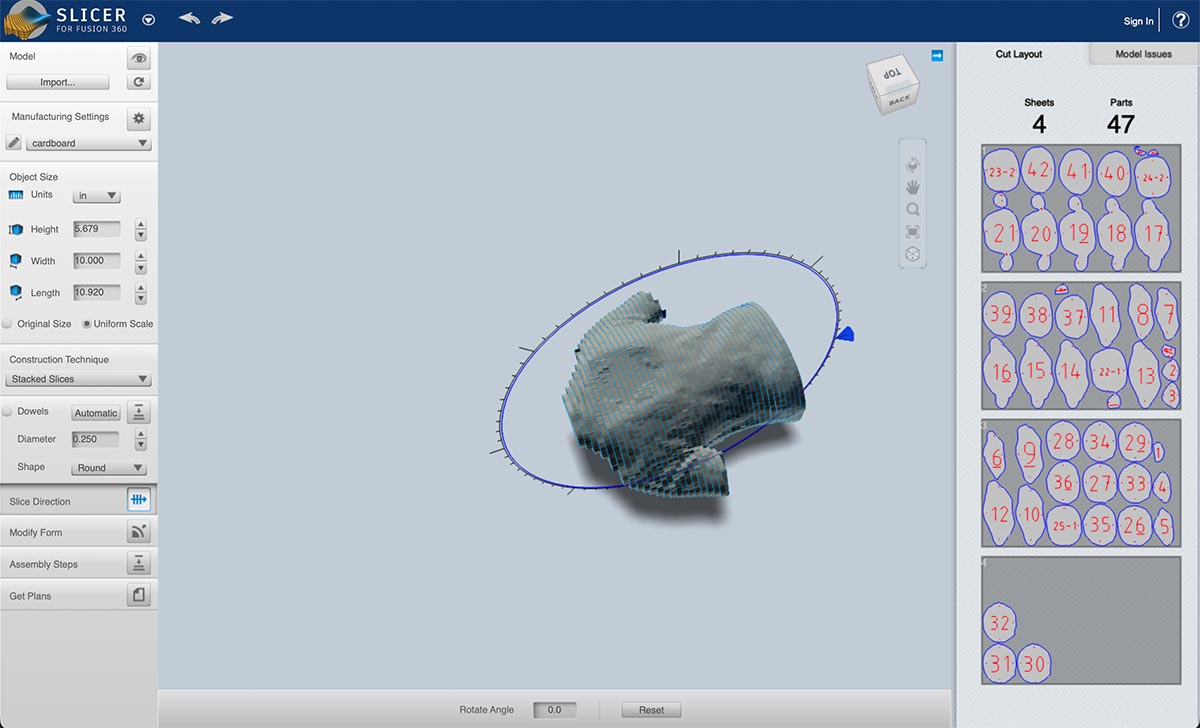
Open file in Slicer for Fusion 360 (next time I'll choose z axis to orient upright)
- Set the material to cardboard.
- Adjust the height, width, or length (have "uniform scale" checked)
- Choose construction technique (e.g. stacked, interlocked slices, etc.)
- Modify slice distribution, edit slices as needed to fix red out of bounds pieces.
- Export files as eps, and pdf. Export mesh as an stl to upload in Sketchfab.
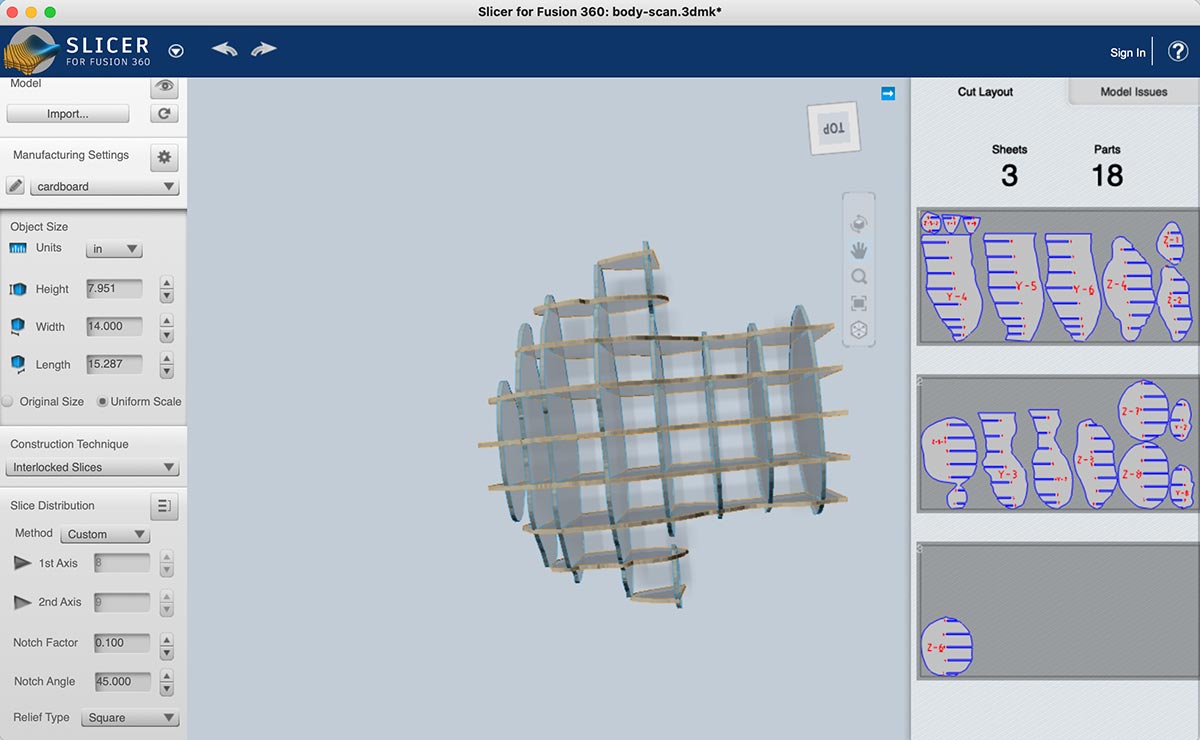
Assembly interface in action:
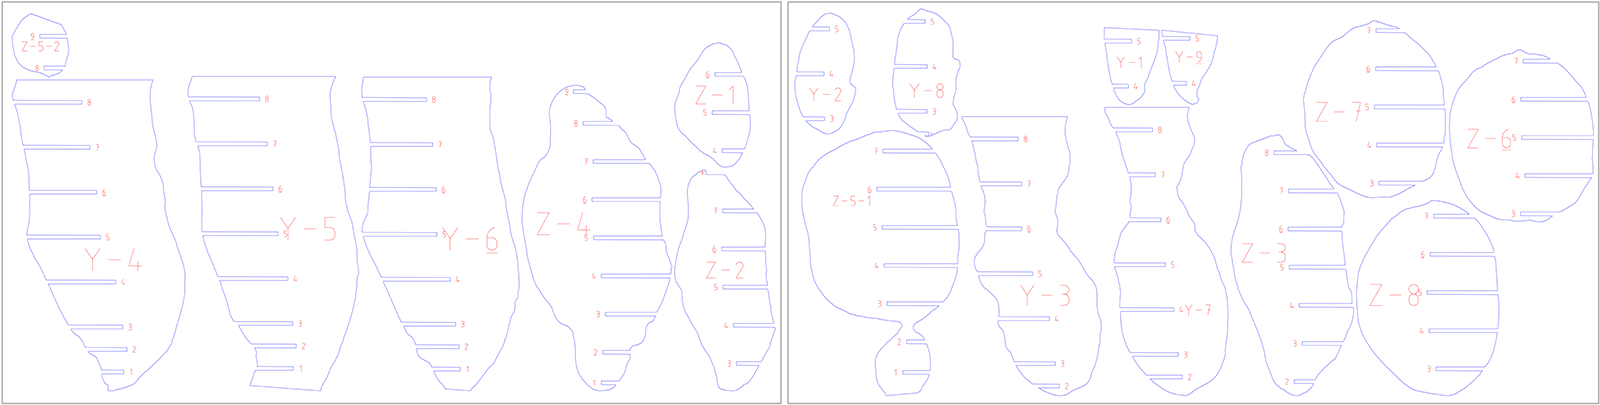
Step 3.4: Clean up vector pattern
Open file in Adobe Illustrator or similar vector software and organize the pieces to save material. These pieces are now on two boards instead of three.
Step 3.5: Laser cut pattern parts
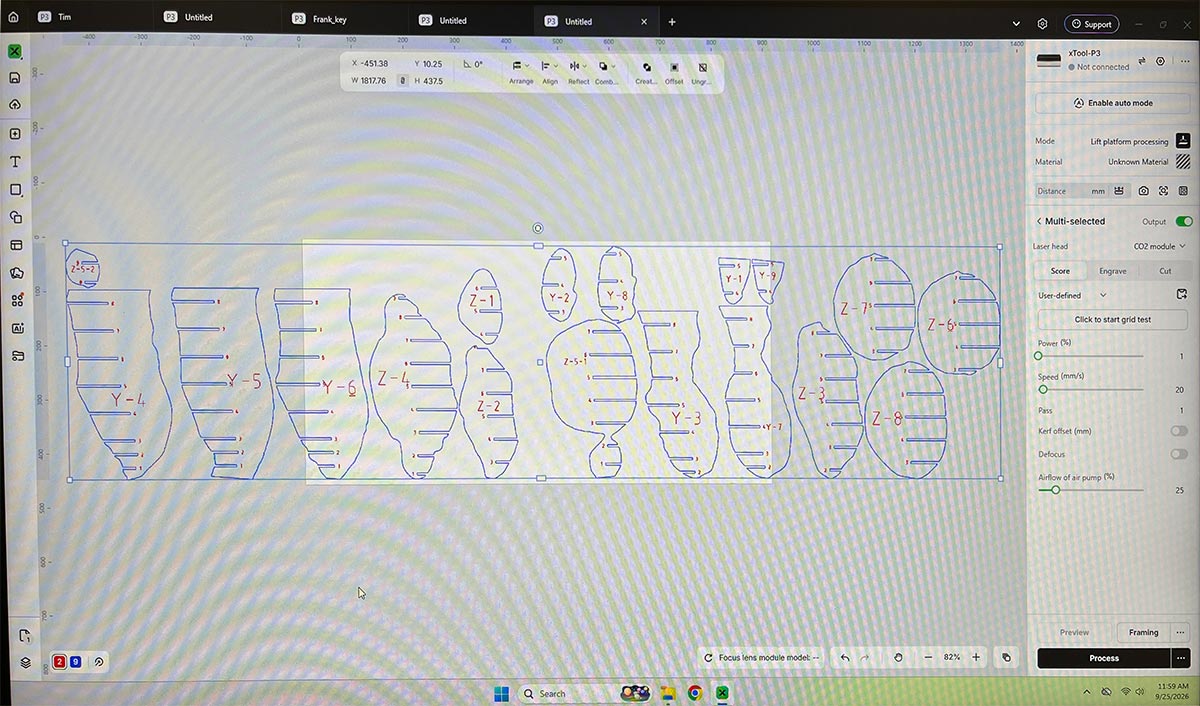
Open file in xTool Studio.
- Place one sheet on cutting stage
- Set red letters and numbers to score (power: 40, speed 400), blue outlines to cut (power: 100, speed 16)
- Cut two pieces, and press pause to check tolerances. (no adjustment needed)
- Proceed with cutting the rest of the pieces out of the cardboard.
- Before continuing with second sheet, adjust supporting lattices to be closer so pieces don’t fall through (In the video below, notice the burning happening to the fallen pieces underneath. Oops!).
Step 3.6: Assemble model
...
4. 3D Model
5. Reflections
The assembly steps were lost when software crashed (which it did every time I tried to save the file to my computer). Luckily I had the model in Sketchfab to refer to. In the future, I will leave Fusion open so I can refer to the steps during the assembly.
This model style and material is excellent for prototyping at ½ and full scale. I’d like to try waffles closer together horizontally, and fewer vertically. I think it will be more interesting visually, and will be more useful for using it as a prototyping form, as is, rather than having to cover it with something like paper mache.
It’s curious how lumpy the model is in Blender. Is it because of the Polycam scanner app? Smoothing only helped a bit. Next time I will play with Blender’s sculpt mode to further clean it up.
6. Fabrication files
-
File - .stl: 3d body scan ↩
-
File - .obj: Body scan mesh ↩
-
File - .ai: Pattern Illustrator vector file ↩