Process
Data collection and translation
The first requirement I encountered in my project was how I was going to translate data to transfer it to Grasshopper and work with parametric design, and what were the best options for measuring it, as well as the best software to use.
With one of my most direct references being Margrét Katrín Guttormsdóttir's “Moving Shapes” project, I realized that it was possible to do it from Grasshopper since that was the way that worked best for her.
However, I realized that this would not work for my project because it involves being live, and recording in an aqueous medium would result in a complexity that would prevent me from optimizing my time for parametric design.
I decided to work with a previous video to get the necessary data, this is an example of video to make the first test and also, this helped me to undestarnd the best way to record a video, with contrast colors, clear background, clean enviroment, etc.
So I researched more thoroughly what tracking meant and how I could use it just to gather information. And I found the KINOVEA software that is useful for athletes who want to see the trajectory of their movements, which was very relevant to my project. So I decided to use this software, which is very easy to use, and with the help of videos, I was able to synthesize and clarify the data for Grasshopper.
After too many intents, I decided to combine two techniques to generate some ondulations in grasshoper, with the below video help.
First explorations by Monse Islas
Download presentation here
First ideas of parametric desgin with 3D printing
Week06_computational couture from Monse Islas
Reading data
I also found another way to read data from a CSV file in Grasshopper; however, visually it only looks like a graph, and what I was looking for were more fluid, curved shapes to create smooth trajectory effects and thereby generate a kind of optical illusion to give the pieces more depth, dimension, and fluidity.
I was able to read data with the elements mentioned in this video
In this part, you can also play with the thickness and dimension of the data, generating more elongated or narrower shapes
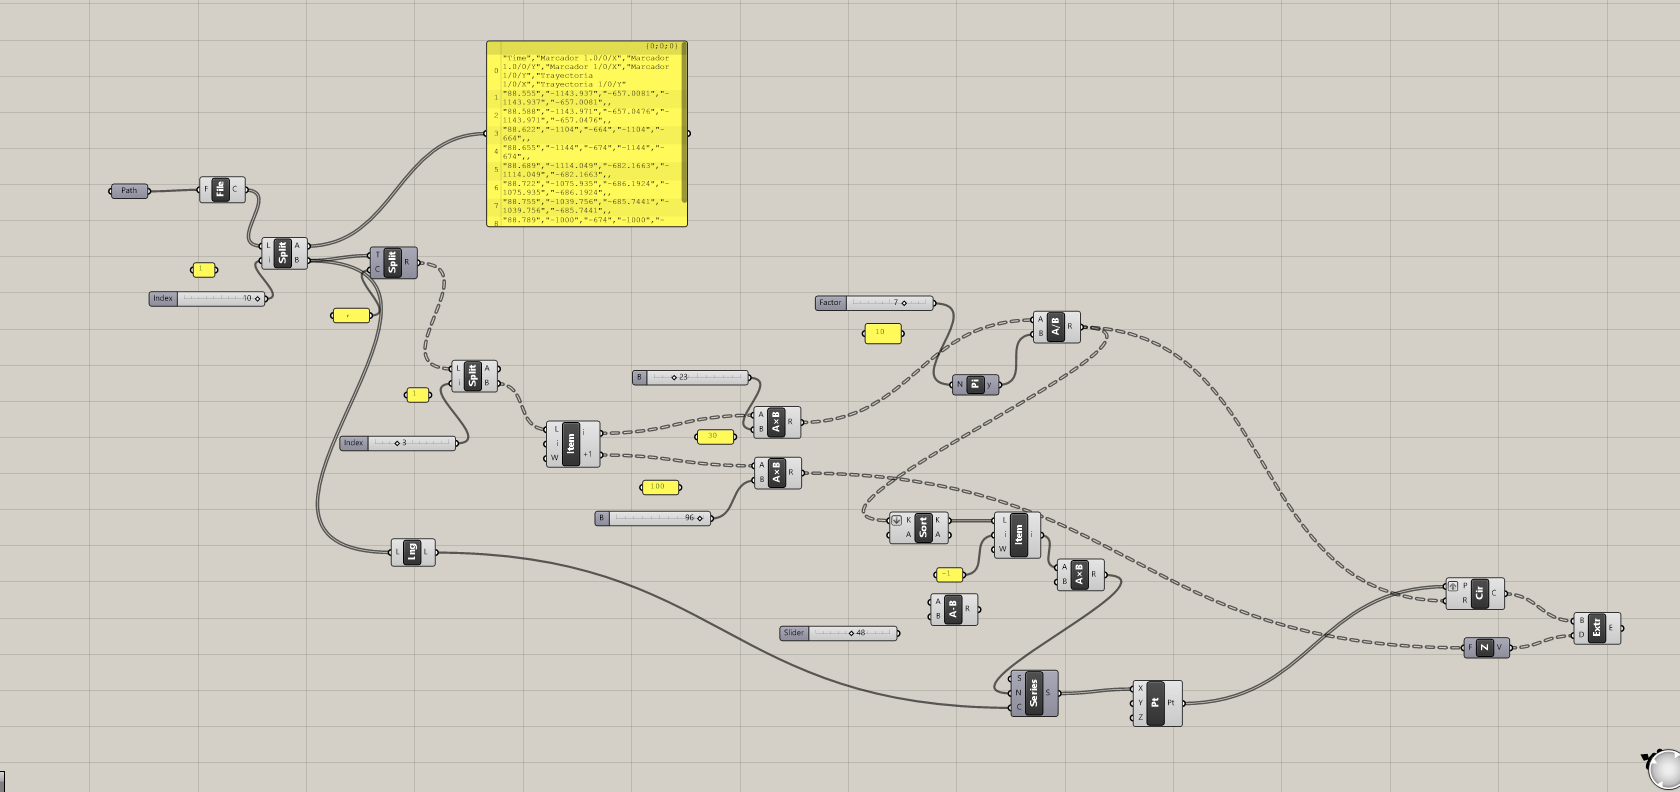
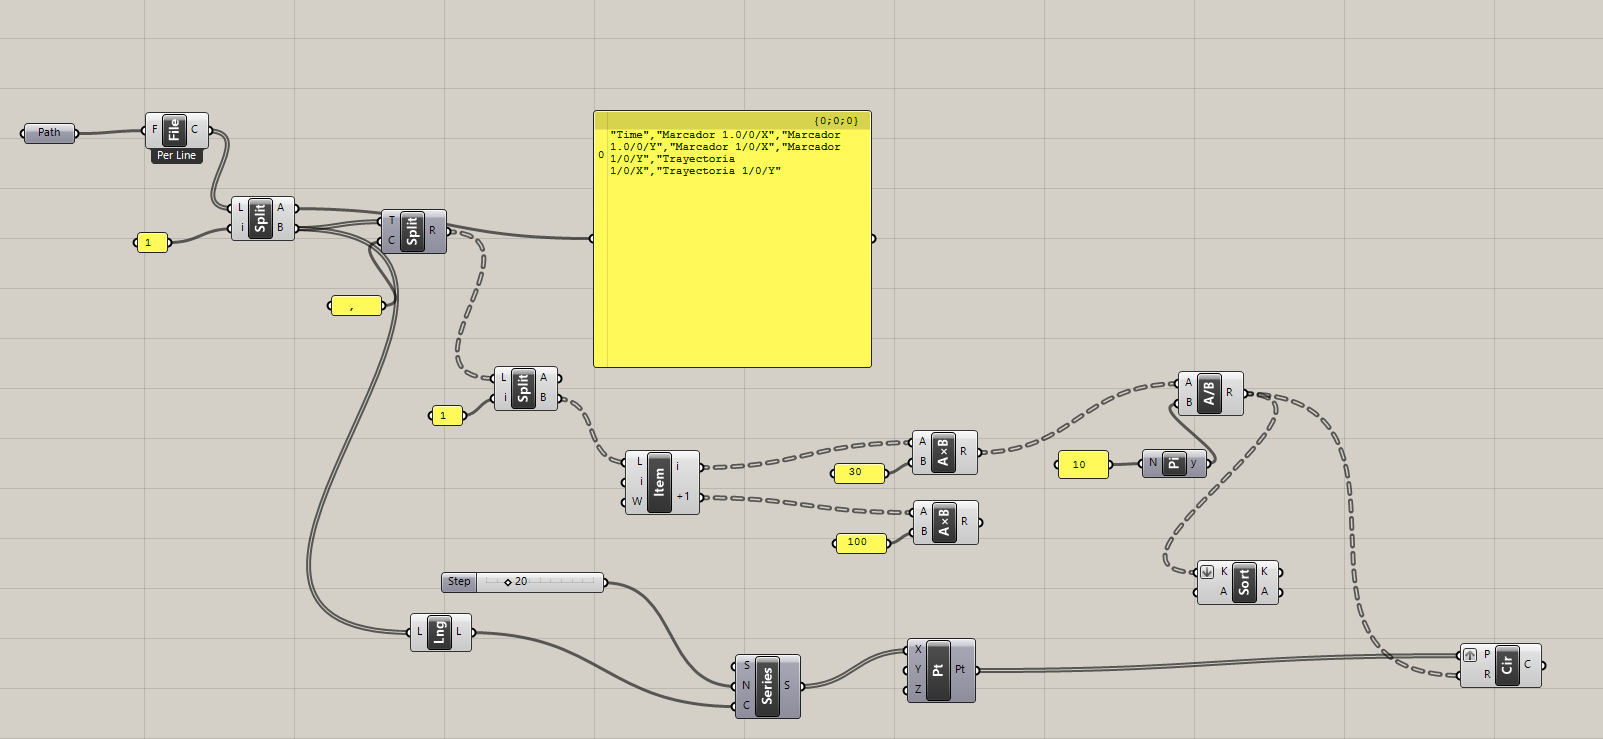
Grasshopper exploration
However, with this Grasshopper diagram and by experimenting with new parameters and components, I managed to create interesting undulating shapes that helped me define the final style and design I was looking for in the pieces.
3D Printing test
While I was figuring out the best way to translate the data, create curves, and achieve the optical illusion I was aiming for, it was also important to find the best match between filament and fabric to ensure the design was durable and capable of withstanding underwater conditions, as well as having minimal water resistance so as not to hinder the body’s natural movement underwater.
Printing parameters:nozzle temperature 210°C, bed temperature 60°C, moderate speed 100 mm/s
Notes: The figure is very stiff and doesn't conform to the body, making fluid movement impossible
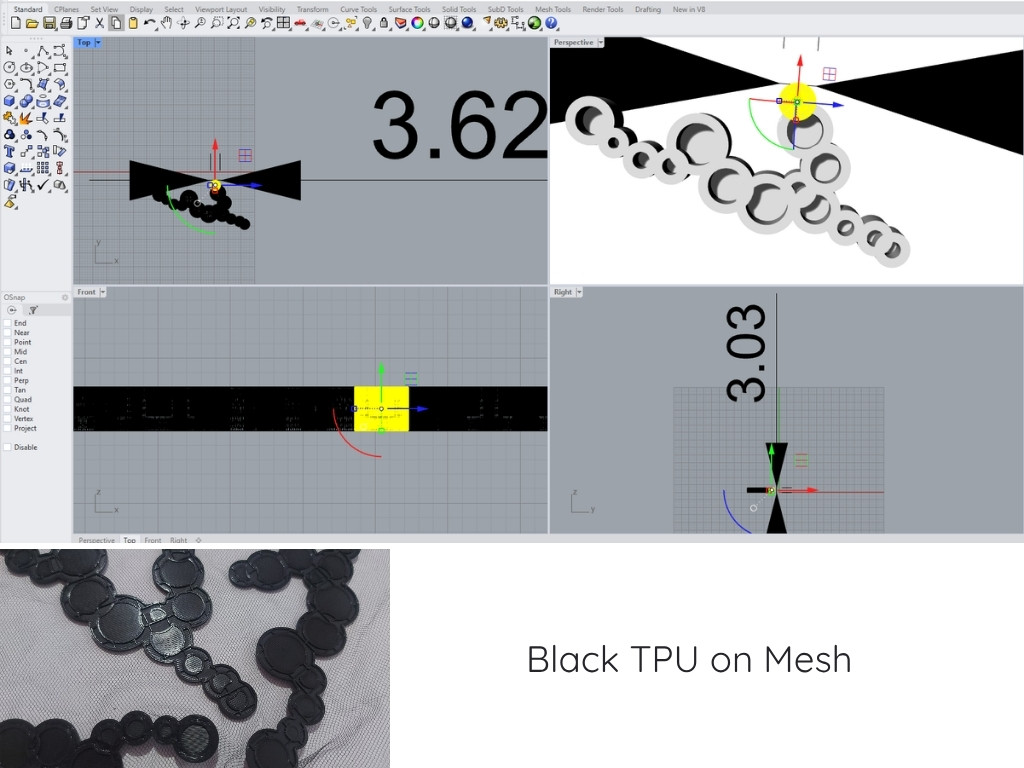
Circles
The first attempt was a pattern created from the silhouette of the body swimming underwater, printed in PETG on a non-stretch flat fabric mesh. Although this first test used a lightweight filament, it was rigid, which could be somewhat cumbersome for the user.
Printing parameters:nozzle temperature 240°C, bed temperature 70°C, moderate speed 60 mm/s
In these initial tests, it was also important to determine the thickness and dimensions of the part to be printed. In this case, they were set to 2 mm, but for this material, the result was too rigid, making it not the best option
As the project took shape, while searching for the ideal fabric, I realized it was important for the fabric to be mostly polyester; the most successful initial tests were conducted on durable fabrics such as neoprene, spandex, and Lycra. For the 3D printing the best filament was TPU because it was more flexible and moldable, despite being one of the most difficult to work with
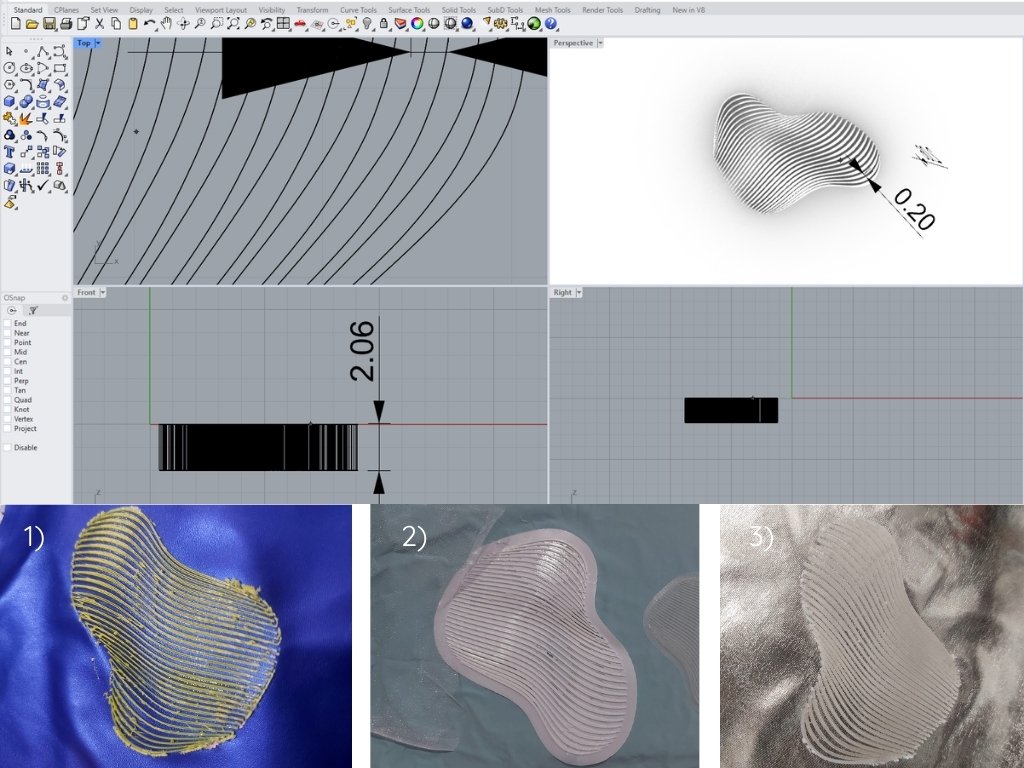
1): Neoprene + tpu filament
Printing parameters:nozzle temperature 230°C, bed temperature 70°C, moderate speed 50 mm/s
Notes: The neoprene used for this sample was too plastic-like, so during the printing process, the nozzle burned the fabric, resulting in a smudged print.
2): Lycra + tpu filament
Printing parameters:nozzle temperature 230°C, bed temperature 65°C, moderate speed 50 mm/s
Notes: In this spandex, the filament adhered better because both materials are elastic
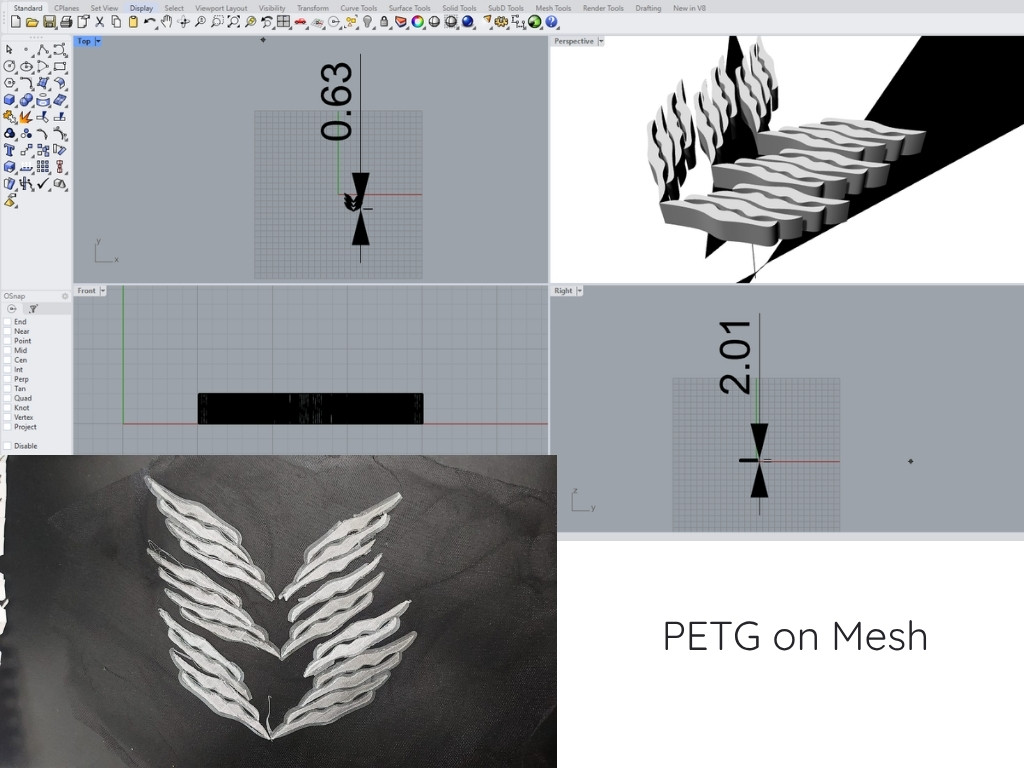
3): Metalic Lycra + PETG filament
Printing parameters:nozzle temperature 260°C, bed temperature 70°C, moderate speed 60 mm/s
Notes:I decided to try again with PETG since it’s a lightweight filament and adhered well to the metallic spandex; it also had a bit of flexibility thanks to the thickness of the lines and the spacing between them, which allowed me to stretch the fabric without affecting the print
Waves on Different fabrics
Fine Lines
This was the best printing option for a 50% spandex, 50% polyester fabric with TPU filament, using a line width of 2 mm and an extrusion thickness of 2–3 mm.
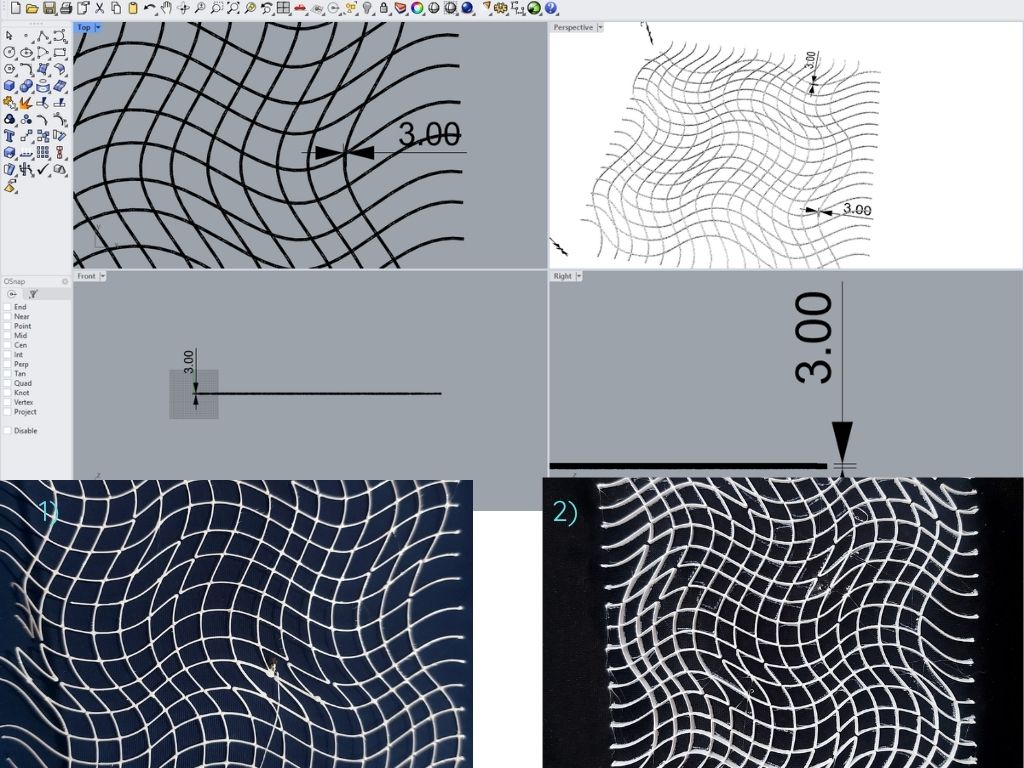
Printing parameters:nozzle temperature 210°C, bed temperature 60°C, moderate speed 63 mm/s
Notes:It was the best option for creating an optical illusion with very thin yet sturdy lines that adhere to the fabric and stay firmly in place.
To add depth and dimension to 3D printing, I found it quite interesting to print on sublimated fabrics, creating an illusion of volume on the garment
3D printing on sublimate mesh