Digital bodies
1. Research & inspiration
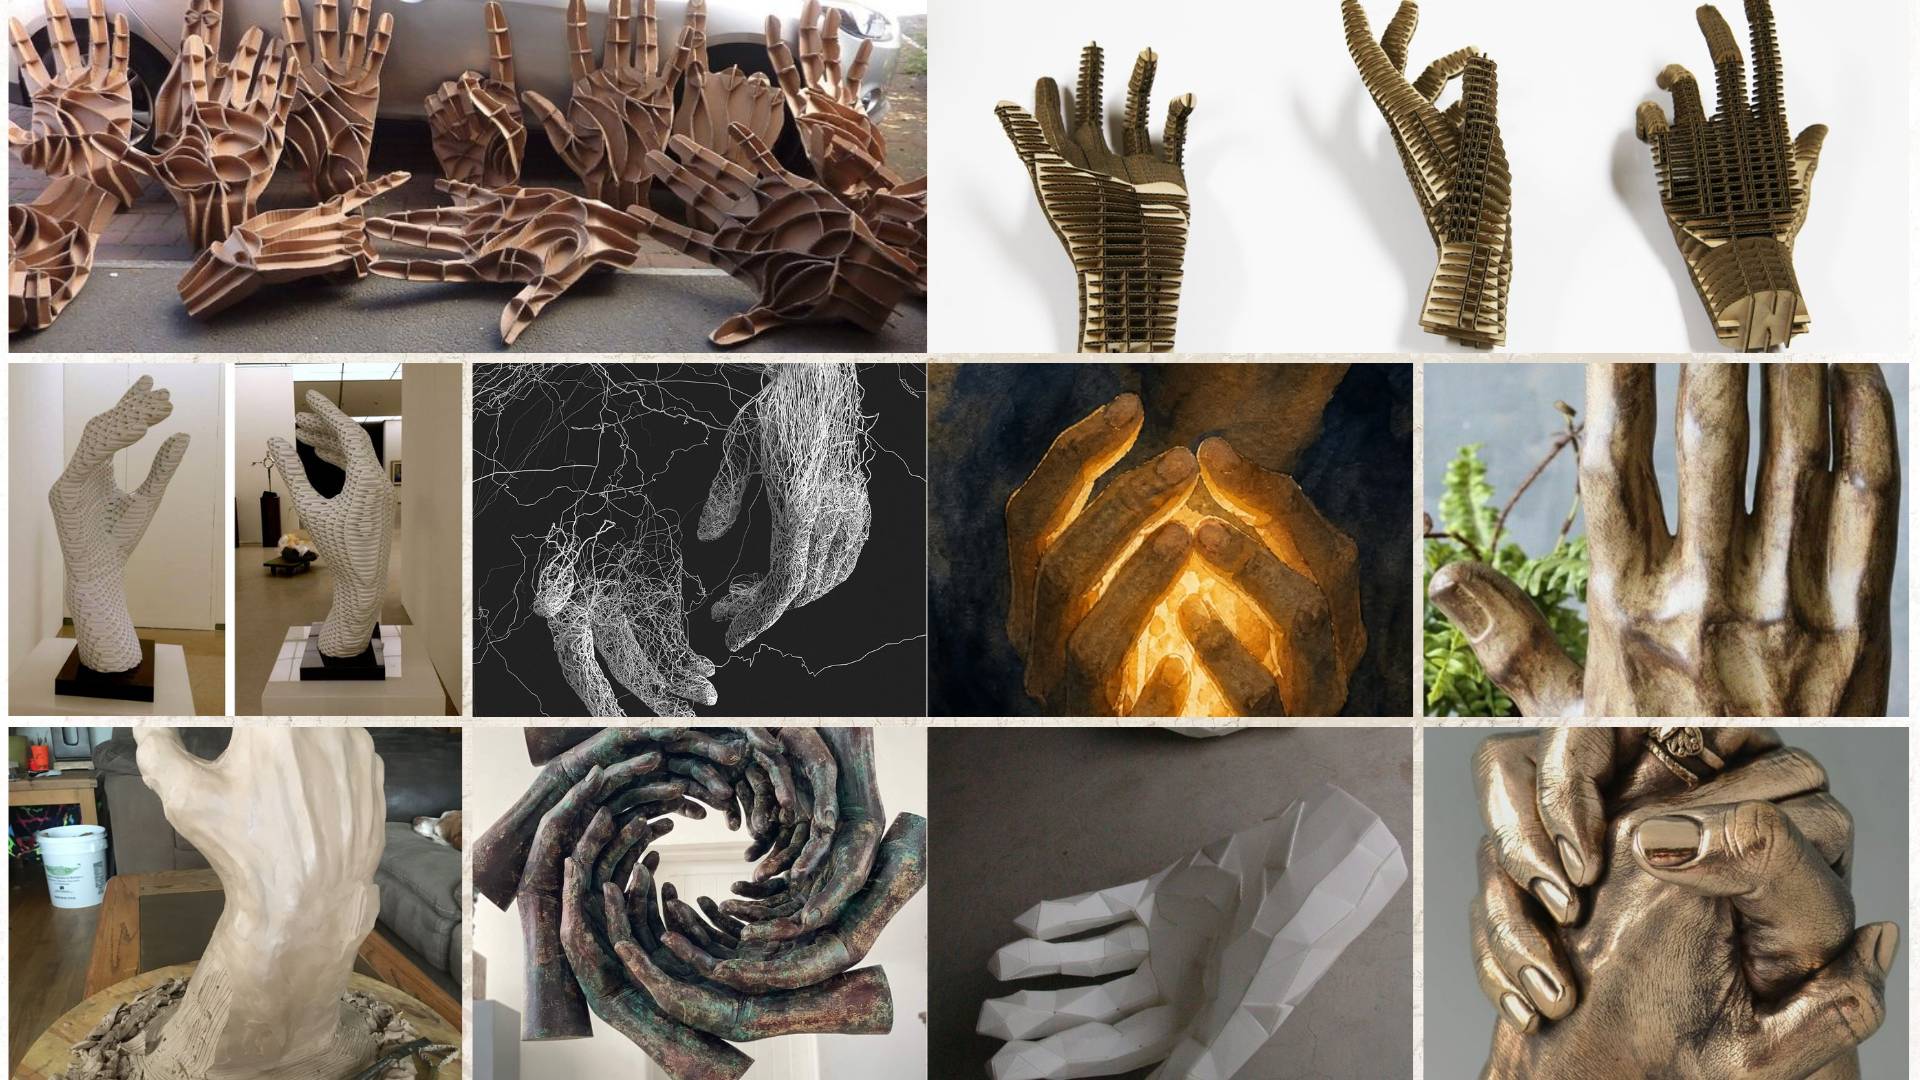
Even before this week began, I started looking at examples of figures made by students in past years, and the first thing that captivated me was the hands. I began to wonder how this part of our body can convey so much simply by being positioned in a certain way.
With this in mind, I decided to browse Pinterest in search of ideas and inspiration for what I could create, and these images were the ones that caught my attention the most.
In my search for inspiration, after looking at so many hands, I remembered a conference I attended a few months ago and the many videos I watched of a Catholic girl named Maria Paula Aldana who discussing the theology of the body—specifically how, through art, theology becomes a part of our lives.
Inspired by a masterpiece she constantly highlights, including at that conference, I decided to replicate the arms and hands of God and Adam from Michelangelo's painting, seeking to express the theology embedded within this work of art.
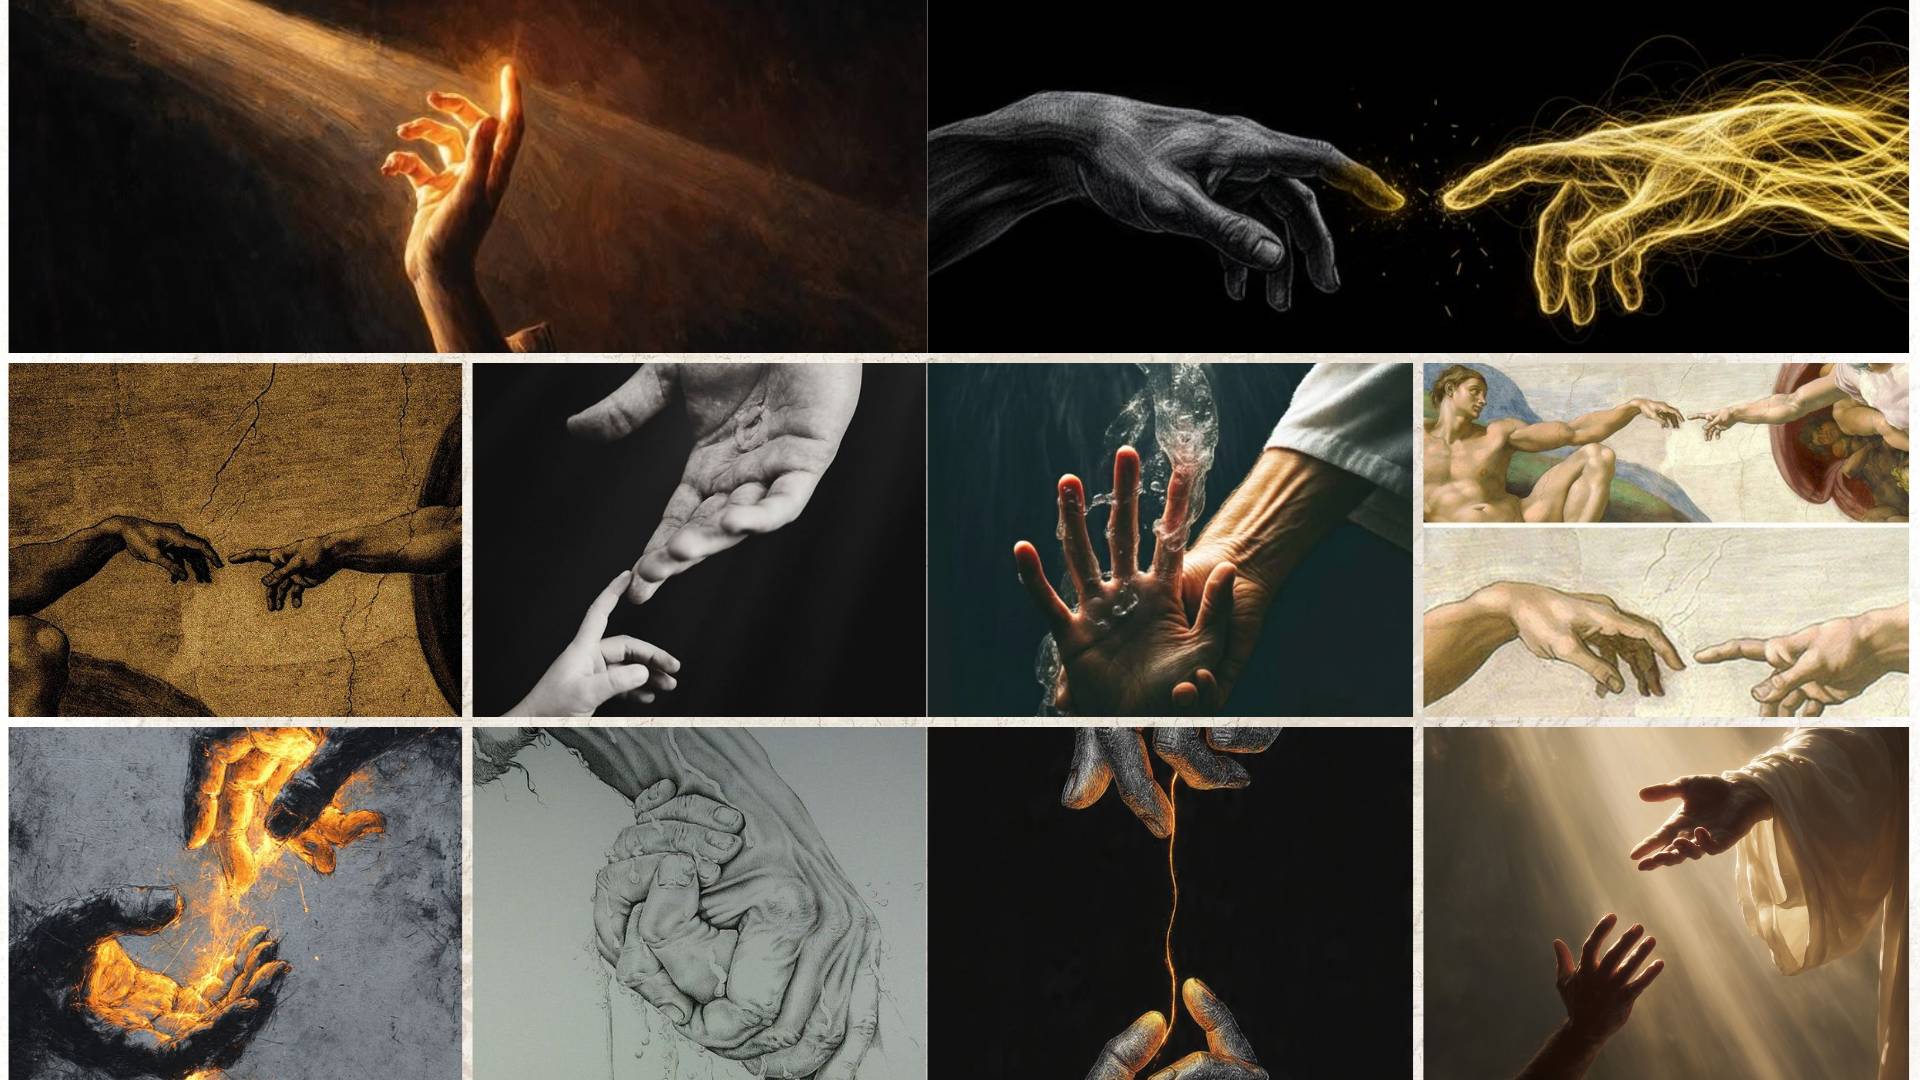
With this in mind, I think it is appropriate to share a bit of context about this masterpiece.
The painting is on the vault of the Sistine Chapel and represents the Genesis scene where God imparts life to Adam: 'So God created man in his own image, in the image of God created he him; male and female created he them.' — Genesis 1:27
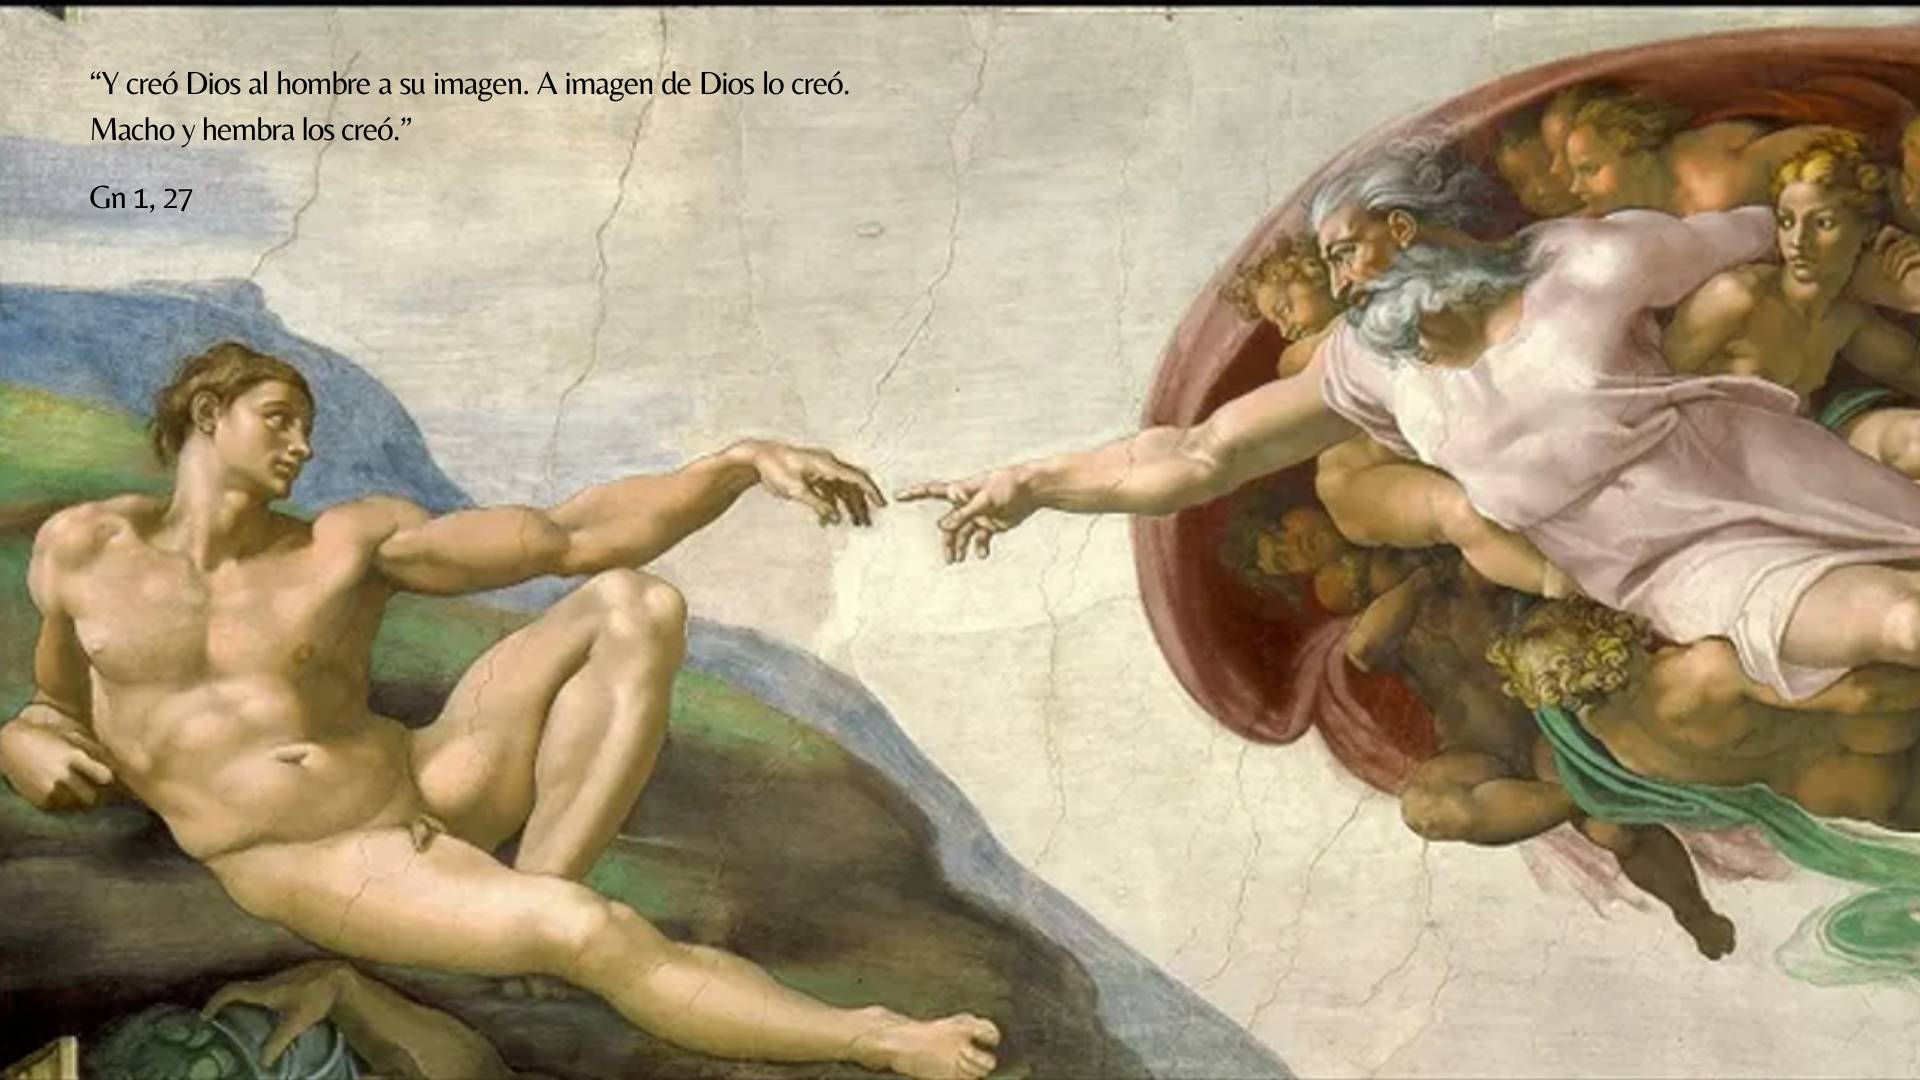
God is depicted as an elderly man with a beard, wrapped in a purple cloak. His left arm surrounds a female figure (Eve), who has not yet been created and waits in the heavens to be given a place on Earth.
God's right arm is extended to impart the spark of life from his finger to Adam's.
On the other hand, Adam is reclining on a patch of earth, effortlessly stretching out his left arm to touch God.
Michelangelo's inspiration came from the medieval hymn 'Veni Creator Spiritus', which prays for the finger of the Father's right hand to grant the faithful love and heart.
At first glance, two figures are seen reaching toward each other, separated by a tiny gap that holds all the power of life. God's hand, firm and decisive, approaches Adam's, which is relaxed and expectant. That near-touch, an invisible spark, became a universal symbol of the creation act and the connection between the divine and the human link.
This is how Saint John Paul II, when writing his catecheses, used this artwork to express the beginning of humanity's creation—how we were created in the image and likeness of God—and to explain the original solitude where we discover that God is a community of persons (Father, Son, and Holy Spirit) who, through love, gives life.
Below, I am sharing a video of one of the talks given by Maria Paula Aldana, where she discusses the theology of the body through the lens of reclaiming fatherhood. In this video, you will better understand this original solitude depicted by Michelangelo. If you wish to learn more about this theology, I recommend watching the videos available on the Somos Suyos - SOS and One body spirit and mind accounts.
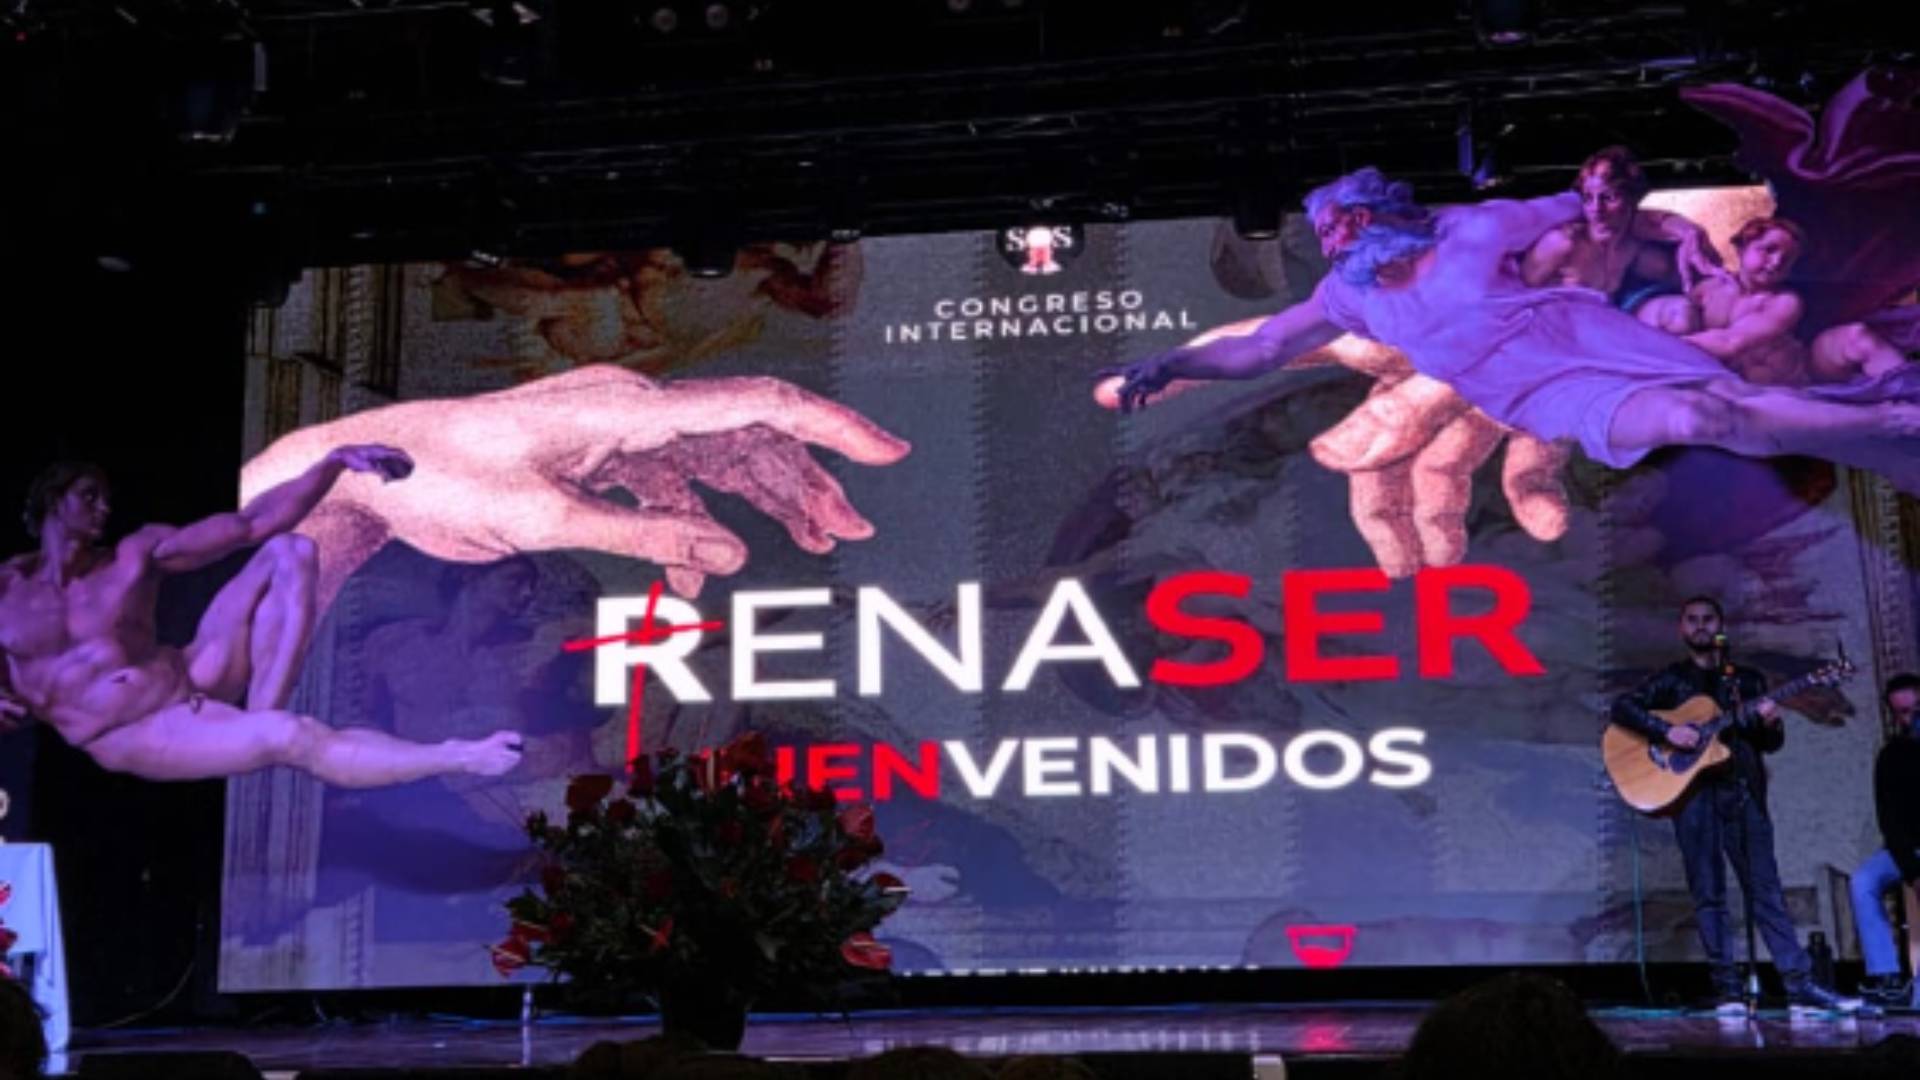
Finally, I want to show you the real image that inspired this project—which, far from being just a decorative backdrop for a conference, expresses for me the most free, total, faithful, and fruitful LOVE we possess: God's love for us.
2. Tools
Tools that I use
3. Process and workflow
I started with the production of Adam's arm and hand, going from scanning a person's body to slicing it in Slicer for laser cutting. Then, I worked on God's arm and hand, employing AI to transform a 2D image into a 3D model and loading it into Bambu Studio to print the piece. Here is an overview of the steps covered below.
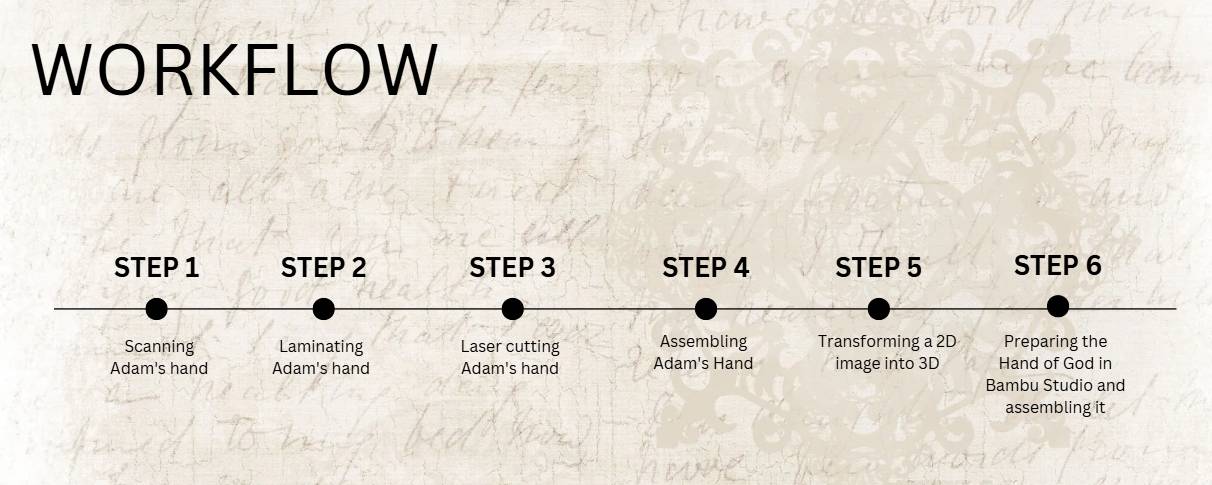
3.1 Step 1: Scanning Adam's hand
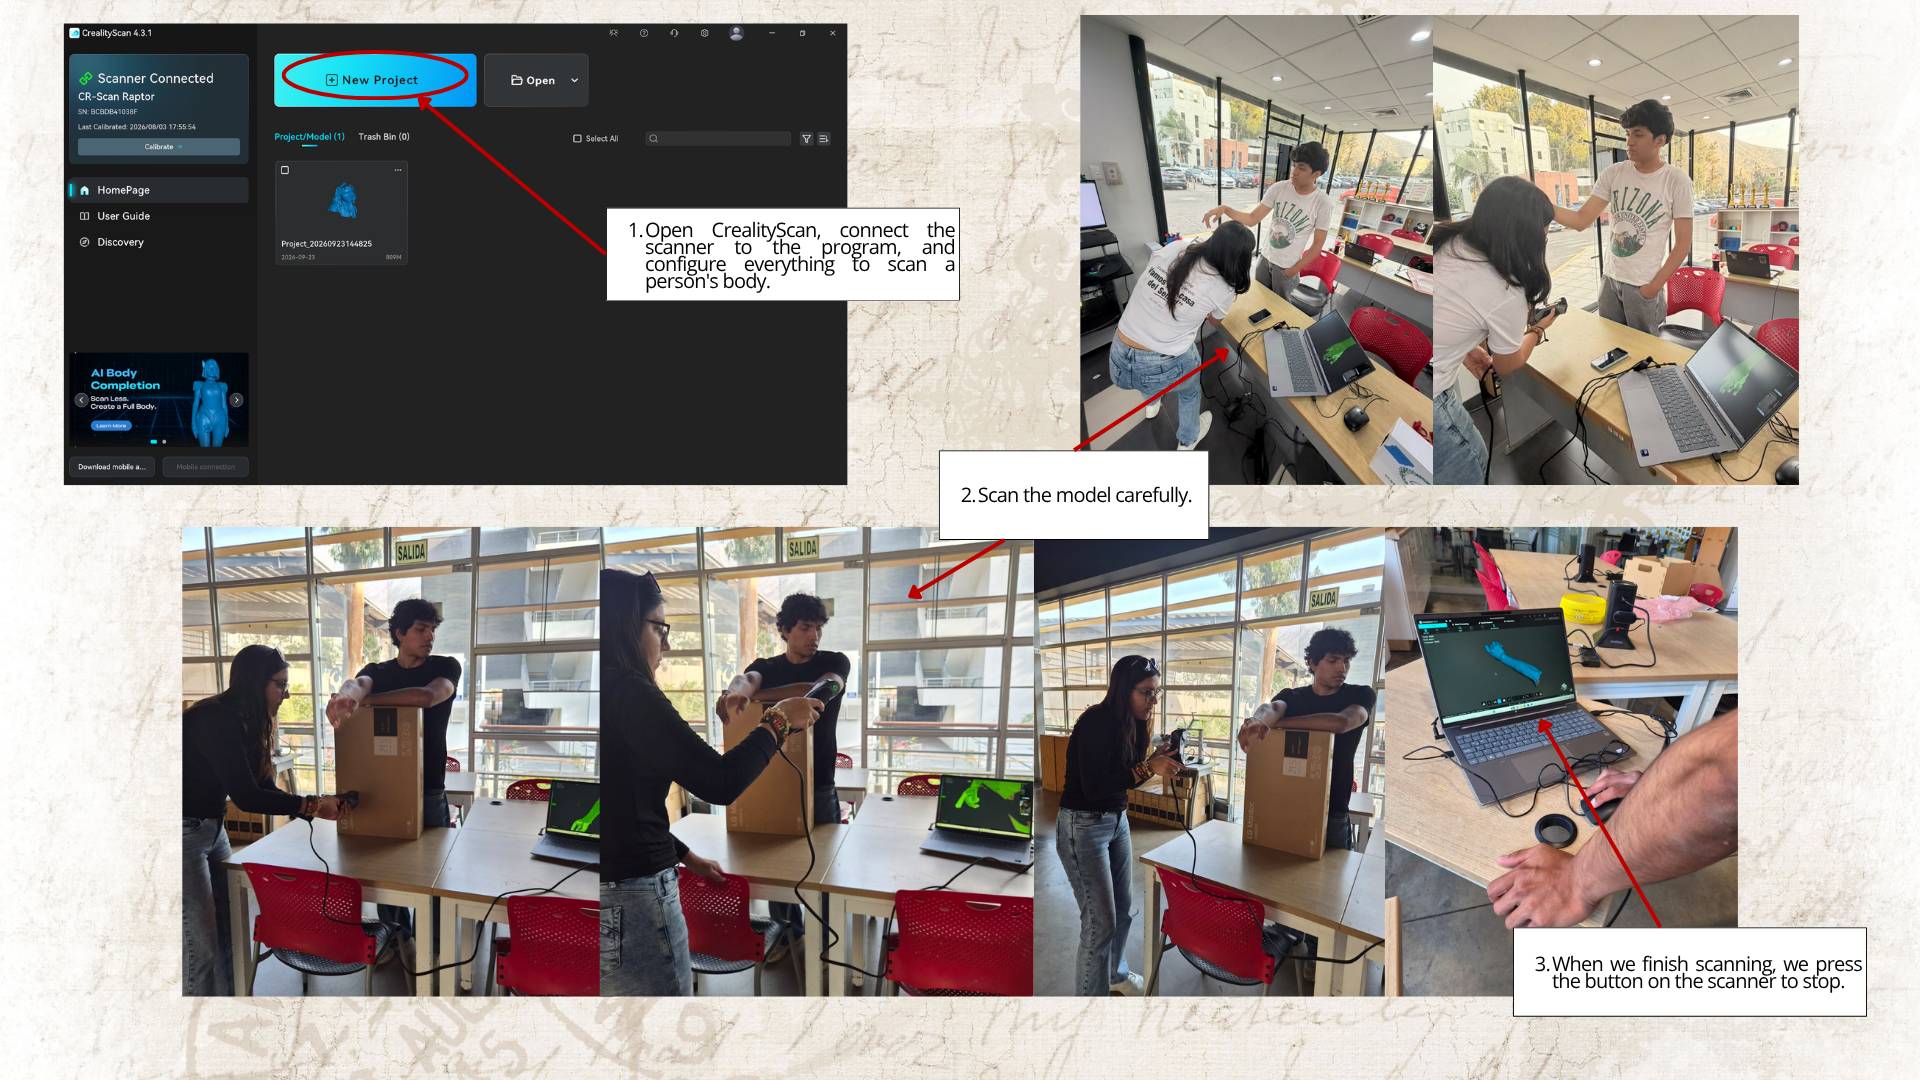
To scan Adam's hand, we enlisted male models whose appearance closely resembled Michelangelo's painting. It was somewhat difficult to capture every detail of the hand without losing the connection between the scanner and the software, but we eventually succeeded.
Once the figure was loaded into the program, we proceeded to process it, as shown in the detailed steps in the following images.
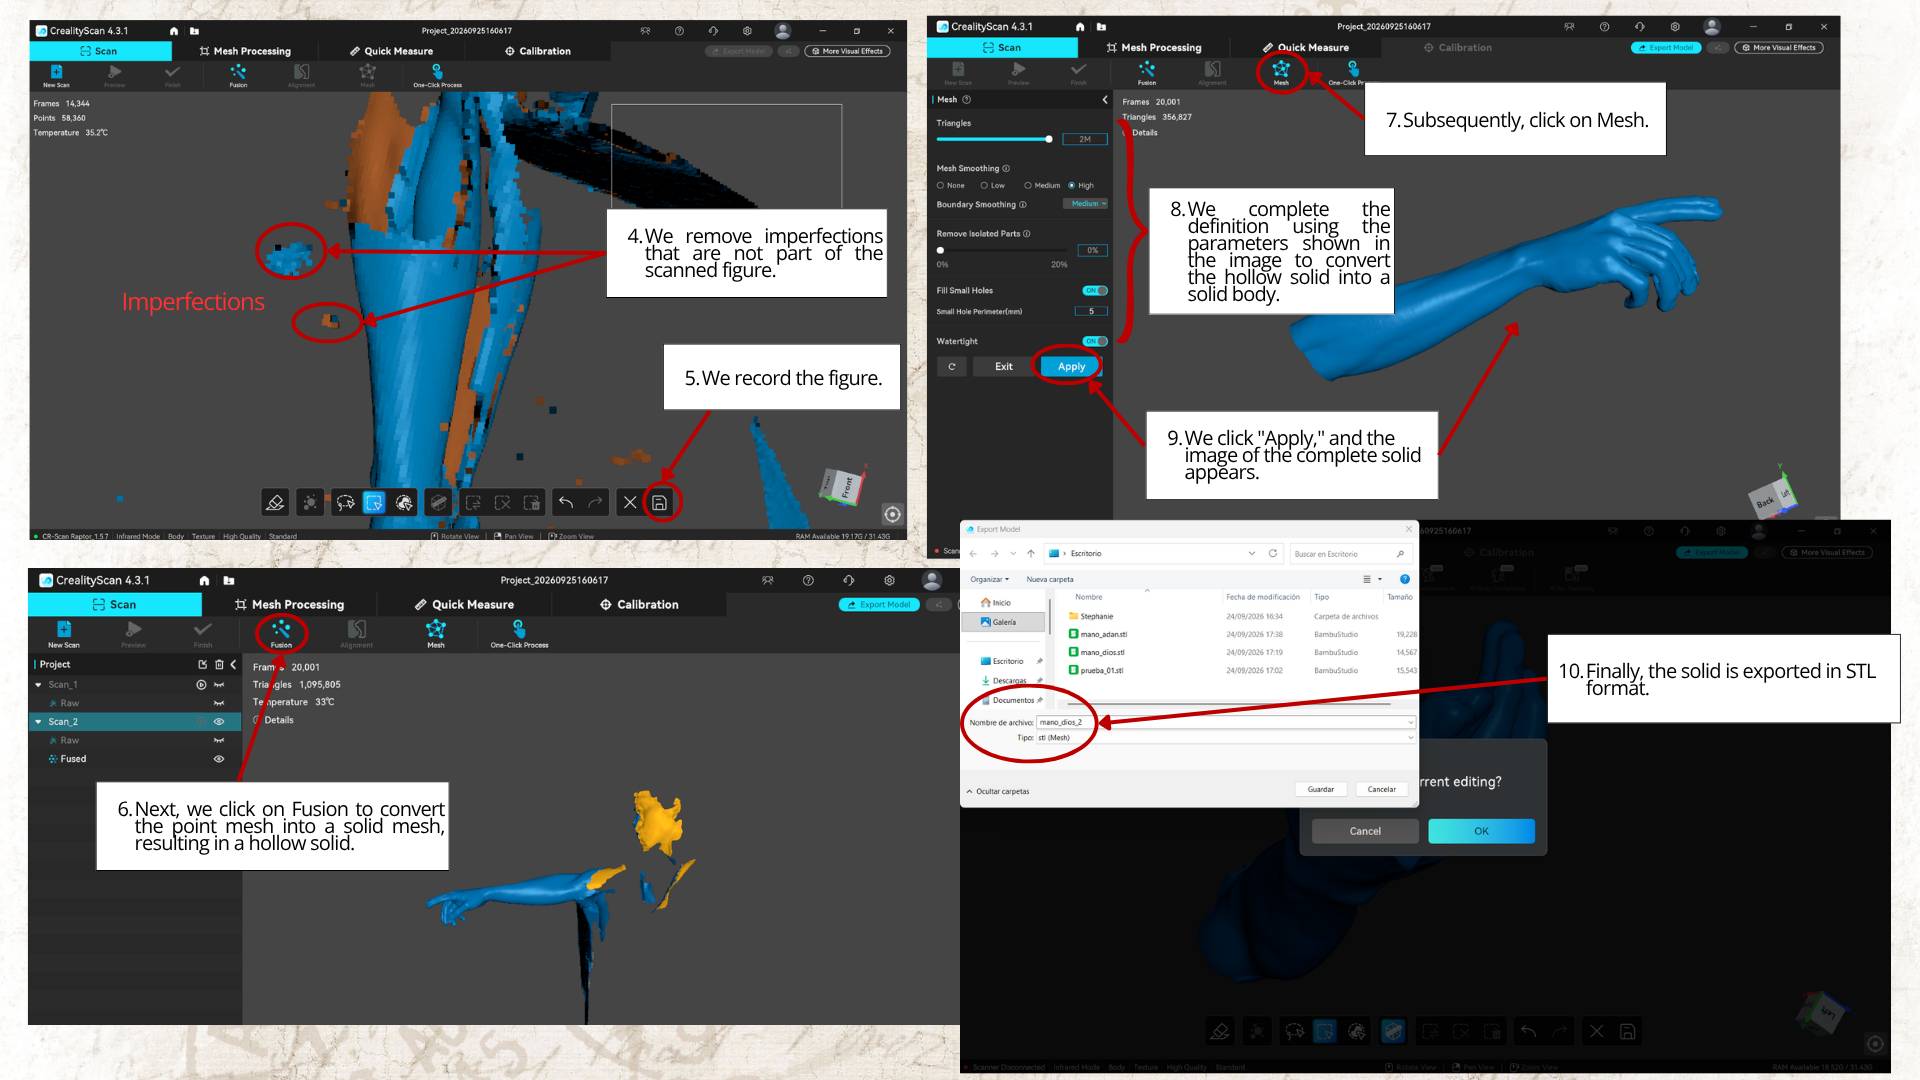
3.2 Step 2: Laminating Adam's hand
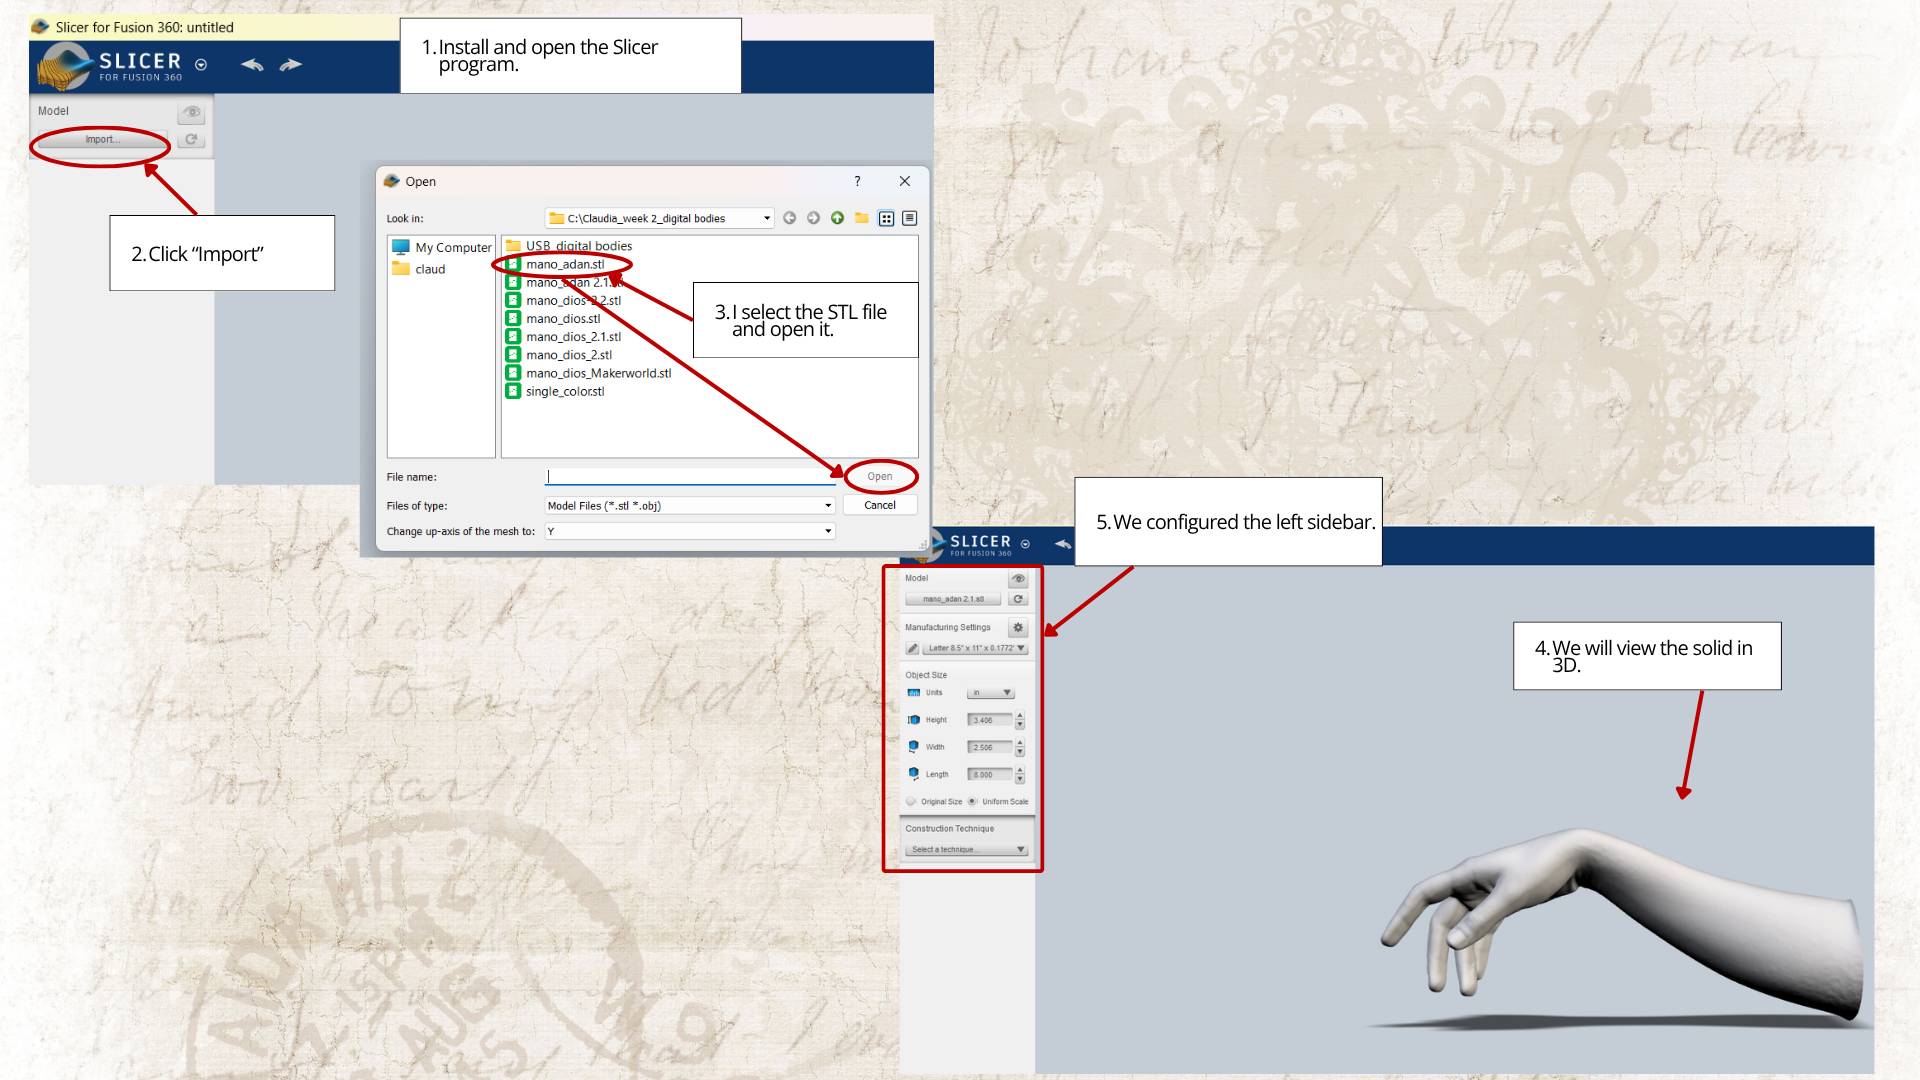
After generating the 3D solid, we moved it to Slicer to slice the model and prepare the layout for laser cutting. The images below illustrate the step-by-step workflow in this program.
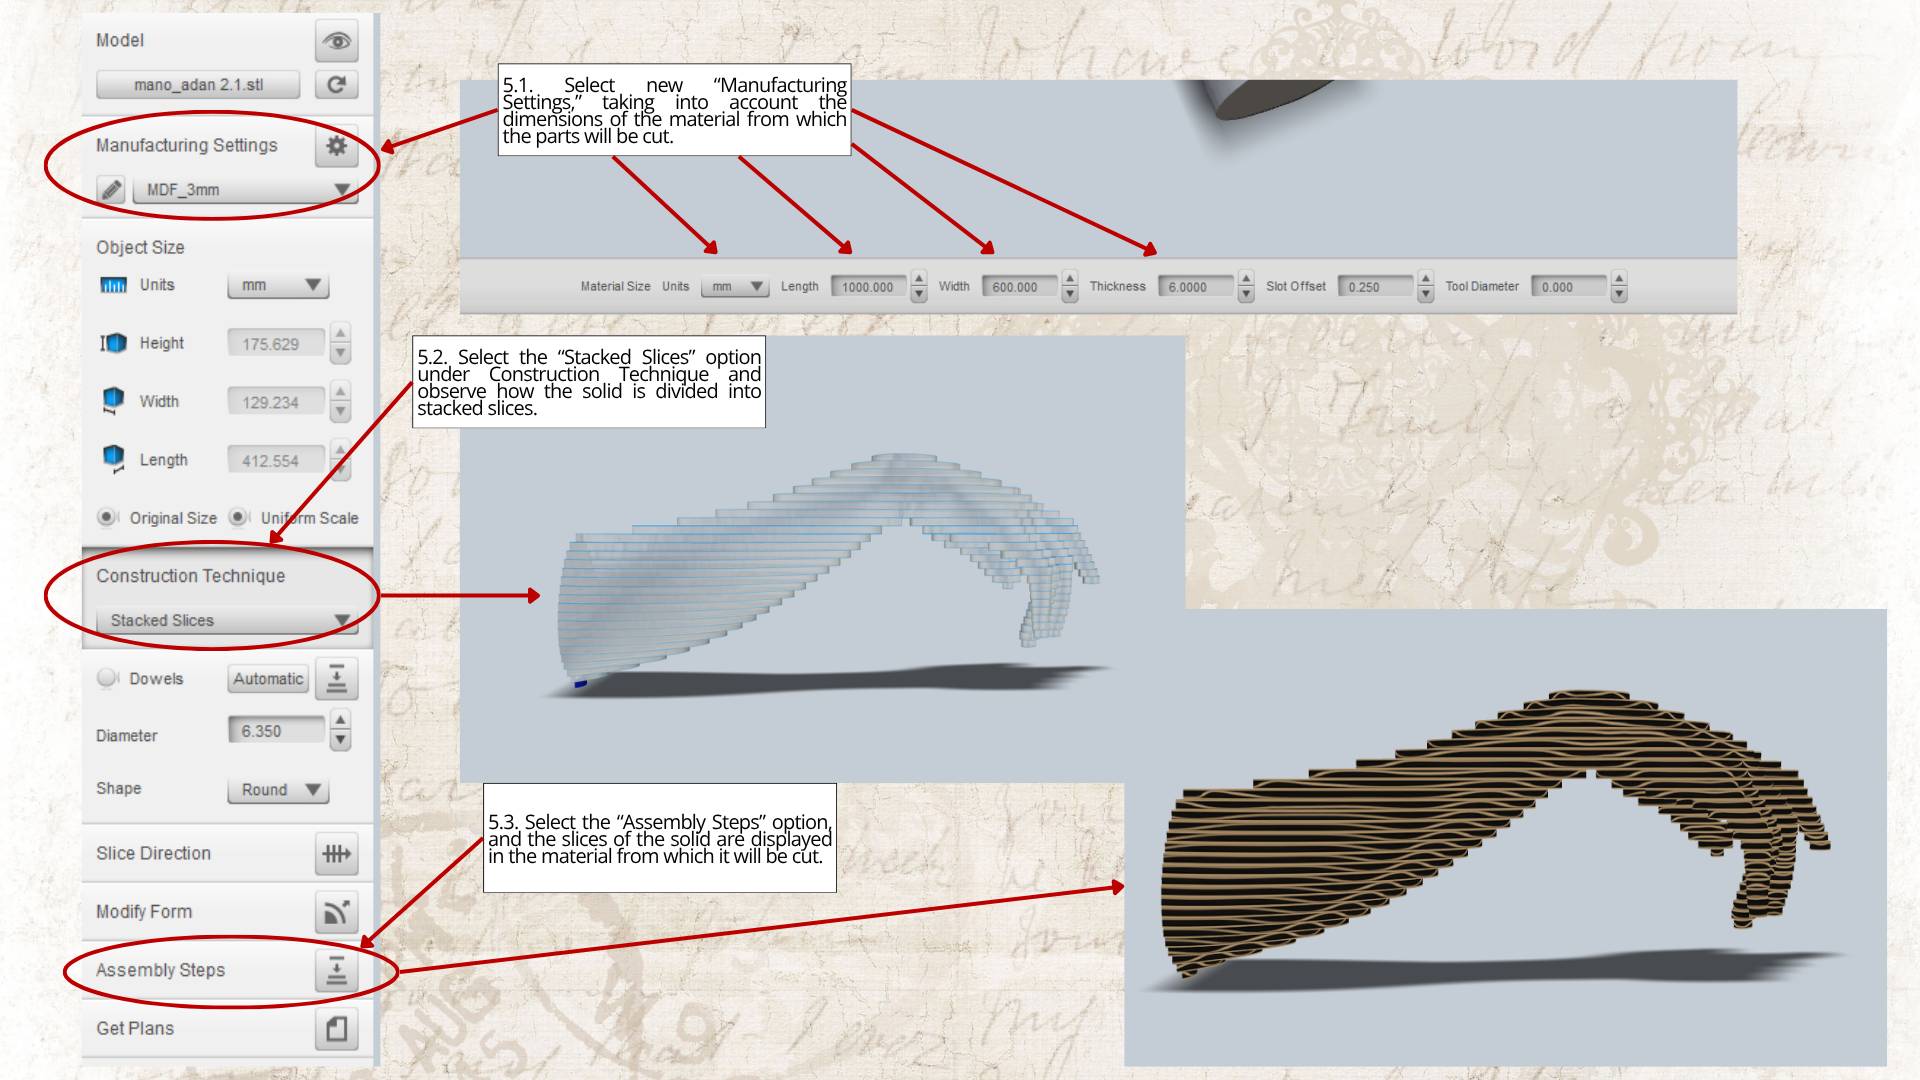
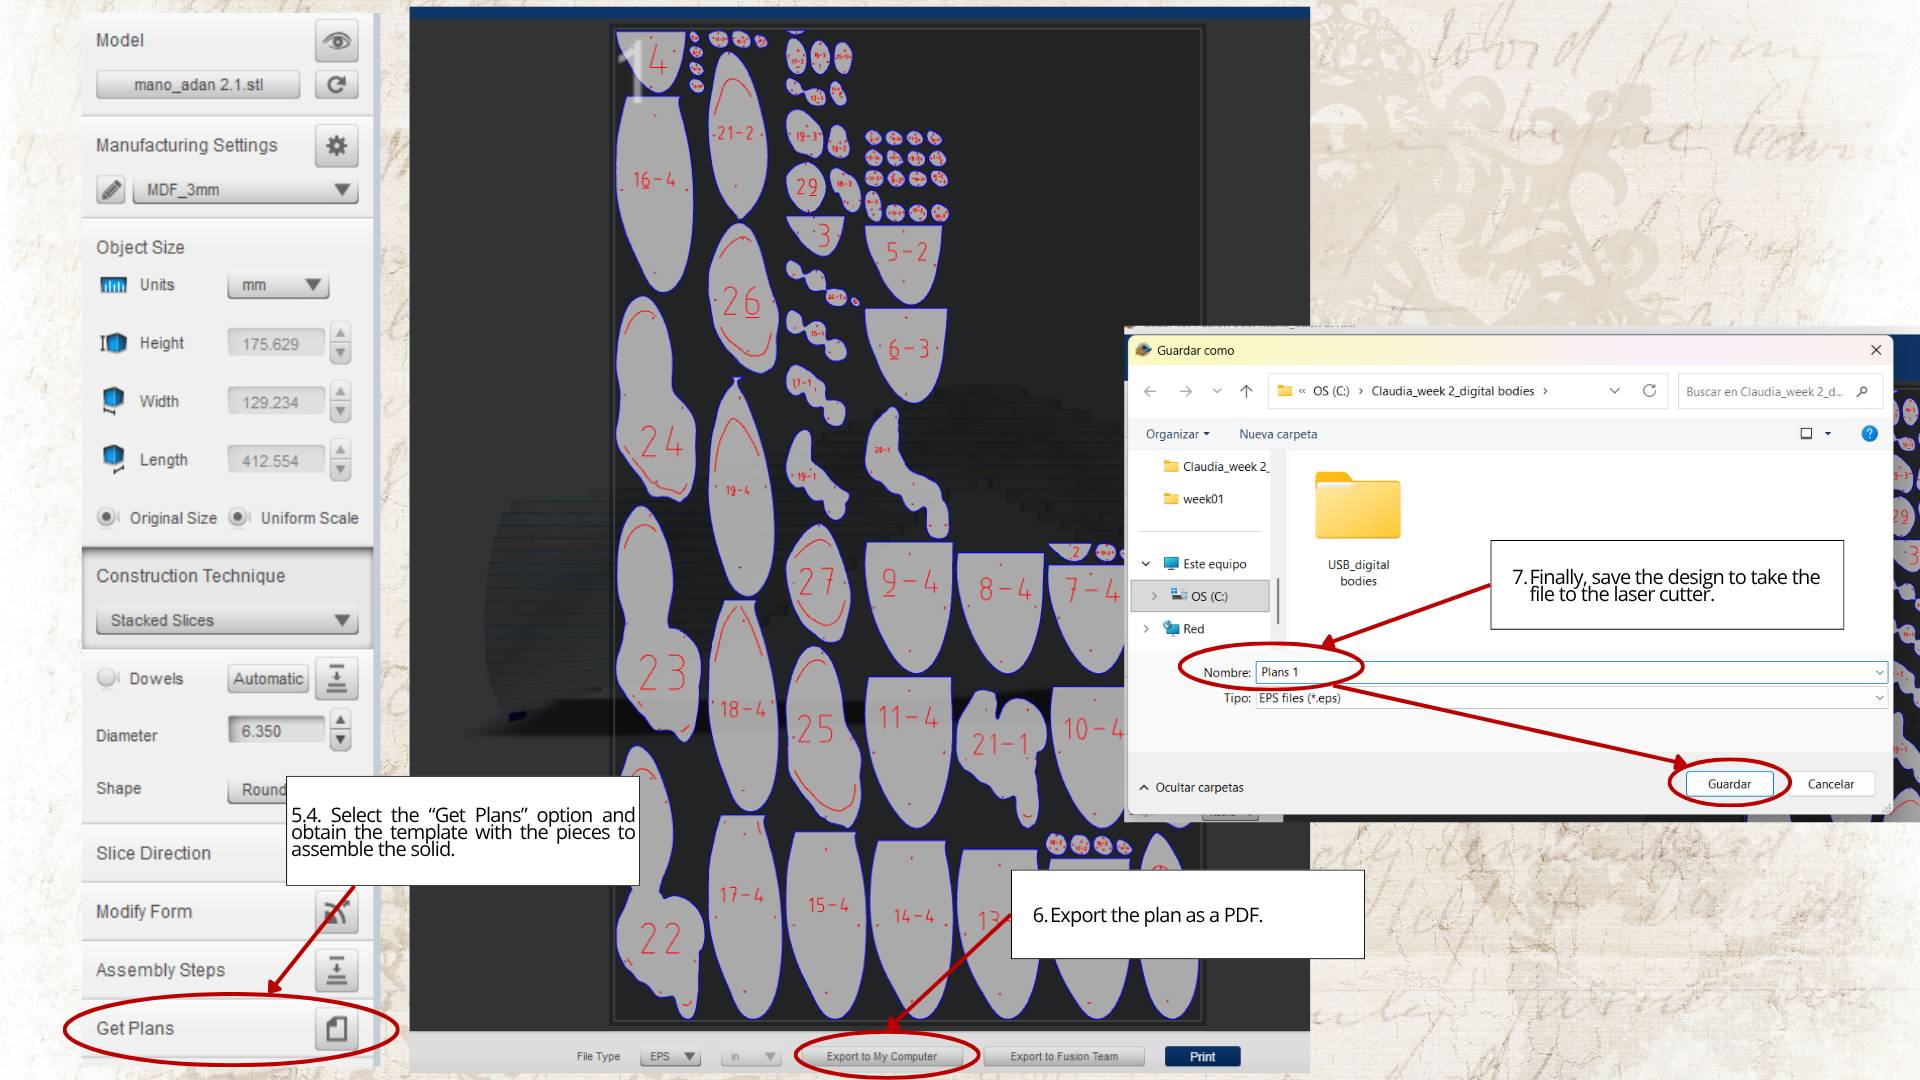
3.3 Step 3: Laser cutting Adam's hand
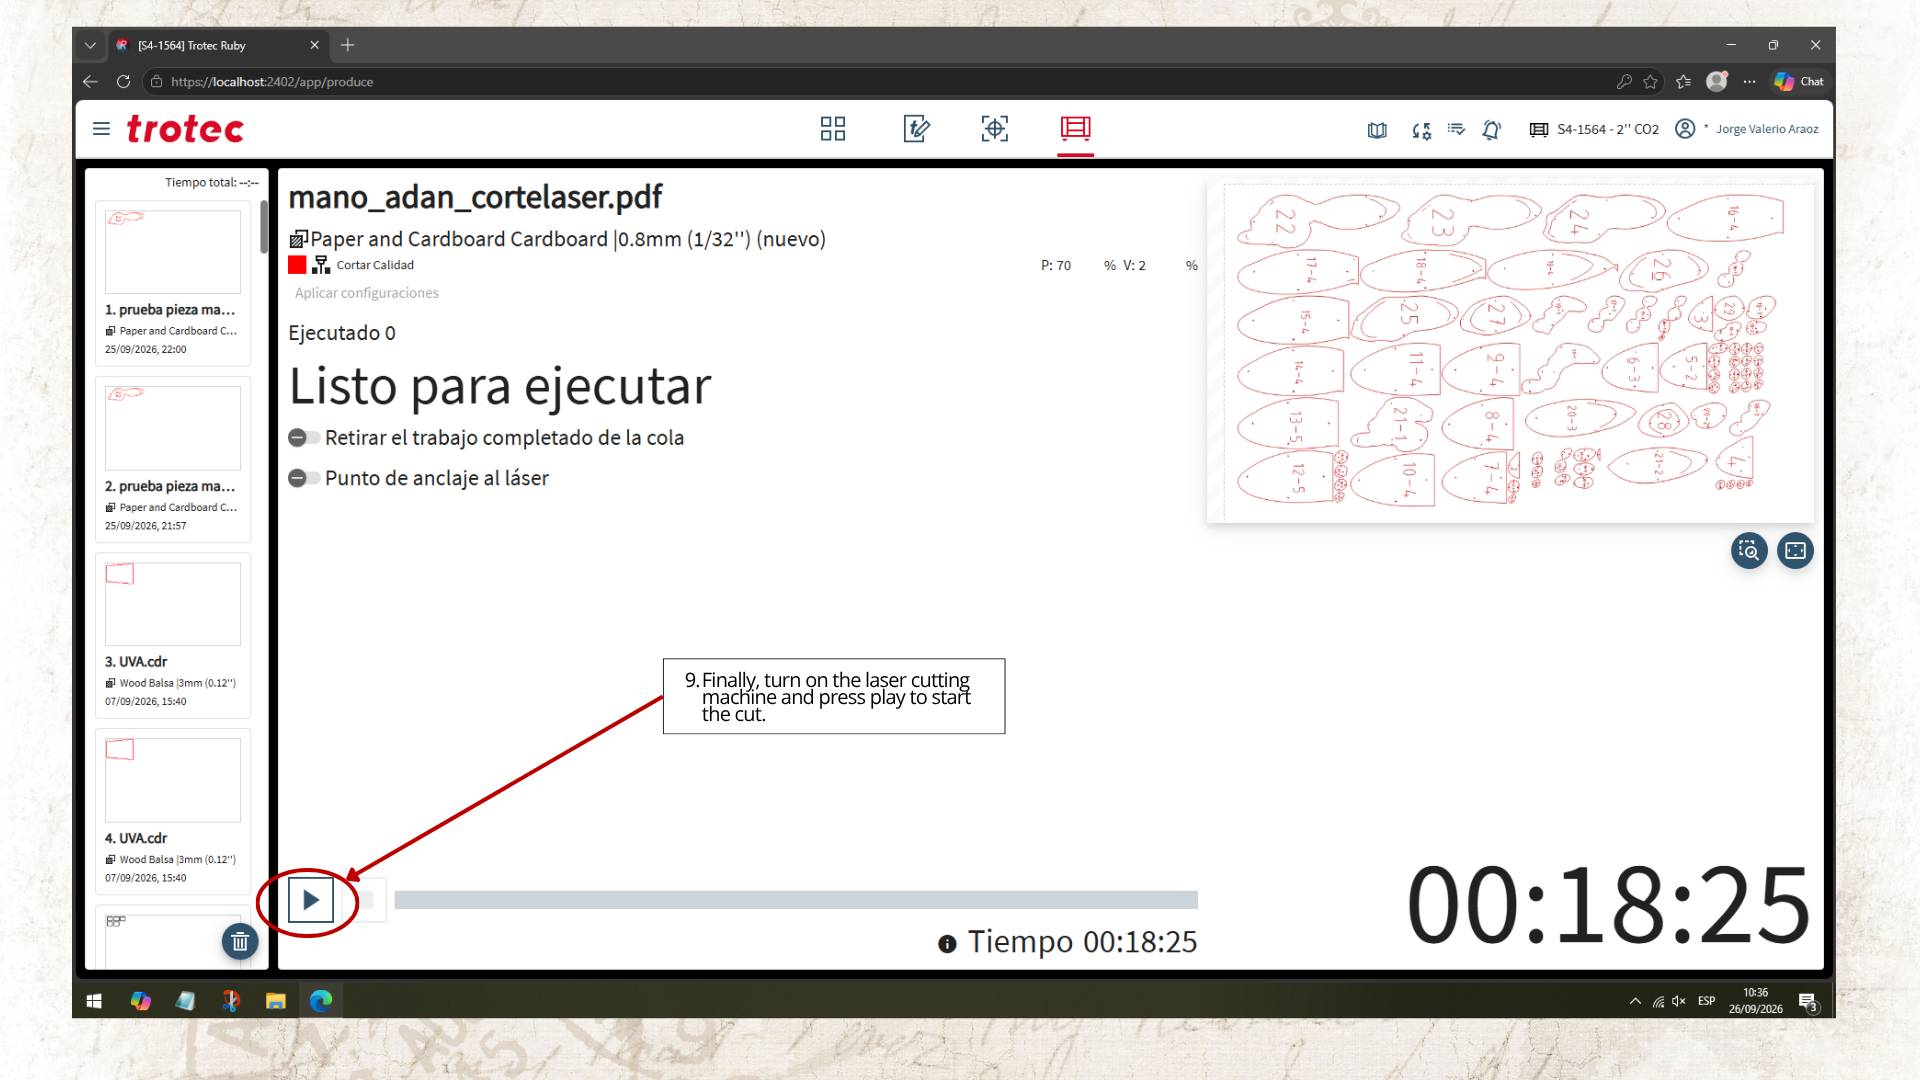
Finally, the template obtained from Slicer was transferred to the Trotec software in order to send the parts for laser cutting.
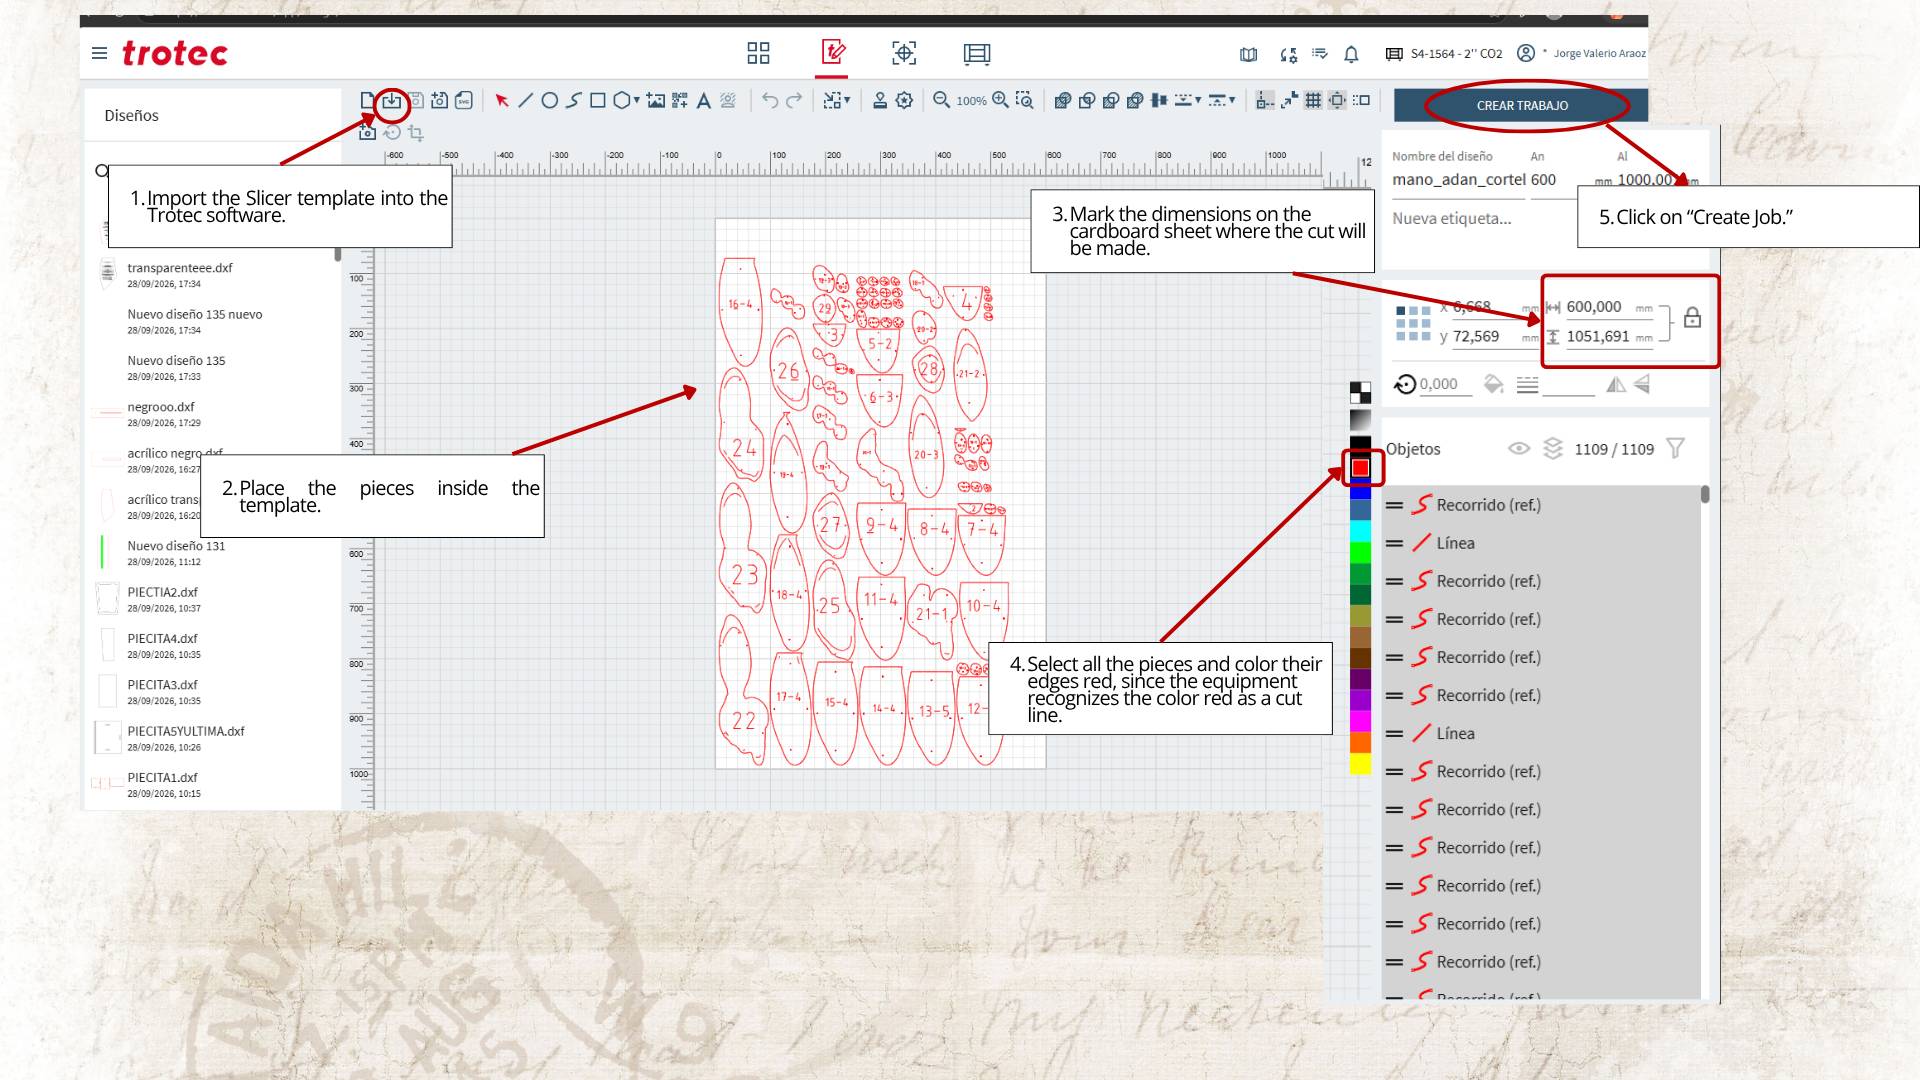
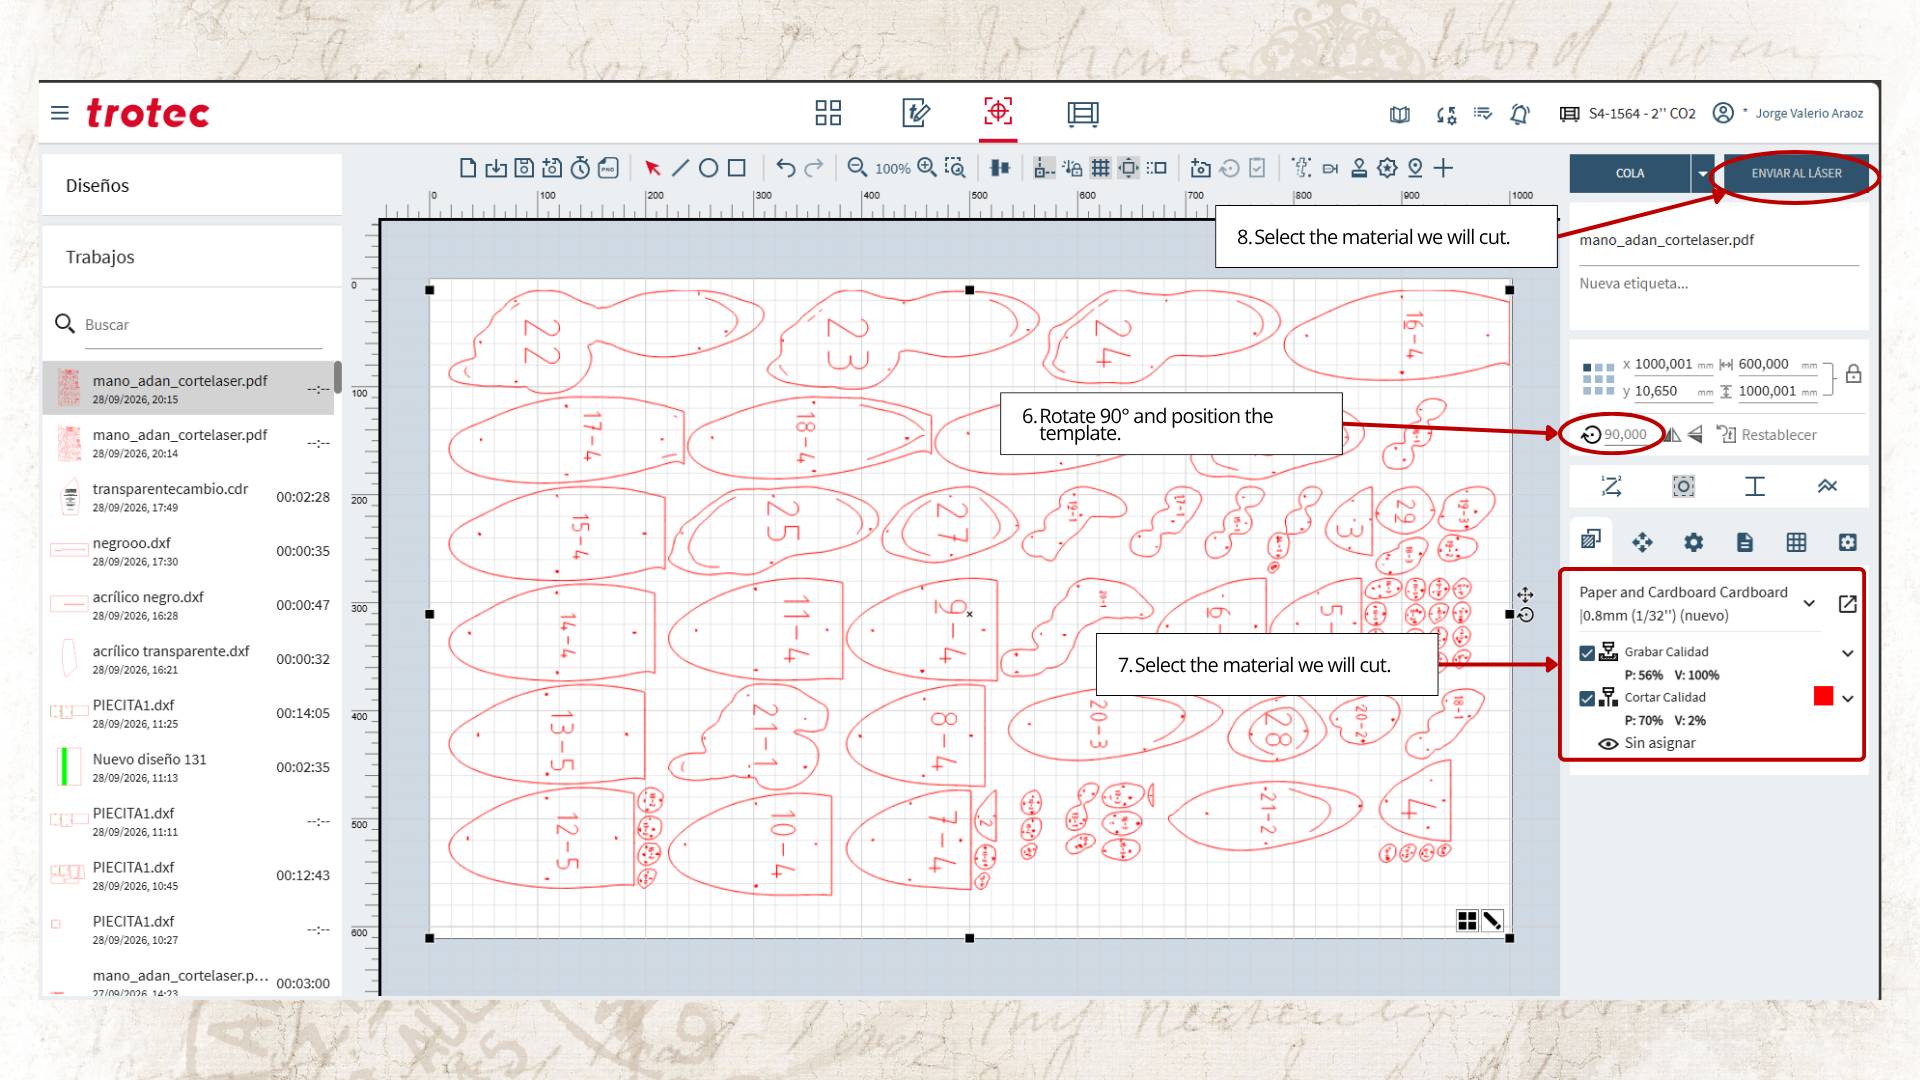
3.4 Step 4: Assembling Adam's Hand
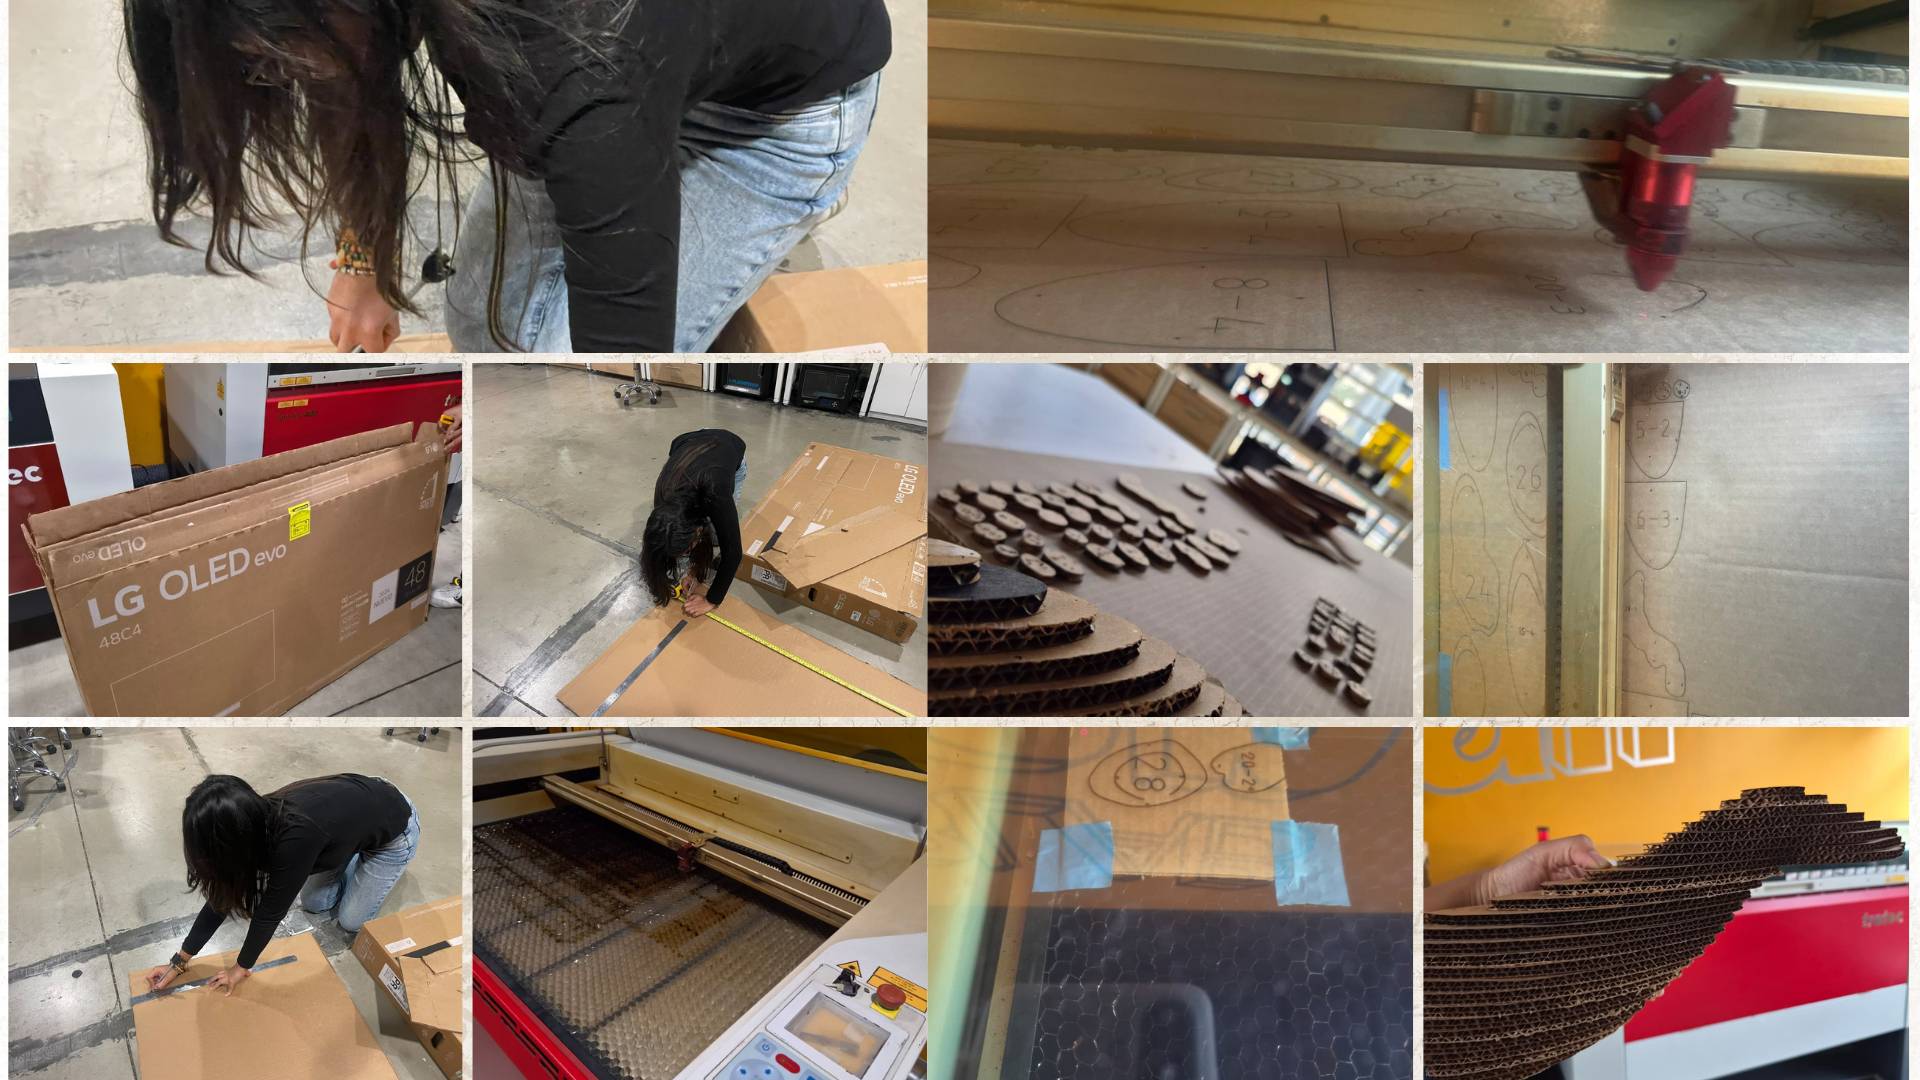
After getting the pieces out of the recycled cardboard, we assembled Adam's arm and hand, as can be seen below.
3.5 Step 5: Transforming a 2D image into 3D
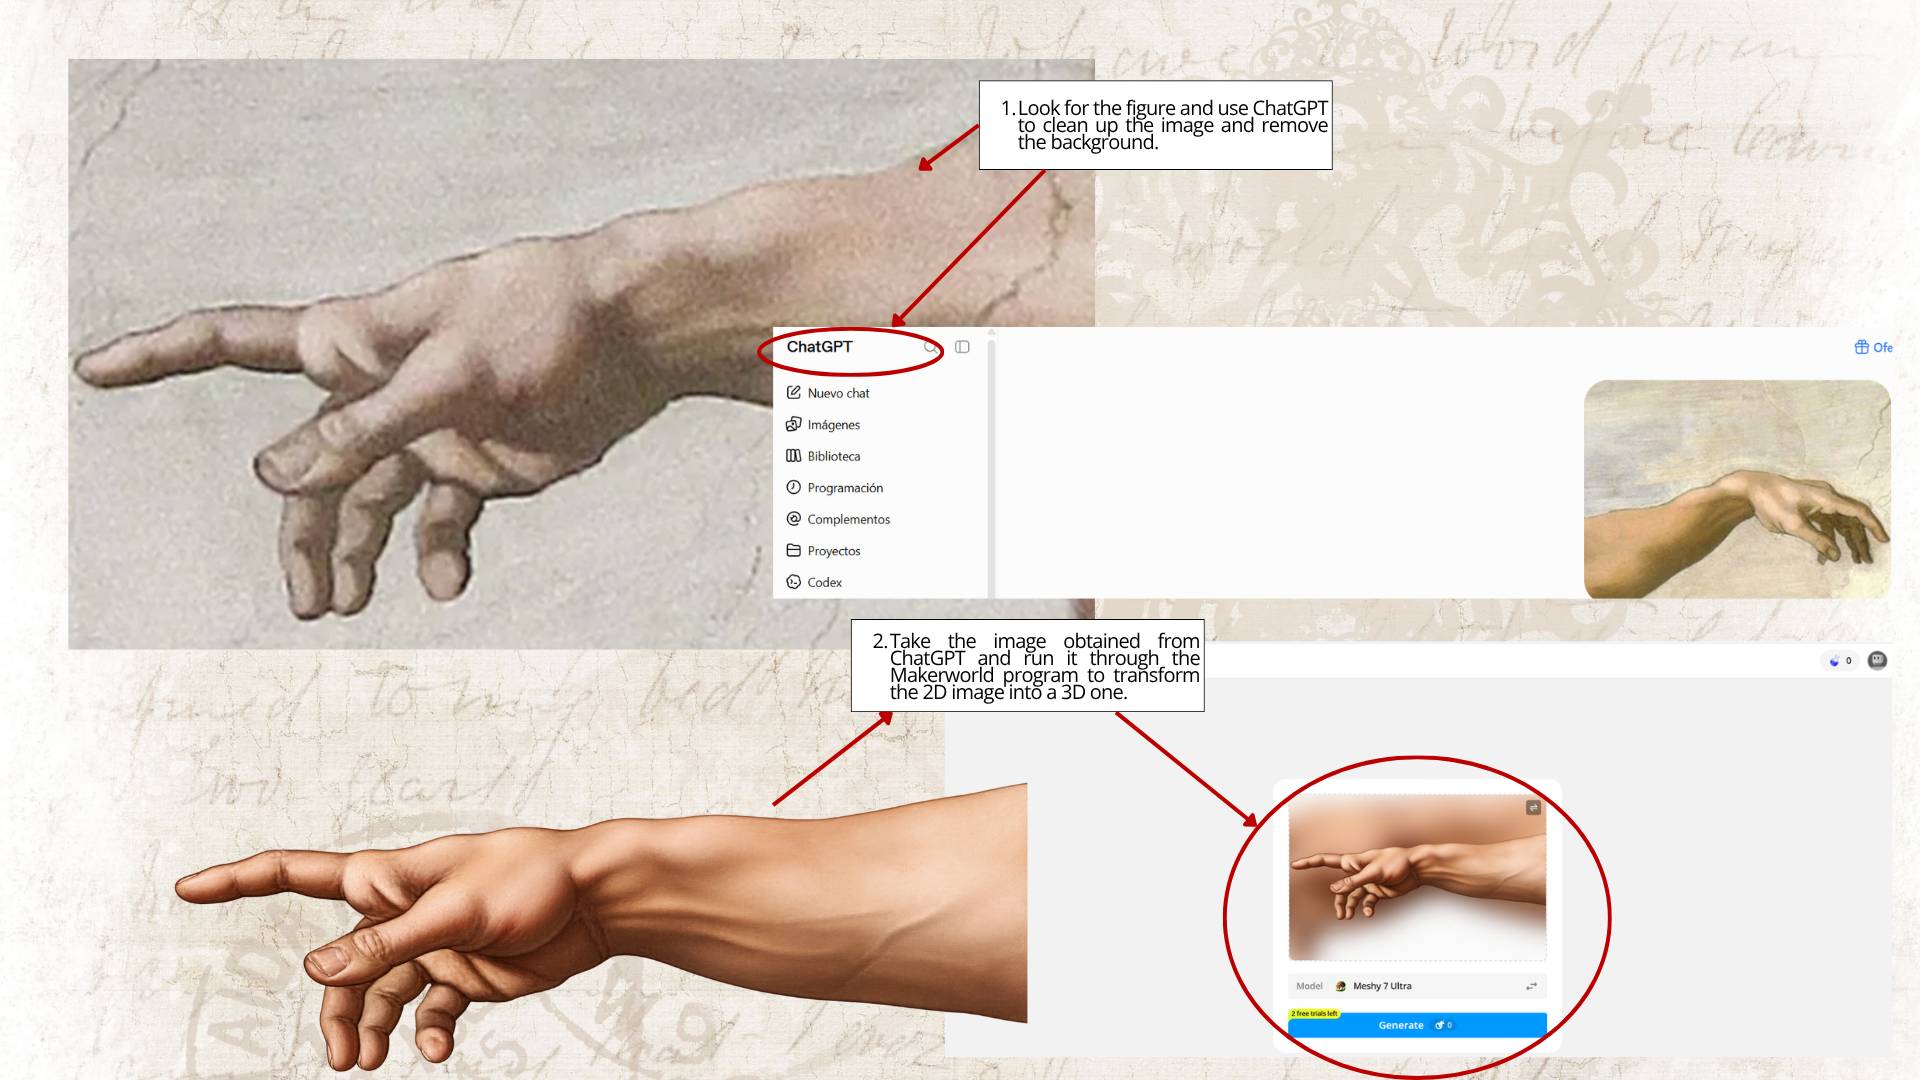
To create God's arm and hand, we took the original painting's image and asked the AI to erase the background and touch up the photo. After that, we loaded the image into MakerWorld to transform it from a 2D image into a 3D model.
3.6 Step 6: Preparing the Hand of God in Bambu Studio and assembling it
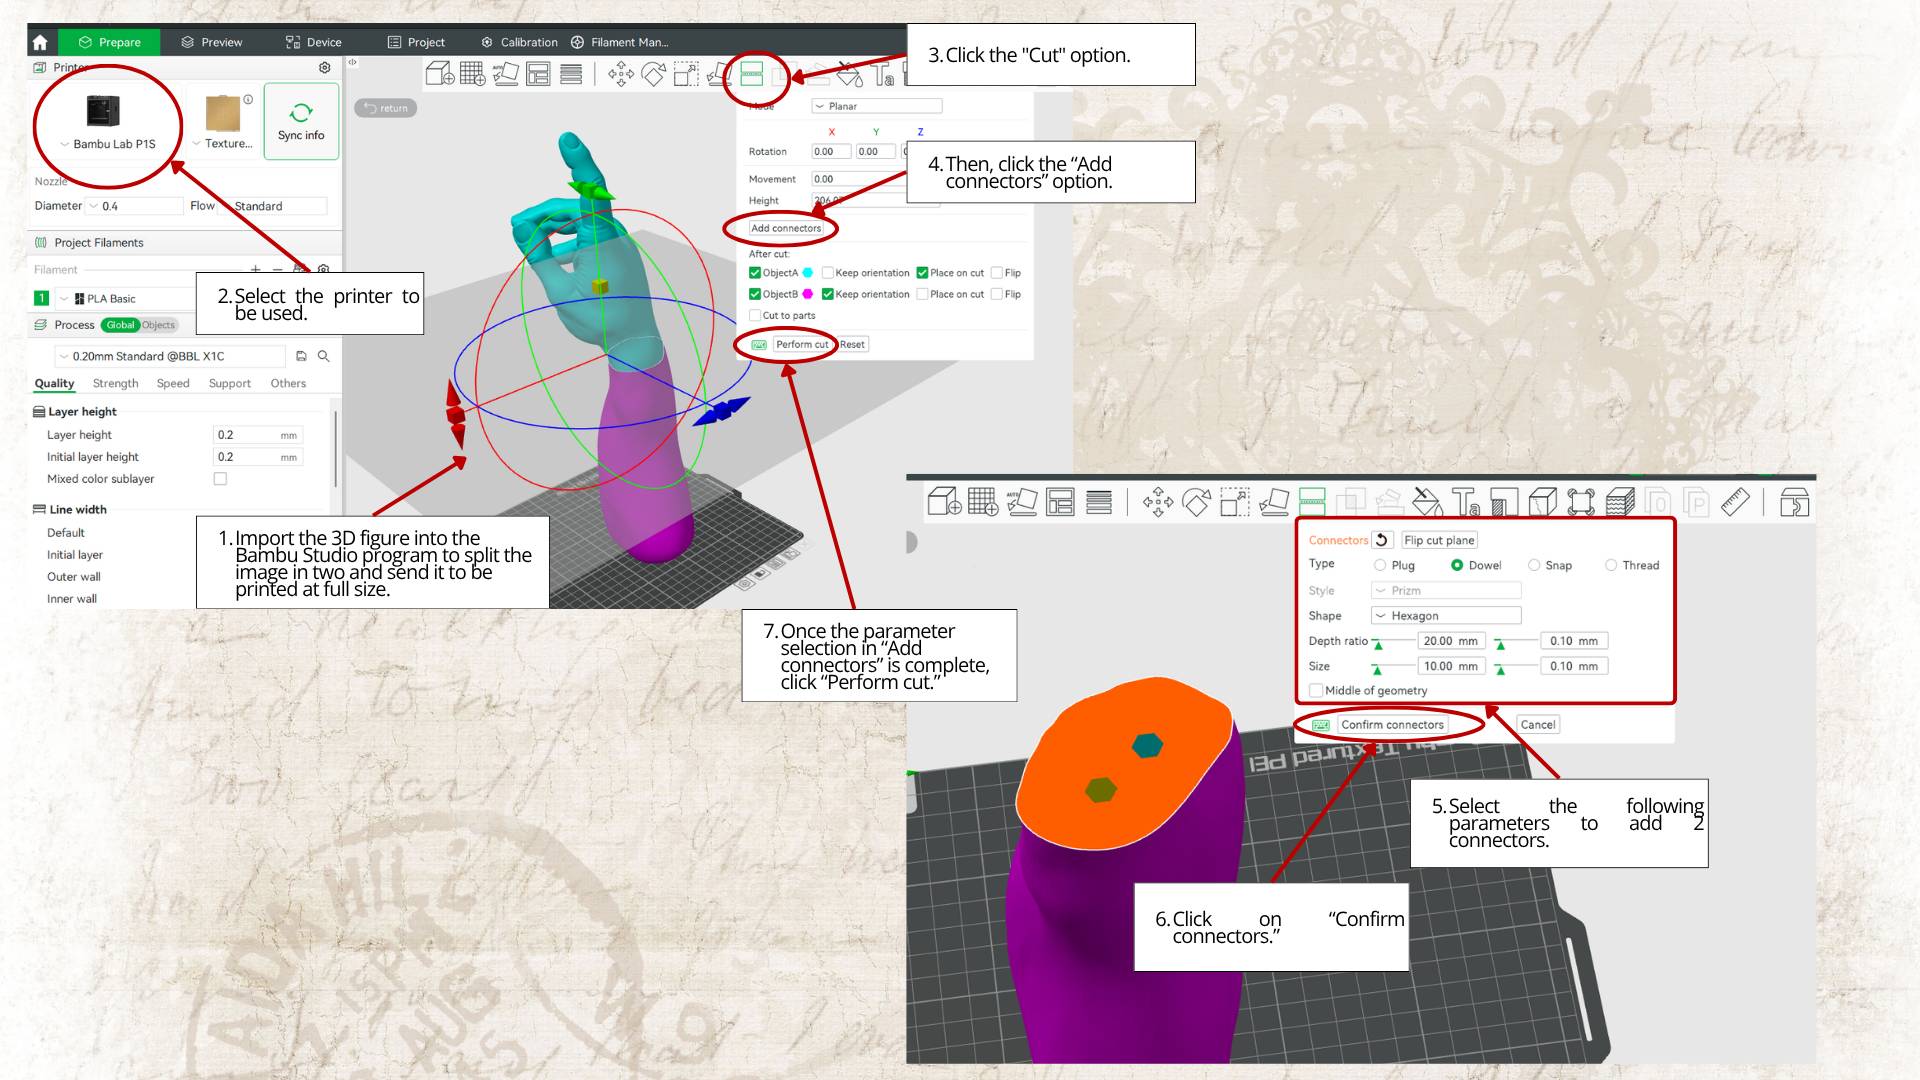
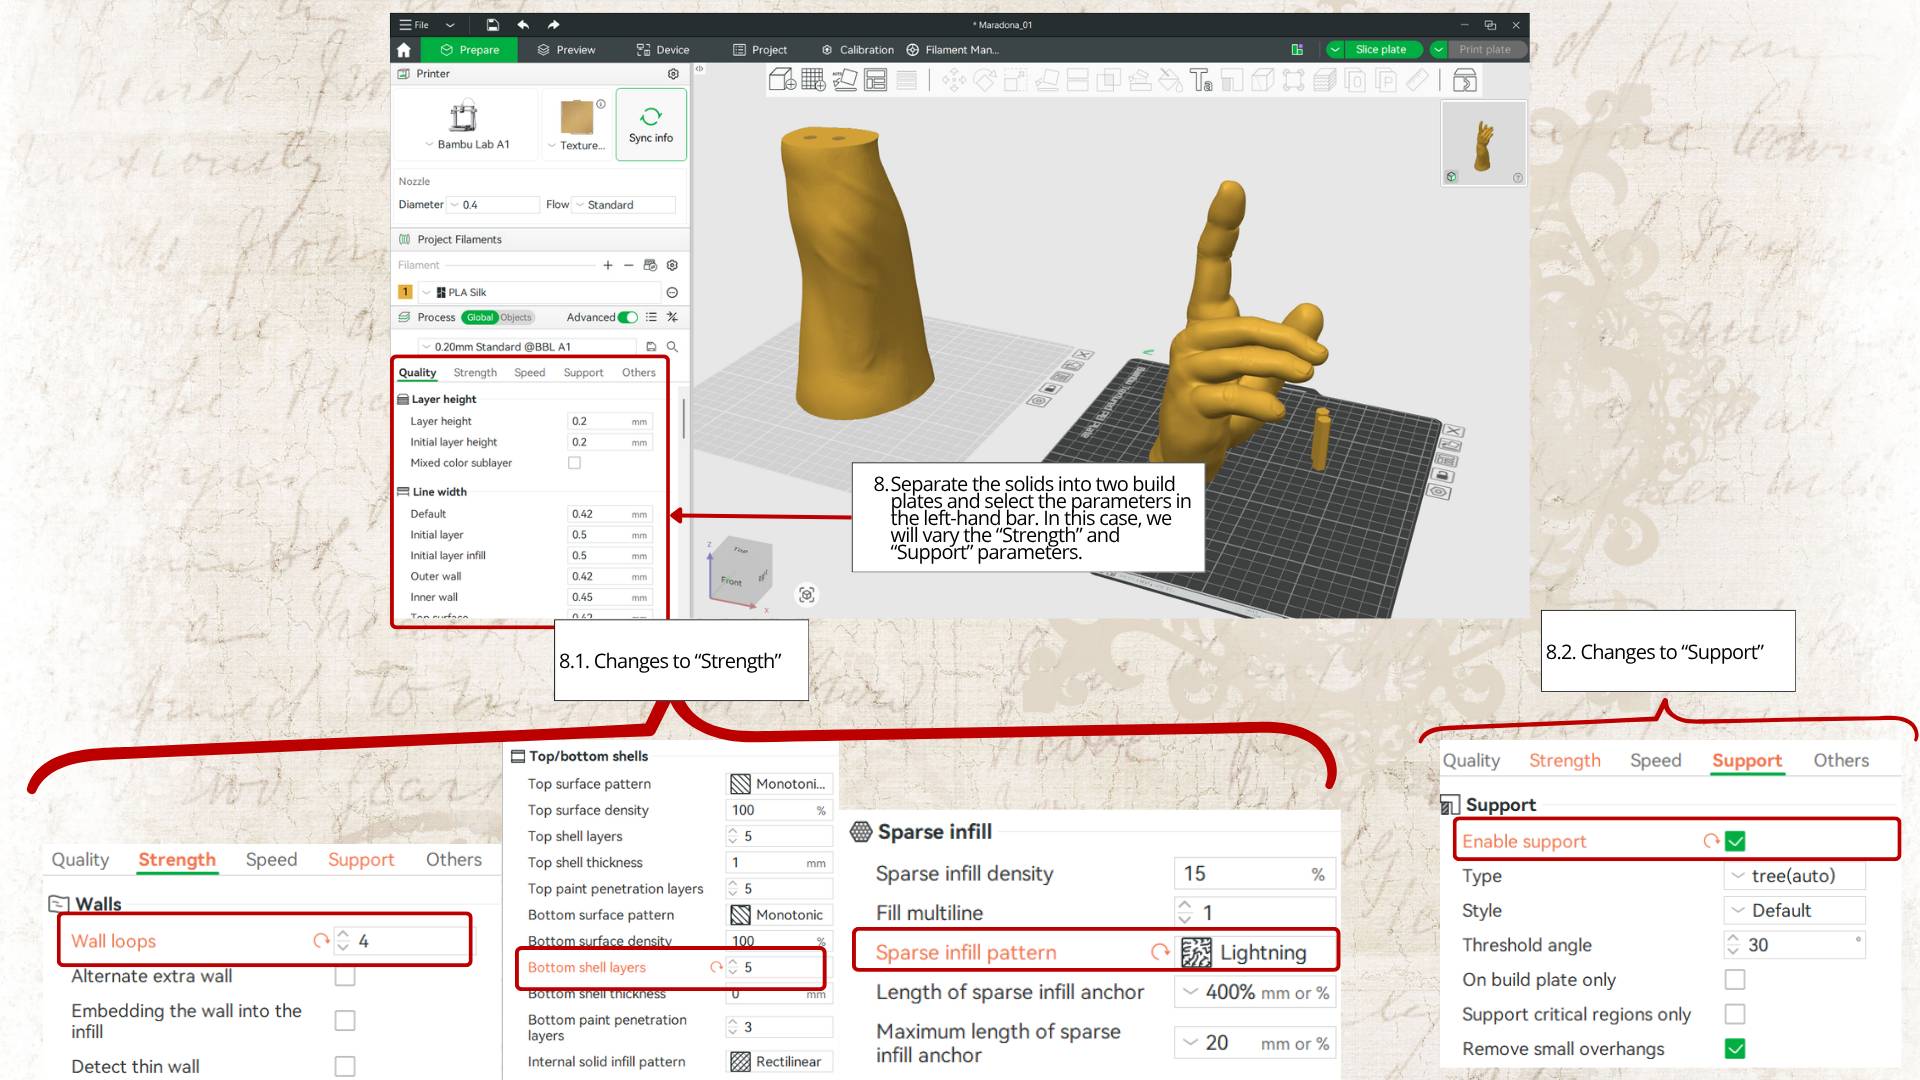
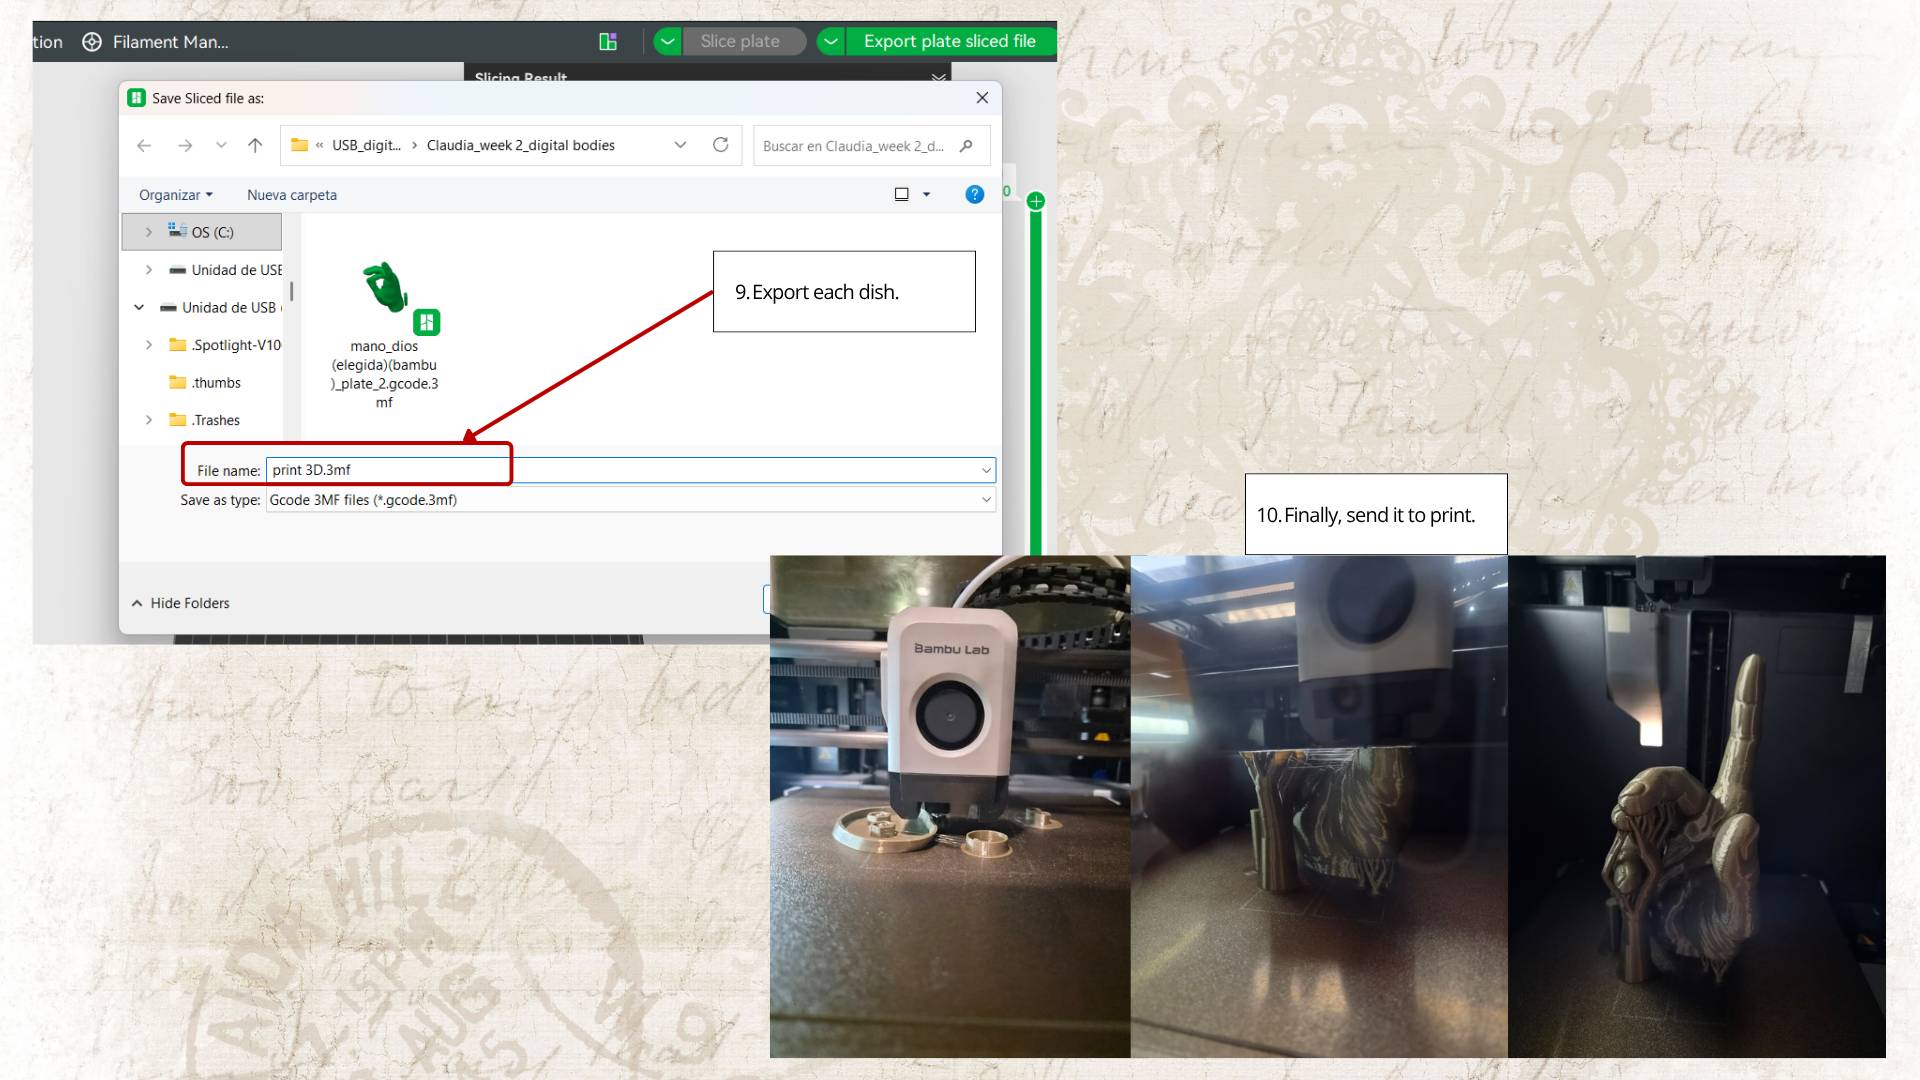
Loaded the 3D model into Bambu Studio to resize it to actual size and cut it in half to print it. Once printed, the parts were assembled to complete the solid model.
4. Results
4.1 Figure
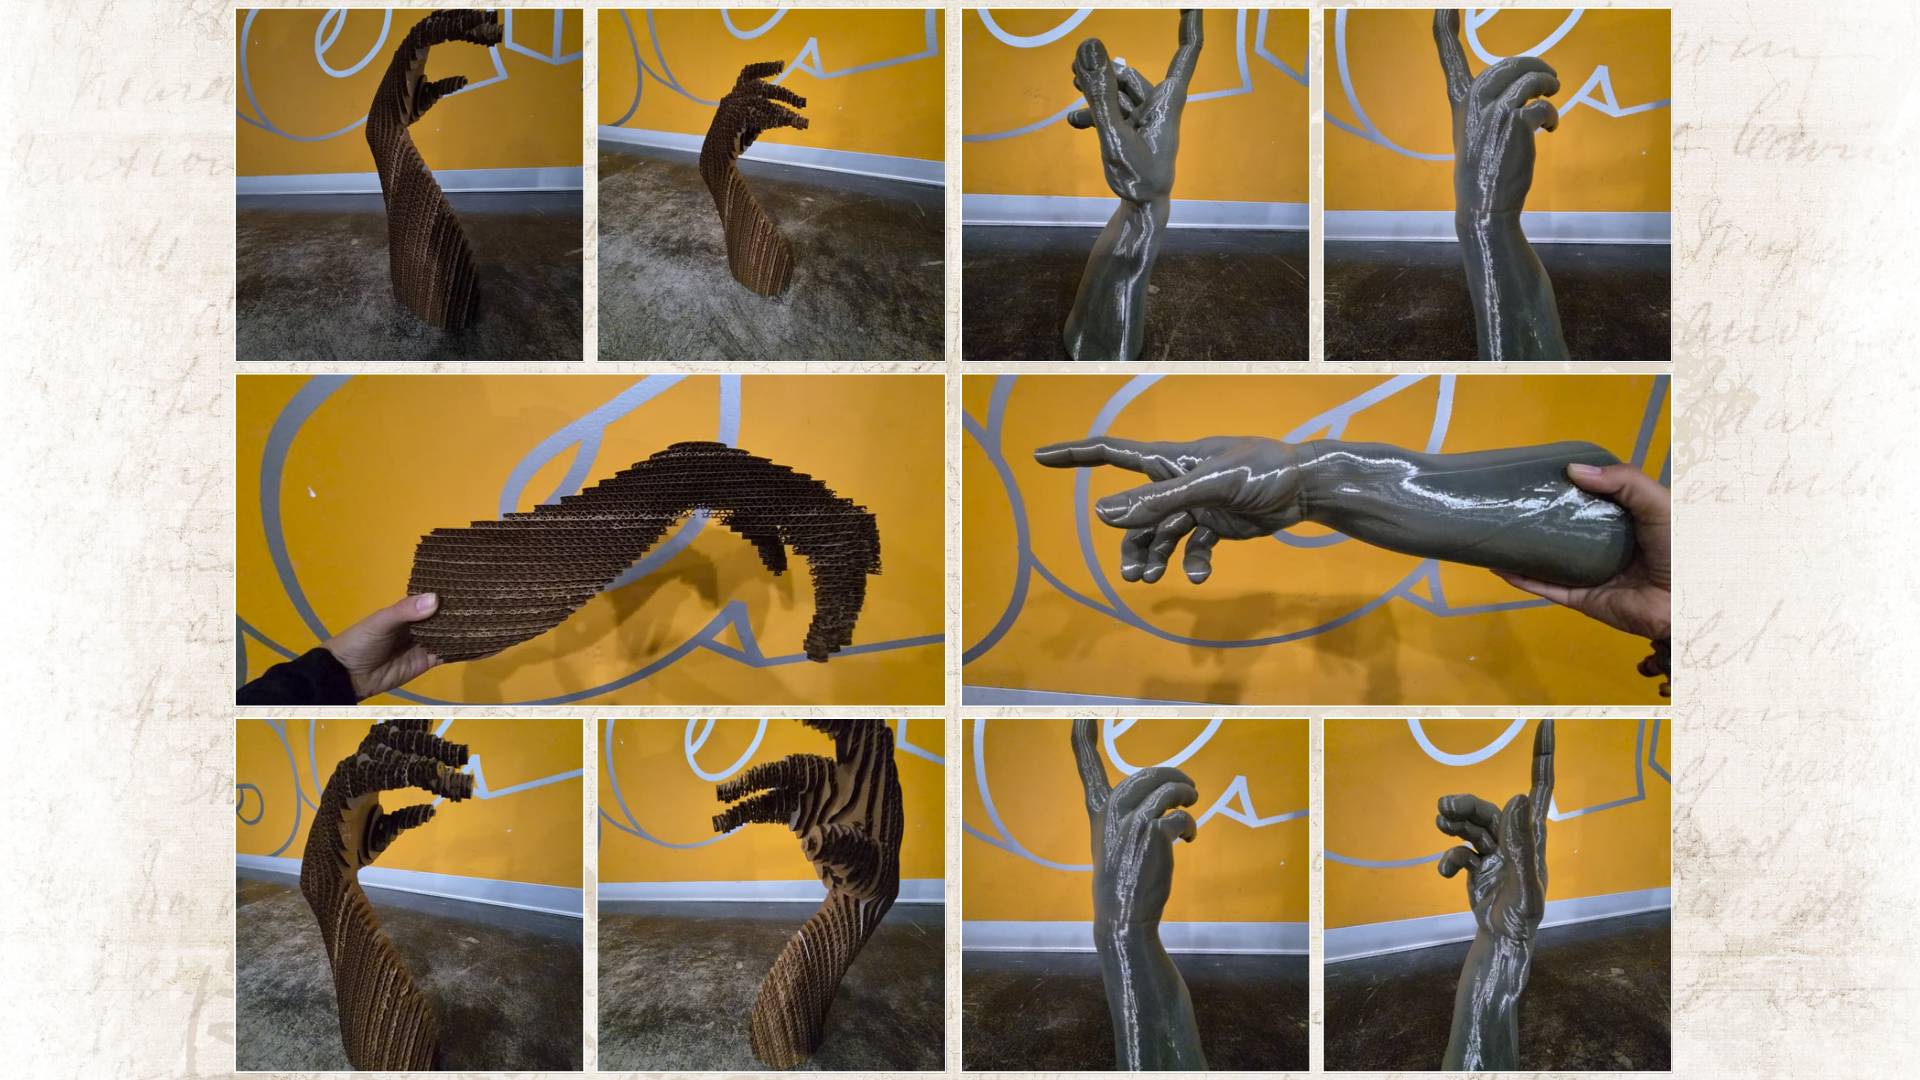
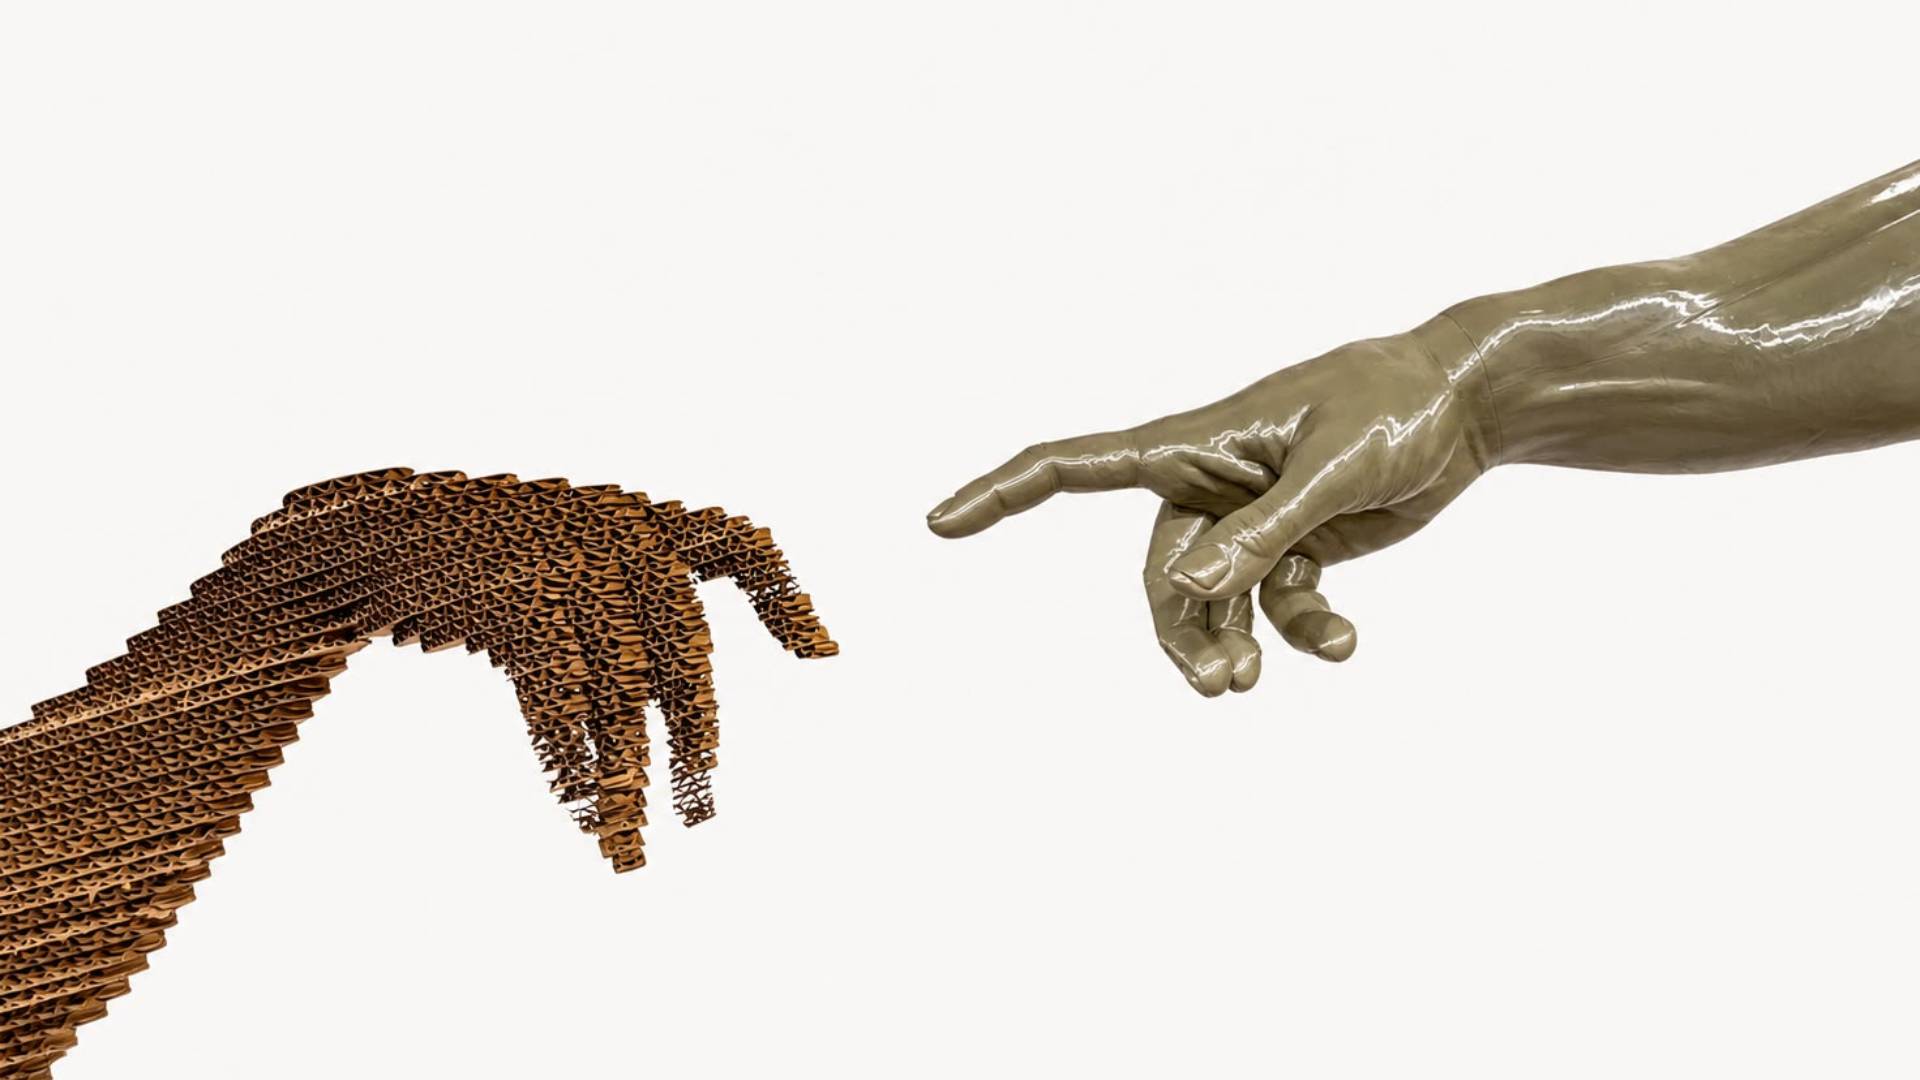
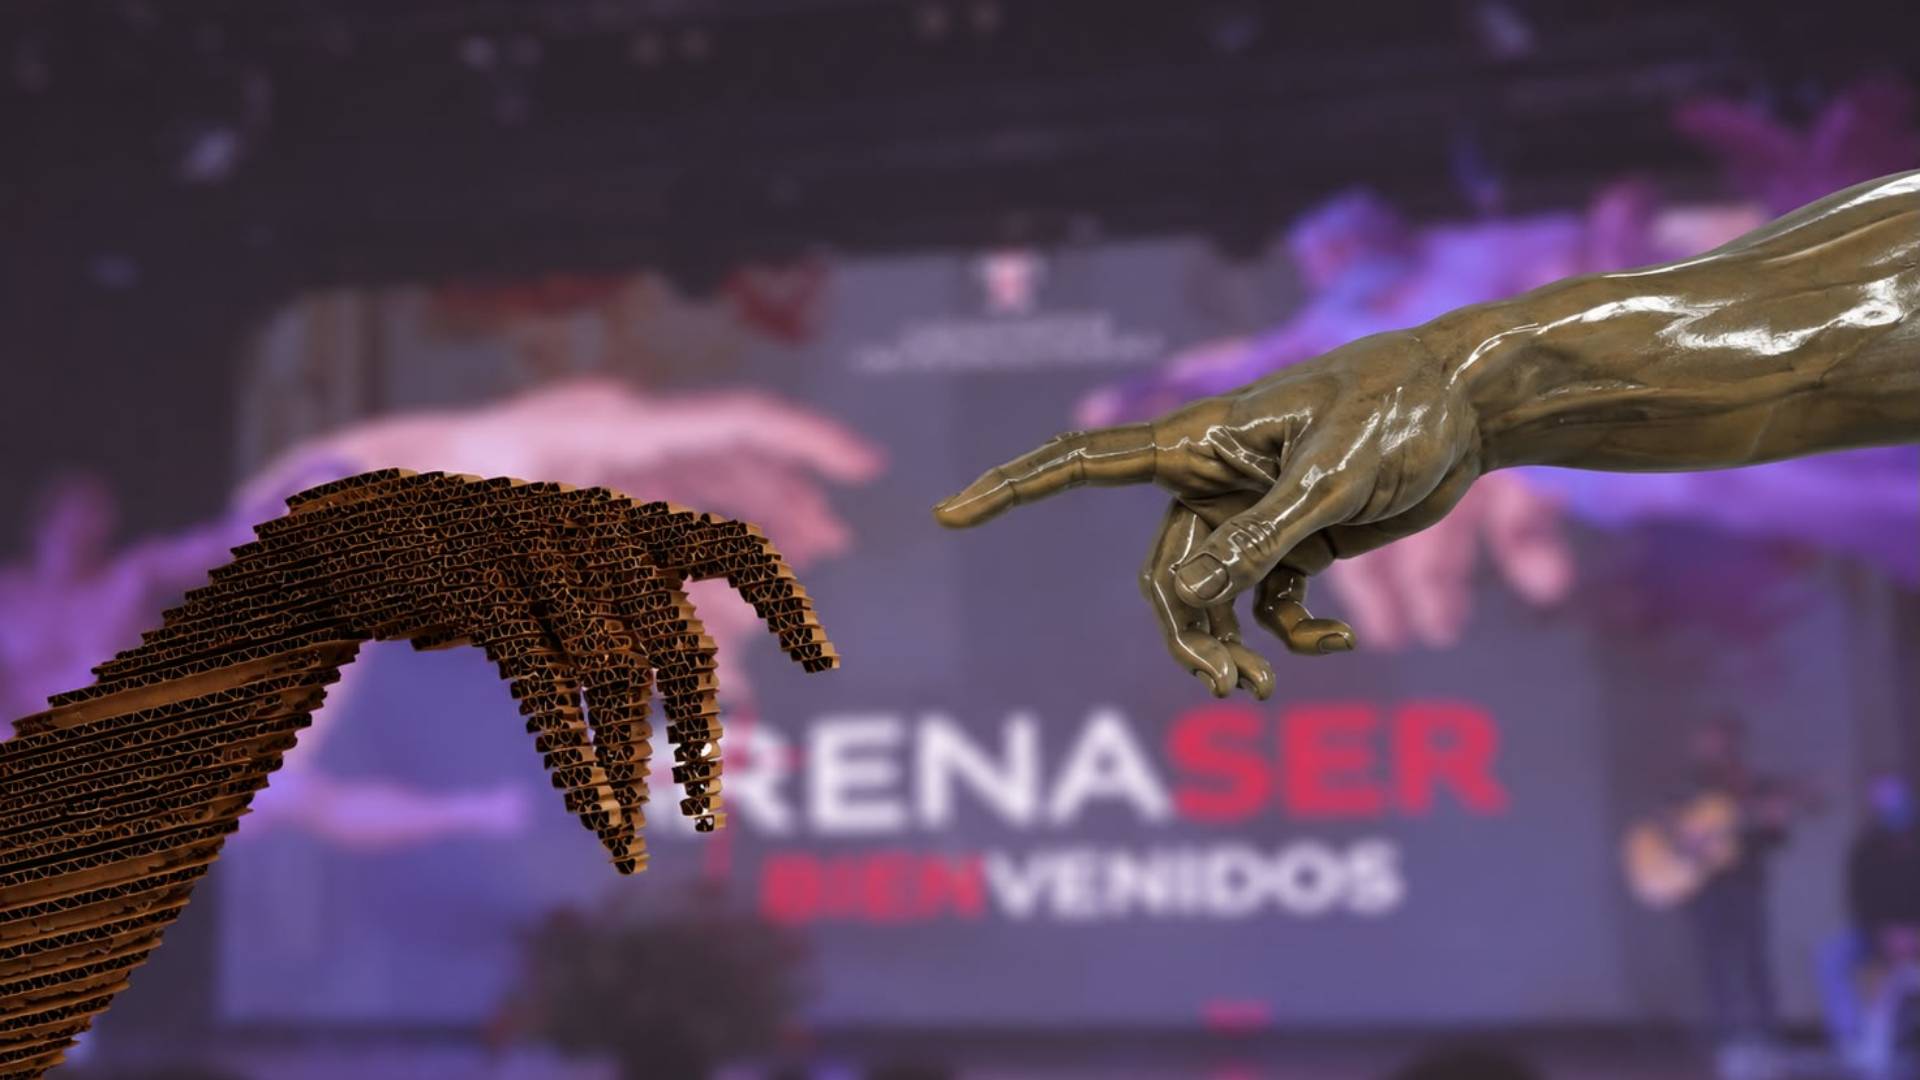
The result of this work was the recreation of those prominent figures in Michelangelo's artwork: the arms and hands of God and Adam.
Assembling Adam's limb took nearly a day due to the way each piece had to be joined together. The final object matched the dimensions of an actual arm and was made from a cardboard television box (height: 600 mm, length: 1000 mm, thickness: 6 mm). Ultimately, a cardboard sheet was used for slightly over 70 pieces.
Regarding God's arm and hand, it was produced using 3D printing, so the material used was plastic. The resulting figure was life-sized, and its assembly was straightforward since it only required joining the pieces using the built-in connections of the solid model.
Both fully assembled parts are shown below.
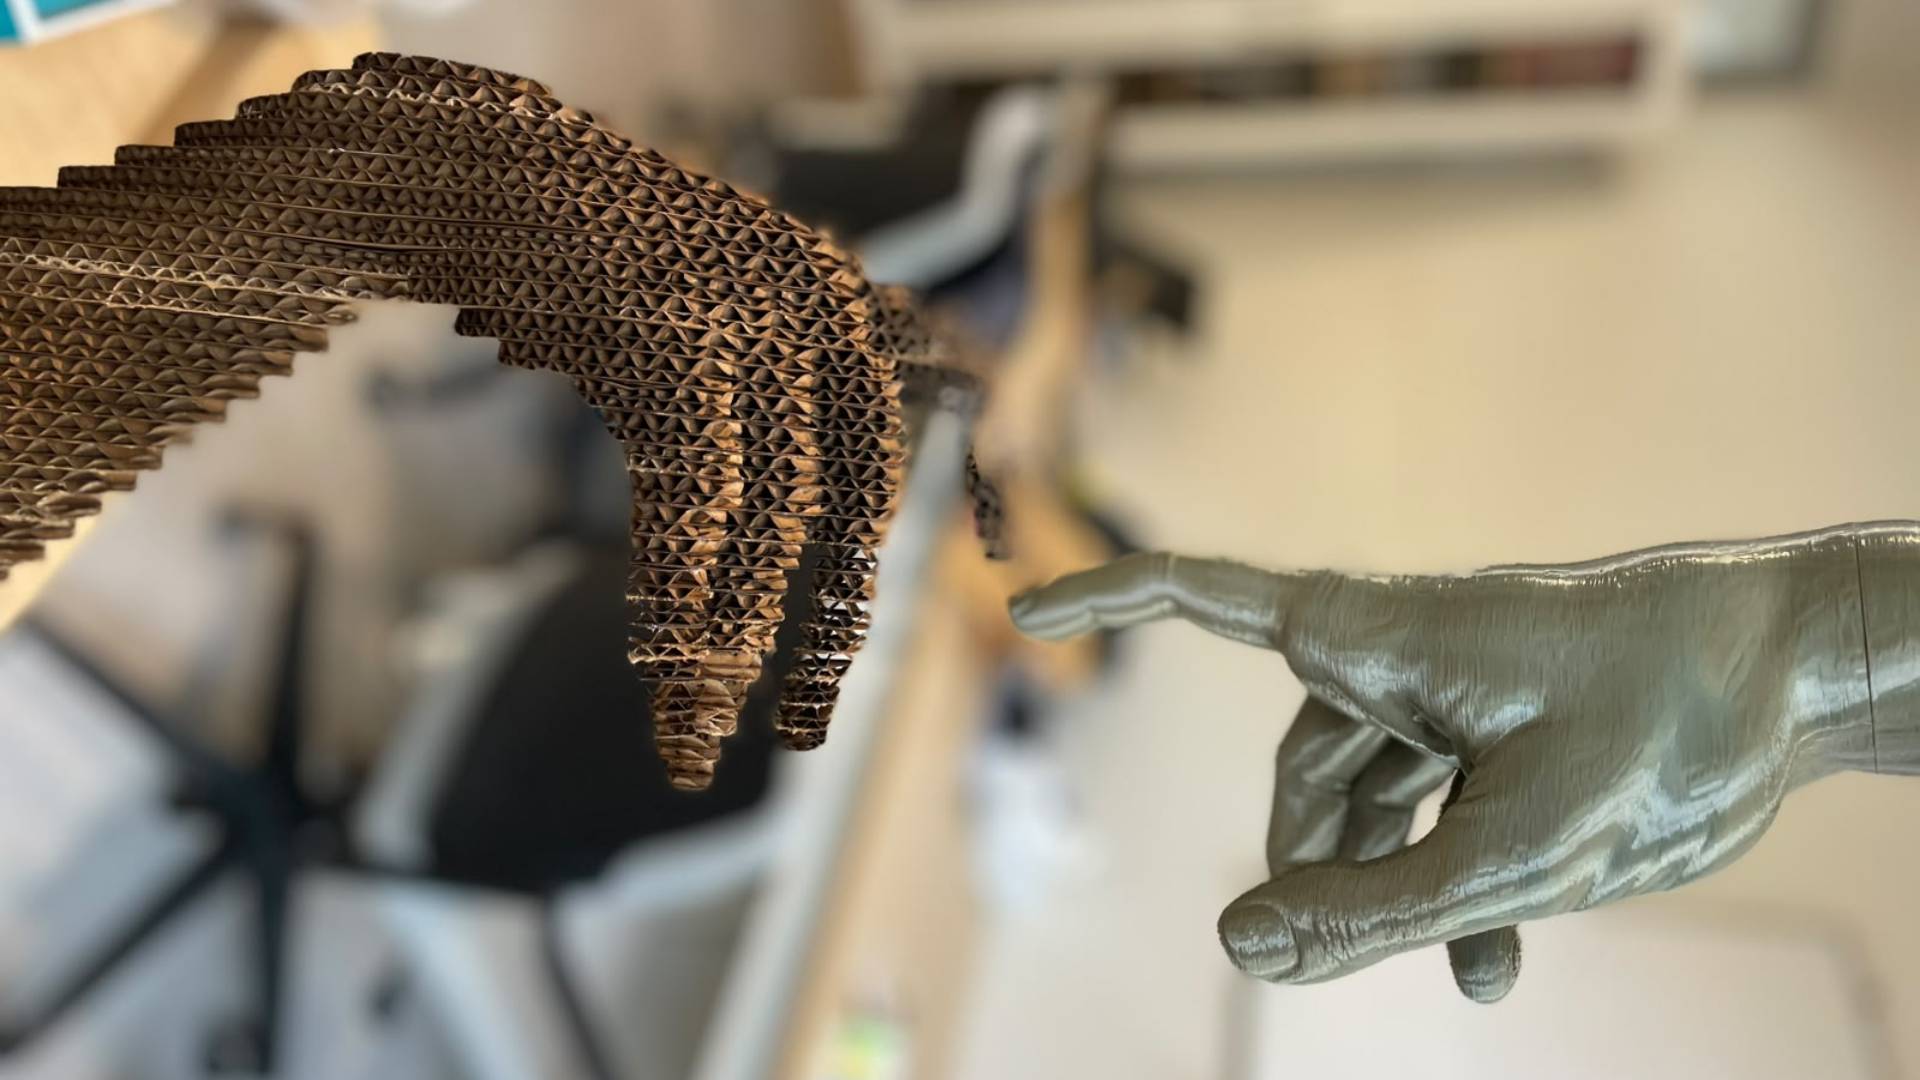
Finally, using a bit of AI, we were able to generate the following images. The last one is my favorite, as it recreates these two pieces within the setting of the RENASER conference.
4.2 Files
In this section, you can review the files obtained from Creality Scan, Slicer for Fusion 360, Marker World, and Bambu Studio.
5. Weekly reflection
- I learned how each of the programs I used works, as all of this was completely new to me.
- Regarding the laser cutter, I learned that it is always a good practice to check whether the machine made a clean cut or if the material required a second pass so that the pieces can be easily removed from the sheet.
- I enjoyed assembling Adam's arm and hand because it reminded me of how it felt to work on handcrafts, even though putting it together took a few hours.
- I came to understand that the scanning process is slow and requires patience. Furthermore, working with human models makes this process even more challenging, as remaining completely still for an extended period is difficult.
- Finally, I would like to explore creating more figures—perhaps slightly simpler ones—to practice and maintain the knowledge I have gained.
6. References
-
Reference:Creality Scan ↩
-
Reference:Slicer for fusion ↩
-
Reference:Trotec Laser ↩
-
Reference:Maker World ↩
-
Reference:Bambu Studio ↩