Soft Robotics
1. References, research & inspiration
Out of everything taught in today's class, what stood out to me most was the movement of each piece displayed. Instantly, my mind jumped to thos time-lapse videos capturing slow, everyday phenomena - like plant growth, wind movement, ocean waves, melting glaciers, and blooming flowers.
Then I asked myself: how could these movements be mimicked using soft robotics? That was when, looking at more images regarding these movements, I realized that the choice of material plays a crucial role in the movement of the final result, as it needs to be flexible. Likewise, the use of folds created by hollow spaces built into the material—through which air flows—is key to recreating each movement.
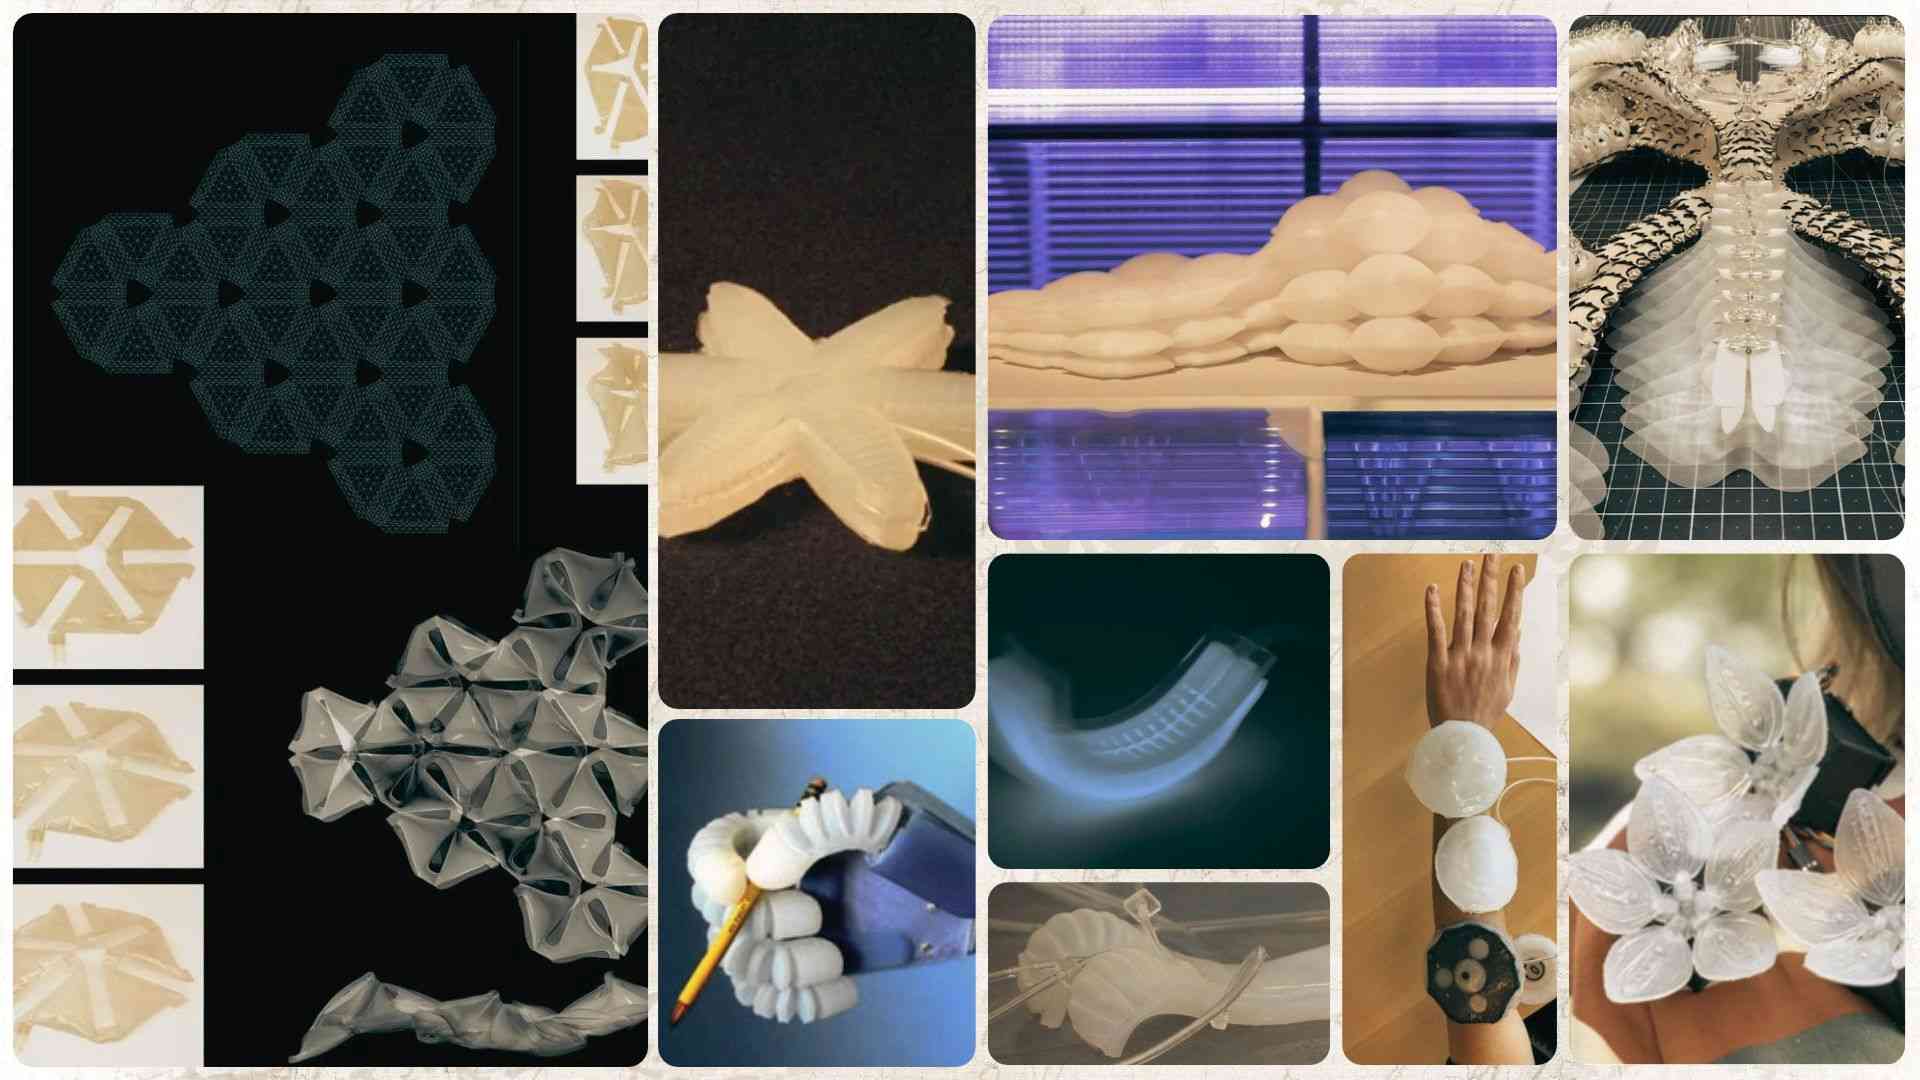
Below are several projects developed by students from prestigious universities, offering a complete overview of what can be achieved:
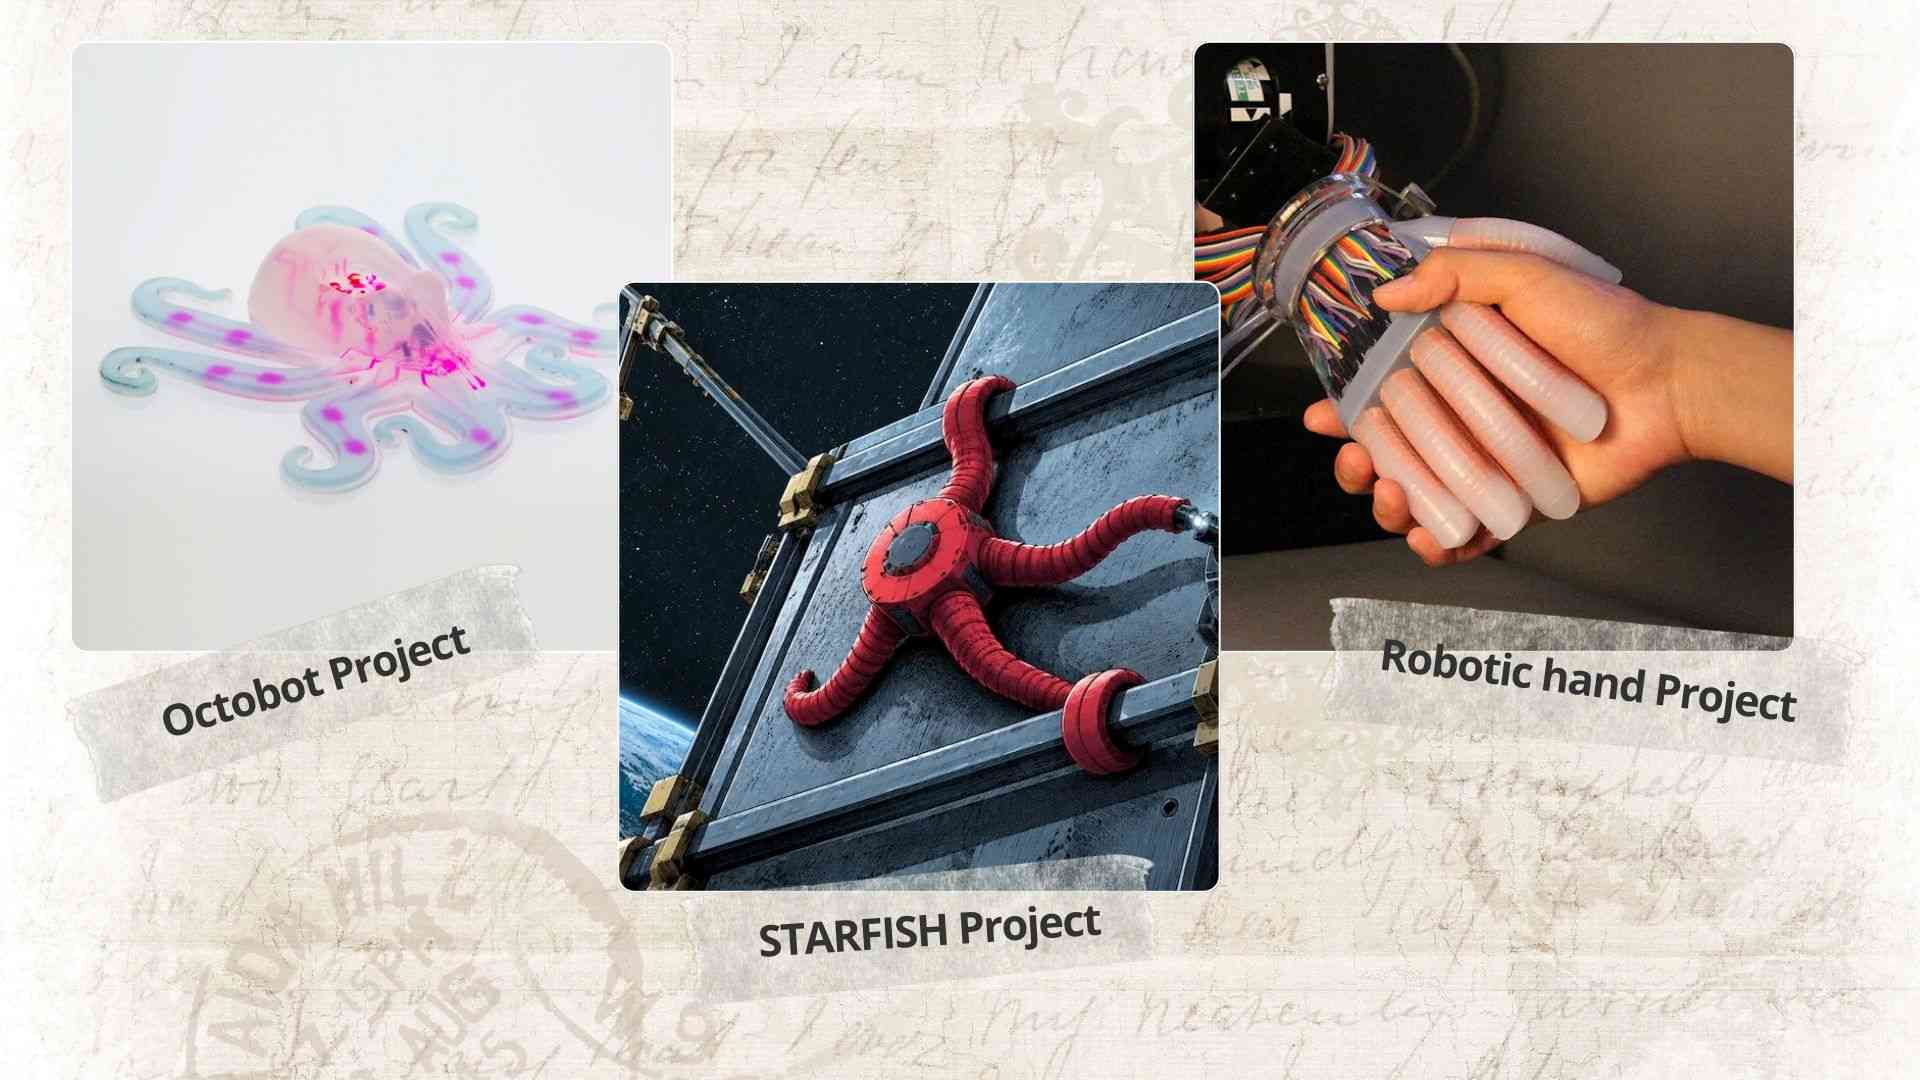
First, there is the Octobot project—the world's first fully autonomous robot made entirely of 100% soft materials, developed by scientists at Harvard University. Unlike traditional robots, this small, octopus-shaped robot does not contain a single rigid component (neither batteries, wires, nor silicon chips), marking a major milestone in the field of soft robotics.1
On the other hand, we have the STARFISH project, developed by PhD student Kristina Andreyeva. This soft robot was designed to inspect welds and joints on orbiting spacecraft. Its concept was straightforward: launch a soft robot attached to the main spacecraft so it would always be available, thereby eliminating the need for a separate, fuel-intensive inspection vessel.2
Finally, I would like to highlight the project by scientists at Cornell University's Organic Robotics Lab. They developed a robotic hand with a level of sensitivity similar to a human's, delicate enough to detect the shape, softness, and overall texture of whatever it touches.3
2. Tools
3. Process and workflow
3.1 Step 1: Heat-pressed inflatables
To start experimenting and understand how each movement is generated and operates, we began by using vinyl and baking paper to craft a simple inflatable similar to metallic birthday balloons, just as taught in class.
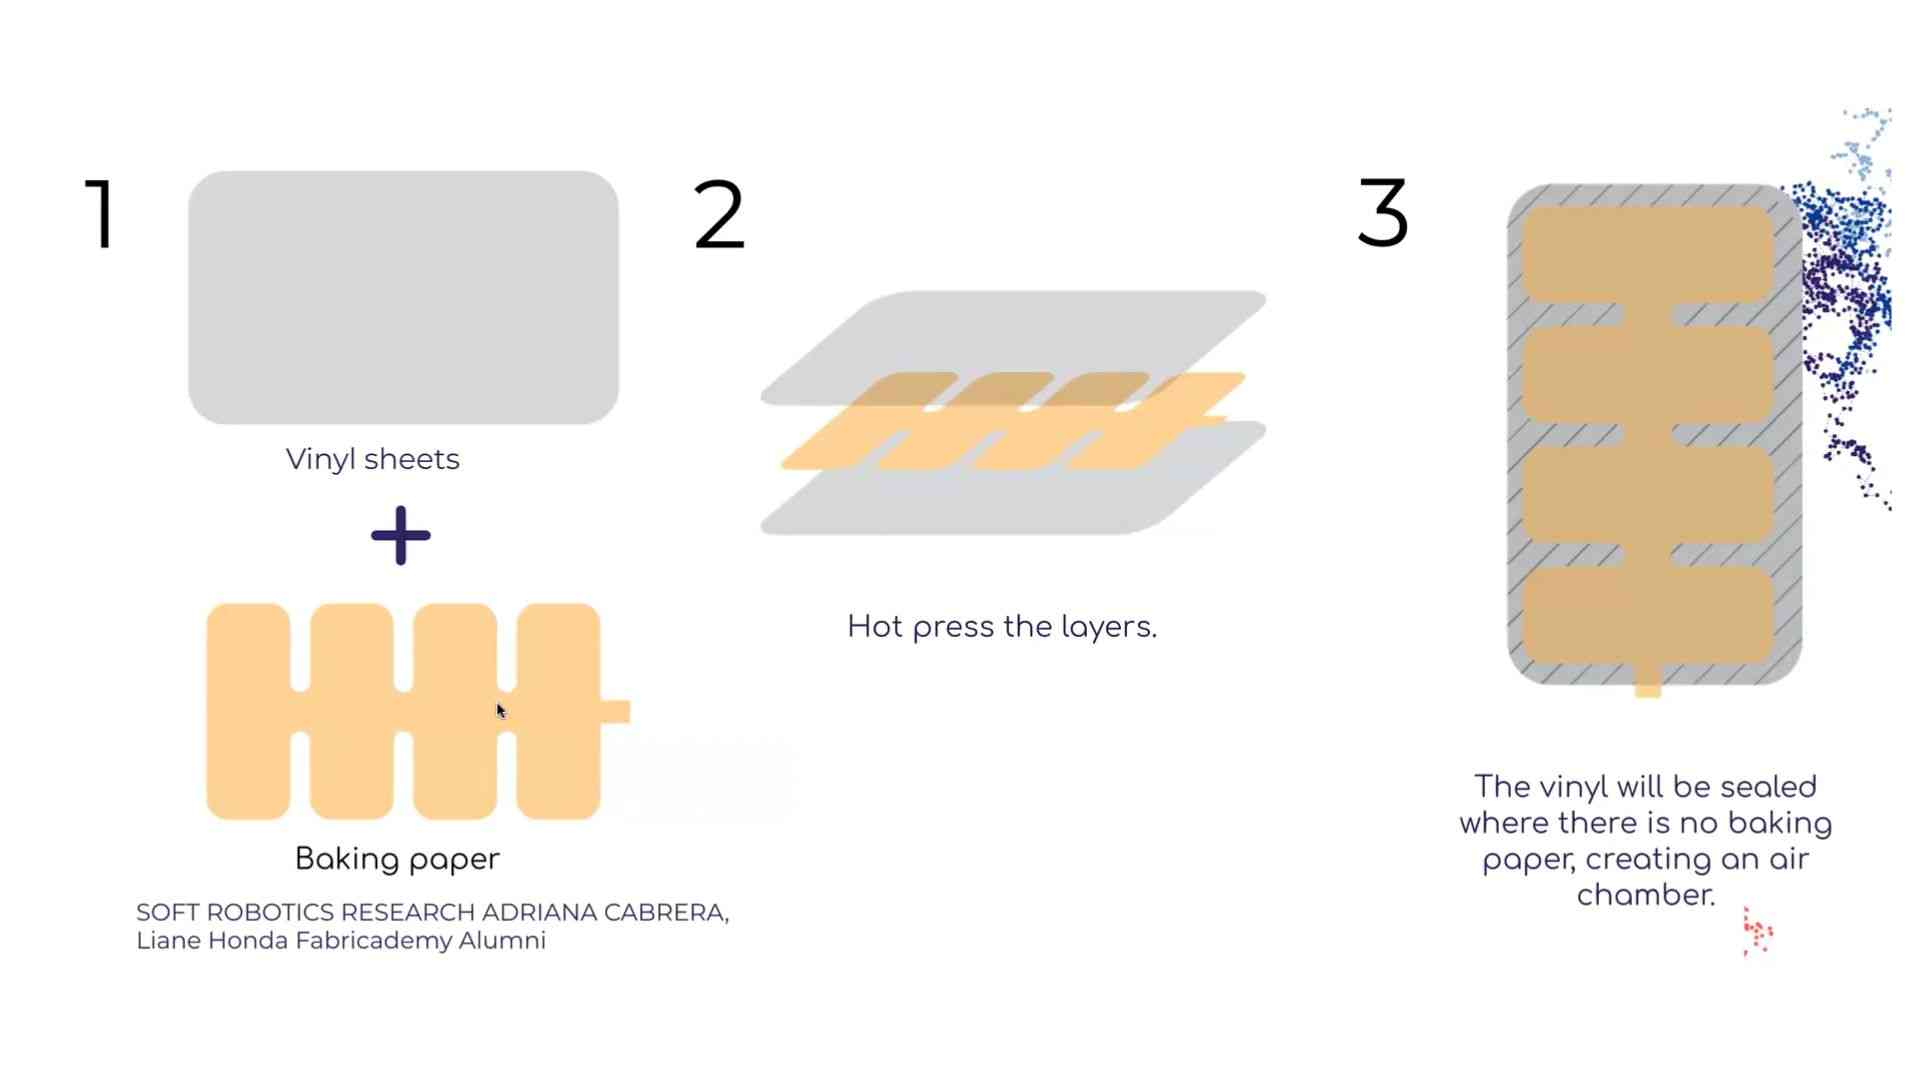
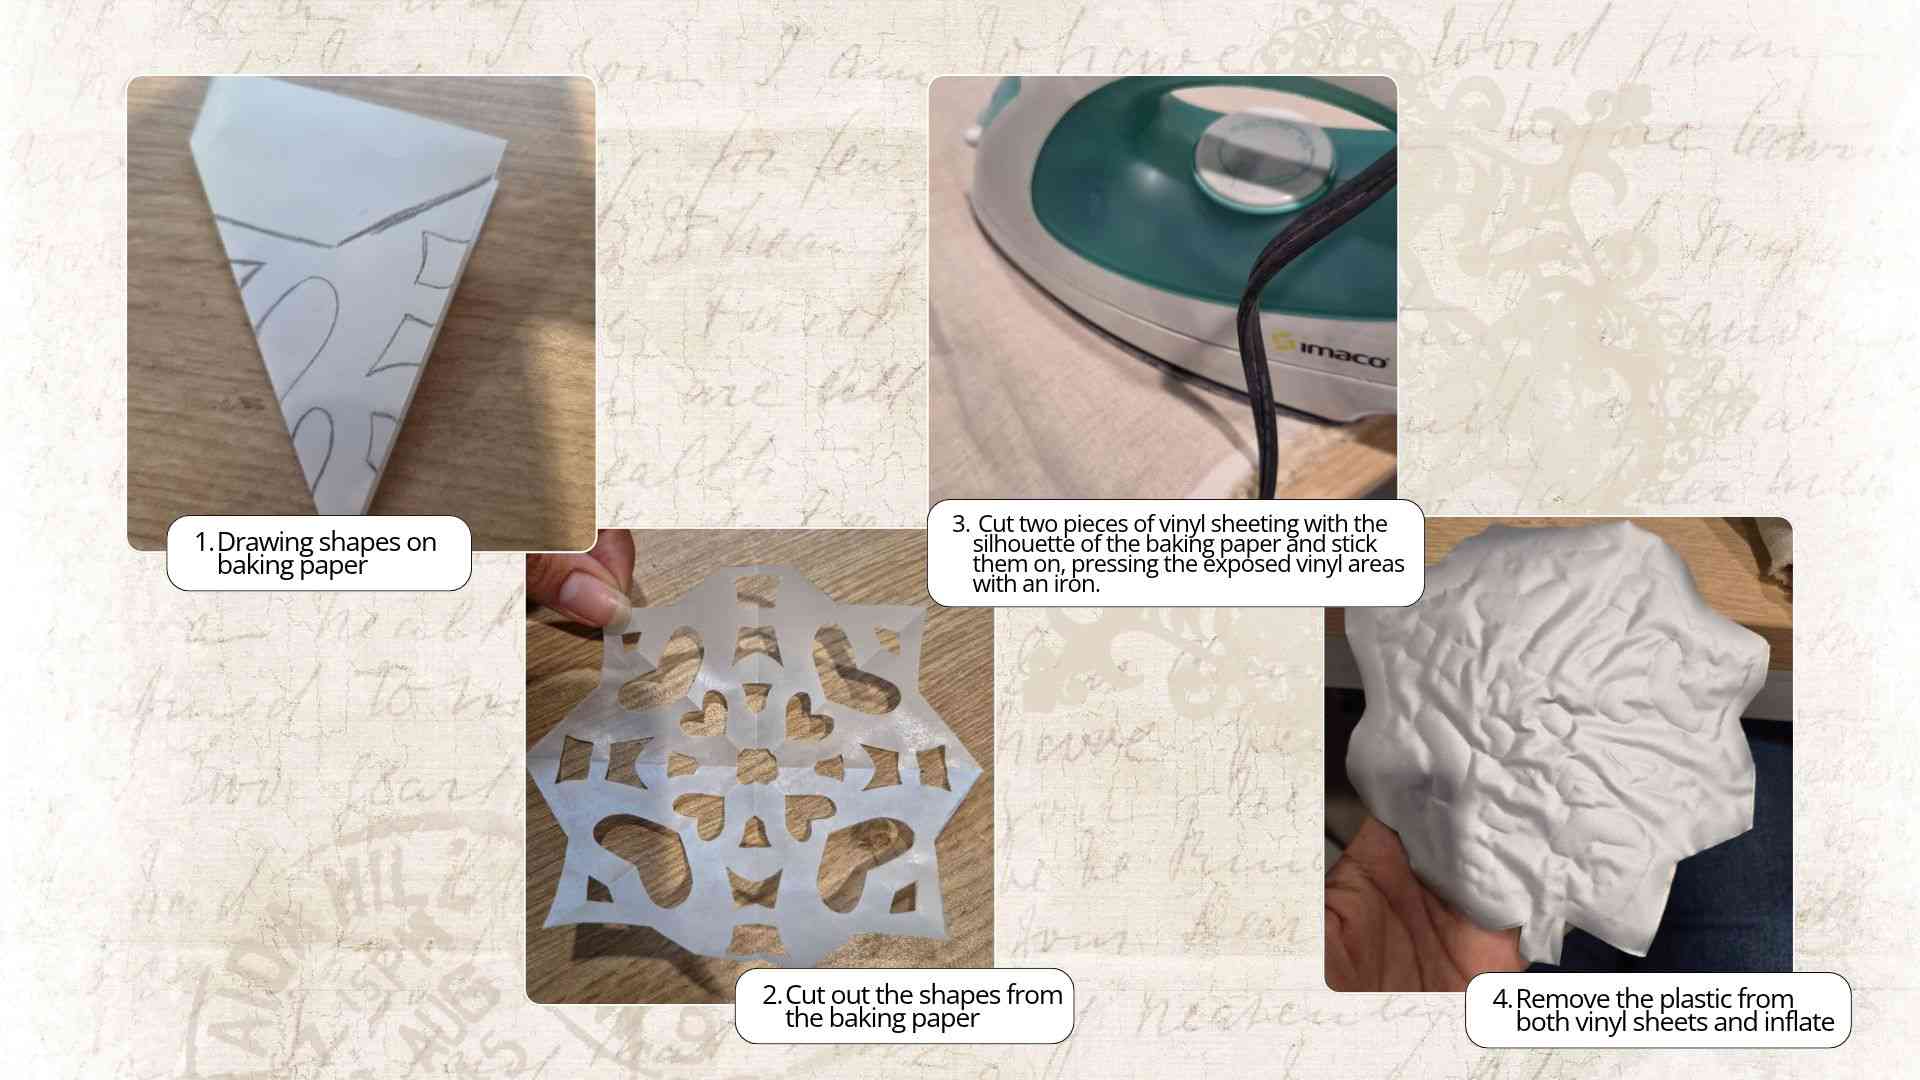
In this regard, I started by drawing various shapes onto the baking paper, keeping in mind hollow spaces where the vinyl could bond together so that movement would be created upon inflation. Additionally, I made sure to include a rectangle somewhere on the design to serve as the entry channel for the tubing used to inflate the material.
Once the baking paper was cut, I placed it over the vinyl, traced the outline of the shape, and cut it out, making sure to leave an extra 1 cm border around the drawn contour.
Next, I cut another piece of vinyl matching the shape of the first, placed the cut baking paper between the two vinyl sheets, and pressed them with an iron so the exposed vinyl areas would fuse together.
Finally, I peeled off the protective plastic film from both vinyl sheets and proceeded to inflate the piece using a silicone tube.
3.2 Step 2: Silicone inflatables
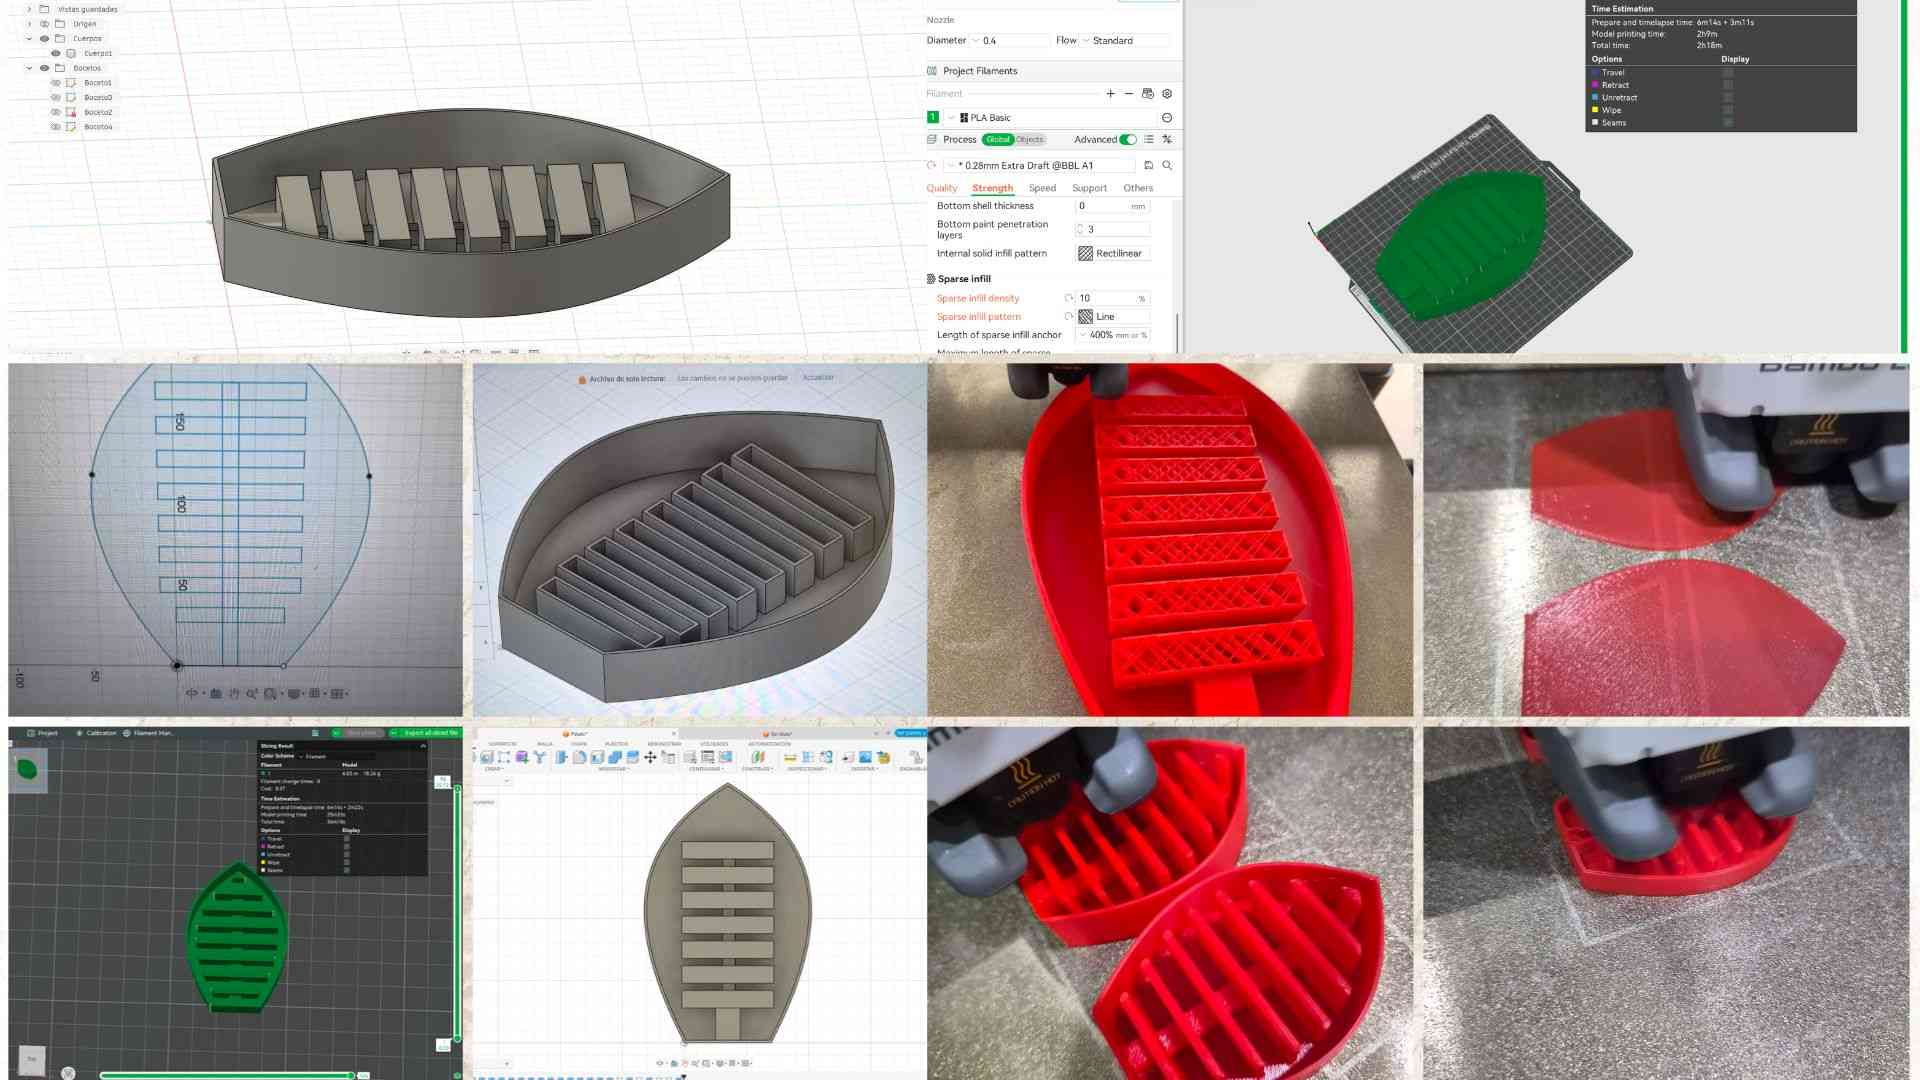
For the silicone inflatable, I designed several models and 3D printed them. The shapes I modeled were inspired by the growth of flowers as their petals unfold. In this regard, I attempted to replicate a flower petal so that, upon injecting air, it would simulate the natural motion of the petal.

To achieve this, I used Autodesk Fusion software and designed a petal, taking its external geometry into consideration. Additionally, to allow air intake and generate movement, I incorporated thin, rectangular channels.
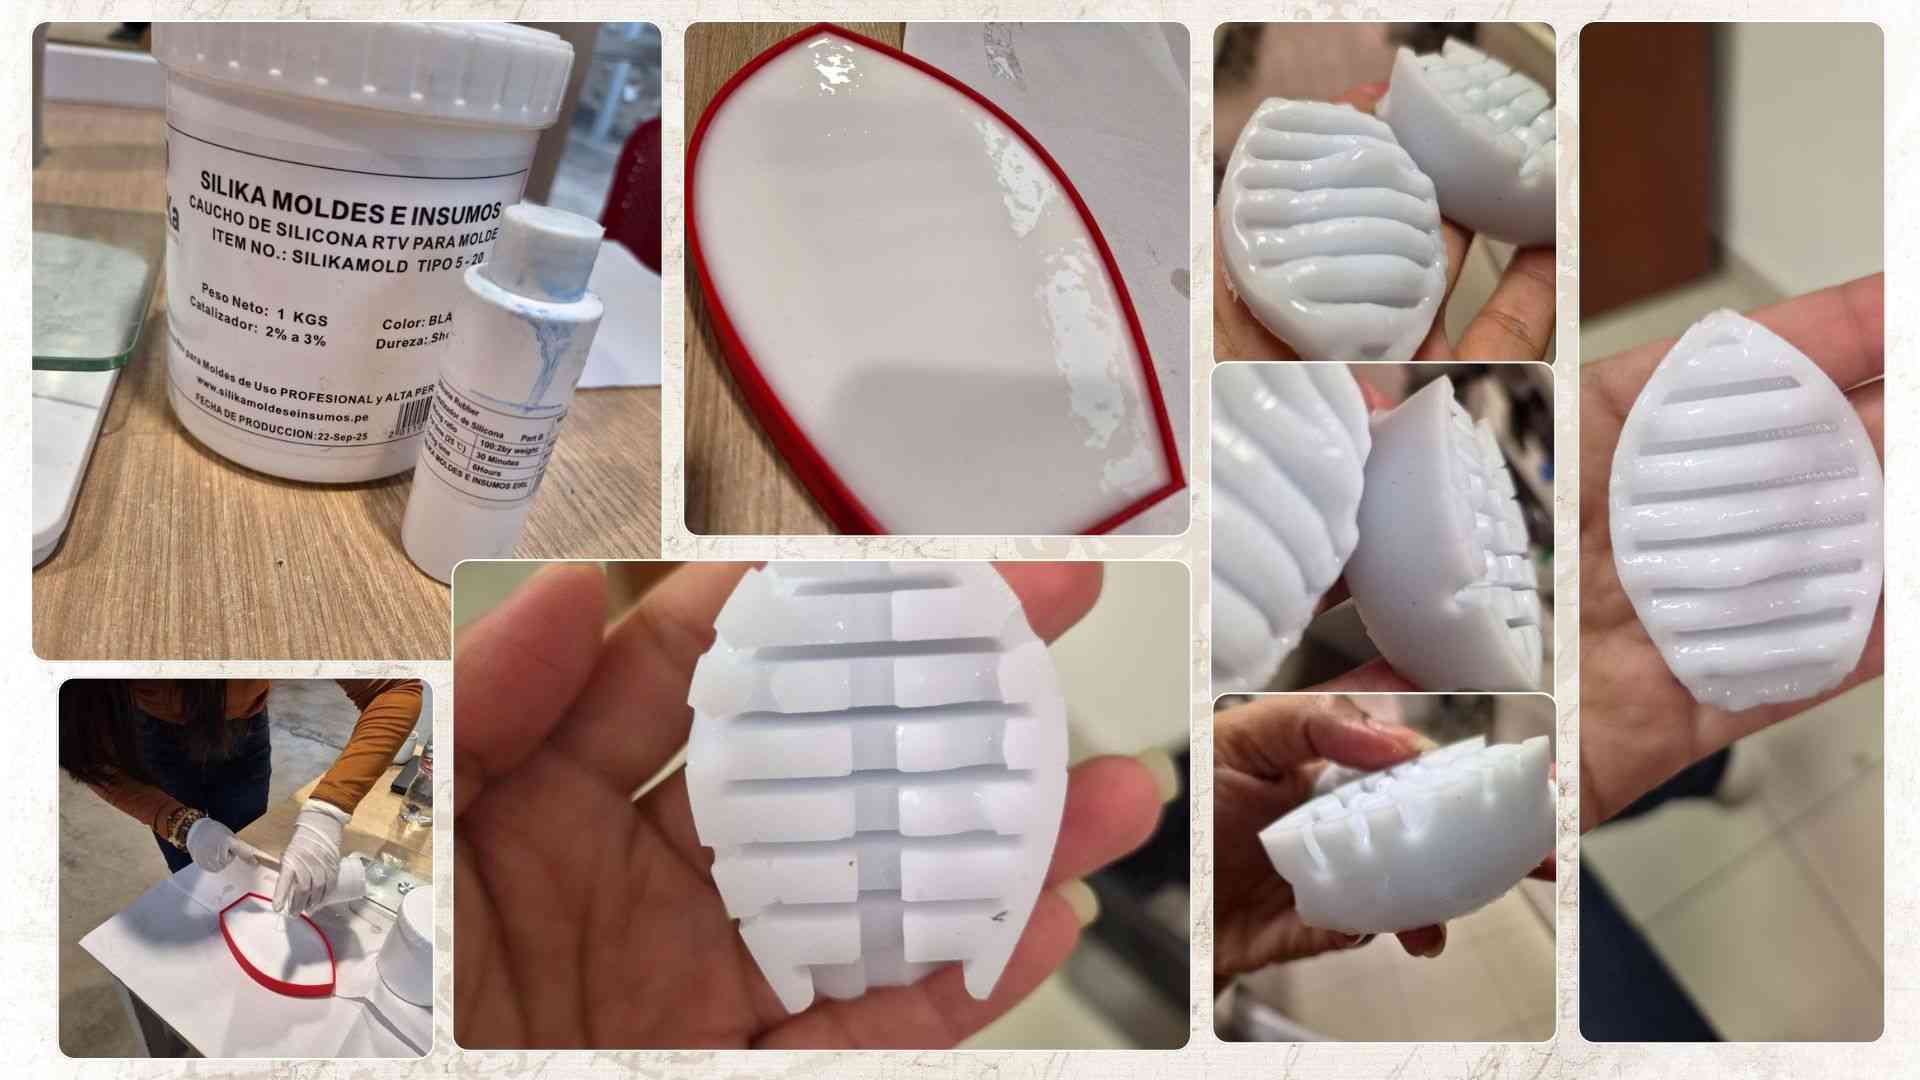
Next, I prepared the mixture for the mold using liquid silicone and a silicone catalyst. For the large petal, I used 400 g of liquid silicone with 5 g of catalyst, whereas for the small petals, I used 130 g of liquid silicone and 4 g of catalyst. Both ingredients must be thoroughly stirred to achieve a homogeneous mixture, poured immediately into the mold, and tapped repeatedly to release trapped air bubbles.
As a result, the large petal took a long time to cure (over 4 hours), while the small petals cured far too quickly—so fast that I was unable to properly pour the mixture into the molds.
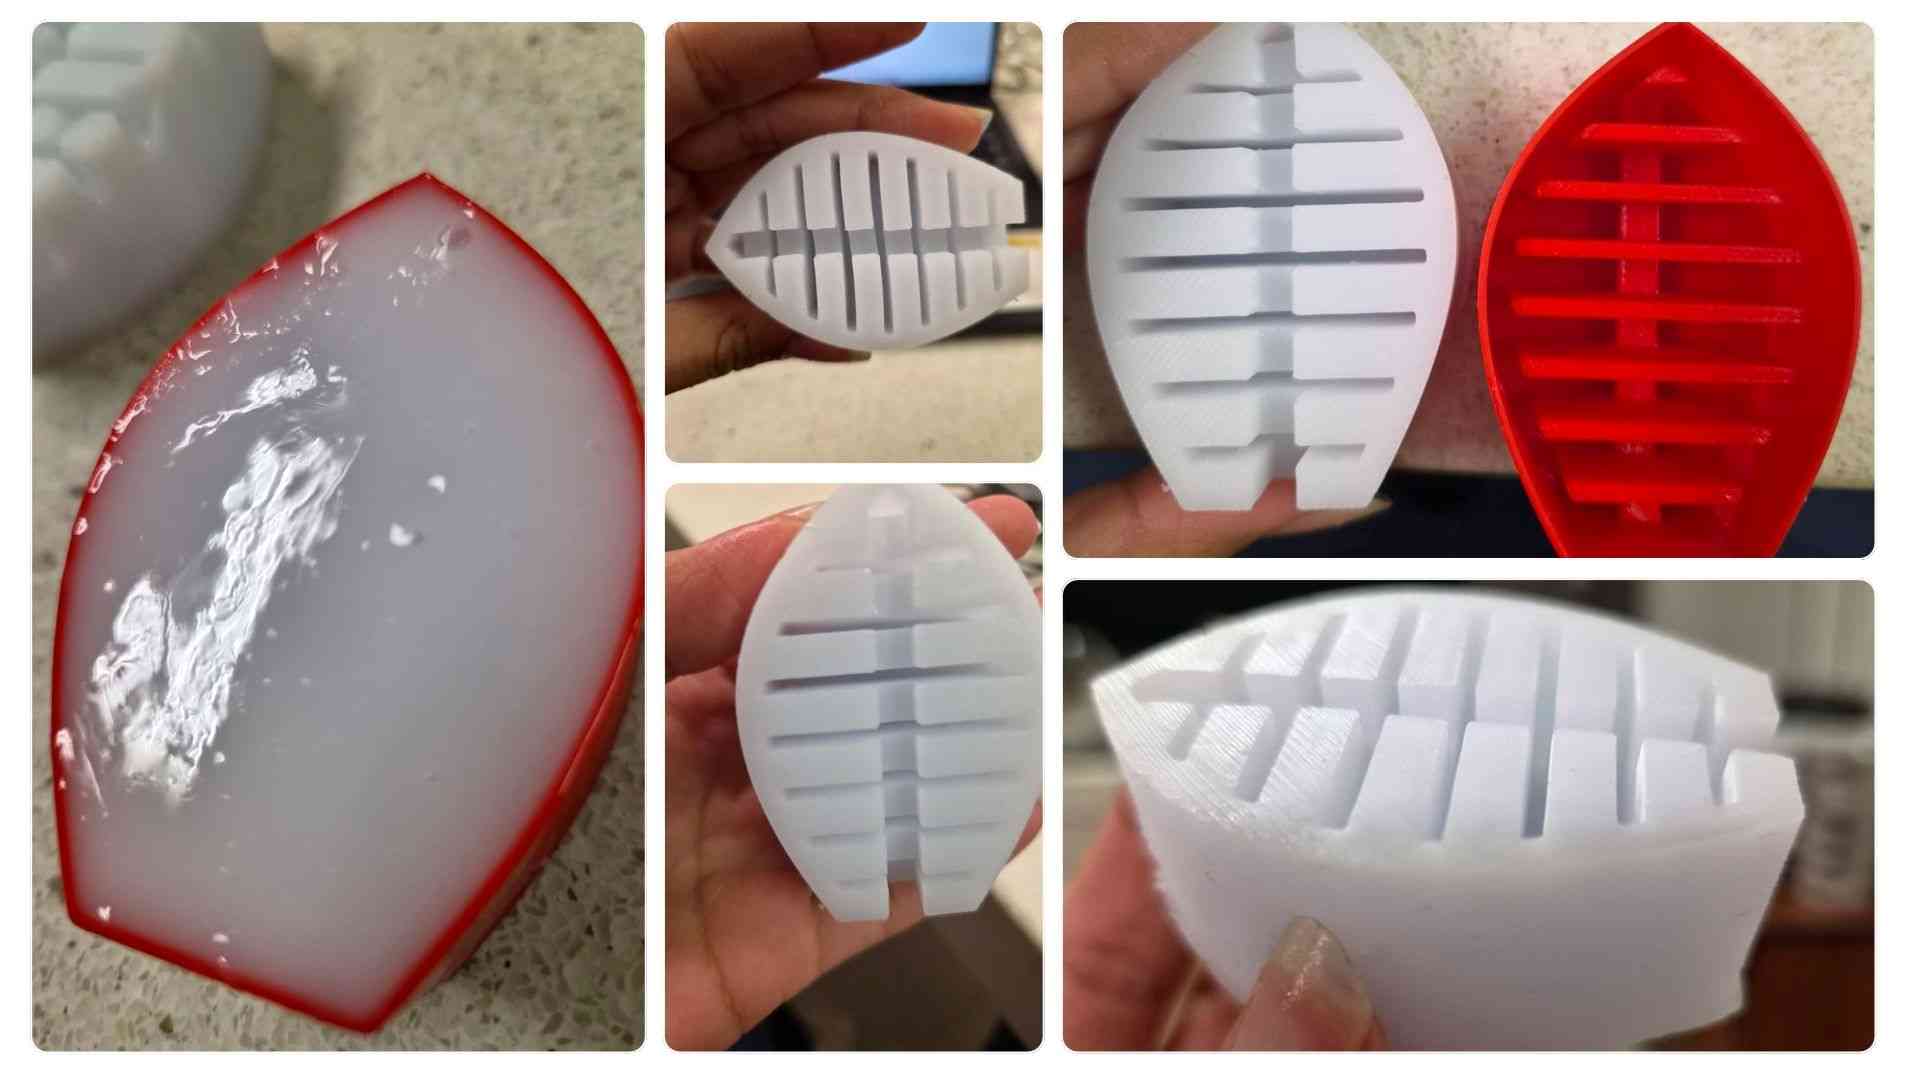
Therefore, I made another attempt for the small petals, using 130 g of liquid silicone and 3 g of catalyst. I poured the mixture into the 3D-printed molds, successfully achieving a suitable result from one of them.
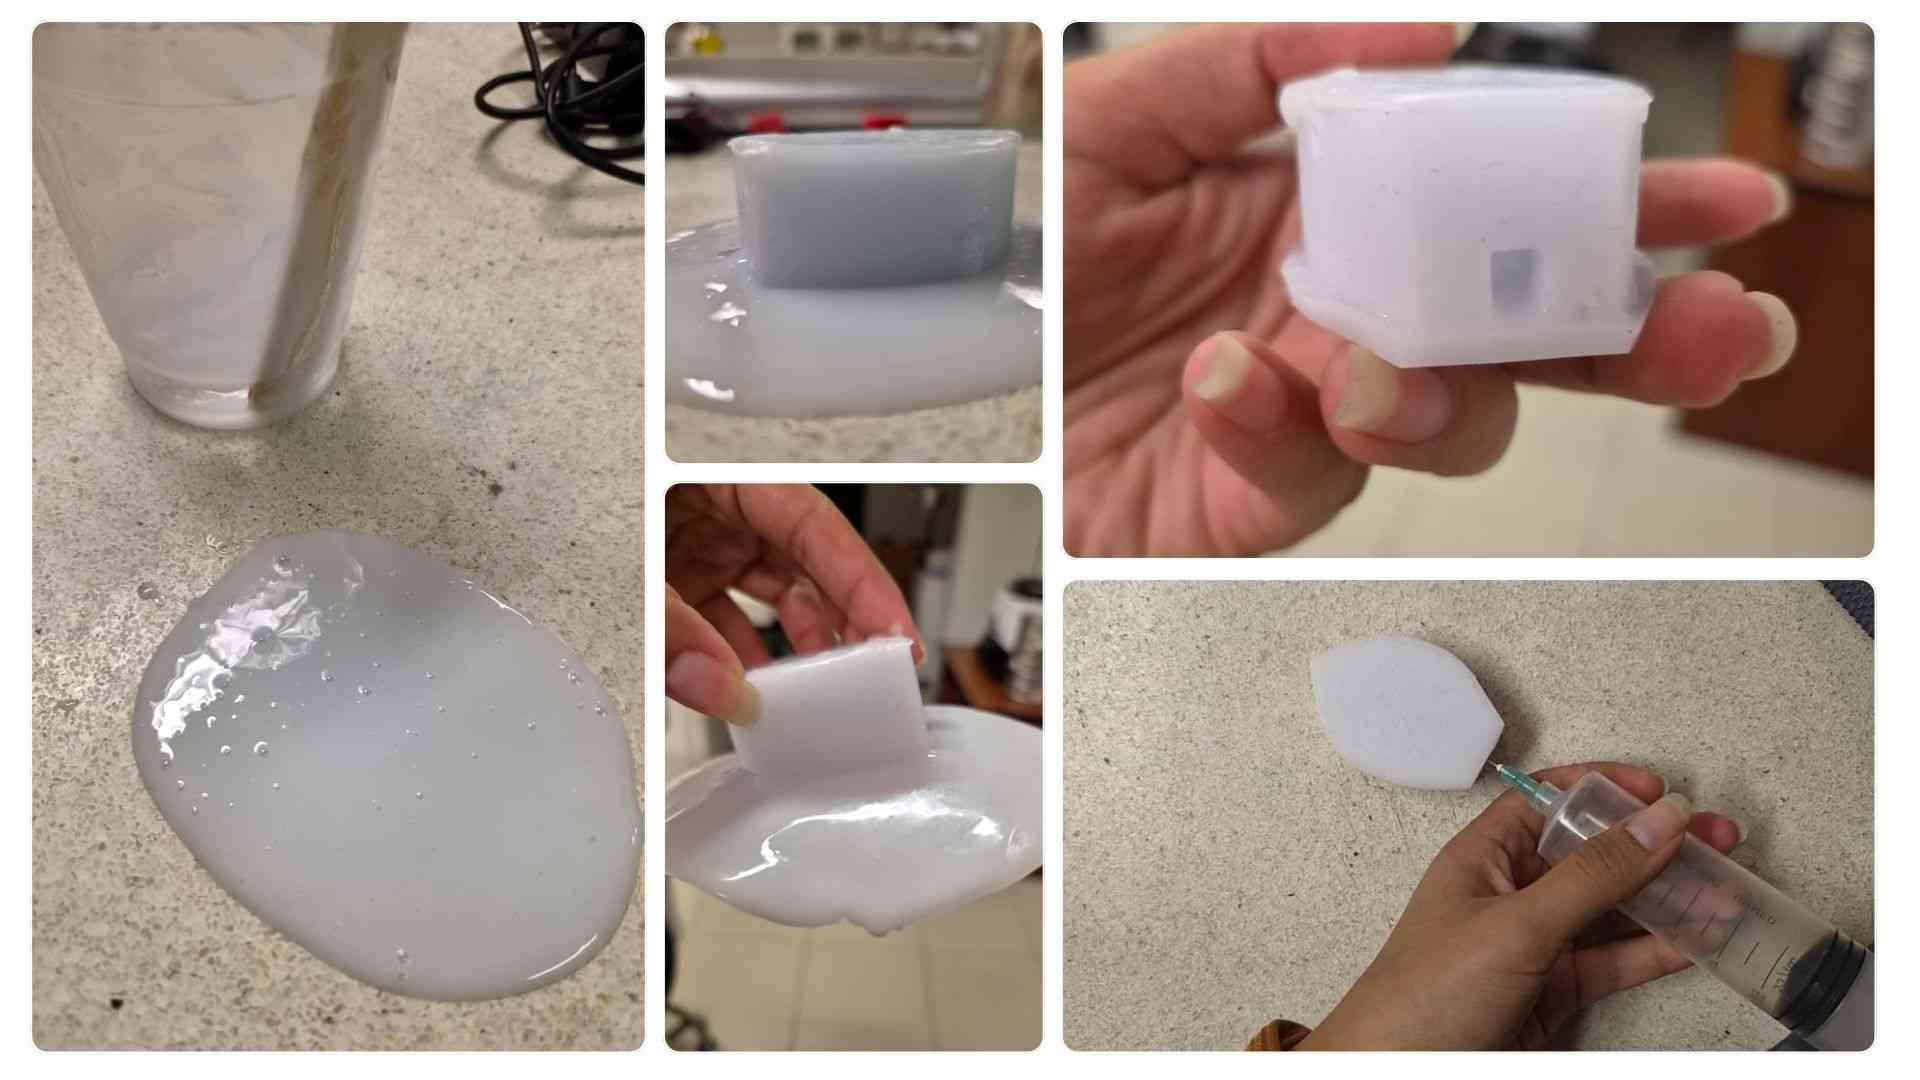
"From there, I poured a small amount of silicone onto a flat surface to create a thin layer, and then placed the molded piece on top. Finally, I made a hole in the piece to insert a silicone tube for inflating the material, ensuring a proper seal and adequate airflow.
4. Results
4.1 Inflation tests
Below are the results of the inflation tests I performed on my samples of heat-pressed inflatables.
The following section presents the results of the silicone-based inflatable.
At the beginning of the video, a previous silicone example is shown, which served as a reference to understand how the model should be designed to achieve movement. However, during testing of the fabricated model, several functional failures became evident, as it displayed no mobility whatsoever upon air injection.
This could be attributed to several factors:
- The channels for the hollow space were too narrow and placed too close together, preventing proper expansion.
- As the silicone cured, it may have swollen, occupying more space than anticipated and restricting movement.
- The small scale of the piece; when designing a shape resembling a petal, the importance of having an elongated rather than circular geometry was overlooked, which hindered proper airflow and motion actuation.
Finally, with the biomaterial from last week, I decided to test the flexibility of my material and whether it inflated when I gave it air.
4.2 Files
In this section, you can review the files obtained from Autodesk Fusion.
5. Weekly reflection & critical thinking
- Always keep in mind the importance of channels to allow airflow and grant the piece movement. The more hollow spaces created, the greater the movement achieved.
- I would like to further research and experiment with flexible biomaterials that can serve as viable alternatives for large-scale projects.
- I wonder if these concepts could be used to develop biocompatible materials for the human body, serving as assistance tools during surgical procedures.
- Integrating soft robotics into school curricula from an early age would broaden students' perspectives, providing them with a solid foundation to build upon in their professional careers.
6. Fabrication files & References
-
Sklar, J. (2016, 8 de diciembre). Meet the world’s first completely soft robot. MIT Technology Review. https://www.technologyreview.com/2016/12/08/155290/meet-the-worlds-first-completely-soft-robot/ ↩
-
Ballon, M. (2026, 22 de octubre). A soft robot reaches for the stars. Information Sciences Institute, University of Southern California. https://www.isi.edu/news/88451/a-soft-robot-reaches-for-the-stars/ ↩
-
Vox. 2016, 18 de diciembre. This robotic hand from Cornell feels as delicately as a human. Vox. https://www.vox.com/2016/12/18/14001048/robotic-hand-cornell-delicately-human-soft-robots ↩