7. Computational Couture
This week is super scheming! Projects we sew during the class are crazy and make me want to create something special! But not forgetting that I will work on rhino and grasshopper..... let's make it work!
3D printing can be used to reshape textile thanks to its capacity to create movement, to skrink textile and create elasticity. The shape of the textile depends on the graphic print you did in the textile thanks to the printed machine.
INSPIRATIONS
Iris van Herpen is my main inspiration for this week... I follow her since years and I can't stop watching at her creations, when women are walking with this alive nature. It's INCREDIBLE the way it moves and how we get hypnotize.
There are some others artists that hold my attention :)

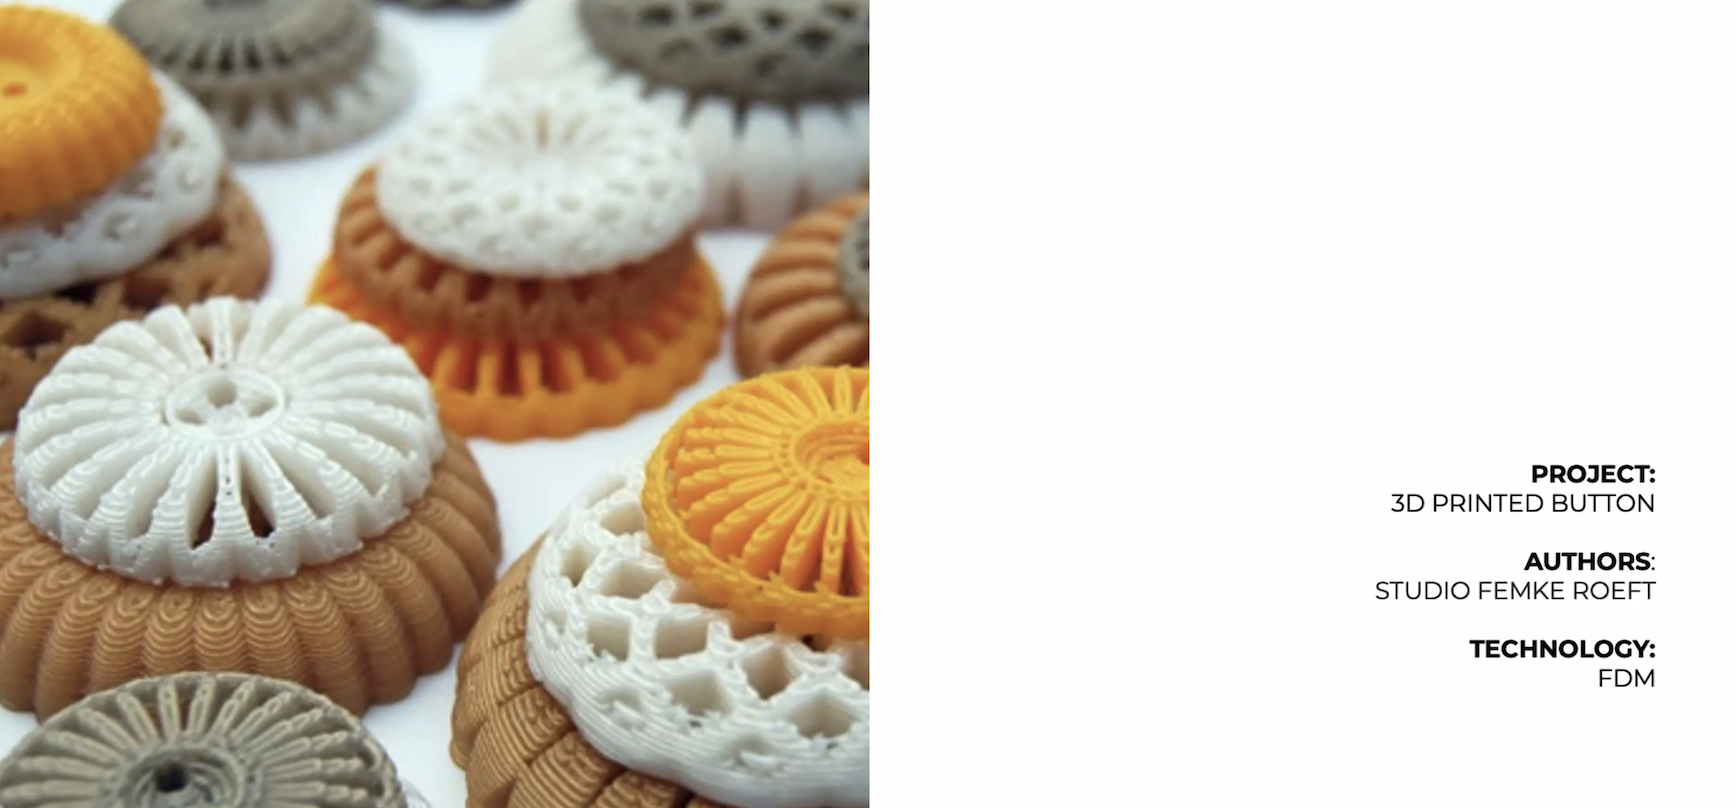
I LOVE BUTTONS so obvioulsy I want to try it too!
The numbers of colours and the details that are in this top are unbelievable!

Bistable Auxetic Kirigami
Bistable Auxetic Mechanical Metamaterials Inspired by Ancient Geometric Motifs from Ahmad Rafsanjani on Vimeo.
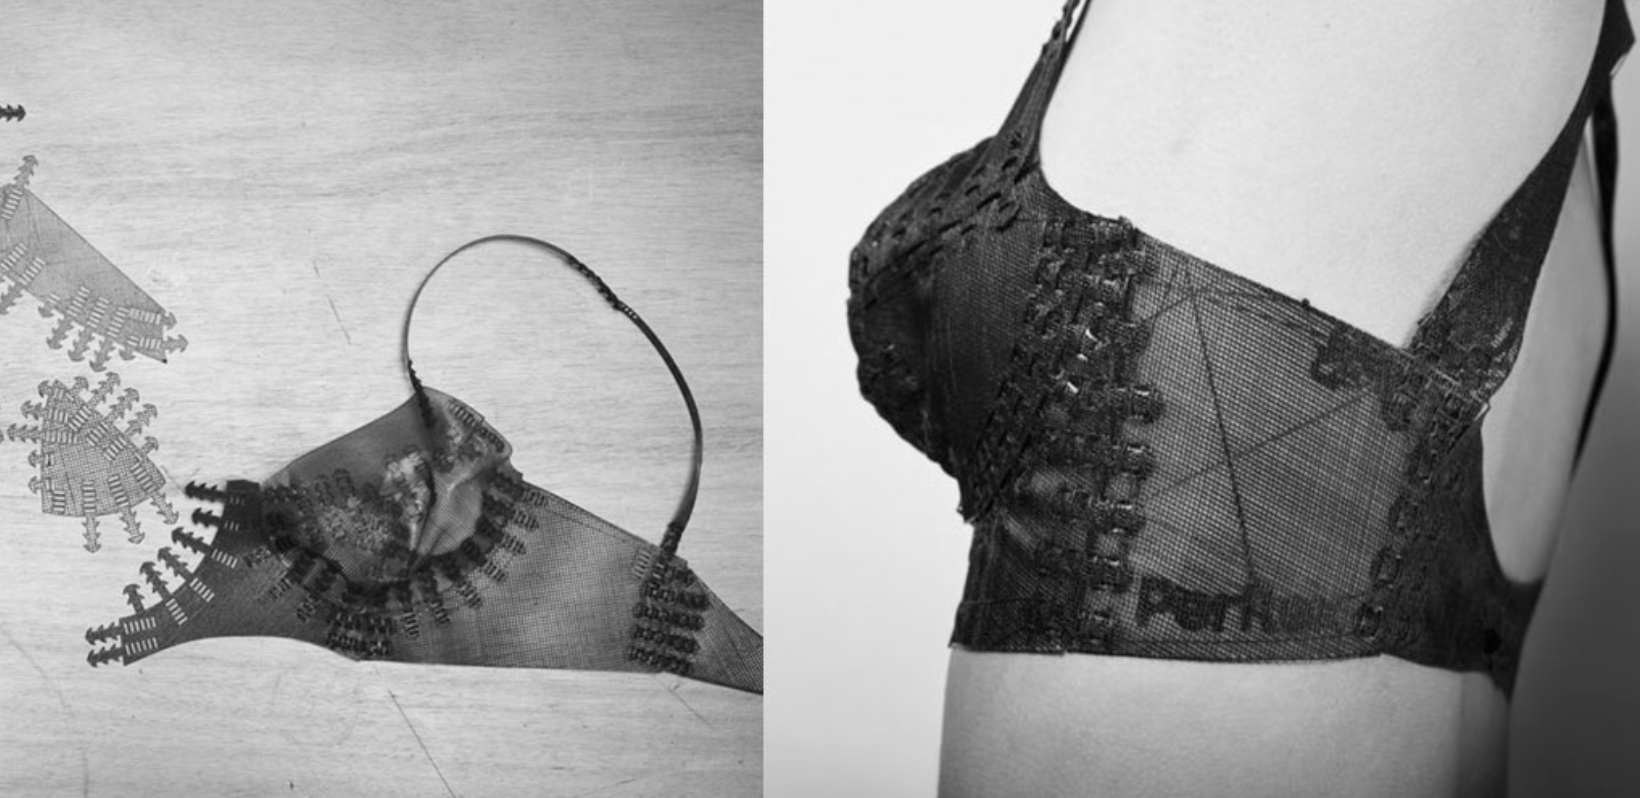
I love her work with the bra. Brigitte Kock's work is also incredible. I didn't know I was going to be so intrigue by this but it can change the all concept of sizes so I will keep it in mind for my big project.....
STEPS FOR 3D PRINTER MACHINE
To the Textile Lab in Lyon, we work with a Zmorph 3D printer and we have PLA / PLA + hamp / TPU materials to print.
-
On VOXELIZER software, to importe a .obj or .stl file
-
Manage the file on the software (dimension, quality, durability...)
-
The software will estimate the time of printing
-
Exporte the gcode file after to have managed on Voxelizer and add on a SD card to put the file in 3D printing
Note : The file exported of Voxelizer is a code file in X,Y,Z to informate the way of printer.
This is one of the tutorial introduction 3D printing we followed (Basque Biodesign Center) :
PROCESS
- Maintenance - Qualibrate - Qualibrate automatique - Put the black cable
Spray the heating bed with the laque (for the fabric to stick or the fabric and the filament to stick together
- Choose temperature settings
Buse = tête
- Testing lines
Remove the cable - Remove the lines , the trial --> Don’t touch the « crayon » it's very hot
- « Pre heating the printer » : custom temperature
We don't care about "right" - "Left" you put the temperature
-
Prepare the bed : Put some laque and Put the ventilateur
-
To change the filament : Calibrer - load filament for setp by step slowly (It needs to be hot )
When it's remove : put the filament in the hole , and in between the weels and press the button on the machine to put it down.
While it's printing, you can change some settings and you can change the color filament as well.
SHOPPING THREAD AND FABRICS
Eco filament :
-
Hemp PLA
-
TPU --> flexible (at AG electronic store in the Lyon 3)
Plastic filament : ABS
I want to try printing on natural fabrics as I love linen. Even if synthetics fabrics work better, like mesh, stretch fabric and polyester.
GRASSHOPPER + RHINO = PARADISE
Download Bifocals GHA from food4rhino
From Grasshoper: file - special folders - components folders - open a double Finder window - drag the download file in the new file called “library” - close rhino and grasshopper and re open them to see if you have bifocals (or any other downloaded file).
Find your window
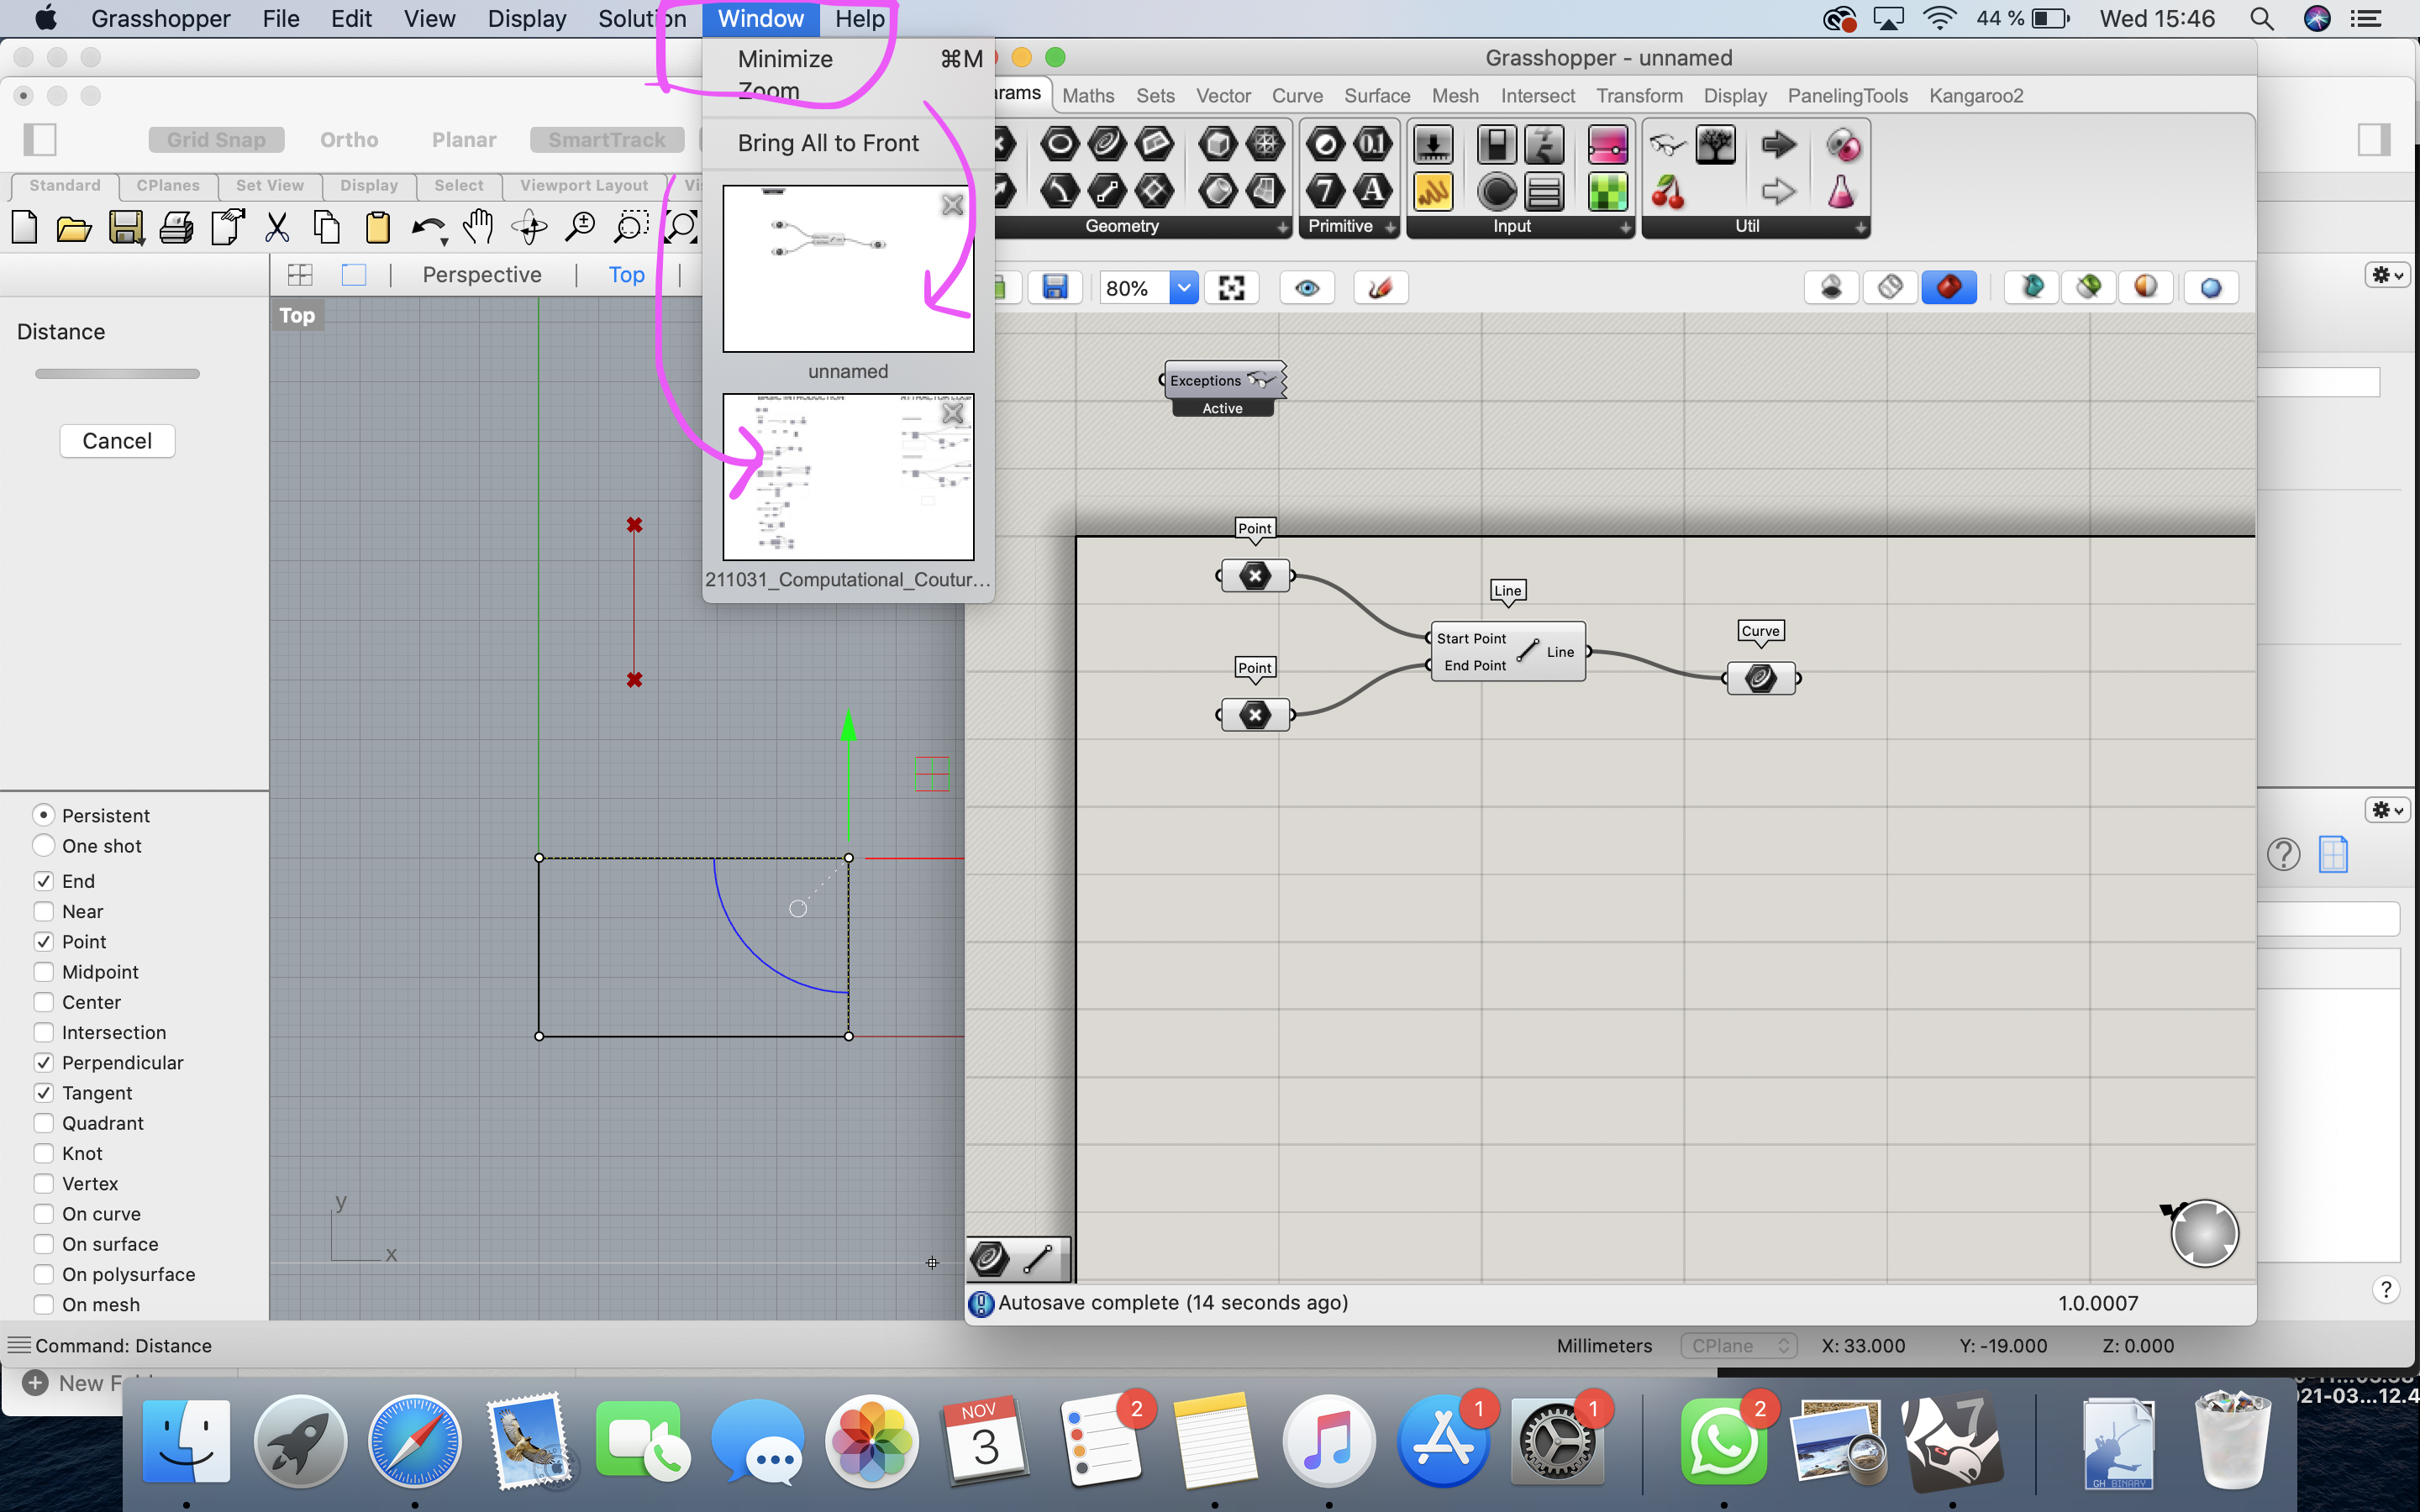
French grasshopper tuto
- Create 2 curves
- Grasshopper : params - geometry - curve
- Rhino : curve - interpolate points
- “Divide curve” on each curve
- “Number slider” = variation tools that you put on each “count” enter of the “divide curve” —> same variation of the number of points on each curve
- “Line”: = create segments between my 2 curves according the number slider
- “Point on curve” (in curve- analysis, point on curve) = divide segment in 2 —> click right to have a precise division
- “Vector z” = control a movement (deplacement)
- “Move button”= create a motion
- Number slider = create variation
6 + 7 + 8 = allow to control altimetry of point

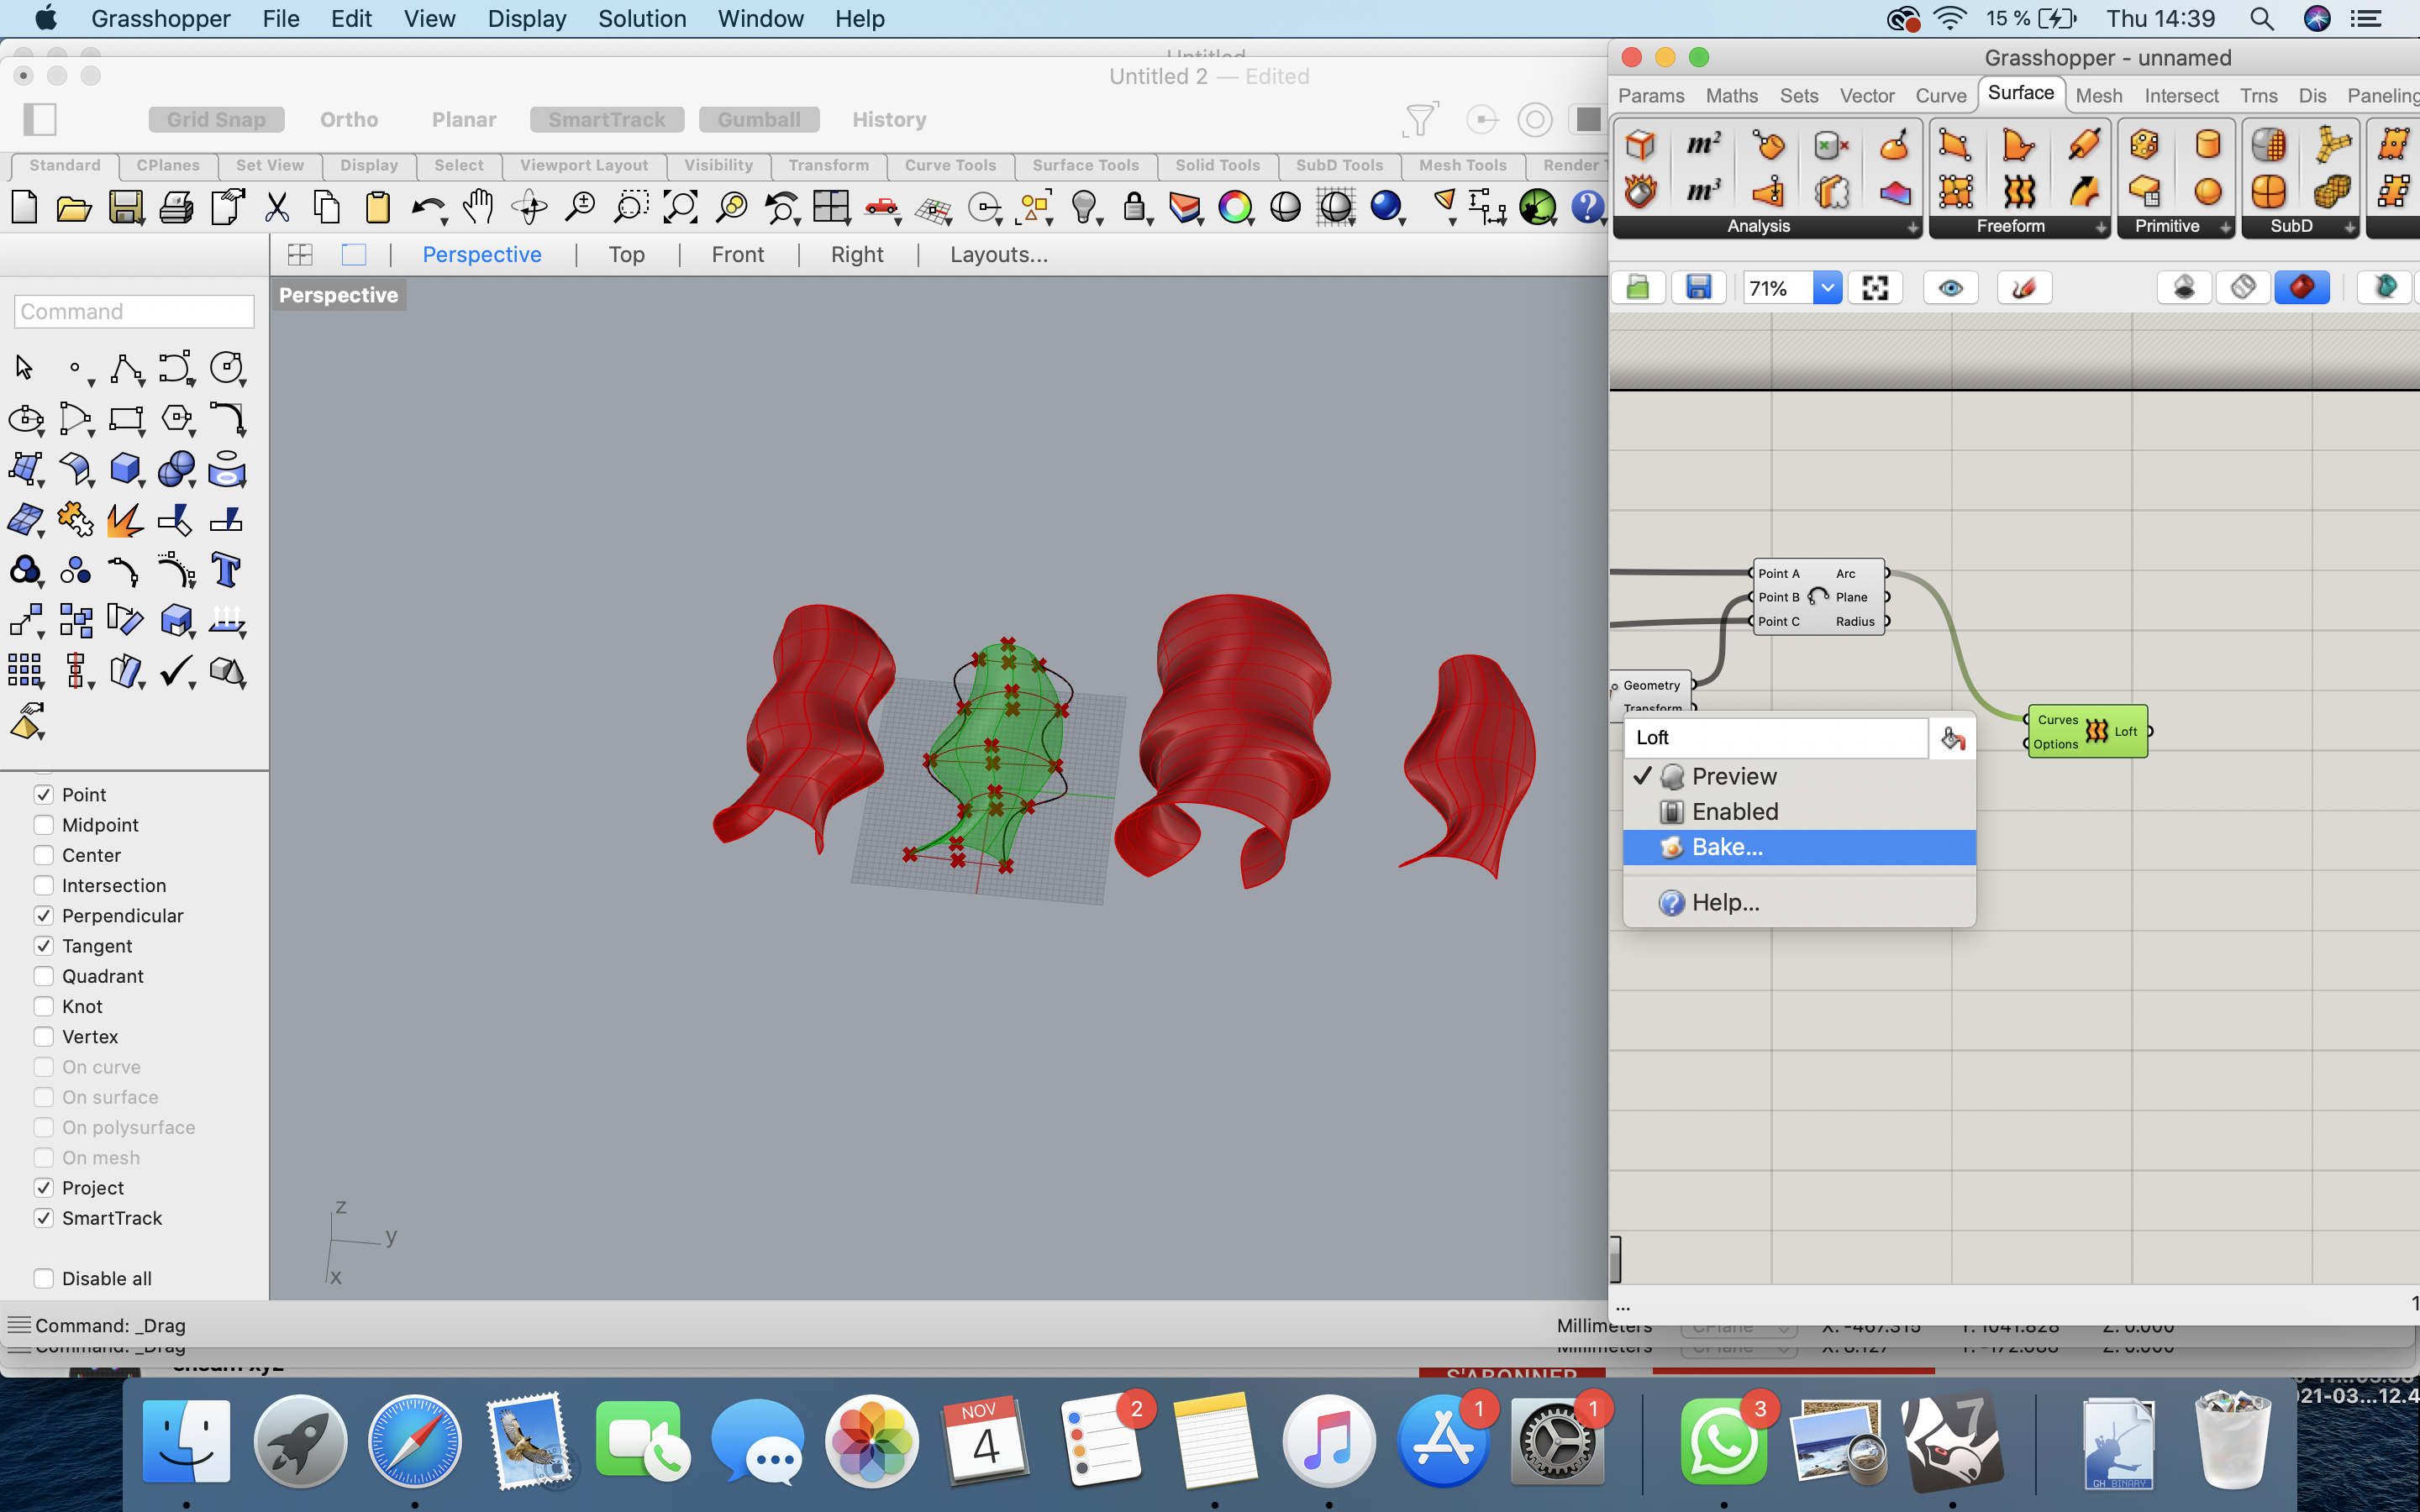
- “Arc 3pt” = create arc —> play with all number slider for shapes’ variations
- “Loft”= generate a surface - click right - bake - layer 1 - on rhino click right - “shaded” —> create different style from your first shape by playing with your number sliders.
CREATING A LAMP
The funisest part is when everything is off set and you have fun with the number sliders. Love it! So amazing to see my shape moving and dancing like this. Thanks for this tutorial :)
Let's dance!
Let's be proud!

Diane's Toturial to help us understanding the tools
scaled-hexagons.gh
Unfortunately, our printer in Oullins is a little bite too small for my object to print.
EXPERIMENTATION
I wanted to print a zero waste surface, and imitate snake skin. For that I decided to use the Voronoi pattern. I needed to have one front, one grid of Voronoi cells, one back (front and back are the same).

KEY WORDS OF THE WEEK / REFLEXION
This week we shared a lot of informations, sources and personal experiences, it was super nice :)
-
Louise talked about Blol, an unicellular very clever organism...
-
creation of a labo for 3D bio-impression
-
The Sugar Lab is the world's first true digital bakery, run by a small team of rogue chefs, architects-turned-designers, and tech geeks in East Los Angeles. Our chefs imagine, our designers model, and our kitchen 3D prints.
-
project ideas : hack a knitting table, create my owm natural died wool --> kids imaginery/minds/dreams / in collaboration with a school --> aim short term ? aim long term ? aim for kids and environment ?