8. Wearables
This week is the second week of electronic applied to textile. It was nice because we already had some bases in electronic circuits so we went more in deepth.
INSPIRATIONS
Even if I have difficulties to see myself in this field later, I discovered some very interesting projects.
Liza gave us an advice : "Your project is a system. It is a constant dialogue between the hardware and the material. Do not go into a project prioritizing one over the other. Be ready to make tradeoffs."
USEFUL LINKS
ARDUINO AND POWER LOADS
How to drive and output device (a load) with Arduino Picture of the steps from the course
Essai : 2-led-analogwrite
Essai : 6-Led - on-off
Digital switch to enclench the on-off
Essai : 7 - array-led-switch
Essai : 8 - magnet
The thread is enrobed with a protection so we have to burn it a little bit at the end of the thread. We want to create a magnetic field, that's why it is important to not bare all the thread.
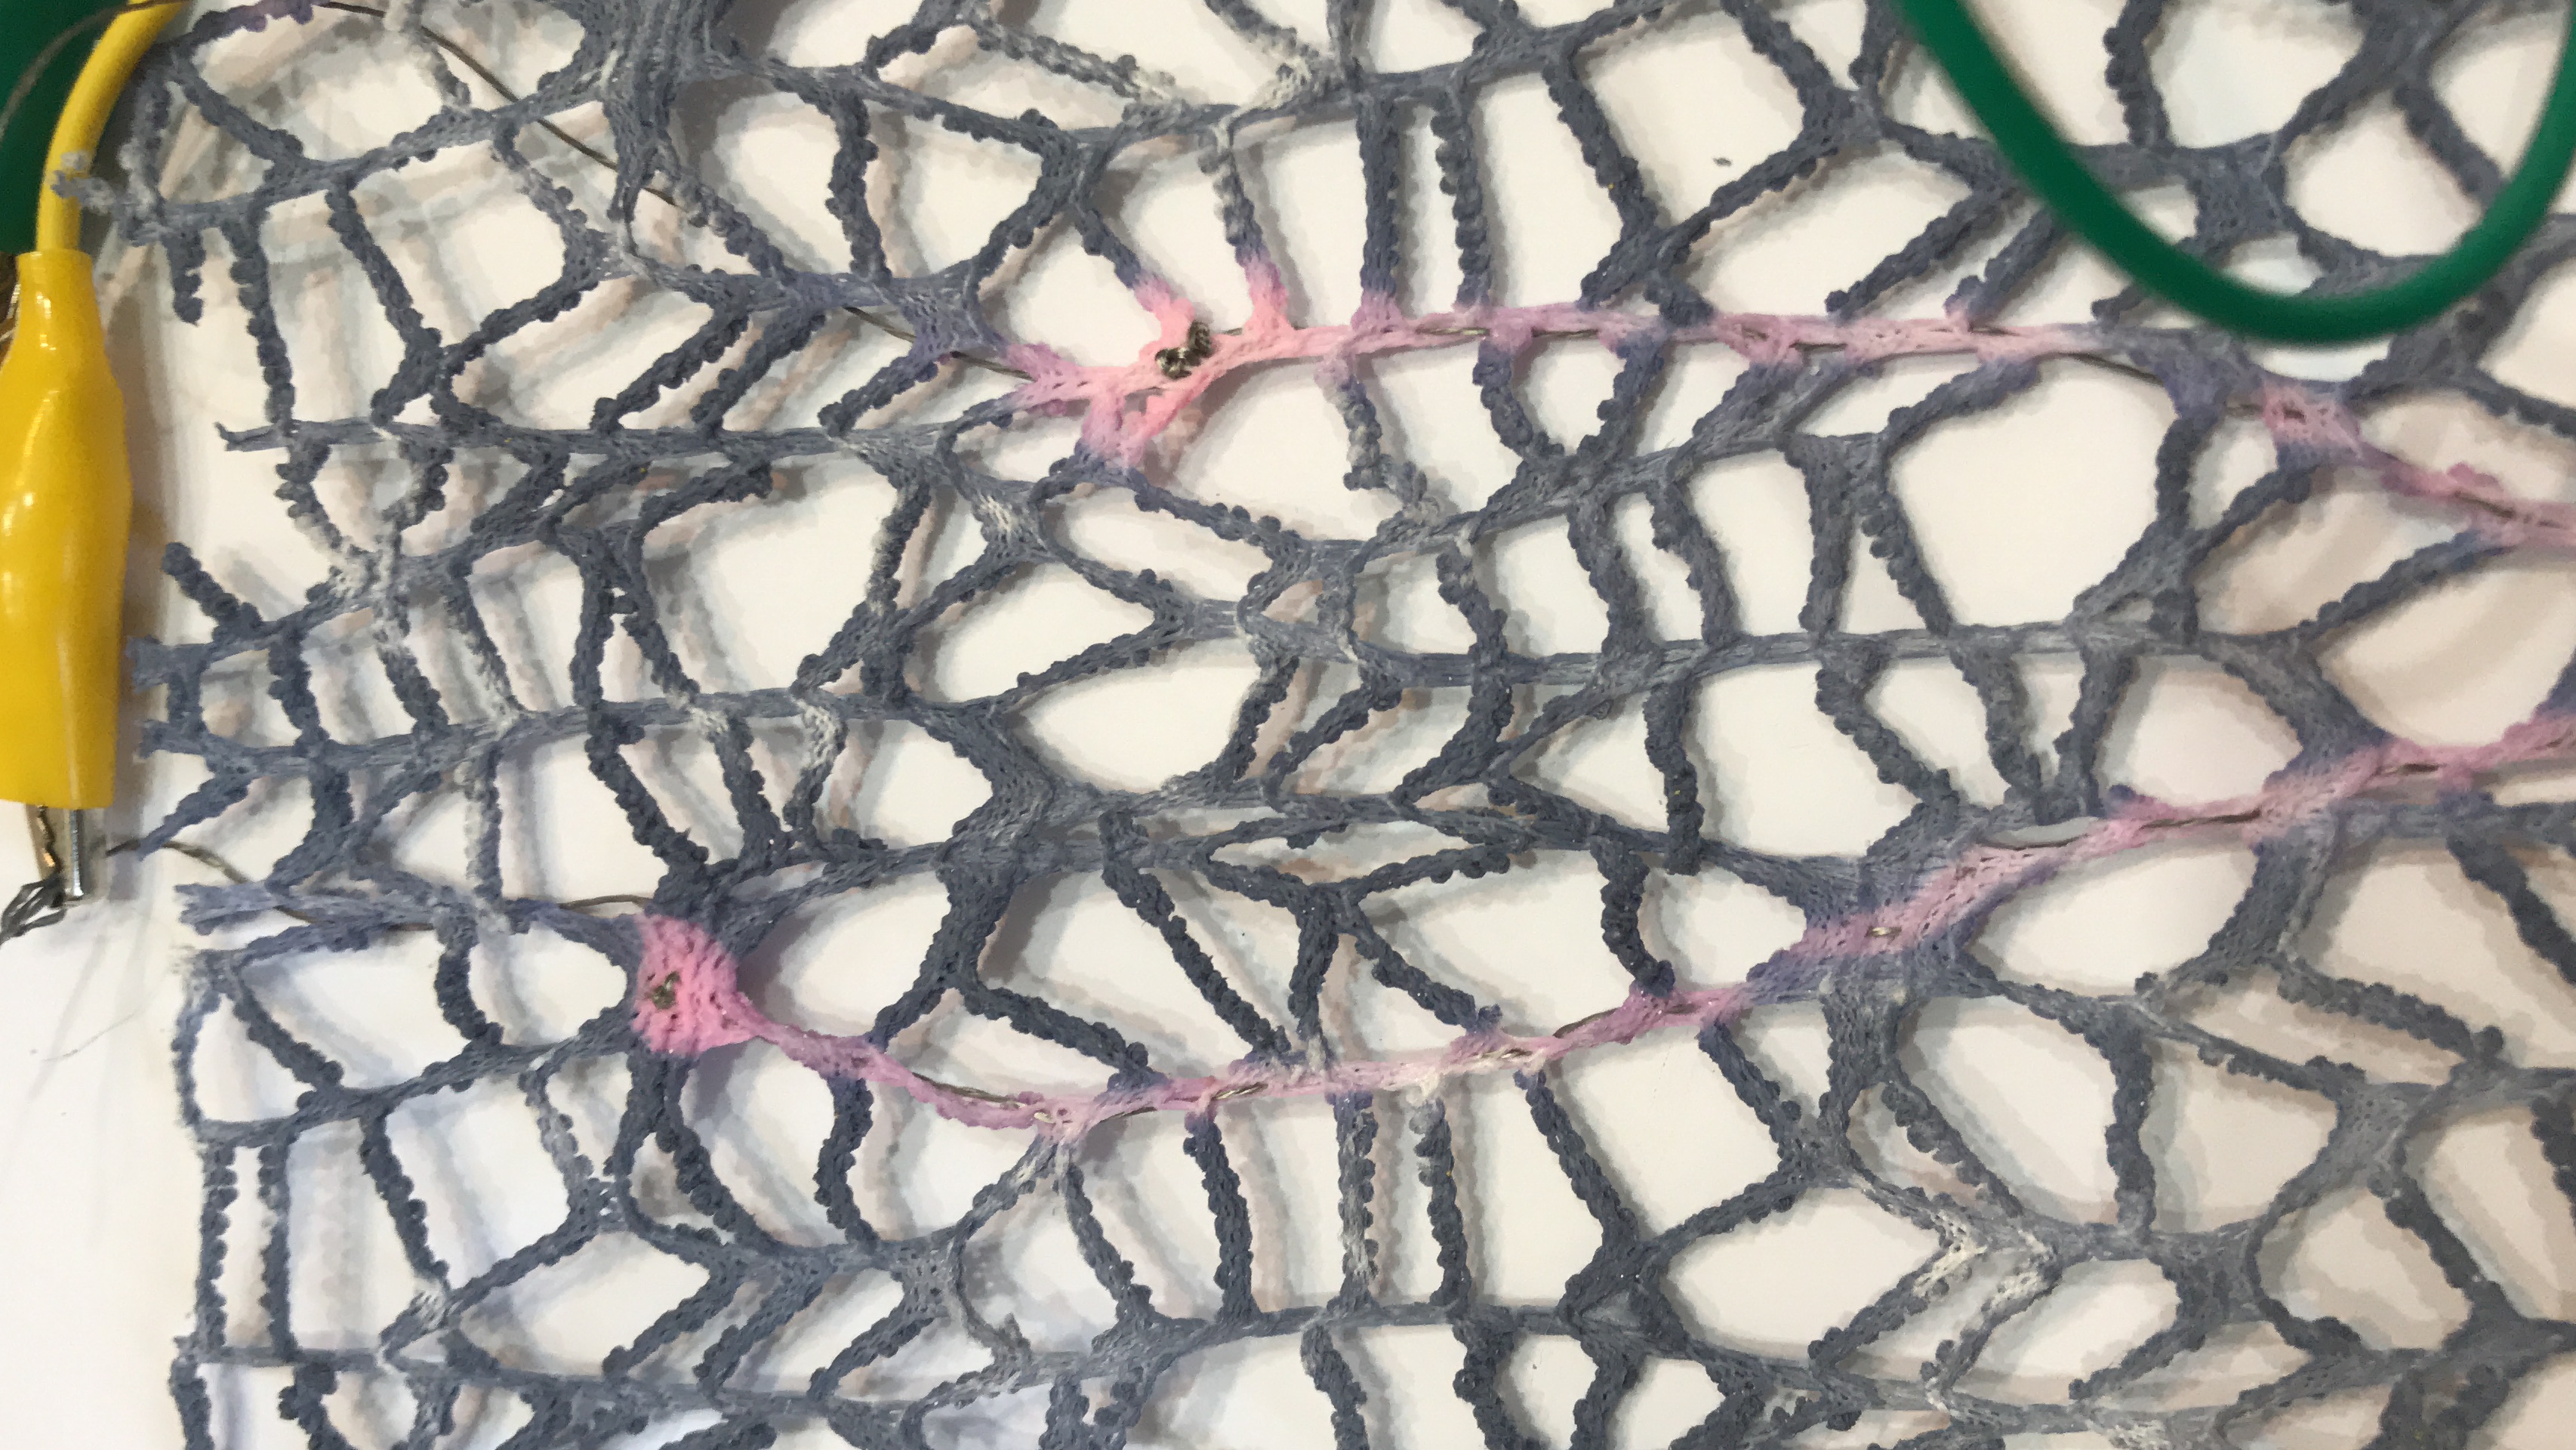
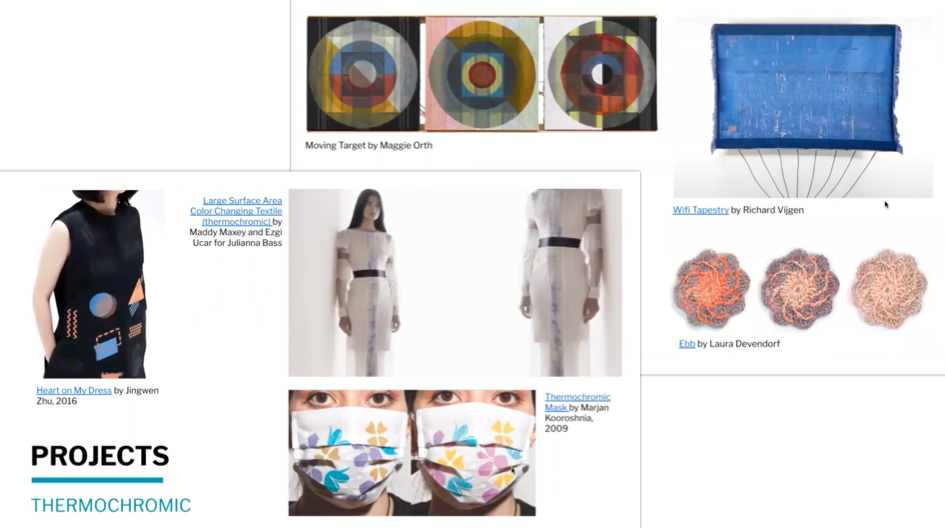
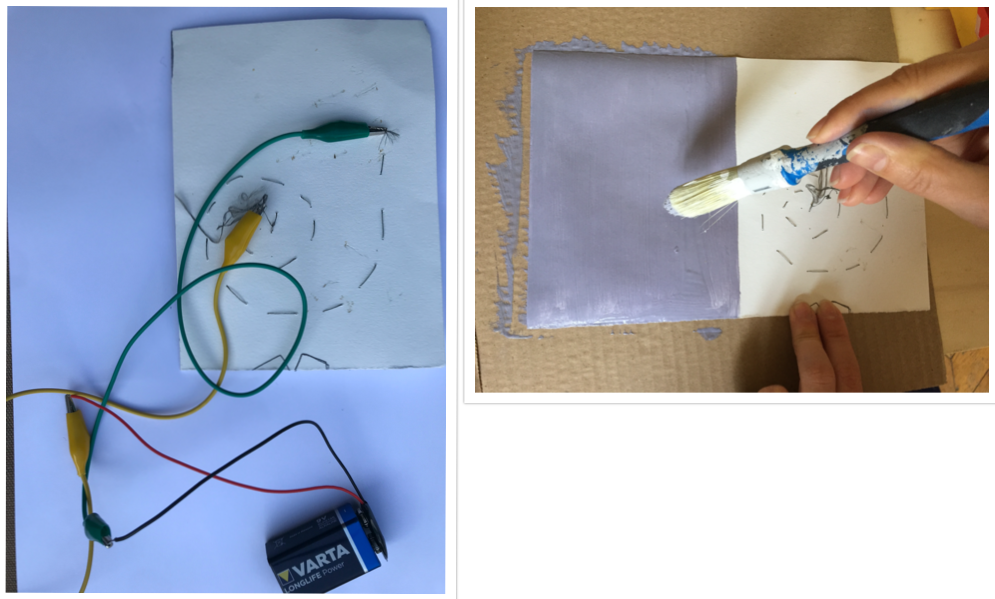
THERMOCHROMIC INKS
They change state in the presence of heat. Diane bought us a pale blue which becomes red under the heat. I did all the experience with Capucine.
Steps
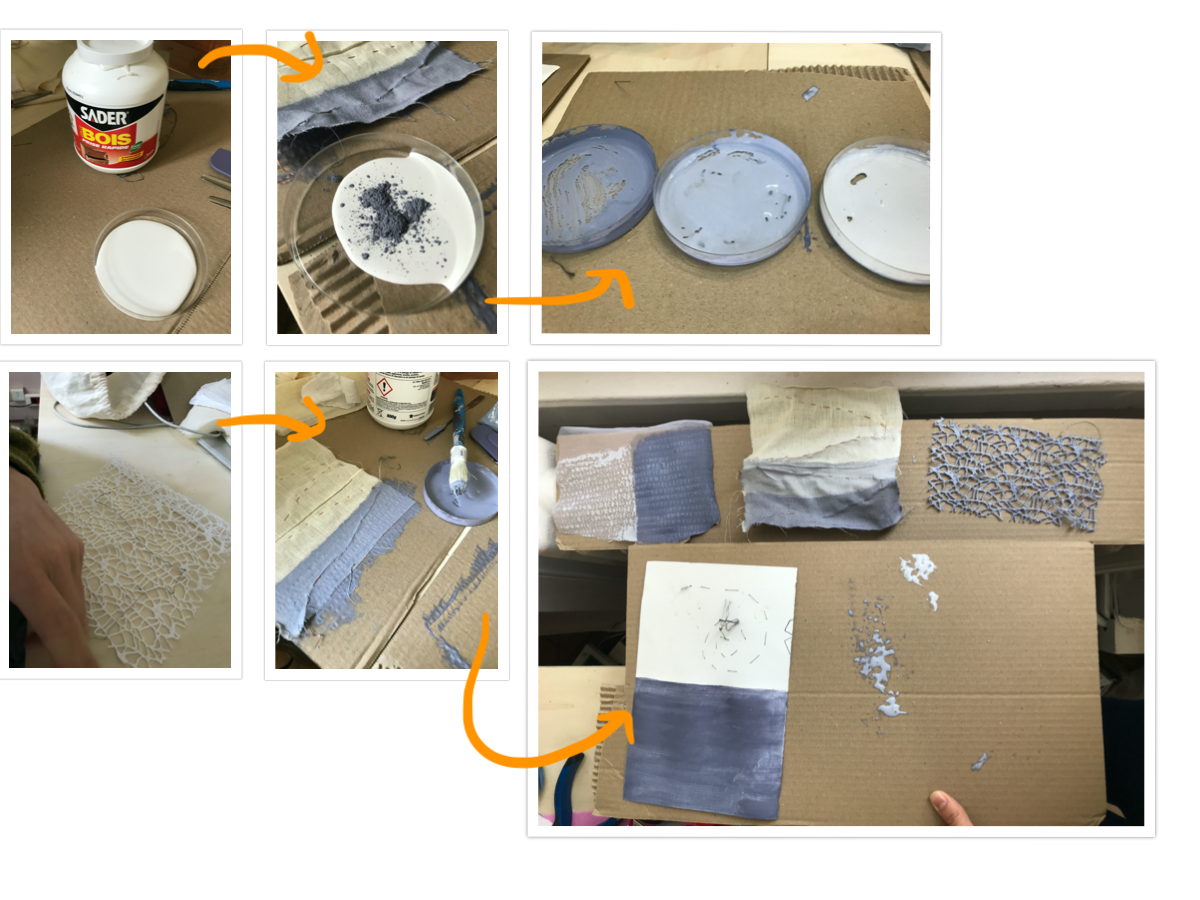
- choose your material : fabrics, papers, cardboard.
- choose your ink and prepare your tools : brush, petri dish, stirrer and of course your electronic devices
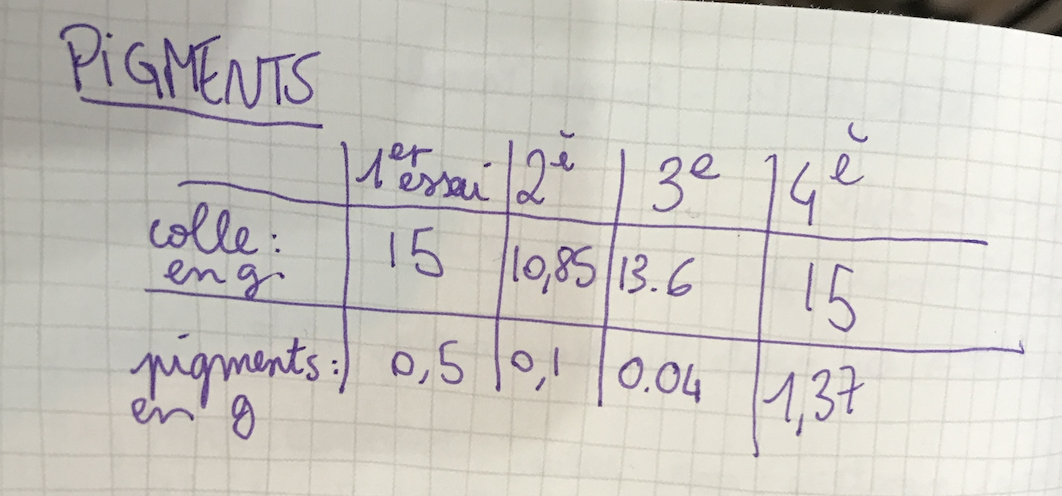
- weight the ink and the glue : we took wood glue and it worked perfectly!
- mix them until you have a nice texture and paint your surface : don't need to be a thick layer / let it dry
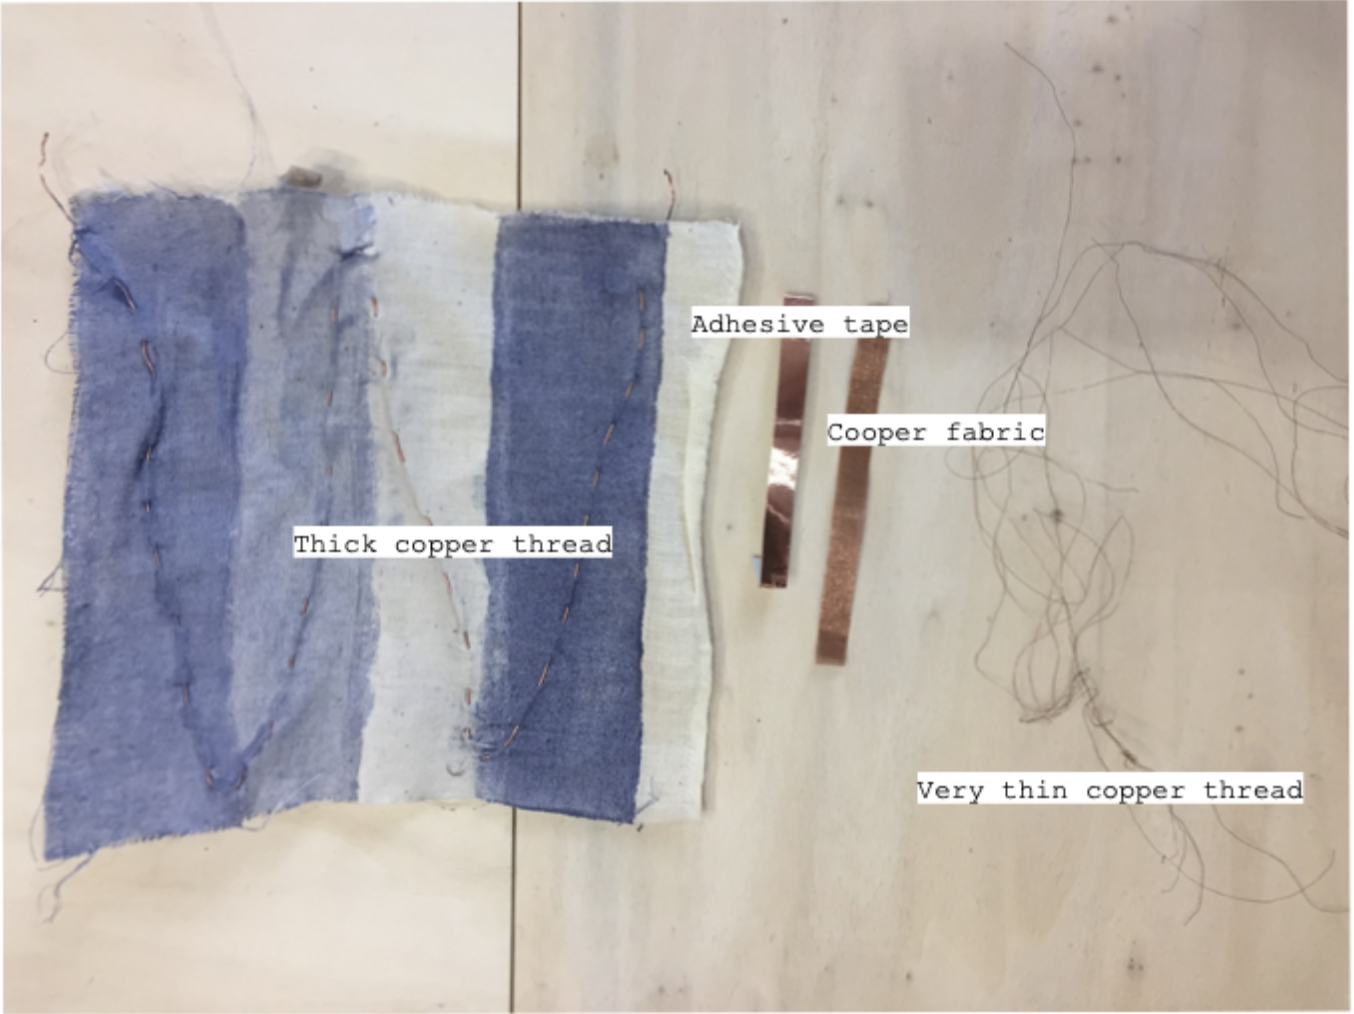
- embroide fabrics and papers with conductive thread.
- create your circuit : we choose a 9V battery
- wait a little bit...
- and admire the magic!
Results

The complexity was chosing the right heating materials for our specific project.
The quantity of ink doesn't matter, but with our color change pigment, it was better to put more ink in our mixte to showcase the contrast.
The color changes quite quickly and leave quick quickly too.
It works with fabrics and paper so I think there is no problem with the thickness of the material you choose.
It was nice to experimente color, light and energy together :)
Tips :
We tried to embroide with copper thread and any copper material but it seems that the copper doesn't heat so it didn't work.
Transistor
We needed to make a circuit with a transistor.
![]()
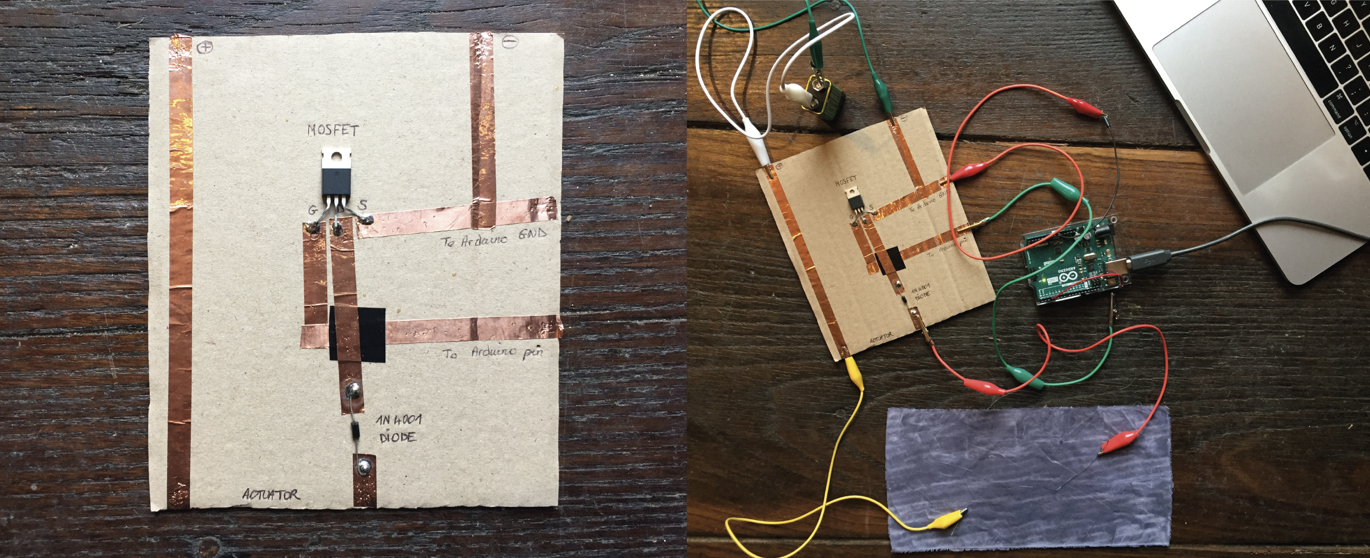
This is a Arduino sketch to heat up an element that I found on Patty Jansen's page.

REFERENCES thermochromic inks
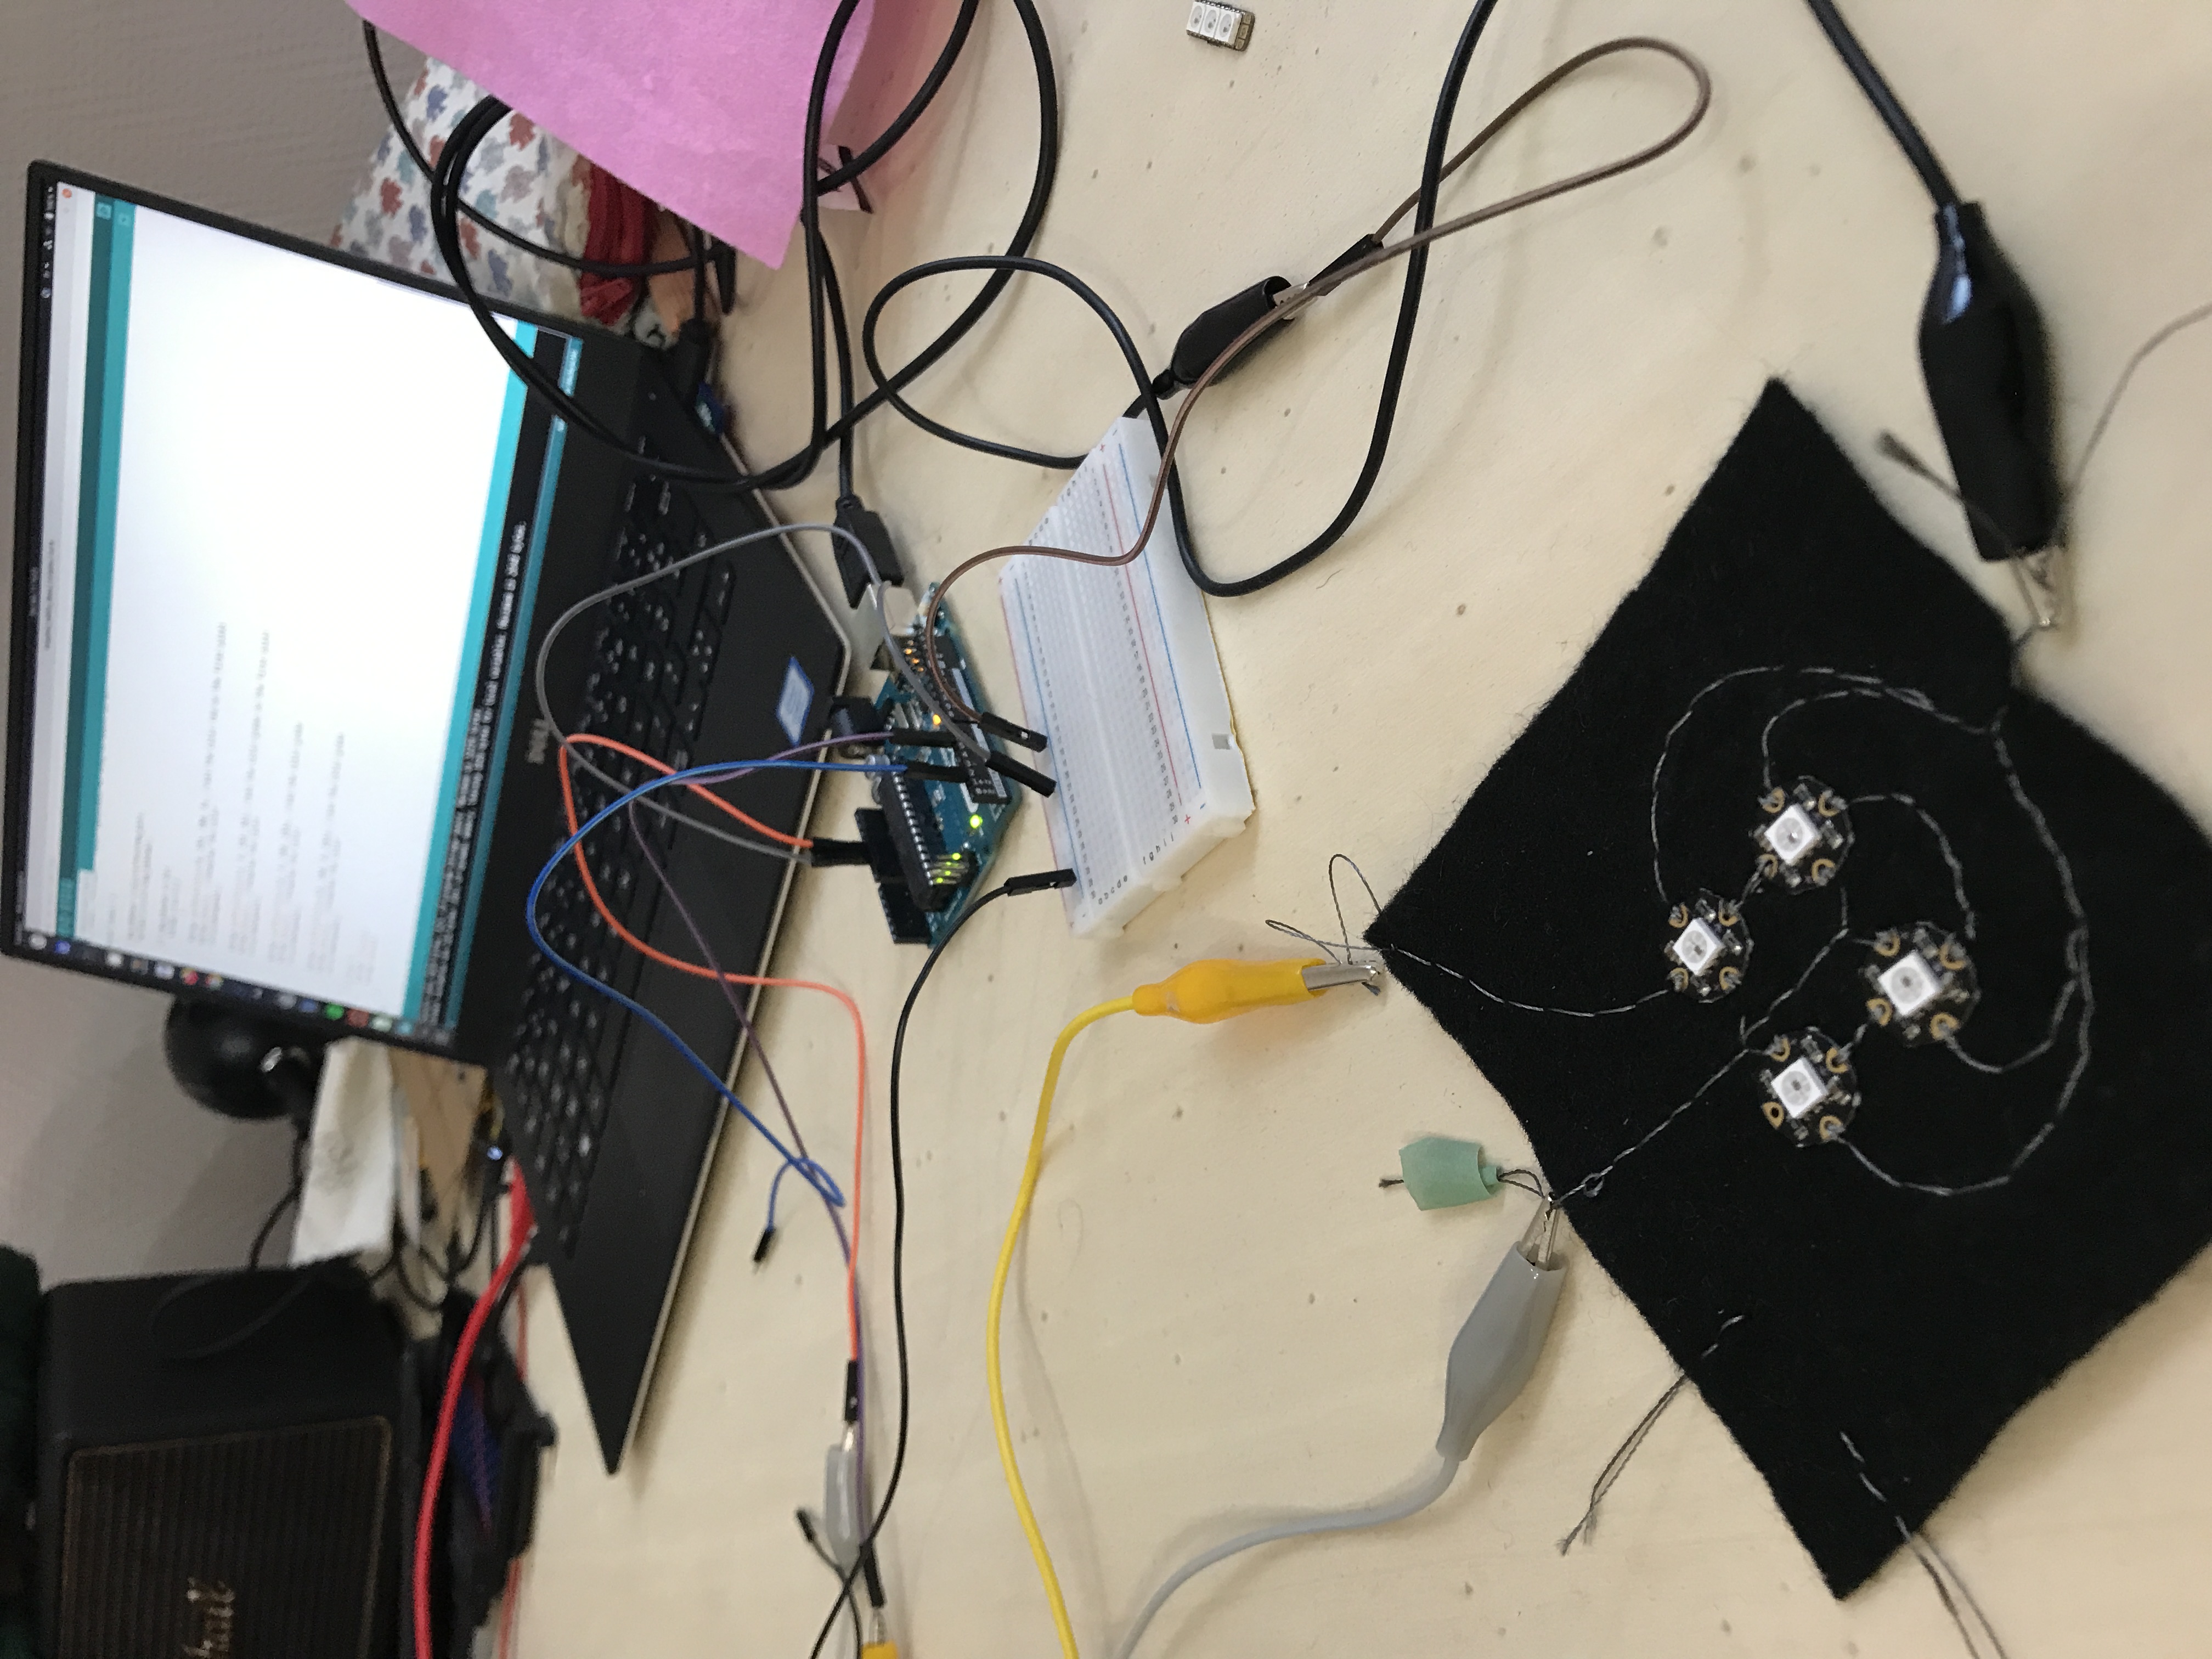
NEOPIXELS
We followed Emma Pareschi's tutorial. In this circuit, we were careful that none of the cables touch each other, this is why we put tape on it. The sketches are from Emma Pareschi's class. First, we uploaded the neopixel library in Arduino. This is the circuit we made :
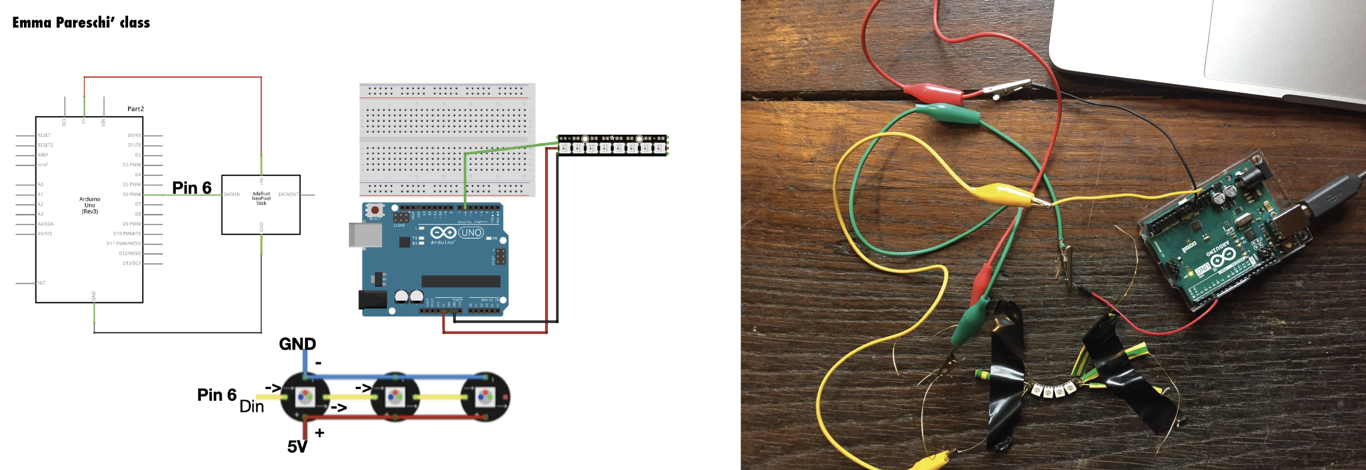
Tutorial : Arduino, Neopixels and Sound
Notes :
- Set pixel colours : 4 chiffres
- Le premier c est quel est la led —> led 1 = 0 (en informatique le 1er chiffre c est le zero)
- Et la 2-3-4 c est le code RGB (si tu mets un code précis, tu peux avoir des couleurs super précise et non banales)
Key words of the week/reflexion
I started thinking about my final project and I really want to work with kids, colors and manual activities. Don't know more for the moment aha