2. Digital bodies
| Importing Stl File |
|---|
 |
This study proposes a method to evaluate clothing fit on human body by dressing virtual clothes on 3D human model. The clothing patterns are designed and subsequently sewn up together around the human model. Due to the complex cloth shapes are difficult to fit well on the human body, this study proposes the 3D human model dressing with virtual clothes according to the body shape.
Assignment
Study and understand the process of biofabrication and materials used in biofabricating technology. Then fabricate at least two crafted materials using biofabriating techniques.
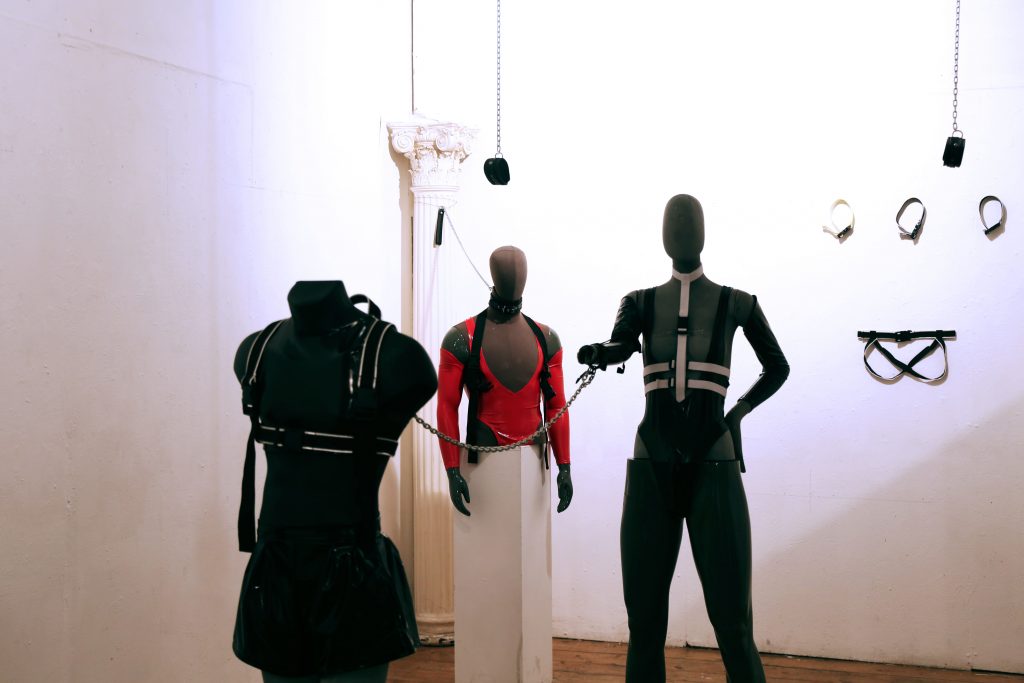
Inspiration
| The Art of Biofabricated Materials |
|---|
4.1. Introduction
“The mannequin has always adapted with fashion, and new digital technologies have seen the industry embrace cutting-edge and dynamic forms – such as holograms and mannequins that move. The 3D scanning of a customer meets the new demand of consumers that are looking for a more ‘real’ reflection in their shopping experience, as well as a more inclusive and forward-thinking fashion industry.”
Required Equiupment and Tools for the Assignment
| Equipmet and Tools | |||
|---|---|---|---|
| Kinect 3-D Scanner | KSCAN 3-D Software | Mesh Mixer Software | Slicer for Fusion 360 |
| GWeiki LC 1390S Laser Machine | Laser Cut Software | Transparent Acrylic | Card Stock Paper |
3-D Model Preparation:
Stand in a well lit area, with your arms hanging slightly away from your body. Ask someone to take a 3D scan of you, following the instructions of the scanner you choose. Unless you want a full body model, you do not need to scan your legs.
If you are using a digital camera, take multiple pictures all around the body, making sure there is sufficient overlap (usually at least 30%) between pictures for the software to recognise where to stitch them together. KScan 3D was an easy software to use for the scanning process.
Combinine all the images together to make the final 3D model.
Then, choose the location to save your file as an STL file.
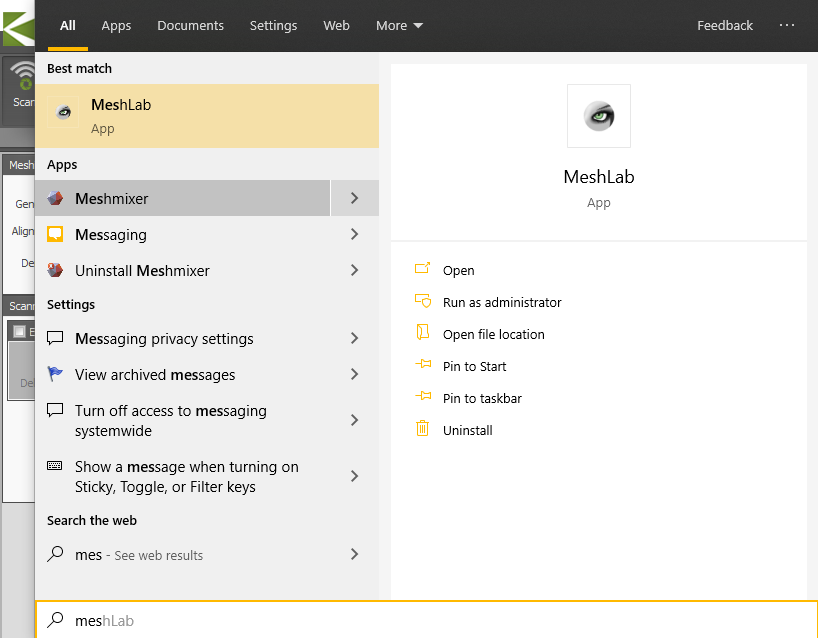
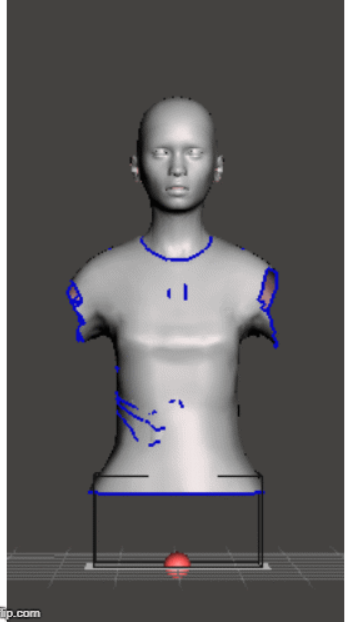
Meshmixer
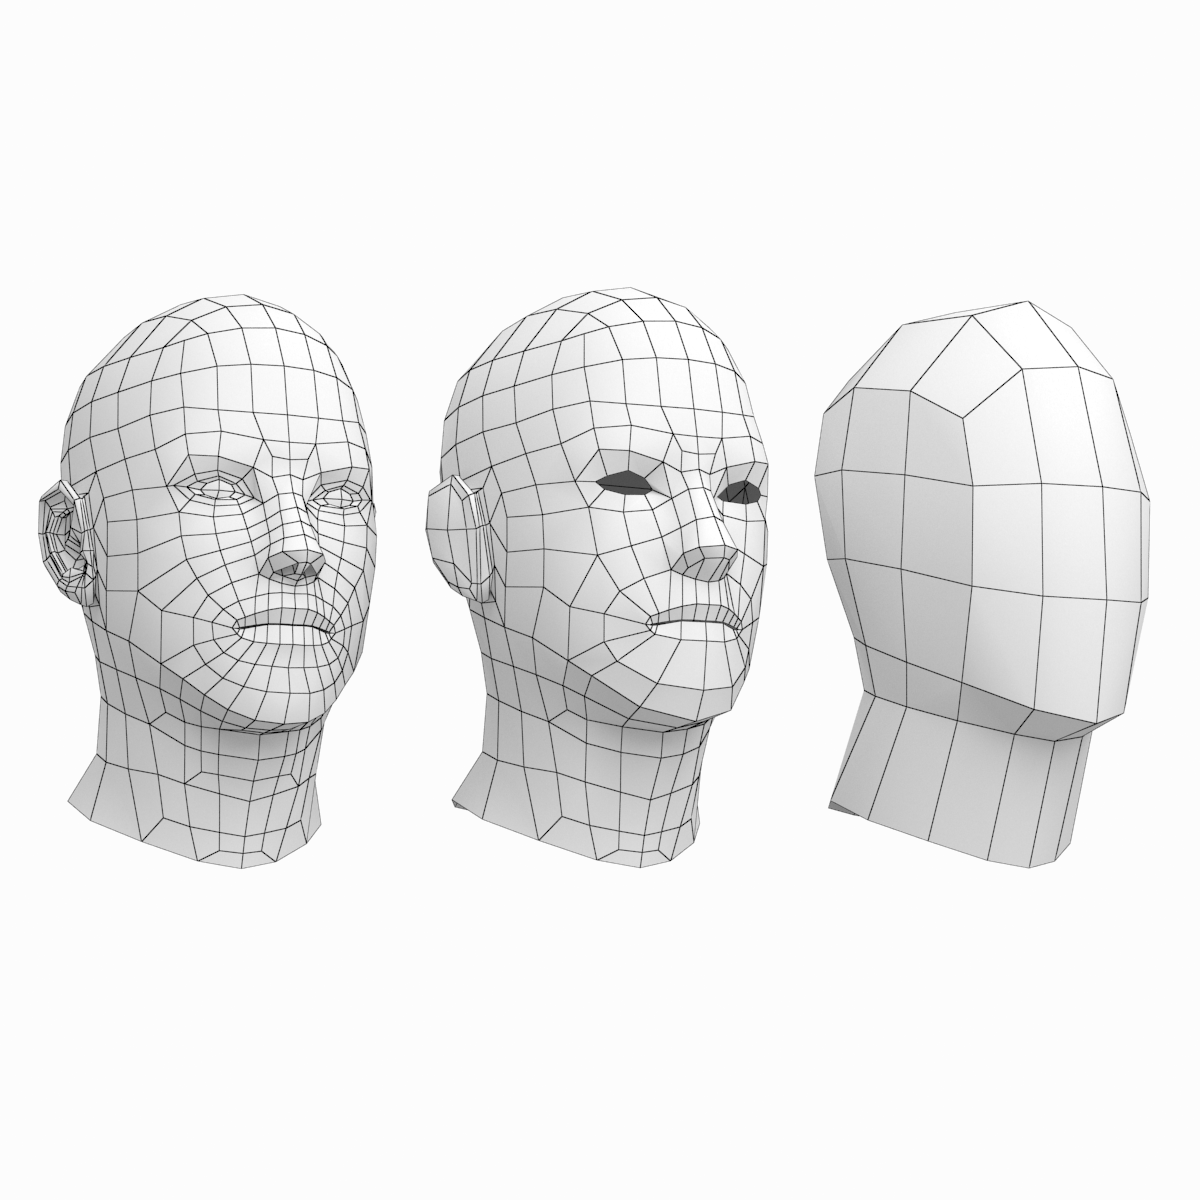
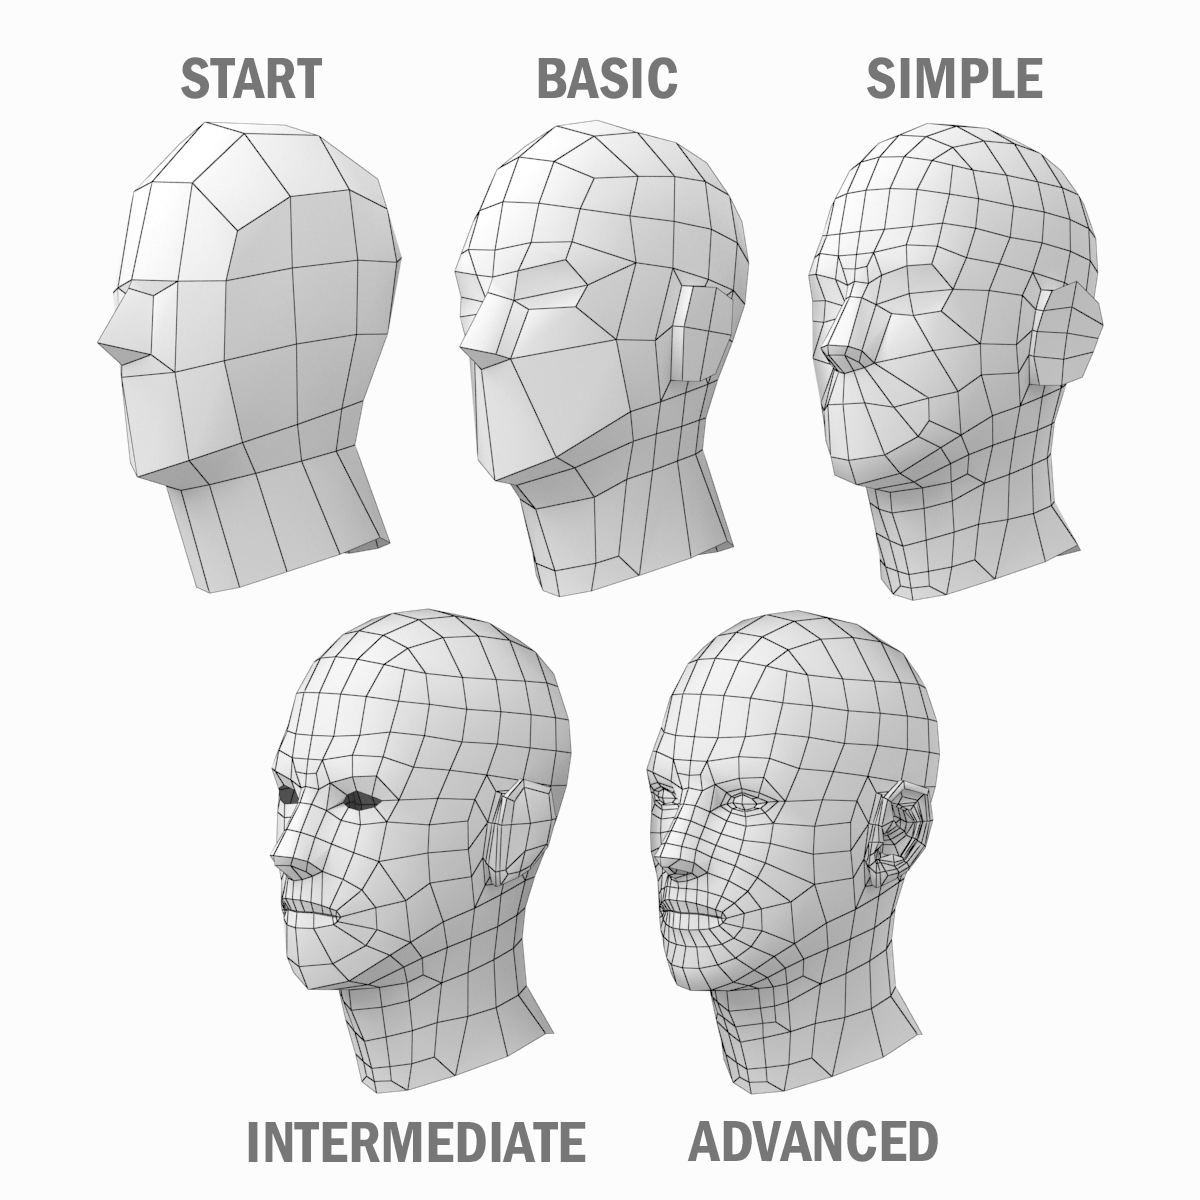
3-D Mesh
A 3D mesh is the structural computarized version of a 3D model consisting of polygons. 3D meshes use reference points in the X, Y and Z axes to define shapes dimensions in terms of height, width and depth. It was very interesting for me to realize from where the 3D mesh came and how the computer analyzes every single point. The following figure illustrates the composition of the mesh.
Generally a 3D model is consisting of many polygon meshes making up the mesh surface. By increasing the resolution of the polygon mesh, the 3D object will tend to look smoother and close to the real object.
| 3-D Mesh | 3-D Mesh Refining |
|---|---|
 |
 |
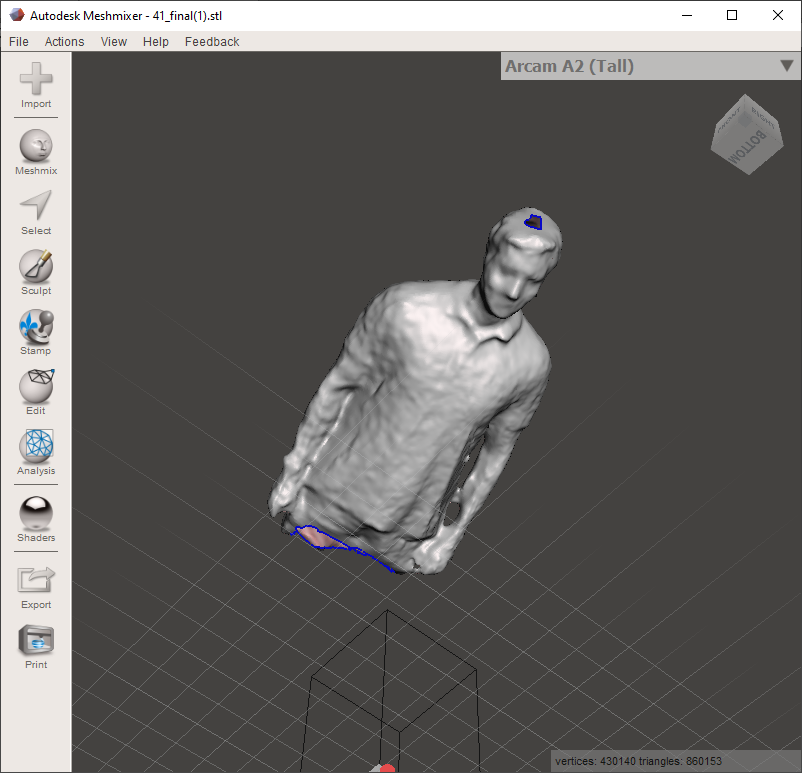
1 - Open Autodesk Meshmixer and import your 3D model.
2 - To remove the head, arms and legs of the model, click 'Select' on the toolbar and then draw a shape around an area of the model you want to remove. This brings up an expanded toolbar, click 'Edit ~ Discard'.
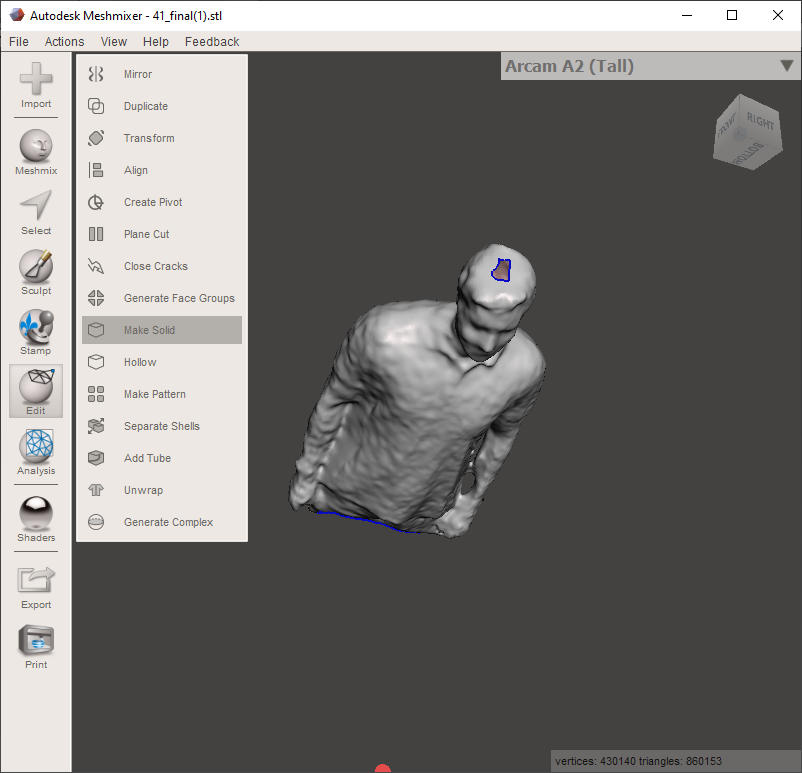
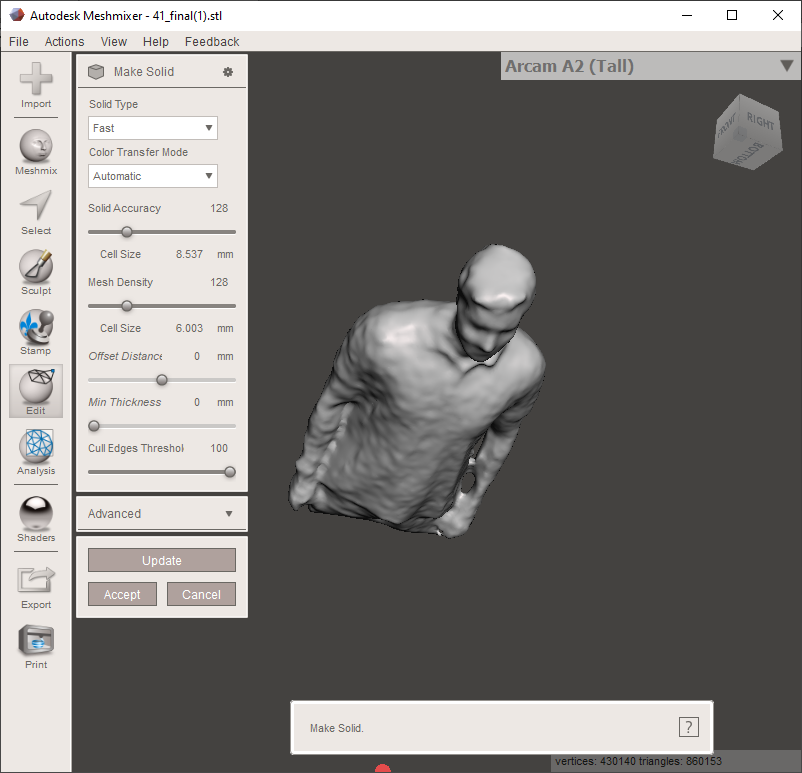
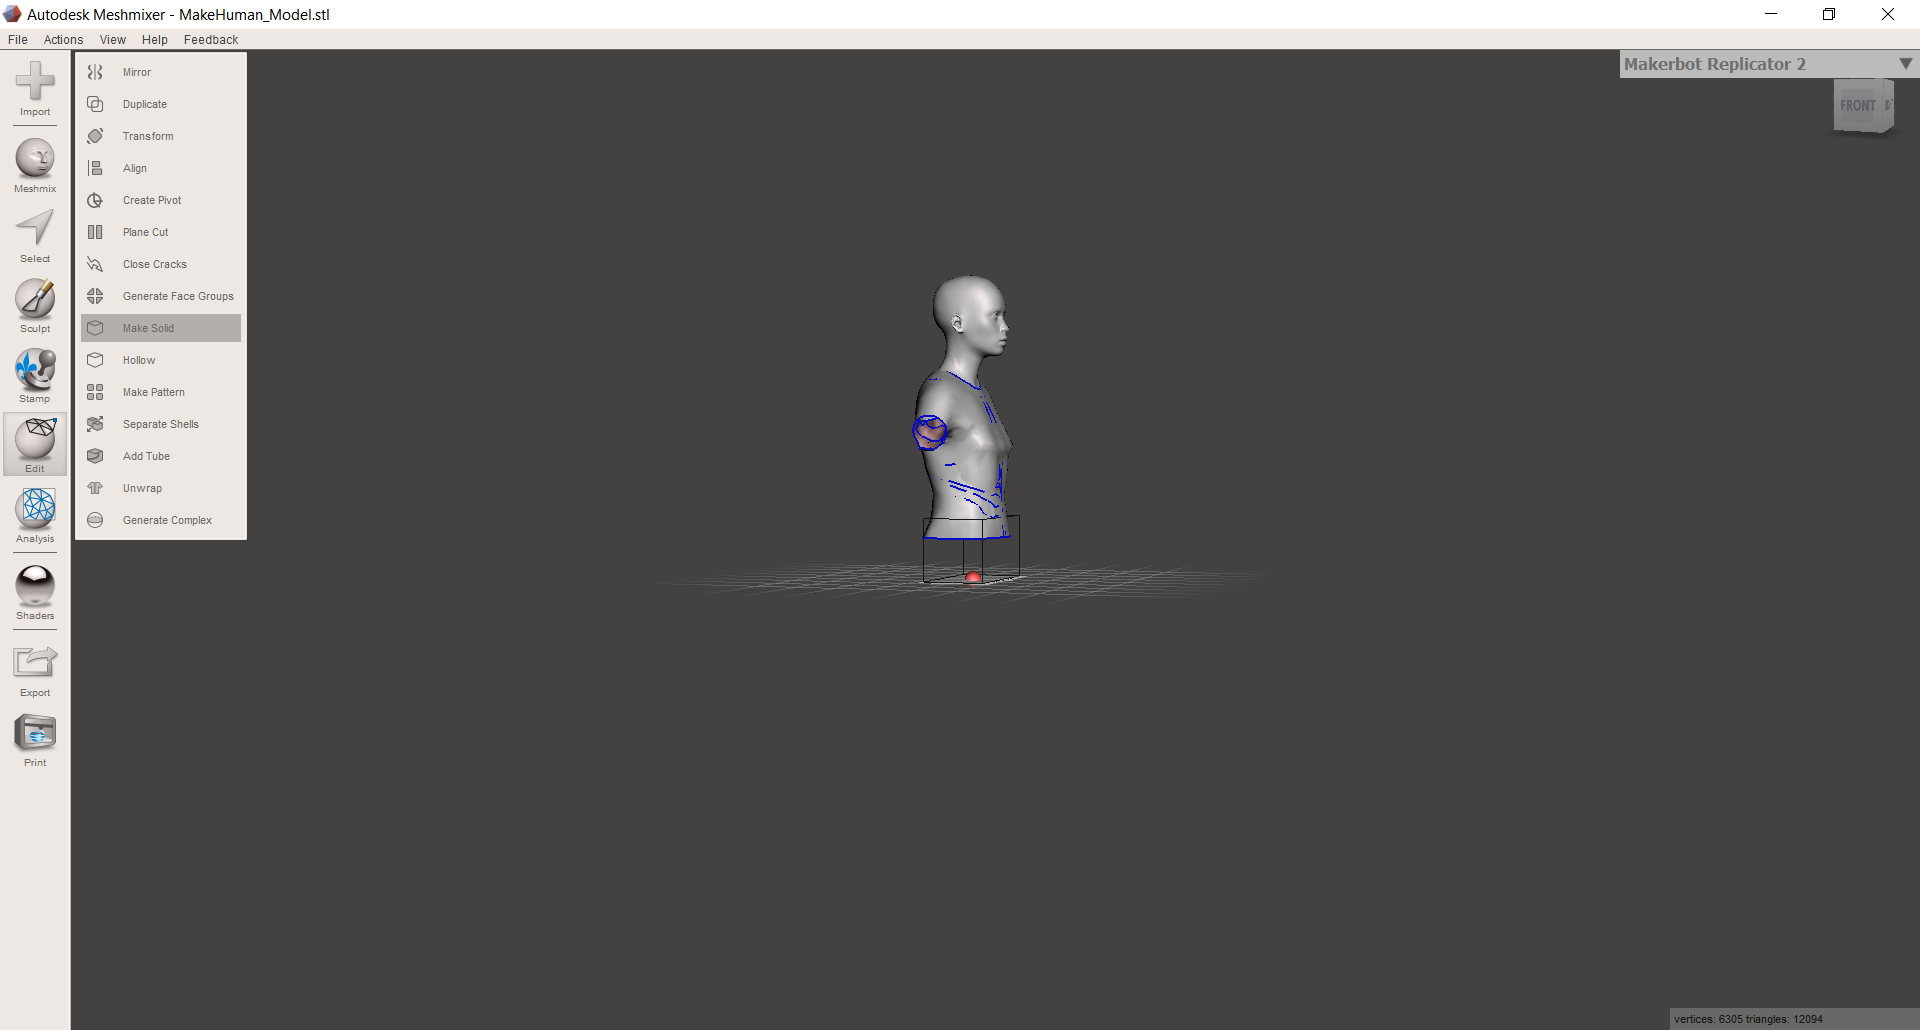
3 - To close all the gaps in the model click 'Edit ~ Make Solid' from the main toolbar.
| Meshmixer | |
|---|---|
 |
 |
 |
 |
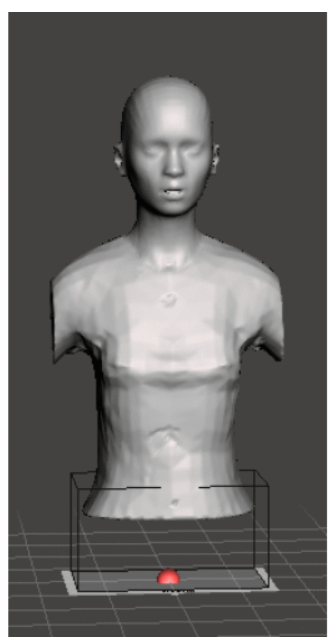
4 - To smooth over any rough surfaces, go to 'Sculpt ~ Brushes ~ Refine' and drag the brush over the relevant areas.
5 - If you intend to create a stand for the dummy, create a perpendicular hole in the middle of the base of the model, at least 200mm deep with a diameter 2mm larger than the diameter of your pole
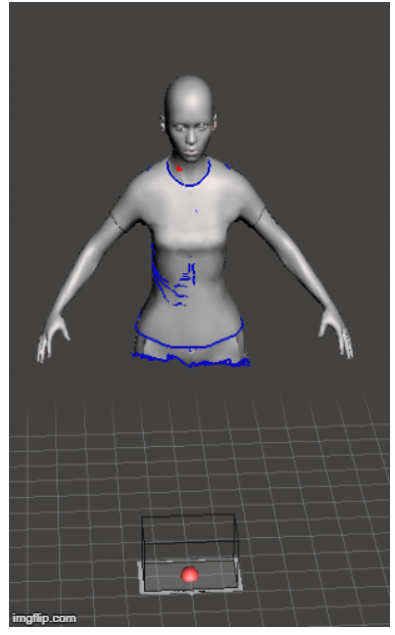
6 - The lower body can be deleted using Meshmixer software.
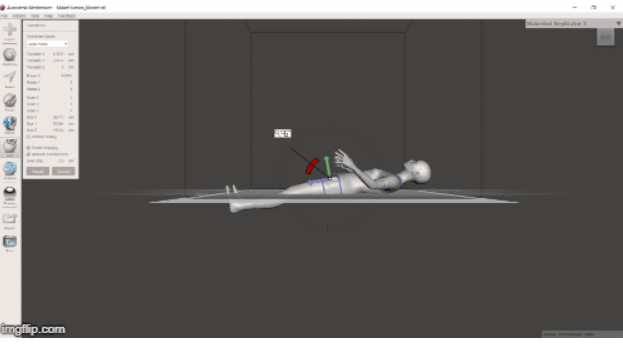
Makehuman
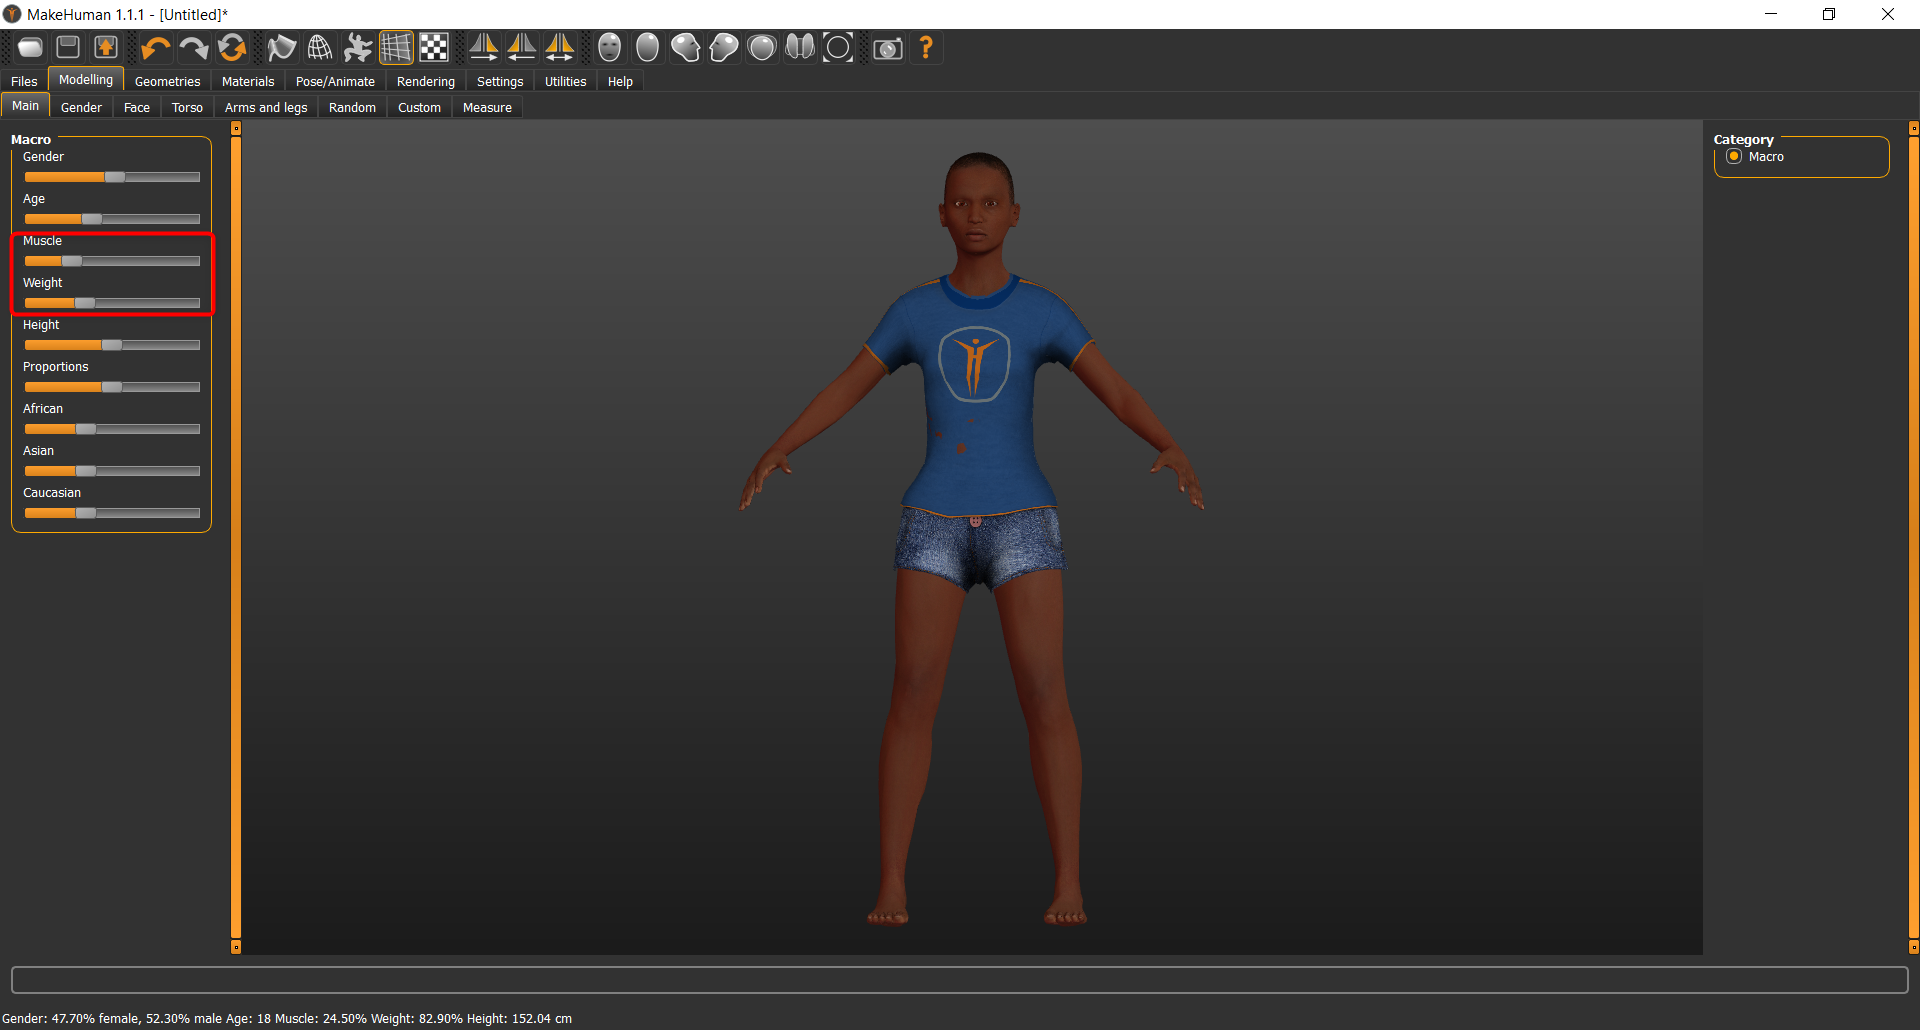
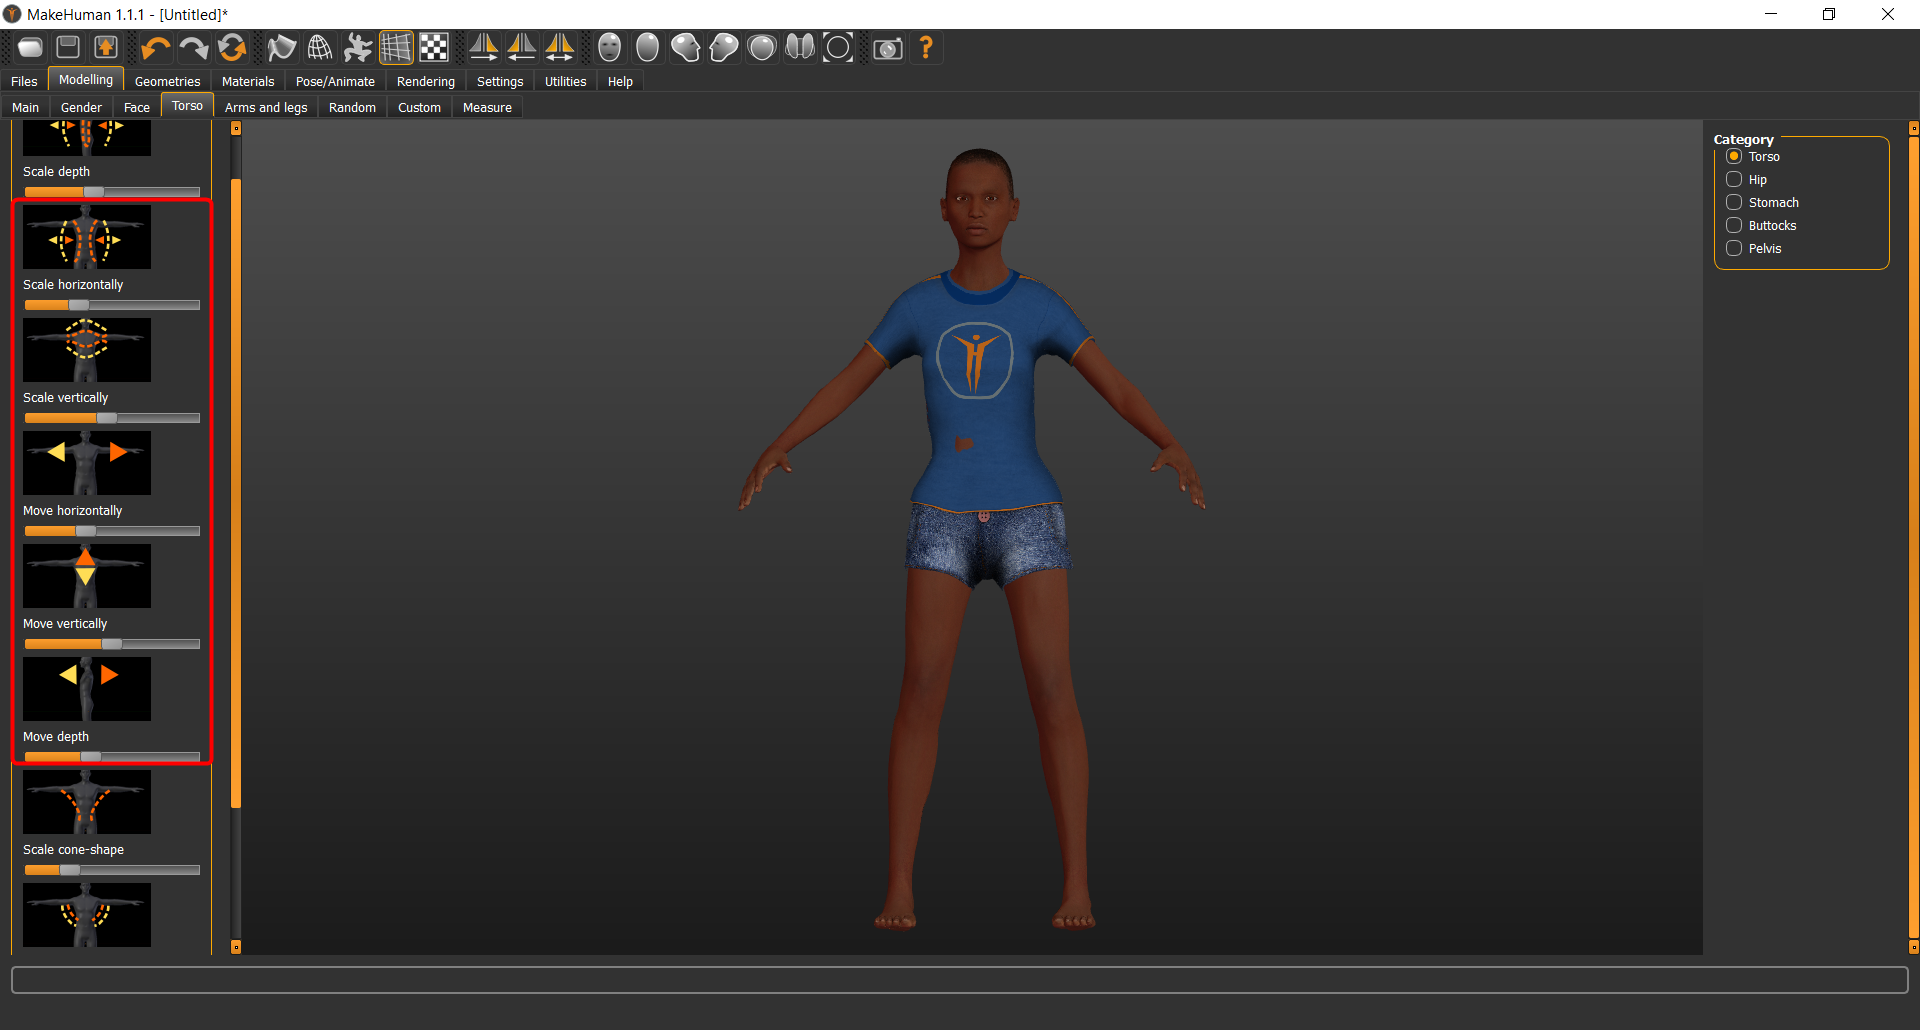
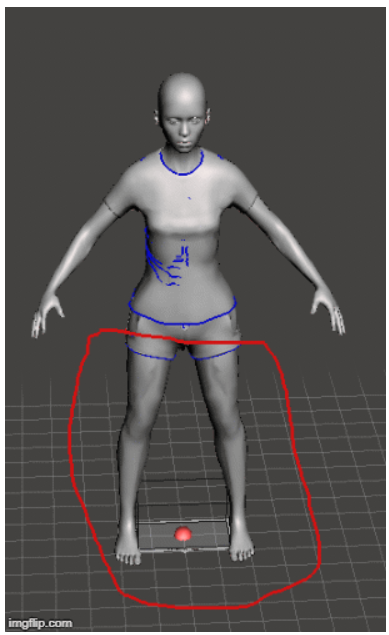
1 - When the software is opened it will give a defualt female model. I have edited the model by changing the customs as follows.
2 - To make the model body slim reduce the musculane feature and the weight .
| 3-D Model from Makehuman | |
|---|---|
 |
 |
 |
 |
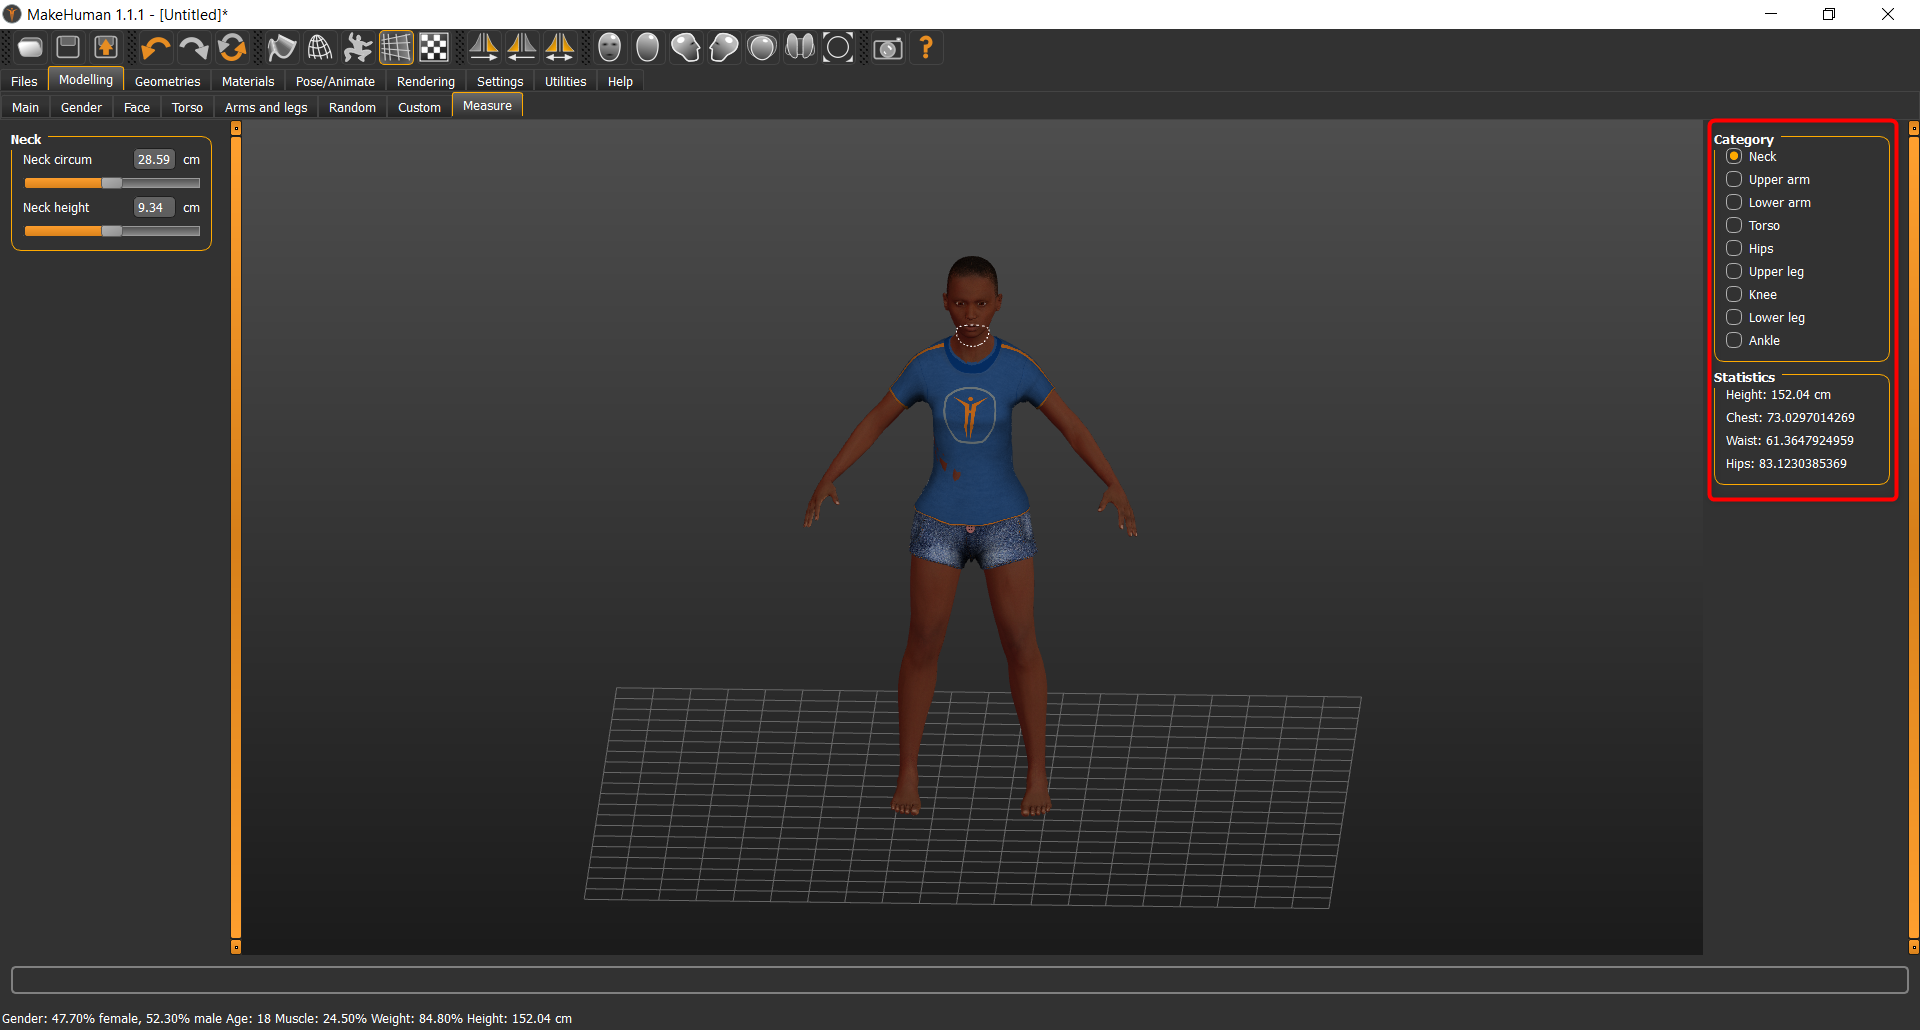
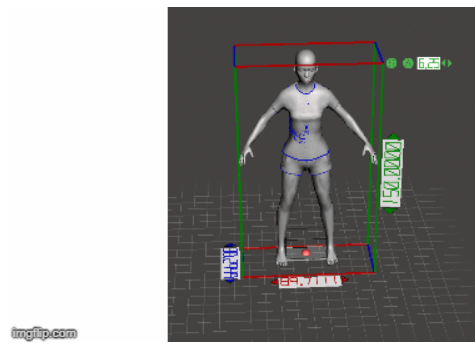
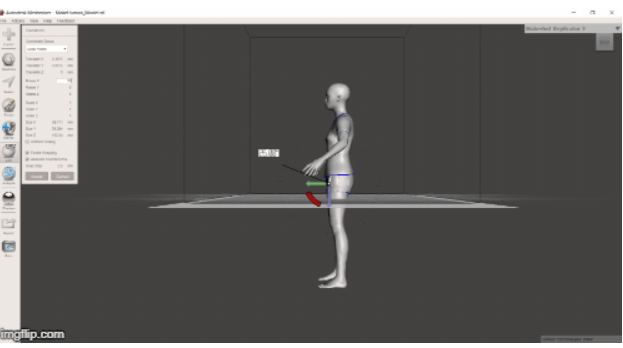
4 - The measurement tap is used to edit different parts of the body.
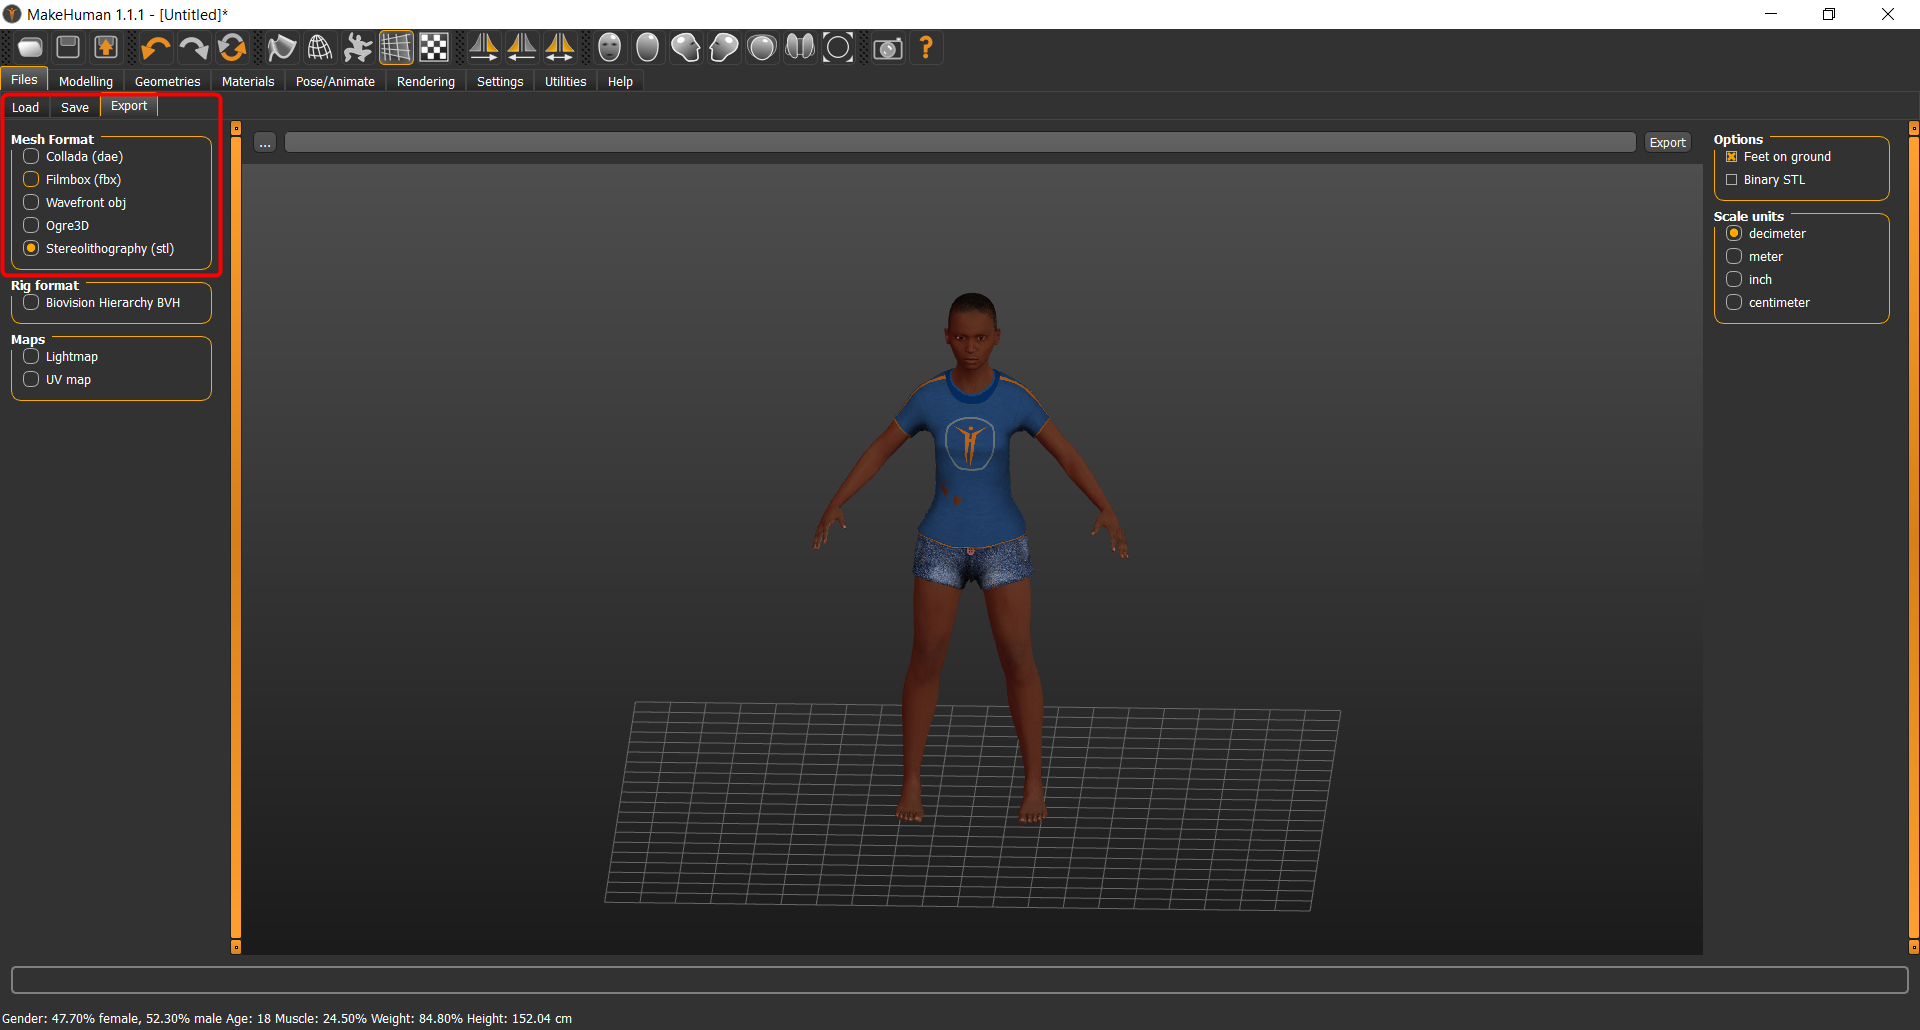
5 - After finishing, the model was exported as an STL file.
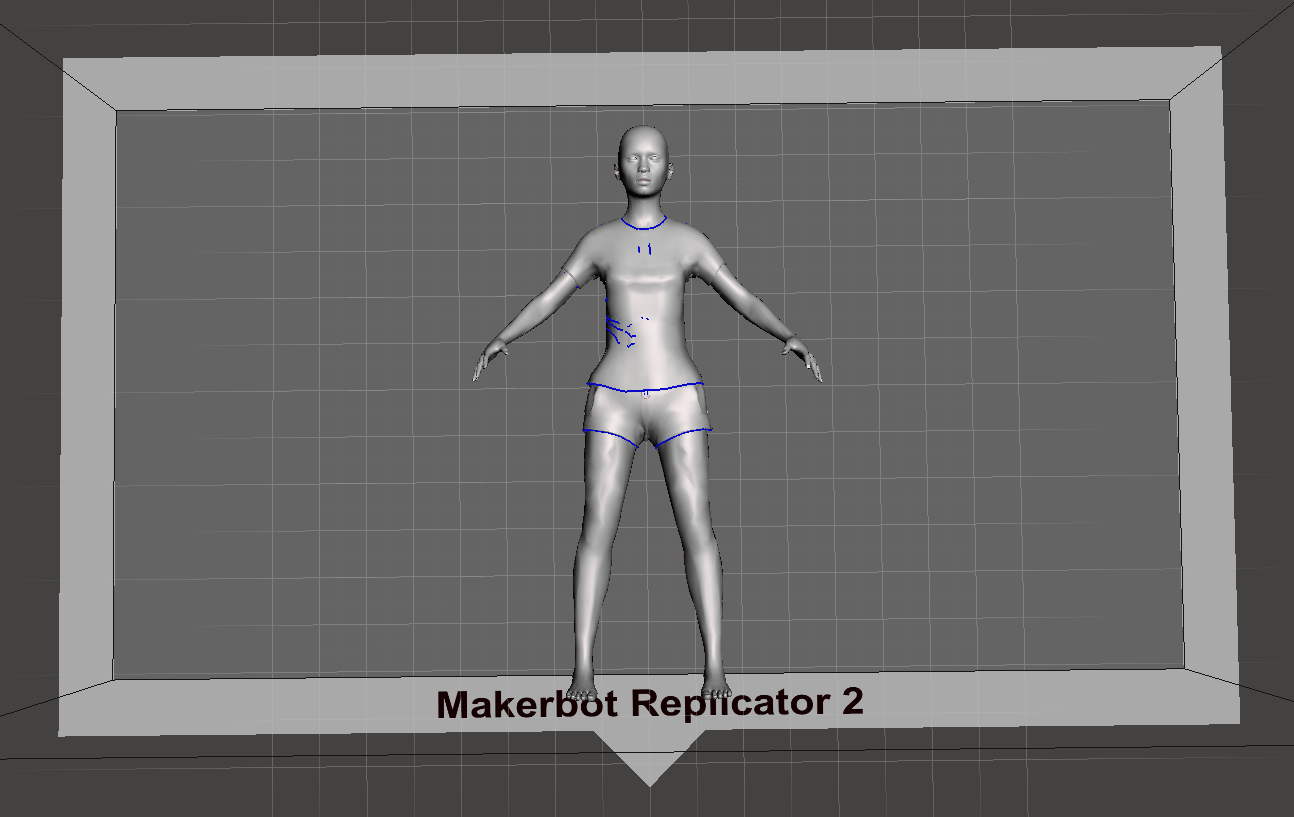
6 - The lower body can be deleted using Meshmixer software.
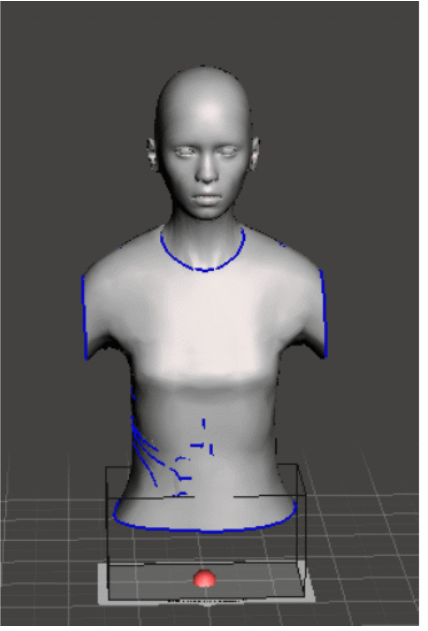
First, import the STL file using Meshmixer.
| Importing Stl File |
|---|
 |
| Deleting Body Parts | ||
|---|---|---|
 |
 |
 |
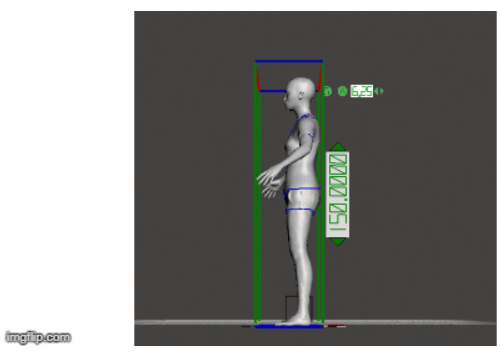
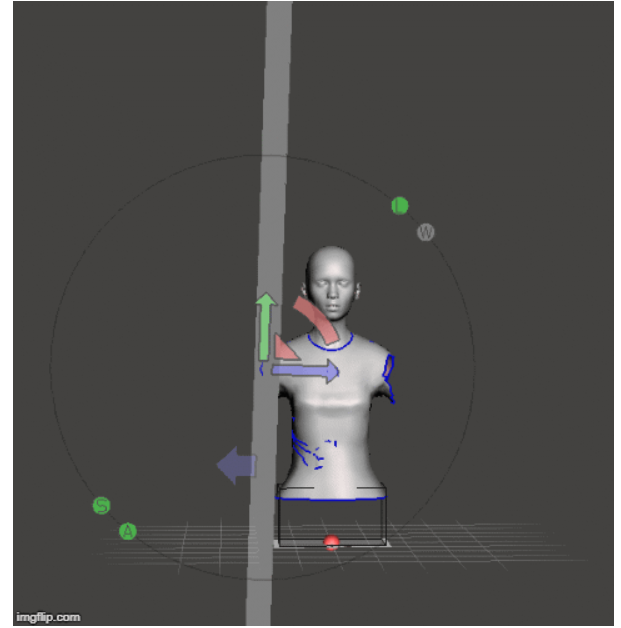
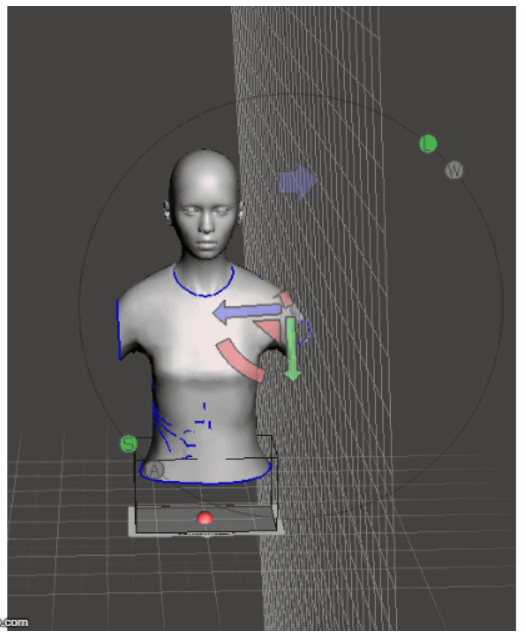
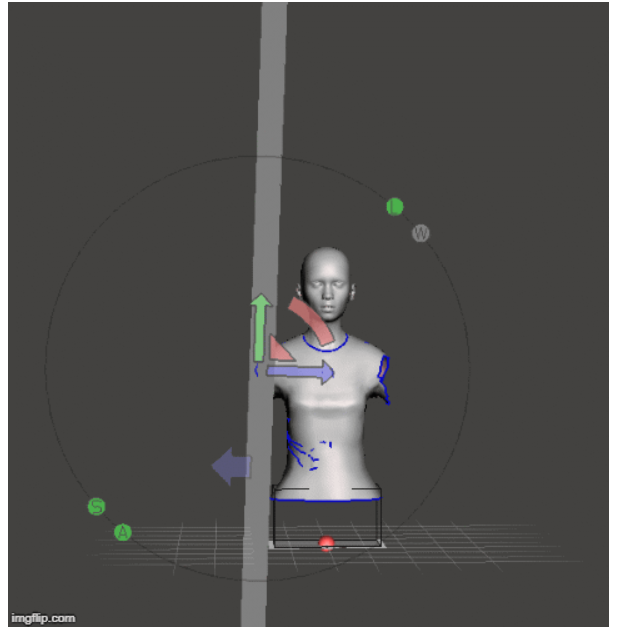
| Orientaion Modification | |
|---|---|
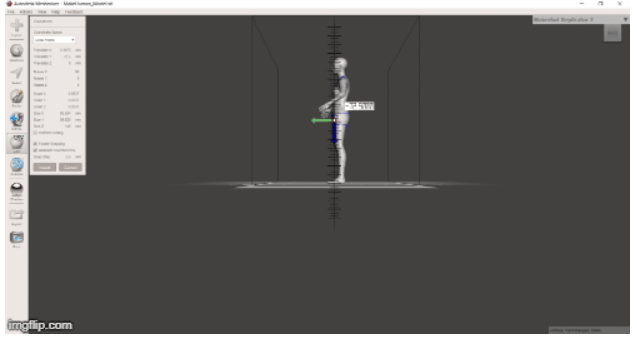 |
|
 |
 |
 |
 |
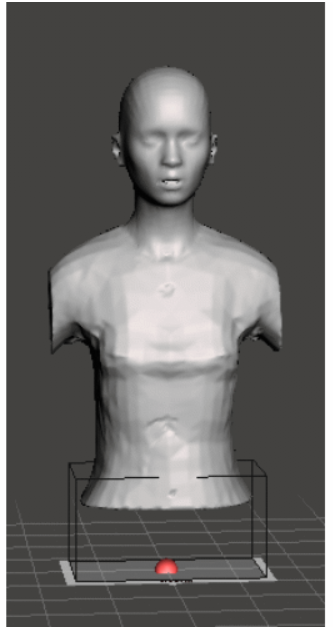
Then delete extra parts from abdomin and arm and make them solid.
| Cutting the Abdomen and making it solid | Cutting the Arm and making it solid |
|---|---|
 |
 |
 |
 |
 |
 |
 |
 |
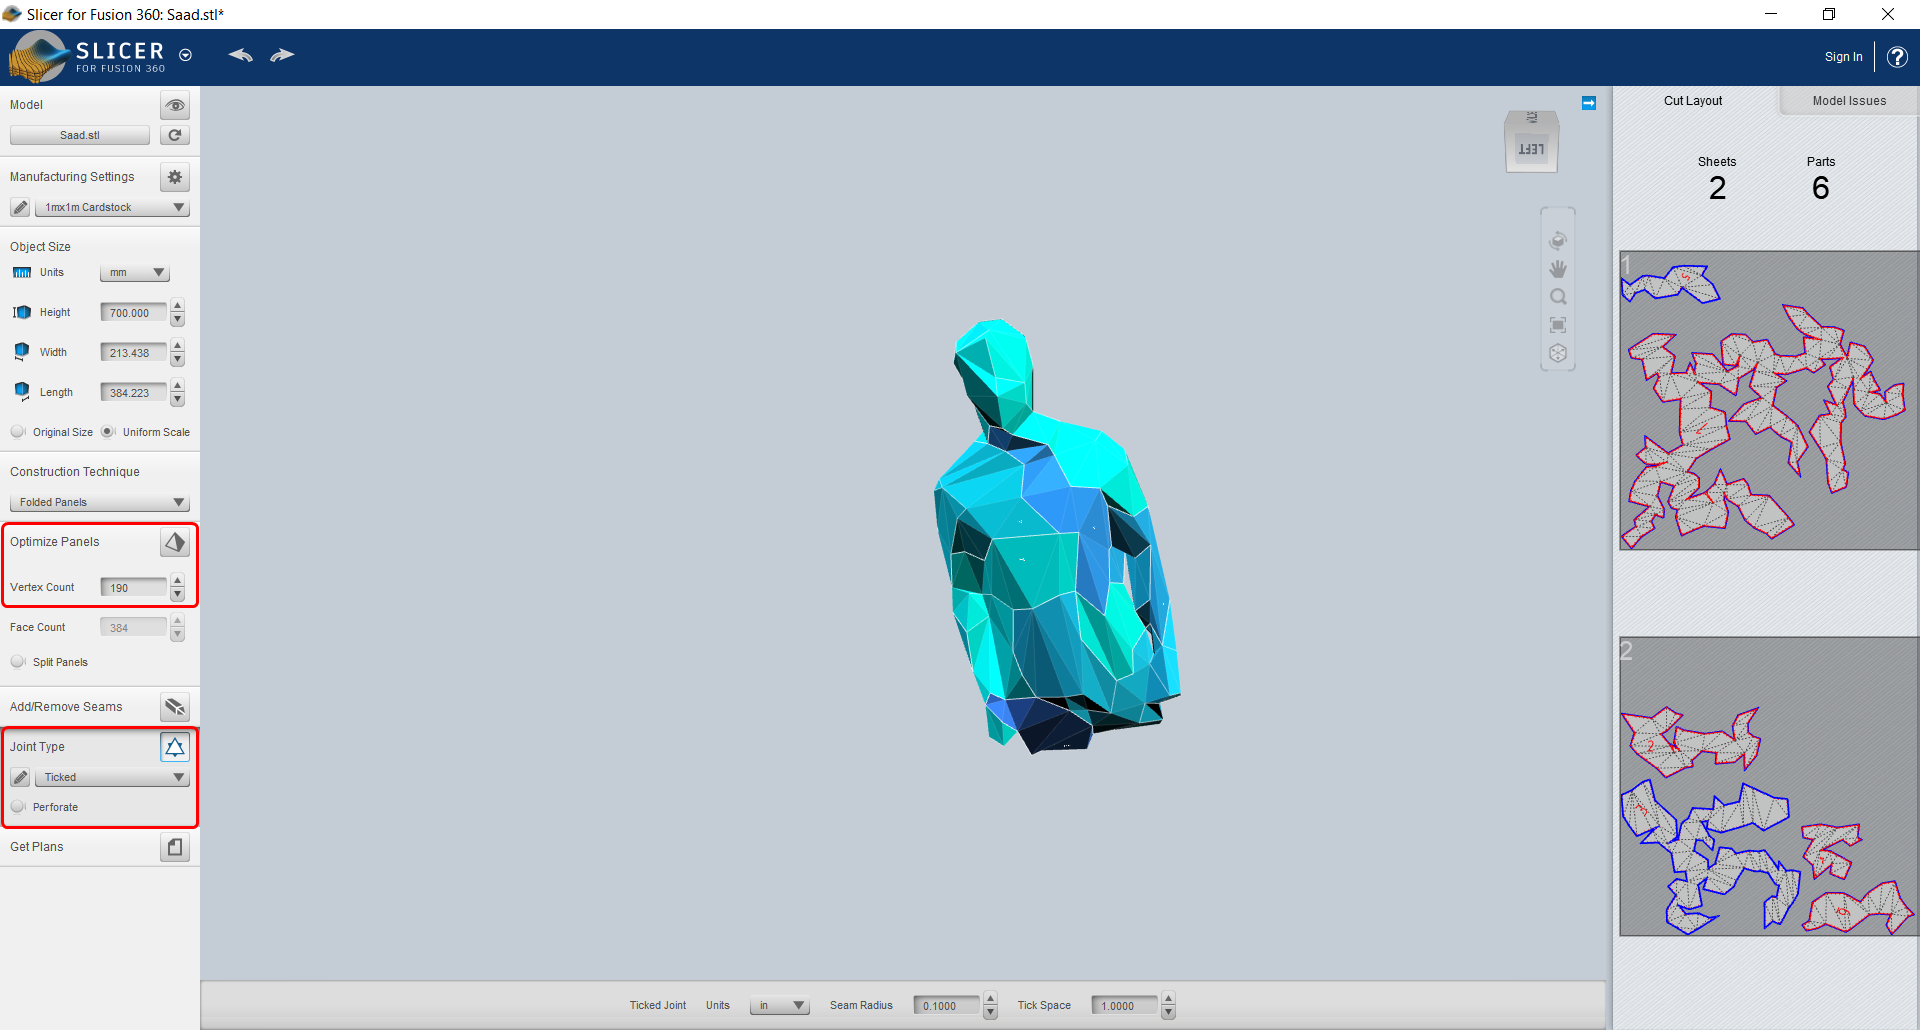
Slicing
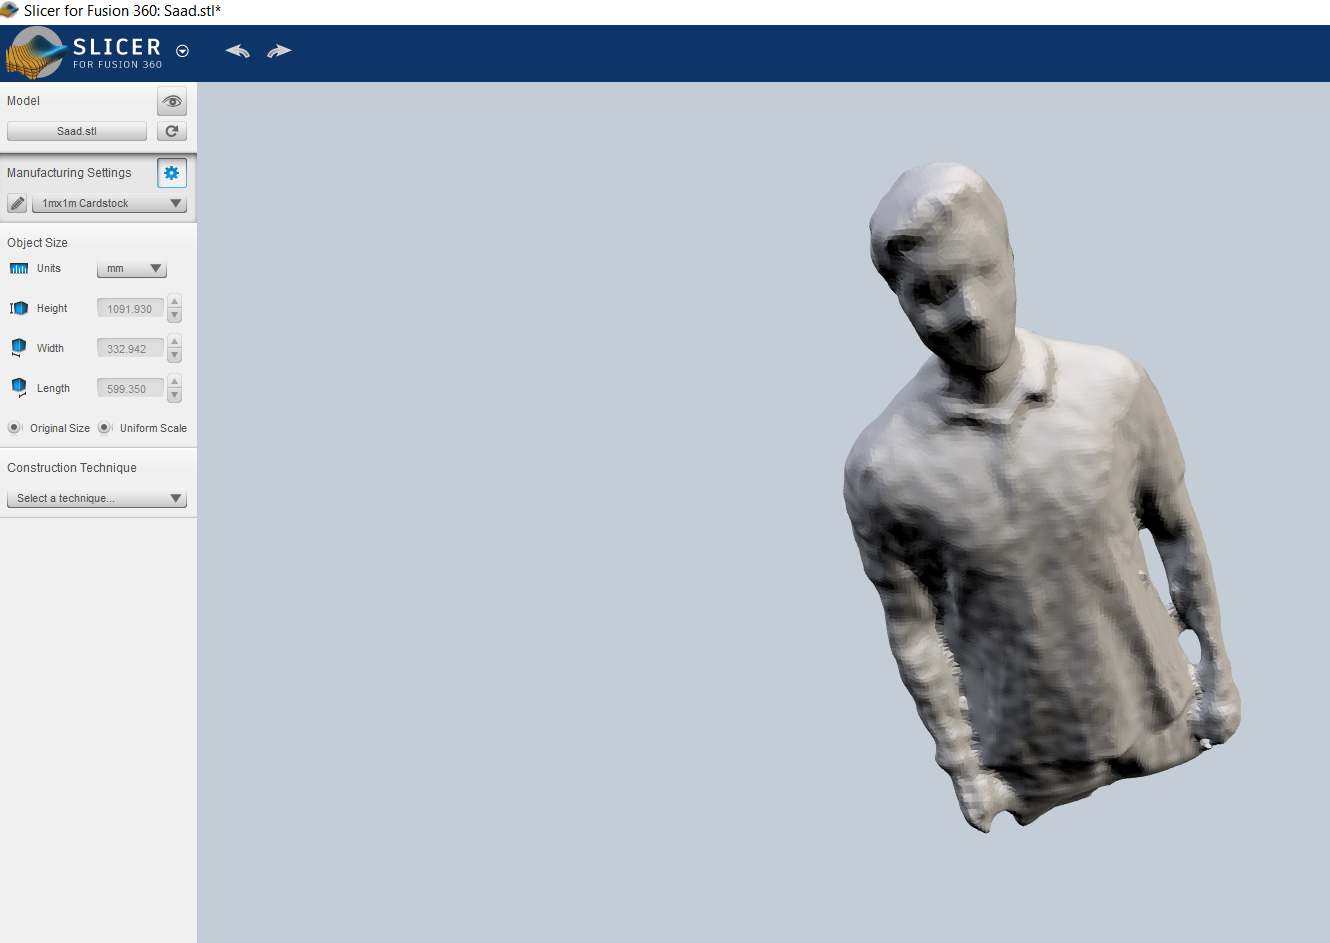
1 - Open Slicer for Fusion 360 and Import the STL file
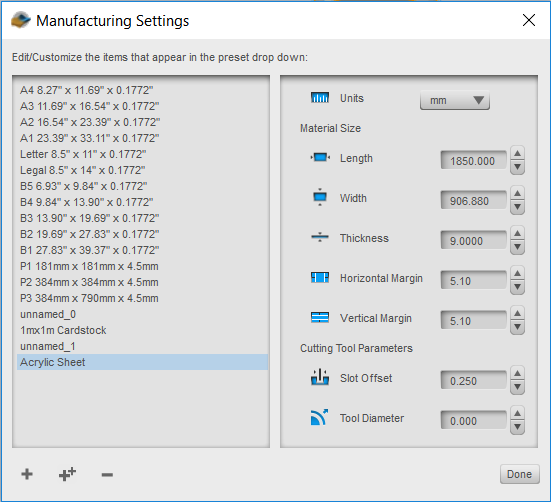
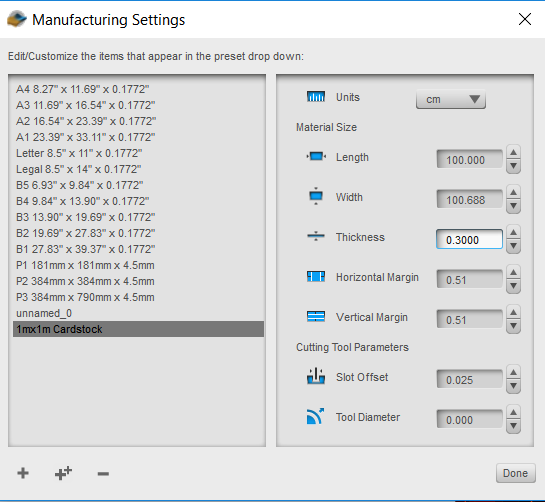
2 - Click the pencil under 'Manufacturing Settings' and add new material size by clicking '+'. Change height, length and thickness to the size of the cardboard (making sure the cardboard will fit in the laser cutter). After creating the new material size, make sure it is selected in the drop down menu.
3 - Under 'Object Size', tick 'Original Size'
| Importing Stl Model | Manufacturing Setting |
|---|---|
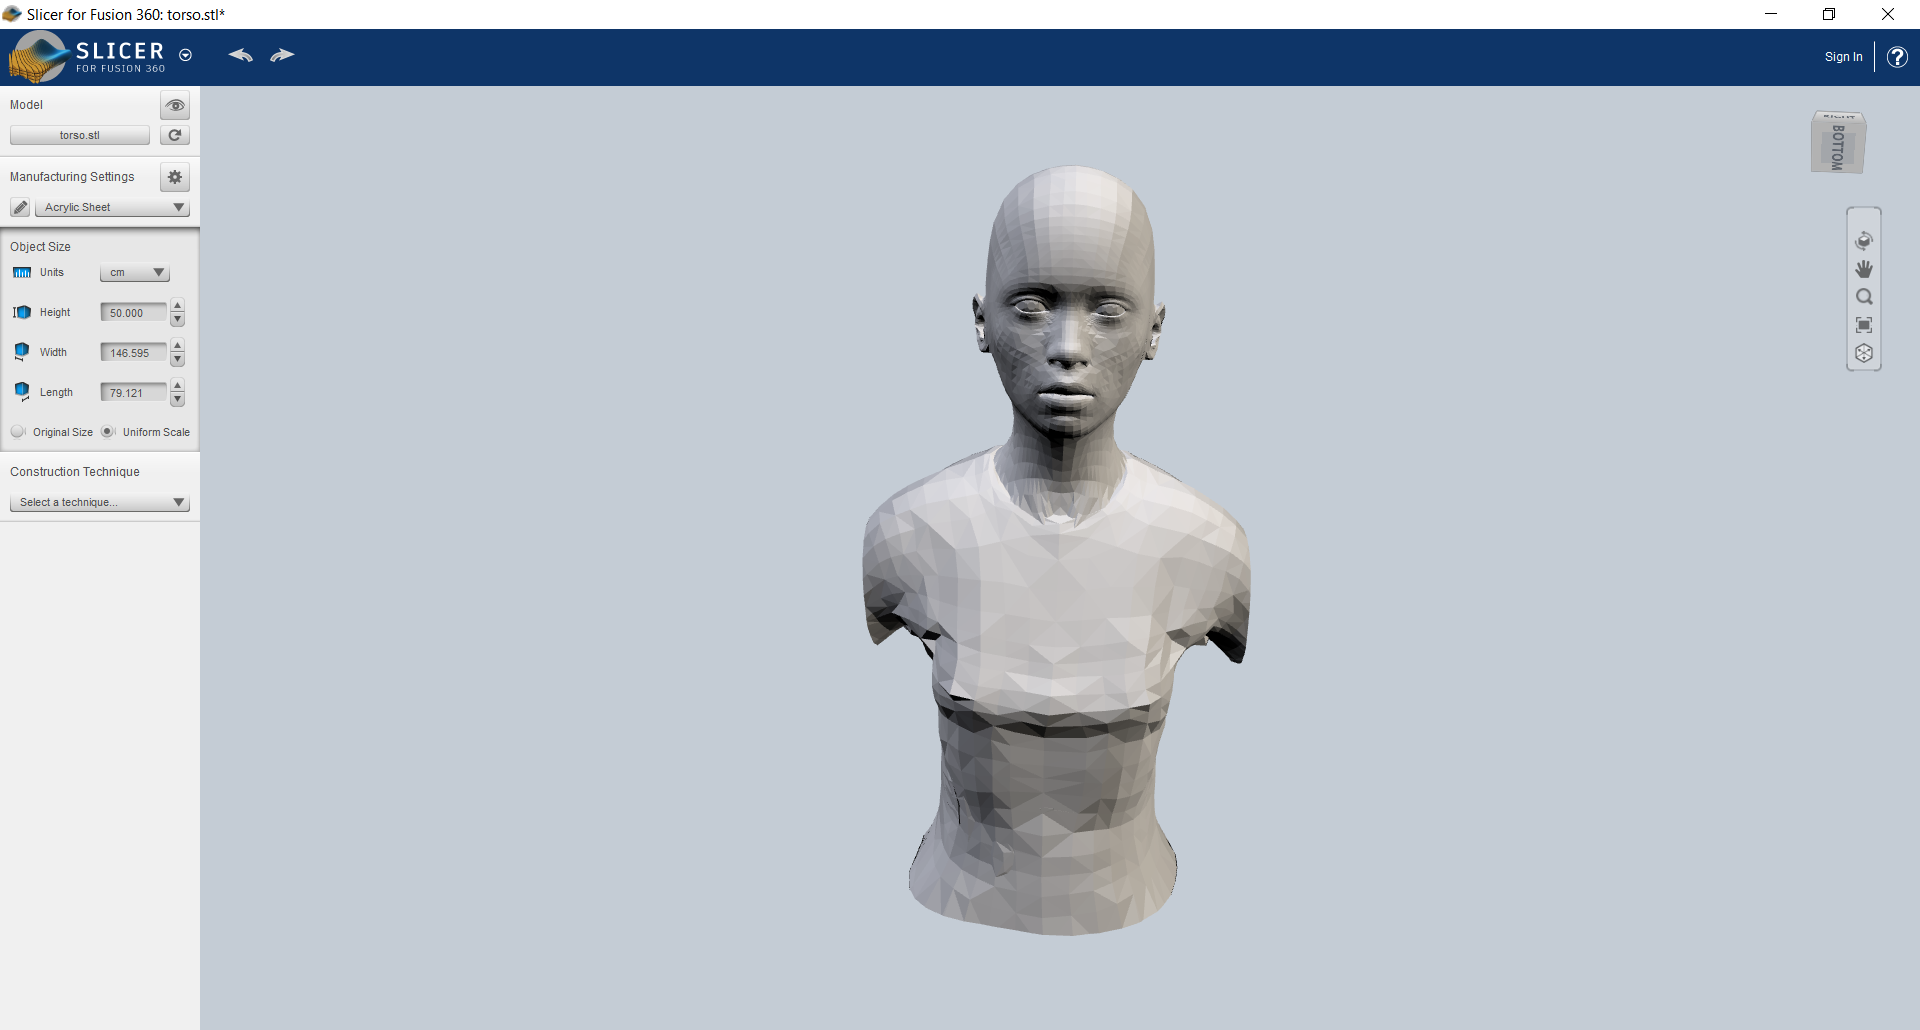 |
 |
| Interlocked Slices | |
|---|---|
 |
 |
| Importing 3-D Model | Manufacturing Setting |
|---|---|
 |
 |
| Importing 3-D Model | DXF files ready for laser cutting |
|---|---|
 |
 |
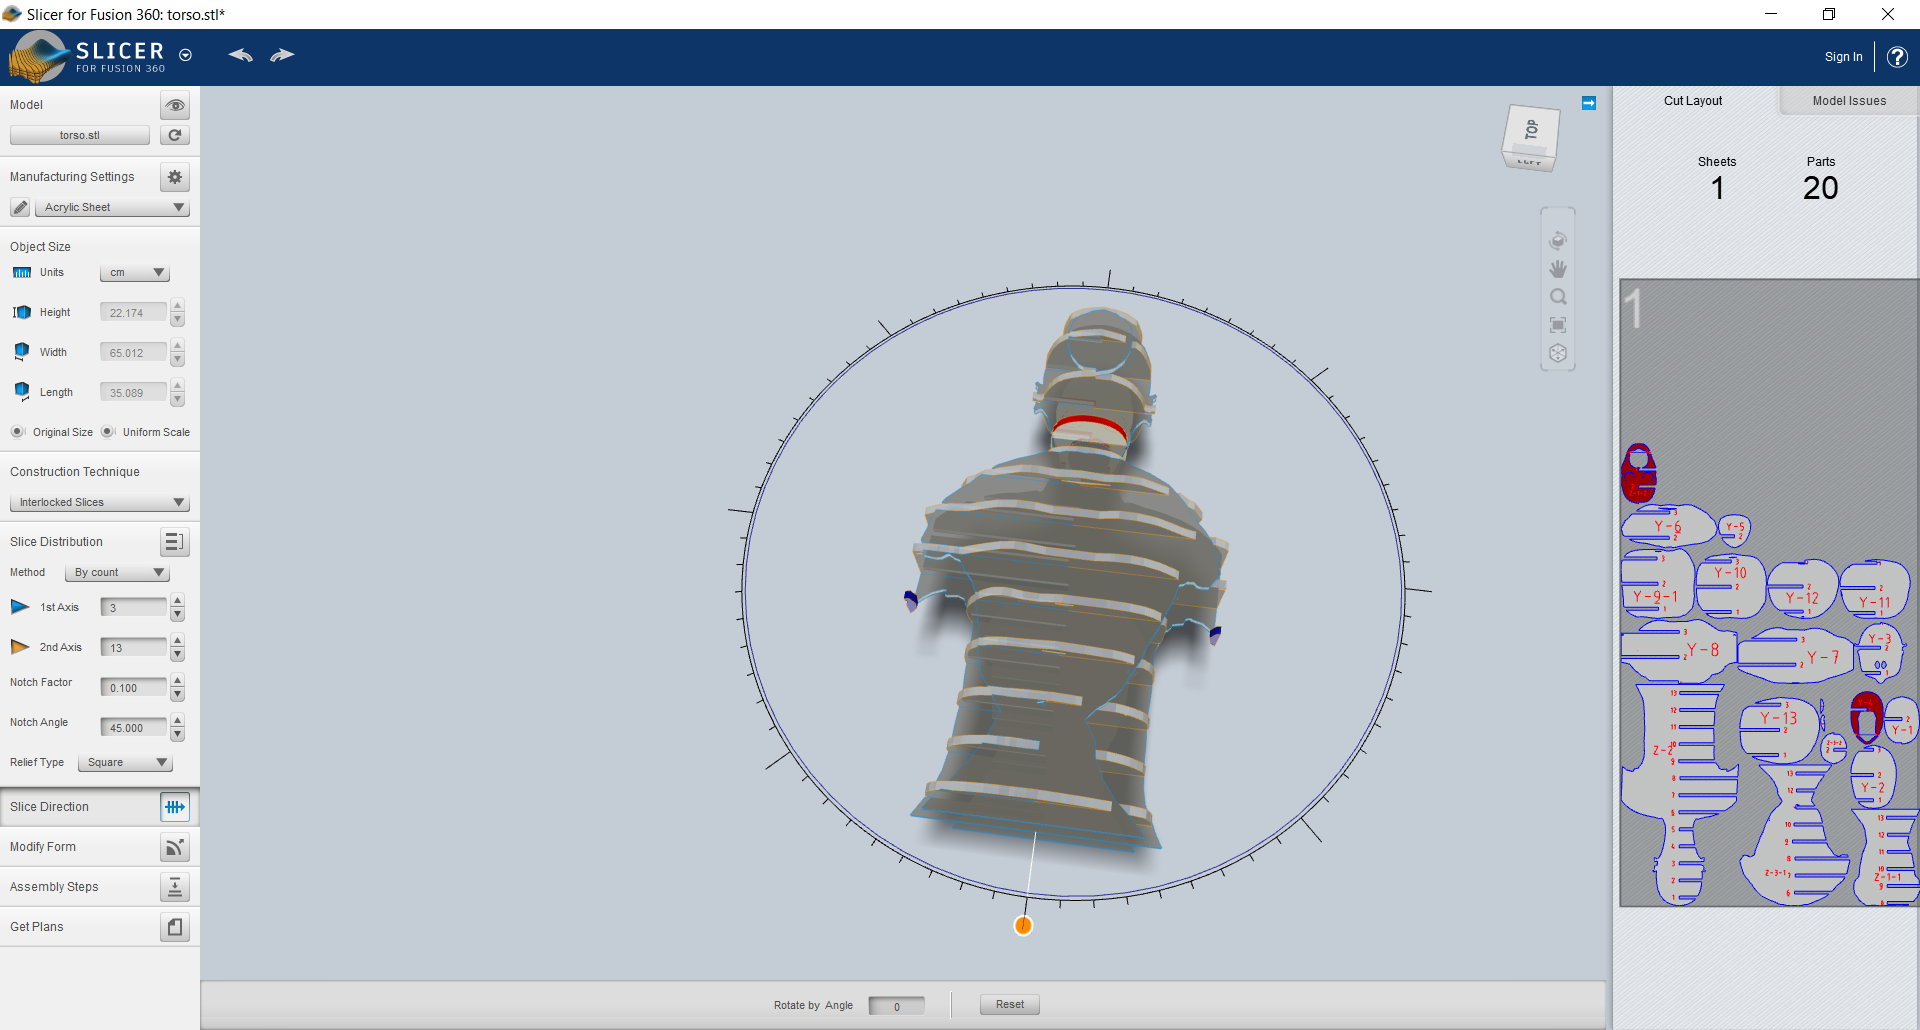
4 - Under 'Construction Technique' I went for 'Interlocked Slices' because it uses less cardboard than Stacked Slices. By playing around with different values for the Slice Distribution you can see how many sheets of card it will use. More slices creates more density, which makes it better to pin fabric to. I chose 65 horizontal slices and 4 vertical, which worked well.
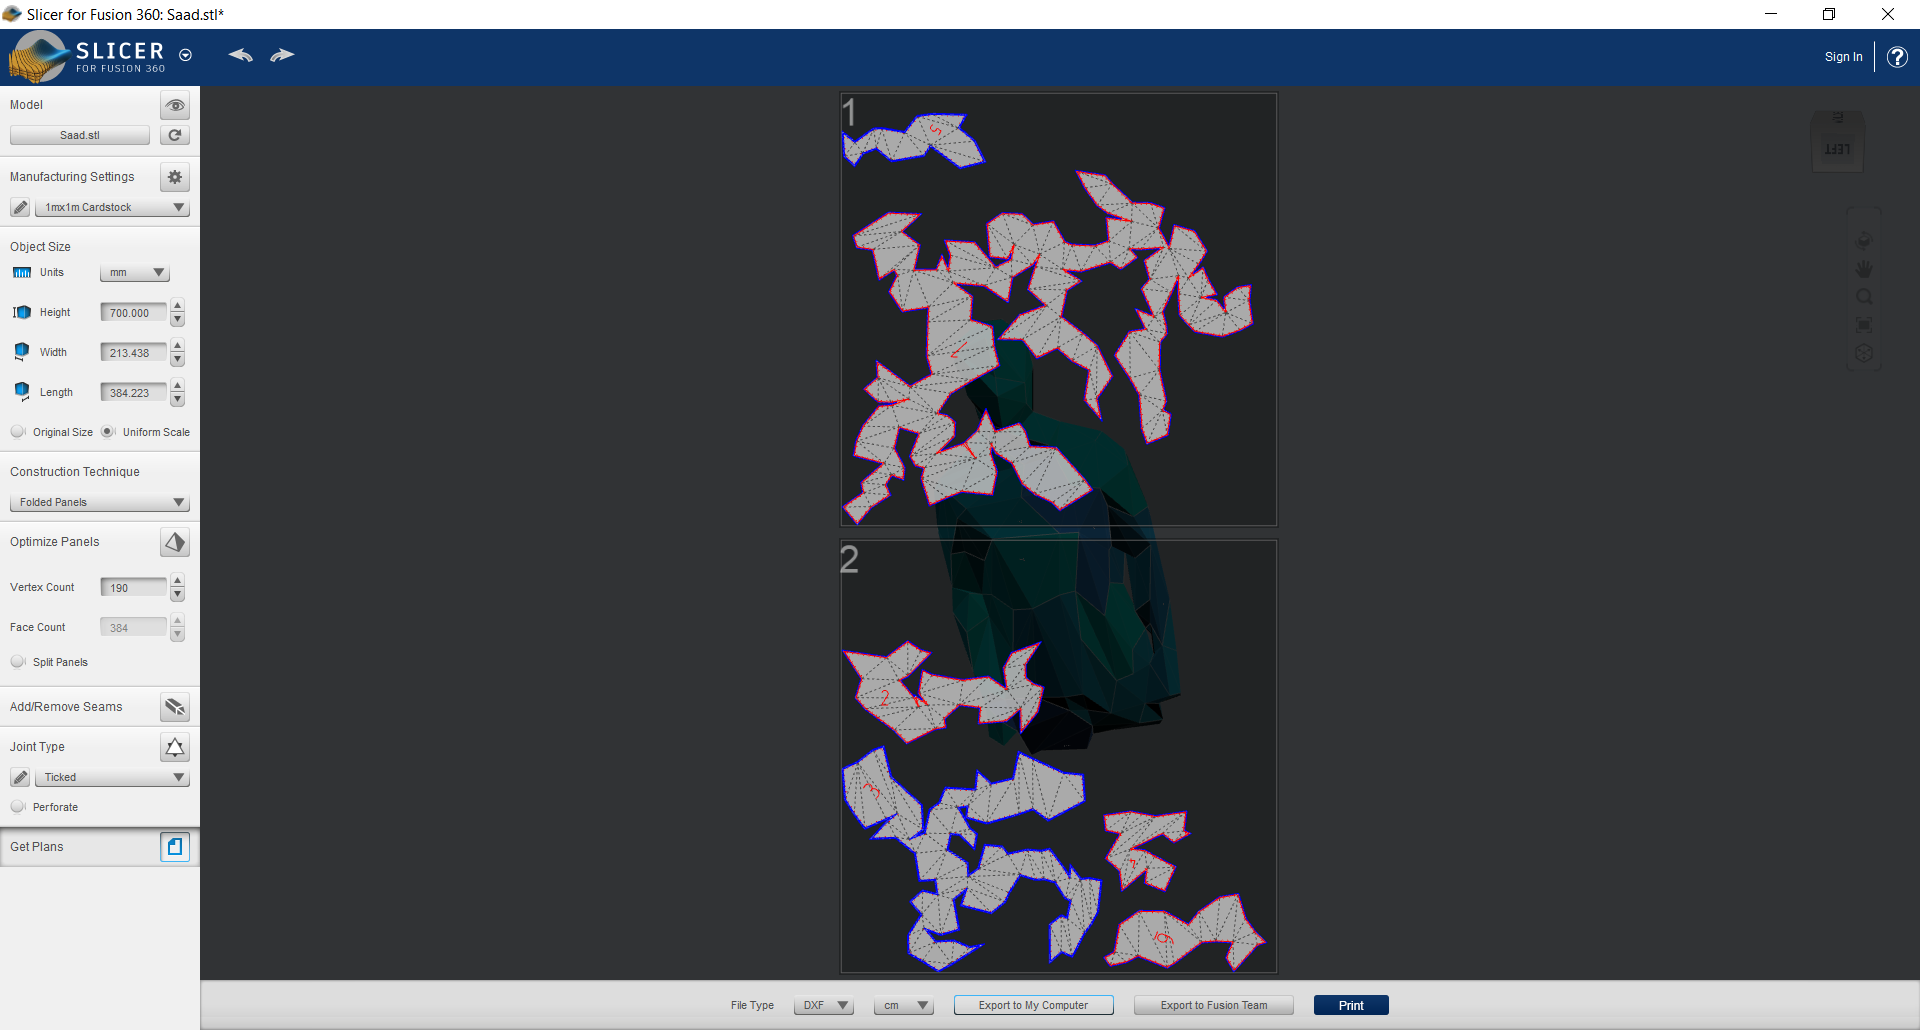
5 - Under 'Get Plans' select the 'File Type' as 'DXF', click 'Export to My Computer' and choose where to save it. This DXF files ready for laser cutting.
Laser Cutting
1 - Open the first page of the PDF in the laser cutter software, and choose the appropriate settings based on the laser cutter's guide.
2 - Test the settings with a scrap piece of cardboard to check it cuts all the way through and then remove from the machine.
3 - Place a sheet of cardboard in the laser cutter. (If the cardboard is too big, cut to size using a craft knife or band saw)
4 - Start laser cutting
| Laser Cutting |
|---|
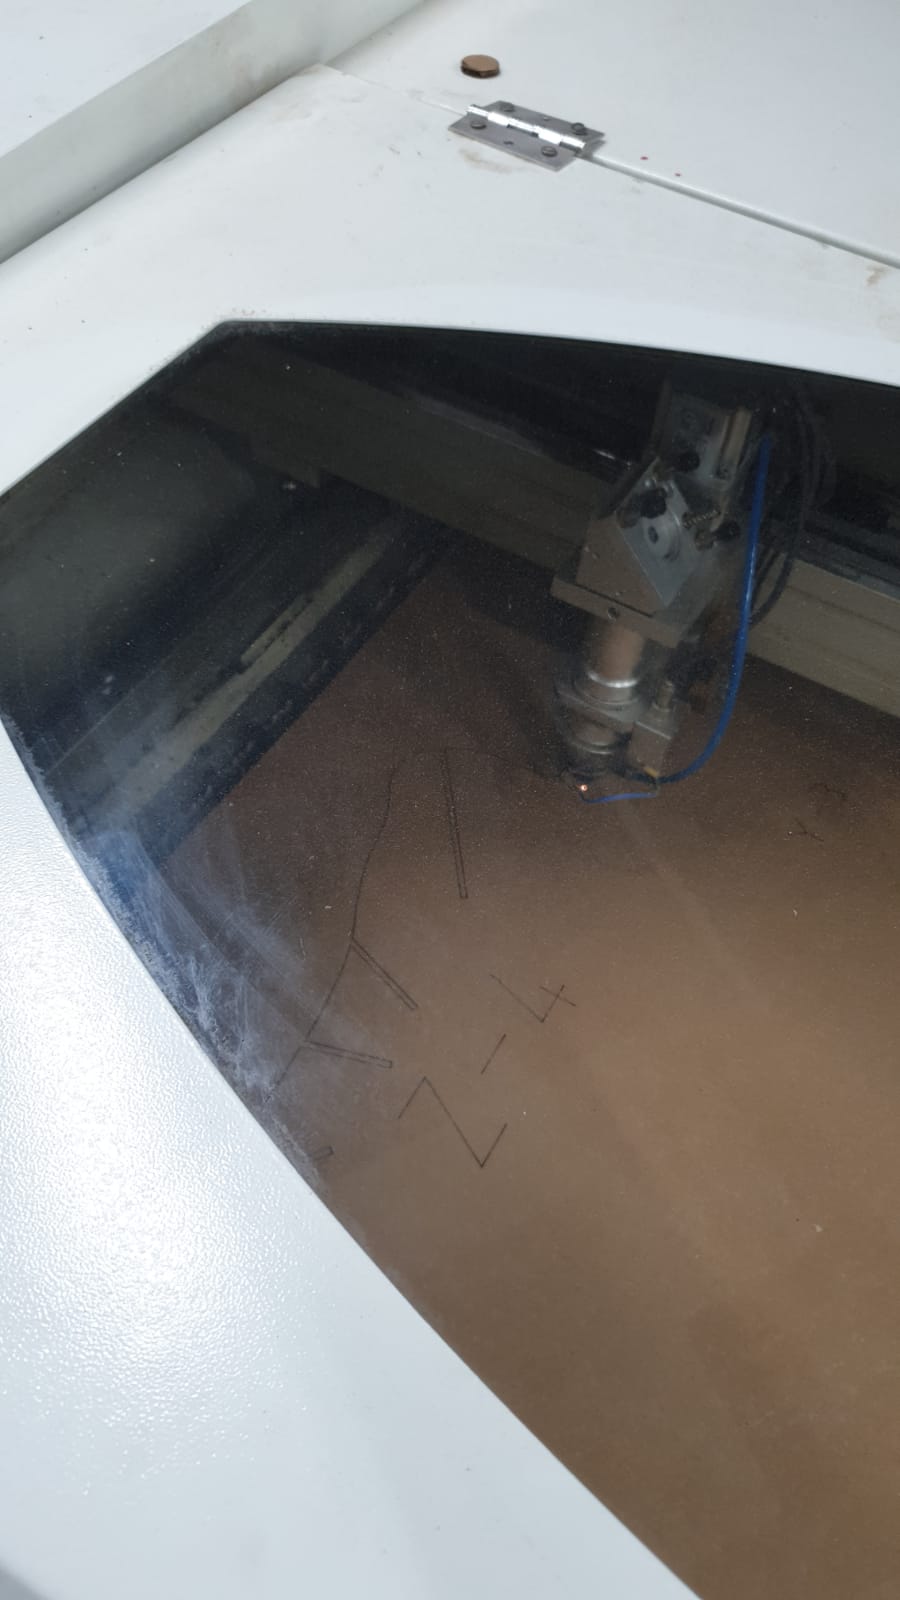 |
5 - Once the laser has stopped, remove the card from the machine
6 - Open the next page of the DXF
7 - Repeat Steps 3 to 6 until all sections of the dressmakers dummy are cut out
8 - Cut an extra piece of cardboard to match the top layer and another to match the base layer
Warning: Make sure the laser cutter is suitable for cutting cardboard and that you follow the guidelines, such as not leaving the machine unattended. Do not use double wall corrugated cardboard as it is more likely to catch fire during laser cutting. Faster settings for laser cutting reduces the risk of fire.
Assembly
1 - Using the guide shown in the Slicer software, under 'Assembly Steps', slot the horizontal slices into the vertical ones. The software automatically numbers each slice to make it easy to assemble.
2 - If using recycled cardboard packaging, some card may be thicker than 4mm, so gently hammer it along the cut line until it slots in. Variable thickness works for Interlocked Slices, but if using Stacked Slices it needs to all be a consistent thickness, otherwise it will affect the height of the dress makers dummy.