9. Textile as scaffold
This chapter reviews techniques as versatile platform technologies and applications for technical textile-engineering and how these approaches could be adapted to develop functional, 3D scaffolds for tissue engineering in industry. Textile engineering is also discussed, as it provides critical platform technologies for creating “smart” fiber-based scaffolds that mimic some of the structural and functional properties of the extracellular matrix found in target tissues, and thus can assist in organ repair or regeneration.
Given the vast differences in the physical and structural properties of diverse tissue such as heart, skin, ligaments, bone, etc., it is important to select both suitable scaffolding materials as well as to engineer the nano- and micro-structural multiscale architecture of the ensuing scaffolds according to the specific tissues under consideration.
| Textile as Scaffold |
|---|
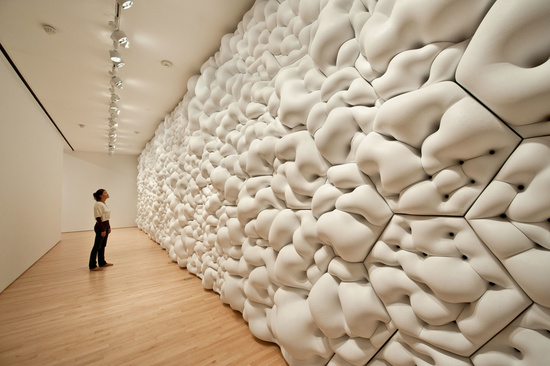 |
Inspiration
| Textile Scaffold for Tissue Engineering (Biomedical Fibre Developmen |
|---|
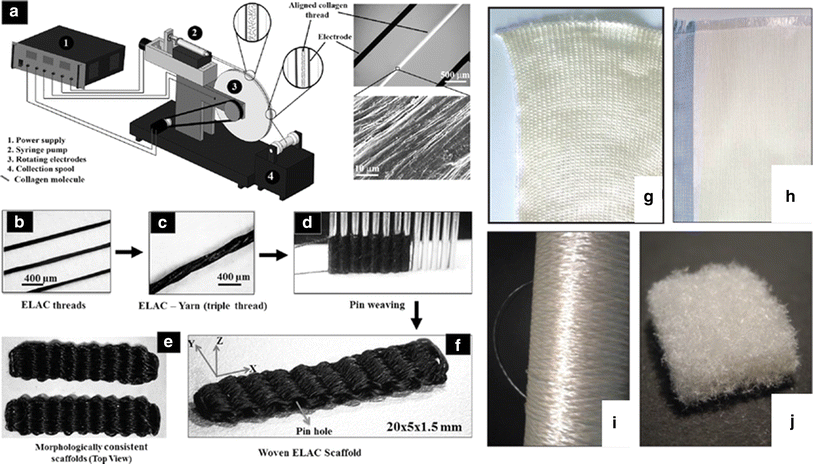 |
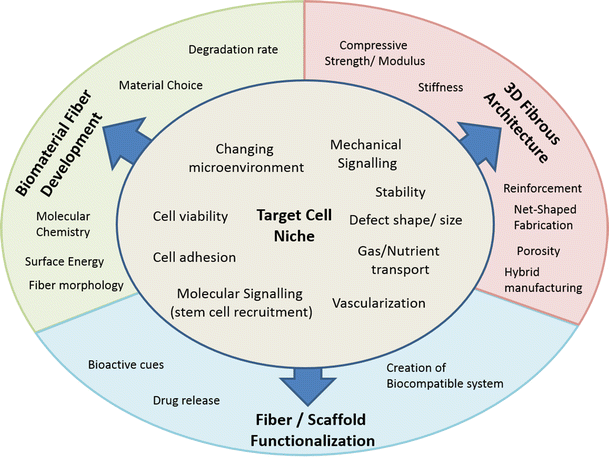
In recent years the general understanding of the requirements imposed on scaffolds for TE applications has changed towards templates which replicate the target cell niche in terms of their structural architecture and which are capable of adapting to a changing microenvironment, thus providing optimal conditions for tissue-ingrowth, nutrient, gas and biomolecule transport and vascularization. The scaffold architecture should be dictated by the requirements of the target cell niche. To generate scaffolds with properties tailored to the targeted application, numerous manufacturing methods have been employed. Those comprise solvent casting, gas foaming, phase separation, emulsion freeze drying, additive manufacturing (AM) techniques, electrospinning and other fiber formation techniques.
The versatility of textile technology allows for the fabrication of 3D spatial structures with tunable properties in the micro- and macro range. In the past decades, textile manufacturing techniques have been used in a wide range of engineering applications such as fiber reinforced composites, construction textiles, filtration, medical textiles etc.
| Textile Development Approach |
|---|
 |
| Scouring Process Video |
|---|
Introduction
A tissue scaffold is a highly porous, artificial cellular matrix. Because of their inherent properties, textiles have a major role to play in making this scaffold. A scaffold can be broadly categorised into three groups based on the processing methods: foams, 3D printed substrates and textile structures. Textile structures form an important class of porous scaffolds used in tissue engineering.
Knitted Scaffolds
With knitting technology, three-dimensionally net-shaped geometries are easily realizable. Due to their highly ordered loop-structure, knitted fabrics are generally more elastic than woven or braided structures. Using different knitting techniques and patterns (e.g. jersey, interlock), the mechanical and porous properties of knitted scaffolds may be tailored to suit the specific demands of most sub-areas of regenerative medicine. This section describes successful studies using knitted cell-free scaffolds, undermining the versatility and suitability of knitting technology for the fabrication of cell-free scaffolds.
Woven Scaffolds
Compared to knits, woven fabrics may be designed to achieve higher tensile strength and less elasticity. Besides flat “2D” fabrics, 3D weaving technology allows for the generation of defined spatial geometries, which are widely used in fiber reinforced composite applications and also in TE applications. With 3D weaving, the through-plane strength of woven fabrics can be improved considerably.
Braided Scaffolds
Braiding generally leads to rope-like structures, either dense, hollow, or with embedded core fibers. More complex braiding techniques allow for the fabrication of 3D net-shaped structures. Due to the fiber orientation in a specific angle to the braiding direction and the resulting mechanical properties of braided structures, braiding is among the most common scaffold fabrication techniques used in ligament TE.
Non-Woven Scaffolds
Since their pore size is accurately adjustable, non-woven fabrics are commonly used for filtration applications. This beneficial property has also been exploited in TE applications, especially for cartilage engineering and biomaterial evaluation, . As well as in classical TE approaches, along with the use of collagen-matrixes, non-woven fabrics are desirable materials for in situ cartilage regeneration.
Assignment
Make two prototype samples of textile form using different techniques out of 5 studied in the class: fabric formwork with casting crystalization wood-textile resin-textile leather molding or other.
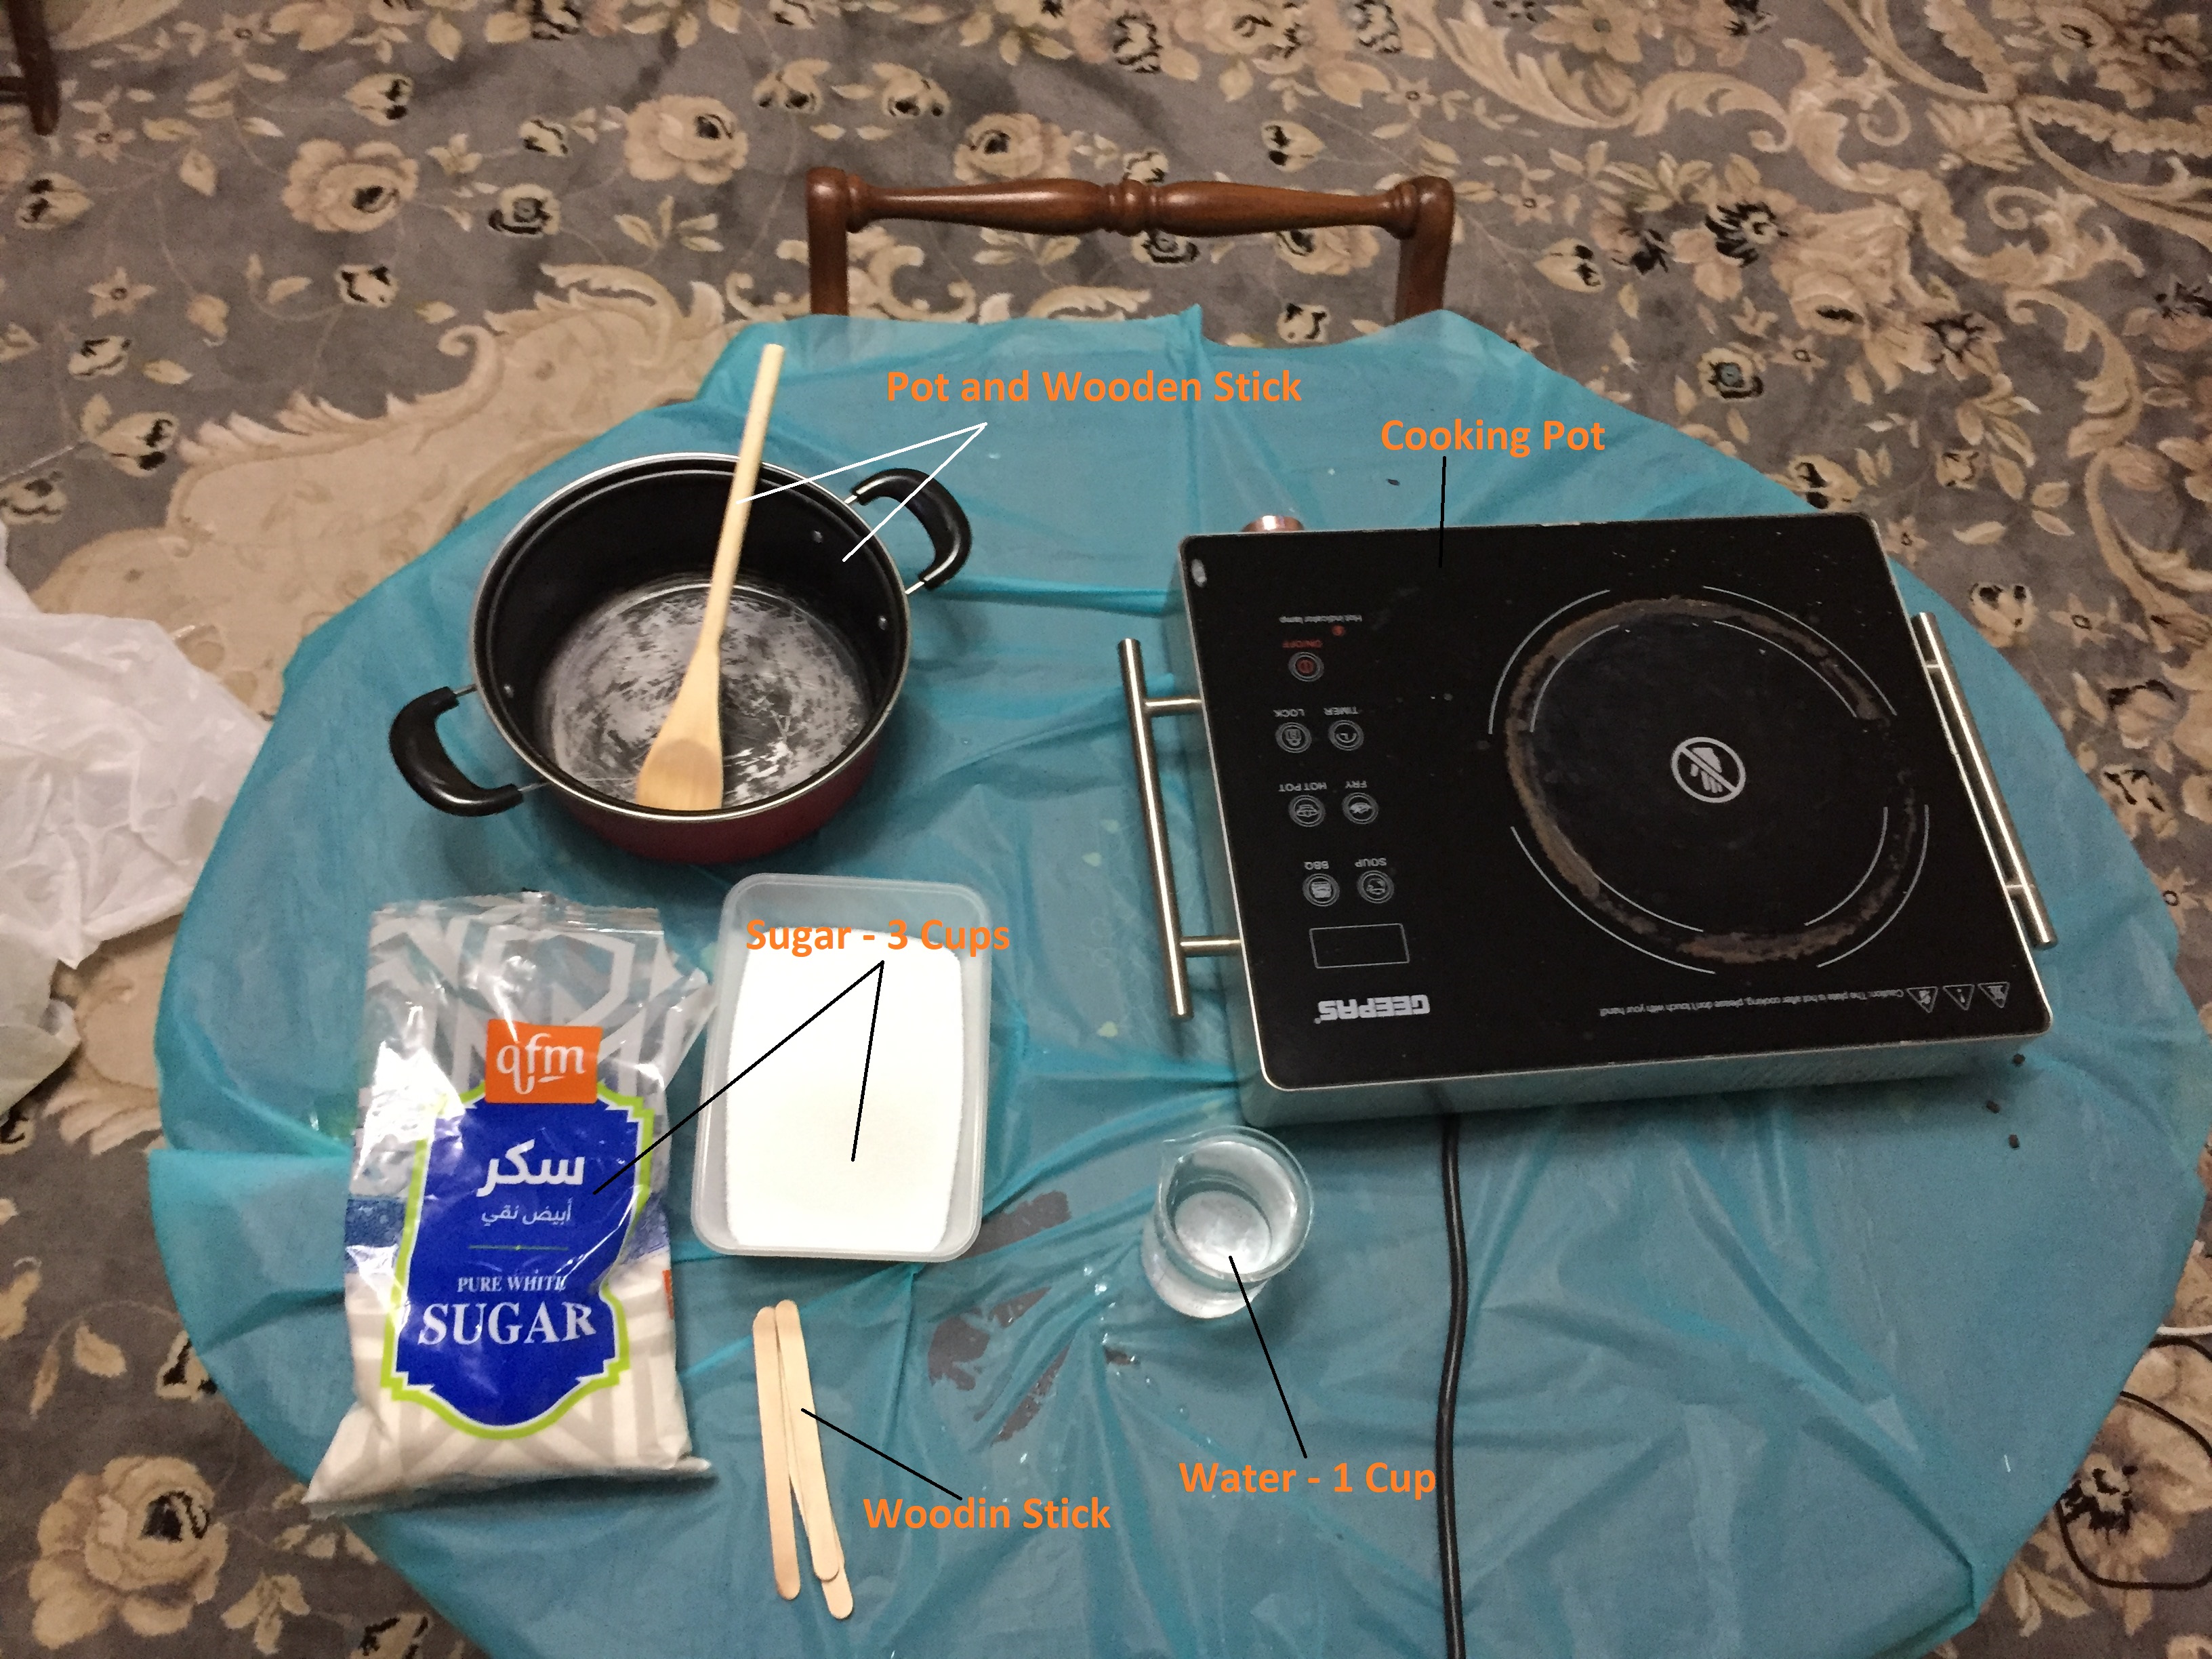
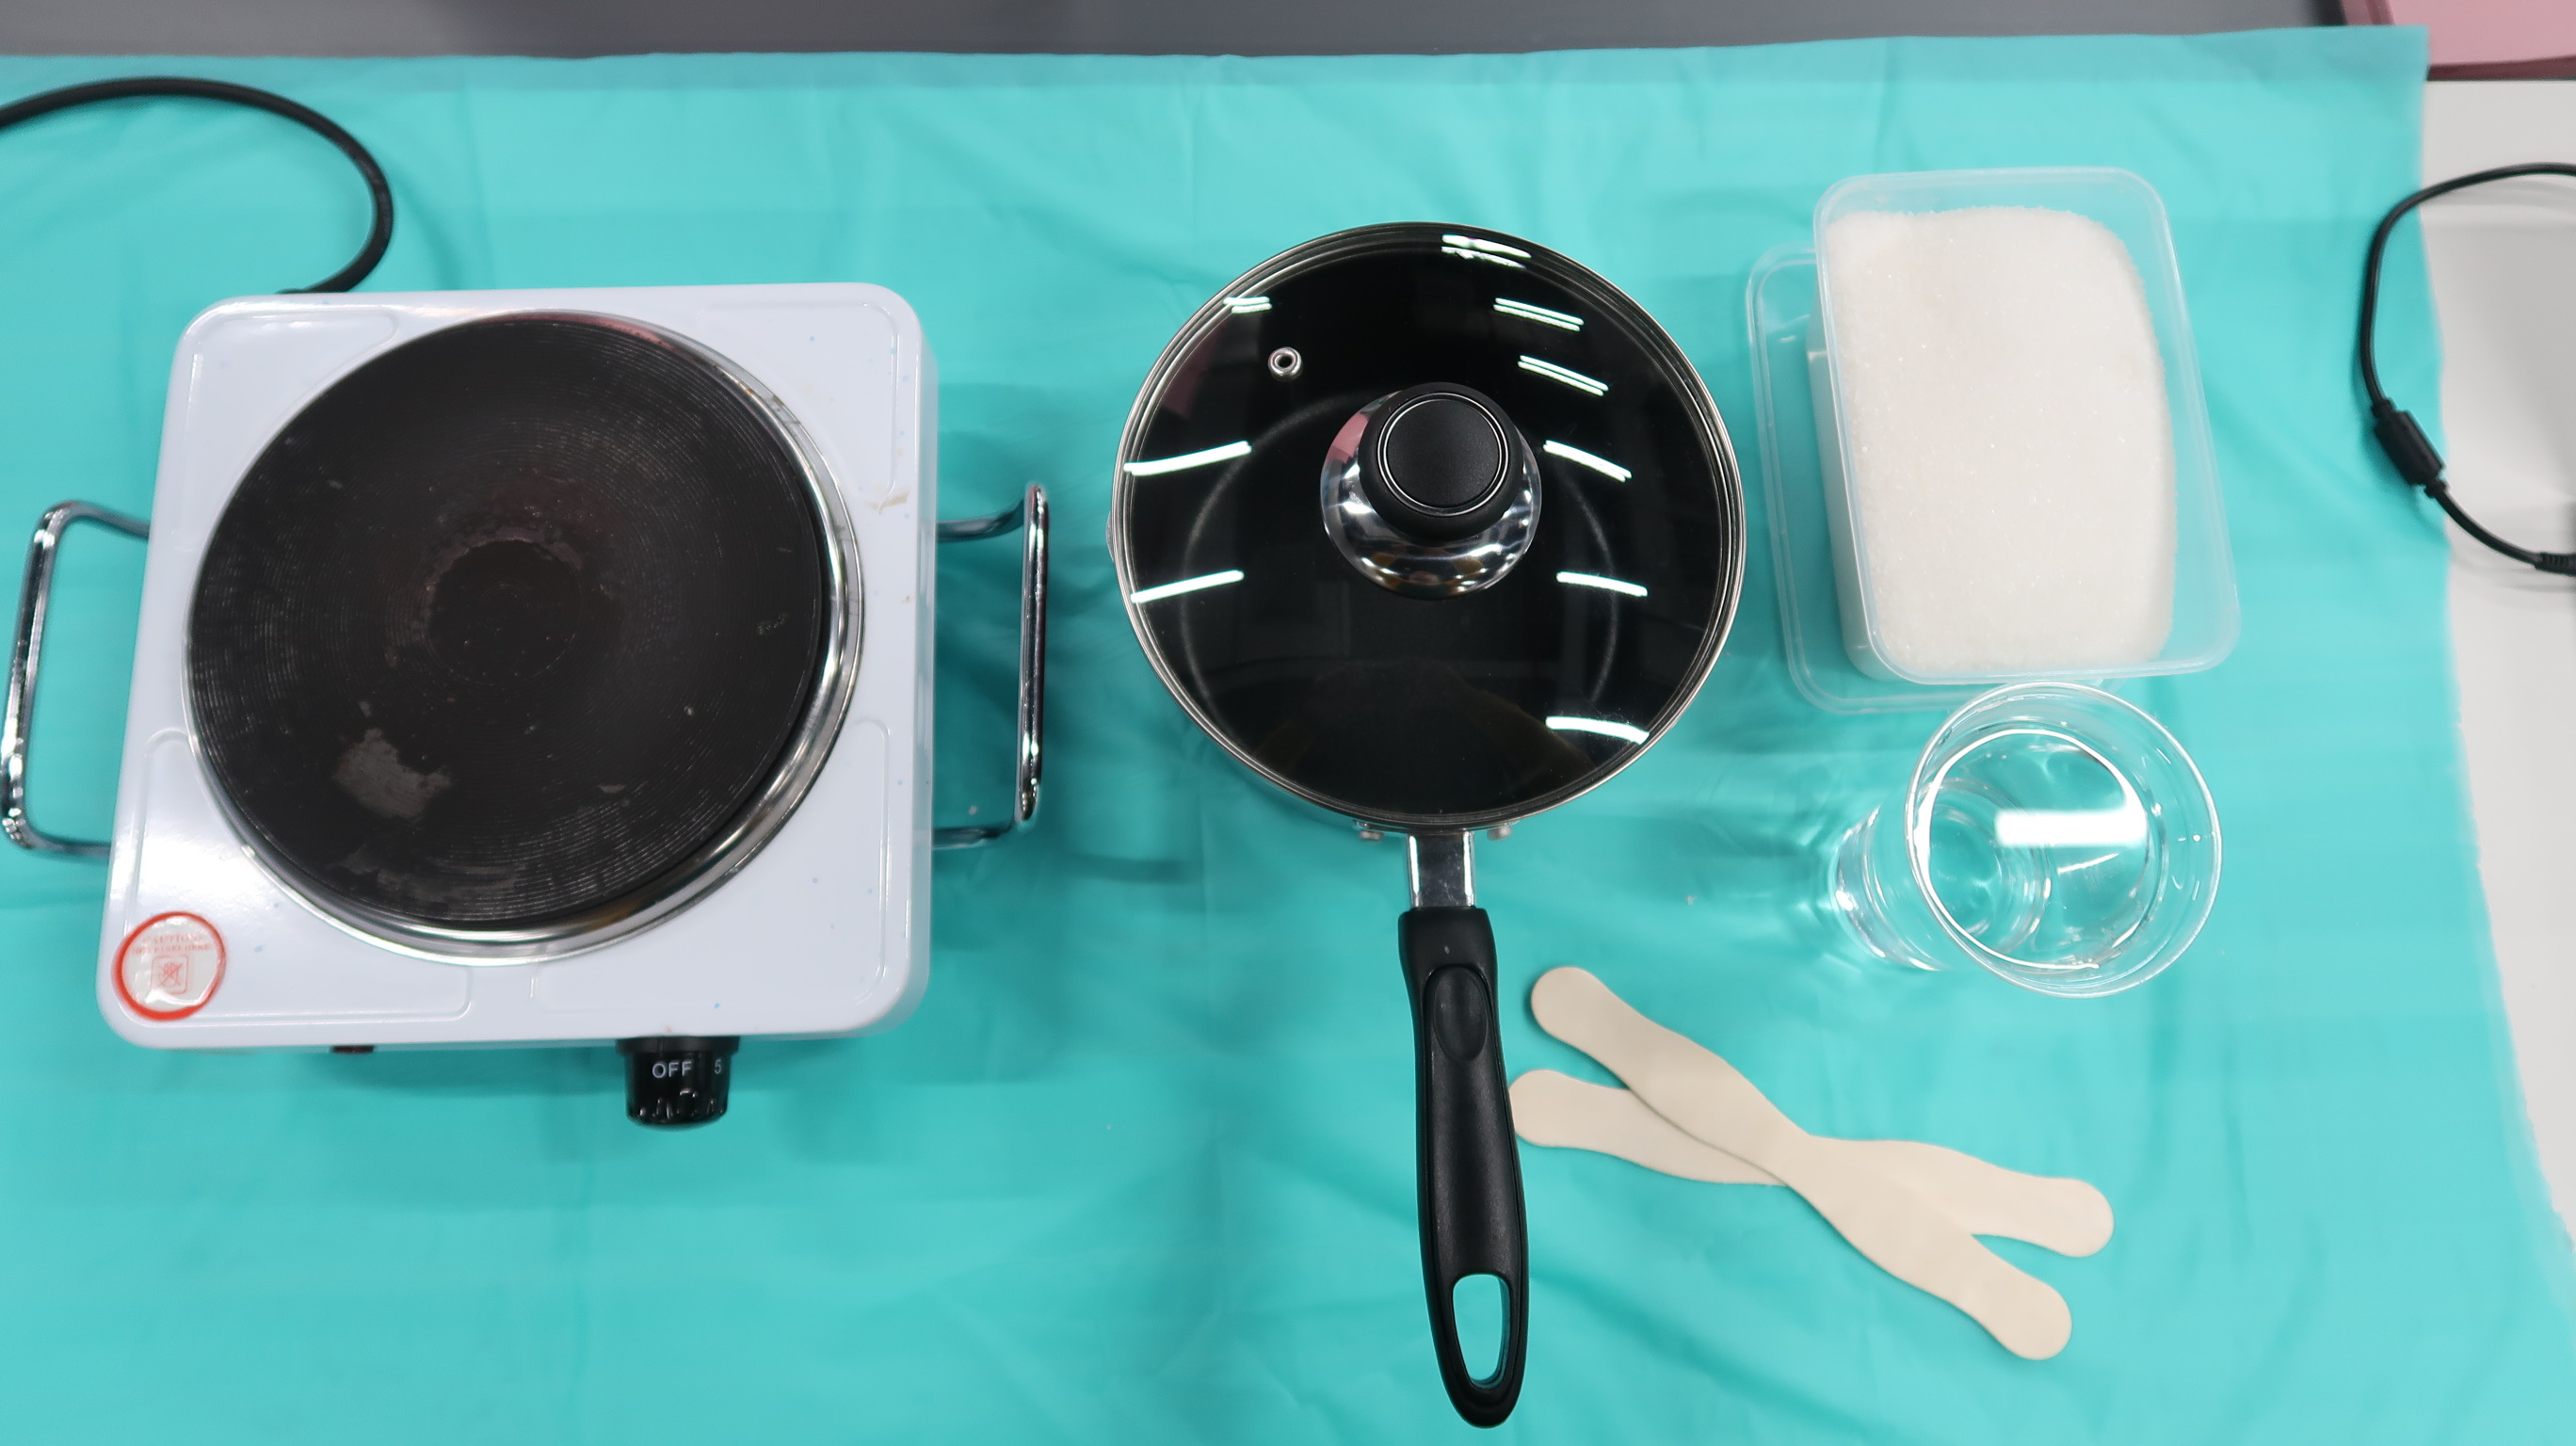
Required Equipment with Specifications
| Equipmet and Tools | ||||
|---|---|---|---|---|
| 3 Cups of Sugar | Stove and Pot | Glass Bowl | Cork | Saw Dust |
| 1 Cup of Water | Vacuum Chamber | SRP Player CAM Software | Rhinoceros Software | Roland MDX-50 Milling Machine |
| Mold Release | Wooden Sticks | Mold Release | Burlap Thread and Ribbon | Arabic Gum |
Sugar Crystalization
This is very interesting recipe for candies lover. The recipe is very simple and easy to make I followed this simple recipe as shown below.
| Sugar Crystallization | Sugar Crystallization |
|---|---|
 |
 |
| Materials used with Quantity |
|---|
 |
| STEP - 1 | STEP - 2 | STEP - 3 |
|---|---|---|
 |
 |
 |
| STEP - 4 | STEP - 5 | STEP - 6 |
|
 |
|
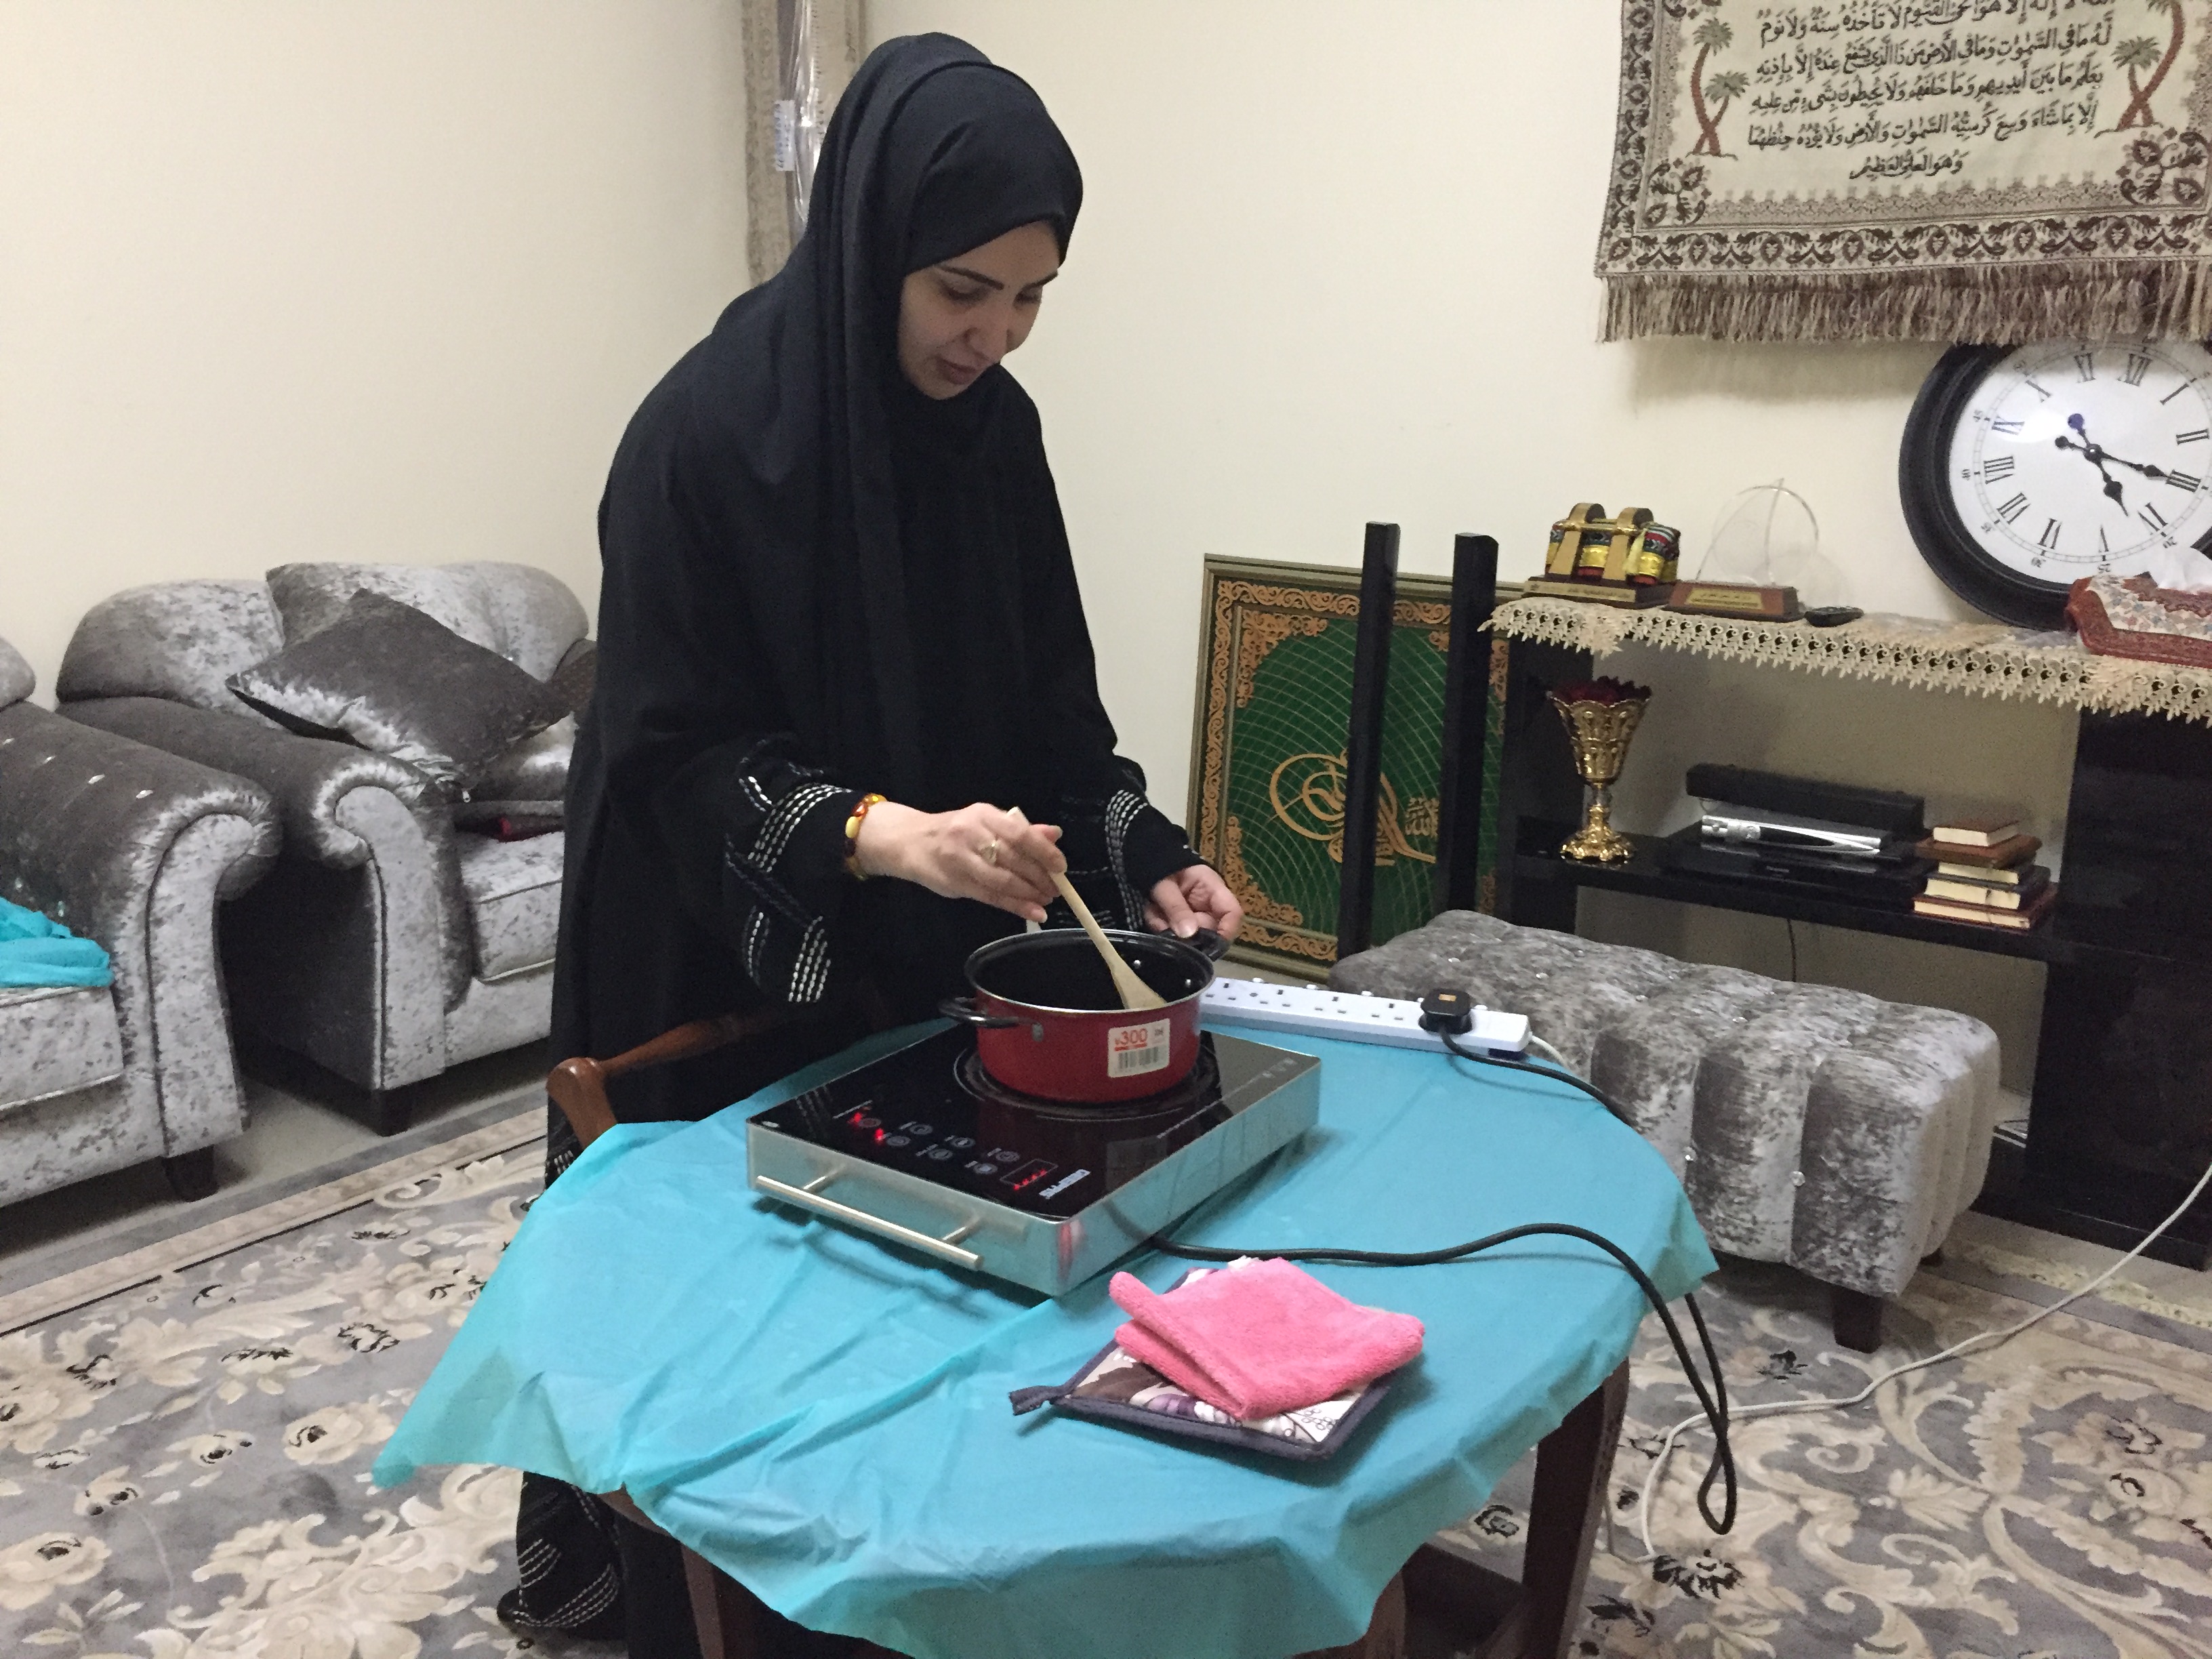
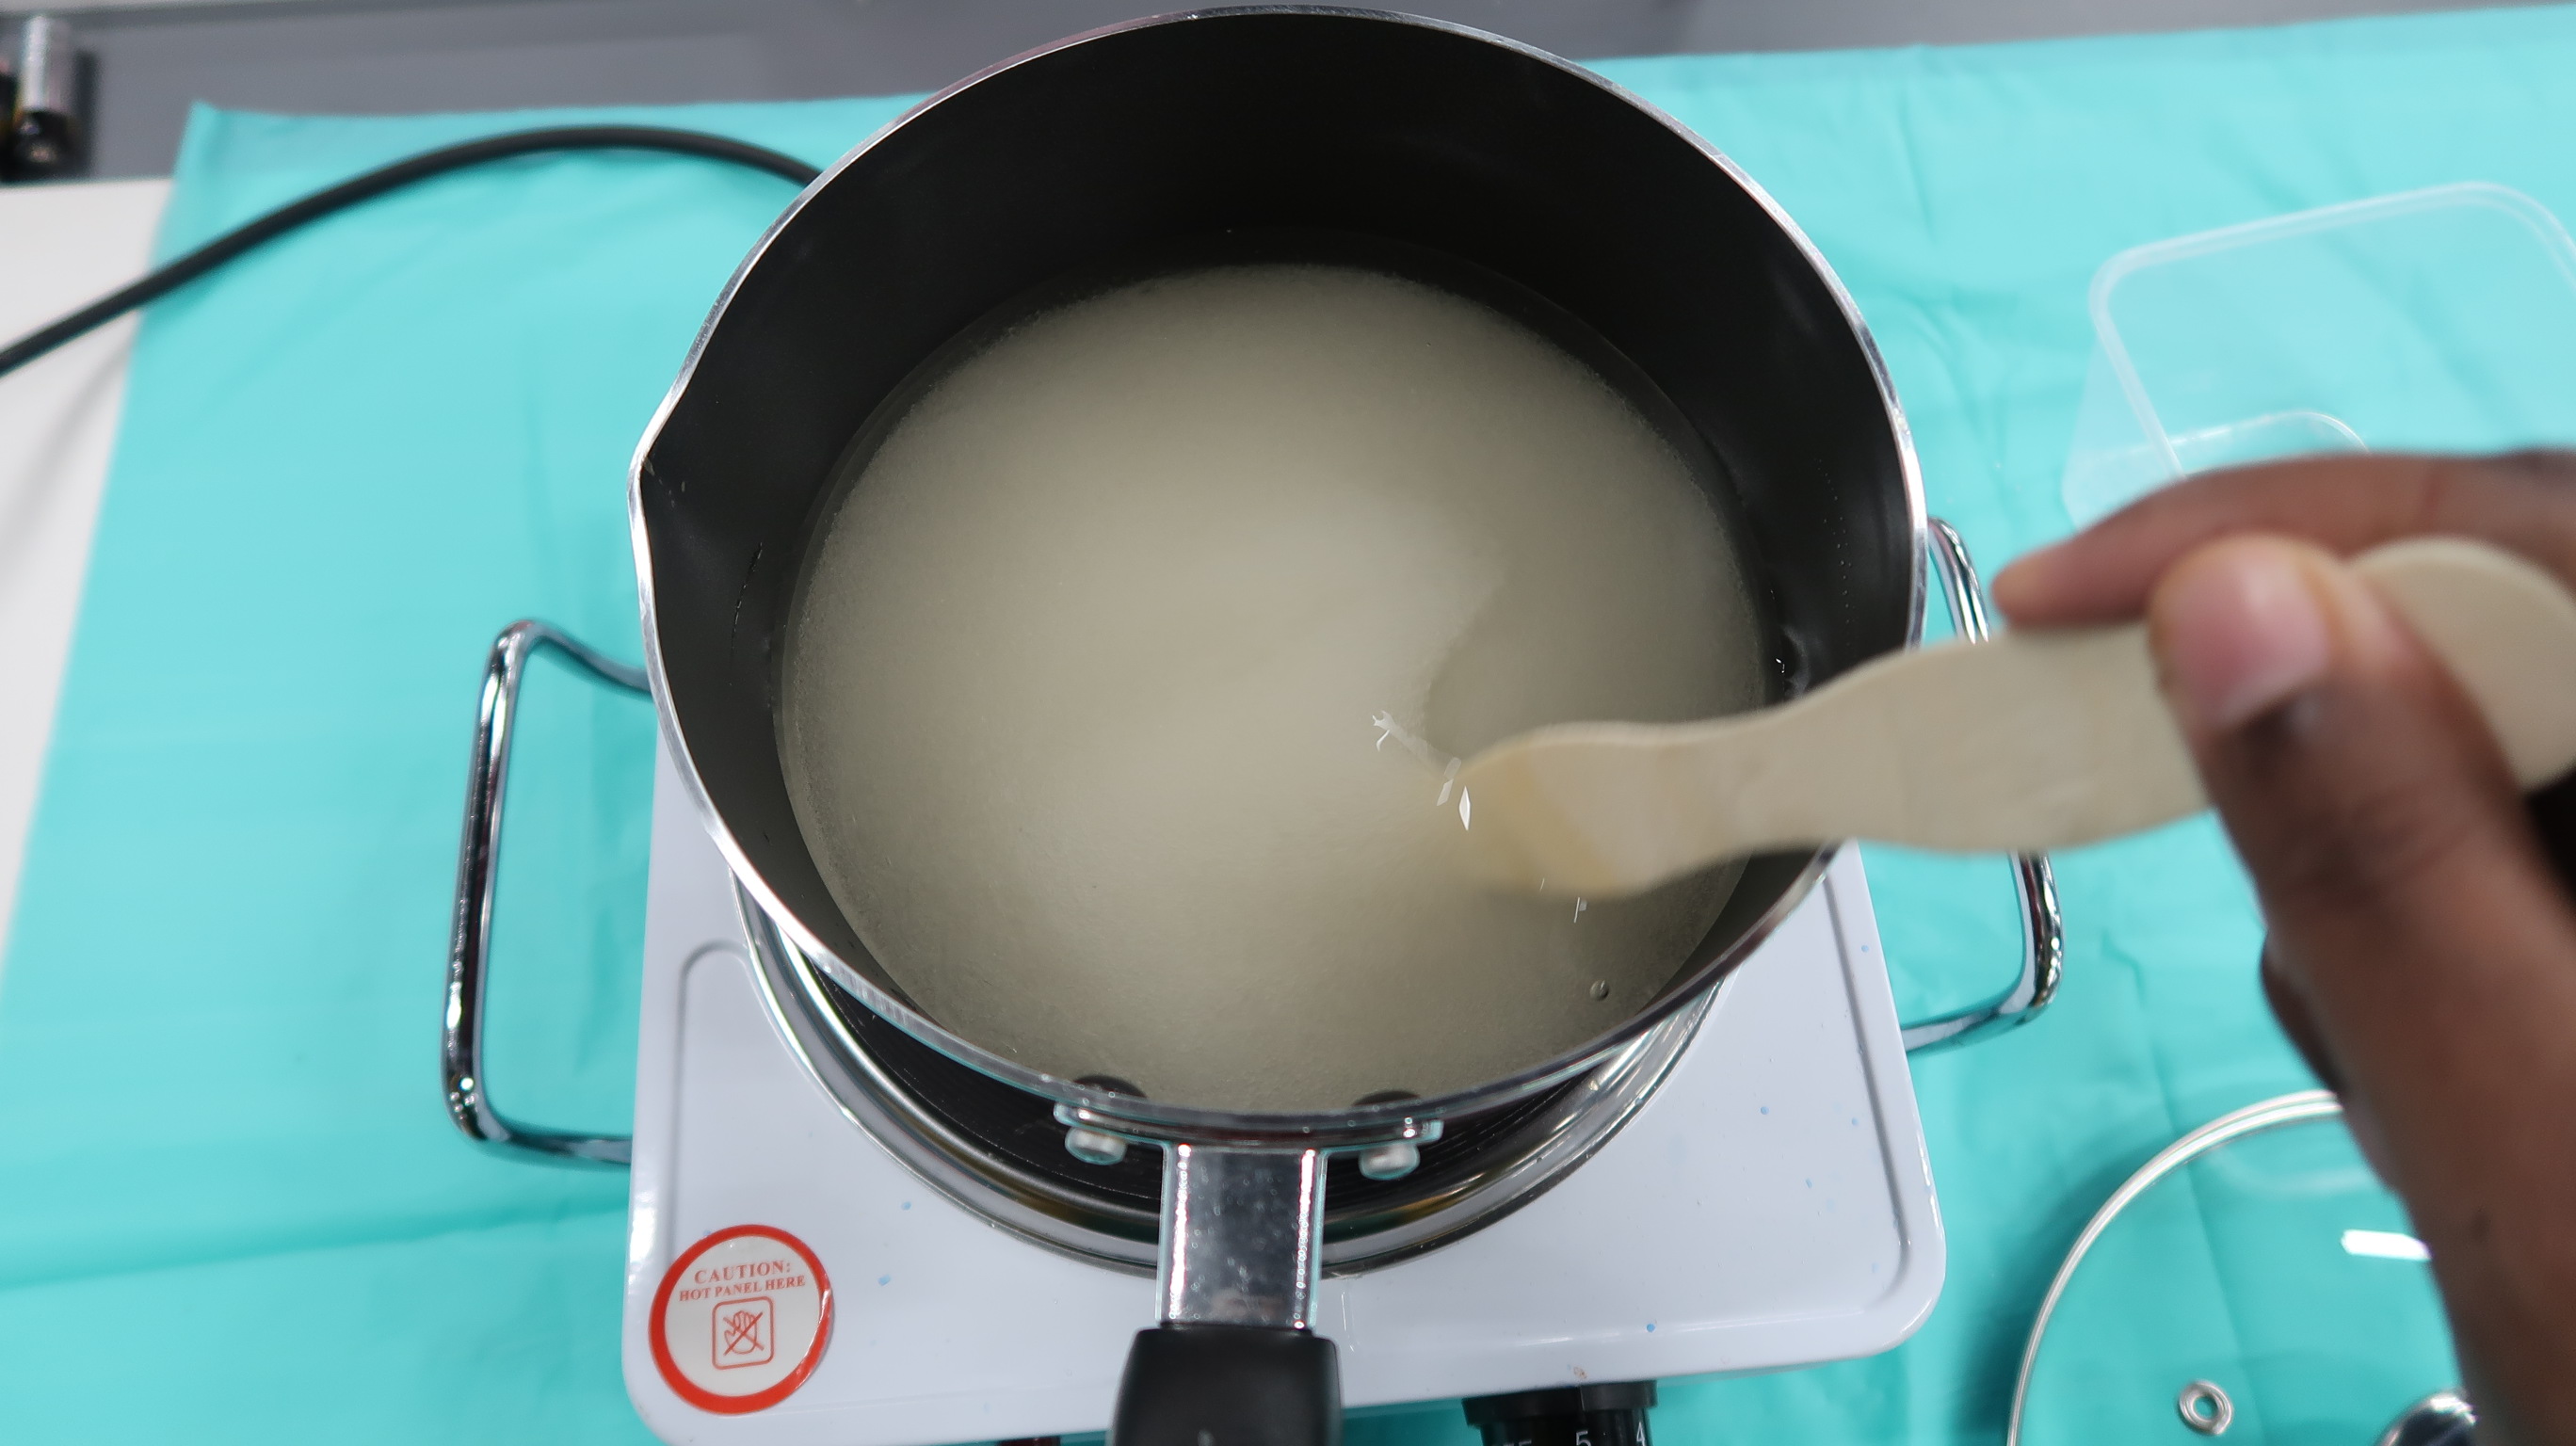
1 - Take 3 cups of sugar and 1 cup of water and put them in the pot at medium temperature over the stov.
2 - Stirr and wait for 10 minutes so that sugar will start to dissolve.
3 - Stirr and wait for 10 more minutes then sugar will completely dissolve and thick solution will be appeared.
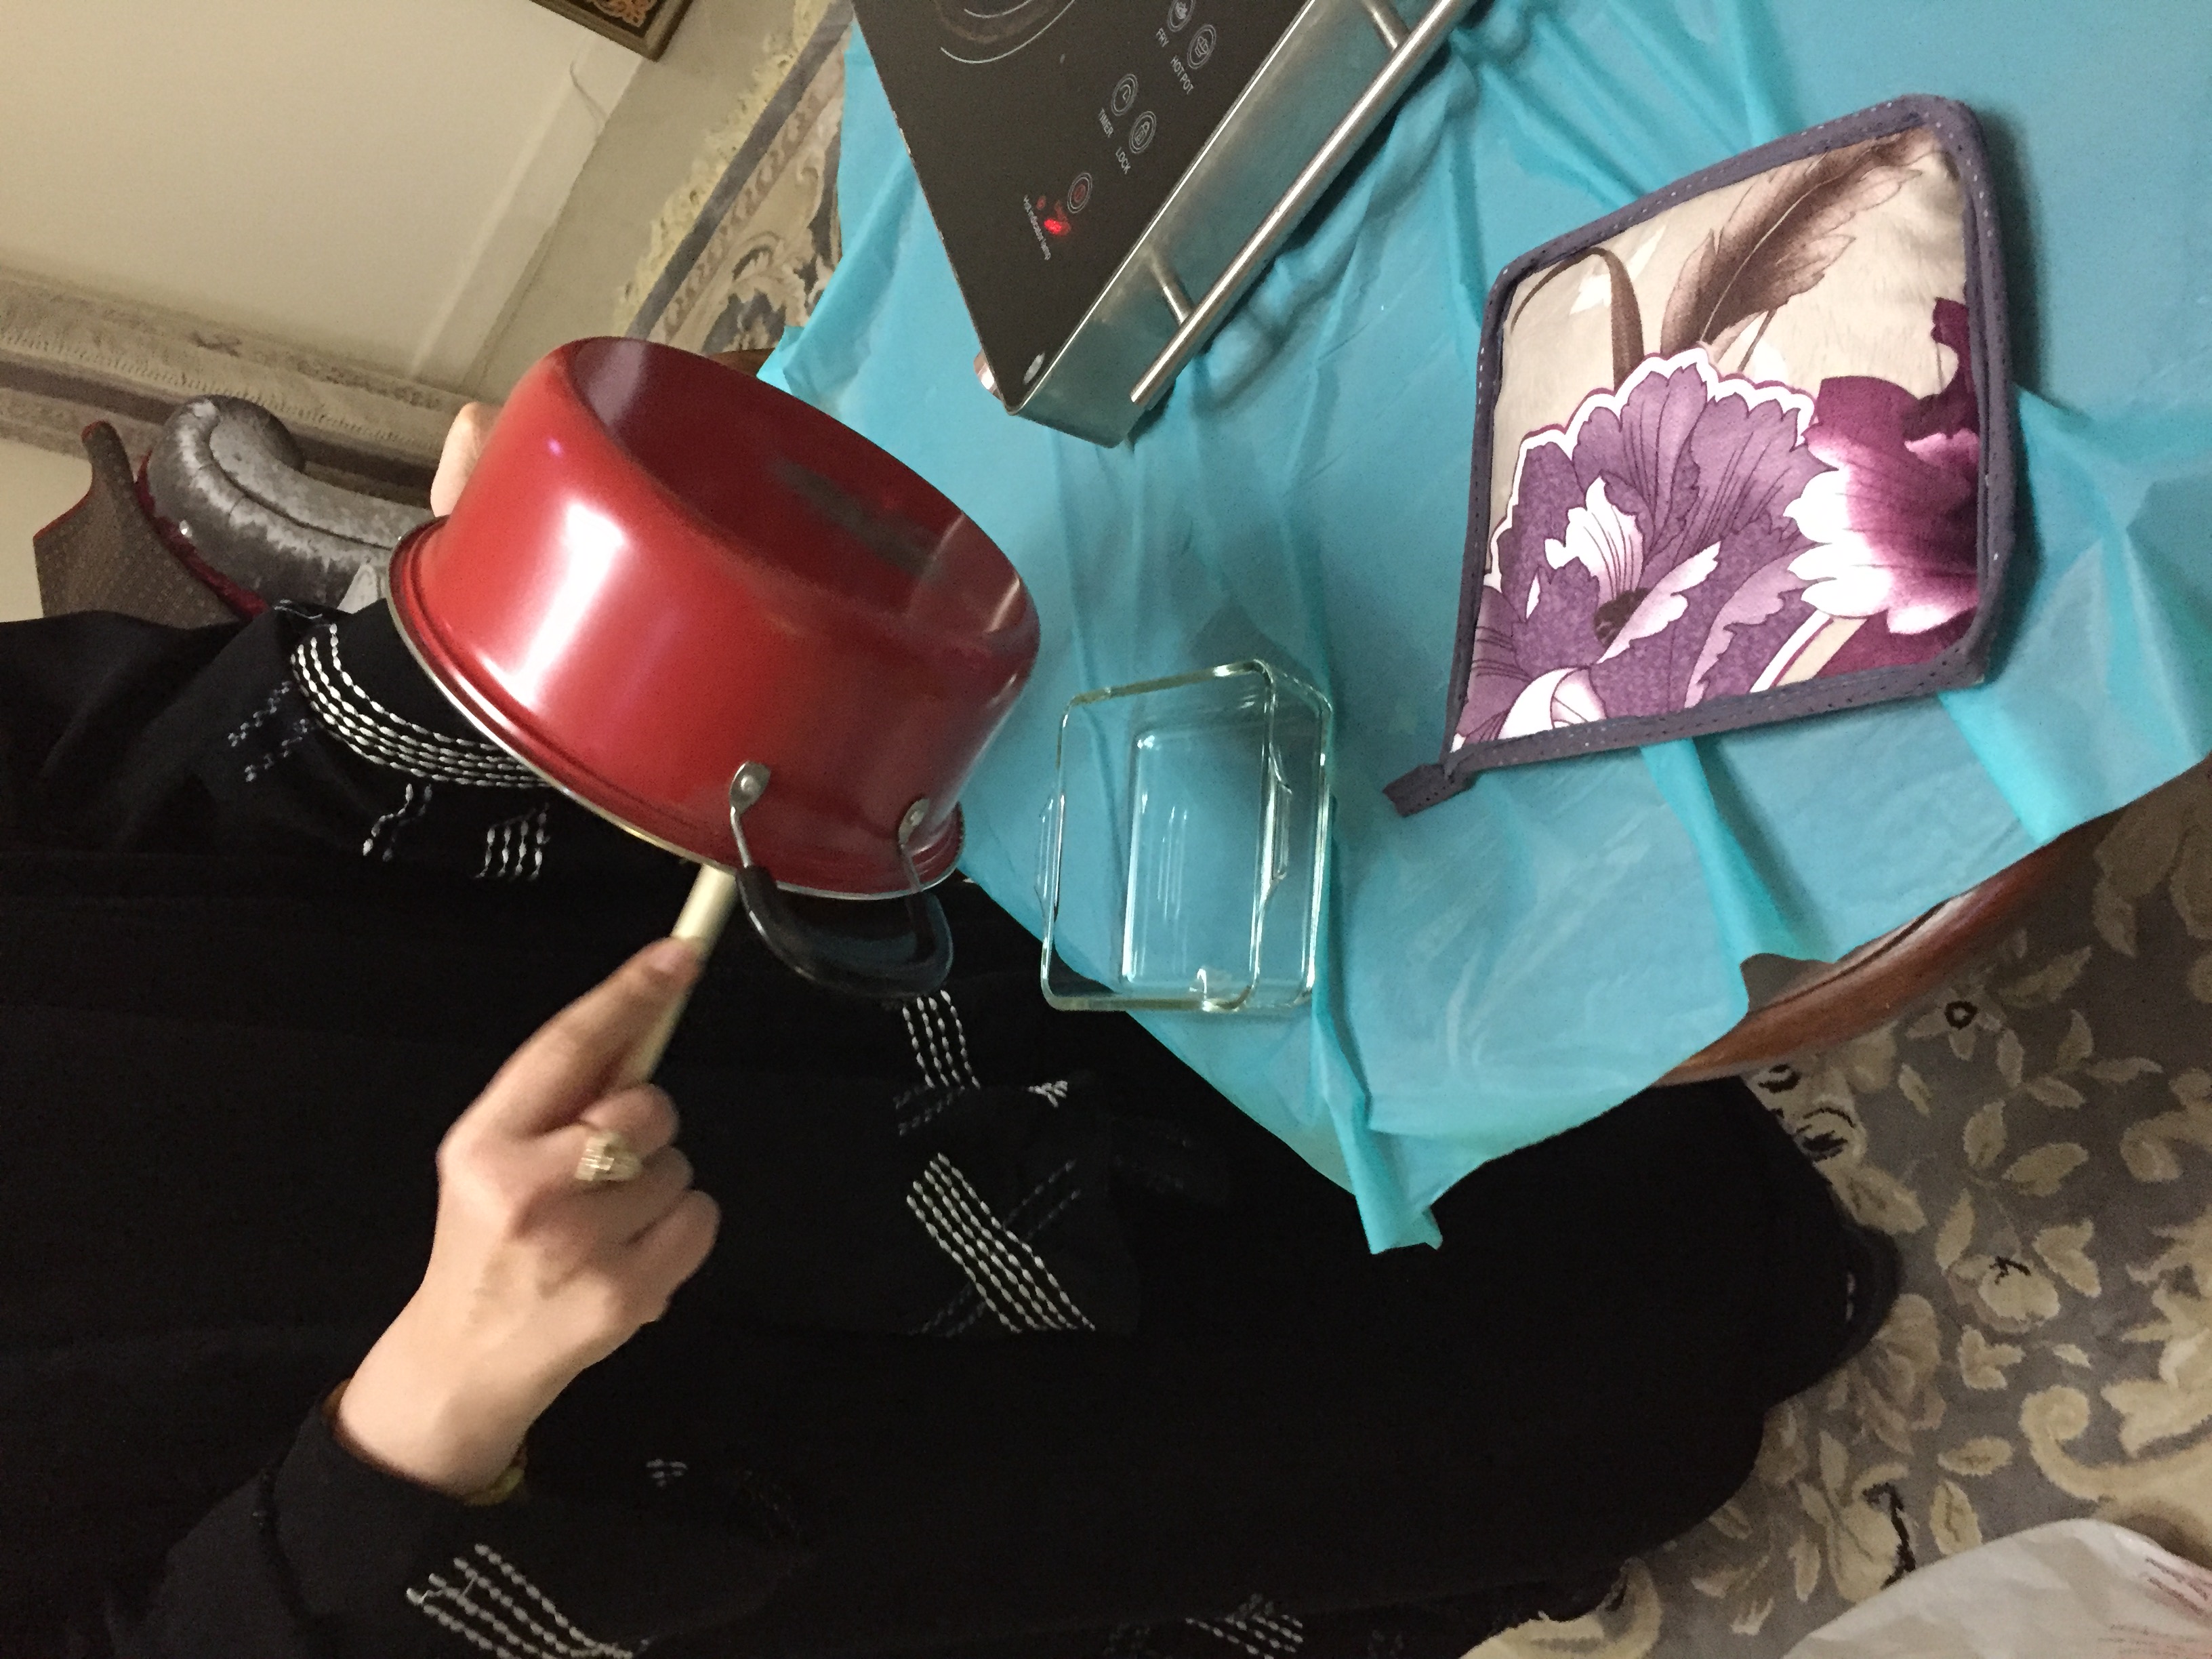
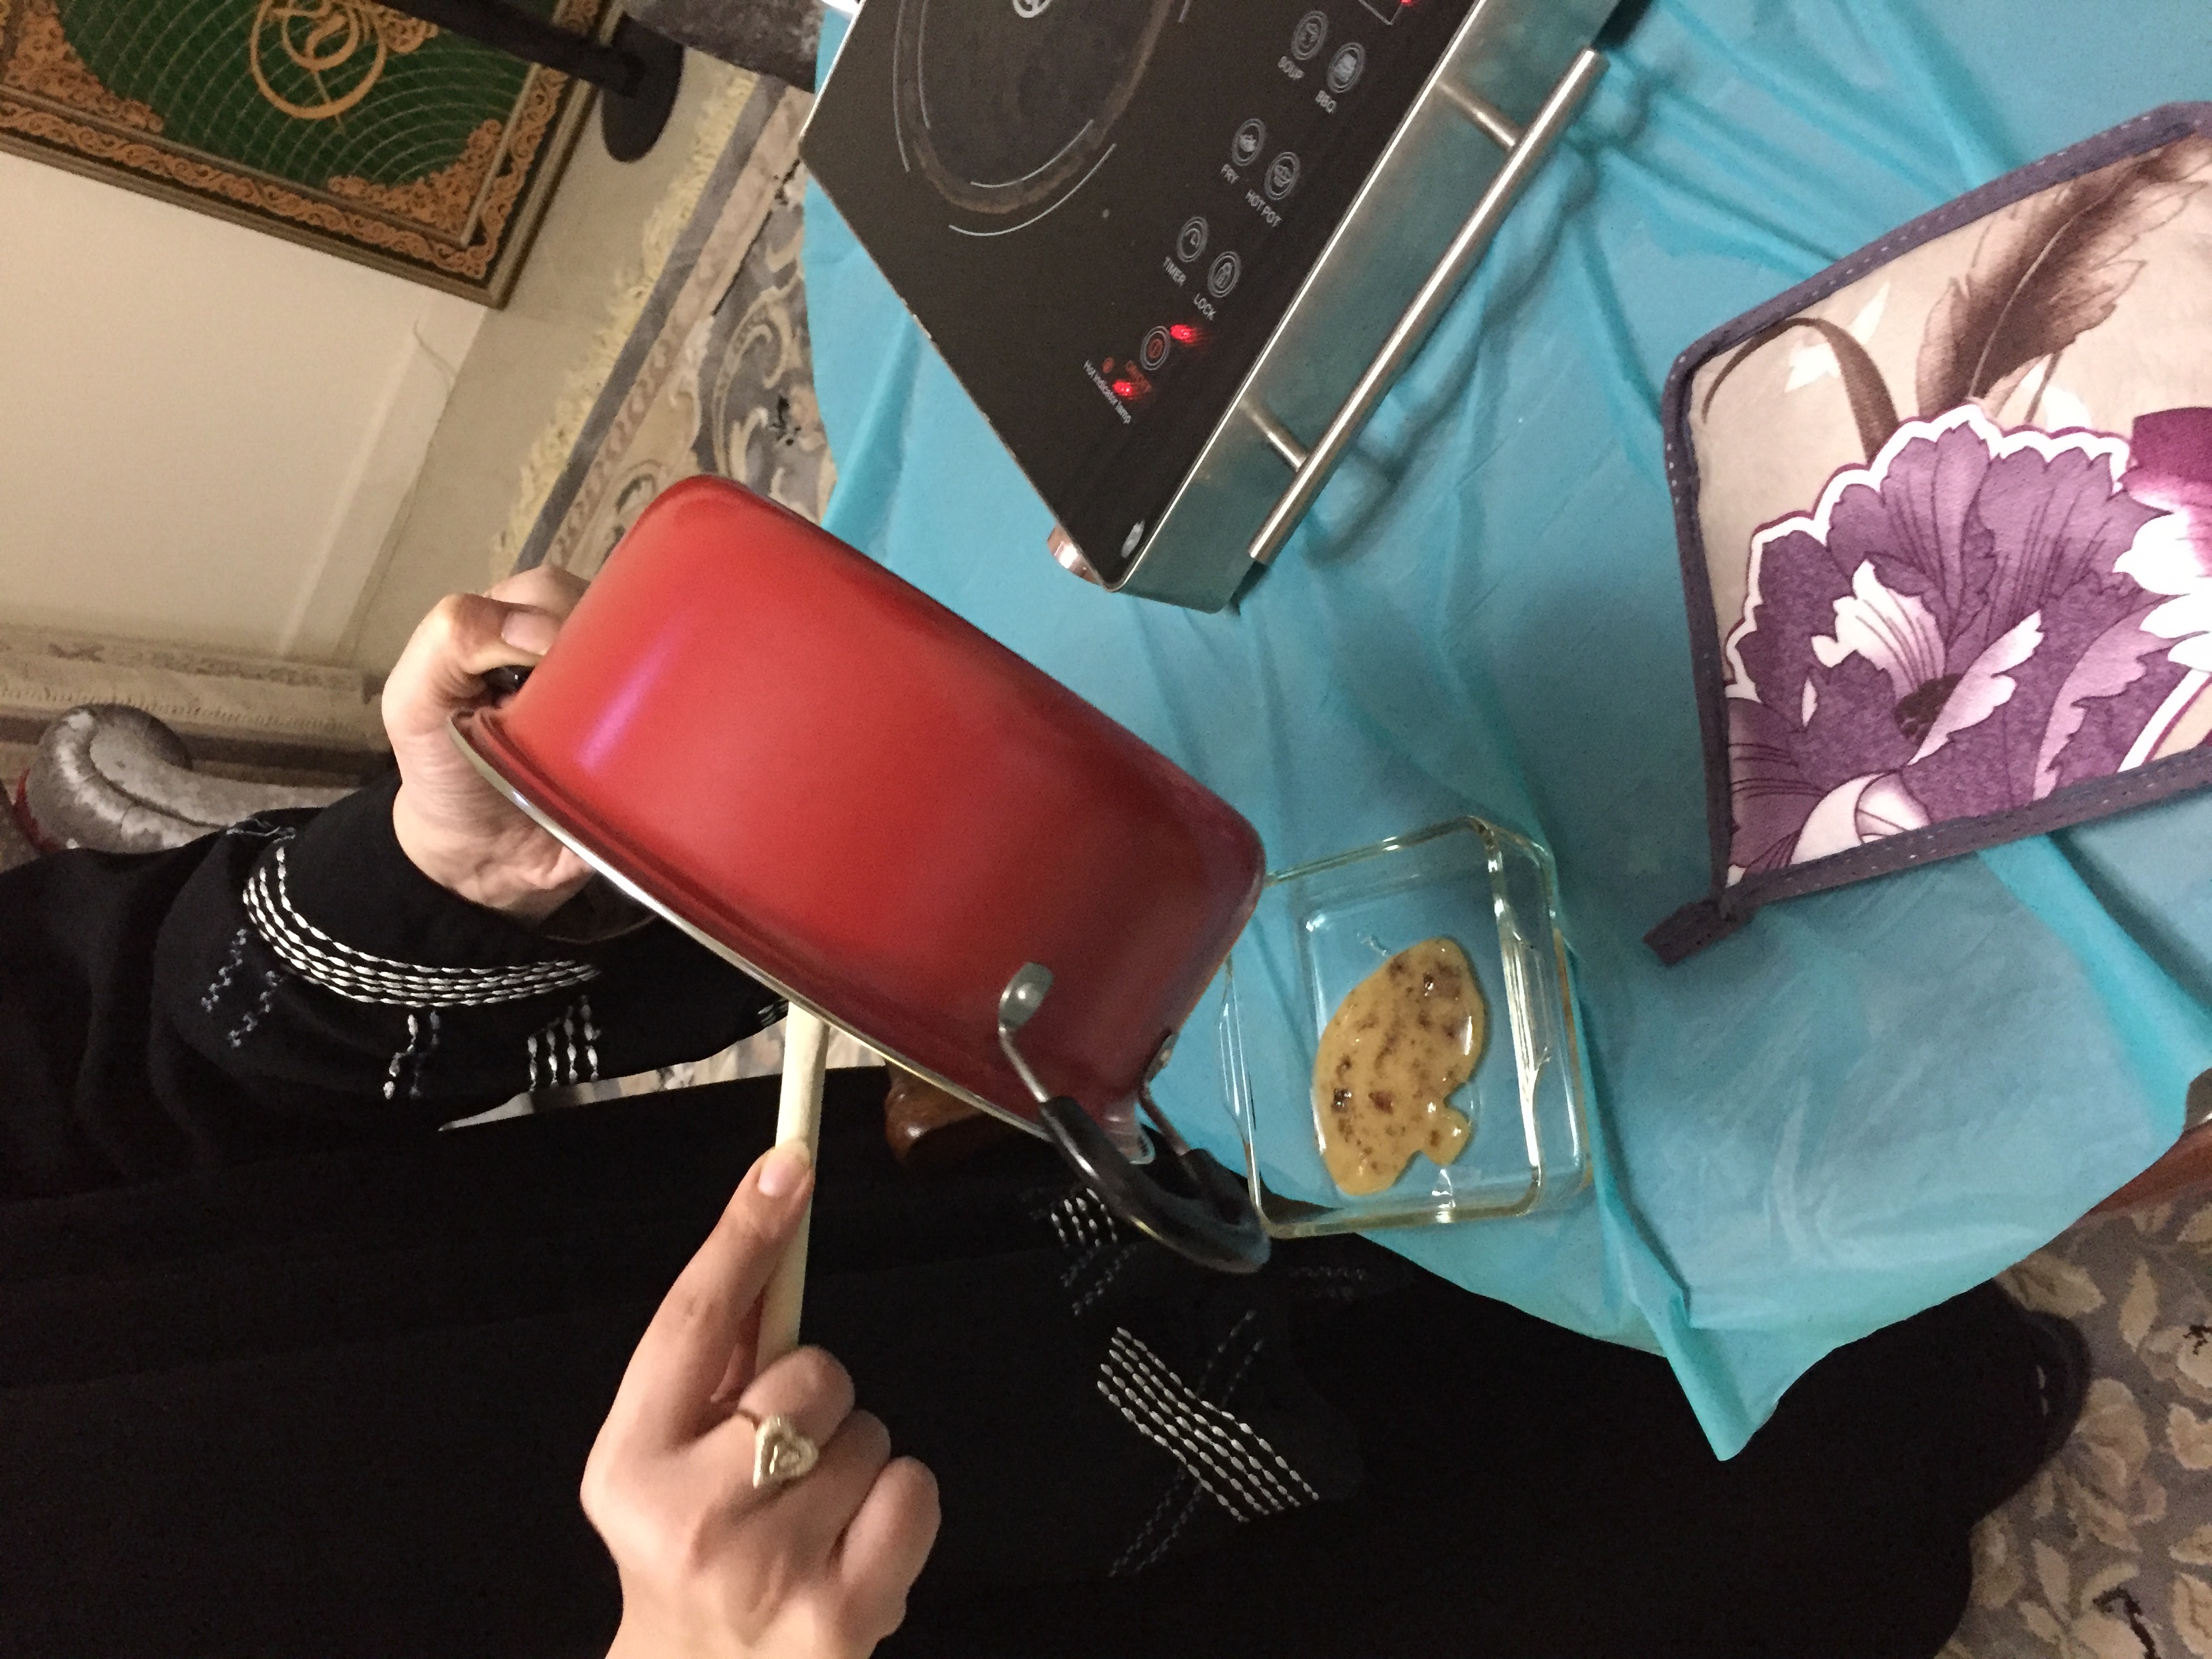
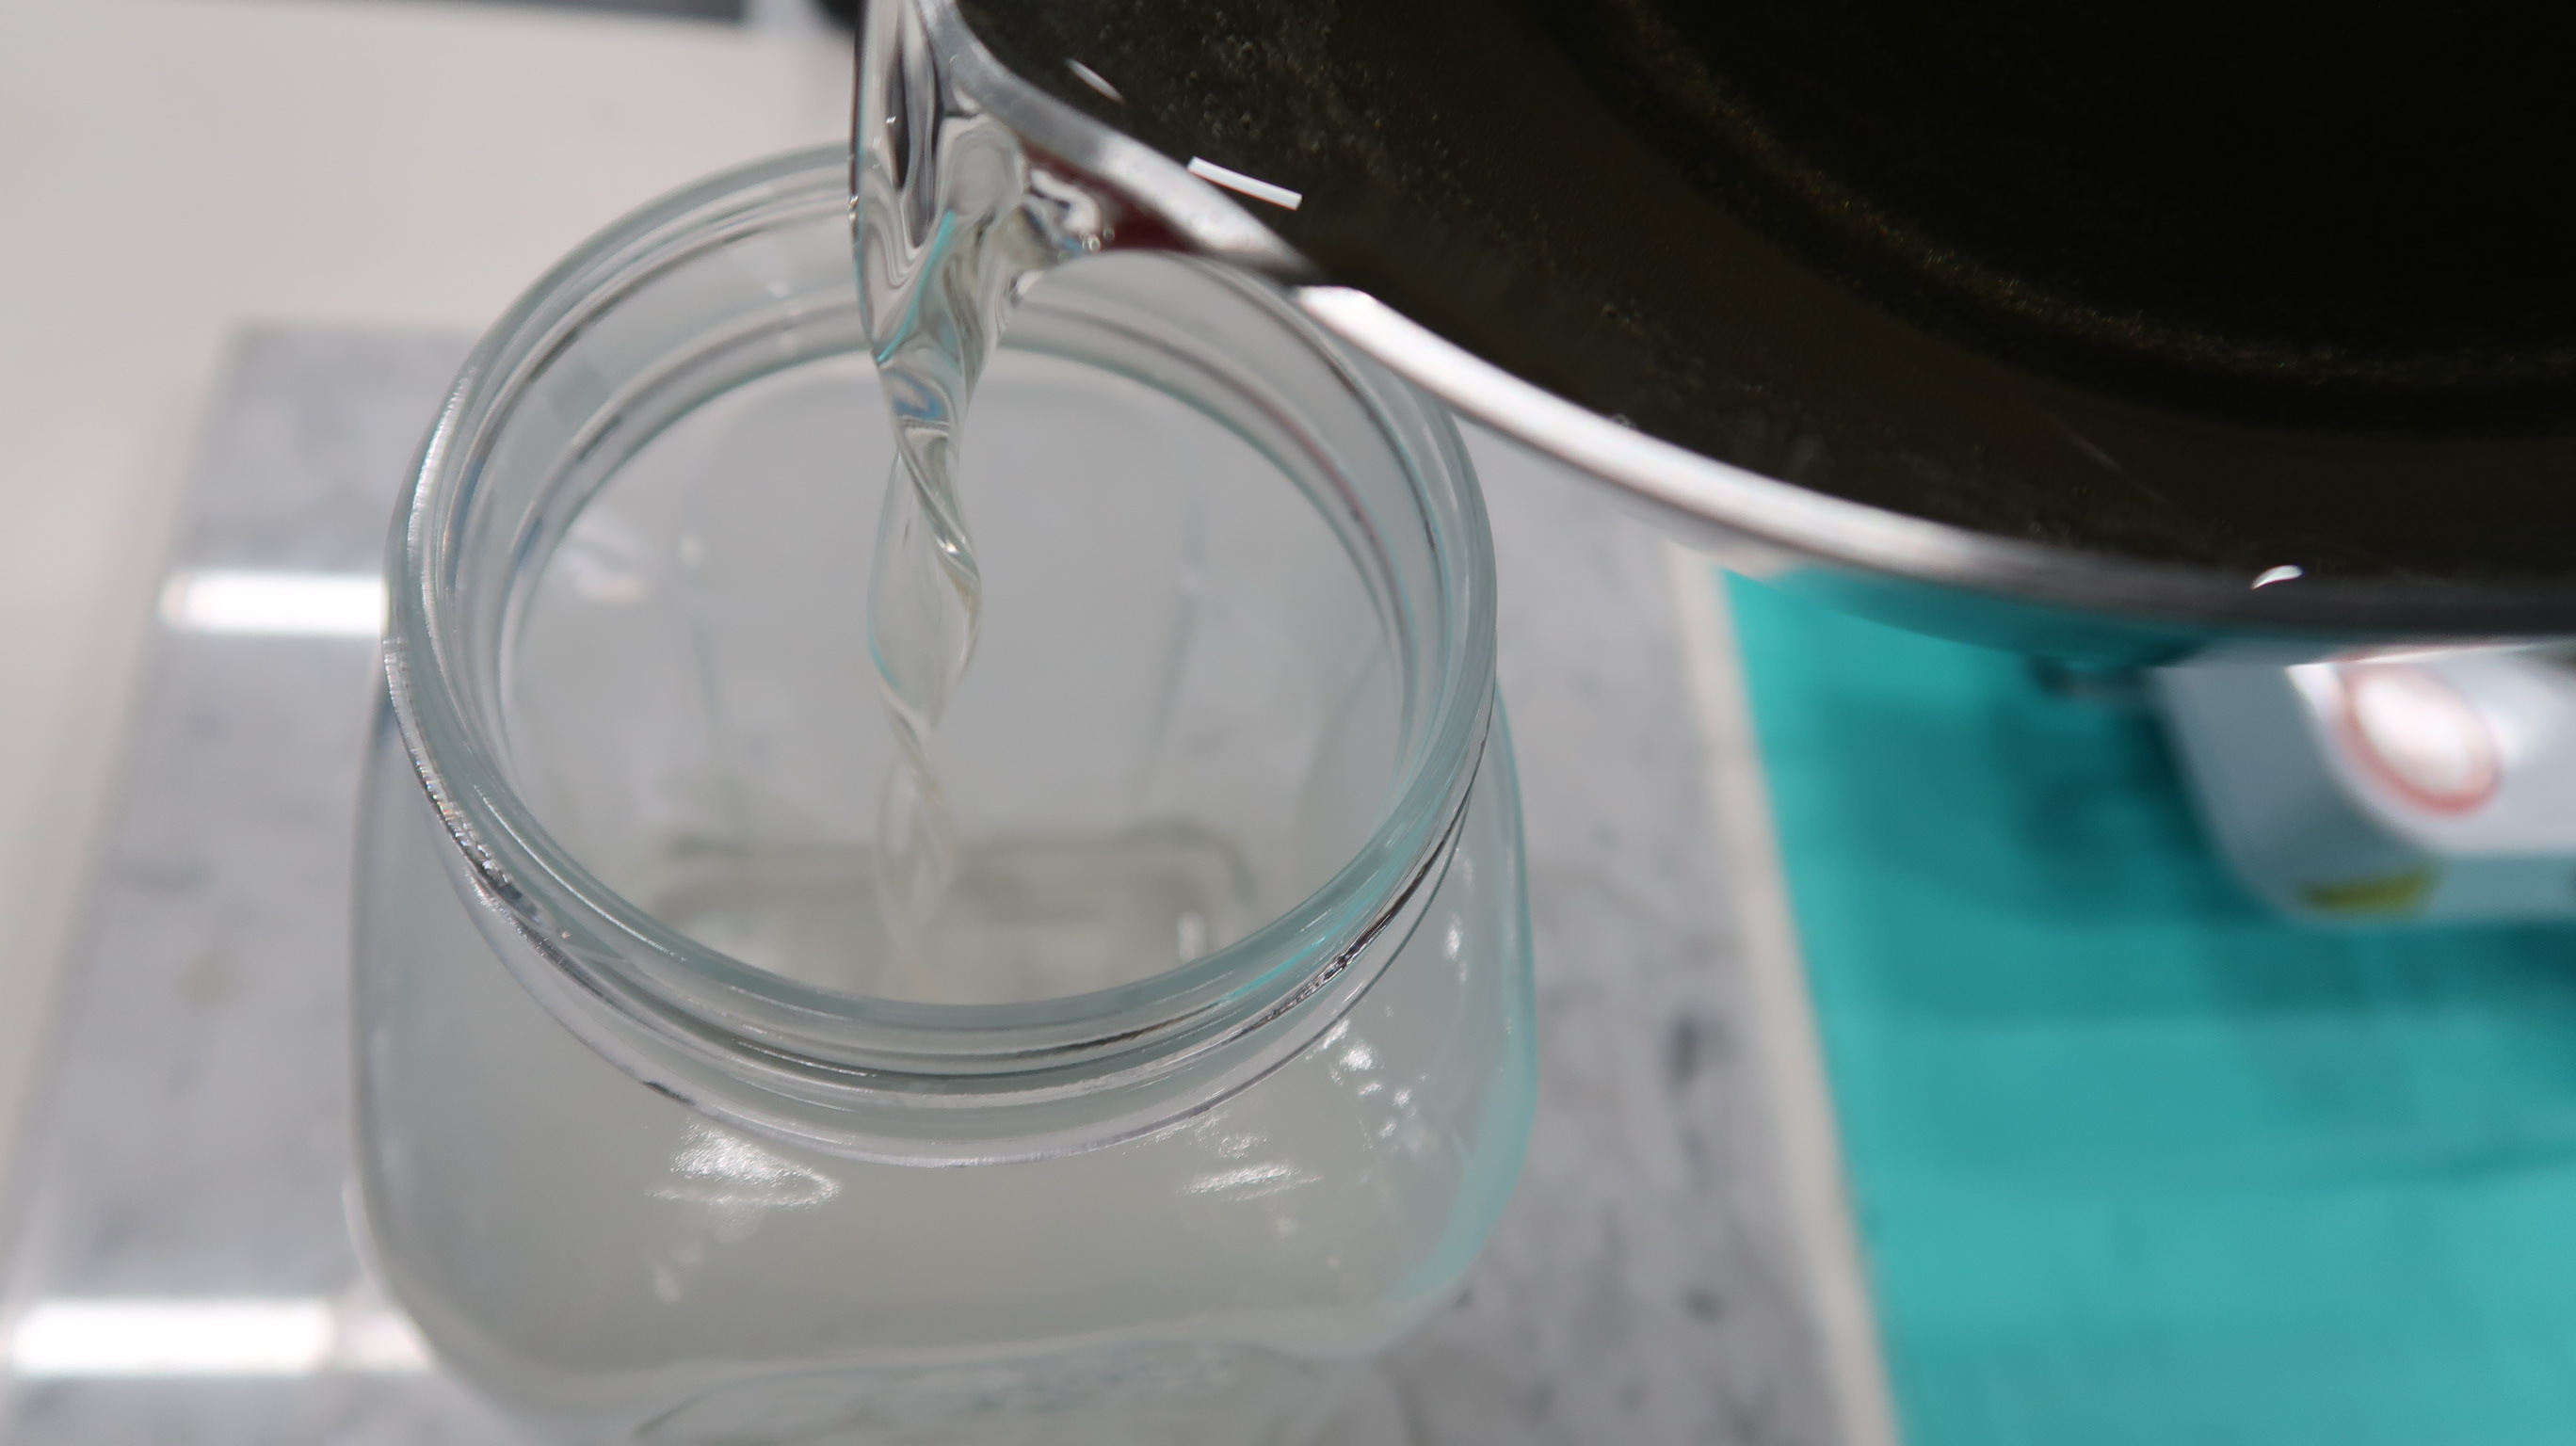
4 - This solution will be poured into the glass jar.
5 - Now, dipped the pieces into the solution and cover the jar.
| Cooking Process Sugar Crystallization |
|---|
 |
 |
 |
For the peices to be crystalized, I have made using burlap thread and ribbon to make earrings and brooch and dipped them on the syrup.
| Pieces to be Crystalized |
|---|
 |
Results
| Initial Result |
|---|
|
| Final Result |
|---|
|
Tips:
This project is not without trial and error! Here are some tips I learned after having this experiment
1 - Don’t overheat the water! I know it’s tempting to really heat that water up to make the salt dissolve, but all the experiments we did with really hot water, heated more than 45 seconds in the microwave, failed miserably.
2 - Stir for at least one to two minutes! This is tough one for littler kids. My daughter was done stirring within a few seconds but you really need to get that water super saturated with salt to make the crystals grow. The less dissolved the salt is the smaller the crystals will be and worst case they may not grow at all.
3 - Let them grow even longer in the fridge. Leave them in the fridge longer than overnight and they should continue to grow. I left a few in the fridge for a over a week and the results got even better!
4 - DO NOT let them sit in water at room temperature. Any crystals that have formed will deteriorate in the water at room temp. Once the crystals have formed and you want to preserve them you will need to pour out the water. I had some gorgeous crystals form in the fridge over the course of a week or so and I took them out and left them on the counter in the water. I came back the next morning to find they had flattened out. The one garden I poured the water out of remained stunning.
Bio Composite Materials - 1
I have used the recipe obtain a biocomposite material consisting of sawdust (from MDF wood) and pine resin as follows:
| Equipment Needed |
|---|
 |
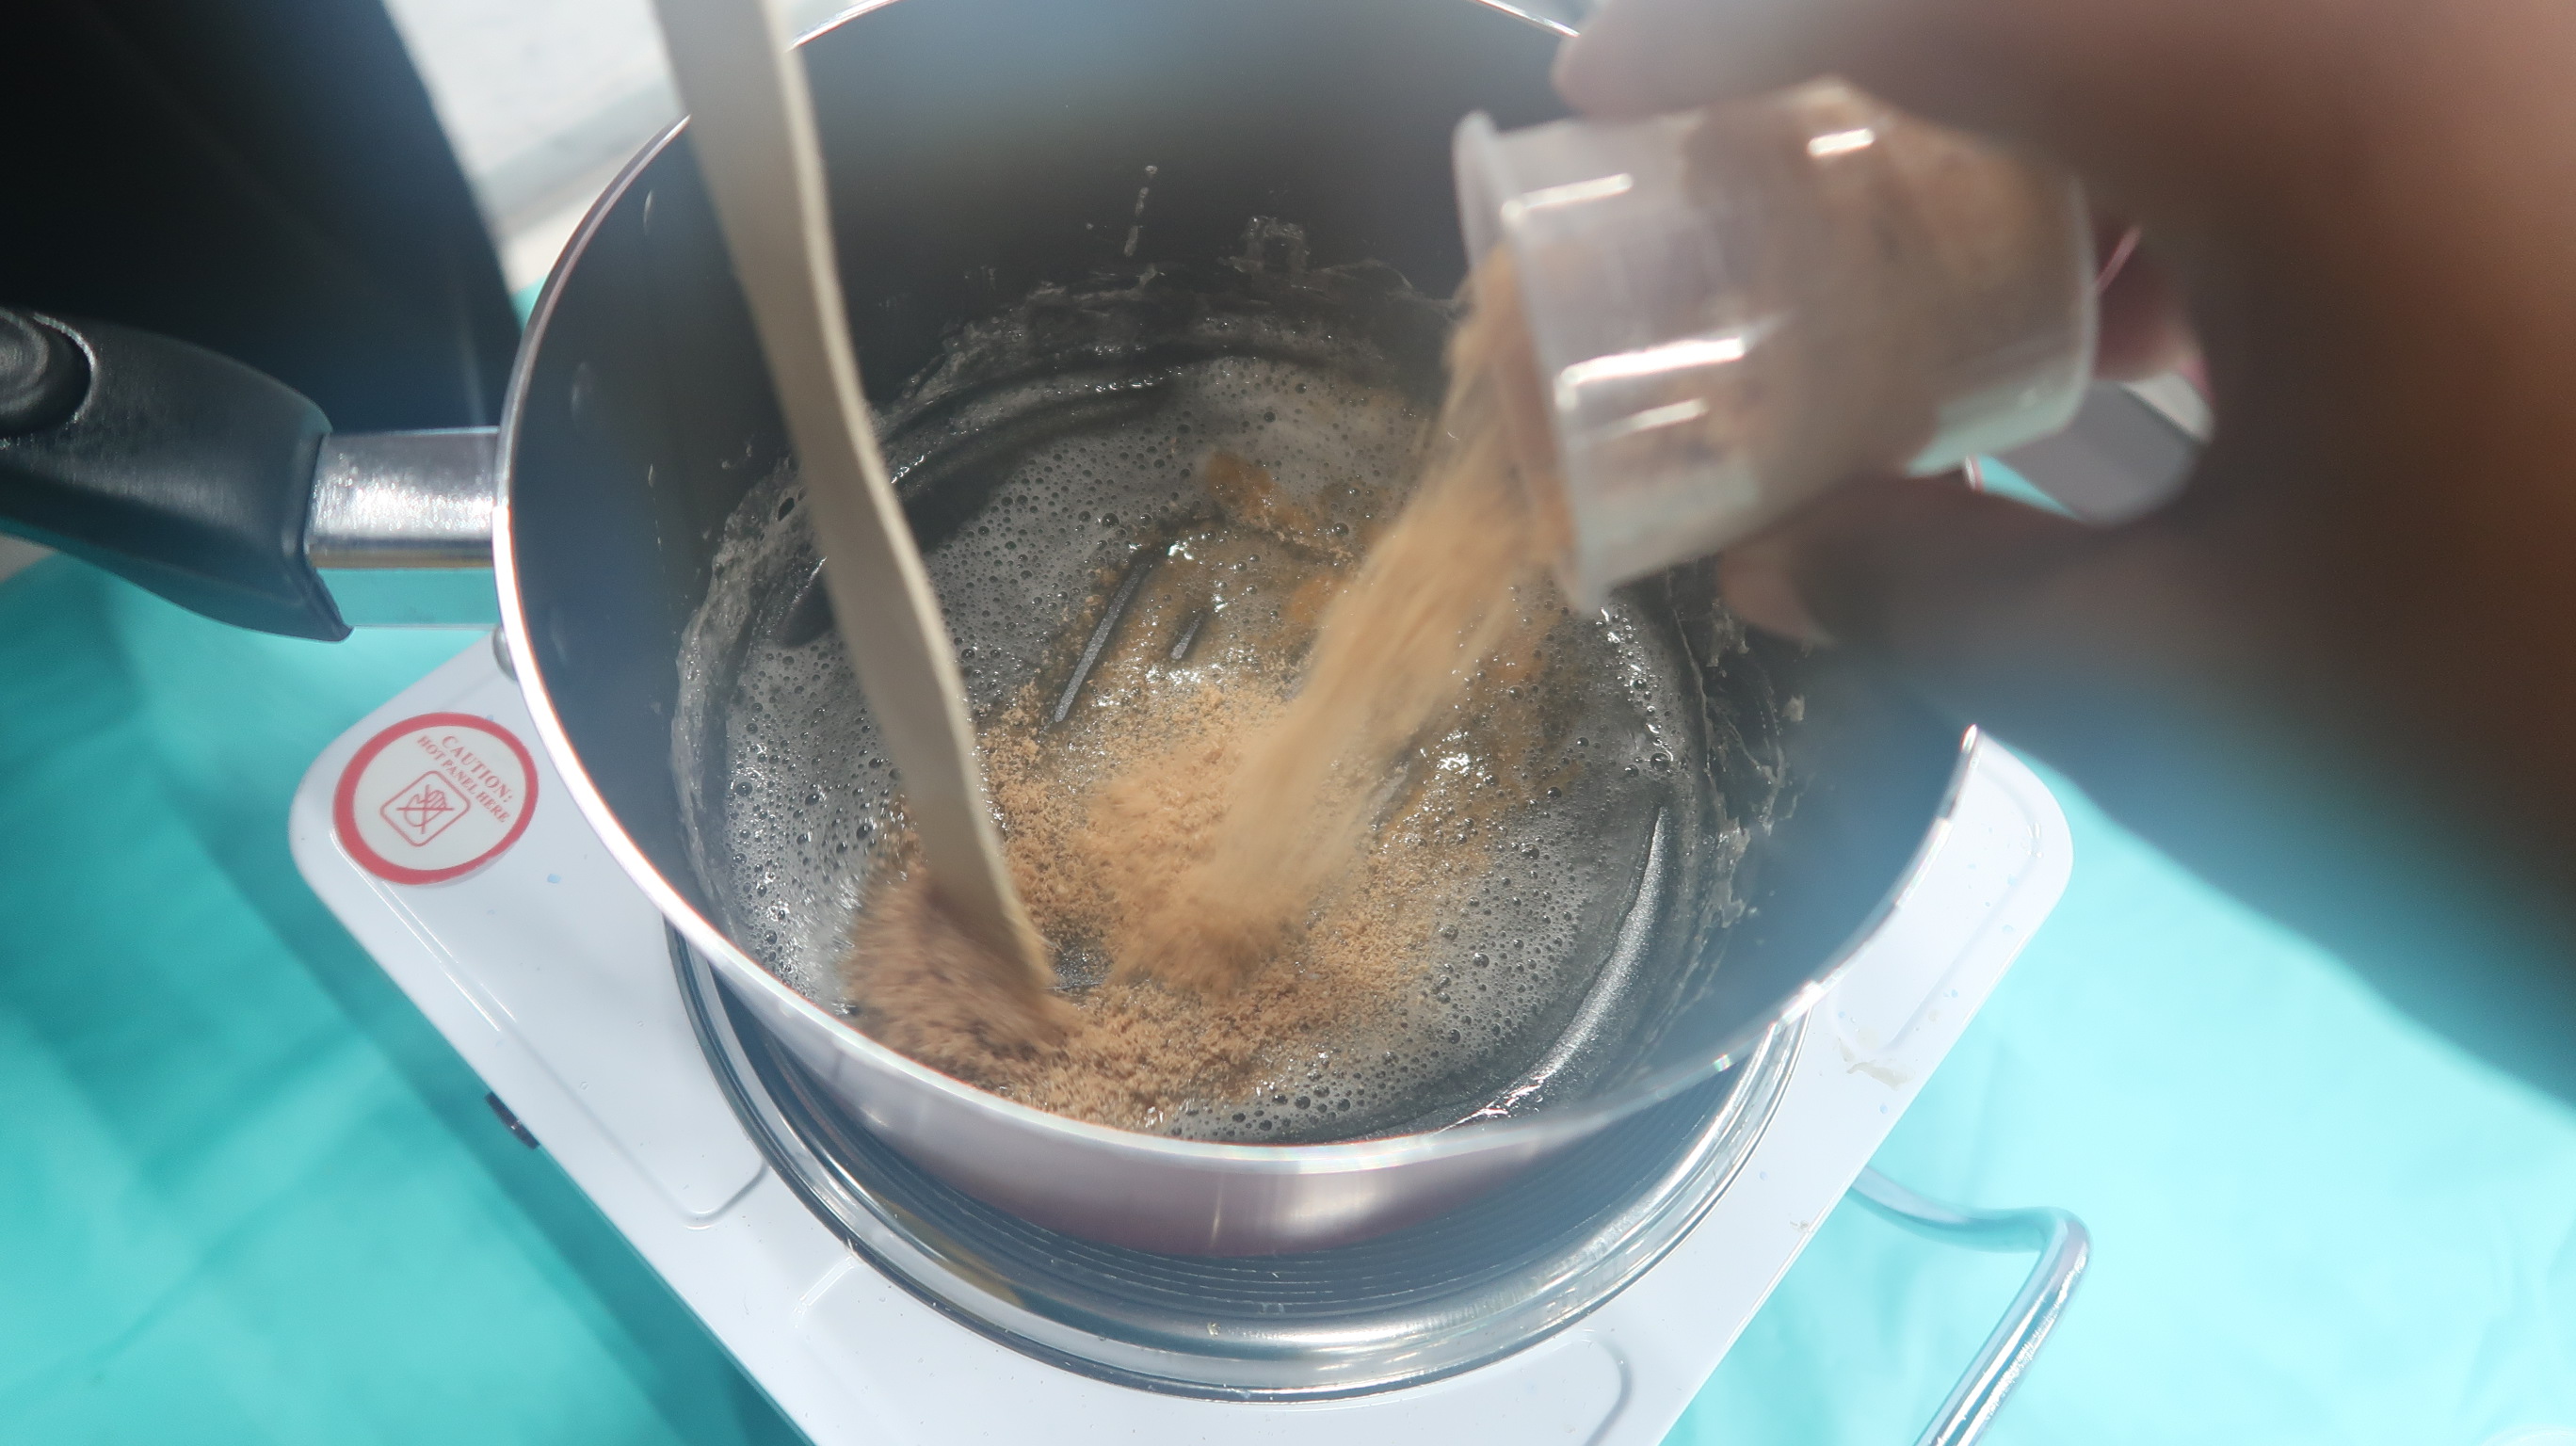
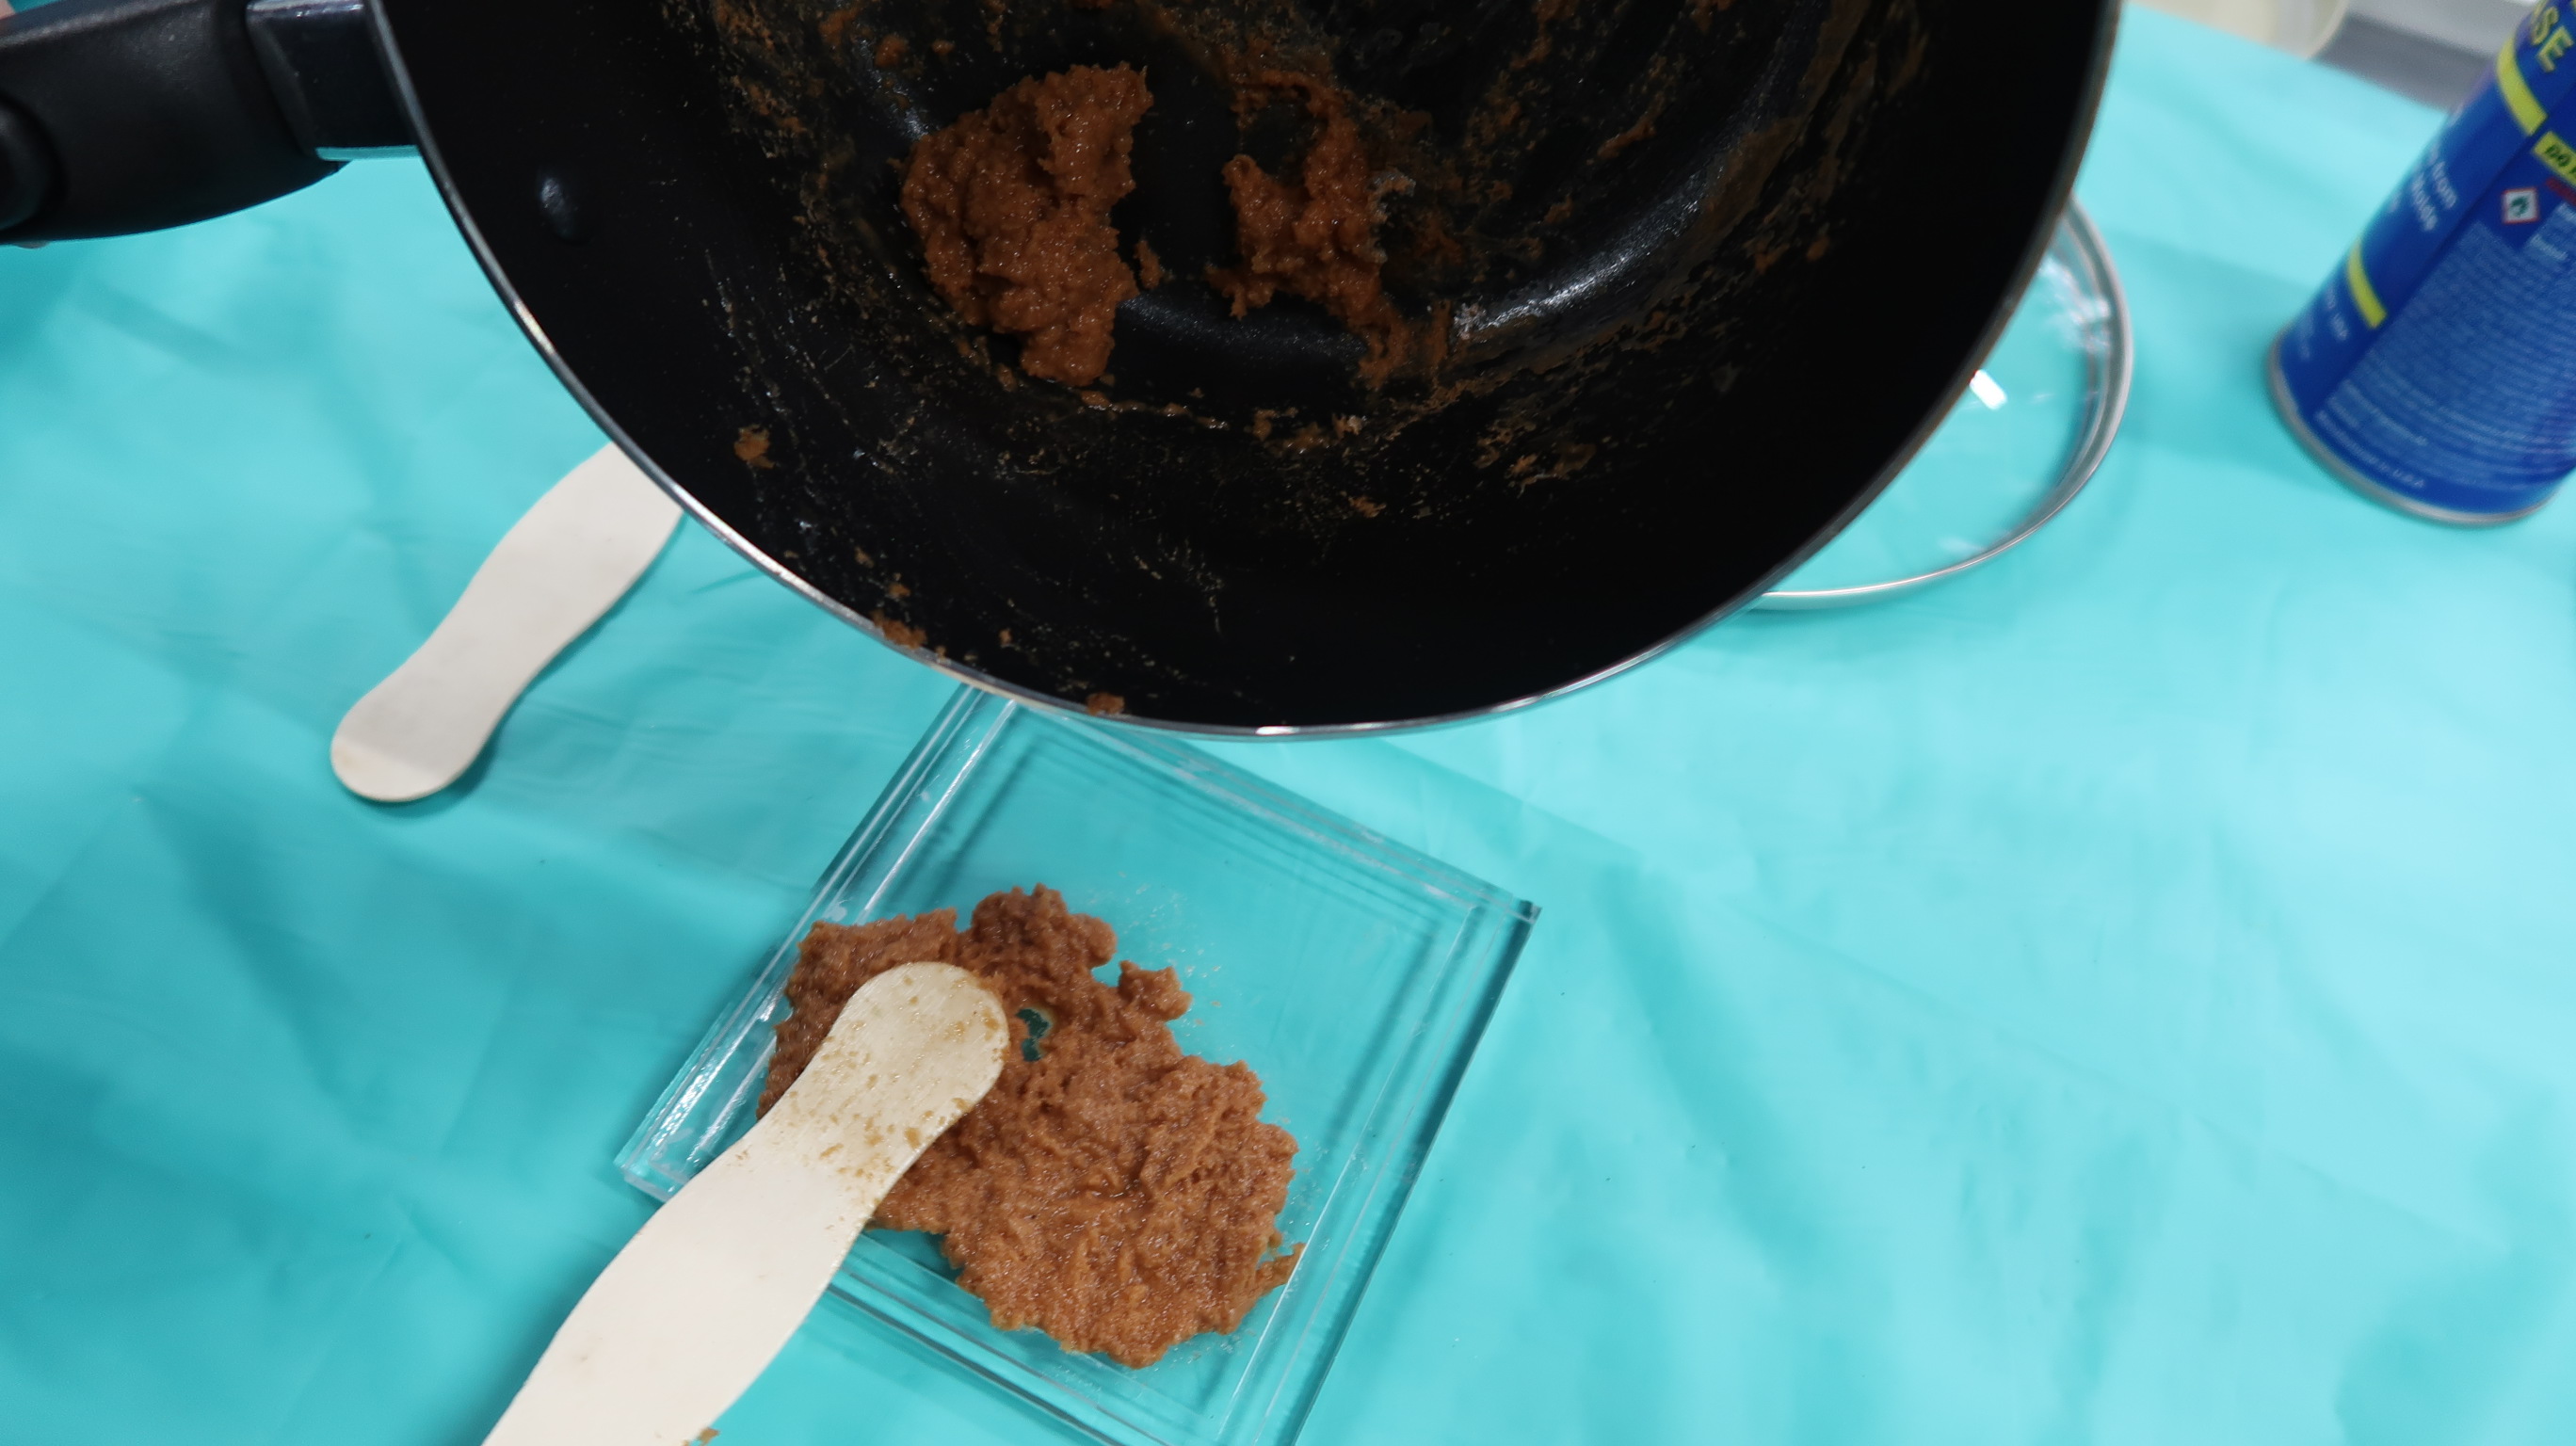
1 - Firstly, dissolve the resin with small amount of water in the pot and start to heat over medium temperature. Also stir the solution until it completely dissolve.
2 - Then put the sawdust into the thick solution
3 - Use mold release or some oil for better removal of material from the mold.
4 - Put the cooked material on the mold.
5 - To remove water bubbles completes use vaccum chamber withe the compressor fo 10 minutes.
| Making of Bio-Composite Materials | |
|---|---|
 |
 |
| Removing Water Bubbles |
|---|
 |
Results
| Final Result |
|---|
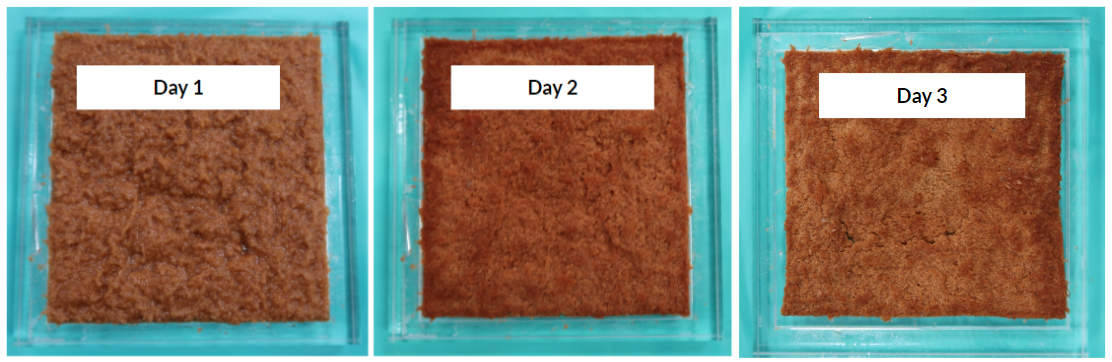 |
Leather Molding
I downloaded an open source design for a seashell from Thingiversse and then imported the STL into Rhinoceros software where I designed the positive and negative molds. According to the lecture slides, leather can be molded using one part positive mold and vacumm machine or two part molds (in both cases the mold should be designed). I decided to make a small coin purse with the shape of seashell.
The following steps involved in designing the mold:
1 - Import the STL file to the rhinoceros.
2 - To make the positive and negative molds, rotate one of th seashell in the Y-axis by 180 degree.
3 - Use "Mesh Boolean Difference" to make seashell dipped inside the box to obtain the negative mold.
| Positve and Negative Molds |
|---|
|
As I am going to use Roland Modela MDX-50 milling machine, the STL file should be processed using SRP Player CAM software.
I am using two strategies for milling. The first one is rough milling and the second is fine finishing. For rough milling I am using 1/8" ball end tool and for fine finishing I am using 1/16" ball end tool. SRP Player has generated tool path for both processes. Roland has automatic tool changer that will automatically change the tool for each process. As rough milling is performed first, I put the tool 1/8" in tool slot 1 in the machine and I put tool 1/16" in slot 2 for fine finishing.
| Rough and Finishing Milling |
|---|
|
Now before sending the file for cutting, the material need to be placed inside the machine and some setup need to be adjusted.
1 - Before sticking the pieces over Roland cutting plate apply diuble sided tissue tape on the backside of pieces
2 - Make the center and use Z-probe to detect the height of the material.
3 - Finally, start cutting. after clciking on start cutting, the spindle head will automatically pick tool 1 for milling and increases the speed upto 150000 RPM. Then Milling started.
The milling process with Roland MDX-50 took 6.4 hours = 6 hours and 24 min as analyzed by SRP Player CAM software.
| Milling Process | |
|---|---|
|
|
| The final Result |
|---|
|
|
Leather Molding
1 - Put the leather in the cold water and leave it for 10 minutes.
2 - Remove leather from water.
3 - Put wet leather in the hot water in the pot and pot will be heated by stove.
4 - Put the leather into positive mold.
5 - Press the both postive and negative leathers by putting leather between them.
6 - Use grippers to press tightly the molds for better result.
| Leather Molding Process | |
|---|---|
|
|
|
|
|
|
Results
| Final Result |
|---|
|