6. Biofabricating
| Biofabricating |
|---|
 |
In this week I learnt about the biofabrication process.
Assignment
Study and understand the process of biofabrication and materials used in biofabricating technology. Then fabricate at least two crafted materials using biofabriating techniques.
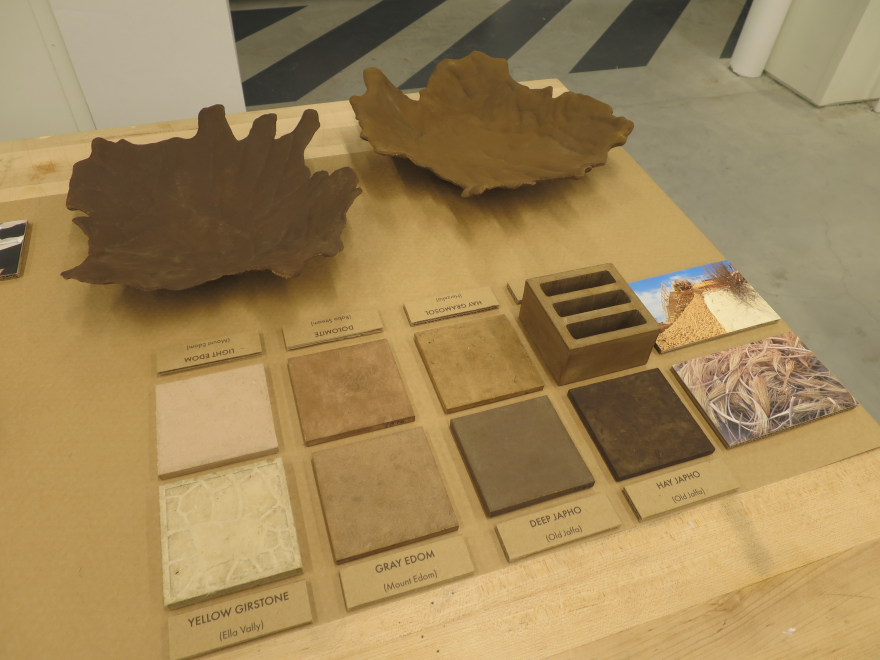
Inspiration
| The Art of Biofabricated Materials |
|---|
4.1. Introduction
Biofabrication can be defined as the production of complex living and non-living biological products from raw materials such as living cells, molecules, extracellular matrices, and biomaterials. Cell and developmental biology, biomaterials science, and mechanical engineering are the main disciplines contributing to the emergence of biofabrication technology.
| The Art of Biofabricated Materials |
|---|
Biofabrication is usually defined as the production of complex biologic products from raw materials such as living cells, matrices, biomaterials, and molecules. This rapidly evolving technology has been stimulated by the development of 3D fabrication technologies. This field builds upon currently available wound healing strategies and methodologies. Biofabrication is the automated production of tissues and organs to address health challenges in medicine. It uses the principles of additive manufacturing – often termed 3D printing – to combine cells, gels and fibres into a single construct that can replace a diseased or injured tissue. The final product is often complex and contains a number of various components including structural and cellular constituents. Biofabrication is a platform technology for a broad range of tissues such as skin, nervous, cartilage, vascularized bone and blood vessels, as well as complete organs such as the heart, kidney, liver and bladder.
| Biofabrication |
|---|
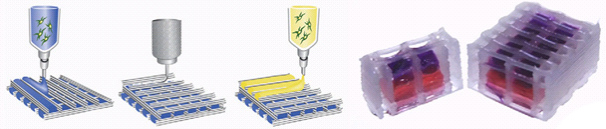 |
Biofabrication is strongly reliant on 3D printing to accurately place cells, matrix and materials in position for tissue culture. These constructs can be used as testing systems for new drug discovery, understanding cell biology and for replacing tissues and organs that are damaged through injury or disease. Using these 3D constructs, better tending to our aging population with minimally harmful surgeries can be achieved, while reducing animal use in research.
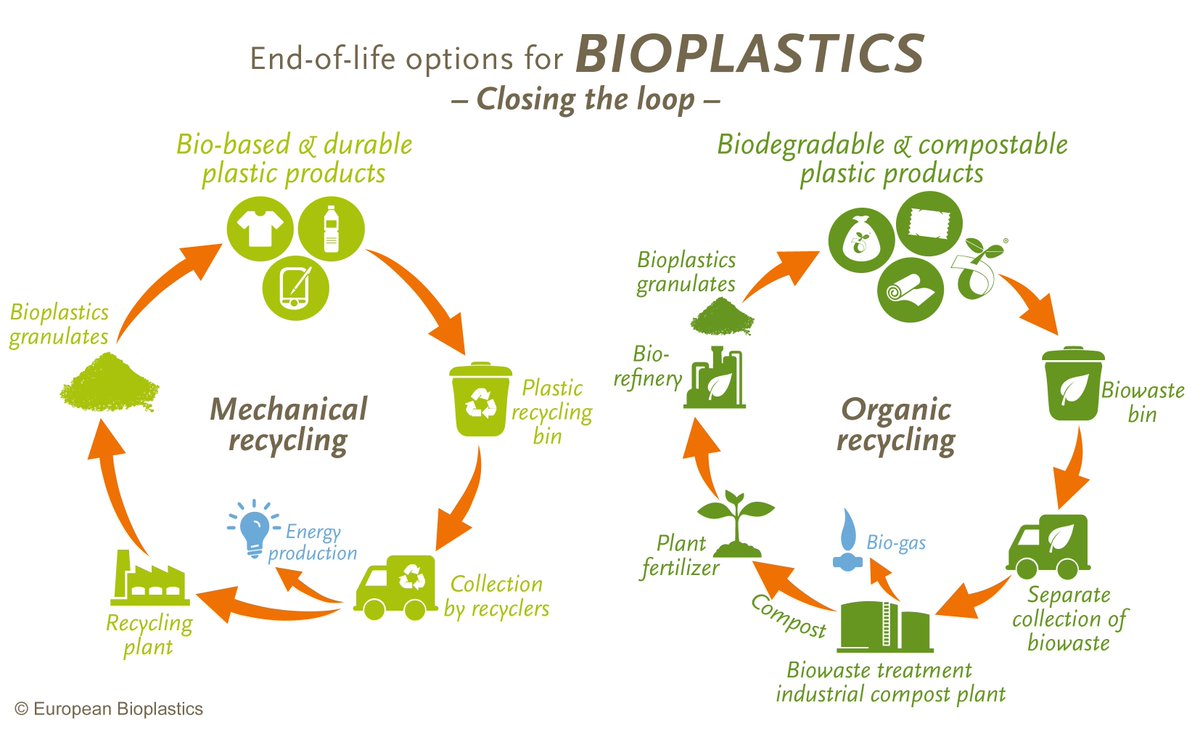
Bioplastic
Bioplastics are biodegradable materials that come from renewable sources and can be used to reduce the problem of plastic waste that is suffocating the planet and contaminating the environment. As an alternative, the use of bioplastics is being promoted, consisting in obtaining natural polymers from agricultural, cellulose or potato and corn starch waste. Advantages of Bioplastics are as follows:
They reduce carbon footprint
They providing energy savings in production
They do not involve the consumption of non-renewable raw materials
Their production reduces non-biodegradable waste that contaminates the environment
They do not contain additives that are harmful to health, such as phthalates or bisphenol A
They do not change the flavor or scent of the food contained
| Recycling process of Bioplastics | |
|---|---|
 |
 |
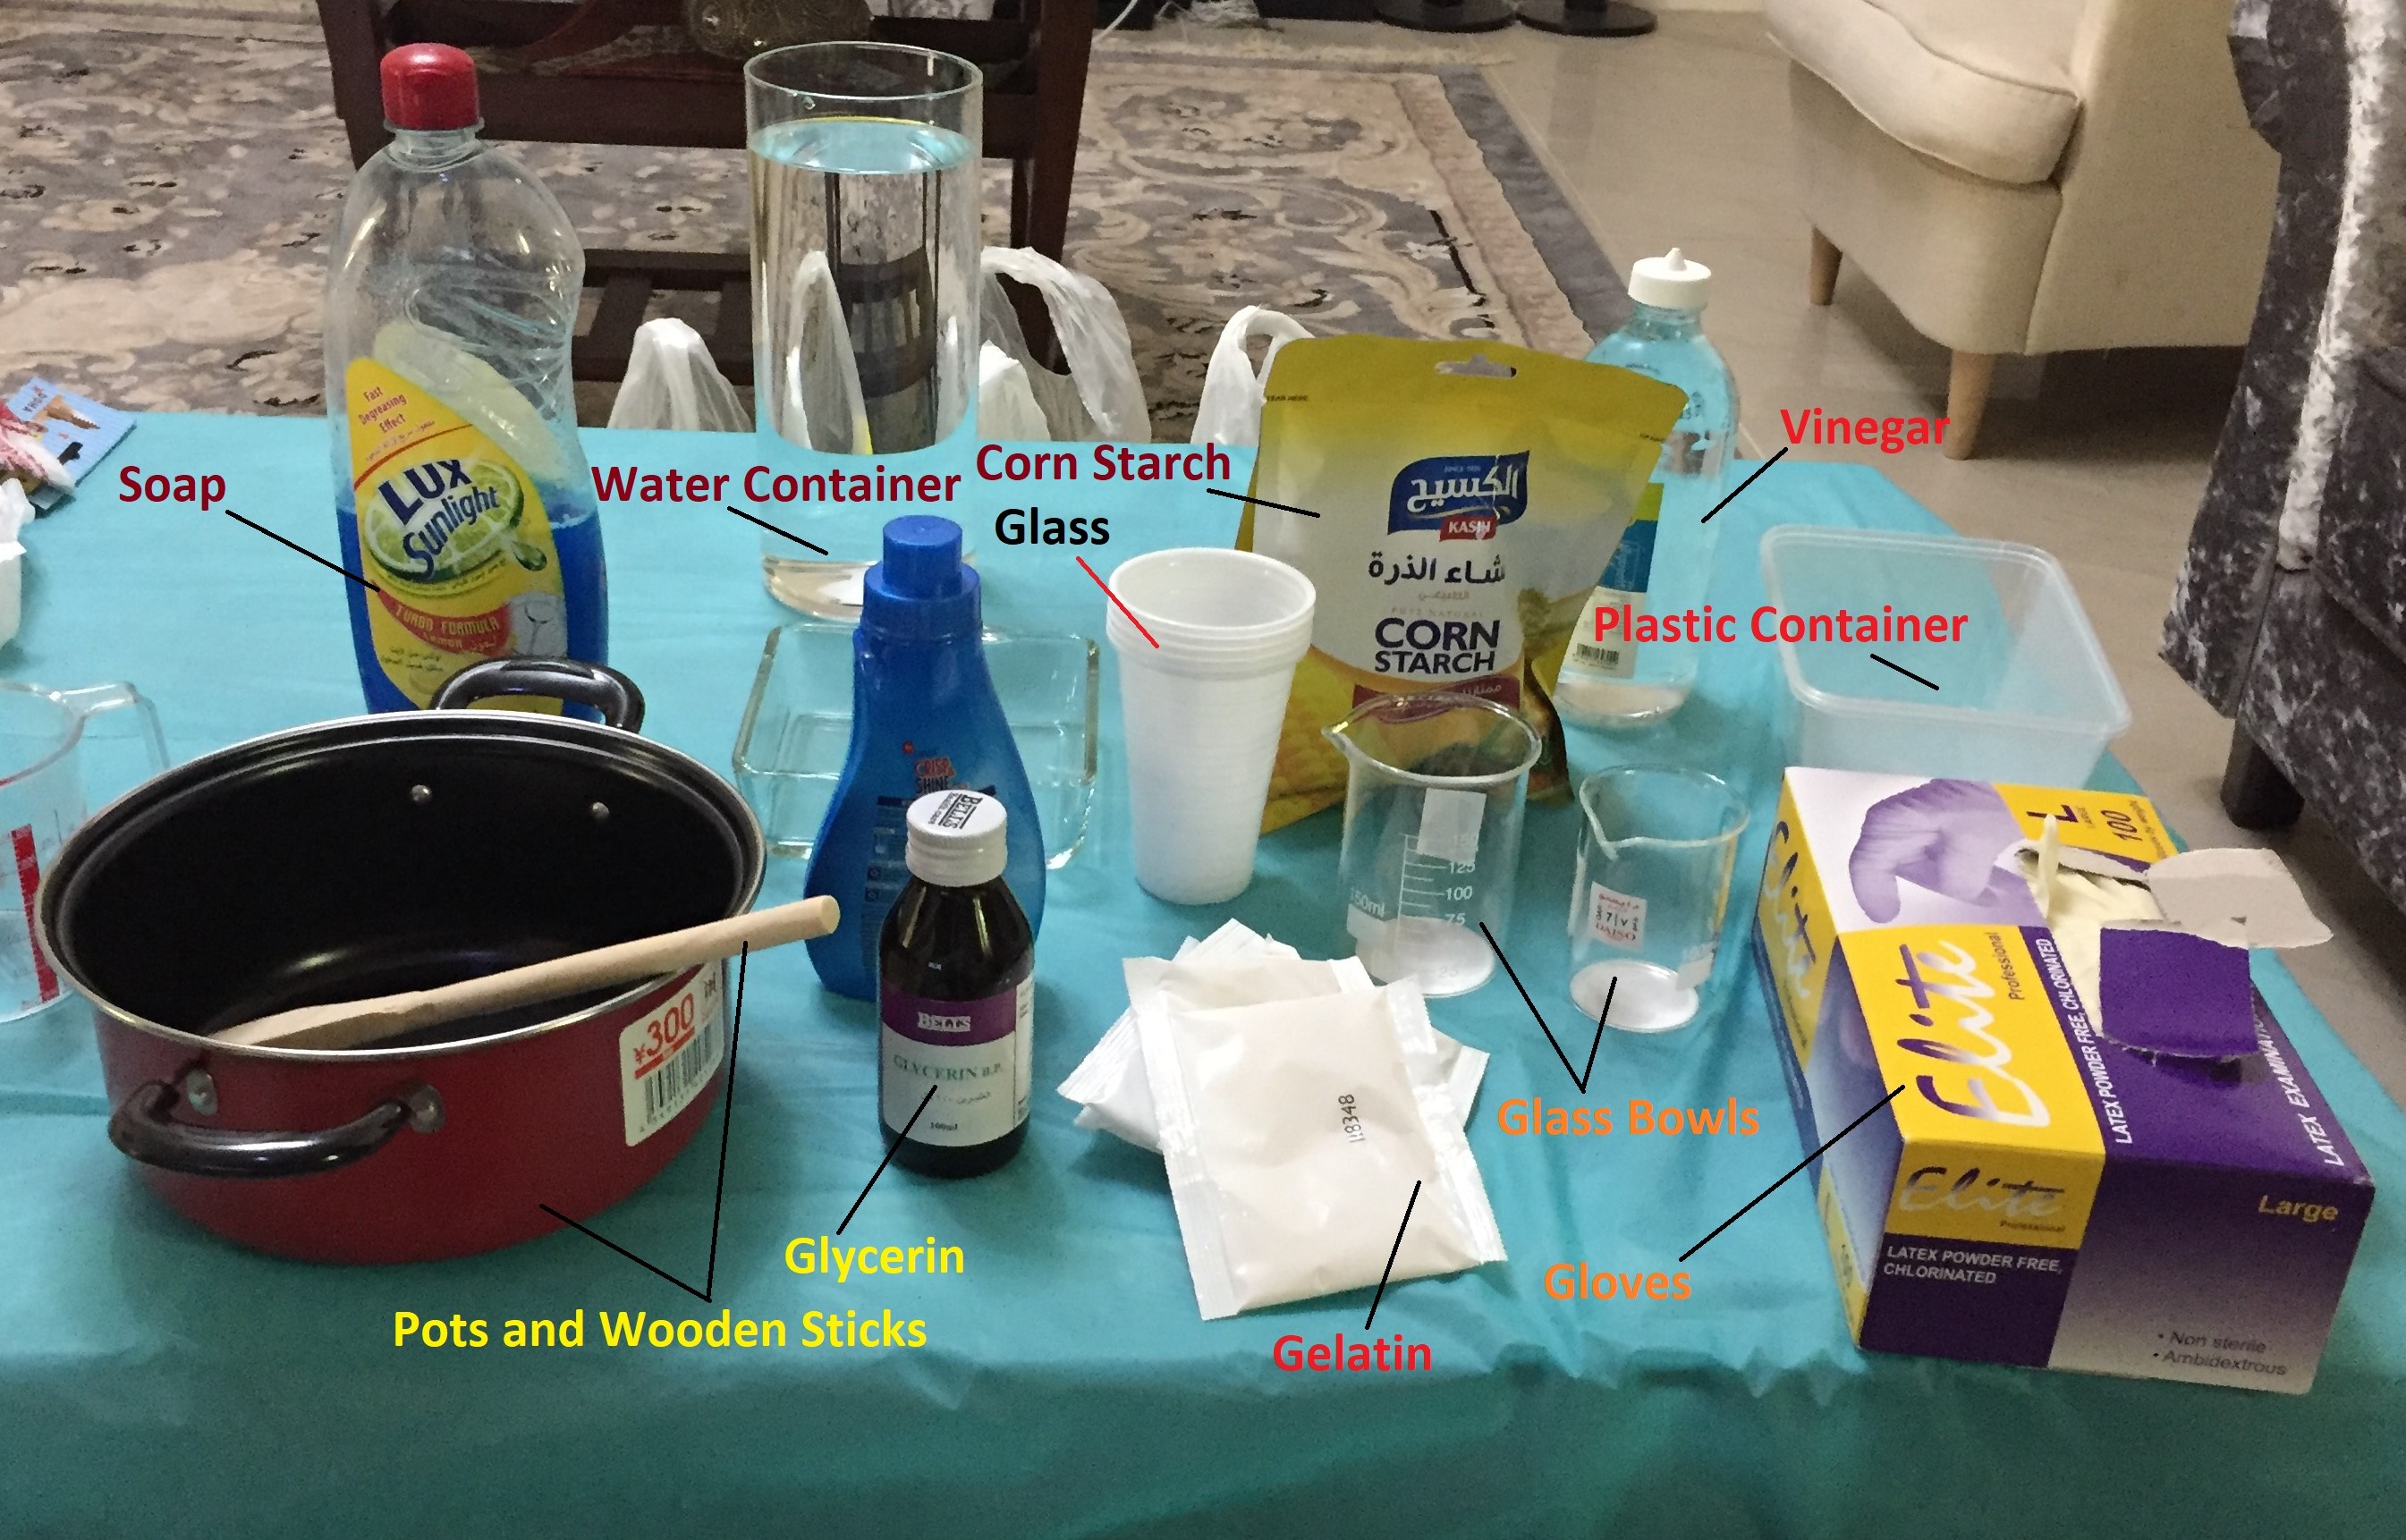
Required Equiupment and Tools for the Assignment
| Equipmet and Tools | ||||
|---|---|---|---|---|
| Ceramic Base | Venegar | Measuring Cups | Corn Starch | Glycerin |
| Cooking Tools | Soup | Spoon and Wooden Spoons | Glass Bowl | Gelatin |
| Natural Colors | Pots | Plastic Container | Safety Gloves | Digital Balance |
| Water | Mold Release Spray |
| Tools used in Biofabricating |
|---|
 |
Making the Bioplastics
Required Equipment with Specifications
| Source Type | Water | Substrate | Substrate Amount | Glycerin |
|---|---|---|---|---|
| Animal | 50 ml | Gelatin | 3 teaspoon (12 g) | 5 drop |
| Algae | 50 ml | Agar Agar | 3 teaspoon (12 g) | 2.5 drop |
| Plant | 50 ml | Cornstarch | 3 teaspoon (12 g) | 5 drop |
-
For each of the three source types, mix tap water, substrate and glycerin in a heat resistant cup using the follow proportions in the chart. Stir each cup until there are no clumps.
-
Heat each mixture separately in a microwave until it begins to froth, usually less than a minute. To prevent boiling over, carefully watch the mixture through the microwave window. Stir after heating.
-
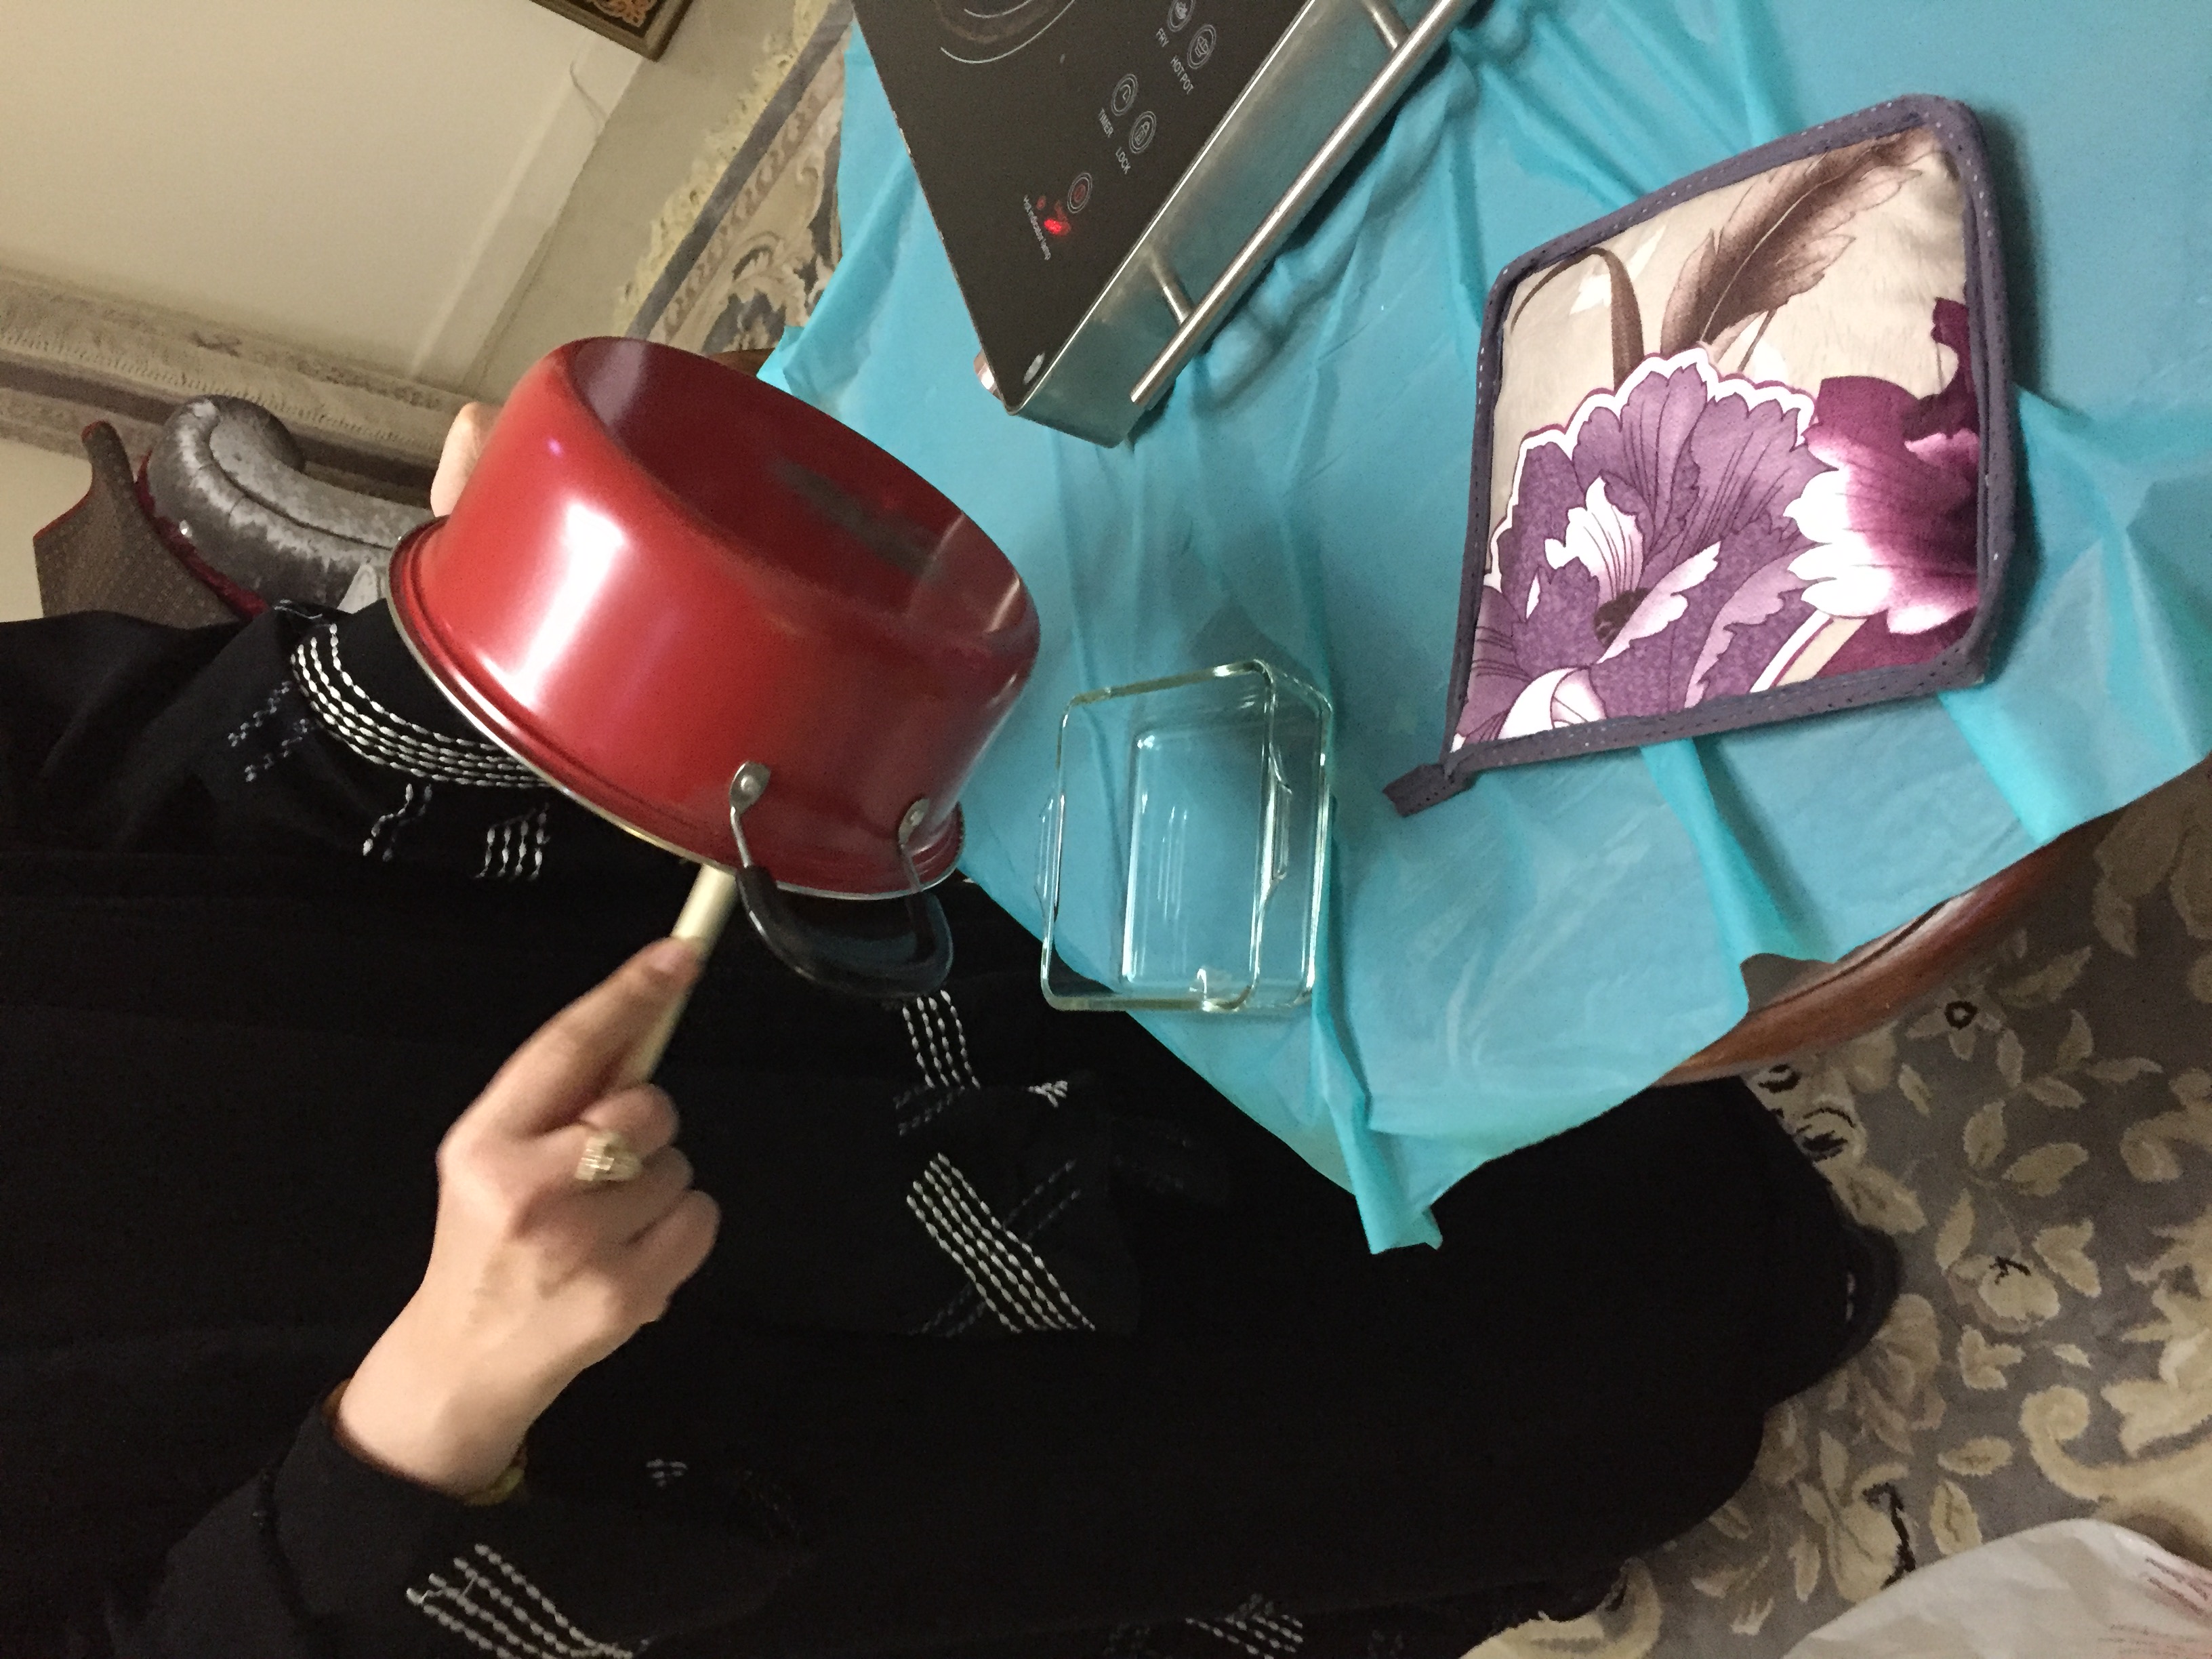
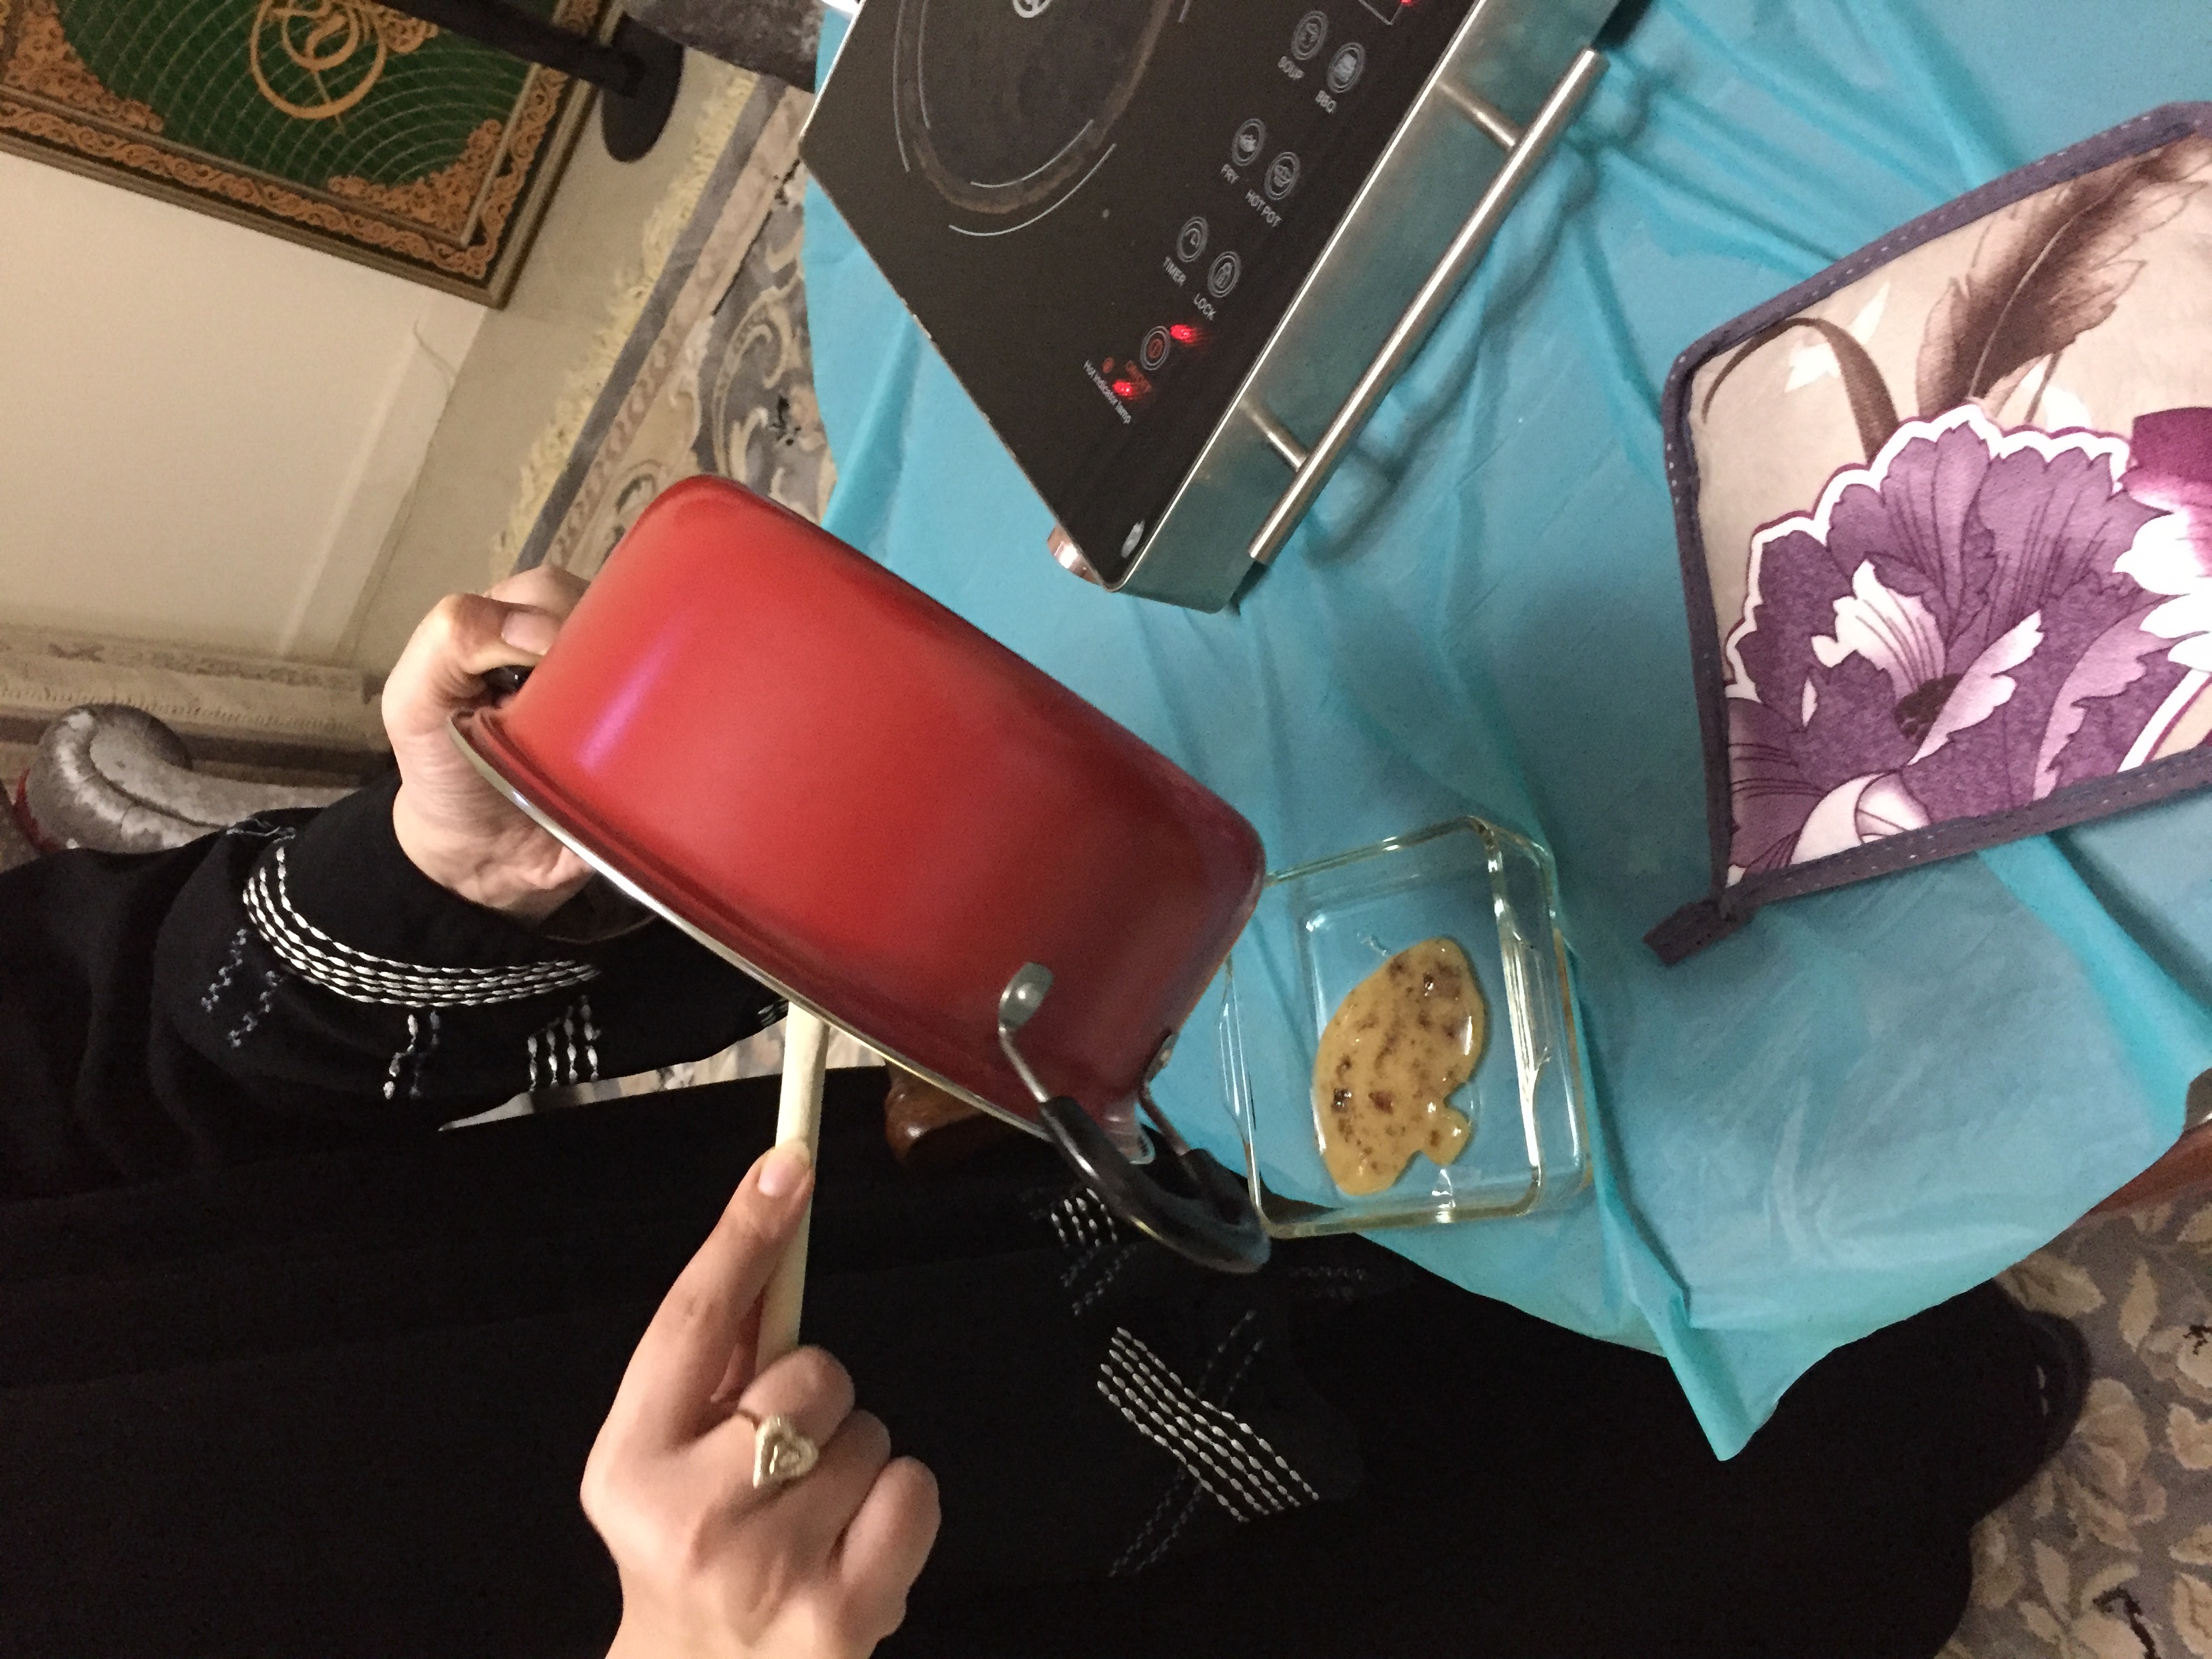
Pour each mixture type out into three molds. Try to pour the plastic to the same thickness (about 0.5 - 0.75 cm) in each mold.
-
Allow the mixture to dry in a warm place. This can be three to five days.
-
Once the folk handles have completely dried, use the multiple samples you made to test the different substrate materials’ characteristics. The chart below has a list of items to test. Record your results.
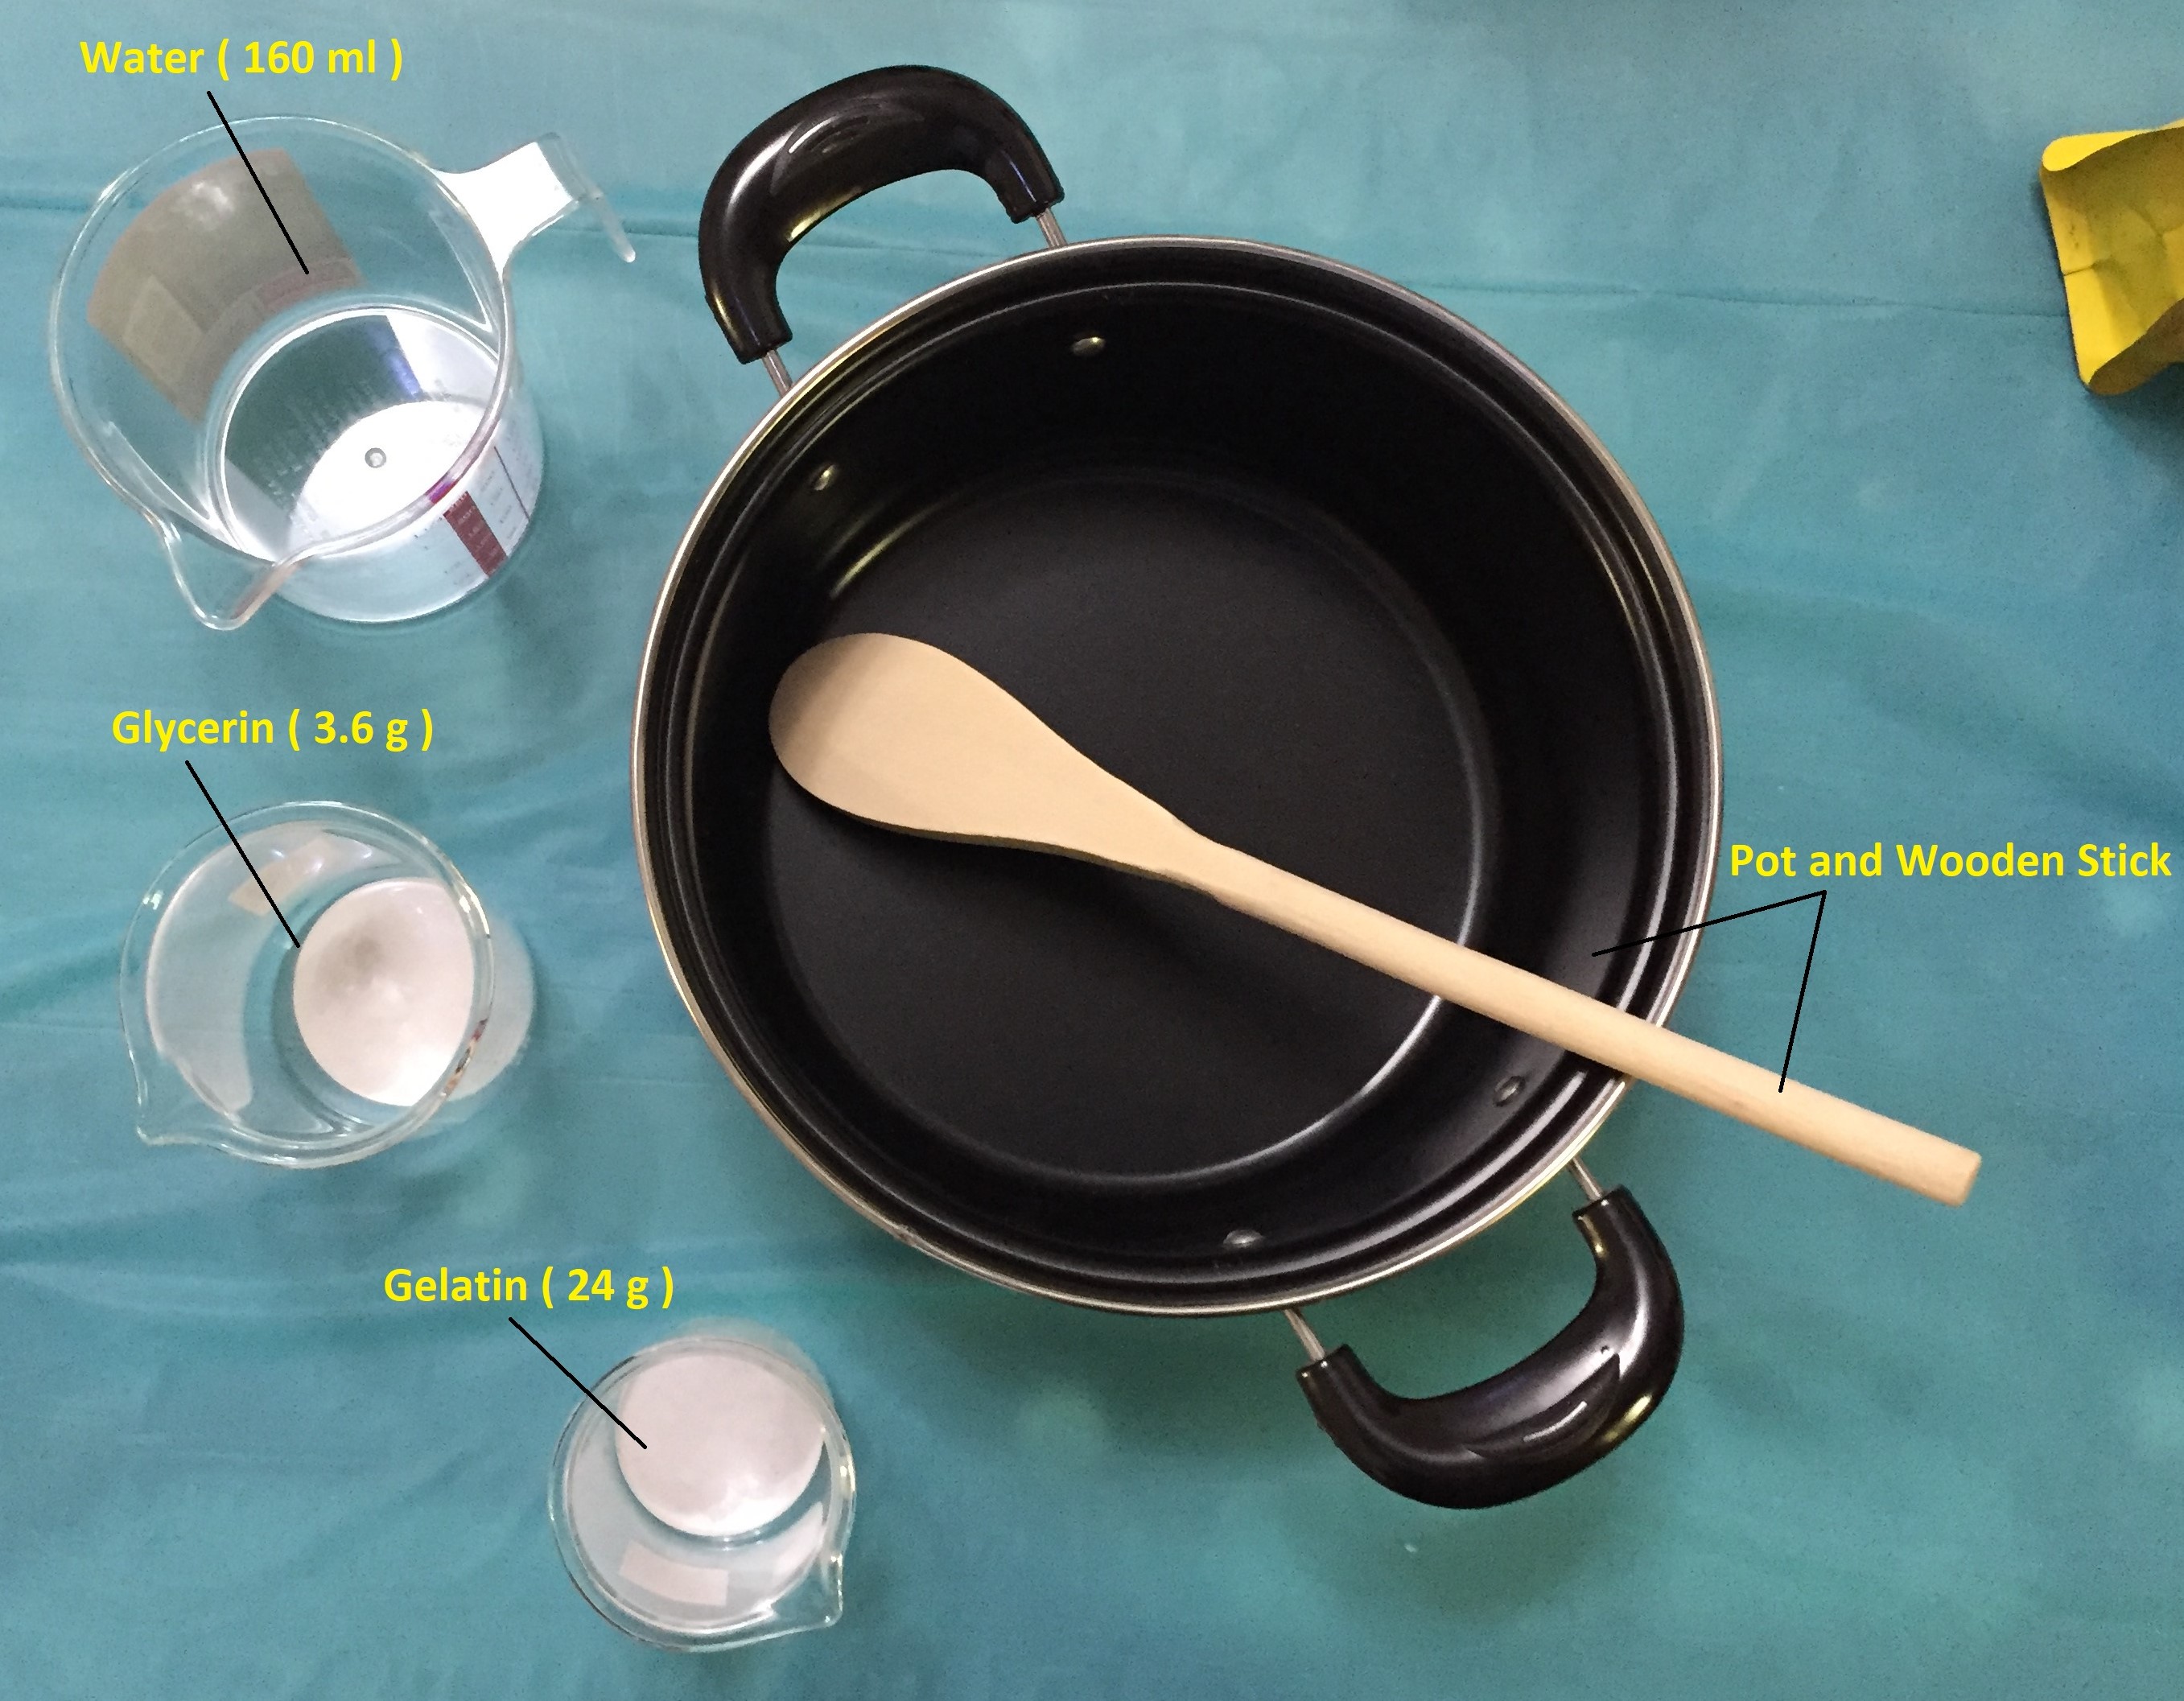
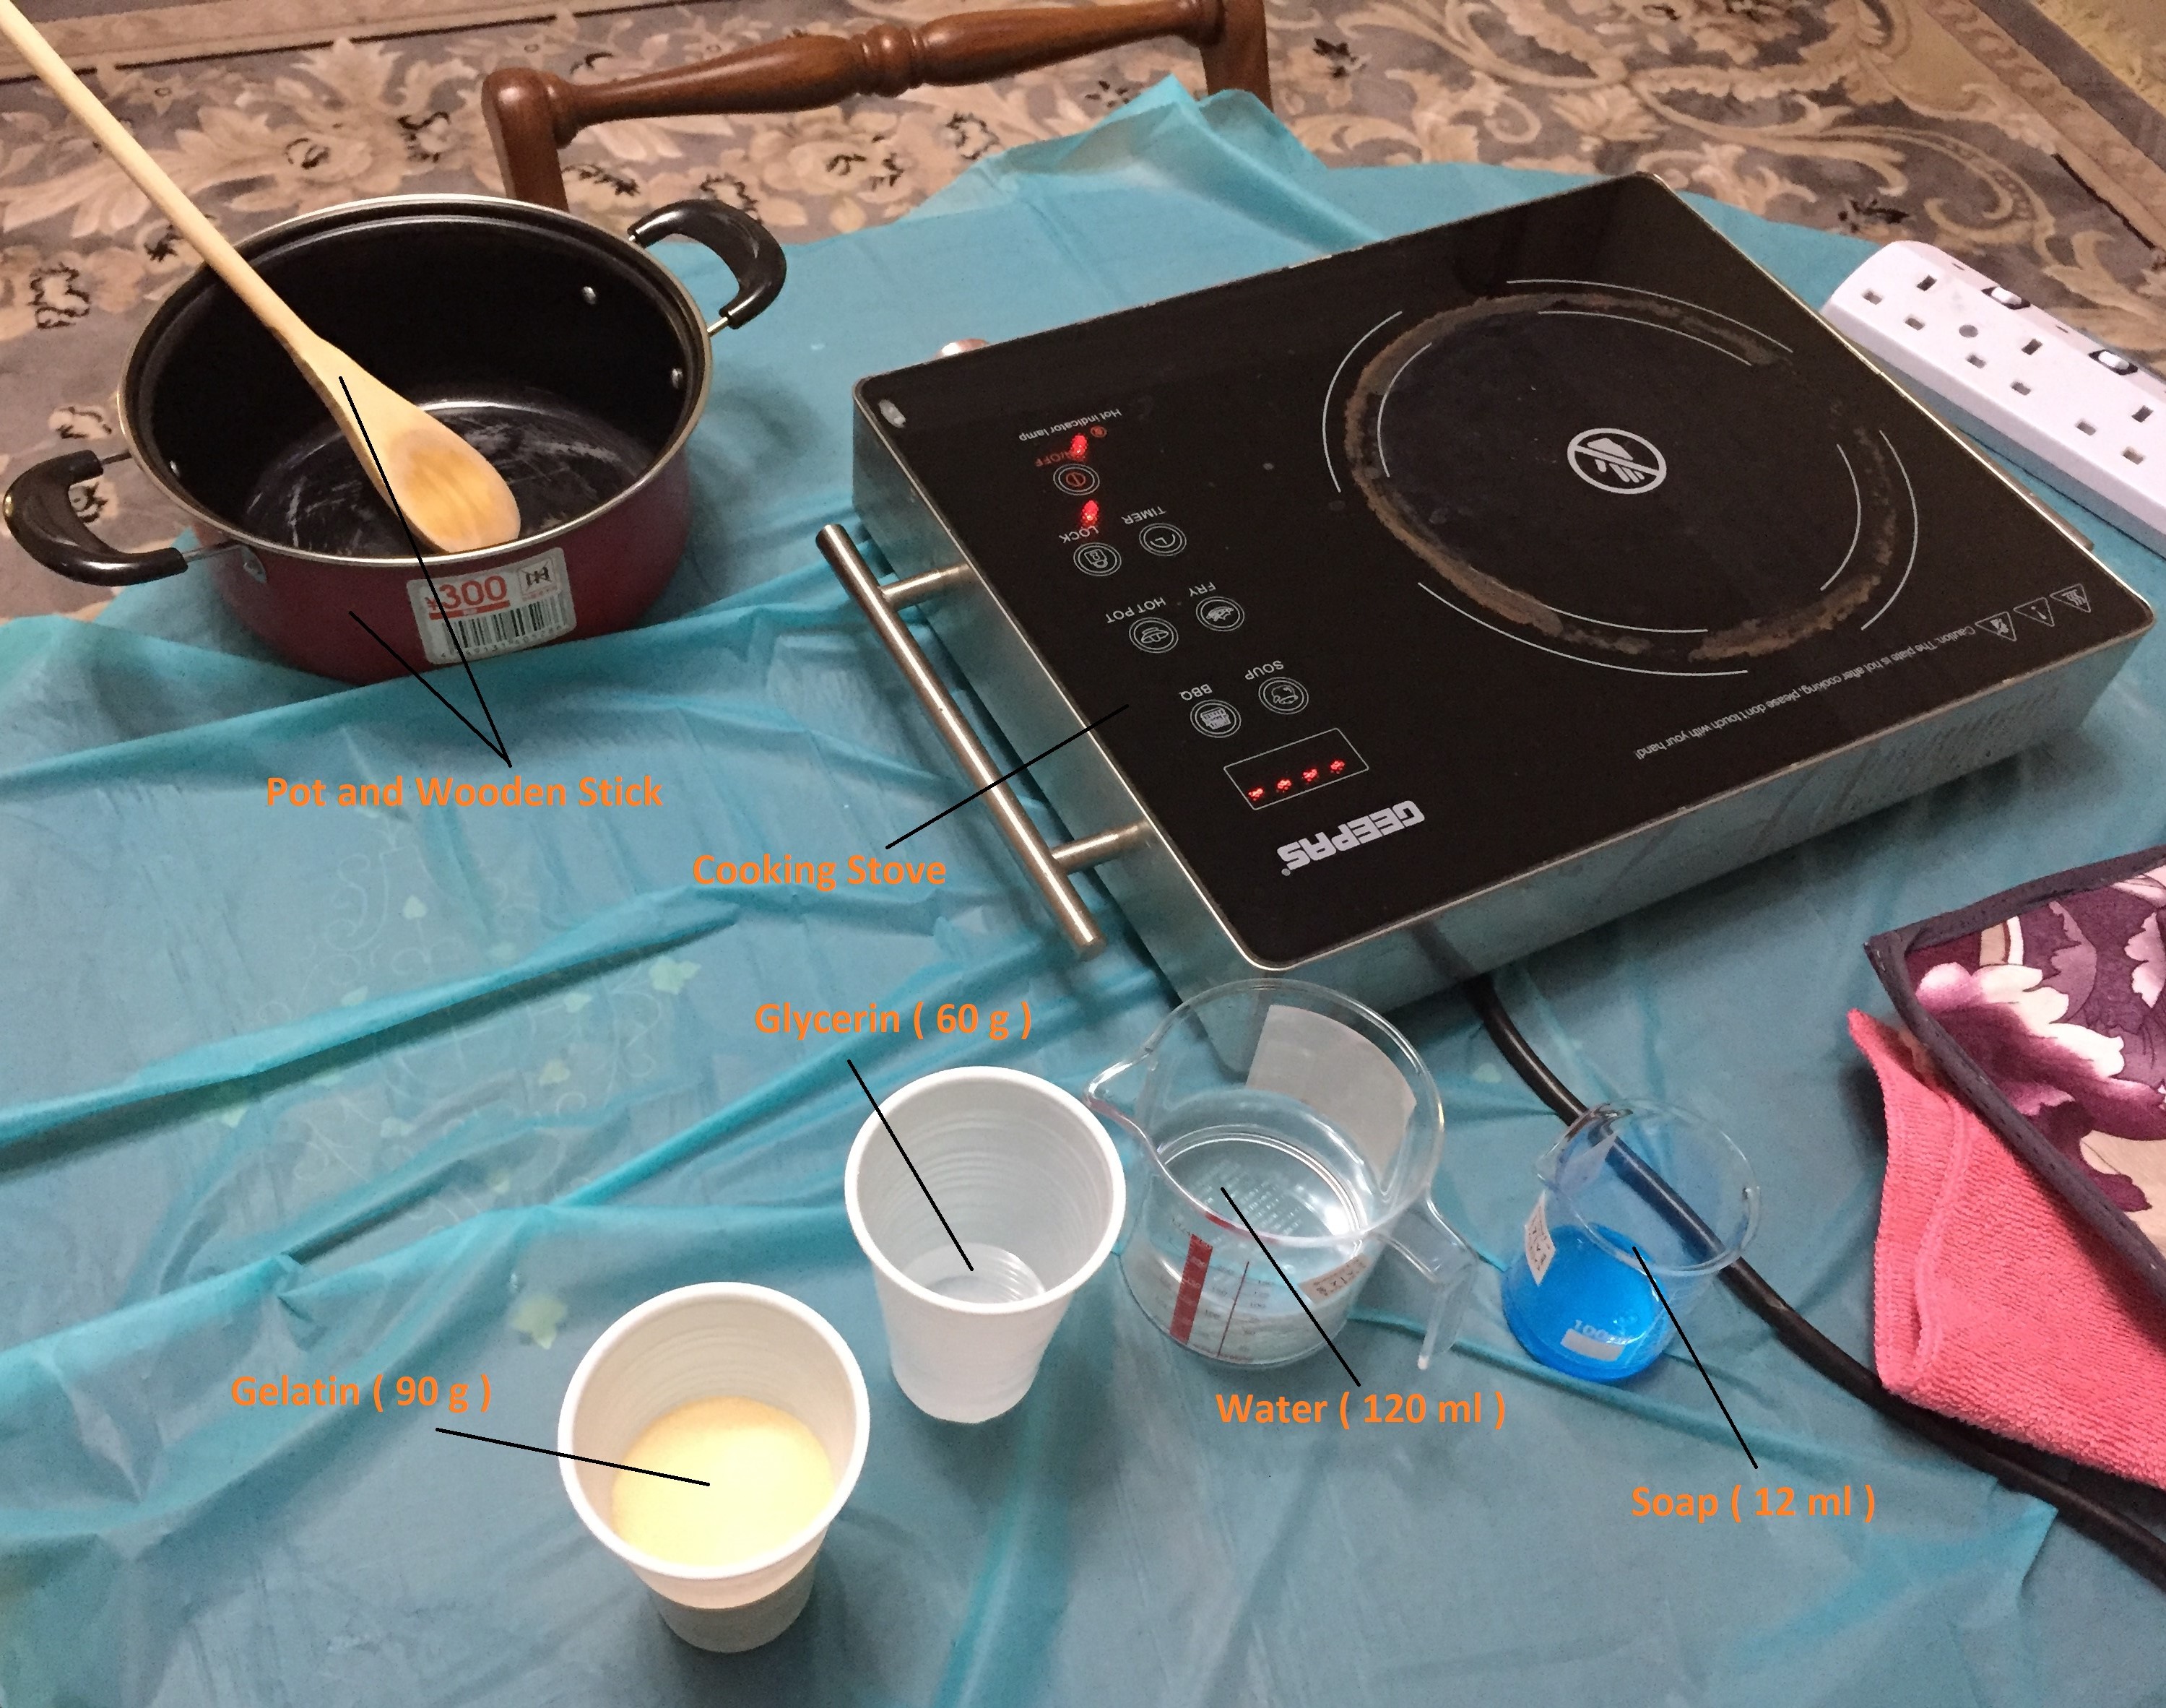
Cooking the Gelatin Bioplastic
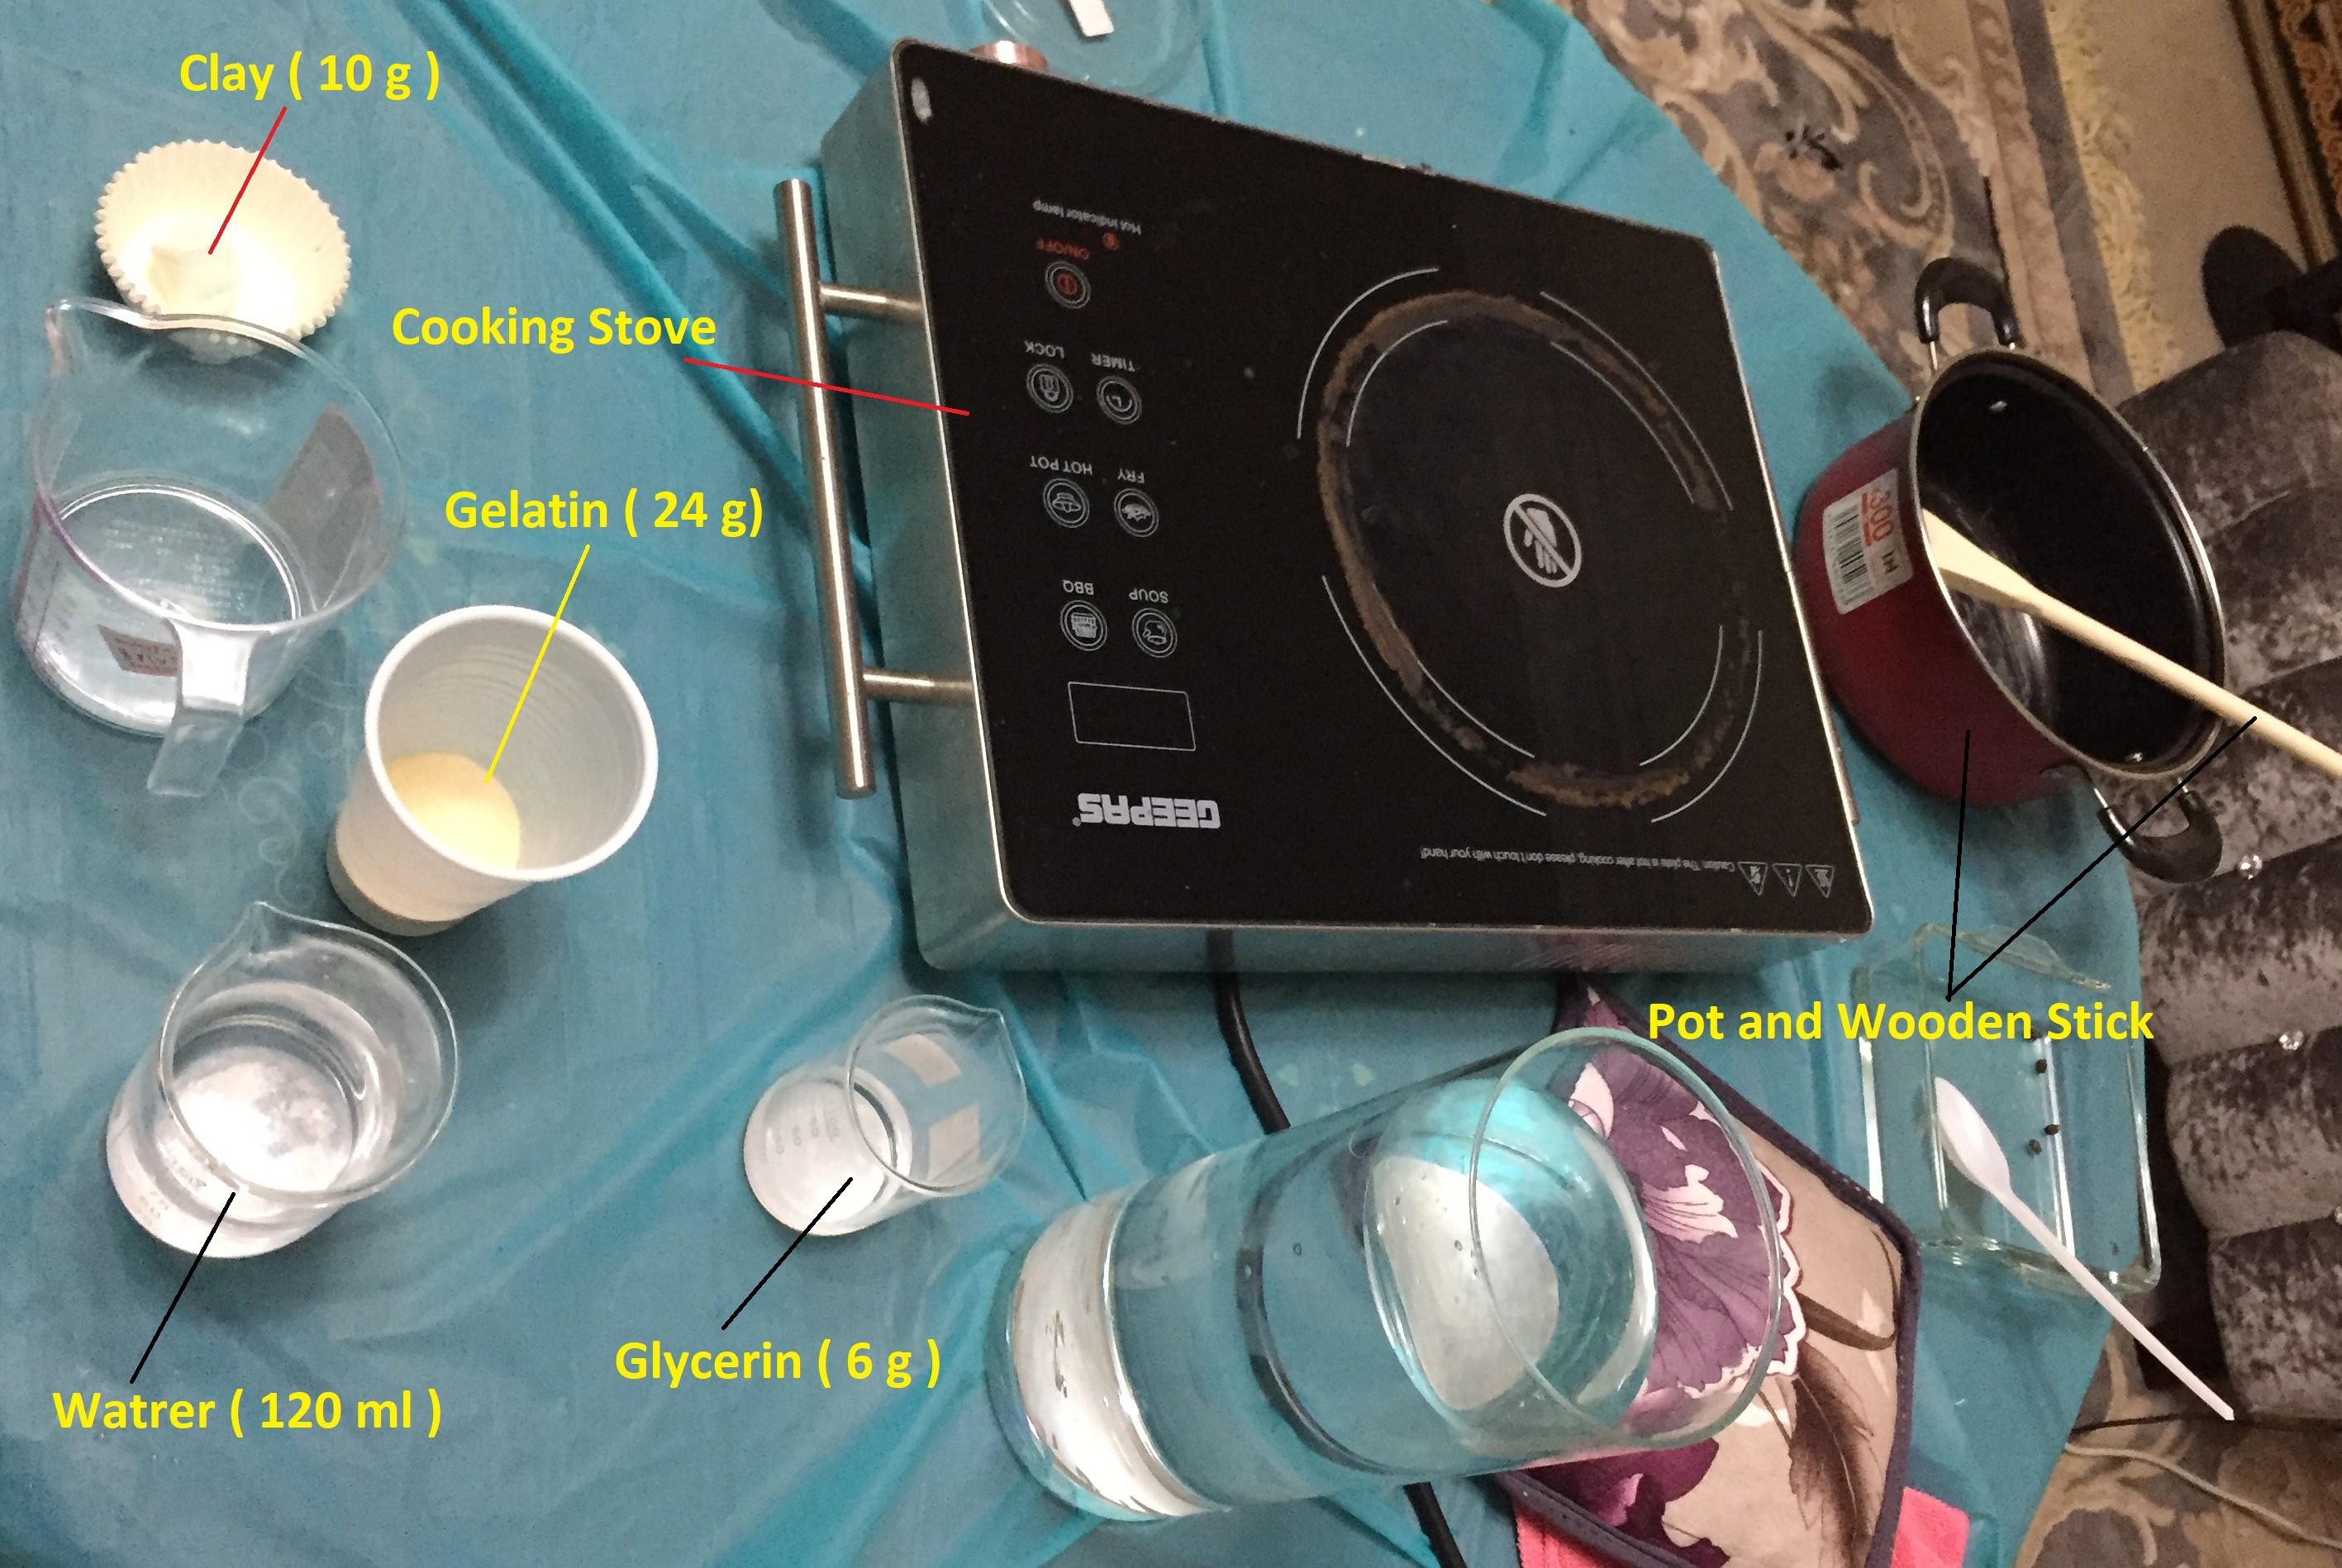
| Materials used with Quantity |
|---|
 |
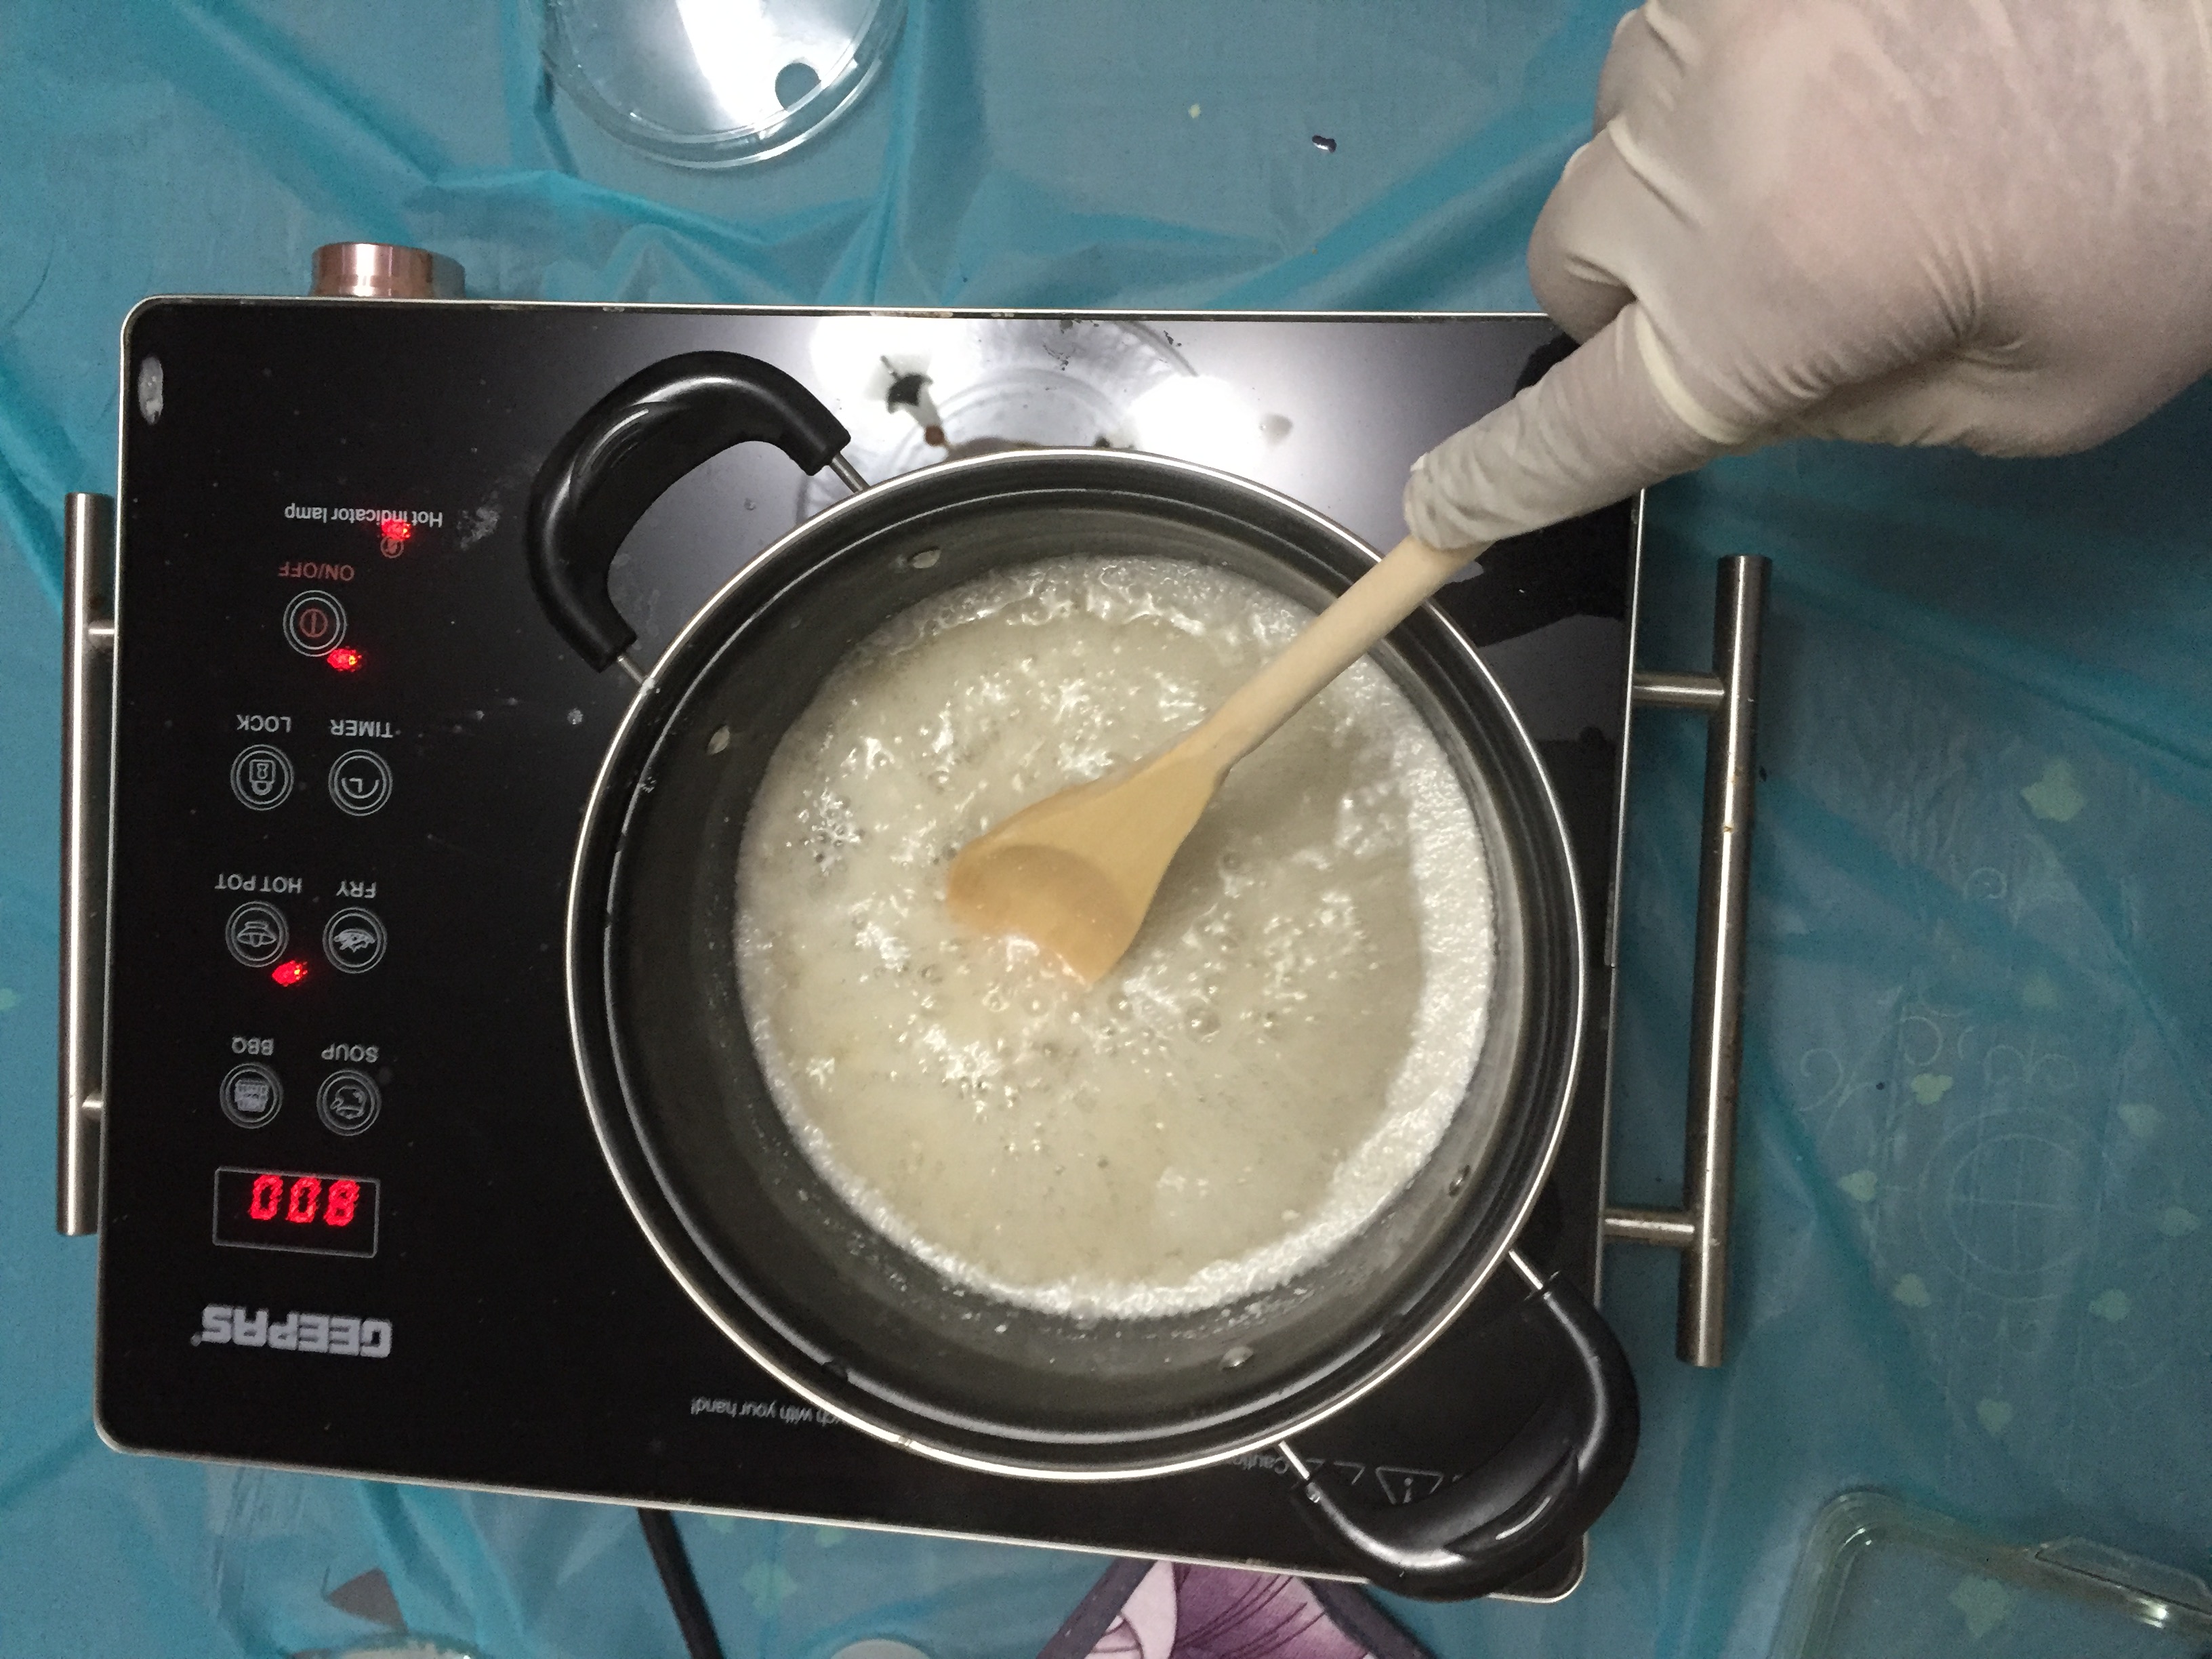
| STEP - 1 | STEP - 2 | STEP - 3 |
|---|---|---|
 |
 |
 |
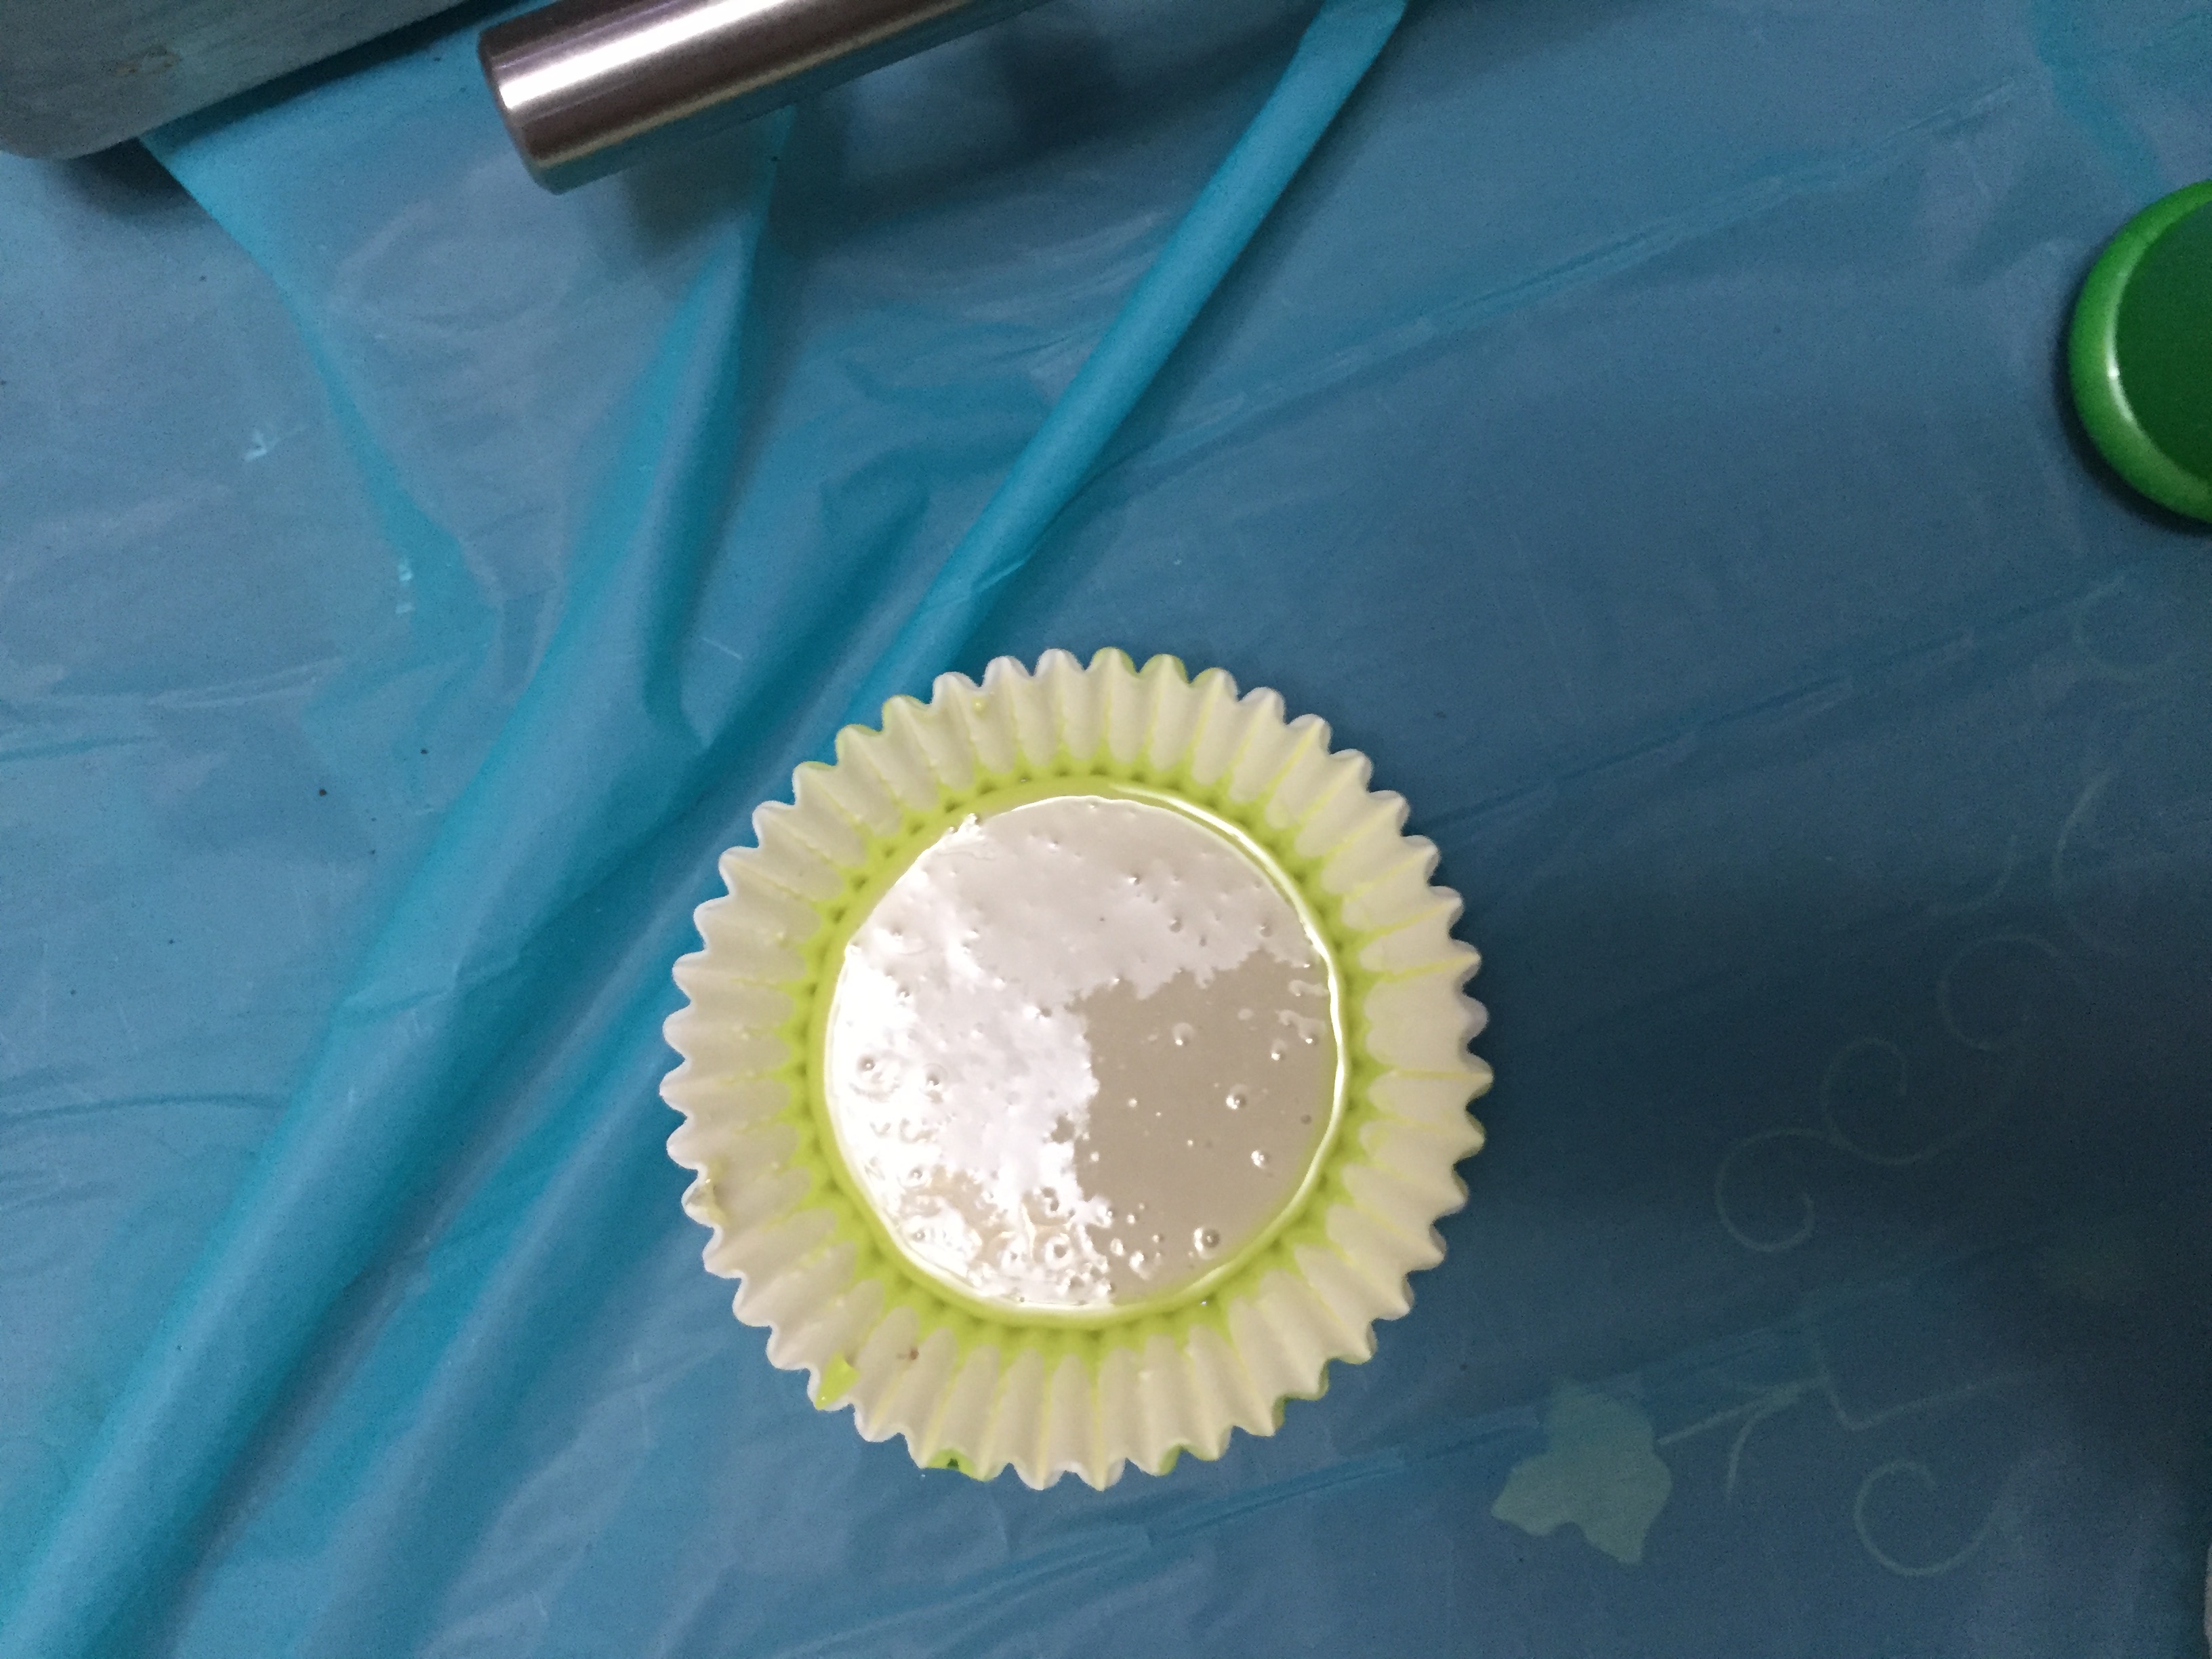
| STEP - 4 | STEP - 5 | STEP - 6 |
|
 |
|
Cooking the Gelatin Foam
| Materials used with Quantity |
|---|
 |
| STEP - 1 | STEP - 2 | STEP - 3 |
|---|---|---|
|
 |
 |
| STEP - 4 | STEP - 5 | STEP - 6 |
 |
|
|
Cooking the Gelatin and Clay
| Materials used with Quantity |
|---|
 |
| STEP - 1 | STEP - 2 | STEP - 3 |
|---|---|---|
 |
|
|
| STEP - 4 | STEP - 5 | STEP - 6 |
 |
 |
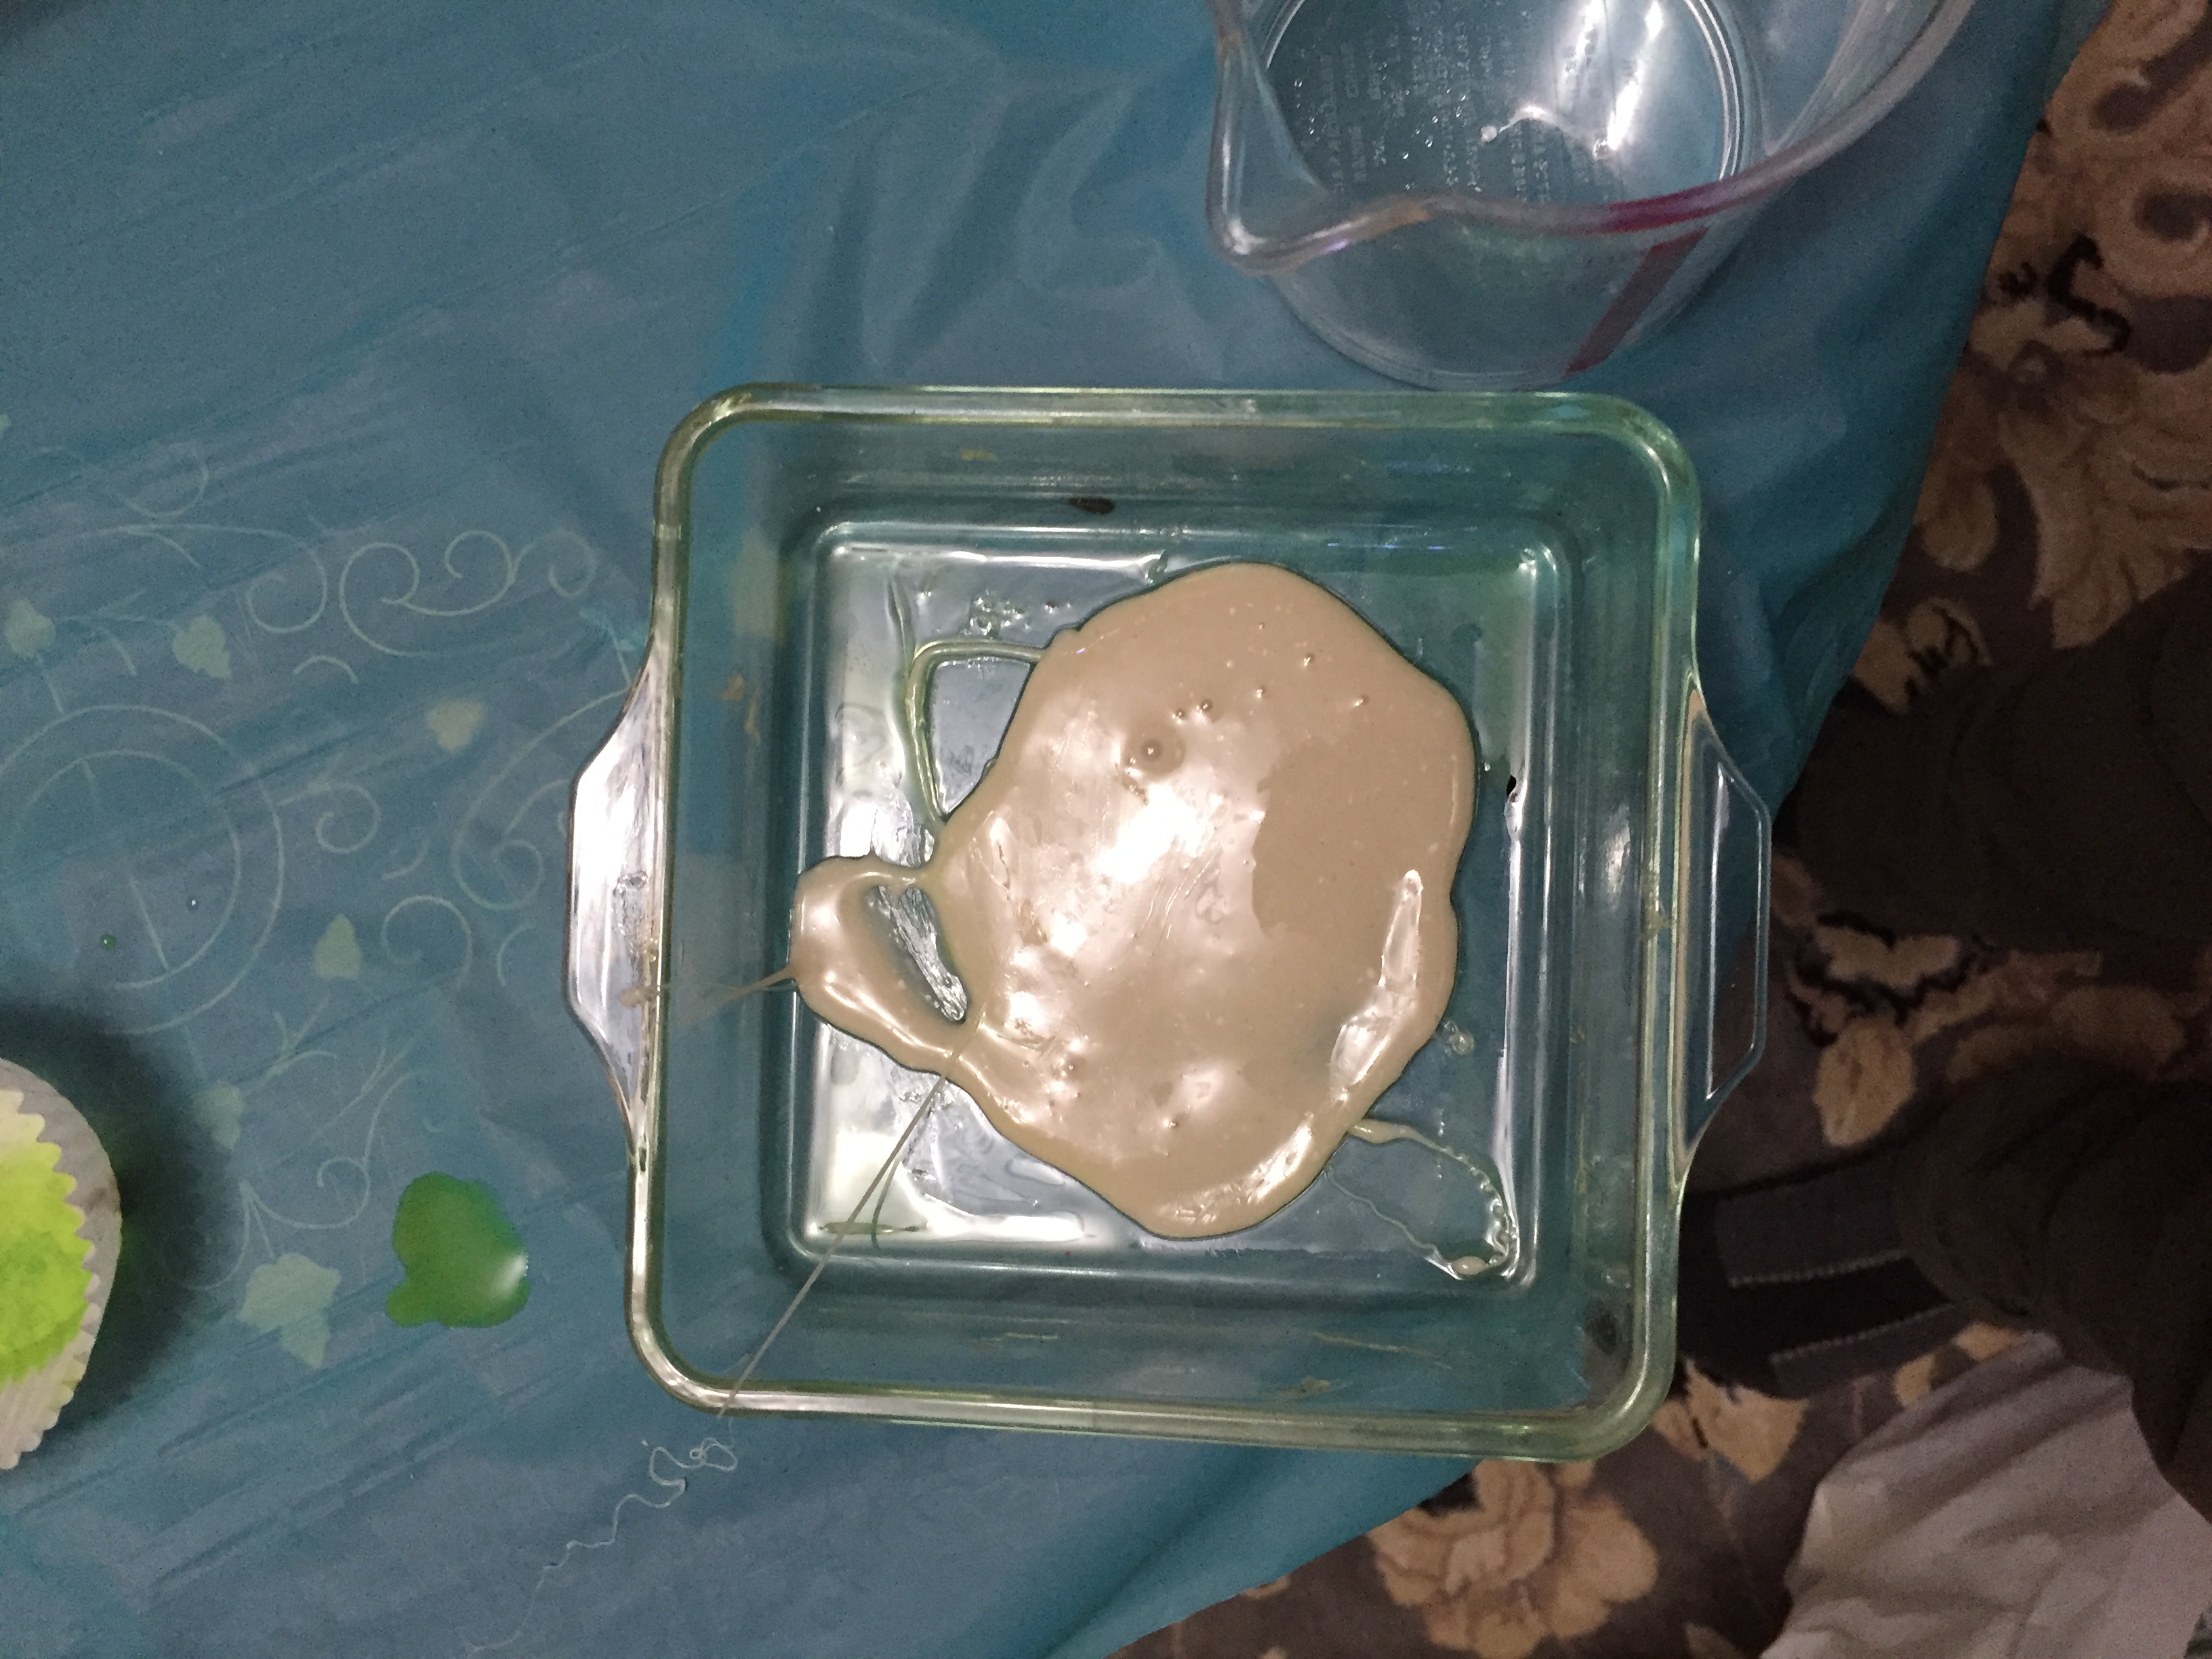 |
Cooking the Corn Starch Bioplastic
| Materials used with Quantity |
|---|
 |
| STEP - 1 | STEP - 2 | STEP - 3 |
|---|---|---|
 |
 |
 |
| STEP - 4 | STEP - 5 | STEP - 6 |
 |
 |
 |
| Recycling process of Bioplastics | |
|---|---|
|
|
| Gelatin Cooking Process |
|---|
 |
| Tools used in Biofabricating |
|---|
 |
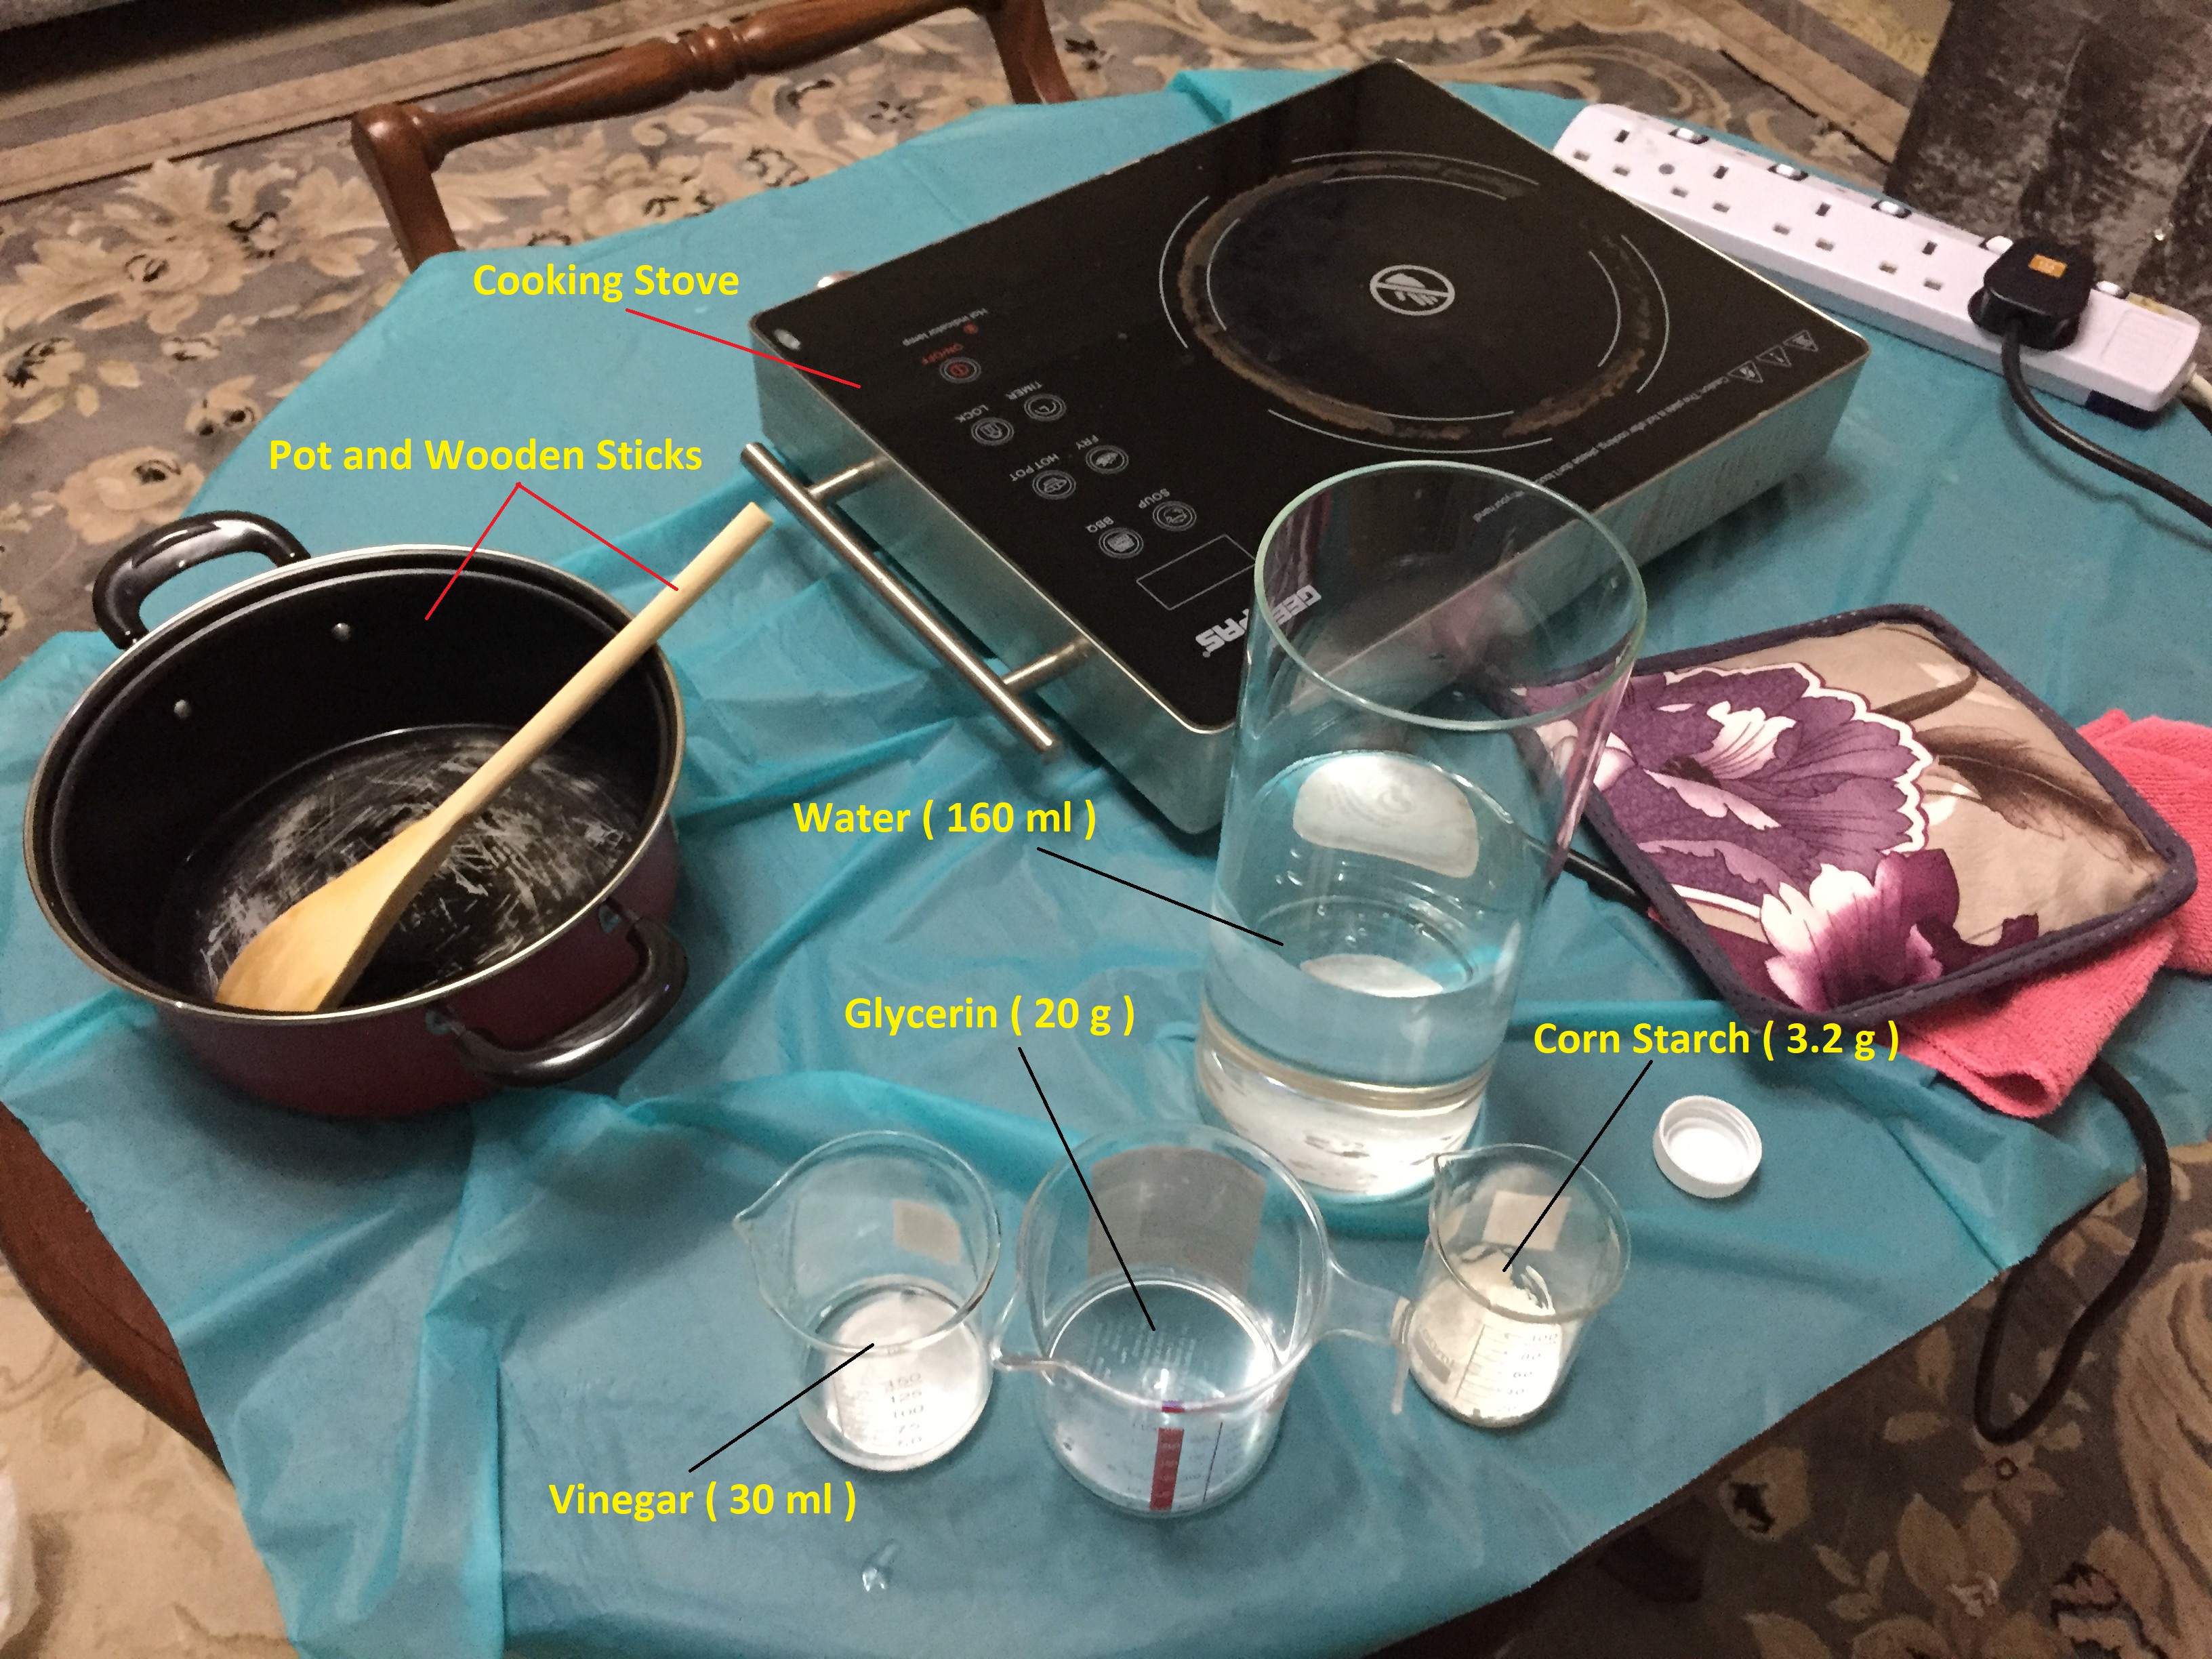
Step - 1 - Gather the necessary materials - To make this type of bioplastic, you will need cornstarch (potato starch also works as an alternative), distilled water, glycerol, white vinegar, a stove, a saucepan, a silicone spatula, and food coloring (if desired). These items should be readily available at the grocery store or online. Glycerol is also called glycerine, so try searching for that if you’re having trouble finding glycerol. The following amounts of each ingredient are needed to make the bioplastic:
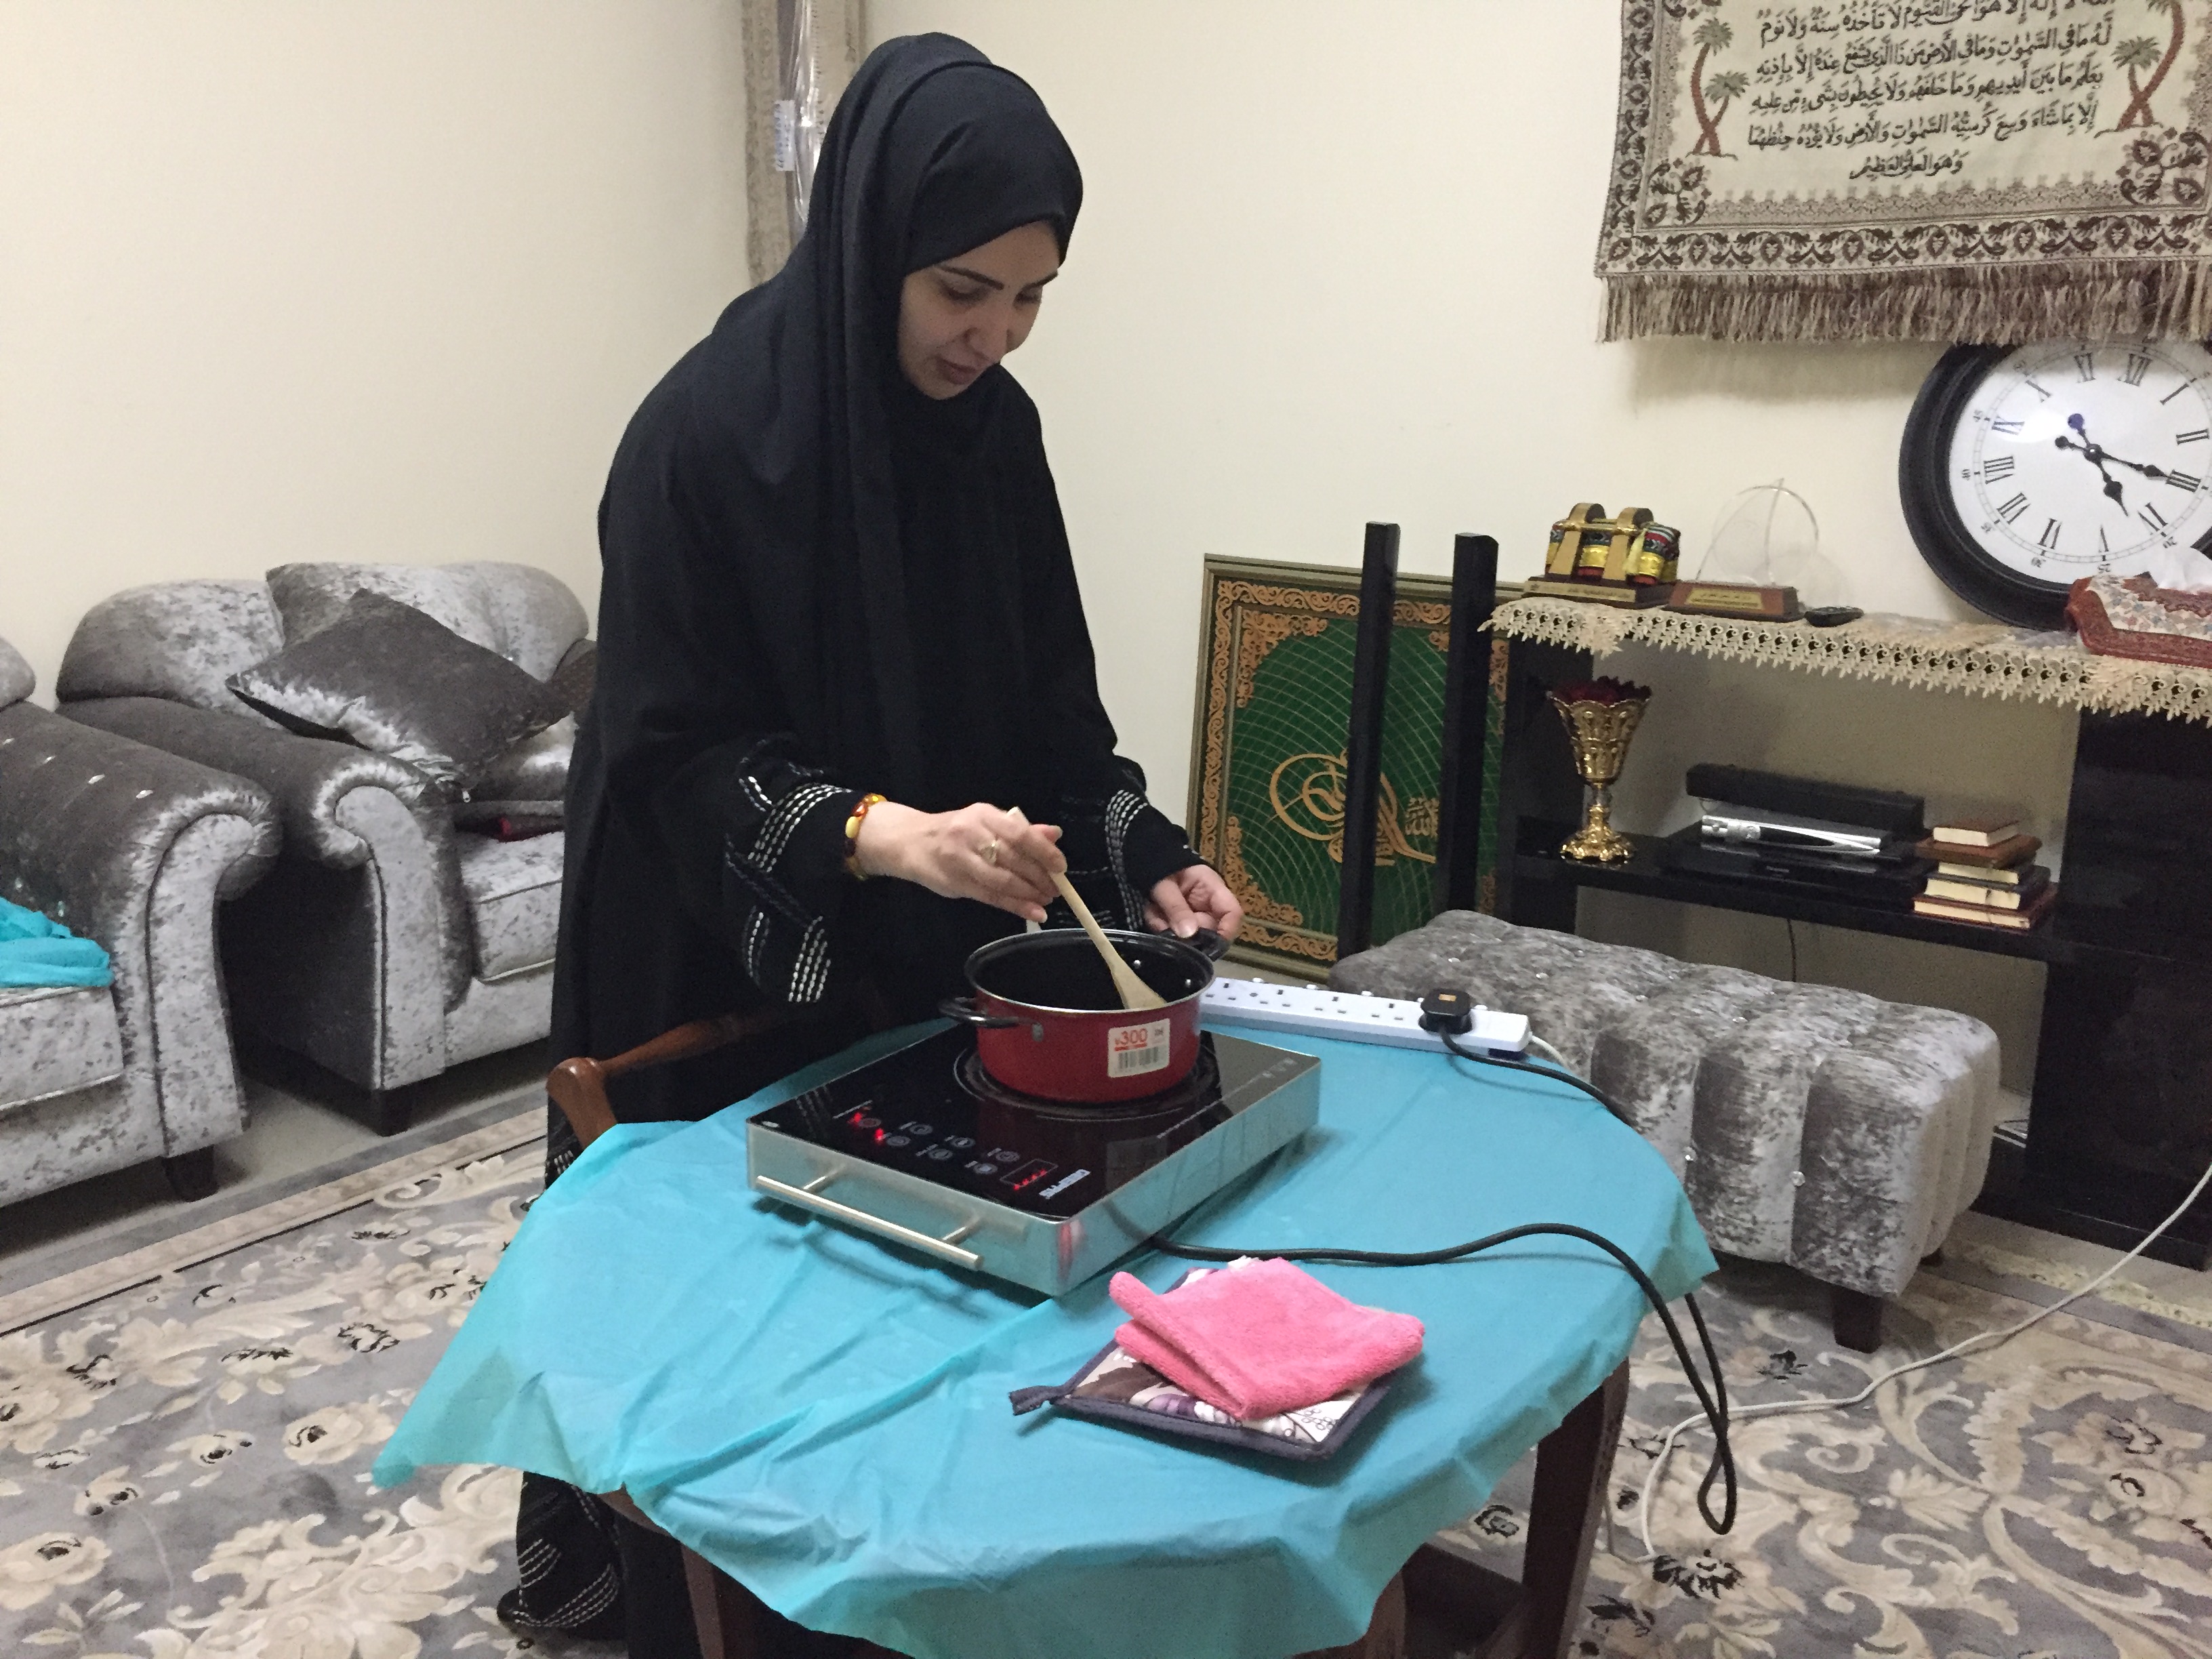
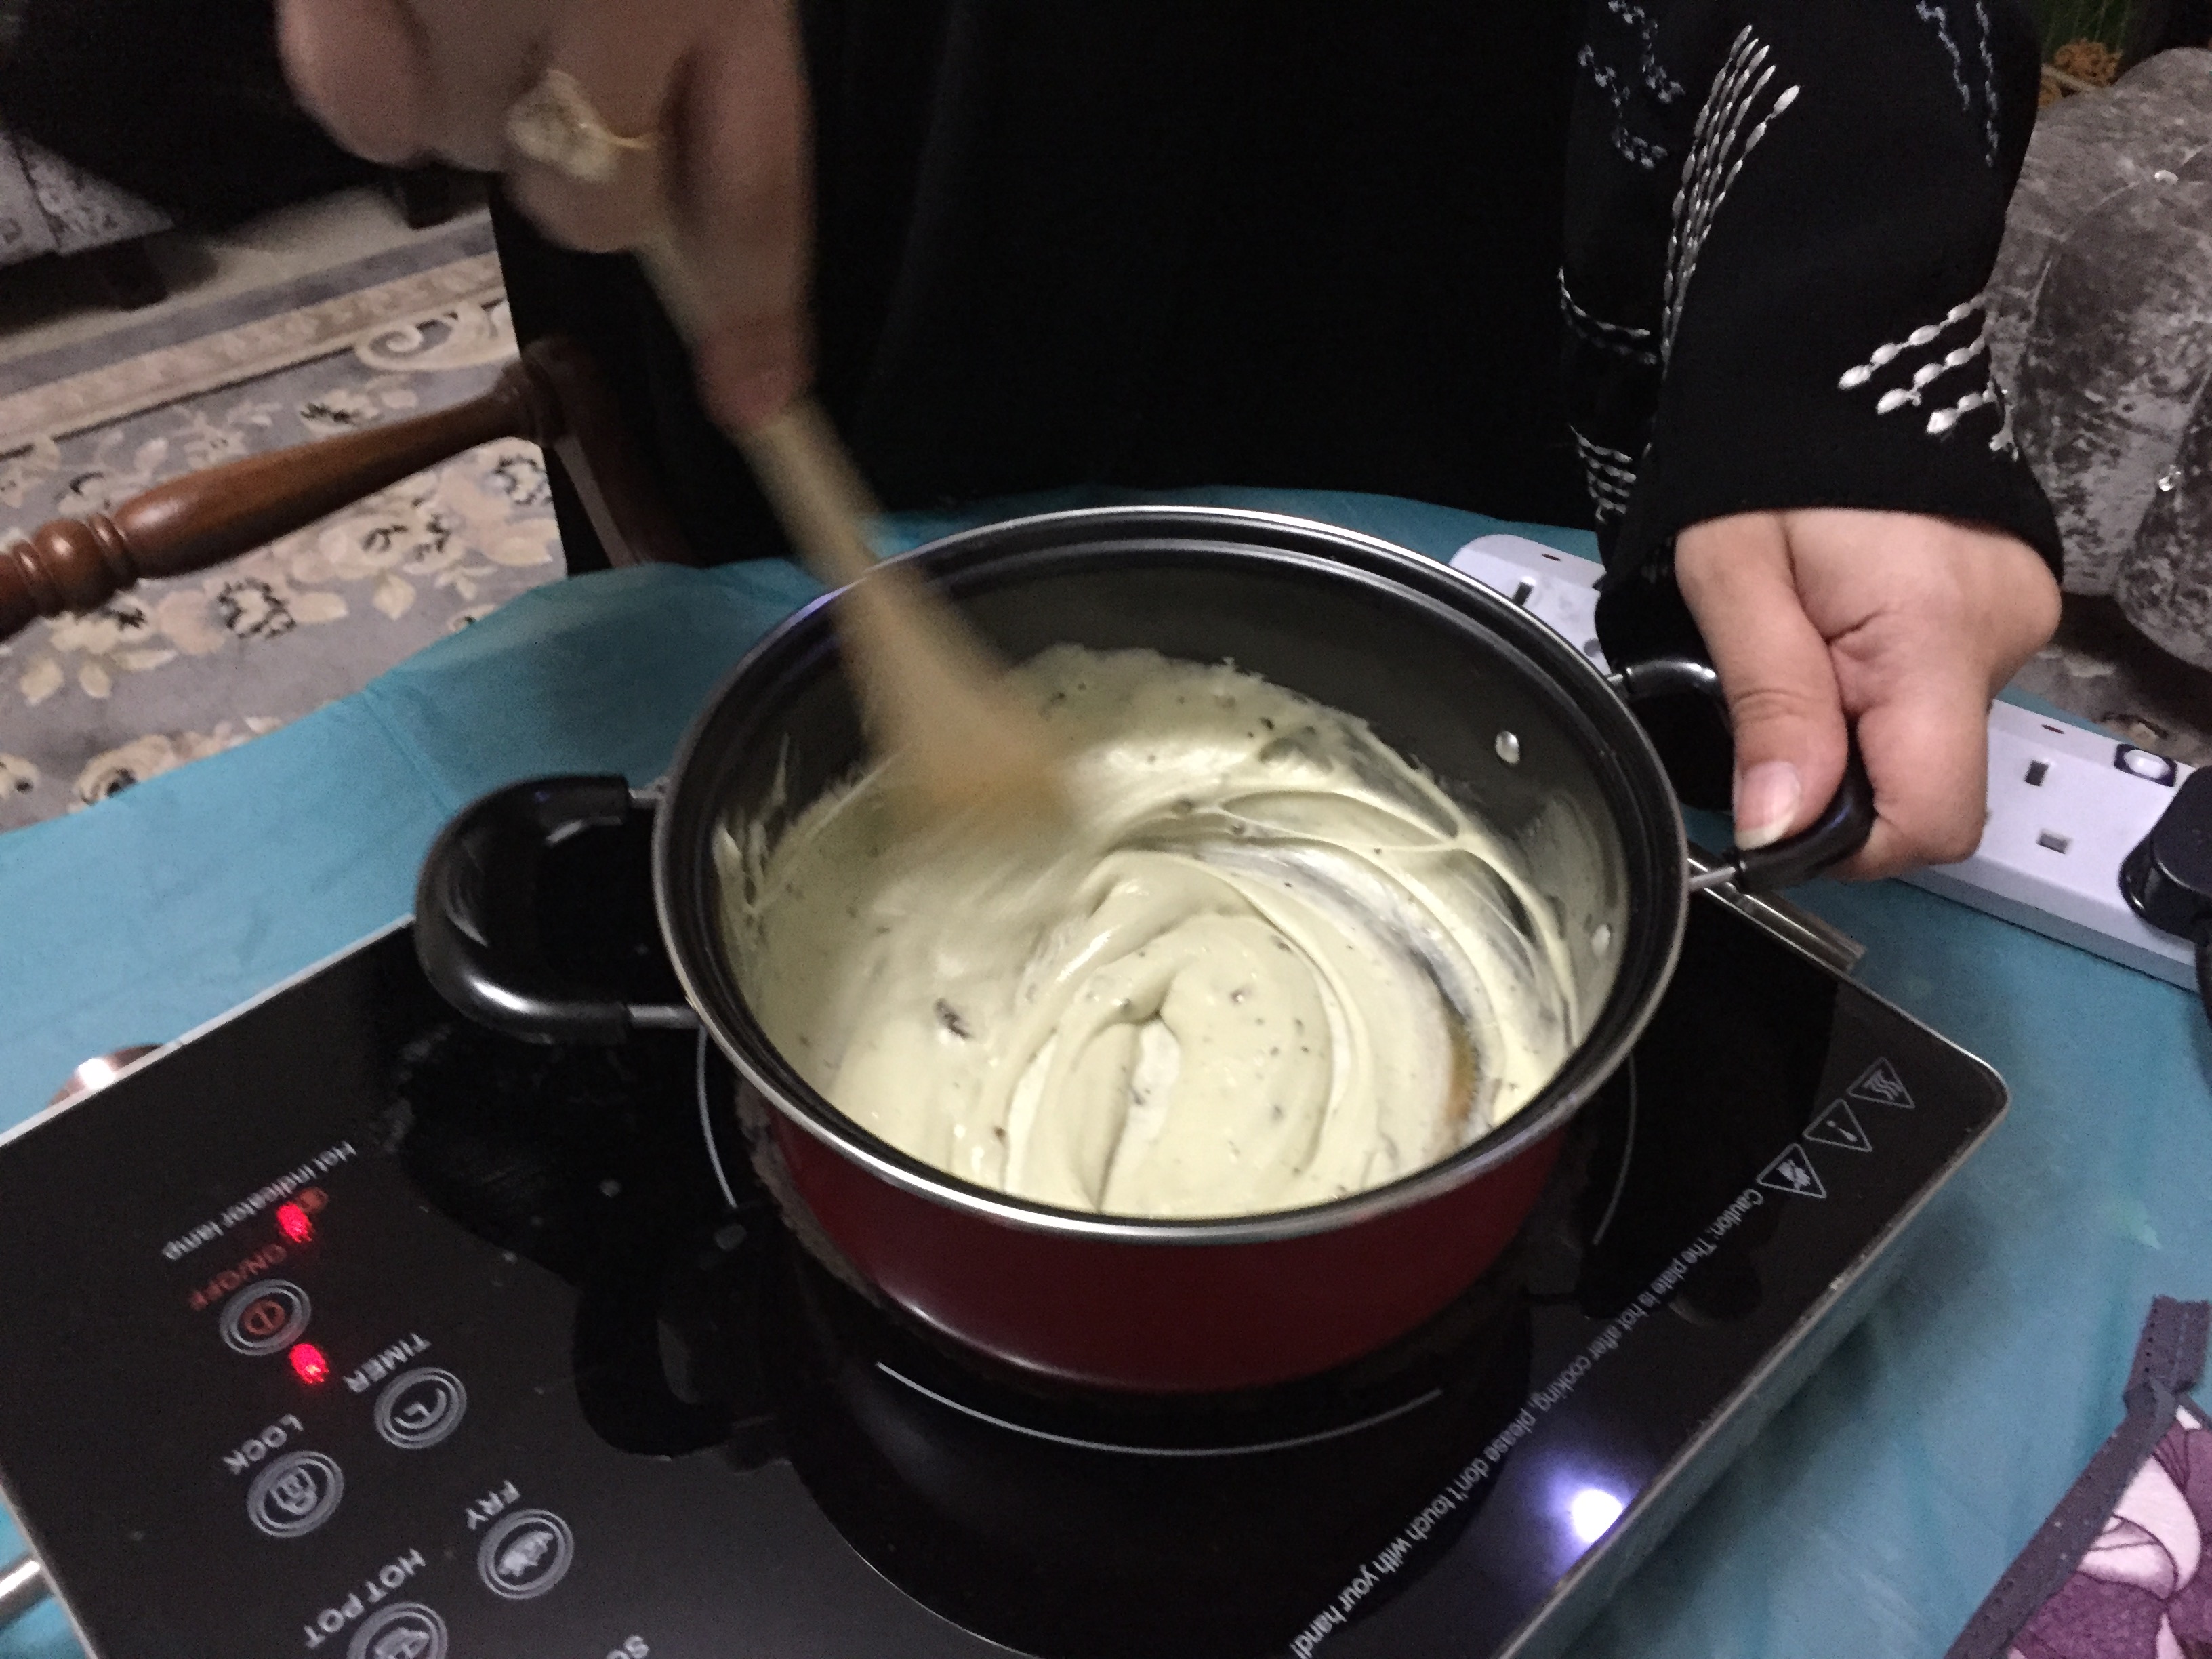
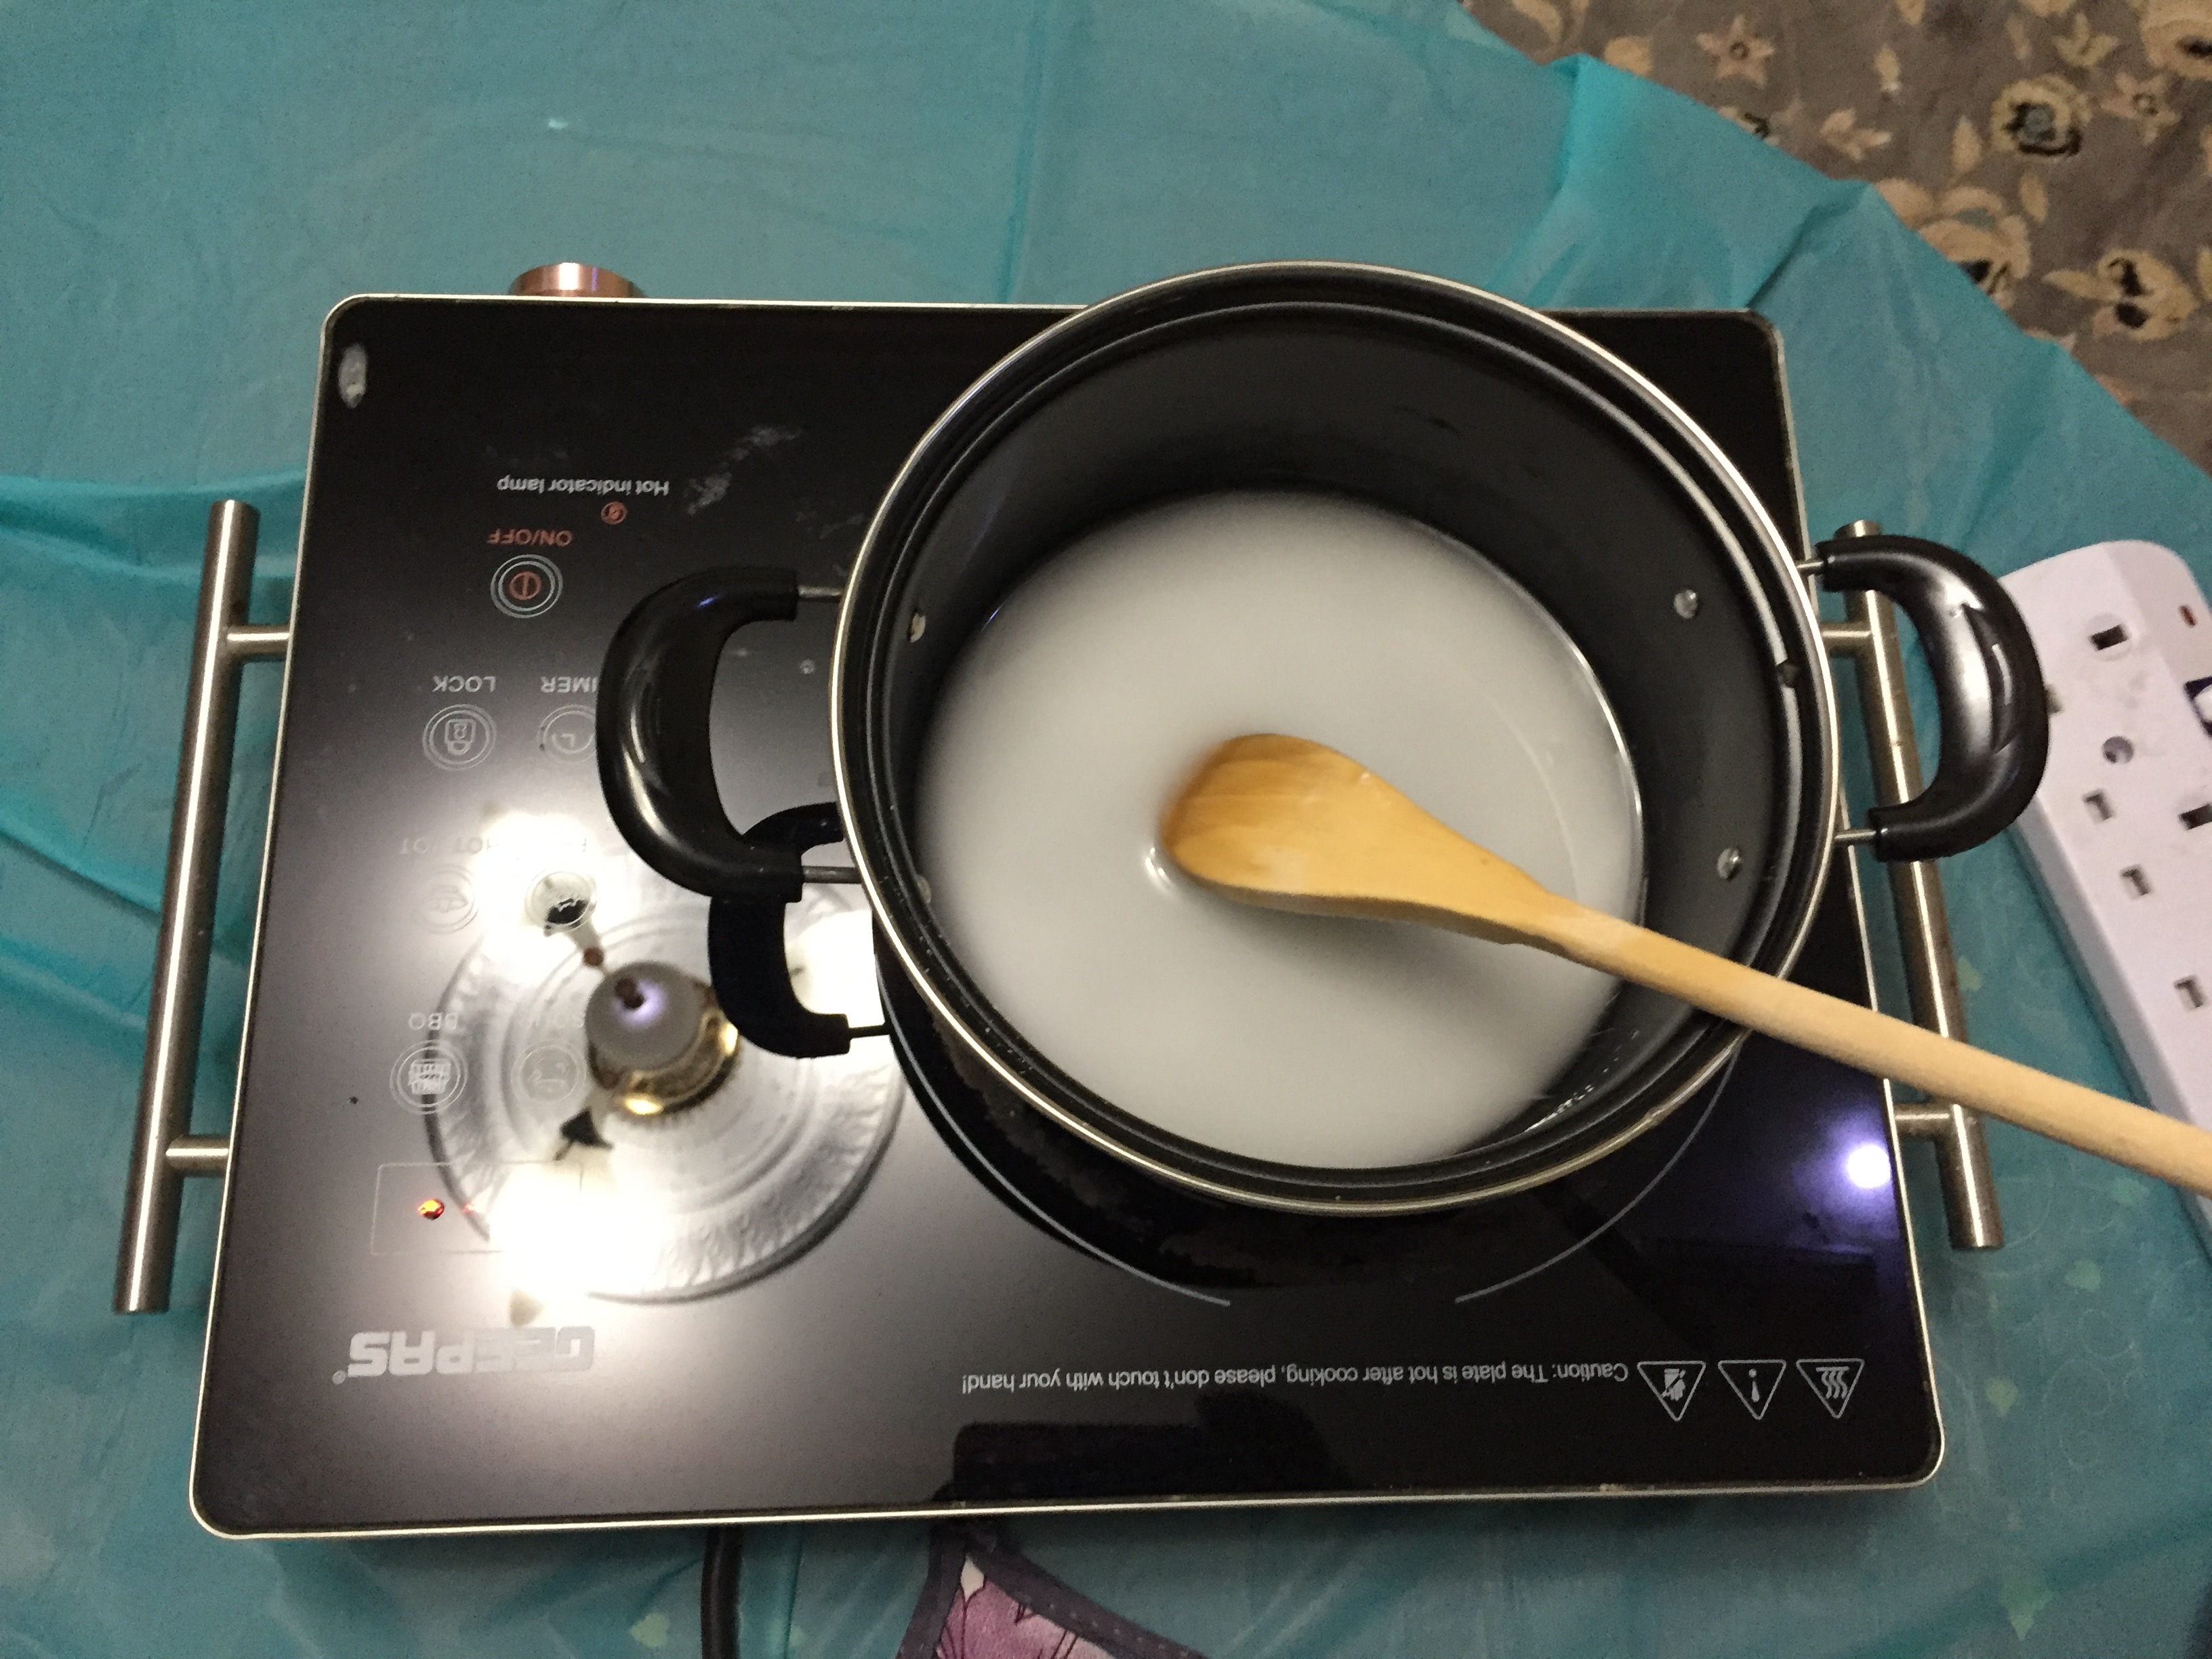
Step - 2 - Combine all of the ingredients and stir together - Add all of the ingredients to the saucepan and stir to combine with the spatula. Stir until you get rid of most of the lumps in the mixture. At this stage, the mixture will be a milky white color and quite watery. If you add the wrong amounts of ingredients, just dispose of the mixture and start again.
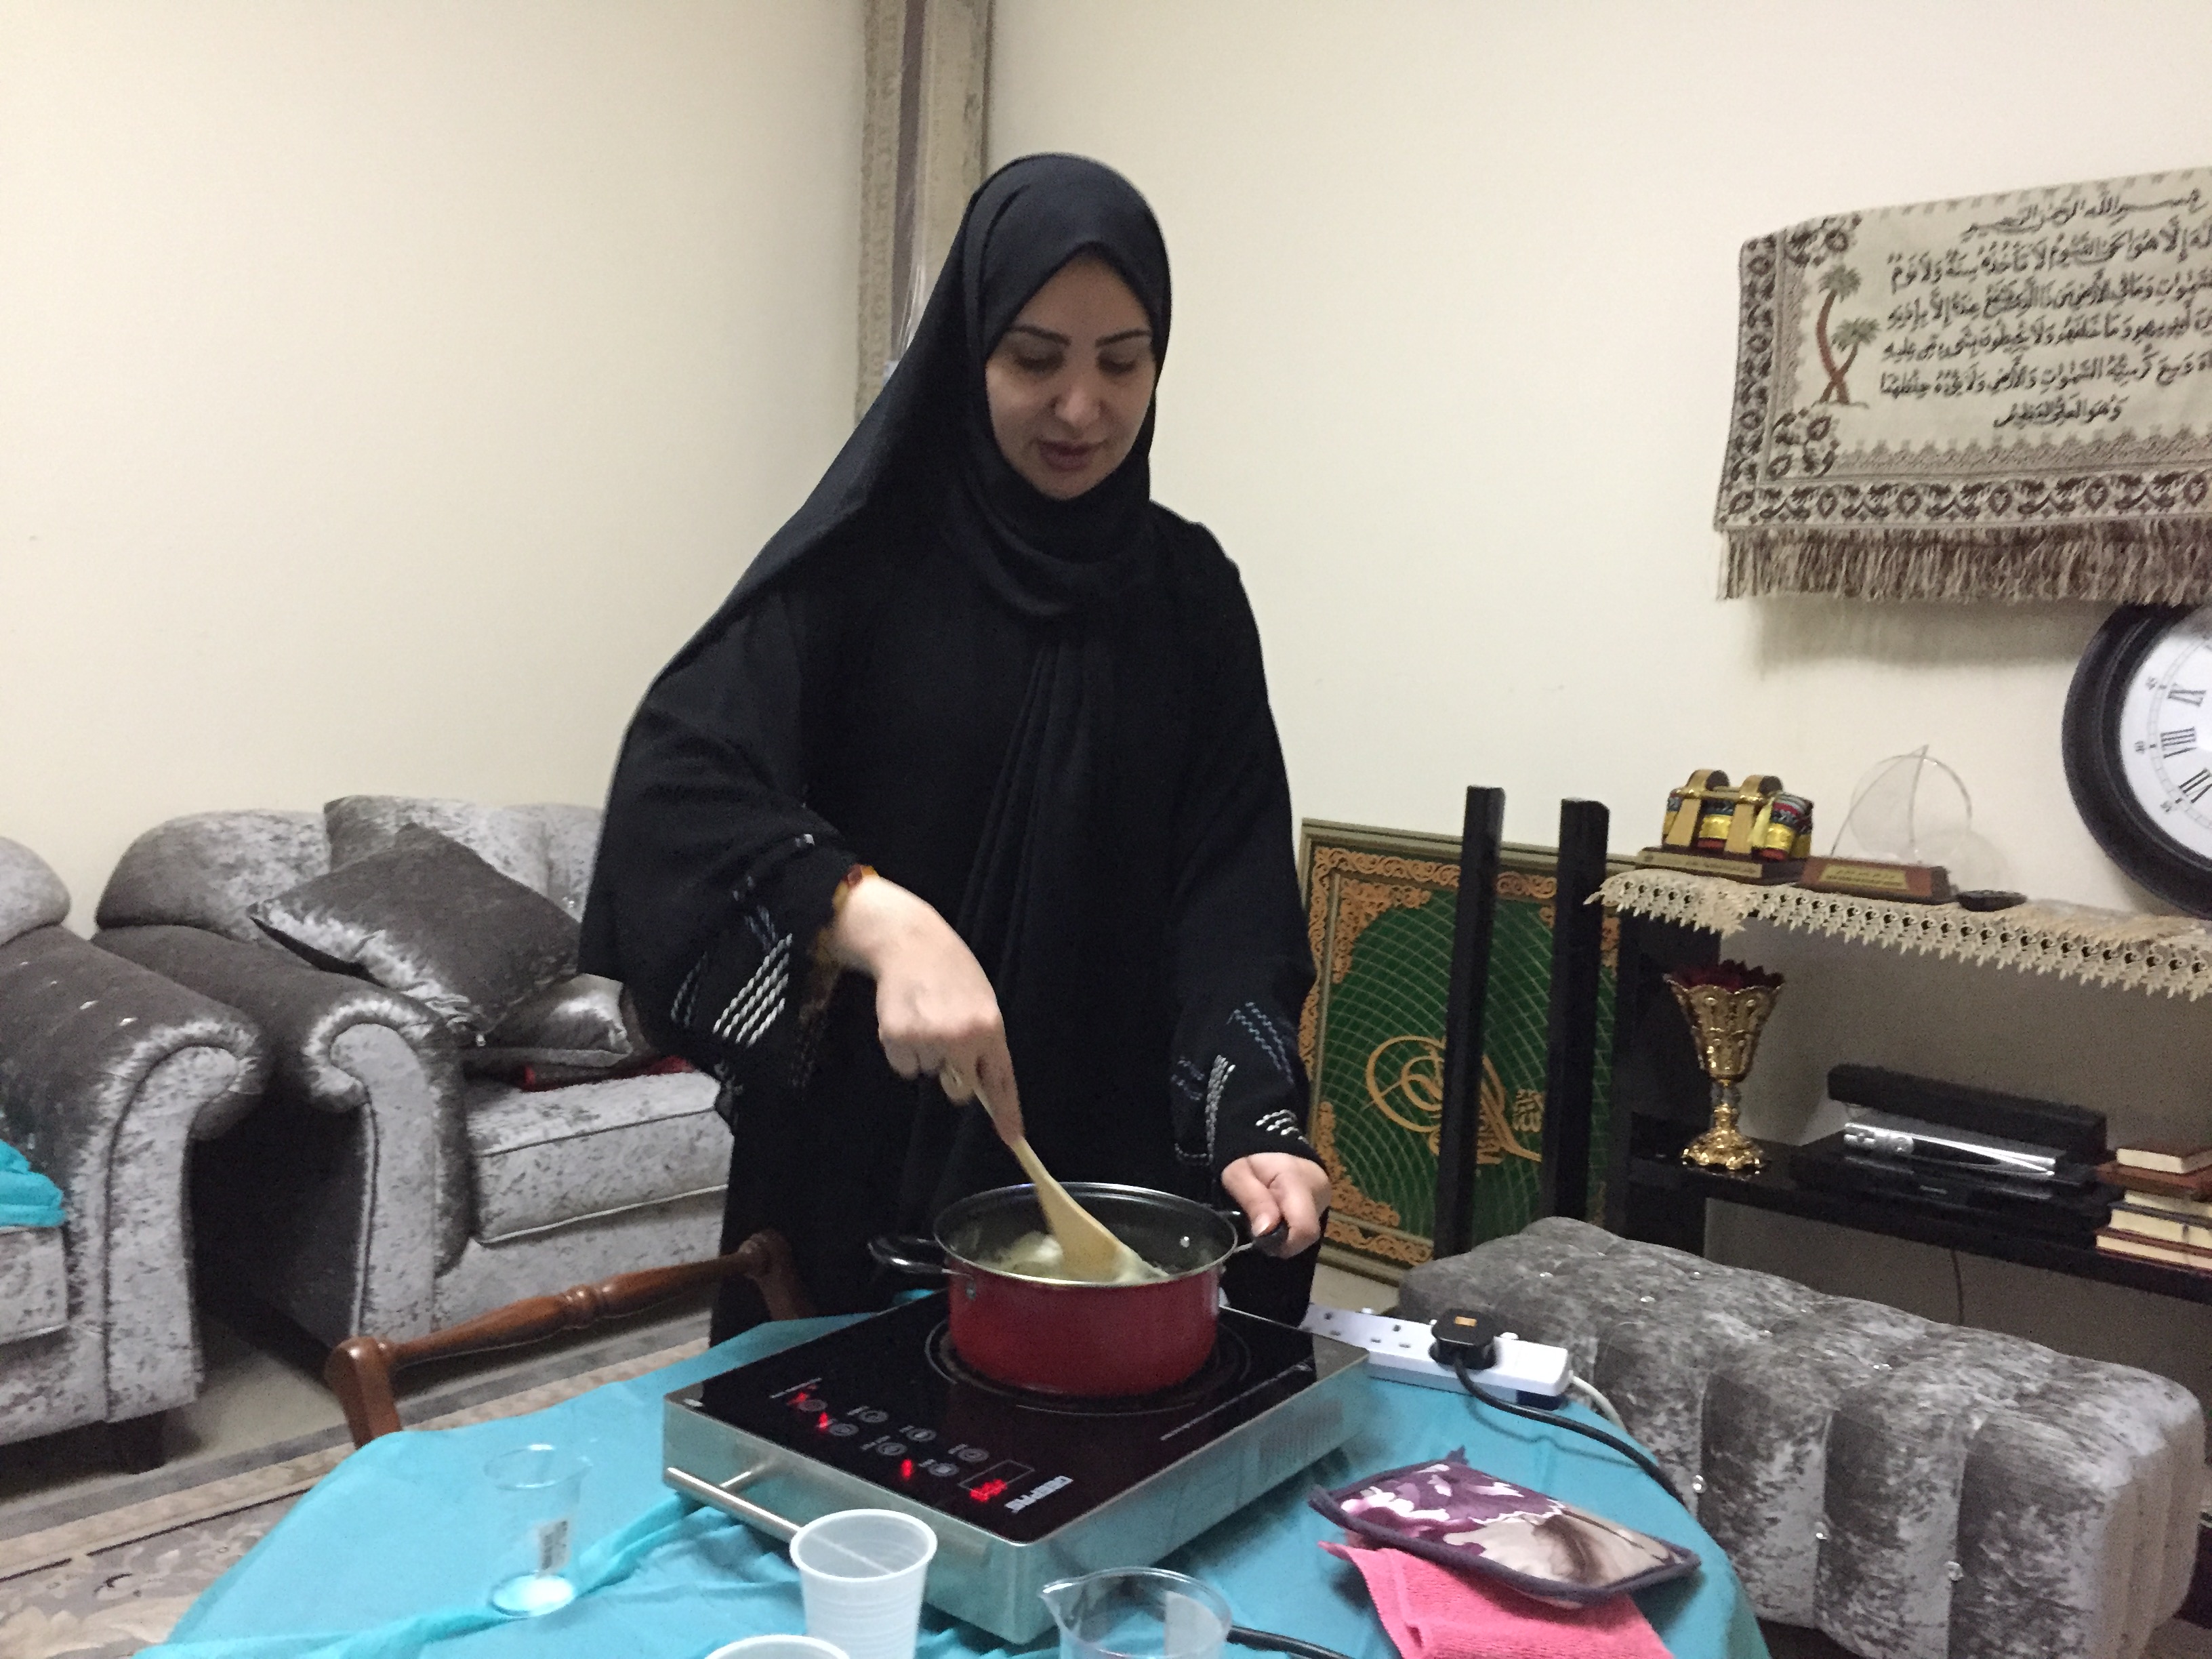
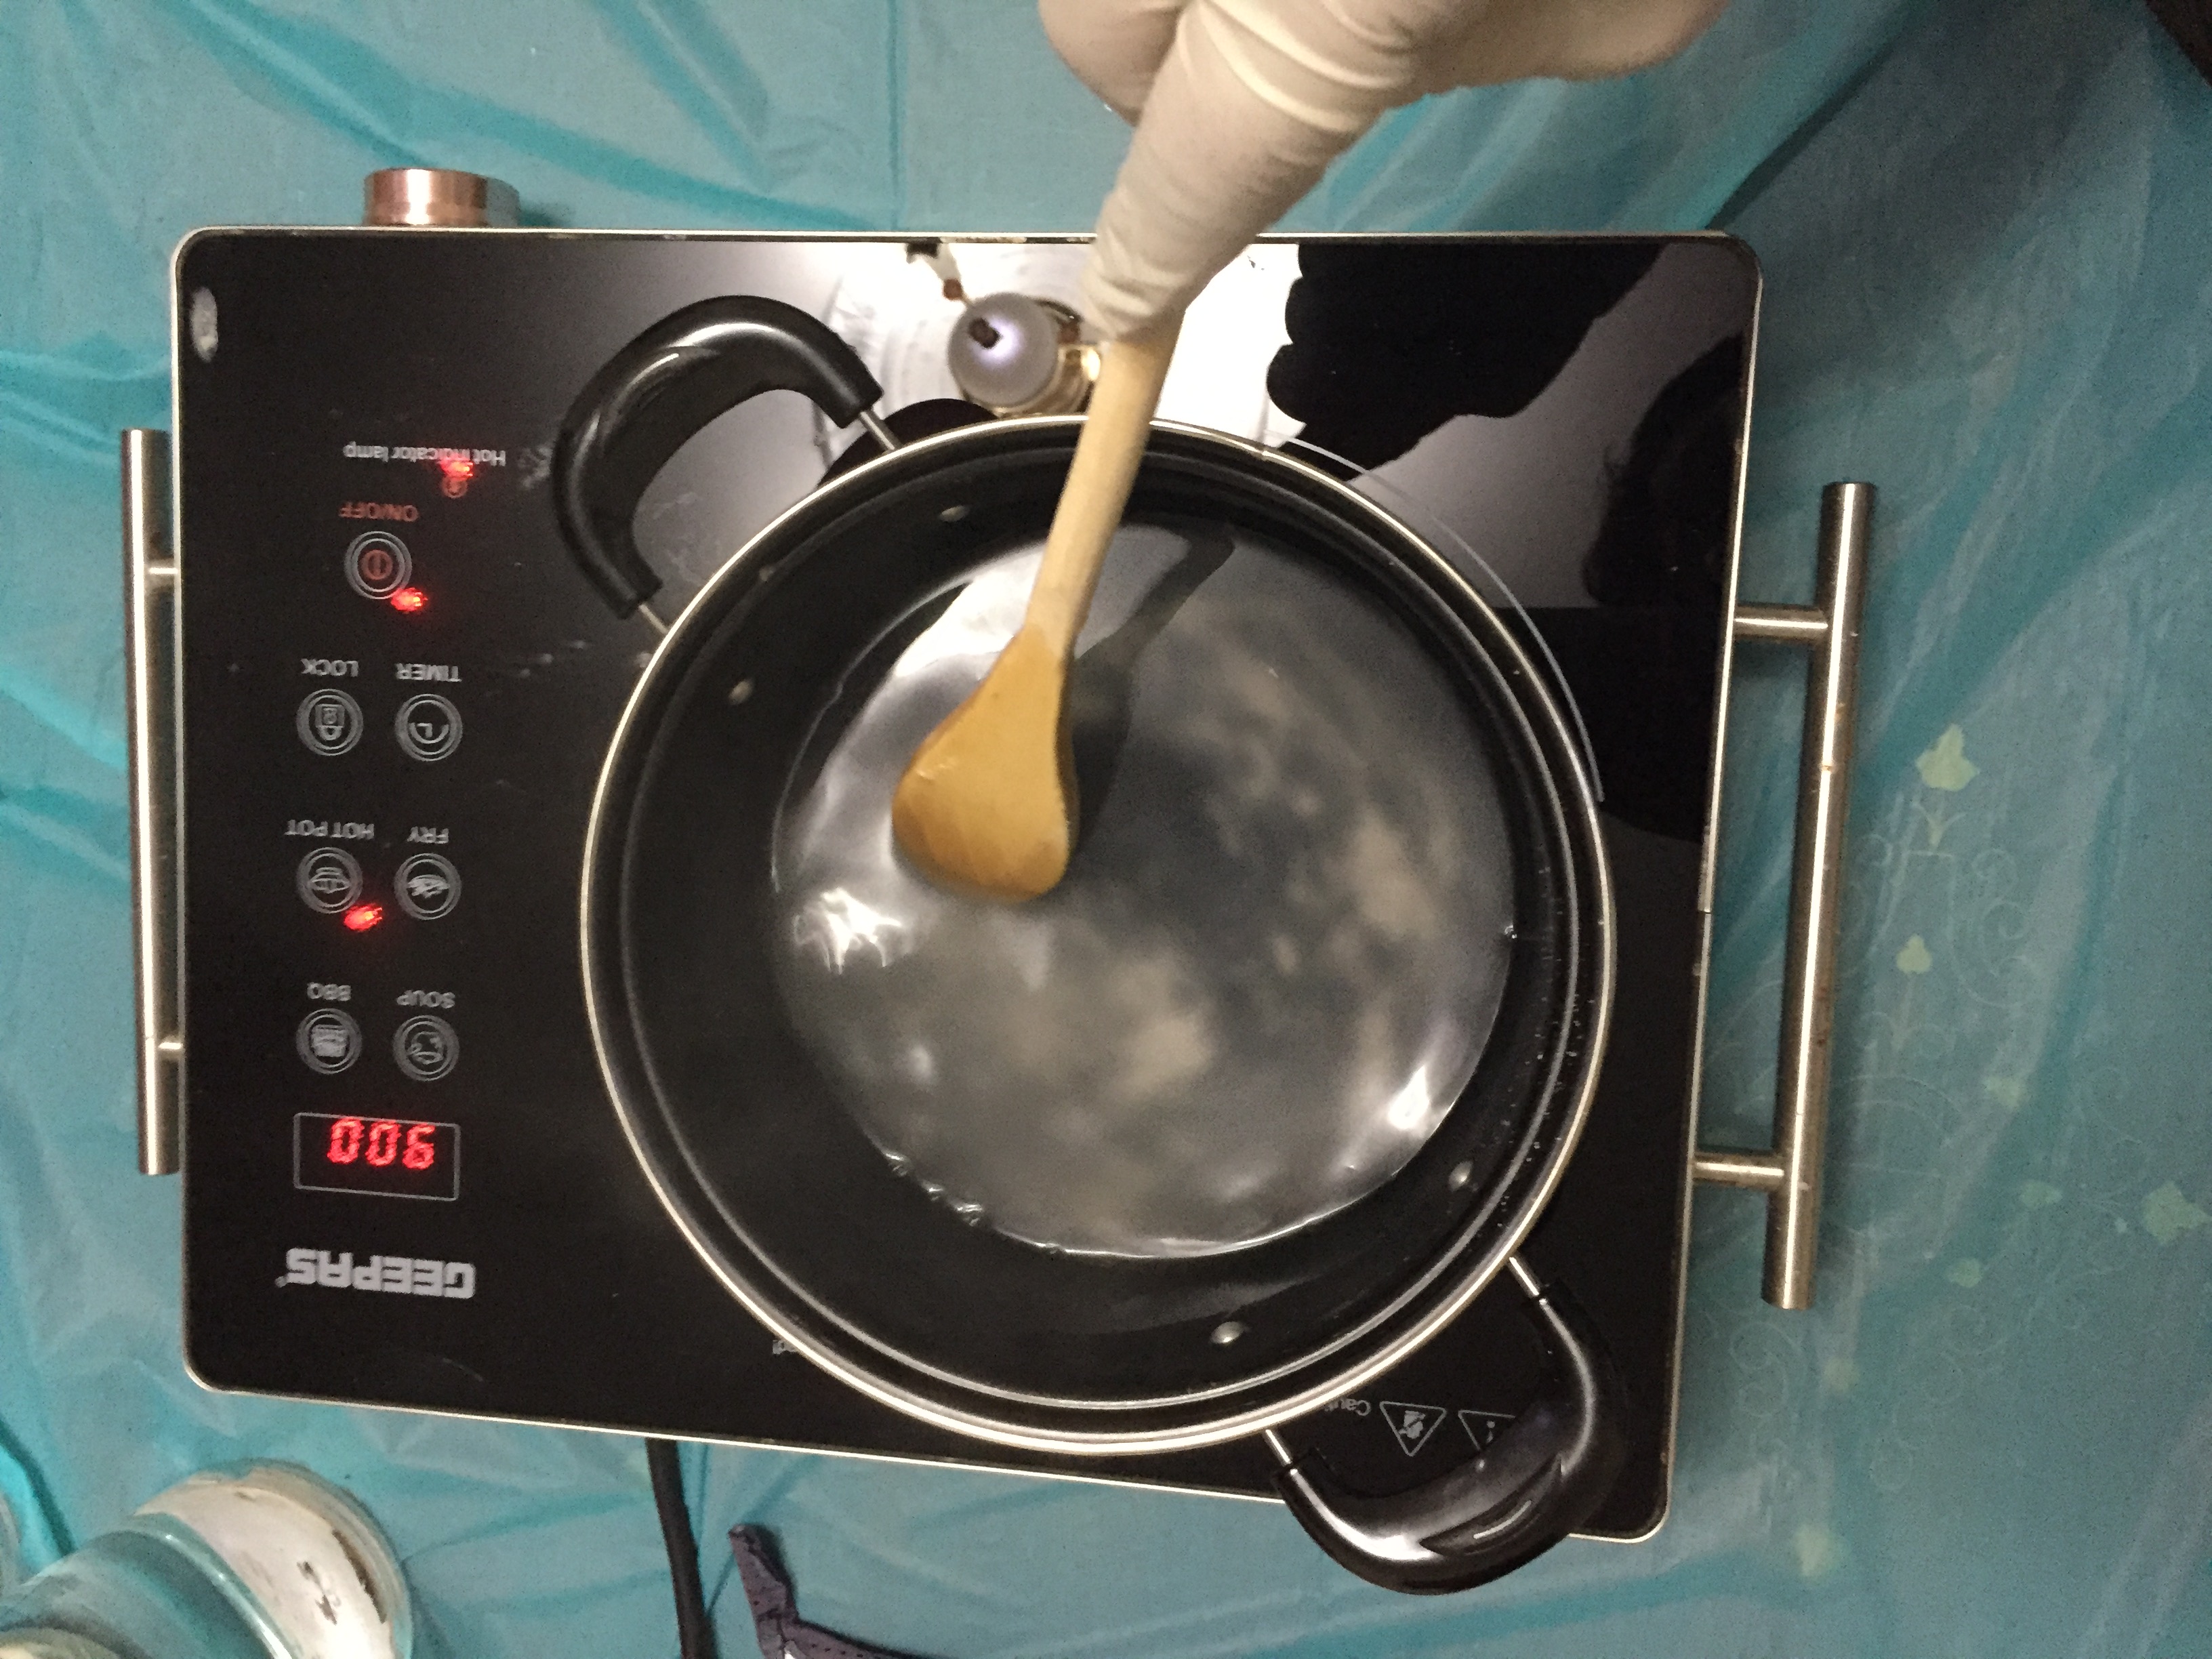
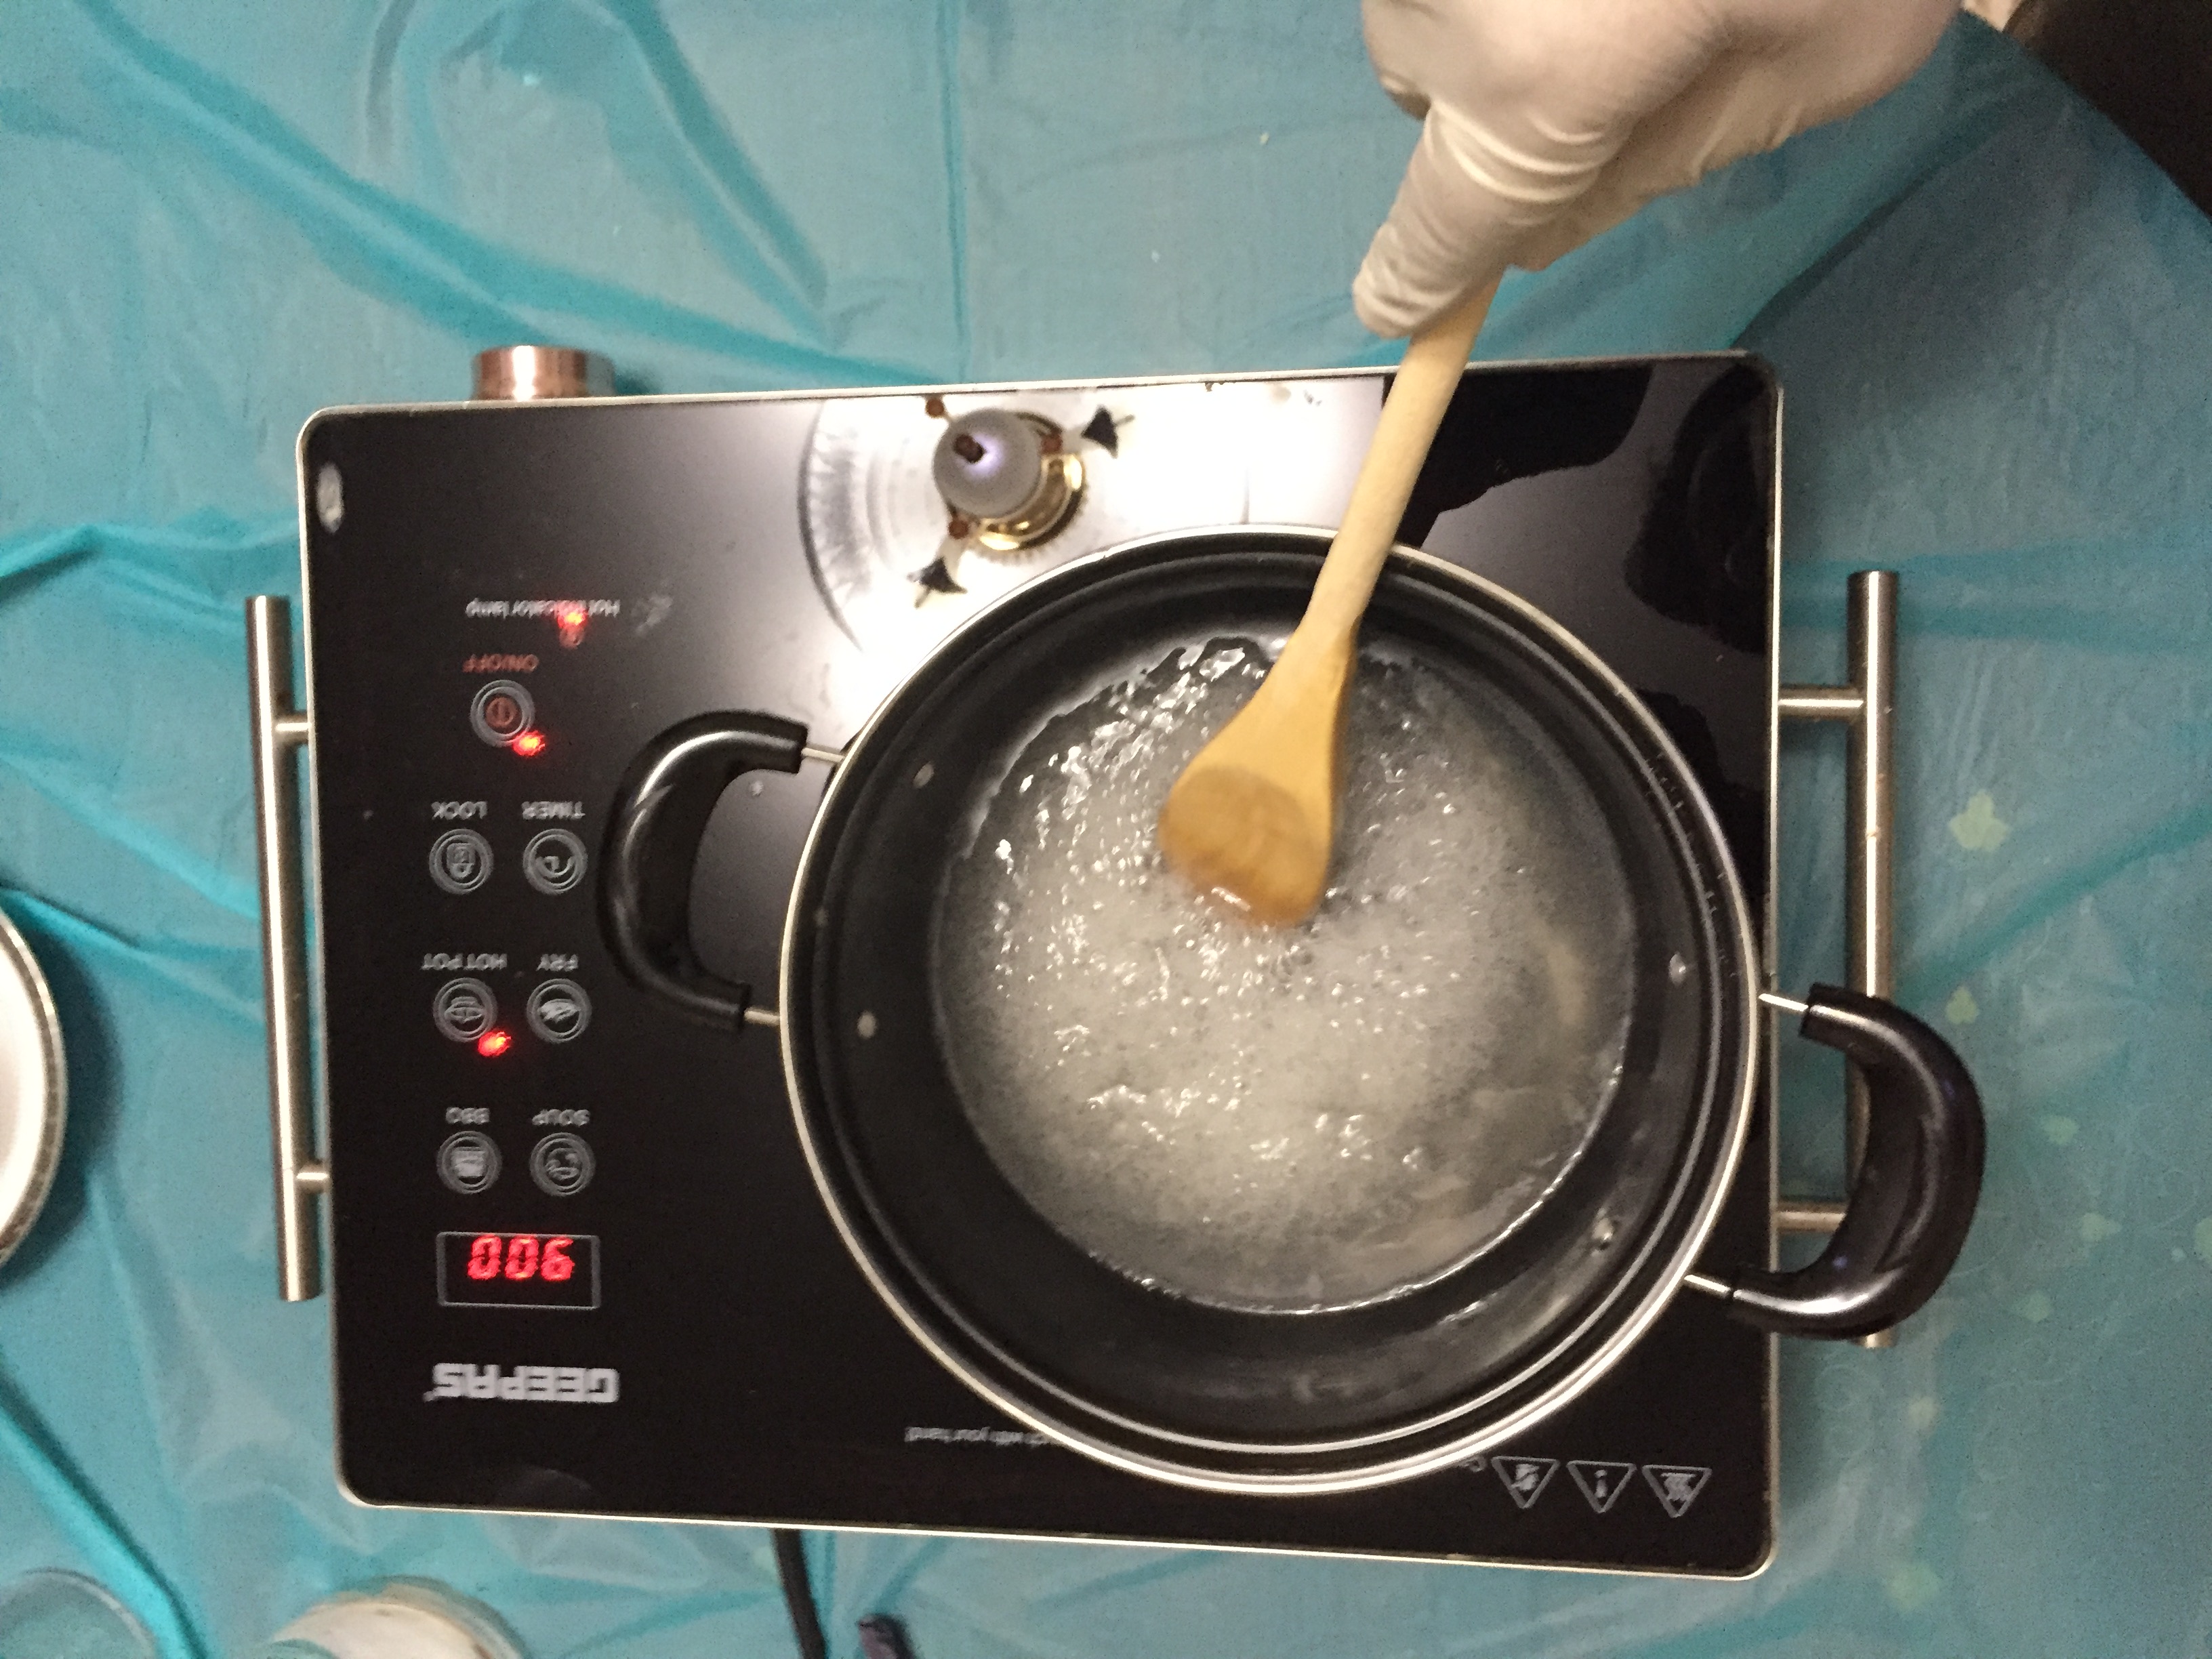
Step - 3 - Heat on medium-low - Place the saucepan on the stove and set the heat to medium-low. Stir continuously as the mixture heats. Bring it to a gentle boil. As the mixture heats, it will become more translucent and begin to thicken.
a - Remove the mixture from the heat when it becomes clear and thick.
b - Total heating time will be around 10-15 minutes.
c - Lumps may begin to form if the mixture gets overheated.
d - Add one-two drops of food coloring at this stage, if you would like to color the plastic.
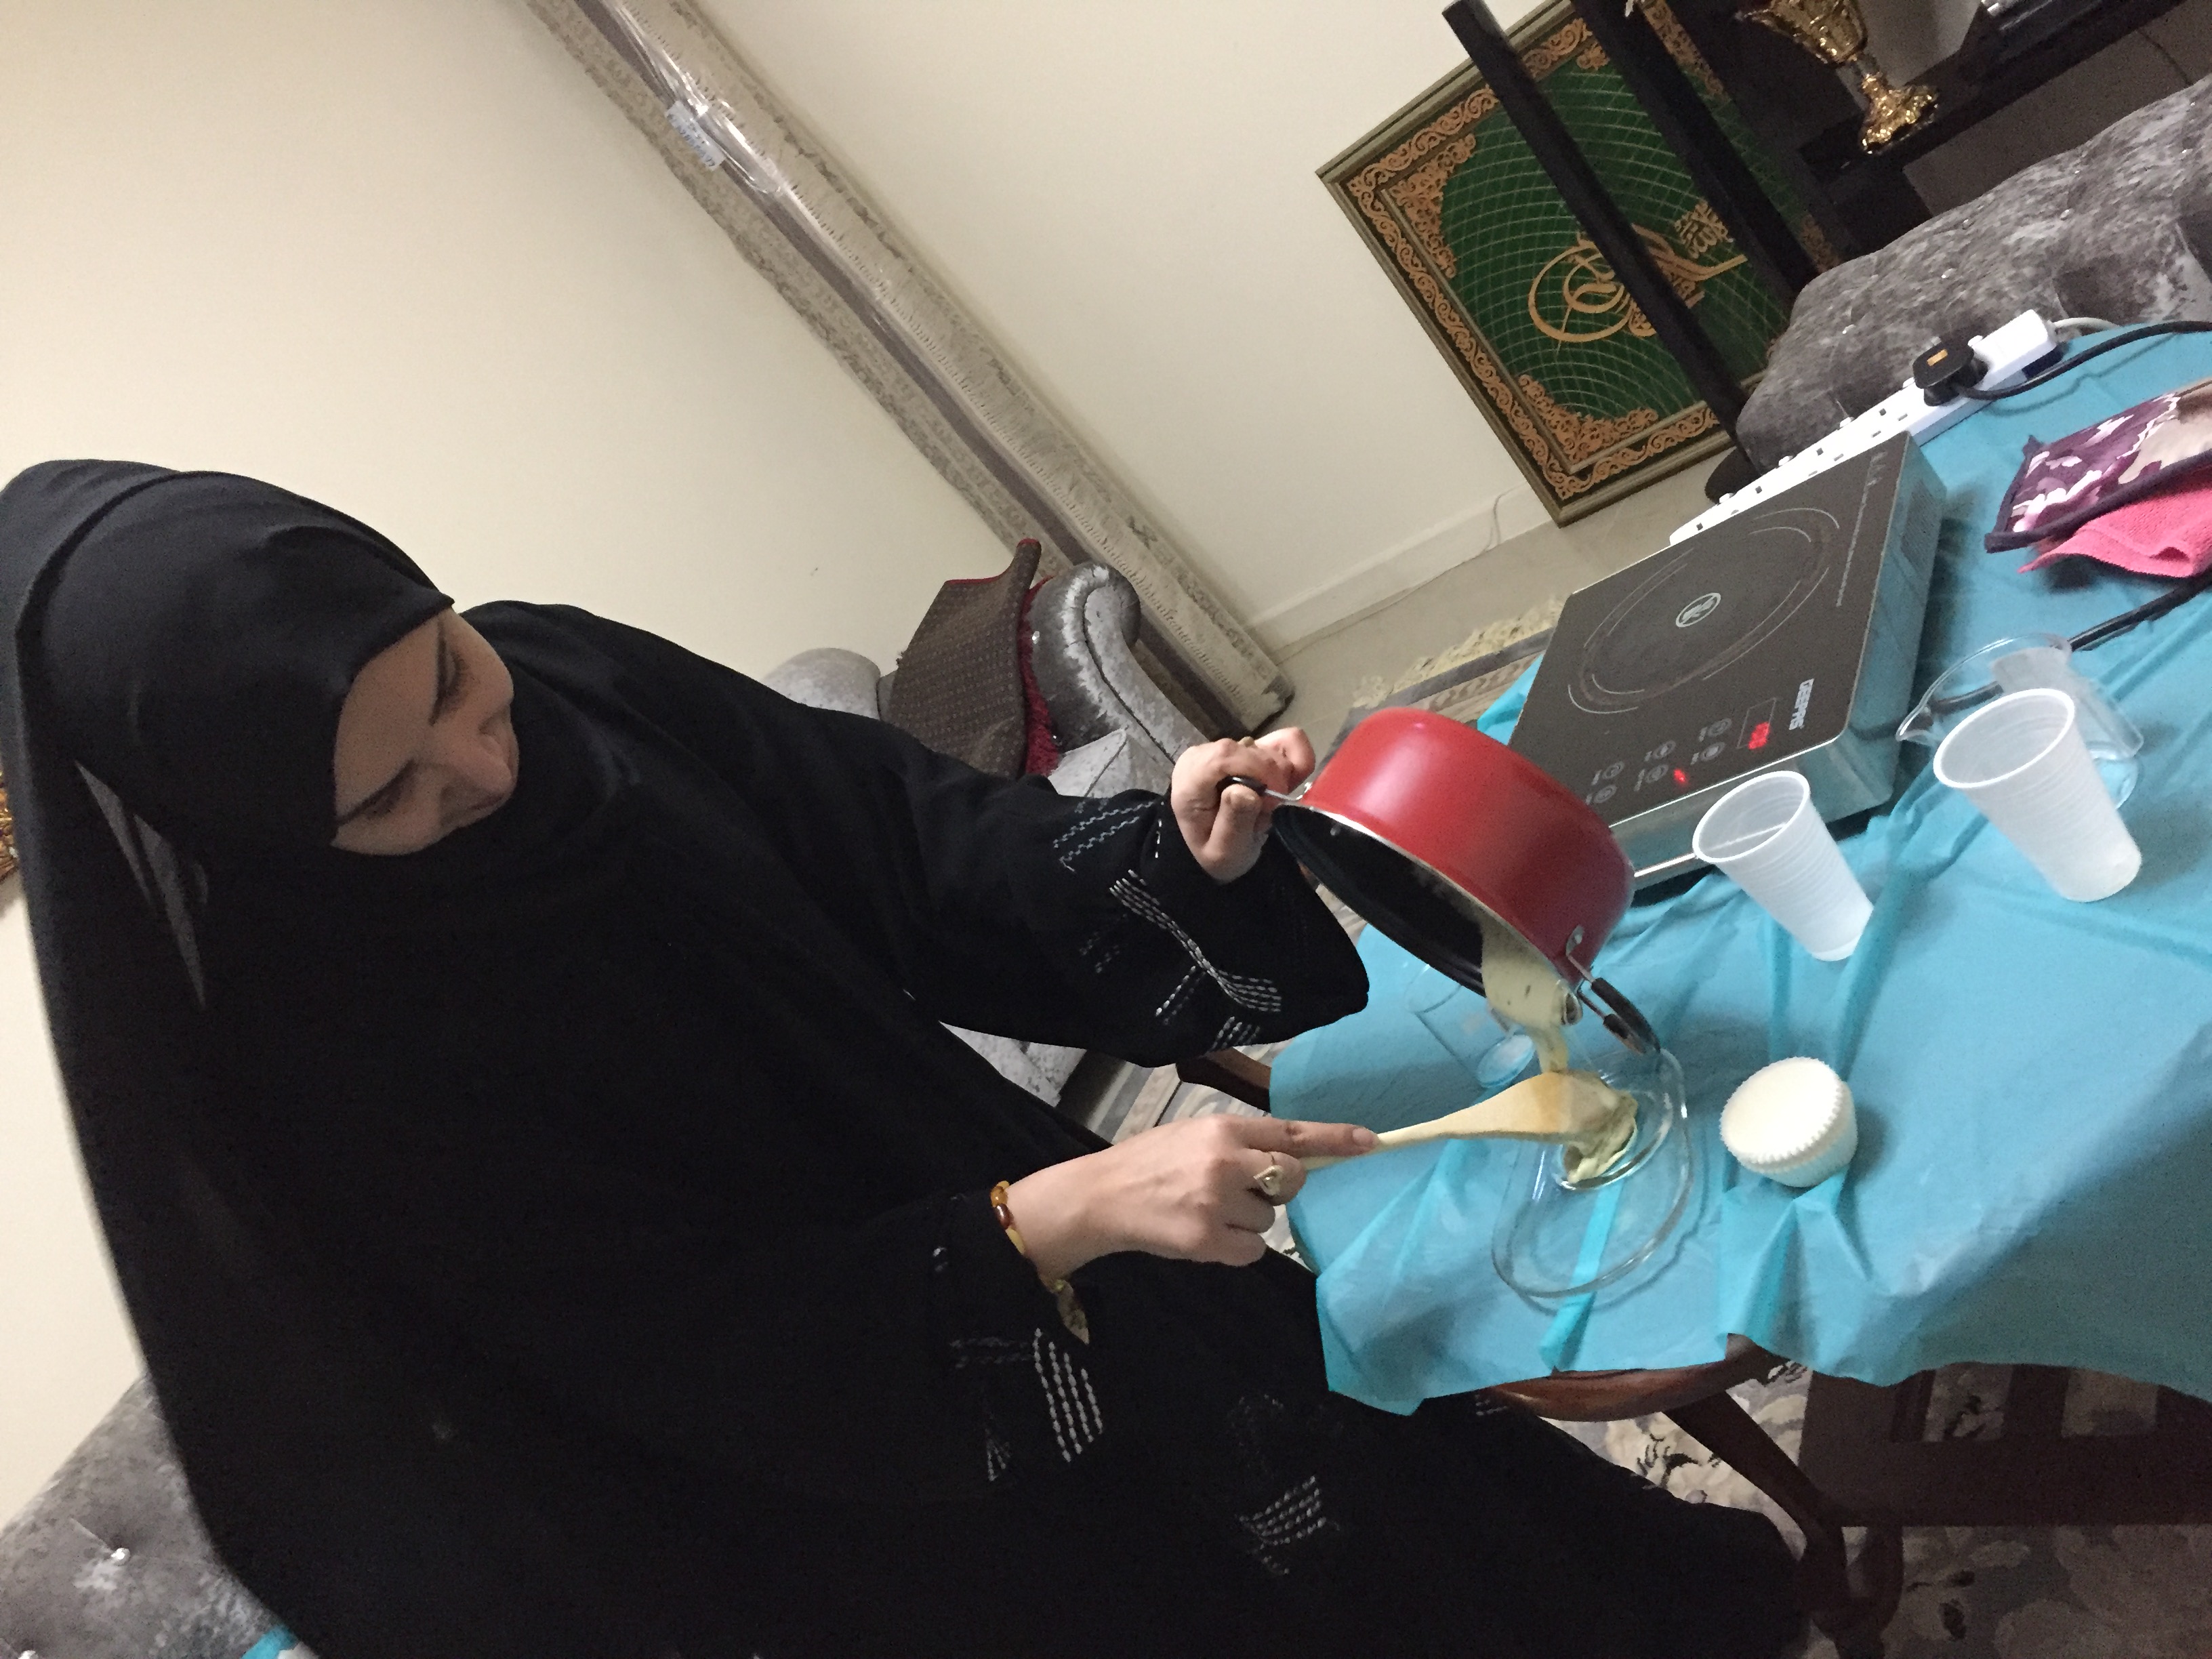
Step - 4 - Pour the mixture onto foil or parchment paper - Spread the heated mixture onto a piece of foil or parchment paper to let it cool. If you would like to mold the plastic into a shape, it must be done while it is still warm. See the last method for details on molding the plastic.
a - Remove any bubbles that you see by poking them with a toothpick.
Step - 5 - Allow the plastic to dry for at least two days - It will take time for the plastic to dry and harden. As it cools, it will begin to dry out. Depending on the thickness of the plastic, it can take longer for it to dry. If you make one small thick piece it will take longer to dry than a thinner larger piece.
a - Leave the plastic in a cool, dry place for this process.
b - Check the plastic after two days to see if it has fully hardened.
Gelatin or Agar
Step - 1 - Gather the necessary materials - To make this type of bioplastic, you will need cornstarch (potato starch also works as an alternative), distilled water, glycerol, white vinegar, a stove, a saucepan, a silicone spatula, and food coloring (if desired). These items should be readily available at the grocery store or online. Glycerol is also called glycerine, so try searching for that if you’re having trouble finding glycerol. The following amounts of each ingredient are needed to make the bioplastic:
Step - 2 - Combine all of the ingredients and stir together - Stir together all of the ingredients. Combine all of the ingredients in the saucepan and stir until there are no clumps left. You may need to use a whisk to disperse all of the clumps. Place the saucepan on the stove and start heating the mixture on medium-high heat. If you want to color your plastic, you can add a few drops of food coloring at this step.
Step - 3 - Heat the mixture to 95°C (203°F) or until it begins to froth - Put the candy thermometer into the mixture and monitor the temperature until it reaches approximately 95°C (203°F) or begins to froth. If the mixture begins to froth before it reaches temperature, that is okay. Remove it from the heat when it either reaches temperature or starts frothing.
a - Continue to stir the mixture while it is heating up.
Step - 4 - Pour the mixture onto foil or parchment paper - After you remove the pan from the heat source, you will need to remove any excessive froth. Spoon it out before pouring the plastic out of the pan. Stir everything to remove all clumps from the plastic.
a - If you just want to make plastic for fun, pour the mixture out onto a smooth surface. Make sure the surface is covered with foil or parchment paper so the plastic can be removed easily.
b - If you want to mold the plastic into a specific shape, you will need to do it during this step. Refer to the last method on molding for more details and help.
Step - 5 - Allow the plastic to dry for at least two days - It will take time for the plastic to dry and harden. As it cools, it will begin to dry out. Depending on the thickness of the plastic, it can take longer for it to dry. If you make one small thick piece it will take longer to dry than a thinner larger piece.
a - Leave the plastic in a cool, dry place for this process.
b - Check the plastic after two days to see if it has fully hardened.
| Gelatin Bioplastic | Gelatin Foam | Gelatin and Clay |
|---|---|---|
 |
|
|
| Gelatin Bioplastic | Gelatin Foam |
|---|---|
|
|
| Gelatin Bioplastic | Gelatin Foam |
|---|---|
|
|
| Corn Starch Bioplastic |
|---|
|
Future Work
| Biofabricated Techniques Used to Fabricate Body Parts |
|---|
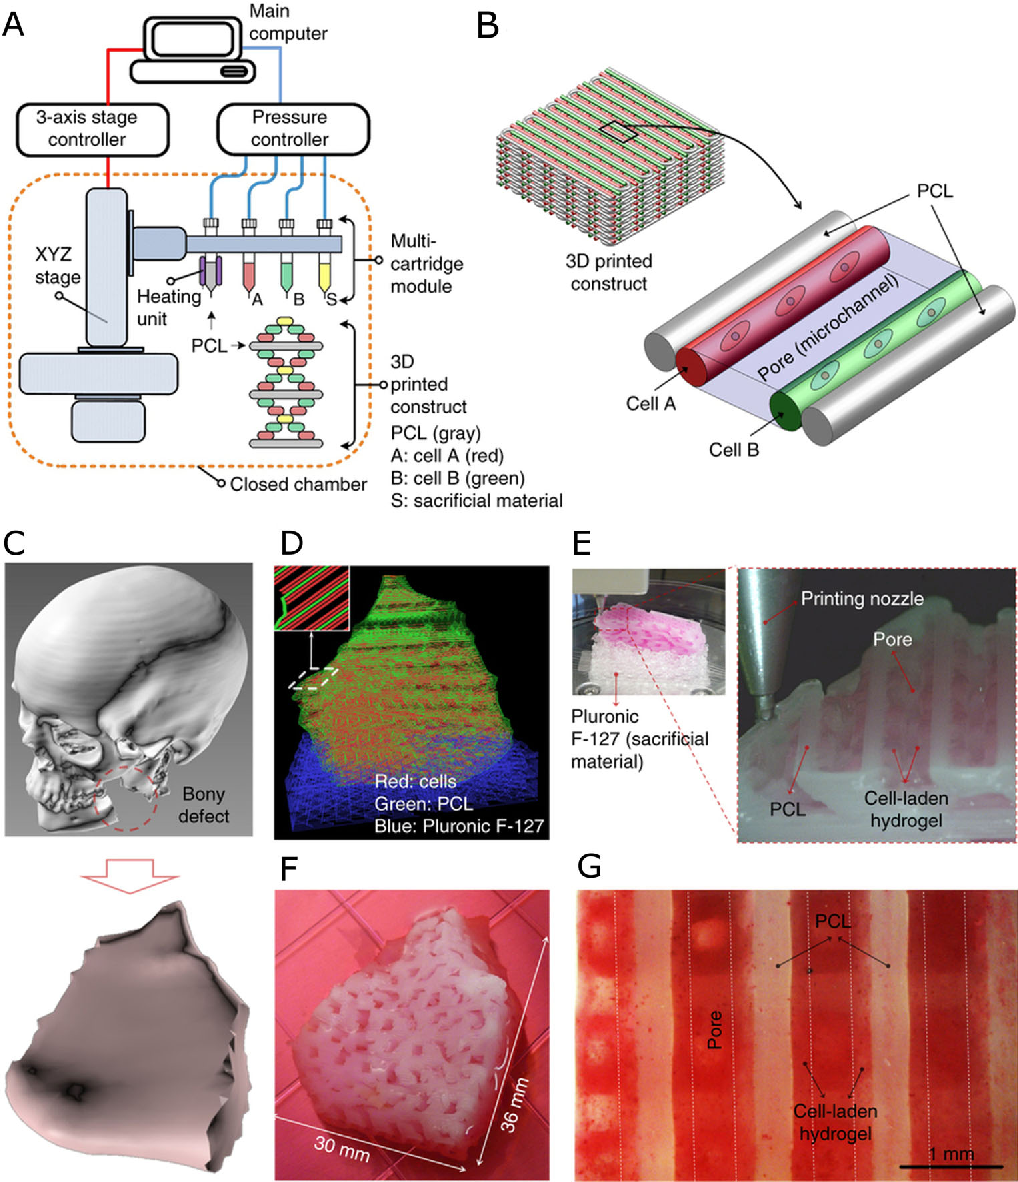
A challenge for tissue engineering is producing three-dimensional (3D), vascularized cellular constructs of clinically relevant size, shape and structural integrity. We present an integrated tissue–organ printer (ITOP) that can fabricate stable, human-scale tissue constructs of any shape. Mechanical stability is achieved by printing cell-laden hydrogels together with biodegradable polymers in integrated patterns and anchored on sacrificial hydrogels. The correct shape of the tissue construct is achieved by representing clinical imaging data as a computer model of the anatomical defect and translating the model into a program that controls the motions of the printer nozzles, which dispense cells to discrete locations. The incorporation of microchannels into the tissue constructs facilitates diffusion of nutrients to printed cells, thereby overcoming the diffusion limit of 100–200 μm for cell survival in engineered tissues. We demonstrate capabilities of the ITOP by fabricating mandible and calvarial bone, cartilage and skeletal muscle. Future development of the ITOP is being directed to the production of tissues for human applications and to the building of more complex tissues and solid organs.
| Figure - 1 | Figure - 2 |
|---|---|
 |
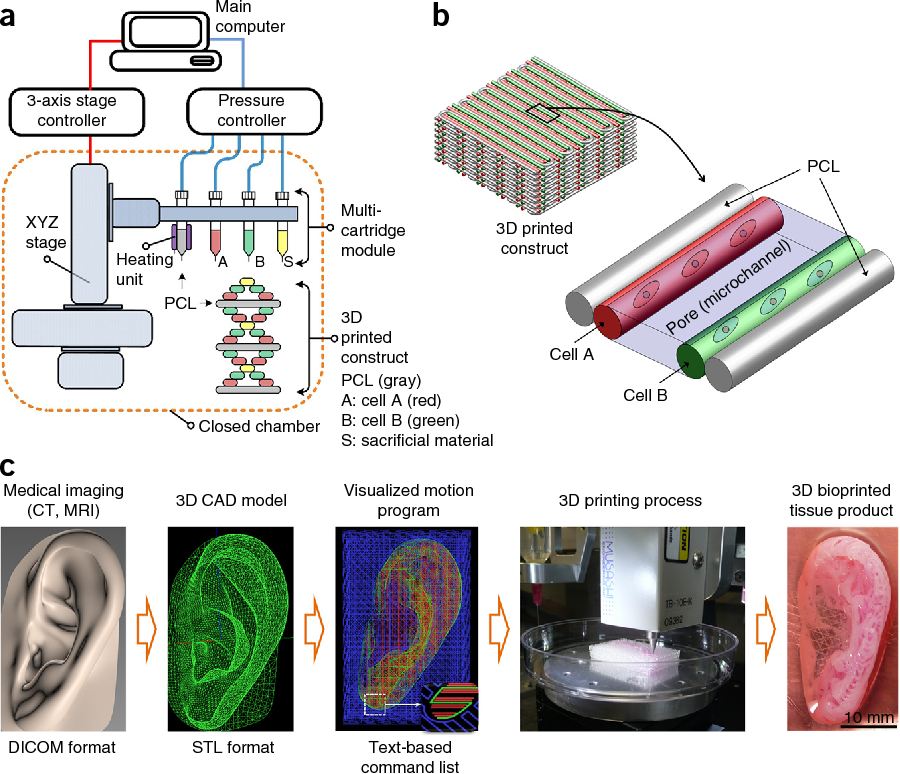 |
Above figures are showing the schematics of the ITOP bioprinting system showing the main components: 3-axis stage controller, dispensing module and environmental chamber for the control of temperature and humidity. b drawing of the bioprinted construct showing the alternate pattern of hydrogel loaded cells, reinforcing polymer and empty channels. c 3D CAD model of a mandibular bone defect. d visualization of established patterns of cells (red), PCL (green) and Pluronic (blue) to achieve the desired 3D architecture. e magnification of obtained patterns in the printed construct. f photograph of the printed bone graft after 28 days culture. g alizarin red staining showing the osteogenic differentiation of amniotic fluid derived stem cells. Adapted by permission from Macmillan Publishers Ltd.: [Nature Biotechnology] (Kang et al. A 3D bioprinting system to produce human-scale tissue constructs with structural integrity), copyright (2016