2. Digital bodies
Research and Inspiration
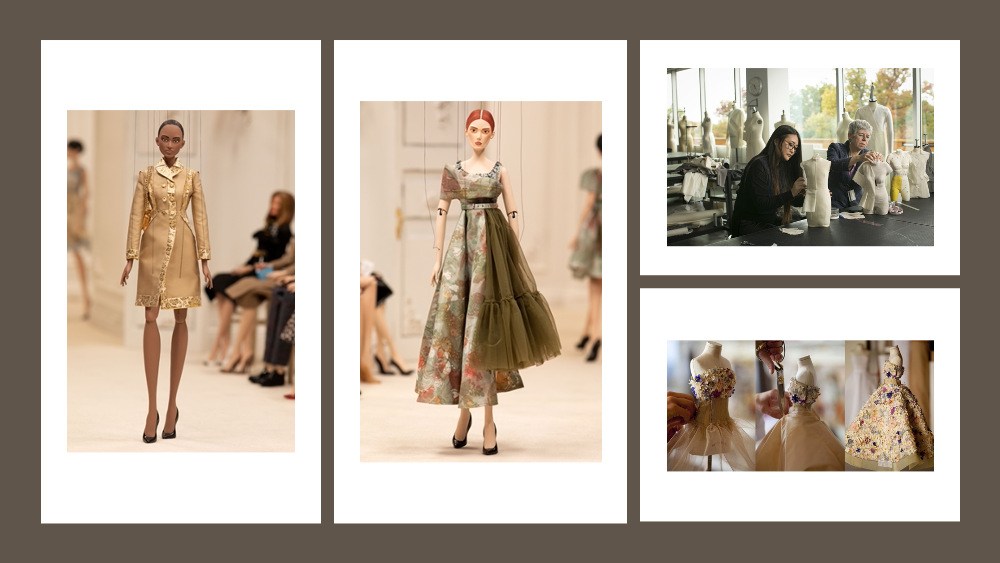
For this week I chose to create a half-scale mannequin based on my own measurements instead of a full scale. Being a lover of miniature versions of things and couture I have long been obsessed with the miniature scale couture dresses made by Dior. Designers at times throughout history have made miniature fashion in different contexts. Most recently I saw and fell in love with the socially-distant puppet fashion show presented by Jeremy Scott for Moschino for Spring 2021.
When I was studying costume design I learned to draft patterns and construct mock-ups in half scale. I also had the opportunity to make a few puppet sized costumes. Since then I have been dreaming of having my very own half scale mannequin so I decided to take the opportunity this week to make a little miniature version of myself. In addition to being adorable, drafting mock-ups in half scale to test out designs and ideas can help cut back on textile waste from the design process as well as speed up the iteration process.
3D Scanning
Since I did not have access to a lab with a body sized 3D scanner I evaluated a couple 3D scanning mobile apps. For this assignment I looked at Capture and ScandyPro which are both available in the Apple mobile app store on my iPhone.
ScandyPro
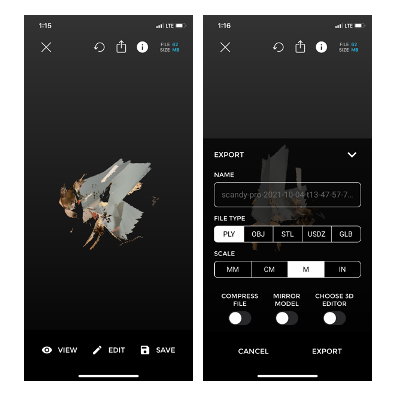
In ScandyPro there is the ability to use a rear-facing camera on devices that have a LiDAR sensor to capture room-scale scans. Unfortunately my iPhone does not have a LiDAR scanner so I found it difficult to scan myself. To make it more interesting and instead of scanning my face I ended up doing a scan of my dog which came out looking very abstract as he moved around during the scan. Though ScandyPro is free, one of the main drawbacks is that you can only save one scan per day with the free version. A variety of different file types for exporting are supported in this app including PLY, OBJ, STL, USDZ, and GLB. The scan for this file can be found below.
Capture
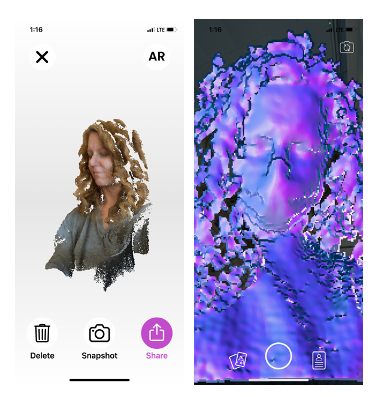
Unlike ScandyPro, Capture does not allow the use of a rear-facing camera. Instead Capture uses the TrueDepth technology in the iPhone’s front facing camera. This is the same technology that helps with facial recognition. Capture seems to allow more than one scan to be saved per day. Unfortunately the only file type that seems to be able to be exported is USDZ which is for AR applications. The scan for this file can be found below.
Digital Design
Make Human
I started out the design process in MakeHuman. MakeHuman is an open source software program for 3D character modeling.
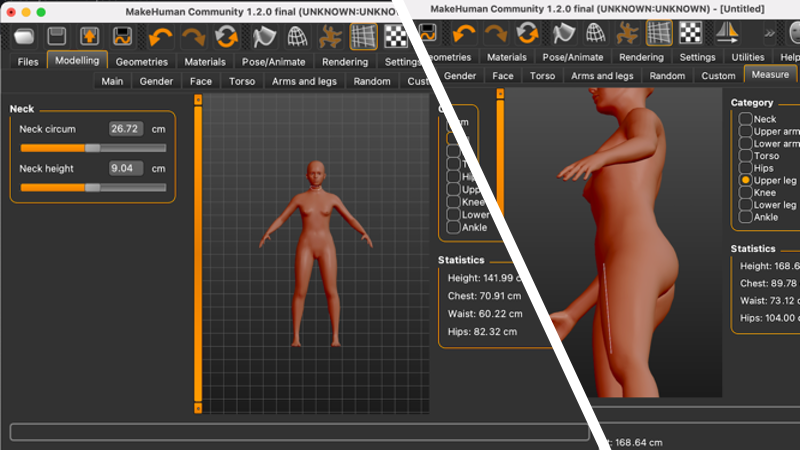
In this program I was able to change the parameters like gender, age, body fat, and muscle tone to start building a form that looks like my body type. Next exact measurements were imputed to refine and make the form more precise. In the end I ended up with a figure that looked pretty close to my body with very exact measurements. Clothing and hair can also be added and the pose can be changed. I decided to skip this part since I wanted a mannequin that I can sew real clothes for later.
Rhino
After exporting the .stl file from MakeHuman I brought it into Rhino. Rhino is a really fun to use 3D modeling software that is unfortunately not free. I was able to use the free trial for this course. It might have to be added to my wishlist after this.
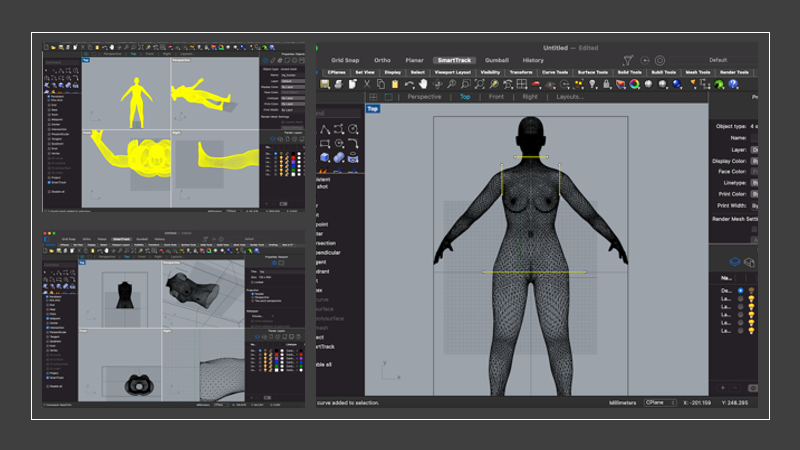
At this point I scaled the model down to half-scale. I removed her head, arms, and legs by using the MeshTrim function. Using this function leaves holes in the model so I capped off the holes in the mesh with the Cap function. Then I exported the model as an .stl for the next step.
Slicer for Fusion
Next I imported the .stl from Rhino into Fusion Slicer. This program allows a 3D model to be sliced at a defind thickness and then files are generated to create a laser cuttable and stackable model.
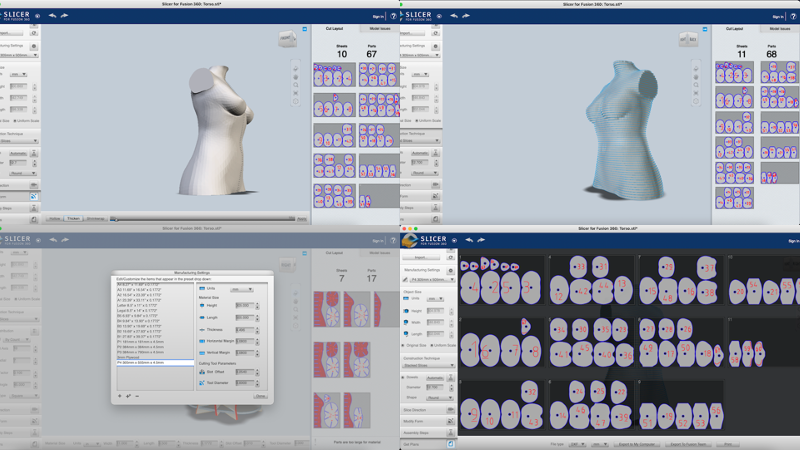
The material I chose to work with for this was 1/4 inch thick plywood. I sliced the model at 1/4 inch intervals and generated the PDF files for the laser cutter. I also used the "thicken" function in Fusion Slicer to add some additional thickness to the final pieces as I planned to sand it smooth later. I also included a hole through the middle of thhe model to thread a rod through to making aligning the pieces easier later.
Fabrication
Laser Cutting
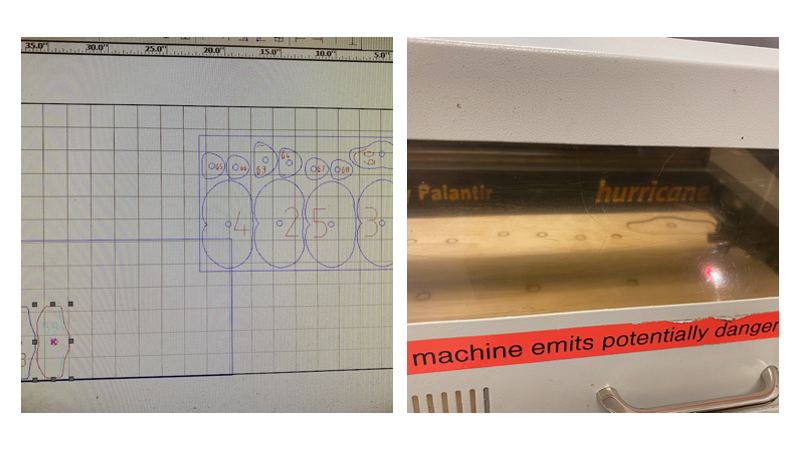
Software, equipment, and settings
 * RDWorks 8.0
 * Windows 10
 * "Mongo" the Hurricane Charley Category 4 80W CO2 Laser 1000mmx600mm
 * Plywood - 1/4 inches thick
   - speed: 10mm/s
   - power: 70%
   - single pass vector cut
I imported the PDF files generated from Fusion Slicer into RD Works. RD works is the program used to interface with the laser at my local makerspace. I was also able to use RD works to design in 2D a simple base stand for my mannequin to sit on.
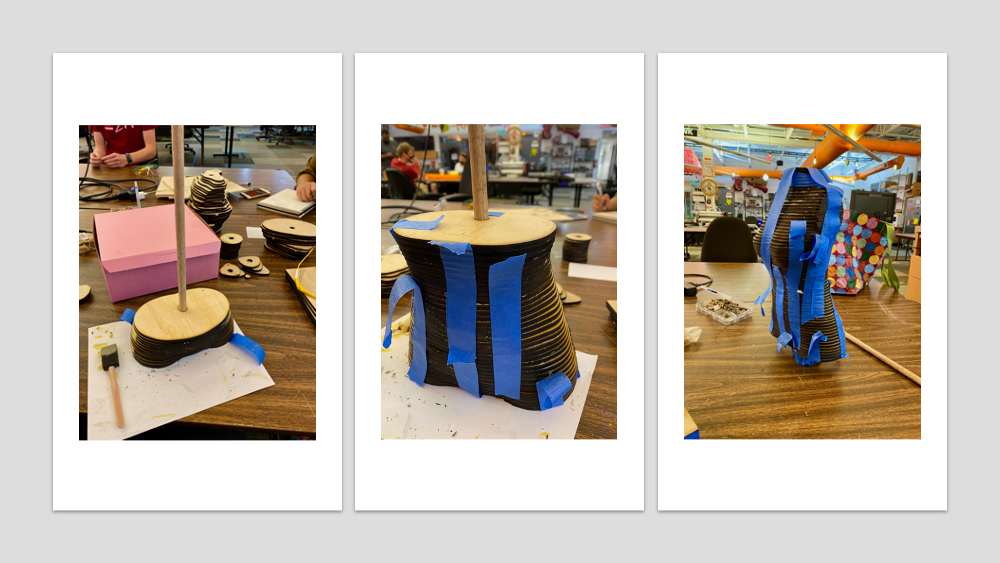
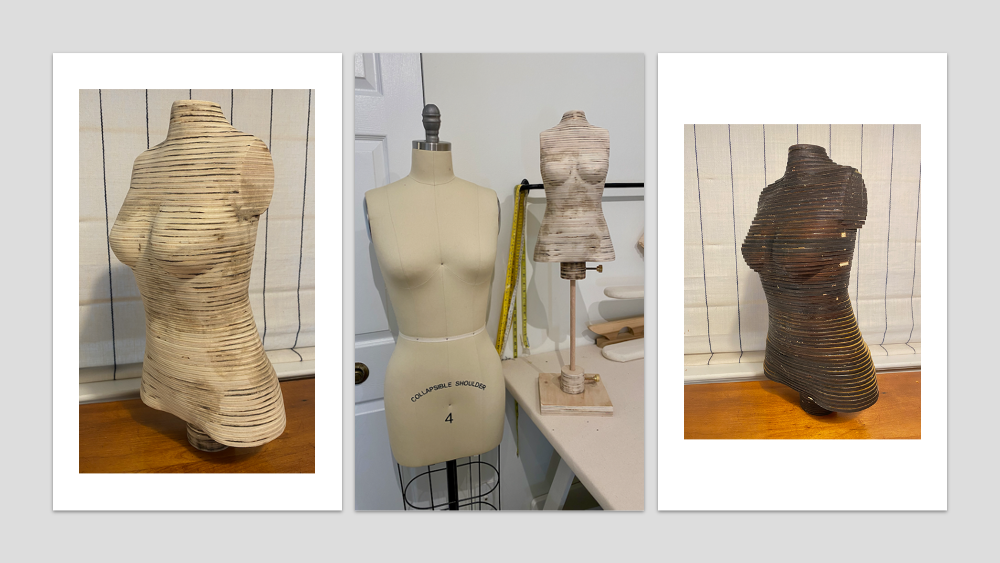
Finishing
To put it all together I threaded the pieces onto a wooden dowel rod as I glued them together. Once all the pieces were dry I did some serious sanding to get it smooth. Once it was smooth it more closely resembled the original form of the 3D model.
Useful Links
References
- Moschino SPRING 2021 READY-TO-WEAR
- Digitally made half forms offer apparel designers new tools
- Dior’s Doll-Sized Couture Collection
- Le Petit Théâtre Dior - Haute Couture in miniature
- Moschino SPRING 2021 READY-TO-WEAR