10. Open Source Hardware - From Fibers to Fabric
This week we learned about and built open source hardware projects. I chose to build a heddle loom based on the project by ProgressTH. The original design by ProgressTH uses PVC and 3D printed parts. I decided to make a modification to the heddle pieces so it could be cut in one piece on the laser rather than 3D printed. I also added apron bars to assist with rolling the warp onto the loom.
Materials
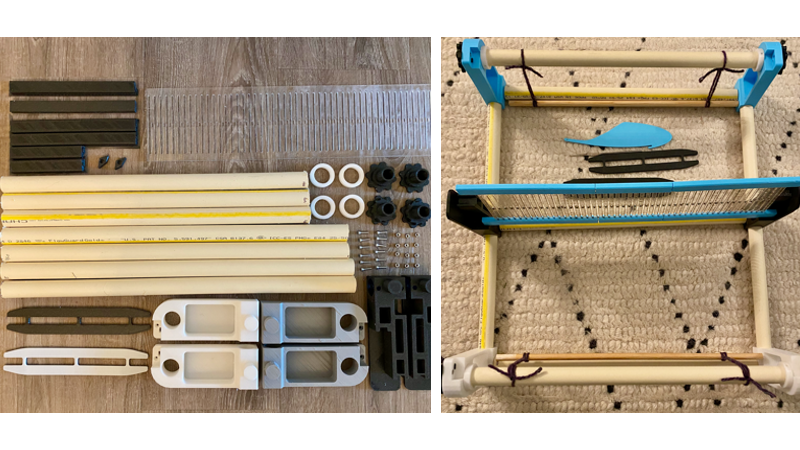
This loom is mainly constructed from PVC pipe and 3D printed parts. The parts are designed in metric measurements and the instructions call for a 22mm diameter PVC pipe for the frame but it can work with 3/4inch with some sanding.
- 3 - 400mm PVC pipes for crosswise frame pieces
- 2 - 450mm PVC pipes for lengthwise frame pieces
- 2 - 455mm PVC pipes for warp/cloth beams
- 2 - 3mm x 12mm bolts and accompanying hex nuts for the cogs and pawls
- 1 piece of ⅛ inch (or 3mm) thick acrylic to cut an approximately 100 x 400mm piece for the heddle
- 2 - ¾ inch (or 10mm) diameter dowel x 400mm for apron bars
- Scrap yarn to tie apron bars (dowels) to the warp/cloth beams
- 3D printed parts on Thingiverse
Assembly
I assembled the loom based on the image provided on the Thingiverse instruction page. The PVC pieces fit very tightly into the 3D printed pieces with a bit of sanding. The amount of friction held the frame together such that there was no need for glue. The ends of the warp beams needed to be sanded down quite a bit to spin freely.
The project by Progress TH doesn’t mention apron bars but it appears that they might have used something like this looking at the images they provided. I added them to this loom by drilling holes in the warp and cloth beams and tying on dowels with some scrap yarn. This helped the warp easily wind onto the warp and cloth beams.
I took the 3D print file provided by ProgressTH and converted it to be laser cut all in one piece. To assemble the heddle I was able to slip the laser cut teeth into the 3D heddle edges as they were originally designed. This piece is a little fragile with the gaps between the 3D printed parts so in the future it makes sense to reinforce this area or redesign it to also be laser cut all in one piece.
Weaving
For this project I decided to try out a houndstooth weaving pattern using pokeberry and prickly pear dyed alpaca yarn from Week 04 on Biochromes. I added the warp to the loom following this great tutorial by Grace O'Neill.
I added the warp to the loom with an improvised “peg” made from an overturned stool. Since I didn’t have clamps I just weighed the loom down with weights to keep the loom from moving to help maintain the tension.
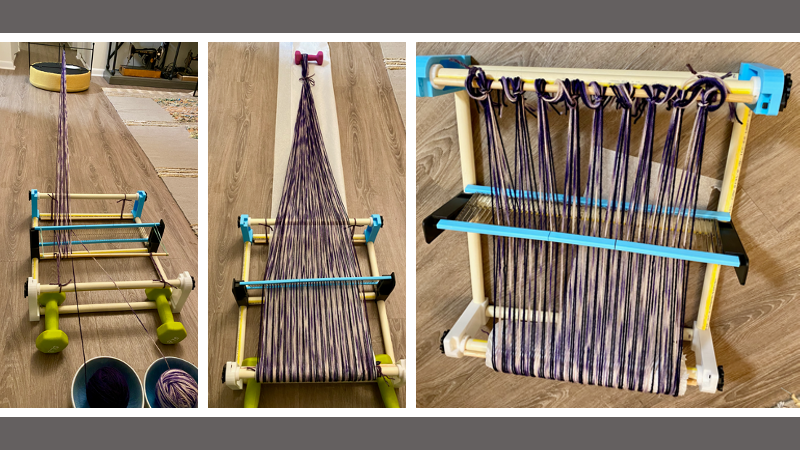
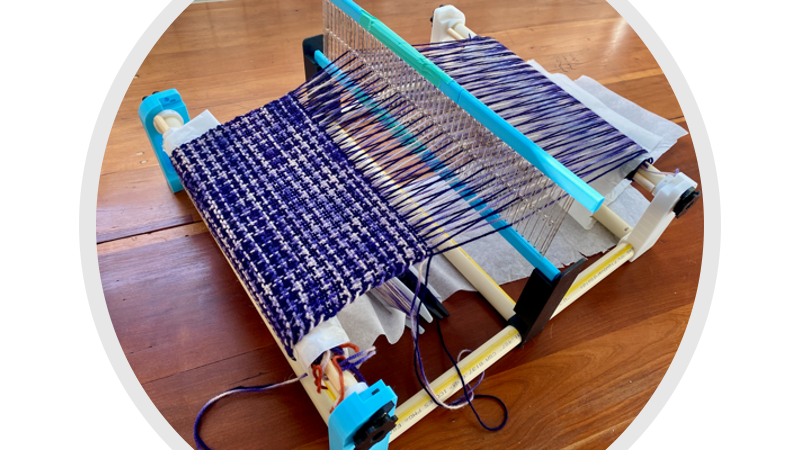
Once the warp was set up I started weaving! I loaded two shuttles with two colors of yarn for the houndstooth pattern.