5. E-textiles
This week we were introduced to e-textiles and building soft sensors. I have had some experience with adding electronics to textiles but this week I got to try building two new sensors using velostat for the first time.
Soft Sensors
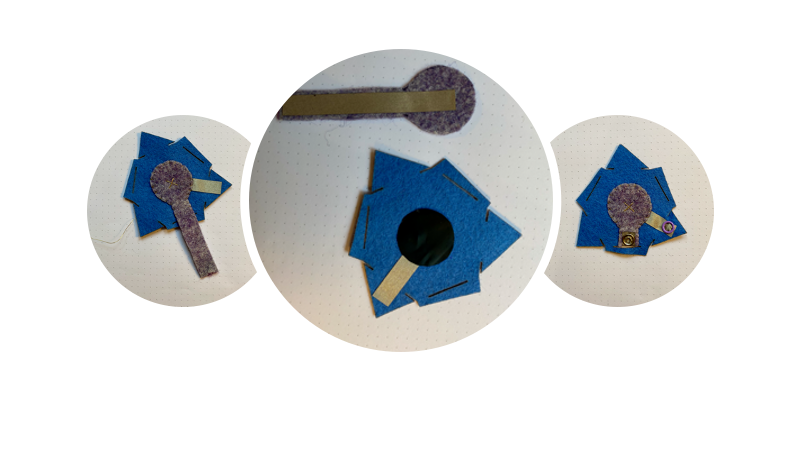
Digital Momentary Switch
I have made one of these switches before and this week I took the opportunity to remake it using different materials. In the past I constructed soft momentary switches out of felt and stainless steel thread. I find the stainless steel thread difficult to work with in an application like this. Sometimes when the button is pressed the thread sticks to itself and stays stuck together. This can be solved by using a more spongy material in between or by using a smoother conductive material that won’t stick to itself when pressed. I chose to construct my switch this week with a smooth conductive fabric tape and wool felt. I built this switch into the fabric modules cut out from the Week 03 Circular Fashion assignment.
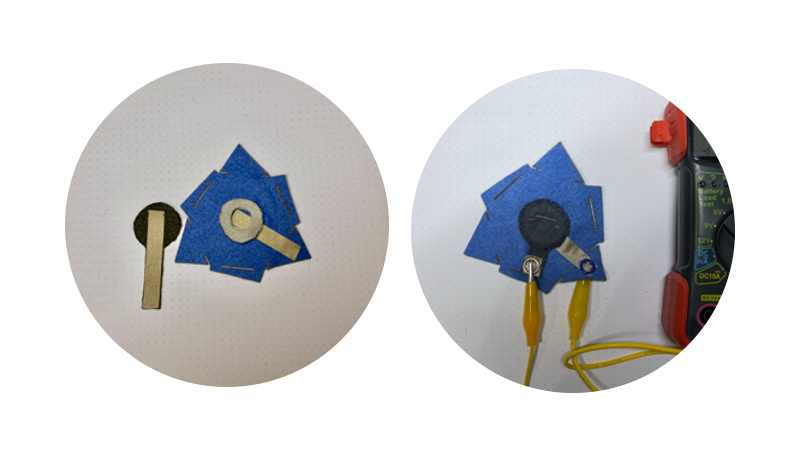
Analog Pressure Sensor
This analog pressure sensor is constructed with wool felt, conductive fabric tape, and velostat. Velostat is a semiconductive, pressure sensitive material that increases conductivity (or decreases resistance) when pressed. In this switch the velostat is sandwiched between two conductive pads. The whole switch is insulated with wool felt. Conductive metal snaps are applied to the conductive tape to create connections between hard and soft materials. Note that the colored metal snaps are only painted on one side and the back side is still conductive.
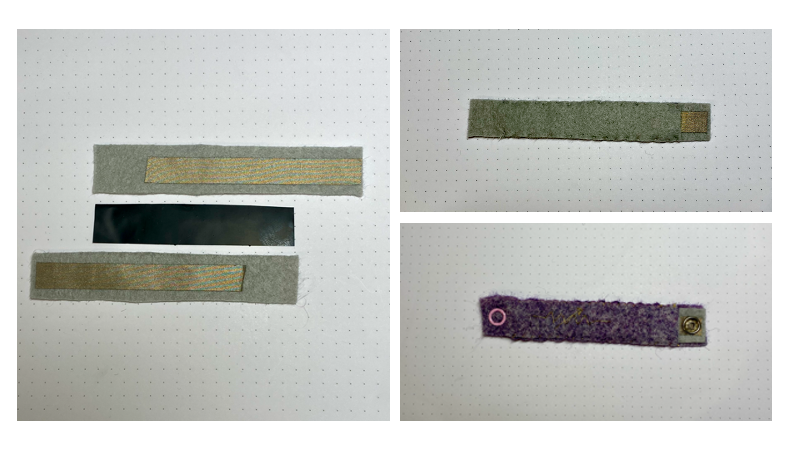
Analog Flex Sensor
The analog flex sensor is constructed in a similar way as the analog pressure sensor. This switch is longer so it can be bent instead of pressed. The snaps are placed at either end of the sensor.
Testing the Sensors
Reading Values from Bend Sensors
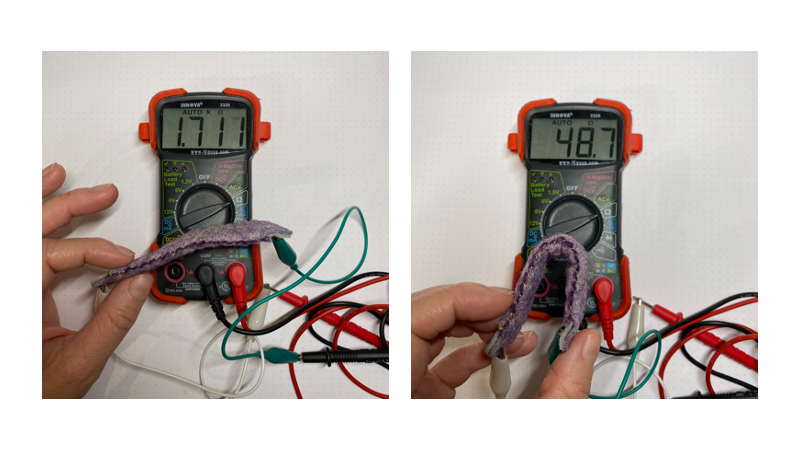
I connected the bend sensor to a multimeter to observe the chance in resisistance when the sensor is bent.
When the sensor is straight I got readings around 1.0-2.0 kiloohms. When the sensor was bent I got readings around 30-60 Ohms.
Reading Analog Sensor Values
Next I set up an Arduino Uno to test the sensors and read the values of the analog sensors.
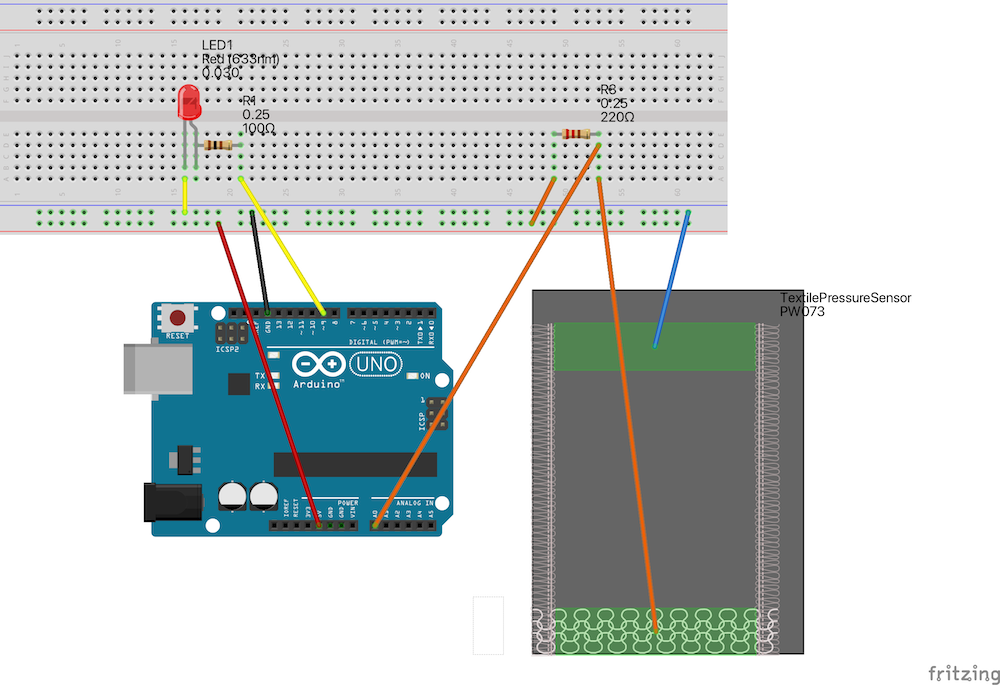
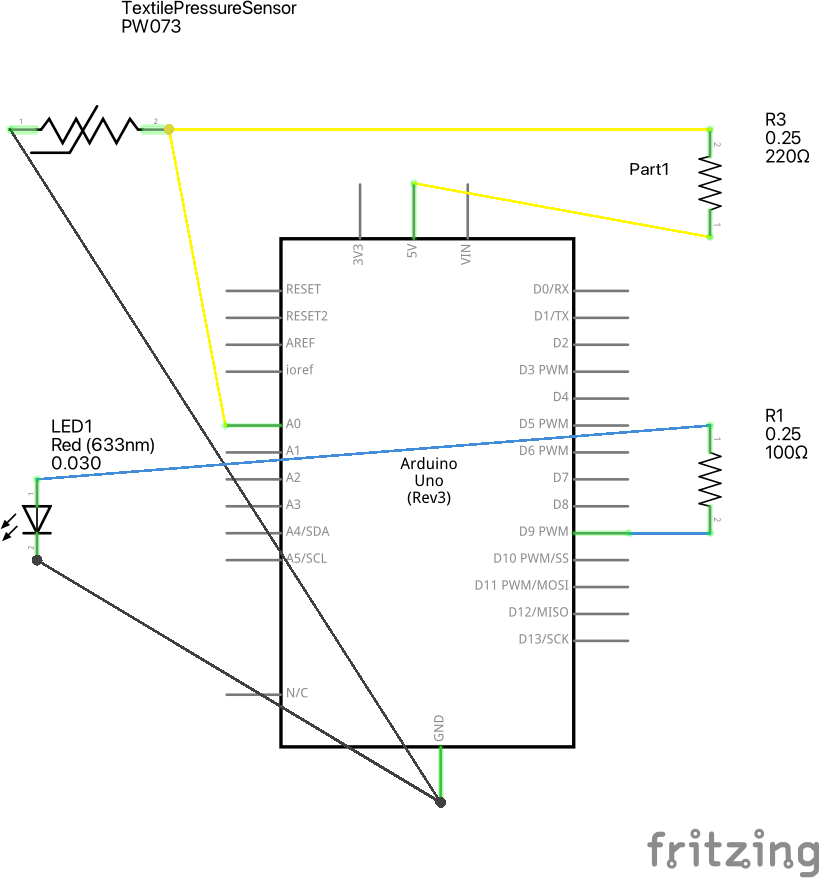
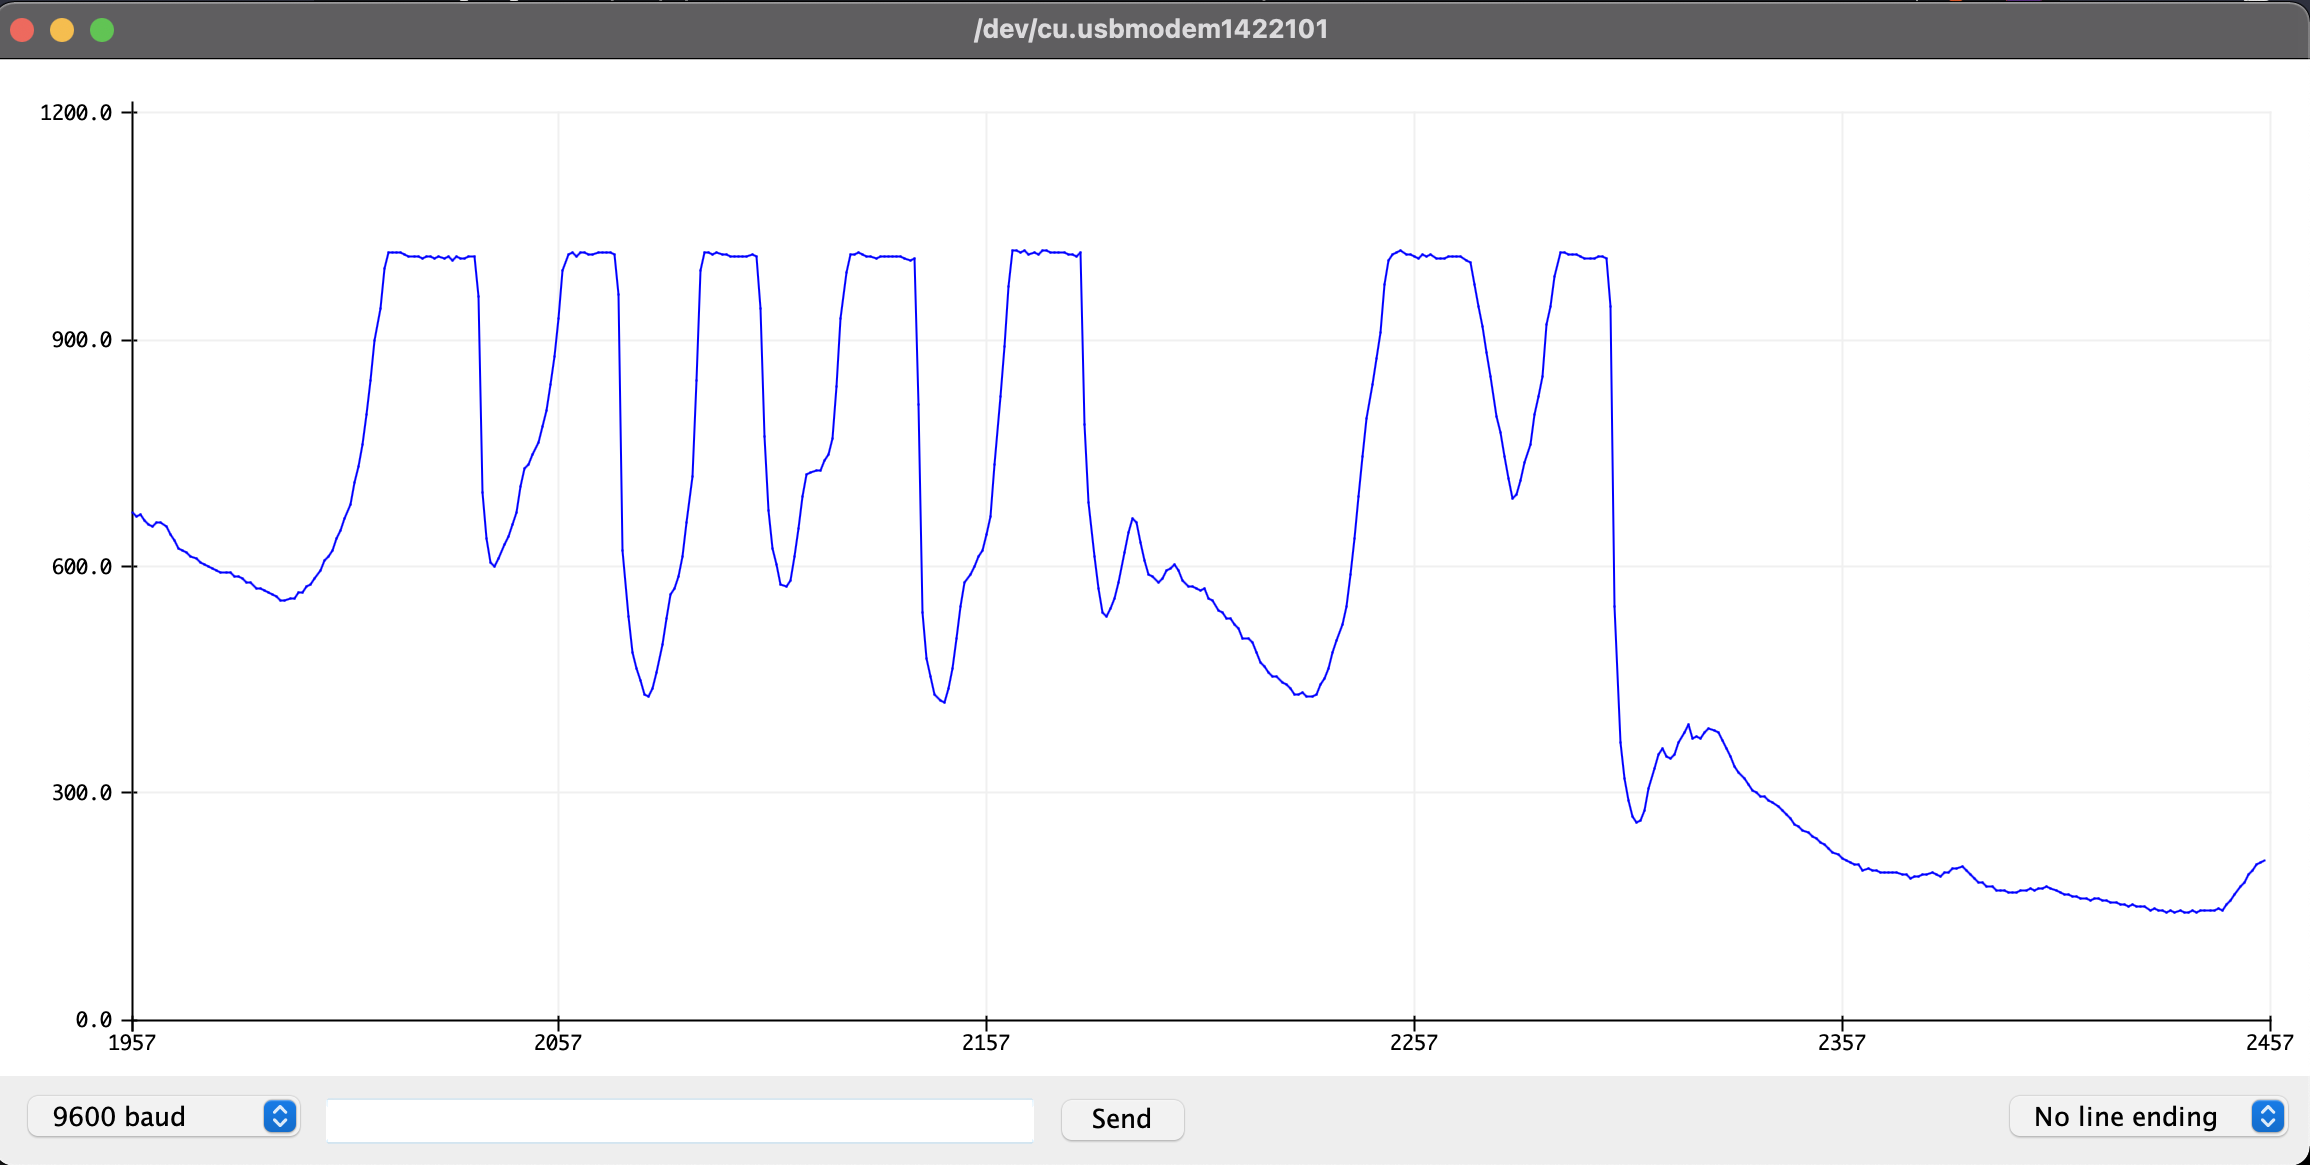
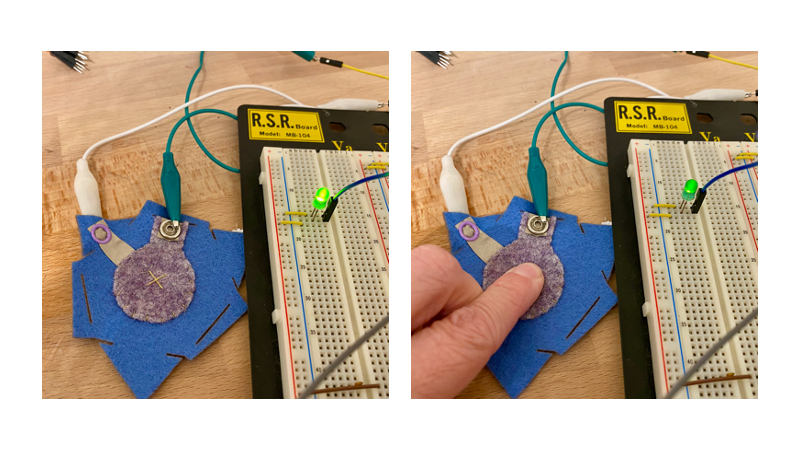
I uploaded the sample code provided by our instructor to read the sensor values of one of the analog pressure sensors. I was able to open the serial monitor and serial plotter to see the values coming in from the sensor! The baud values are higher, around the 900s, when the button is not pressed. The baud values are lower, around 30s, when pressed. The LED in the ciruit gets dimmer when pressed.
/*

 Reading Sensor Values
 Comp Craft Spring 2013

 This sketch reads the data coming in from the sensor and prints it to the serial
 monitor. This is extremely helpful to debug or find the range of values you
 want to use.


 */

int sensorPin = A0;    // select the input pin for the sensor
int ledPin = 9;     // select the pin for the LED
int sensorValue = 0;  // variable to store the value coming from the sensor


void setup() {
  // declare the ledPin as an OUTPUT:
  pinMode(ledPin, OUTPUT);
  pinMode(sensorPin, INPUT);
  Serial.begin(9600);
}

void loop() {

  // read the value from the sensor:
  sensorValue = analogRead(sensorPin);

  analogWrite(ledPin, sensorValue);

  //Print the value to the Serial monitor
  Serial.println(sensorValue);

}
Using the Digital Sensor in a Circuit
To test the digital sensor I combined the switch into a set of felt modules from week 03. I wanted to make a "snappable" breadboard. In this sample three modules are used, one as a switch, one for the LED, and one for the battery.
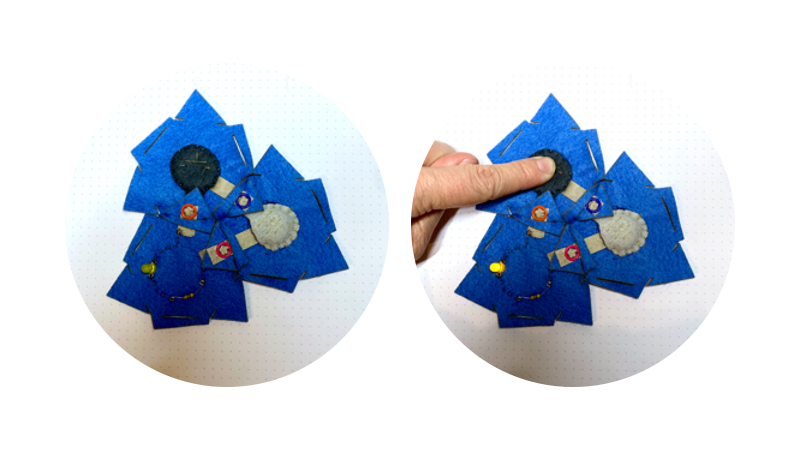
Testing the Digital Switch
I went ahead and snapped in one of the analog sensors to test as well.