6. BioFabricating Materials
This week we explored various ways to create biomaterials. In fashion biomaterials have the possibility to be used as alternatives to plastics, synthetic materials such as vinyl and leather. This week we learned about biomaterials that can be derived from different algae, from byproducts of the food industry such as gelatin and food waste, or in collaboration with microorganisms like kombucha.
Research and Inspiration
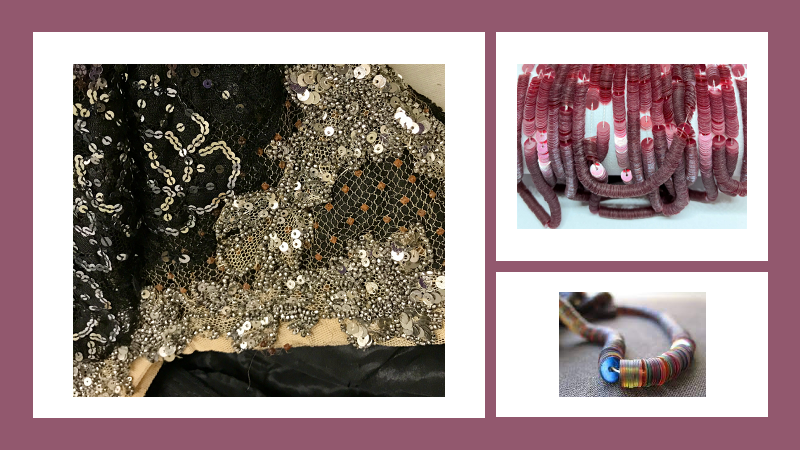
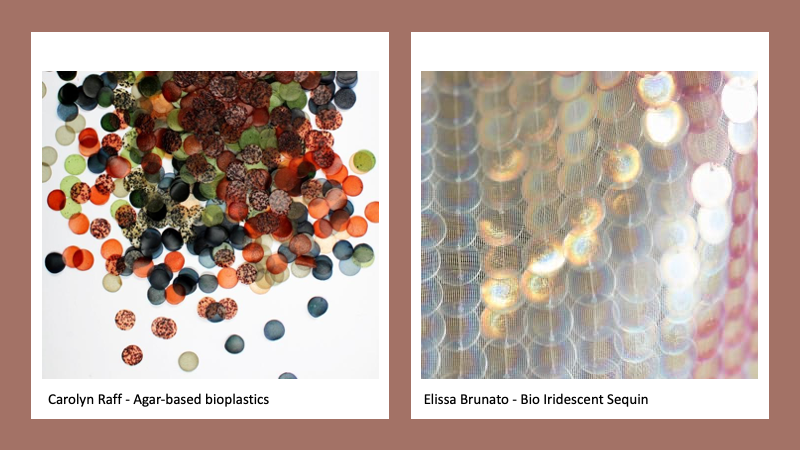
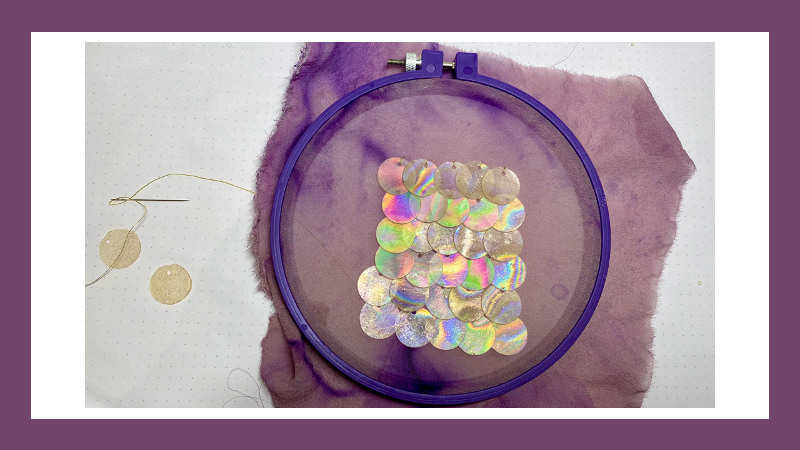
This week I was inspired by the works of Carolyn Raff and Elyssa Brunato. Both of these artists have made sequins and paillette embellishments out of biomaterials. In looking into the history further I learned that between the 19th and early 20th century sequins were made out of gelatin that was electroplated to be shiny. I encountered some of these sequins during a previous textile research internship. Though some of the sequins were over 100 years old they were still well preserved if kept dry and clean. Gelatin sequins are very sensitive to moisture and heat and were eventually replaced by plastic counterparts.
I decided to experiment with alginate bioplastic and gelatin bioplastic to make some embellishments. Alginate is extracted from algae and has applications in food and. This material is waterproof in acid and neutral pH water. Gelatin is a byproduct of beef and pork production in the form of collagen.
Alginate Bioplastics
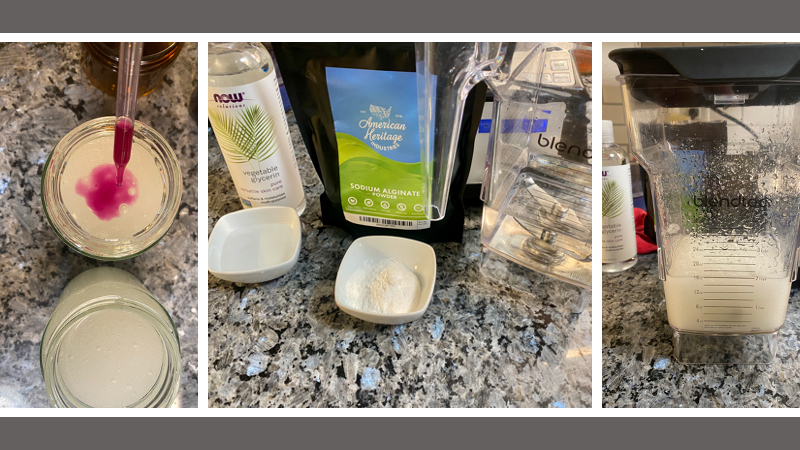
To make a flexible alginate bioplastic sheet I started with the following ratio:
- 12 grams Sodium Alginate
- 40 grams vegetable glycerin
- 400 milliliters of water
I blended this mixture in a blender and divided the mixture into two separate jars. To one jar I added pigment extracted from the pokeberry dye from the week 04 assignment on biochromes. To the second jar I added pokeberry dye saved from the week 04 assignment.
To make the curing solution for the alginate plastic I mixed the following in a plastic spray bottle to get a 10% calcium chloride solution.
- 10 grams calcium chloride
- 100 ml warm water
To make the most basic form of the alginate I poured some of the dye tinted alginate mixture to a shallow mold made from laser cut acrylic left from another project. The mold was tilted to help spread the alginate evenly. Once the alginate leveled out I sprayed it with the calcium chloride solution to kick off the curing process. The alginate immediately started shrinking in the mold as water is expelled.
Alginate Additives
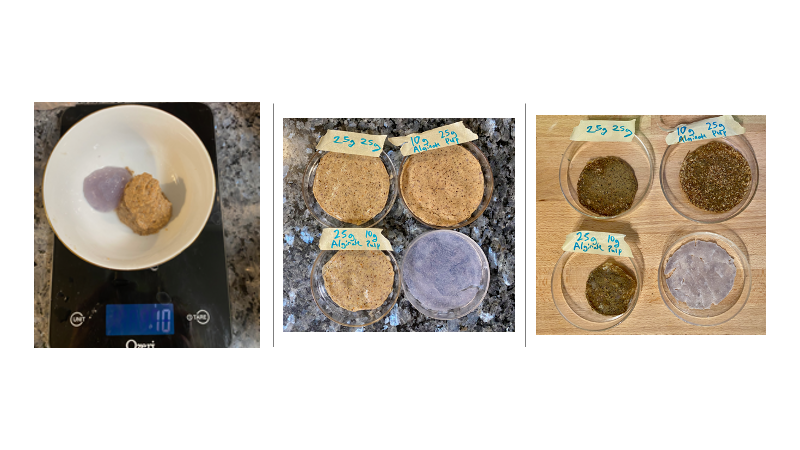
To the second batch on the alginate I experimented with different ratios of plant matter left over from the prickly pear fruit and seeds from week 4. I made a pulp from the seeds and skins of the prickly fruit by putting it in the blender and adding enough water to make it blend smoothly. I added in alginate and pulp in the following different ratios:
1:1 alginate to cactus pulp 1:2.5 alginate to cactus pulp 2.5:1 alginate to cactus pulp 100% alginate as a control to observe shrinkage
Results
All of the samples had some shrinking with the 2.5:1 alginate to cactus pulp mixture having the most shrinkage, the 1:1 mixture had a moderate amount of shrinkage, and the 1:2.5 alginate to pulp mixture and the alginate sample had the least shrinkage. The 2.5:1 alginate sample feels the most flexible and least least likely to rip when stretched. The 1:2.5 alginate to pulp mixture was the most fragile and had little elasticity. The 100% alginate sample seemed a little fragile possibly due to the addition of the pokeweed pigments and residual chemicals from the pigment extraction.
Gelatin Bioplastic
To make gelatin bioplastic I started with the following ratio:
- 48 grams gelatine
- 12 grams of glycerine
- 240 milliliters of water
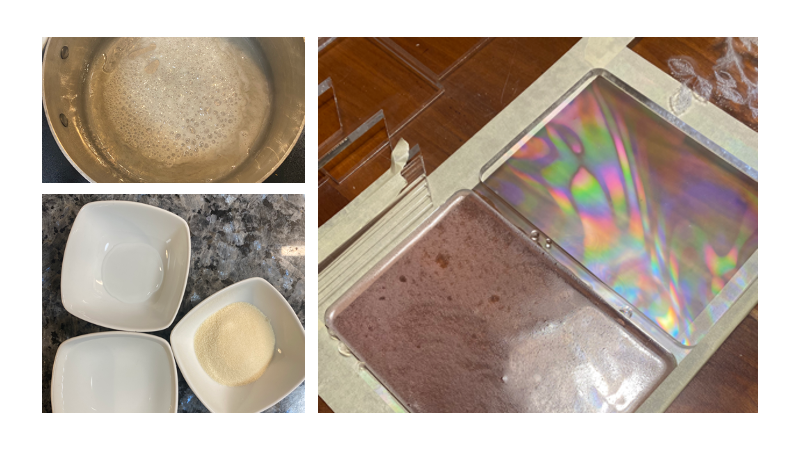
I added the glycerin and water to a pot and heated to incorporate. Once the mixture was at 60 degrees celsius I added the gelatin powder. I whisked until all the gelatin was melted and continued to whisk as the mixture simmered for 5 minutes. I removed and added some pokeberry dye ink left from week 04.
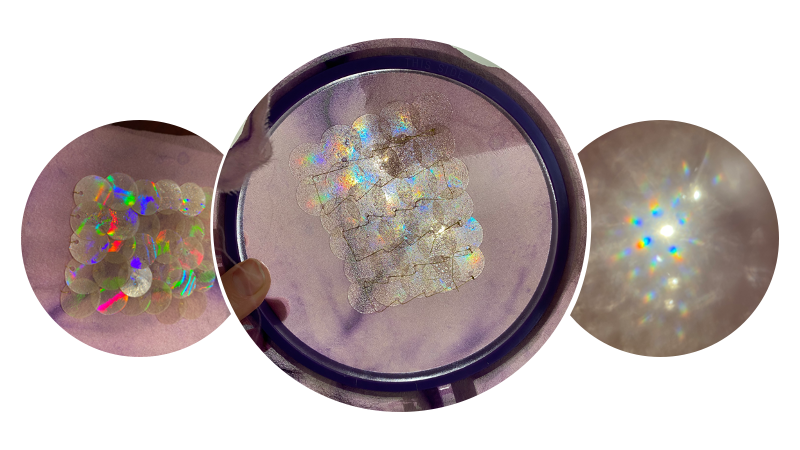
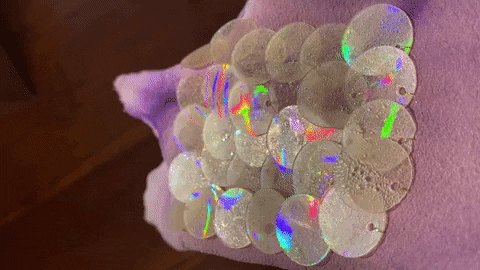
Gelatin Sequins
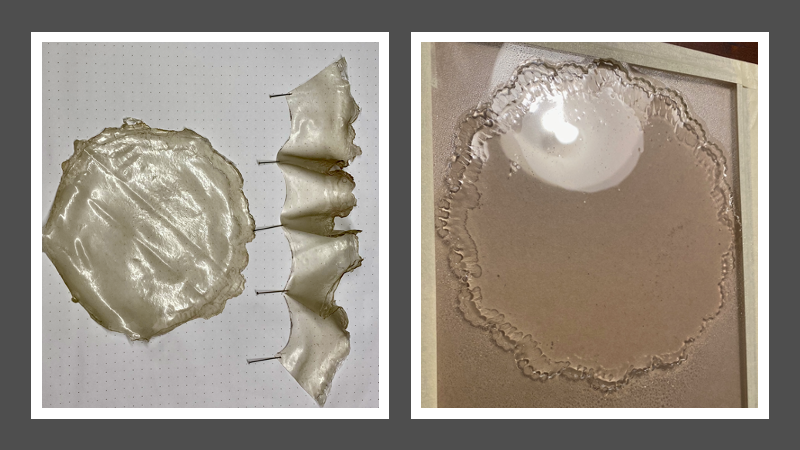
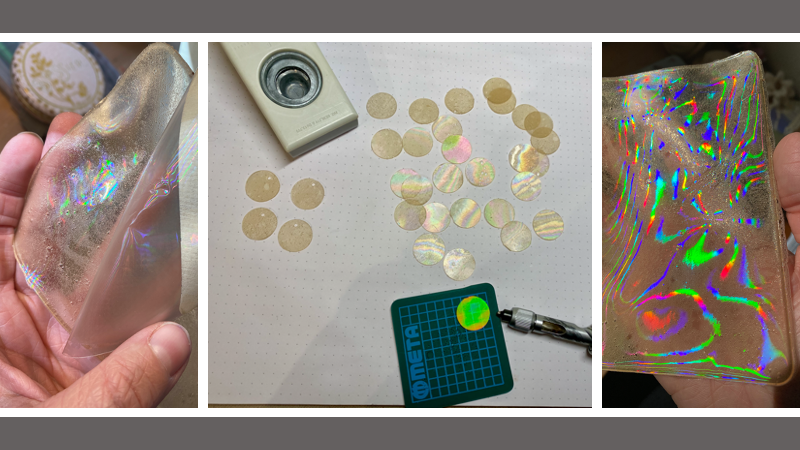
To give the gelatin a more interesting finish I cast it onto a diffraction grating sheet to capture the iridescent surface of the sheet into the gelatin. To prepare the molds I taped a diffraction grating sheet to the bottom of a laser cut acrylic mold and secured it between another sheet of acrylic. The gelatin was poured across the surface of the sheet and the mold was tipped to level the gelatin out.
Results
The surface of gelatin bioplastic took on the iridescent properties of the diffraction grating sheet quite well. The first batch of gelatin was small and had many bubbles but had no effect on the iridescent properties of the side of the gelatin that was cast onto the diffraction grating sheet. When looking through the bioplastic sheet the light is diffracted just as it would be looking through the original sheet.
Kombucha Bio-leather
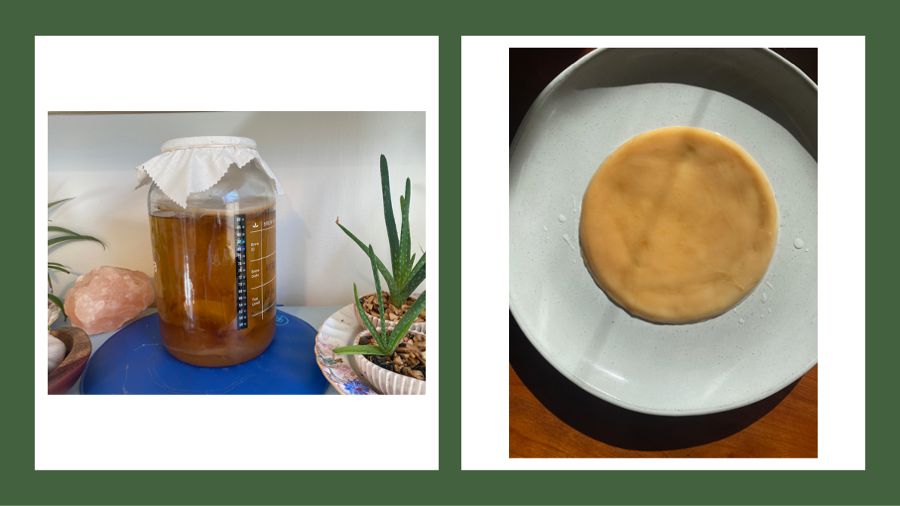
To make the Kombucha I followed this recipe:
- In a medium sized pot, bring 4 cups of filtered water to a boil, then turn off heat.
- Add 3 tablespoons of black tea leaves to a cotton tea bag and add to the pot.
- Let the tea steep for 7 minutes, then remove the tea bag.
- Add 1 cup of sugar to the pot and stir until dissolved.
- Pour sweet tea mixture into a 1 gallon jar.
- Fill the jar up with 10 more cups of cold, filtered water.
- When the temperature is between 68-86 degrees fahrenheit add a kombucha culture (SCOBY)
- Test pH, it should be between 4.5 or below.
- Cover and set aside in a warm place until a new SCOBY forms. I used a heat mat to keep the temperature around 83 degrees fahrenheit.
- When the SCOBY is a few millimeters thick it is ready to use.
Check in to Textile as Scaffold Week 09 to see what I made with the SCOBY material!