7. Computational Couture
This week, we explored the world of computational couture, at the intersection of abstract data manipulation and physical material creation. The goal of the week was to use Rhino and Grasshopper 3D to create a parametric model to print on a 3D Printer. As a computer scientist, the idea of this week really spoke to me, but the reality of it really exceeded my expectations. Turns out, creating parametric models with a visual programming language is FUN. Once I started playing around with it, I felt possessed by the demon of Grasshopper and went into a sort of trance, coding late into the night and obsessing about data structures and algorithms. I admit it doesn't make for the cleanest code, but I had a lot of fun exploring the possibilities of this software.
Inspiration
I've been following the work of Krizia Medero of Sew Printed on social media for a while and I find it really inspiring. Krizia uses desktop 3D Printers and flexible filaments to create all sorts of textiles, from fabric samples and sequin panels to complete wearable garments, shoes and bags.
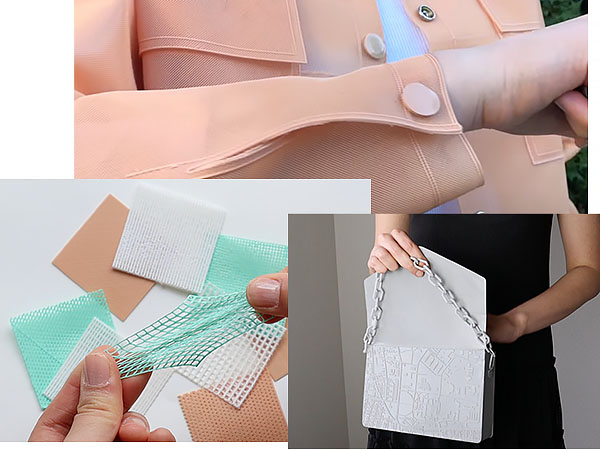
She recently revealed her latest project, a wedding dress she created out of chiffon and 3D printed flowers that look just like lace.
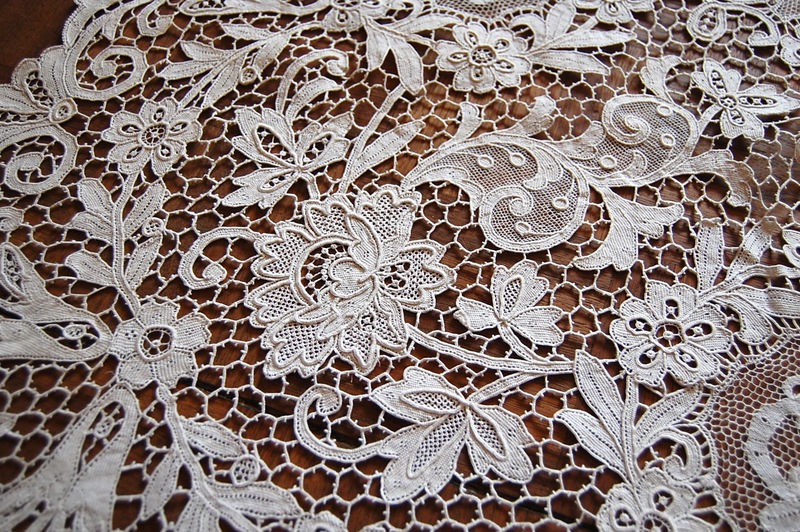
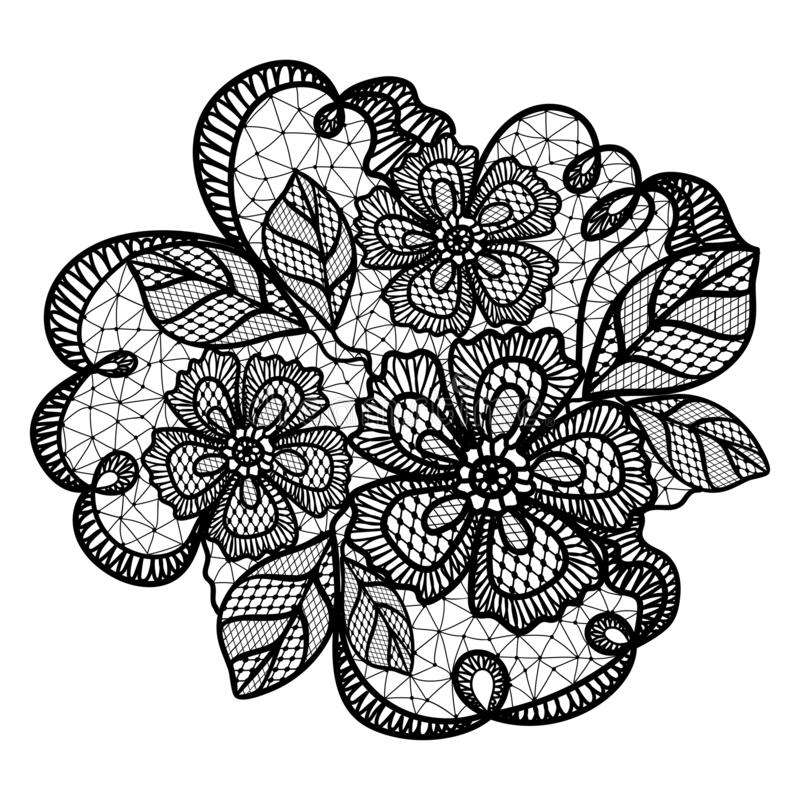
I found this idea of combining the modernity of 3D printing with the aesthetics of traditional lace fascinating, and I searched for pictures of lace to use as inspiration to create a fabric sample.
Parametric flower generation
Looking for parametric fabric generation examples online, I found this article on Batik design generation by Tian et al.
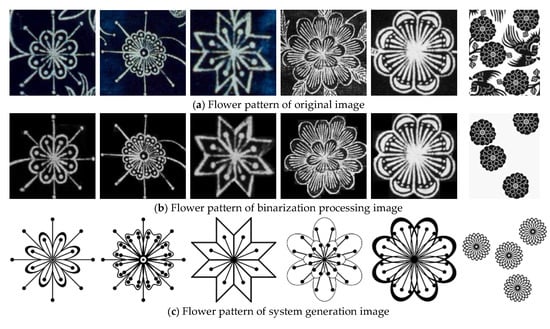
While Batik and lace are obviously very different textiles, I figured some of the algorithms used to create flower shapes might apply to my situation as well. The paper itself was way too in-depth for me to dive into for a one-week project, but browing through it I took away the main idea of using rose curves (also called rhodonea or Grandi's curves) to generate flowers mathematically.
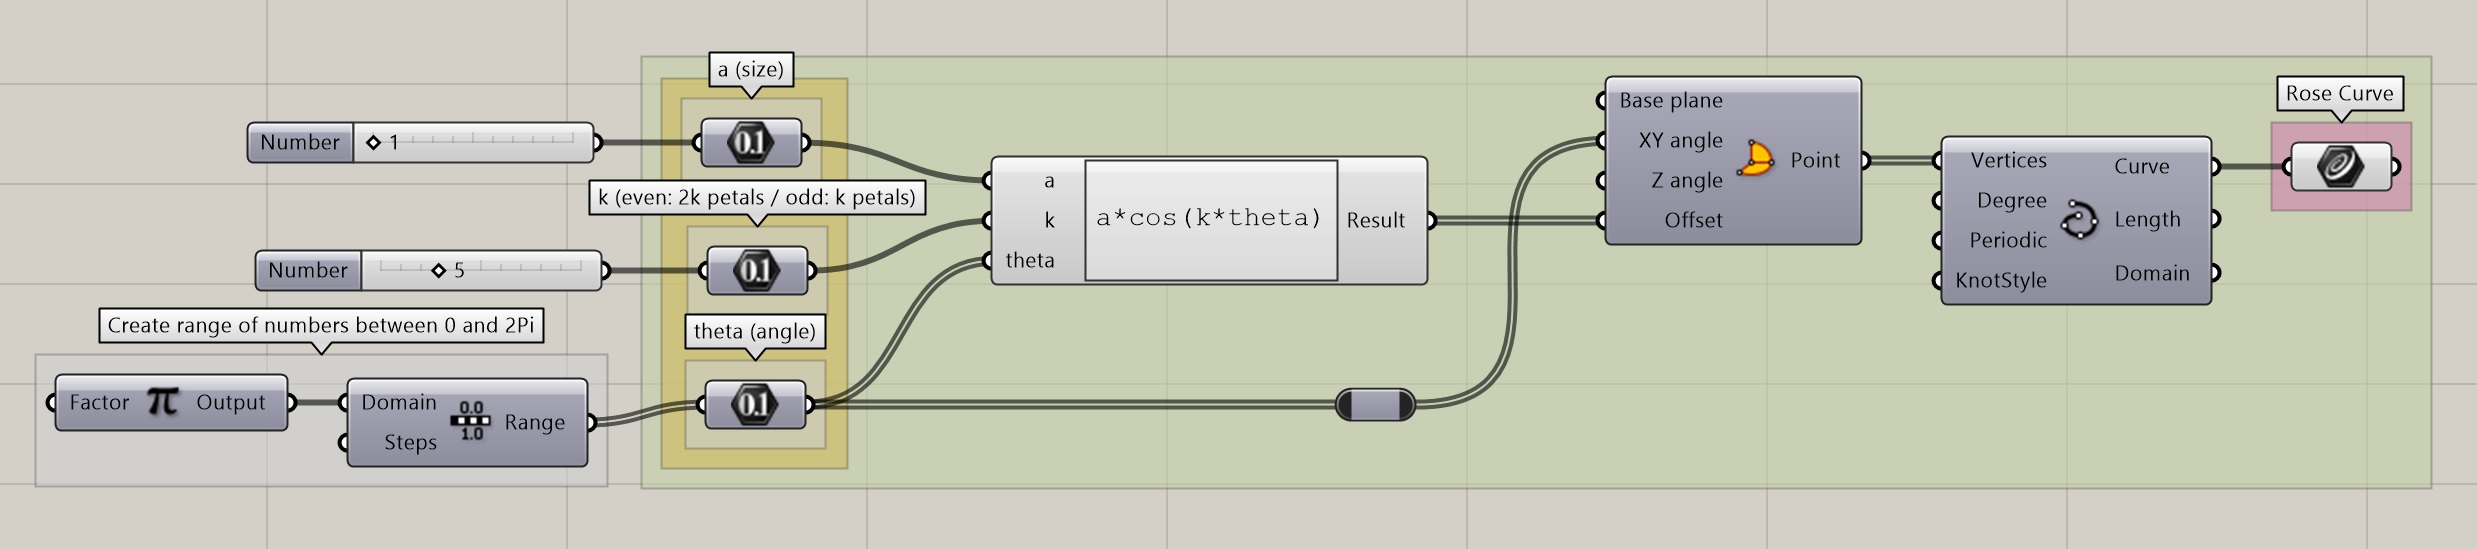
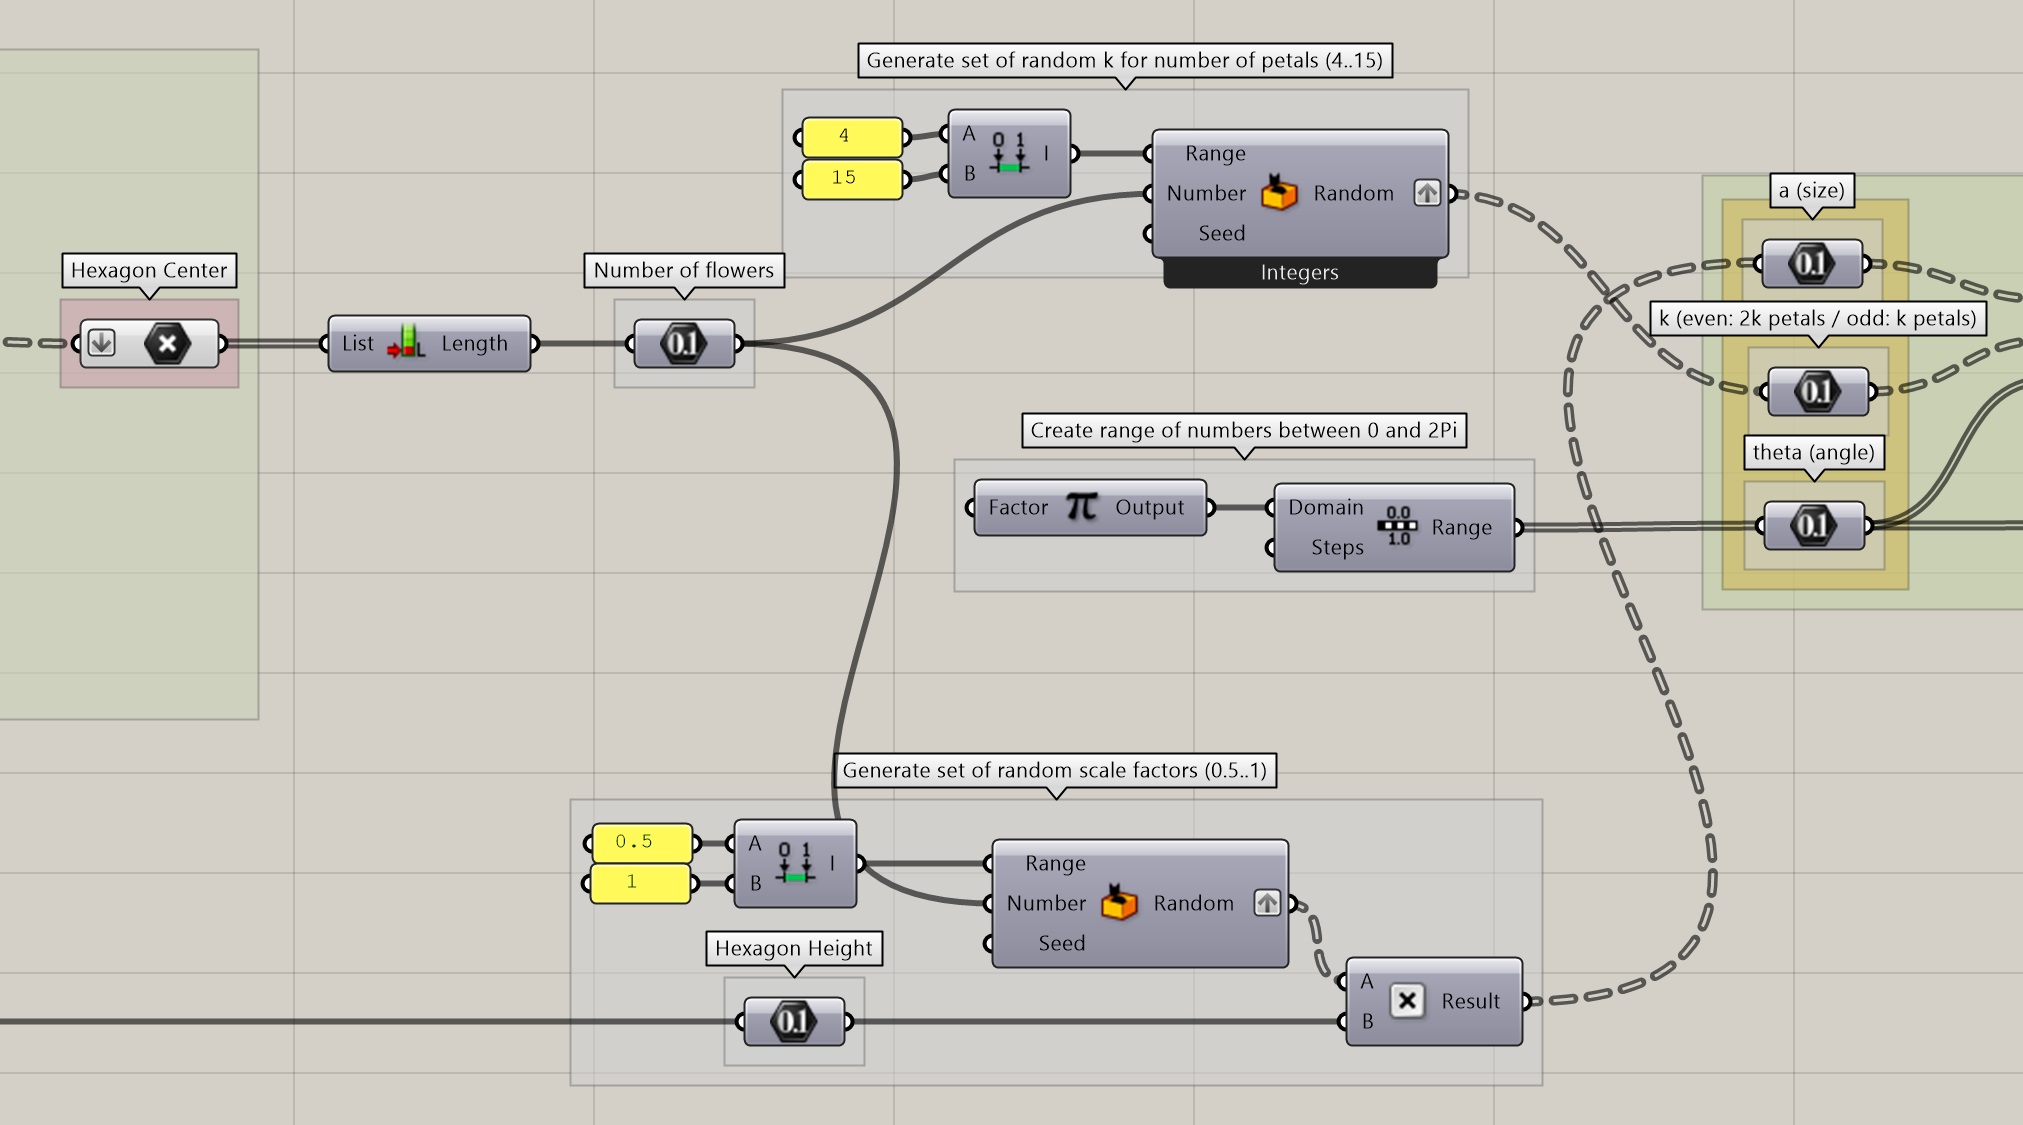
Rose curves are constructed with very simple polar equations of the form r=acoskt or r=asinkt. The equation defines the distance of each point to the center based on the angle. a is the scale factor for the radius and k is a factor that determines the number of petals the curve will have. If these curves look familiar, it might be because they're the basis for many people's first experience with parametric design: the Spirograph!

Generating Rose Curves
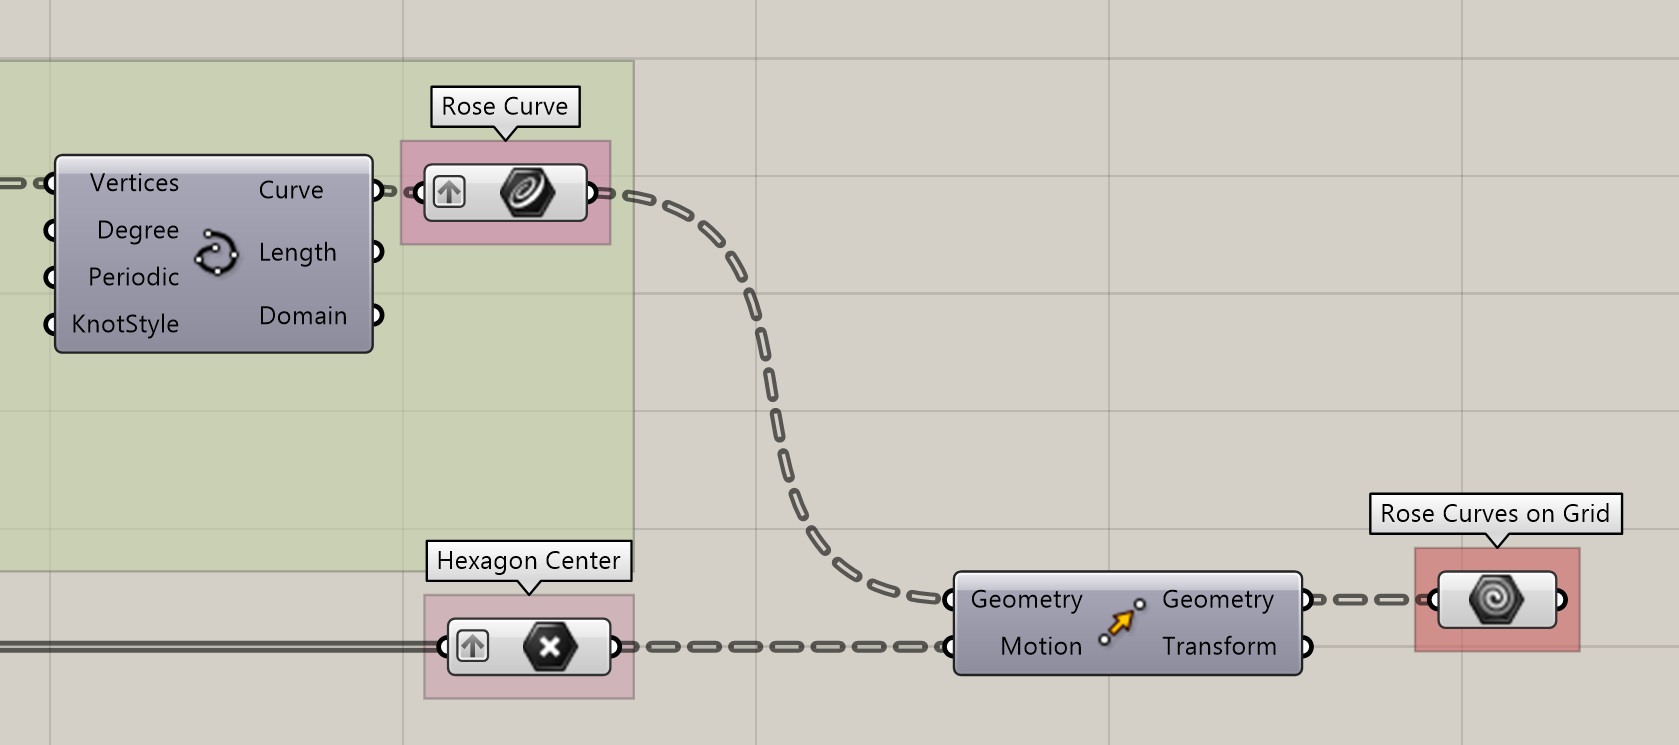
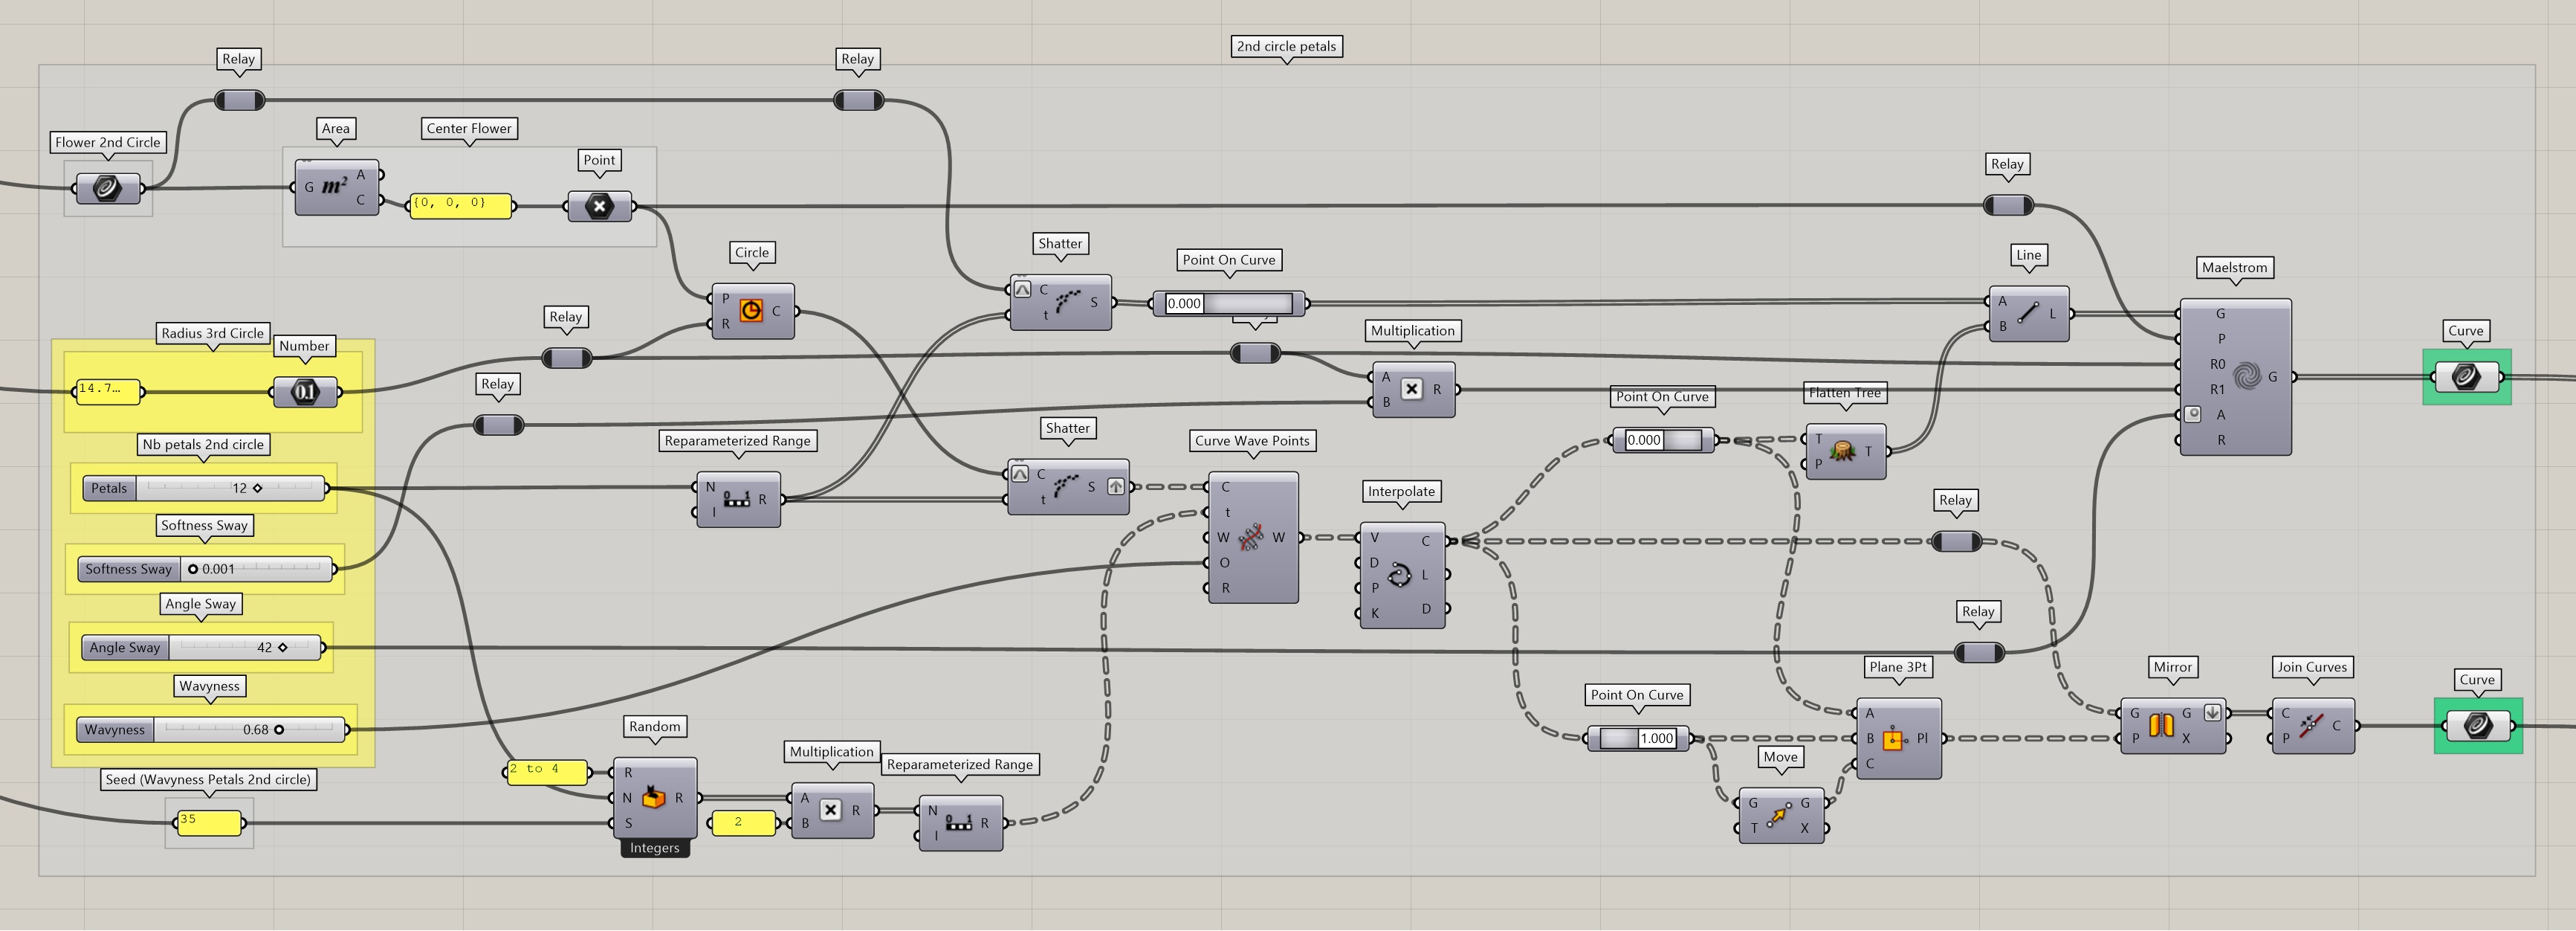
Implementing rose curves in Grasshopper was actually not that hard once I had understood the way the data structures worked.

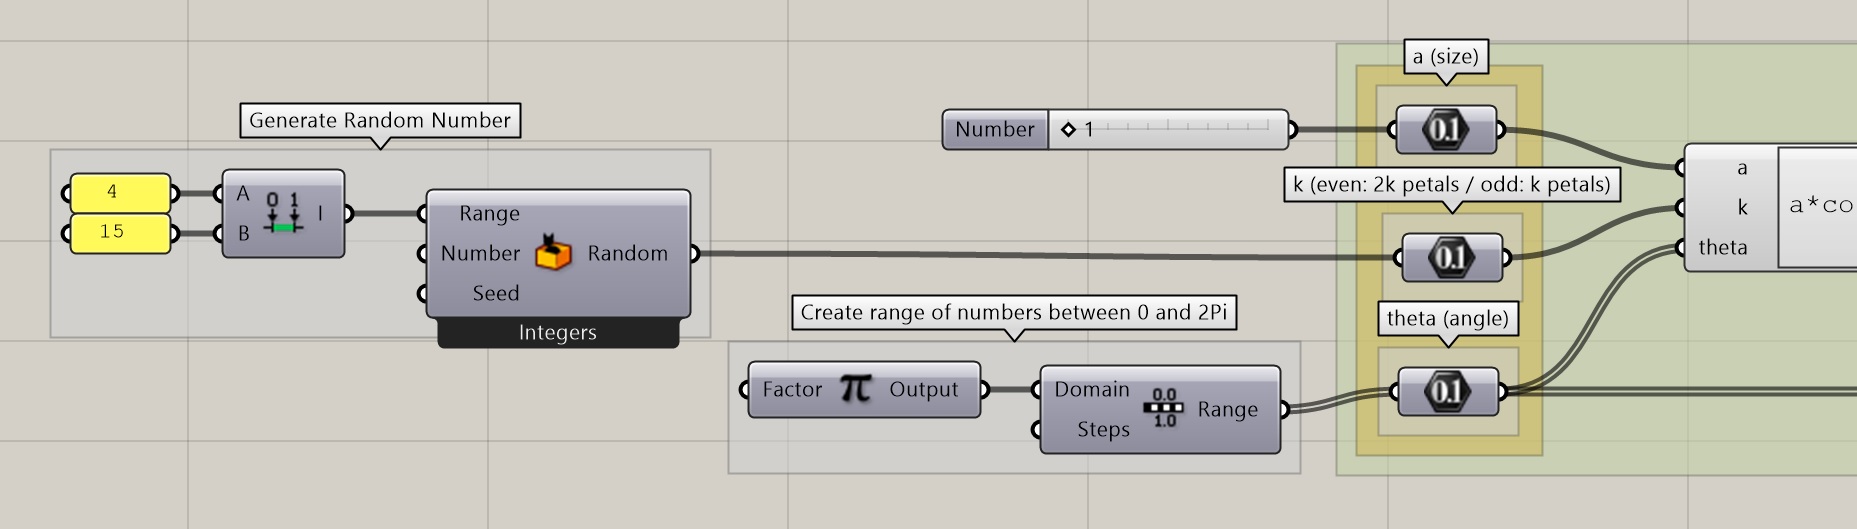
Adding Randomness
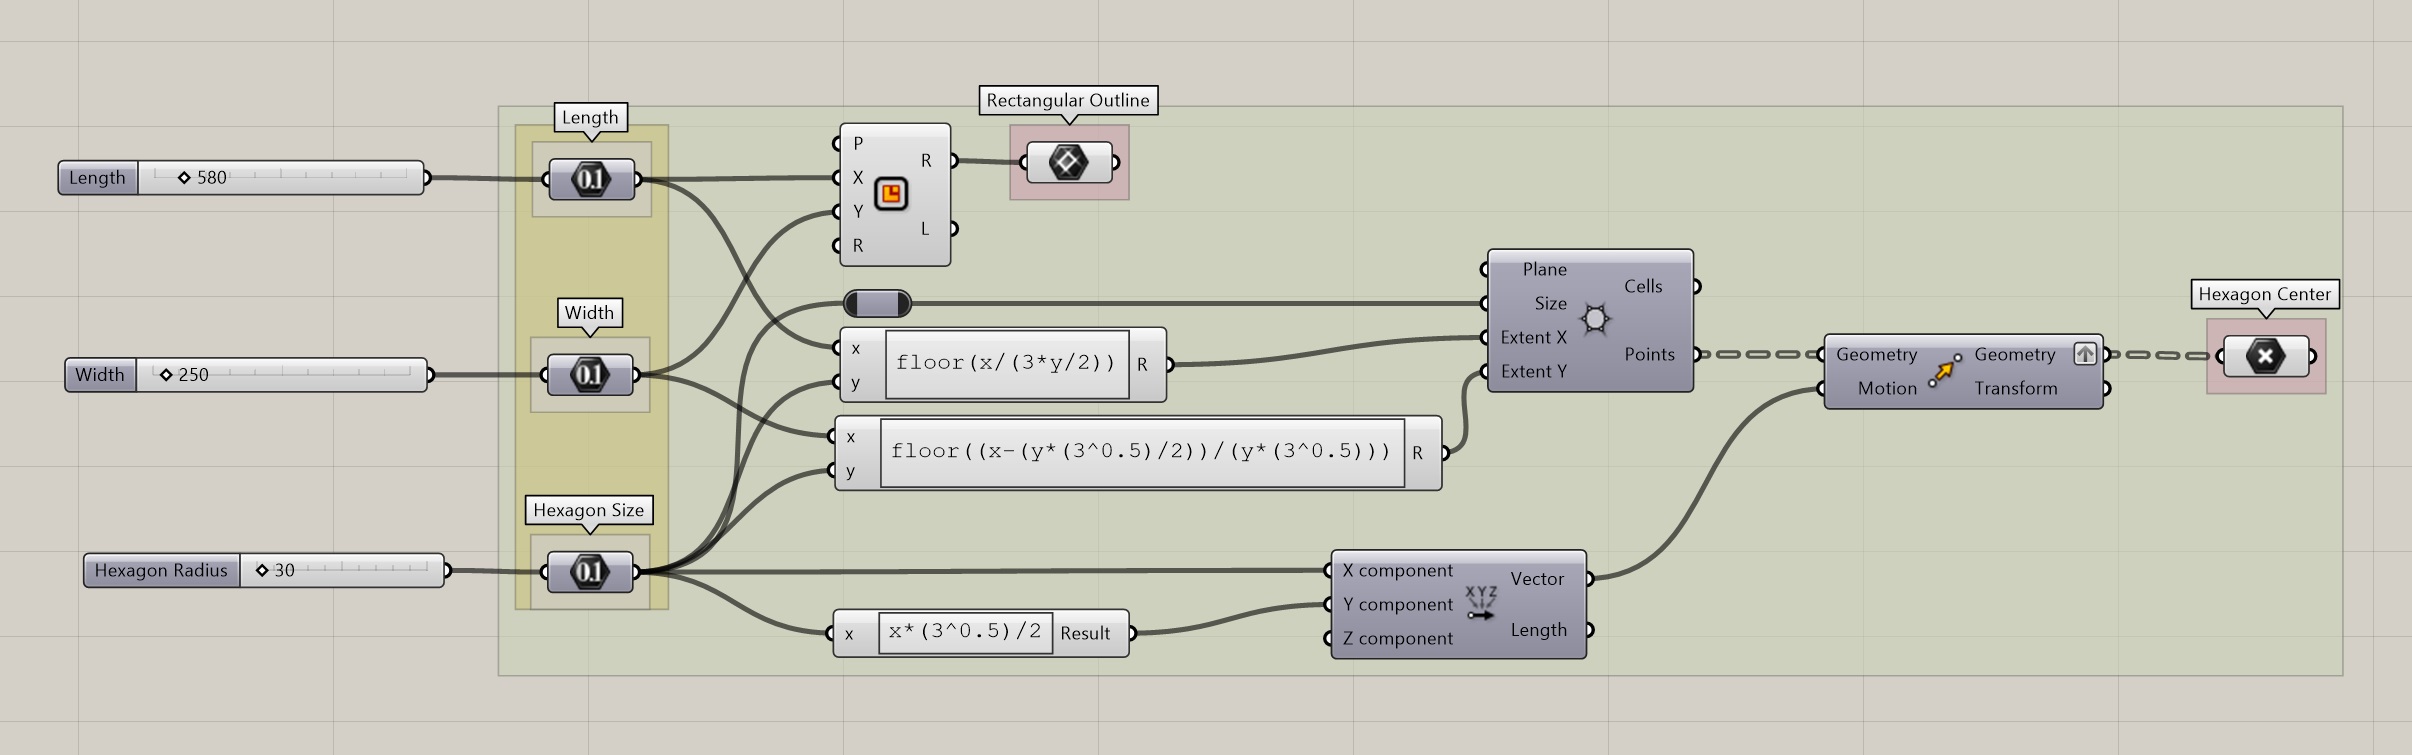
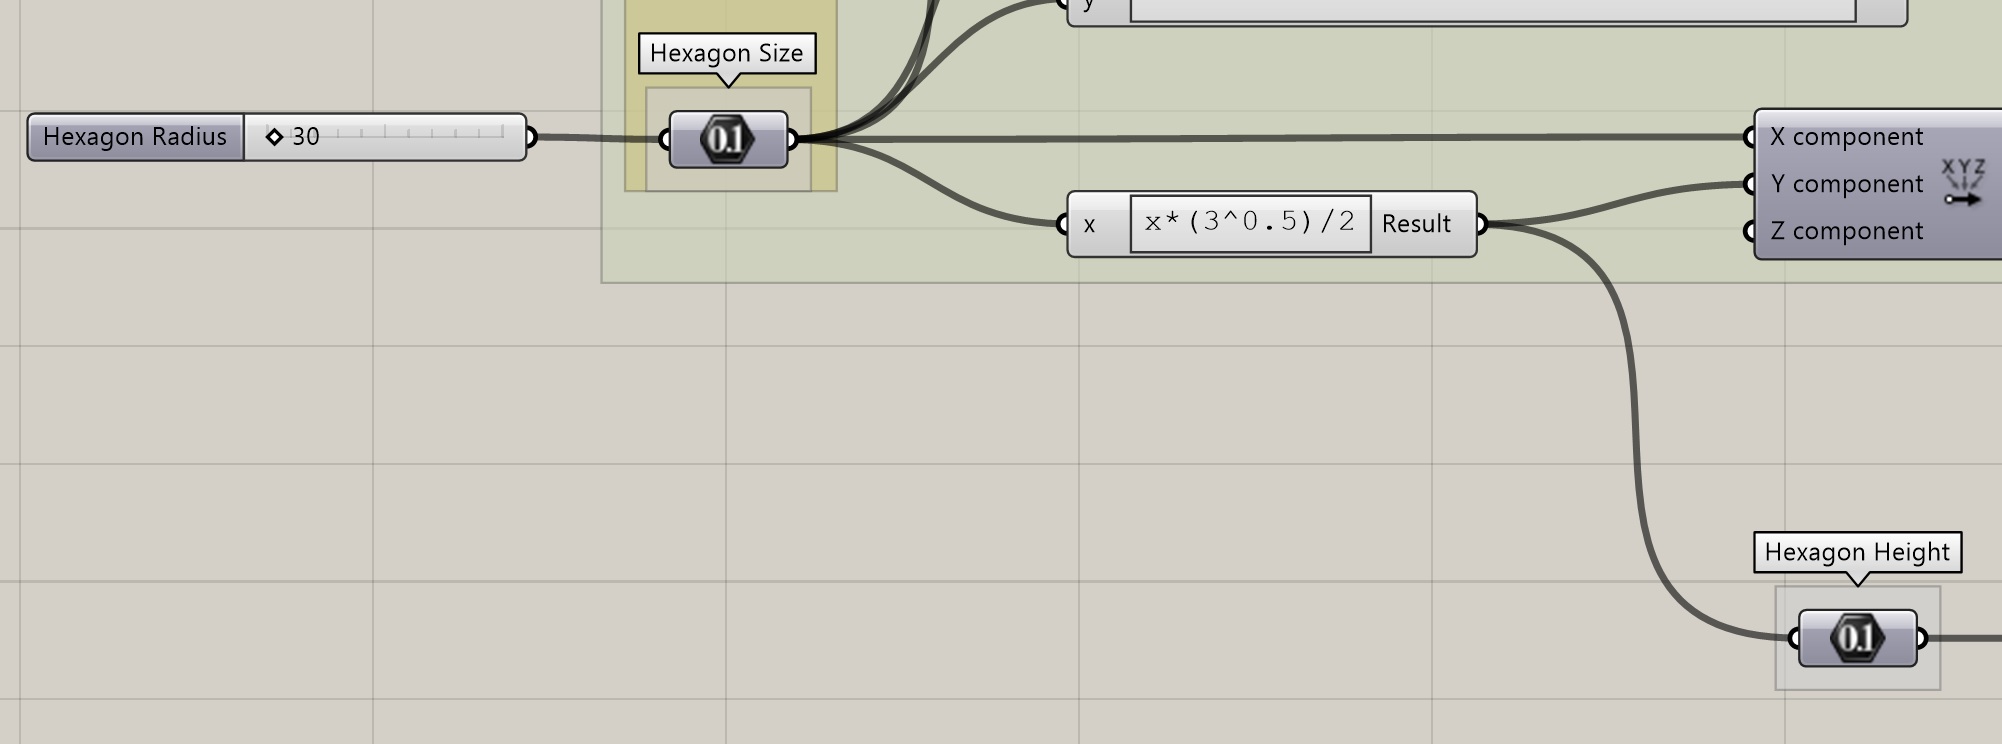
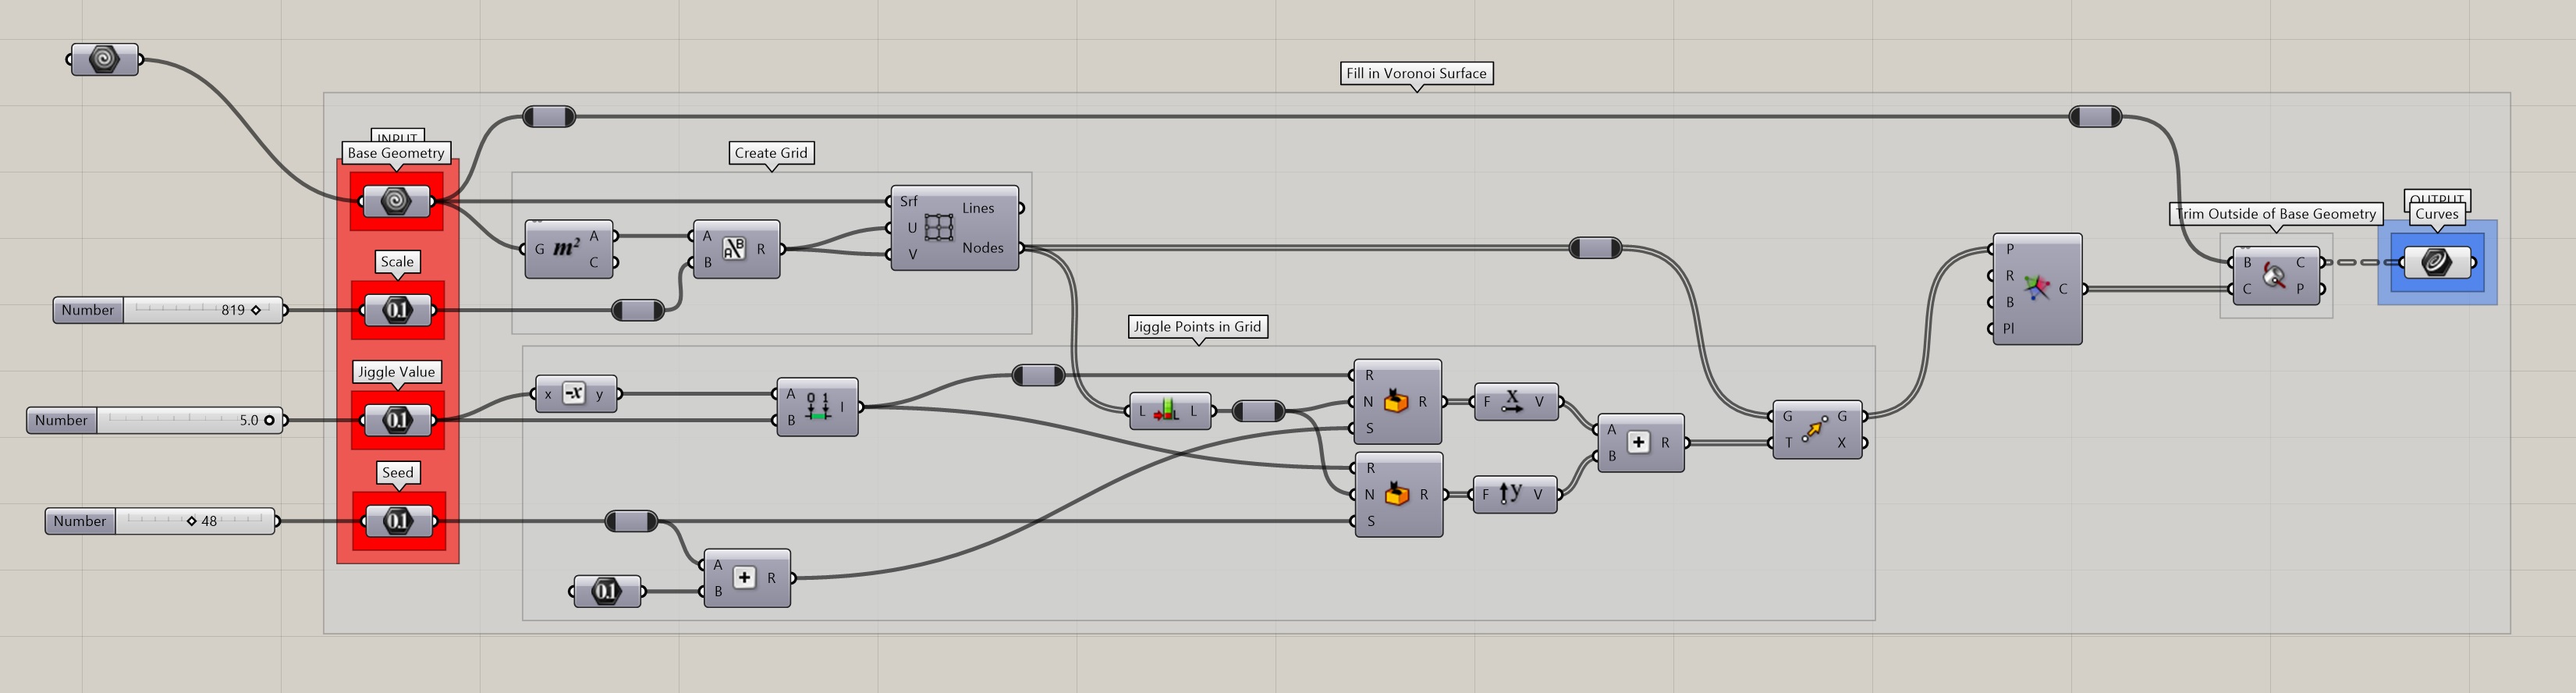
Generating an Hexagonal Grid

Plugging the Rose Curves into the Grid
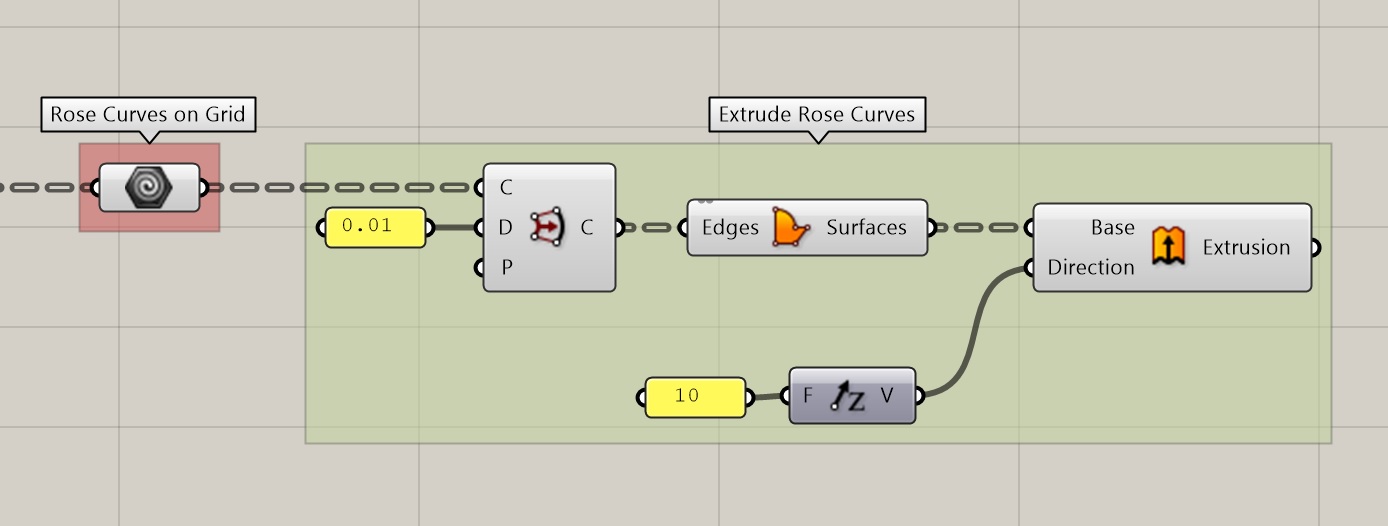
Extruding the Rose Curves
The trick with the rose curves is because they're self-intersecting, they need a little offset so that the surface generation works properly.
Results
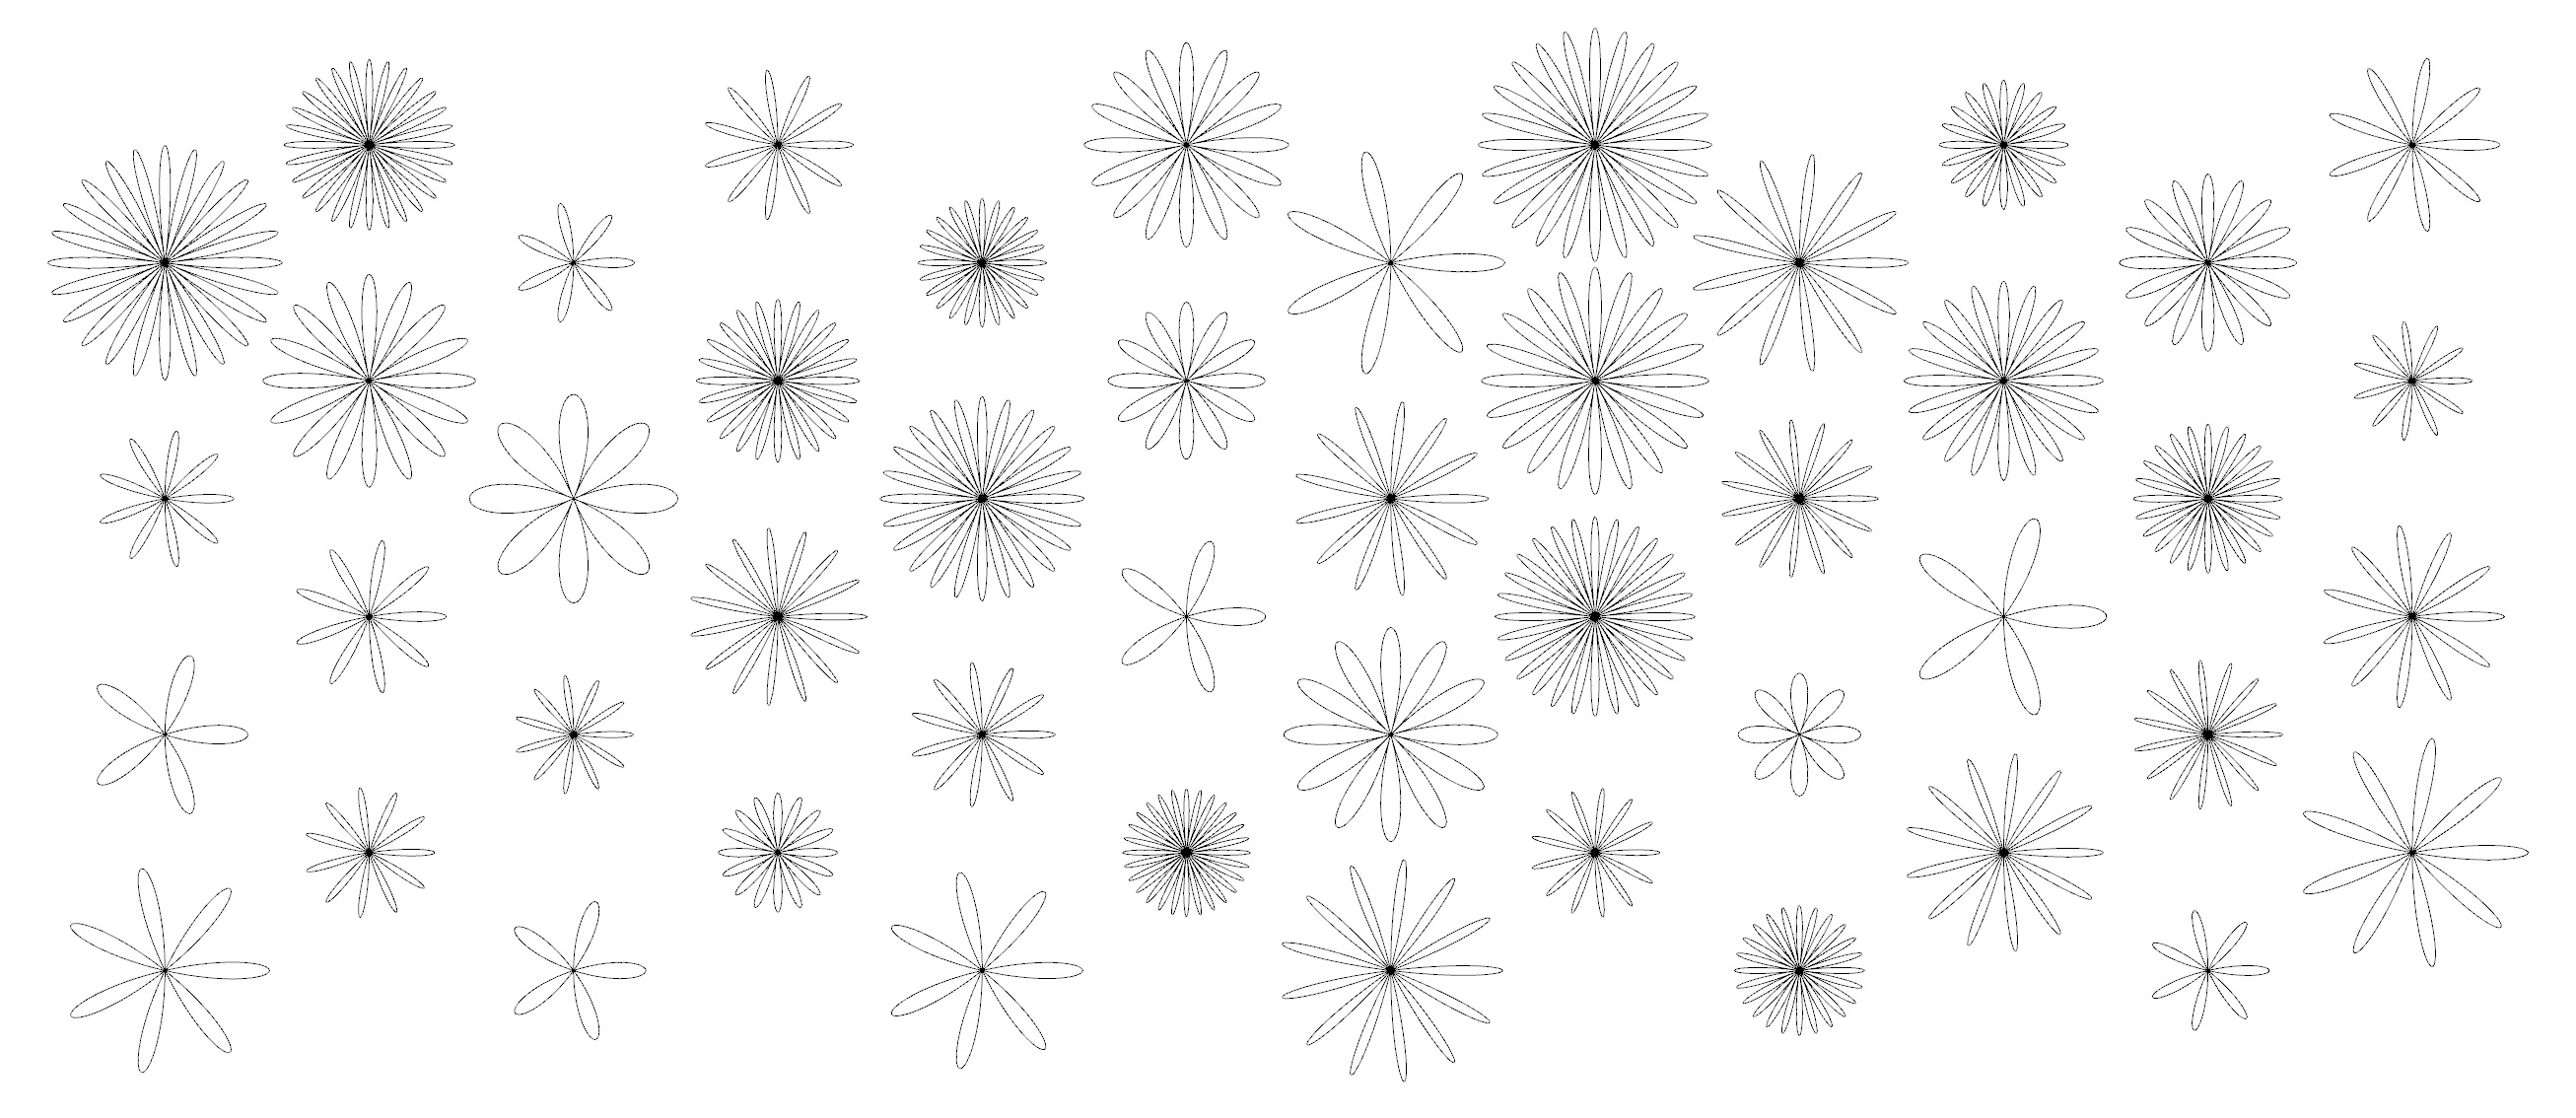
And here's what it looks like after creating surfaces from the curves and extruding them to transform the curves into 3D objects:
The grasshopper source code1 and an example of 3D model output2 can be downloaded below.
Unfortunately the shapes are not very suited to 3D printing, and Cura gives weird results when trying to slice them:

I haven't tried printing it but I'm expecting that the flowers would be completely disjoint at the center.
On top of this, I wasn't very excited about the perfectly symmetrical flowers and I thought it would be a lot of work to mess them up enough so that they'd appear organic, so I switched to a different approach.
Parametric lace generation
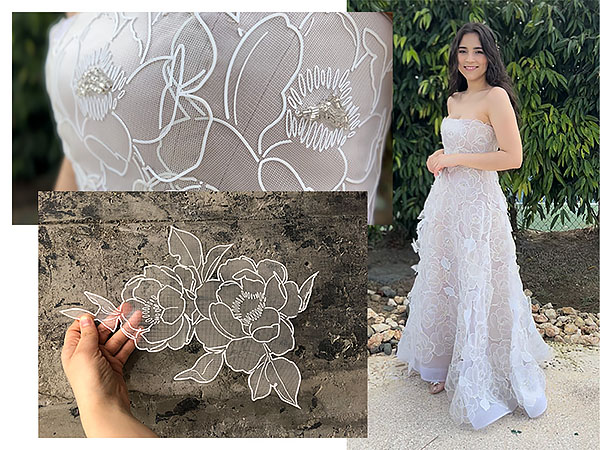
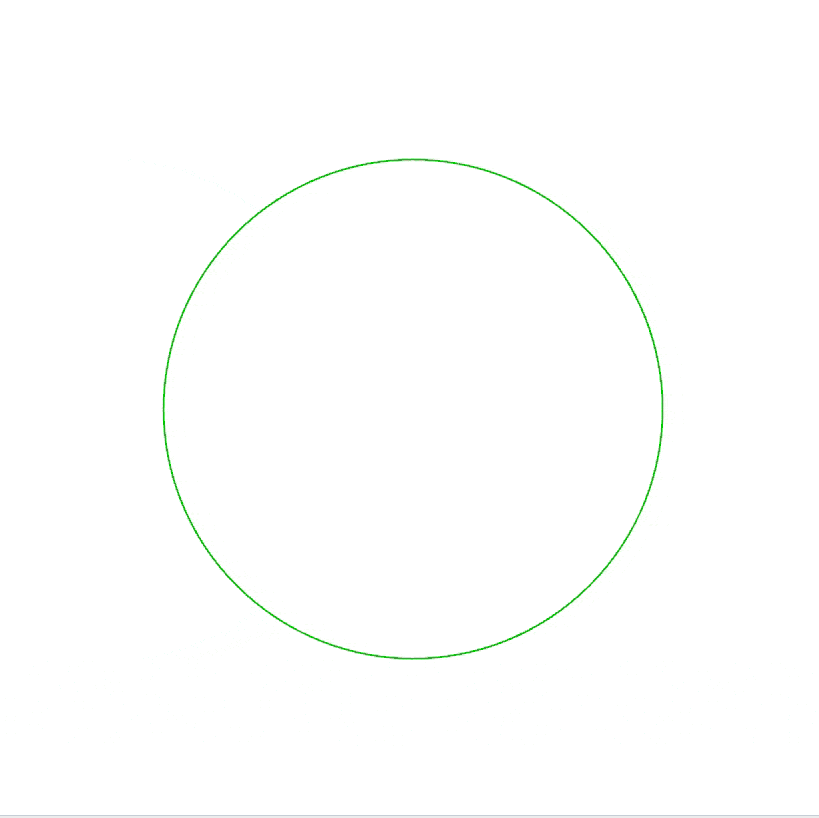
I decided to start from scratch and try to recreate a specific lace panels, using a step-by-step approach.
I chose the stock image below to reproduce, because I thought it had a lot of distinct parts and textures. Note that it's not actually a real lace panel but a vectorial drawing of a lace panel, which I thought would make it easier to reproduce using parametric design.
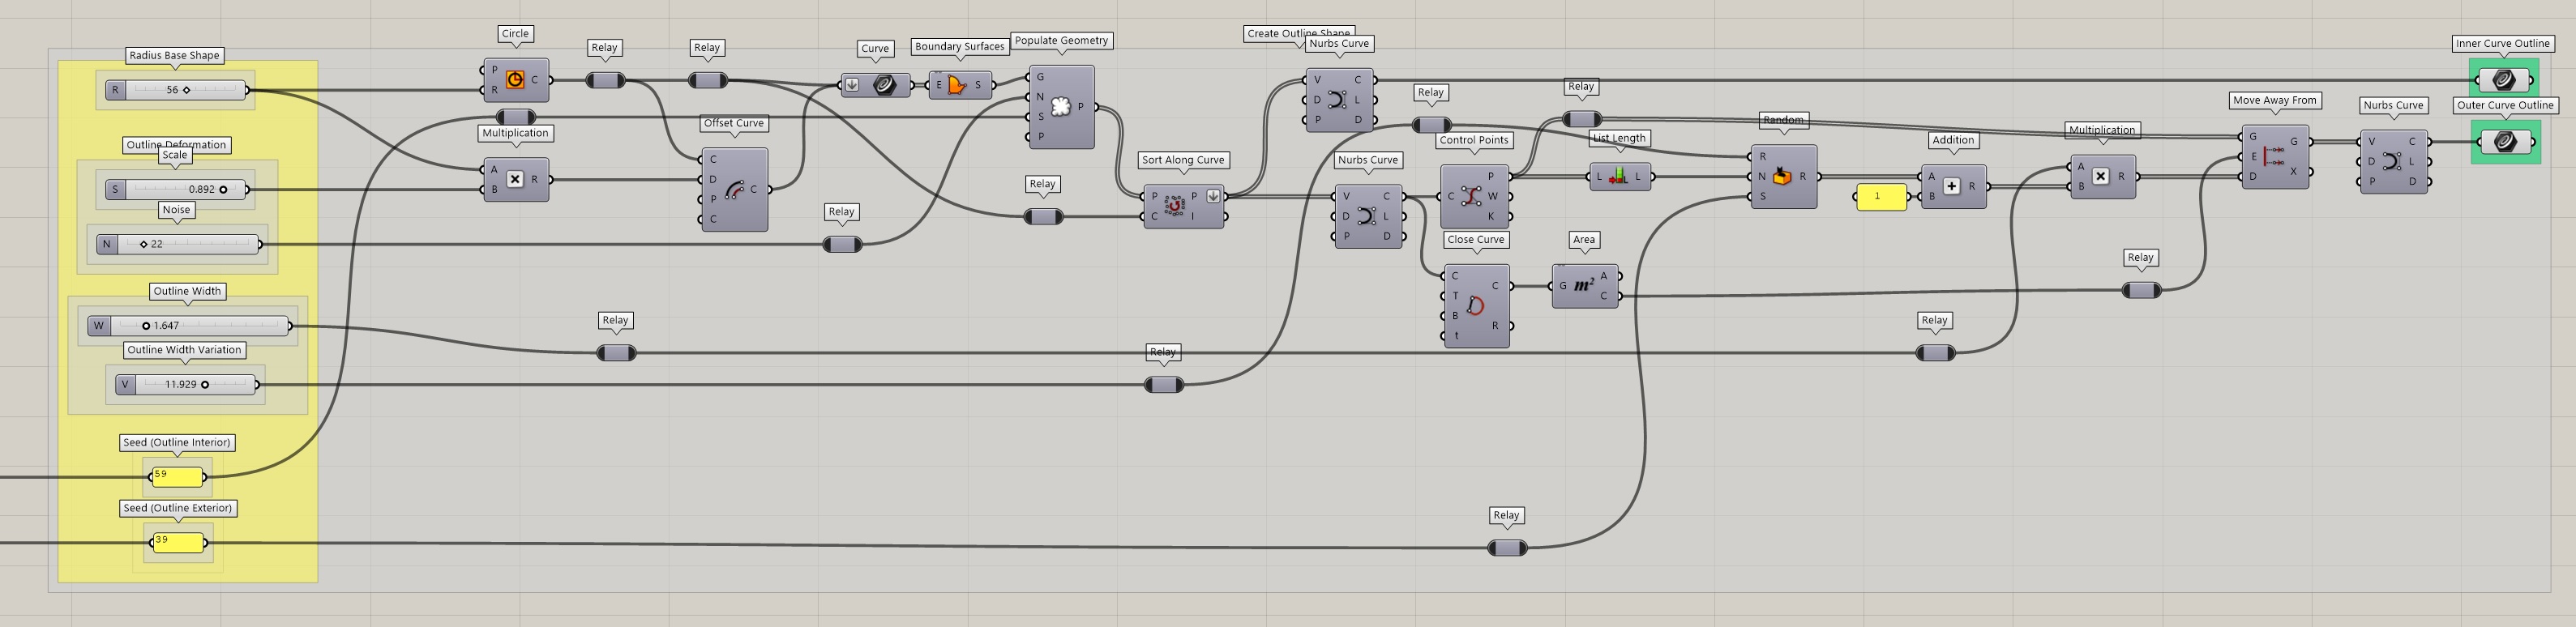
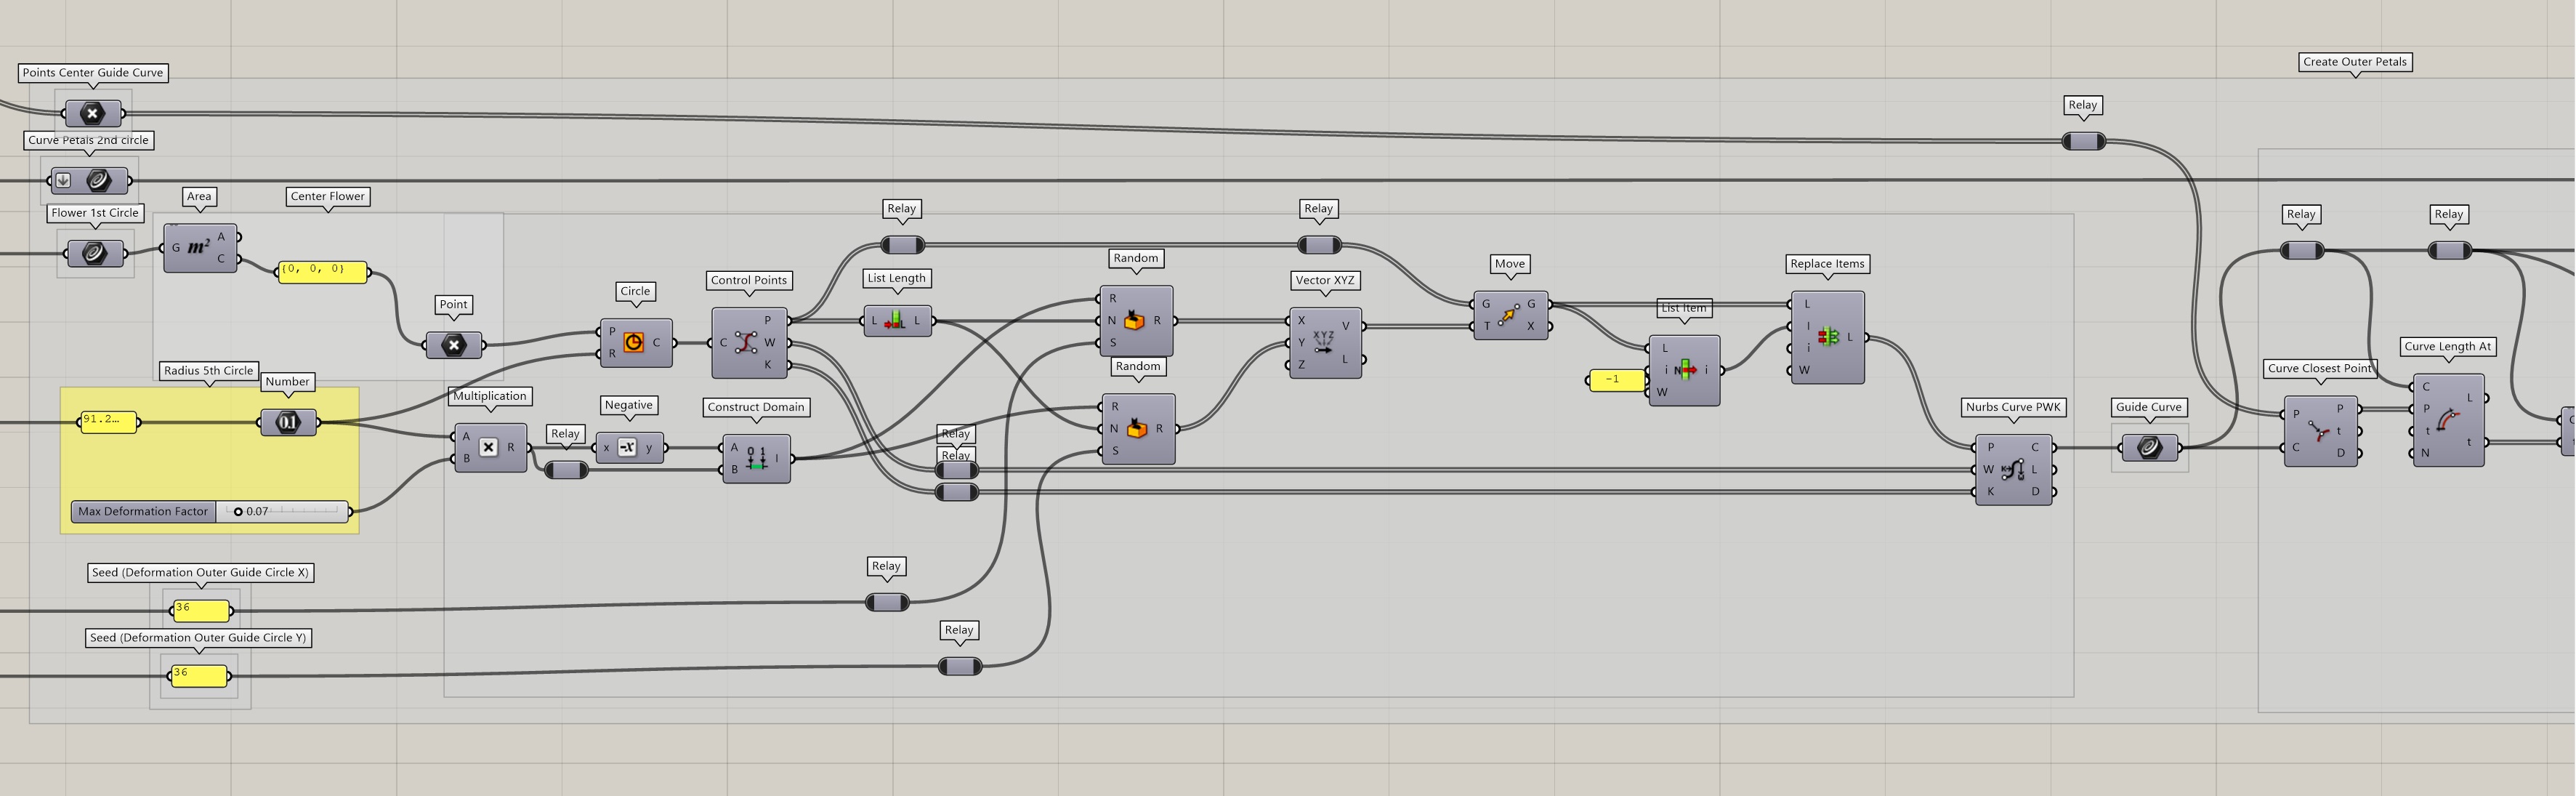
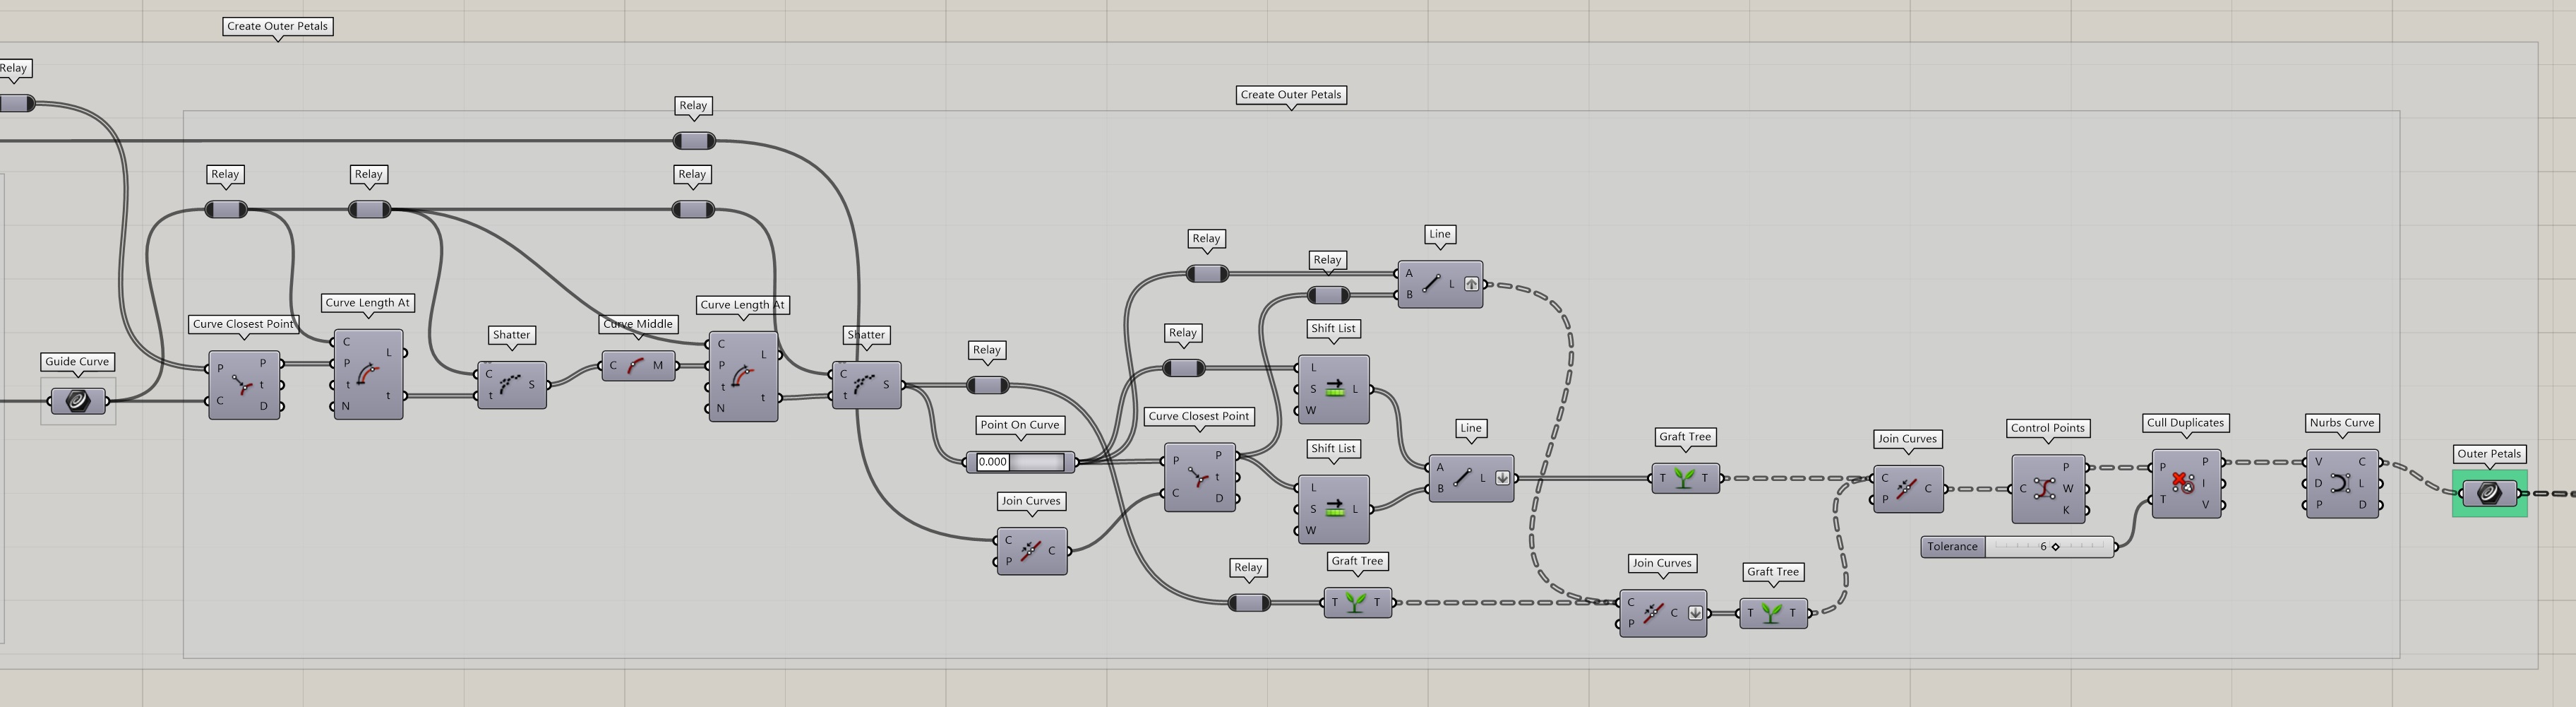
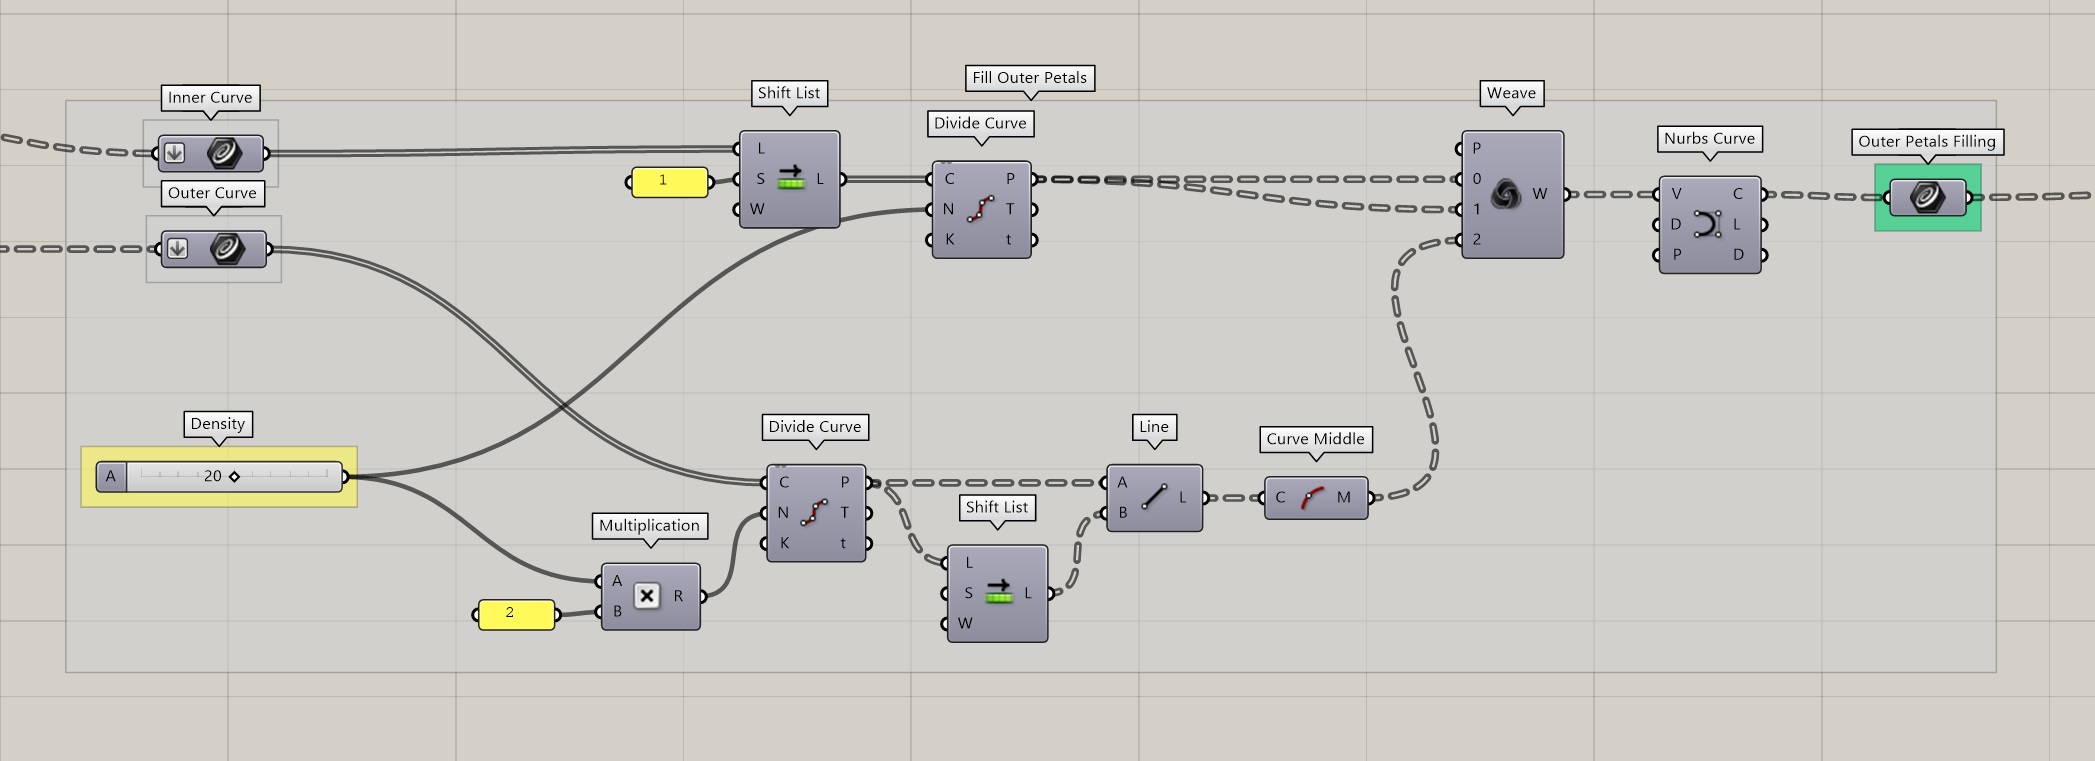
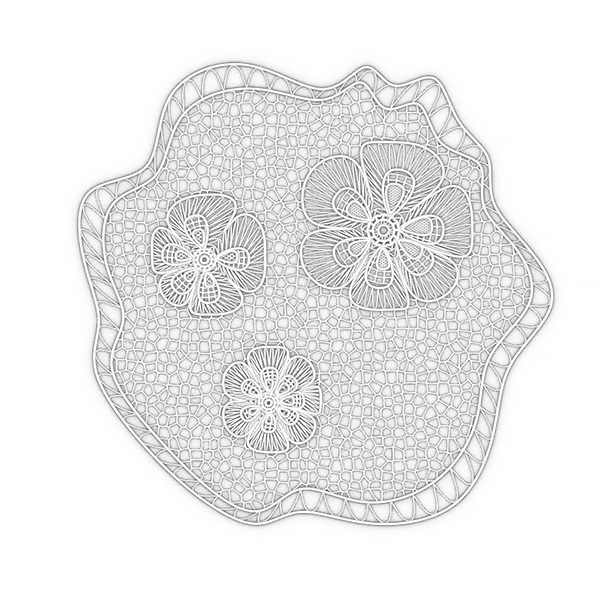
As it turns out, creating this step by step completely parametrically is a lot of code... Here's a preview before we dive into the details:

Outline
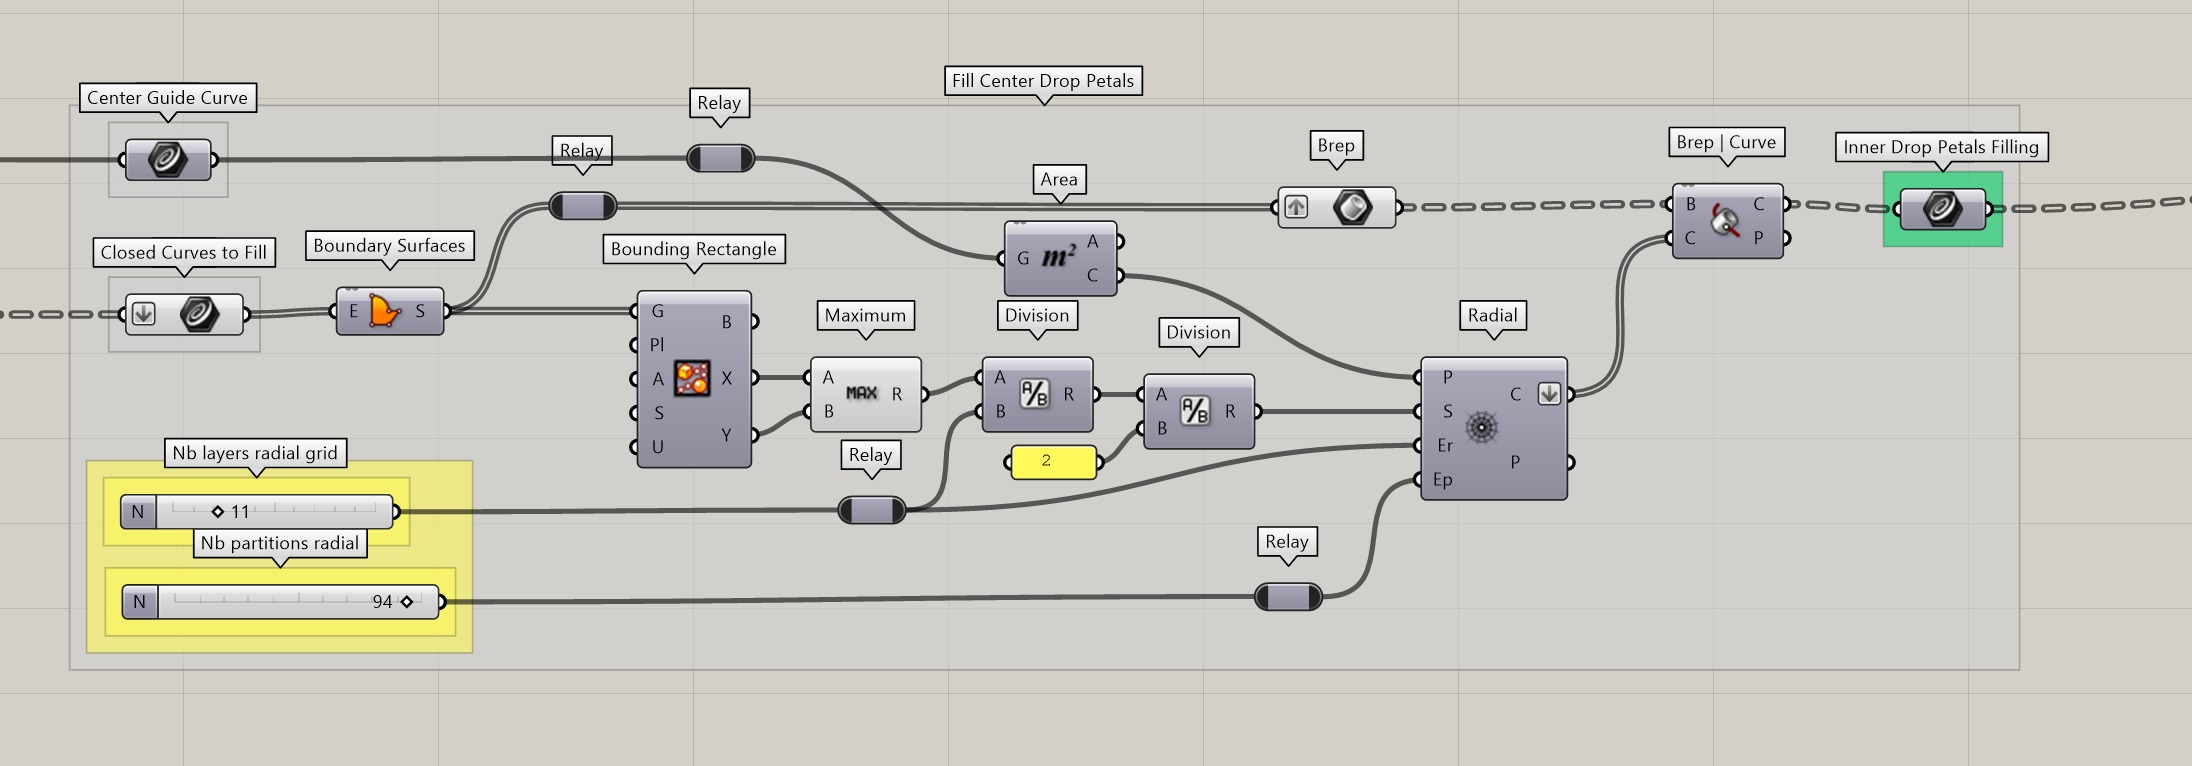
Base geometry
| Outline Expansion | 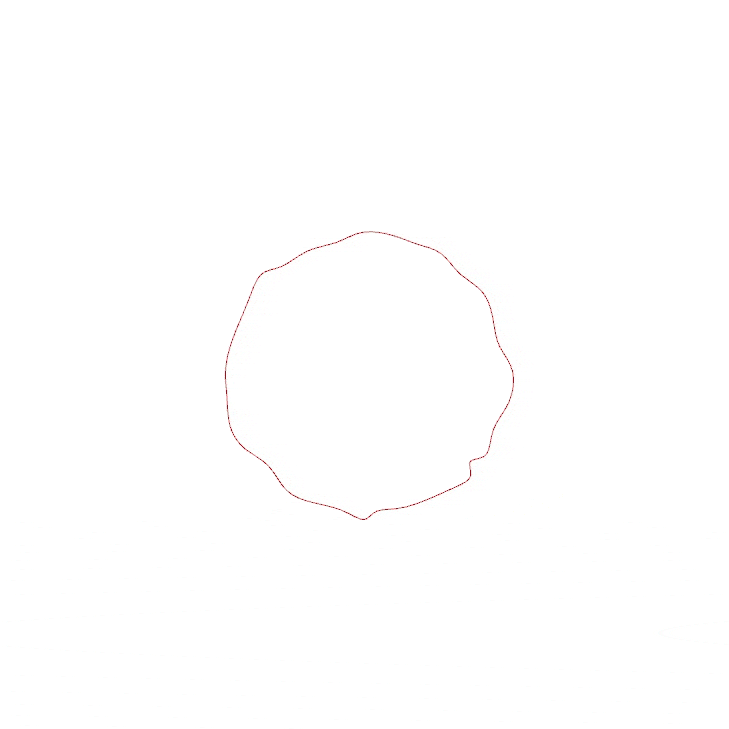 |
| Outline Noise | 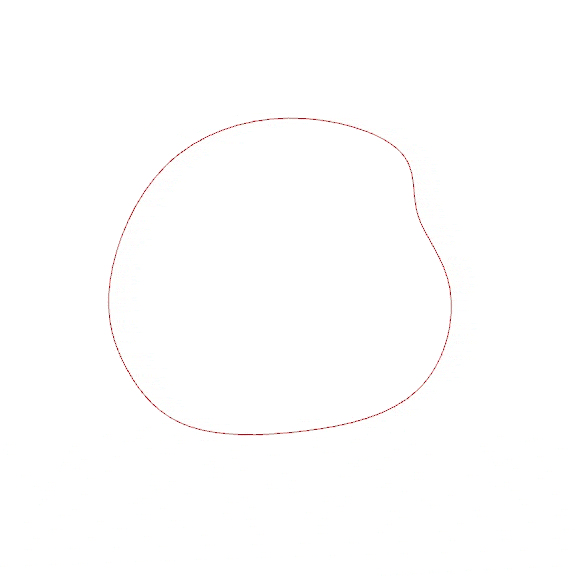 |
| Outline Random Seed |  |
| Outline Width |  |
| Outline Width Variation | 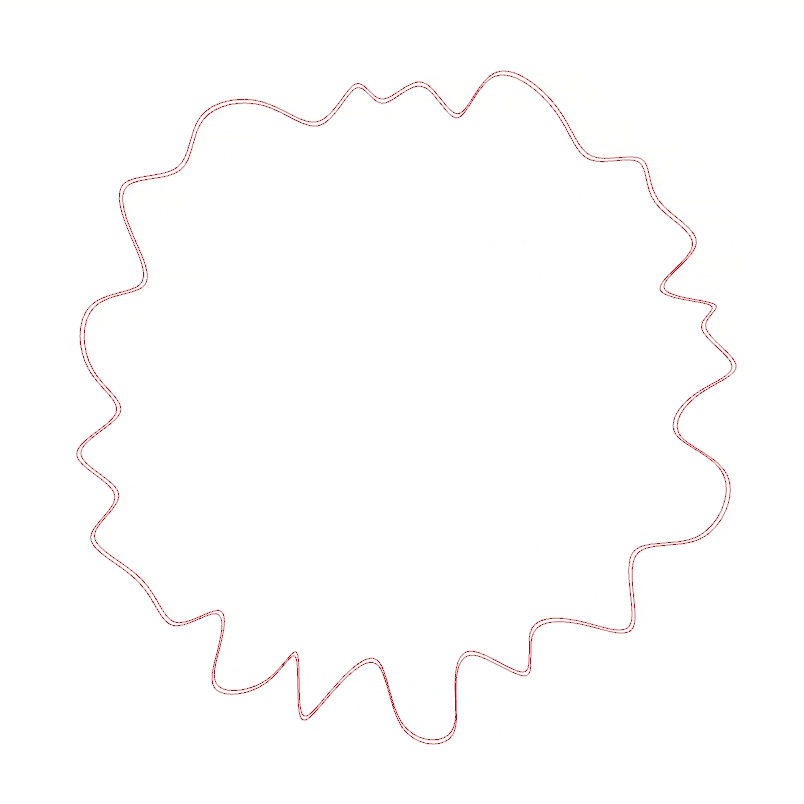 |
| Outline Width Variation Random Seed |  |
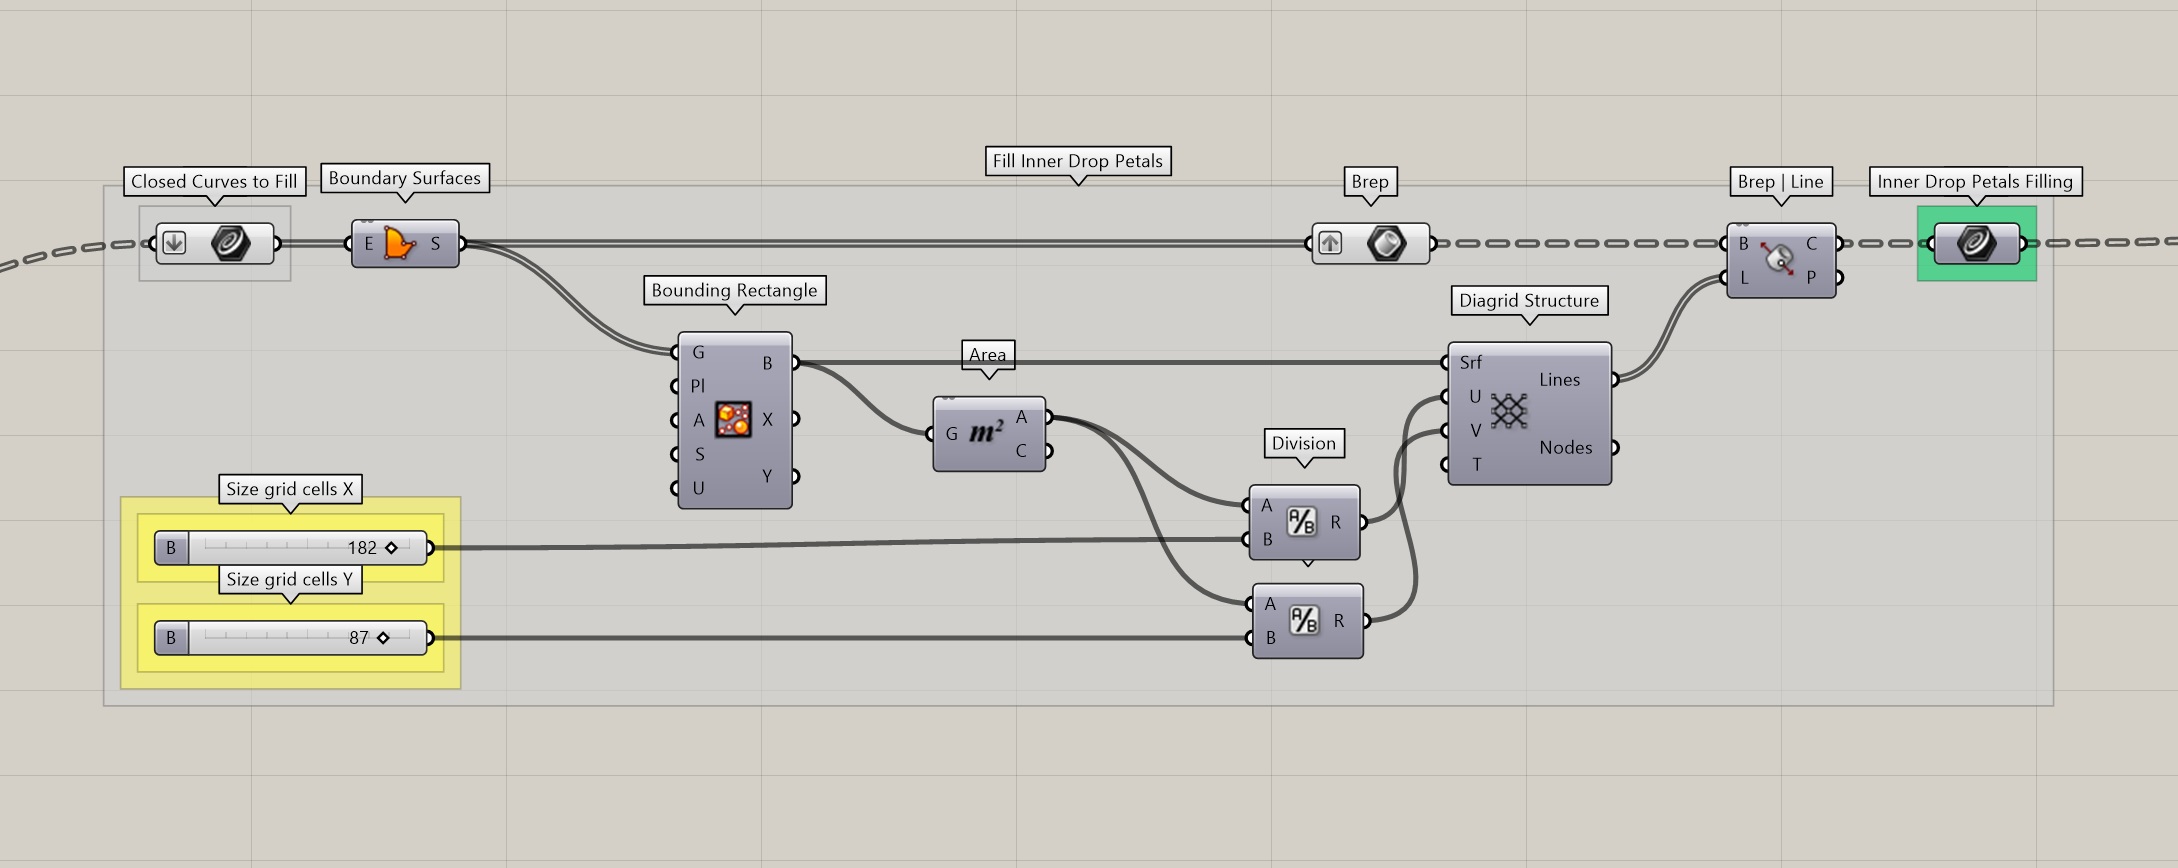
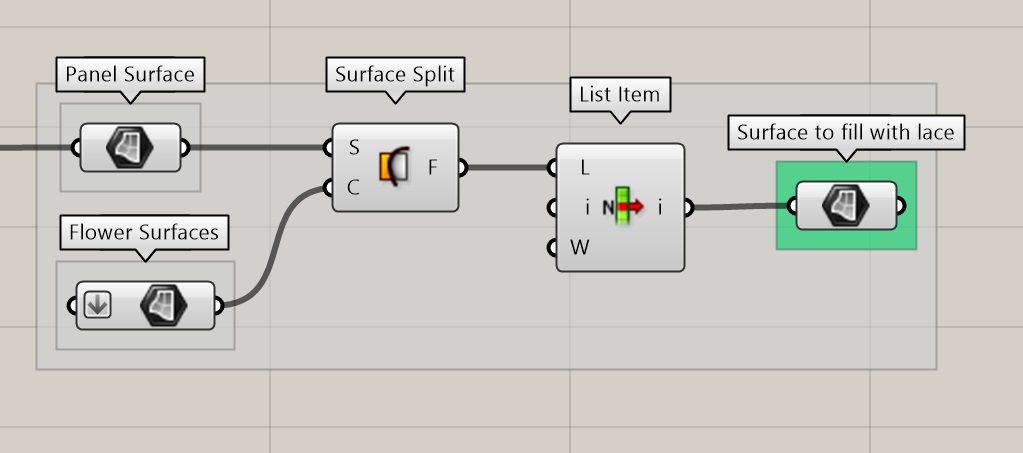
Filling
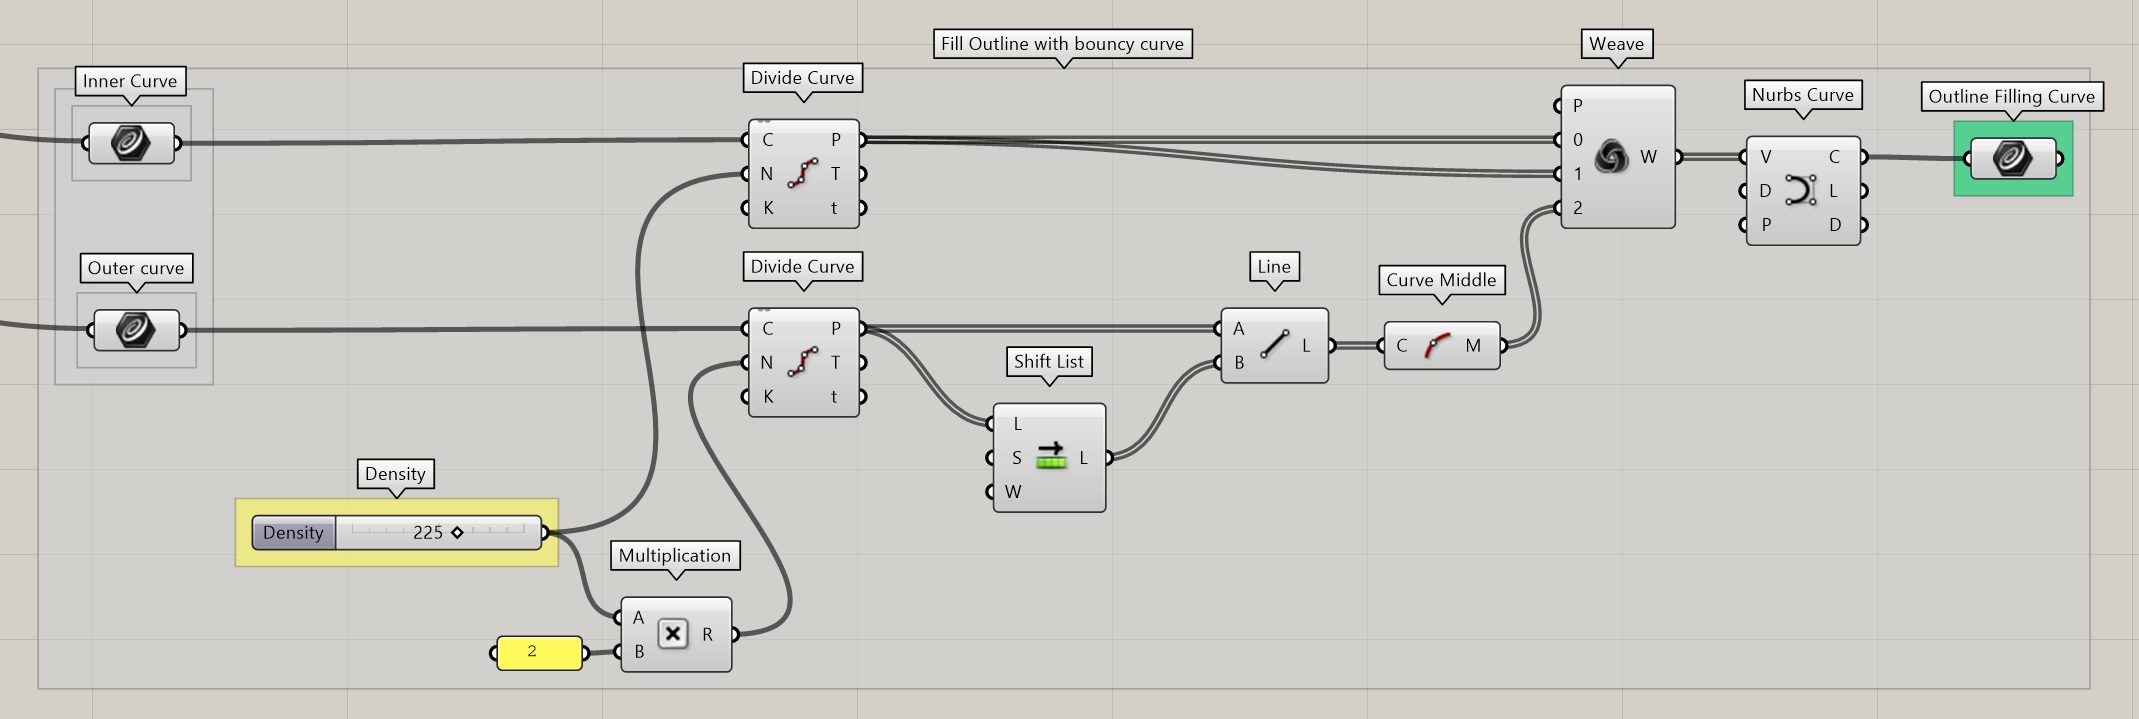
| Outline Filling Density | 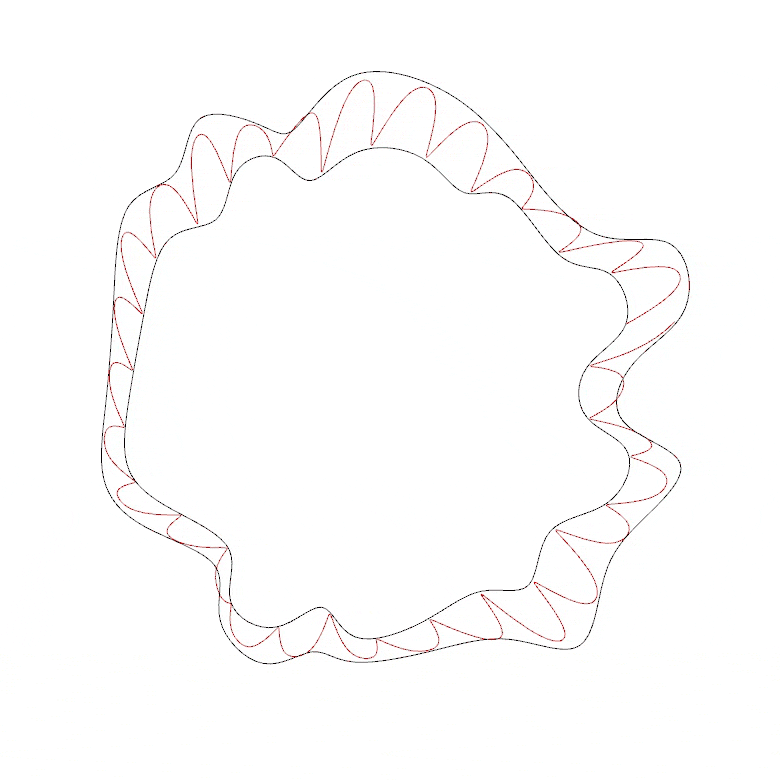 |
Flowers
First Petal Layer

| Number of Petals |  |
| Scale Petals | 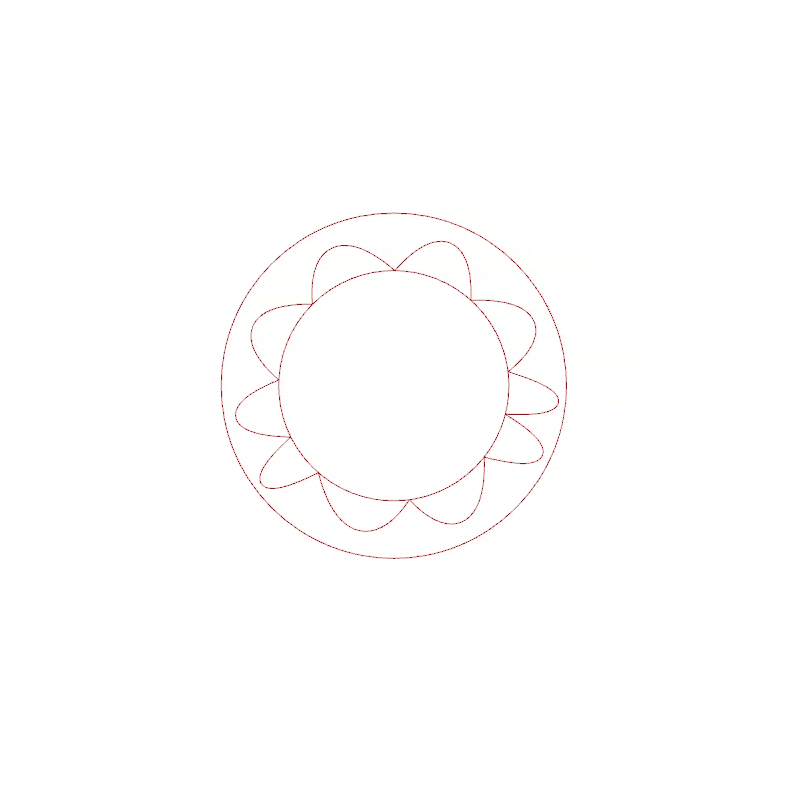 |
| Base Petals Random Seed | 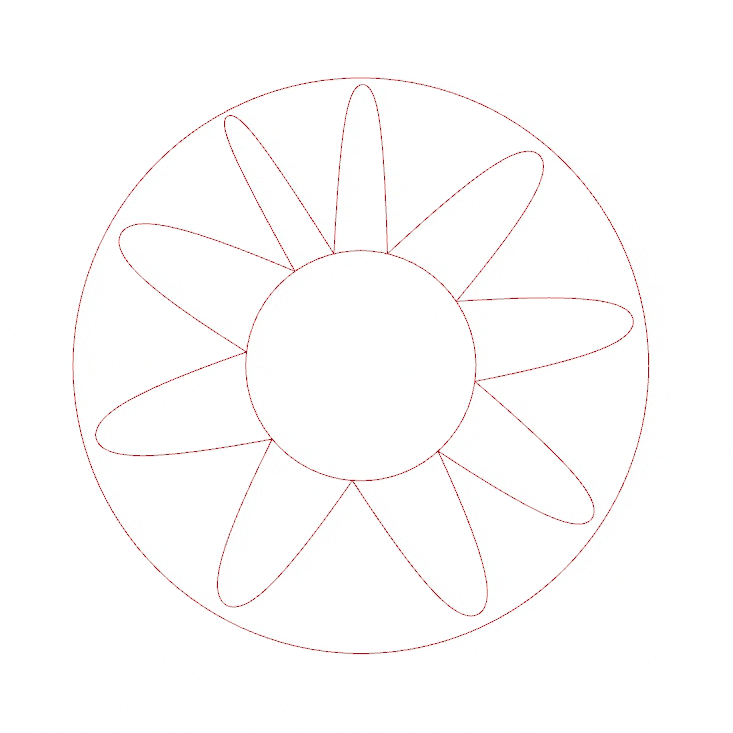 |
| Maximum Sway | 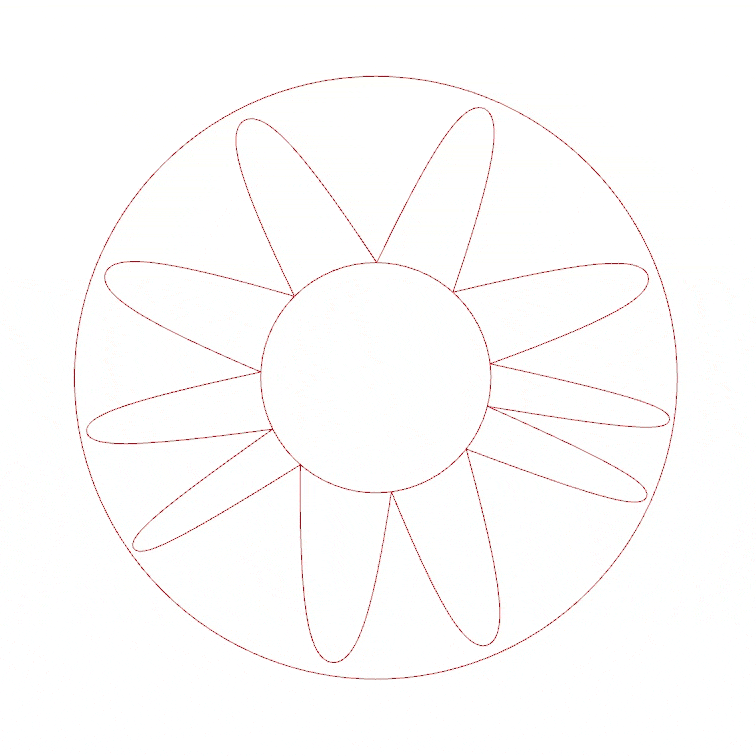 |
| Sway Random Seed | 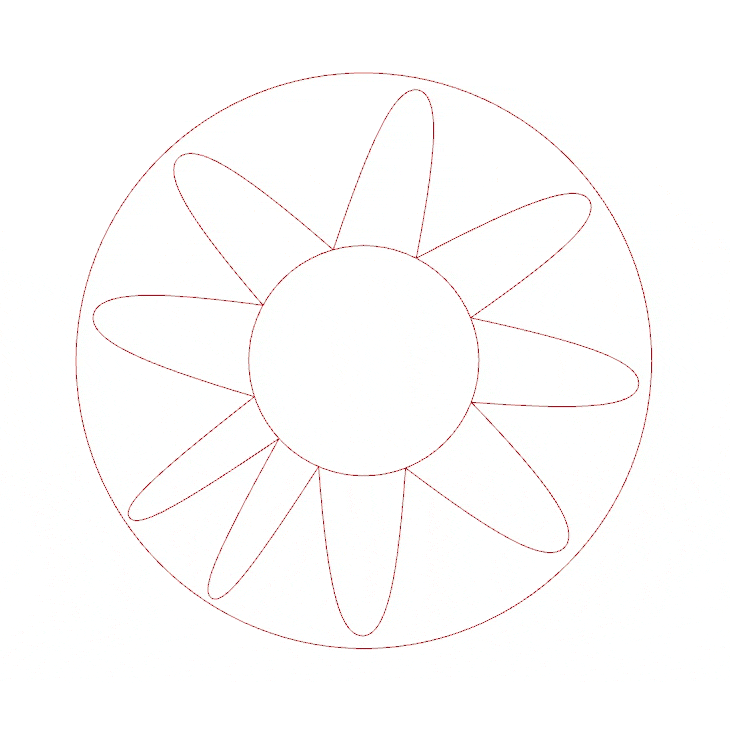 |
Second Petal Layer
| Number of Petals | 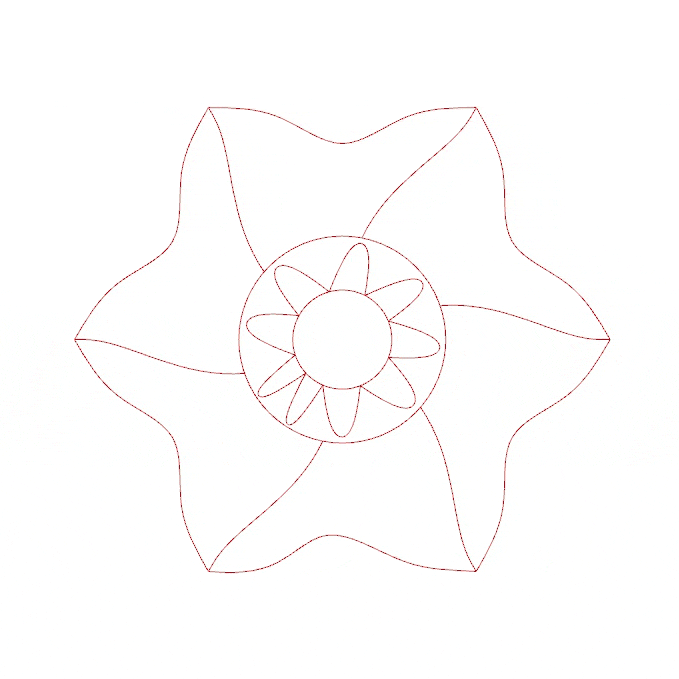 |
| Scale Petals | 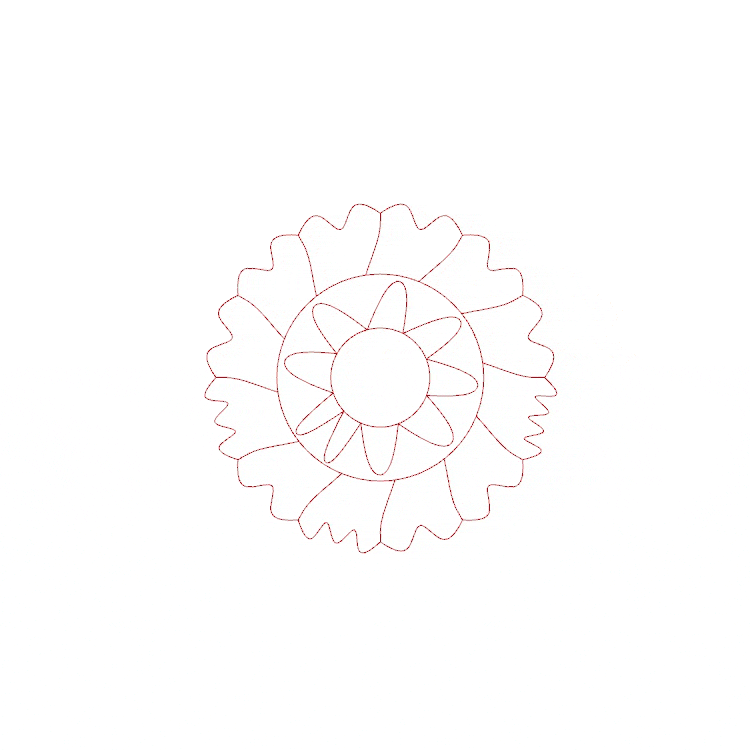 |
| Petal Wavyness | 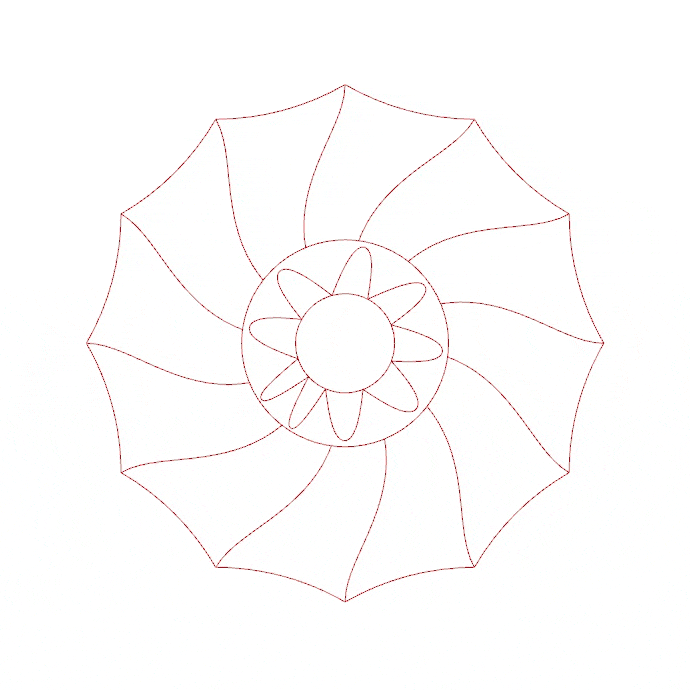 |
| Petal Wavyness Random Seed | 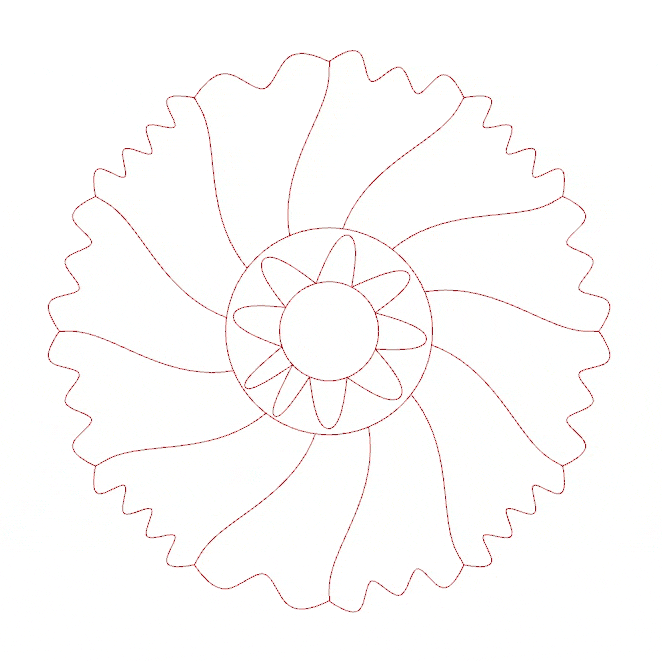 |
| Petal Curviness | 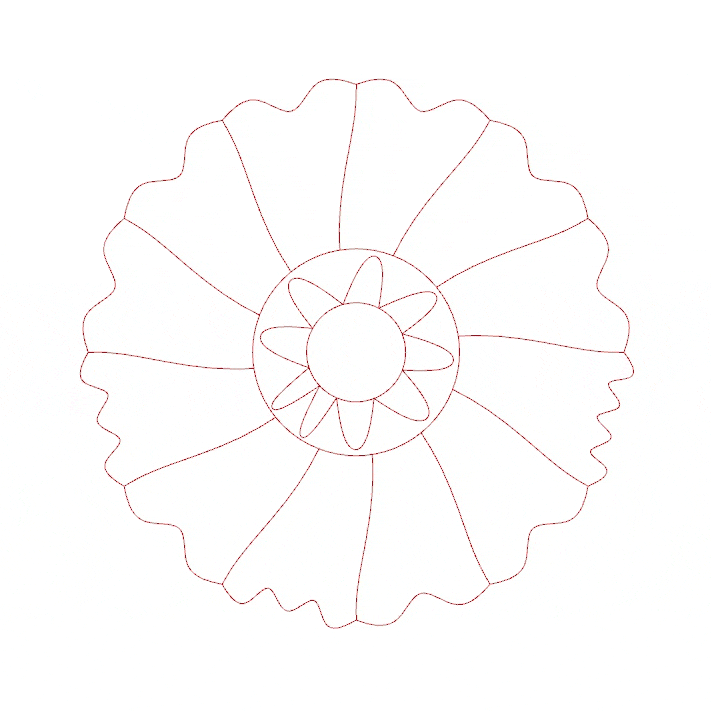 |
| Petal Curve Softness | 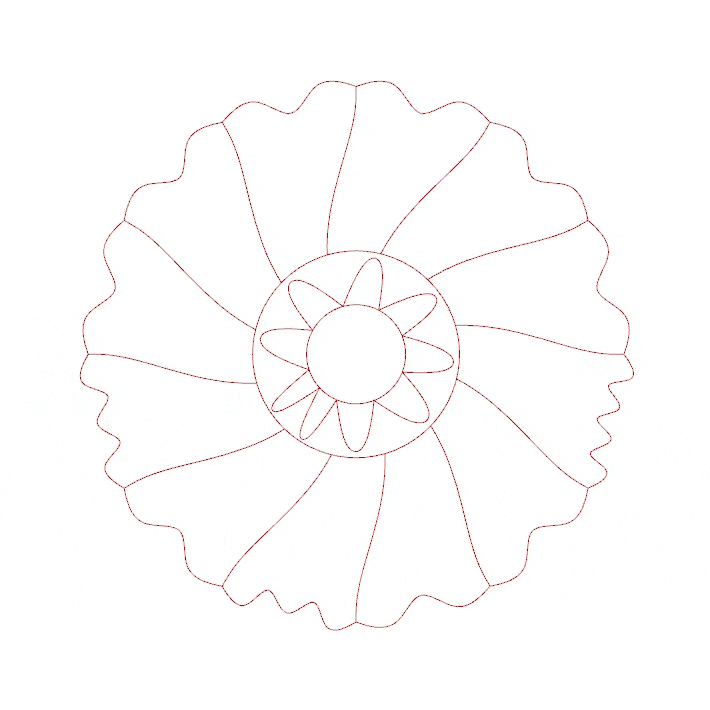 |
Third Petal Layer
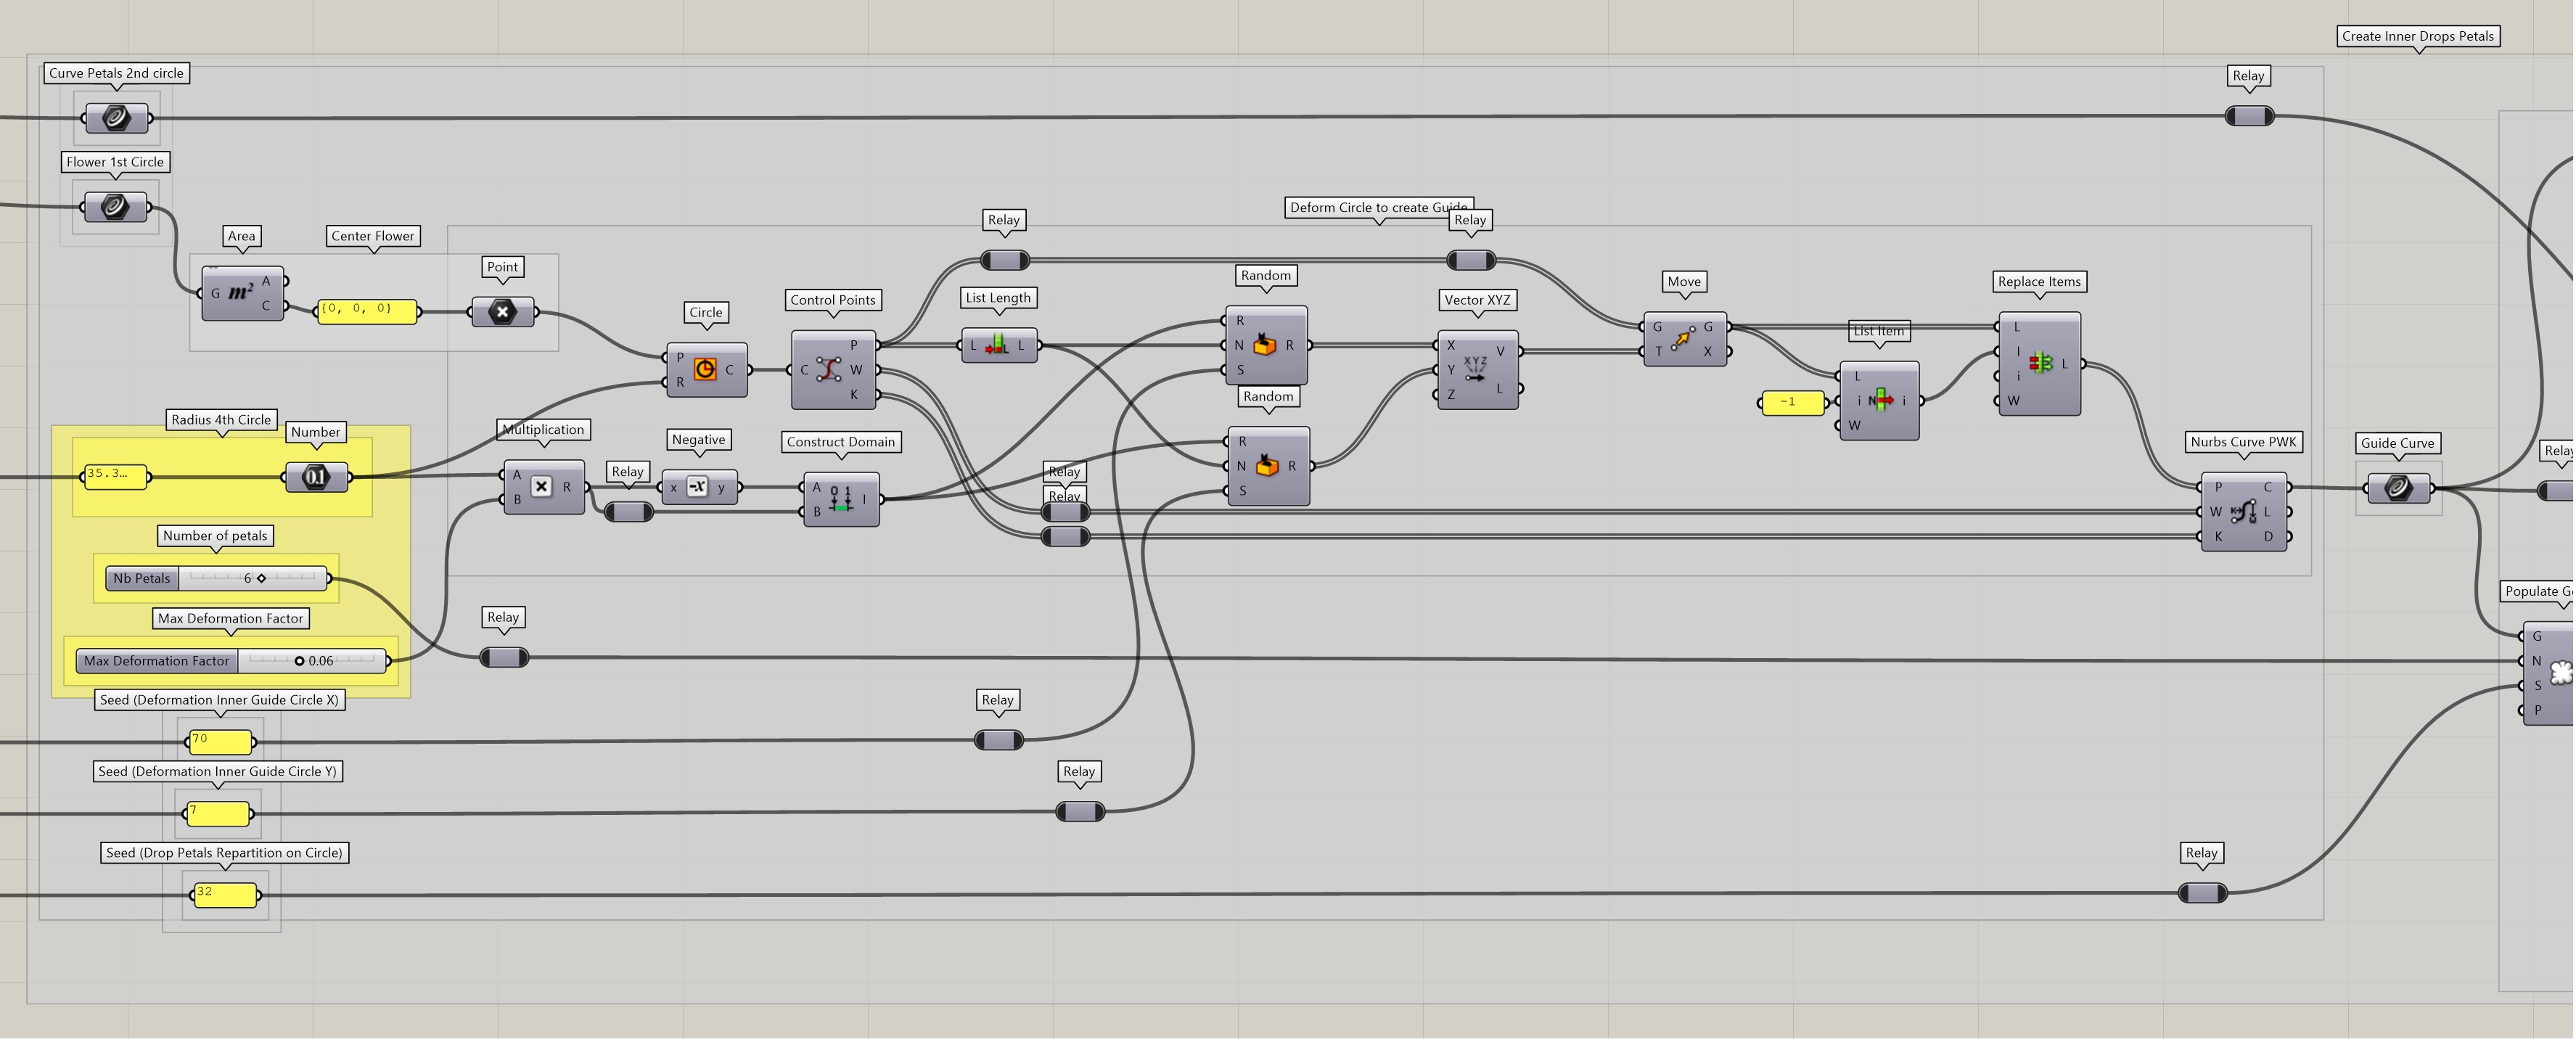

| Scale Petals | 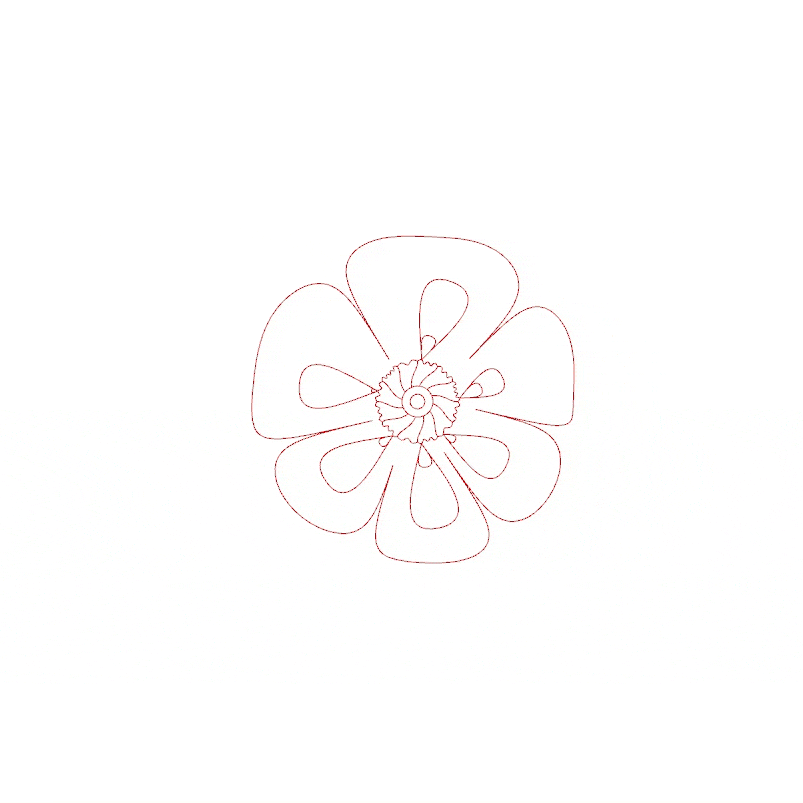 |
| Number of Petals | 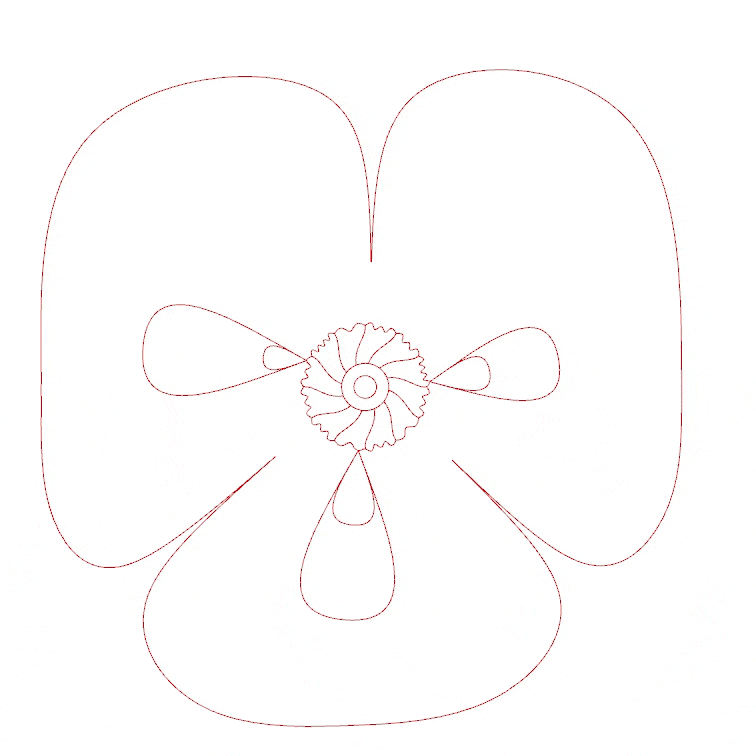 |
| Petal Position Seed | 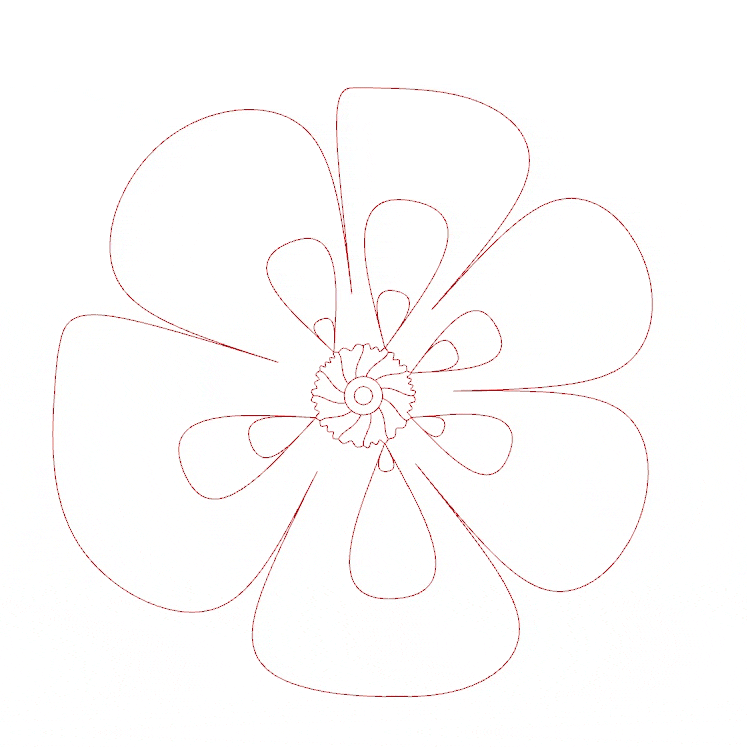 |
| Maximum Deformation | 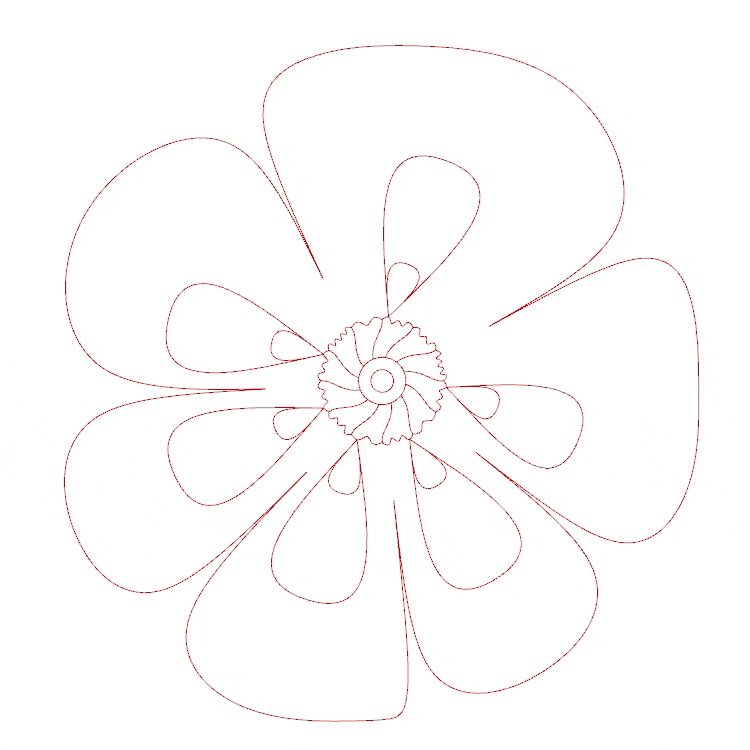 |
| Grid Scale X | 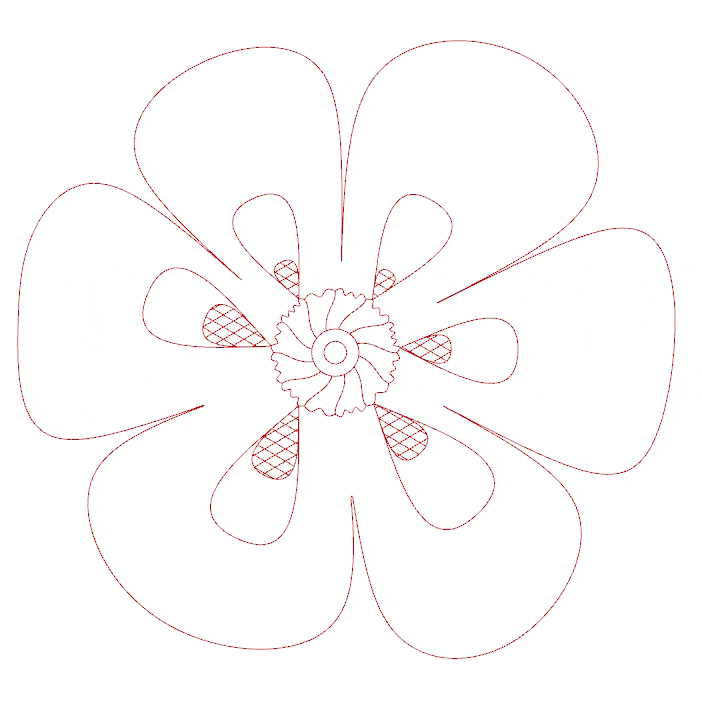 |
| Grid Scale Y | 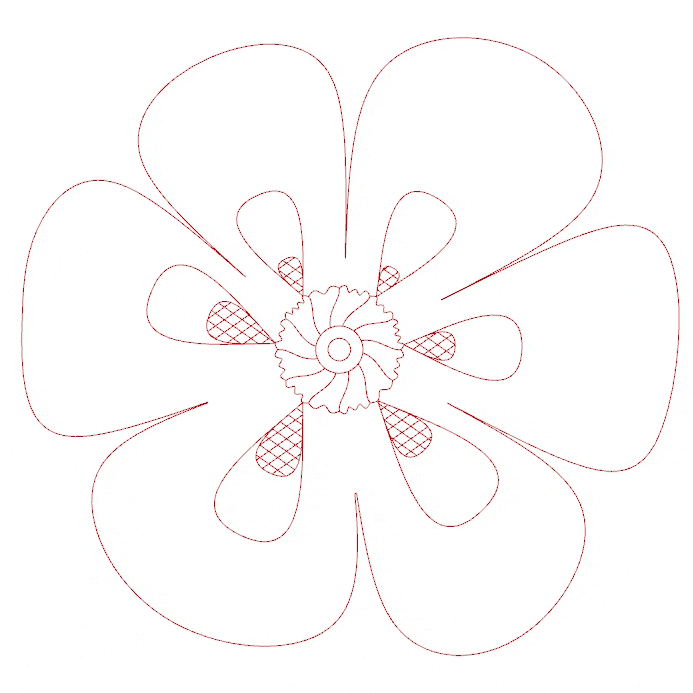 |
| Scale Petals | 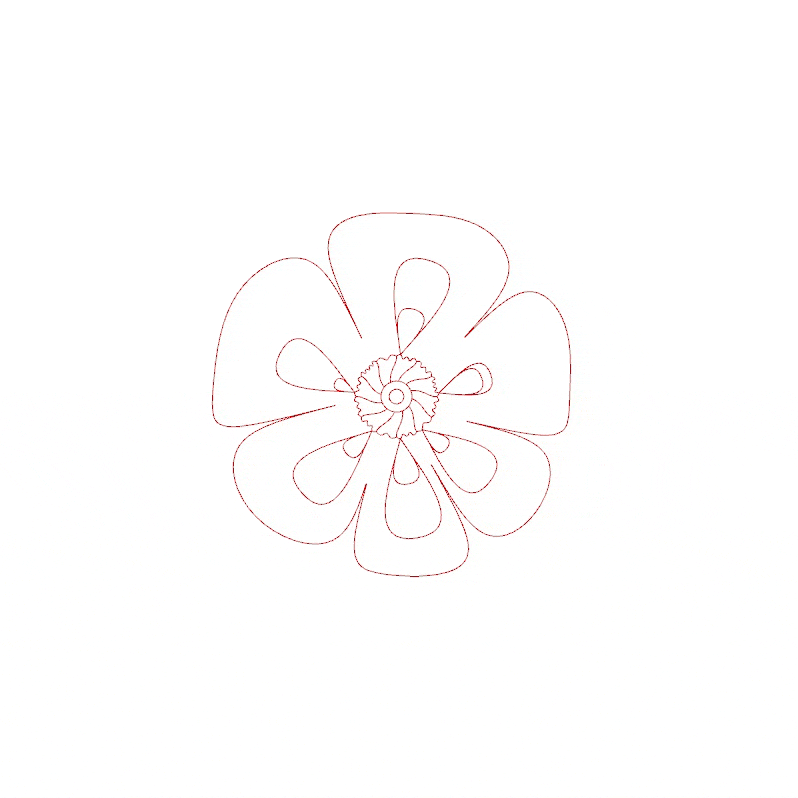 |
| Maximum Deformation | 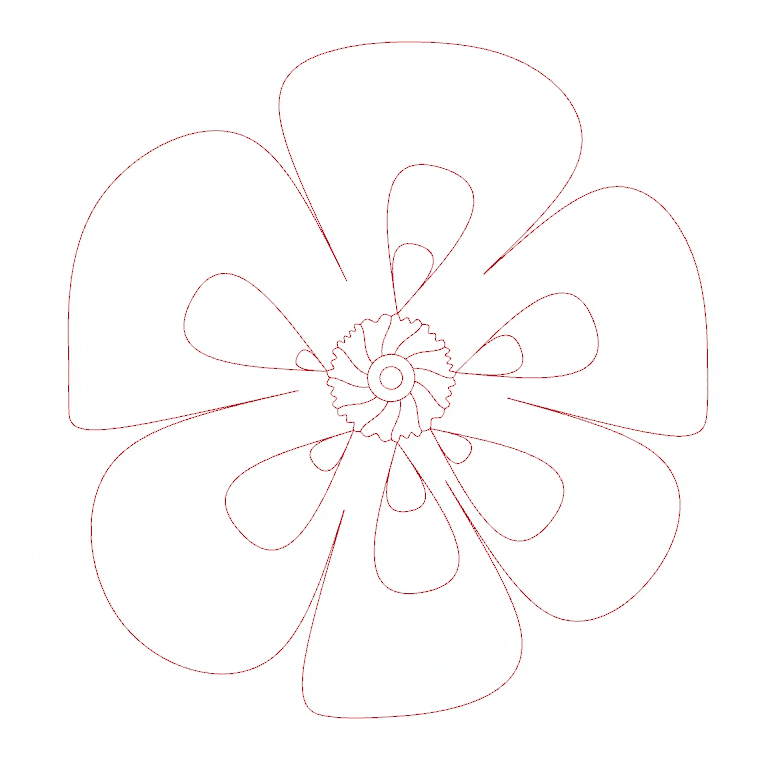 |
| Radial Layers | 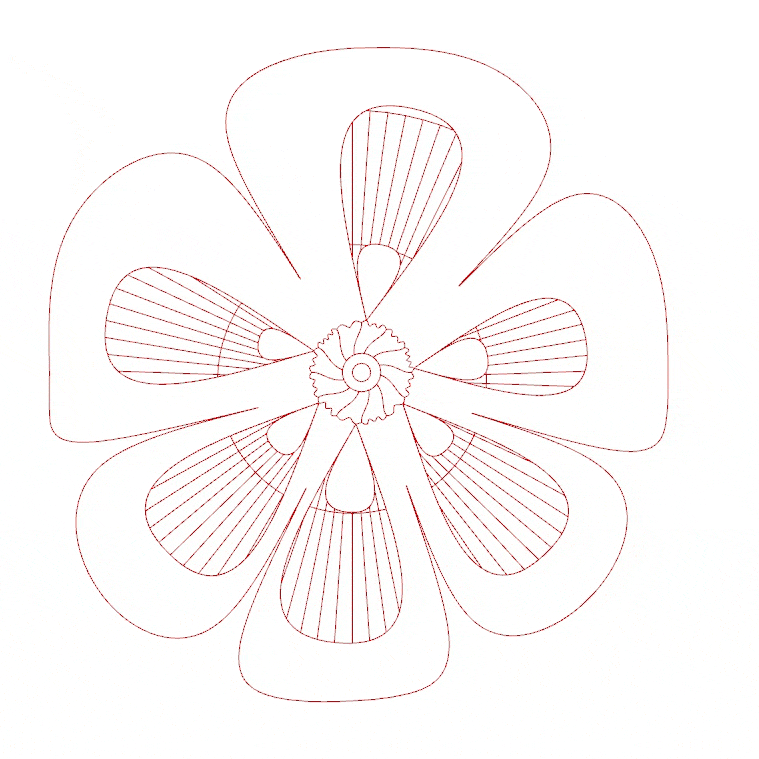 |
| Radial Partitions | 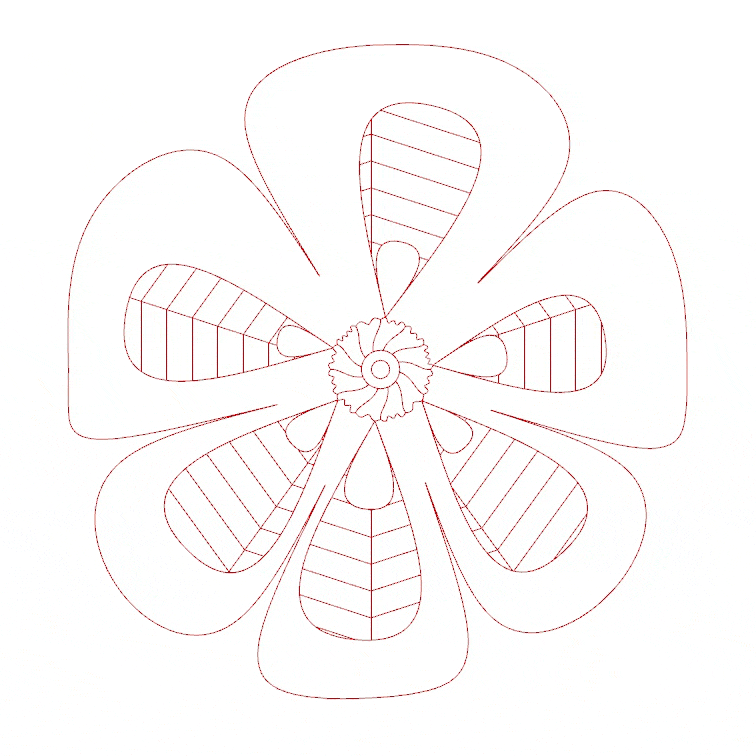 |
| Scale Petals | 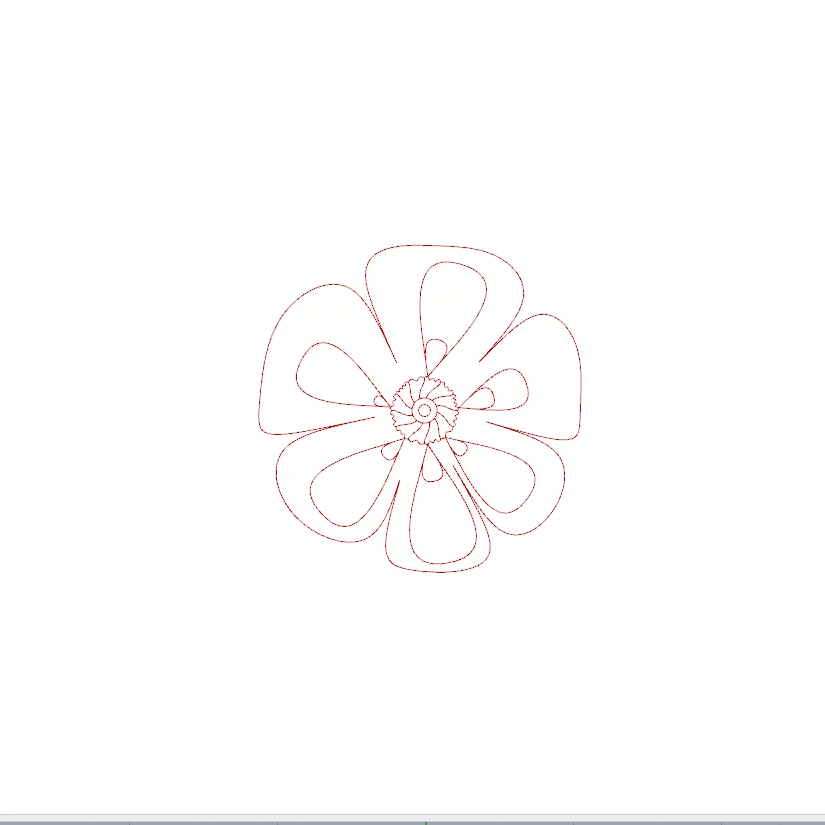 |
| Maximum Deformation | 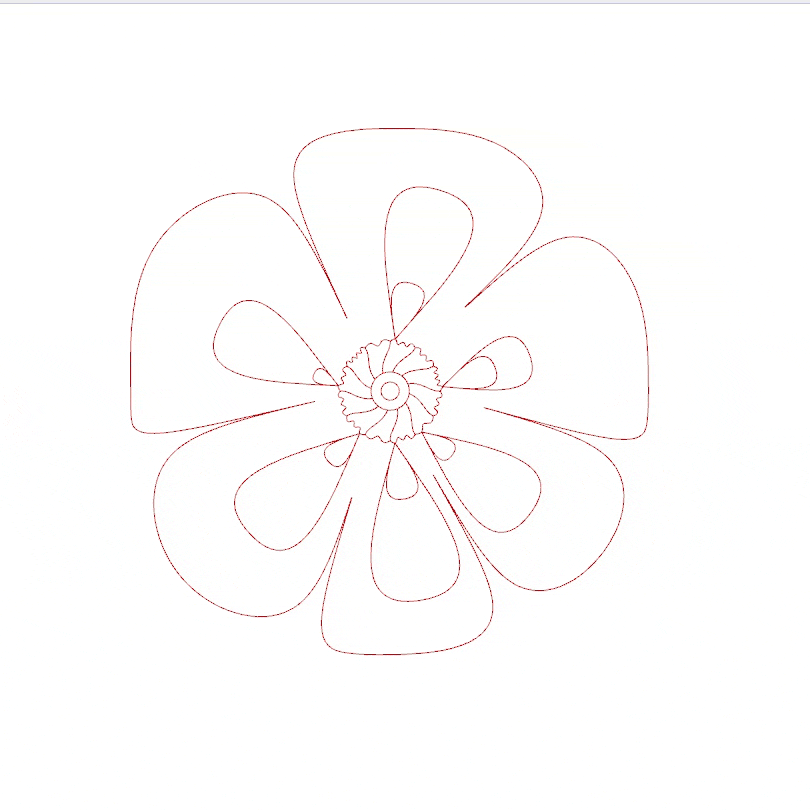 |
| Filling Density | 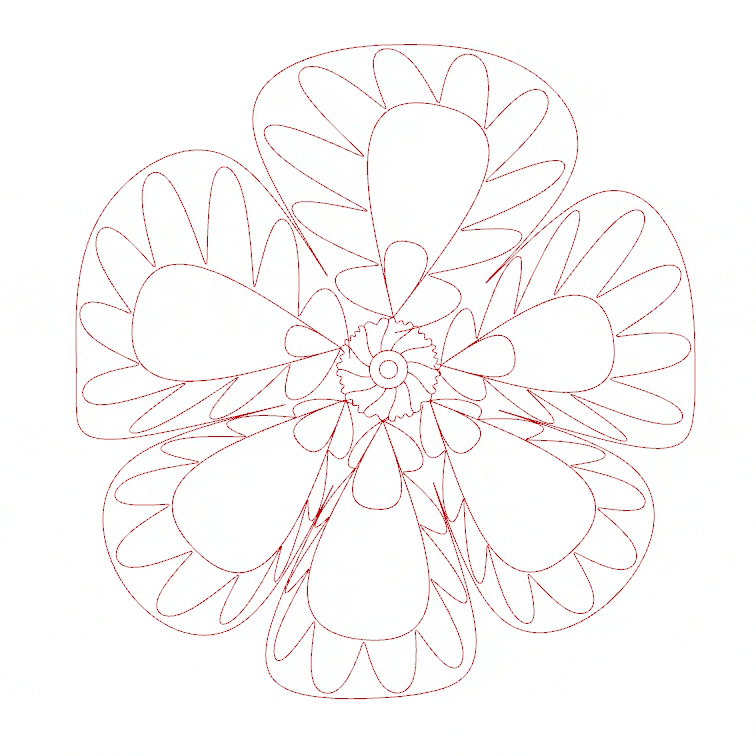 |

Manual layout
Filler Lace
| Lace Scale | 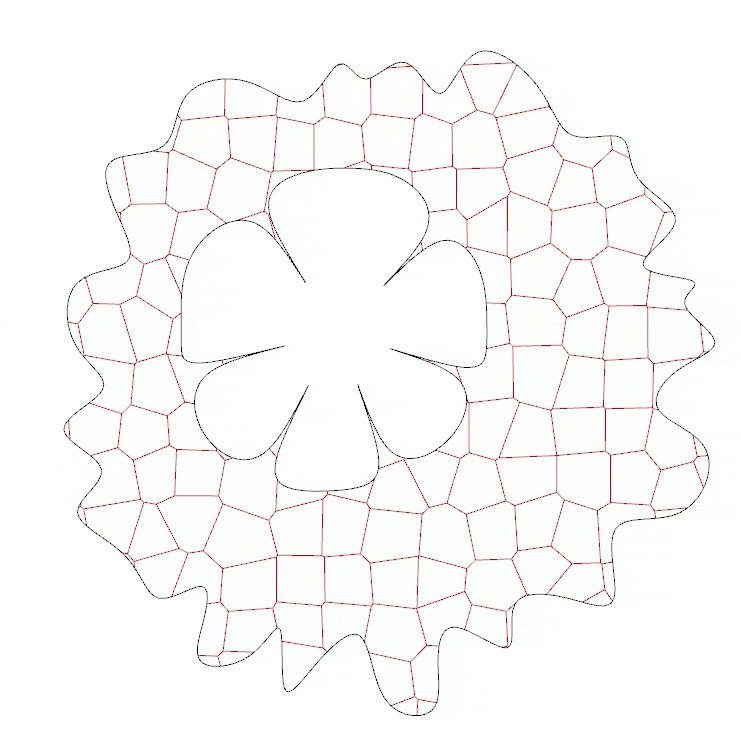 |
| Lace Regularity | 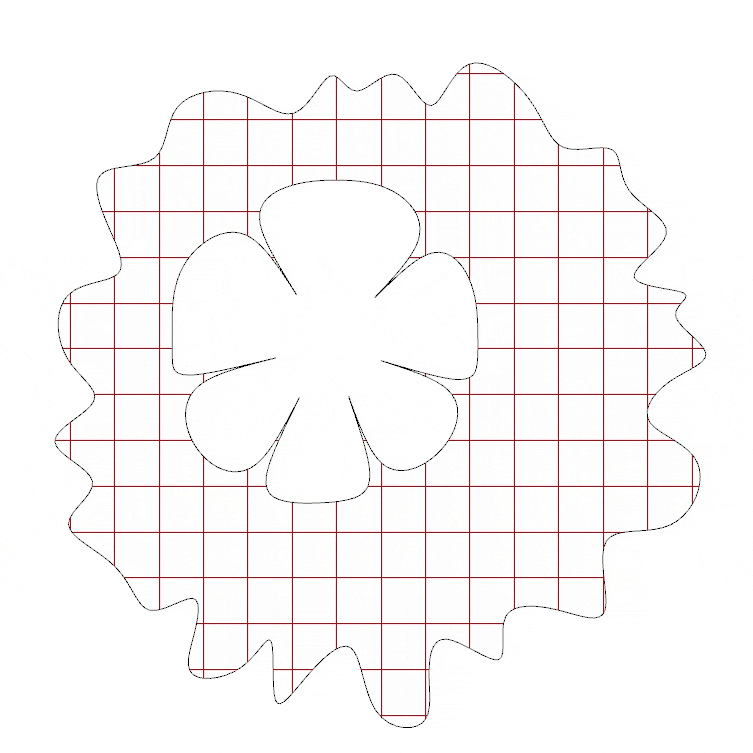 |
| Lace Random Seed |  |
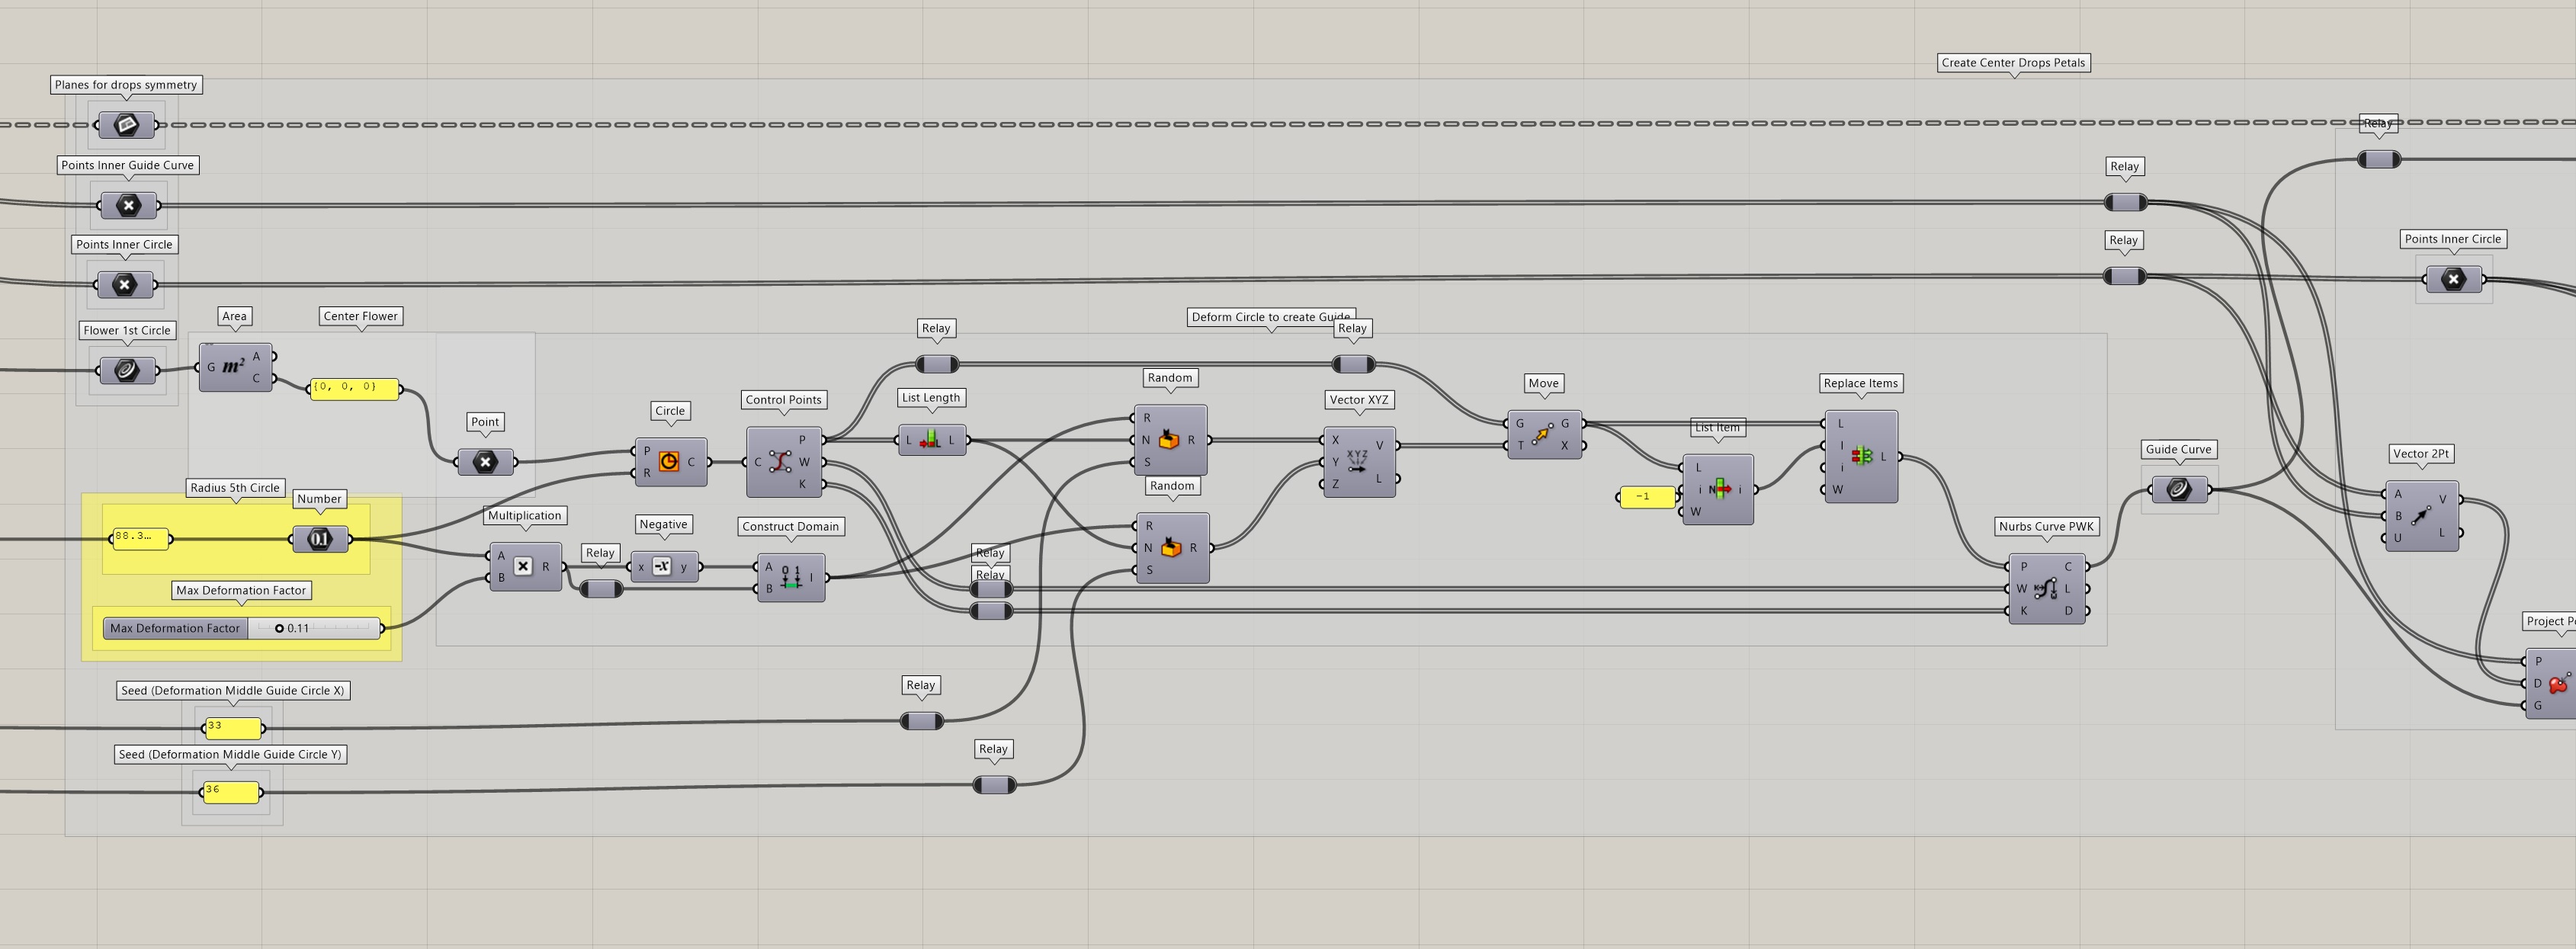
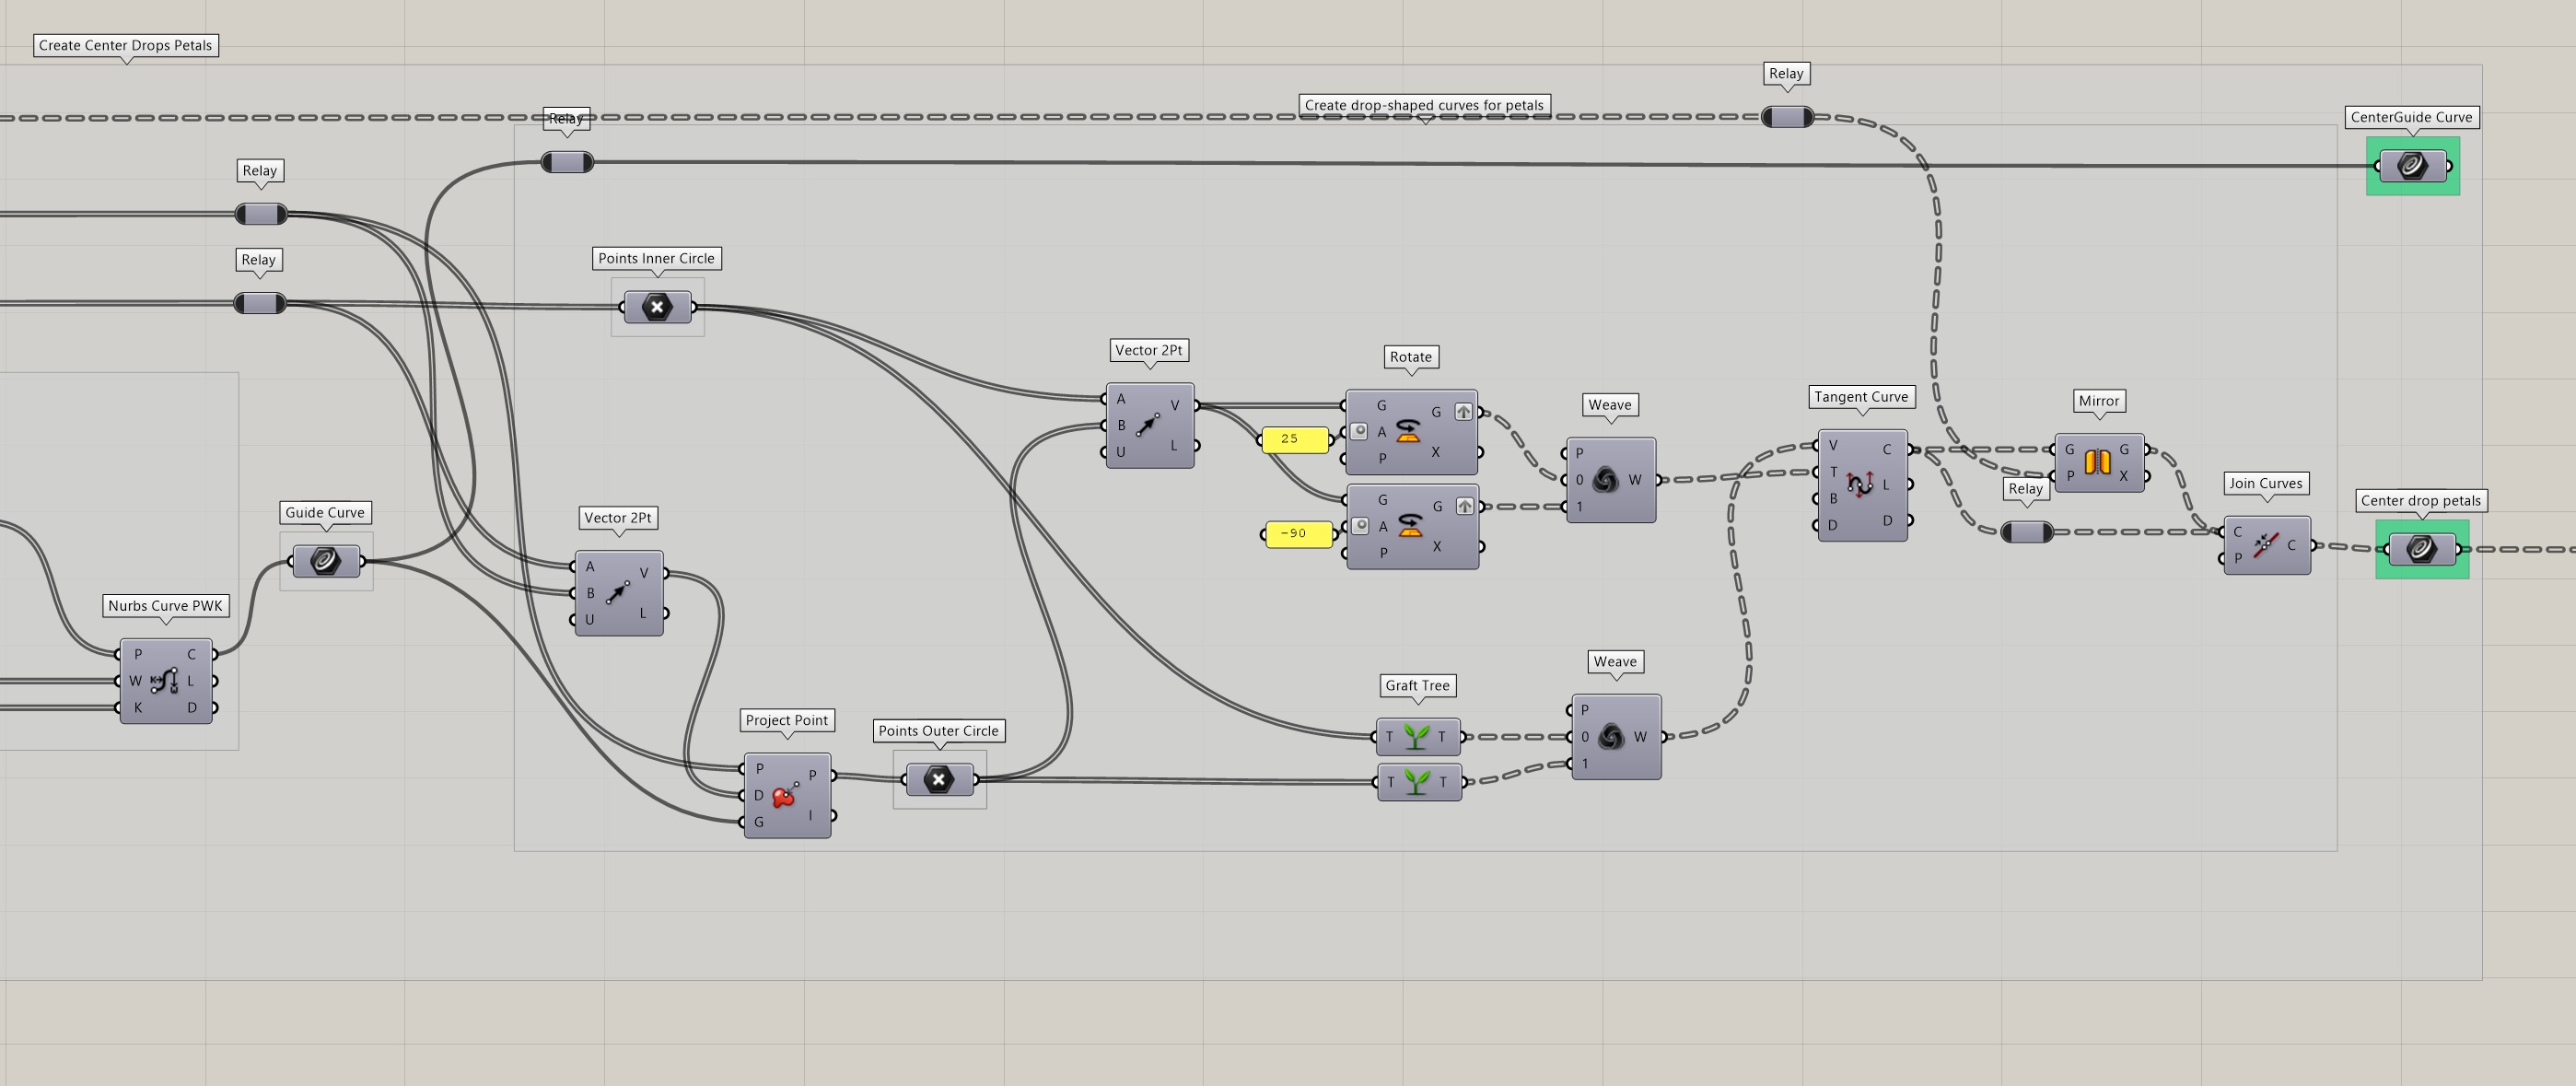
3D Transformation
At first I had tried extruding the different parts using a similar method than with my rose curves attemps, but unsuprisingly all the intersecting meshes created a lot of issues. Then I discovered the multipipe component that allows you to create a polysurface from a set of curves and specify different radii at different points. This allowed me to specify different widths of "thread" for different parts.
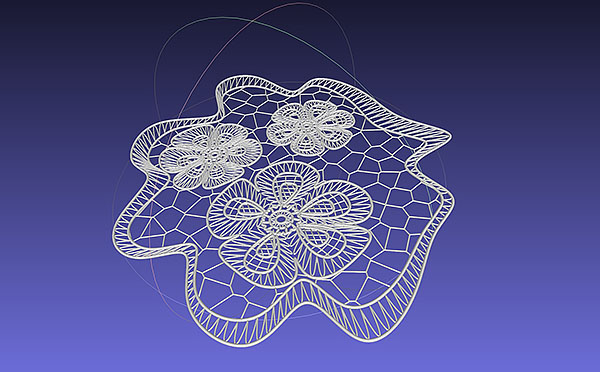
Results
Here is a recap of the whole process:
And pictures of the final results for two different attempts at generating a whole panel:
Unfortunately (but still unsurprisingly) the mesh is so complex than it takes forever to load in Sketchfab:
I tried using some mesh repairs functions in MeshLab to improve it but so far I haven't found anything that doesn't either 1/ give awful results or 2/ make the program crash.
3D Printing
First attempt - Printing a flower
I fist tried printing a single flower on a Zmorph printer using flexible filament:
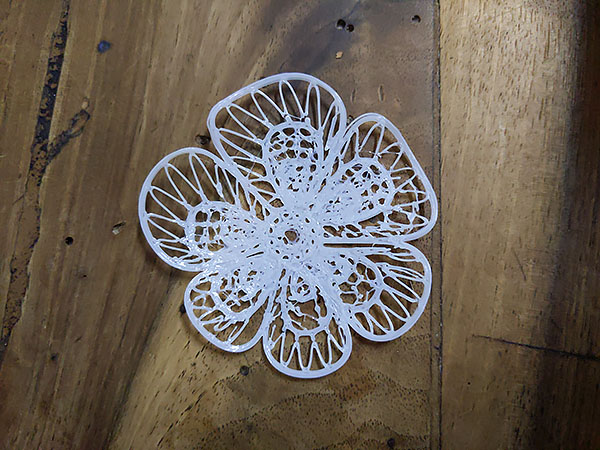
In addition to the issue mentioned above which is that the mesh was very messy (which caused issues with gcode generation in Voxelizer, though I was able to use Cura), I had another problem which is that the print didn't adhere to the plate enough and moved during printing.
Second attempt - Printing a whole panel
I wanted to try printing a whole panel next, but I'm still having issues getting Cura to slice the mesh without crashing... I'm working on it!
I am going to try printing on the homemade 3D printer at the Textile Lab that has better plate adhesion, and if that still doesn't work, I'm going to try sandwiching a piece of organza in the middle. I'm not a big fan as I was hoping to keep the look of the plasticky lace and this might make the design even more busy, but it might work.
Next steps
Dump of ideas :
- repair mesh/better mesh generation
- generate leaves
- automating layout
- work in 3D: relief pattern (3D flowers etc) but also generate panels based on curves of the body and not just flat
- divide by layers directly in the mesh and consider the path of the 3D printer extruder
- clean up grasshopper code
- work more on the outline generation, maybe create panels based on a sewing pattern that can then be fused together to create a garment