3. Circular Open Source Fashion
This week, we talked about the systemic problems of the fashion and textile industries, in particular the issue of textile waste, and explored alternative approaches. We focused on open source initiatives and circular economy and worked on imagining modular elements that could be used to create recombinable garments.
Research and Ideation
Modular Textile Designs
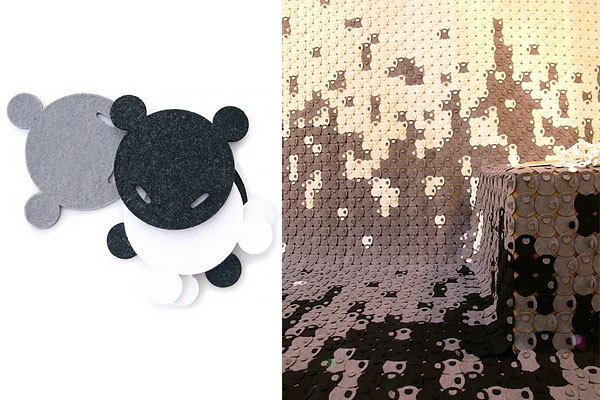
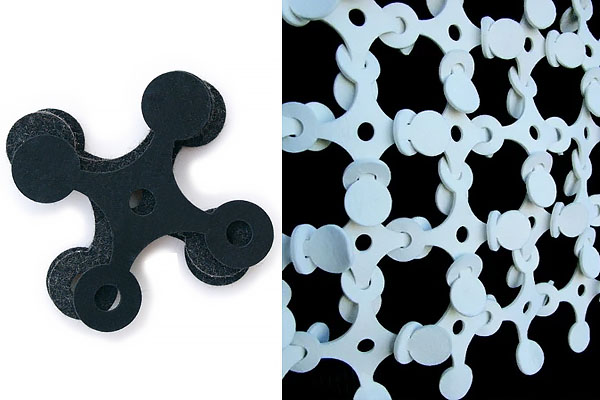
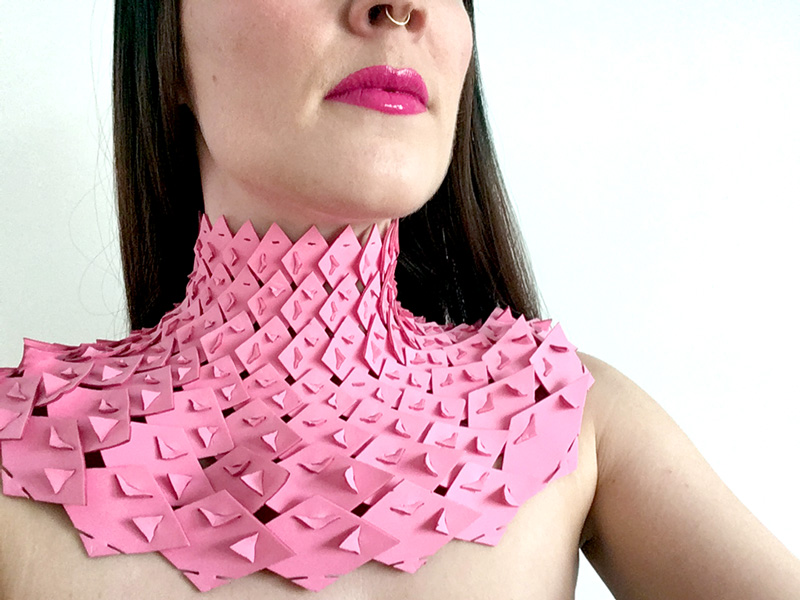
Modular designs feature small standardized units that can be combined in multiple configurations. Here are a few examples that I found interesting, from designers, artists and Fabricademy alumni:
What is a standard unit of fabric?
Looking at all these amazing modular designs, I started to wonder about the very nature of this assignment: what is a module, exactly?
The idea of a unit of fabric is already a little fuzzy, from fibers to threads to woven or knitted fabric, and now we're turning that fabric into modules that we're turning into another fabric. A strand of thread, a length of yarn, or even a ribbon could be woven, knitted, knotted... and the resulting fabrics could still be disassembled to reuse the materials. Does that make a single strand of thread a module in itself? Could we consider the stitches in a knitted sweater as individual modules, combined through increases and decreases to create volume?
Interlocking fabric modules were similarly intriguing: is weaving an interlocking system? Knotting? Lacing? Can a module interlock with itself?
I decided to explore these questions by designing a module that could be combined into various structures (chain, ring...) that could themselves be considered a module and be in turn combined into a structure (by weaving, knitting, knotting...) at an even larger scale.
Creating a paper prototype
My goal was to design a very simple module that can be assembled in many ways to create different types of volumes and textures.
My design process was as follows:
- first, figure out the functional properties (what interlocking technique to use, how many holes and tabs, etc.)
- second, decide on the scale of the module (smaller would be more versatile, bigger would be less finicky and make it easier to assemble large surfaces)
- last, refine the shape to consider both aesthetics and fabric waste
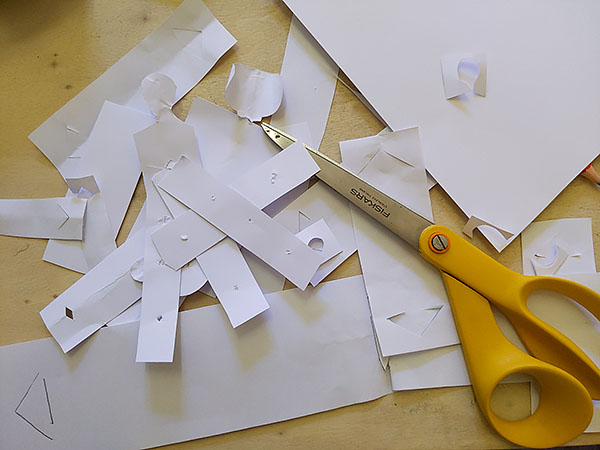
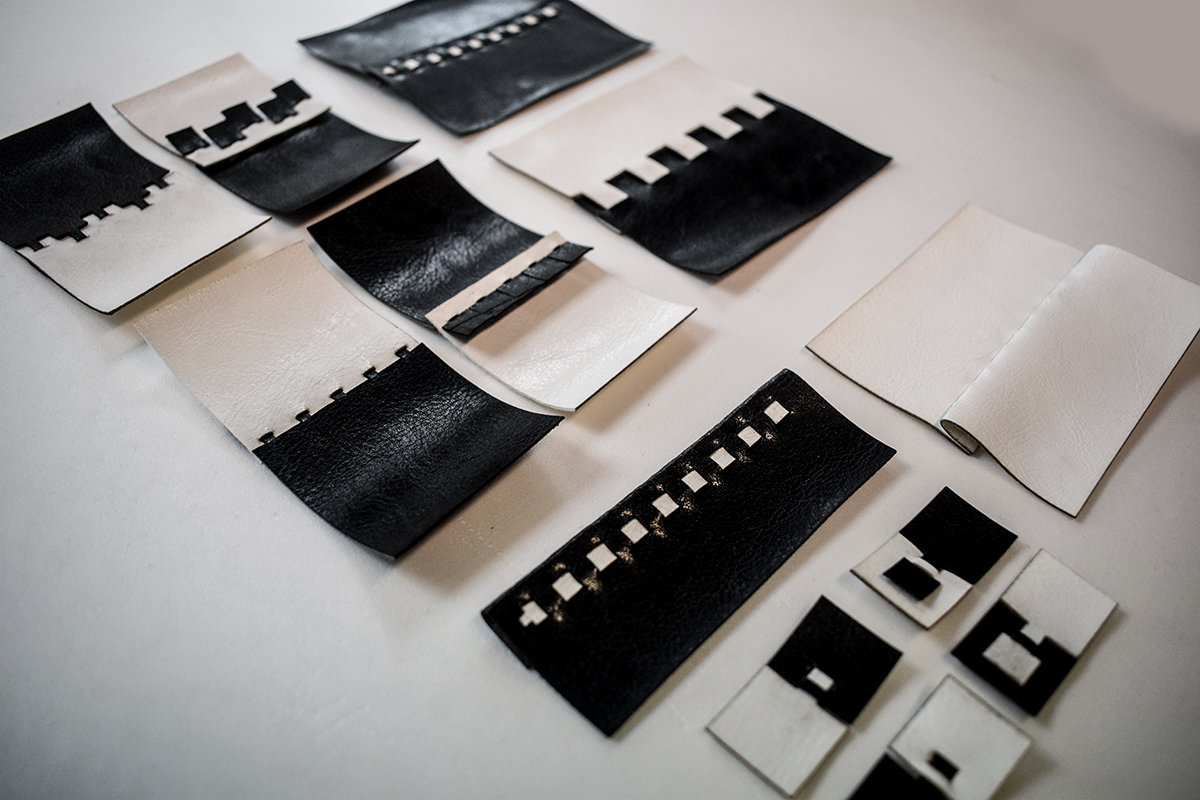
I did something that was very unusual for me, which was going straight to paper prototyping without researching theory first. I cut out some strips of paper and experimented with different interlocking mechanisms, until I came up with a set of constraints and properties that I found interesting.
General Shape
-
Goals: Being able to use the module flat or sideways and lock it into a 3D shape.
-
Constraints:
- thin enough so that the width would still make sense as a thickness measurement for a textile when used sideways
- long enough so that it could lock onto itself to form a ring
-
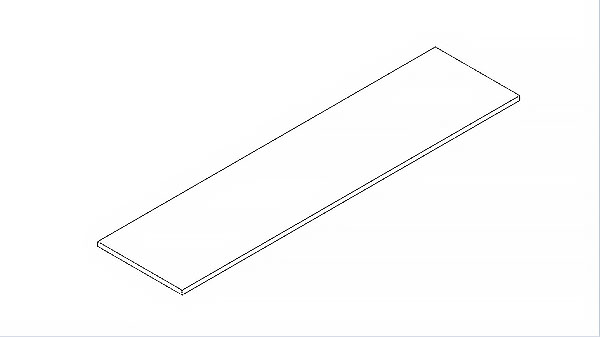
Solution: I decided to start with a long rectangle, with a length of at least 8 cm and a width of max 2 cm.
Interlocking mechanism
- Goal: Allow increases (attaching two or more modules to the same one), decreases (attaching one more to two or more modules), a variety of angles between modules (attaching modules in a line or perpendicularly to one another) and different points of assembly per module.
I first tried to find a symetrical interlocking mechanism, as that would give even more flexibility, but didn't find a satisfying solution:
- slits were only allowing for one angle, and increases would be very dependent on fabric thickness
- arrow-shaped cutouts could be used to lock either one module in a line, or two modules at an angle, but still weren't versatile enough
- long fringes that could be tied together were the most versatile, but they didn't seem to be in the spirit of the assignment as much
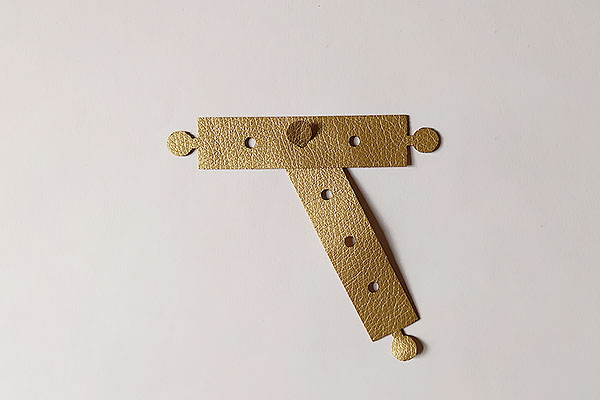
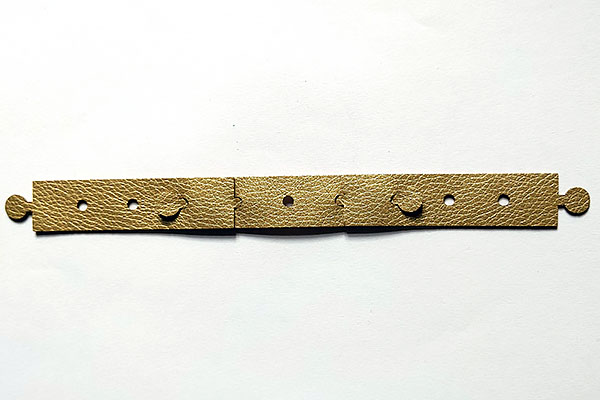
I settled on an asymetrical mechanism with a male/female configuration: holes and tabs.
-
Constraints:
- round holes and rounded tabs, so that the junction could be done at any angle, and that the overlapping tab shapes woudln't limit the number of possible increases and decreases
- several holes per module
-
Solution: I decided to keep it simple and start with one tab at one end of the rectangle, and several holes down the length. Eventually I added a second tab at the other end for more versatility.
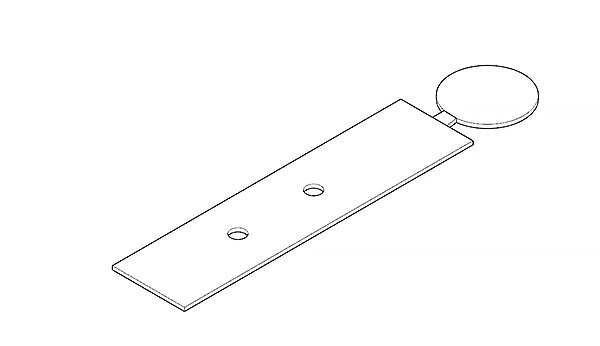
Digitalizing the design
I created the vectorial design in Adobe Illustrator easily using a combination of rectangles and ellipses. I made a number of variations by changing different parameters so that I could experiment on the stability of the locking mechanism, the ease of assembly, and the size and shape of the module.
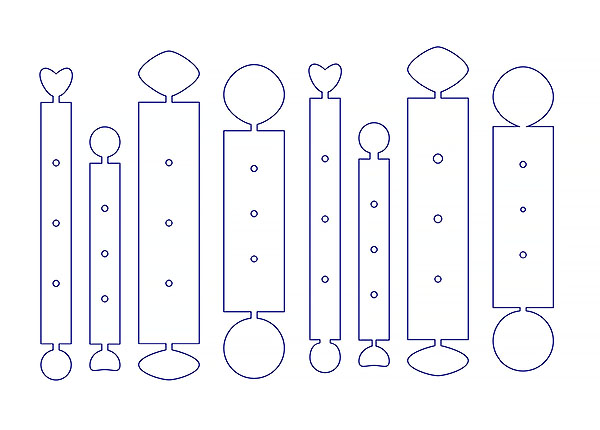
The parameters are:
- rectangle length
- rectangle width
- fabric thickness
- tab ellipse length
- tab ellipse width
- tab stem length
- tab stem width
- number of holes
- hole diameter
- space between holes
- space between end holes and edges of rectangle
I also played around with tab shapes and made a dented ellipse tab and a heart-shaped tab.
Testing the design on fabric
Based on my design decisions, I knew I had several constraints on my fabric choice:
- stable enough for the rounded tabs to stay in place
- either thin or squishy enough to insert several tabs in the same hole
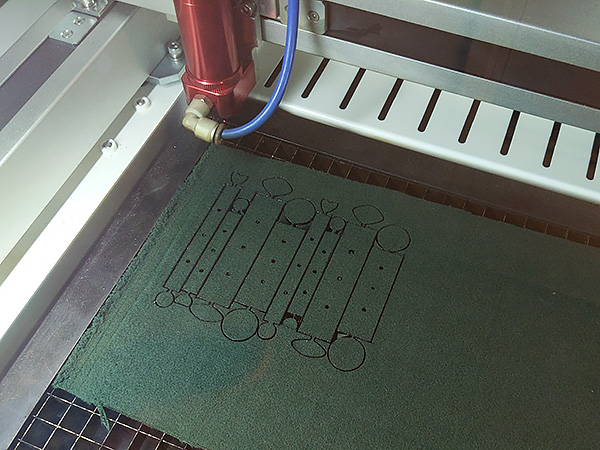
I first tried cutting the test modules in a polyester felt:
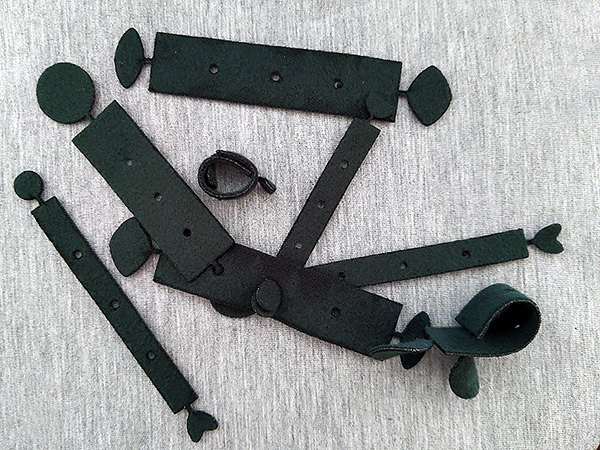
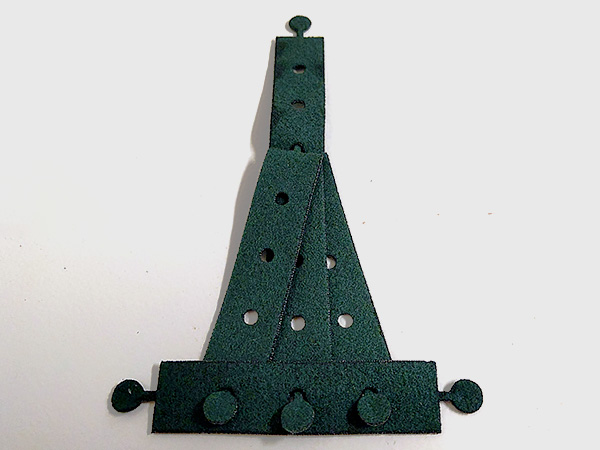
After playing around with assembling the modules, I settled on the following parameters:
- 80 mm rectangle length
- 20 mm rectangle width
- 3 holes
- 20 mm space between holes
- 10 mm round tab diameter
- 4 mm hole diameter
- 3 mm tab stem width and length
This resulted in the following design:
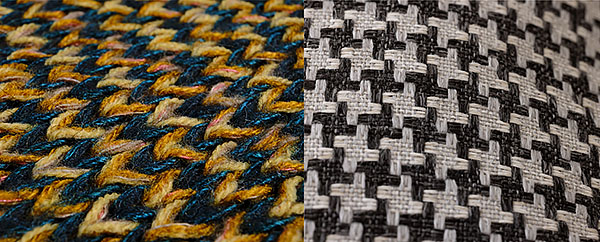
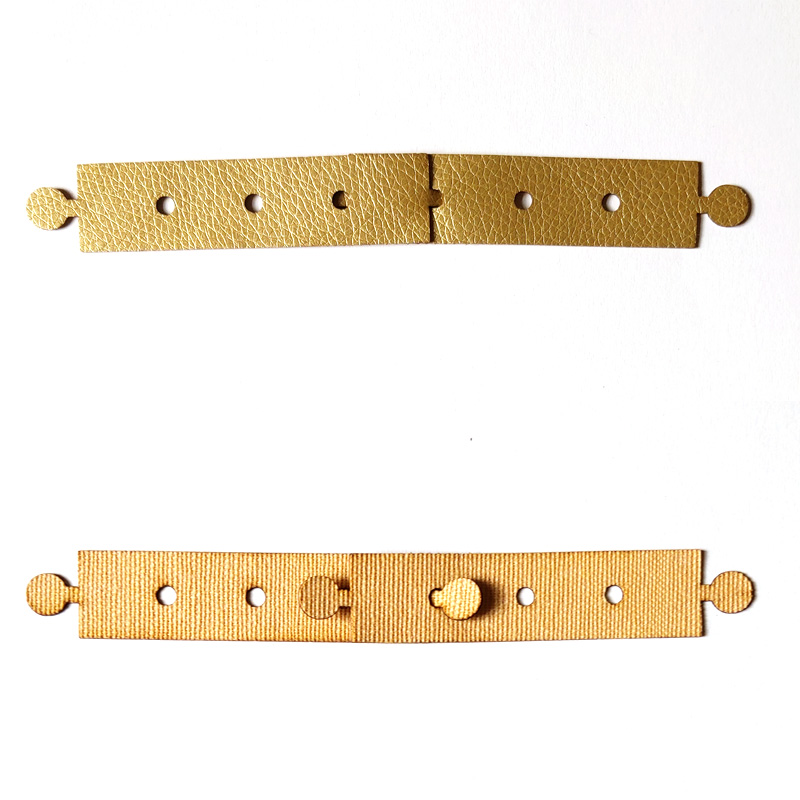
I then tried cutting this shape in a few different fabrics, including scuba knit, ripstop nylon, and pleather. I chose to go with the pleather, which was stable with no elasticity, resistant to tears, and thin (1 mm thickness).

Making the cut
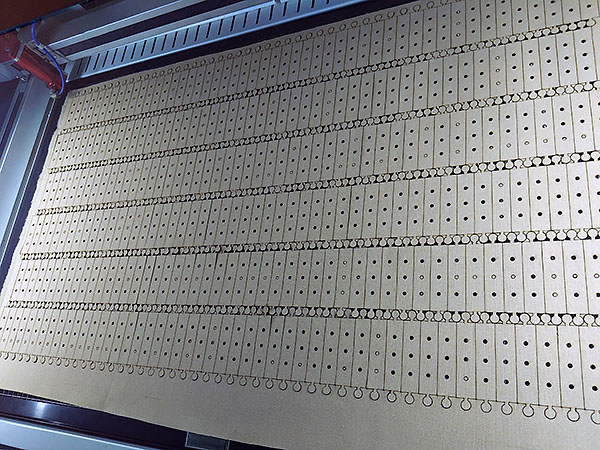
The parameters chosen above meant that the modules could nest very well, creating a compact shape with very little waste. I made basic calculations for how much surface I would have to cover to create a simple top and determined I would need around 300 modules. Nesting the modules as shown below, I was able to cut 294 out of a 60 cm x 1 m cut of pleather.
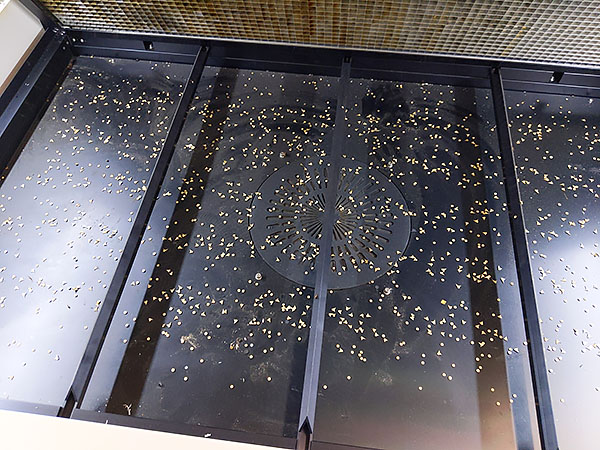
The aftermath of the cutting process was very satisfying: apart from the perimeter of the fabric, barely a handful of pleather confetti!
Exploring combinations
Now that the modules are cut, it's time to look into all the ways they can be used together!
Basic assembly
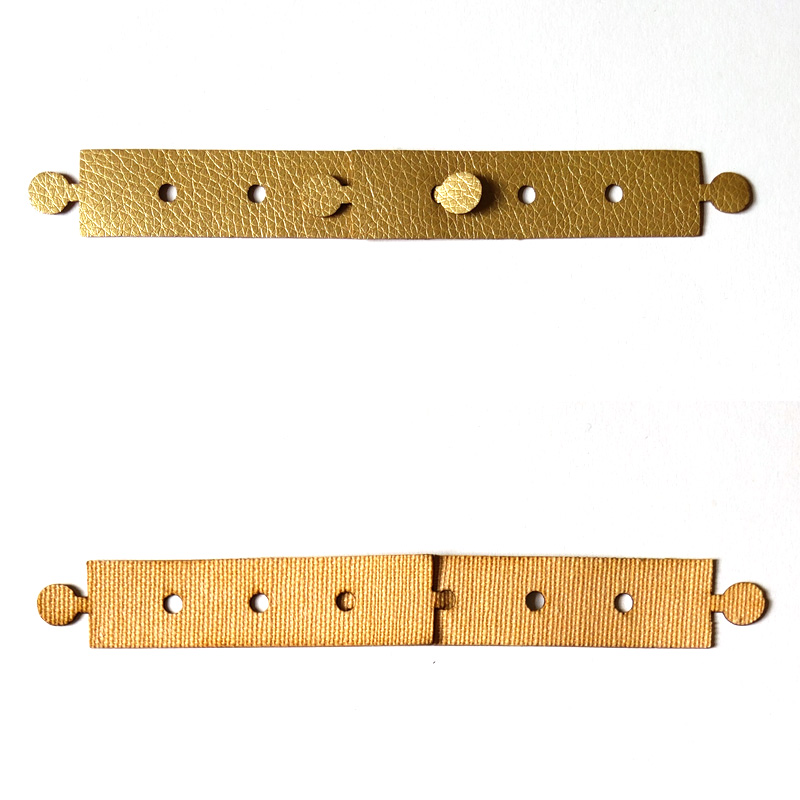
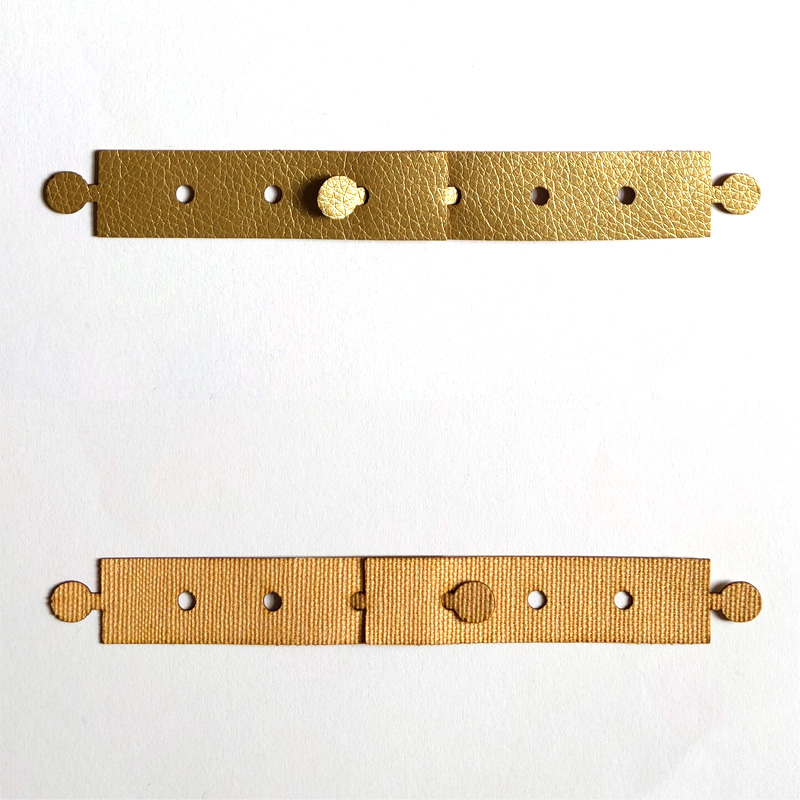
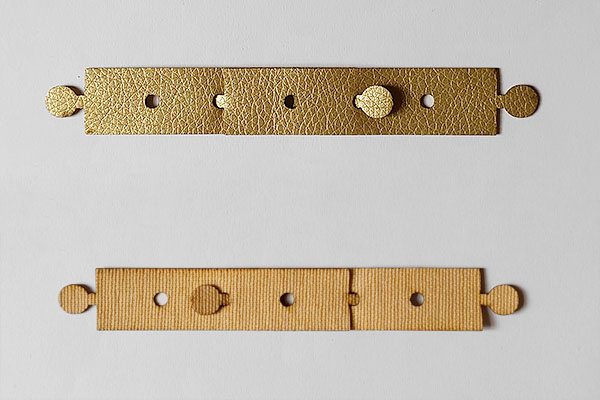
There are three ways to create a lock:
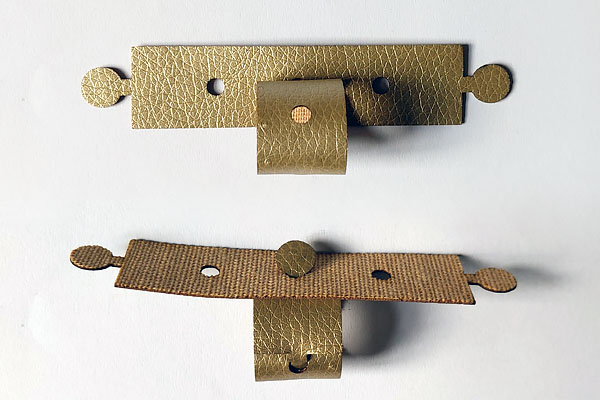
- Over: the tab is inserted from the front to the back of the hole. The tab circle is hidden behind the fabric.
- Under: the tab is inserted from the back to the front of the hole. The tab circle is visible on the front of the fabric.
- Over-under: one tab is inserted from the front to the back, and the opposing tab is inserted back to front. One of the tab circles is visible on the front of the fabric, the other one is hidden.
 Over
Over
 Under
Under
 Over-under
The over-under lock is stronger, but requires the two modules to be in a line. The over and under locks can be used at any angle. All locks can be done on the first, second or third hole of a module.
One module
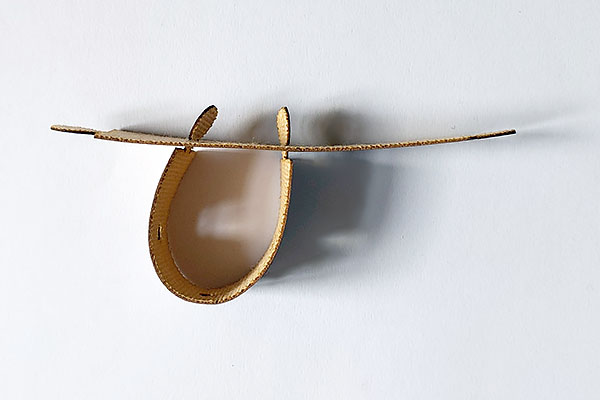
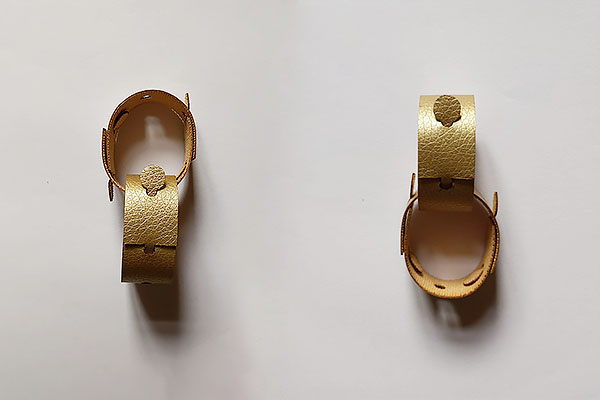
A module can be locked on itself to form a loop or a ring:
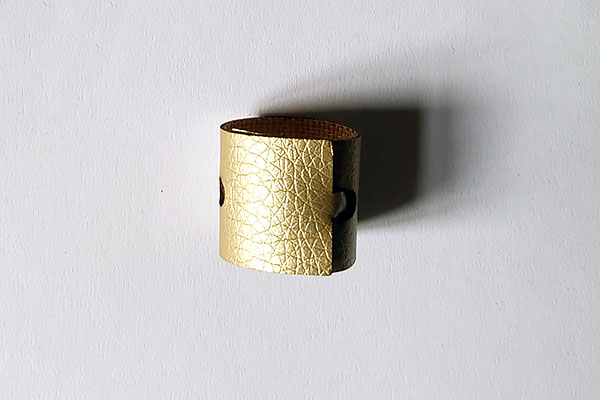 The Plain Ring: over lock in hole 3
 The Diamond Ring: over-under lock in hole 3
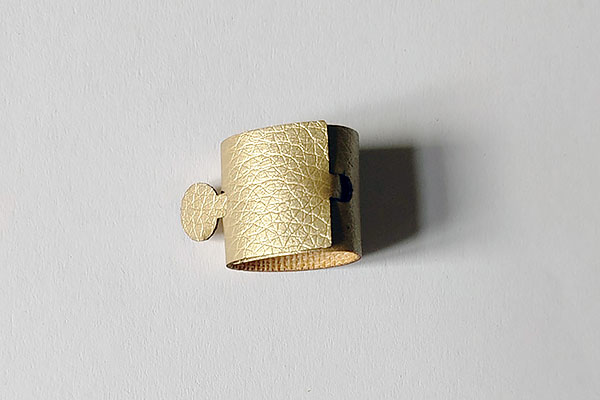
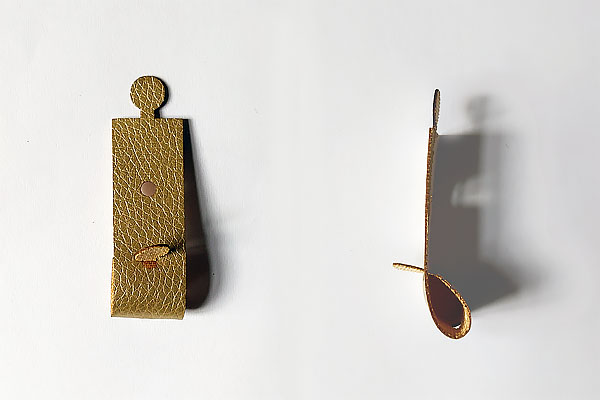 The Luggage Tag: under lock in hole 2
 The Chubby Luggage Tag: under lock in hole 3
 The Twirl: under lock with 90° angle in hole 3
Two modules
Two modules can be locked one after another in a line to form a chain:
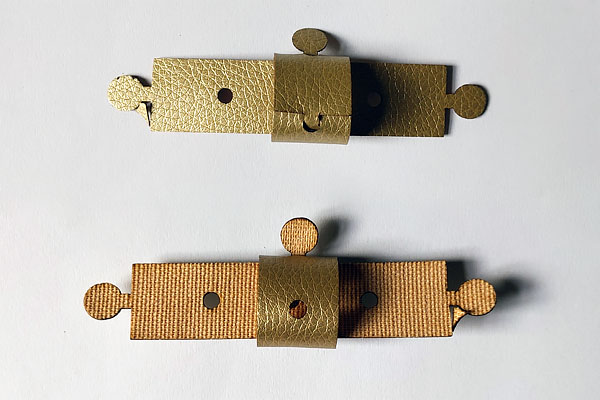
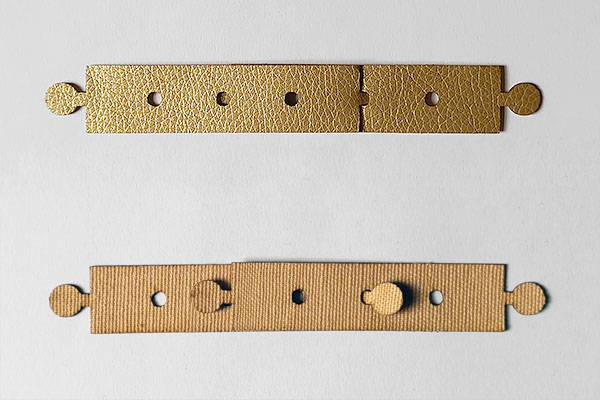 The Smooth Chain: over lock (here in hole 2)
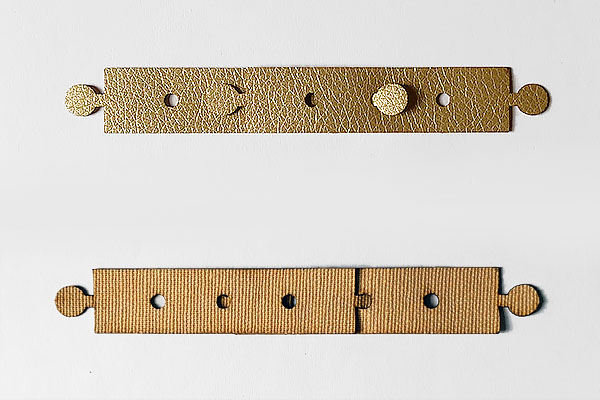 The Bumpy Chain: under lock (here in hole 2)
 The Unbreakable Chain: over-under lock (here in hole 2)
These chains can then be closed to form Chain Loops or Chain Rings.
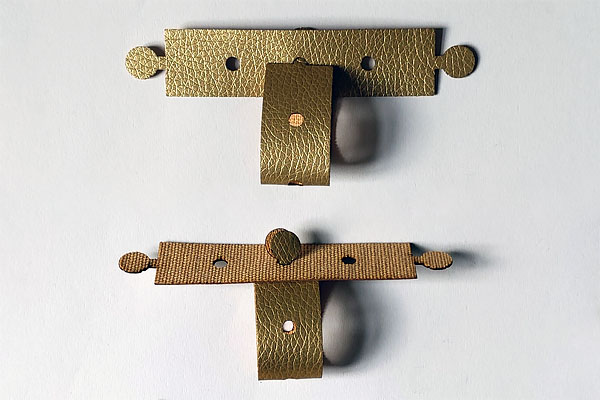
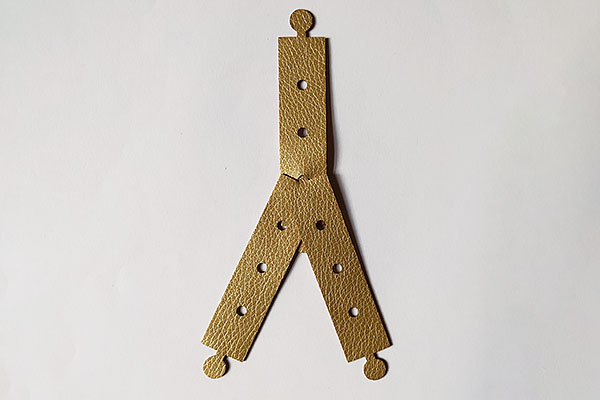
Under and over locks can also be used to create T-shaped or angled junctions between modules:
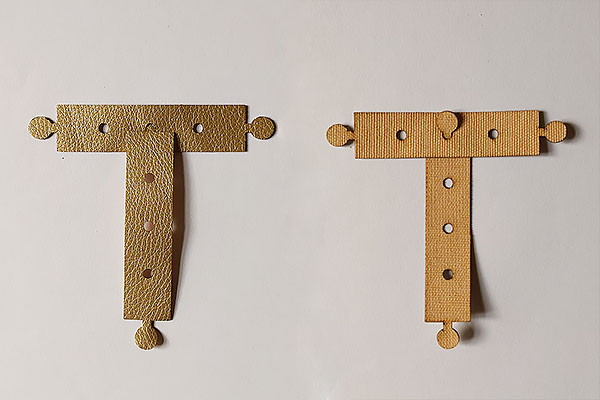 The Elephant: over lock with a 90° angle
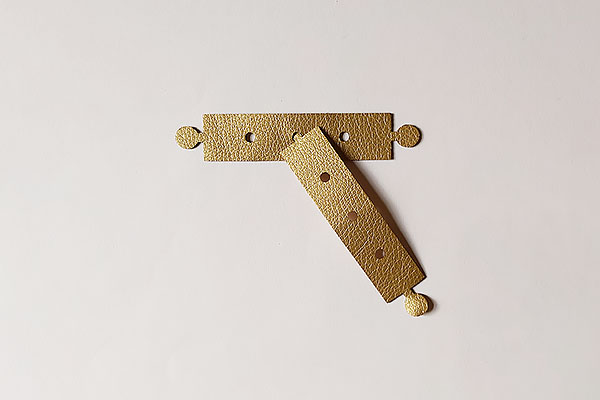 The Drunken Elephant: over lock with an acute or obtuse angle
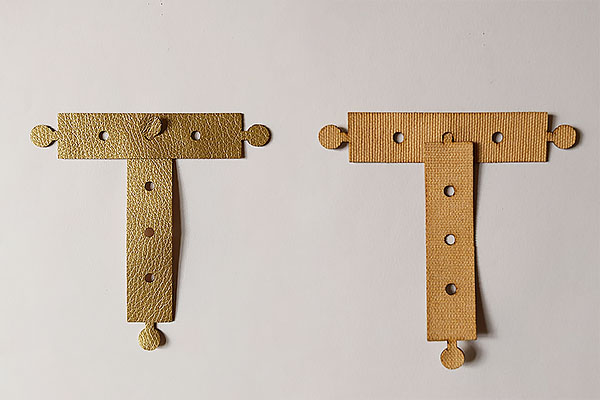 The Robot: under lock with a 90° angle
 The Drunken Robot: under lock with an acute or obtuse angle
Loops and rings can be attached to another module either via locking or via threading:
 The Hanging Luggage Tag: Luggage Tag over locked into another module
 The Hanging Diamong Ring: Diamond Ring over locked into another module
 The Marriage Proposal: Diamond Ring with a second module threaded into it
A module can be locked twice onto another module, either in the same hole or in different holes, to create even more sorts of loops:
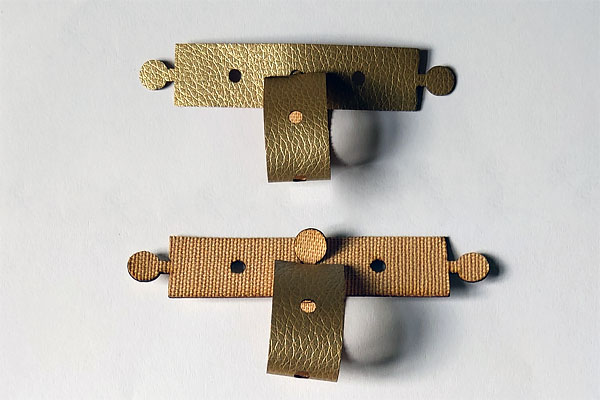
 The Bump: ends of the first module over lock in two different holes of the second module (here holes 1 and 2)
 The Drop: both ends of the first module over lock in the same hole of the second module (here hole 2), wrong sides facing
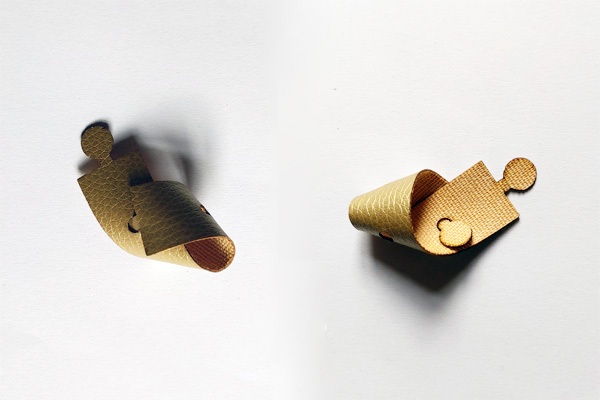
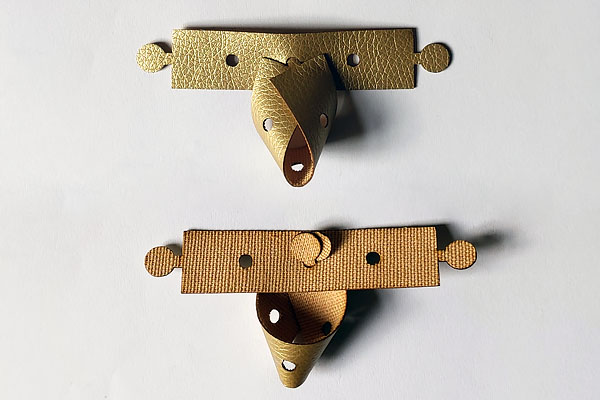 The Fox: both ends of the first module over lock in the same hole of the second module, wrong and right sides facing
 The Spiral: both ends of the first module lock in the same hole of the second module, one over and one under
Threading a module into a ring and then locking it onto itself to make another ring can create a Ring Chain:
 The Plain Ring Chain: Plain Ring threaded into another Plain Ring
Three modules and more
Chains can be extended to any length by adding modules linearly. Alternating lock patterns can create different effects:
 The Strong Leapfrog Chain: over-under locks lined up in the same direction
 The Strong Crenelated Chain: over-under locks lined up in alternating directions
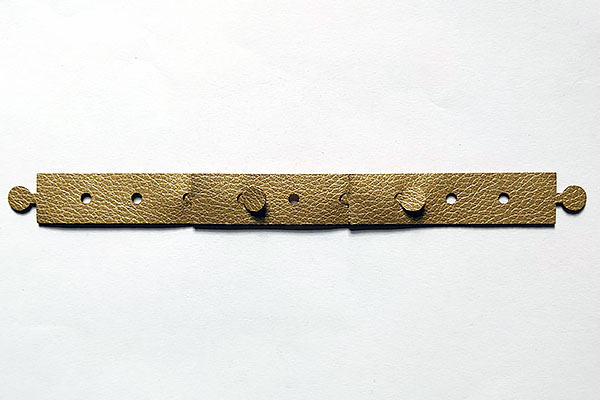
A single tab can be matched with up to three holes, and similarly up to three tabs can be matched with a single hole, to create increases and decreases:
 The Basic Increase: two modules over locked in the same hole
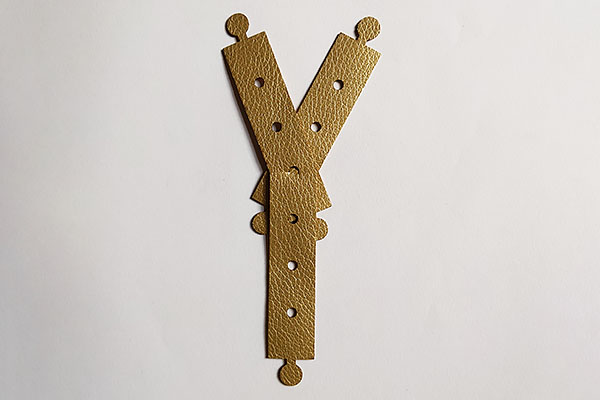 The Basic Decrease: one module over locked into two overlapping holes
By threading a Chain into a Chain Ring, then closing the former, one can create a Chain-Ring Chain:
 The Mixed Chain-Ring Chain: 2-length Crenelated Chain Ring threaded into 2-length Leapfrog Chain Ring
The same principle could be used to create chained rings of chained rings of chained rings... ad infinitum.
Similarly, chains can be constructed and then treated as units and woven or knitted together. If additional structure is needed to hold the weave together, additional modules can be locked into overlapping holes to keep them strongly in place.
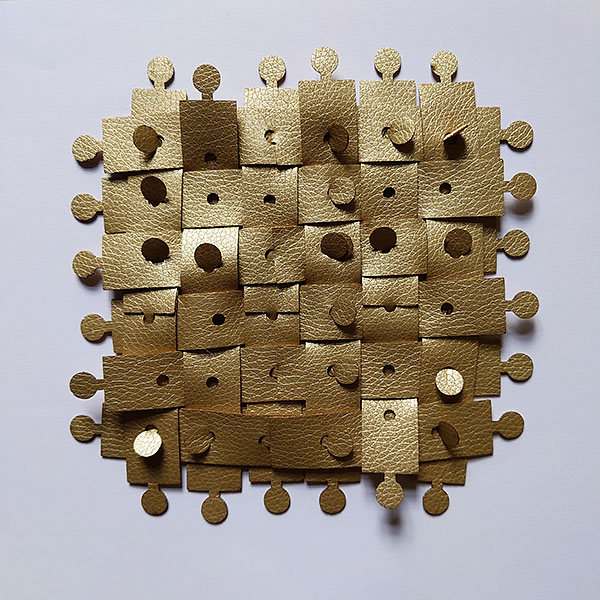
Making a garment
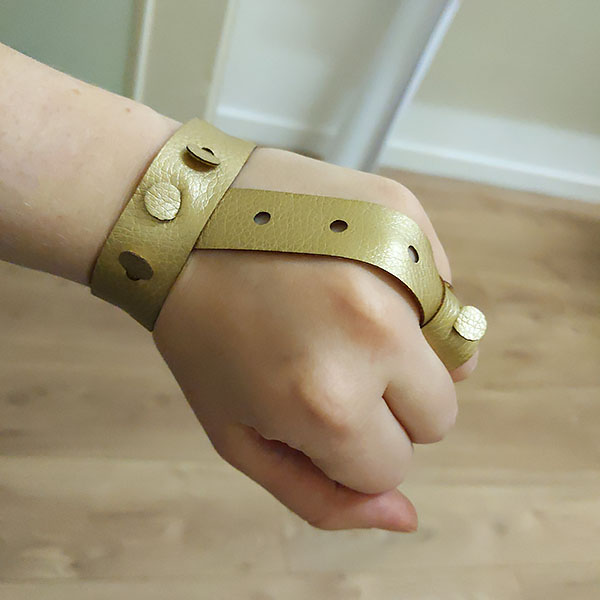
I first tried combining several of these techniques to create an accessory. Here is the pattern to create this simple hand chain:
- make a Strong Crenelated Chain Ring the size of your wrist;
- make a Diamond Ring to fit your finger;
- make a Strong Leapfrog Chain the height of your palm (in my case, this is just one module);
- connect one end of the chain to the chain ring with an under lock;
- connect the other end of the chain to the ring with an under lock.
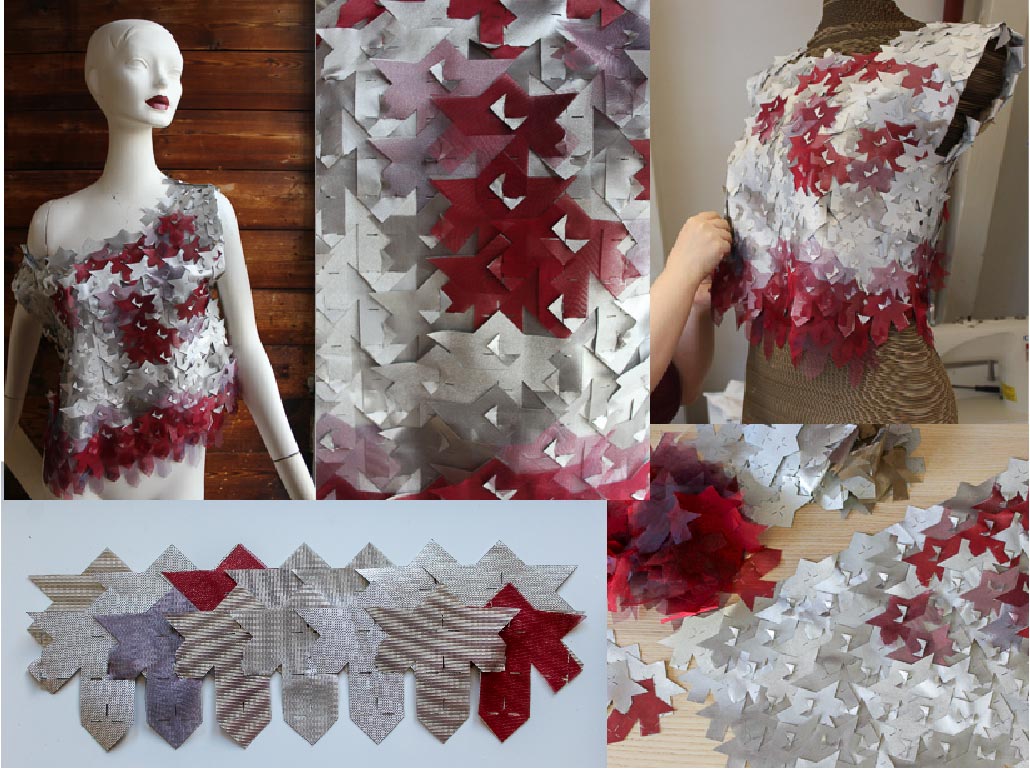
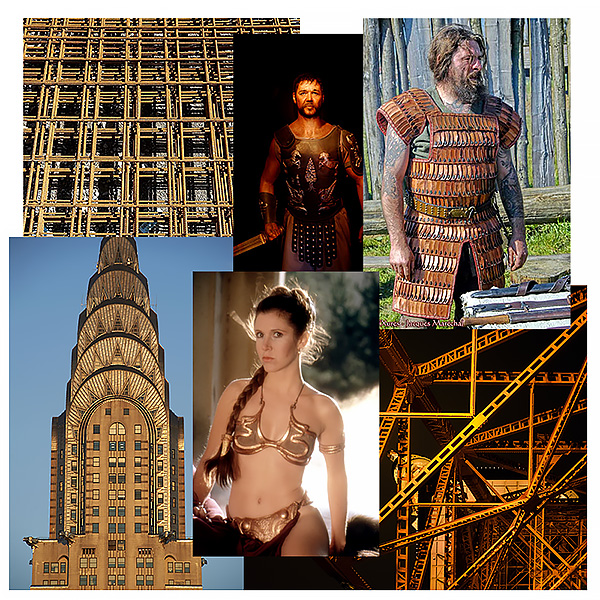
Next, I wanted to create a wearable garment. The association of the golden pleather, the elongated rectangular shape and the evenly spaced holes made me think of a mix between ancient and modern: ancient leather and metal armor vs. sci-fi costumes, art deco architecture vs. humble steel beams...
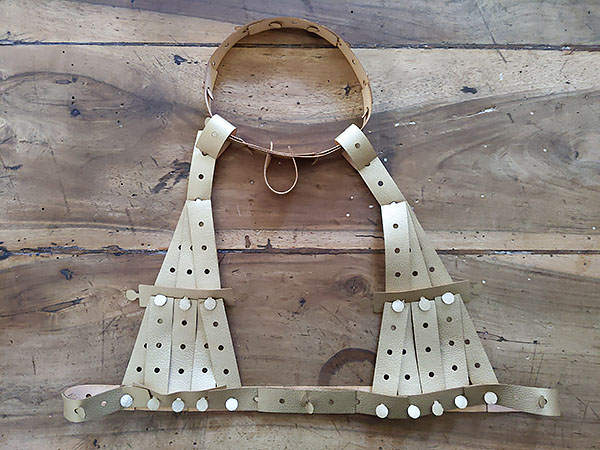
I started by draping a bikini top on myself, using Increases to create a fan-like shape at the bust, and experimented with a BDSM-lite halter collar. The collar is a Chain Ring that is threaded through Drops attached to the straps.
I switched to straps, made partially out of Ring Chains, and lengthened the body with a woven panel made of Strong-locked Crenelated Chains. I strenghtened the weave by adding Bumps in a chevron pattern, and attached one last Crenelated Chain at the bottom with alternating Elephant and Robot T-junctions.
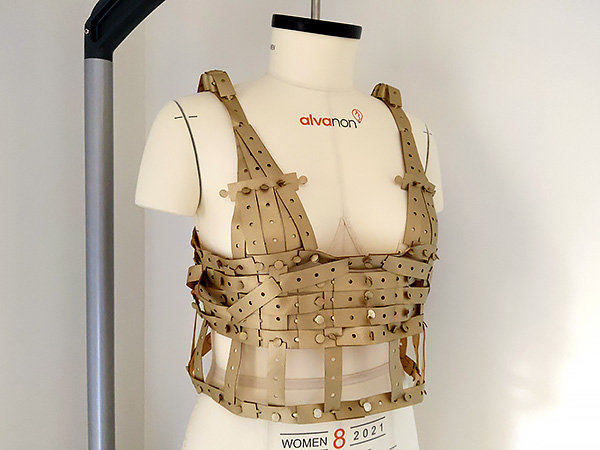
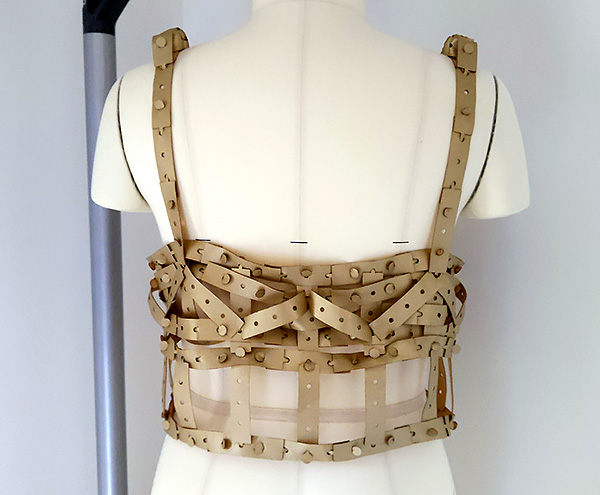
I had a lot of fun with this assignment coming up with different ways of assembling the modules and silly names for them. Putting together the garment took me about three hours altogether but it felt like playing with Legos. I quite like the final top: even if it doesn't fit me quite right and looks much better on the mannequin, it has a lot of cool details. I'd be curious to see all the different patterns that I could come up with if I had modules cut from two different fabrics or from a reversible fabric.
Source Files
The module design created for this assignment is available to download on the Open Source Circular Fashion page and also can be downloaded here. The tiled version is also available here.