9. Wearables
Research
I began my research by reviewing the notes and tutorials of Emma Pareschi and Liza Stark. From there, I explored additional resources on Instructables and studied how to use a heartbeat sensor and Arduino code to create a wearable garment that controls Neopixels based on the user’s heartbeat.
References & Inspiration
I was truly inspired by My Heart on My Dress, Jingwen Zhu’s wearable IoT project that beautifully blends technology with intimate human emotion. The piece demonstrates how data can be transformed into a poetic, visual expression of the body, turning something as personal as a heartbeat into a shared, interactive experience. Its thoughtful design and seamless integration of sensors and aesthetics encouraged me to think beyond functionality and explore how wearable technology can communicate feeling, presence, and connection in meaningful ways.

Tools & Materials
- Arduino UNO
- Arduino IDE
- Transistor E13009-2
- Diode 1N4001
- Sewable neopixels
- Neodymium magnets
- A piece of fabric,conductive thread
- Sewing machine
- Conductive tape
- Wires, jumpers, breadboard
Process and workflow
Neopixels
I decided to work with neopixels to turn of the lights one by one using Arduino Uno and later integrate them in a garment.
Process
I soldered the wires to connect the NeoPixel ring (5V, GND, and data pin). I then connected the ring to the Arduino Uno and wrote the code. When tested, it worked perfectly, as shown in the video.
I used the following circuit:
![]()
Neopixels Code
#include <Adafruit_NeoPixel.h>

#define PIN 6
#define LED_COUNT 12
#define BRIGHTNESS 50
// Declare our NeoPixel strip object:
Adafruit_NeoPixel strip(LED_COUNT, PIN, NEO_GRB + NEO_KHZ800);

void setup() {
  // put your setup code here, to run once:
  strip.setBrightness(BRIGHTNESS);
   strip.begin(); // This initializes the NeoPixel library.

}

void loop() {
  // put your main code here, to run repeatedly:
   // Set all pixels to a vibrant blue
  for(int i = 0; i < LED_COUNT; i++) {
    strip.setPixelColor(i, strip.Color(0, 0, 255));
    strip.show(); // This sends the updated pixel color to the hardware.
    delay(10); // A small delay to make the effect visible

  // Add a delay before turning them off
  delay(1000);

  // Turn all pixels off
  strip.clear();
  strip.show();

  // Add a delay before the next cycle
  delay(1000);
  }
}
LEDs wrist band
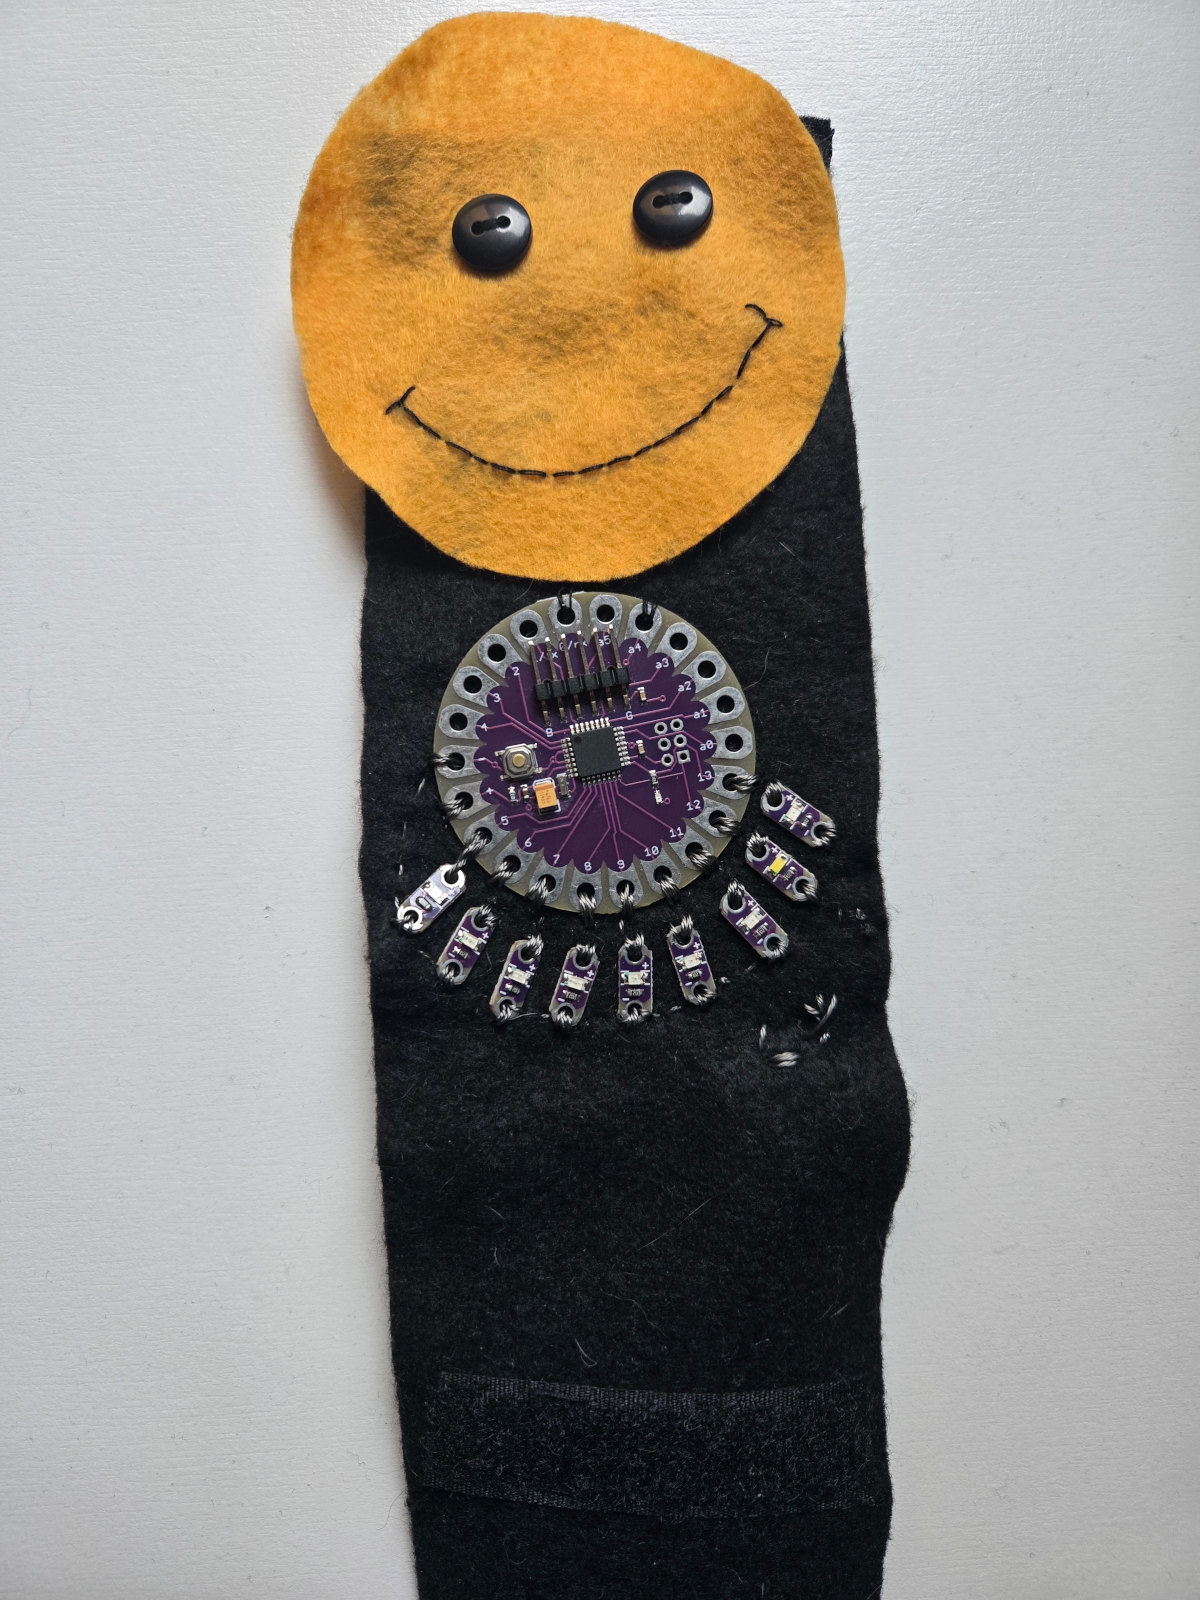
I built a wristband using a LilyPad, nine LEDs, and a LiPo battery, arranged to form a happy face. The wristband closes securely with Velcro straps.
Materials & Tools
- Lilypad
- 3.7v lipo battery
- Yellow and Black felt
- Velcro straps
- 9 Sewable LEDs
- 1 Sewable switch
- Black and yellow thread and conductive thread
- Wires, jumpers, breadboard
Process
Step 1
After cutting the felt pieces for the wristband and the happy face, I sewed the nine LEDs to the LilyPad and attached black buttons as the eyes and a smile.
Step 2
I wrote the code, connected the LilyPad, and tested the circuit. Then, I added the battery using Velcro and sewed a switch to turn it on and off. As shown in the video, the LEDs turn on one by one.
LEDs Lilypad Code
#define LED1 5
#define LED2 6
#define LED3 7
#define LED4 8
#define LED5 9
#define LED6 10
#define LED7 11
#define LED8 12
#define LED9 13
#define interval 11000
#define dead_time 1000

unsigned long PWM_counter = 0;

int offset = 0;
int step_size = 200;

unsigned long on_time = 0;
unsigned long cycle_start = 0;
char dir = 1;
int offset2 = 0;
int step_size2 = 200;
unsigned long on_time2 = 0;
unsigned long cycle_start2 = 0;
char dir2 = 1;

byte LED_tracker1 = 1;
byte LED_tracker2 = 1;


void setup() {

  Serial.begin(57600);
  pinMode(LED1, OUTPUT);
  pinMode(LED2, OUTPUT);
  pinMode(LED3, OUTPUT);
  pinMode(LED4, OUTPUT);
  pinMode(LED5, OUTPUT);
  pinMode(LED6, OUTPUT);
  pinMode(LED7, OUTPUT);
  pinMode(LED8, OUTPUT);
  pinMode(LED9, OUTPUT);
  offset = random(2500,7500);
  offset2 = random(2500,7500);
}

void loop()
{
  PWM_counter = micros();
  if( (PWM_counter + offset - cycle_start) >= interval) {  // completed cycle, start over
    on_time += step_size*dir;
    cycle_start = PWM_counter;
    if (on_time >= (interval - dead_time) ) {
      dir *= -1;
      on_time = interval - dead_time;
    }
    else if (on_time <= 0) {
      on_time = 0;
      dir *= -1;
      LED_tracker1 = LED_tracker2;
      while (LED_tracker1 == LED_tracker2) LED_tracker1 = random(1,10);
      offset2 = random(0,4000);
    }
  }
  else if( (PWM_counter + offset - cycle_start) >= (dead_time + on_time) ) {  // time to switch LED off
    //digitalWrite(LED1, LOW);
    LED_off(LED_tracker1);
  }
  else if( (PWM_counter + offset - cycle_start) >= dead_time) {  // time to switch LED on
    //digitalWrite(LED1, HIGH);
    LED_on(LED_tracker1);
  }
if( (PWM_counter + offset2 - cycle_start2) >= interval) {  // completed cycle, start over
    on_time2 += step_size2*dir2;
    cycle_start2 = PWM_counter;
    if (on_time2 >= (interval - dead_time) ) {
      dir2 *= -1;
      on_time2 = interval - dead_time;
    }
    else if (on_time2 <= 0) {
      on_time2 = 0;
      dir2 *= -1;
      LED_tracker2 = LED_tracker1;
      while (LED_tracker2 == LED_tracker1) LED_tracker2 = random(1,10);
      offset2 = random(0,4000);
    }
  }
  else if( (PWM_counter + offset2 - cycle_start2) >= (dead_time + on_time2) ) {  // time to switch LED off
    //digitalWrite(LED1, LOW);
    LED_off(LED_tracker2);
  }
  else if( (PWM_counter + offset2 - cycle_start2) >= dead_time) {  // time to switch LED on
    //digitalWrite(LED1, HIGH);
    LED_on(LED_tracker2);
  }
}

void LED_on(byte LED)
{
  if (LED == 1) digitalWrite(LED1, HIGH);
  if (LED == 2) digitalWrite(LED2, HIGH);
  if (LED == 3) digitalWrite(LED3, HIGH);
  if (LED == 4) digitalWrite(LED4, HIGH);
  if (LED == 5) digitalWrite(LED5, HIGH);
  if (LED == 6) digitalWrite(LED6, HIGH);
  if (LED == 7) digitalWrite(LED7, HIGH);
  if (LED == 8) digitalWrite(LED8, HIGH);
  if (LED == 9) digitalWrite(LED9, HIGH);
}

void LED_off(byte LED)
{
  if (LED == 1) digitalWrite(LED1, LOW);
  if (LED == 2) digitalWrite(LED2, LOW);
  if (LED == 3) digitalWrite(LED3, LOW);
  if (LED == 4) digitalWrite(LED4, LOW);
  if (LED == 5) digitalWrite(LED5, LOW);
  if (LED == 6) digitalWrite(LED6, LOW);
  if (LED == 7) digitalWrite(LED7, LOW);
  if (LED == 8) digitalWrite(LED8, LOW);
  if (LED == 9) digitalWrite(LED9, LOW);
}
References
Wrist band process and result

Speaker
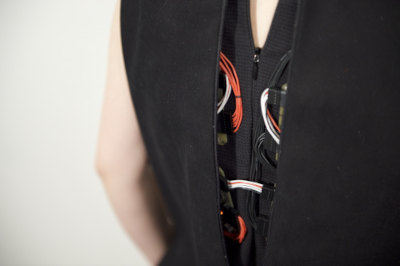
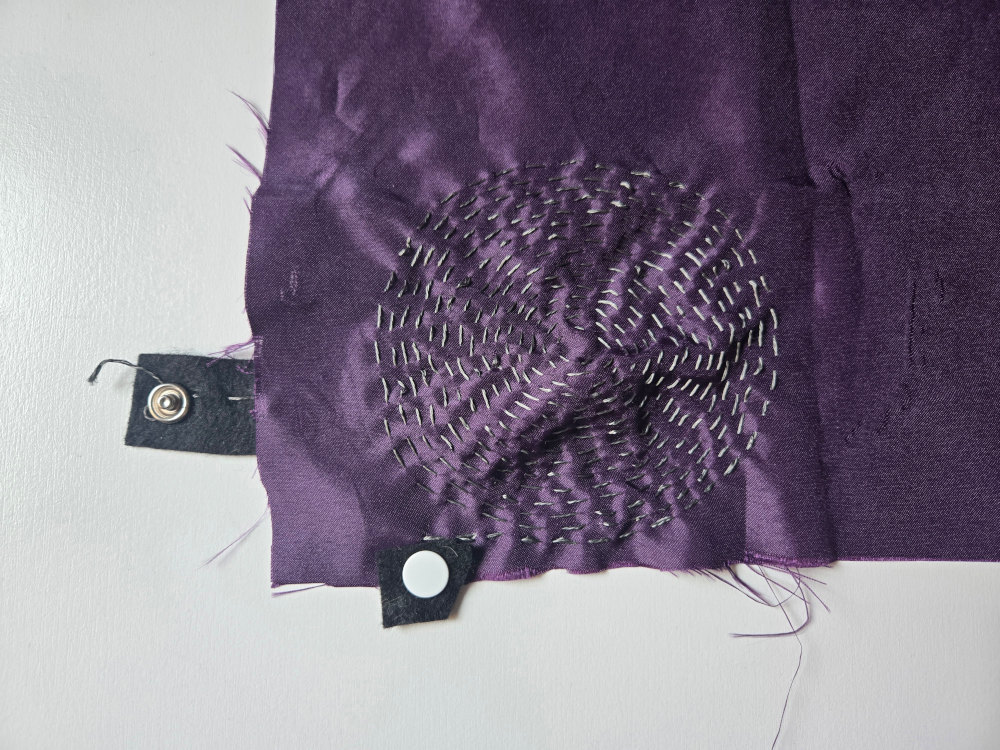
I created a speaker with fabric, conductive thread and neodymium magnets. I added snaps to conect it to an amplifier or any other device. I also used the Arduino Uno and wrote a code to generate a sound on the speaker
Materials & Tools
- Arduino UNO
- Arduino IDE
- Transistor E13009-2
- Diode 1N4001
- Neodymium magnets
- A piece of fabric,conductive thread
- Conductive tape
- Wires, jumpers, breadboard
Process
Step 1
Using conductive thread, I sewed a circular design resembling a speaker and added snaps for connections.
Step 2
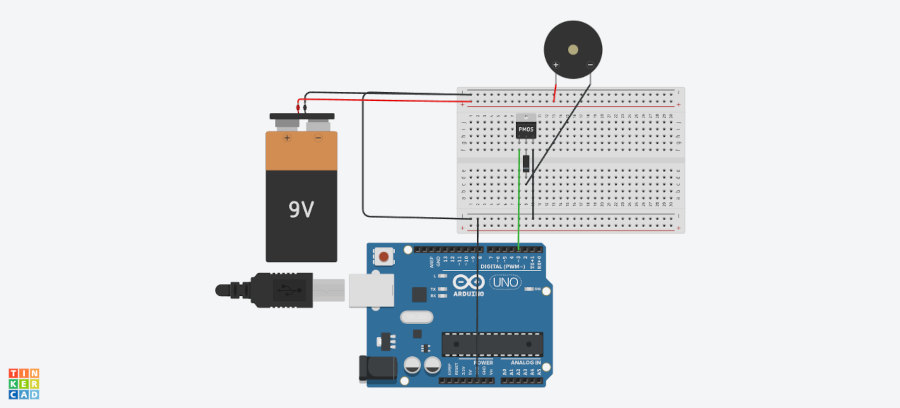
I assembled the circuit shown in the image below using a transistor, a diode, and a 9 V battery, then connected it to the Arduino Uno and wrote the code.
Step 3
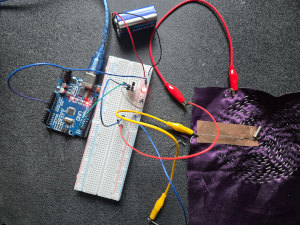
I tested the speaker by bringing the magnets closer to the center of the circular design.
I used the following circuit:
Speaker Code
//Generate a sound on a speaker at a frequency of 1000Hz
int speaker= 3;

void setup() {
  // put your setup code here, to run once:
  pinMode(speaker, OUTPUT);
}

void loop() {
  // put your main code here, to run repeatedly:
  // tone(pin, frequency)
  tone(speaker, 1000, 200);
  // 1 sec delay
  delay(1000);
  // stop sound
  noTone(speaker);
  delay(1000);

}
Speaker Process & Results

Learning outcomes and Observations
I really enjoyed working on wearables, and this lesson gave me a lot of inspiration for future designs. It was my first time using a NeoPixel ring, and I realized that soldering the wires so close together was quite challenging, but the results were beautiful.
Regarding the speaker, it did not work as expected. From this, I learned that I need to use larger and stronger magnets.