Digital bodies

Inspo and research
The art and complexity of the human body make it a rich subject to study and understand. The body is so natural and perfect that it is difficult to replicate. Since ancient history, many artists and cultures have tried to achieve beauty in their work, as in Greek sculptures. There is a huge area of experimentation in body representation throughout history, and each culture uses its own characteristic features to make the figure look like a real human body, always shaped by a subjective perception of beauty. This perception has changed over the years, and many artists play with shapes, proportions and sizes to create depictions of the body that do not follow aesthetic standards.
Innovation occurs at the intersection of different fields, disciplines and cultures. The use of virtual models and technological tools has opened a field to explore the body beyond the artistic and the scientific.
Art bodies around us.
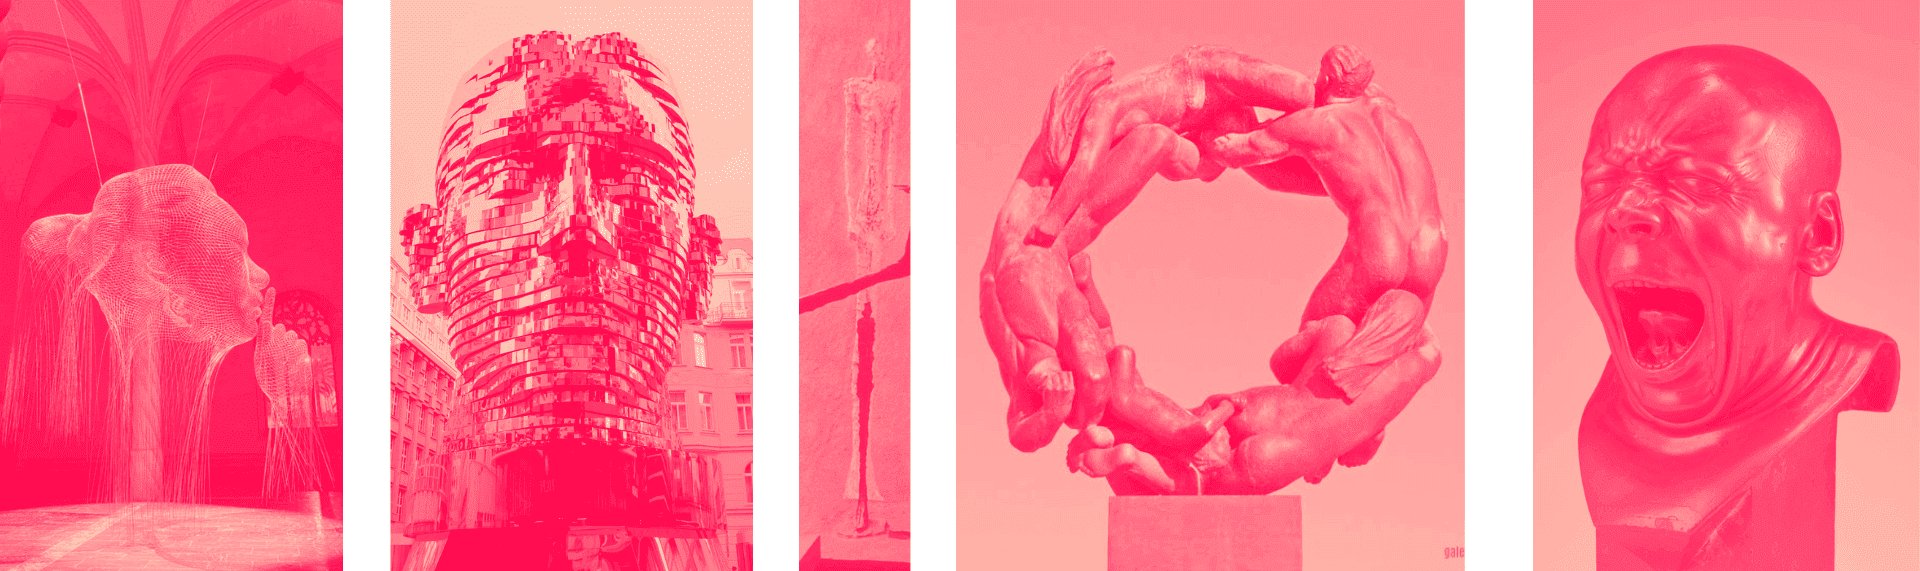
Jaume Plena, David Cerny, Giacometti, Rodin, Gustav Vigeland, Franz Xaver Messerschmidt and Marc Quinn are some artists that inspired for this project. I have always like sculpture, I´ve seen some of their expositions and work, digital bodies took me back to that inspiration.

This is one of my favortite expositions from Marc Quinn where he inspiresin Franz Xaver Messerschmidt work and I love the facial expresions and what it can make you feel. Emotional detox
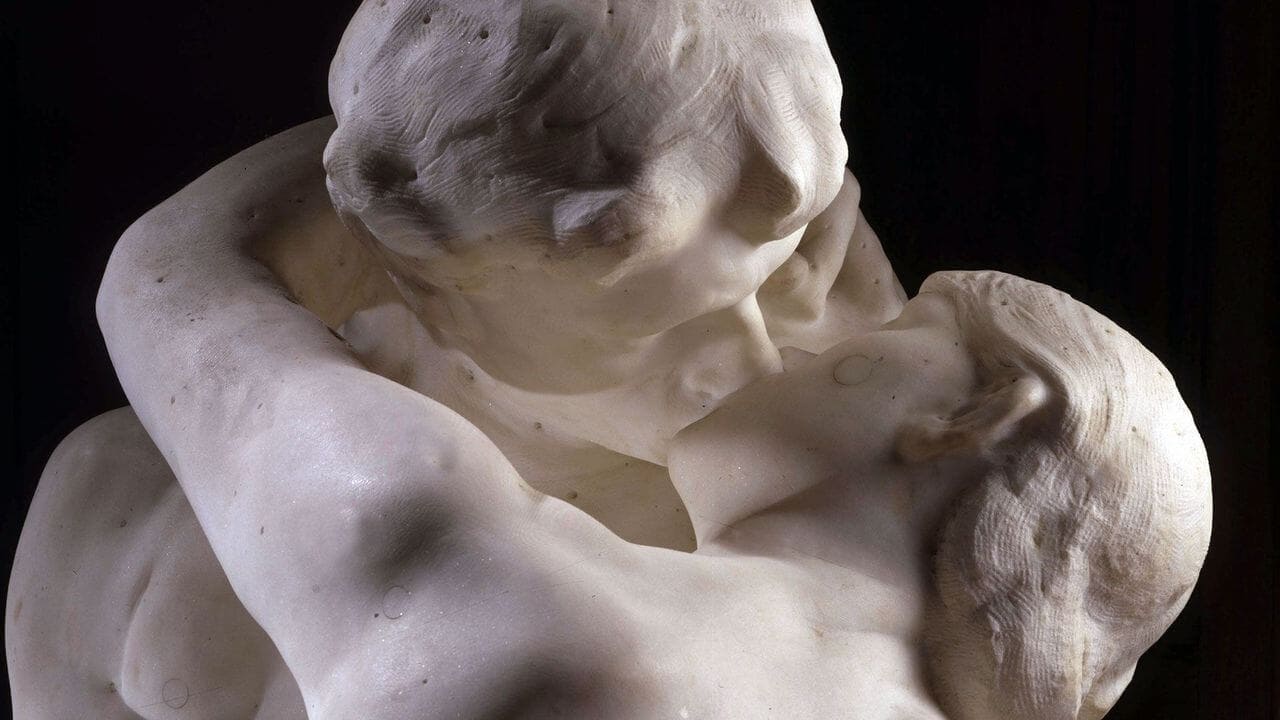
For this project I got inspire in Rodin’s art specifically “the kiss”. My idea was to represent the action of kissing someone and give the impression that the moment is half in real dimension and the other half captured inside a wall. And I took a look to the past Fabricademy projects and liked the Sara Alvarez Vinagre idea of cuting a part of the body and cutting the rest, I would like to give a similar effect.
Tools
Process and workflow
Modeling
First I experimented scanning with polycam with my phone and editing the model in Blender. I opened the app and selected the camera in the bottom right corner, I scan the face of a woman two times, and I got a good scanner of the head. I saved it and opened it with Blender to start editing.
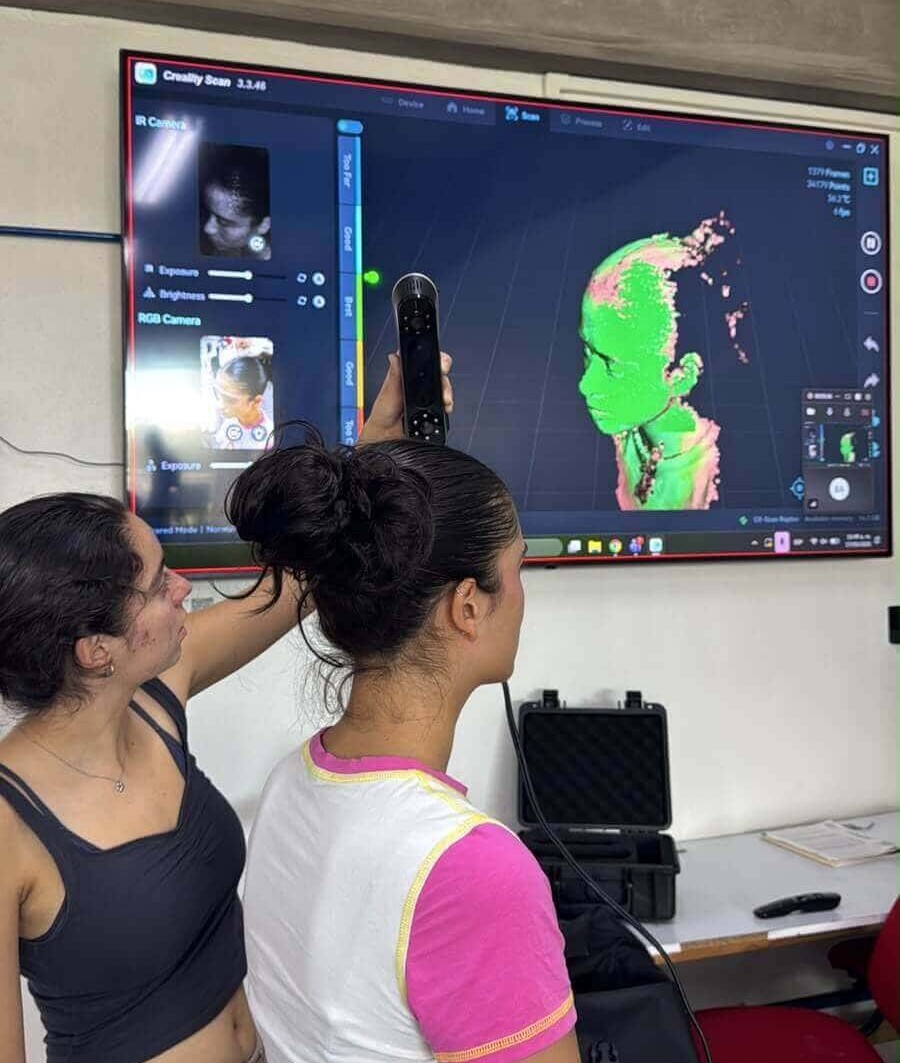
Creality scanner
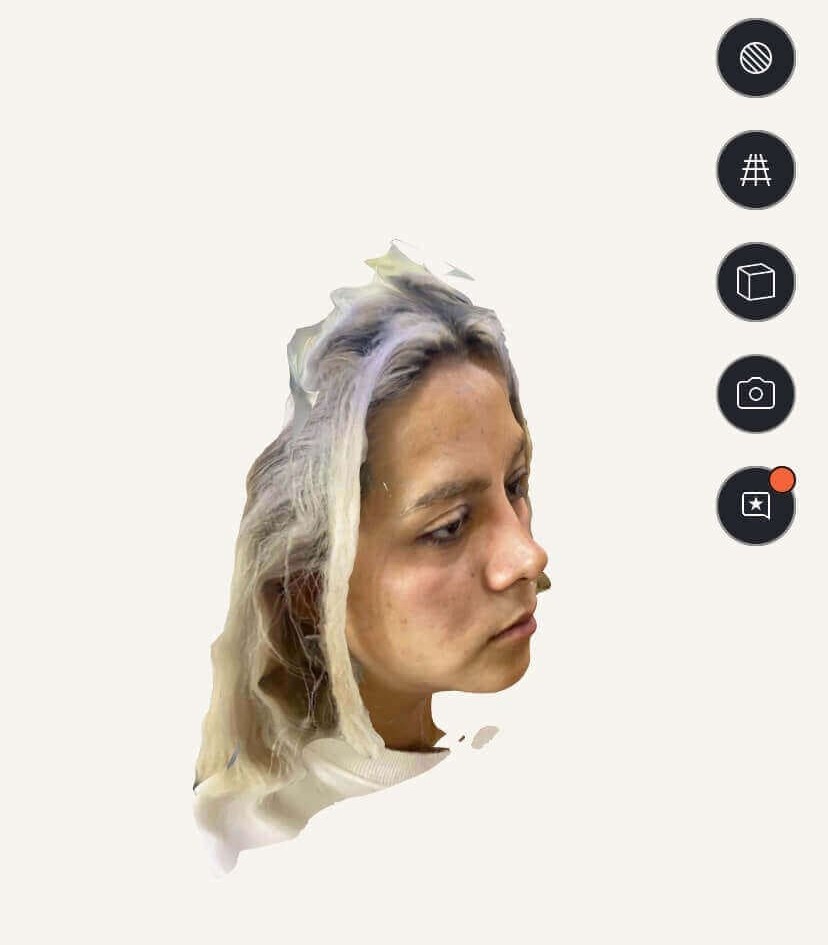
Polycam scanner
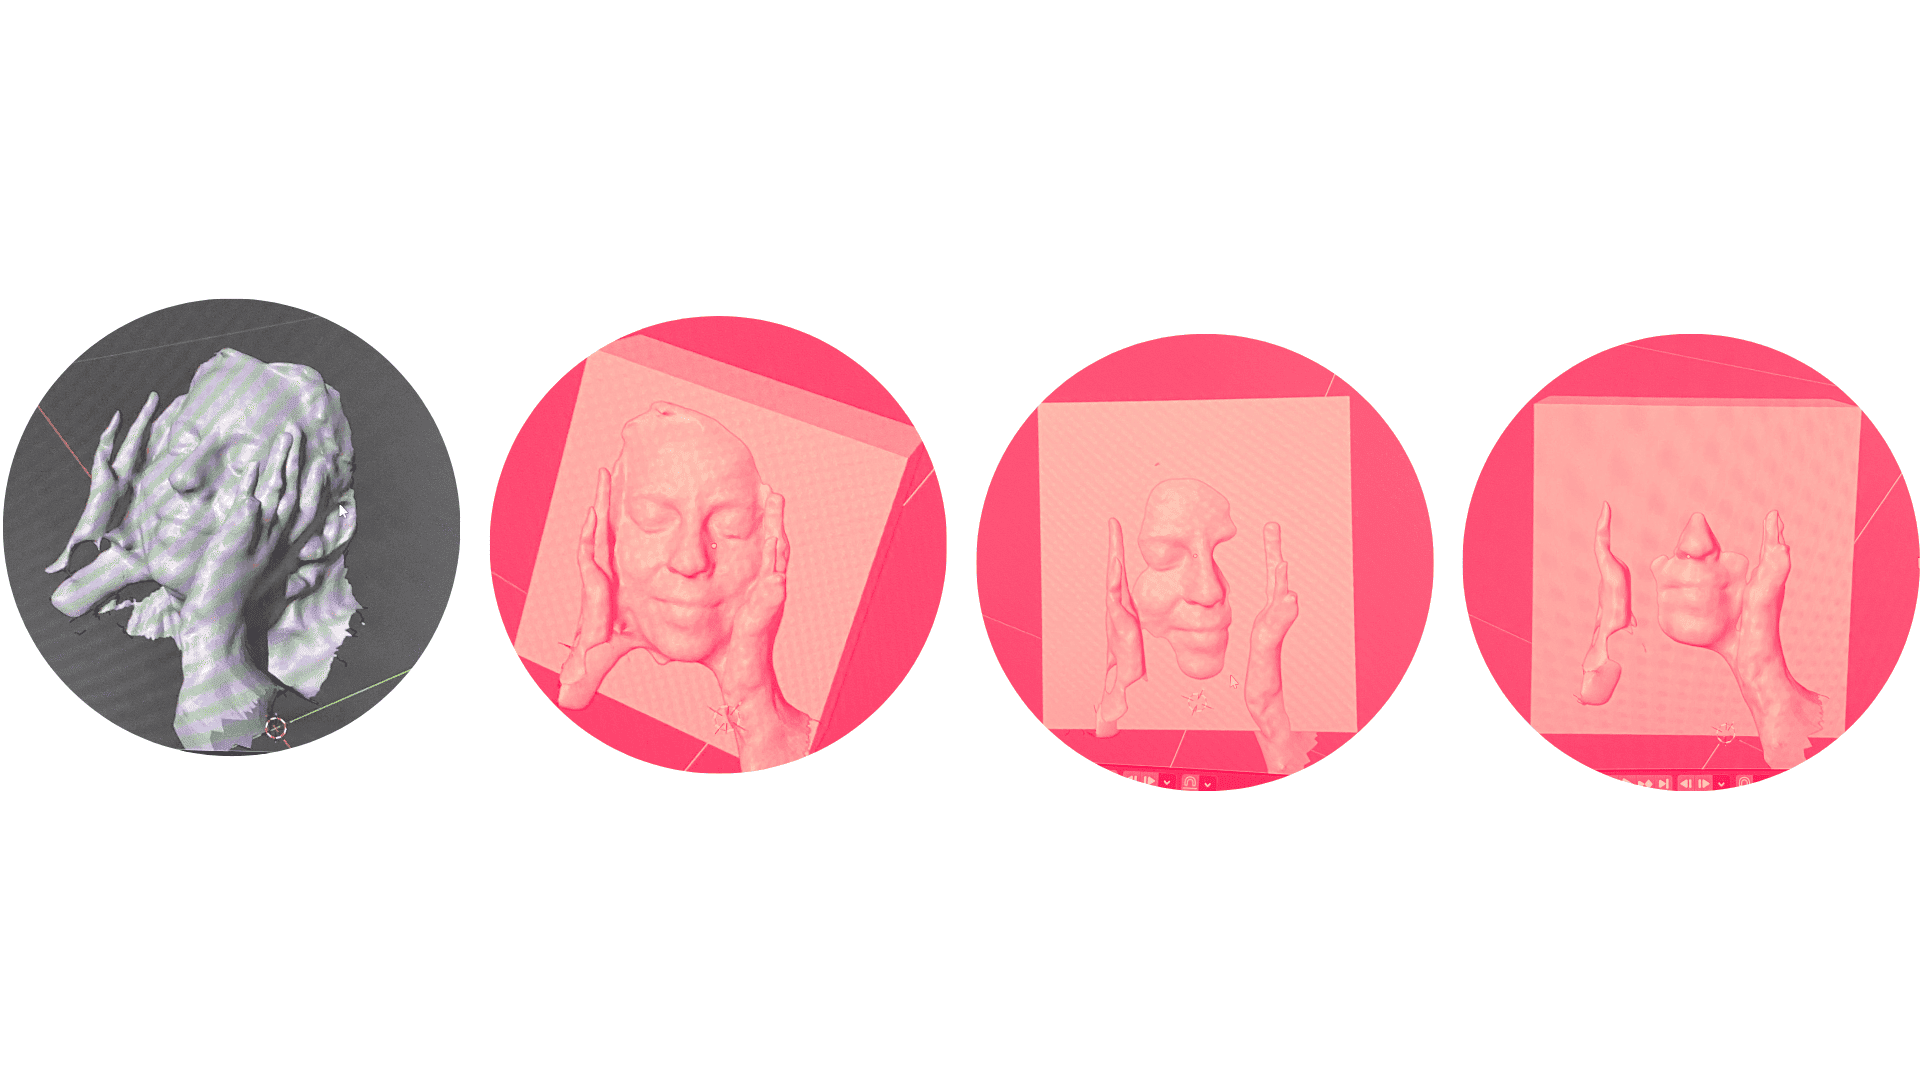
I kept experimenting a little bit more with polycam I found it really fun, so I wanted to experiment with it a little bit further. I scanned the face of a woman and I took the model to blender. There I implement the idea of leaving just a part of the face and cutting the rest like is behind a wall or somewhere else. Here are some of my results
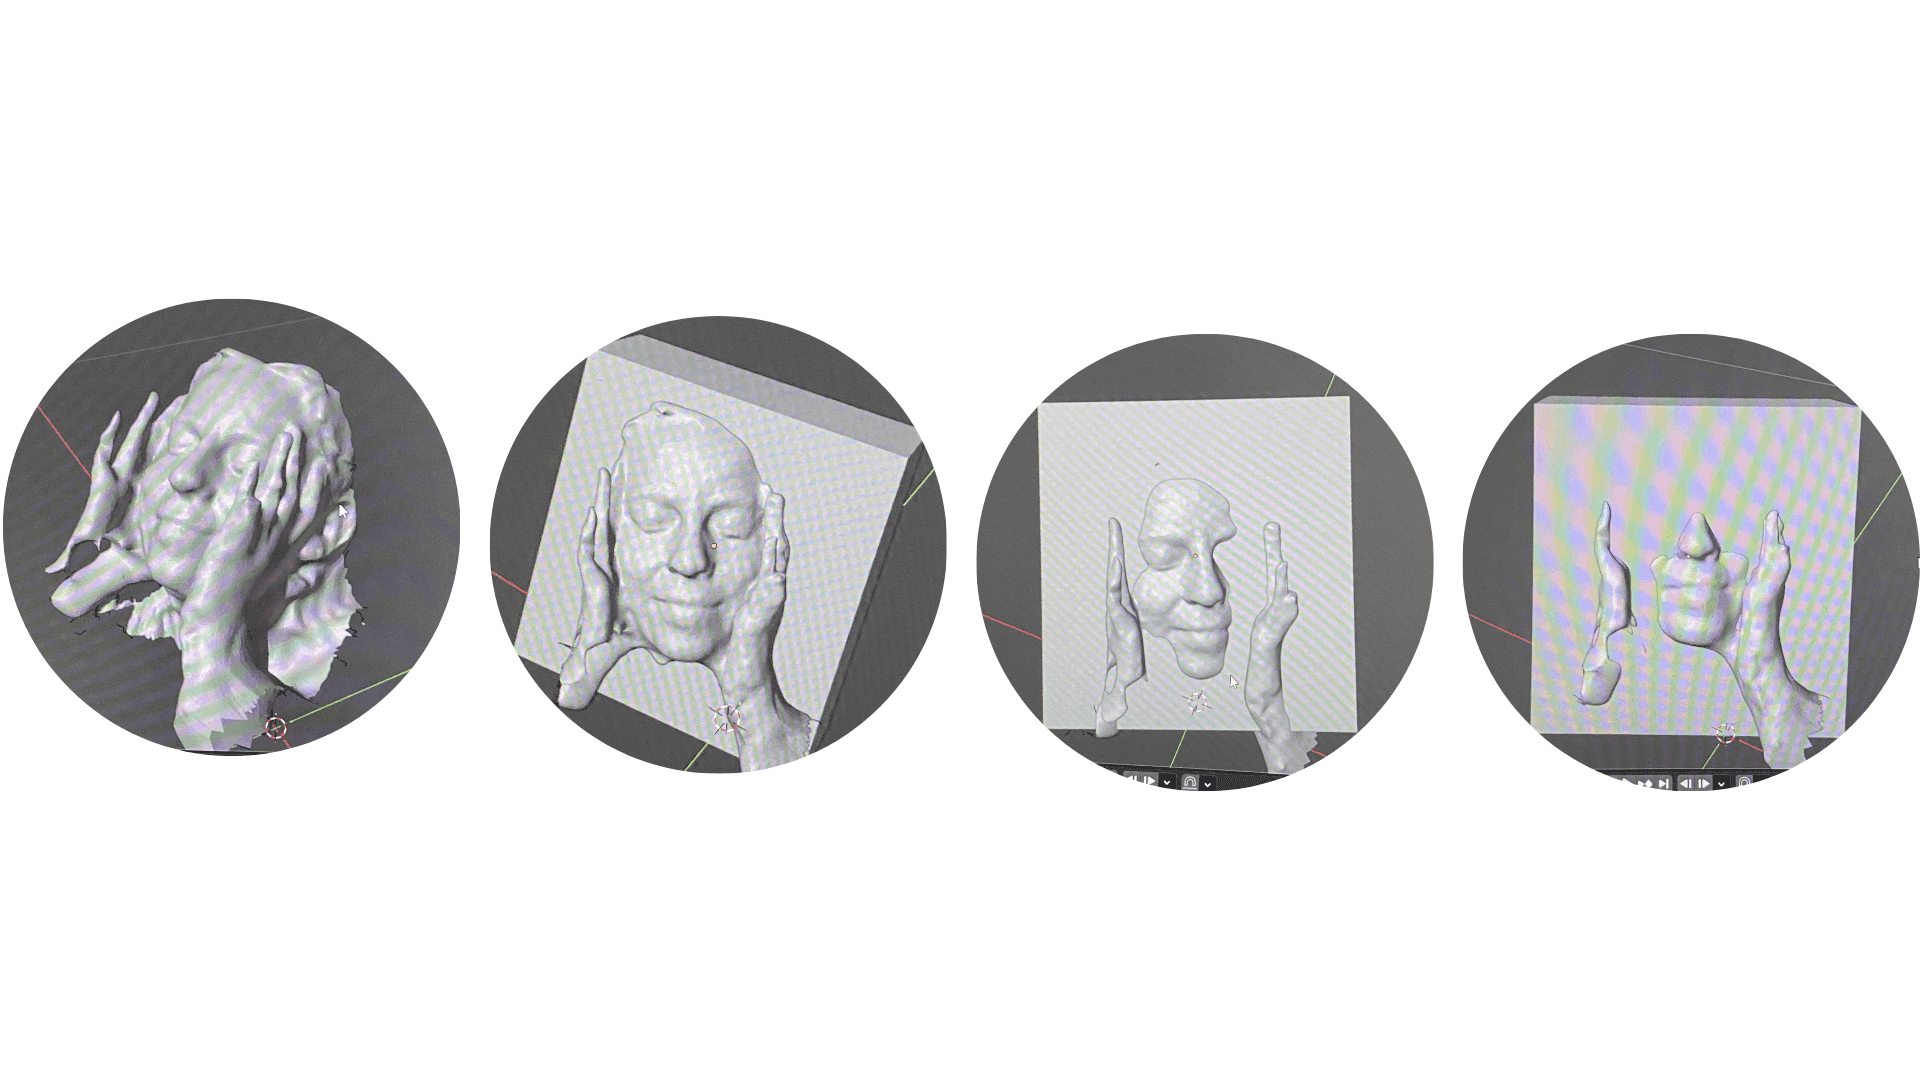
It was fun playing with the shapes, it took me a while liking the result without making any changes.
After exploring a little with the shape, I went back to my first idea of Rodin’s kiss.
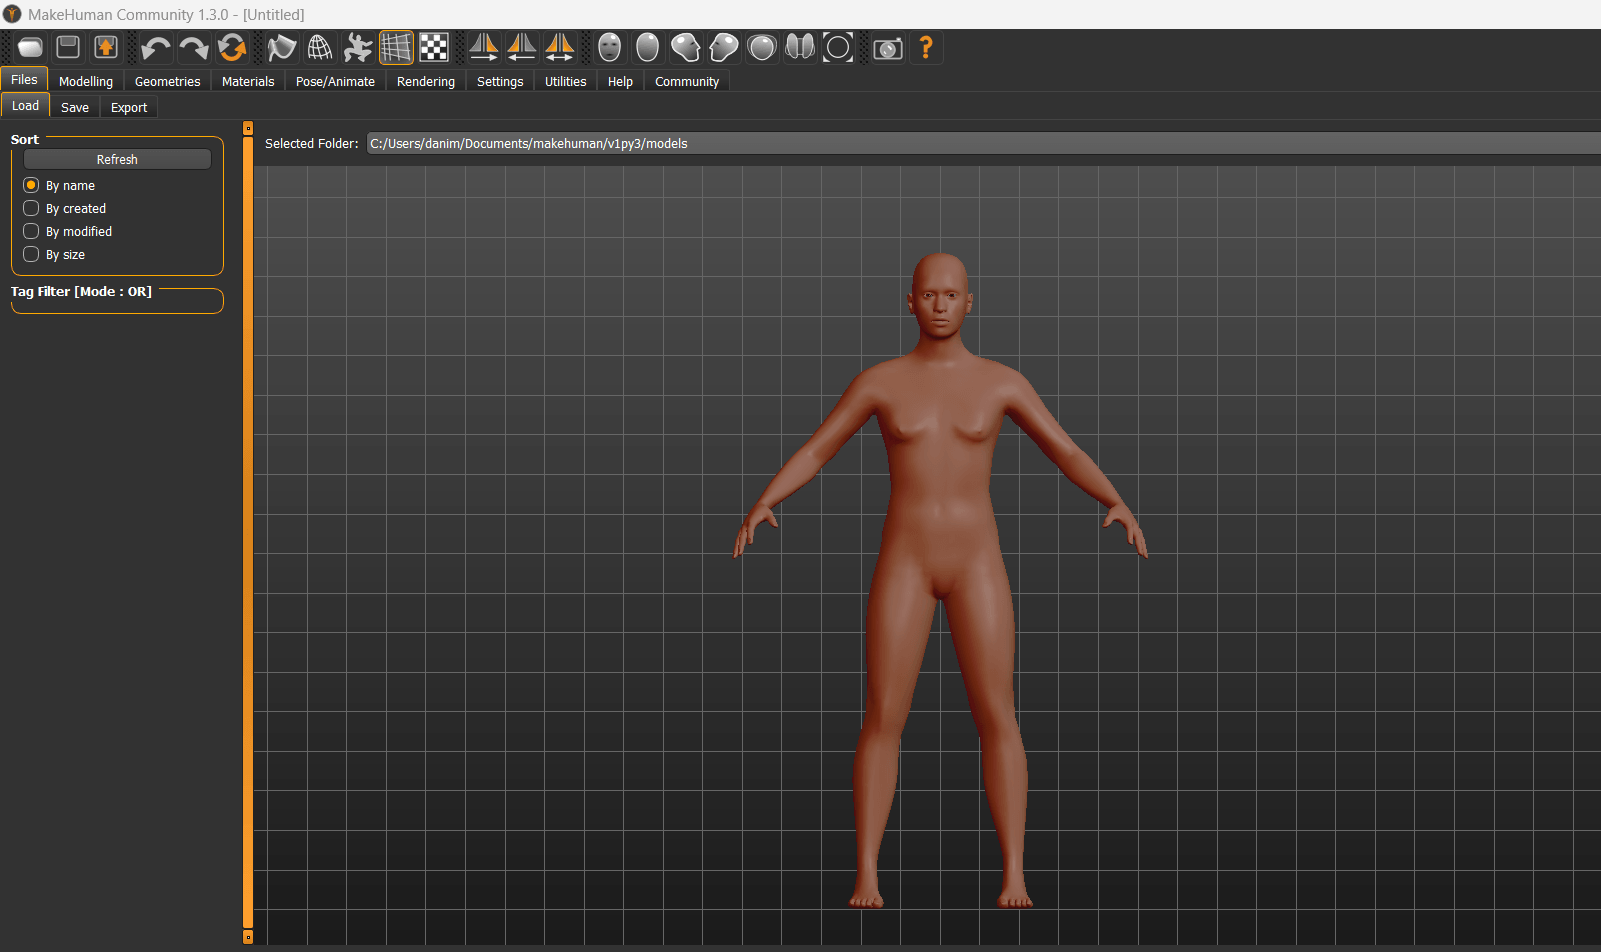
So, I looked for women’s head model from Sketchfab and for the other person I used make a human to create a different head. I opened the program to select new human, and I gave the specific characteristics I wanted for the second head, such as facial expression, age and gender.
When I had both, I imported them to blender.
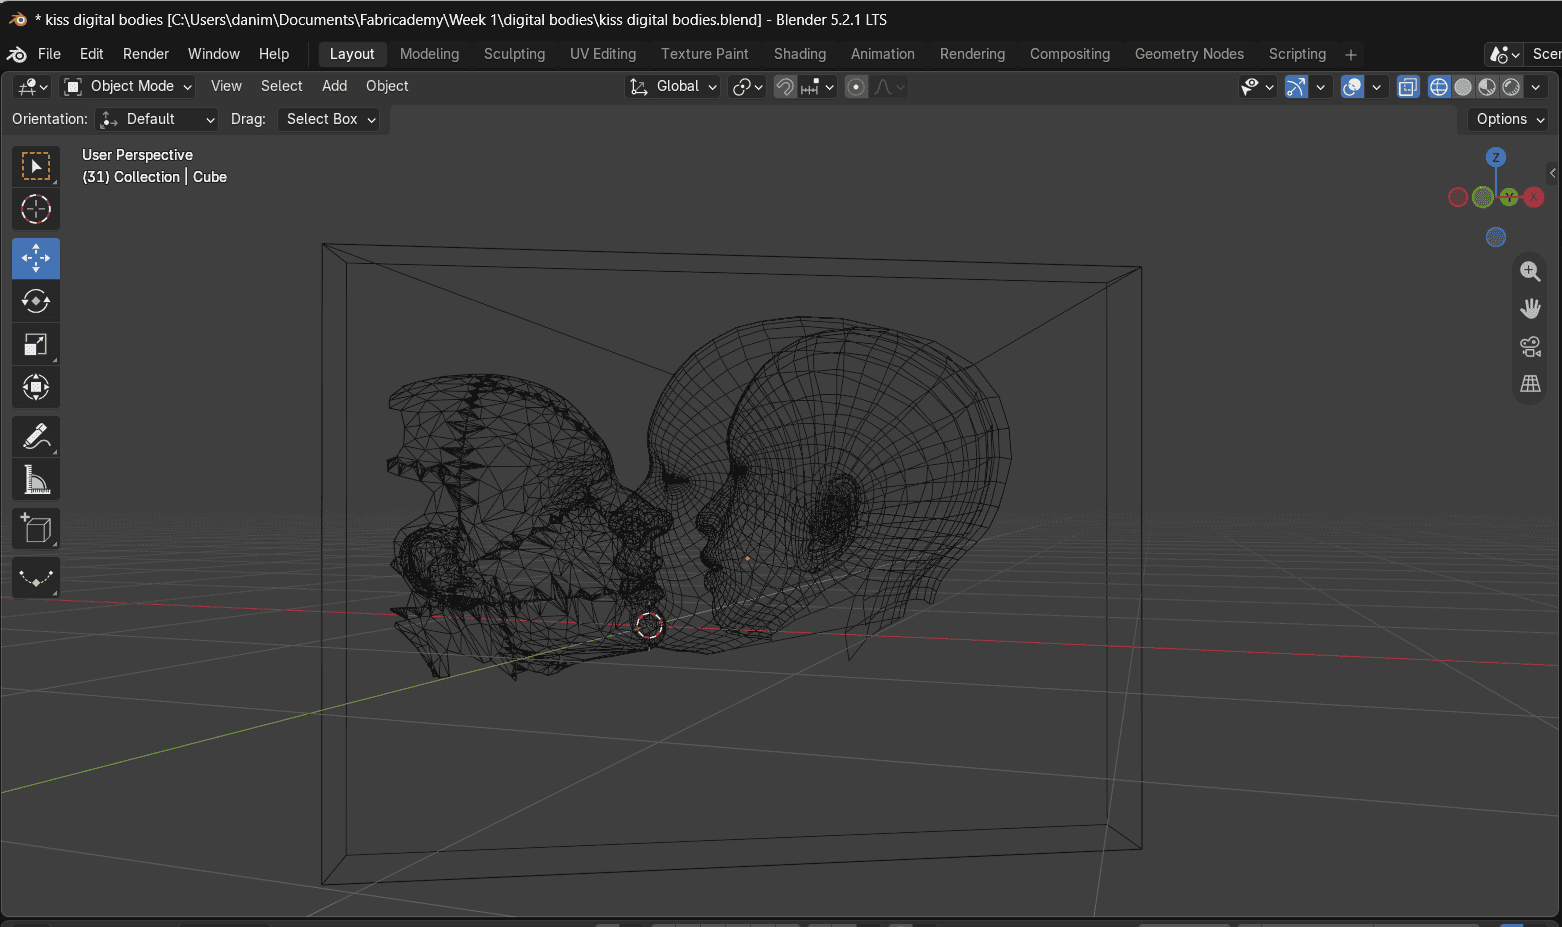
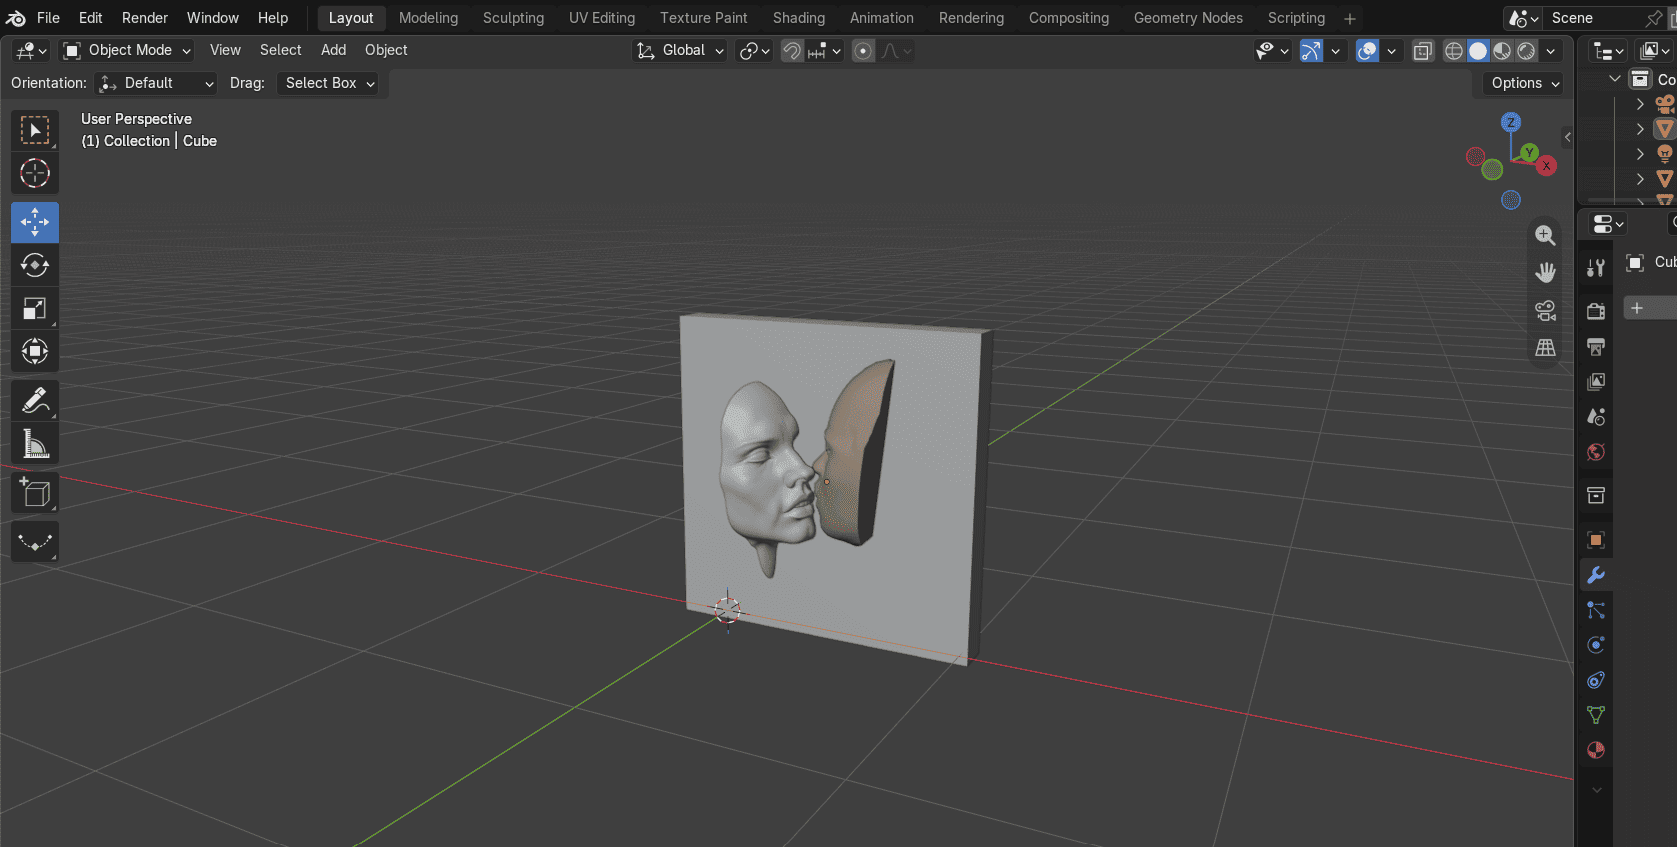
I moved the angles and position of each to get the posture and gestures of a kiss. After getting it, I decided to kept the idea of cutting the faces and I added a cube to cut the kiss and give the effect behind the wall.
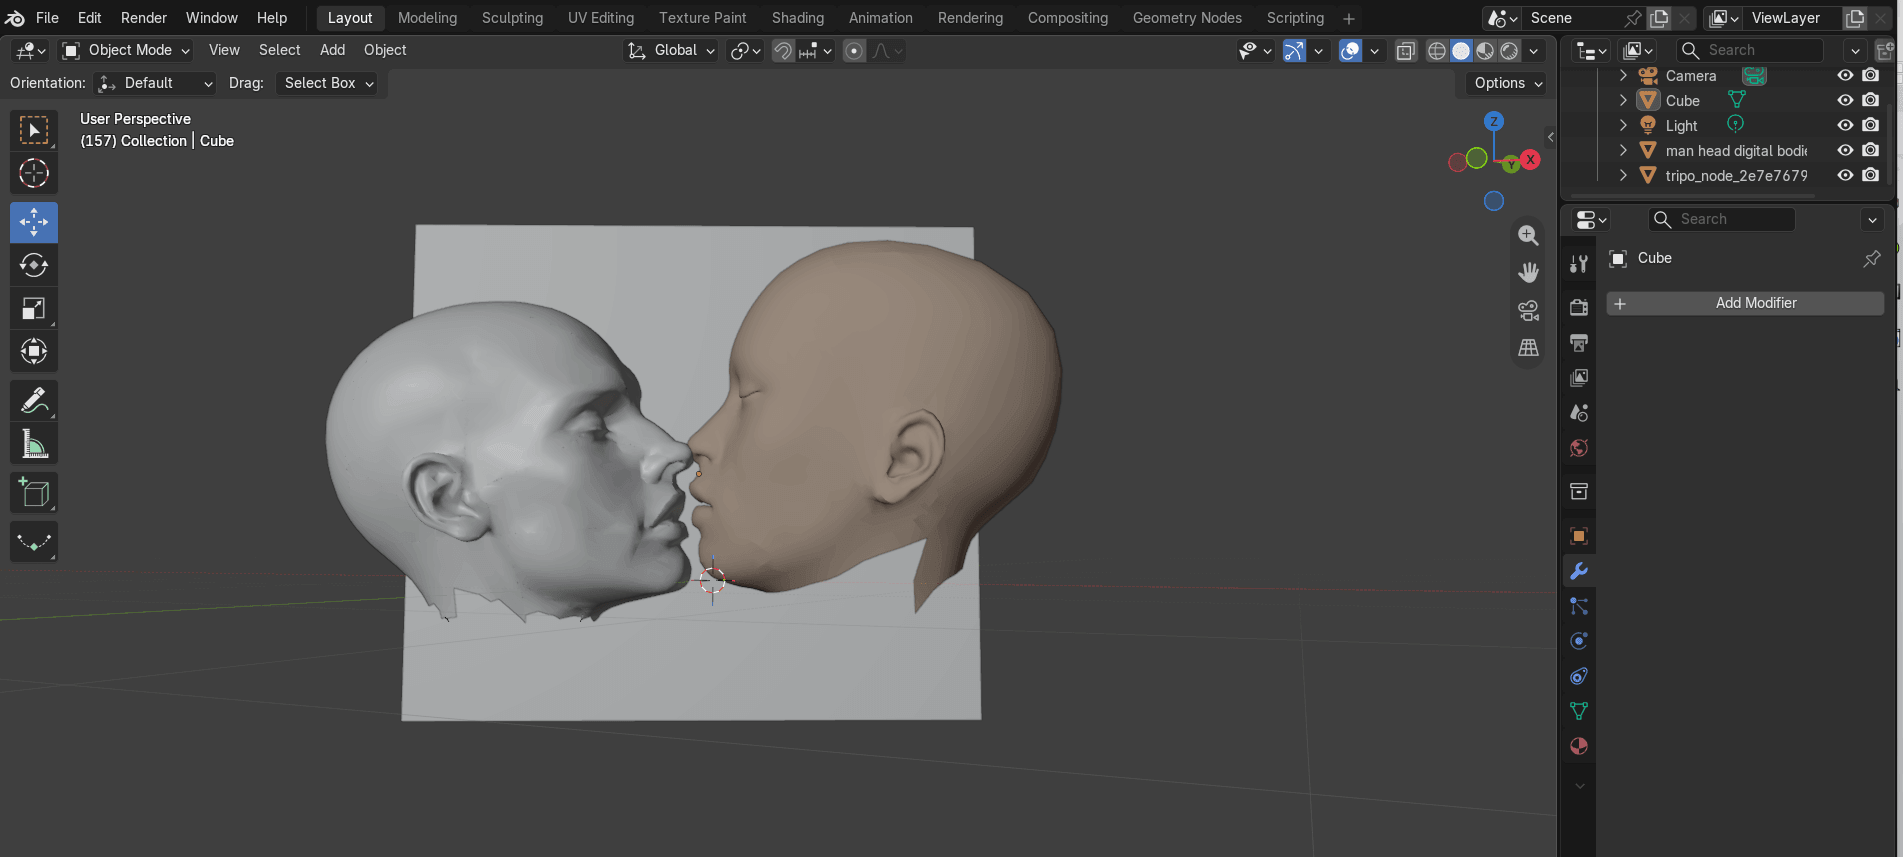
When I got the position, I had in mind I deleted the parts useless like the back of the skull and the half inside the wall using Boolean difference to the faces with the cube, one time for each head, I had problems closing the open areas of each head, so I had to start over to arrive to the result. It was so much easier to start again instead of keep editing.
Slicing
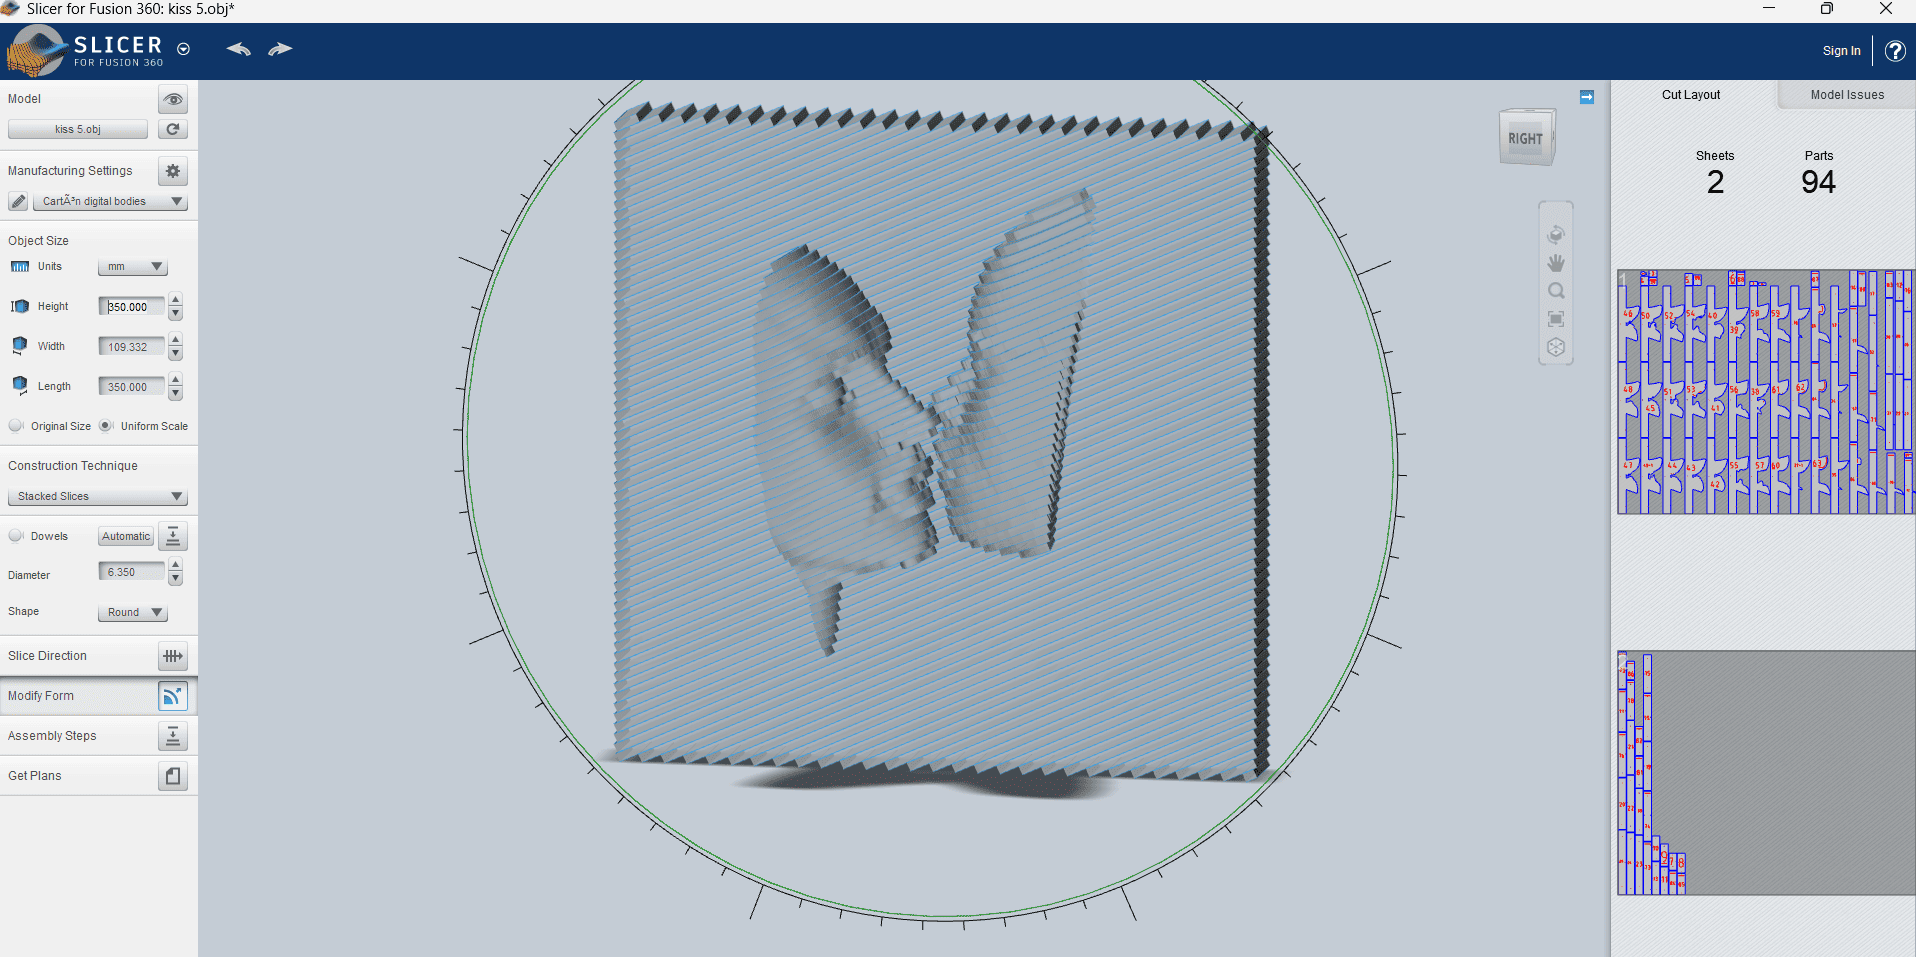
I saved the document and opened Slicer, I imported the model and chose the measures of the final body, high 40cm And I started playing with the different construction techniques such as stacked slices, interlocked slices, curve, radial slices, folded panels, 3D slices. The one that I liked the most for the shape it was Stacked slices, so I kept changing the slice direction rotating the angles in both directions. After getting the result I wanted to achieve I exported the document so I could cut my material.
Step by step
- Import the model. Open Slicer, click Model and select your .obj or .stl file.
- Enter the material. In Manufacturing Settings, set the thickness and the sheet size of the material you will cut.
- The thickness defines the spacing between the slices.
- Set the final size. In Object Size, choose millimeters and enter the height of the body. Keep Uniform Scale selected so the proportions do not change.
- Choose the construction technique. In Construction Technique, compare the options and pick the one that best suits your shape. Stacked Slices builds the form with parallel layers.
- Adjust the slice direction. Use Slice Direction to rotate the angle in each direction until the shape reads clearly.
- Check the result. In the Cut Layout tab, review the number of sheets and parts. In the Model Issues tab, look for problems to fix. If there are too many parts, reduce the size or use a thicker material.
- Check the assembly order. Open Assembly Steps to see how the parts go together.
- Export the plans. Click Get Plans and export the file in the format your laser cutter software accepts.
- Cut and assemble. Cut the material, follow the numbers on the parts, and stack the layers in order.
Laser cut guide
- Turn on the power fuente de poder
- Insert the key and turn on 3 corrientes +
- Set the coordinates to 0,0
- Turn on the laser
- Open smart Carve in the computer (select first the grabado and then the cut parts)
- Select file/import/ and select the document
- Select coordinates
- Set the origin in the laser sheet
- Select Go scale to view the cutting area
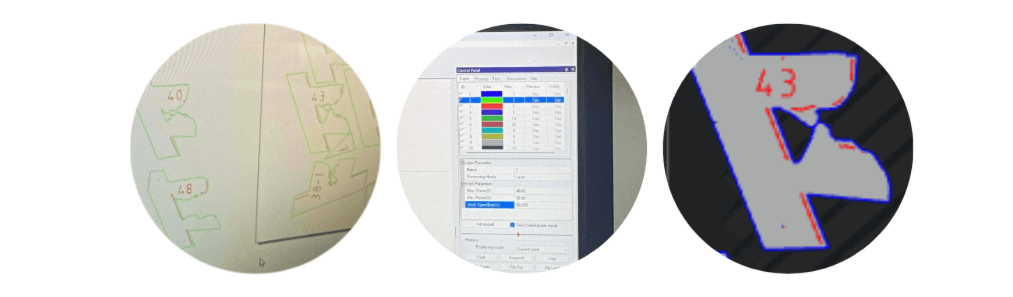
- Change the potencias and order of layers
- Close the window
- Select the laser
- Click on start
- Wait a few seconds to open when it and see the result
- Turn off the laser, emergency stop, and take of the key.
- Take your material.
I complemented this information with extra information based on the IDIT fab academy laser machine group assignment:
Safety precautions
Before using the laser cutter, it is important to follow some safety rules:
- Never look directly at the laser beam.
- Do not put your hands inside the machine while it is working.
- Never operate the machine with the door open.
- Avoid cutting materials if you are not sure what they are made of, since some can release toxic fumes.
- Make sure the smoke extraction system is working properly.
Laser parameters
When working with the laser cutter, there are three main parameters to consider:
| Parameter | Description |
|---|---|
| Power | Controls the intensity of the laser. |
| Speed | Controls how fast the laser head moves across the material. |
| Rate | Refers to the number of laser pulses per second (Hz or PPI). |
Power and speed need to be adjusted depending on the material and the desired result.
- Higher power produces a stronger laser effect.
- Lower speed means the laser stays longer in one area.
- Higher frequency produces smoother and more continuous cuts.
- Lower frequency produces more separated pulses, which can be useful for perforating cuts.
Tip The recommended focus distance in the document is 5 mm. Having the correct focus helps produce cleaner and straighter cuts.
If the focus is too low, the material may burn. If it is too high, the laser may not cut through the material properly.
Cutting
Material
- Corrugated cardboard 3mm
Settings for the laser cut
- Engrave: Power: max. 25, min. 15. Speed: 150%
- Cut: Power: max. 95, min. 85. Speed: 80%
Tip These settings correspond to the material and tests. They need to be adjusted when working with different materials.
| Cutting | Engraving | |
|---|---|---|
| What it does | Goes through the full thickness | Goes through the full thickness |
| Type of path | Vector (lines) | Raster (pixel fill) or vector |
| Power | Hogh | Low or medium |
| Speed | Slow | Fast |
| Result | Separated pieces | Outlines Images, text, textures, relief |
Process
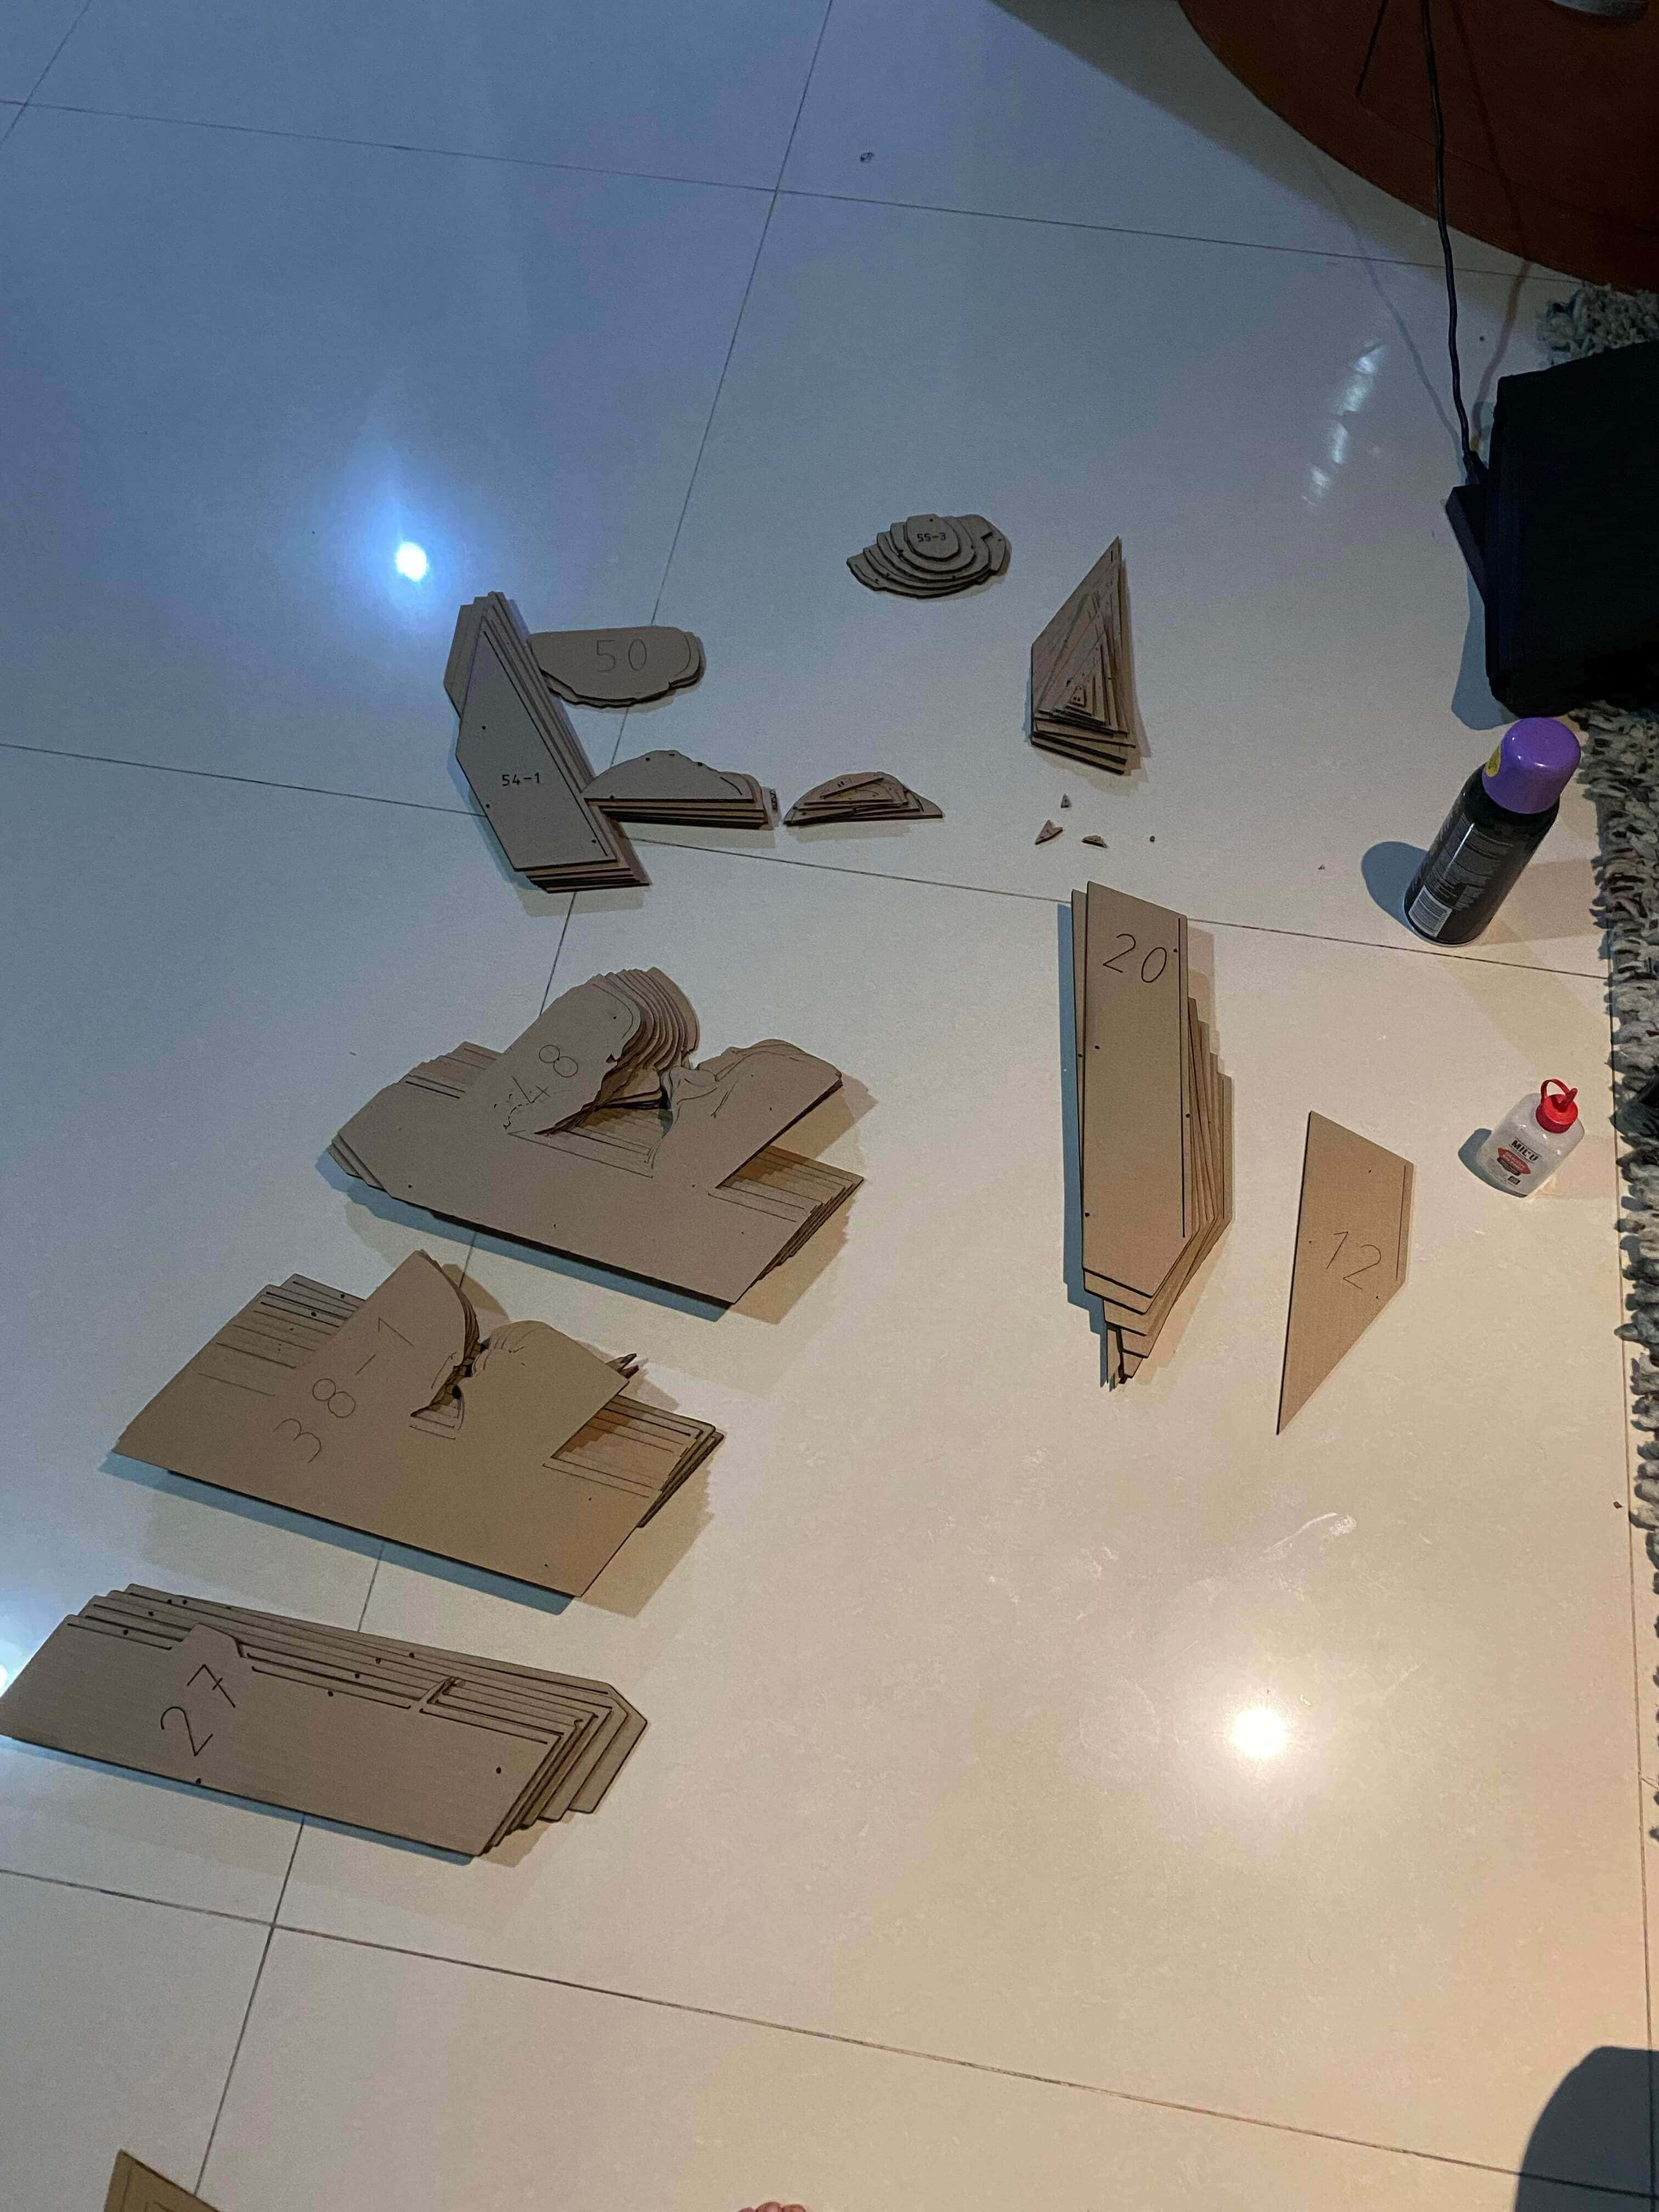
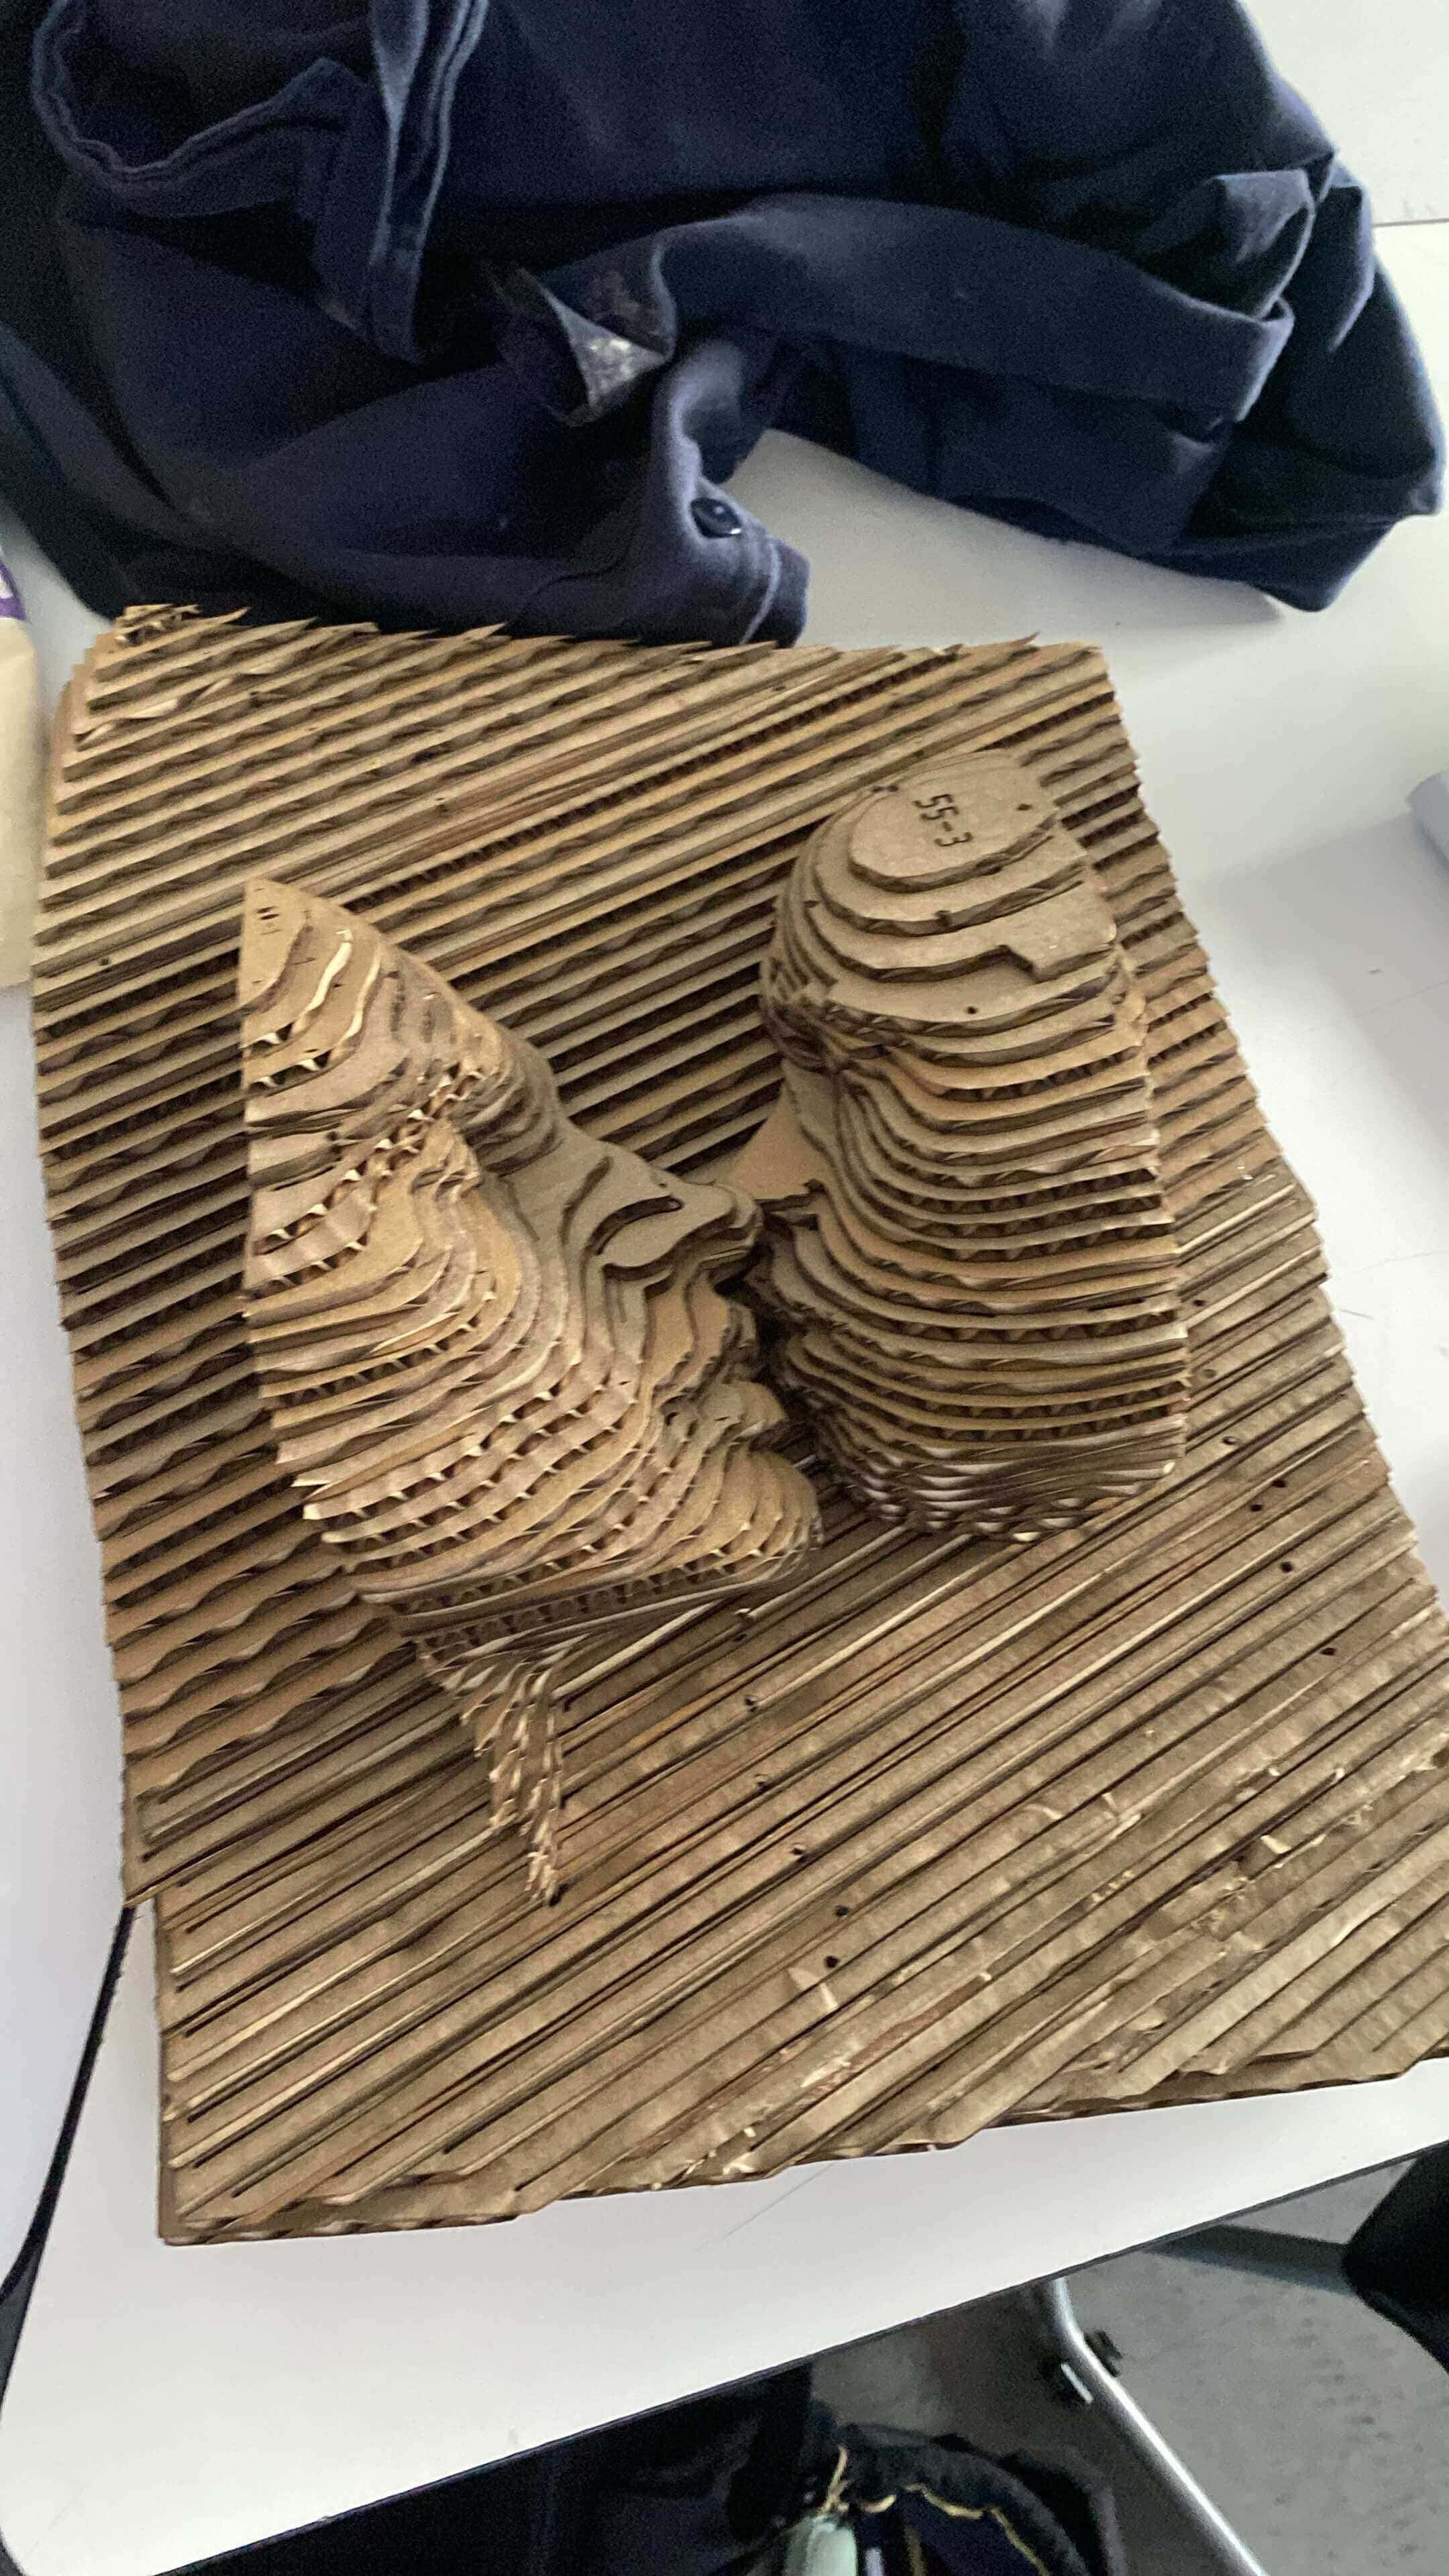
I took the material from the laser cut sheet and I tried to keep the pieces in order so it was not super messy to put it together.
Process
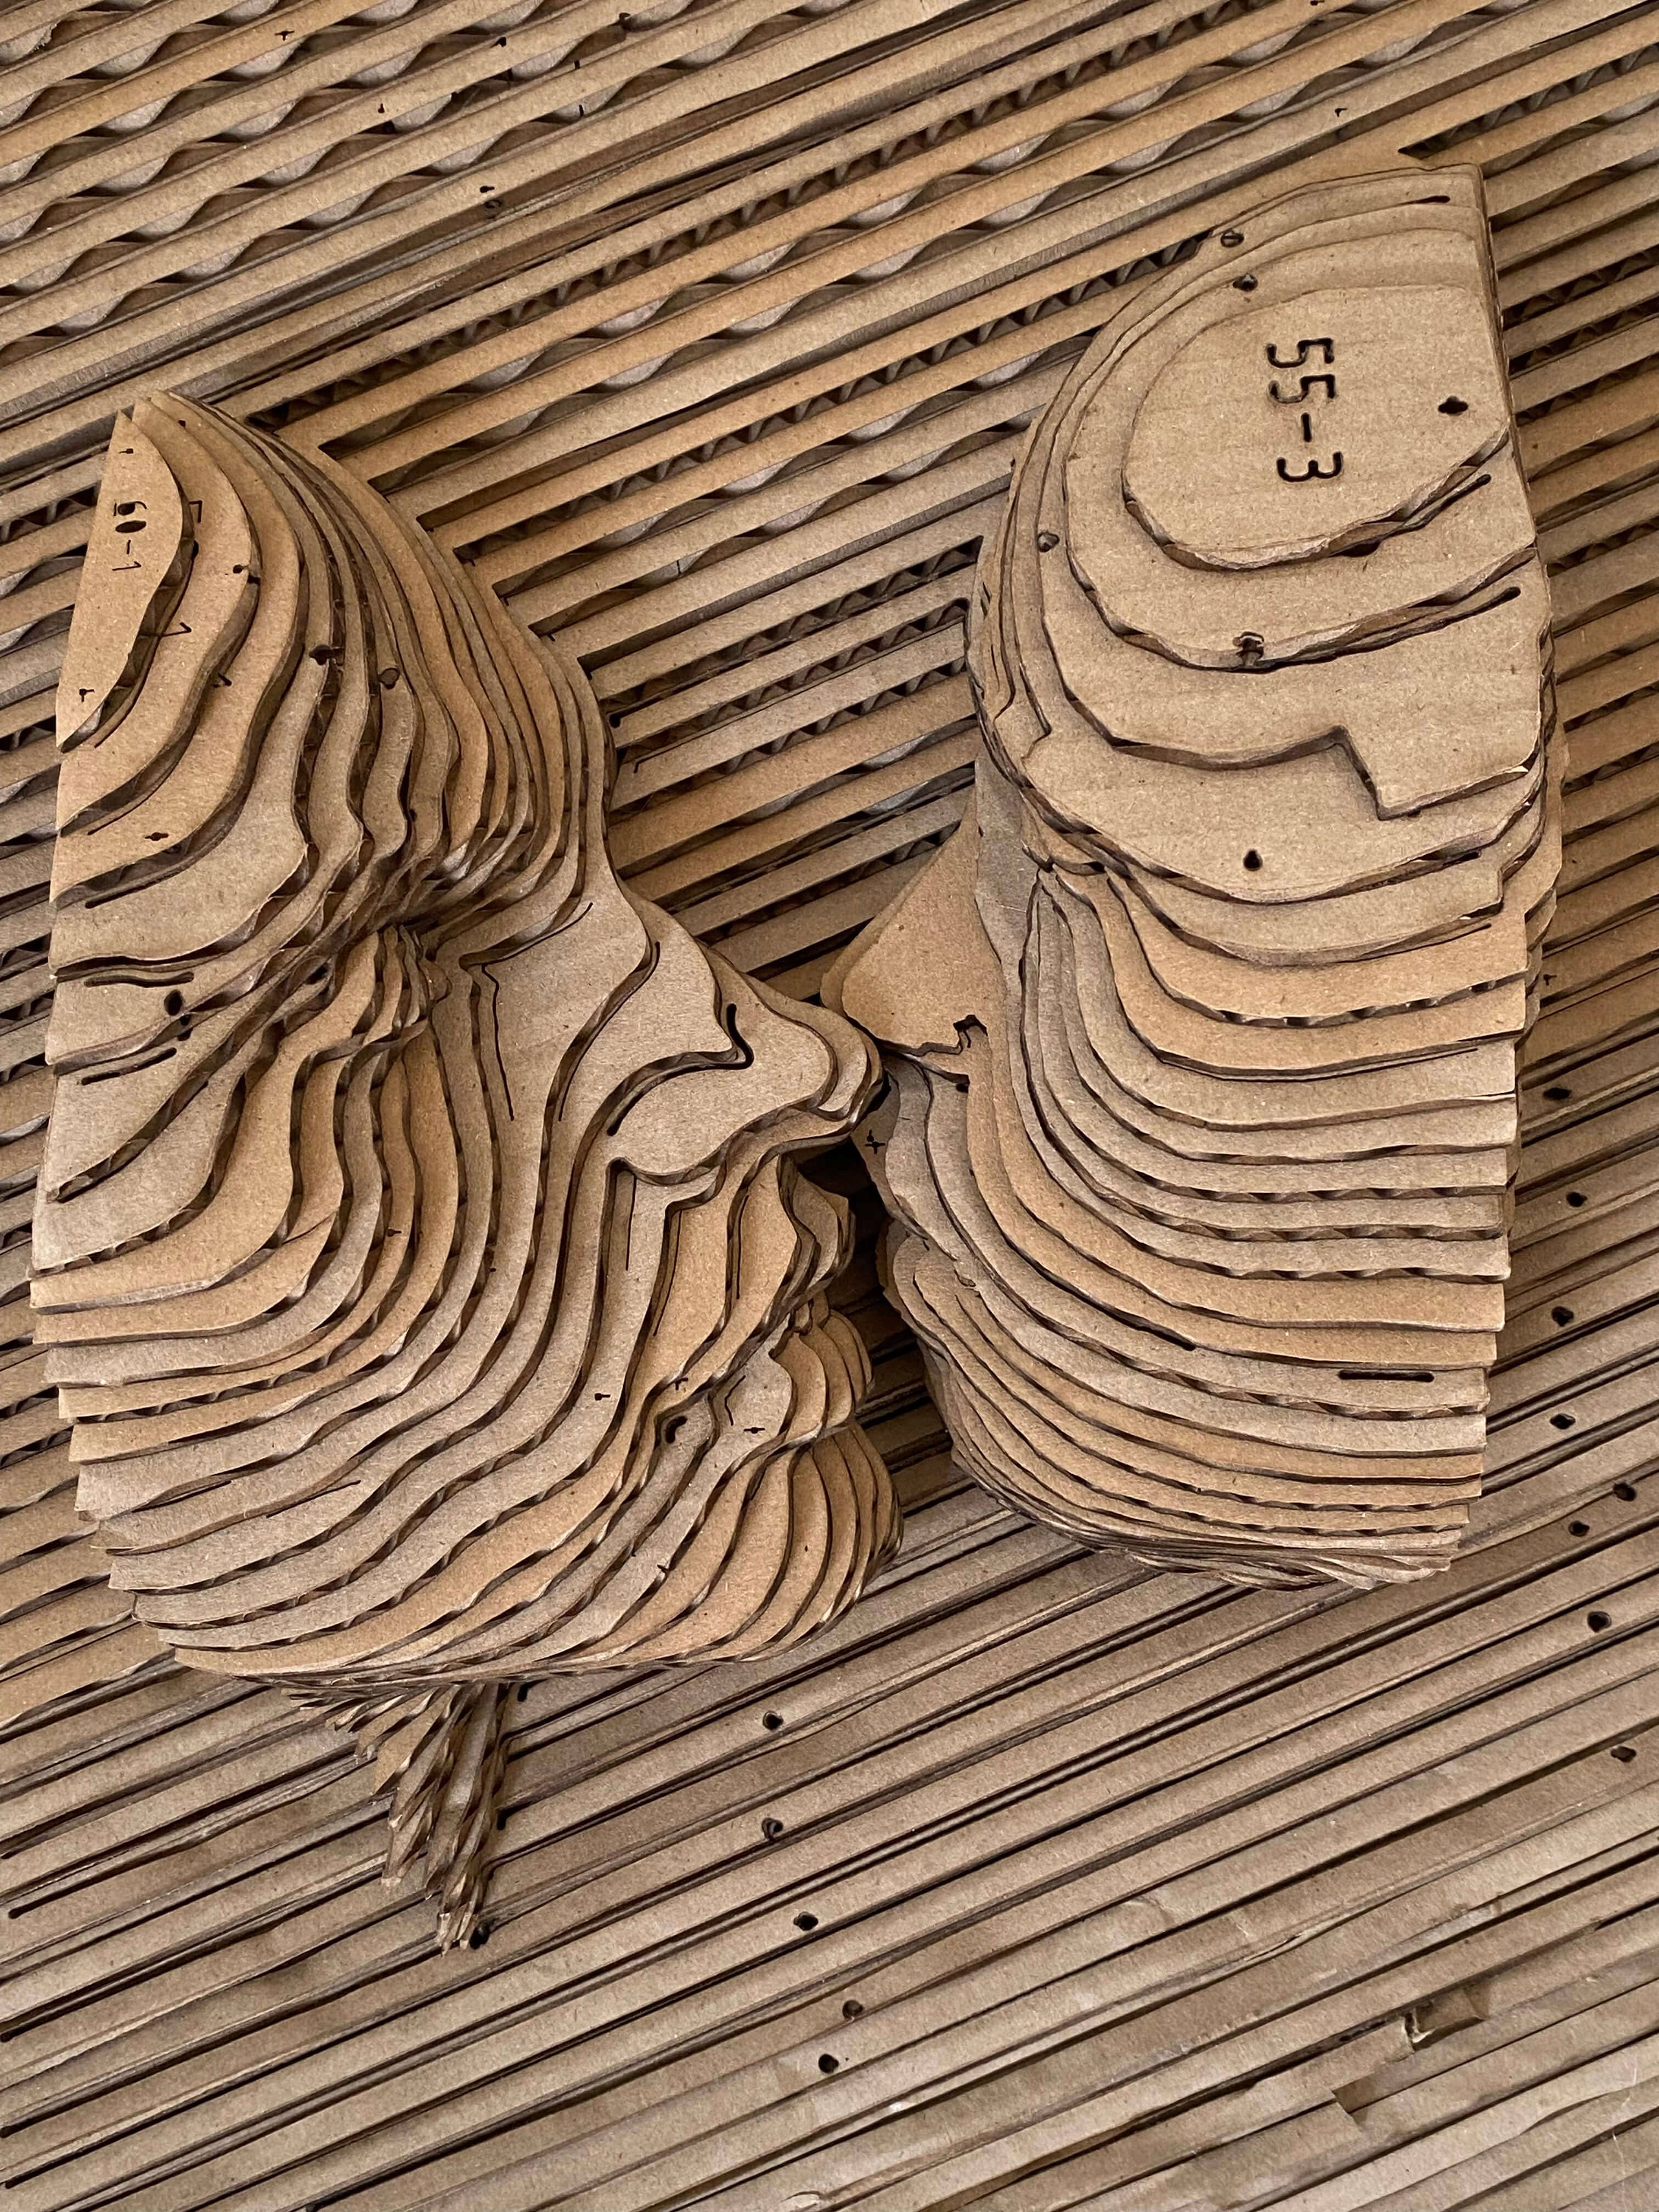
I setted all the pieces together to see the final result. I was kind of tricky understand the shape because the rotated angles in both directions still when it was all together, while I started glueing the first pieces everything made sense and I continue until the shape was completed.
Results
Final result
Weekly reflection & critical thinking
I really liked this week, it was the first week of experimenting and it was exciting. I liked working with the human body and shaping in different programs, I think the human body is sper complex and it has so much to explore and understand. And is basically exploring our own constitution and complexity. Using scanning tools was really intersting for me because it was my first time using them and I think with this kind of tools you have a lot of posibilities and you can explore a lot of different shapes and speccially when you need them to be with super specific metrics like working with the human body in this assignment. I have used the laser cut so many times but this time I really learnt how to use the by myself.
If I would do the process all over again I would experiment with different shapes even if I was happy with the result I got it would be nice to experiment with different parts of the body. And before start glueing all together understand 100% the shape cause the first pieces I glued where a little bit different than the rest of the shape.
I would like to implement this kind of tools in the future projects and I think it opens different posibilities I can achieve in the future.
Fabrication files & References
-
File: 3d modelling make a human ↩
-
File: 3d modelling kiss ↩
-
File: 3d modelling scanner ↩