Digital bodies
1. Objective
This week’s objective was to learn about how to create and work with digital bodies. We learnt to use Blender a 3D-modelling and animation tool, as well as Slicer for Fusion , an application that automatically creates a sliced version of a 3D model, ready to be sent to a laser cutter. Although I have never personally used a laser cutter, I have worked with laser-cut objects and elements in the past, those parts were all in wood of different thicknesses.
The priority this week lay in learning the ropes of these apps and the process of laser cutting and assembling, however, I wanted to give a little bit of thought to the material I would use to be cut, as that would inform the rest of my process and approach.
2. References, research & inspiration
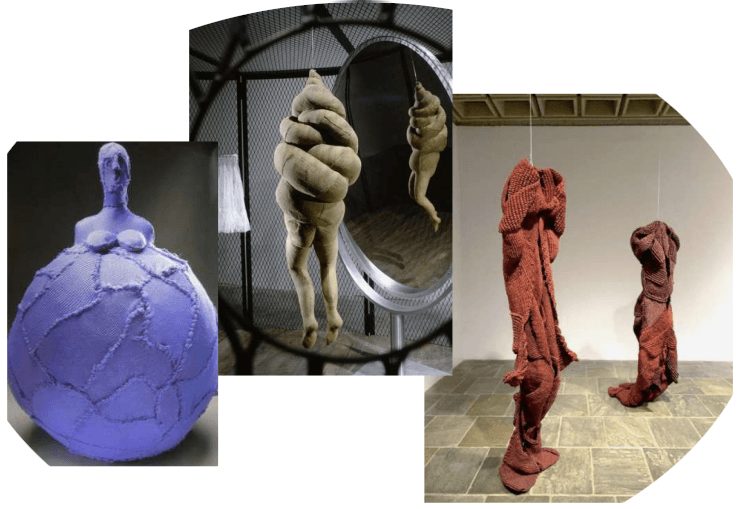
When thinking of the final object, I was drawn to creating something abstract and somehow ‘fragile’. I took inspiration from artists such as Magdalena Abakanowicz, Mrinalini Mukherjee and Louise Bourgeois. The things that touch me the most about these artists’ works on human bodies is the seeming fragility and abstraction of the form. While we can discern some sort of human-like bodies, they are abstract enough to give us the room to create our own narratives. And to me, what many of their sculptures ewoked was a sense of solemn fragility. Bodies that display the soul’s weight.
I wanted to try and find a material that could emulate such a sensation, and that I could create in this short time-frame. My choice fell on crumpled-up plain white office paper. Paper is a material that fascinates me, thanks to its duality of being both fragile and resistant, depending on how it is manipulated. The plan was to make the laser cuts, crumple every piece, and then ‘flatten’ it again, before assembling them. This process would give the paper texture and character, that was totally unpredictable.
3. Tools
!!! "List of apps and tools used"
- Mesh manipulations with [Blender](http://XXXhttps://www.blender.org/download/)
- 3d scans with [KIRI engine](https://www.kiriengine.app)
- 3d Model with [free3D](https://free3d.com)
- Image compression with [TinyPNG](https://tinypng.com/)
- Video compression with [Handbrake](https://tinypng.com/)
4. My Process
4.1 Trials and Errors
Blender
Following the fantastic tutorial by Rico, I went on to try all the techniques proposed by him and found that I enjoy using Blender. I created my own little 3D character and played around with different make-human models. Among other things, I tried to play with proportional editing, the boolean modifier, creating objects from planes, mirroring, etc. etc.
Stephanie proposed a tutorial for Blender Cloth Sewing, it is quite magical…
Here are some results of my Blender explorations.
3D scanning
Using the the application KIRI engine, I tried to scan different objects of my everyday life1 & 2 & 3. It was quite a challenge to get a scan that was complete and of acceptable quality, but playing around with it, gave me a first insight into 3D scanning, and I will sure come back to this at some point. In the end however, I decided to download a free 3D model of a human leg.
4.2 Workflow
My model
After deciding that I wanted to use a leg as my model, and not succeeding in neither scanning it properly, nor manipulating it perfectly (with boolean modifications) in Blender, I decided to download a ready-made 3D model of a standard leg.
Slicing it
Using Slicer for Fusion, it was a real child’s play to slice the 3D model. As I had chosen crumpled-up paper as my material, I indicated that the material was thicker than paper normally is (3mm instead of 1mm), and set the offset on -2mm. Playing around with the direction of the slices, I finally settled on vertical slices, as I hoped it would give my leg a droopy quality.
Prepping for the cut
Our Fablab has a Beam Box laser cutter, that comes with the software Beam Studio. As it is my first time using a laser cutter, I have no means of comparisson, but this software is very user friendly! With a few clicks, the cutting card was perfectly lined up with the paper inside the laser cutter.
4.3 Assembly
To crumple or not to crumple
To start with, I had to crumple up each piece and then unfold it to its full size again. All the while, taking care not to rip the paper, which extra fragile due to the engravings made by the laser cutter.
Getting the numbers right
Next, I had to sort all the 100 pieces by number, so that I could follow the assembly plan provided by Slicer for Fusion.
The big sewing marathon
I decided to assemble the layers by sewing them together, which was already a pretty challenging task in itself. However, as I wanted to create space in between each layer, I needed to add a little pieces of foam board while sewing….
This whole assembly experience took the best part of my Sunday but I found it very meditative and exciting to ‘meet’ my leg at the end of it all.
One little side note: my leg ended up having no toes, as the pieces were way too small to be used.
Timelapse video of my assembly process
5. Results
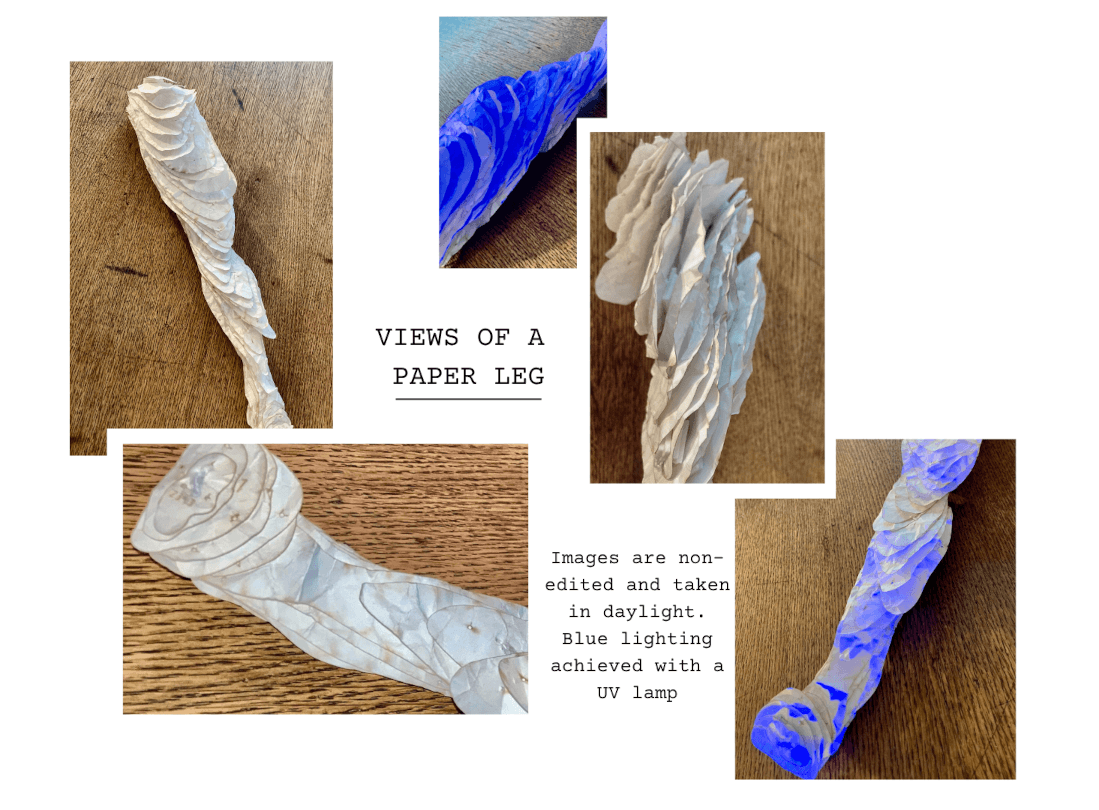
The final leg measures approximately 40cm when held upright (standing position). The crumpled paper gives it a lovely, sensual quality and I particularly like the burnt borders. While trying to capture it on image, I quickly realised that it is not very easy to make out what it is and I found that I needed to place it in an upright position with a slight bend, to bring out the leg’s curvatures.
For the final photoshoot, I used our Fablab’s studio and a big thread spool. This added a support for the leg to rest upon as well as a visual guide to imagine the proportions of my sliced leg.
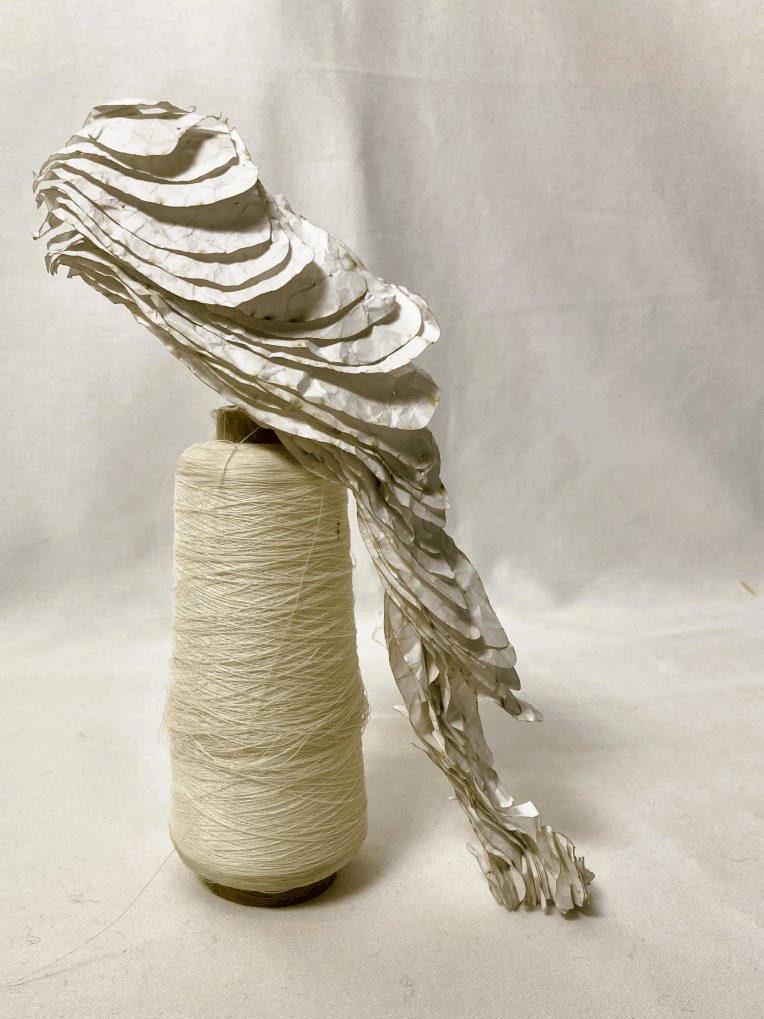
Paper leg plain
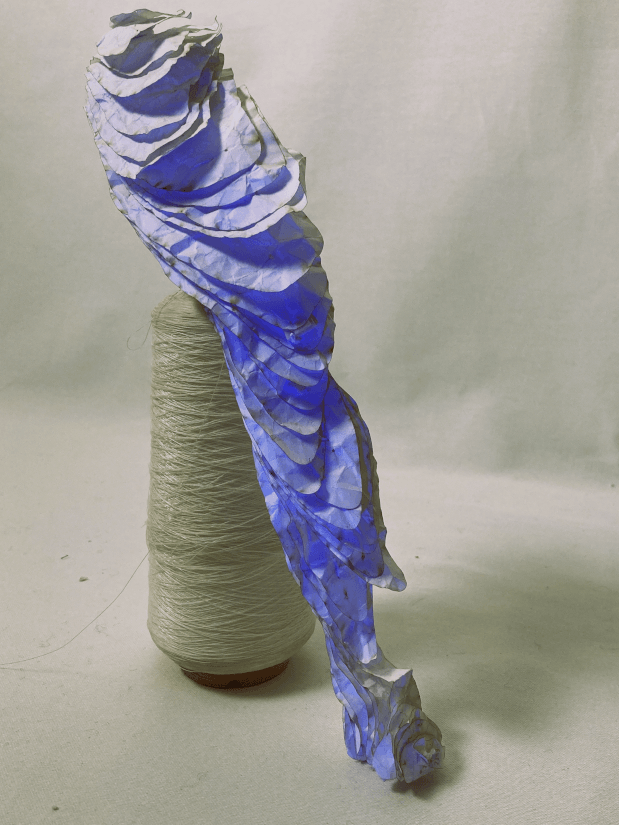
Paper leg UV-light
6. Weekly reflection & critical thinking
The learned
- Assembling a sliced 3D model takes a lot of time and patience.
- Taking my time to choose the material I want to work with is important, as it makes the assembling process more enjoyable when I take pleasure of the material I’m working with.
- I want to learn more on Blender and see how this skill can be useful in my artistic practice.
The mistakes
- My leg should have been printed in a bigger size, so that I could have built the toes as well.
- The direction of the slicing added a lovely texture to the leg, but made the ‘legibility’ of it more complex, as the chosen direction does not support the natural curves of my model.
Connections to my work
- Right now, I don’t see how I would connect 3D-sculpting to my artistic practice. However, I can imagine that laser cutting will become an asset, as I would love to experiment further with cutting and engraving different types of textiles.