Biofabricating Materials
1. Objective
This week was dedicated to exploring biotextiles and natural fibres through a series of collective material experiments. Rather than focusing on a finished product, the aim was to better understand how plant-based materials can be transformed into textile-like structures through relatively simple processes.
I was particularly interested in materials that are usually considered waste and discovering how everyday natural elements can reveal unexpected textile qualities when processed in different ways.
2. Inspiration
In contrast to the previous week’s assignment, this week was all about slowing down and observing how materials behave. It felt like an invitation to look differently at what surrounds us: fruit and vegetable peels from the kitchen counter, wild plants growing around us, and materials that are often overlooked or discarded.
I find something quietly magical in revealing hidden fibres and transforming everyday materials into new composites with new possibilities.
2.1. Artists and Makers
I found myself drawn to makers who explore the transformation of organic waste into valuable and meaningful materials. What interests me is not only the material process itself, but the shift in perception: seeing something that is usually discarded, ignored or considered worthless become something beautiful, precious and full of new possibilities.
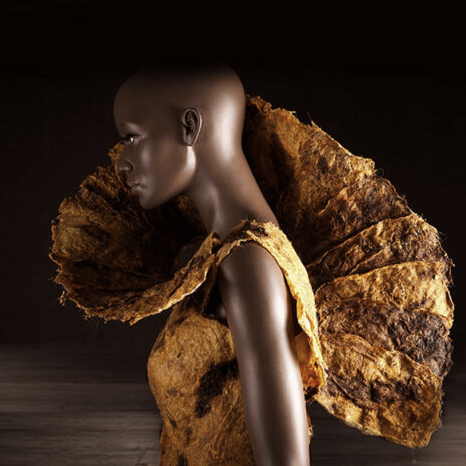
Agnes Van Dijk
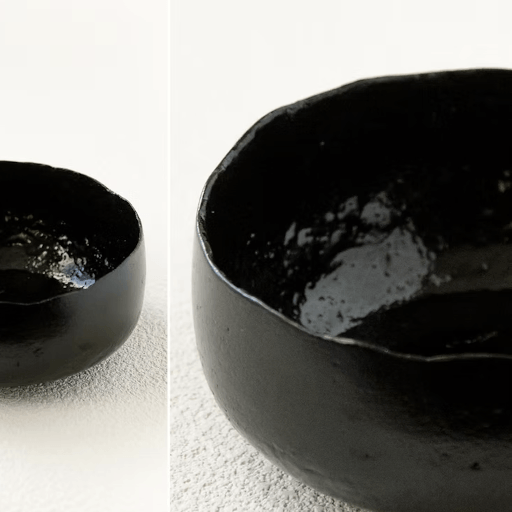
Kosuke Araki
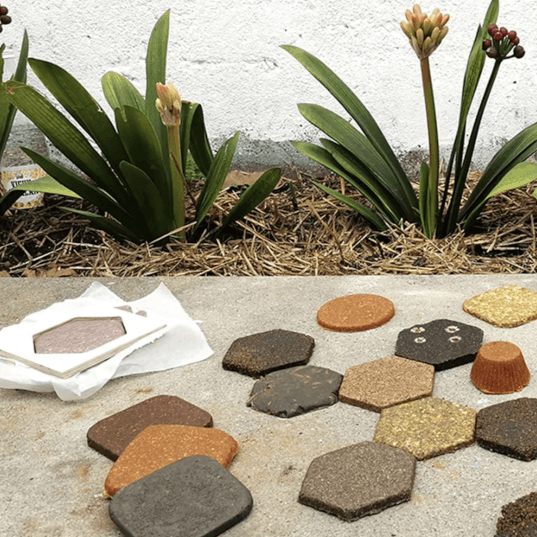
Remix El Barrio
Agnes van Dijk
explores the relationship between organic materials, fashion and the body, creating wearable works from natural and residual materials. Her practice questions our ideas of value and reveals the beauty of fragile, overlooked matter.
Kosuke Araki
transforms food waste into refined objects, challenging the idea that discarded materials have reached the end of their life. His work highlights the hidden qualities and stories contained within organic leftovers.
Remix El Barrio
particularly inspired me through its community-based approach. By working with local food waste streams and transforming them into new materials, the project connects material exploration with local ecosystems, collaboration and collective making.
3. Tools
List of tools and ressources
- Cecilia Raspanti presentation link for vimeo
- Green Fabric recipes
- pots, jars, spoons, plastic wrap, blender, colander, dish towels, scales
- Ingredients: water, gelatin, sodium carbonate, sodium alginate, glycerol, plant-based ingredients, fiber
4. Process and Workflow
4.1. introduction
This week, we did a wide range of experiments rather than focusing on one or two materials in depth. To make this possible, we decided to work collectively, spreading our women-power across different source materials, textures and fabrication methods.
To kick things off, Stephanie introduced us to a large variety of biotextiles, -plastics and -papers. Our table quickly transformed into a landscape of different shapes, textures and colours. I was particularly drawn to the materials with an earthy, organic feeling — materials that still seemed connected to the plants they came from.
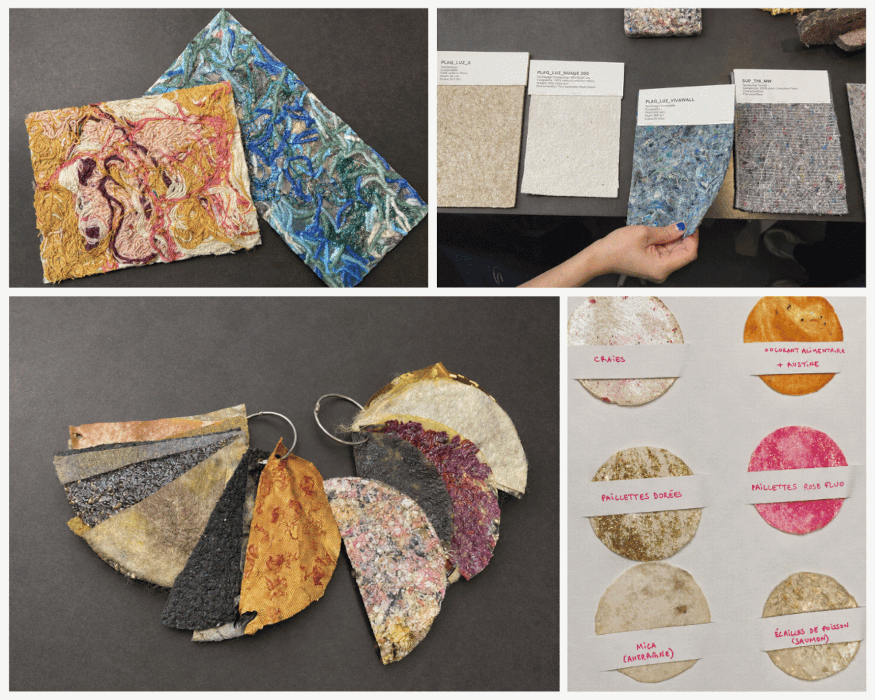
4.2. Yarns
Exploring yarn fabrication felt like a particularly meaningful direction for me, given my own textile practice and long-standing relationship with fibres and making. We experimented with different approaches to creating bio-yarns, mainly focusing on algae-based yarn, while also beginning an exploration of stinging nettle fibres.
These experiments opened questions around how future and traditional fibre-making processes can meet.
4.2.1. Algae-based yarn
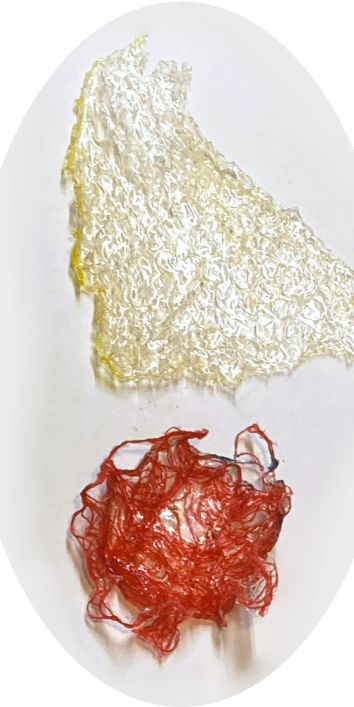
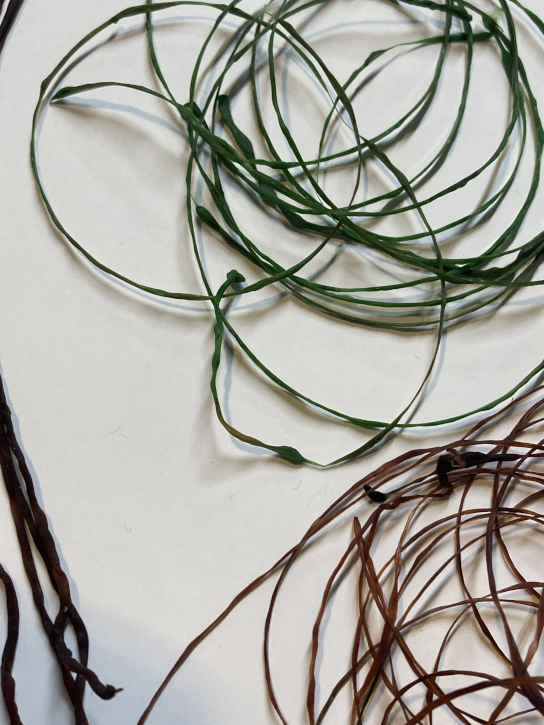
The creation of algae-based bioyarn relies on a fascinating transformation: a liquid material becoming a solid fibre. By extruding sodium alginate gel into a calcium chloride bath, a chemical reaction takes place where the calcium ions bind the alginate molecules together, turning the liquid into a stable, water-resistant filament.
The process in images
The addition of glycerol helps keep the dried yarn flexible rather than brittle. It was fascinating to see how a simple-looking liquid could be transformed into something with a textile quality through such a small interaction between materials.
* 250g coloured water solution
* 6g sodium alginate
* 10g glycerol
* 1L water
* 100g calcium chloride
* tall container
* spoon
* sauce bottle (squeeze bottle)
* plastic sheet
* First, prepare a 10% sodium chloride solution
* Prepare the sodium alginate and glycerol solution separately
* Pour the second mixture into the empty sauce bottle
* Let it sit for 24 hours to remove any bubbles
* Extrude it into the sodium chloride solution
* Try to maintain a constant pressure so that the thread has a uniform diameter
* Untangle the yarn
* Let it dry flat or wrapped around a plastic bottle for several days
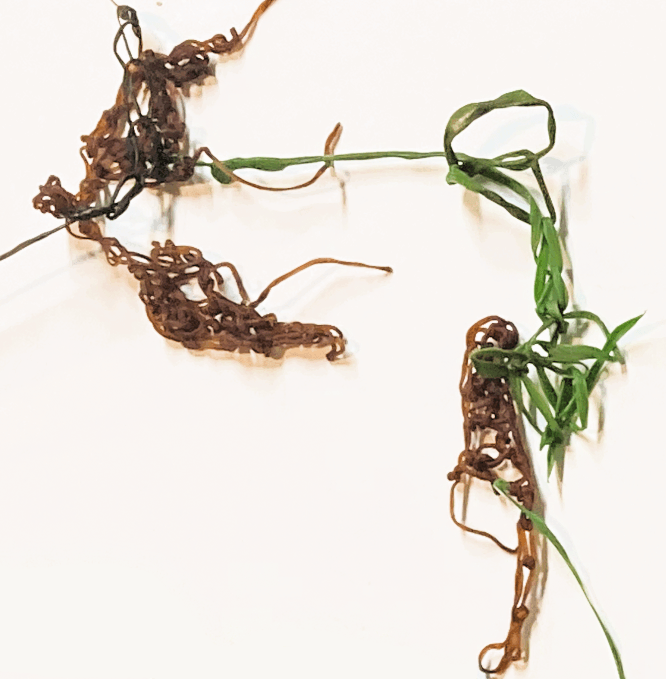
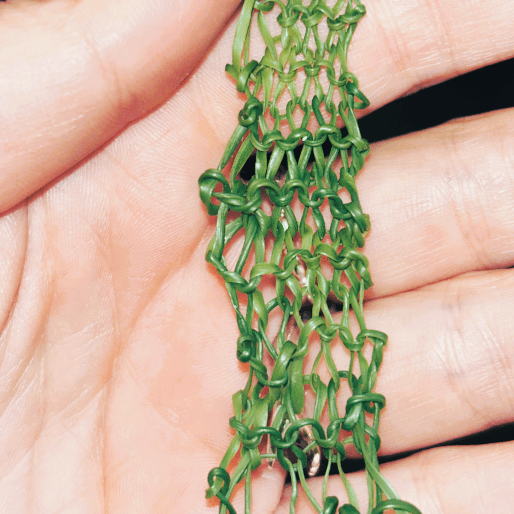
The ‘fresh’ yarn was quite thick and fragile. During the curing process, it shrank considerably, the colour darkened and the material became noticeably stronger.
I experimented with crocheting the wet as well as dried yarn, but this proved challenging: both were quite delicate and broke easily, requiring a very careful touch. A small knitting test with the dried yarn gave slightly better results, suggesting that some textile techniques may be more suitable than others for working with this material.
4.2.2. Stinging Nettle yarn
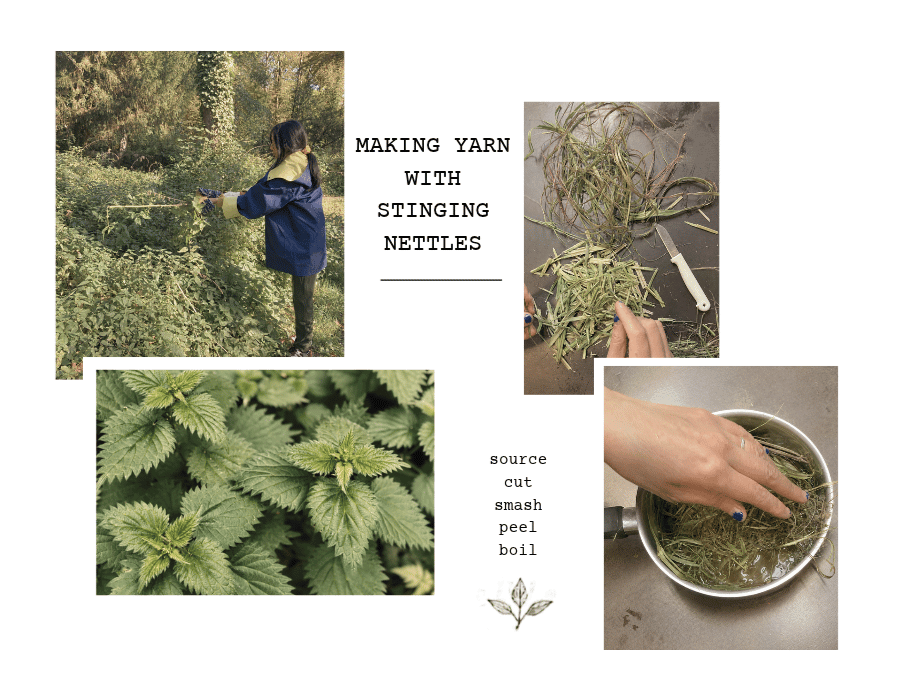
On our second day, we decided to join pleasure with an experiment and went for a nice walk in the autumn sun to collect mature stinging nettles in a nearby park.
Once back at the lab, we extracted the fibres using traditional hand-processing techniques. First off, we crushed the stems by foot to break the woody core. Next, we gently peeled off the outer fibres, this process was made easier by cracking the stem as we went along to separate the fibres. The aim was to colles as long fibres as possible. Once all the fibres were separated, we went on to boil them for an hour and then left tehm to dry. The next stages will involve cleaning, refining and spinning them into yarn.
Although this process is not yet complete, it has already revealed how much time, patience and manual work lies behind the production of natural fibres that we often take for granted.
4.3. Papers
Exploring paper fabrication allowed me to rediscover an everyday material from a new perspective. I was curious to understand how paper is made and how natural waste materials could be transformed into something beautiful as well as functional. Through these experiments, we explored different fibres and processes, revealing the unexpected textures and qualities hidden within ordinary materials.
4.3.1. Materials and recipes
We used three different source materials to create paper:
- Tangerine Peels - air-dried and finely ground
- Garlic Skins
- Spent Grains from beer production - coarsely ground
4.3.2. Basic recipe
same for all three materials
* source material (straw - garlic skins - orange peels - etc.)
* water
* 1 spoon of sodium carbonate
* sauce pan
* coffee or grains grinder
* blender
* tulle on an embroidery hoop
* felt sheet for drying
* hydraulic press
* heat press
* If material is hard, grind it first
* Place the source material in a saucepan with water
* Add a spoonful of sodium carbonate. Check that the pH is basic (water minus 10)
* Simmer over low heat for about 1 hour. The appearance of the material should change
* Rinse with water
* Blend if needed
* Add water
* Spread onto a tulle (paper-making process)
* Press (manually - hydraulic press - heat press)
* Let it dry (ideally in a dehydrator or next to a fan)
* If wanted, paper can be made more flexible by applying glycerol with a brush or spray
4.3.3. Tangerine Peels
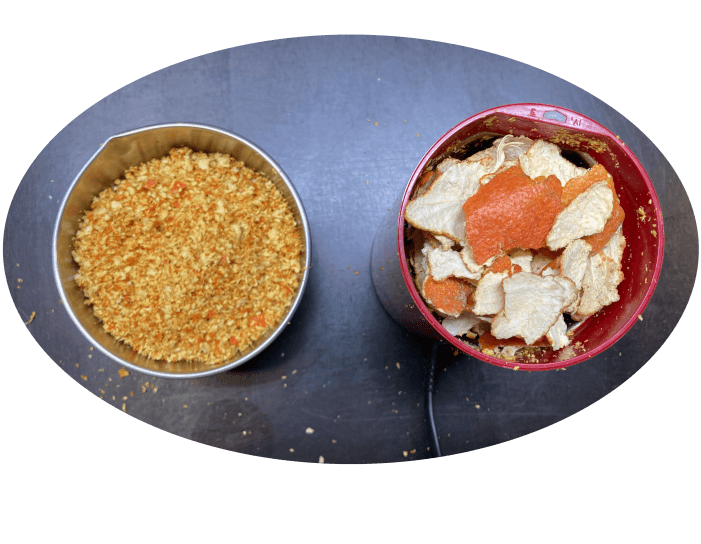
When we cooked the tangerine peels, we prepared two separate batches:
- one boiled in water only
- one boiled with the addition of sodium carbonate
Once the fibres were ready, we tested three different forming methods.
Hydraulic power
Our lab has a fantastic hydraulic press, which we used for our first pressing experiment. However, the result was not what we expected: the wet pulp simply escaped from the mould instead of compressing into a coherent sheet. This made us realise that the choice of mould and how the material is contained are important factors when working with this technique.
The press in action
Pressing with heat
Our second attempt included using a heat press, pressing it through four cycles of approximately thirty seconds each. This produced by far the best result, creating a much more stable and cohesive sheet.
Using our own strength
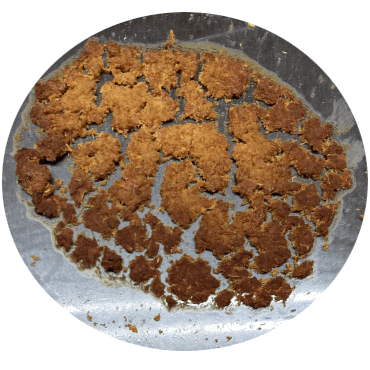
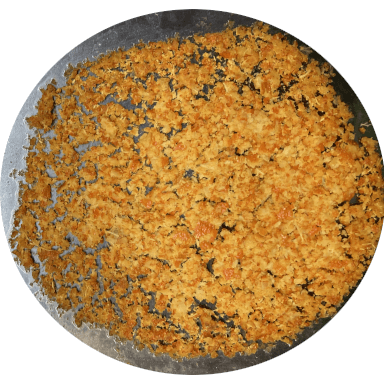
Finally, we experimented with pressing the pulp manually into a piece of fabric. Although less successful than the heat press, the result initially looked promising, creating a flat and cohesive sheet. However, during the drying process, the material revealed a different behaviour: as it contracted, the fibres pulled apart until the sheet lost its integrity completely, breaking into hundreds of small flakes.
4.3.4. Garlic skins
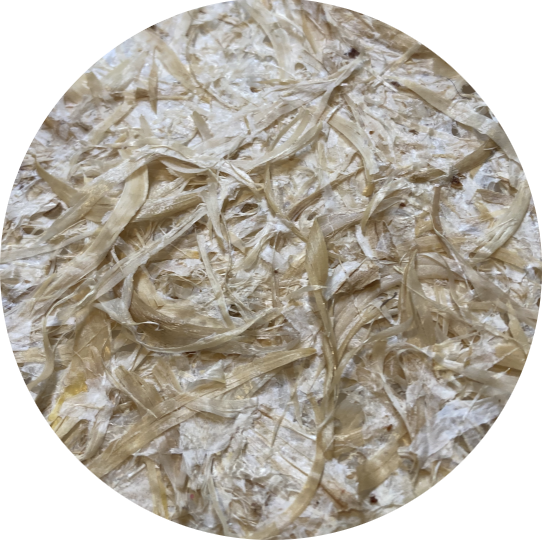
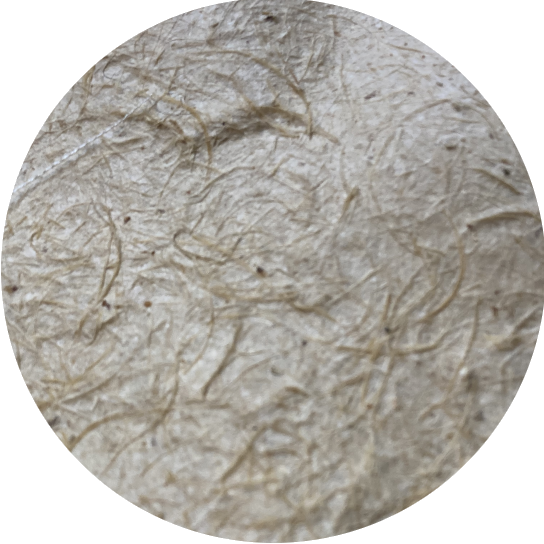
When making paper from garlic skins, we did not grind the material beforehand. Instead, the skins were blended after the cooking process. We ground the pulp to different levels of fineness in order to compare the resulting papers.
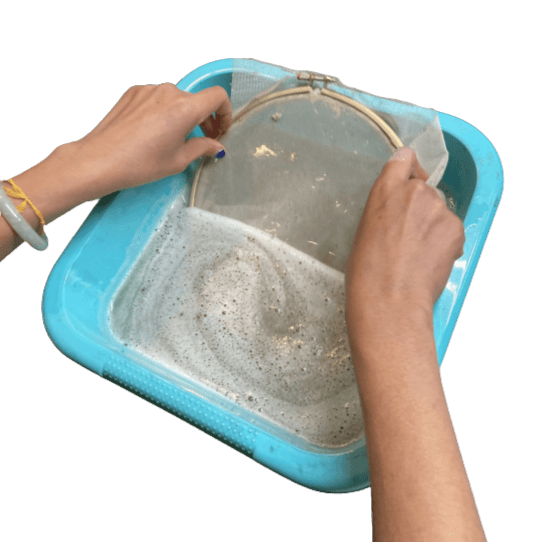
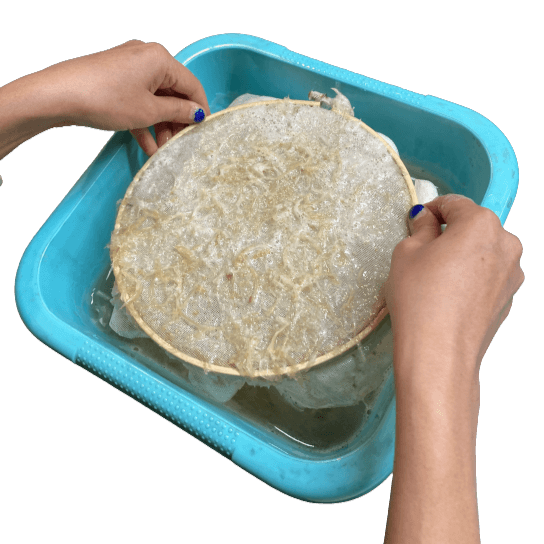
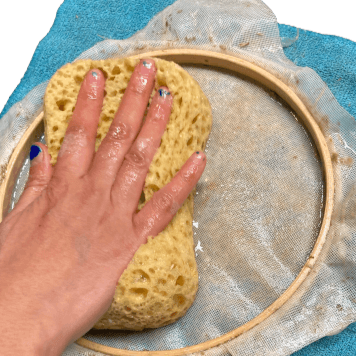
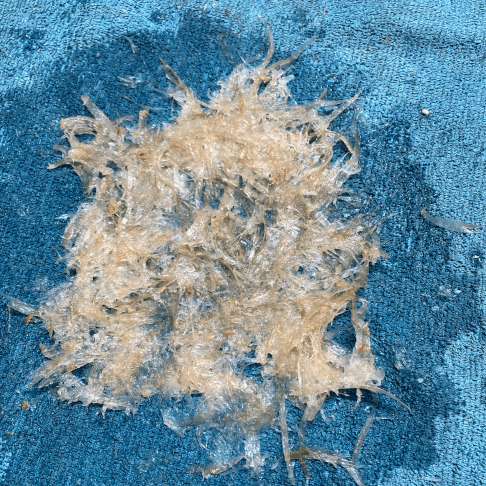
When the pulp was left coarse, the long fibres made it difficult to form a cohesive sheet. The resulting paper crumbled easily, although its rough, fibrous texture was, in my opinion, particularly beautiful.
Finely blended garlic skins produced a much smoother paper that was stronger, while still remaining somewhat brittle. Adding glycerol to the pulp increased its flexibility, although this also reduced its paper-like feel.
Manipulating the different garlic papers
video by Melanie Chillaud
4.3.5. Grains
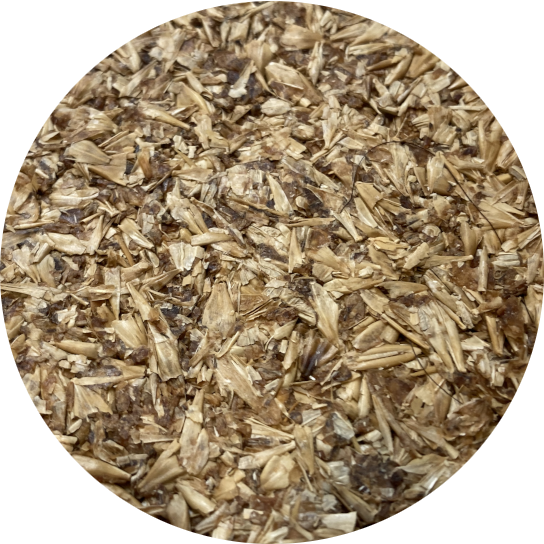
For this experiment, we used spent grain from beer production. We used the material as is, without cooking it. Rather than transferring the pulp directly into a mould, we first shaped it into small nuggets by hand and then compressed them into a thin sheet using the heat press.
This method worked remarkably well, producing a cohesive, even sheet with a pleasant natural texture. During heat pressing, the warm aroma of the spent grain filled the lab, briefly making it smell more like a bakery than a biomaterials workshop.
The heat press in action
4.4. Furs
We explored the possibility of creating biofur from plant fibres, using cattail and Clematis vitalba as natural sources of soft, fluffy structures. These experiments revealed unexpected textile qualities hidden within everyday plants.
4.4.1 Cattail
Fortunately, the lab already had a bundle of cattails on hand, allowing us to recreate the technique Cecilia had shared during her presentation. By gluing the pods onto a piece of fabric, carefully opening them and unfolding their layers, we revealed the soft fibres hidden inside. What initially appeared to be a simple plant pod transformed into a delicate biofur, uncovering yet another unexpected textile quality within a natural material.
* Cattail
* Fabric
* wood glue
* brush
* scisors
* Take a cattail
* Cut a piece of fabric to the size of the cattail
* Apply wood glue to the fabric
* Wrap the fabric around the cattail
* Let it dry
* Use a utility knife to slit open the cattail
* Lay it flat
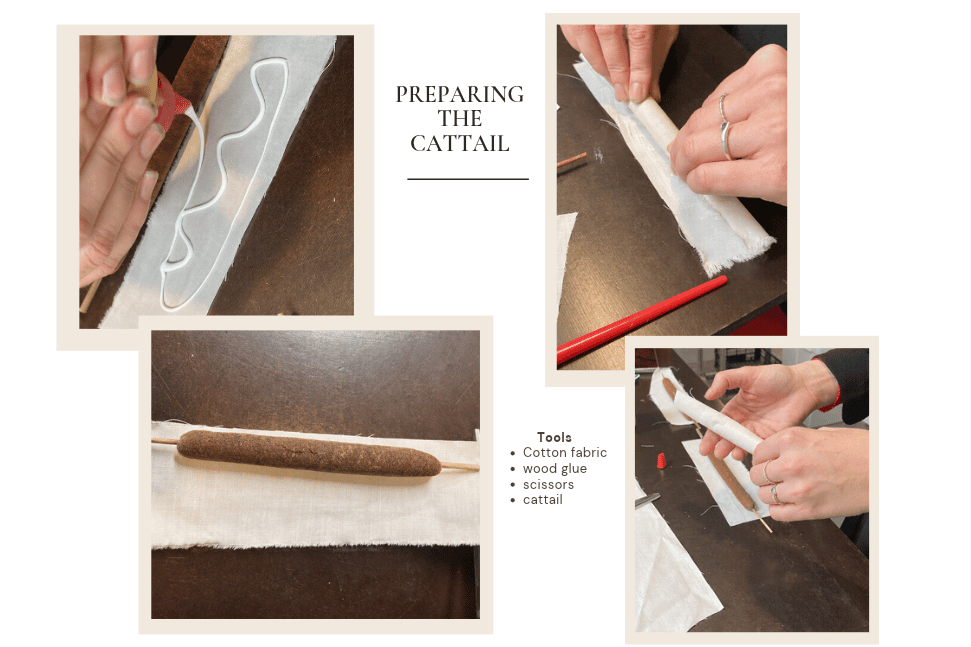
The technique is easy to do, and the result is incredible. It really looks like fur—and it’s incredibly soft, too. However, it’s fragile and tends to crumble when you touch it.
Cattail unveil
4.4.2 Clematis vitalba
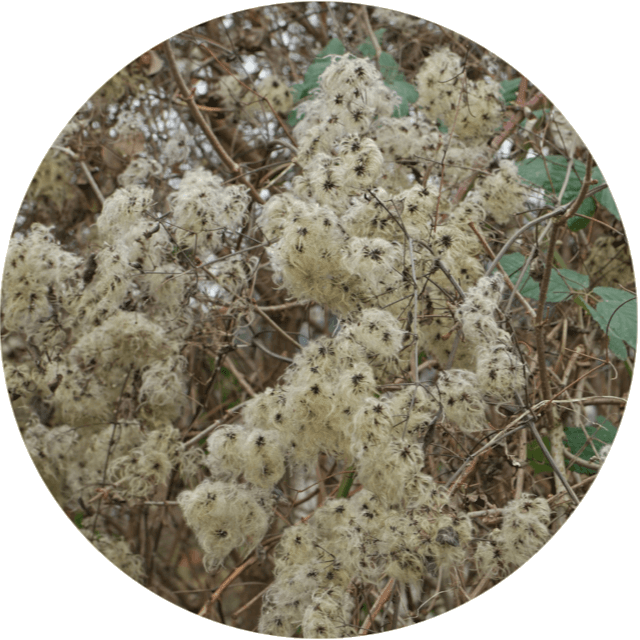
One of the pleasures of this week was discovering the potential of materials simply because they looked interesting. Melanie brought a small bag of Clematis vitalba from her neighbour's garden after being captivated by its soft, feathery seed heads. By following Cecilia's technique once again, we transformed them into a remarkably delicate biofur, revealing yet another unexpected textile hidden in an everyday plant.
* Clematis vitalba flowers
* Fabric
* wood glue
* brush
* scissors
* Pick the flowers, being mindful of the quantity <10% of the plant
* Cut away the stems
* On a light cotton-like fabric, apply wood glue with a brush
* Apply the flowers (fluffy side up)
* Let dry
* Trim off excess fabric
4.5. Gelatin-based Bioplastics
My interest in bioplastics came from the question of how we can replace conventional plastics with more sustainable alternatives. Through these experiments, we explored how natural ingredients can be transformed into new materials with different textures and properties.
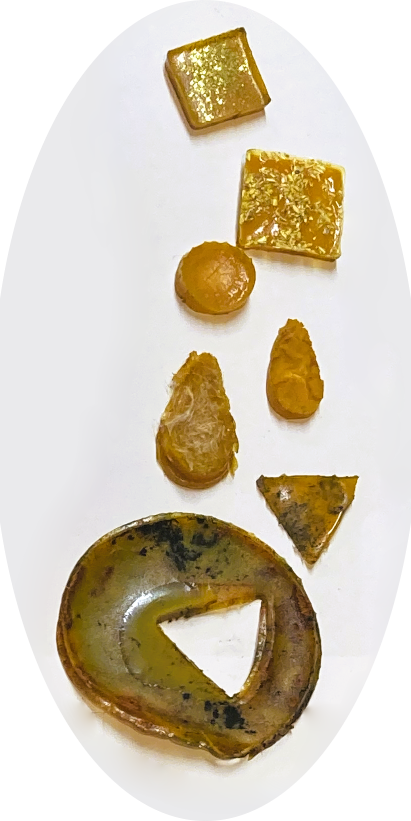
Gelatin-bases are one of the most commonly explored recipes in biomaterials, as they are relatively simple to make and can produce surprisingly versatile results. What makes them particularly interesting is how much the final material can change depending on the balance of ingredients. By adjusting the amount of glycerol added to the mixture, the bioplastic can become softer and more flexible, or harder and more brittle.
We explored this relationship by creating four different recipes with increasing amounts of glycerol. Alongside this, we played with different binders and food colouring, not only observing how they changed the visual appearance of the material, but also how they affected its texture, flexibility and tactile qualities.
* 48g of gelatin
* 8g or 12g or 18g or 48g of glycerol
* 240ml of warm water
* food coloring
* differents binders: fibers, wool, pencil shavings, maple samara,
* sauce pan
* spoon
* embroidery hoops
* plastics foils
* Prepare the embroidery hoops by tucking a sheet of plastic into them. You can add objects or binders in there
* Mix the gelatin into the hot water. It must dissolve completely
* Add the desired amount of gelatin and stir
* Gently pour the mixture into the embroidery hoops (trying to avoid bubbles as much as possible)
* Remove any bubbles
* Let it dry, if possible under a fan
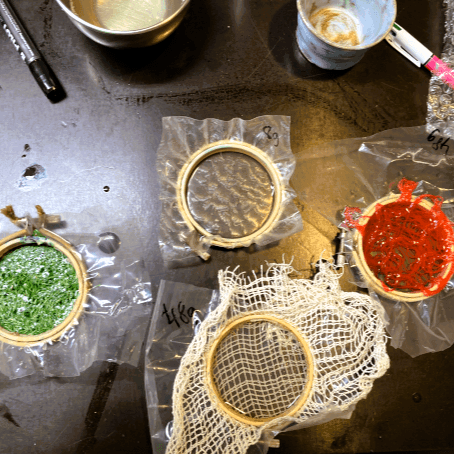
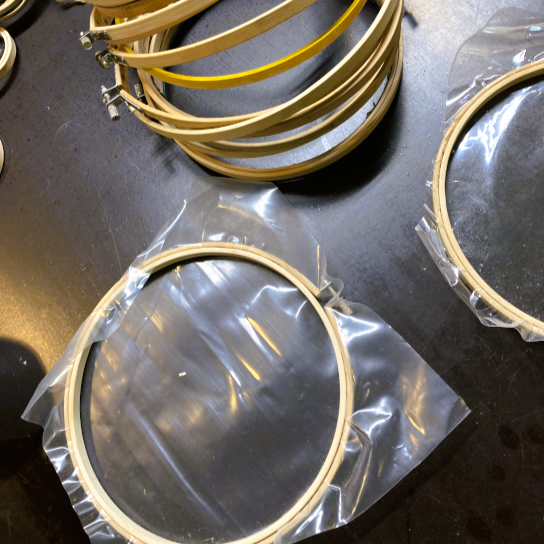
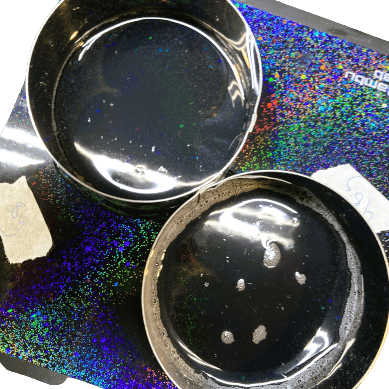
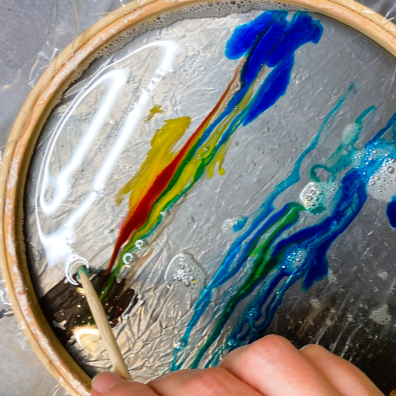
The different recipes revealed just how much the amount of glycerol influences the character of the material. With increasing amounts of glycerol, the bioplastic gradually moved away from a hard sheet-like material towards something much softer and more flexible. The sample containing 48 g of glycerol was particularly surprising, with an almost rubbery quality that felt completely different from the more rigid samples.
We also discovered that the drying process plays a crucial role in the final result. As the bioplastics dried, some samples experienced significant shrinkage and changes in shape. Careful positioning of the embroidery frames was therefore essential: they needed to remain flat and well ventilated, ideally placed under a fan, to encourage even drying and prevent mould from developing. This highlighted how sensitive these materials are, and how much the final properties depend not only on the recipe itself, but also on the conditions in which the material is formed.
4.5.1. Gelatin fabric
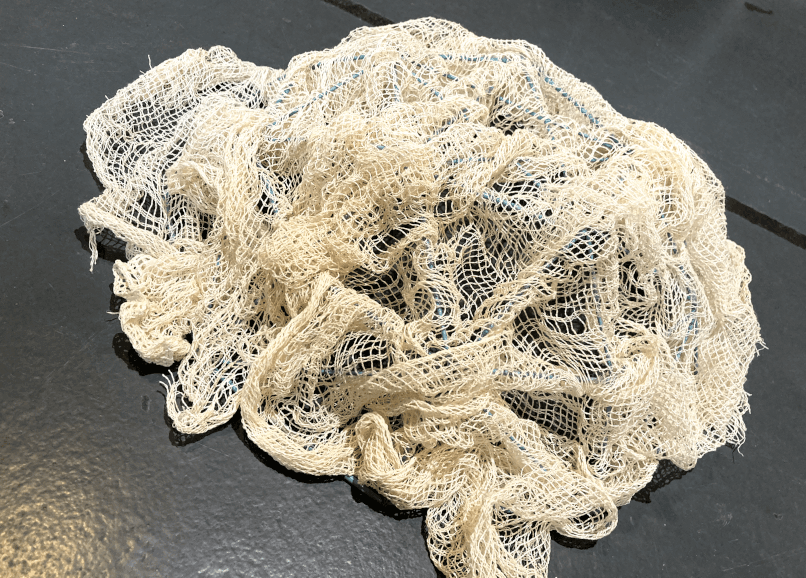
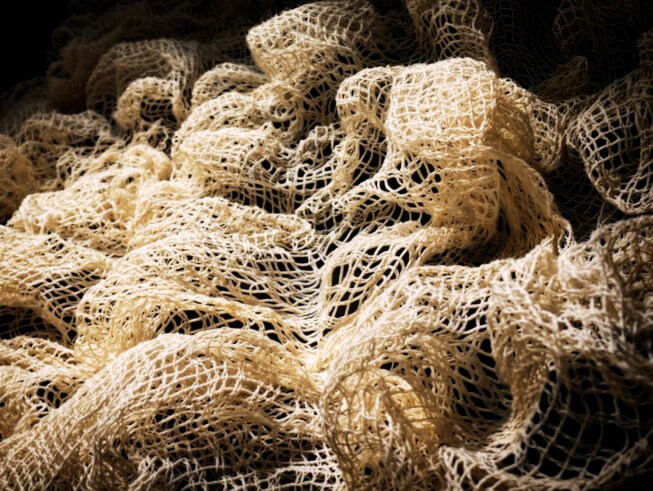
Inspired by Claire Jouanchicot, we tested whether gelatin could transform waste textile into a rigid, sculptural material. As we were aiming for stiffness rather than flexibility, we adapted her recipe and used 9 g gelatin with as little water as possible, brushing the mixture directly onto the fabric. As there wasn't much mixture left, I decided to dip my fabric directly in the remaining mixture, leaving out the borders of the fabric, so that they would keep the fabric's natural fluidity.
As I really loved the way this fabric reminded me of fishing nets, I wanted to recreate a wavy structure that can hold by itself, so I suspended the fabric on a rounded grid and pushed bits of the fabric through the holes. My idea was that those parts would become the "waves" once dried and turned inside out.
Two days later, I found that the gelatin had bonded well with the textile and the final result was rigid enough for the waves to be self-supporting. Now I just need to figure out what I'm going to make with it!
4.6. Mycelium-based biofabrication
Exploring biofabrication with Mycelium introduced us to a different approach to material creation: instead of being manufactured, the material grows. Through mycelium composites, we explored how fungi can transform a simple substrate into a new material structure over time, revealing a very different relationship between making and growing.
We started with a batch of pink oyster mushroom (Pleurotus djamor) mycelium growing on grains. The bag spent a week in my fridge before coming to the lab, waiting for its turn in the experiment.
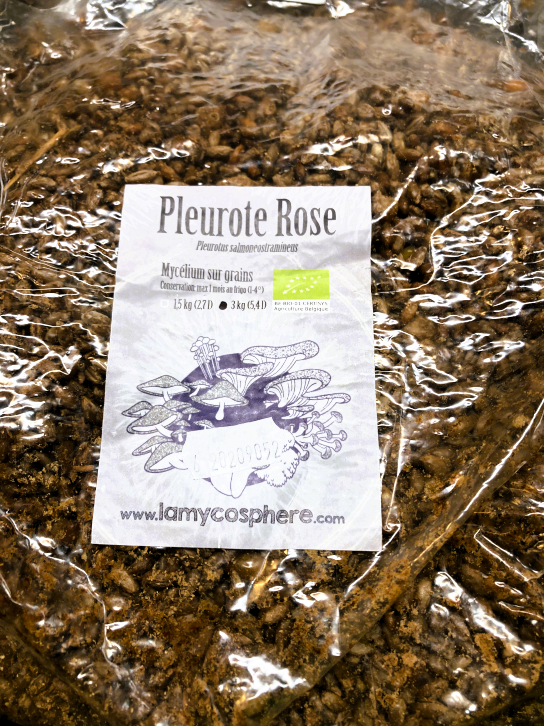
First off, we ground straw into smaller pieces and sterilised it in a rice cooker to create a suitable environment for the mycelium to grow. To reduce the risk of contamination, we prepared a clean working environment using camping burners and ethanol.
Once set up, we mixed the straw with the mycelium, adding water to create the right conditions for growth. The mixture was then placed into different moulds, wrapped in cling film and transferred into a grow tent where the conditions could be controlled. Now we wait and observe as the mycelium slowly grows through the straw, binding the material together and taking the shape of the moulds.
Our Mycelium process
Mid-process observations After three days, the grow tent had already developed a strong yeasty smell. To me, this sensory change makes the process feel very different from the other biomaterial experiments, as the material is not simply drying or being shaped, but continues to grow. We will keep observing how the mycelium develops and how it transforms the straw into a cohesive material.
5. Results
5.1. My universe of this week's textures and colours
Bioplastics
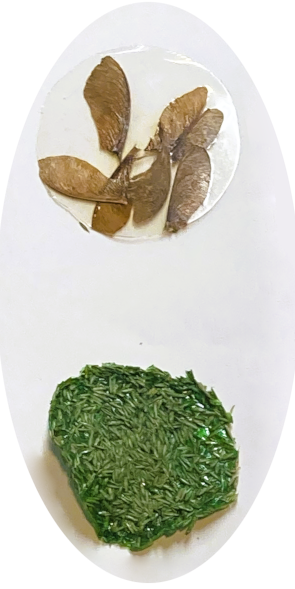
48g gelatin - 8g glycerol
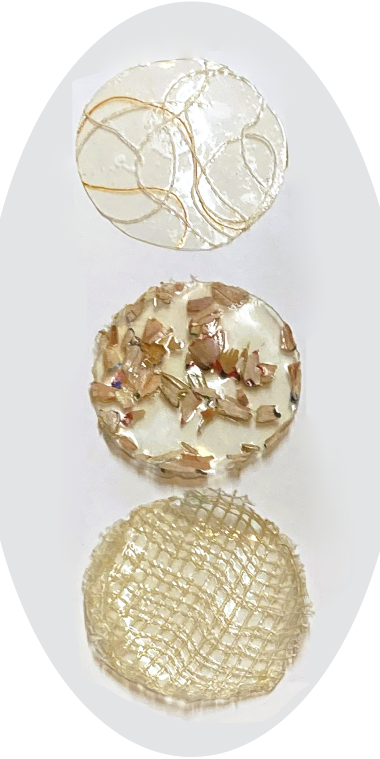
48g gelatin - 12g glycerol
48g gelatin - 18g glycerol
48g gelatin - 48g glycerol
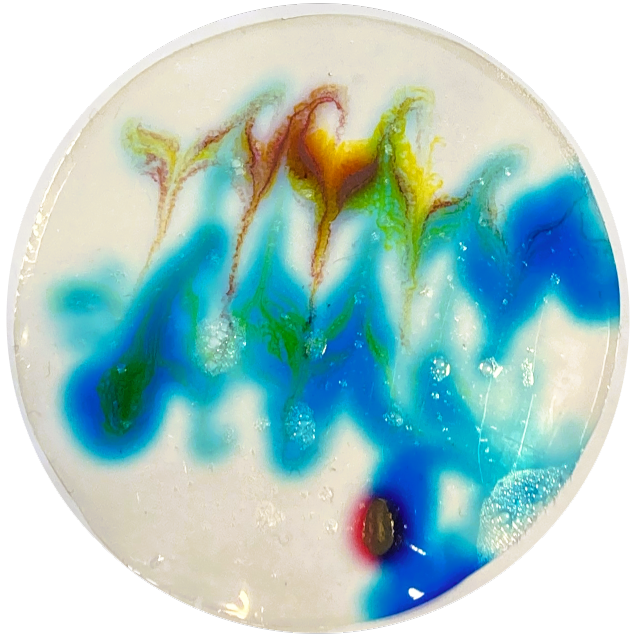
8g glycerol & food colouring
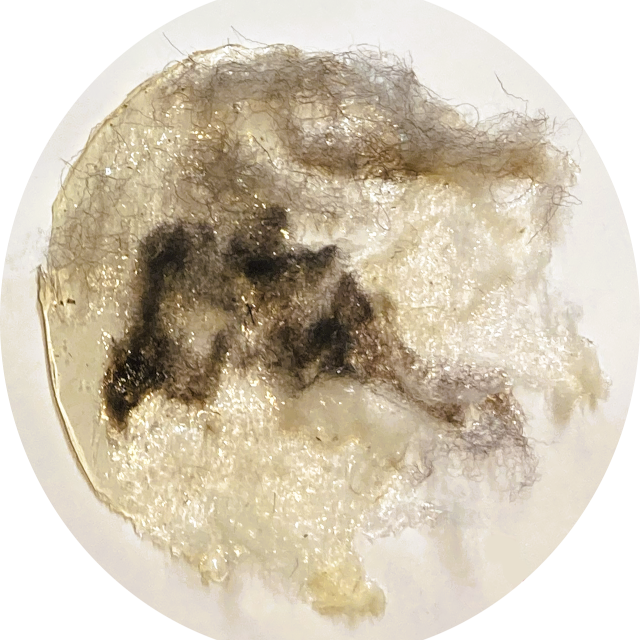
48g glycerol and raw wool
Furs and Yarns
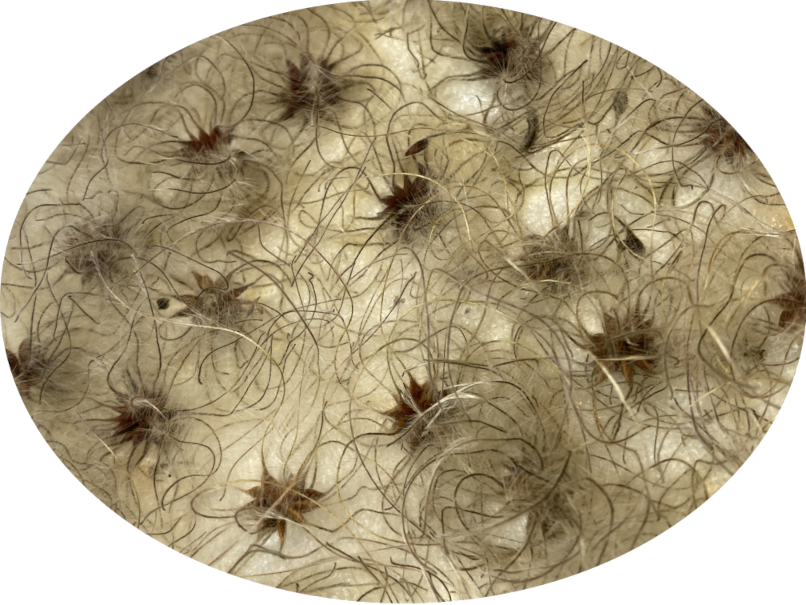
Clematis Vitalba
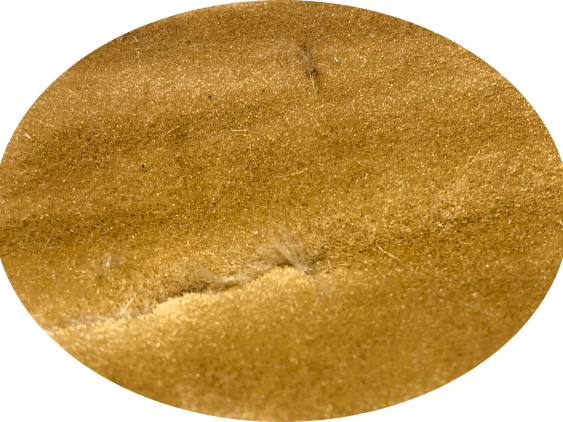
Cattail
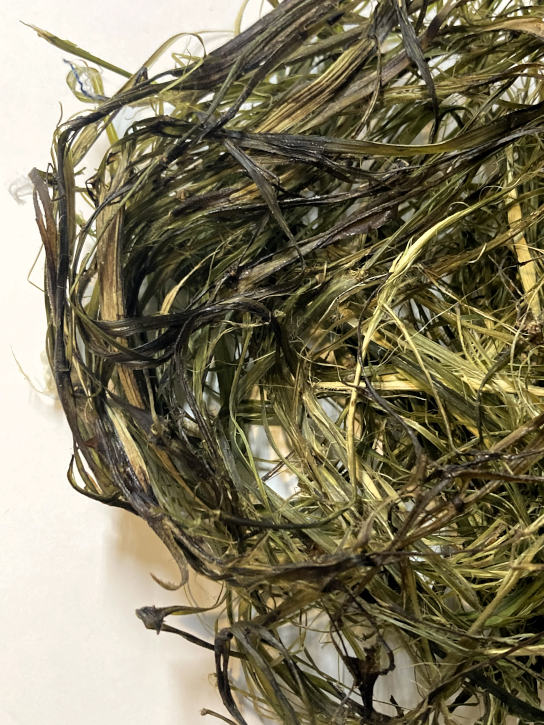
Nettle fibres
Algae yarn
Papers
Rough garlic paper
Fine garlic paper
Heat-pressed, spent grain (pure)
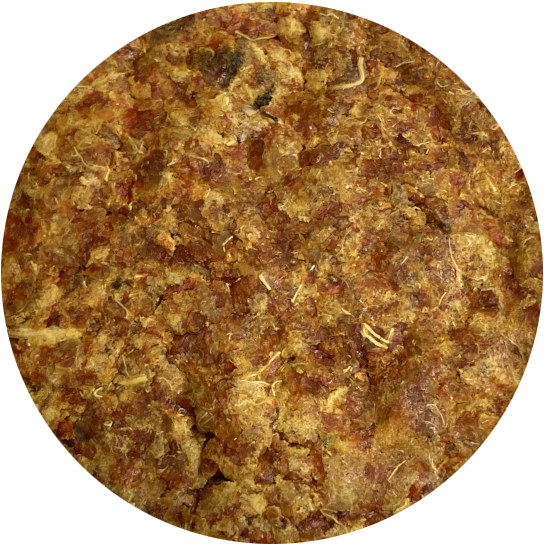
Heat-pressed tangerine peels with added sodium carbonate
6. Weekly reflection
6.1. Learnings
This week allowed me to discover a wide range of biomaterials and their different possibilities. However, exploring so many materials in a short time also made me realise that I would like to spend more time with fewer experiments, allowing for deeper exploration and a better understanding of each material. I learned that texture is extremely important to me. Beyond the visual result, the tactile qualities of a material strongly influence how I connect with it. While some of the more rubbery or artificial-feeling results were less appealing to me, I was very inspired by materials with organic textures, natural colours and unexpected forms.
6.2. Questions
This week raised questions about how biomaterials can become part of artistic practice. How can we preserve their natural qualities, imperfections and unpredictability while developing them further? How can their limitations become part of the creative process?
6.3. If I had another week
If I had another week, I would now concentrate my research on paper and yarn making only, experimenting with different natural fibres and processes to better understand their potential within my own textile practice.