Biochromes
1. Objective
This week, we entered the world of natural dyes. The basic objectives were to make one or more samples of natural dye, experiment with modifiers and produce a natural ink or pigment from the dye. Well in our Brussels lab we were in for a treat, as we got the opportunity to make quite some incredible extra explorations, that took me on a journey of what colouring and dying might mean to me.
2. References, research & inspiration
2.1. Time and process
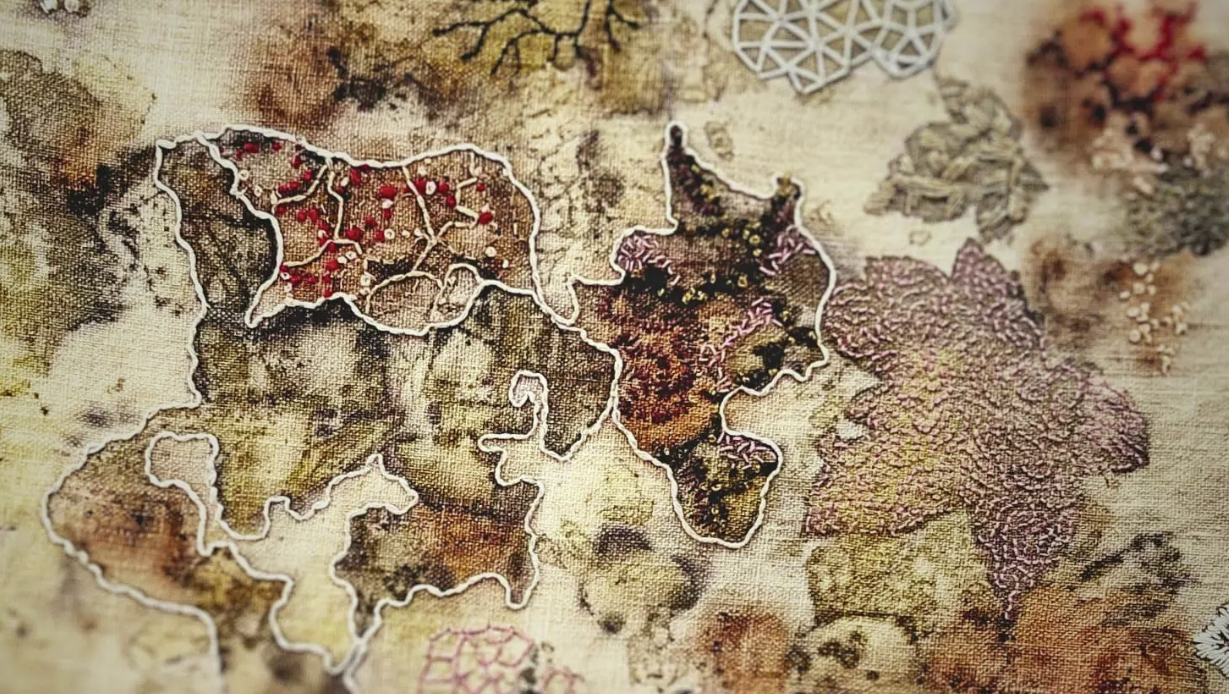 Textile artwork by Mirjam Gielen
I realised that, although I only have a basic knowledge in natural textile dying, I have experimented with natural colours and modifiers for countless years - on my hair! When it comes to the effects of Henna, natural pigments, beer, hydrogen peroxide or lemon juice in touch with human hair, I have made my fair share of experiences - some fabulous, some admittedly tragic.
I realise that what has always fascinated me the most in dying, is the element of time and the aliveness of the process itself. I mostly enjoy observing a chemical reaction taking place and being the co-pilot of that process to make sure that the dying turns into what I was looking for. It’s a duet where both partners are equally leading and following.
I approached this week’s assignment with the will to dive into this world of natural colours and transformations with a child-like curiosity and to observe if a path emerges that tickles my interest specifically.
Textile Artists working with natural colours I drew inspiration from
3. Tools
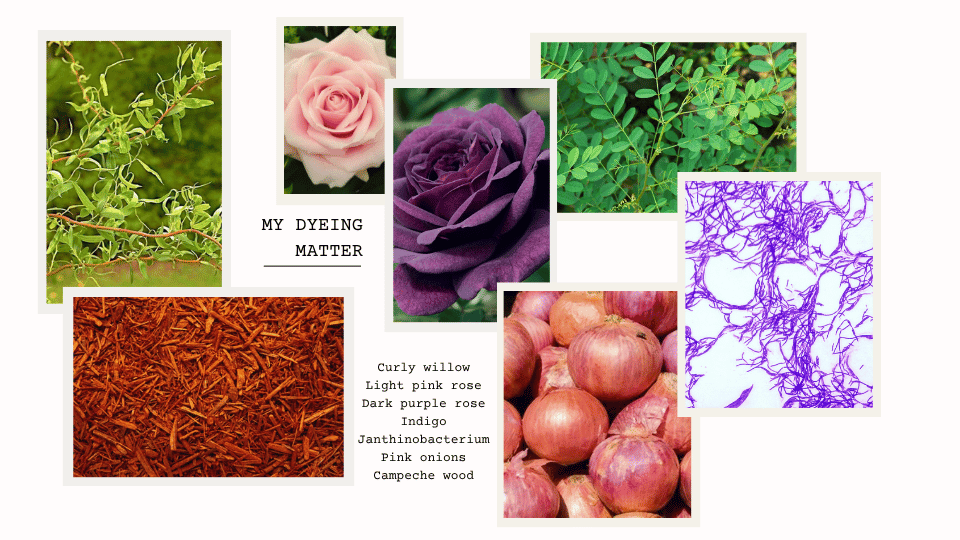
materials I explored this week
- Campeche
- Roscoff Rosé onion peels
- Red onion peels
- Light rosé rose petals
- Dark red rose petals
- Corkscrew willow leaves and branches
- Indigo vat
- Janthinobacterium Lividum
4. Process and workflow
4.1. Working with our surroundings
Prior to this week, we hade gone on a collective walk through our lab’s neighbourhood, including a local dyer’s park. This walk and introductory talk was meant to instil a curiosity in the living potentials around us. We picked up several different samples that we took back to the lab. Inspired by this walk, I decided to do some tests with my own garden’s richness, to see what colours might be hiding within.
4.2. Modifiying colour
We were introduced to 7 different modifiers when working with our dyes. Each one of them having a different impact on the colours, each one fascinating.
The fabulous 7
- Alum
- Baking Soda
- Borax
- Iron Sulfate (use extremely sparingly, to avoid dulling the colour)
- Citric Acid
- Epsom Salt
- Cream of Tartar
4.3. First things first
- I made four dye baths in total.
- Each of them was simmered for around 45 minutes.
- I used swatches of cotton and silk that had been pre-mordanted by the fablab
- I used raw wool that I mordanted myself
4.4. Campeche and pink onions
In the lab, we started our experiments with pink onions and campeche wood. We laid out 8 petri dishes, prepared our modifiers and cooked our ingredients for 45 minutes. Then, the experimenting started….
After pouring some of the dye bath in each petri dish, we carefully added a bit of each modifier and watched the magic happen.
Next, we took small batches of fabric that had been pre-mordanted in the lab and dipped them in those little baths. While the fabric bits kept soaking, we played with making ink by adding arabic gum to thicken the bath.
Unexpected distortions
Campeche, the wow-ingredient among natural dyes, delivered as expected with vibrant colours in different tones. However, when I placed the fabric swatches to dry, I wanted to leave a print on the back of my cardboard-bound notepad, so I let them dry there. And then, something unexpected happened - the colours transformed! I guess there must have been chlorine in my book’s binding, that made the colour react once again. I like the final result of the colours, but they can’t be used as representative colour swatches for my campeche dying.
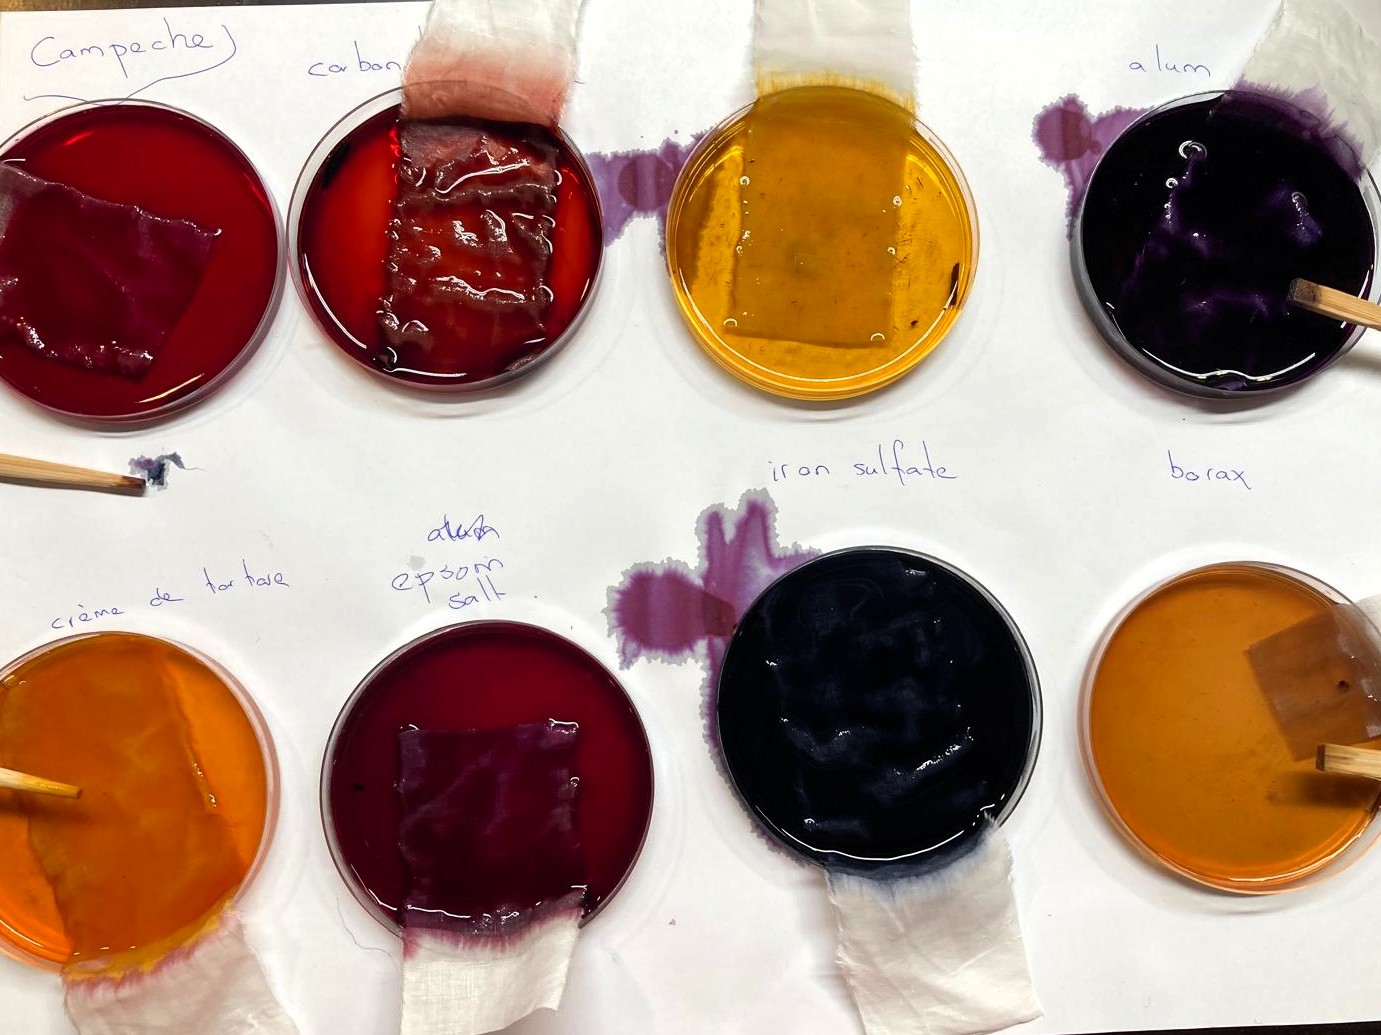
campeche dyes
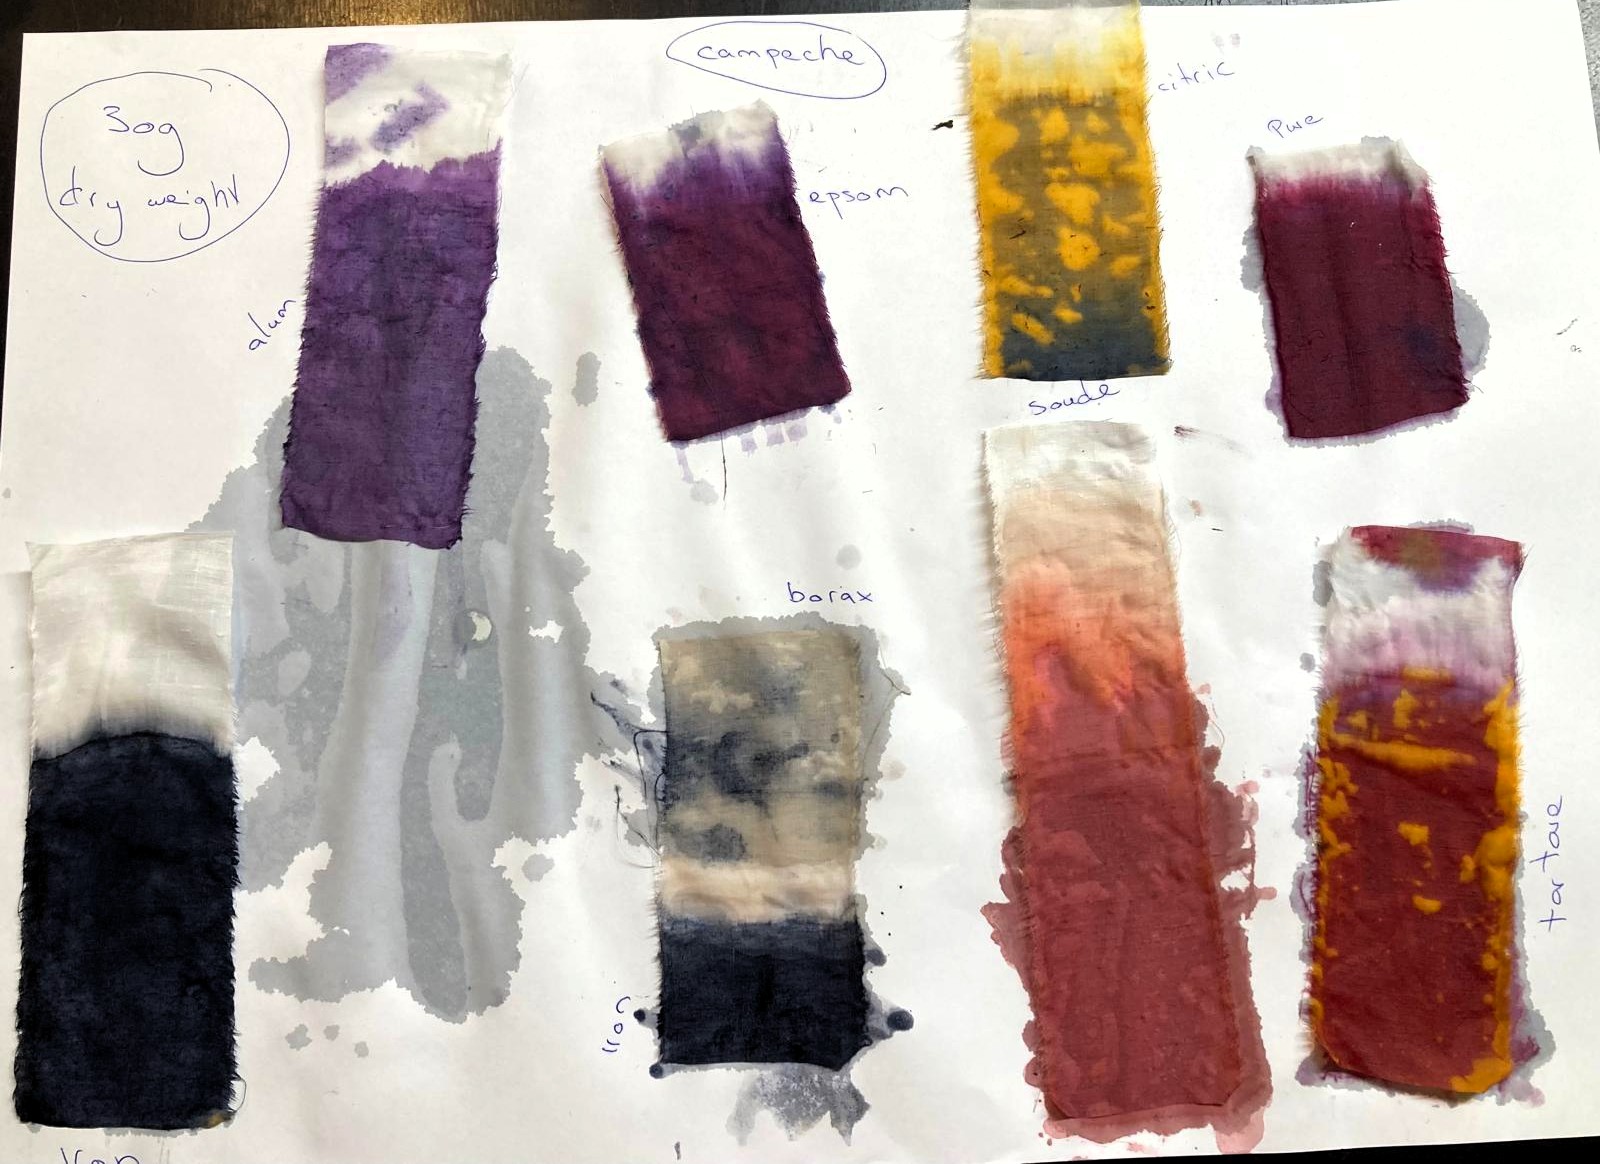
campeche cotton swatches
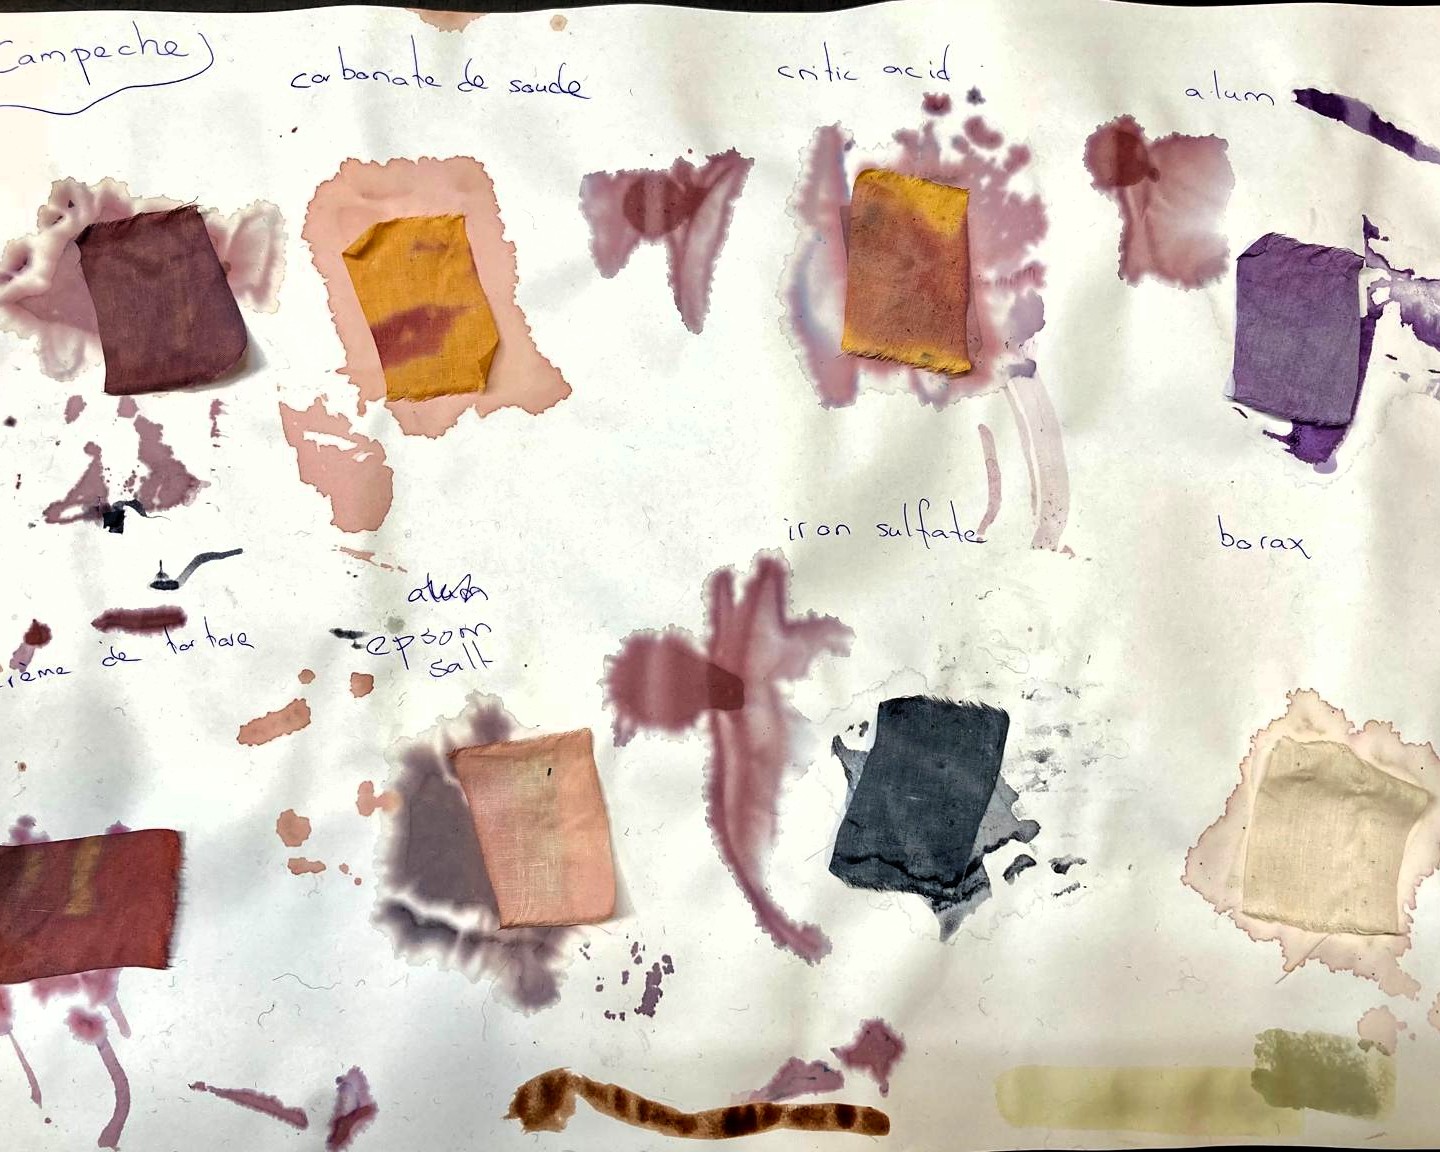
campeche silk swatches
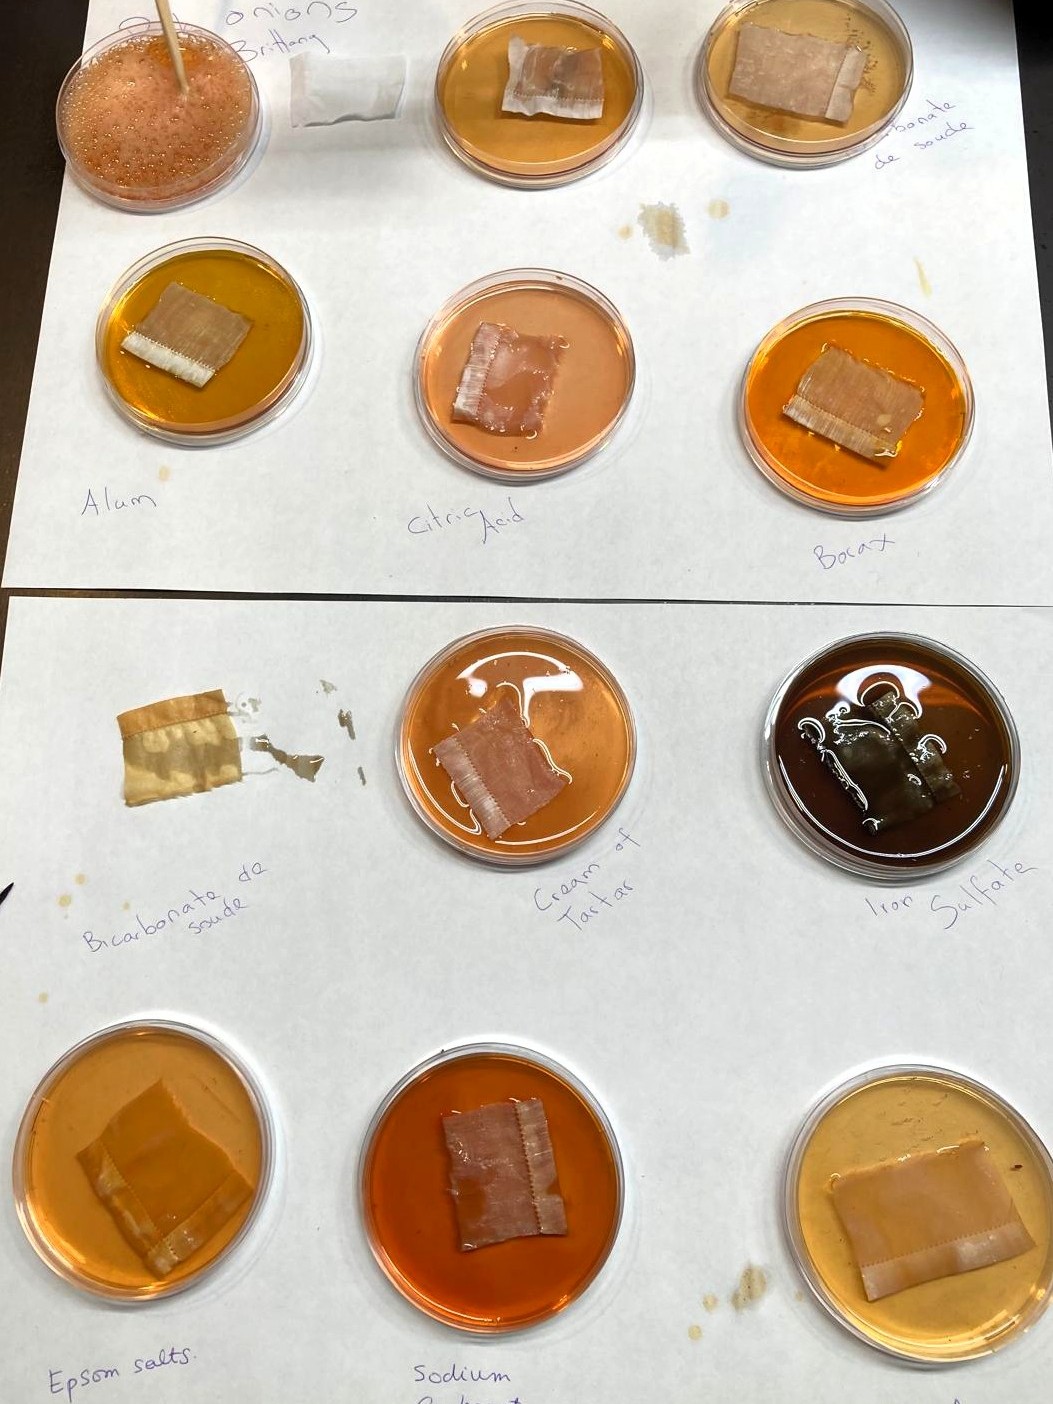
pink onion dye baths
4.5. Uncovering my garden's secrets
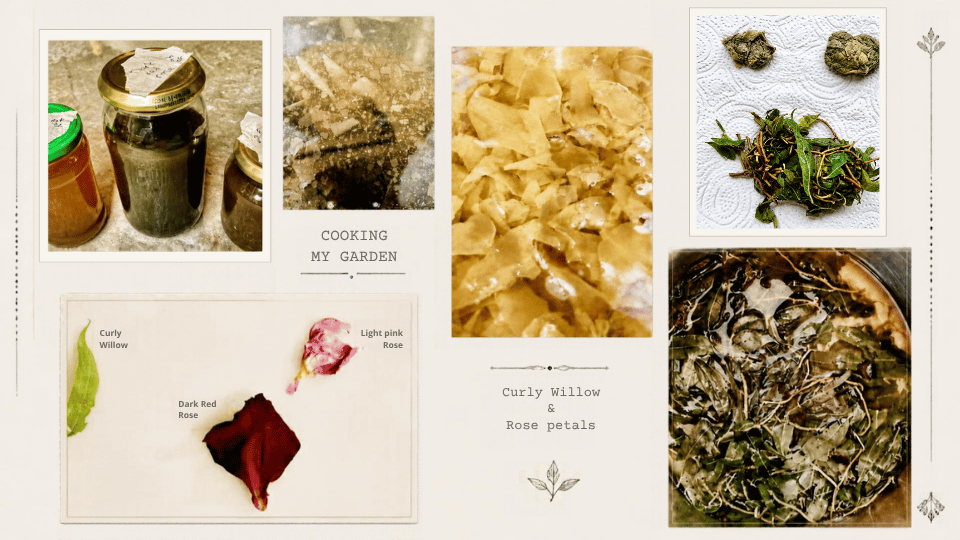
After these first experiences, my curiosity was ignited and I wanted to explore my back garden's potential colours. I took some ripe rose flowers and cut off a branch from my beloved curly willow tree, and set up a lab in my kitchen. As I wanted to dye wool as well, I mordanted a batch of raw wool overnight.
Cooking recipe
- 200% wof in dying materials
- simmer at 80° for 45 minutes
Mordanting my wool
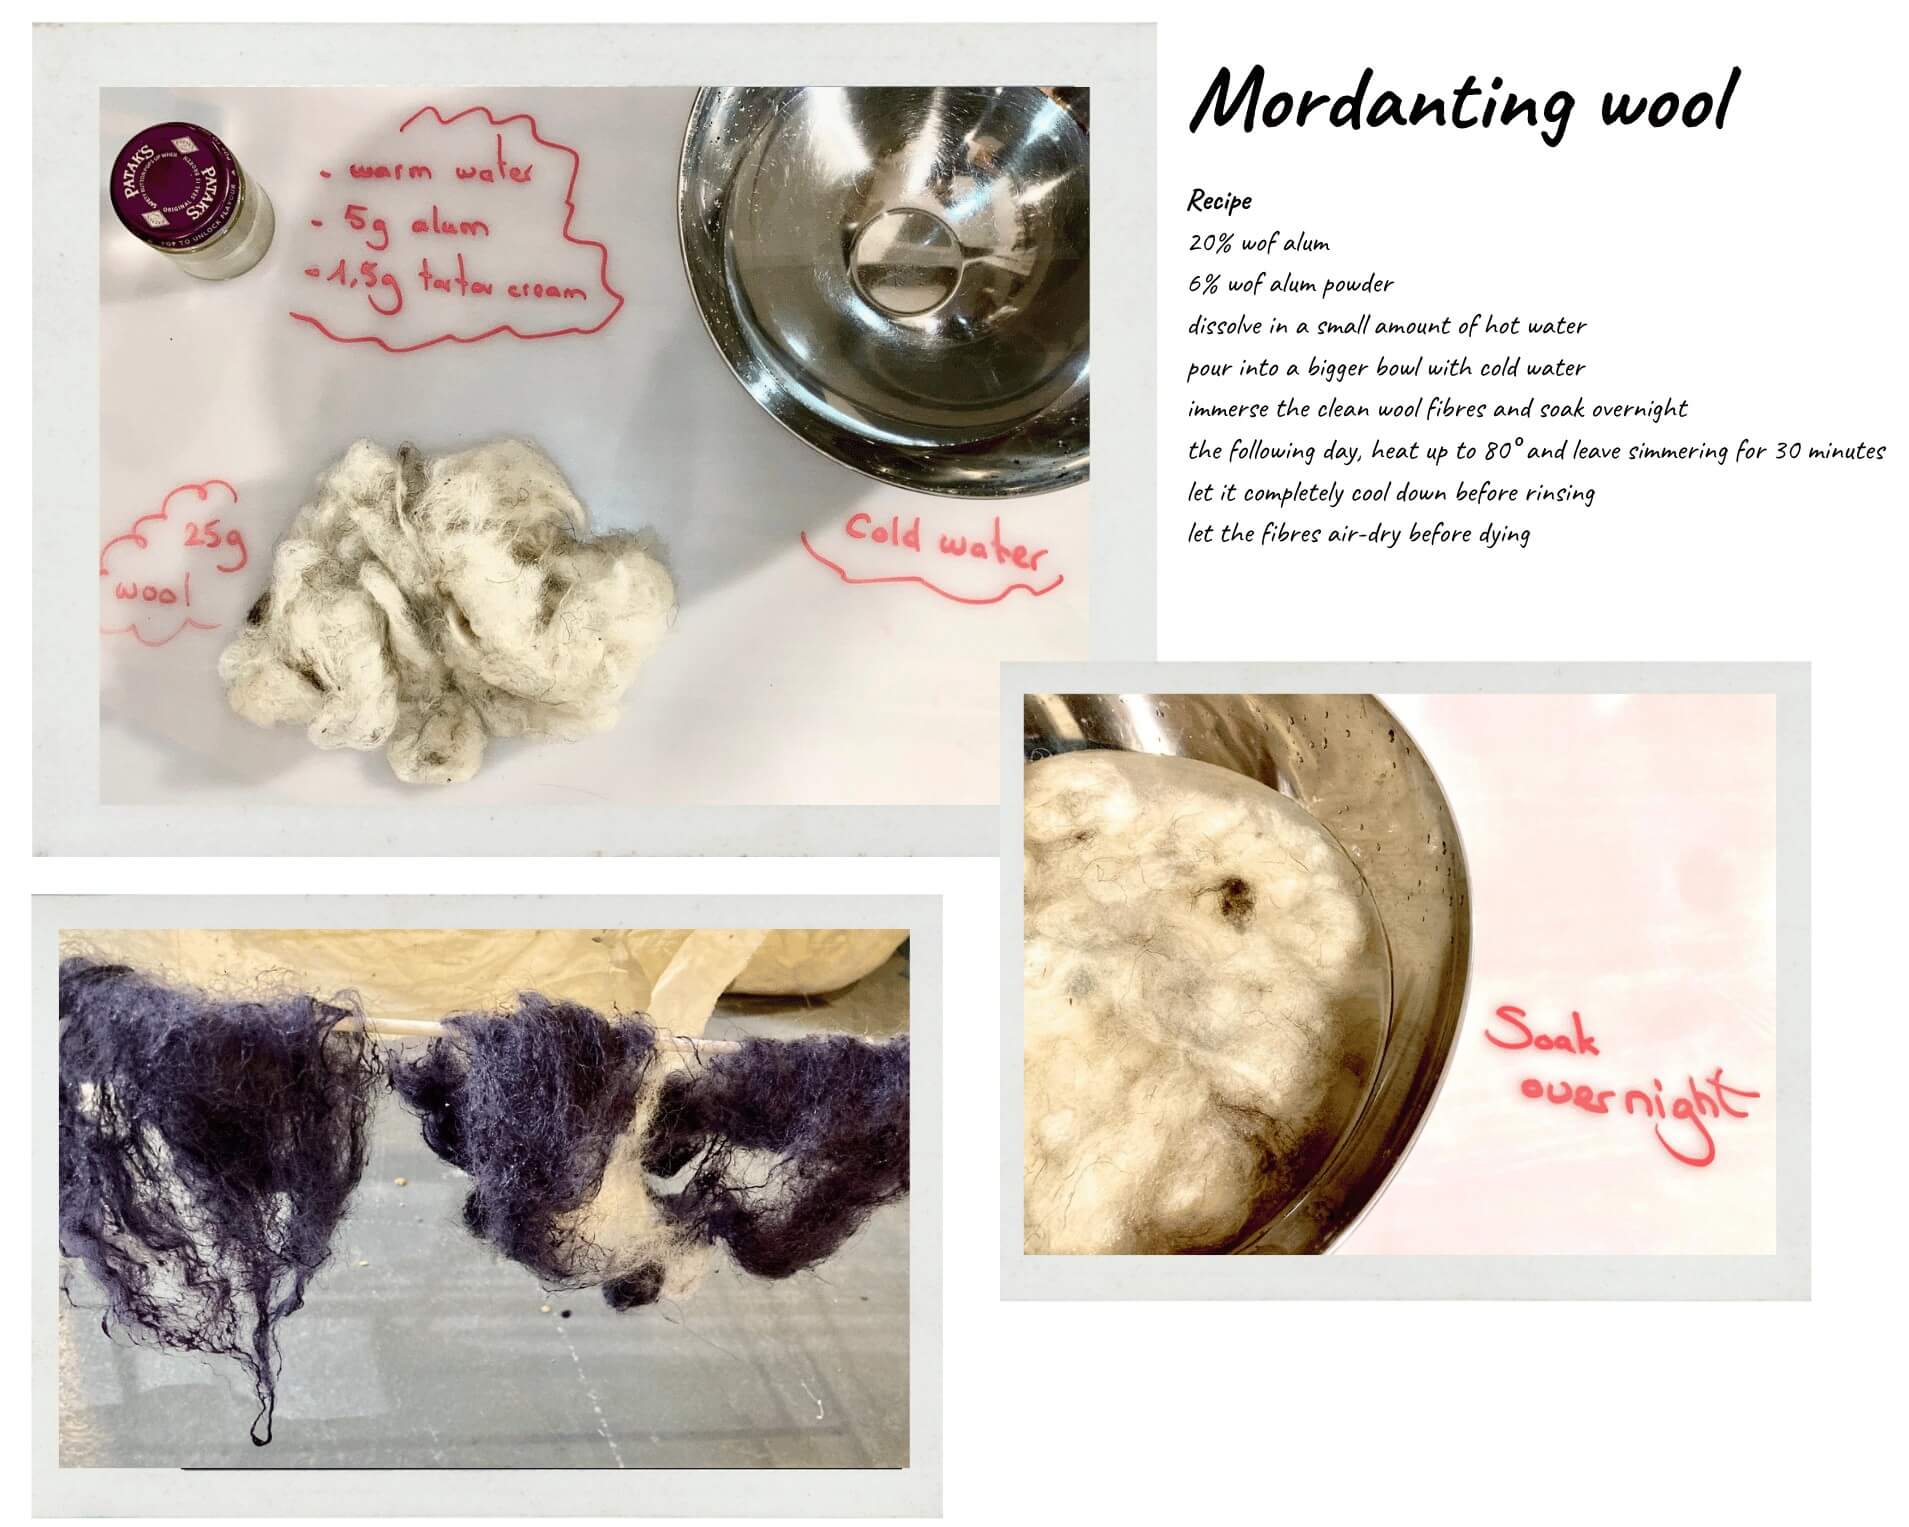 recipe from Michel Garcia
Colours, where are you
Although the original ingredients were full of colour, the dye baths turned out rather bland and there were not many surprising changes when I added the modifiers. Nevertheless, I love the fact that I can extract colour from my back garden and I will certainly continue the experiement until my entire garden has been tested!
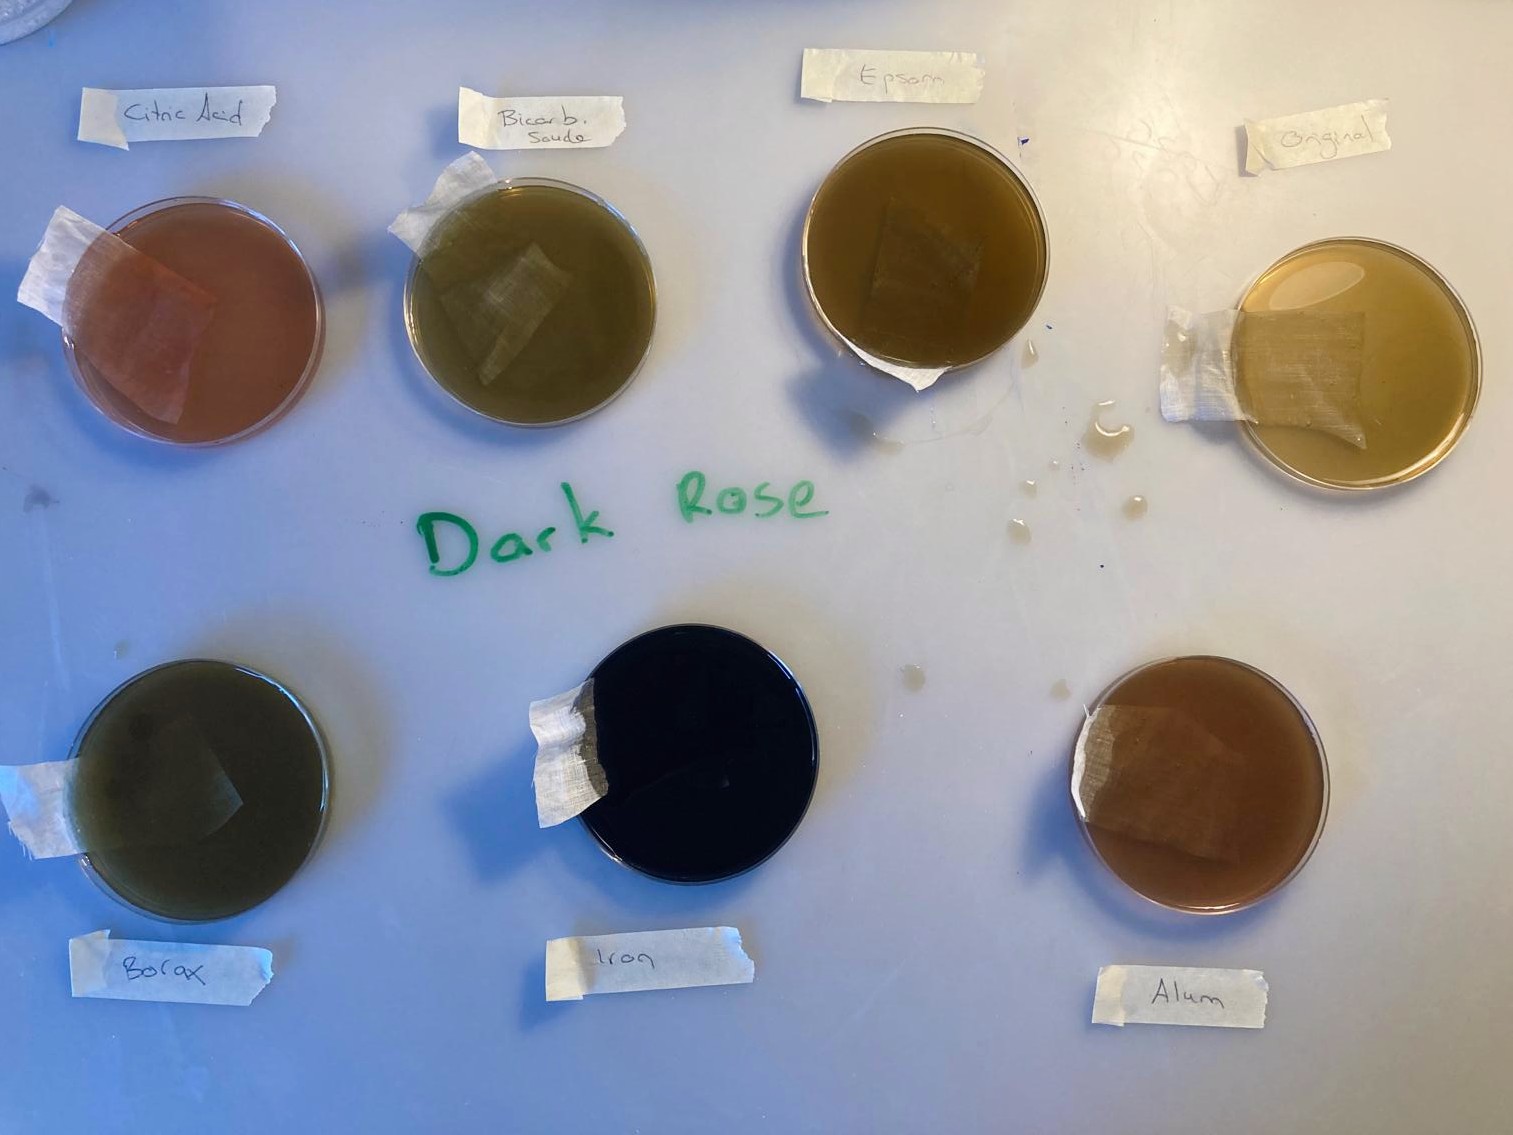
dark purple rose baths
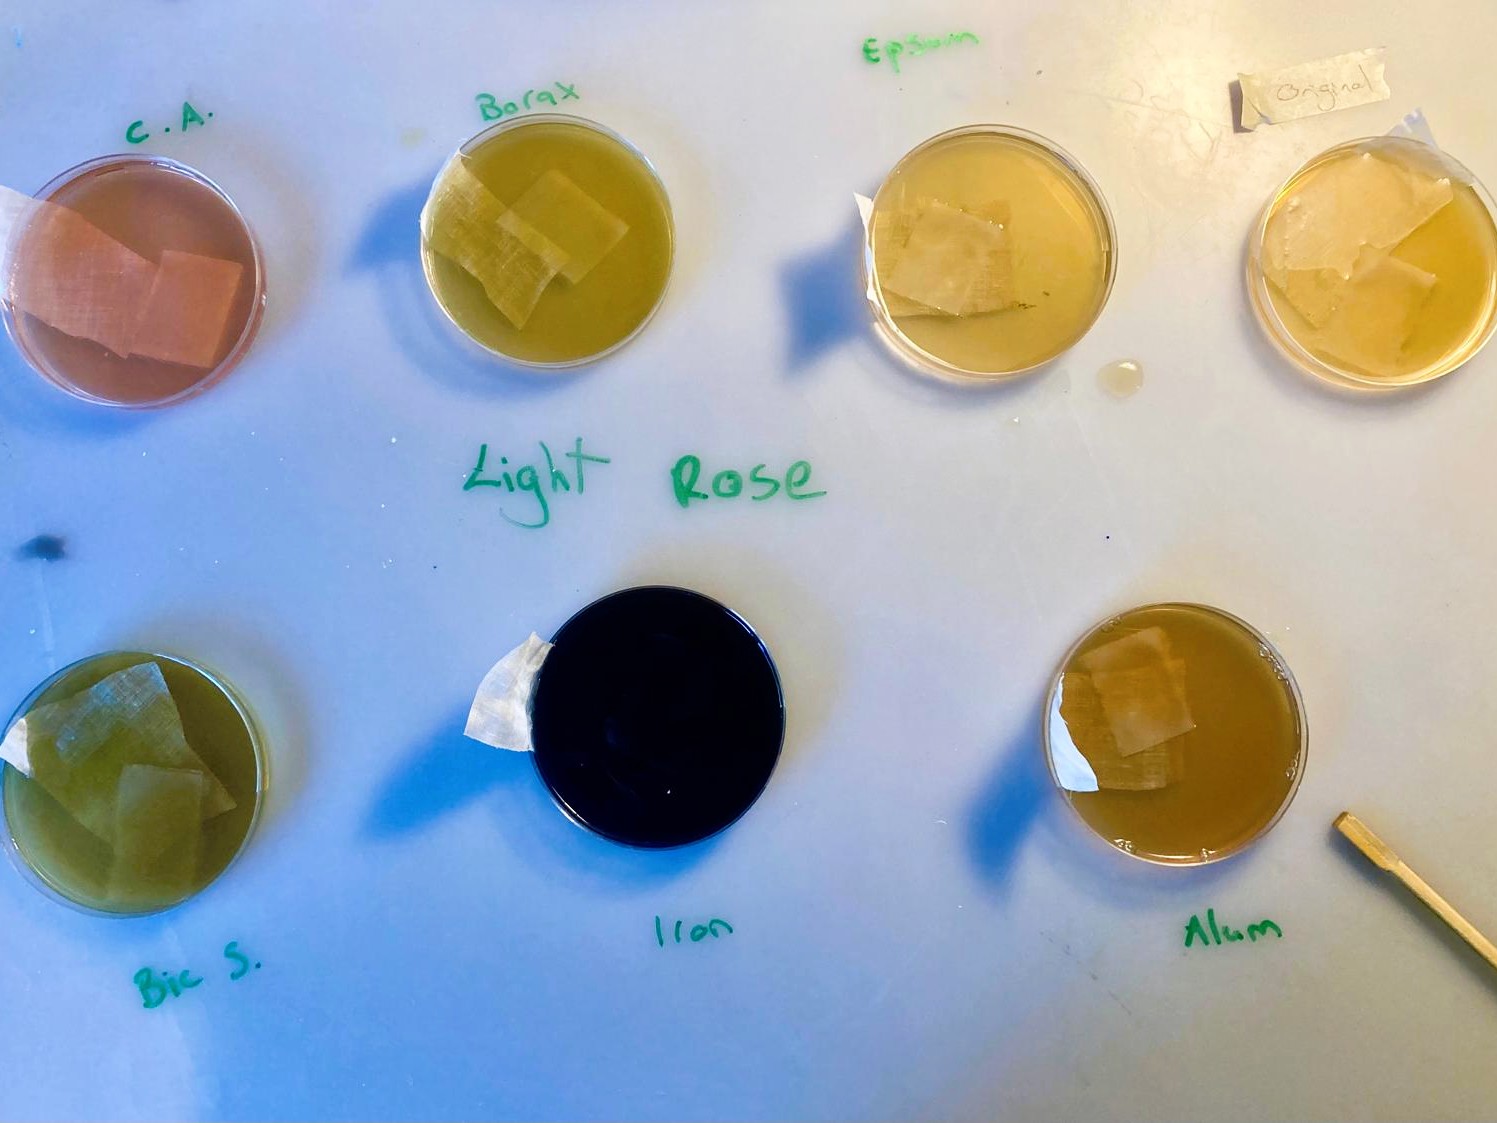
light pink rose baths
One little wow-factor moment
The light pink rose bath reacted strongly to baking soda, which turned the bath a strong lime green. I decided to turn that bath into a pigment and will come back when that pigment is ectracted!
4.6. Indigo
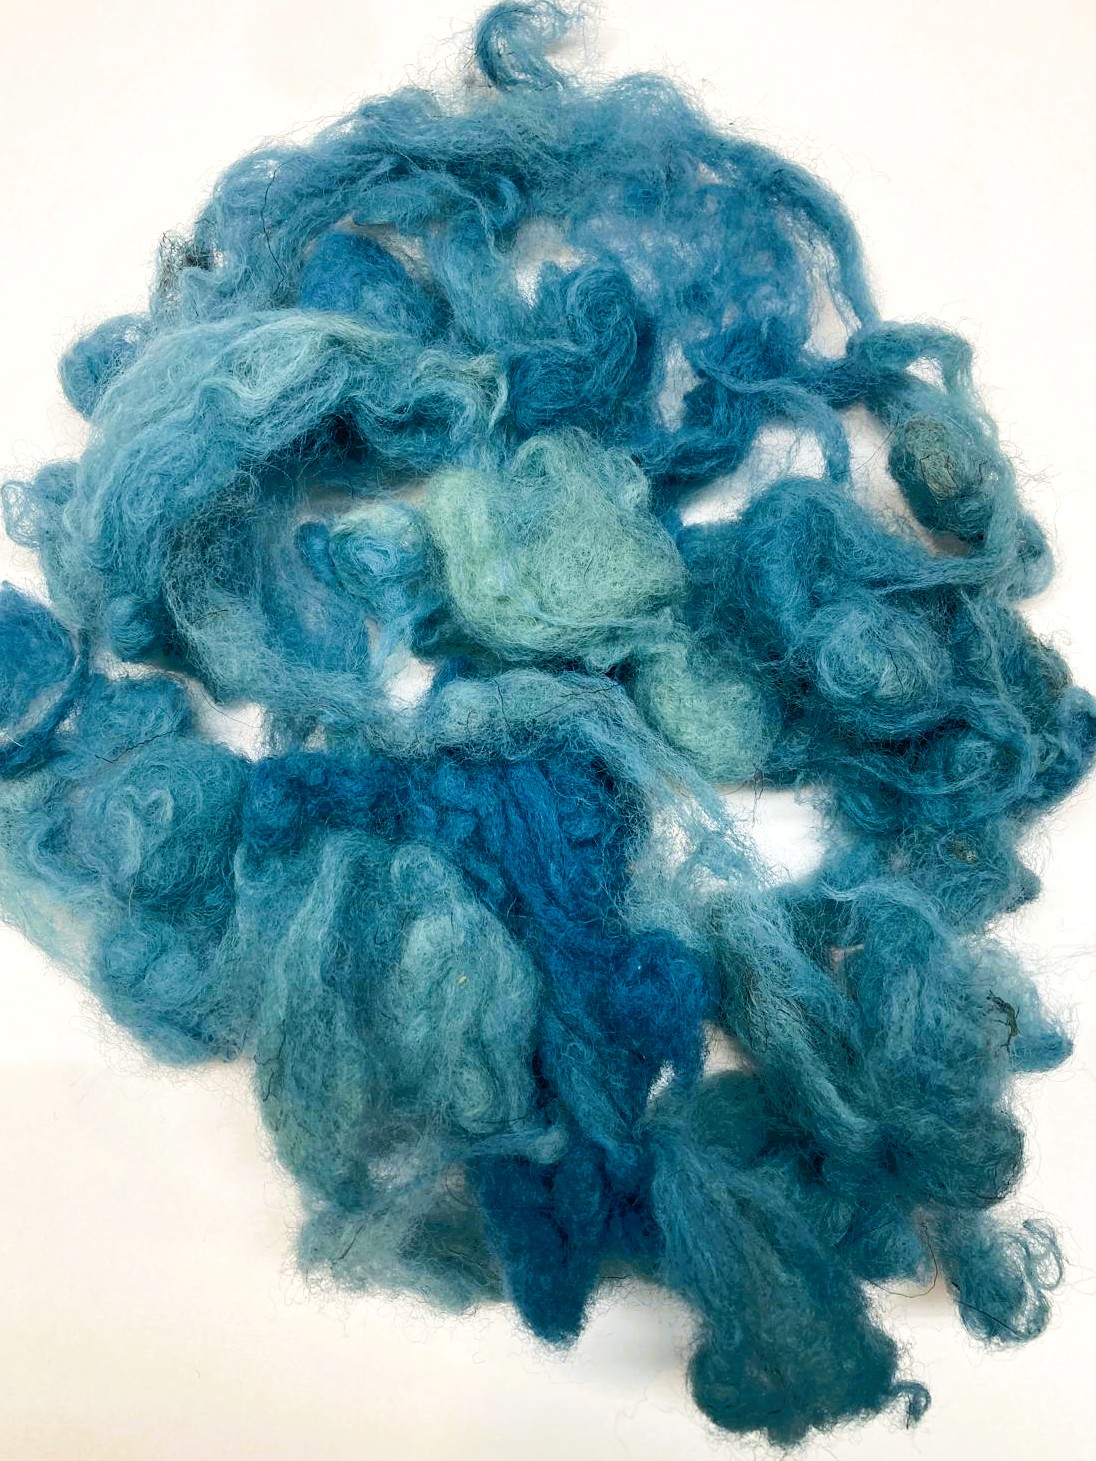
My indigo-dyed batch of raw wool
Thanks to local colour expert Amandine Brunsauvant, our lab houses a big indigo vat that we had the chance to use this week. I decided to experiment with a batch of 15g of raw wool.
The whole indigo dying experience feels truly magical and I love how much care and attention goes into making and maintaining an indigo vat. One of the key takeaways is how the vat must be protected from oxygen as much as possible. So it is stored in an airtight environment, and all the liquid that is used, shall come into as little contact with oxygen as possible.
When Stephanie started to stir the vat, the indigo inside came up to the surface, which created a seemingly viscous consistency. Although I had been warned that my hands would turn blue, I decided to work without gloves as I wanted to be in contact with this noble liquid, and I did not regret it.
For this dye, we decided to keep the vat at room temperature and we think that the wool didn’t go as dark as indigo normally would because it wasn’t warm. We would like to do another test with warmed-up indigo at some point, to see if there is a difference in the end result.
In total, I dipped the wool three times
1. time - 3 minutes, squeeze and rinse
2. time - 5 minutes, squeeze and rinse
3. time - 20 minutes, squeeze and rinse well, then lay to dry
stirring the indigo
the dyeing process
4.7. Bacterial Dyes¶¶
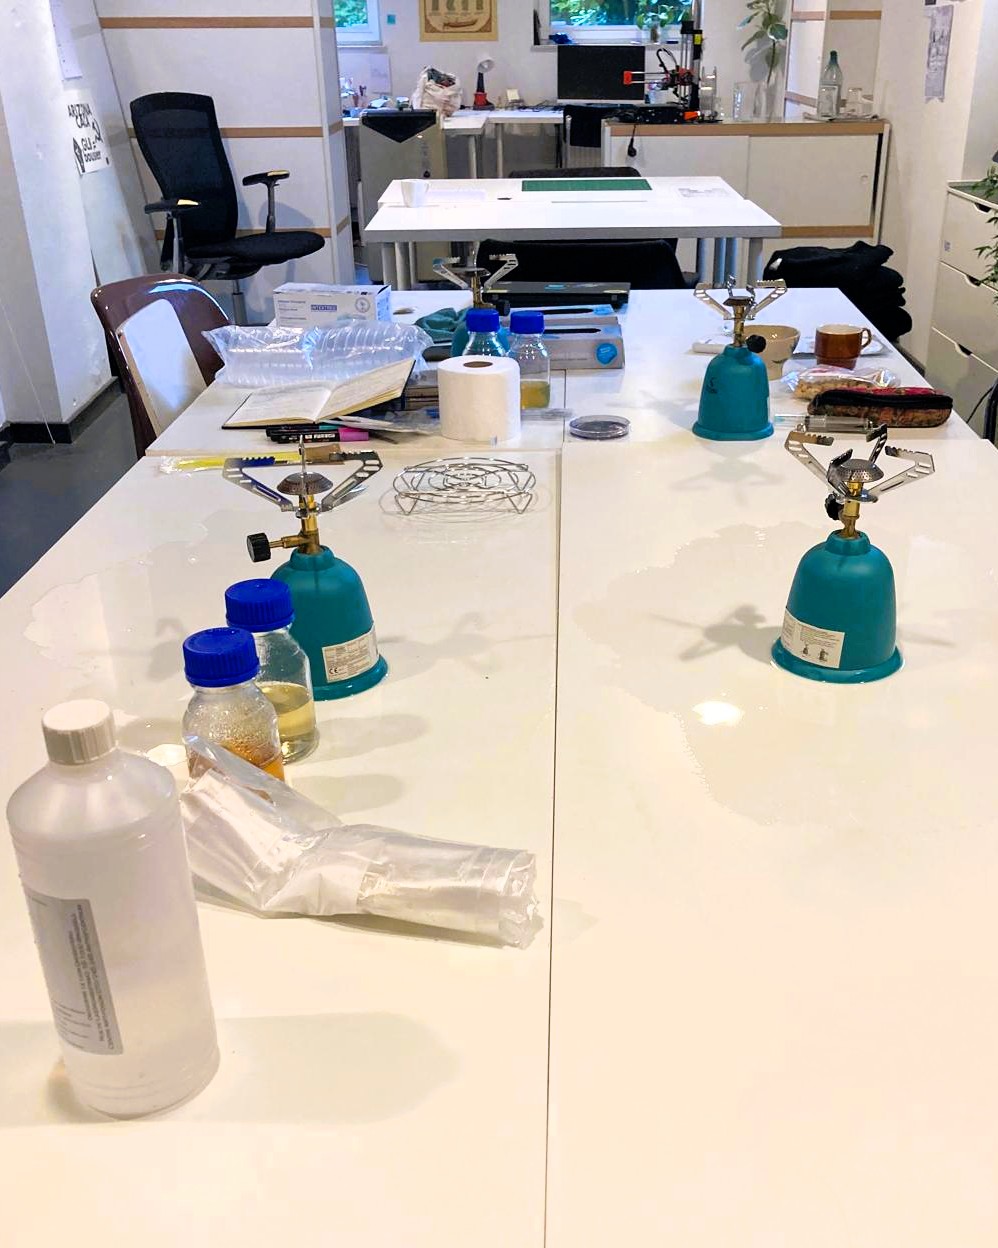
Our makeshift lab
We had the oportunity to do a bacterial dye experiment with a culture of Janthinobacterium Lividum. There was a batch that had been kept at the lab for a while and Stephanie had revived it for the occasion.
To begin with, we folded up a piece of cotton to fit in a petri dish. As I wanted to play with uneven dyes, I scrunched mine up in random ways and then fixed the scrunches with a couple of sewing stitches.
Bacterial dyeing step by step
- We used the office as our make-shift lab for this occasion
- To start with, we produced two types of media, a solid gel for the reproduction of the bacteria and a liquid broth for the dying of our textiles
- For the solid broth, we used nutrient agar, distilled water and glycerol
The broth was prepared with LB, glycerol and distilled water - Both mixtures went into our rice cooker for 20 minutes
- When they were ready, we went on to sterilise the tables with ethanol, sterilise our hands and pour ethanol over the working tables, around our camping gaz burners
- Gently, we scraped off some of the bacterial culture to transfer them onto our folded fabrics, making sure that we opened the petri dishes as little as possible, to avoid cross-contamination to a maximum
- Once that was all done, we transported all the petri dishes to a small utility room, where the bacteria will now hopefully reproduce and create magic on our fabric pieces! I couldn’t help it but have a little pep talk with the bacteria. I sing to my plants at home and speak to trees and animals, so I don’t see why I wouldn’t have a little encouraging word with this tribe of micro-organisms…
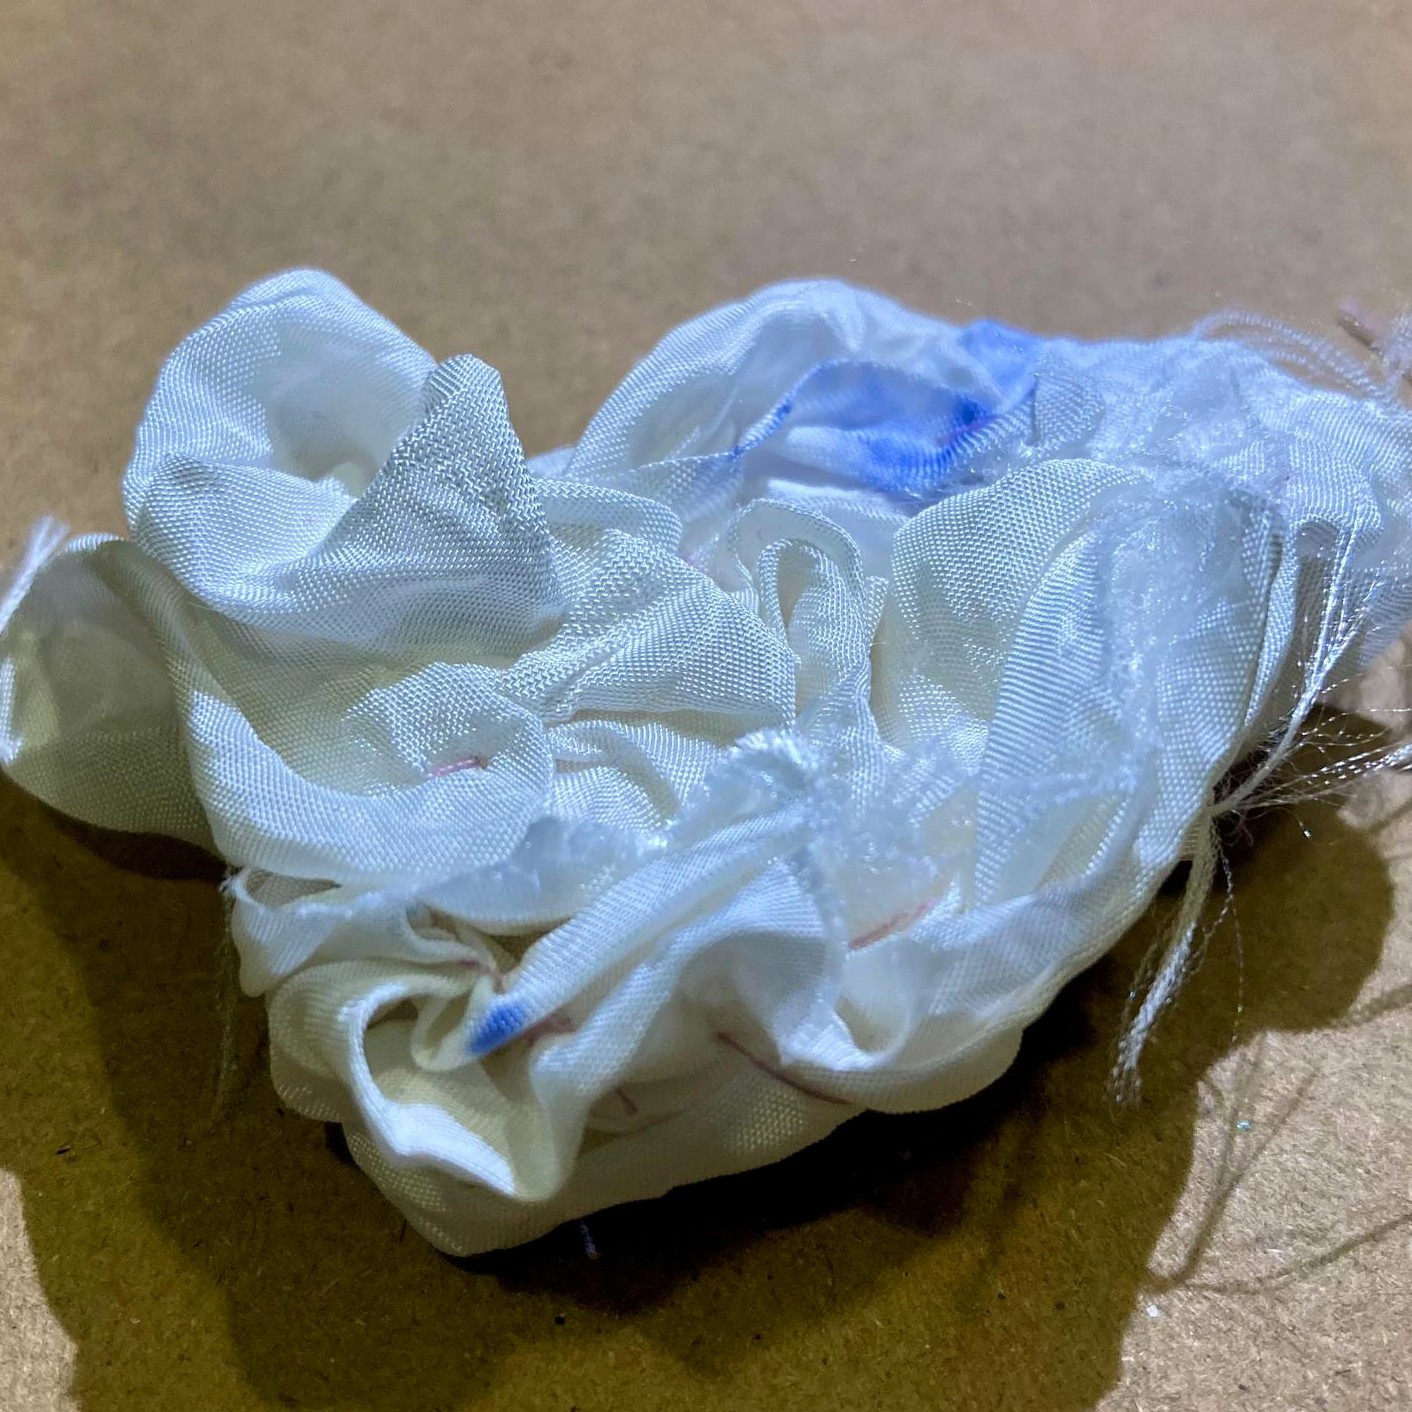
prepped fabric
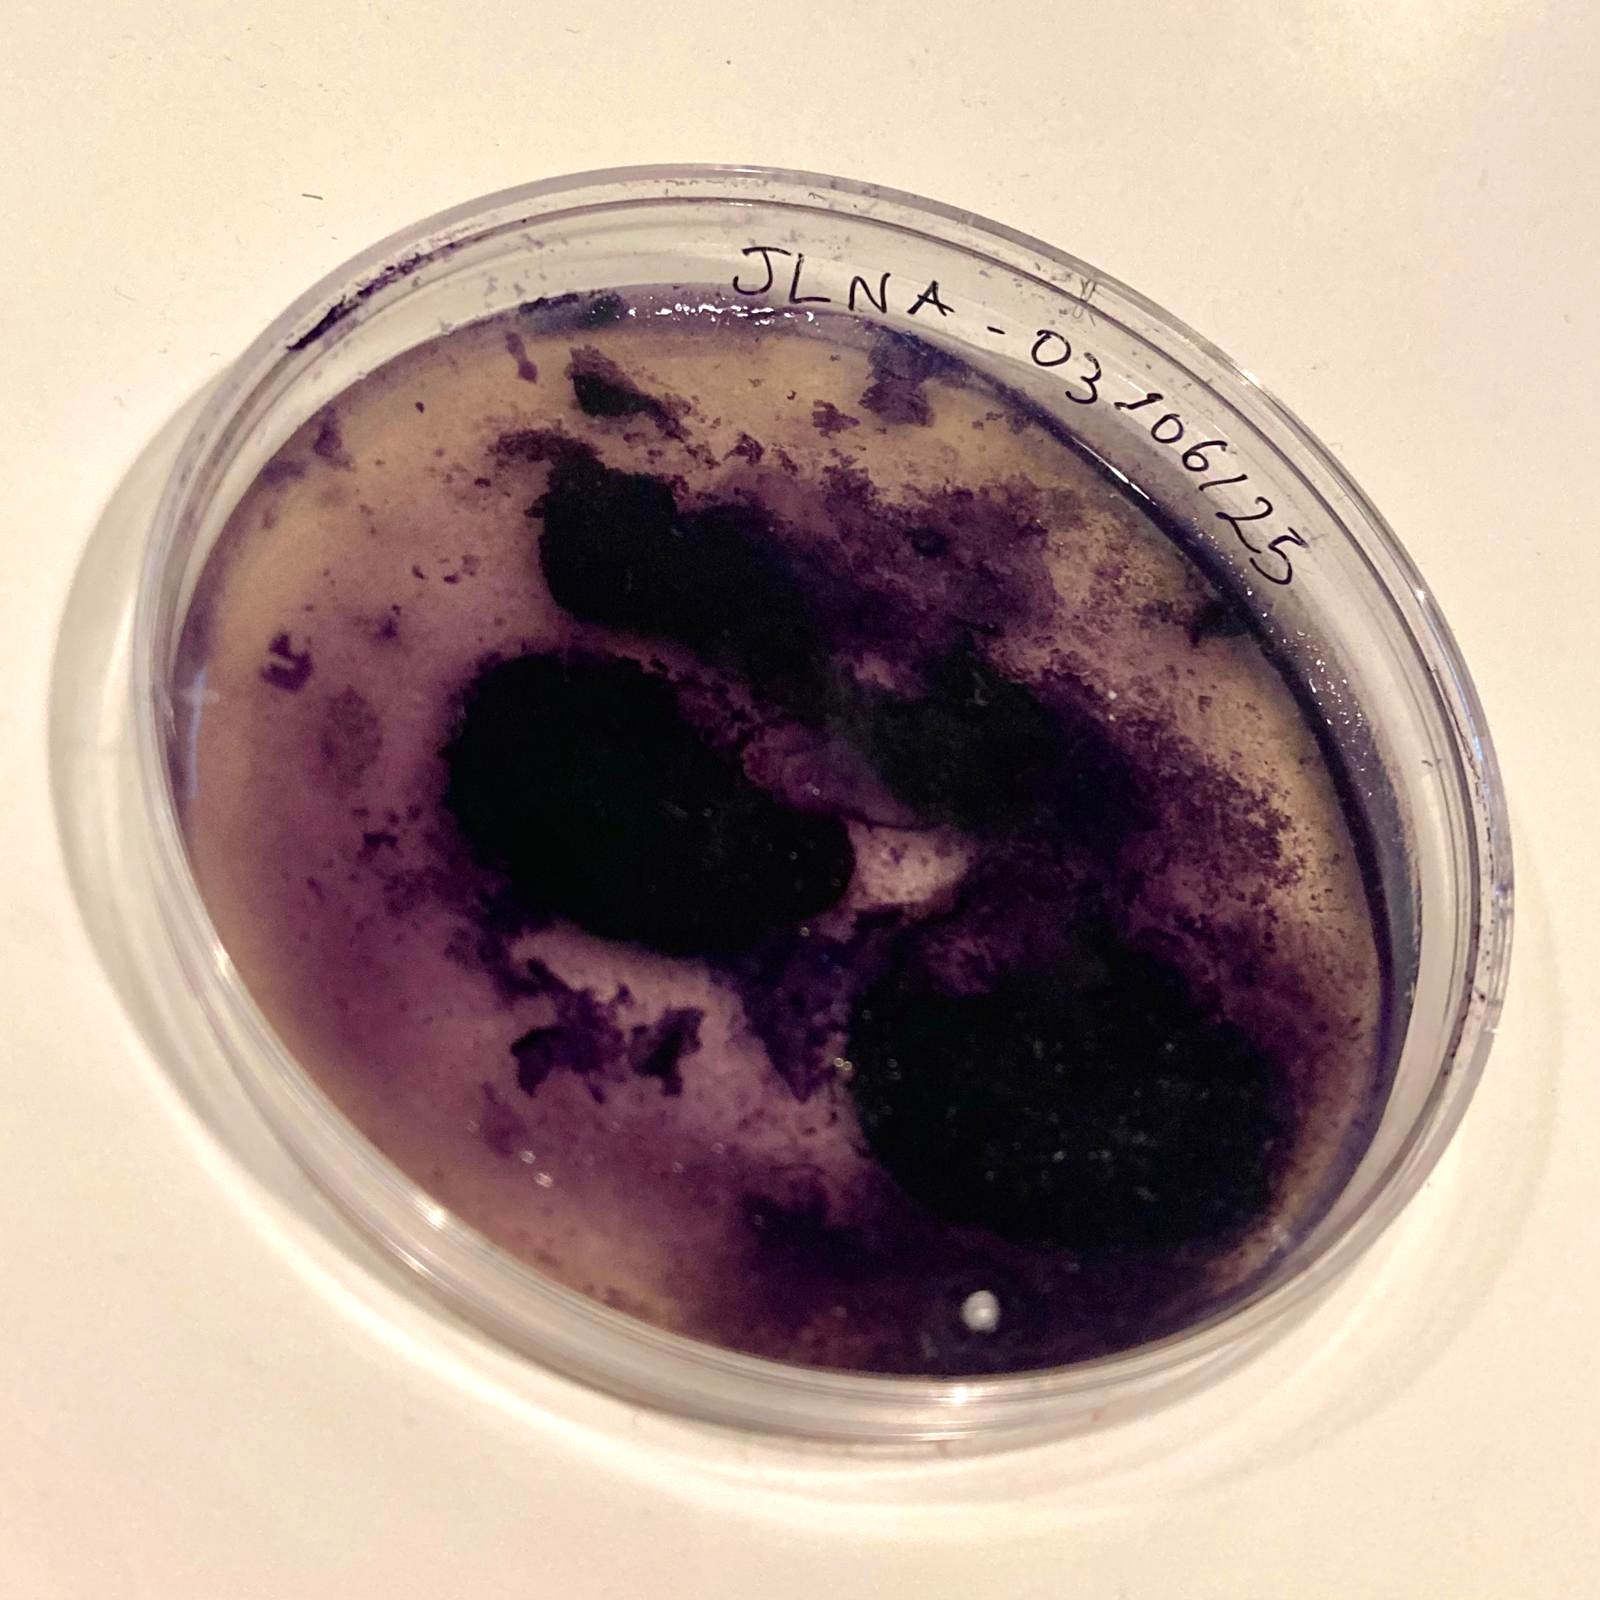
the bacteria batch
5. Results
5.1. The final colour swatches
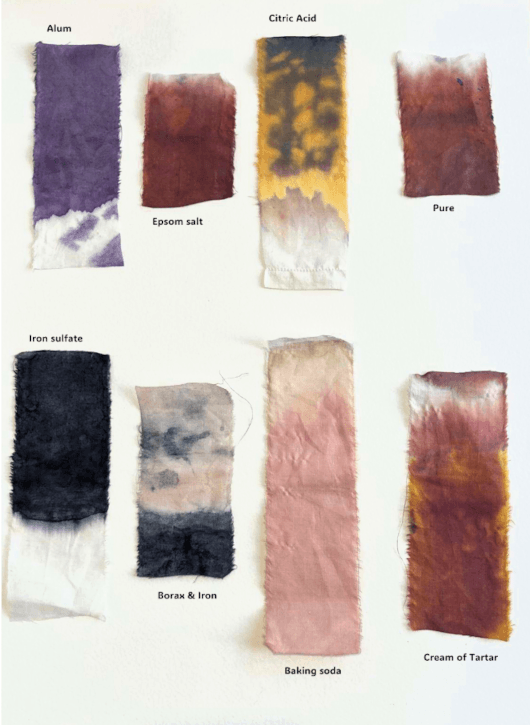
Campeche on silk
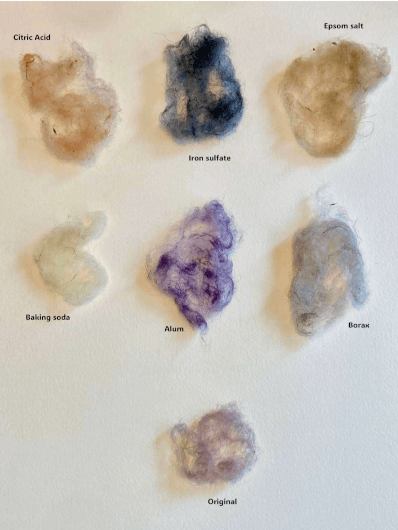
Campeche on wool fibres
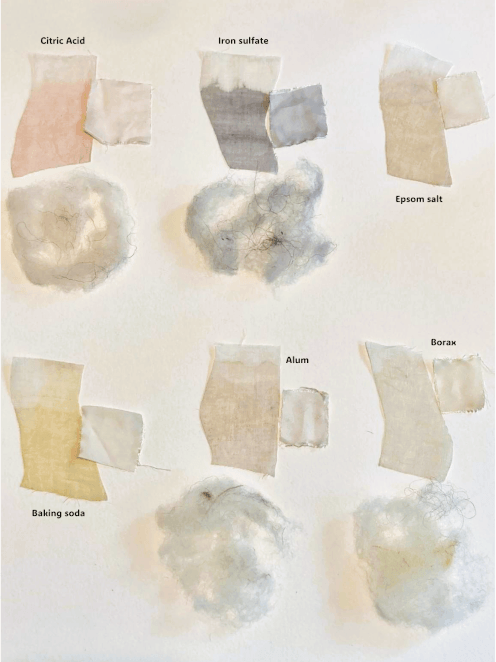
Dark purple rose petals
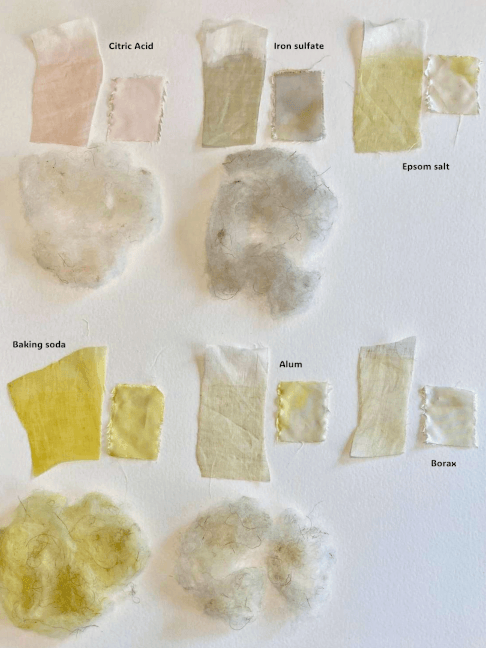
Light pink rose petals
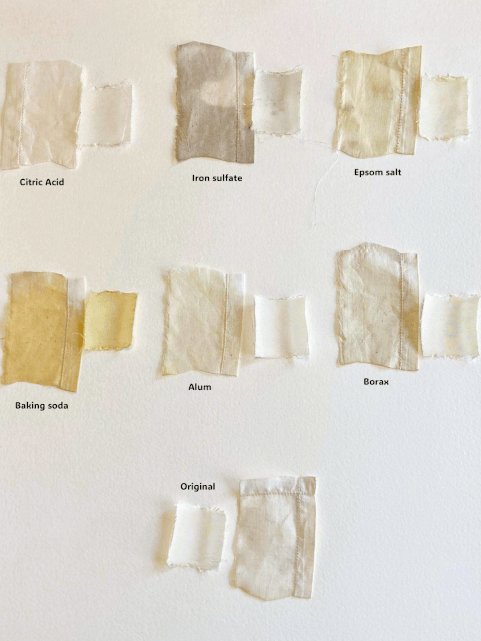
Curly willow leaves and branches
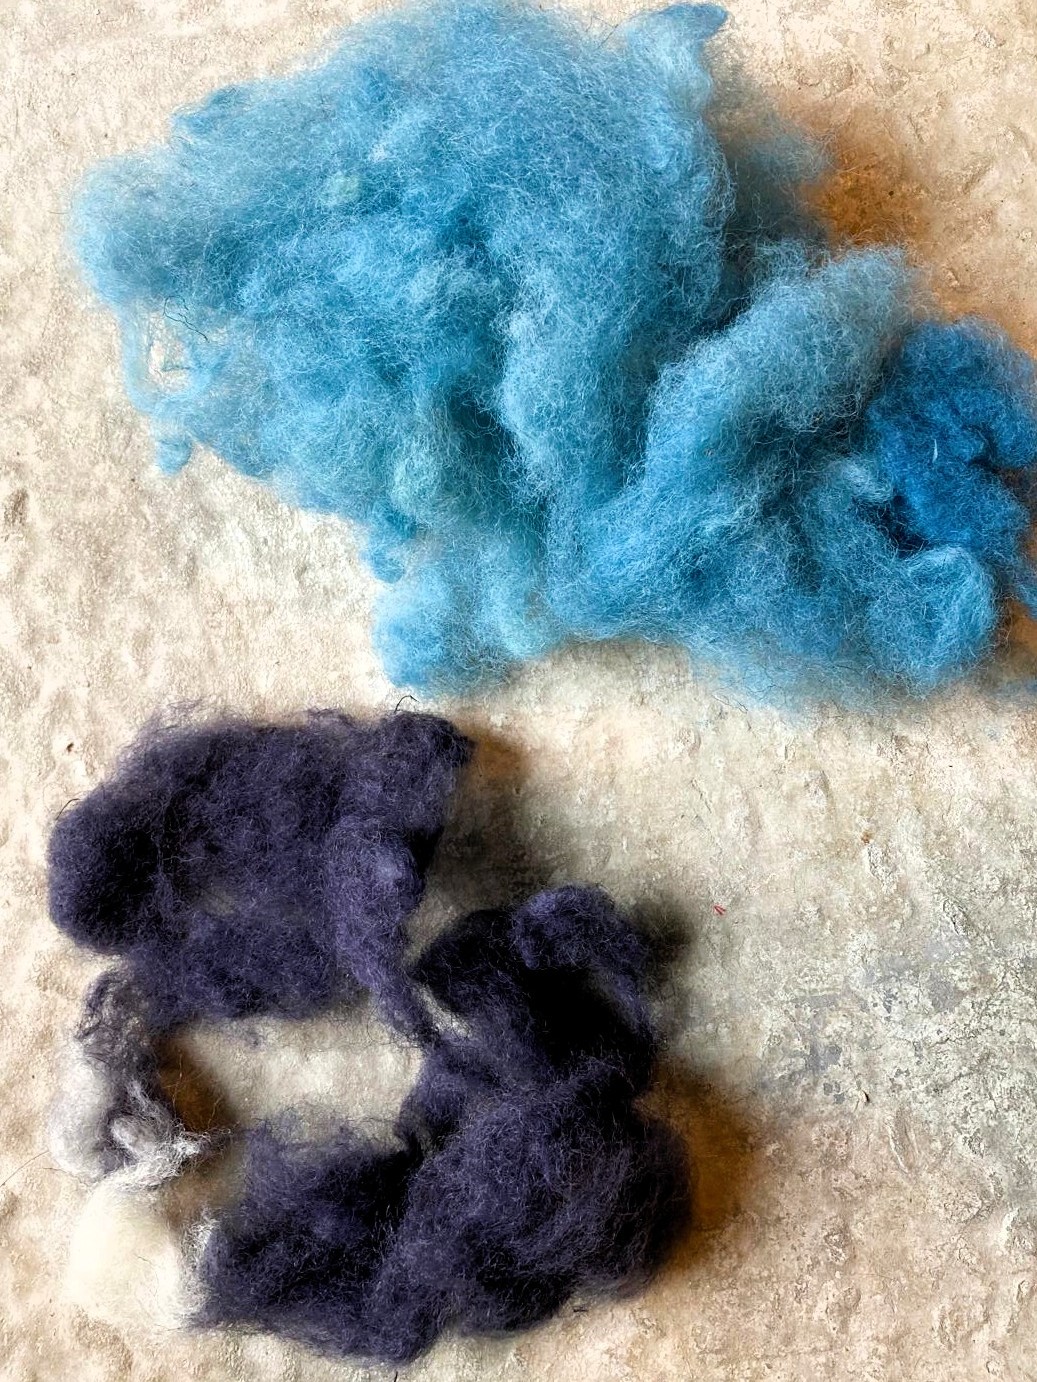
Top: indigo / Bottom: campeche - alum & iron sulfate
6. Weekly reflection & critical thinking
6.1. Learnings
- Although there might be materials that contain a lot of colours in real life, they might not transfer much.
- Dyers worldwide for centuries have tried and tested just about any plant there is. I will not be reinventing anything and can save precious time by reading up on previous experiences if I want good colour results. However, I can base my dying experiences on a more conceptual approach, where the journey itself is the main interest and where there is a storyline around the colours found.
6.2. Questions
This week I had many questions that kept arising and which were mostly related to our responsibility towards living matter. I make no difference whether the living organisms are plants, bacteria or fungi.
- How do I consider a living organism when working with it?
- How do I handle it responsibly and respectfully?
- What can I do with the leftovers after cooking to honour their offerings?
- How do I consider waste and over-consumption?
6.3. Connection with my life
I can see many ways of applying biochromes in my life, but I need to gather much more experience first.
The fields I am mostly interested in include:
- dyeing yarn to use in my crochet and embroidery work
- dyeing yarn and textiles to use in my mending and upcycling work
- dyeing textiles for costumes and installations
A little dying experiment to end with
I dyed a piece of cotton with a freehand method.
- First, I splashed drops of Campeche with citric acid onto it
- Then, I rolled it around a swatch of freshly dyed wool that had been bathed in campeche with an iron sulfate & alum mixture
- Let it sit for an hour, then unroll and let dry
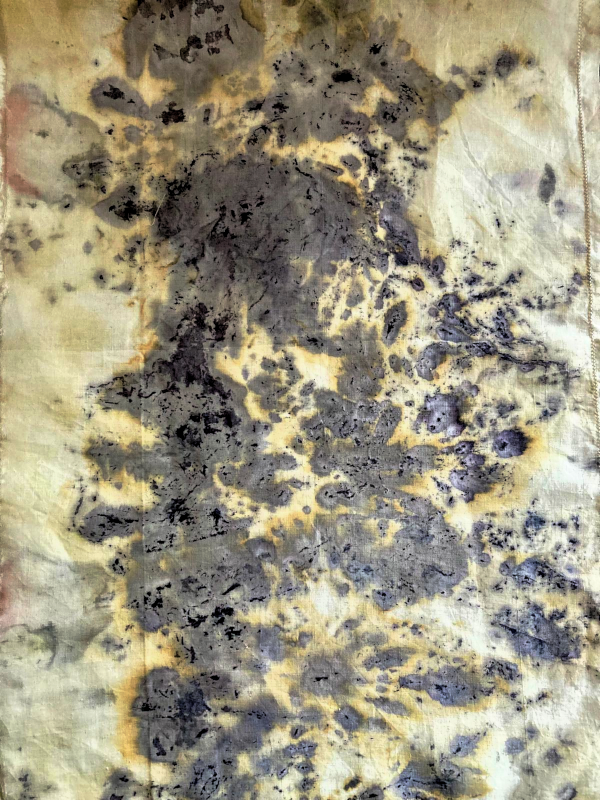
freshly dyed
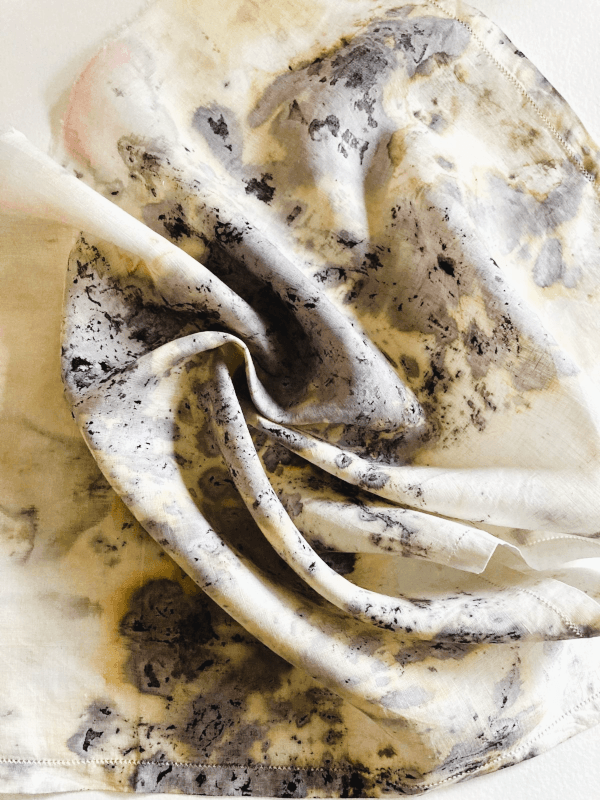
rinsed and dried