Computational Couture
1. Objective
This week, we entered the world of computational design as a means of creating textiles and wearable objects, while learning the fundamentals of 3D printing. We also took our first steps into parametric modelling with Blender, with the aim of designing our own parametric models. It was to become a very computer-heavy week for me, where my nerdy side got to have a proper fiesta!
As with every Fabricademy assignment, my interest wasn't limited to learning new software or machines. I wanted to explore how these digital processes could become part of my existing textile practice, opening up new possibilities for bringing computation and digital fabrication into dialogue with my craft and artistic language.
2. Inspiration
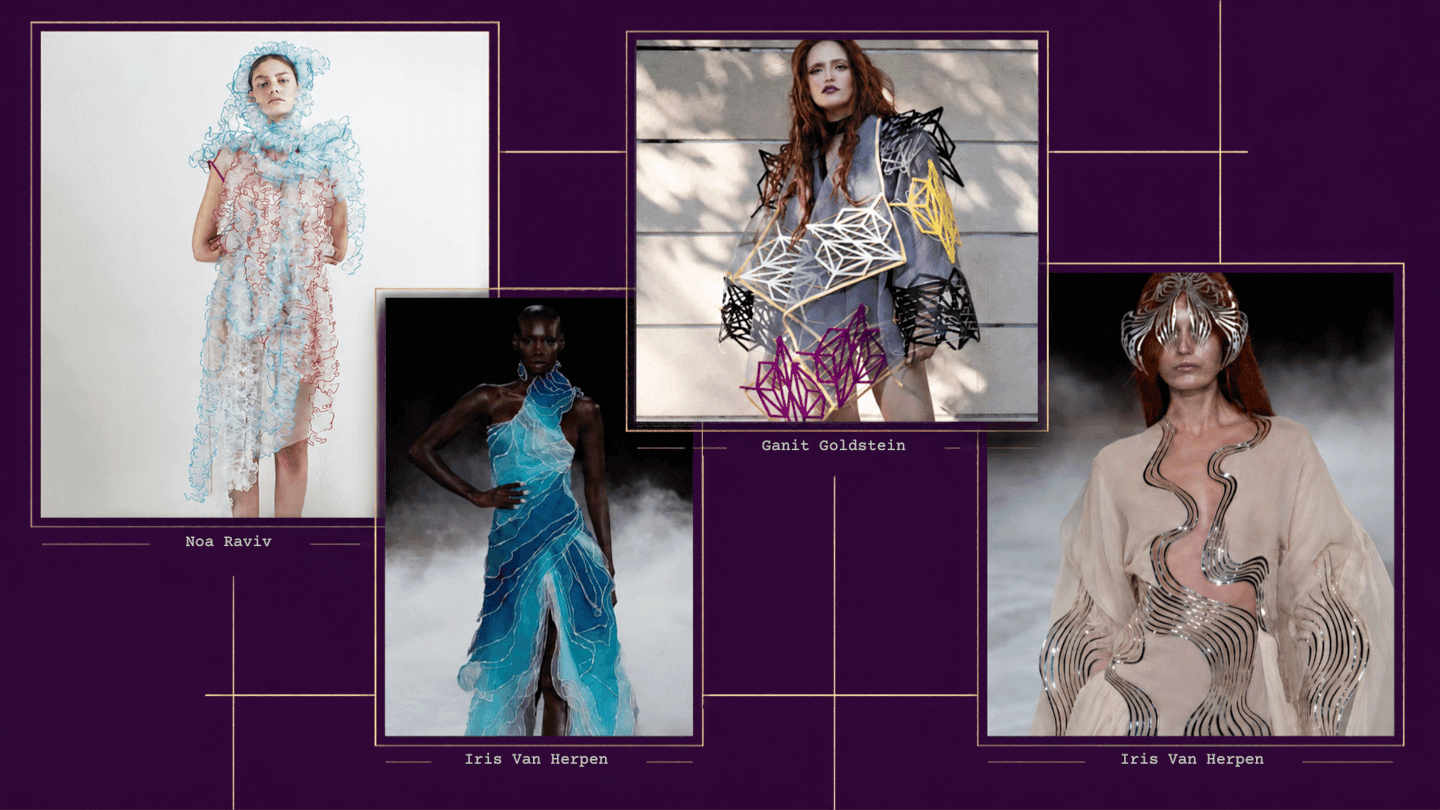
This week's introductory tutorial was given by Julia Koerner, whose impressive trajectory opened up a fascinating view into the possibilities of computational design, architecture and fashion.
While discovering different applications of 3D printing, I felt a growing tension around the use of plastic as a textile material. Coming from a practice rooted in natural fibres, recycling, upcycling and visible mending, I do not wish to replace textiles with plastic. However, I became fascinated by the possibilities of using printed structures as an additional layer: adding new forms, movement, decoration and functionality to already existing fabrics.
The strong focus on fashion also raised questions that are already present in my practice: how can we use new technologies while remaining conscious of the environmental impact of producing more objects? If I was going to introduce plastic into my work, I wanted it to serve something meaningful.
Lace from Camariñas in Galicia, and ancient celtic symbols.
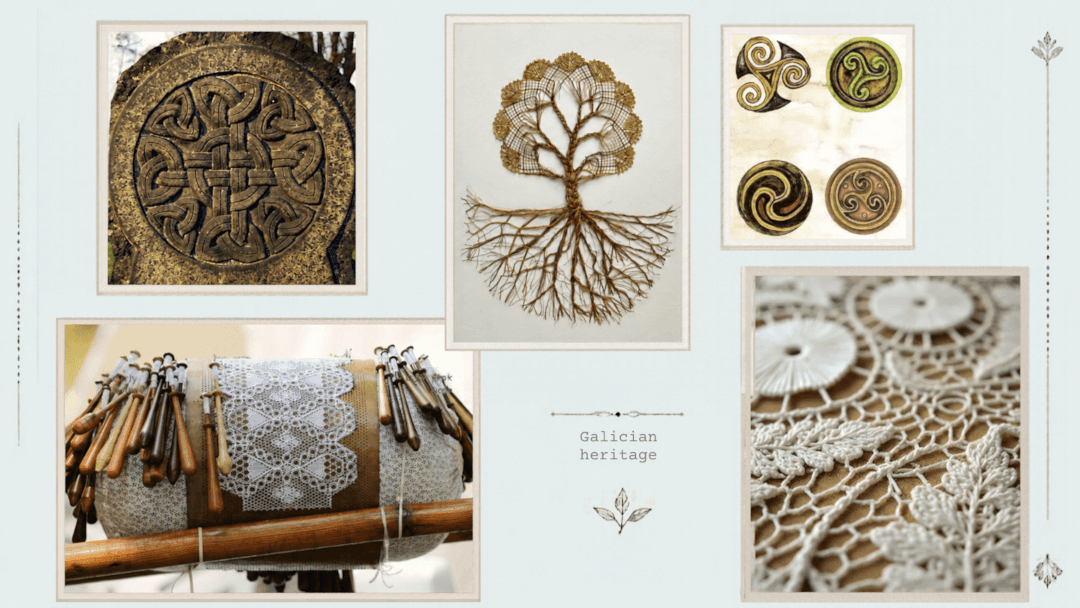
My first path of exploration came from my own roots, through Galician lace traditions and Celtic drawings. I was inspired by the relationship between repetitive structures, flexibility and movement.
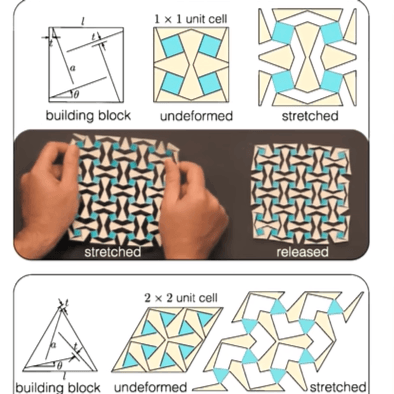
This led me towards auxetic patterns: geometries that can expand and transform through their structure. I became curious about translating this principle of elasticity into a more rigid material such as 3D printed plastic. This gave birth to the idea of an elastic mending patch.
The second experiment grew from a more personal and playful place. Rather than creating an object that would remain a simple prototype, I wanted to make something that would be used and cherished. While watching my daughter prepare for Halloween celebrations, the idea emerged to create a wearable piece together: a computationally designed element for her otherwise hand-made costume.
Both experiments became ways of exploring the same question: how can digital fabrication enter a textile practice based on care, reuse and mindful making?
3. Tools
List of all tools and materials used this week
Software
• Blender — parametric modelling and digital design of Halloween “Claw” structures
• Geometry Nodes (Blender) — procedural generation and variation of the claw arrangement
• Inkscape - vector design and preparation of auxetic structures
• Bambu Studio — slicing and preparation of the 3D print for the Bambu printer
• Prusa Slicer - slicing and preparation of the 3D print for the Prusa Mini+ printer
Hardware
• Prusa Mini+ 3d printer - used for printing auxetic patch experiments
• Bambu Lab A1 Mini 3d printer - used for printing the parametric claw structures
Materials
• TPU Flex filament - used to explore flexible and responsive auxetic structures
• PLA basic filament - used for the printed claw structures
• Machine-knit fabric strips & mesh fabric strips — integrated into the print through layer pausing and later sewing
• Red and sparkling nail varnish - for the final (bloody) touch on the claw tips
Other tools / techniques
• 3D printing (FDM) — additive manufacturing process used to create the wearable elements
• Layer-pausing technique — used to embed textile materials inside the printed structure
• Hand sewing — final integration of printed pieces into textile structures
4. Process and Workflow
4.1. A Patch That Wants to Move
4.1.1. Exploring auxetic structures for visible mending
While looking into Galician lace traditions and Celtic drawings, I became fascinated by repetitive structures and the way geometry can create movement. Auxetic structures are all about movement and repetition, and I was immediately fascinated by their reactivity to stretch. While researching them further, I soon saw a possible connection with visible mending, as areas most prone to deterioration are usually the ones exposed to stretch.
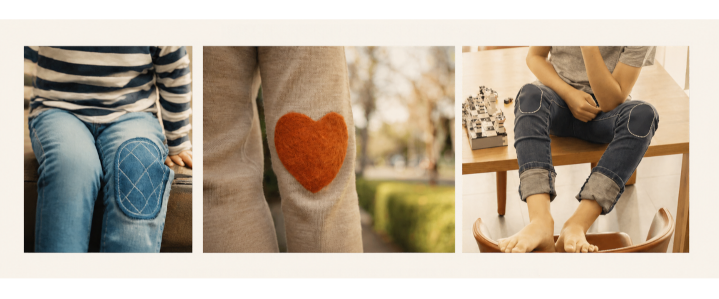
Could a 3D printed structure become a flexible patch for areas of clothing that experience movement and stress, such as elbows, knees or other bendy areas, and sublimate the repair at the same time?
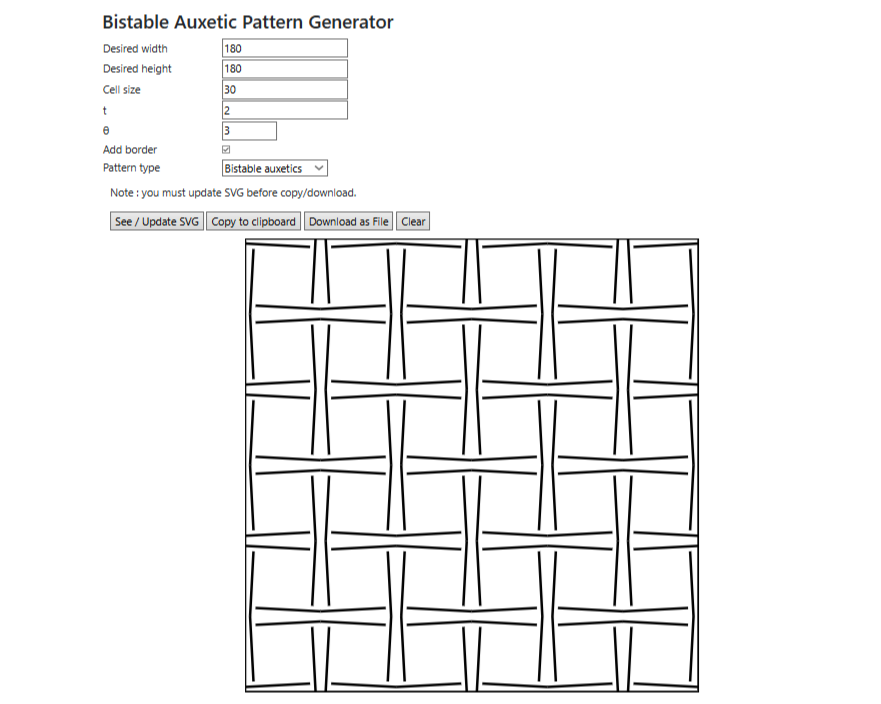
I generated different auxetic structures using the Fab Academy digital mechanics resources and decided to explore a bistable auxetic design. I was mostly attracted to its square geometric appearance and its potential for beautiful movement when stretched.
4.1.2. Preparing the design for printing
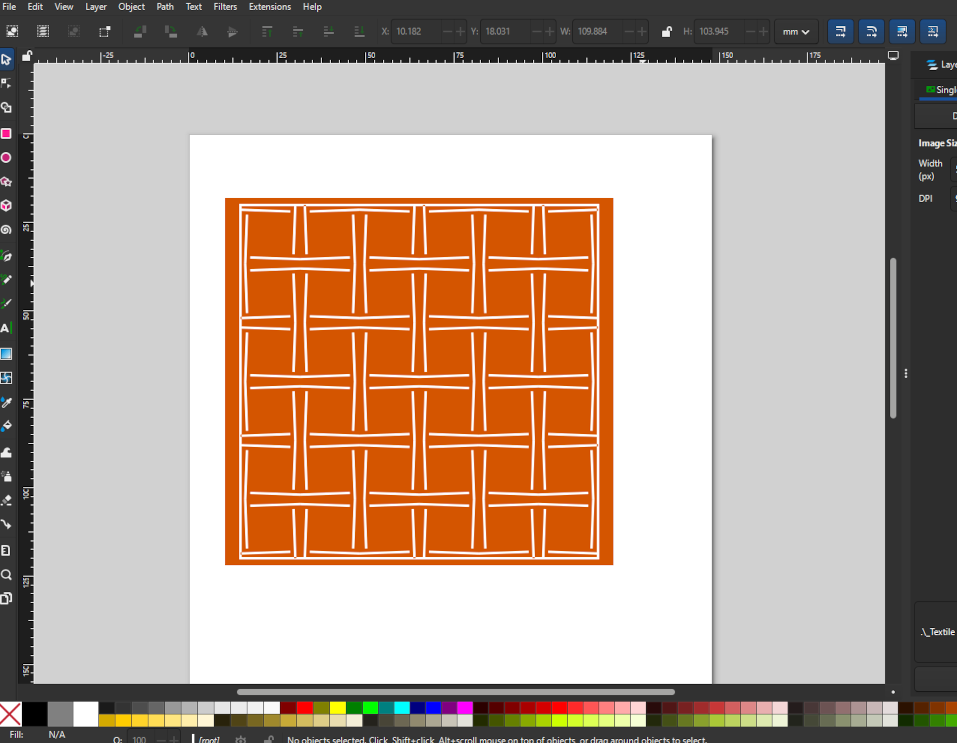
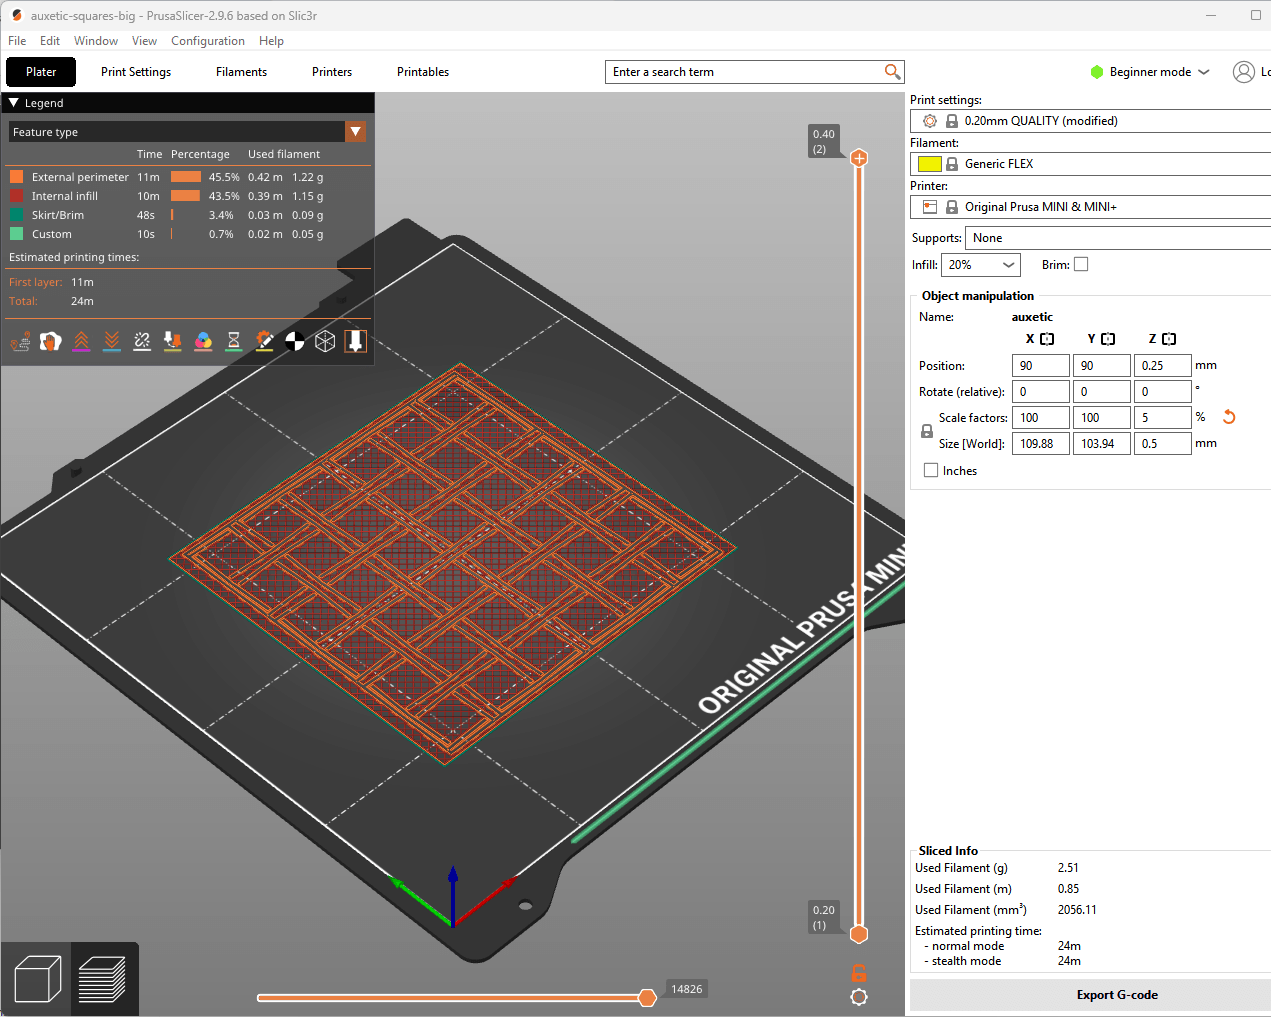
I imported my chosen structure into Inkscape and prepared it there for the 3d printer. Once done, I saved it as an SVG file and opened it in Prusa Slicer, where I changed the Z-value to 0.5mm to change its thickness.
Inkscape workflow
I made a little workflow of the steps needed to turn the auxetic shape into a 'negative' image, that a 3d printer would understand.
Prusa Slicer print settings:
3d printing settings
-
Quality: 0.20 mm layer height
-
Size Z (thickness) : 0.5 mm
-
Filament: Generic FLEX TPU
-
Infill: 20% rectilinear
-
Perimeters: 1
-
Horizontal solid layers: none
-
Skirt: 0 mm
Download fabrication files1
4.1.3. First prototype: testing the auxetic behaviour
The first print was made as a standalone object, without fabric integration.
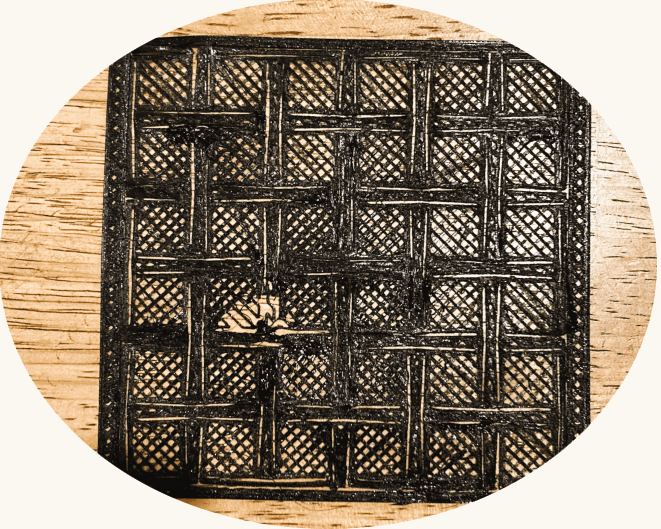
Although the printer struggled slightly with the flexible TPU filament and created some imperfect areas, the result was successful. Most importantly, the auxetic movement worked beautifully.
Auxetic Stretch
The structure expands and transforms, confirming the potential of this approach.
4.1.4. Integrating the print with textiles
The next question was whether this movement could be preserved when combined with fabric.
The first experiment was printing directly onto mesh fabric. The result was surprising: although the printed structure was attached successfully, the auxetic movement disappeared. The fabric stopped the expansion of the structure.
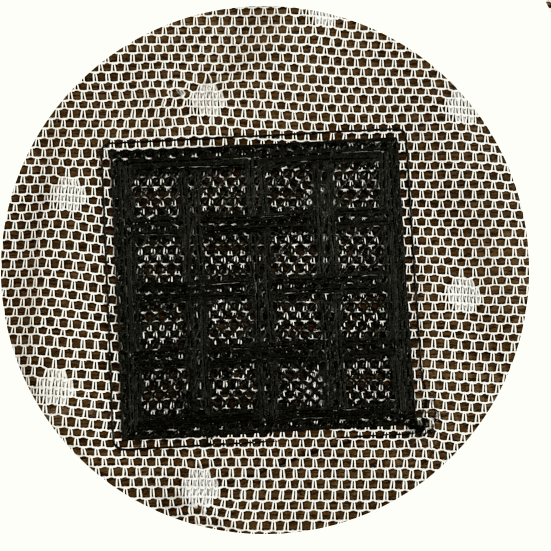
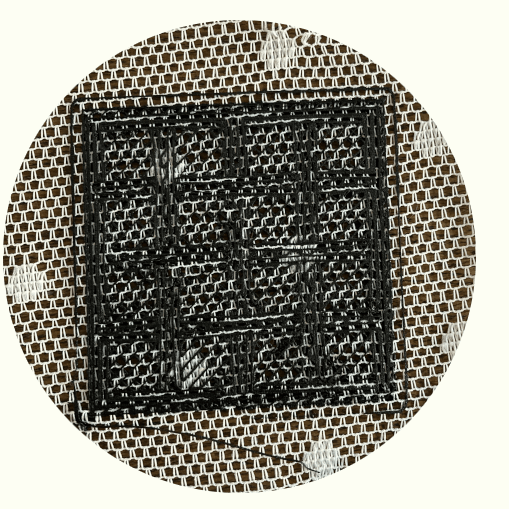
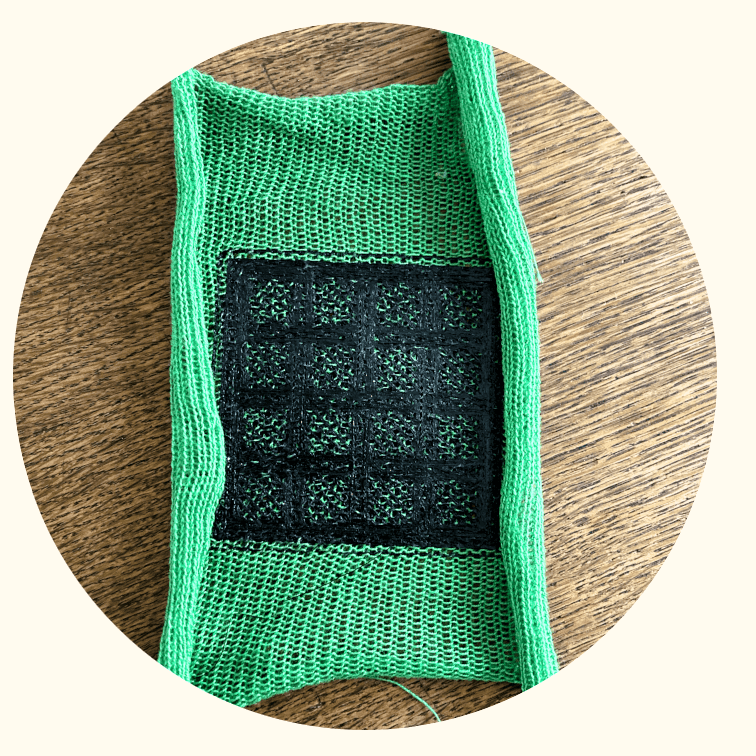
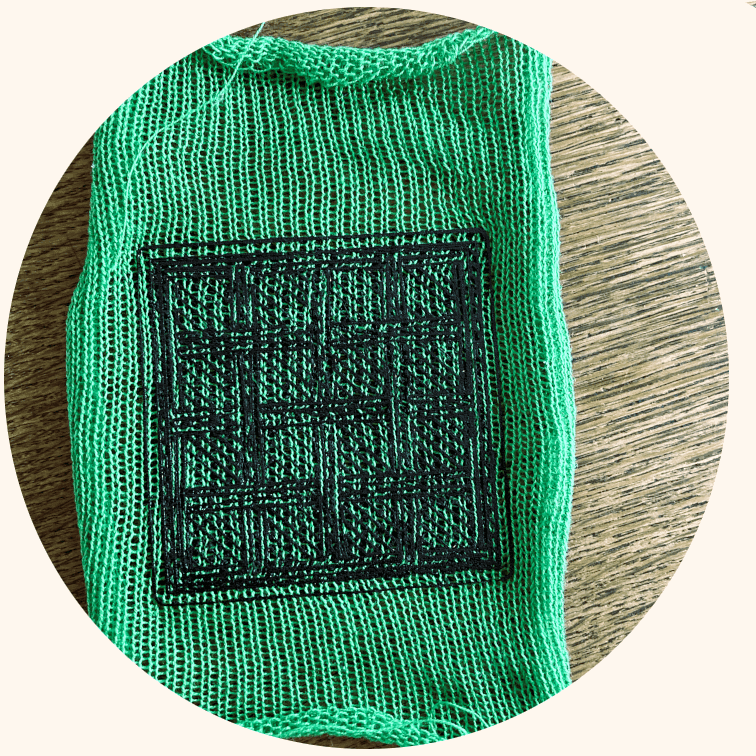
Wanting to see whether a much more elastic fabric would change things, I wanted to test printing it onto a stretch fabric and decided on thin knit fabric. With Stephanie's help we made some machine-knit samples I could then go off and experiment with.
Knitting my fabric
original music by Adam Skinner
The knit fabric needed to be extremely thin. If it was too thick, the printer nozzle would catch on the fibres during printing. Printing on a very thin knit fabric was in the end successful, but once again, the auxetic movement was lost, despite the fabric's great stretch quality.
4.1.5. Final trial: separate structures, combined materials
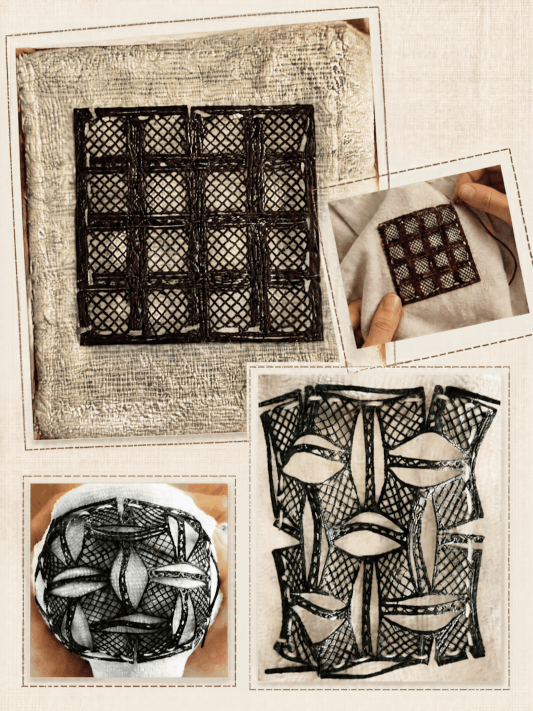
The last experiment was to hand-sew a printed auxetic patch onto a stretchy textile patch. This approach preserved the flexibility of both materials and allowed the printed structure to move as intended.
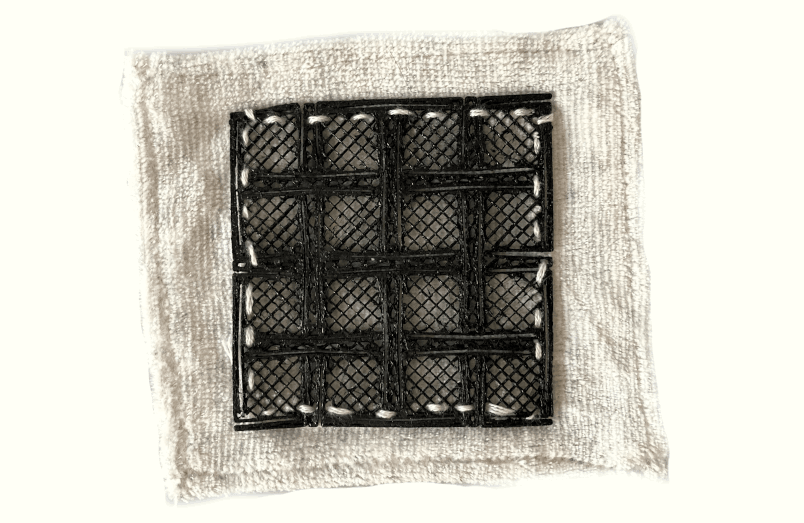
Elasticity tests
The final challenge is now to find the right garment or object to give this patch a meaningful life — ideally a piece that benefits from both repair and movement.
4.2. When algorithms grow claws
4.2.1. From geometry nodes to wearable storytelling
The second experiment emerged from a very personal and playful starting point: creating an accessory for my daughter's Halloween costume. The original idea was a thorny cape, but after discussing possibilities together, my daughter quickly made it clear that a clawed-up headband was the way to go - Girl knows what girl wants!
Together, we imagined a surreal accessory covered with organic claw-like structures with a touch of theatricality: blood-red tips painted onto the claws.
4.2.2. Creating the parametric claw
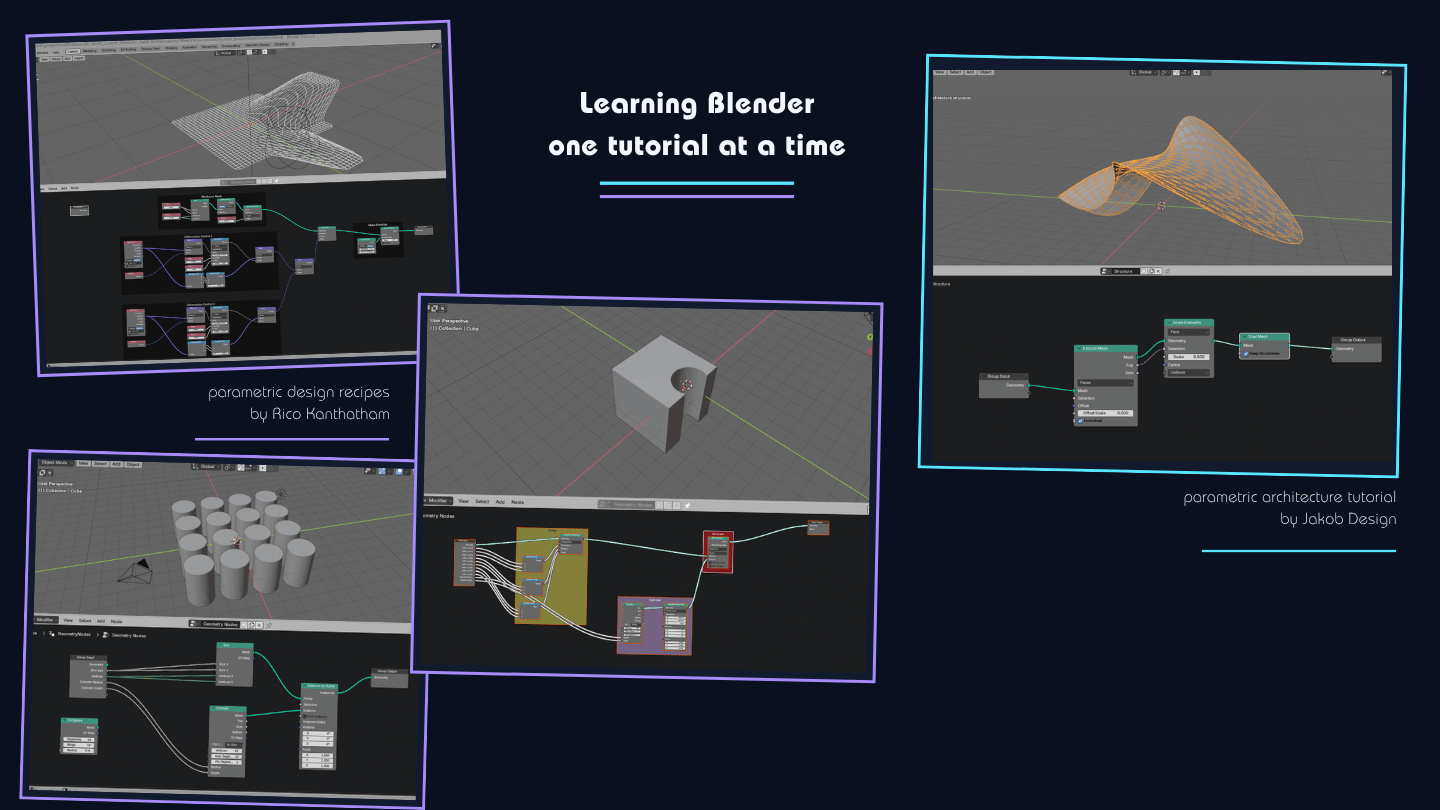
To kick-start our Blender adventures, we had a very rich tutorial by Rico Kanthatham, who shared some precious Blender geometry recipes with us. Before approaching my claw experiment, I tried his recipes and followed another tutorial on how to create architeture in Blender. I learnt heaps and bounds and felt ready to tackle my claw idea!
I started by designing a master claw in Blender, following a high-speed claw-drawing tutorial
From there, the exploration moved into Geometry Nodes. Rather than simply duplicating identical claws, I wanted each one to feel alive and organic with different sizes, slightly different rotations, and individual positions that would create a sense of growth and variation.
Using procedural controls, math nodes and a sine wave variation, I slowly discovered how to make the computer create variation for me. I made a sequence of small and large claws, each slightly different, arranged along a curved path to create an organic composition.
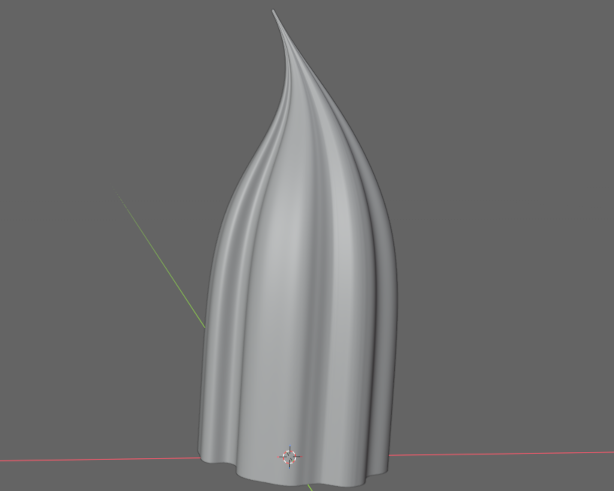
master claw
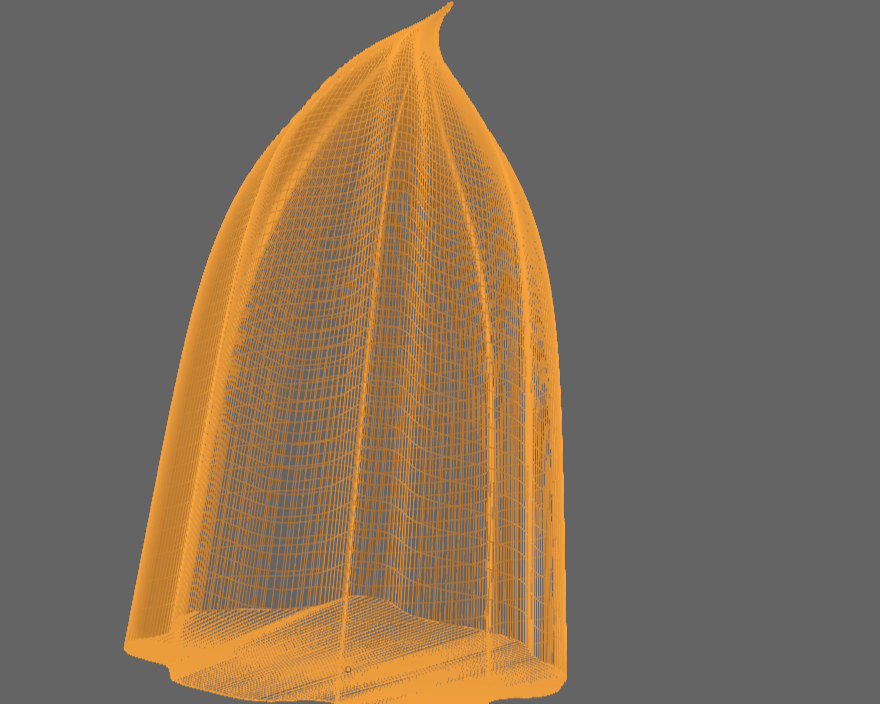
wireframe view
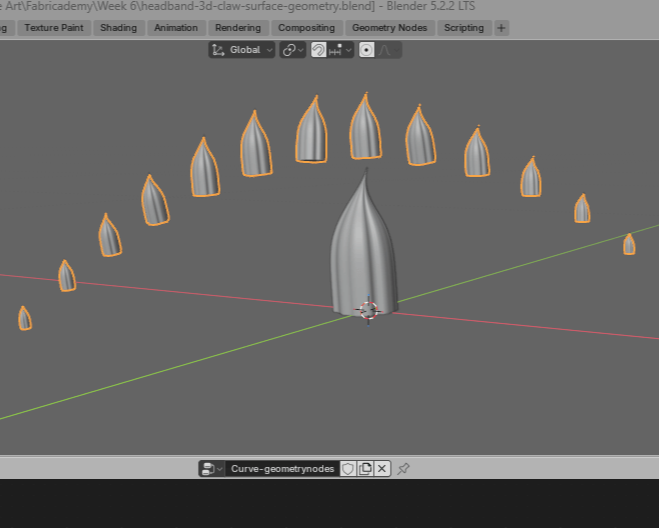
claw path
What nodes I used and why
As it was a super steep learning curve for me to grasp the meaing and functionning of all these geometry nodes, I started making myself a simplified list of nodes.
| Node Name | What it does | What I used it for |
|---|---|---|
| Curve to Points | Places points along a curve | Deciding where each claw would sit |
| Instance on points | Copies an object onto every point | Creating all the claws automatically |
| Scale Instances | Changes the size of each copy | Making some claws small and others large |
| Rotate Instances | Rotates each copy | Giving every claw a slightly different tilt |
| Sine | Creates a smooth wave | Making the claw sizes rise and fall naturally |
| Spline Parameter | Knows where you are on the curve | Letting the size change from one end to the other |
| Realize Instances | Makes copies into real objects | Preparing the claws for editing and printing |
This was my first real experience using parametric modelling as a design tool. Instead of manually creating each element, I created a system that could generate and control variation.
And what an awesome sensation when, after many experiments, the system finally started to behave!
My working nodes recipe
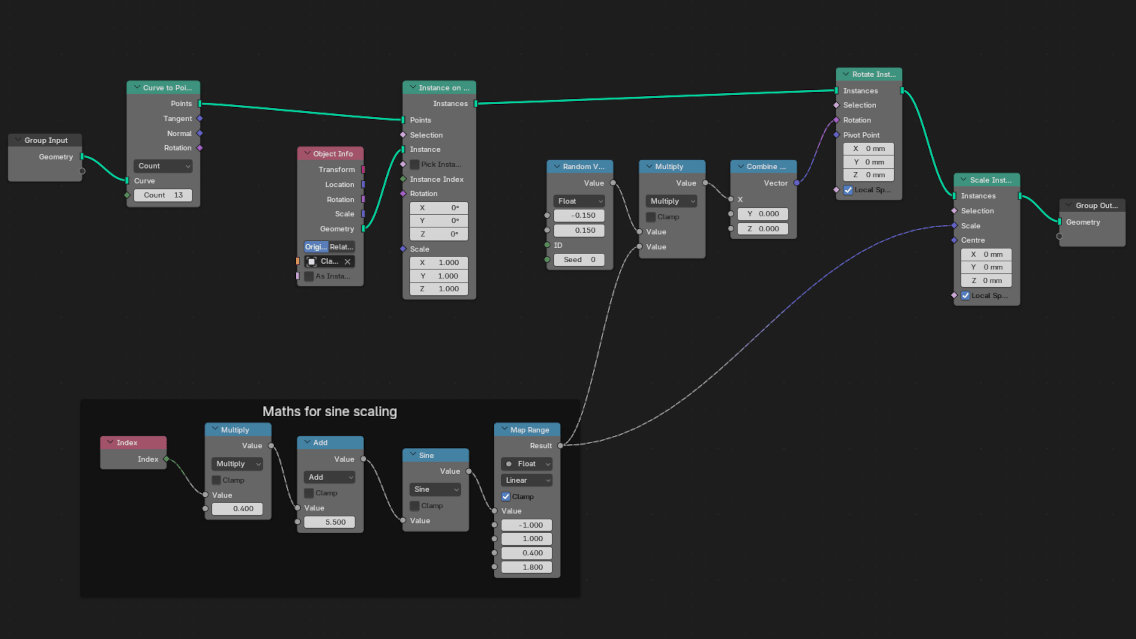
4.2.3. From beautiful geometry to printable object
First, I needed to adapt my claws to the reality of the printing process. The claws had been beautifully arranged along a curved path, each one slightly tilted and rotated. This looked great digitally, but the printer needed every claw to meet the flat printing surface correctly, as I wanted to print directly onto a flat sheet of fabric.
The challenge was to preserve their organic personality while making them printable. Instead of flattening the claws and losing their individual tilt and movement, I used Boolean Difference to cut each base parallel to the printing surface. I then snapped the claws onto a flat plane, allowing them to keep their organic orientation while creating a stable contact point for printing.
Once this was done, I was ready to export and print. But…
My biggest challenge appeared when moving from Blender to fabrication. In Blender, the claws looked complete, but Bambu Studio did not recognise them as printable objects and would therefore not allow me to slice them. The reason was that the claws were only surfaces rather than solid, closed meshes.
This became an important lesson: a visually complete digital model is not necessarily a printable object.
After exploring many possible solutions and facing a few frustrations, I finally found a surprisingly simple way forward: creating solid mesh bases underneath each claw. These bases provided the necessary volume for Bambu Studio to correctly interpret the objects. Each claw was then joined with its base, transforming the digital surface into a real printable object.
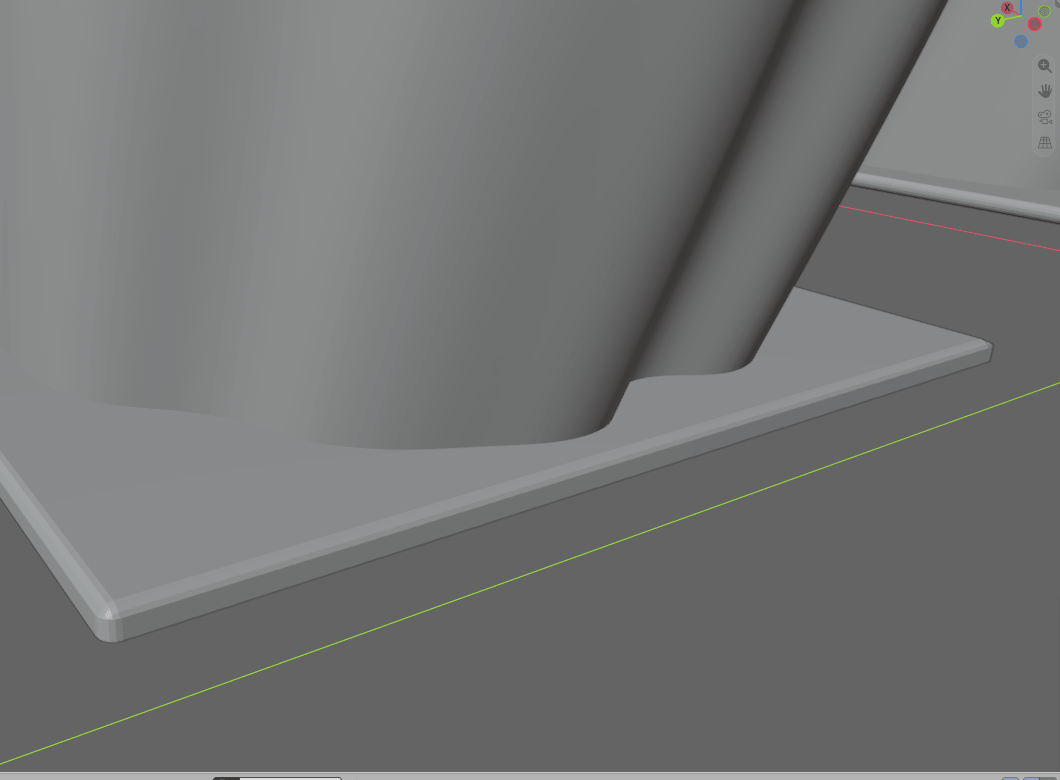
As a final touch, and to turn a technical necessity into part of the design, I bevelled the edges of the bases. The supports became small organic sockets for each claw, giving the final object a more intentional and integrated appearance.
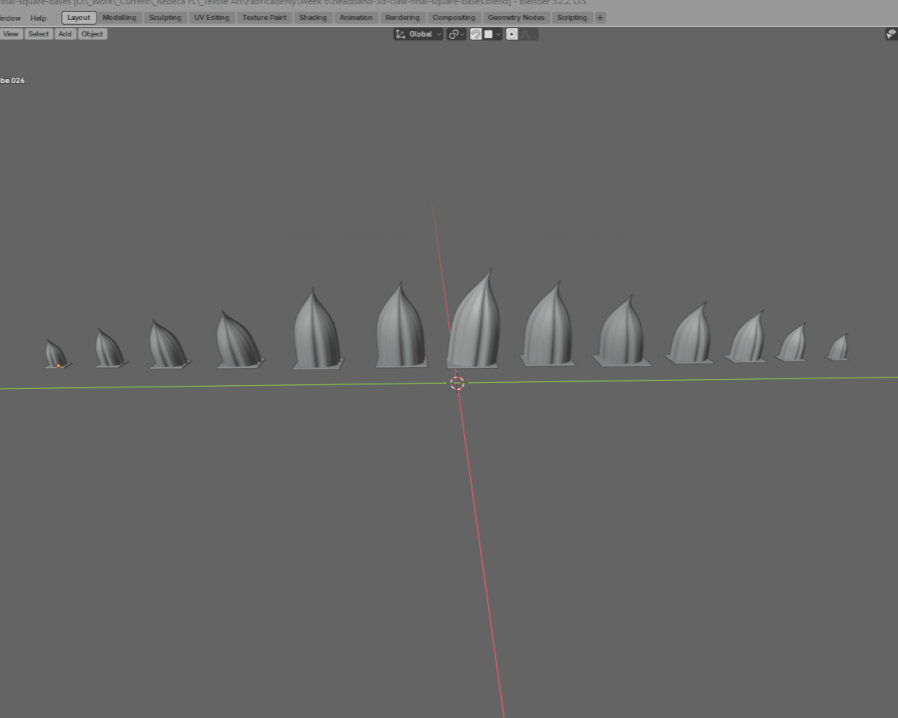
Workflow in blender to prepare the print
- separate each claw into individual objects
- align them onto a flat printing surface
- join them with individual supporting bases
- export them as selected STL objects
These are some precious Blender fabrication tools that I used all the time:
- snapping objects to surfaces (magnet icon in the 3D Viewport’s header)
- separating // joining meshes (P in edit mode // ctrl J)
- x-ray view (alt Z)
- orthographic views for precise positioning** (numpad 1, 4, 7)
4.2.5. Printing and textile integration
The moment of truth had finally arrived: could the digital claws become a real textile object?
The final claws were printed in black PLA filament on the Bambu Lab A1 Mini. To integrate the textile element, I paused the print after the third layer and carefully inserted a piece of white mesh fabric between the printed layers, securing it to the print bed with small magnets.
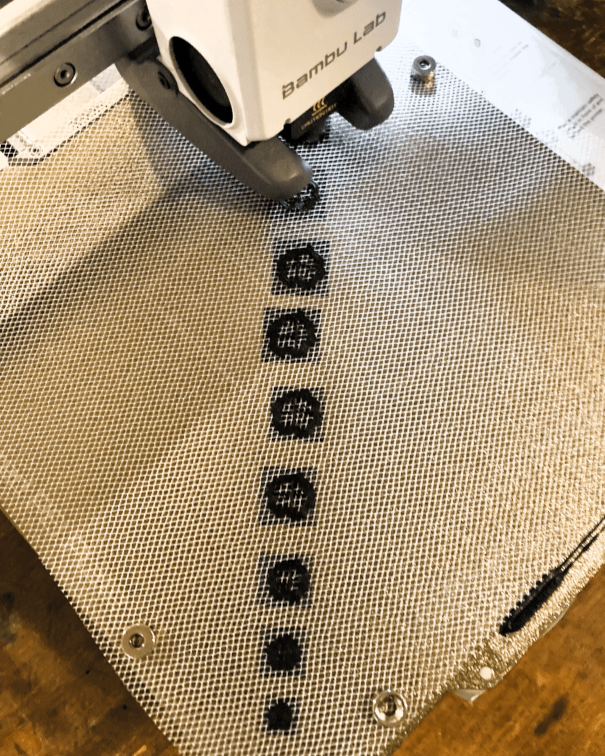
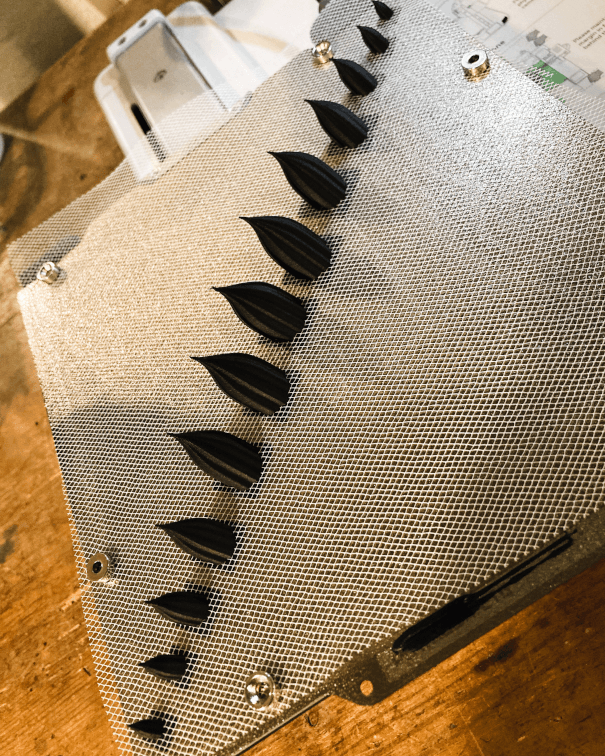
Thirty minutes later, the claw strip emerged from the printer as a successful combination of plastic and fabric — a small but very satisfying first experiment in textile-integrated 3D printing.
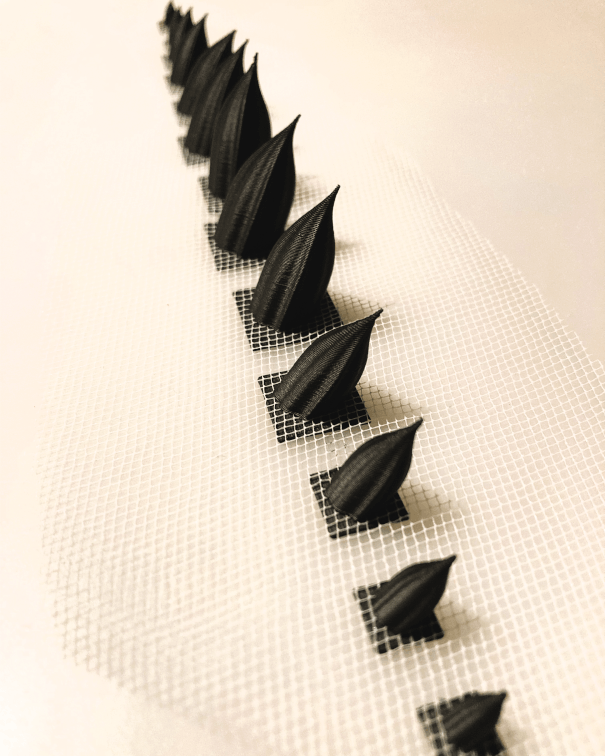
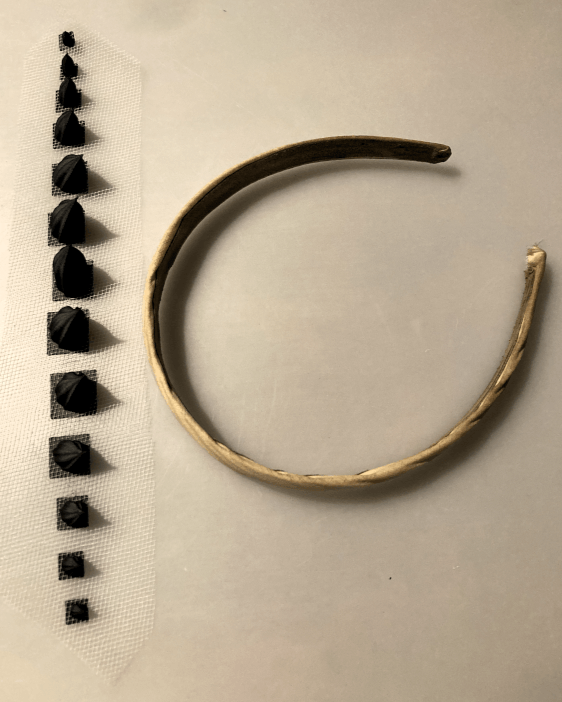
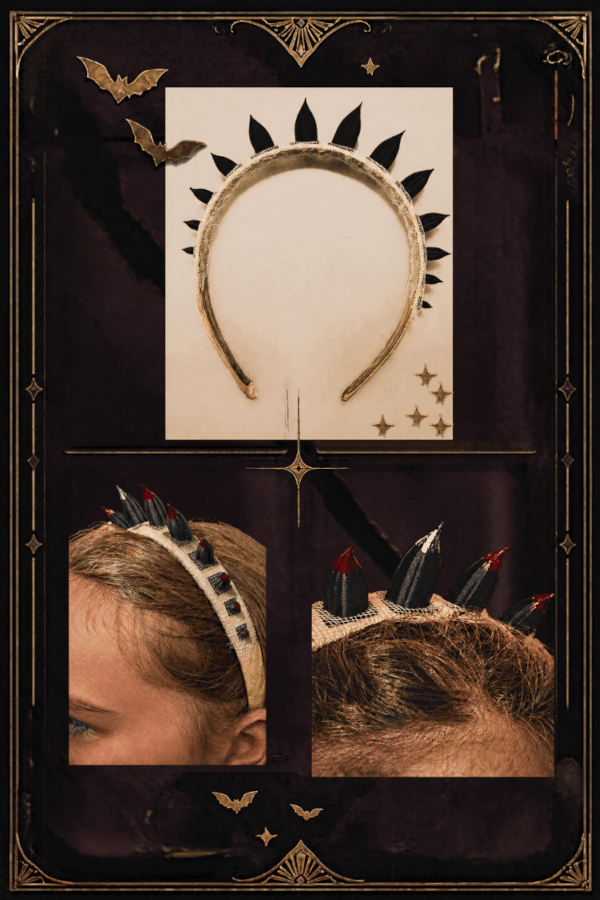
The final step was bringing the piece back into the handmade world. I hand-stitched the printed strip onto my daughter's headband, transforming a digital experiment into a wearable object.
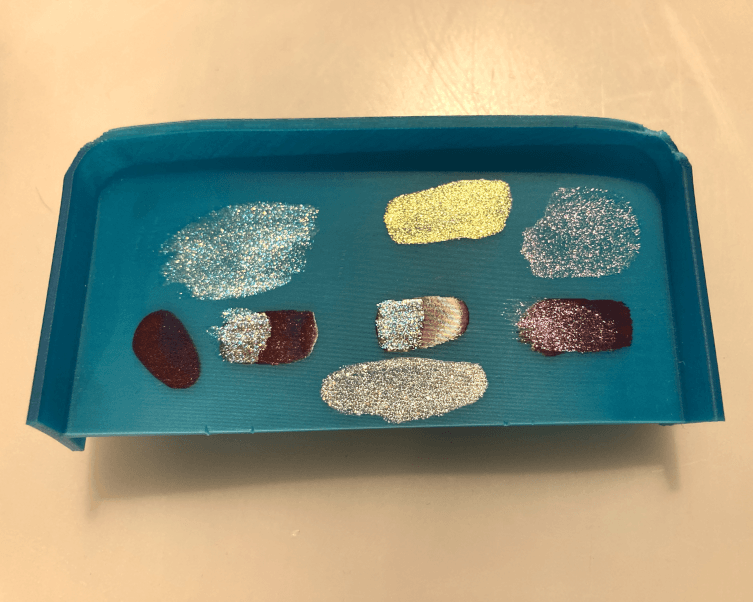
For the finishing touch, my daughter and I tested different nail varnishes on a discarded printed piece before choosing the perfect colour. Together, we painted the claw tips, adding the final theatrical (and slightly creepy!) bloody detail.
Now all that remains is waiting for Halloween…
5. Results
5.1. The Bendy Mender
A visible mending patch that can be used on its own or attached onto a piece of stretch fabric. It is meant to be sewn onto damaged areas or items that are exposed to stretching such as knees, elbows, underarms, bags... Whenever the piece is stretched, the patch comes into action and transforms beautifully. The idea being that a weakened area is both reinforced and transformed into a highlight of a garment.
5.2. Halloween claws
A fun, simple project of decorative claws that can be extended into a longer row and with infinite possibilities to manipulate the claws on the path. The geometrical maths allows to create arrangements and sizings that give an organic-looking row of objects based on a master object.
6. Weekly reflection
6.1. Learnings
This week opened up a completely new territory for me. I entered computational design with curiosity, but also with some hesitation around how 3-d printing could fit within my textile practice that is rooted in upcycling, reuse and hand-making.
My biggest learning was that a beautiful digital form is only the beginning of the process. A shape that exists perfectly on screen still needs to negotiate with materials, machines and fabrication constraints in order to become a real object.
Both experiments taught me through trial and error. The auxetic patch showed me how strongly the behaviour of a structure depends on its relationship with the material it is combined with. The claw experiment taught me that designing for fabrication requires a different way of thinking than designing only for the digital world. I also discovered the potential of parametric modelling as a creative tool. Instead of manually creating every individual element, I can design systems that generate variation, movement and unexpected results.
6.2. Questions
This week also raised many questions that I would like to continue exploring.
-
How can I integrate digital fabrication into a textile practice in a meaningful way, without simply adding more objects and materials to an already overproducing world?
-
How can printed structures and textiles work together in a way that respects the qualities of both materials?
-
How can I continue exploring computational tools while keeping the values that are central to my practice: care, reuse, repair, tactility and human connection?
I am particularly interested in continuing to explore the relationship between rigid and flexible materials, and how digital structures can create new possibilities for movement, adaptation and repair.
6.3. Connection with my life
What surprised me most was discovering that computational design could become an asset in my textile toolbox — another way of exploring materials, movement and storytelling.
The auxetic patch feels like a natural extension of my relationship with visible mending and repair. I am excited by the idea that a patch can become more than a repair mark: it can have its own movement, respond to the body, and bring new life to a garment that already carries a history.
The claw experiment opened another door that feels very connected to my performative and sculptural work. I can imagine creating playful textile creatures, unexpected additions to costumes, or sculptural elements that transform a space. Digital fabrication brings a new kind of magic: the possibility of growing, repeating and adapting shapes that would be very difficult to create by hand alone.
7. Fabrication files & References
-
Download all auxetic patch fabrication files ↩