BioChromes
Objective
Weekly assignment
Learning outcomes
- Research skills: the participant has acquired knowledge through references and concept development
- Technical skills: Master techniques mordanting, dyeing (botanical or bacterial), pigments
- Process skills: Anyone can go through the workflow and recipes, understand them and reproduce it
- Final outcome: the participant understands various stages of color as: dye, inks and pigment
- Originality: Has the research been thought through and elaborated?
Student checklist
- Include some inspiration: research on artists or projects that on natural/bacterial dyeing, local ingedients and resources
- Produce at least 1 natural dye with modifiers on fabric or yarn
- Produce 1 ink (not just dye on a paper) OR 1 pigment (recycling the dye bath leftover or creating one from scratch)
- Document your recipes, the ingredients and process and if there have been changes from what was provided, document your unexpected discoveries
- Submit some of your swatches or a catalogue of them to the analog material library of your lab (20cm x 20cm approx)
References, research & inspiration
This weeks' session was absolutely fascinating, mixing Fashion, Environment, History, and Chemistry all together to give a multi-faceted overview of BioChromes. To me, it felt like a topic that feels so simple on the outside but hidden within are infinite complexities.
Over the years, I discussed the topic of natural dyes with my textile designer friends and I have seen the Batik or Ajrakh artisans' work, but it was also from a place of curious, and enthusiastic audience. But, with this week's assignment, I finally get to be in the " driver seat." During the session, it was interesting to understand the use of colours in various prehistoric cultures, different interpretations of colours and colour palettes throughout the years, and evolution and impact of dyes on people and environment.
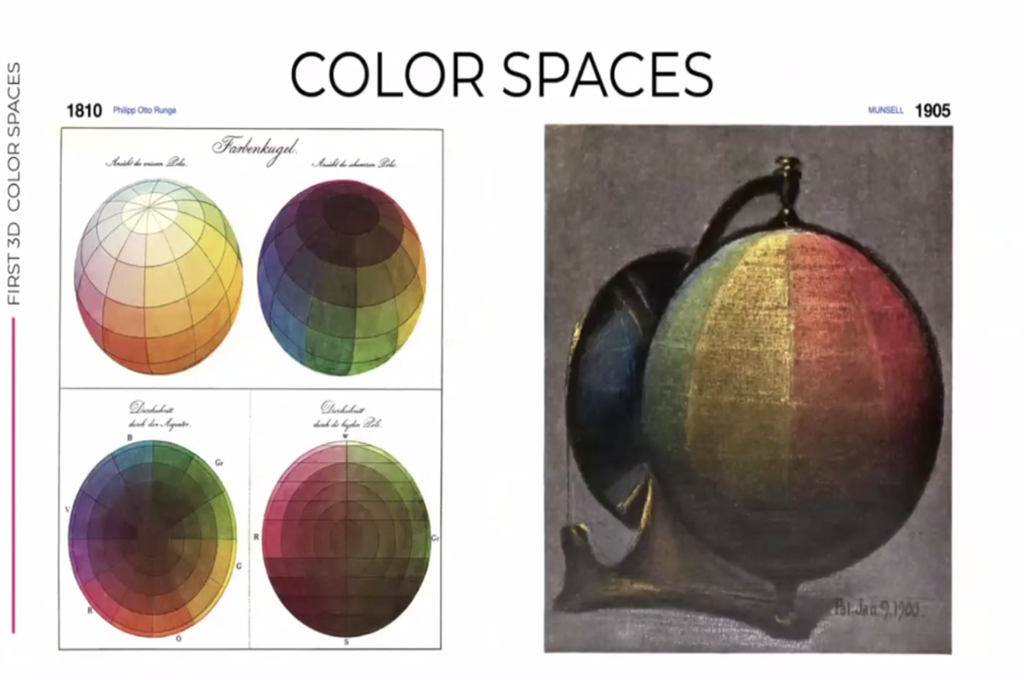
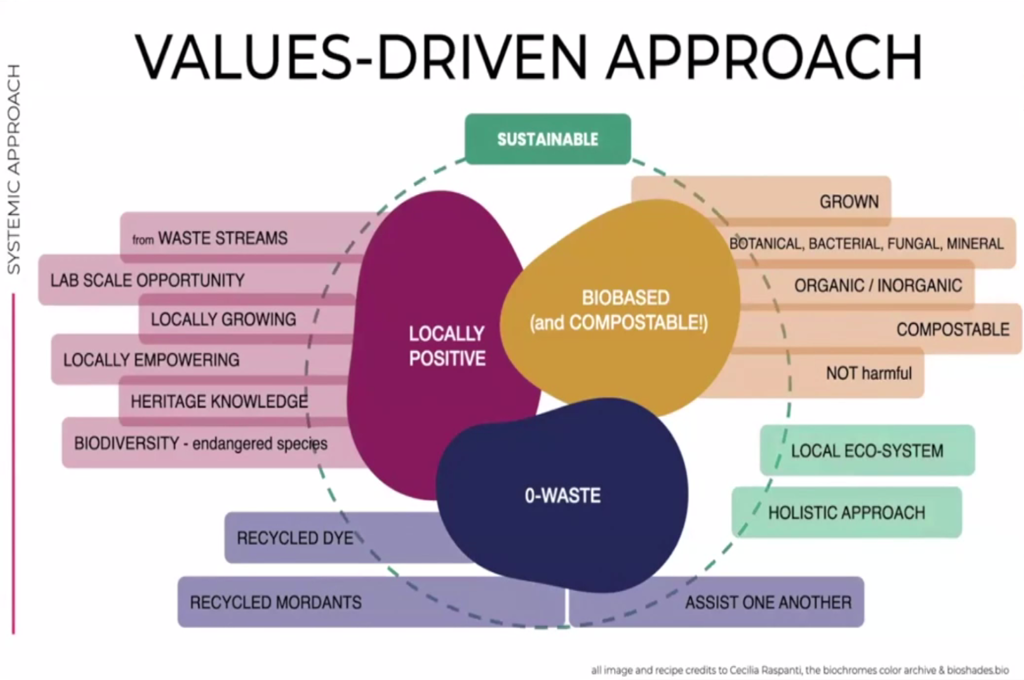
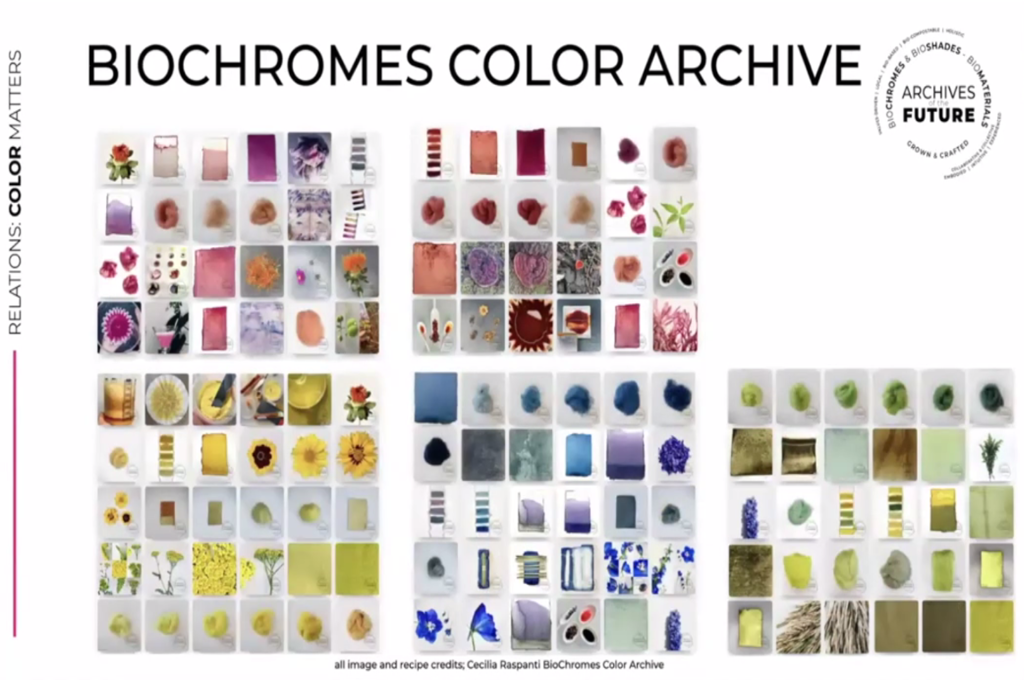
reference images from weekly session
The chemistry involved in the process was explained very well and that gave me a good foundational idea for brainstorming, but as the session progressed the sheer amount of combinations of materials and their behaviour was a bit overwhelming but it also gave me a sense of infinite possibilities. The work of Mirrium Rice with Mushroom Dyes and Jason Logan's Ink Studies were particularly interesting and definitely worth exploring in the future. Additionally, sticking to the themes from last week, the philosophy of zero waste being utilised in the processing of natural dyes was a good reminder of the overarching goal of the course.
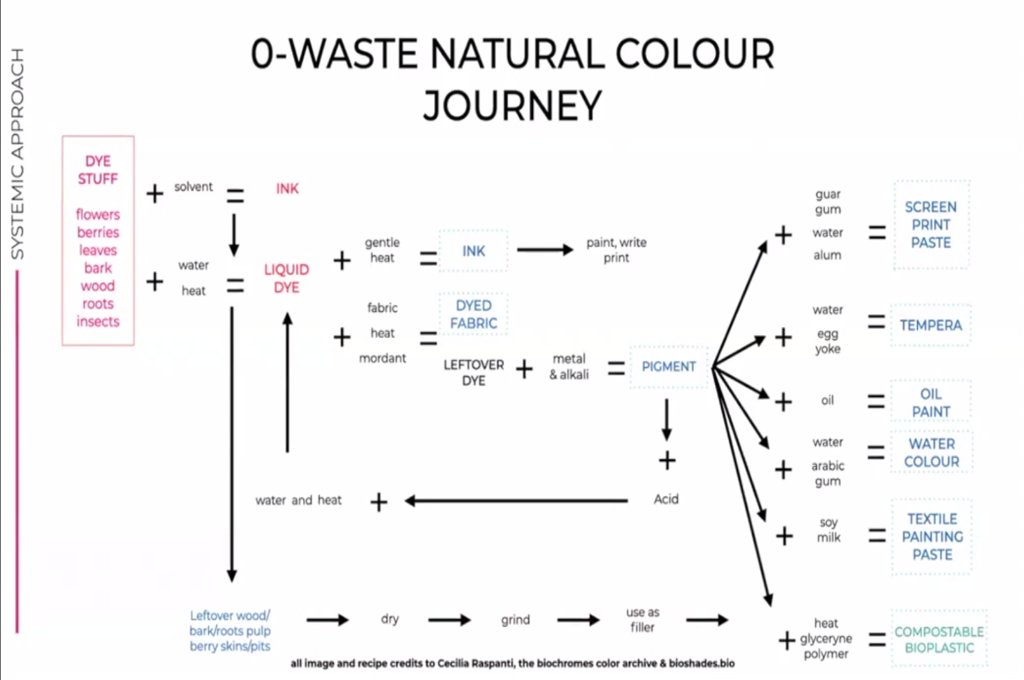
reference images from weekly session
In the next session, I was able to shape all the infinite possibilities from the first session into a solid workable action plan.
Ideation and Planning
Coming from the "Land of Colours", I thought I was going to have a lot to play around with. But, I started getting into the processes and most importantly the time requirements, I had to narrow down my scope. But since beginning the idea, one thing was fixed- to cover a good area in the field, I wanted to work with two fibres at least, one plant based and one animal based.
There were many options available in plant (cellulose) based fibres like cotton, linen, jute, and many more, out of all this, I decided to go for the straight-forward choice of cotton. On the other hand, the animal (Protein) based option turned out to be a challenge, since most places only had acrylic blends for silk and wool. But, after some exploration in the new areas and markets, I decided on a 100% Wool yarn as my second fabric.
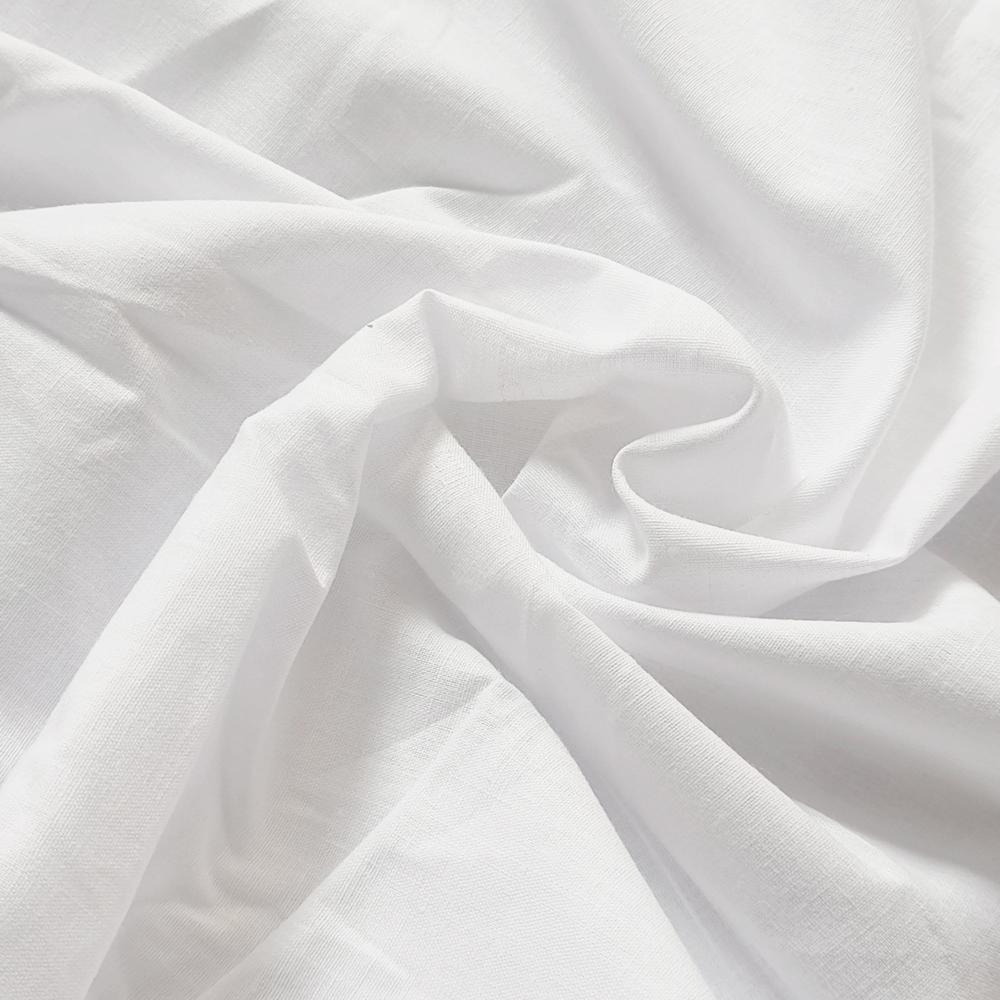
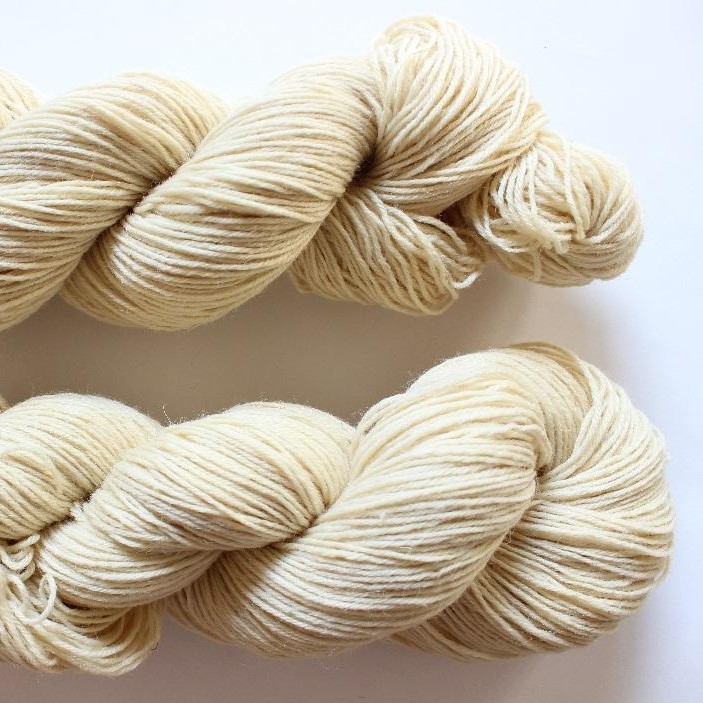
For the selection of colours instead of going for random ingredients for the most varied colour range, I decided to put a constraint of a theme on the choices, and thus, The criteria was decided to be Colours you can eat. And thus, to get the primary ingredients for the dyes only from grocery stores and vegetable and fruit shops.
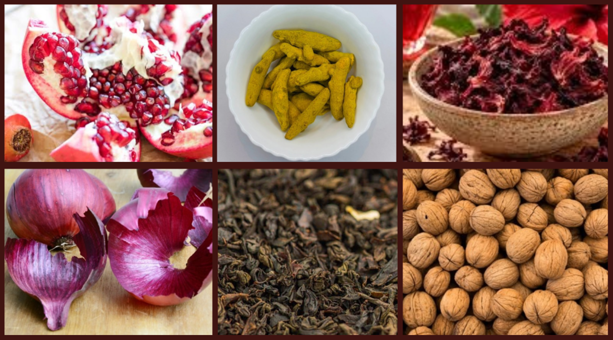
The final dye materials were as follows -
* Walnuts
* Pomegranates
* Turmuric
* Onions
* Hibiscus flowers
* Tea leaves
During the weekly session, one of the points of discussion was the effect of pH on the dyes, and their behaviour. To understand that I decided to test each dye material in a neutral (pH 6-7), acidic (pH 3-6), and alkaline (pH 8-11) environment.
Due to the setup available to me in the lab, the hot dyeing was not practical, and since I was going for cold dyeing, I decided to add an element of exposure time as well at 1hr, 6hr, and 24hr dip time.
With all that, these were the parameters being tested -
- Fabrics (2) : Cotton, Wool
- Dye Stuff (6) : Walnuts, Pomegranates, Onions, Hibiscus, Turmuric, Tea
- Environmental Conditions (3): Neutral, Acidic, Alkaline
- Dip Time (3) : 1hr, 3hr, 24hr
The total sample number is 2 x 6 x 3 x 3 which comes out to 108 samples
Now that this part was finished it was time to look into preparations and recipes for all these ingredients.
Terminology
Since this was a new field for me, the first thing was to understand some terminology to make the experience seamless between different resources. Some of the important terms are as follows -
-
Scouring - Scouring is the process of cleaning natural fibres or fabrics to remove dirt, oils, waxes, and other impurities before dyeing. It helps the fibres absorb the dye more evenly and effectively.
-
Tanning - This treatment helps prepare primarily the cellulose fibres to bind more effectively with certain dyes and mordants, often improving colour depth and fastness.
-
Mordanting - Mordanting is the process of treating fibres with a substance, such as alum or iron salts, that helps natural dyes bind to the fabric. Mordants can improve colour fastness and may change the final shade of the dye.
-
Stable vs Fugitive colours - Stable dyes retain their colour relatively well when exposed to light, washing, and other environmental conditions. Fugitive dyes fade or change colour more easily due to sunlight, washing, heat, or changes in pH.
The initial list was supposed to stop at point 4. But, during the preparation stage I got to learn about the next one unwillingly.
- Felting - Felting is the process in which animal fibres, especially wool, become entangled and interlocked through moisture, heat, friction, or agitation. This creates a dense fabric without weaving or knitting, and the process is generally irreversible.
image
Preparation
Since I was going to have 54 samples each of cotton and wool, One way to start was to first cut the fabric and yarn into pieces, but I only measured the fabric roughly and separated it from the whole piece. To make logistics easier, the plan was to keep everything in one piece right up to the dyeing stage. With that, the first stage in preparation was scouring. For this, I decided to use a pH balanced fabric liquid and 2% of WOF Soda ash at 80-90oC for about an hour. After this stage, I rinsed and dried the fabric since the next stage was scheduled for the next day. If that's not a constraint, you can just move on to the next stage after making sure all the soda ash and liquid soap has been washed off. This stage is the same for both of the fabrics.
Mordanting on the other hand is different for cellulose and protein based fibres. While you can move directly to this stage for protein fibres, the cellulose fibres require an intermediate stage called tanning in between for better performance with the mordant as well as dyestuff.
For tanning, I used Myrobalan, locally known as Harda, a popular ingredient in Ayurvedic concoctions. For Mordanting, I used Alum. The parameters used are as follows -
At this stage, I should mention that it is immensely helpful to have a Jewelers scale, along with the regular kitchen scale.
Mordant quantities are calculated as a percentage of the Weight of Fabric (WOF), which refers to the dry weight of the fabric.
Cotton - Myrobalan Followed by Alum
| Parameter | Myrobalan Treatment | Alum Mordant |
|---|---|---|
| Quantity (% WOF) | 15–20% | 10–15% |
| For 100 g dry cotton | 15–20 g | 10–15 g |
| Temperature | 60–80°C | 50–60°C |
| Time | 45–60 minutes | 45–60 minutes |
| Water quantity | 2–3 litres | 2–3 litres |
Method
- Wet the scoured cotton thoroughly.
- Dissolve myrobalan in hot water, add the cotton, and maintain the temperature for 45–60 minutes.
- Remove the fabric and allow it to cool. Rinse lightly if desired.
- Dissolve alum in a separate bath, add the cotton, and maintain the temperature for 45–60 minutes.
- Remove the fabric, rinse gently, and dry or proceed to dyeing.
Wool - Alum Mordant
| Parameter | Recommendation |
|---|---|
| Alum quantity | 8–12% WOF |
| For 100 g dry wool | 8–12 g |
| Temperature | 70–80°C |
| Time | 45–60 minutes |
| Water quantity | 2–3 litres |
Method
- Wet the wool thoroughly in lukewarm water.
- Dissolve alum separately and add it to the mordant bath.
- Add the wool and raise the temperature gradually to 70–80°C.
- Maintain the temperature for 45–60 minutes, avoiding sudden temperature changes and agitation.
- Allow the wool to cool in the bath, then rinse gently.
Water Quantity and WOF Calculation
A useful starting point is a 1:20 to 1:30 material-to-water ratio.
For 100 g of dry fabric:
| Material-to-Water Ratio | Water Required |
|---|---|
| 1:20 | 2 litres |
| 1:30 | 3 litres |
The fabric should move freely in the bath and remain fully submerged.
Warning
This is the point where I had my first "learning moment" , the wool yarn while mordanting started looking a bit frasseled, I "intervened" and agitated the container a bit too much. Which in turn caused some Felting.
Do Not Boil wool or agitate it!
For the Preparation of dyestuff, wash and dry the materials thoroughly, and grind the materials into coarse powder.
Extracting Dye Liquid
For extracting Dye liquid from the dye stuff, I decided to keep it simple. The dye extraction method was going to be the exact same for all of them. Although, in future I'd like to explore each dye individually and get into the most ideal methods and treatments. As instructed during the weekly session, I calculated my WOF(Weight of Fibre), and took approximately 2xWOF of each ingredient with 1.1 Ltr of water. This mixture was then heated and kept simmering for 1hr between 70-80oC.
Since I only had 2 pots available for my 6 dye materials, I ran 3 consecutive extraction rounds. I transferred each finished liquid into separate, clearly marked extra containers.
image of dye making
-
Round 1: I placed Walnut Shells in Pot 1 and Pomegranate Peels in Pot 2. I added enough water so they could move freely, brought them to a boil, and simmered them for 1 hour. I strained the liquids into my master containers, labeled them, and washed both pots.
-
Round 2: I repeated the exact same process by adding Turmeric Powder to Pot 1 and Hibiscus Flowers to Pot 2. I simmered them for 1 hour, strained the juices into separate master containers, labeled them, and washed the pots again.
-
Round 3: I conducted the final extraction round with Onion Peels in Pot 1 and Black Tea in Pot 2. I simmered them for 1 hour, strained the liquids into my final master containers, and labeled them.
-
Cooling: For a quicker turn around on the pots, I used a large bucket of water as a makeshift heat exchanger to cool off the heated dye liquid. I allowed all 6 master containers of liquid dye to cool down completely to room temperature. This was a crucial step because I knew hot dye liquid would feel and ruin my wool yarn during long exposures.
Modifier Batches
For each dye liquid, there were three variants. 1. No Modifier 2. Acidic Modifier - Citric Acid 3. Alkaline Modifier - Sodium Carbonate
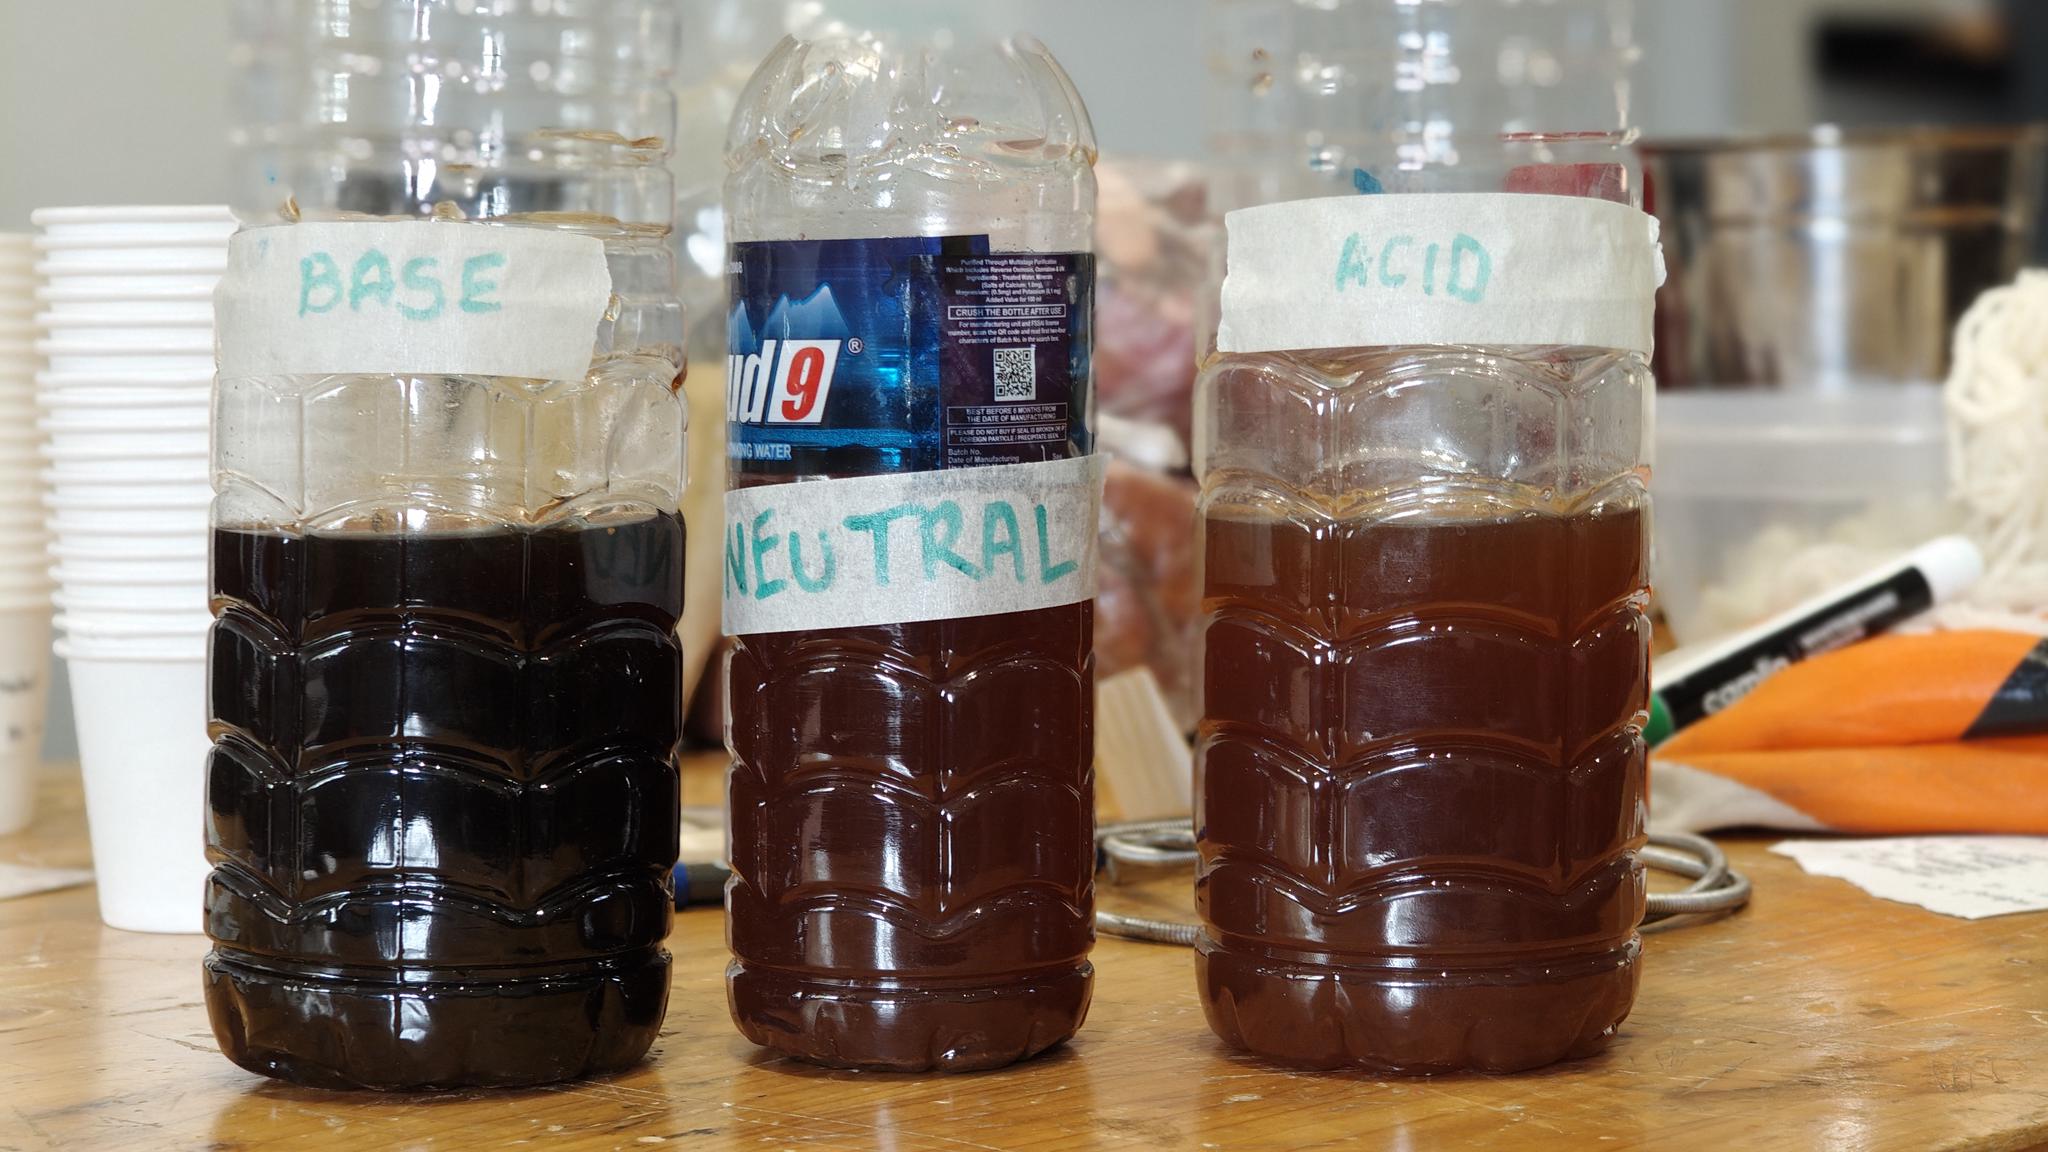
Walnut dye liquid with modifiers
After filtering, each pot created around 600-750 ml dye liquid, and thus I decided to create modifier batches of around 200 ml for each dye , which were later split into 30 ml in each cup.
Thus, The stage was set for the dyeing to begin.
Dying Process
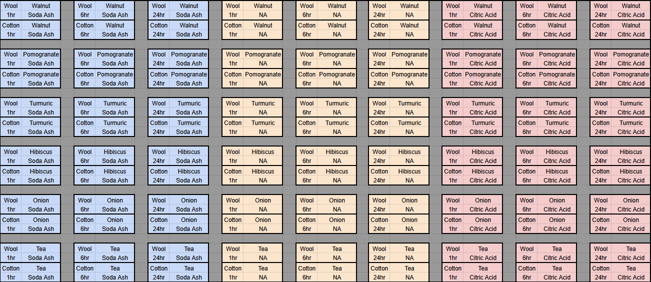
108 cup arrangement
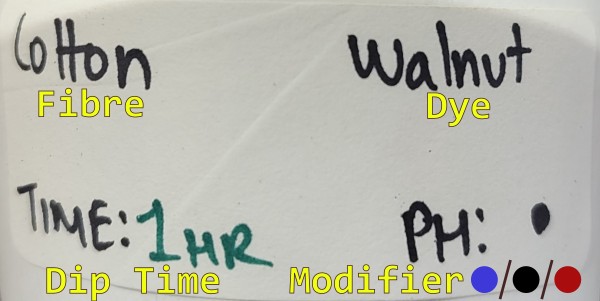
single label
This was the system used to keep all the combinations isolated and to make the tracking easy. Each labelled cup has four pieces of information - Fibre, Dye, Dip time, and Modifier.
embed video of dipping
Compiling Dyeing Ouput
Most of the 1hr dip samples and some of 3hr dips were out during the dying process itself and were drying. Once all the 24hr dip samples were out and dried completely, it was the time for rinsing and one final drying, and to see the results of the work. There were some that were a little underwhelming but some that made me truly happy and made all the waiting and long hours worth it.
images of walnut swatches images of pomegranate swatches
Pigments and Inks
The second part of the activity was to use the leftover dye liquid to create pigments, inks, or watercolours. For this section I decided to go with lake pigments and later watercolour paints.
Although I had total 18 samples to work with, I decided to use the Neutral i.e. No modifier batches of each dye liquid for this activity.
To transform the dye liquid into stable pigments, there needs to occur a Precipitation Reaction. The idea is to use alum and Soda Ash together in the dye liquid and create solids that will bind the pigment particles to themselves and drop at the bottom of the vessel.
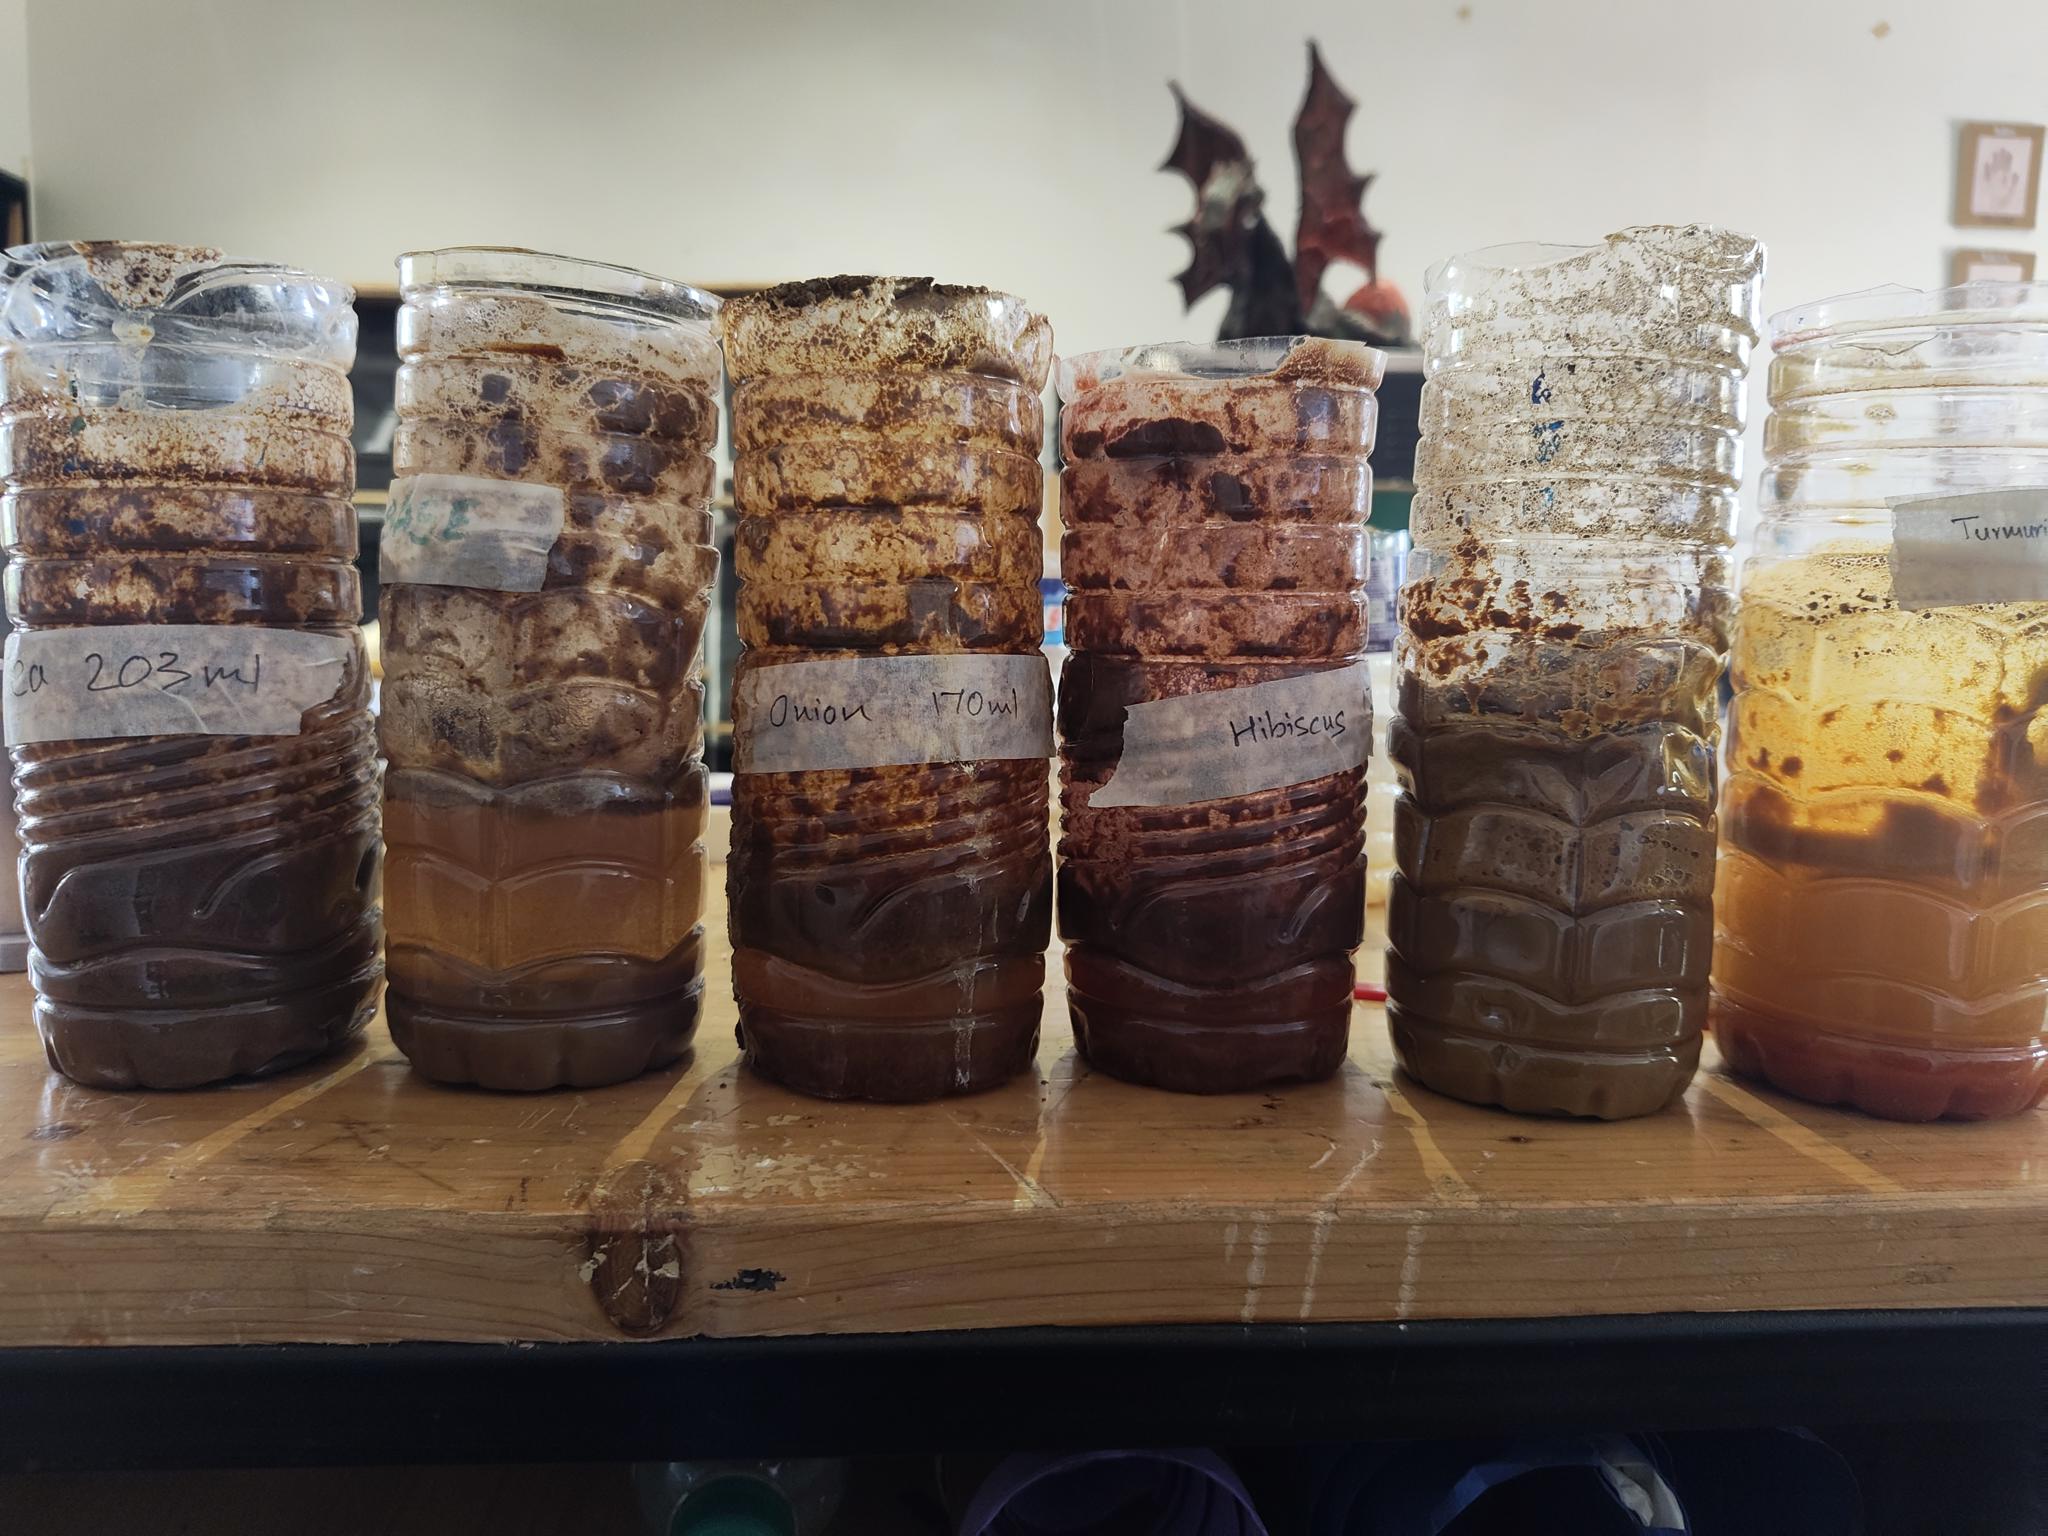
Following are the steps for the procedure:
For 1ltr of dye liquid it requires 2tbsp of Alum and 1 tbsp of Soda Ash. Adjust the ratios according to your dye liquid quantity.
- Dissolve the Alum
Heat the liquid to about 40-50oC and mix the Alum completely. Stir the vessel vigorously.
- The Alkaline Reaction
Introduce the Soda Ash slowly and little by little while gently stirring the liquid. This reaction is going cause the liquid to fizz and rise up in the vessel, so make sure to have a tall enough vessel to prevent a spill-over.
video of fizz
- The rest
Let the mixture rest for 12-24hrs completely undisturbed so that all the solids are separated and there's a layer of clear water on top.
- Decanting
Once the pigment has fully settled at the bottom, carefully pour off the clear water at the top without disturbing the thick sludge at the bottom. I found a large syringe a good tool for this.
- Filtering and Drying
Pour the sludge into a funnel and a coffee filter and let it get completely dried.
Once dried the lake pigment can be crushed into fine powder to be used for creating inks, watercolours or other colour mediums. I am planning to make watercolours out of my batches, but I am looking into ways to create wood stains as well.
Creating Paints
To create the paints, binders like Gum Arabic or Gum Tragcanth can be used.
To turn your handmade natural pigments into professional-grade watercolors or gouache, you need to blend the pigment powder with a binder made from gum arabic (the sap of the acacia tree).
The secret to smooth, vibrant paint is a process called mulling, which completely coats each tiny grain of pigment in the binder so it adheres to paper perfectly without cracking or washing away.
To make the Liquid binder using gum Arabic crystals, first grind the crystals into fine powder and mix in the ratio of 1 part gum to 2 parts boiling water. Additionally, some recipes also suggested adding a few drops of Clove essential oil to prevent mold.
Once the liquid binder is cooled completely, we can start the mulling process. I used a ceramic tile for this. This process is as follows-
- Take 1tbsp of dried pigment on the ceramic tile. make a mound with a divot in it.
- Put 1tsp of liquid binder in the divet and start folding the pigment and the binder like you would for pasta.
- Place your glass muller or similarly heavy object directly onto the paste. Using firm, downward pressure, move the muller in a figure-8 pattern across the slab. This shears the particles apart and forces the binder around every single grain.
- Keep scraping and repeating until the mixture becomes smooth and glossy.
Project Assembly
These are the dye palettes from six dyes.
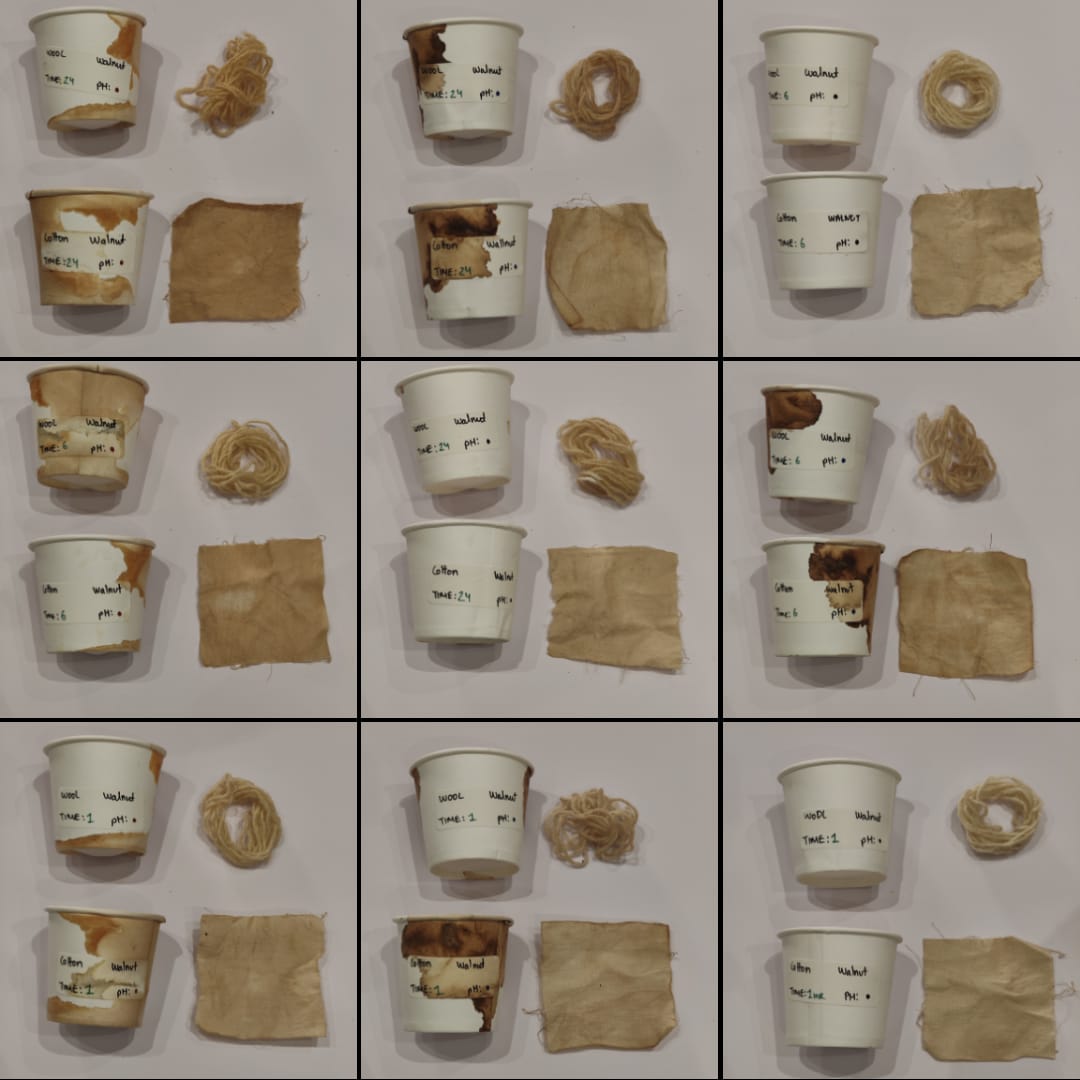
Walnut Hull dye
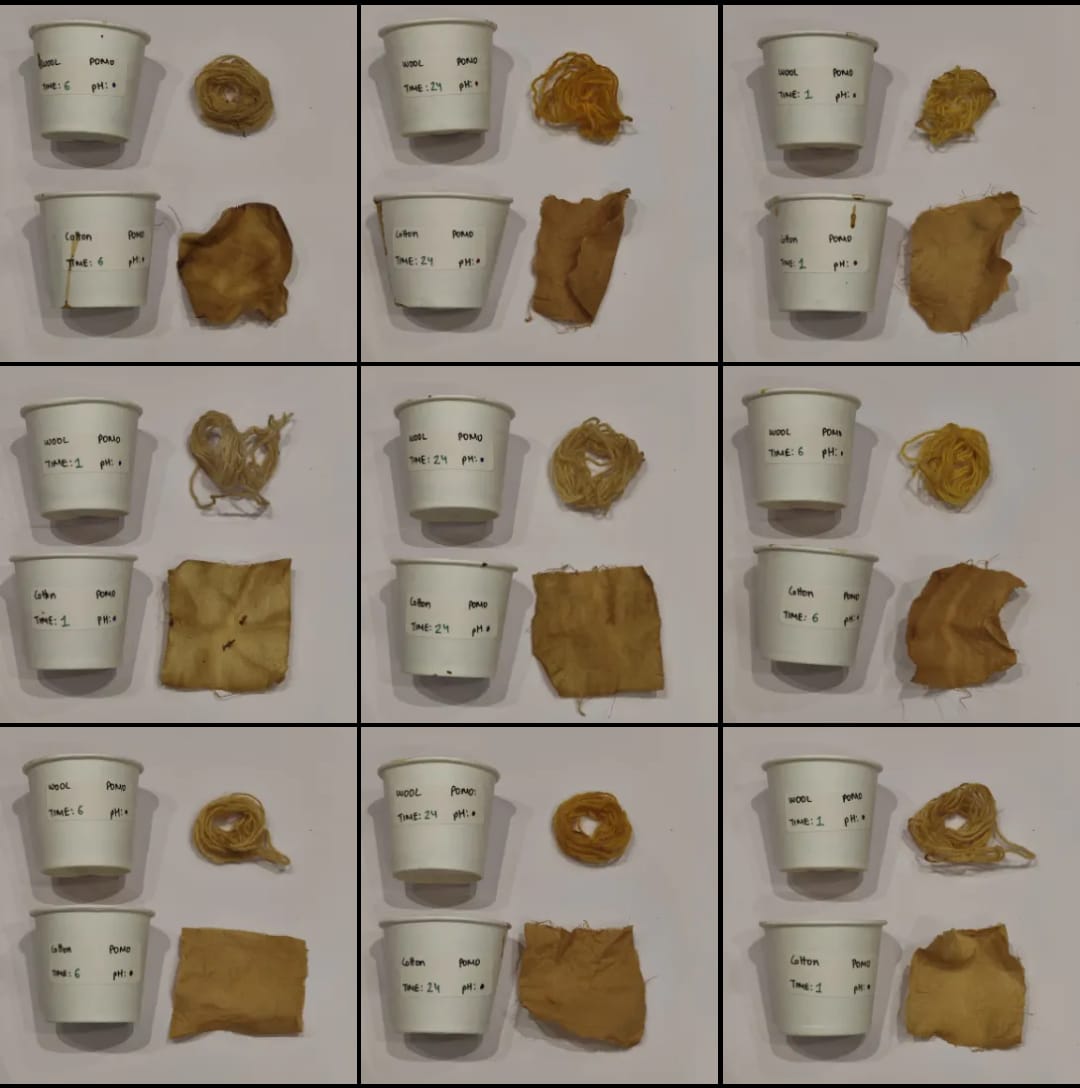
Pomogranate Peel dye
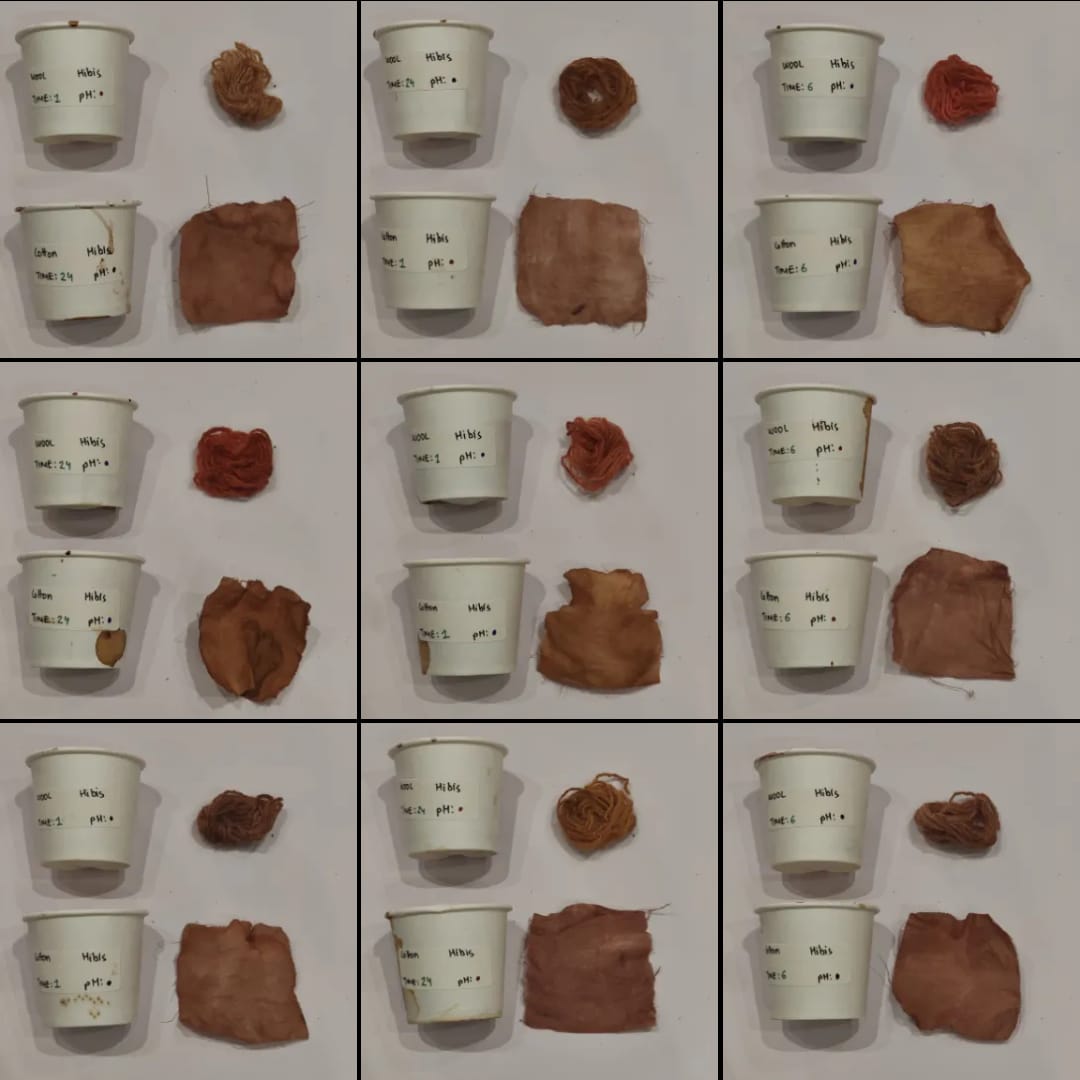
Hibiscus flower dye
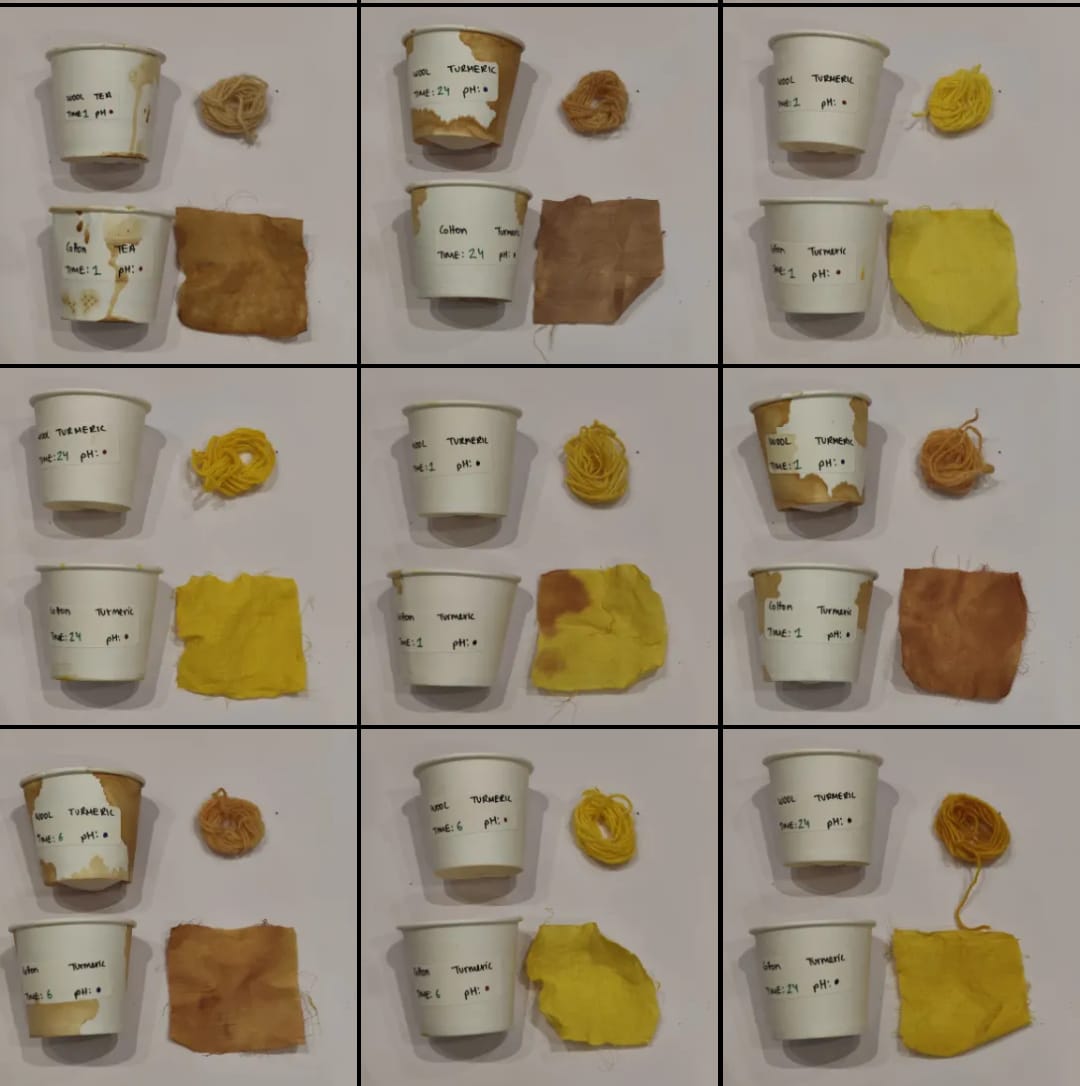
Turmeric Root Dye
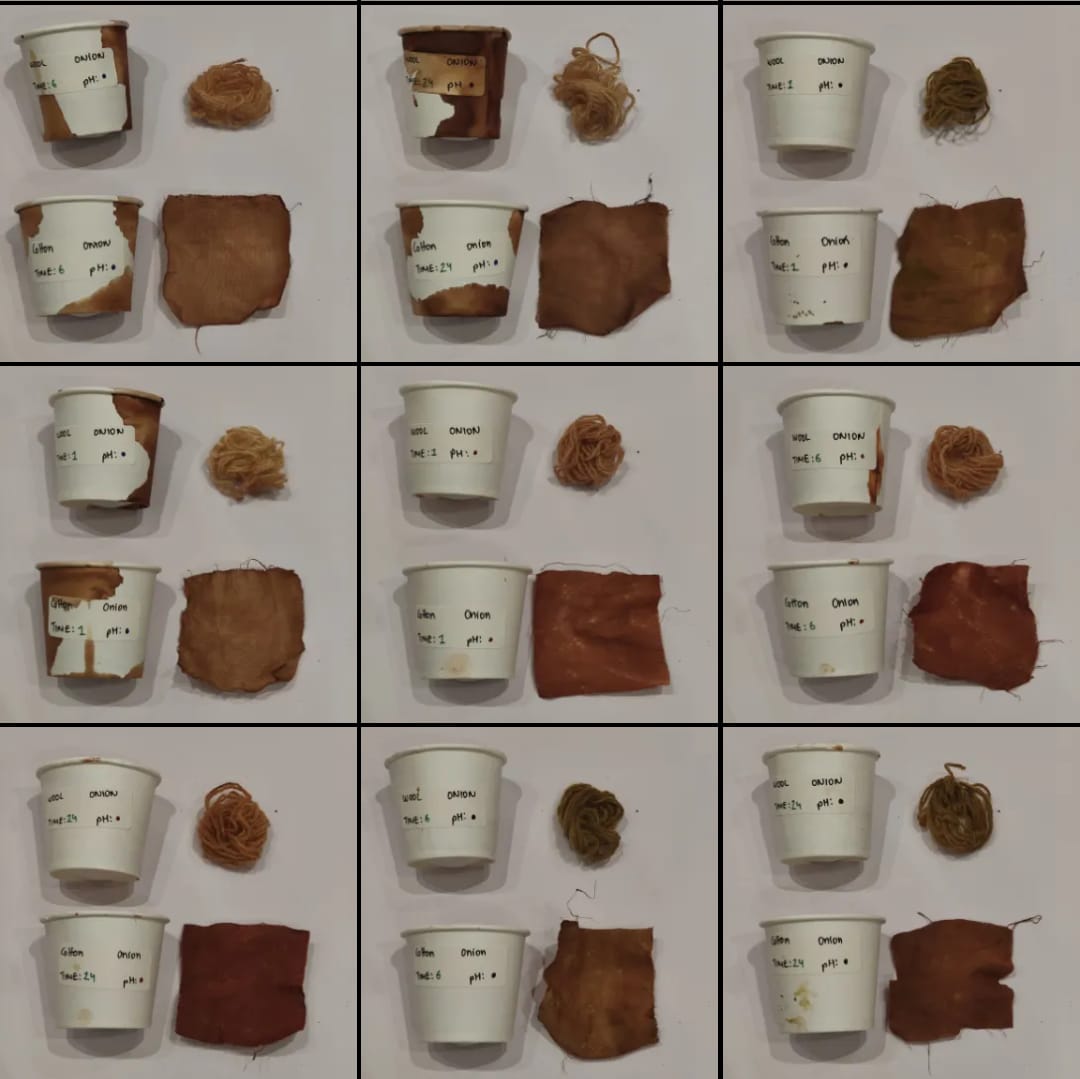
Onion peel dye
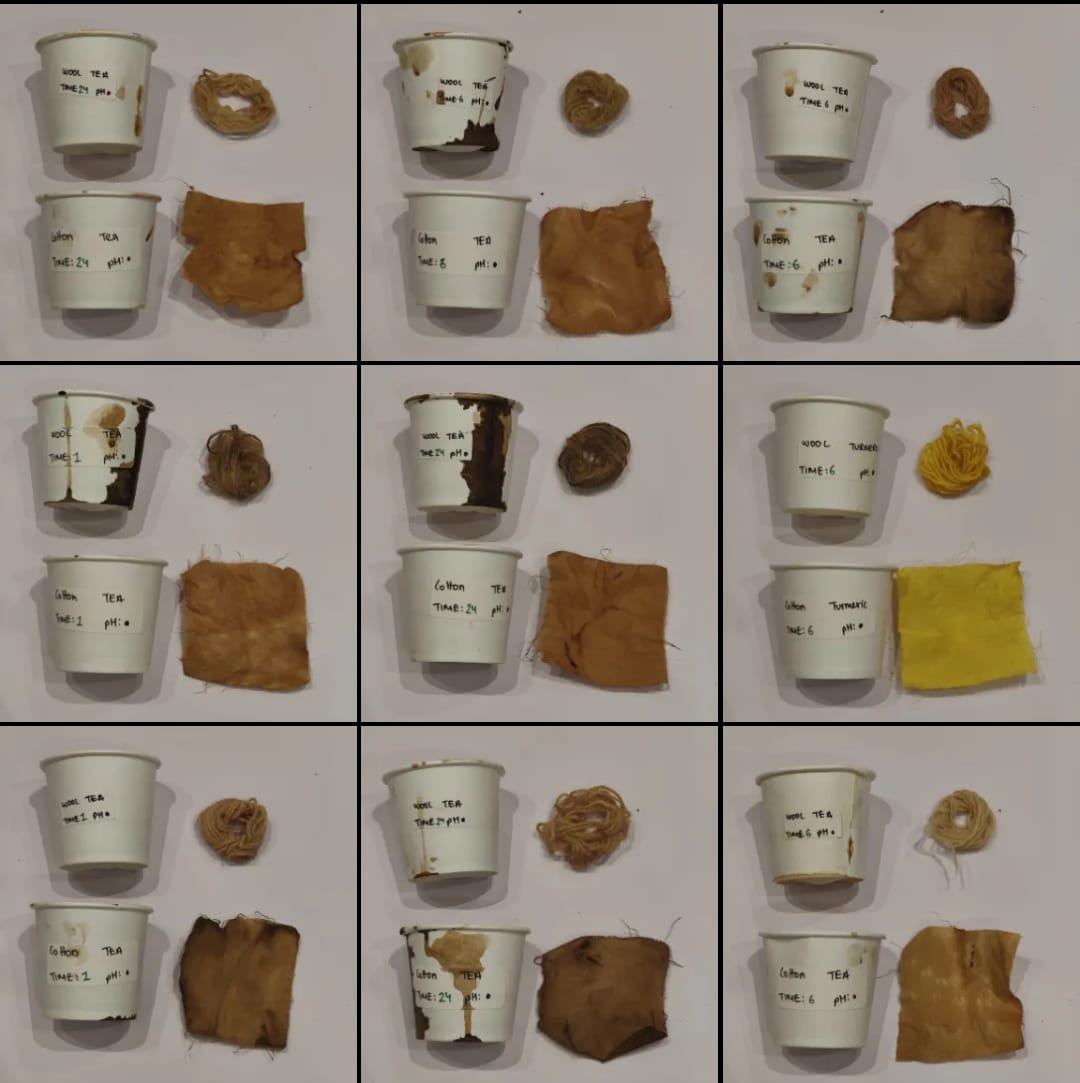
Tea leaf dye
Takeaways and Learning
Special Mentions
This project would not have been possible without the help of Jesal Mehta, who helped me a lot with the project management aspect of this assignment.
And this would not have been possible with my friends Simran and Mihir who helped with the execution and made this assignment a day of fun.