WEEK 6 - BIO-FABRICATING MATERIALS
Last Update: Jan 12, 2022
October 25-31, 2021
This week I learned how to create new materials out of organic and bio-ingredients. In this case I crafted materials using agar and gelinate and I grew materials using kombucha
Keywords: agar, gelinate, alginate, glycerine, bio-resin, bio-silicone, bio-plastic, bio-foil, flexible, natural, homemade, fillers, eggshells, dyes, textiles, sheets, kombucha, microbial leather, crafting, growing, scoby, yeast, bacteria, tea
Quick Summary
 Tools/Resources Learned:
- Fabricating bio-materials organically, in my own kitchen! Yeah just the general gist of this.
 Tools Refined:
- Adobe Illustrator Version 2021 - a photo editing program
- Adobe Lightroom Version 2021 - a photo editing program
- Canva: a graphic designing platform
- DSLR Camera: Canon 5D Mark II*: - the camera I used to take final photos
 What I still want to learn better:
- TBD
Obtaining the Materials
Here is a list of the materials I obtained/purchased (primarily online):
- Agar
- Knox Gelatine (store bought at Star Market, Boston)
- Sodium Alginate
- Glycerine
- Kombucha Scoby
- Jasmine Tea
- Sugar
Research and Inspiration
Just like Week 4 (Biochromes, I give huge credit to instructor Cecilia Raspanti for her class notes, informative tutorials and mind-blowing knowledge around this topic of biofabrication.
Preparation Process
To prepare myself for the cooking process, I wrote down the steps in my own way with unit conversions based on the recipes provided by Cecilia. I also noted any potential changes to the ingredient quantities (e.g. theoretical vs. actual).
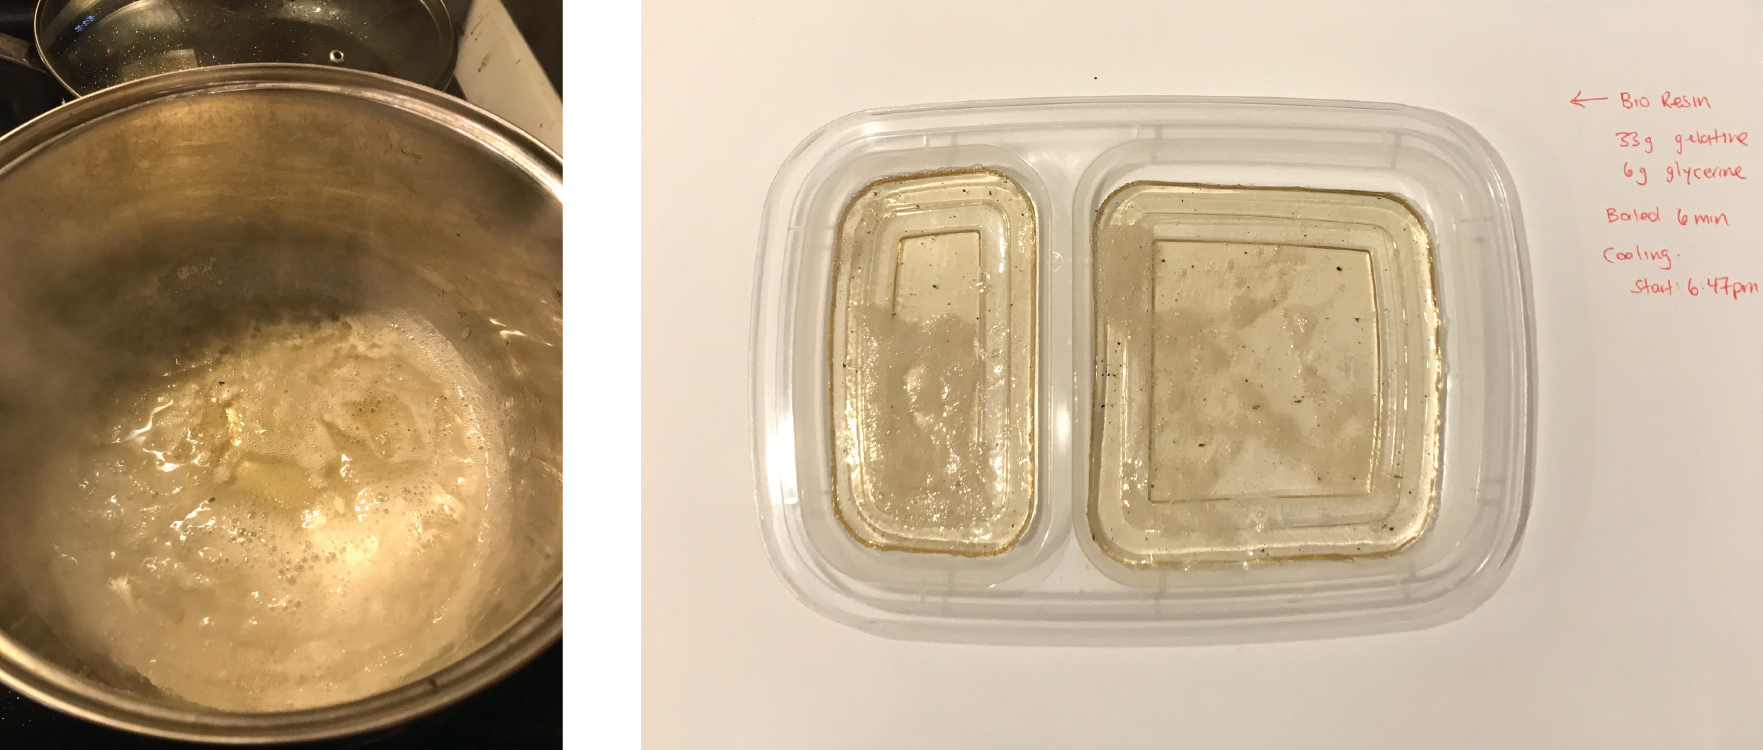
Gelinate | Bio-Resin
Ingredients
- 6g Glycerin
- 33g Gelatine
- 240mL (1 Cup) Water
Process
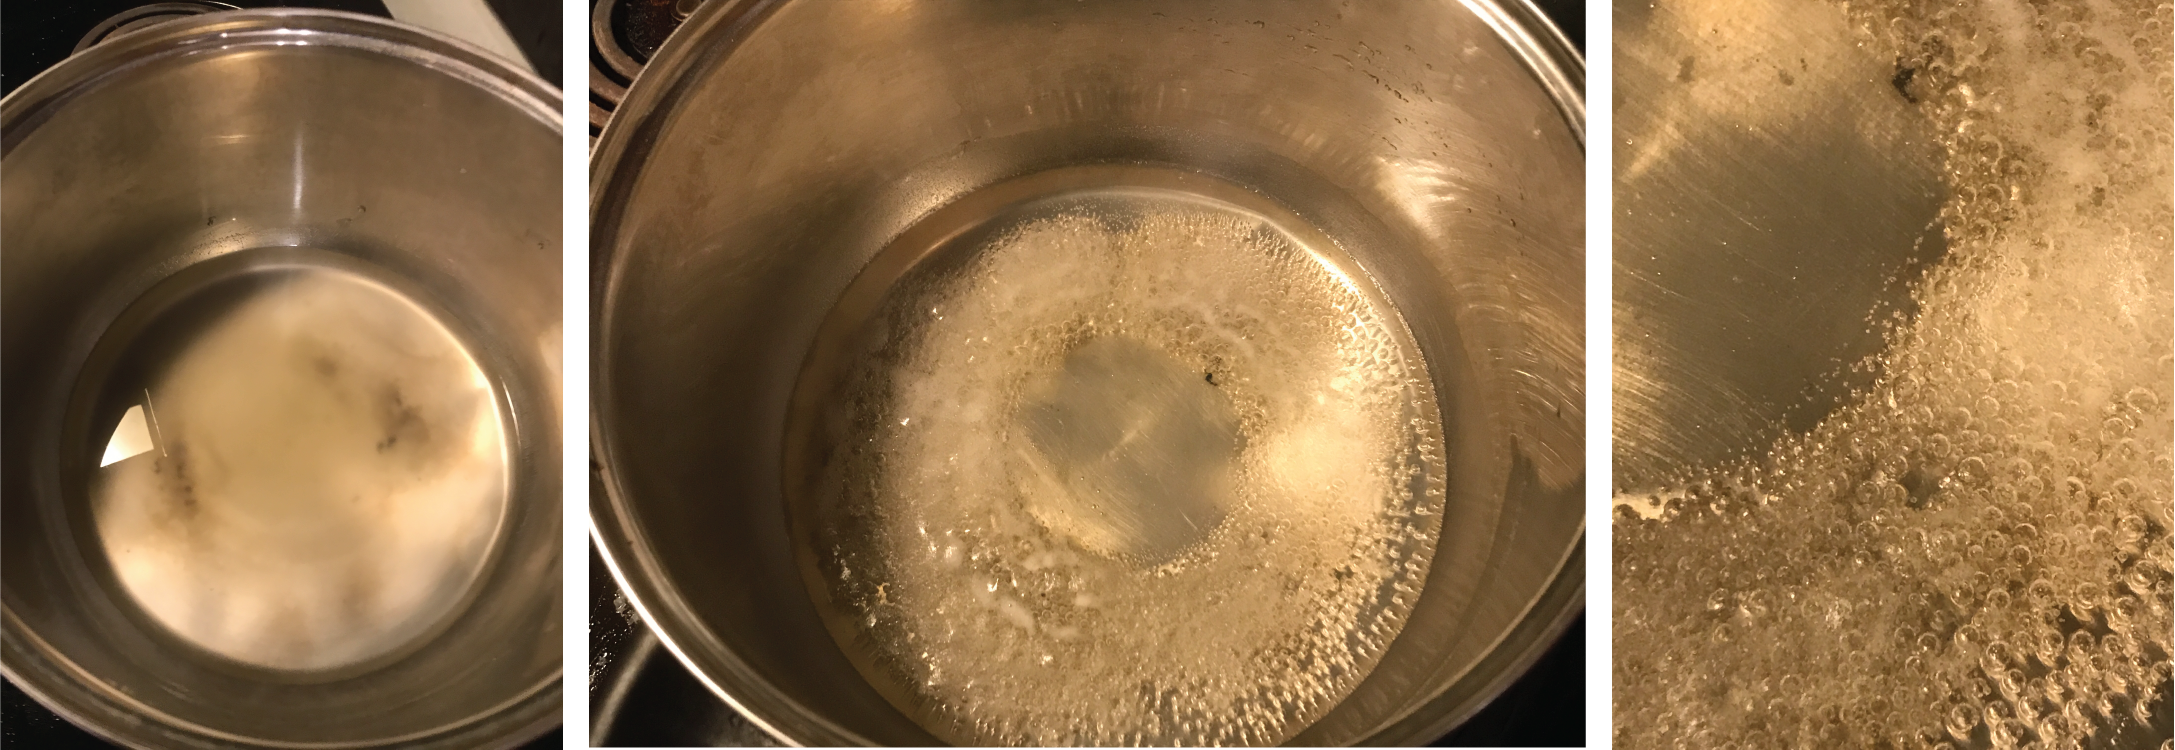
- Heat up water in pot until it reaches 80 Deg C
- Add 6g glycerin and stir
- Add 33g gelatine and stir
- Mix until and smooth
- Boil for 6 min
- Pour mixture into tupperware lid
- Let mixture rest, cool, and dry for 1-2 days
Agar | Bio-Plastic
Ingredients
- 6g Glycerin
- 33g Agar
- 250mL (1 Cup) Water
Process
- Heat up water in pot until it reaches 40 Deg C
- Add 6g glycerin and stir
- Add 33g gelatine and stir
- Mix until and smooth
- Boil for 25 min
- Pour mixture into tupperware lid
- Let mixture rest, cool, and dry for 1-2 days
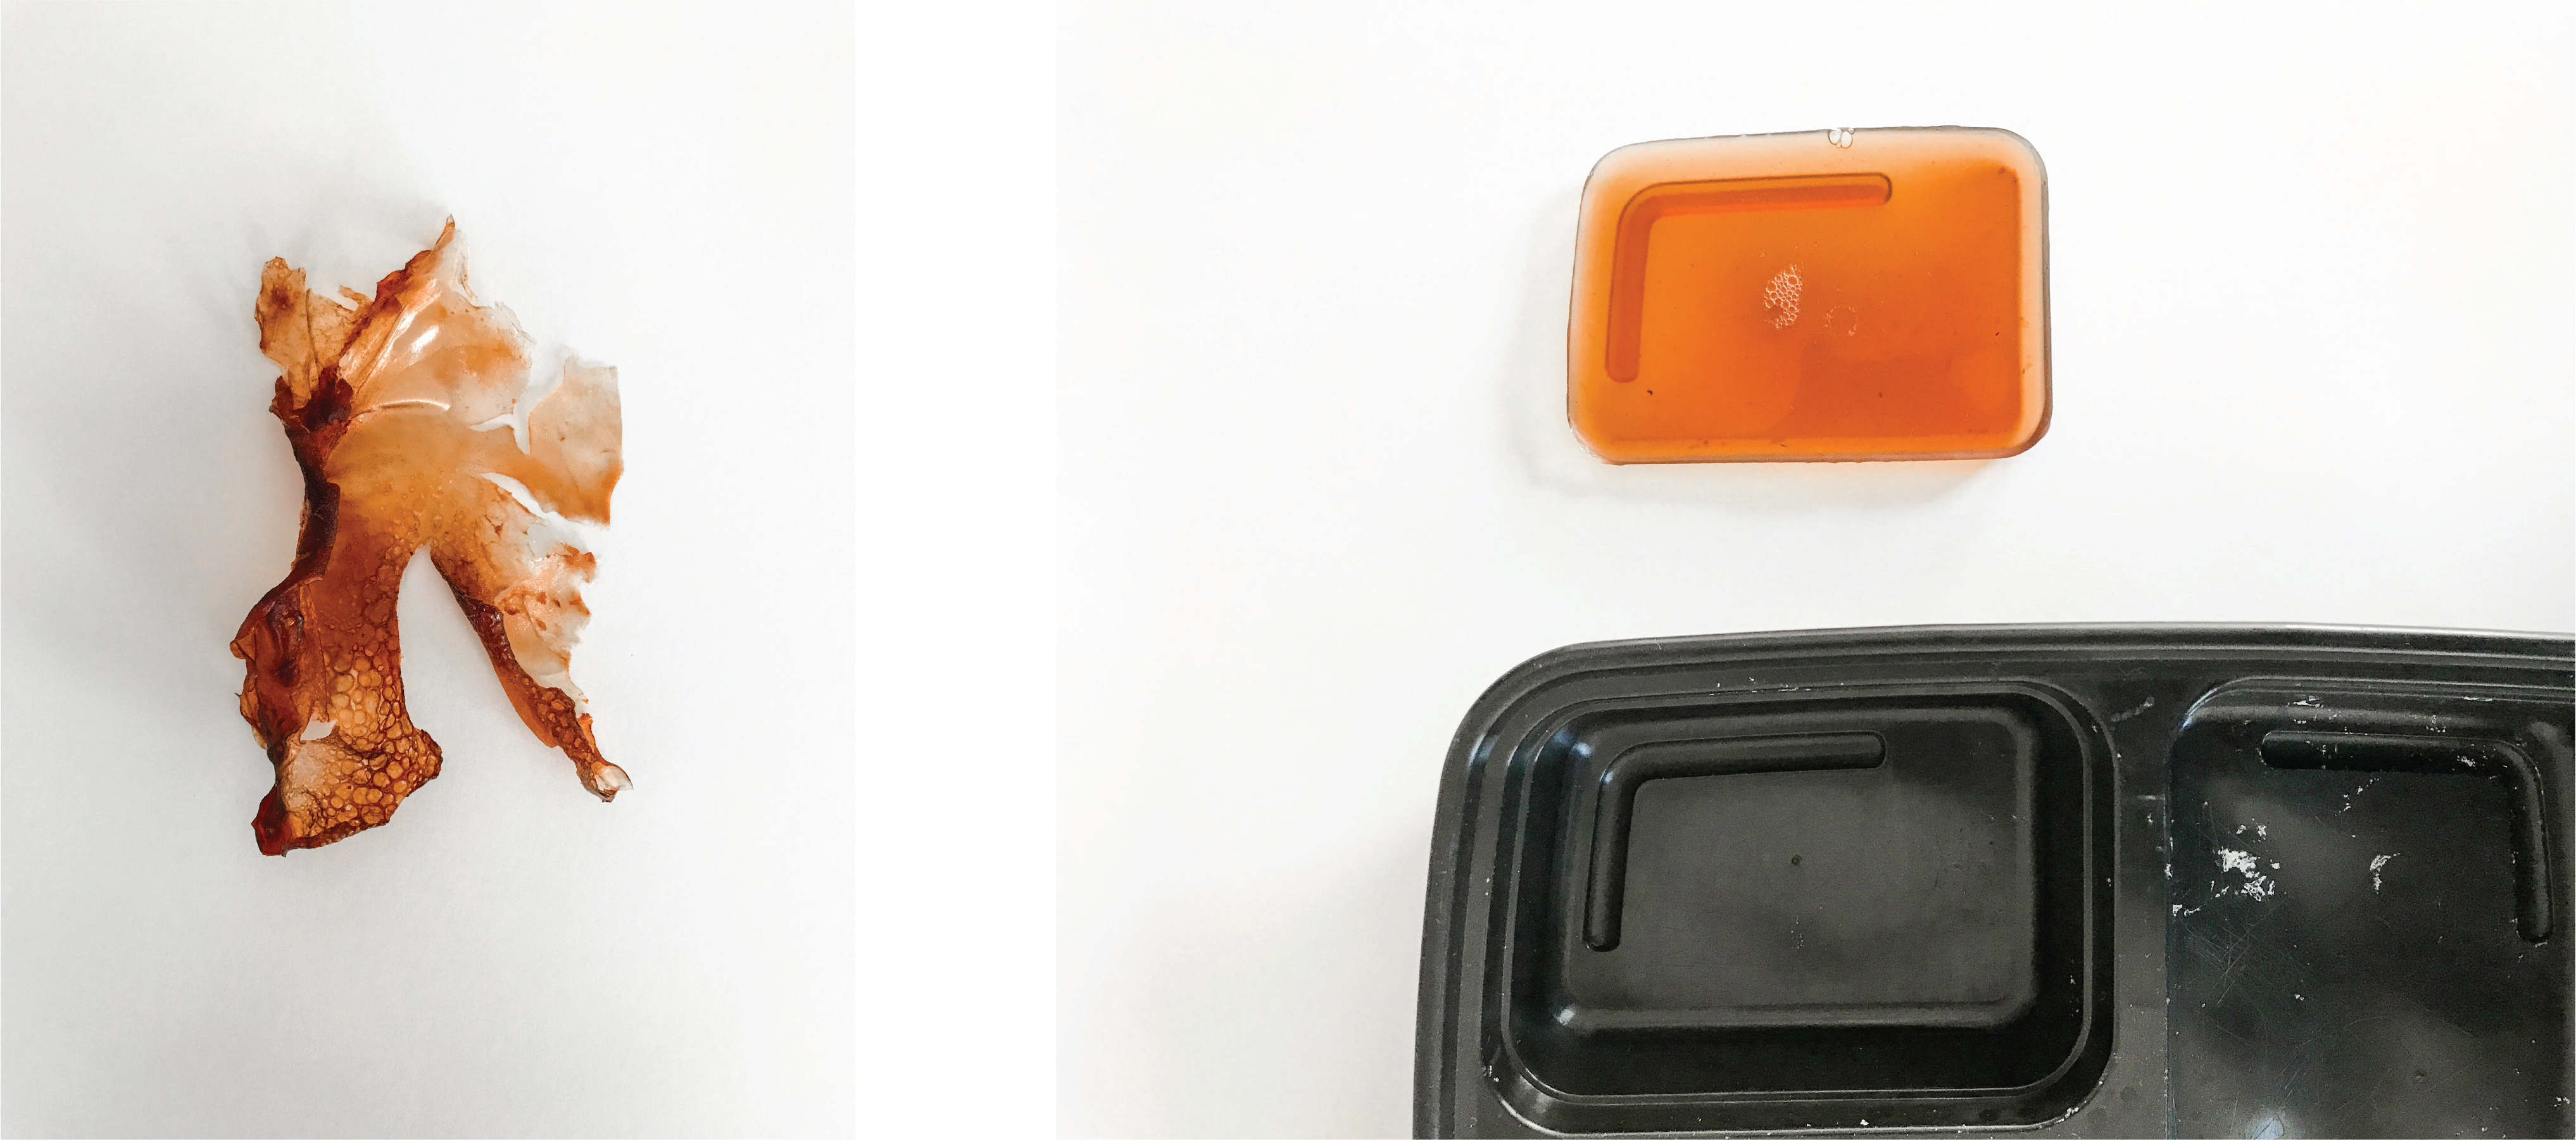
Part 1 Results
The solution got stuck on the crafting pot and was not extractable.
Part 2 Results
I poured some of the solution into a tupperware container (or at least one section of it) and got the following piece. I had also dyed it this time by adding 1 cup of the avocado pit dye I made 3 weeks prior.
Note the piece on the left was leftover scrap from the bottom of the pot that I was able to gently scrape off and dry after using a little bit of dish soap and water to lift it off the surface of the pot.
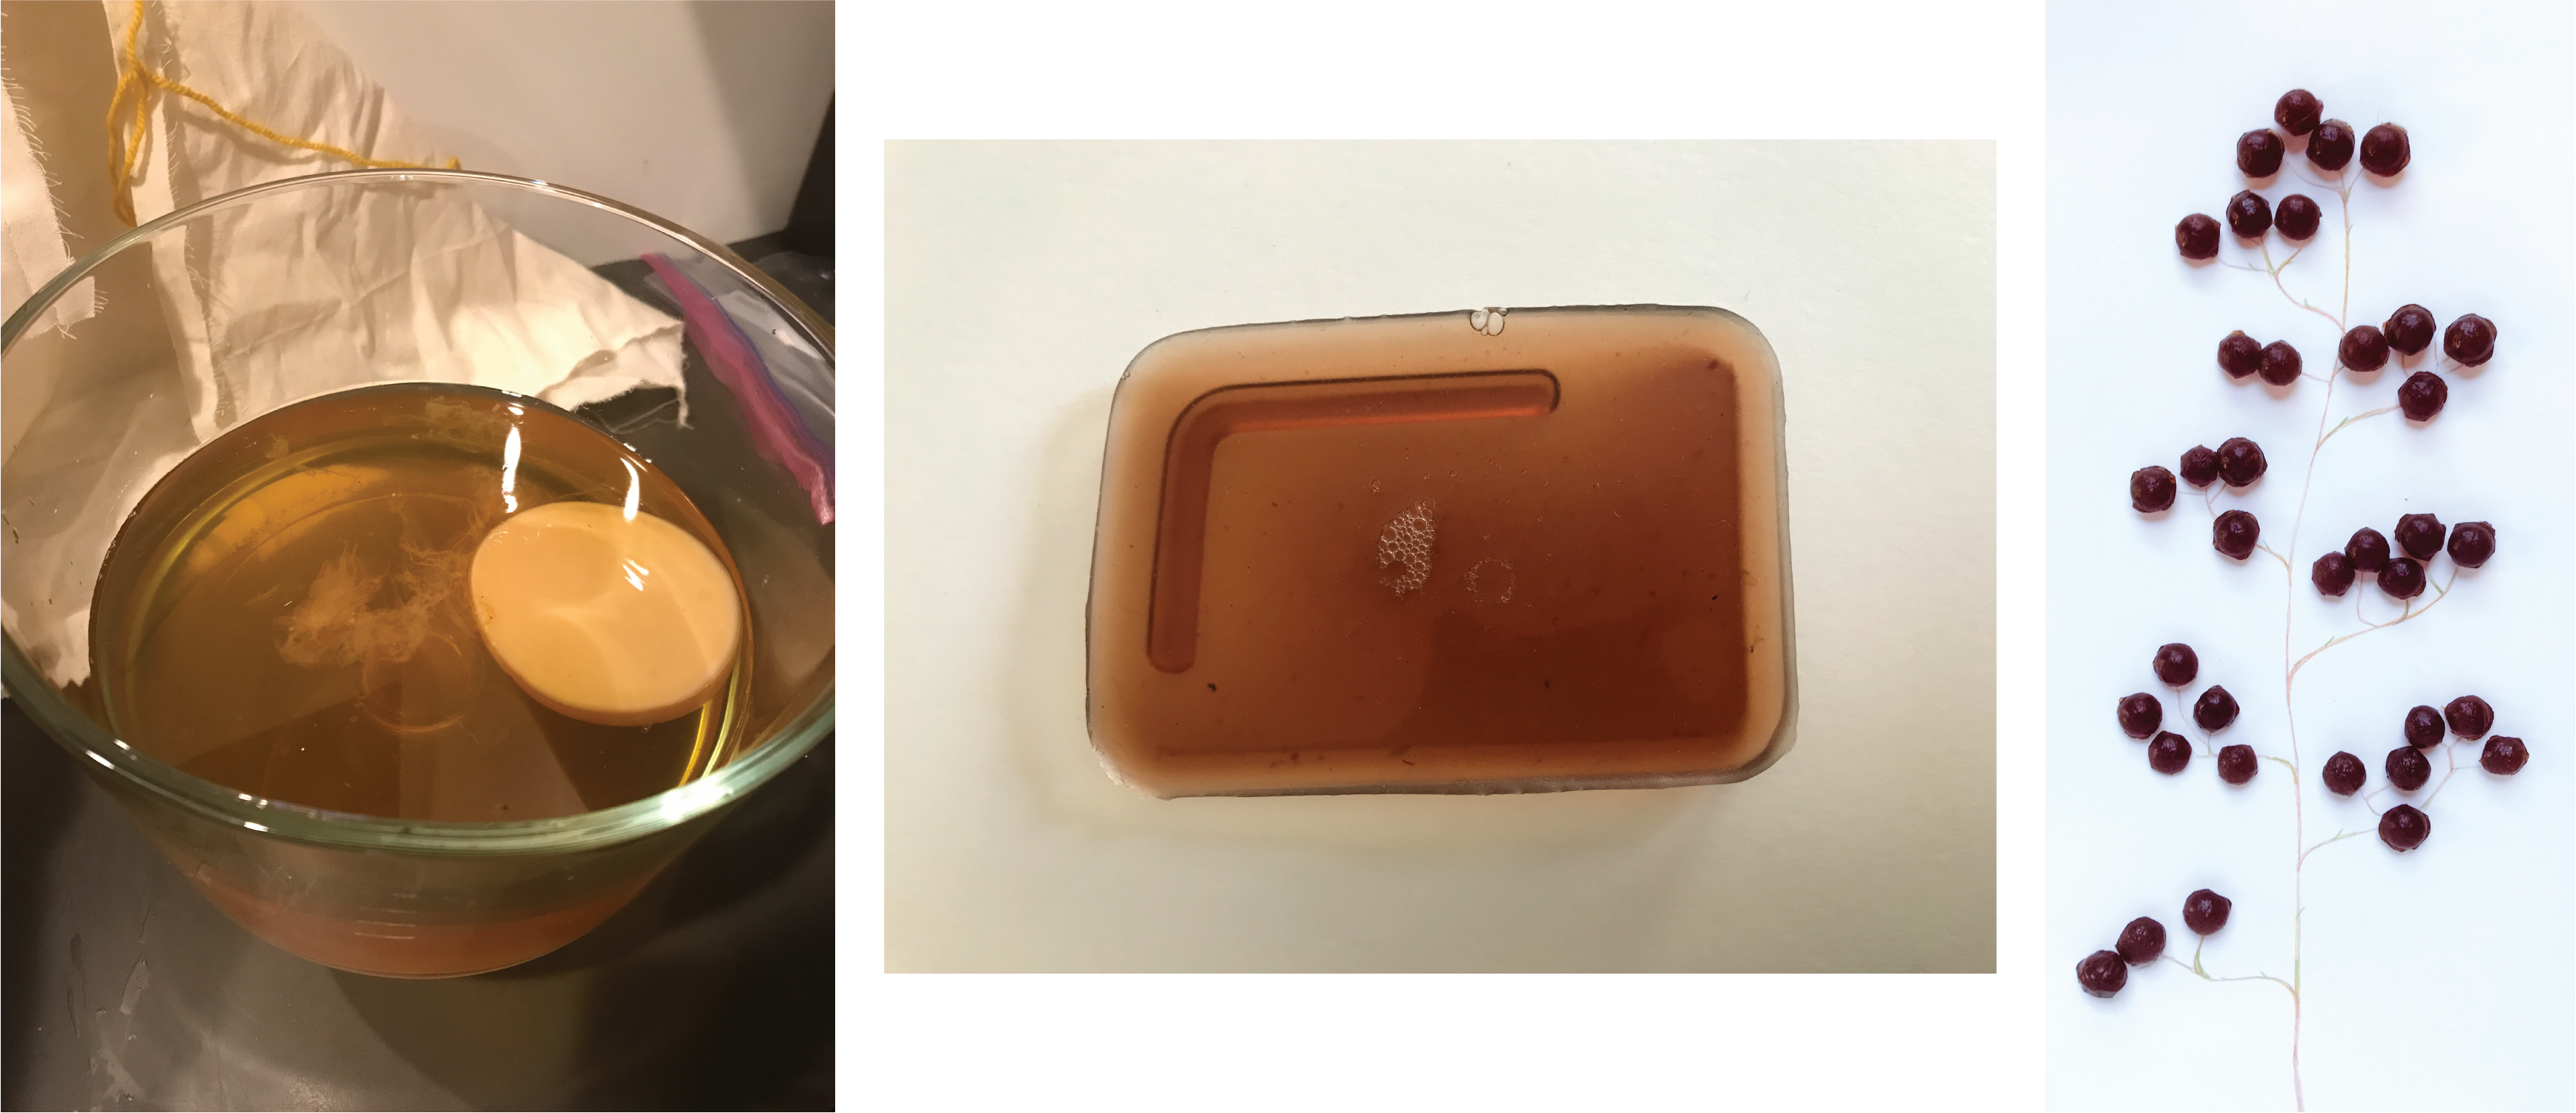
Agar Dots
Nov 5-6, 2021
On this day I took another stab at making agar, but had fun with making them using a push pop fidget toy. After making the agar solution in a crafting pot, I poured the solution into the silicone toy and let it sit for a day.
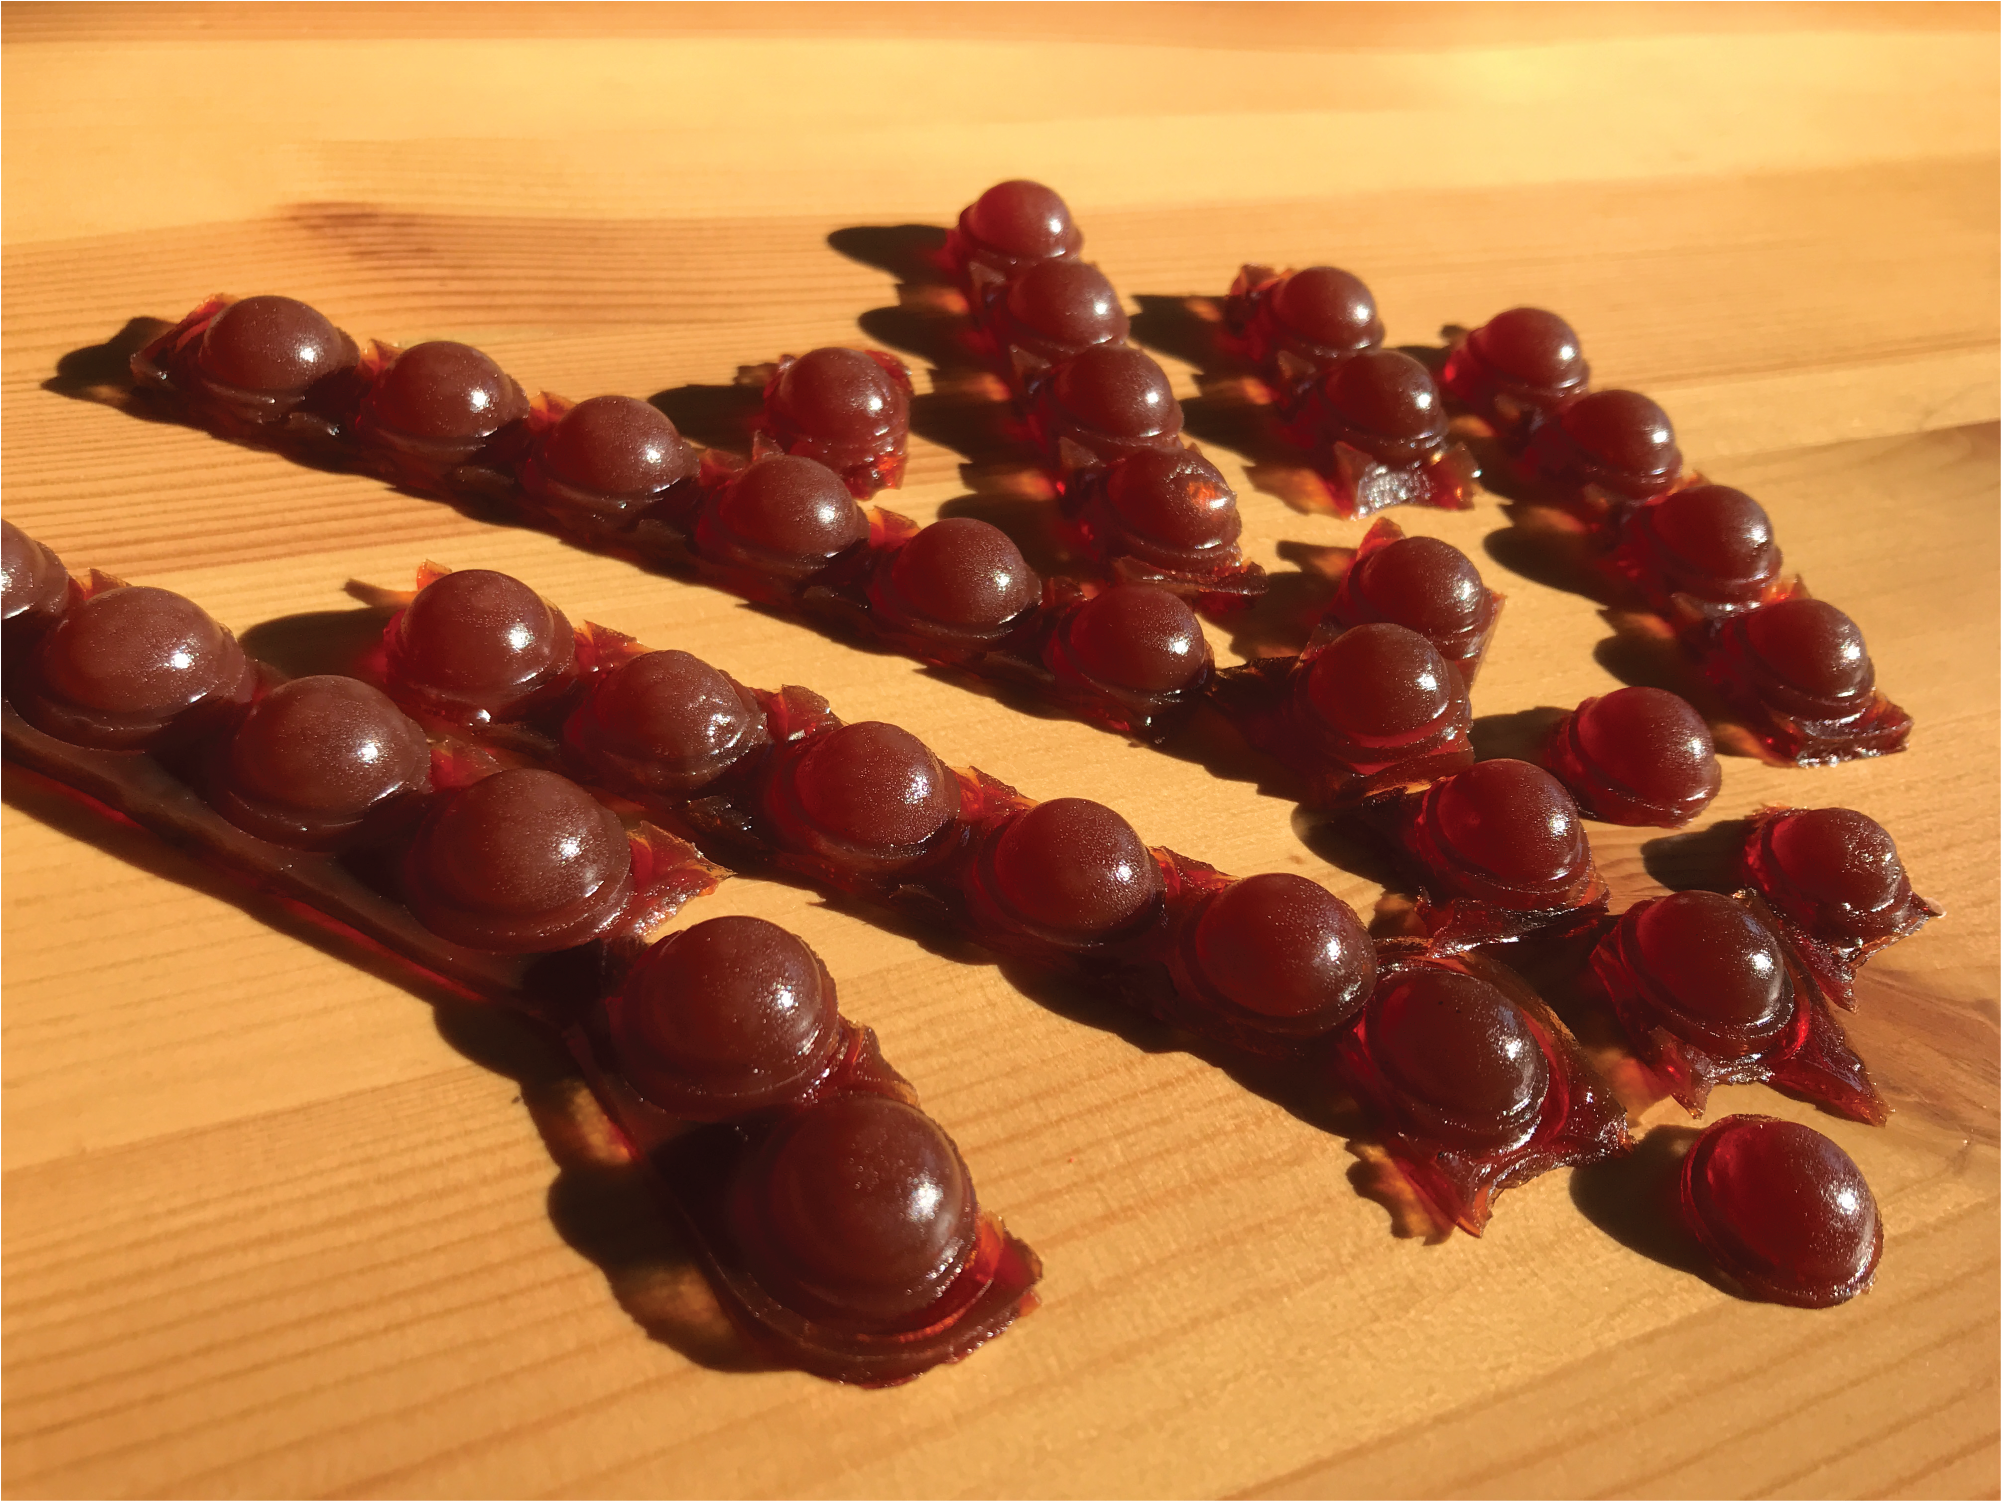
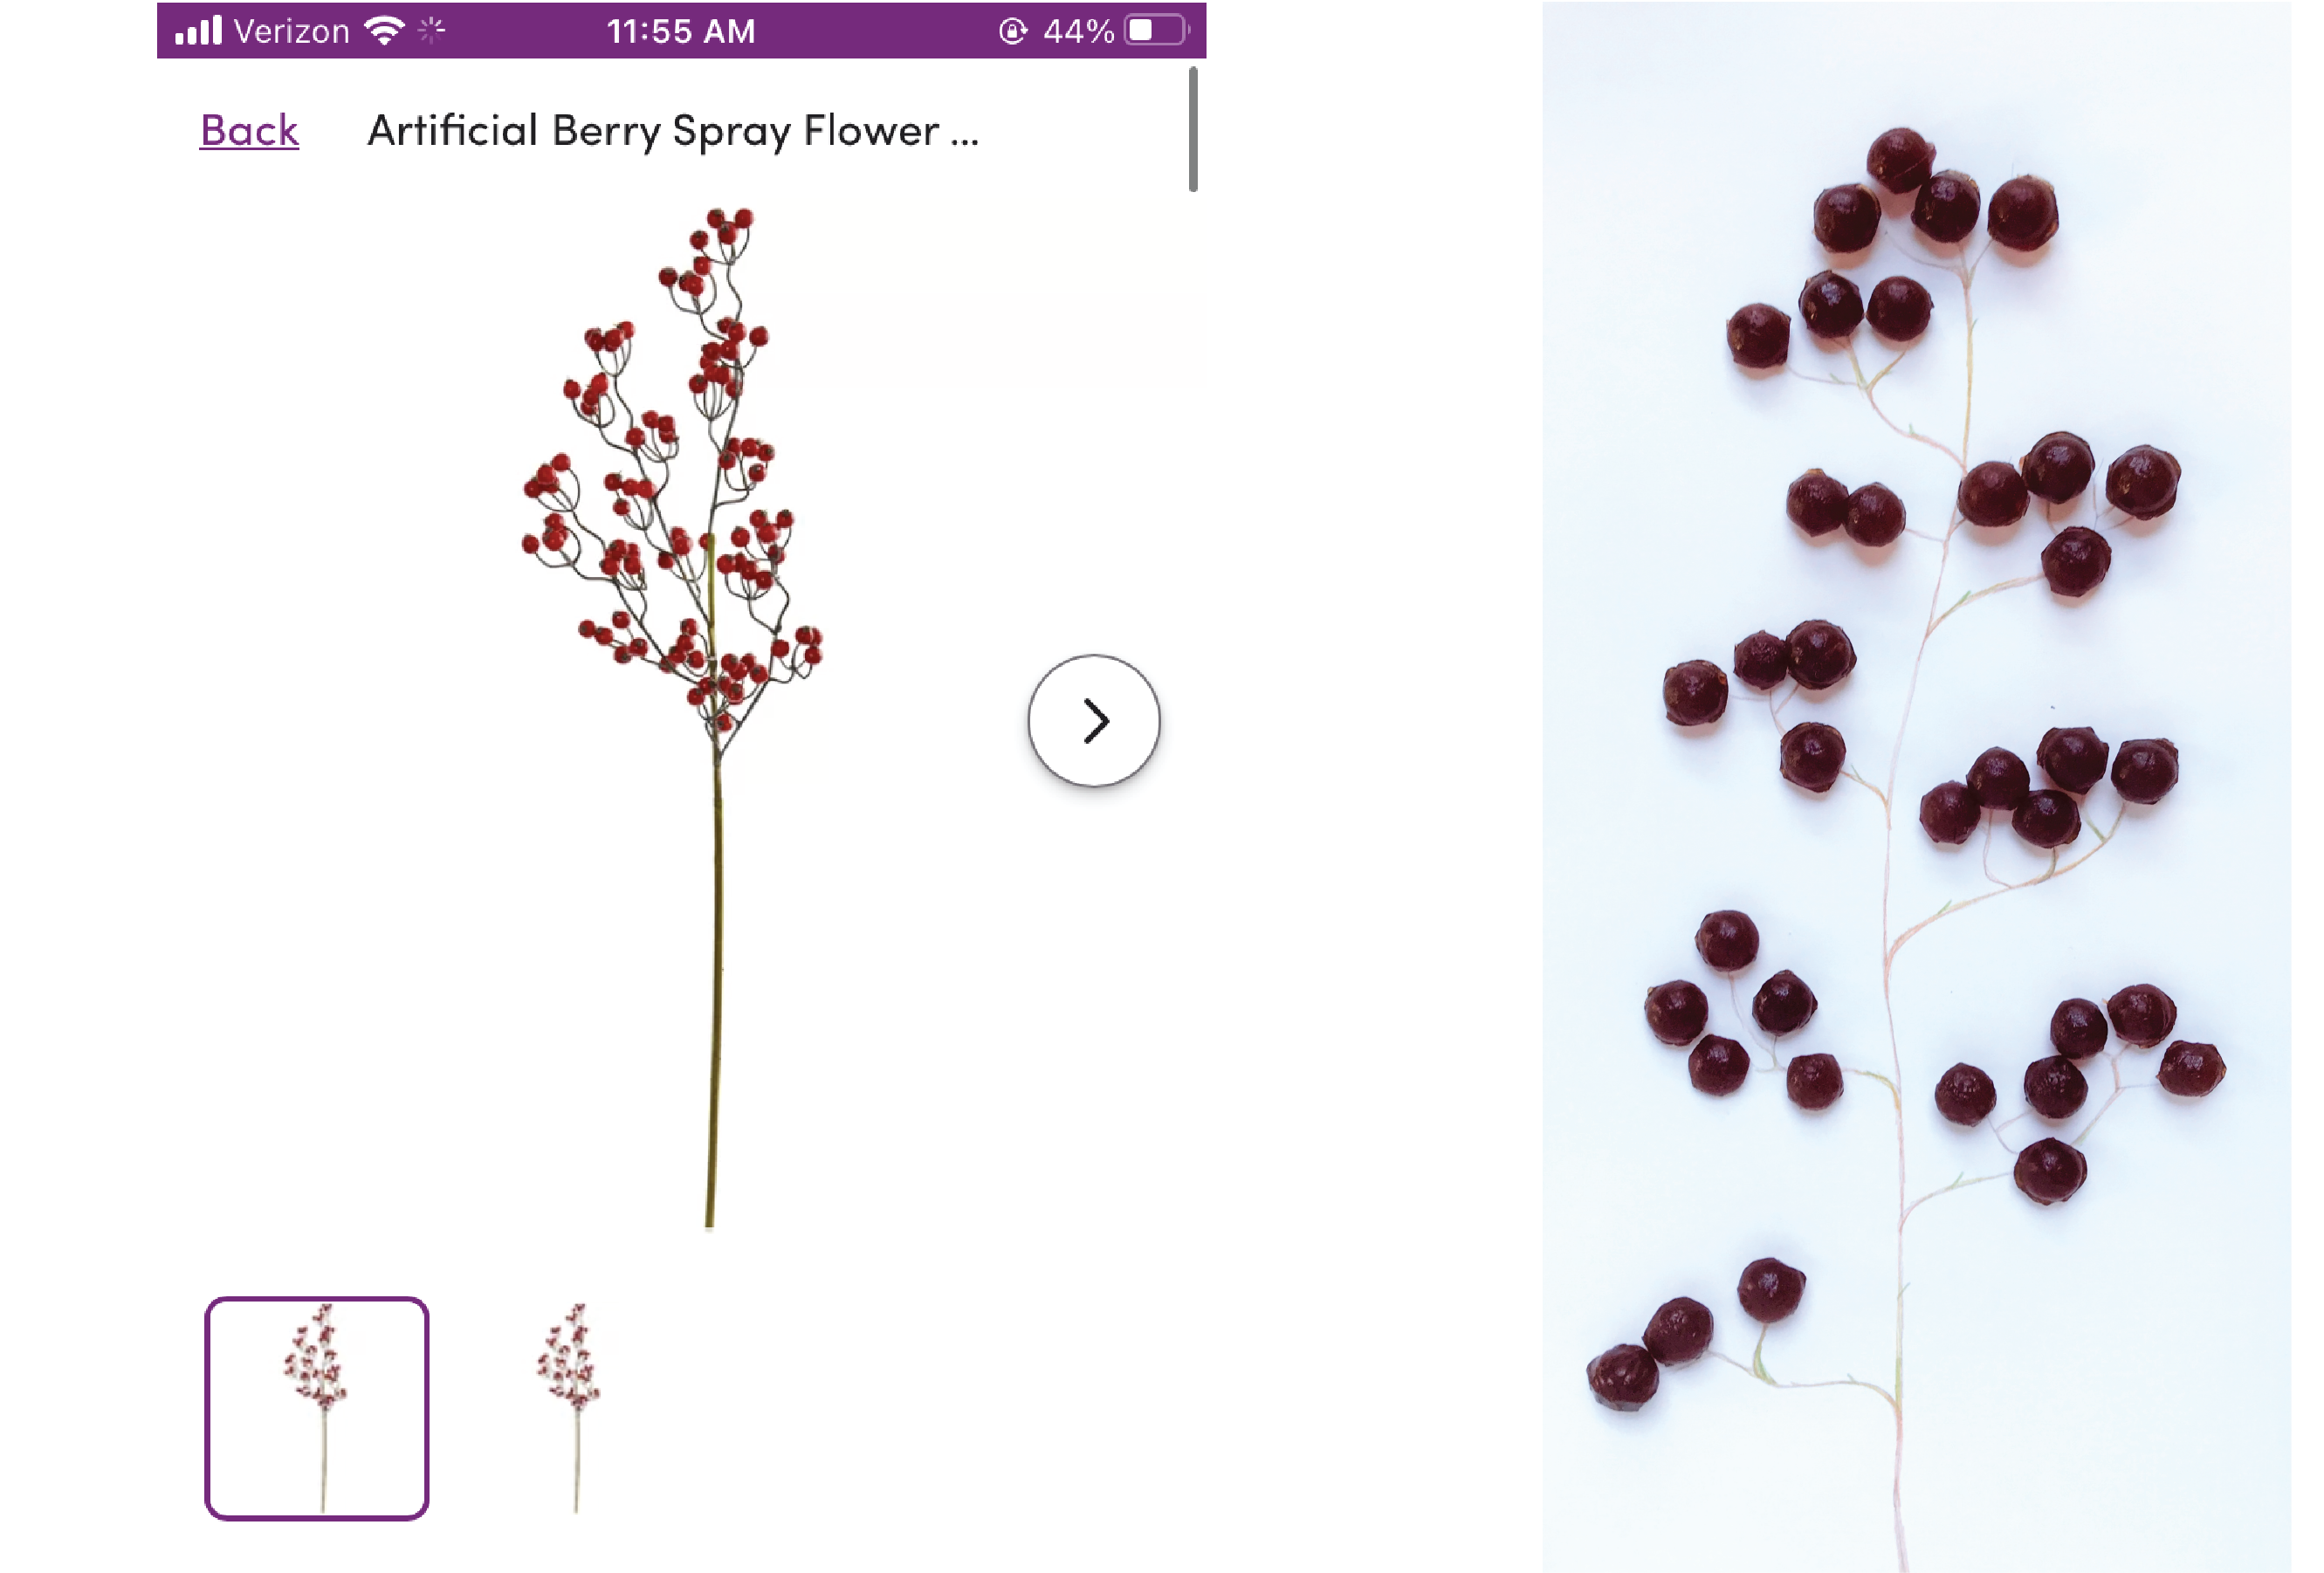
The next day, I popped the bubbles out and thought it'd be fun to make some art with it, imitating a festive berry flower/plant.
Kombucha | Bio-Leather Failed Attempt
Ingredients
- 1L Water
- Green Tea
- 120g Sugar
- 1 Kombucha Scoby
Process
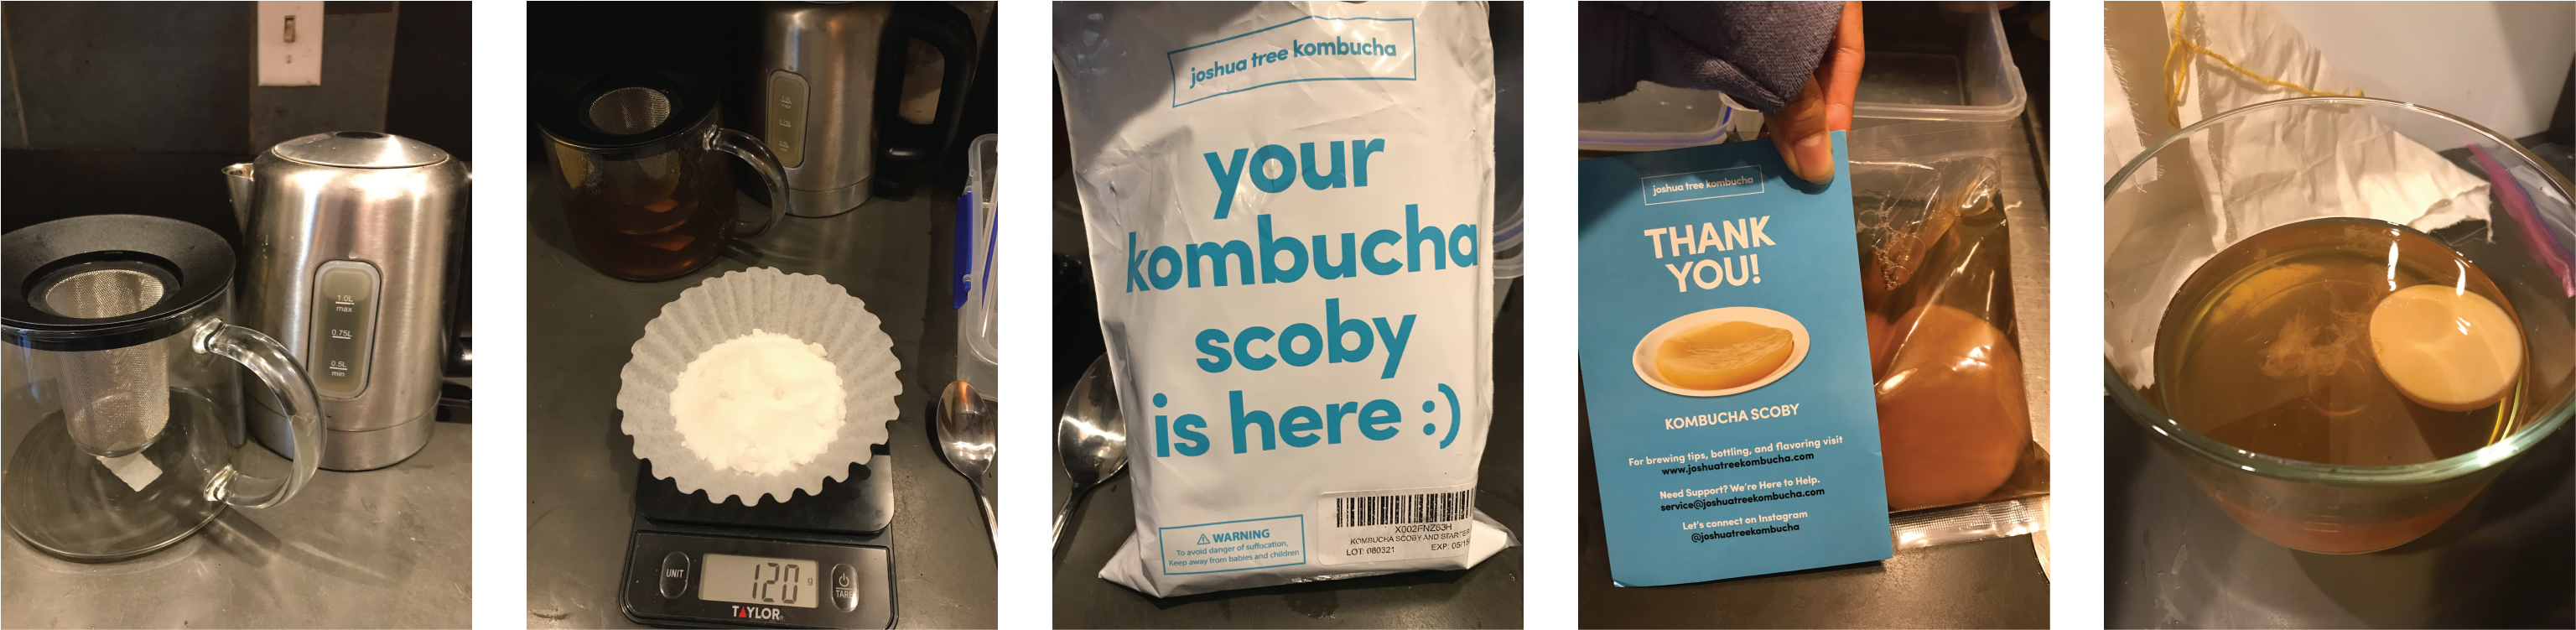
I started fermenting kombucha for the first time on Oct 31 evening using the following process:
- Heat up 1L of water in a kettle
- Steep 3 spoonfuls of jasmine tea leaves
- Cool tea to room temperature (30 degrees Celcius). Meanwhile, measure 120g of sugar
- Once cooled, dissolve the sugar into the tea pot.
- Pour room temperature tea into glass container along with scoby and its containing liquid
Update: November 22, 2021
The top layer has started to solidfy slightly and thicken (approx. ⅜" thick)
 this attempt ended up failing because I kept the kombucha brewing for too long (32 days) and mold started to form over the culture layer... I restarted this part of the assignment a month later (see next section)
Kombucha | Bio-Leather Successful Attempt
Update: January 5, 2022
The project has restarted!
I followed the same instructions as above but with the following modifications:
- one teabag of black tea (Yunnan) instead of green tea
- add sugar in while tea is still hot (it ended up being over 70 deg C) instead of waiting till the tea already cooled down (why did I do that in the first place even?)
January 11, 2022
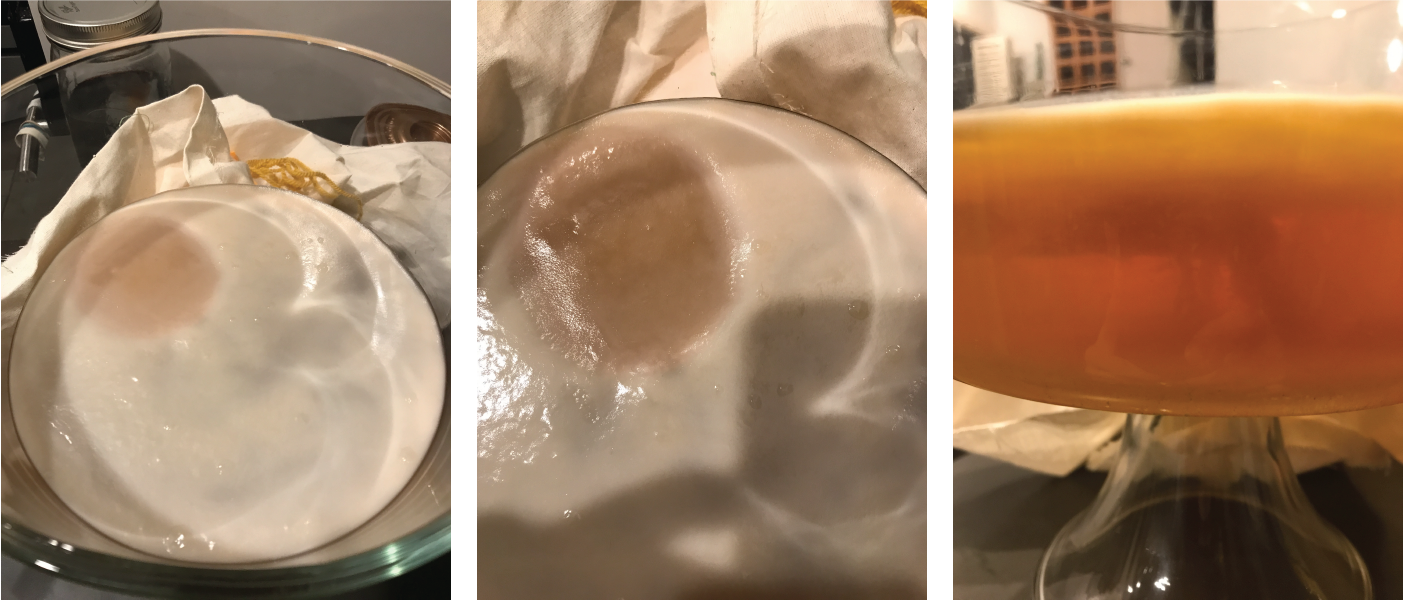
I checked on the kombucha to see how things were going and found two things:
- the scoby had sunk to the bottom
- a culture layer had formed above the scoby beneath the surface
Opposite to last time where I waited too long, I jumped on the opportunity to extract something as soon as I could so I used chopsticks to fish this thin layer out.
At first, I placed the layer, which had a very jelly-like texture to it, on a regular plate. I let it sit for a bit thinking the liquid would eventually reduce to the air, but after about an hour or two, I decided to filter out the liquid and dry the layer out by slipping it onto a few layers of coffee filters and paper towels.
This process drastically revealed how thing the actual layer was. When I tried to pick it up and moved it around, it tended to coagulate and started to look like... a weird long booger.. Anyway, I left it on the plate again and used my finger to flatten the edges out and create a flat disc.

I then left it out to dry...
However, I may have left it to dry for too long because the layer is now stuck on the plate.
January 26, 2022 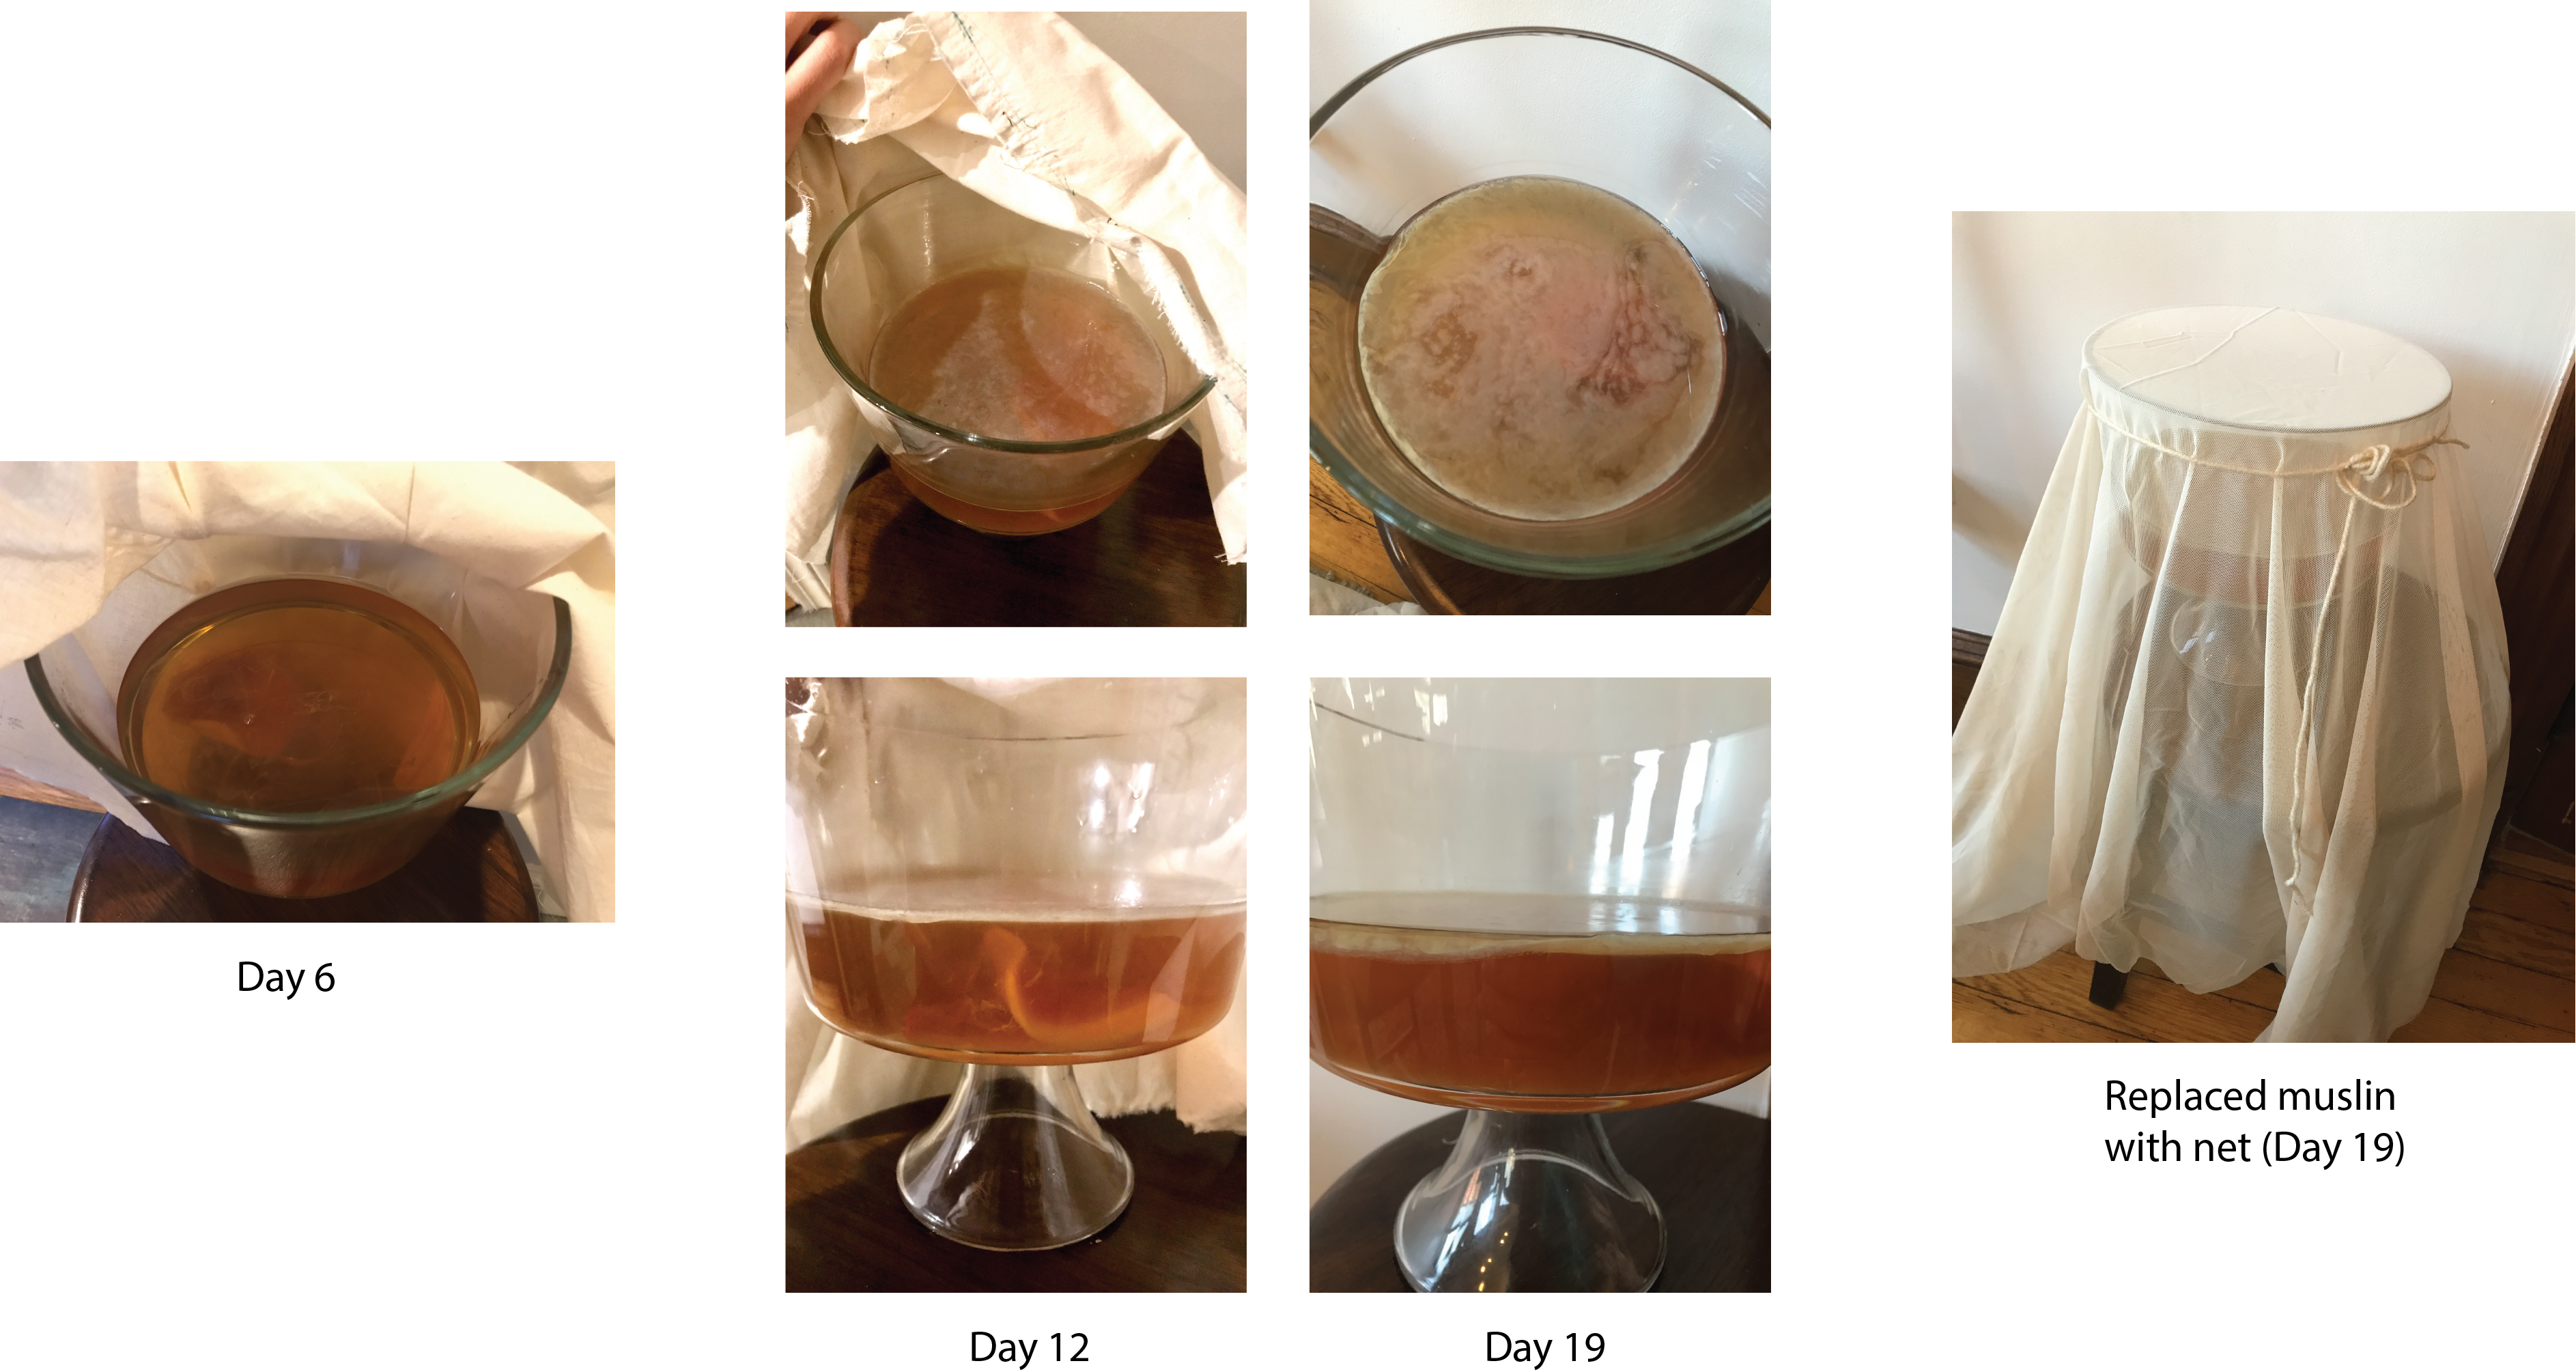
Latest Update: January 31, 2022
After a few more days, I took the layer out and washed and dried it. This resulted in a more distinct result.

Final Results
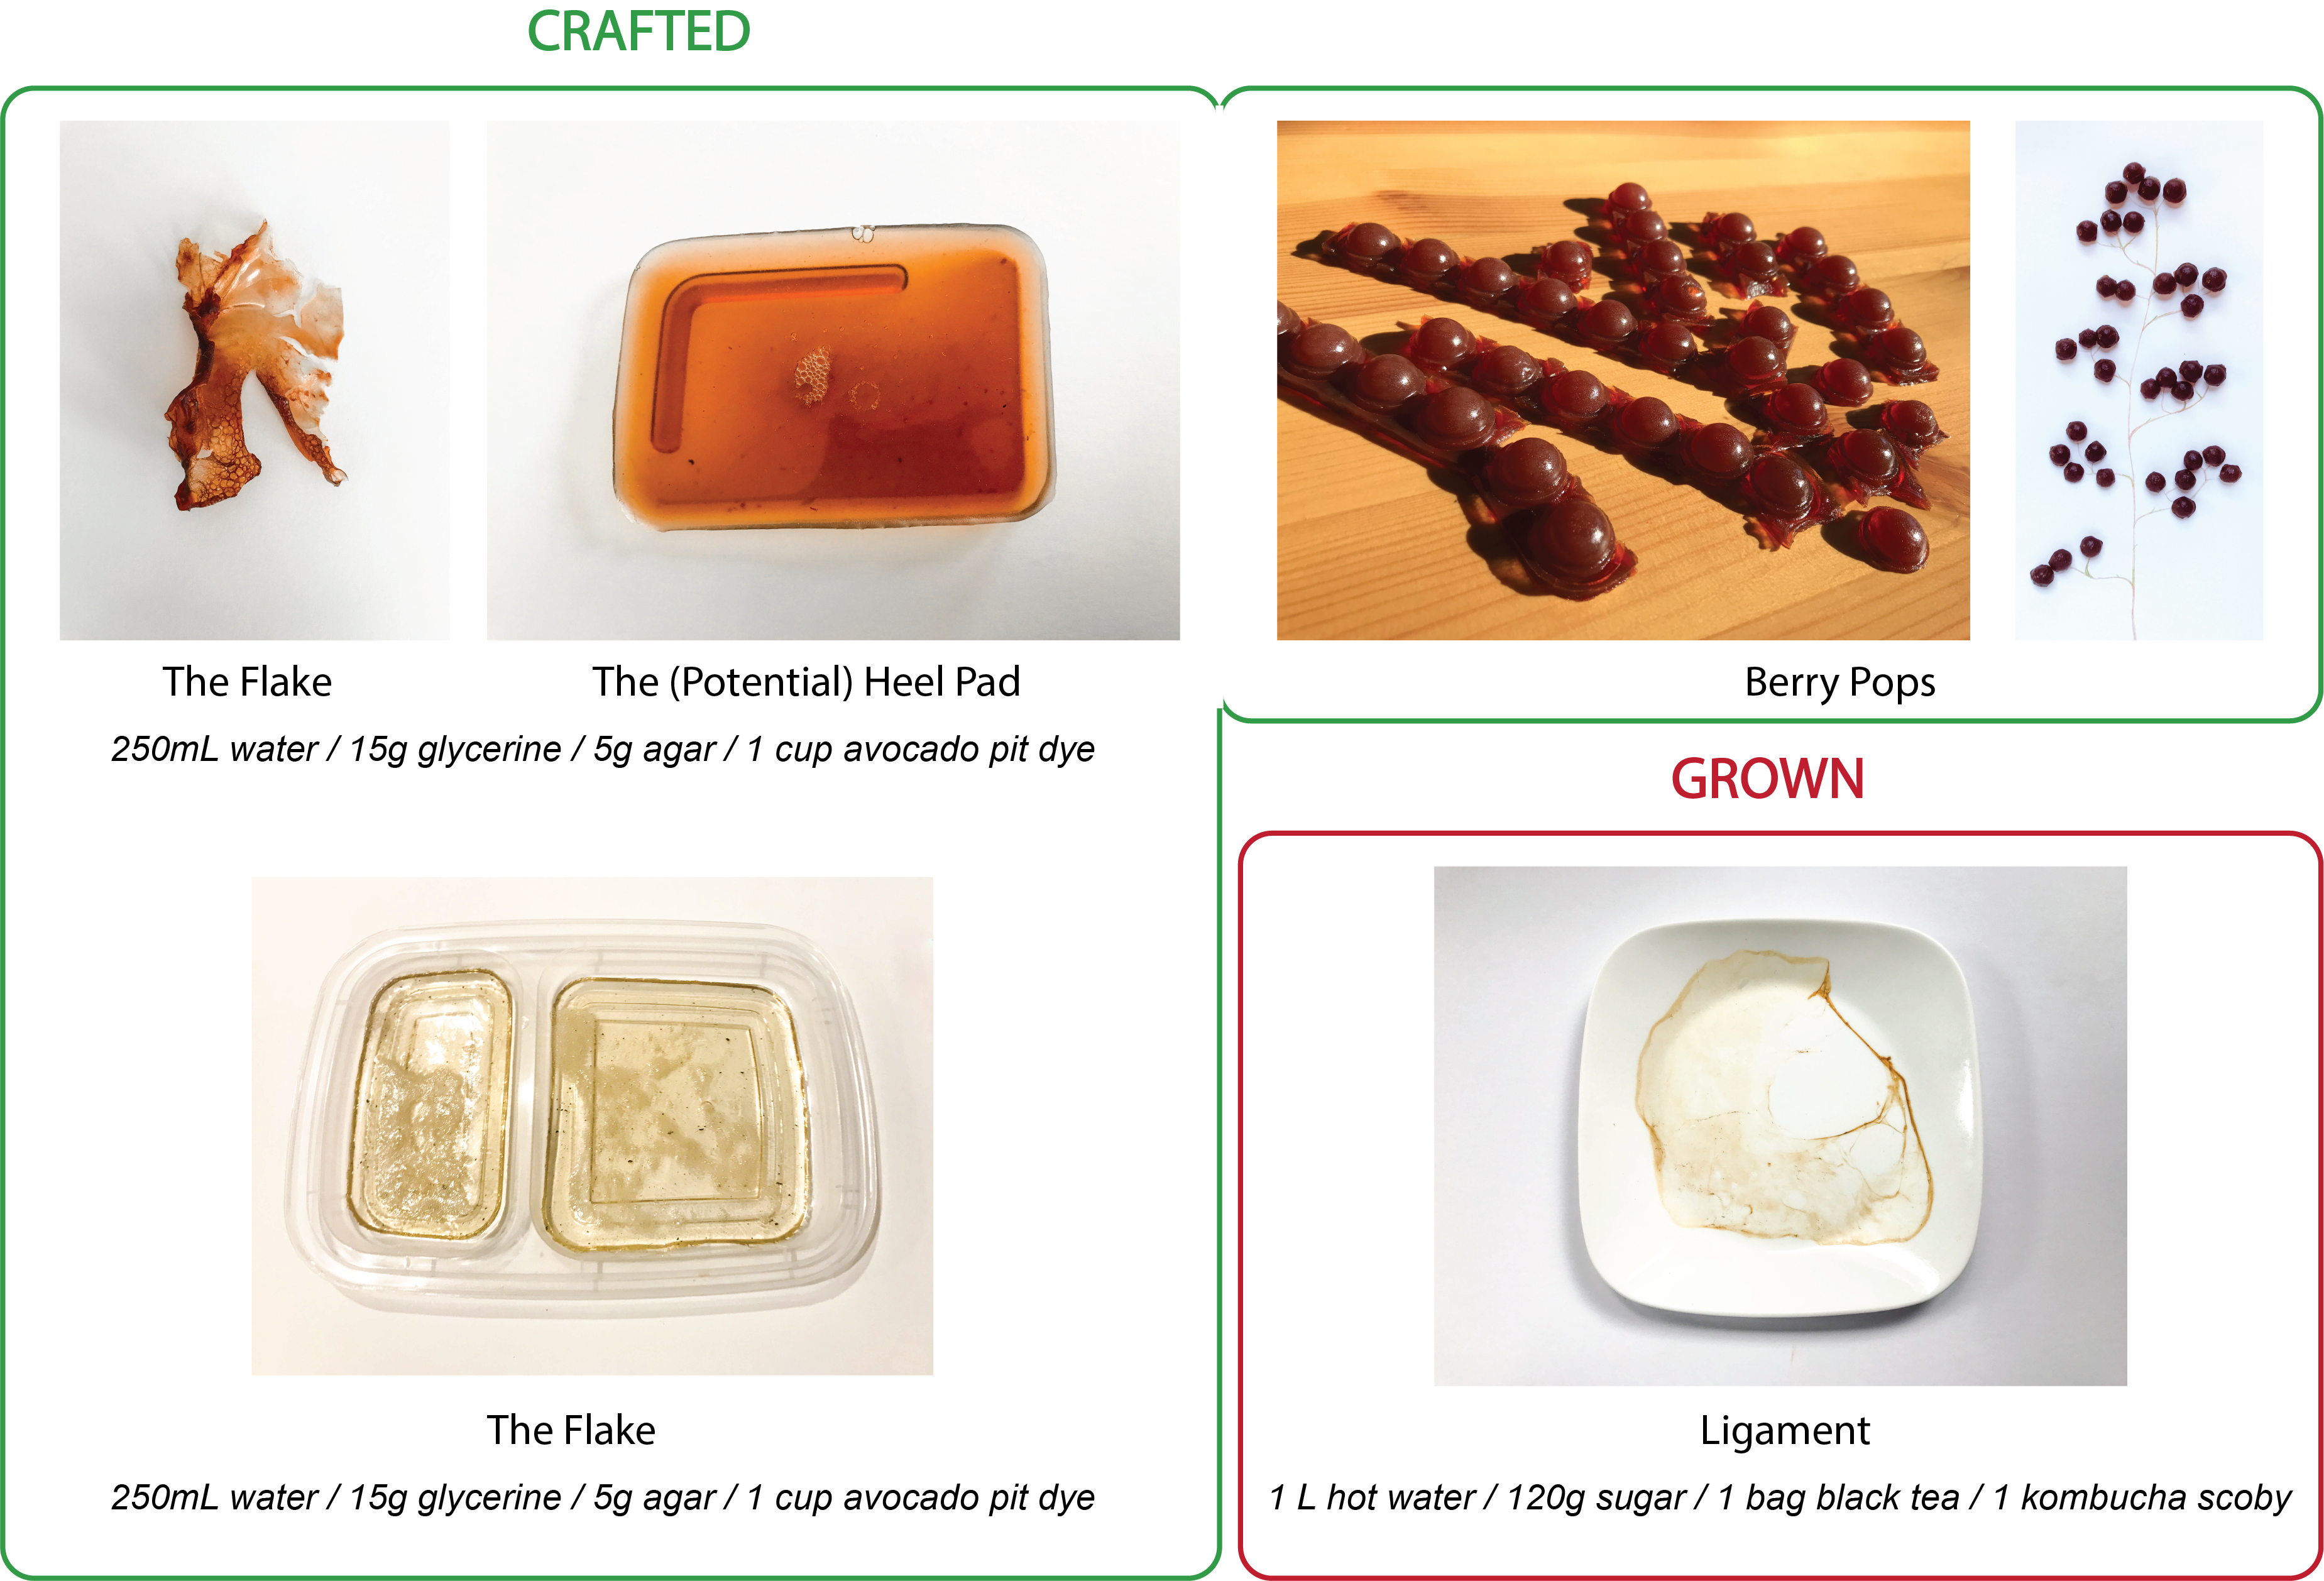
On the third attempt of extracting kombucha leather, I got a thicker and more distinct layer

For the future, I will make sure to check on it during the drying process more often so it doesn't get stuck on the cardboard as much.
Problem Areas
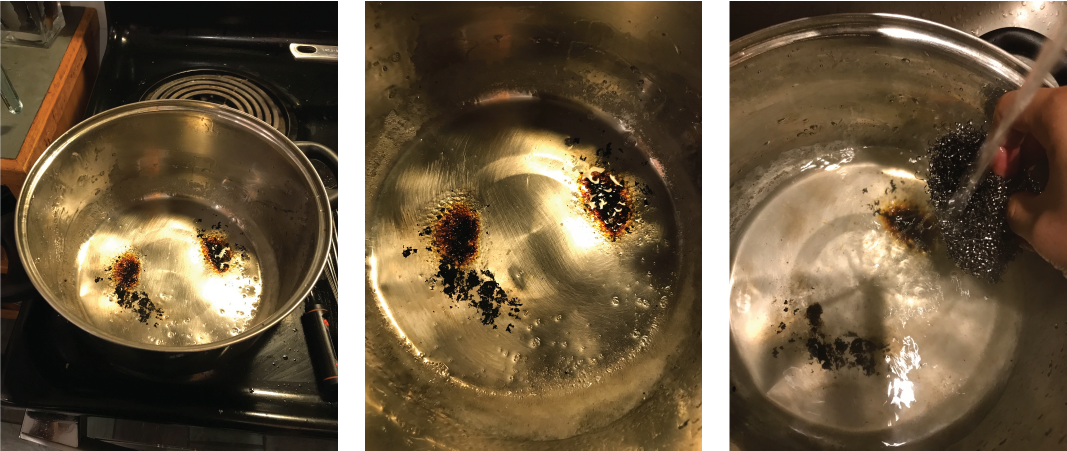
Burn flakes in mixture
Problem
The pot I was using had old burn marks on its bottom surface that was previously hard to clean off. Because of this, I assumed it was fine to use for this project. However, as I started stirring and whisking the gelatine mixture, the burn marks started to flake off the surface of the pot and got into the mixture.
Solution
Or be okay with it acting as a filler... 
Burned Glycerin
Problem
The pot I was using didn't have a flat bottom surface and was rather bumpy. As a result, some of the glycerin collected in the deeper dents and burned. The mixture was unaffected by this but the cleanup was tougher.
Solution
Use a better pot... perhaps
Bubbles in Mixture
Problem
As evident in the initial prototypes, tons of mini bubbles accumulated and remained in the biomaterial samples.
Solution
As suggested by my instructor Nuria, in the future, I can tap the bottom of the container to let the bubbles rise and pop away.
Moldy Kombucha
Problem
Update: December 2, 2021
In my foolish state of mind, I thought I could keep the kombucha brewing for another week to reach the max limit of 30 days (I went to 32 days). When I checked up on it again, mold had started to grow on the top layer. :sad:
Solution
Therefore this batch was scrapped, the bowl was cleaned and I started over again.
Note: given the crazy schedule I was faced with in December, I wasn't able to start this part of the assignment again until January 5
Inconsistent/Broken Leather
Problem
While peeling off the kombucha leather from the cardboard, I noticed it was very difficult to peel it off the cardboard without breaking the leather.
The reason why the final result may have ended in such a broken and inconsistent manner could be because:
- it was left on cardboard which caused the solution to stick to it
- it was not washed properly, leaving the layer to be stickier and stuck to the cardboard
- even during the additional 2 weeks, the inconsistent temperature in the room due to heating issues in the middle of winter, plus my curiosity pokes, caused some holes/thinner layers to form.
Solution
Be more careful maybe?