WEEK 7 - COMPUTATIONAL COUTURE
Last Update: Feb 8, 2022
November 1-7, 2021
This week I learned how to integrate 3D printing techniques on top of fabric and using modelling software (Rhino, Grasshopper) to program patterns for the 3D printing.
Keywords: Rhino, Grasshopper, 3D printing, parametric design, Sindoh, tulle, fabric, patterns, computational, PLA, TPU, filament, print bed, brim, construct domain, geometric, extrude, materials, bed adhesion, analysis, bounding box, array, plug-ins, Weaverbird, bifocals, Lunchbox, Chromodoris, Flexhopper, Food4Rhino, Kangaroo, Anemone
Quick Summary
 Tools/Resources Learned:
- Rhino 7 (Mac) Version 7.11
- Grasshopper Version 1.0007
- Sindoh 3D Printer Version 3DWOX
- 3DWOX Desktop
- Food4Rhino
 Tools Refined:
- Adobe Illustrator Version 2021 - a photo editing program
- Adobe Lightroom Version 2021 - a photo editing program
- Canva - a graphic designing platform
- DSLR Camera: Canon 5D Mark II - the camera I used to take final photos
 What I still want to learn better:
- How 3D printing behaves on other fabric/fiber types (e.g. organza, net, mesh, etc.)
Research and Inspiration
The main theme I was inspired by was repetitive patterns in nature - specifically in fish (ichthyology) and plant roots. I aspired to create something physical such as the kinetic stingray but in the end I produced something much simpler (but the aspiration is not gone yet!)
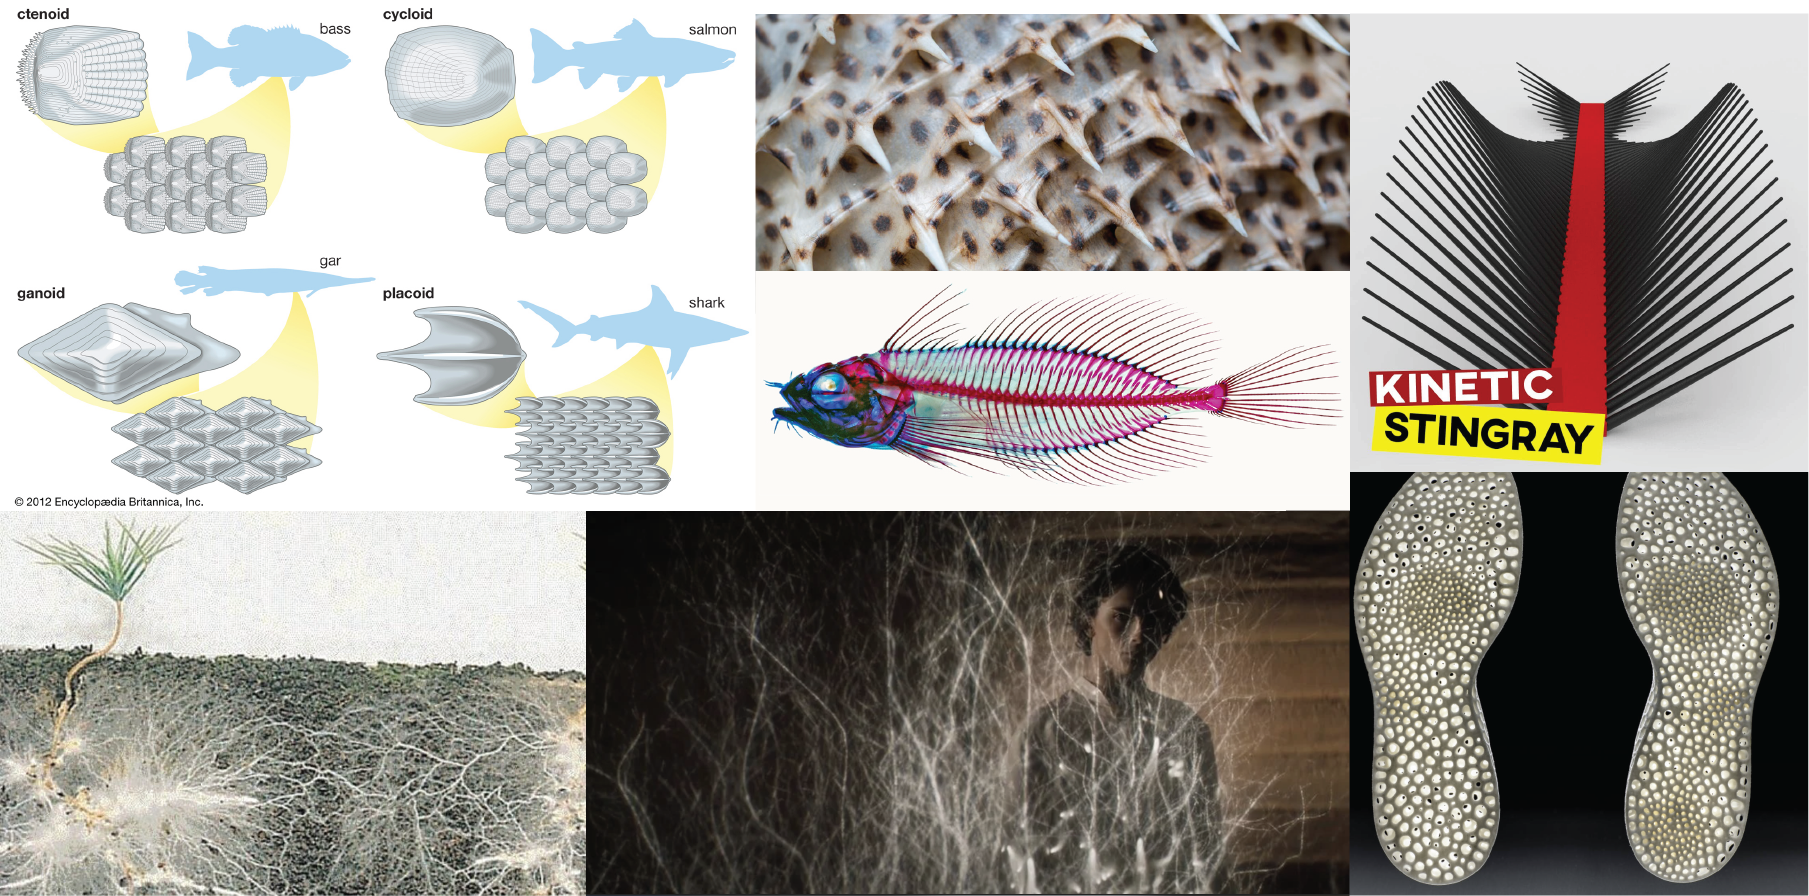
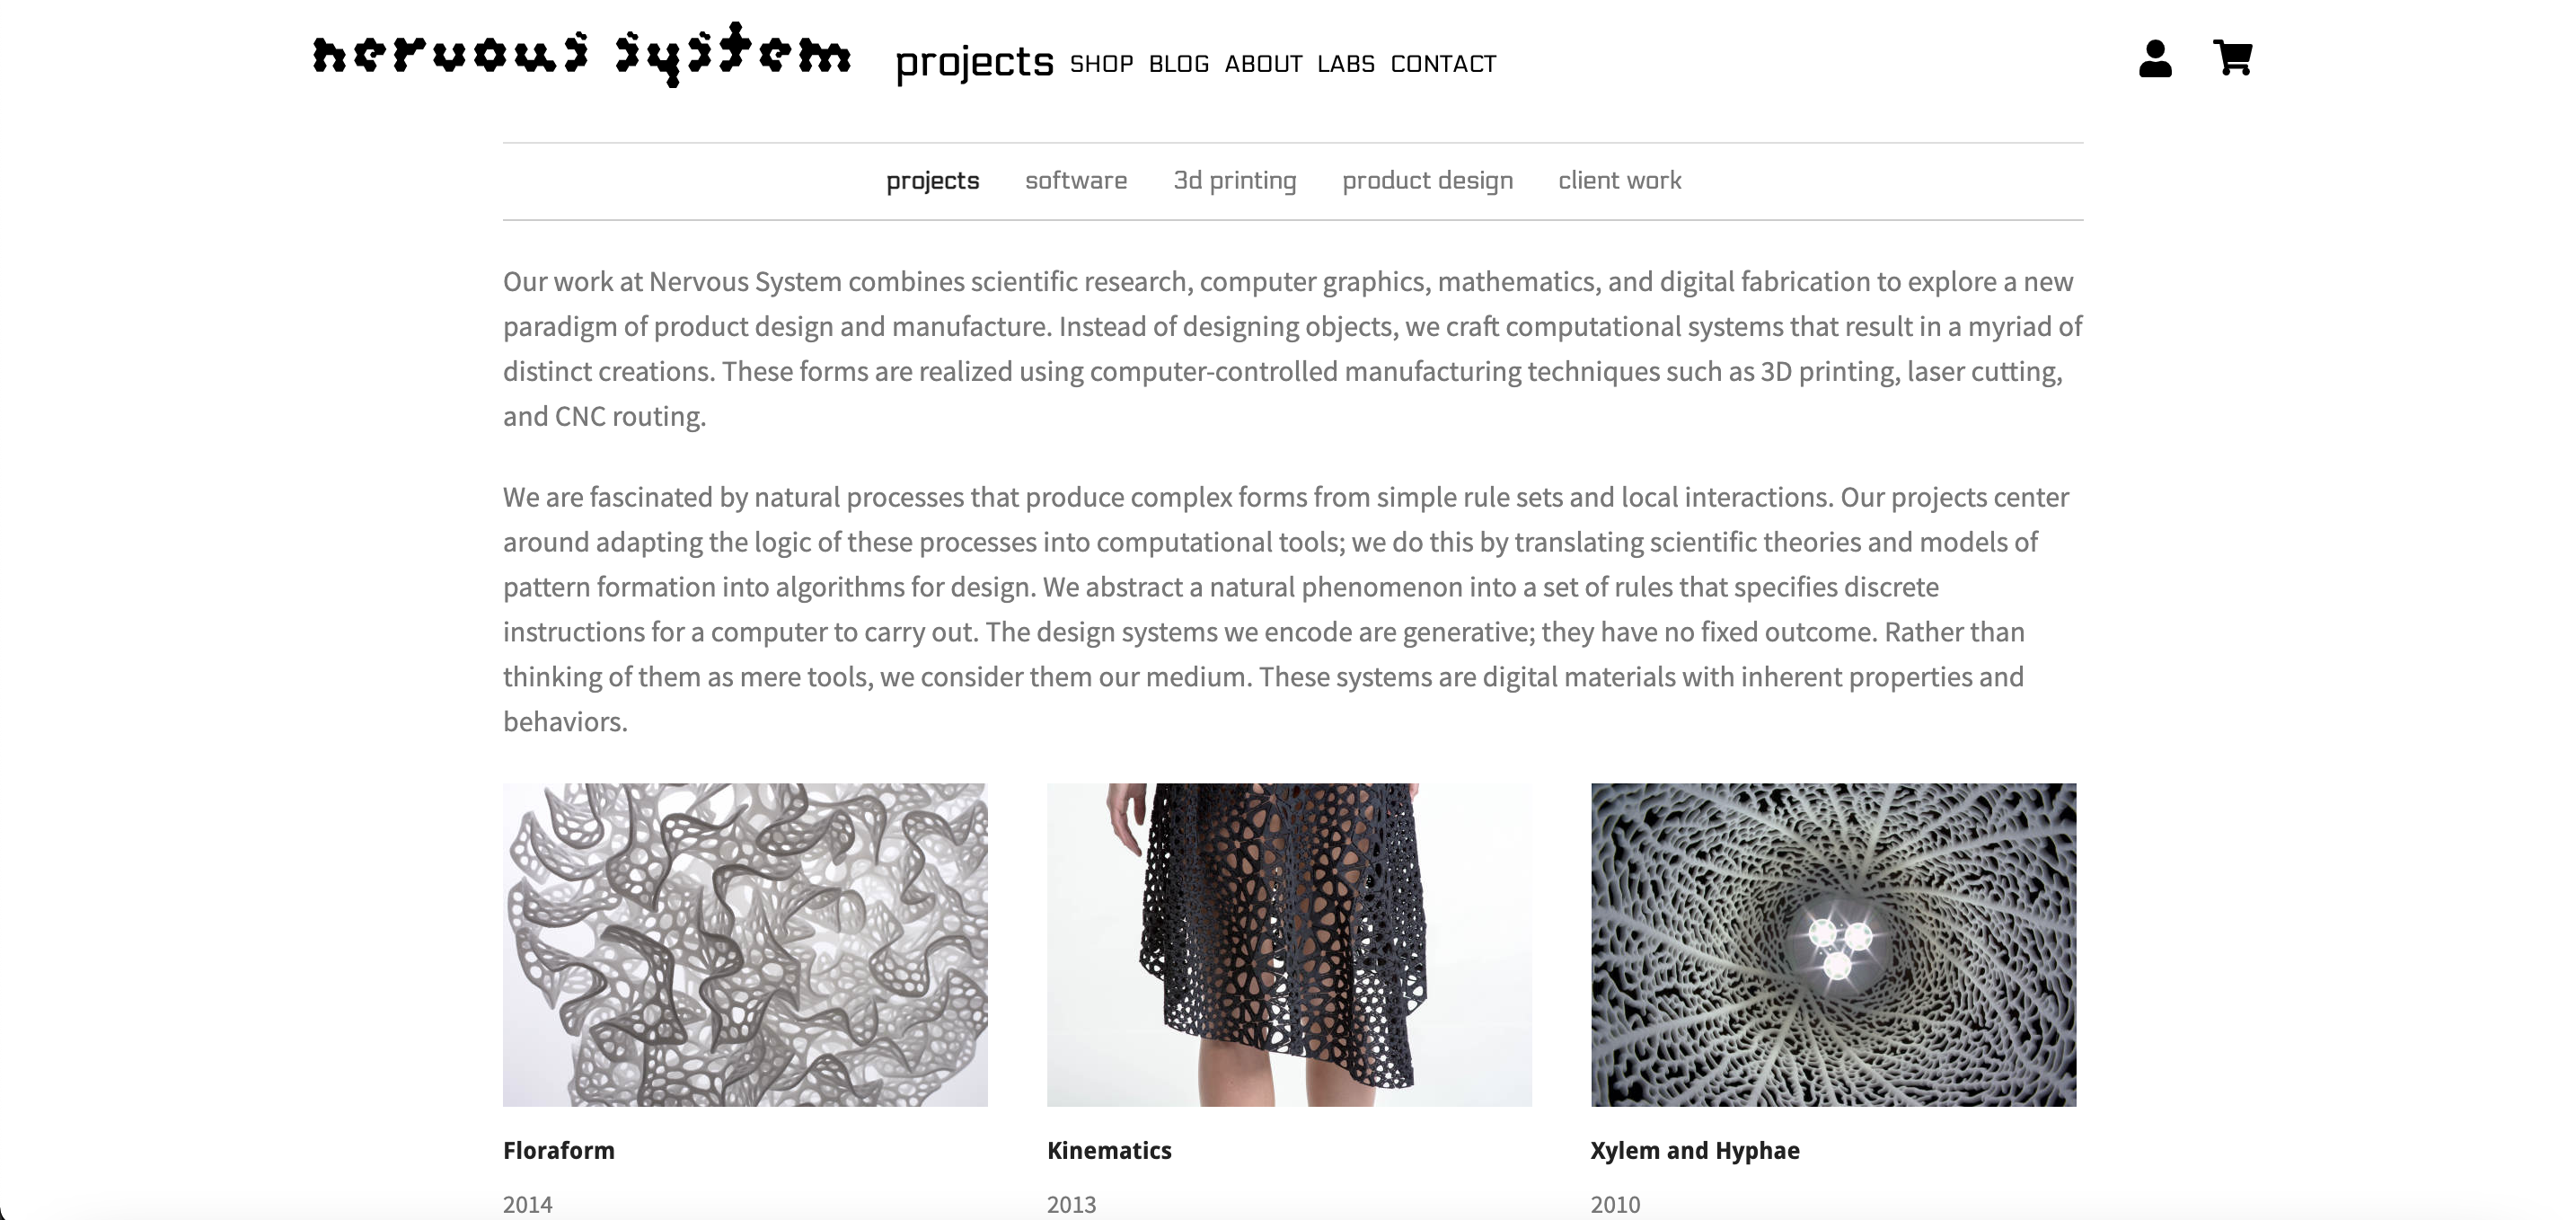
In my research of complex patterns, I was inspired by my instructor Nuria Robles to look at the projects produced by n-e-r-v-o-u-s
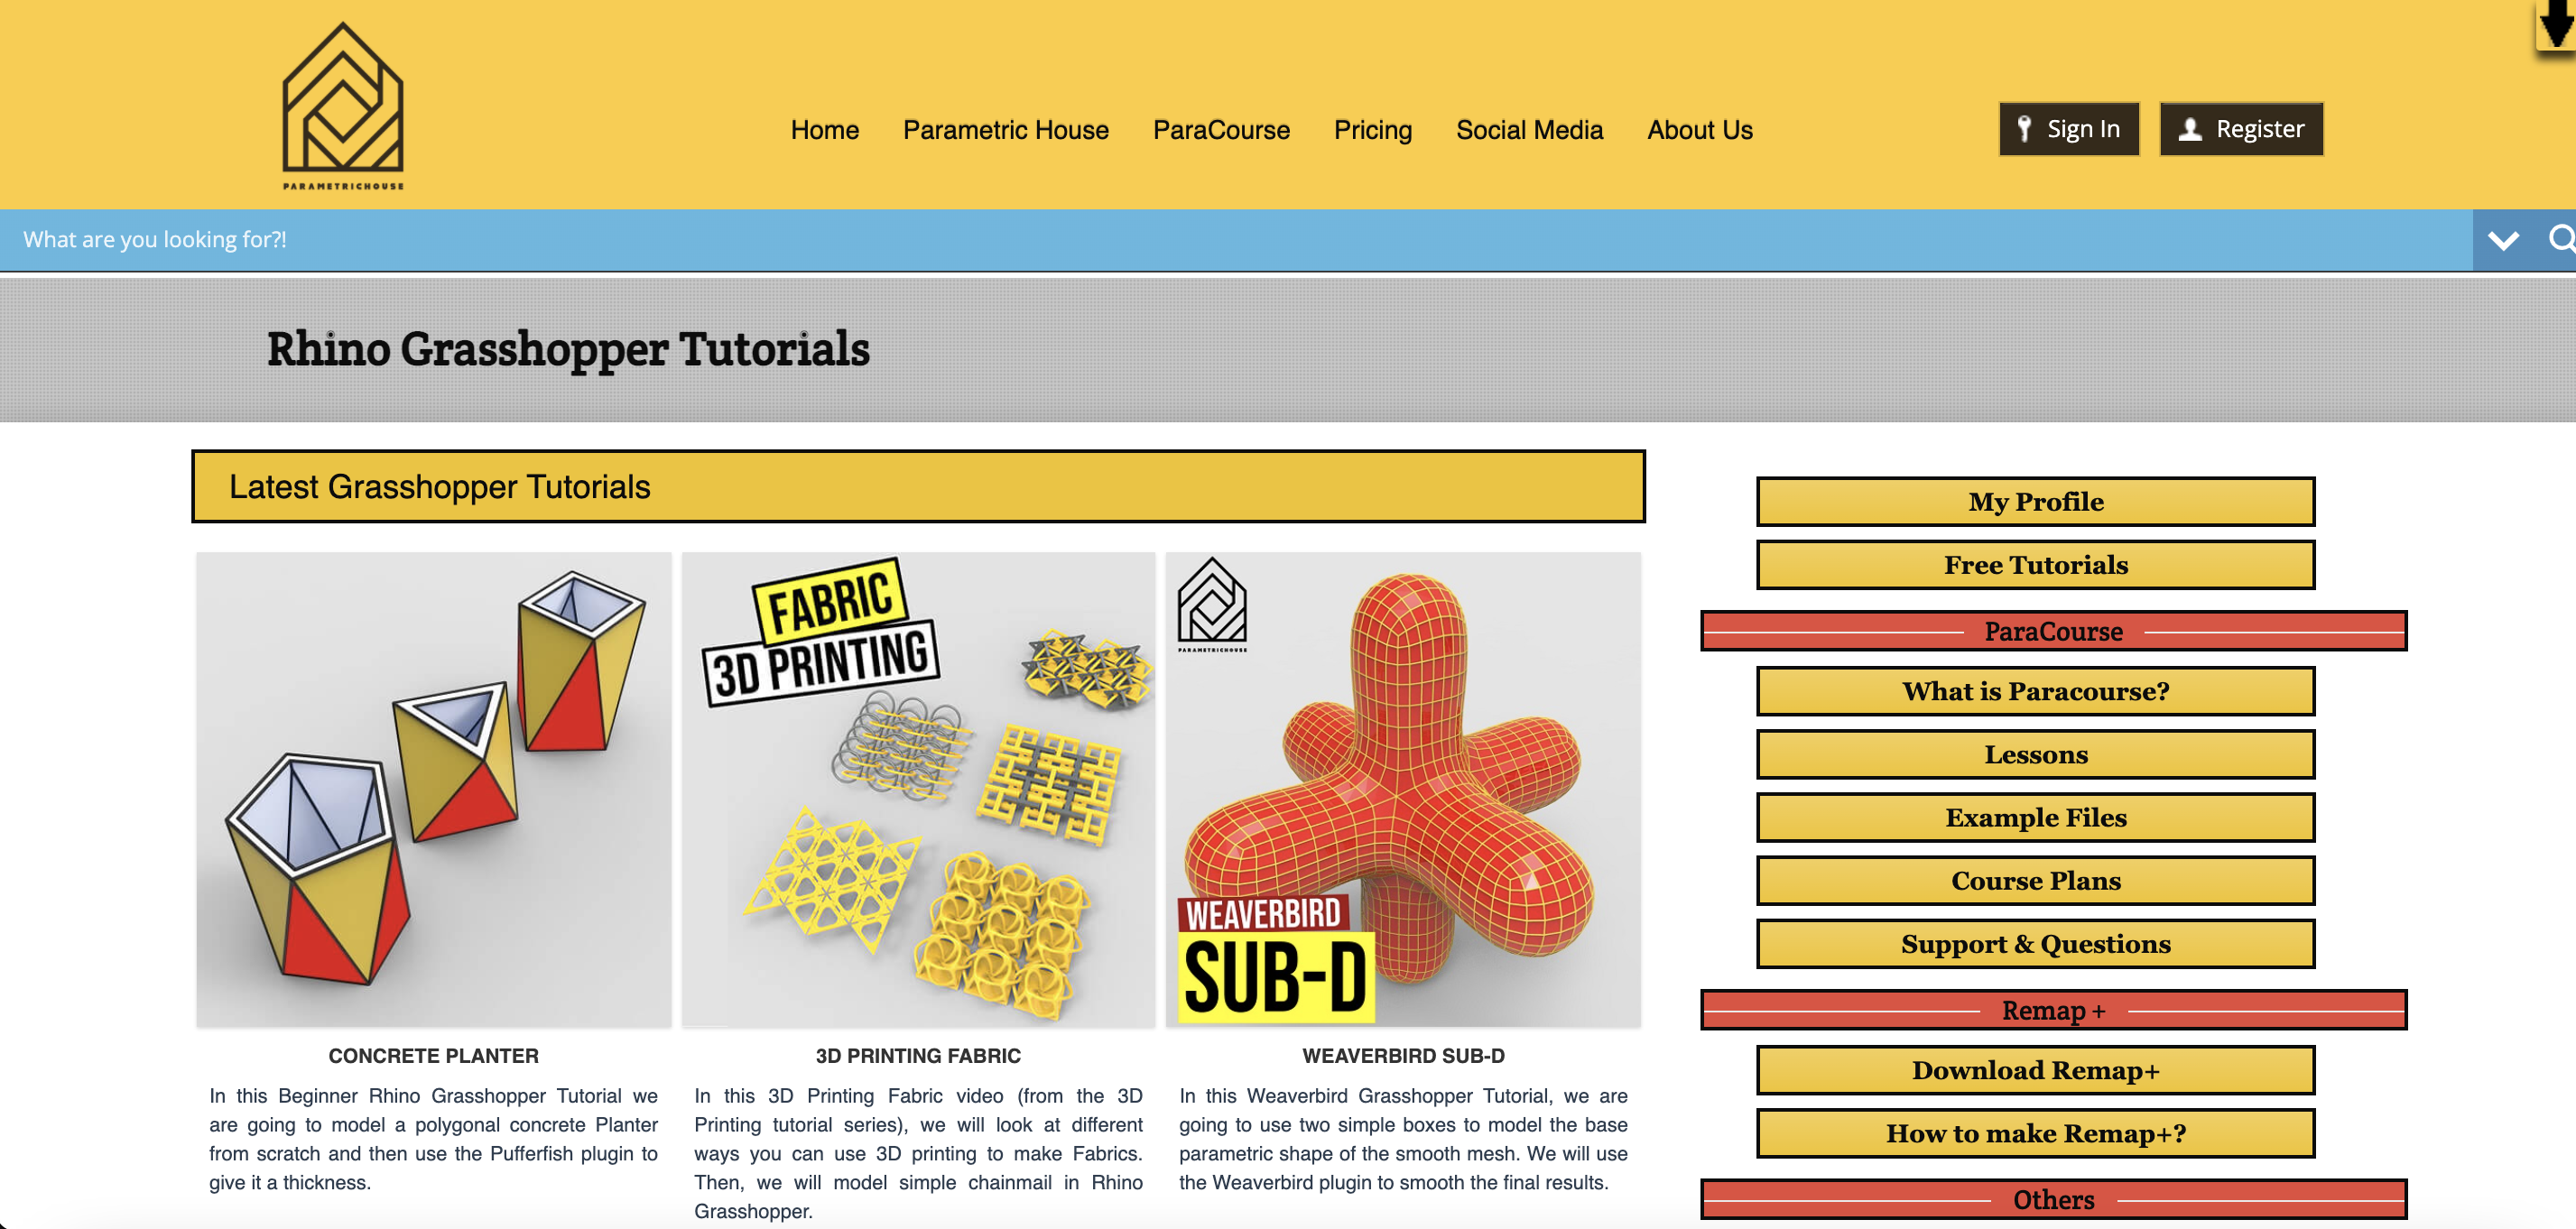
And then I followed Parametric House for tutorials on how to produce specific projects in Rhino and Grasshopper. This was done while waiting for the Fabricademy tutorials to be posted/shared.
I was in a bit of rush to produce something because my time at the 3D printer at the lab was limited (4 hours this week).
The second part of my assignment on leather molding was highly inspired by Fabricademy alumni Noemie Carrier. I also followed a tutorial on Youtube that showed how to do wet leather molding on wooden blocks.
Grasshopper Practice
Expanding Icons
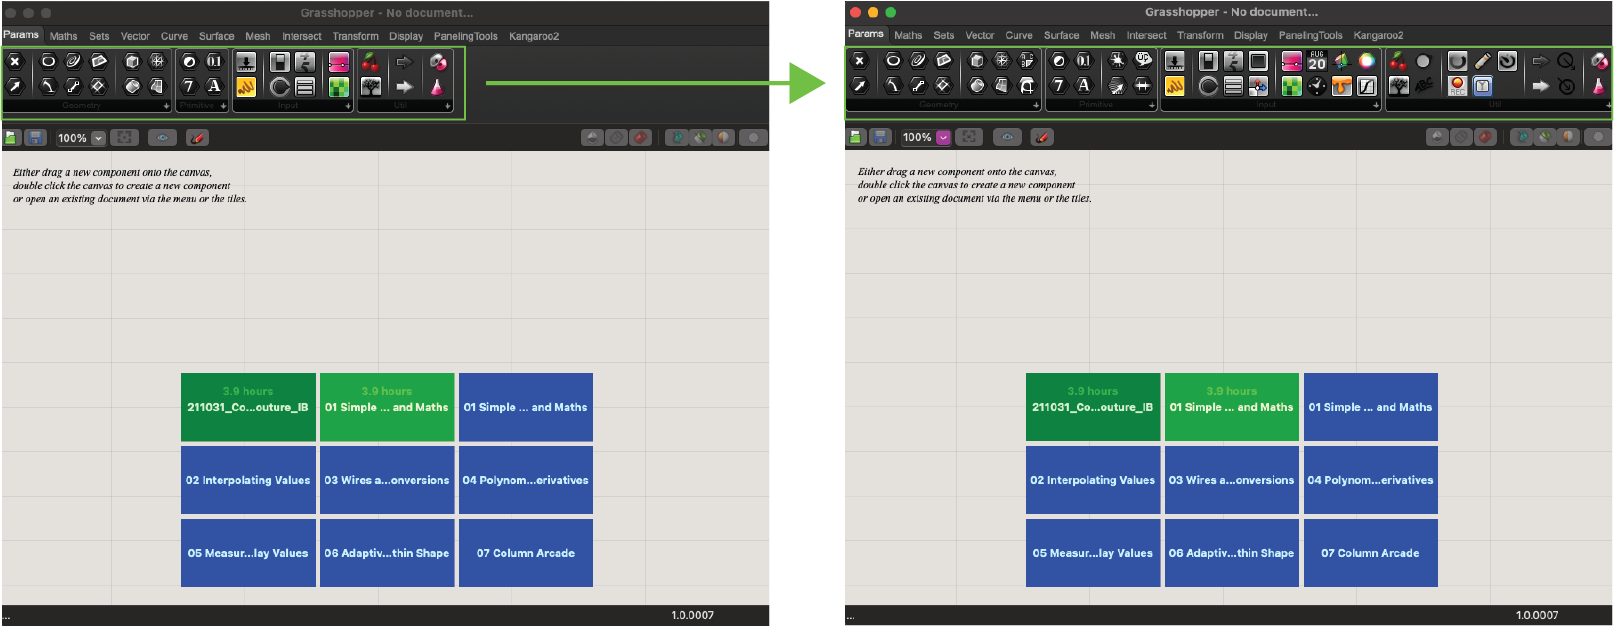
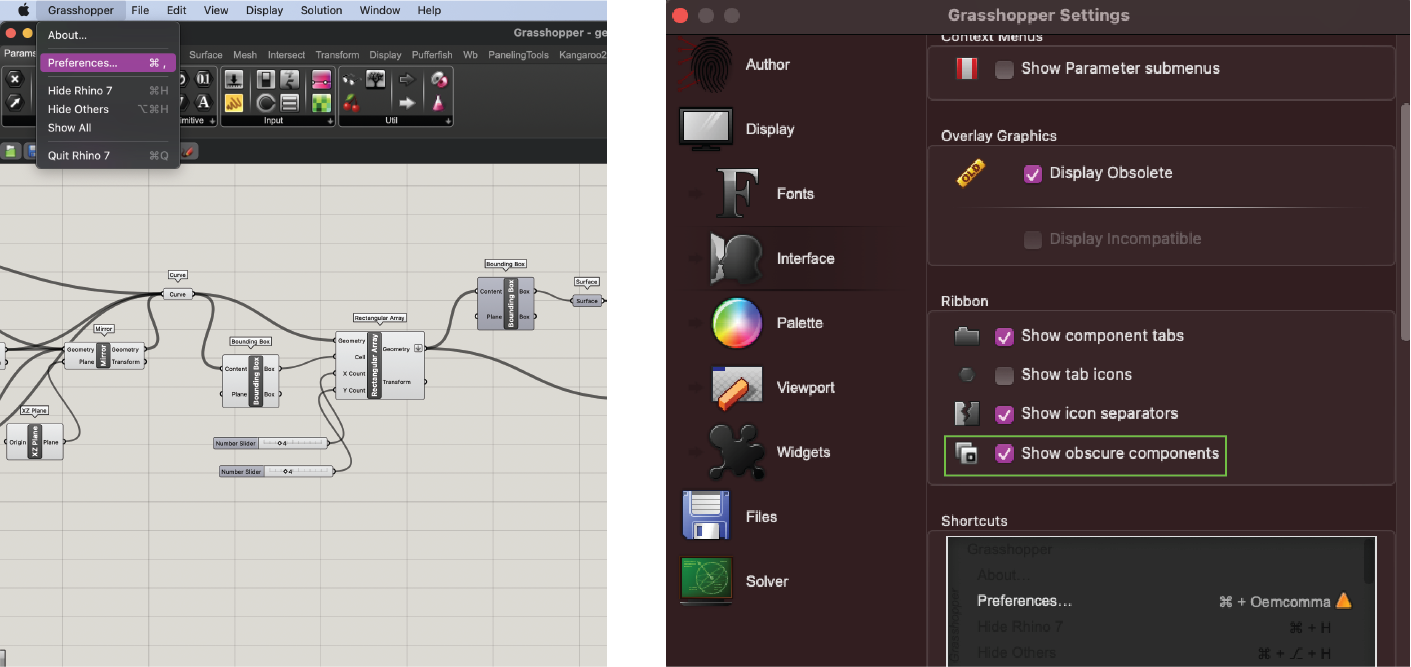
I played around with the preferences and settings in Grasshopper so that I could see all the functions available in one view. I did this by going to Grasshopper > Preferences > Interface > Check 'Show Obscure Components'
Adding Plug-Ins
To add the recommended libraries for Grasshopper, I searched for them on Food4Rhino. I then downloaded them to the following directory:
On my Mac:
/Users/vickyyluan/Library/Application Support/McNeel/Rhinoceros/7.0/Plug-ins/Grasshopper (b45a29b1-4343-4035-989e-044e8580d9cf)/Libraries
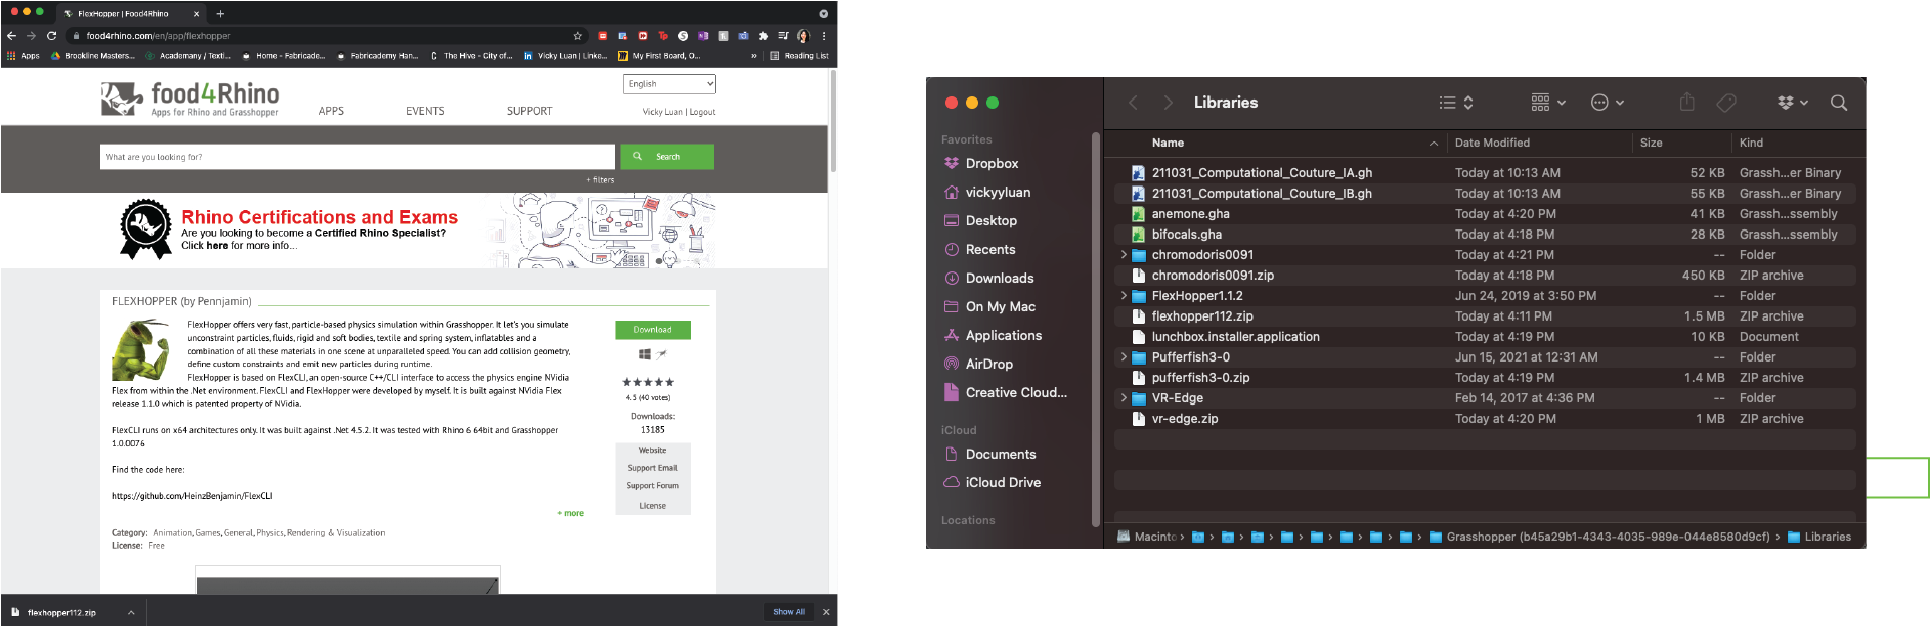
But because I'm working on a Macbook, only a few them were available. In fact, I ran into issues with Rhino when I thought I could import all the libraries that were Windows-only into the app folder (see Problems section below). Here are the libraries I ended up keeping:
- Bifocals (.gha)
- Pufferfish Version 3.0
- Weaverbird
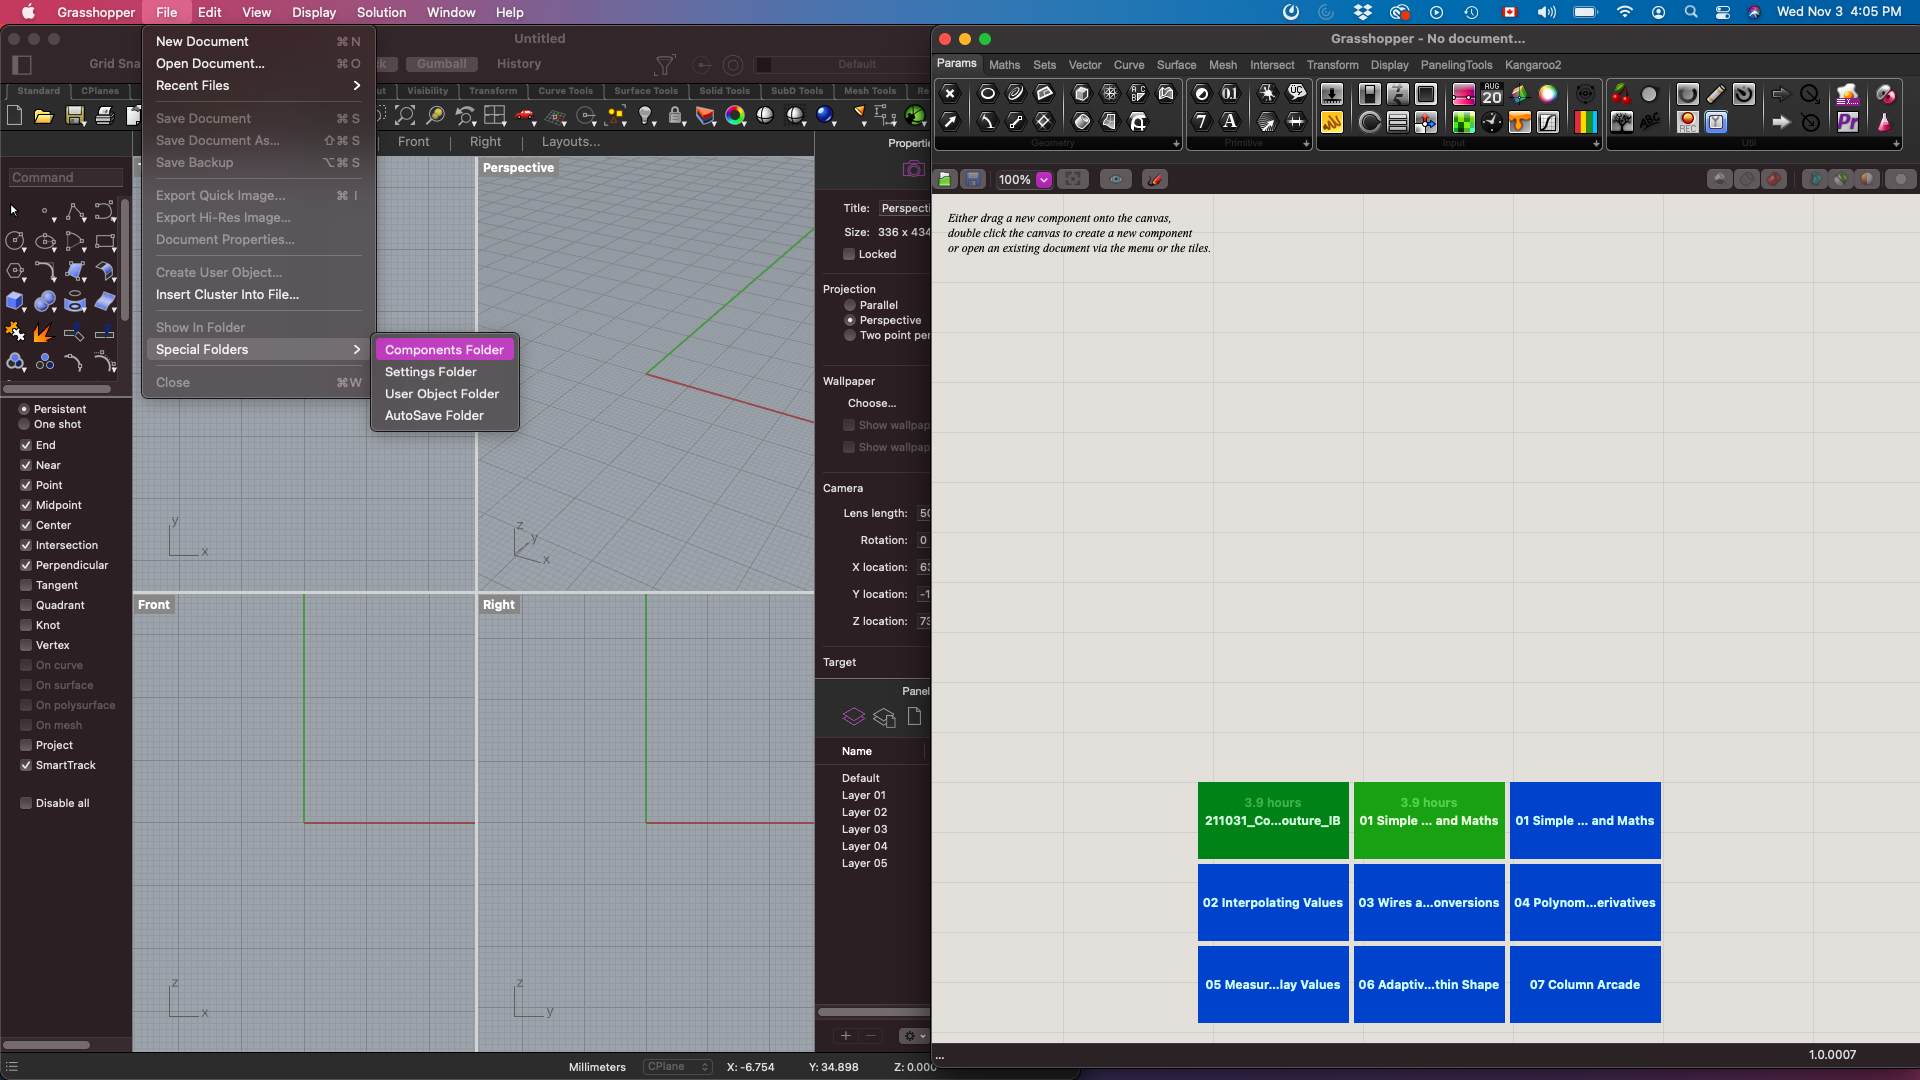
These files were also accessible through Grasshopper by going to File > Special Folders > Components Folder, which leads to the same directory shown above.
Practice #1: Tube
My first practice with Grasshopper was creating a circular tube as per a Youtube Tutorial from 17:45 to 24:10
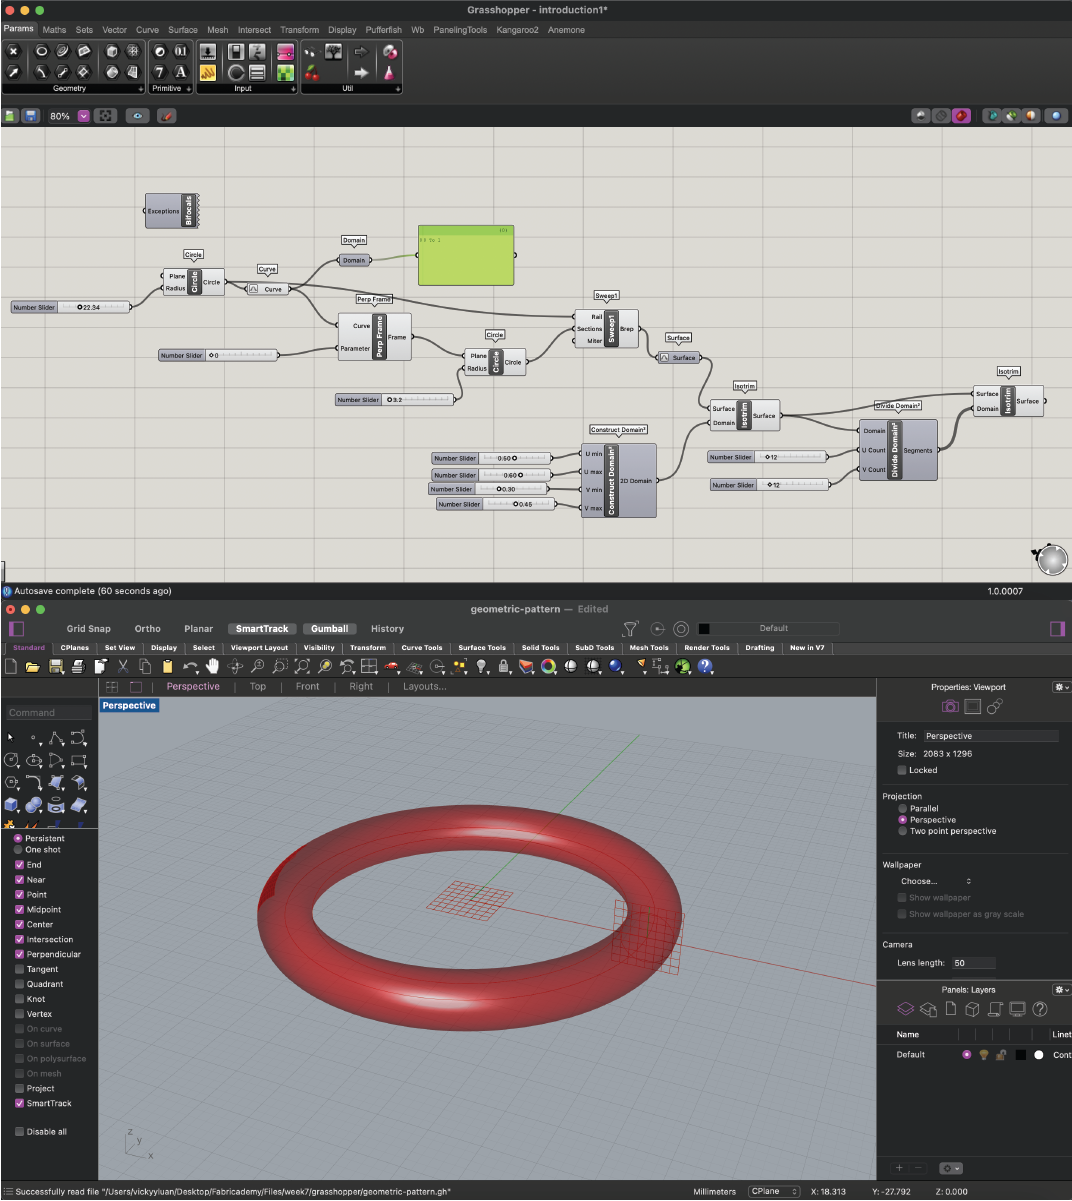
For these files, see Download Links below
Practice #2: Geometric Pattern
To play around with Grasshopper more and produce a pattern in Rhino I followed this tutorial from Parametric House
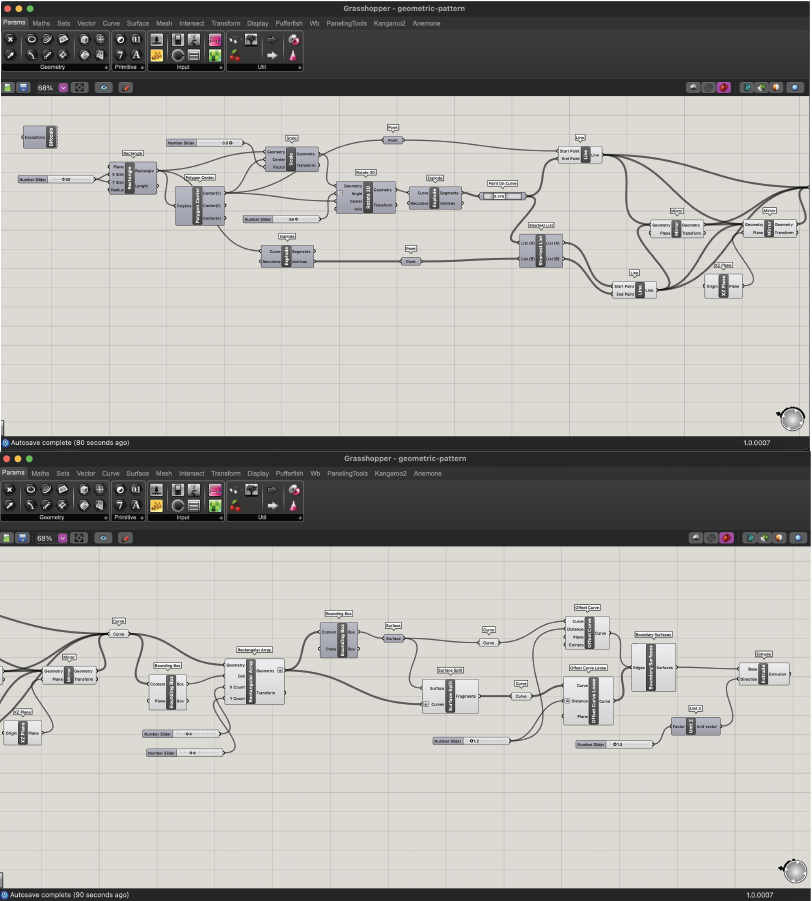
which produce
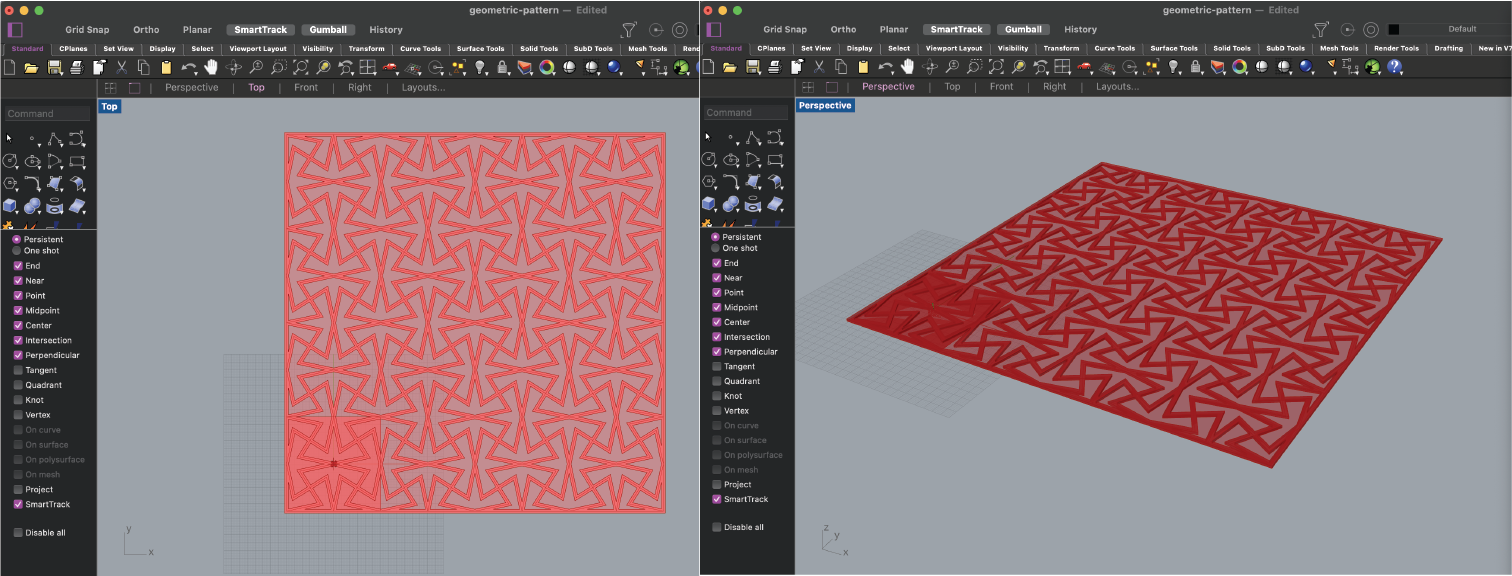
This wasn't my actual assignment but it gave me great practice in getting familiar with Grasshopper and see how the logic works in the program. (See Download Links below)
Quick Tricks I learned
Adding an Element
Assuming I know what function I want, I quickly add it in the Grasshopper space by double clicking in it and typing the name of it as opposed to searching for it in the top bar.
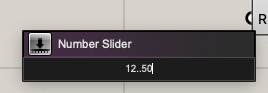
Adding a Number Scale and Defining the Range
Originally I thought I would have to add a Number Scale and then define the range by double clicking on the Number Slider then typing the number.
Instead, I figured I could just double click in the Grasshopper space and then immediately define a range by typing "the min number + .. + the max number" and it'll immediately generate a Number Slider.
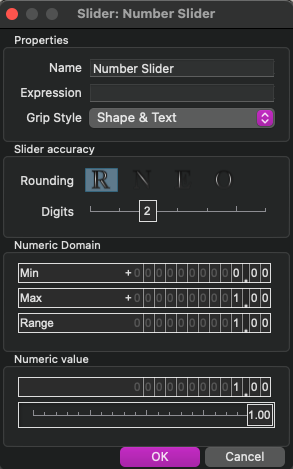
Changing Number of Decimal Points
If I double-click on a Number Slider on its title, a new window pops up where I can change the parameters of the function. For example, I can change the number of decimal points by making sure the Rounding is set to "R" and then choosing the number of digits I want after the decimal point. Then I double check the min and max range to what I want to be.
Dotted Plane with Gradient
To create the following effect, I followed an online tutorial on Youtube called "Grasshopper Tutorial 06 | Domain Basics".
Side Note: I found it faster to add an element to the Grasshopper space by double-clicking in it and typing the function I need... assuming I even know what function I need of course.
Below is the pathway I used to create the basic parametric design in Grasshopper
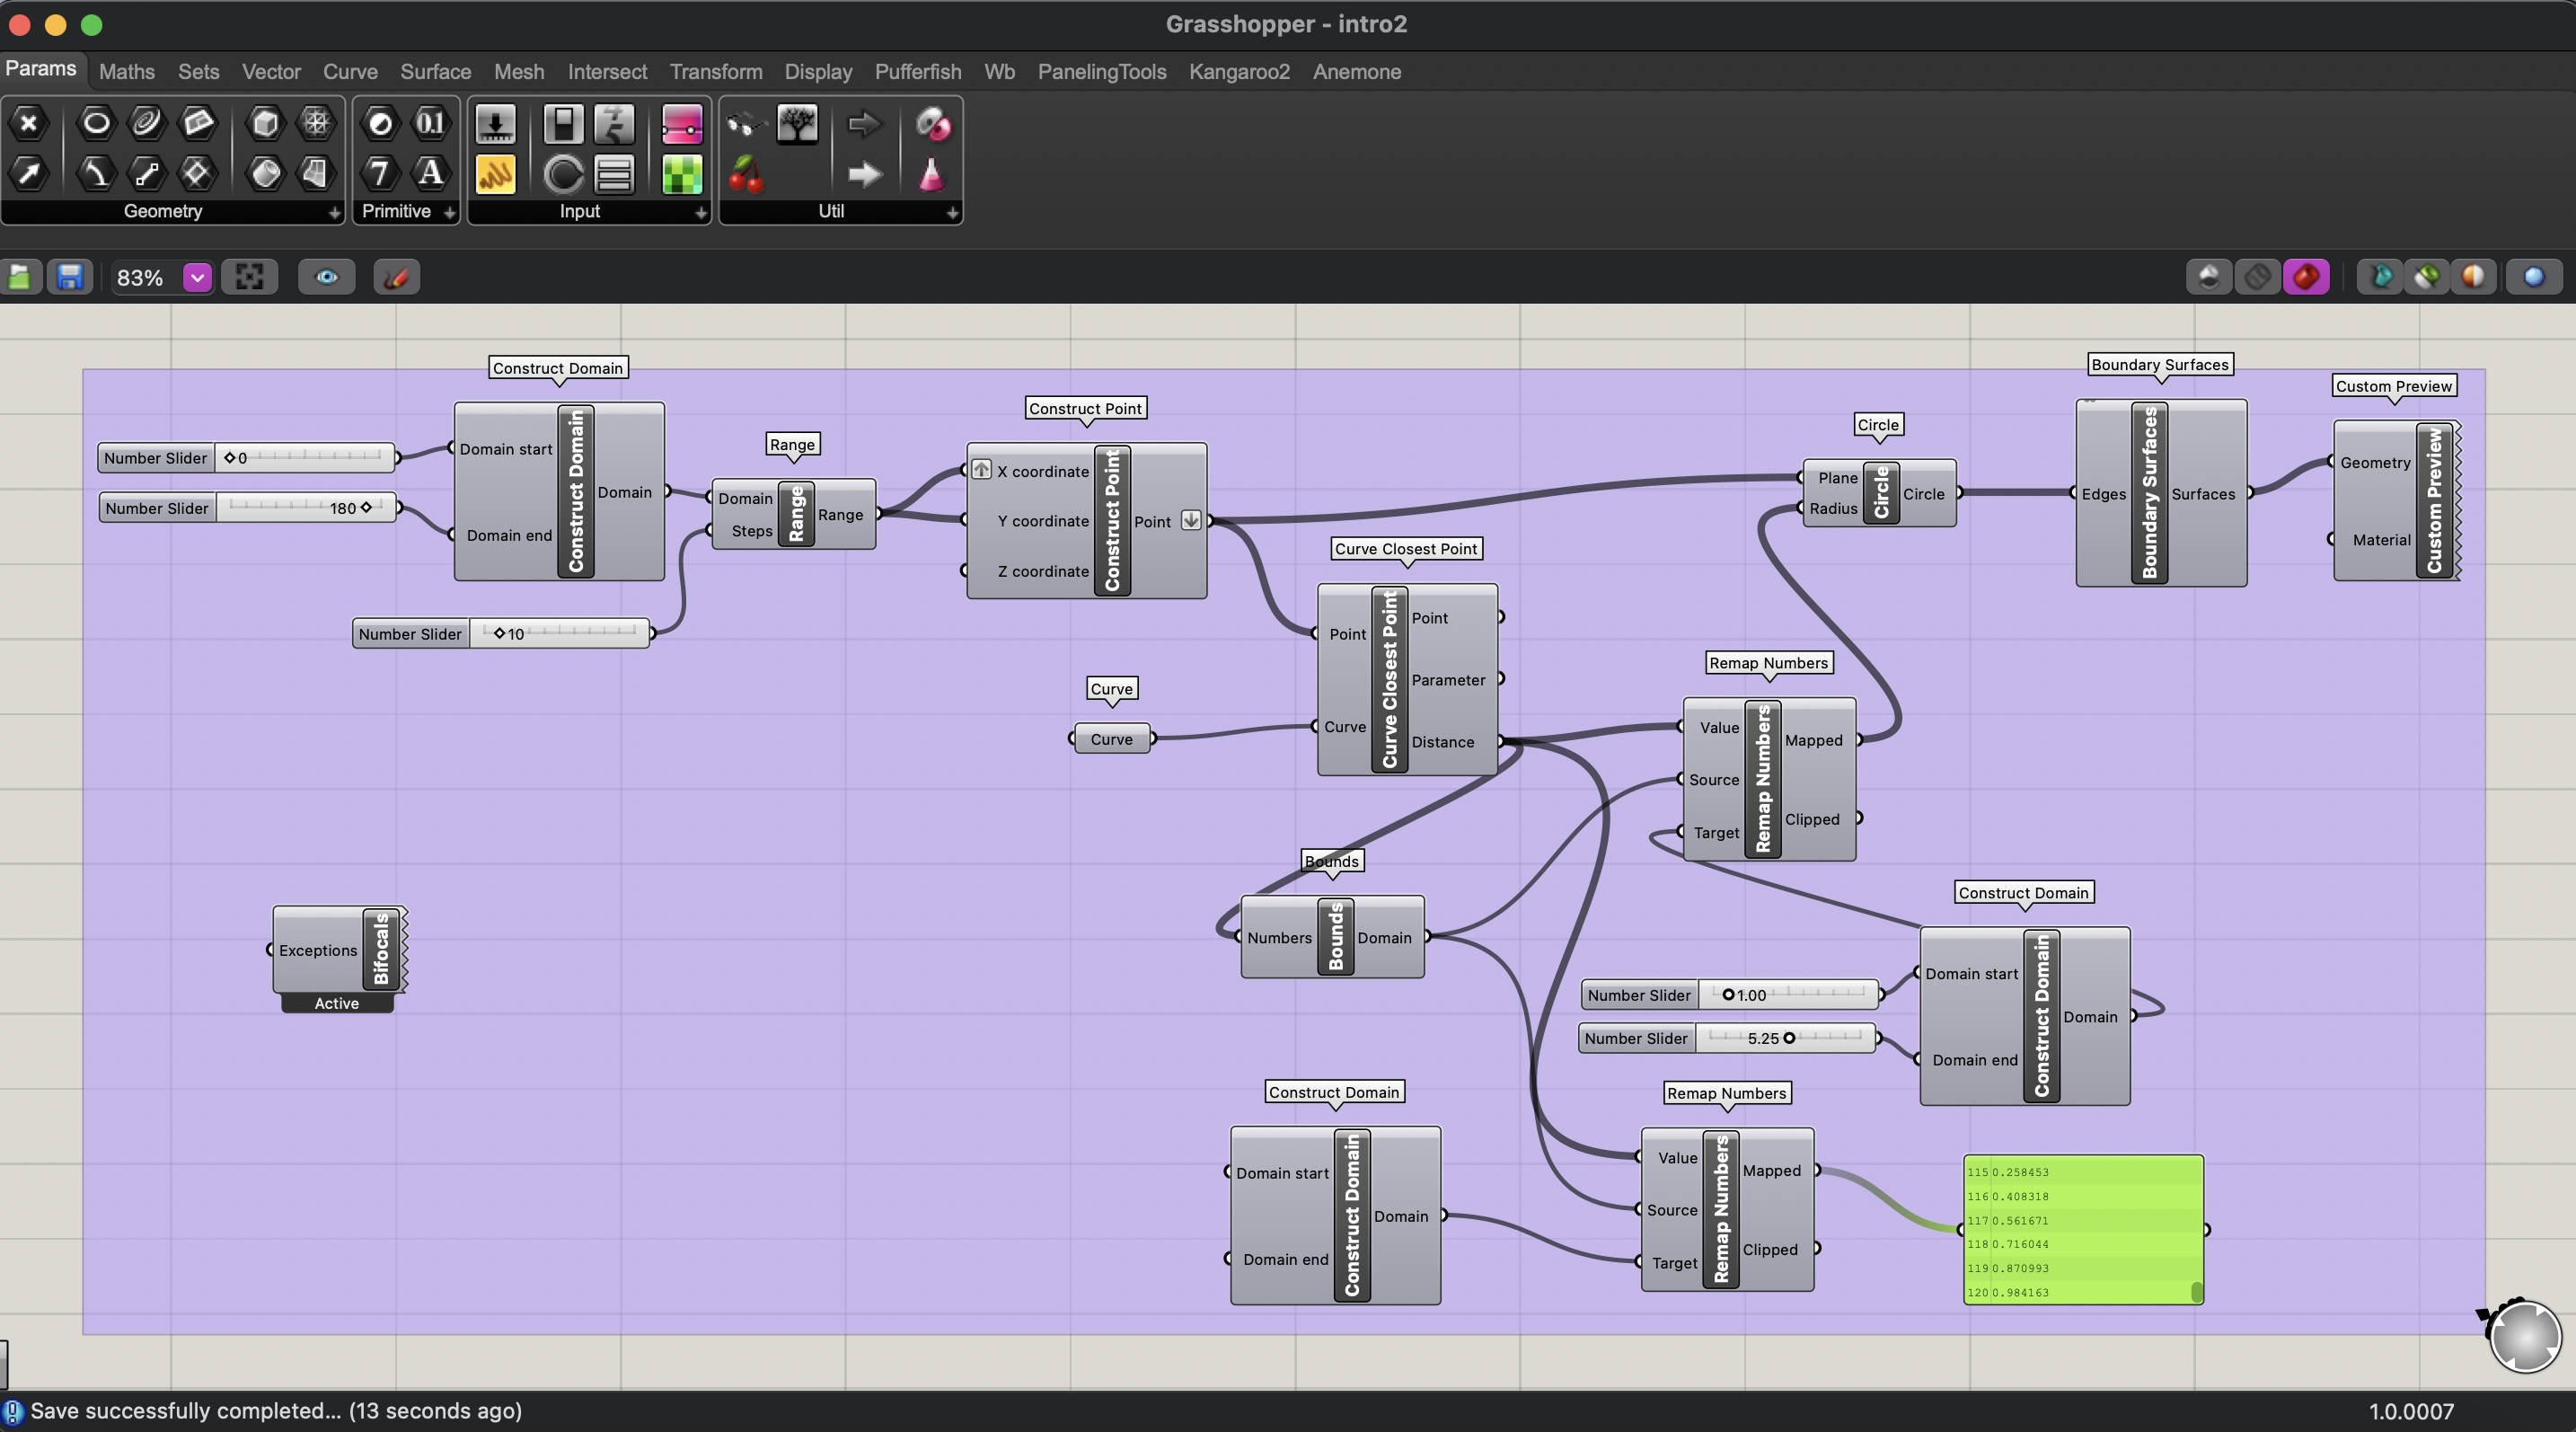
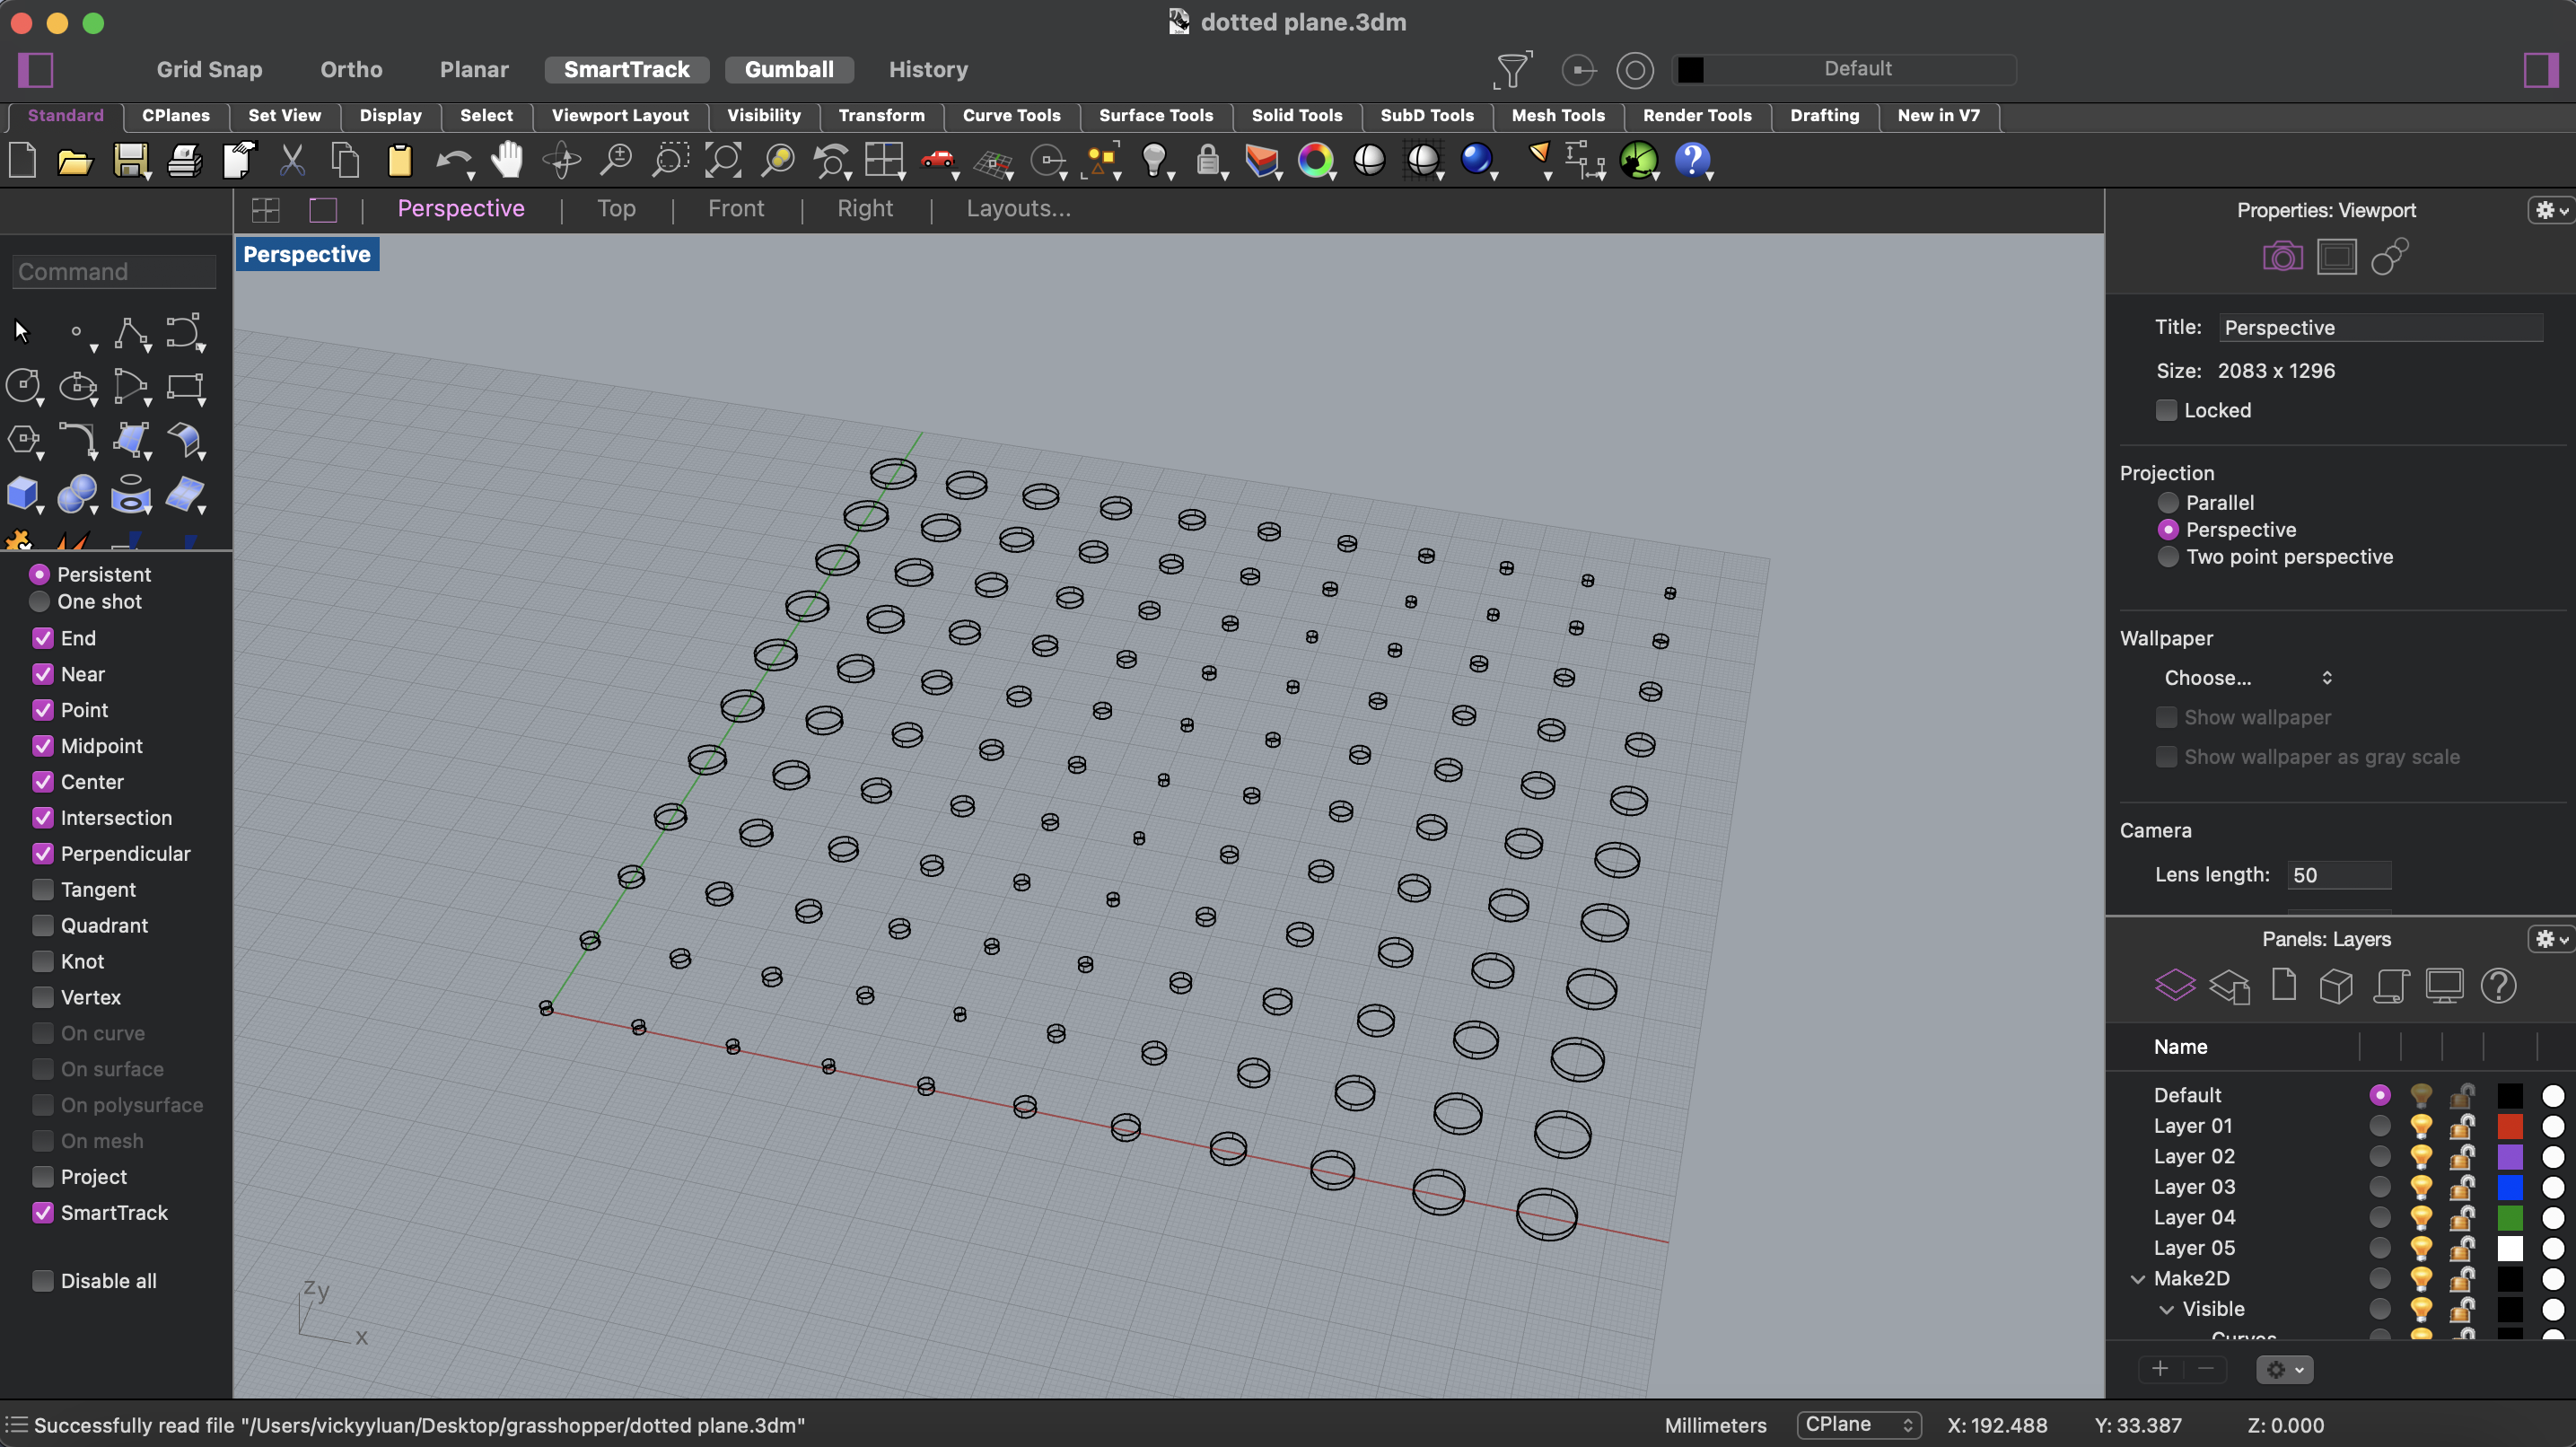
which generated the following model in Rhino
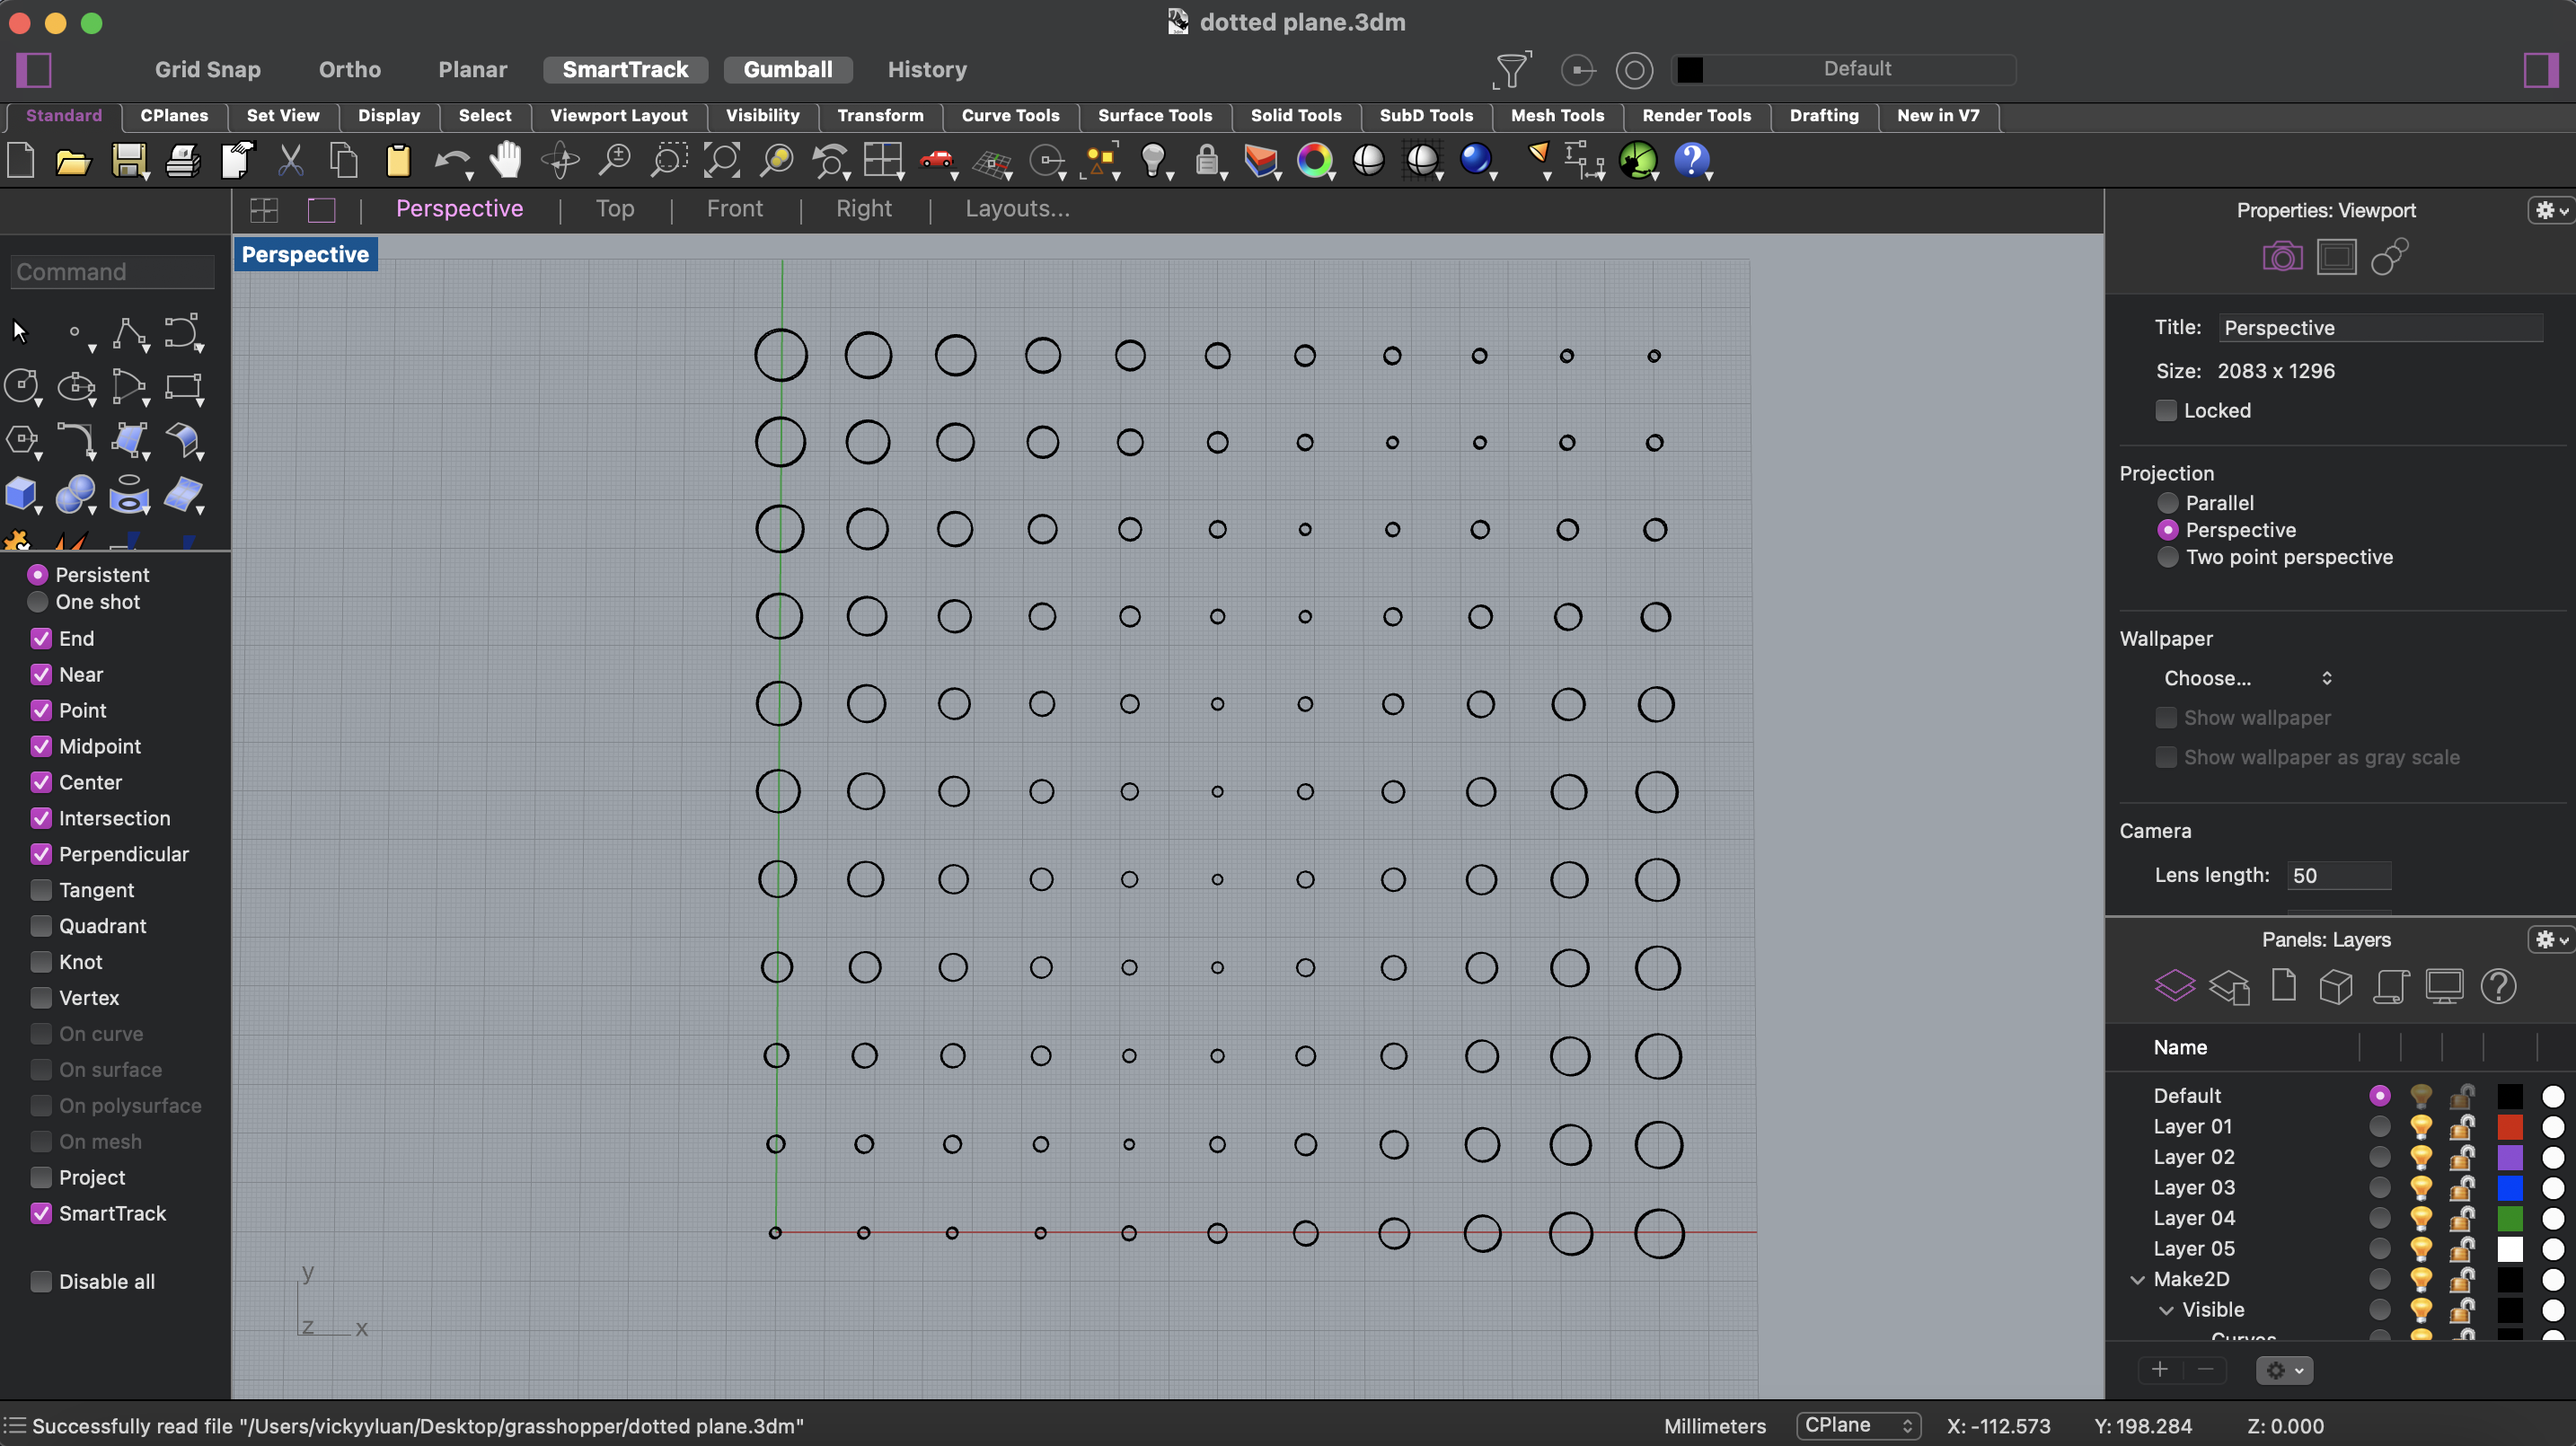
I then extruded the shapes to have a depth/thickness of 1.5mm
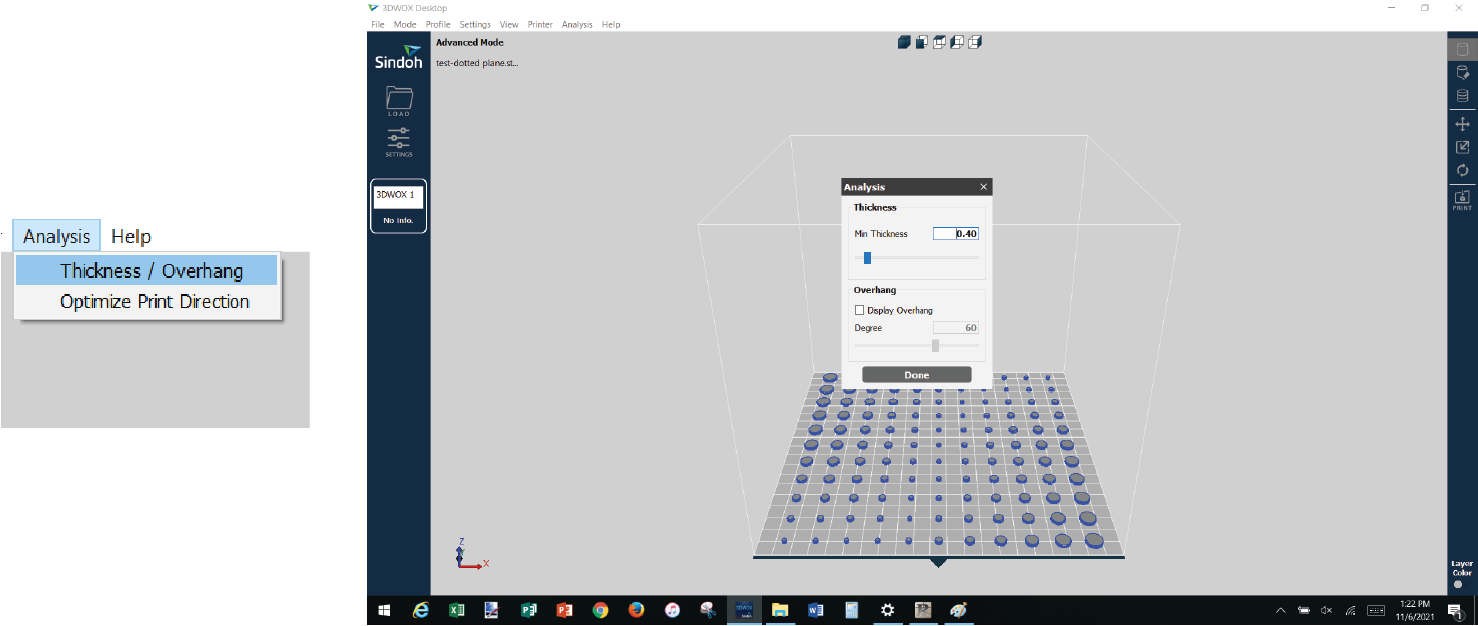
This file was then exported as an .stl file (see Download Links below) and uploaded into the 3DWOX Desktop software at the lab computer, which was connected to the Sindoh 3d Printer.

After uploading this file, I run two analyses:
- Thickness/Overhang
After clicking on Analysis > Thickness / Overhang, I usually go with the default settings.
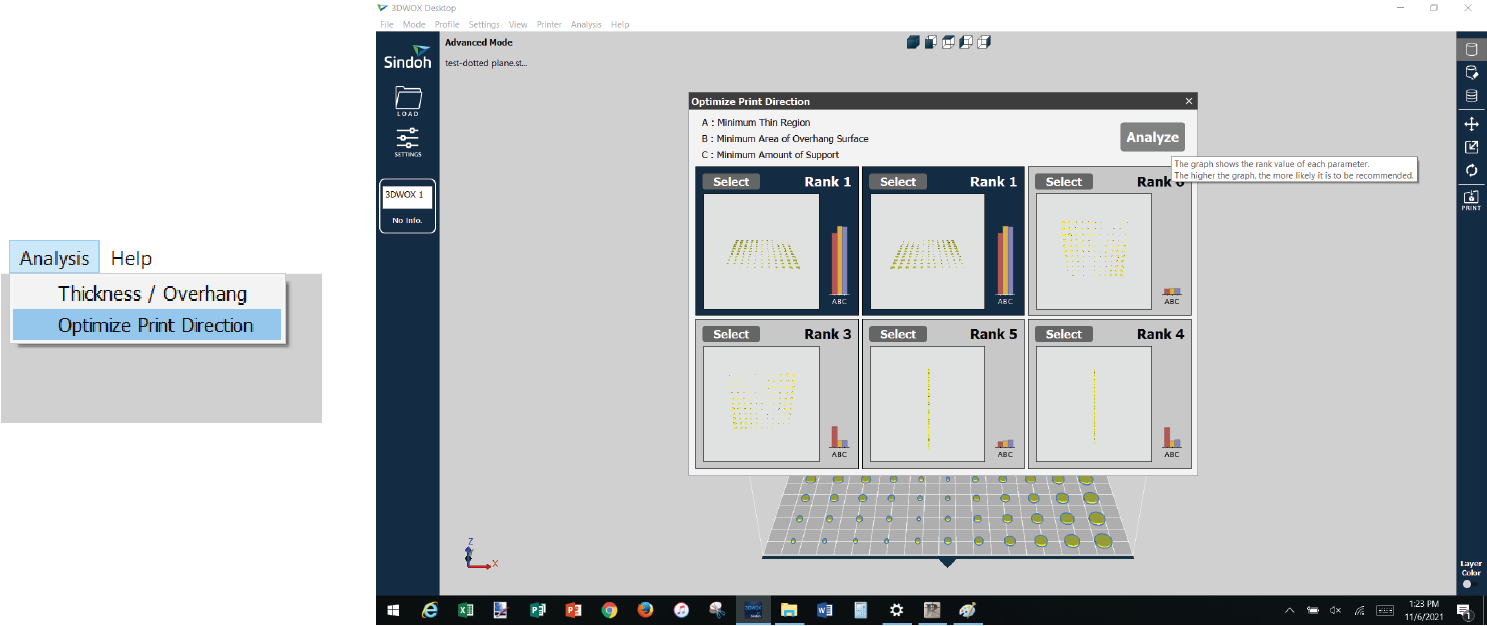
- Print Direction
After clicking on Analysis > Optimize Print Direction, I usually go with what's in Rank 1. I select the box and then hit "Apply".
I then click on the icon with the three stacked circles on the right-hand side. This computes the estimated time to print. At first it may say 1.5-2 hrs, but I reduce this by removing any bed adhesion. I do this by going to "Settings" on the left hand side and then changing the "Bed Adhesion Type" to "None" in the dropdown menu.

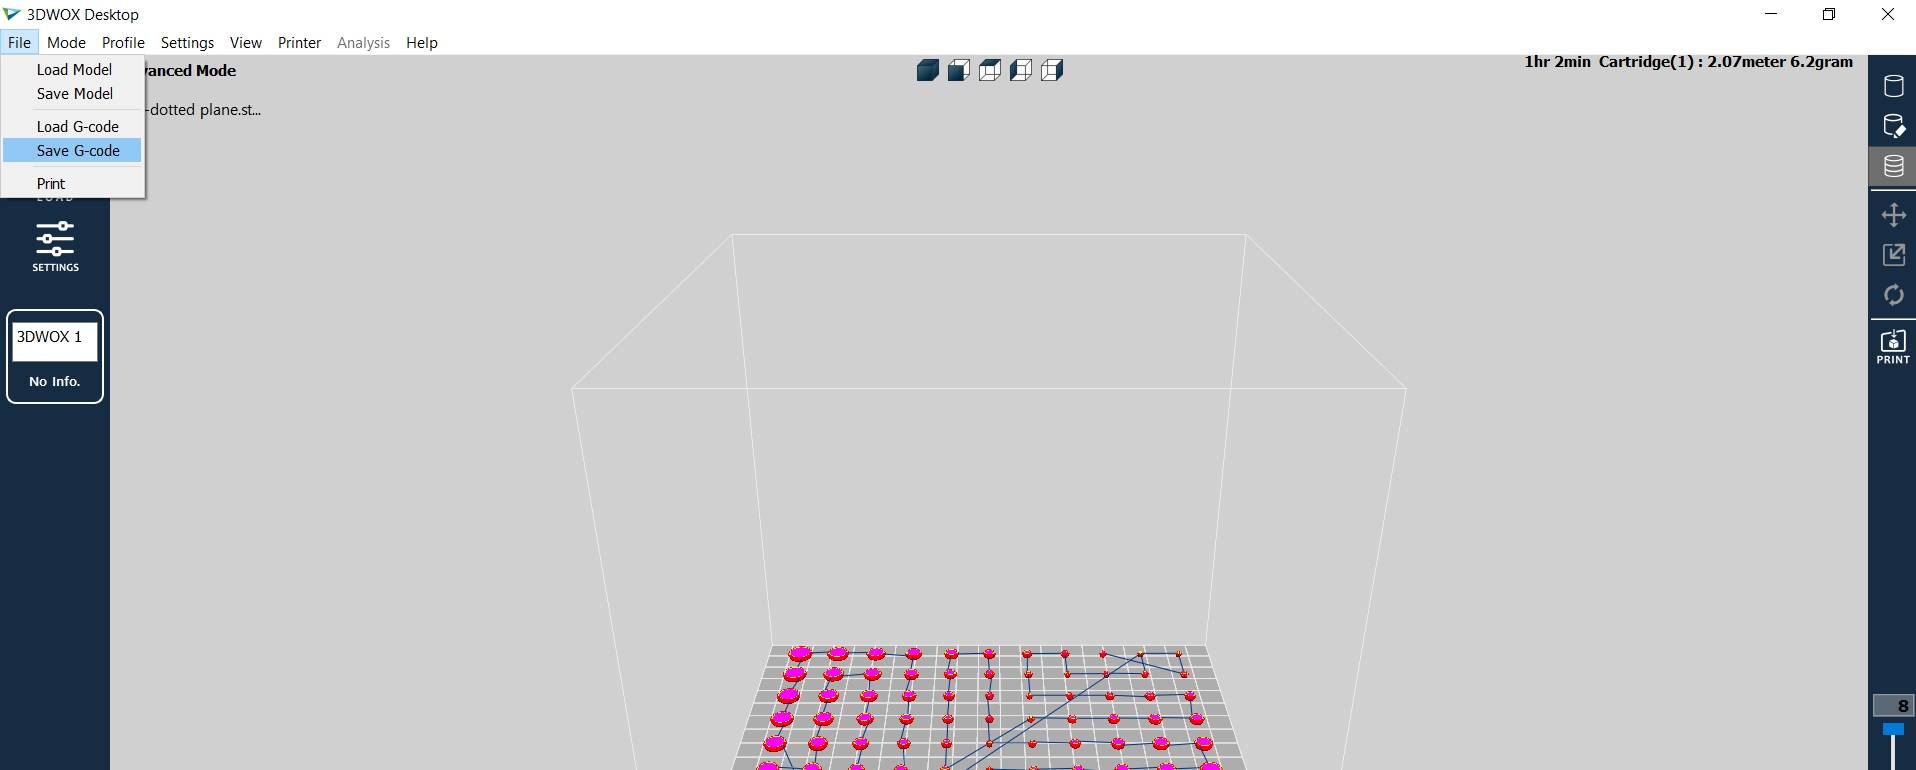
Once completed, I save the file as a gcode (see Download Links below).
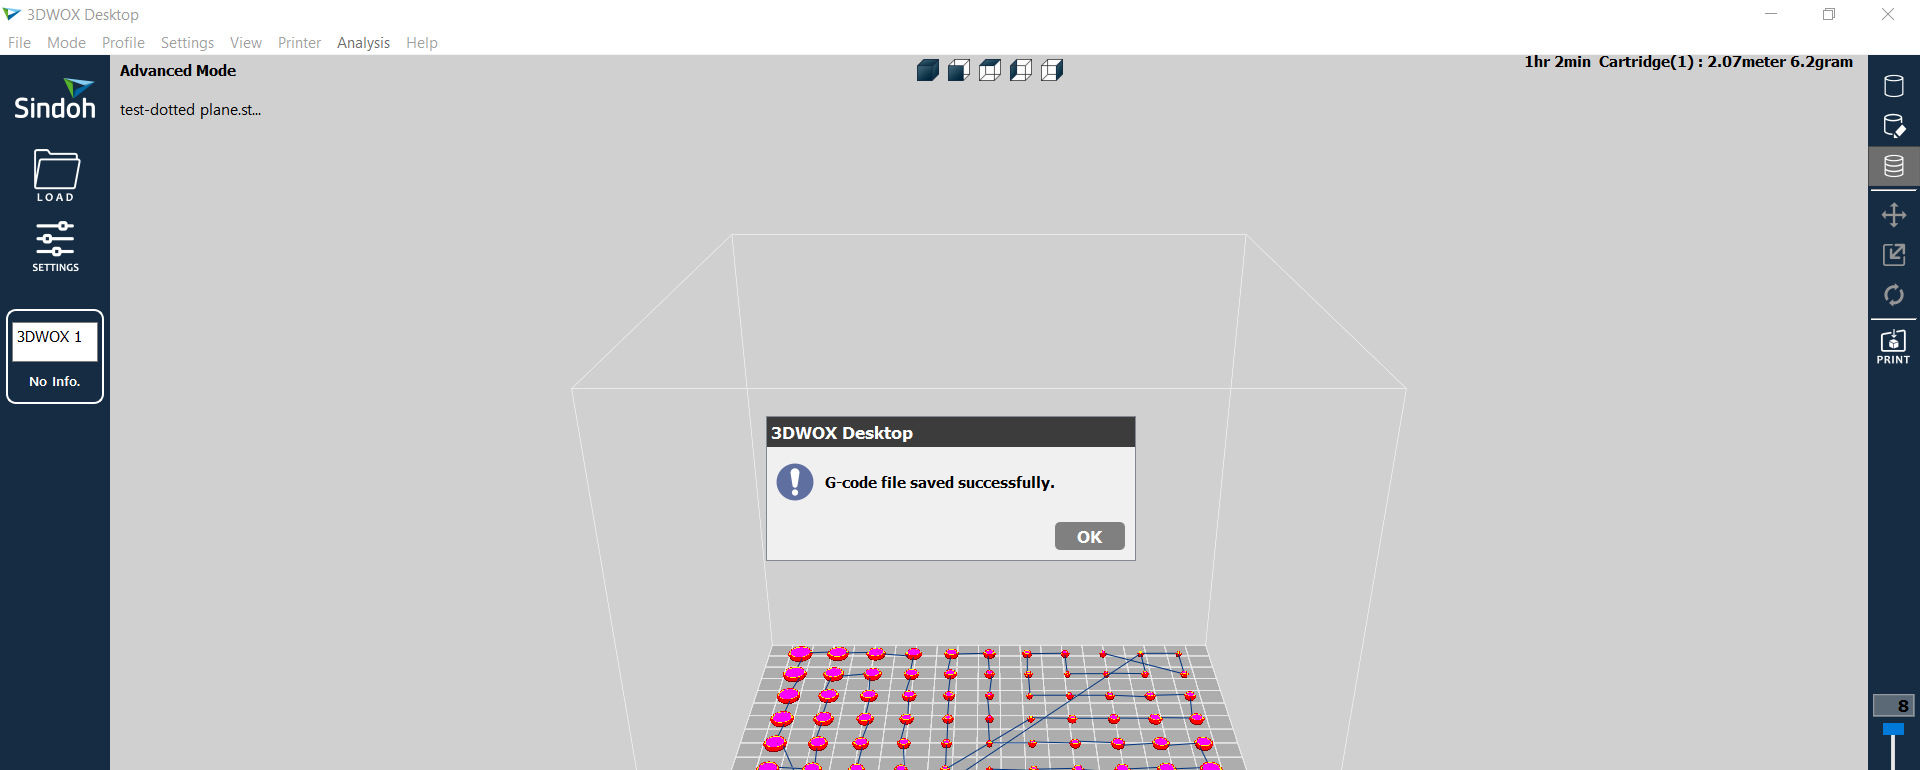
After a few seconds or minutes, I receive a notice that the gcode was saved successfully.
3D Printing - Run #1
 Unfortunately we ran into issues loading up the flex TPU filament into the Sindoh so the samples I created all involved PLA.
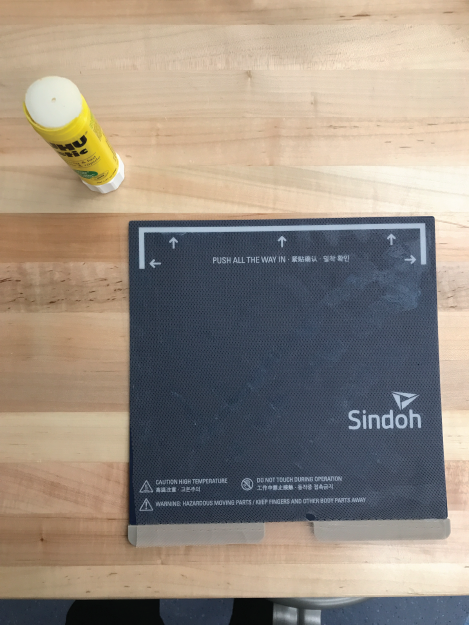
Below is the Sindoh printer I used where the filament is inserted vertically in the slot on the right and the file is uploaded via USB.
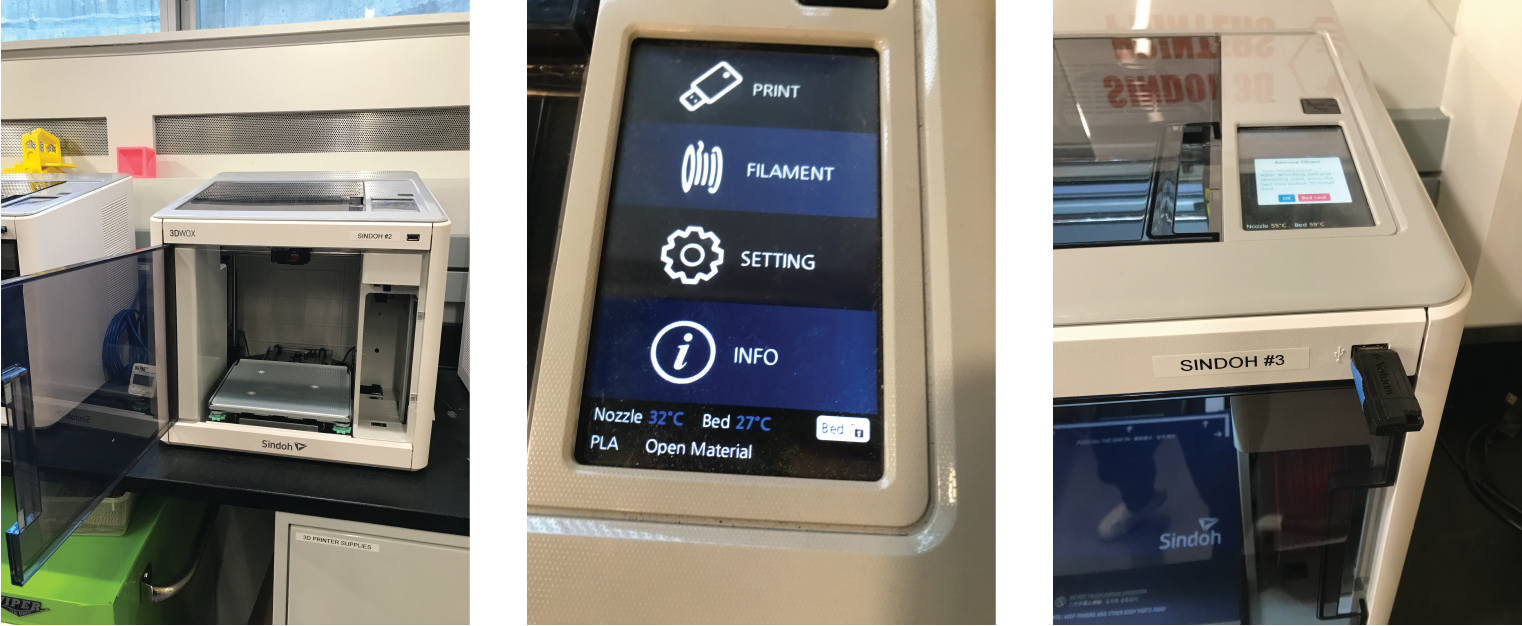
To prepare the tulle, I took the bed insert out of the printer and used a regular gluestick to place the tulle down.
When I upload the file and start the print, it takes roughly 10 minutes for the print bed to warm up before the printing begins. In this case, the print nozzle warms up to 210 deg C and the bed warms up to roughly 85 C.
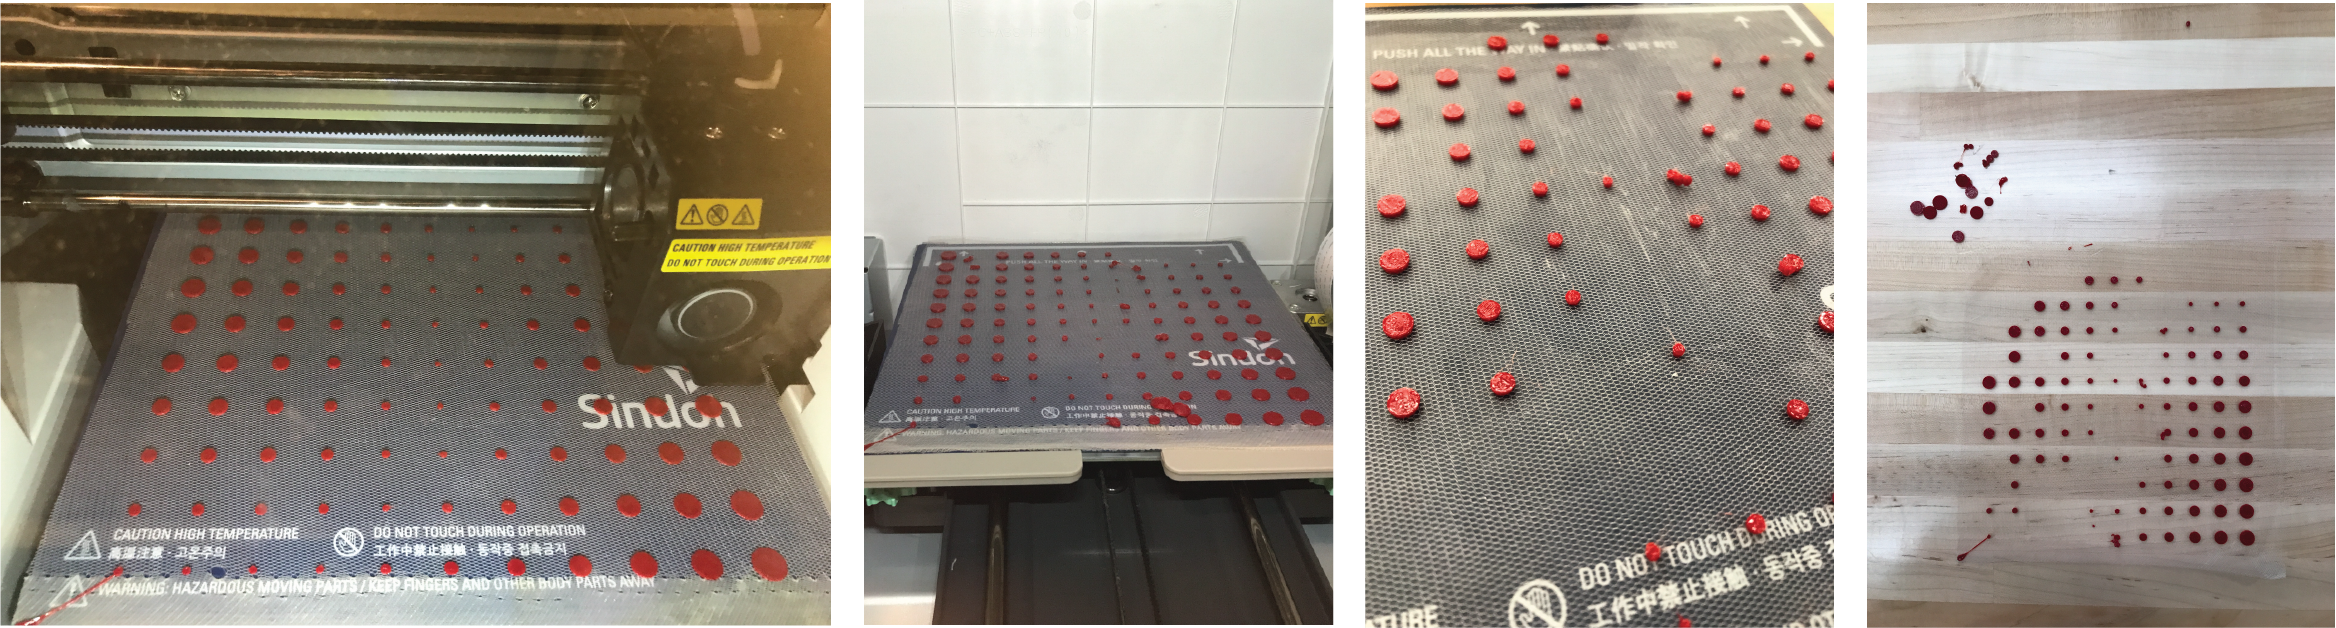
The print then begins on the tulle. For this first run, I had hoped that the 1.5mm thickness was enough to stick and stay on the tulle.
However, the thickness was either too high and/or the pieces in the center was too small, but several pieces ended up falling off.
3D Printing - Run #2
For the second attempt, I tried to pause the print after the first layer was printed (approx. 20% into the print) so that I can apply a second layer of tulle on top for the remainder of the print, hoping that the PLA would stick to each other with the tulle in between.
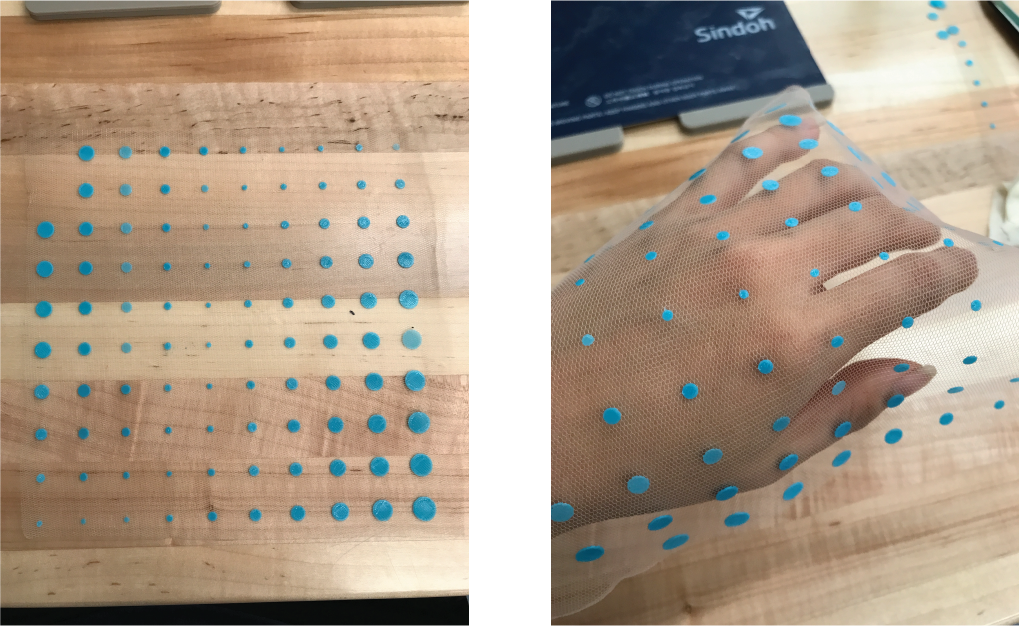
Fortunately, the top layer of tulle could be removed relatively easily and the bottom layer was conserved quite nicely, which showed that just 1 layer of print was enough to stick well.
3D Modeling for Leather Molding
The second part of my assignment was creating a pressing mold for wet leather molding processes. Using Rhino 7, I created a 2-piece mold where the top is congruent to the bottom and pressing a wet piece of leather in between would, theoretically, create a wavy texture to it.
This is a quick video of my 3D modelling process - lots of trial and error and learning.
When I put the .stl files into Ultimaker Cura, it said the print would take over a day, in which case I decided I've had enough... for now (need to focus on final project at last).
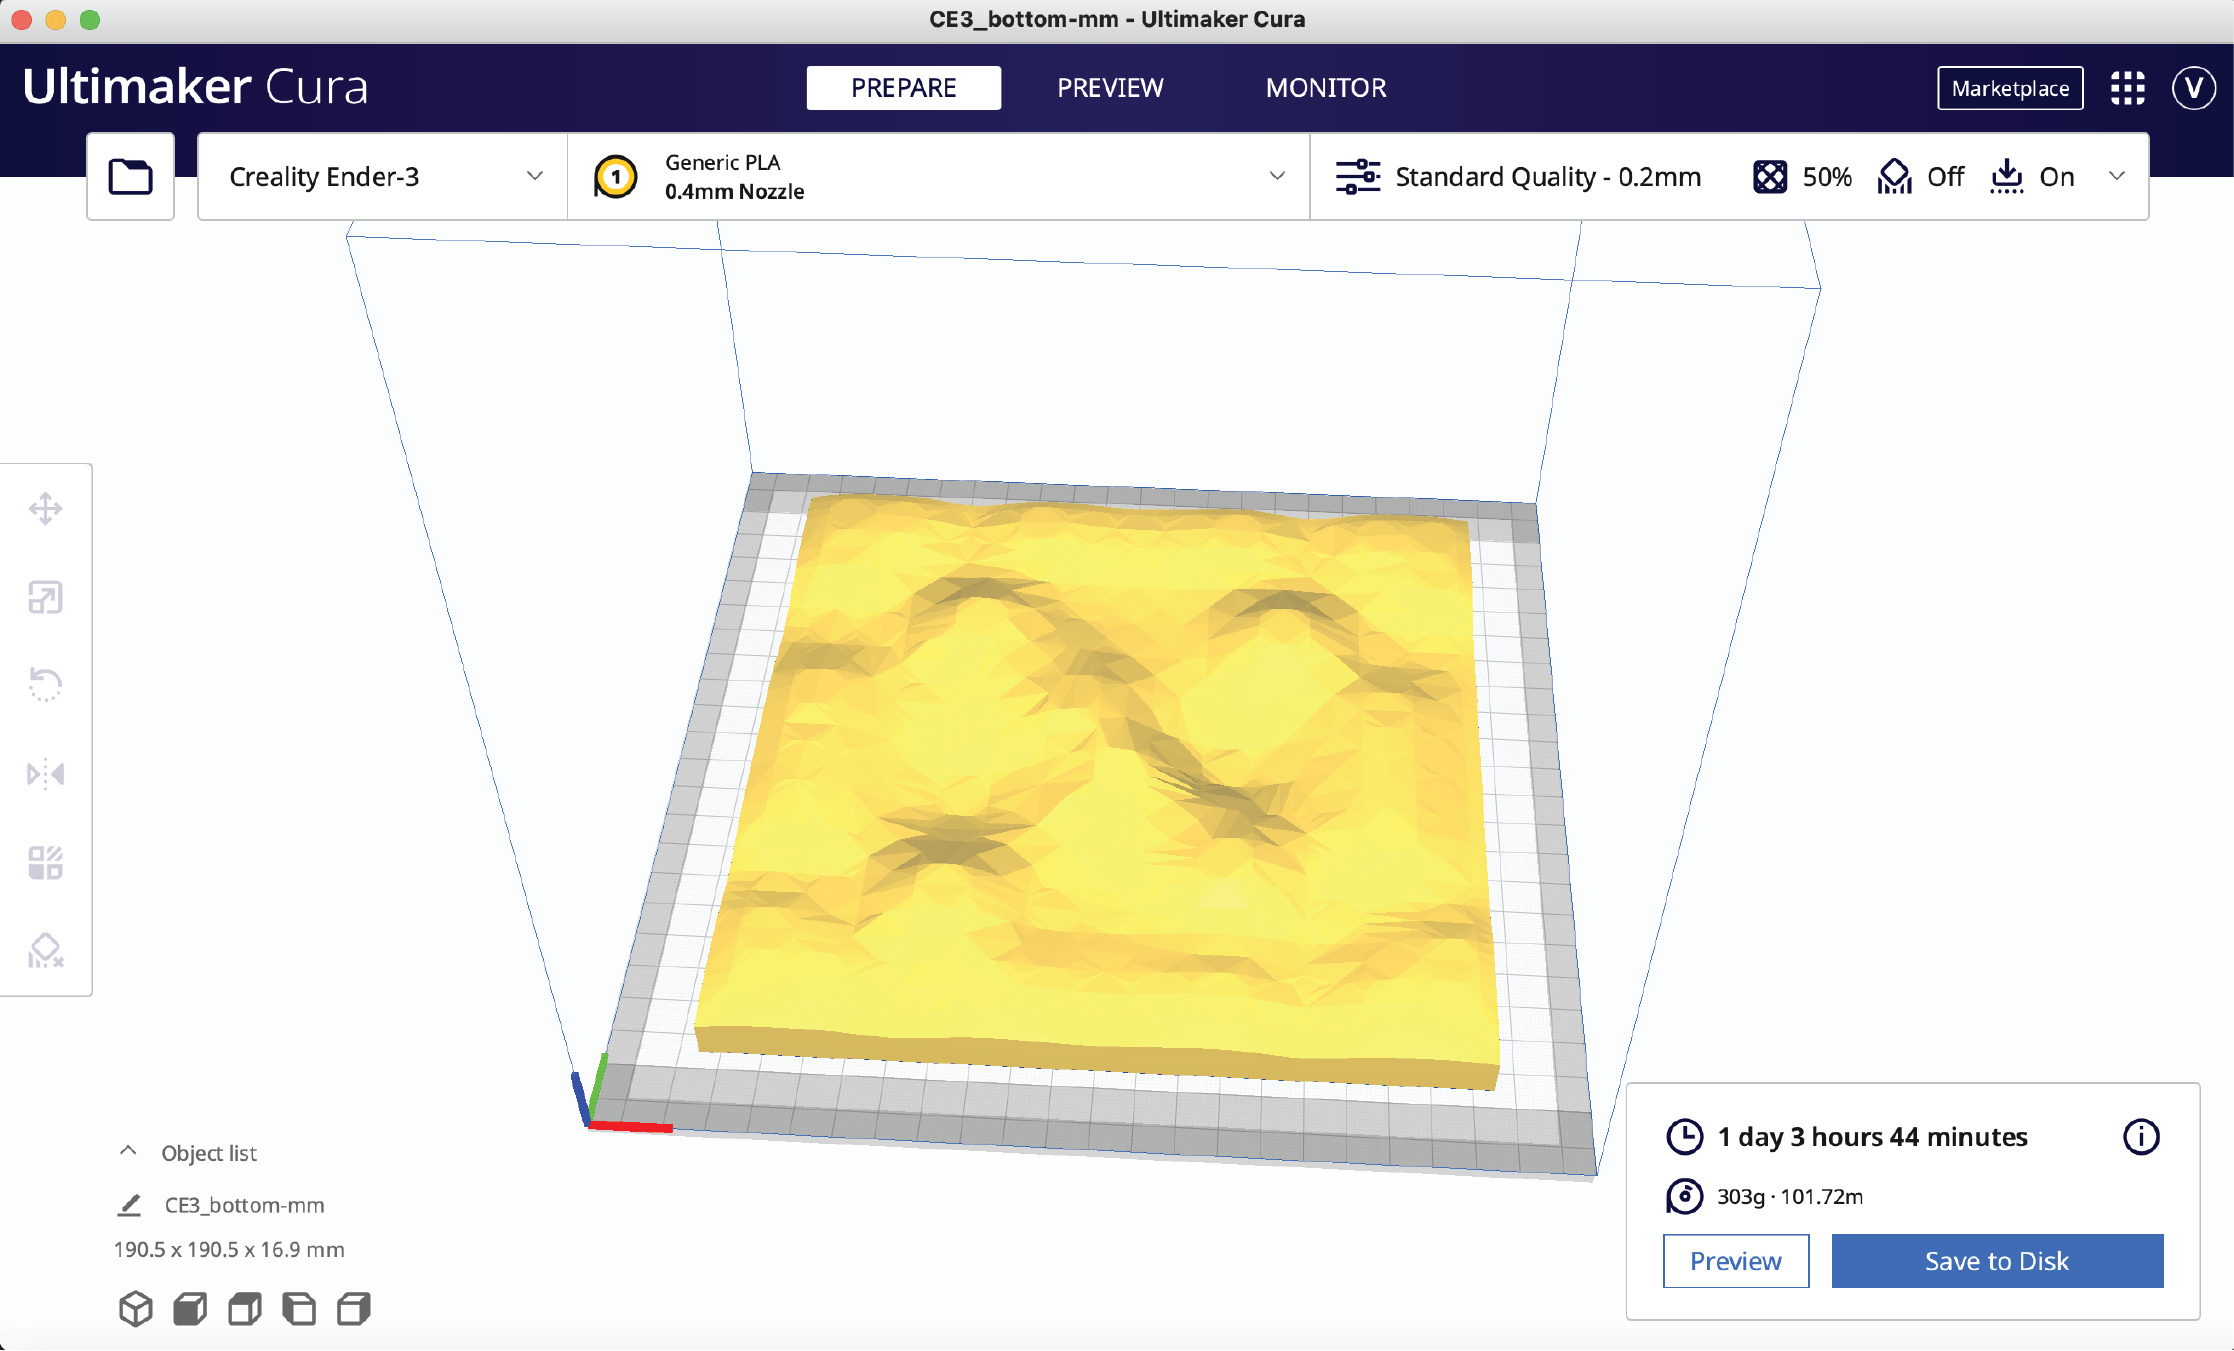
Anyway, I might be better off running this in a CNC machine instead. But anywho, the files are shared below.
Download Links
Rhino
Dotted Plane (.3dm)
Dotted Plane (.stl)
Geometric Pattern (.3dm)
Leather Mold Top Piece (.stl)
Leather Mold Bottom Piece (.stl)
Grasshopper
Dotted Plane (.gh)
Geometric Pattern (.gh)
Tube (.gh)
3D Printing
Dotted Plane (.gcode)
Problem Areas
Rhino Crashing
Problem
At first I thought it wouldn't be a problem to download all the required libraries and just store them in the Grasshopper components folder - Windows and MAC files. Unfortunately this caused Rhino to crash everytime I tried to launch Grasshopper
Solution
Delete any and all library files that are Windows-only from the Components Folder on my Macbook.
3D Printing on Tulle
Problem
When I printed PLA on a single layer of tulle (no pausing in between prints), some pieces stayed on and some other didn't.
Solution
Method #1: Print a thinner layer (lower thickness)
Method #2: Pause the print one or two layers in, lay another layer of tulle on top and continue print
3D Printing on 2xTulle
Problem
Unfortunately, after applying the second layer of tulle, which took a lot of time and effort, something may have shifted but the second print did not align with the first layer.

Solution
I'm not totally sure what caused this, but I must have accidentally shifted the bottom layer of tulle (even though it was glued down?) while applying the second layer. I believe this method of printing could still be successful if it was an open printer rather an enclosed one... but there must be a way... TBD.
Other Resources and Sources of Inspiration
- Instructables: How to 3D Print Onto Fabric
- n-e-r-v-o-u-s
- Fabricademy Alumnus: Oye Ajewole
- YouTube Tutorial: Rhino Grasshopper Tutorials for Beginners
- Youtube Tutorial: Grasshopper Tutorial 06 | Domain Basics
- Fictiv: Preparing Rhino Files for 3D Printing
- Rhino Forums: Rhino Crashes when launching Grasshopper
- YouTube Inspiration: How to 3D Print on Fabric for Cosplay
- Rhino: SoftEditSrf
- Rhino: Subd modeling
- Youtube: Leather Molding
- Rhino: Splitting Models