WEEK 3 - OPEN SOURCE CIRCULAR FASHION
Last Update: Jan 7, 2022
October 4-10, 2021
This week I learned how to make paper prototypes of interlocking modules that would collectively produce a larger 2D pattern. If/when successful, I recreated the pattern digitally before laser cutting and assembling it in felt.
Keywords: paper prototypes, Glowforge, Adobe Illustrator, interlocking pieces, module elements, textiles, felt, shawl
Quick Summary
 Tools Learned:
- Glowforge Version TBD -
- Open Source Circular Fashion Version N/A
 See my upload here! -> https://oscircularfashion.com/project/-MspbP1z-q1qbR2pIteY
 Tools Refined:
- Visual Studio Code Version 1.61 - a source code editor I'm now using to document and edit my documentation website locally on my desktop
- Adobe Illustrator Version 2021 - a photo editing program
- Adobe Lightroom Version 2021 - a photo editing program
- Pinterest: a photo sharing and saving platform
- Canva: a graphic designing platform
 What I still want to learn better:
- how to improve my design or assembly to construct it into something more 3-dimensional / structural
Research and Inspiration
Artists and Designers
Right from the beginning of this week we were introduced to a source of inspiration: Elisabeth Poyet. Her recitation lecture was incredibly inspirational to me because of the novelty of the design and the fact that whole garments could be constructed seamlessly (literally).
To continue this inspiration and for me to start creating my own original design, I looked for more examples of modular design... or what I eventually learned was the term for this: tessellation. The primary source of this was www.oscircularfashion.com. From this library of past projects, the following designers stood out the most to me were Noemie, Kate Reed, Carlos Herbozo Vidal, 黒河緑, Betiana Pavon, and Ana Laura San Roman (top down, left to right).

Other similar artists discussed during our global lecture that I couldn't forget were Takehiro Ando, Matija Cop, Eunsuk Hur for what seemed like very simple and minimalistic module elements that got assembled into complex-looking garments. I also re-watched videos by British GQ which interviewed designers Oki Sato and Lu Yongzhong who are some of my favorite minimalist designers.
Existing Patterns
Lastly, I was inspired by mathematically notable patterns - particularly the penrose lattice and the Sierpiński carpet. I may not be able to explain the math behind each of these patterns but I appreciated the aperiodicity in the elements that somehow still led to a symmetrically pleasing image overall. I also appreciated Micky van Zeijl's walkthrough of how she was able to create an interlocking system based from the penrose lattice.
Putting all these pieces of inspiration together, I realized that I wanted to incorporate the following features in my design: - play with fill and space within each element themselves - interlock two different elements - keep the elements simple in terms of design
Paper Prototyping
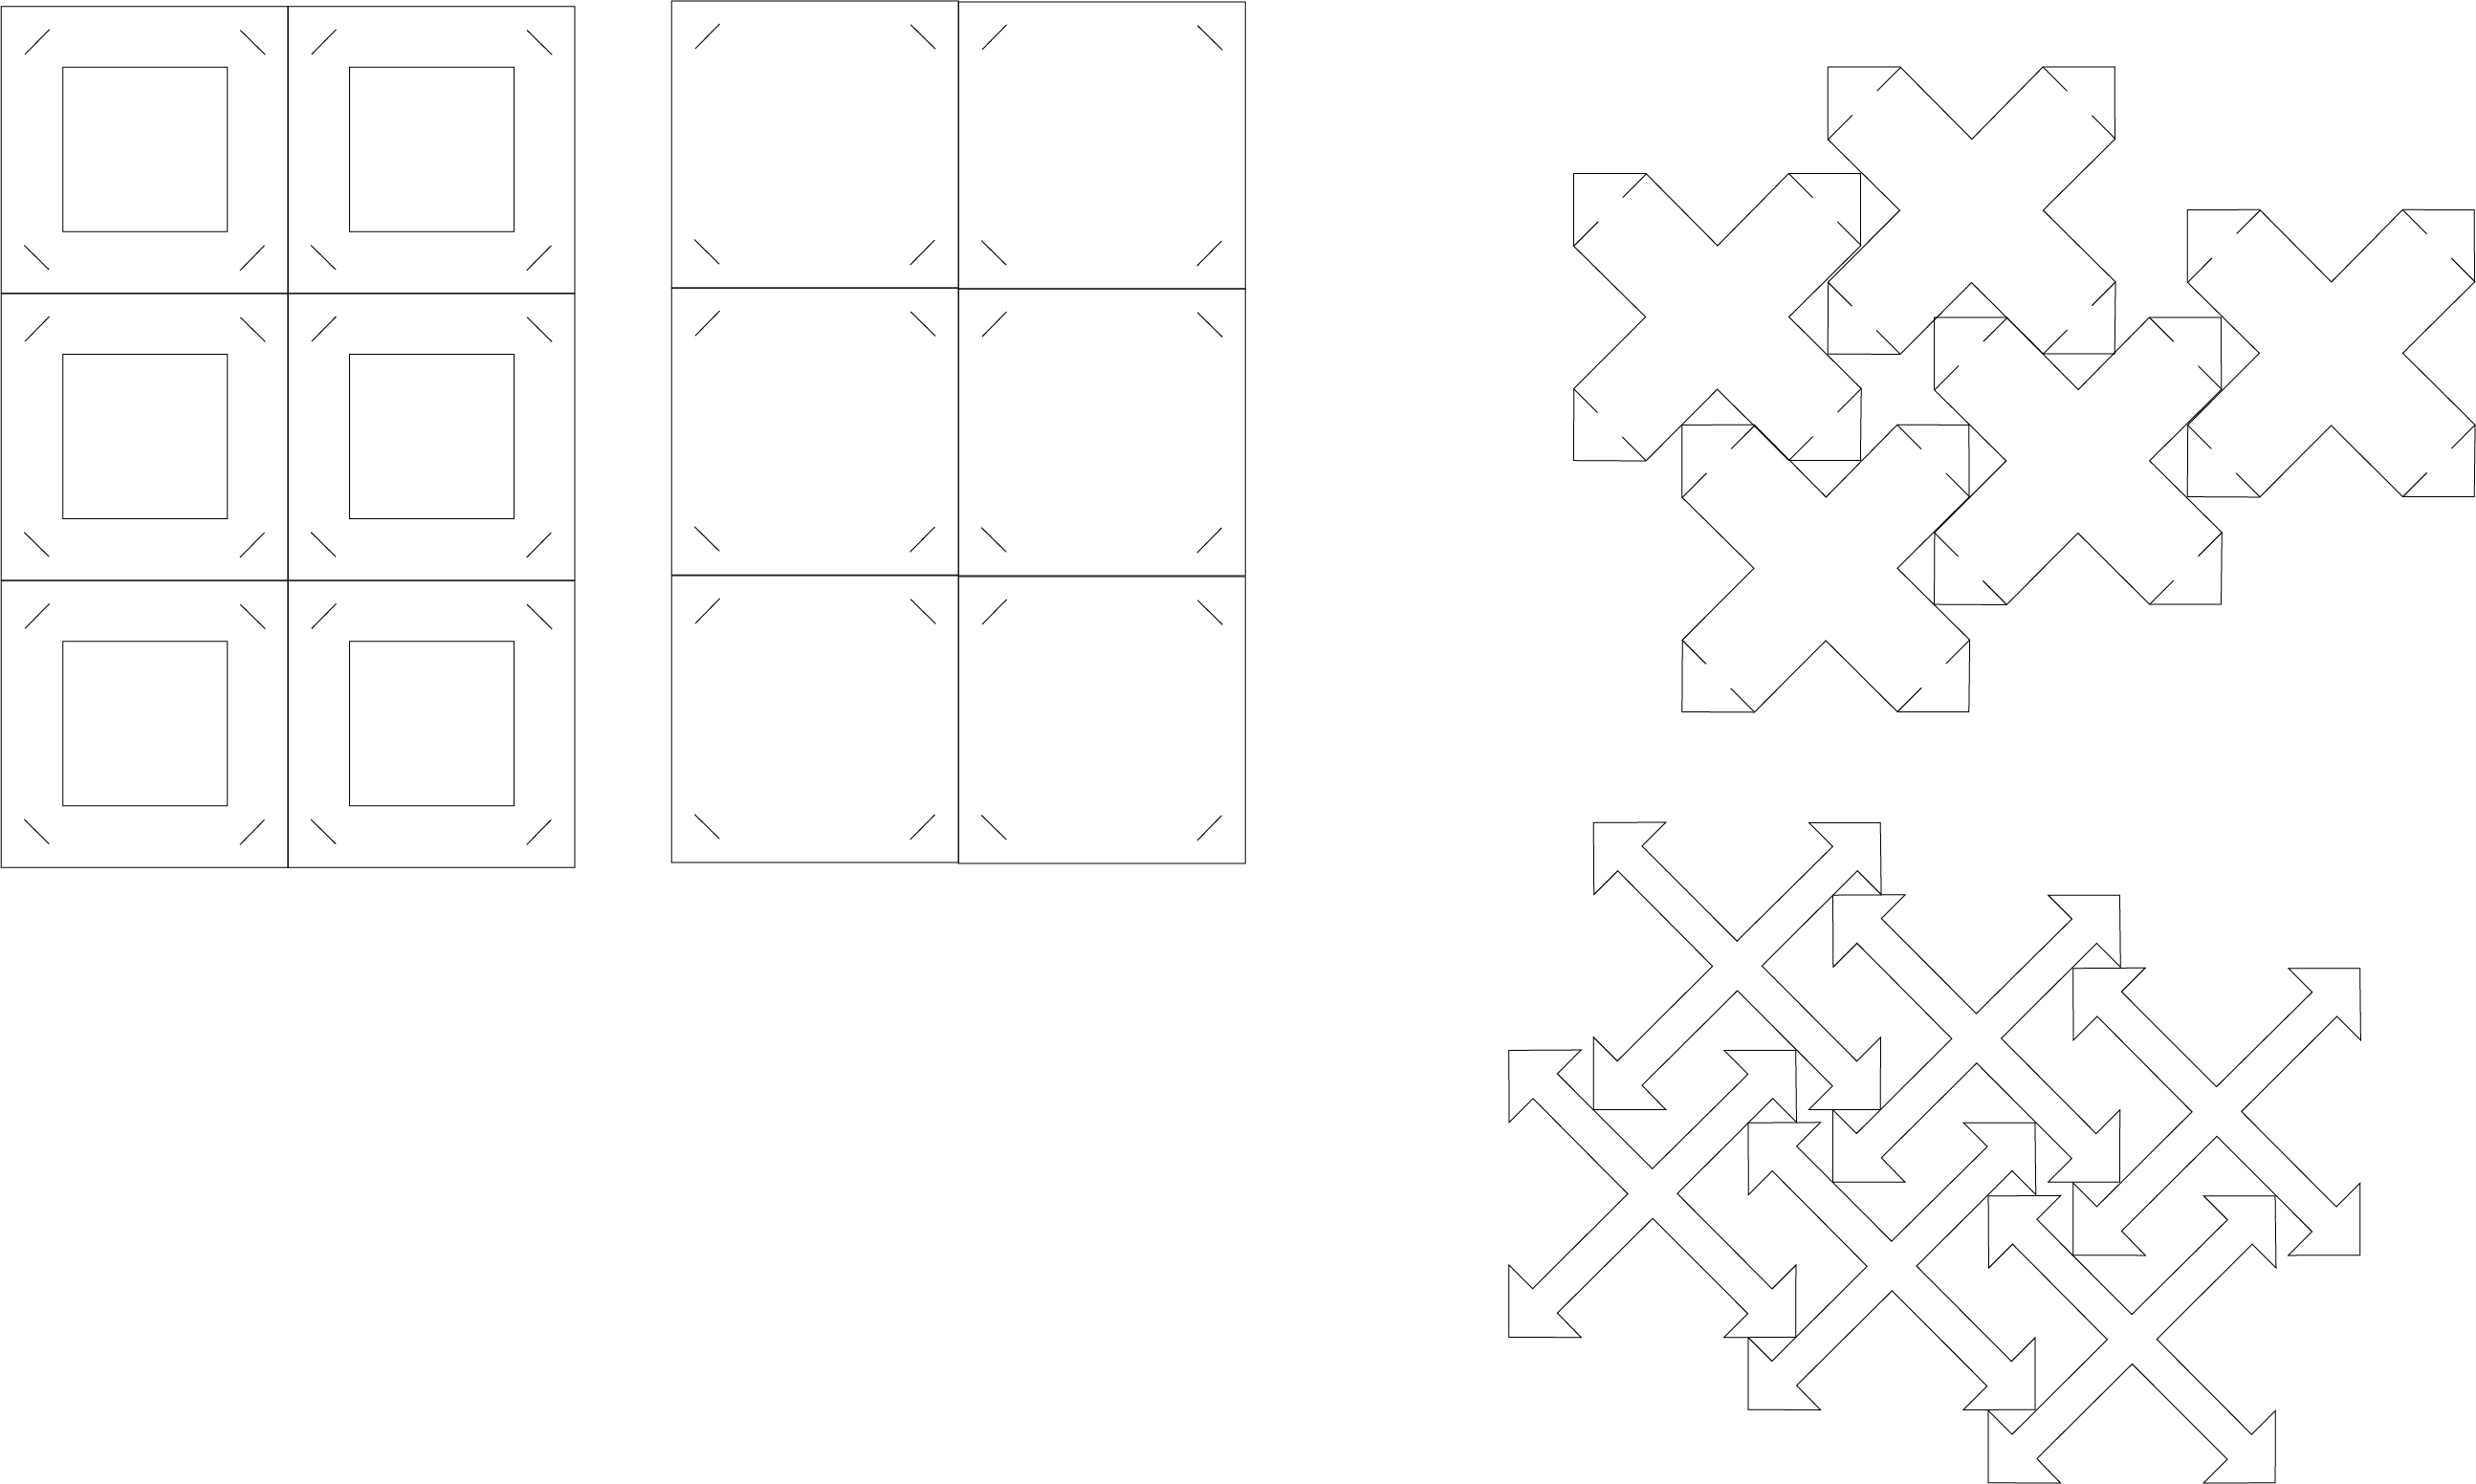
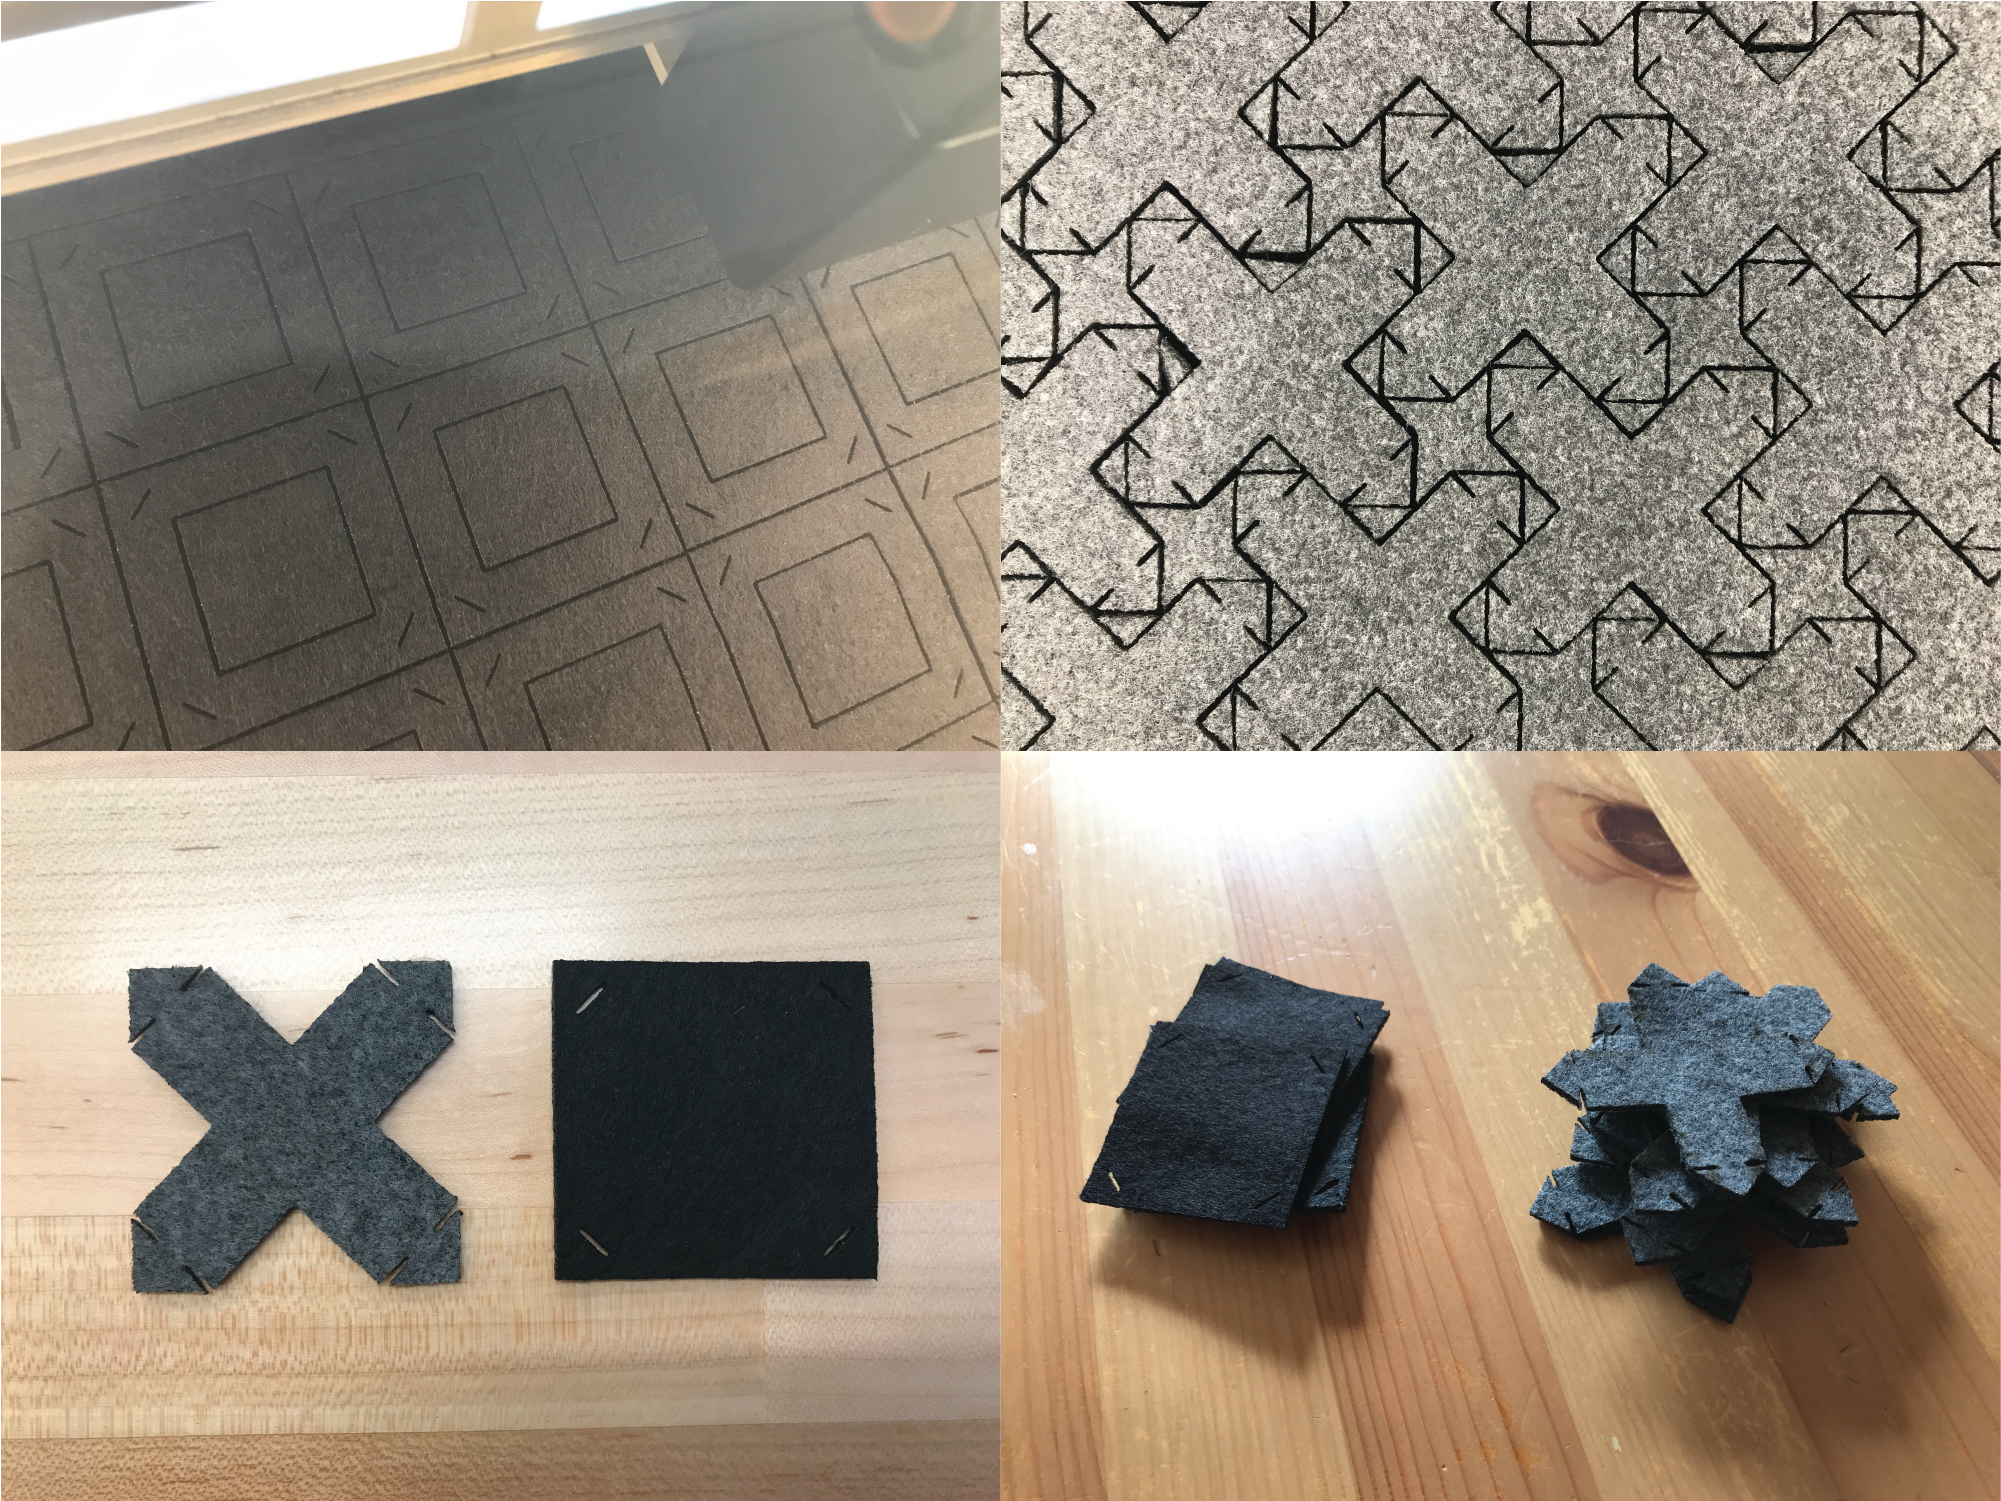
If I had to be completely honest, the prototyping phase was a LOT of sitting down and staring at the paper I had in front of me. When I did put in action, the first thing I did was cut 2"x2" squares out of this black hard stock paper. I then laid the squares in a rough layout of what my final textile could look like.
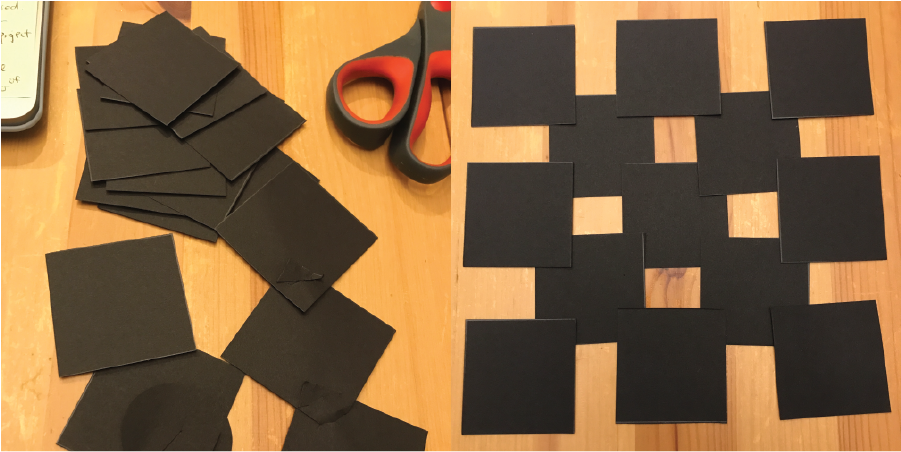
With these squares, I would then make small cuts into the corners or sides that would be the "female" piece of the inserts. If I thought of a potential idea that I didn't know how to cut out yet, but still wanted to fit into a 2x2 square, I would quickly sketch out and re-examine the cutting method.
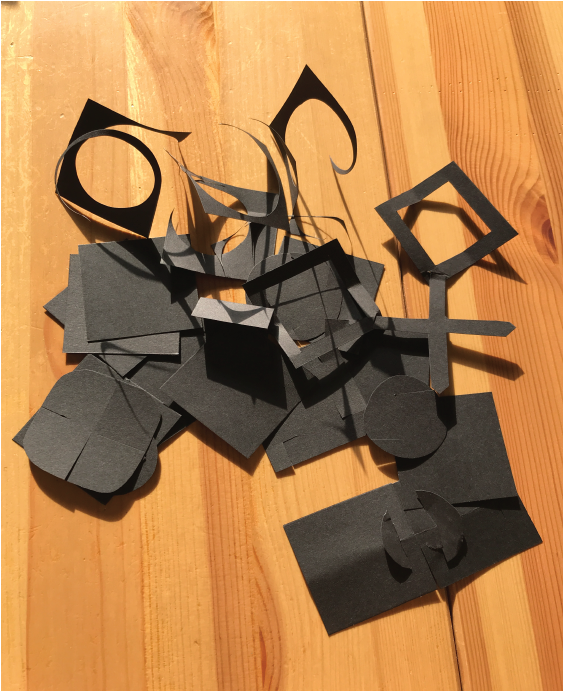
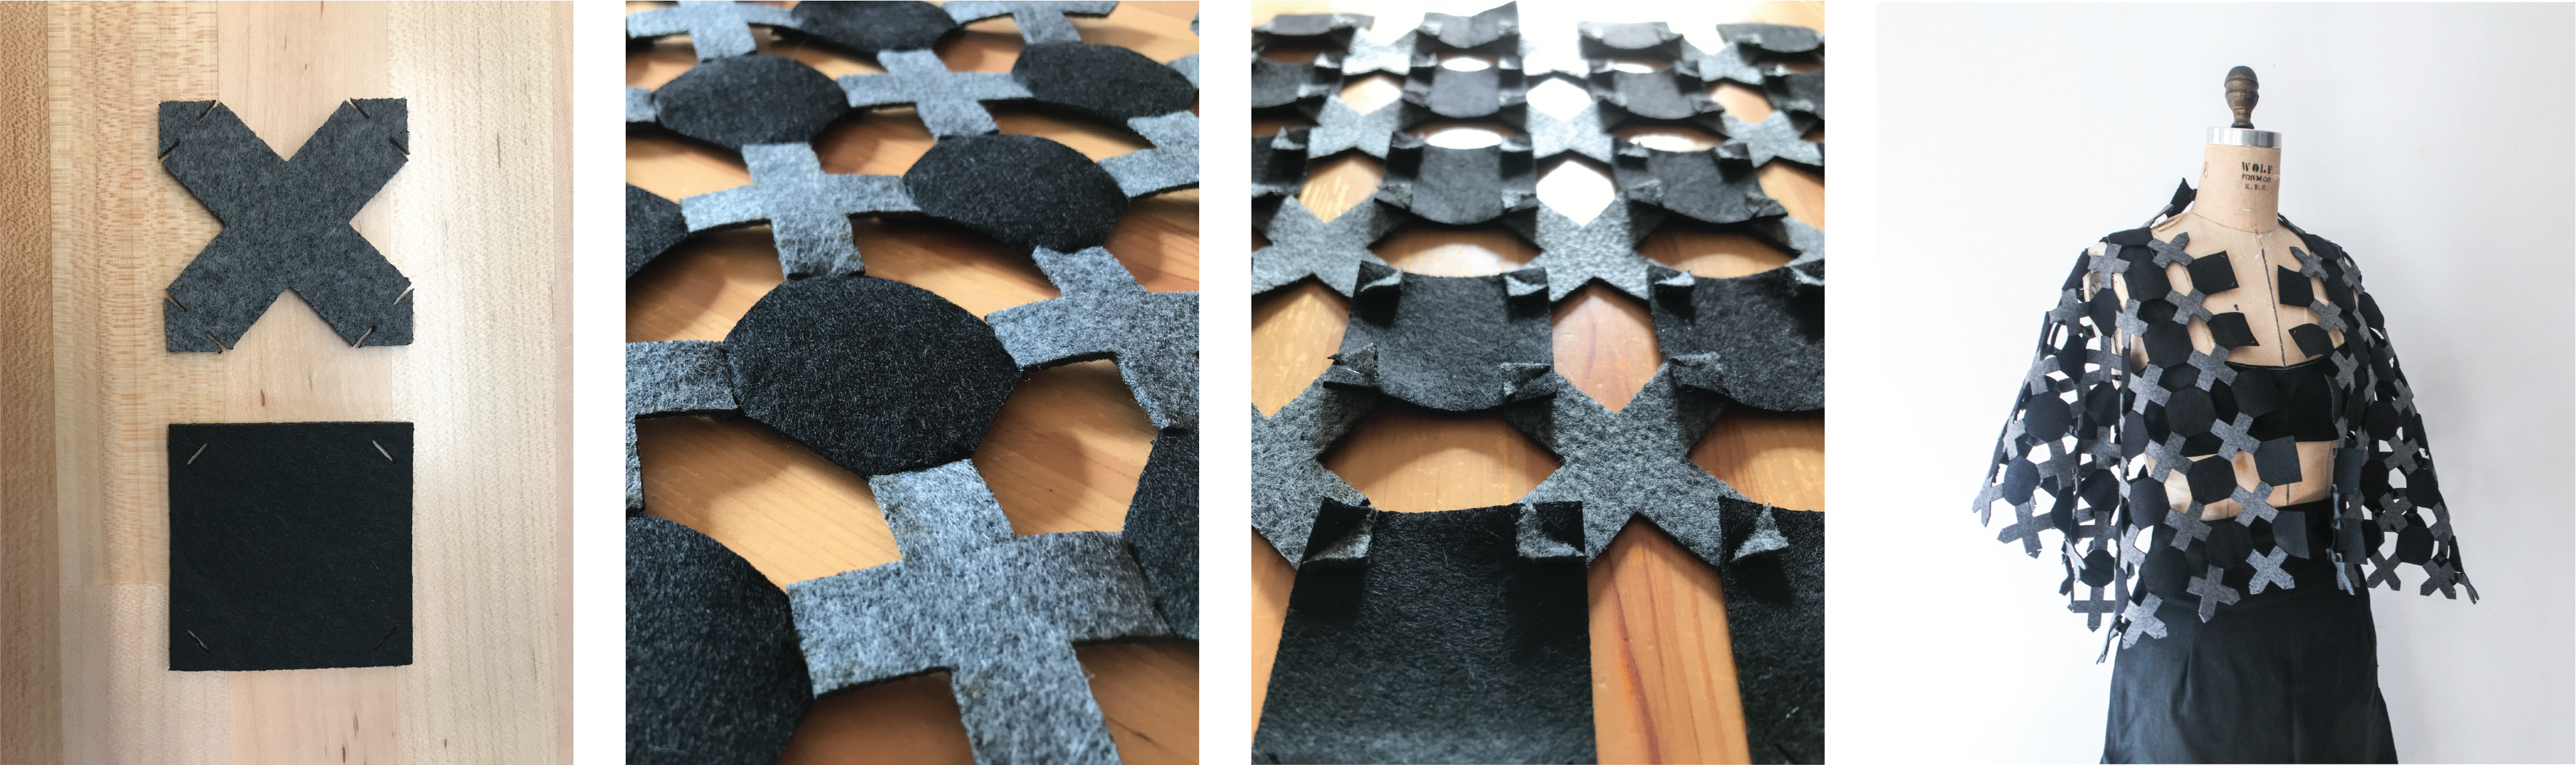
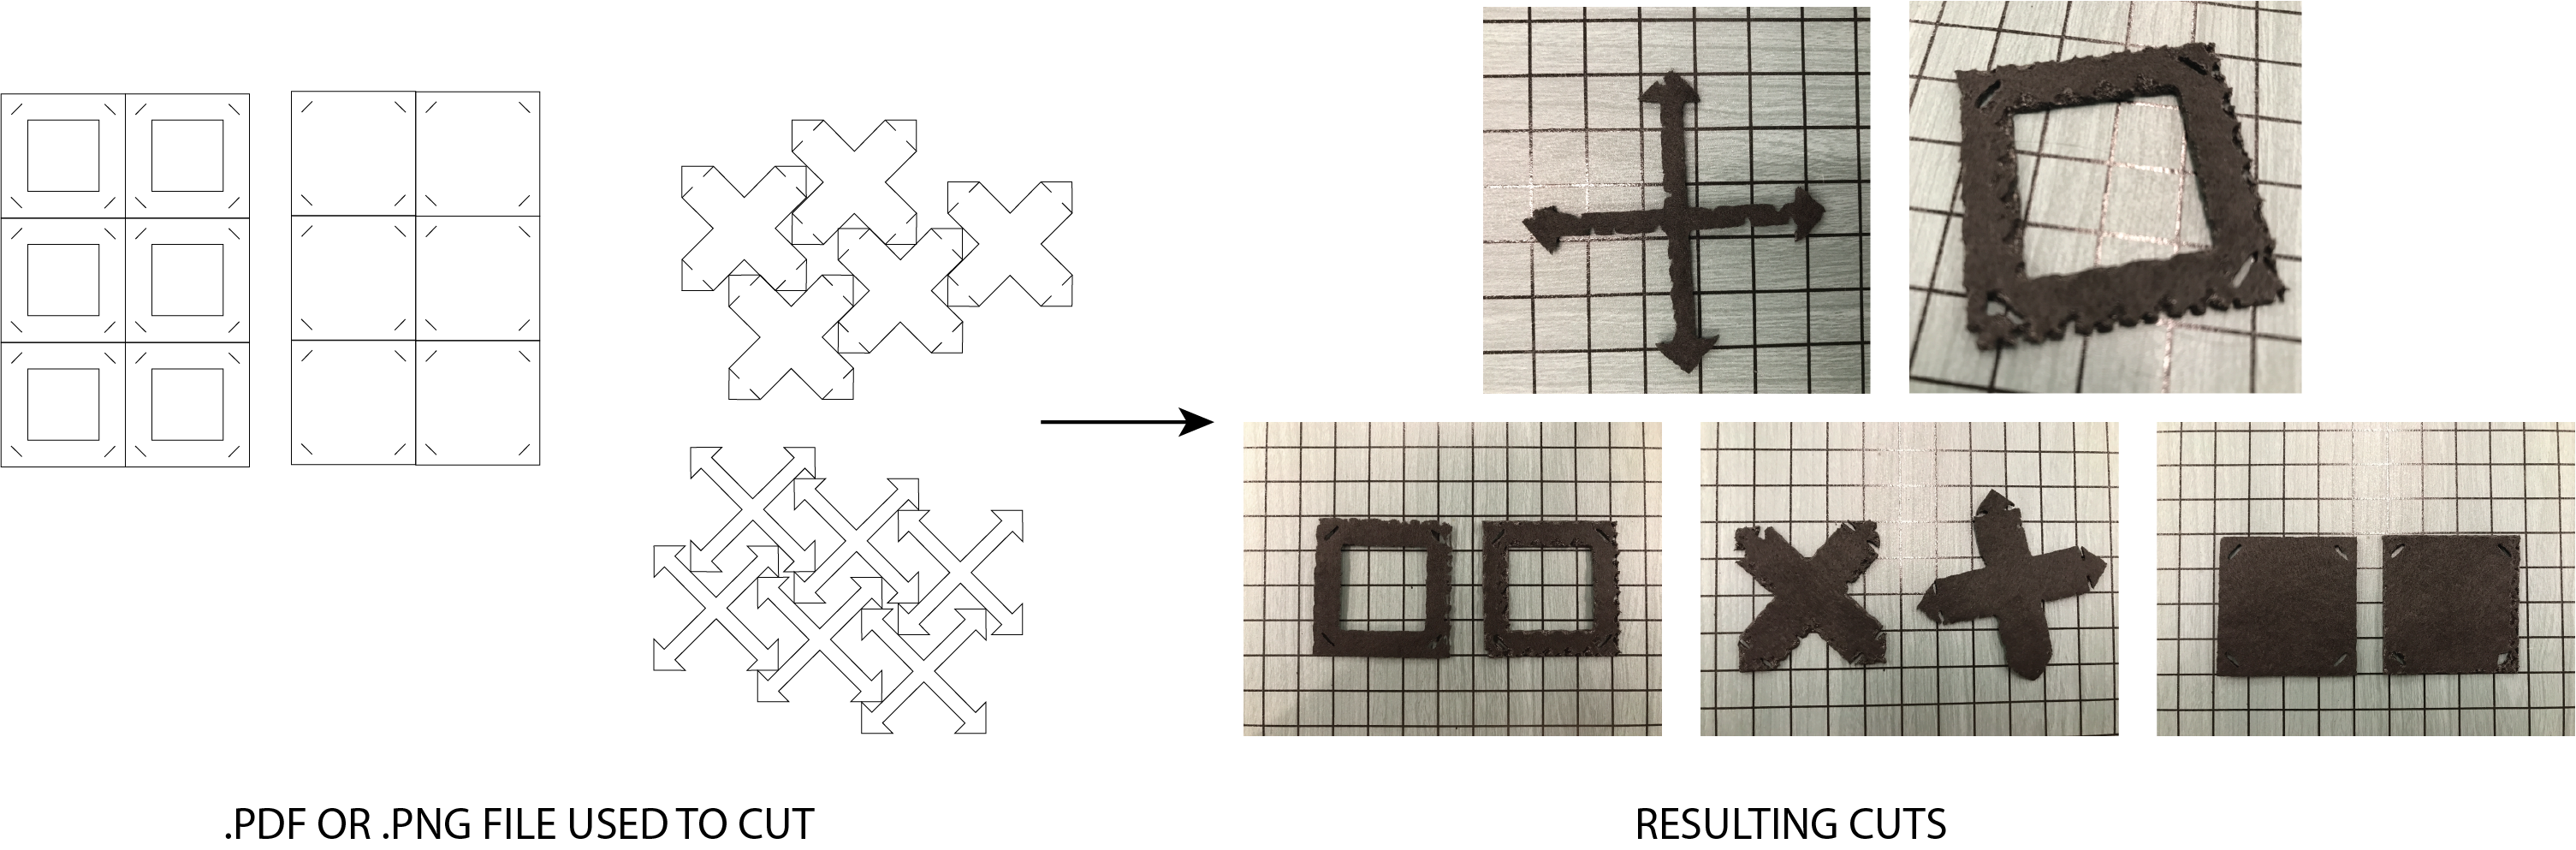
After several trials and errors, I eventually got to the square and X combination.
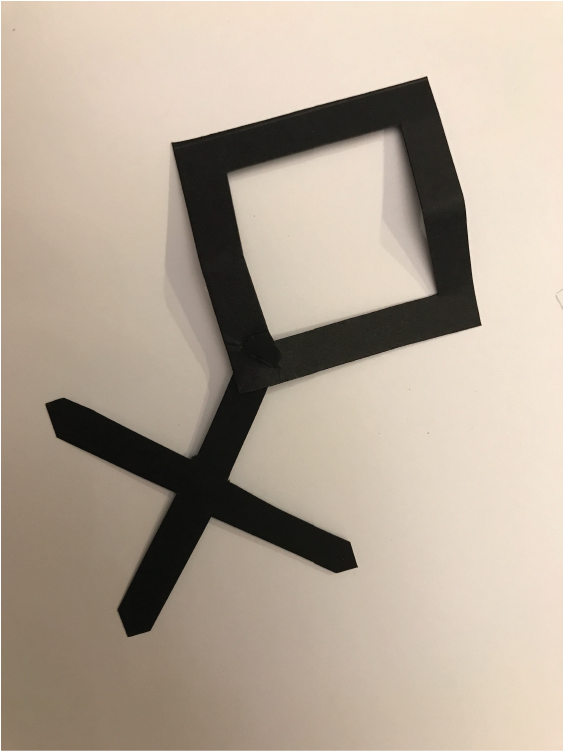
Digital Design
I primarily used Adobe Illustrator to create the square and X designs, which I then combined into an array that would eventually be laser cut. To create the square and X Designs, I first made a box and drew a line across one of the corners.
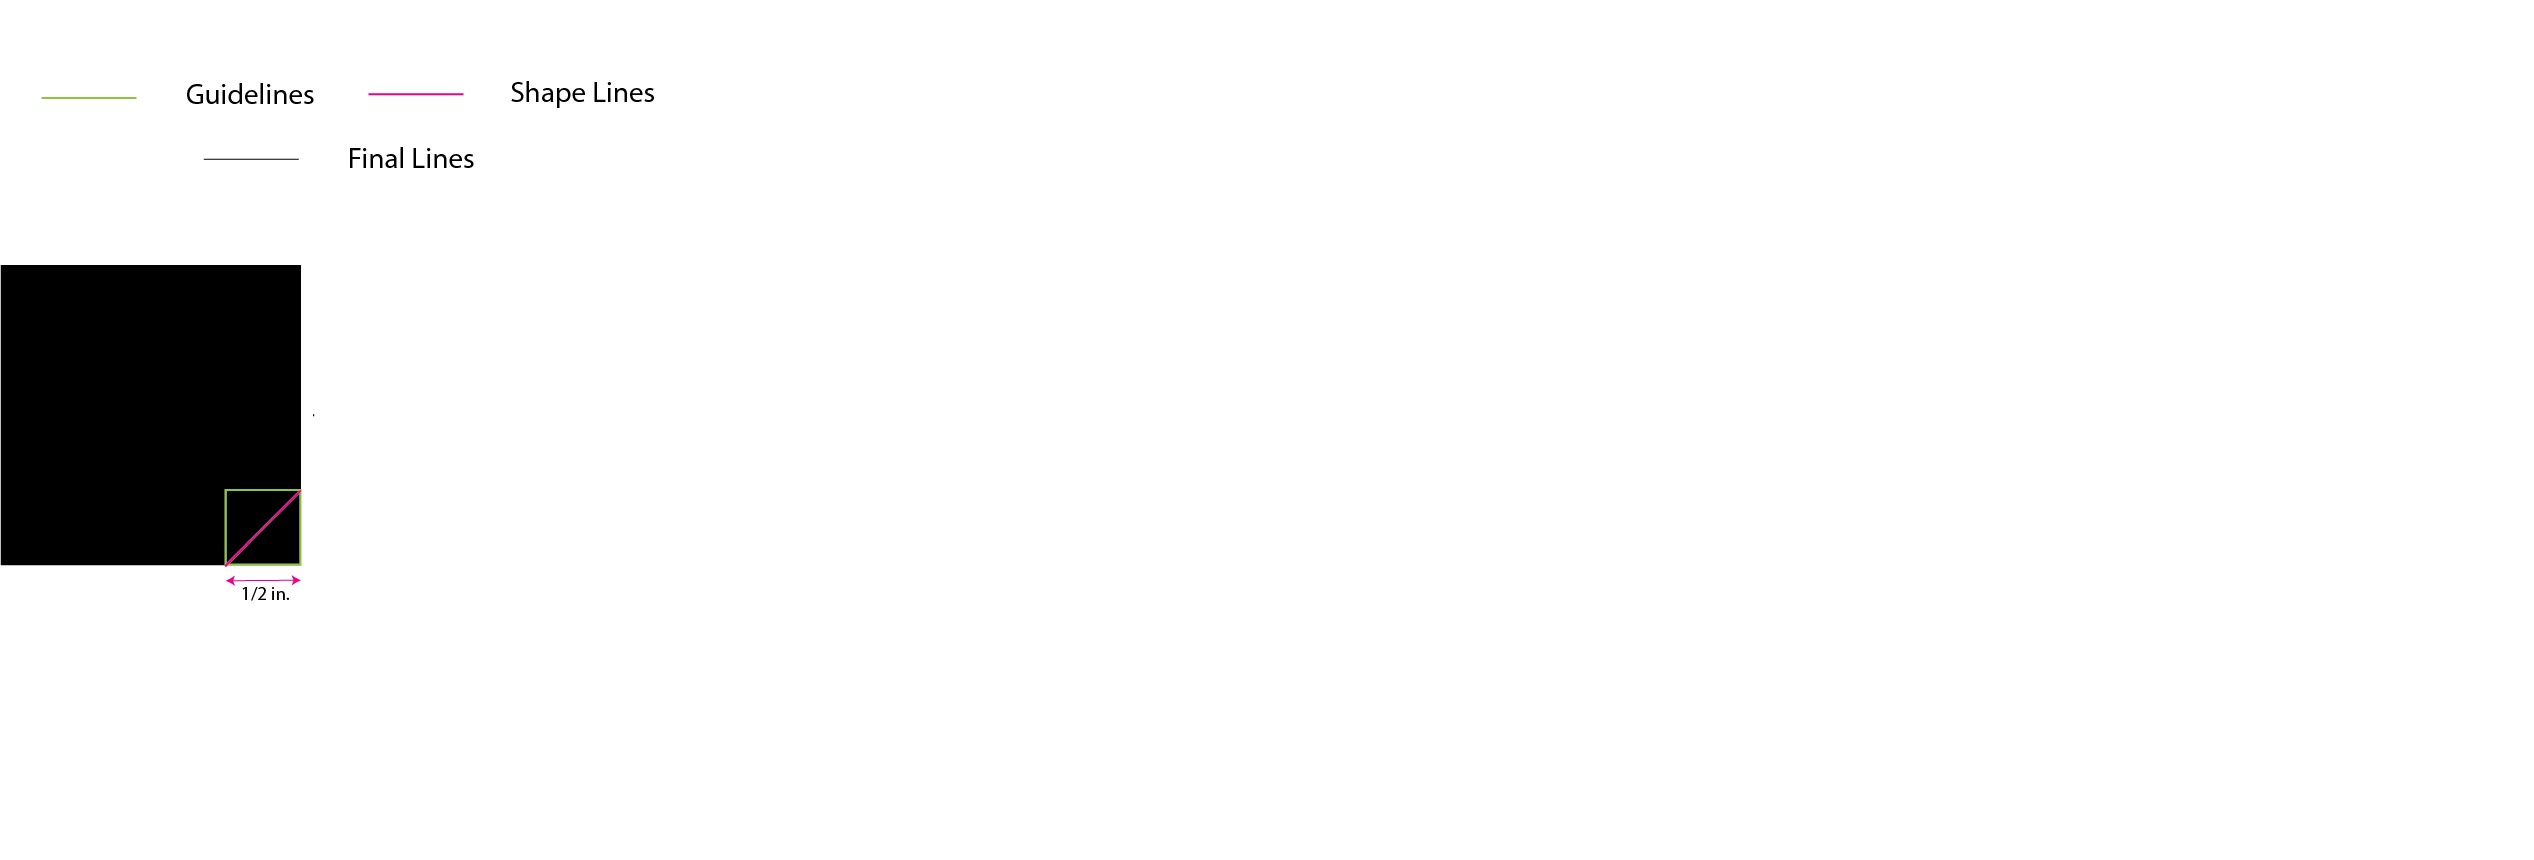
I then divided this line in thirds and took out the middle third. This middle third will be the insert opening while the outer thirds will be the cuts of the insert piece. This line in the square was then copy/pasted across the other 3 corners.
Using this square with the four cuts as a template, I drew lines diagonally across connecting the edges of the original "cut line" to create the cross.

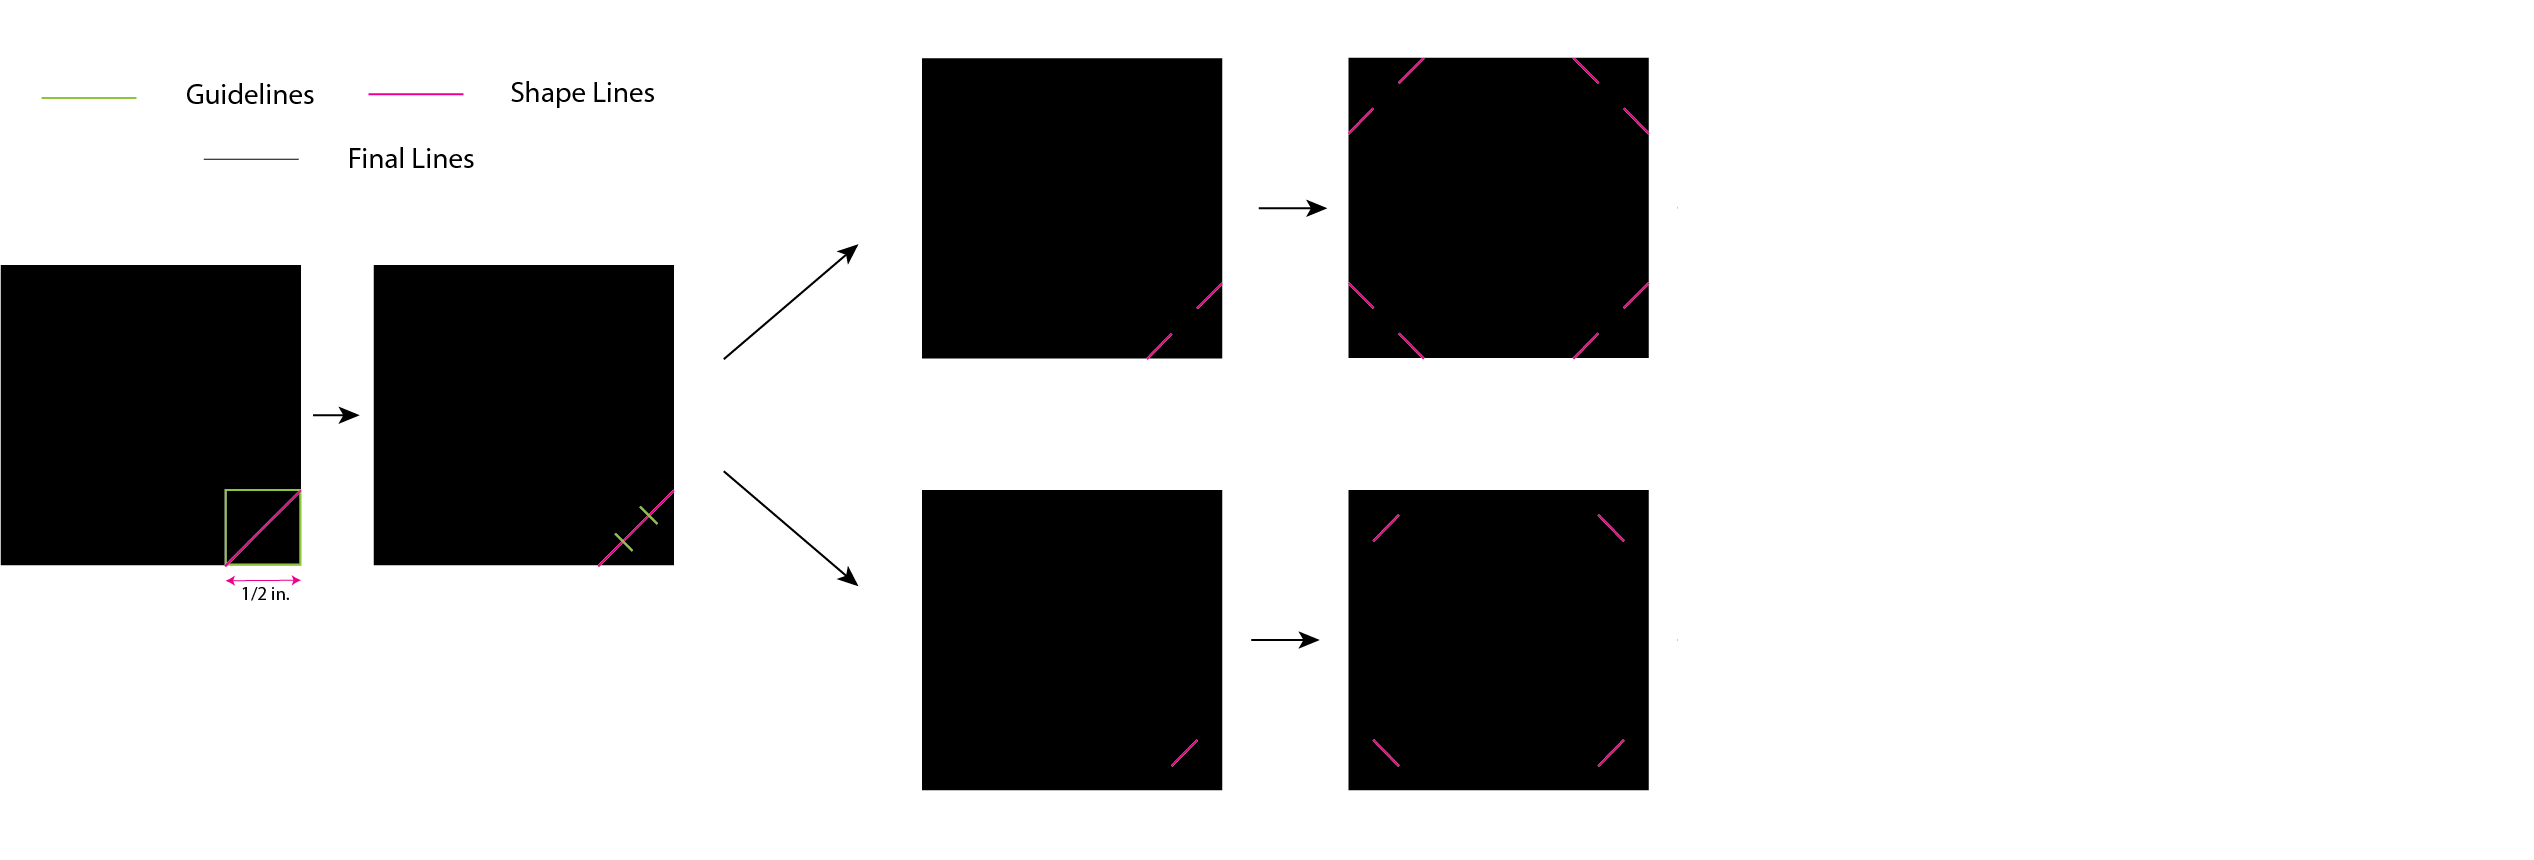
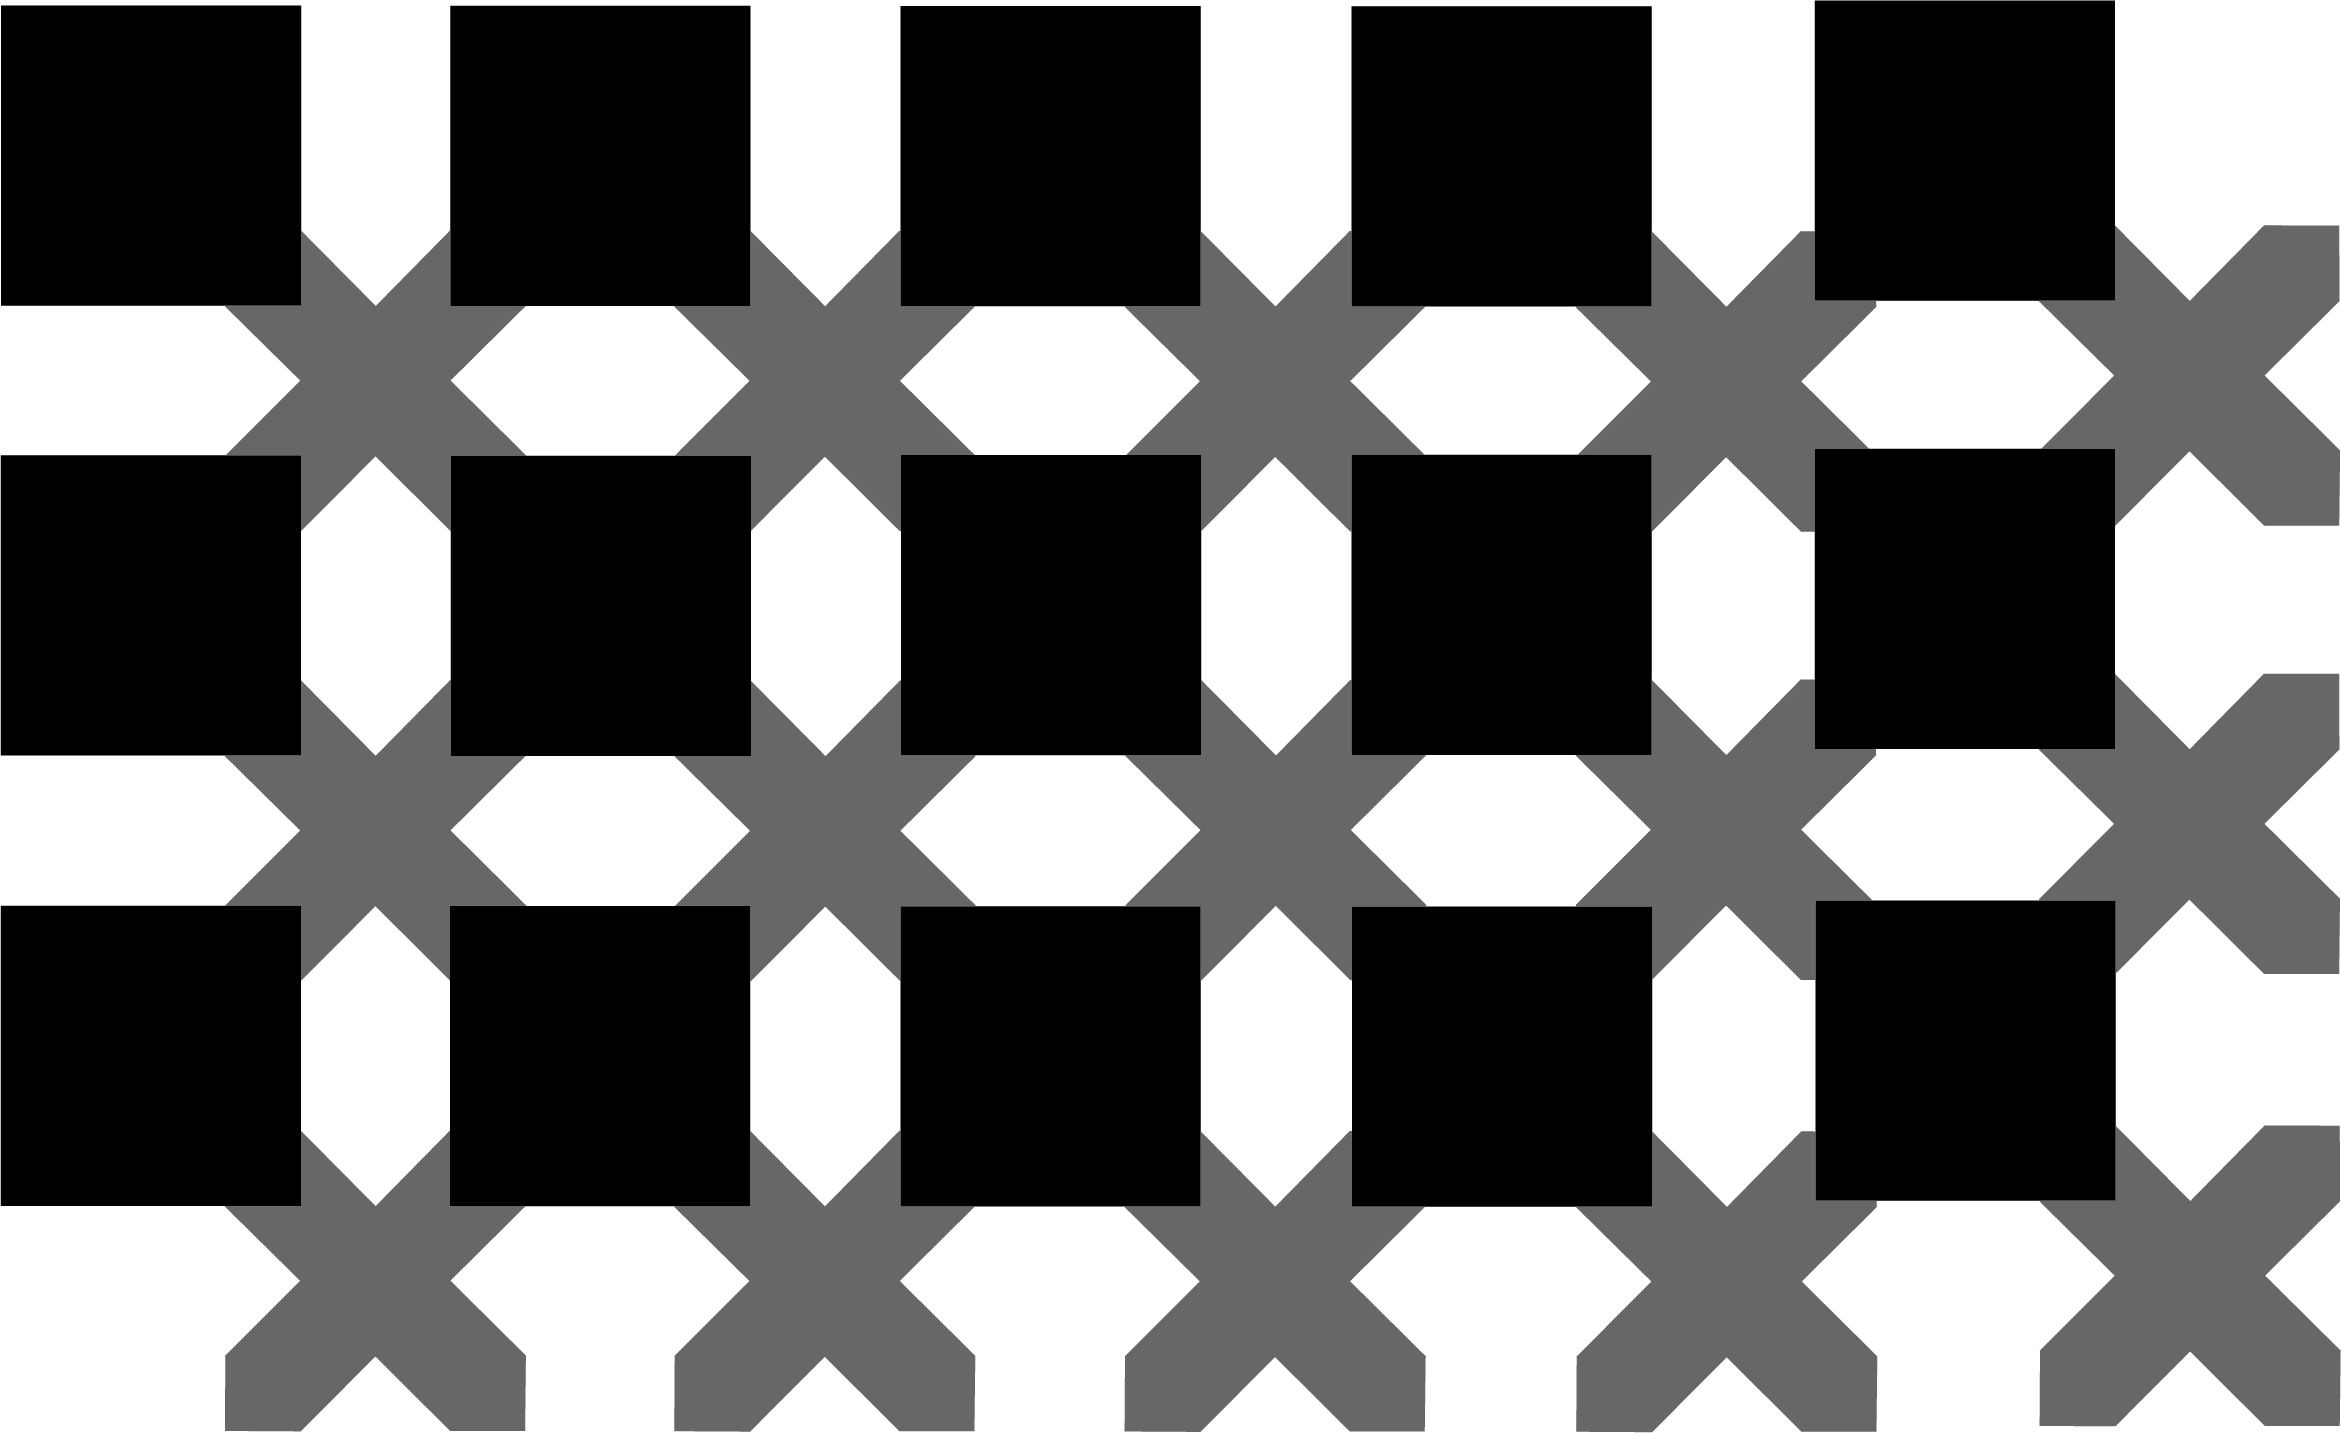
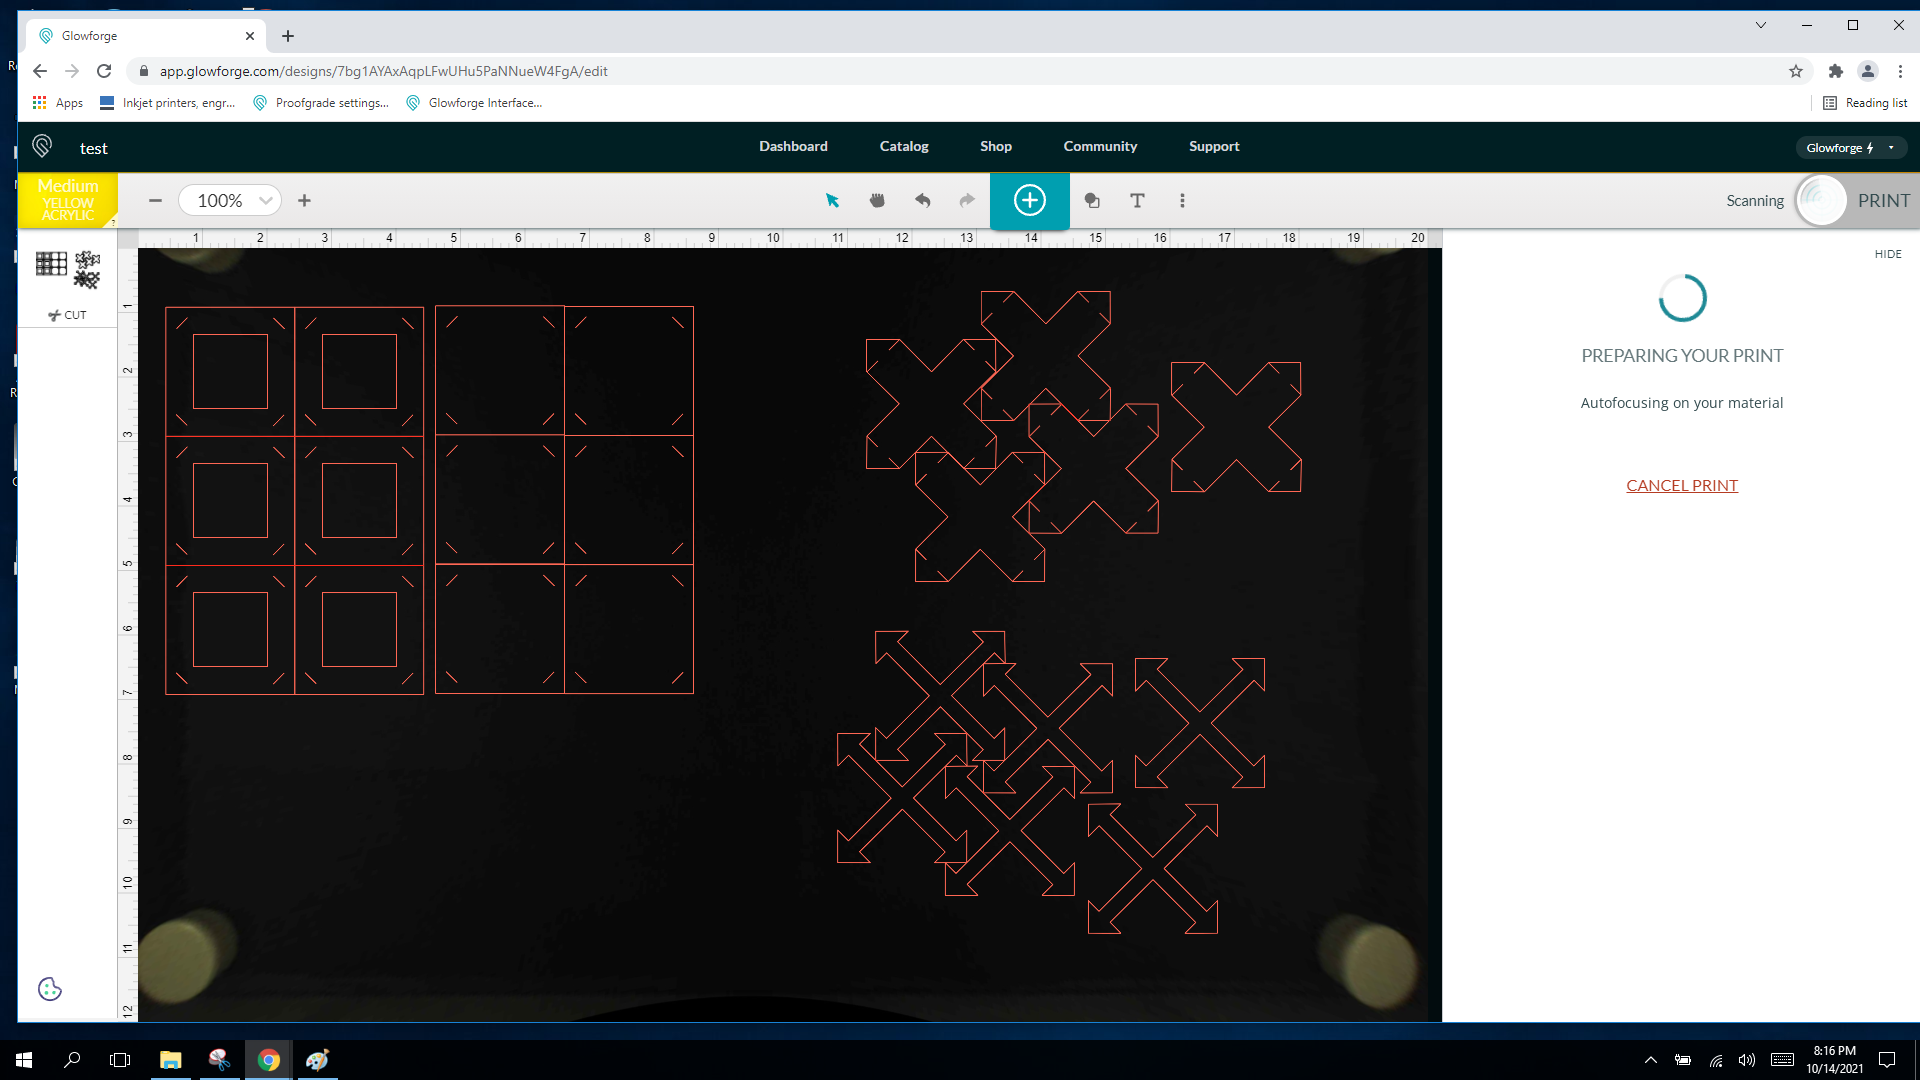
After making these starting pieces, I made an array of each on a 19"x11" artboard by copy/pasting each piece next to each other. (The laser cutting bed is 20"x12" so I wanted to undercompensate).
I also played around with variations of each piece. For example, having the square be more of just a thick border with the middle square cut out of it, and having the cross be in a much thinner form. The following image is also what I used for my first laser cutting test run (see below).
In the end, I generated 8 different possible arrays, with these various combinations of shape and color.
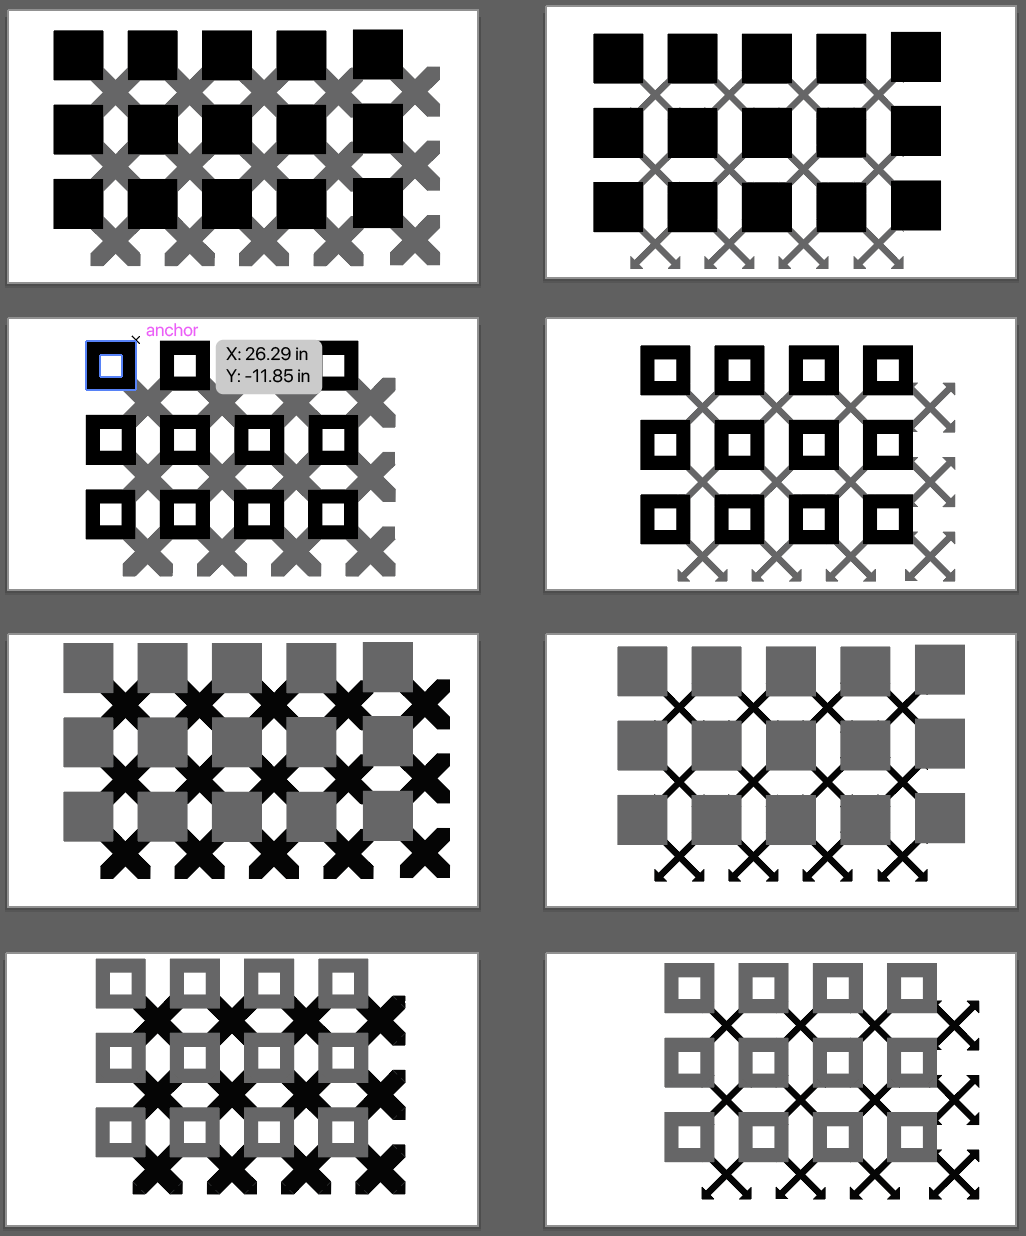
I decided to go with the original filled box and thick crosses as the final design and proceeded to the laser cutter.
Laser Cutting (Glowforge)
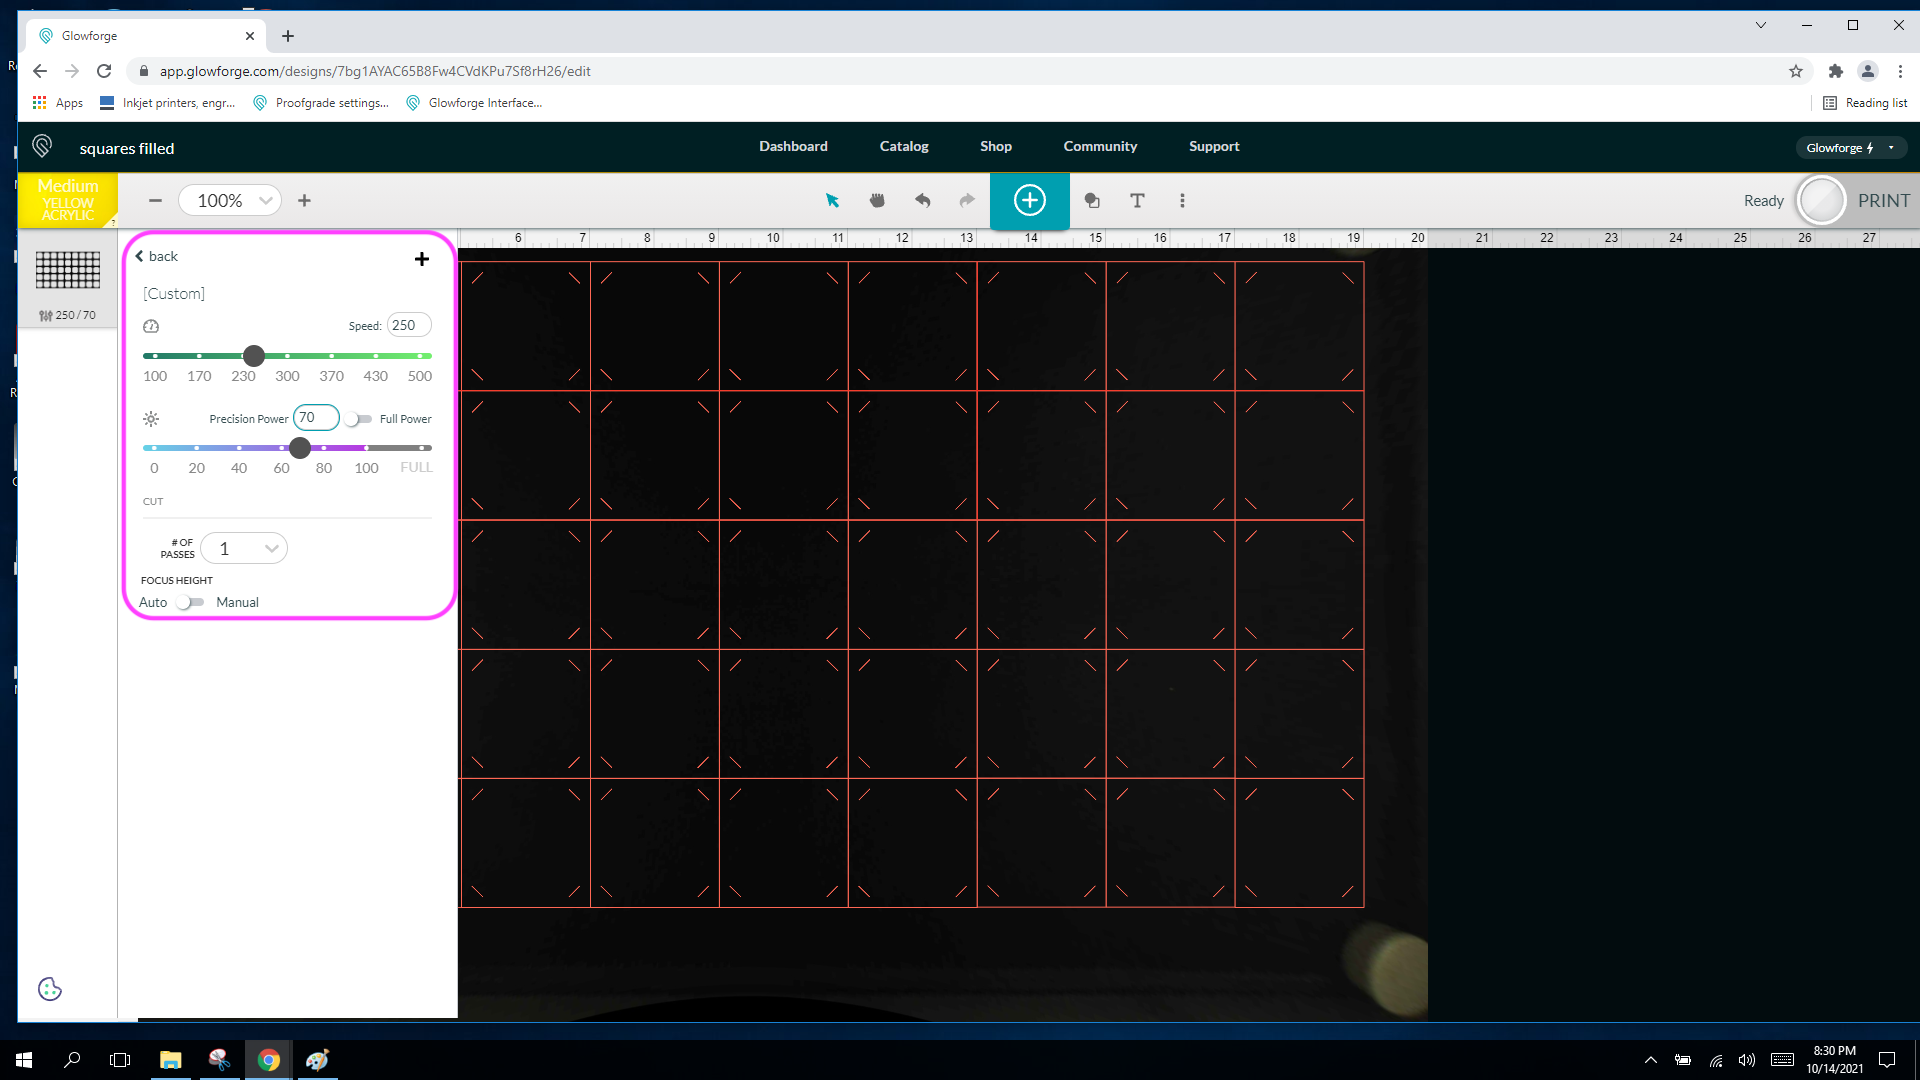
Laser Cutter Settings for the Black Felt:
  Brand: Glowforge
  Bed Size: 12"x20"
  Material: Medium Yellow Acrylic, 12"x18"
  Speed: 300
  Precision Power: 70
  No. of Passes: 1
  Average cut time: 7:40min

Laser Cutter Settings for the Grey Felt:
  Brand: Glowforge
  Bed Size: 12"x20"
  Material: Medium Yellow Acrylic, 12"x18"
  Speed: 250
  Precision Power: 70
  No. of Passes: 1
  Average cut time: 9:20min
Settings for cutting felt inspired by user @phoenix from the Glowforge forum
Before using the laser cutter, I exported the arrays as 2 separate .pdf files.
Fortunately, because this laser cutter has a camera and the capability for me to move the pieces in their web-based software, I was able to rearrange the array as needed to fit properly on the felt.
Another setup change I had to make for this particular assignment was using magents instead of tape to hold down the felt on the laser cutting bed.
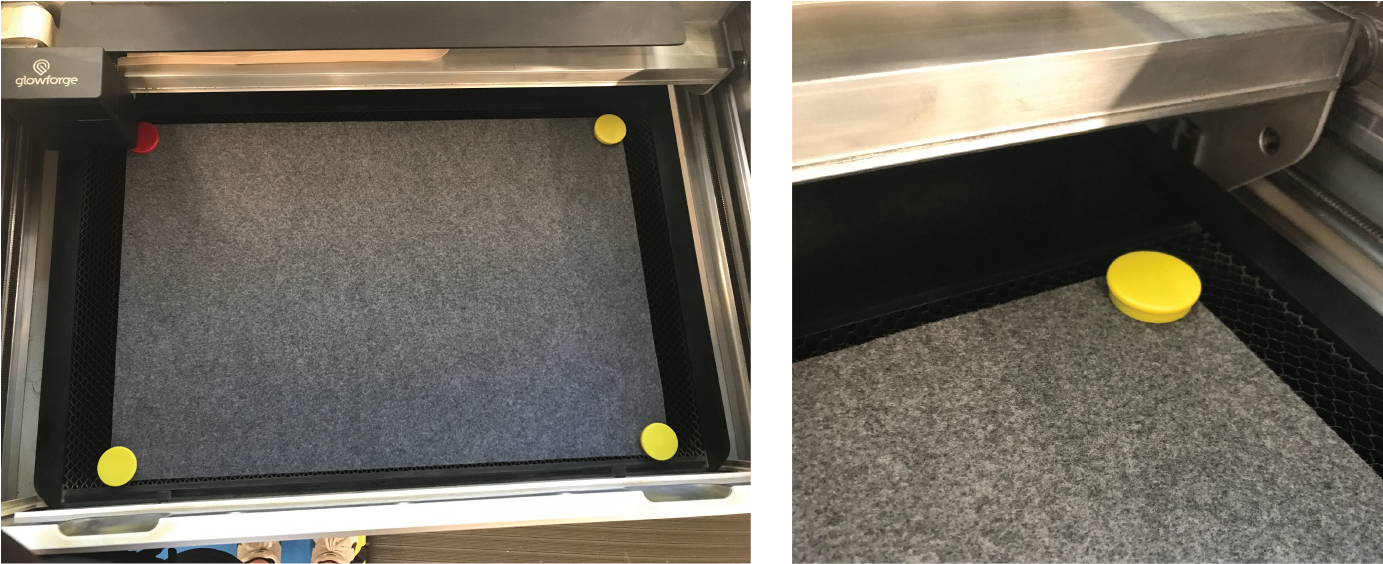
However, before going straight for the arrays, I made a quick test file to cut on extra felt I had to make sure the machine could handle the material. (The fab lab I went to hadn't used textiles in their laser cutter before I wanted to make sure the first test was a quick and safe one).
Once the test run was successful, I moved on to the arrays. In total, I cut over 4 sheets of felt and 4 sheets of gray felt to produce over 350 pieces in total. For fun, some open square pieces were also laser cut out.
Assembly
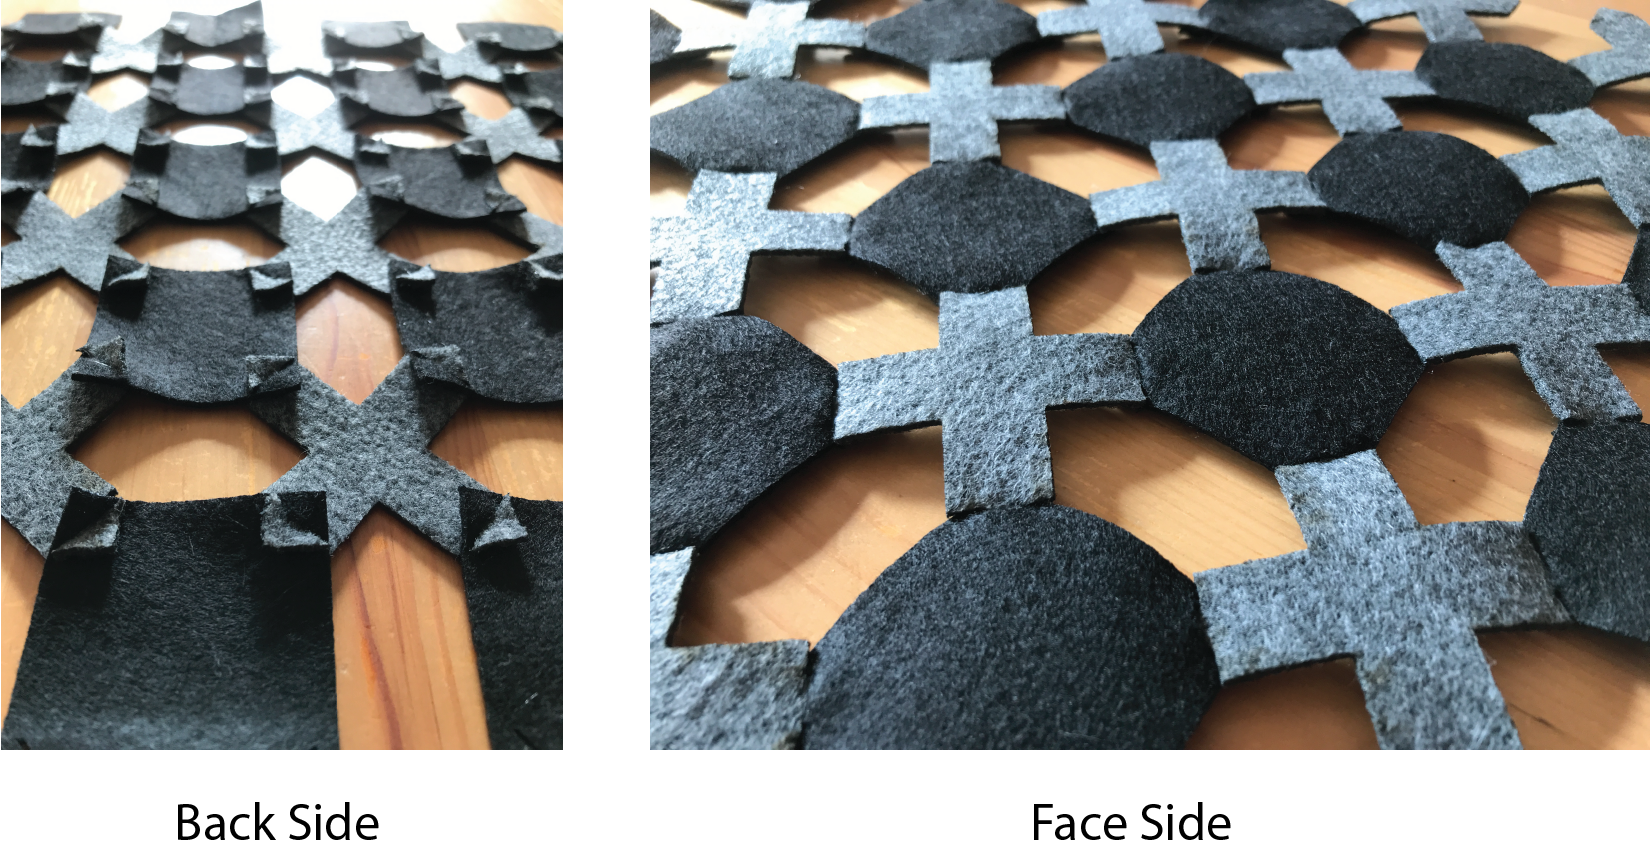
Assembling the pieces together were pretty straightforward in terms of interlocking the corners of the crosses into the insert openings of the black square corners.
I honestly didn't know what I was going to make in the end so I just kept building and building and building.
At some point I just built two large panels that I roughly draped over my friend's arms.
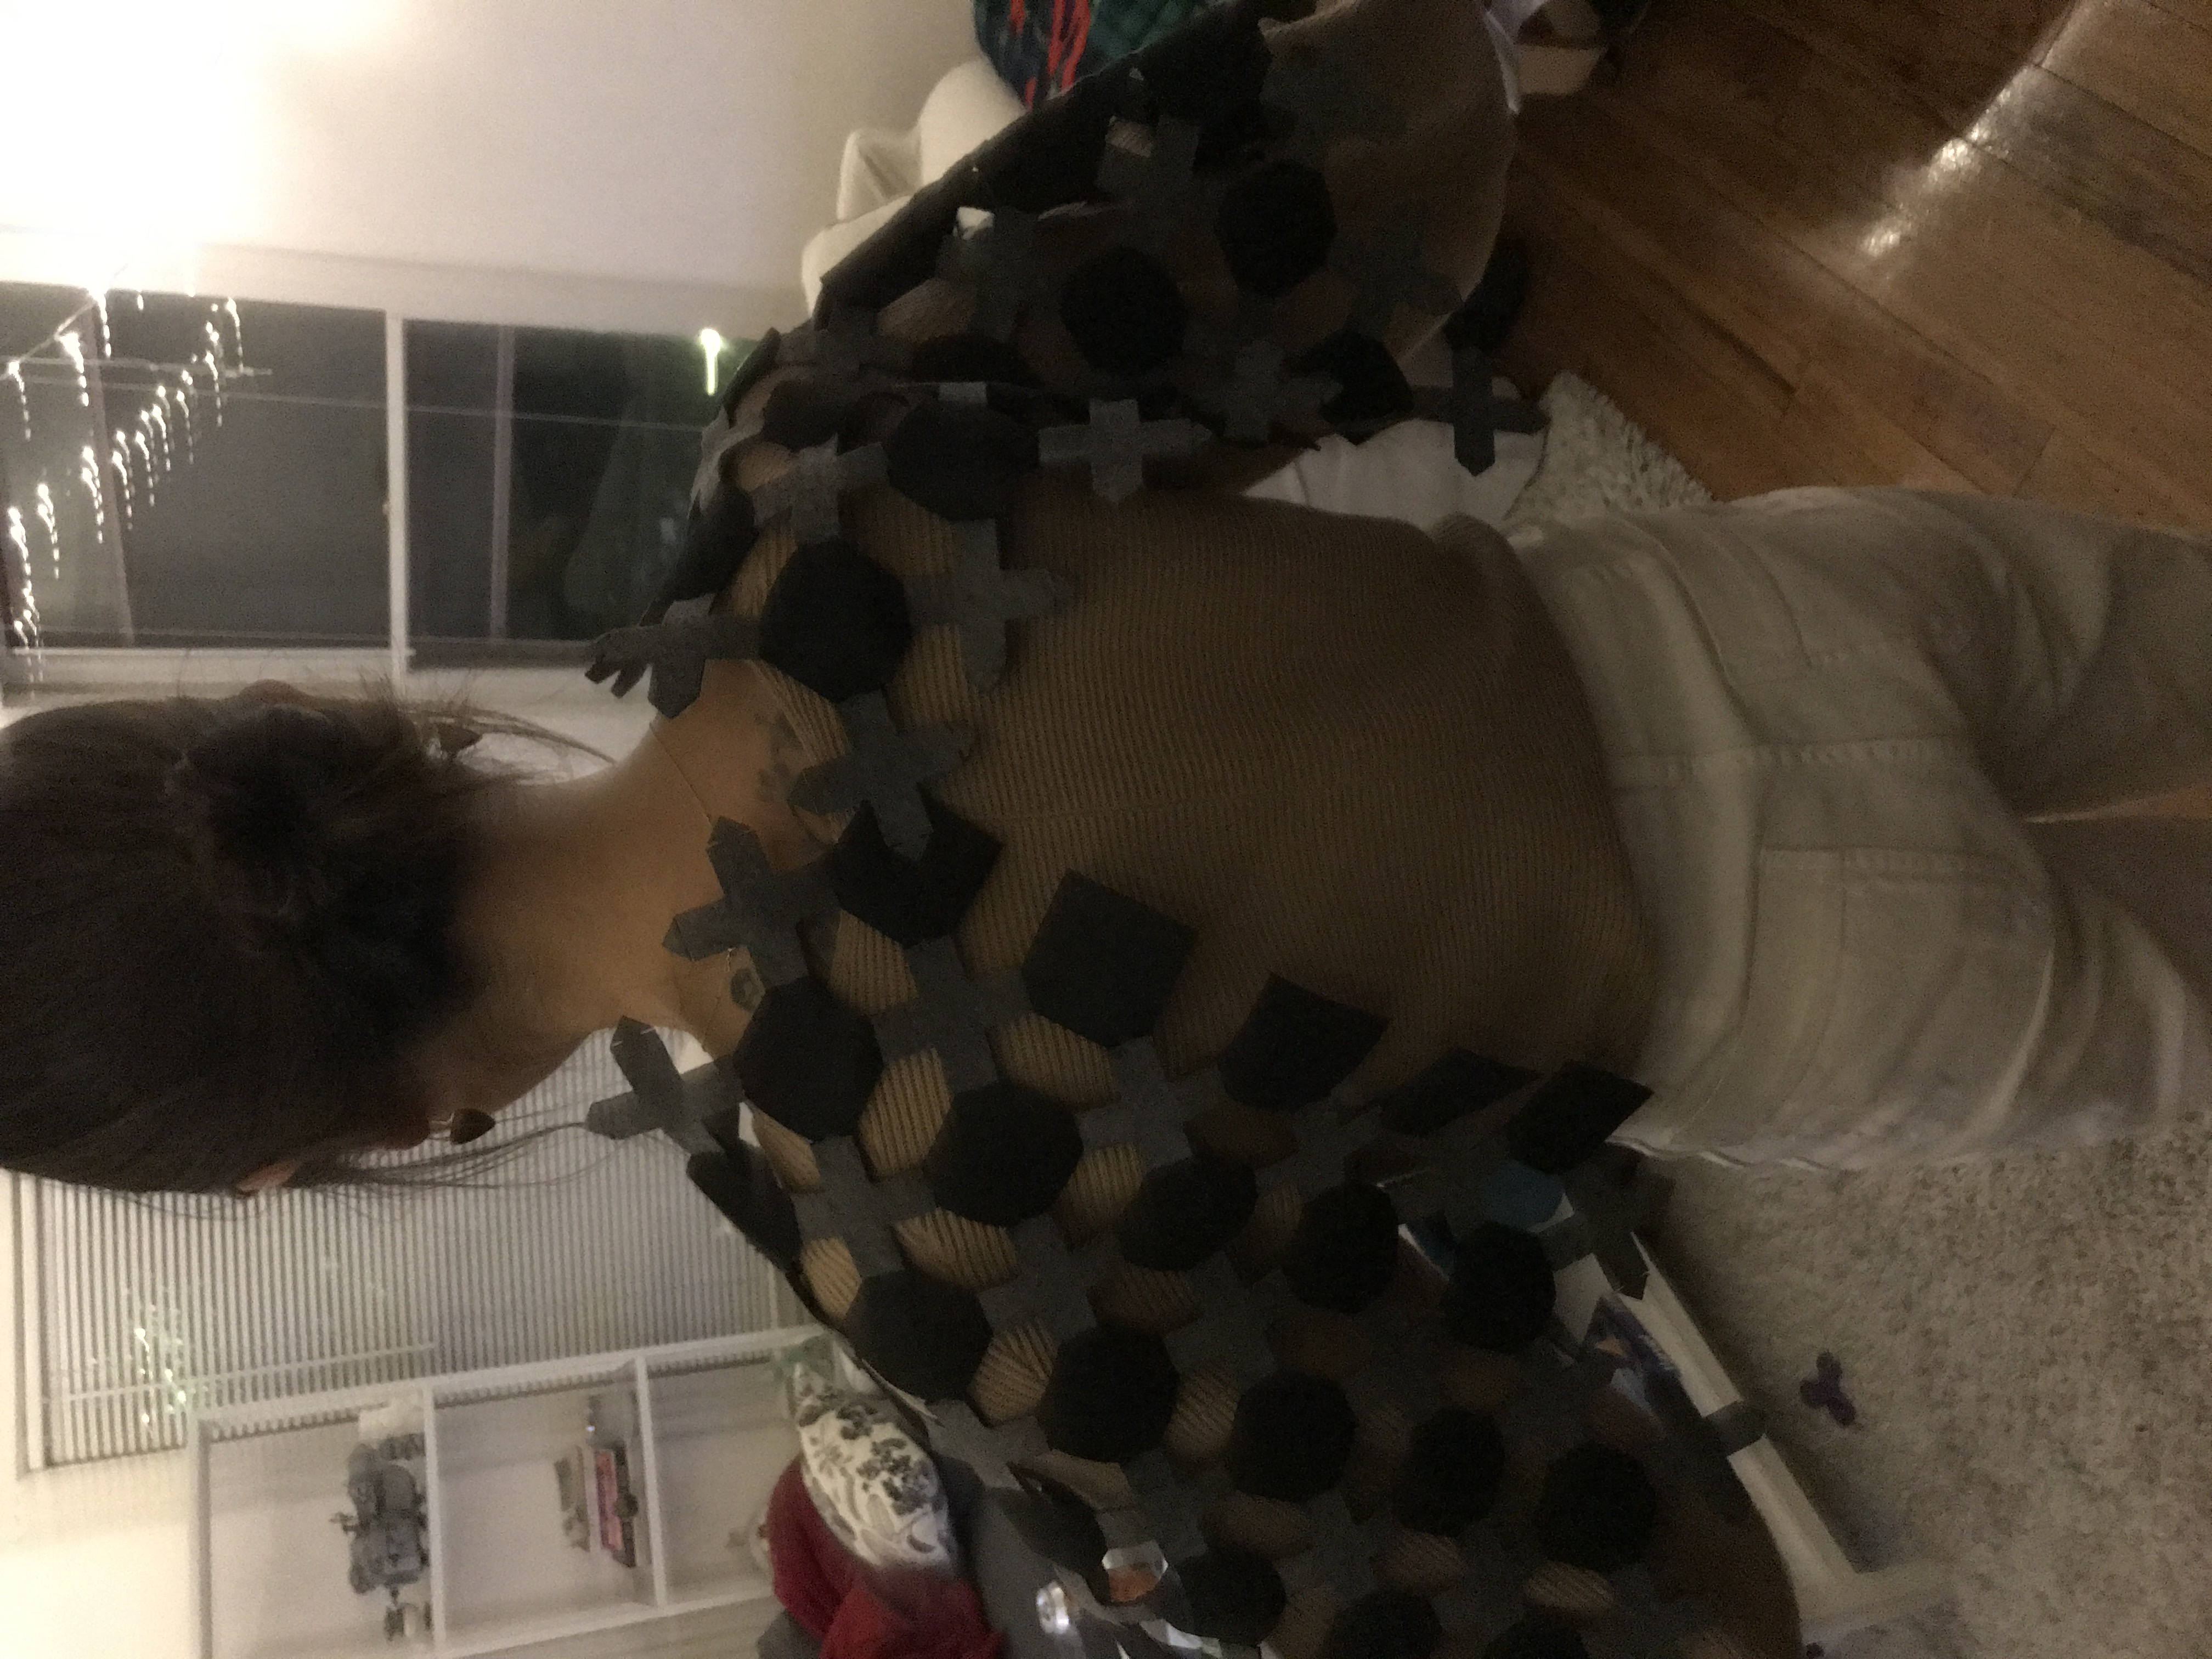
Then I realized I had enough to make a back panel to connect the two capelets and incorporate some of the shell pieces I printed extra of. Using a dressform, I created and assembled the back panel and made as many adjustments as needed to create a symmetric shawl.
Final Result
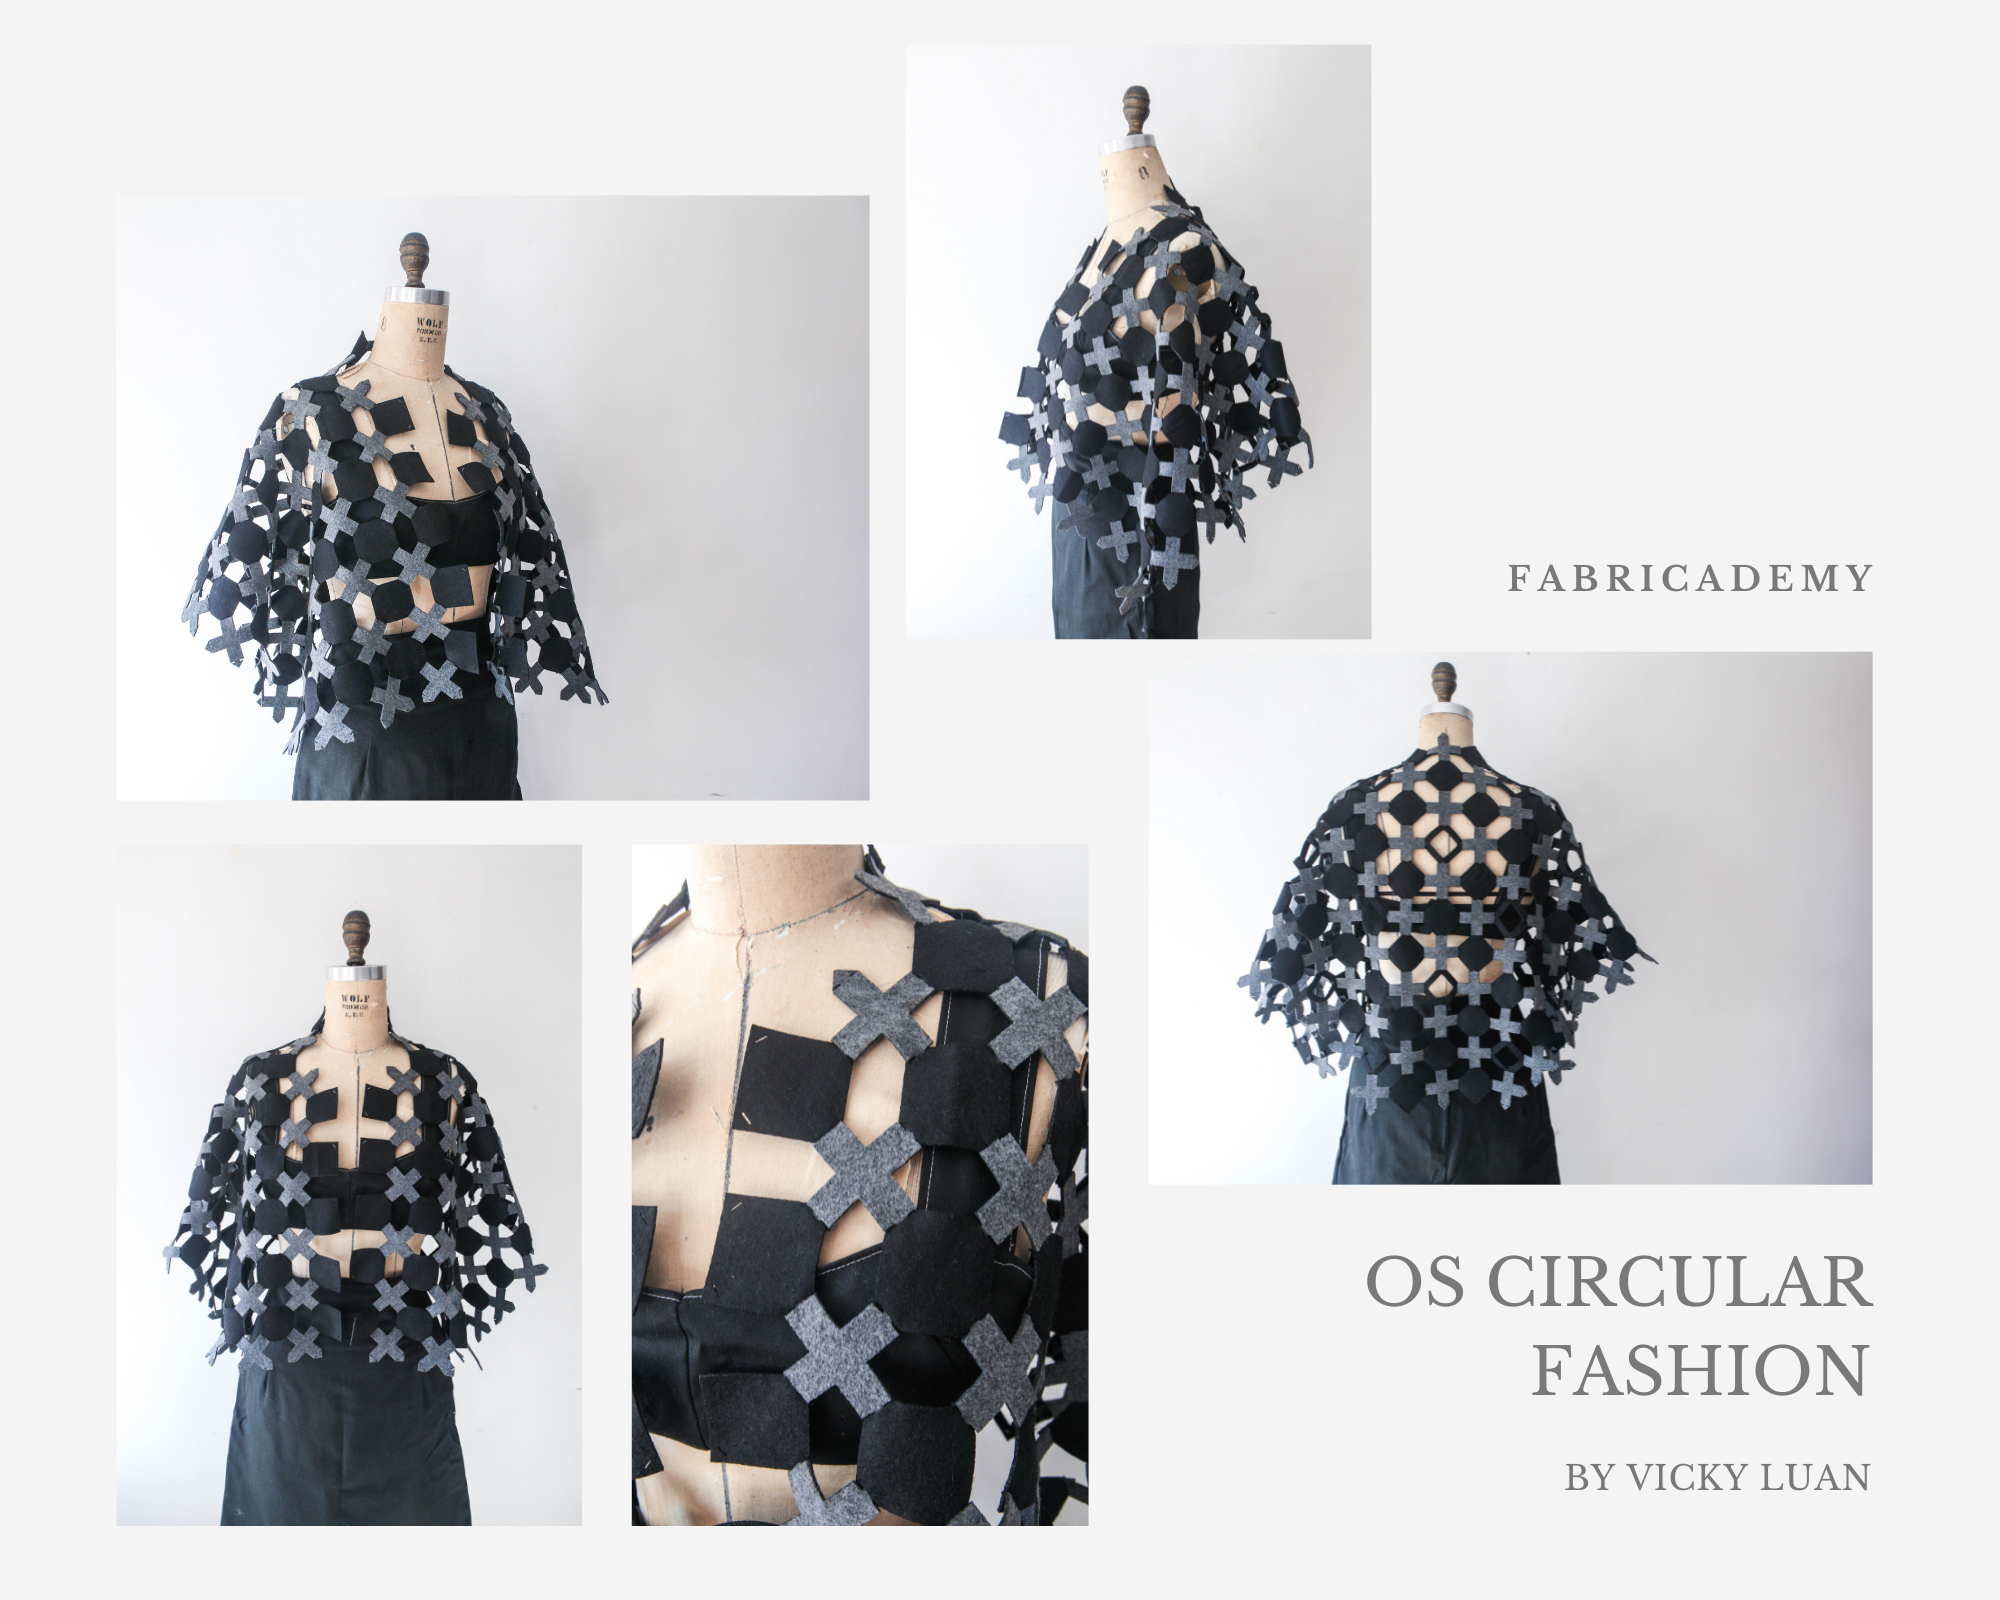
Uploaded on OS Circular Fashion HERE
Problem Areas
Laser Cutting Settings
Problem
Before going straight for the arrays, I made a quick test file to cut on extra felt I had to make sure the settings were correct. Good thing I did this because I realized that I hadn't adjusted the settings to what they should have been and as a result, the edges of the shapes got scorched harsher than they should have.
Solution
Learning the hard way, this forced me to remember to correct the settings manually prior to each print.
Material Placement (Laser Cutting)
Problem
Another problem that occurred during laser cutting was not properly pressing out some kinks/folds in the felt before cutting. As a result, some pieces that were cut out were flipped out of the sheet and began standing up. The ventiliation system also moved these pieces out of their original positions.
Solution
The solution was simple: TRIPLE CHECK the flatness of the material. I used my hands press the fold out and sometimes even folded the felt the opposite direction to even out the kink. After these moves, the problem never occurred again.
Download Links
Illustrator Files for Laser Cutting
Cross Pieces (.pdf)
Squares - Filled (.pdf)
Squares - Empty (.pdf)