WEEK 9 - TEXTILE AS SCAFFOLD
Last Update: Nov 22, 2021
November 15-21, 2021
This week I learned how to create new materials using various processes such as crystallization.
 Side Note: I suffered a back injury on the Tuesday of this week and was out of commission until Sunday. I attempted a crystallization process but will revisit the other half of this assignment in the following week.
Quick Summary
 Tools/Resources Learned:
- Crystallization using alum and water
 Tools Refined:
- Visual Studio Code Version 1.62.2 - a coding platform I'm using to document and upload my work onto my Fabricademy website
 What I still want to learn better:
- How to grow crystals directly on fabric draped over dress form?
- How to stabilize crystals adhesion so they don't fall off as easily
Research and Inspiration
Due to time constraints, I relied my inspiration primarily on the lecture notes and video for this week as well as the tutorial on crystallization.
Crystallization
The Solution
I first started by boiling 1 cup of tap water and then adding 50g of alum. I stirred the solution around for about 20-30 seconds before adding one drop of a blue food dye. (At first I thought I'd need more drops, but after just one it turned dramatically blue very quickly)
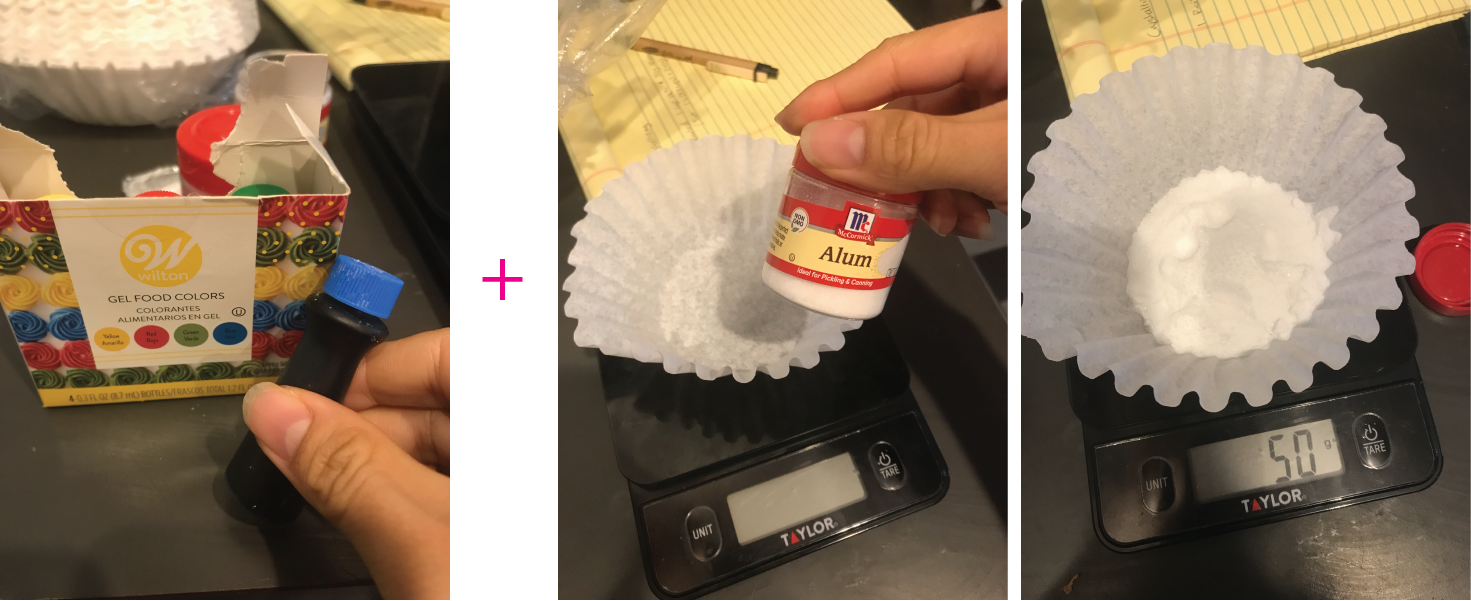
After mixing this solution, I strained it using a coffee filter.
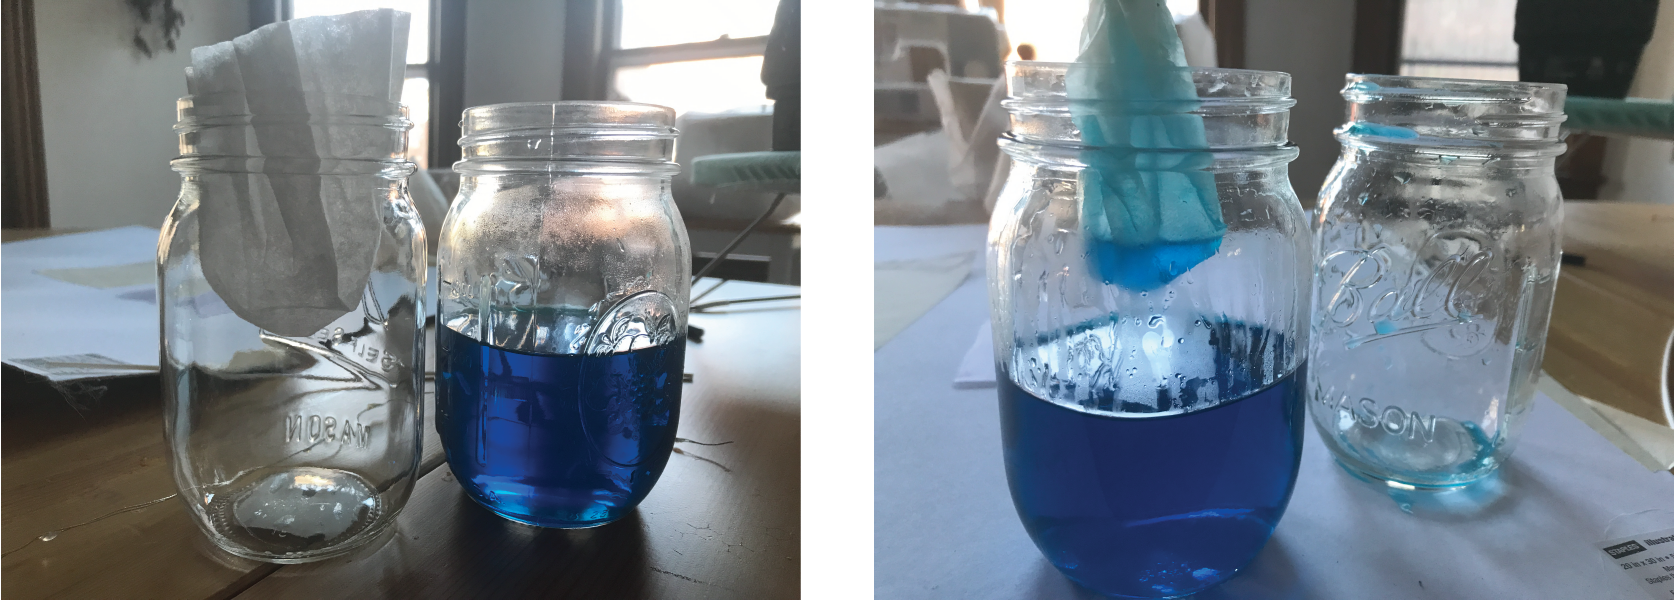
I used the filtered solution to spray, drop, and soak various materials.
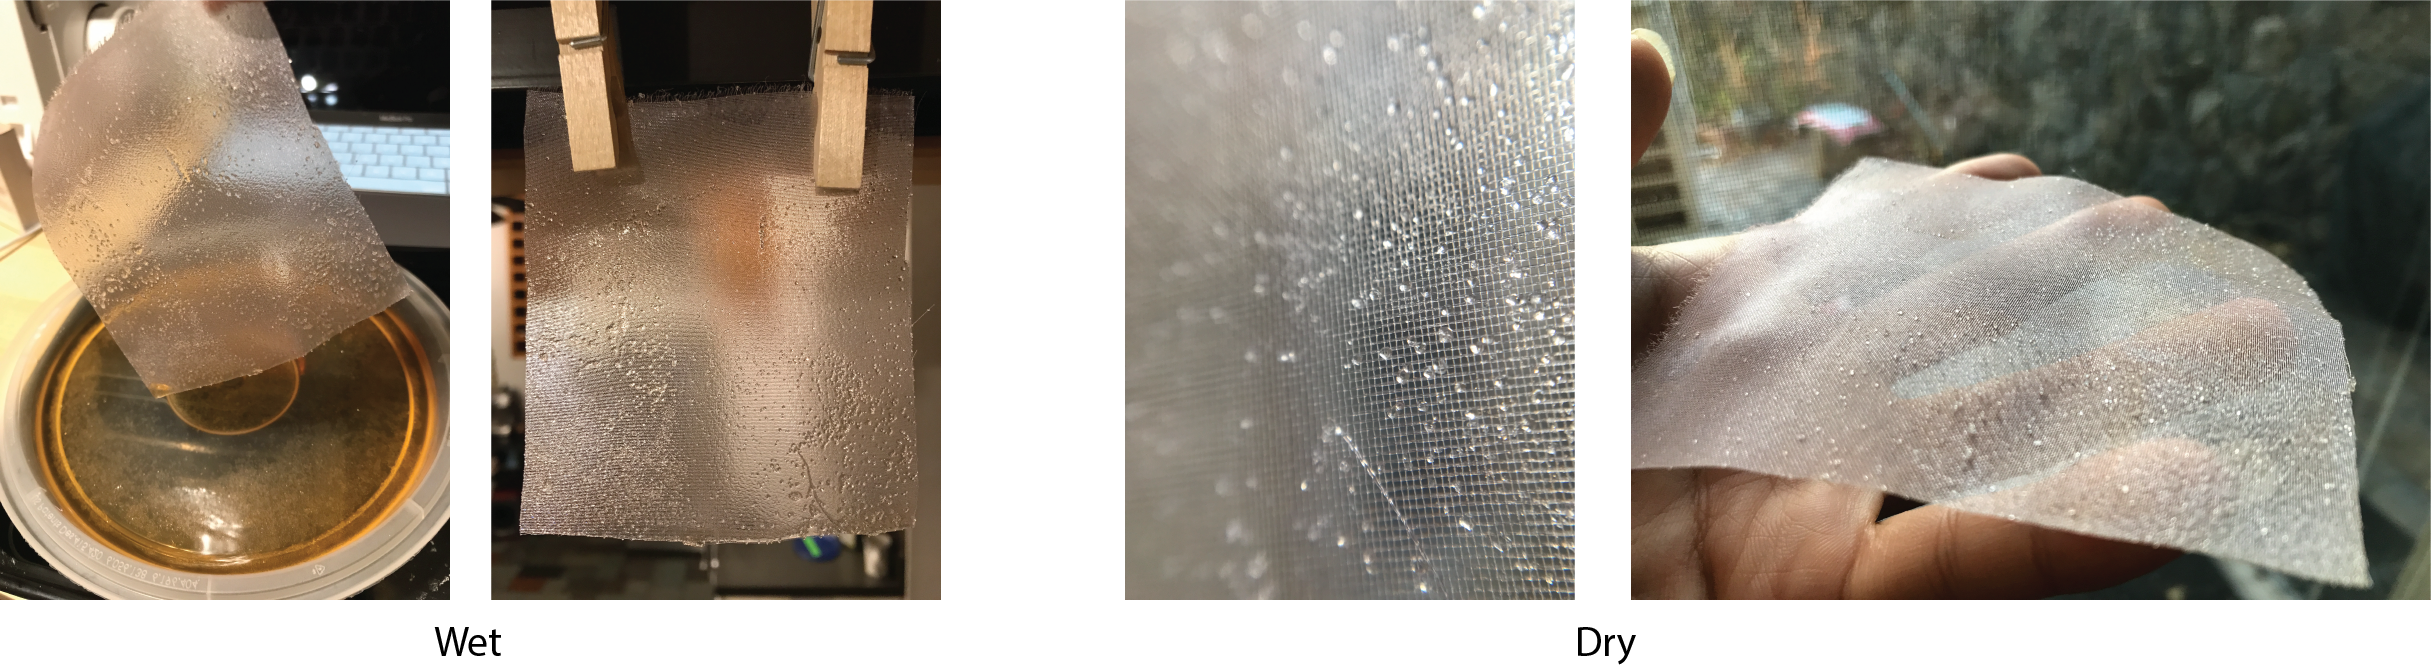
Organza
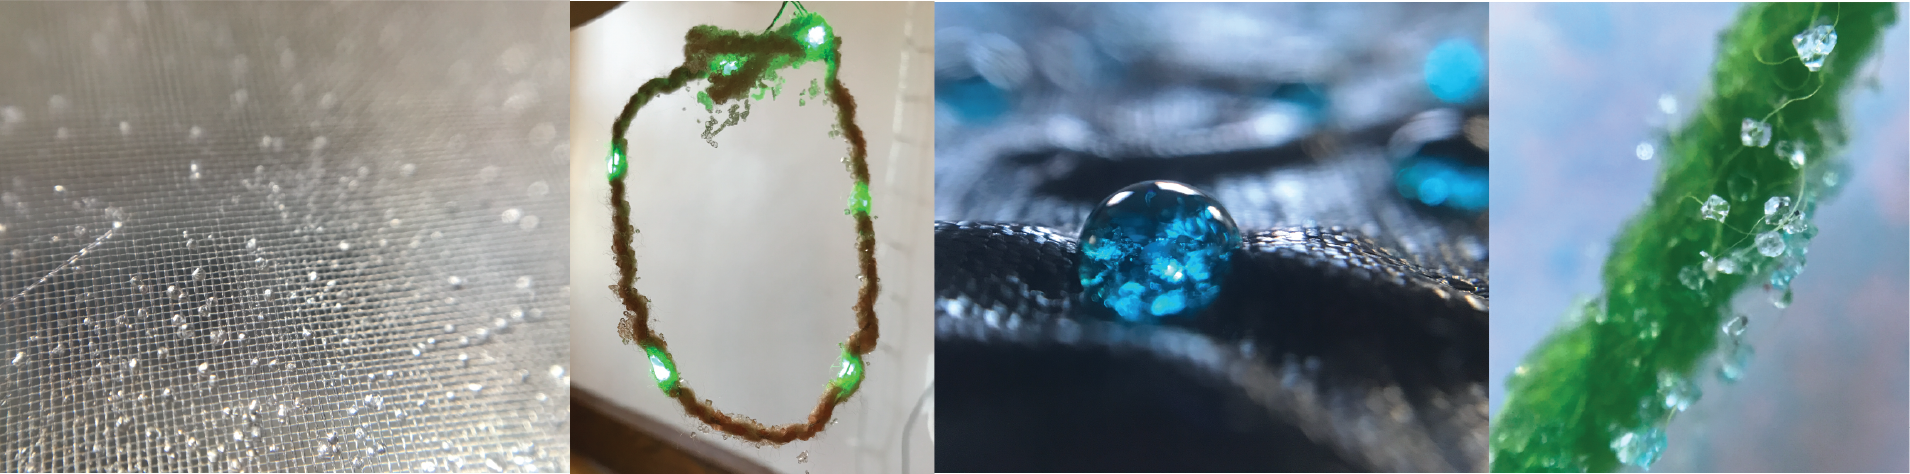
I cut two swatches of organza and put the head of a spray bottle into the mason jar of the alum solution to give a few sprays onto the organza. The intention was to create super small crystals that would have a star-like effect
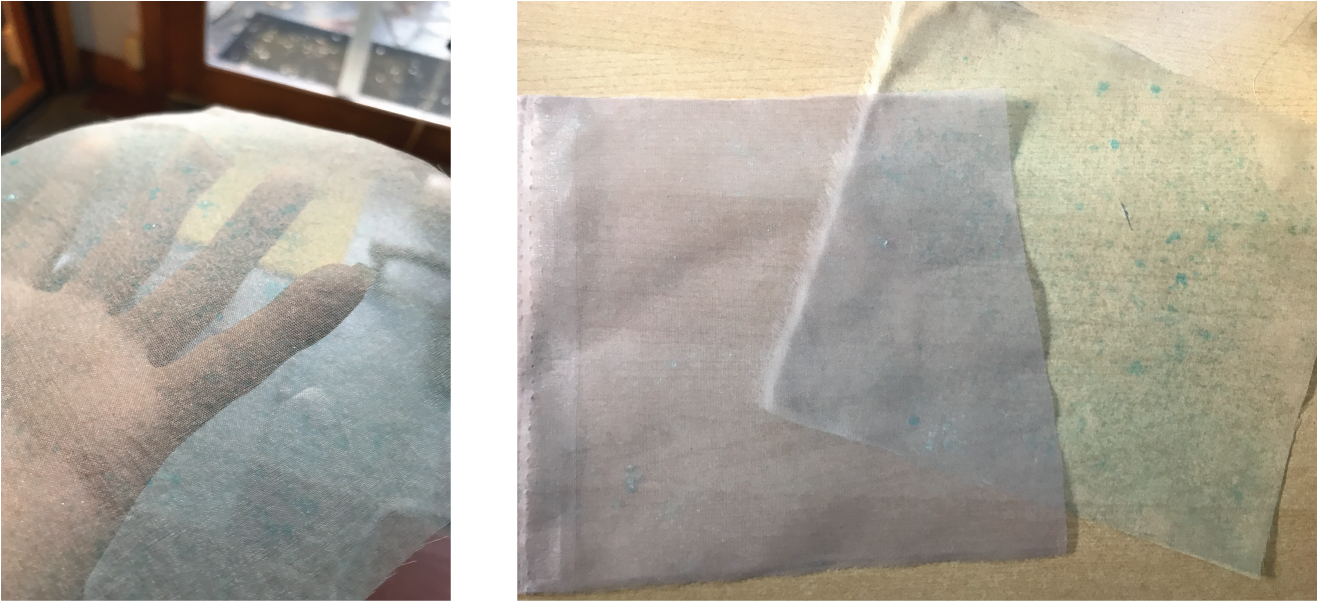
The next day I tried it again by letting a swatch sit right in a thin layer of red alum solution in the lid of tupperware. This stayed for a couple hours to few hours. The results turned out better than the last!
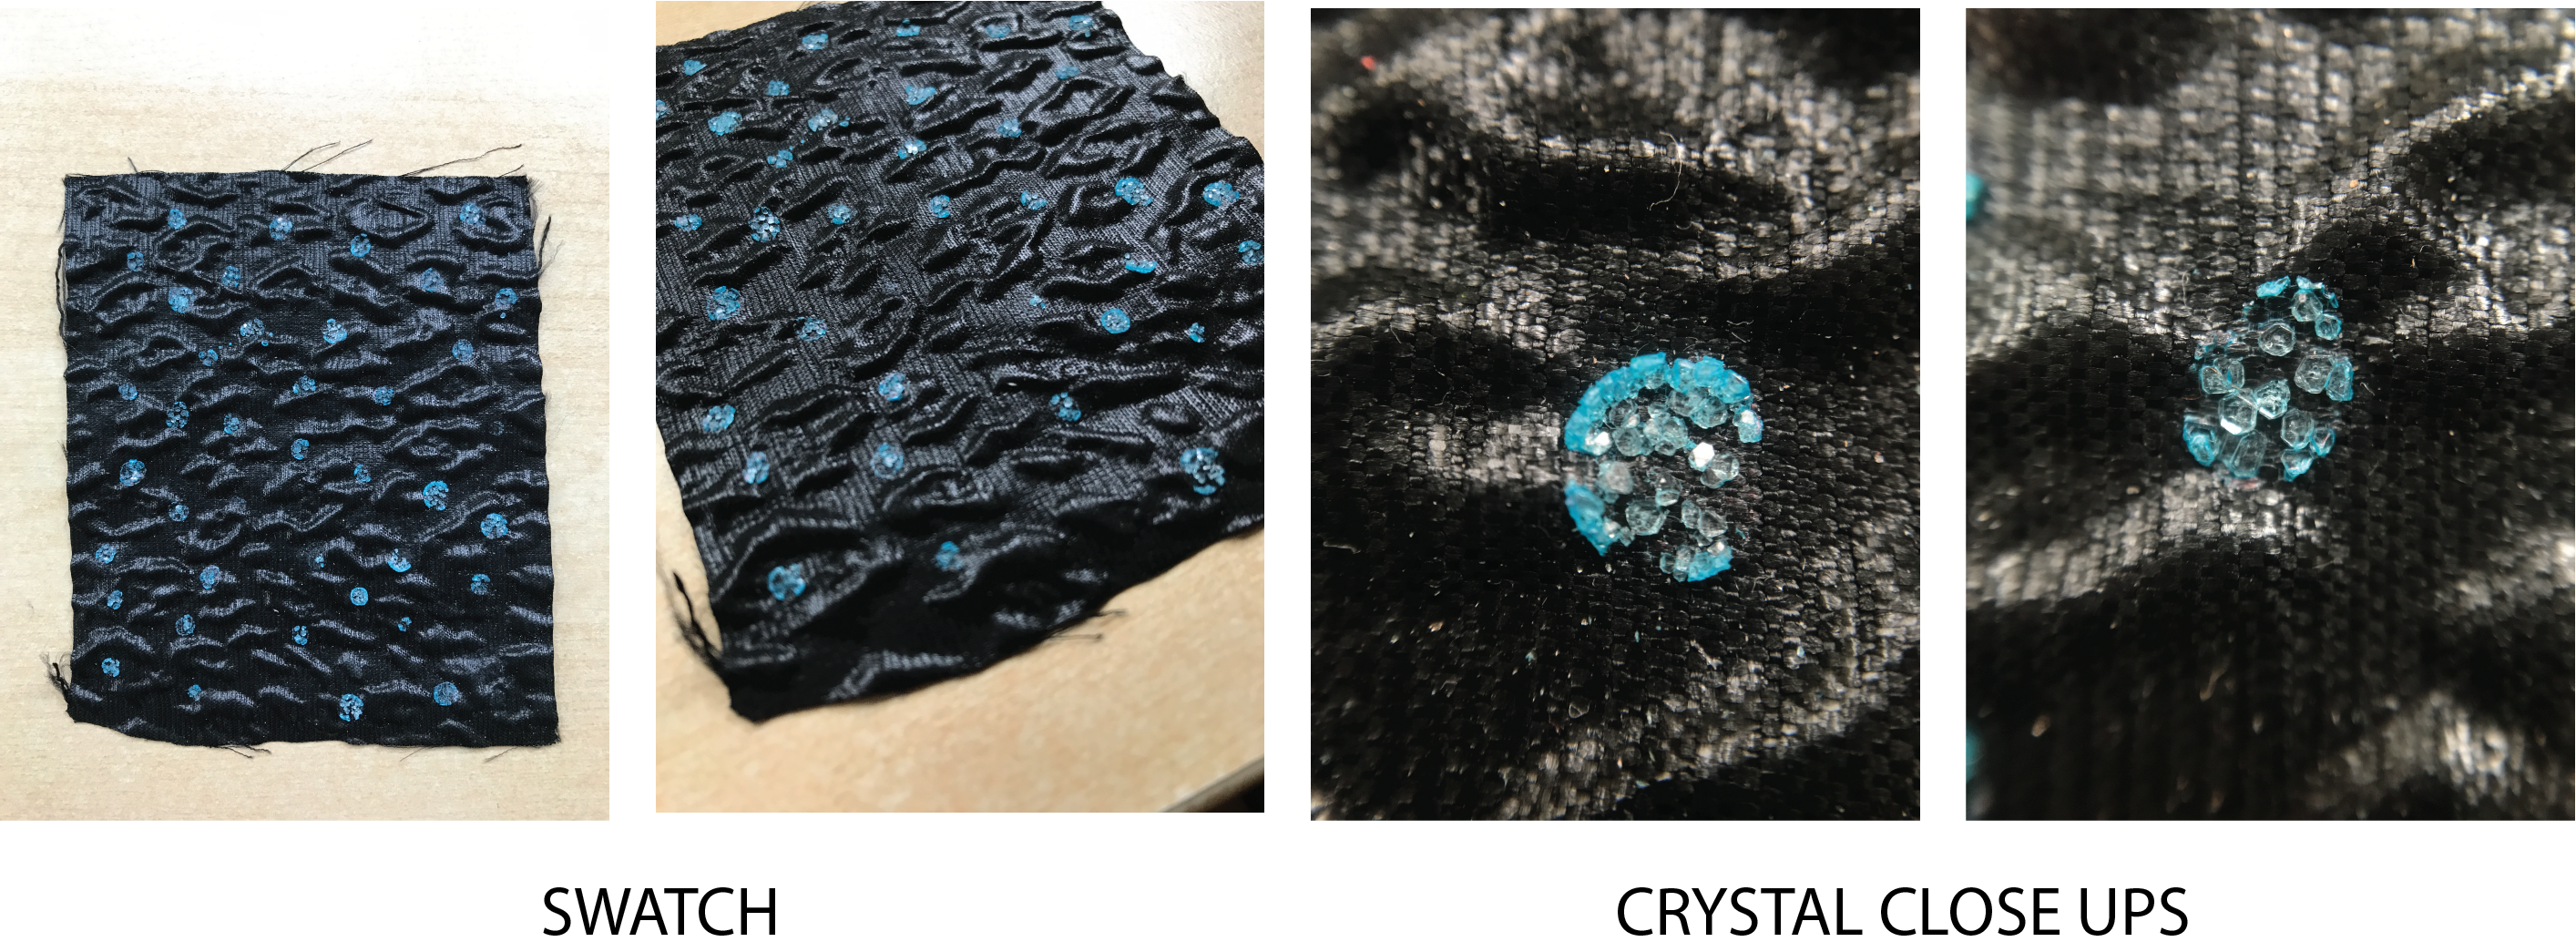
Textured Fabric
Another swatch I played around with was a black textured fabric, on which I used a pipette to create round droplets of the alum solution.
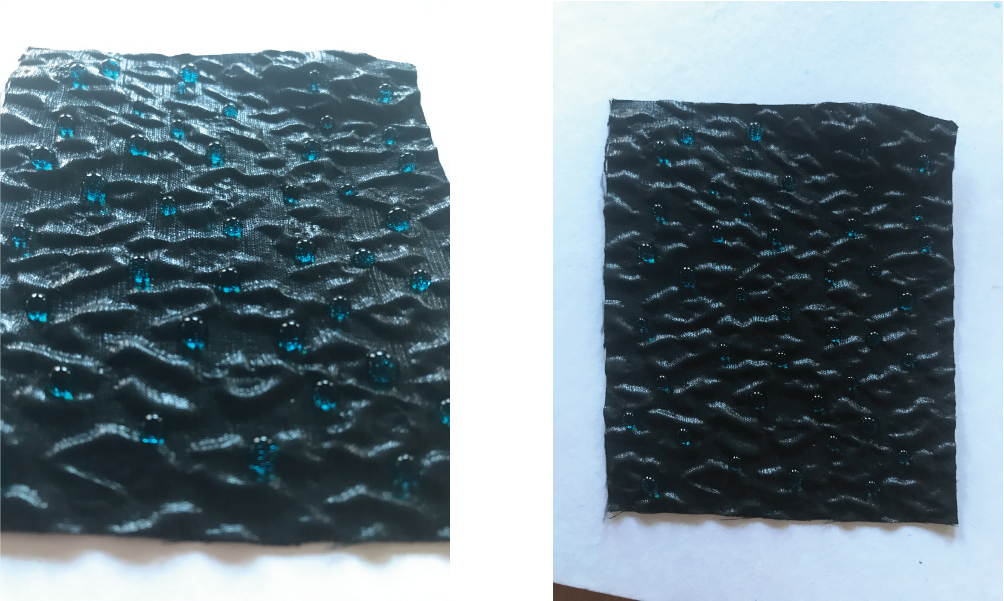
After about 45min, the droplets reduced in size and the crystals were left behind.
Side note: I received a phone call in the middle of this timelapse and my phone fell onto the material so the final result was not captured in the above video.
After a few hours of drying, the following was the final swatch:
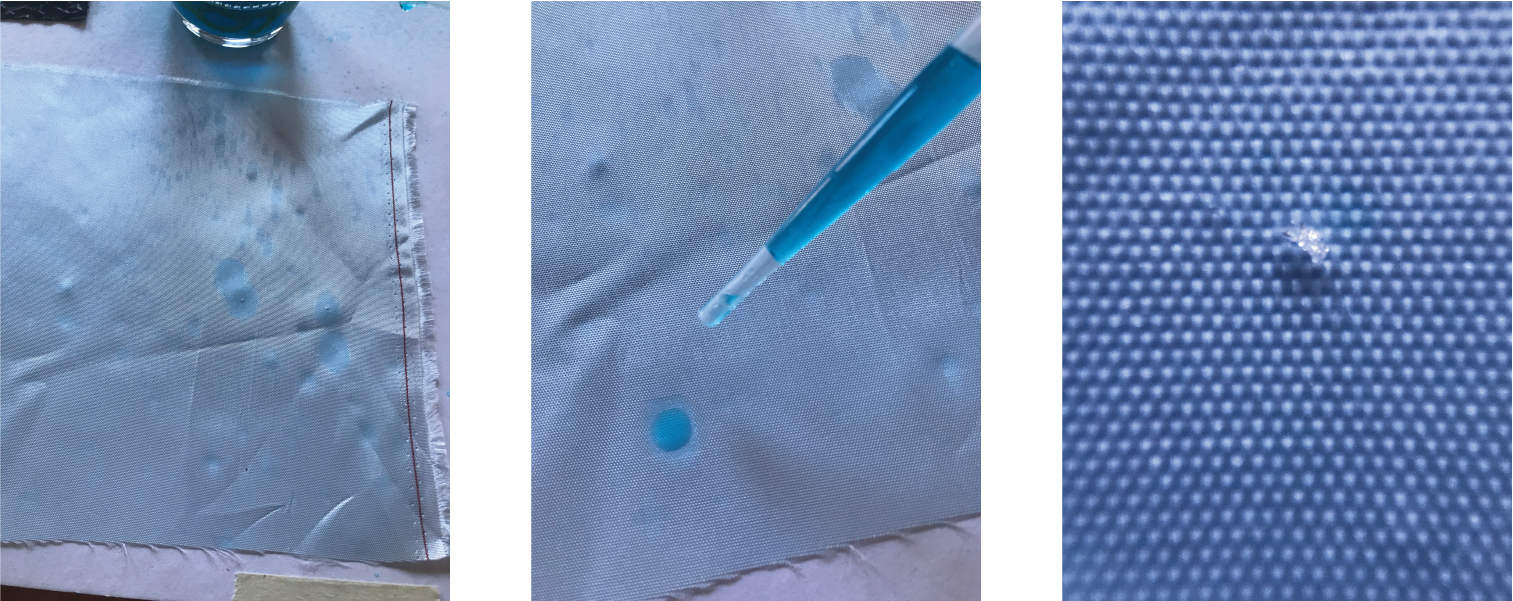
Silk Taffeta
Fail
The last fabric sample I tried was a silk taffeta - horrible idea, really. I wasn't 100% sure the fabric I was sampling was silk until the moment I placed a drop on it. It immediately soaked and stained the fabric. Fortunately I was able to capture evidence of the tiniest crystal on the fabric along with its woven fibers.
Yarn from Week 4
The next time I tried was a piece of the yarn I dyed with onion peels from Week 4.
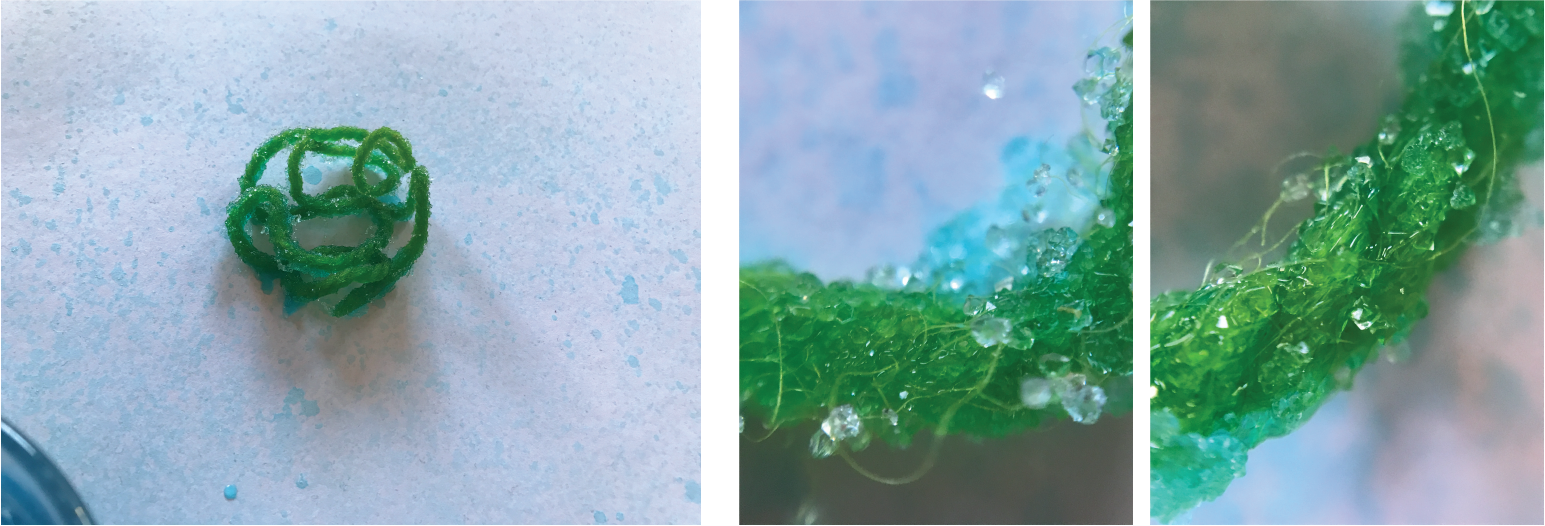
This was particular fun because many many crystals were formed along the yarn AND it dyed the yarn green.
LED Lights
Fail
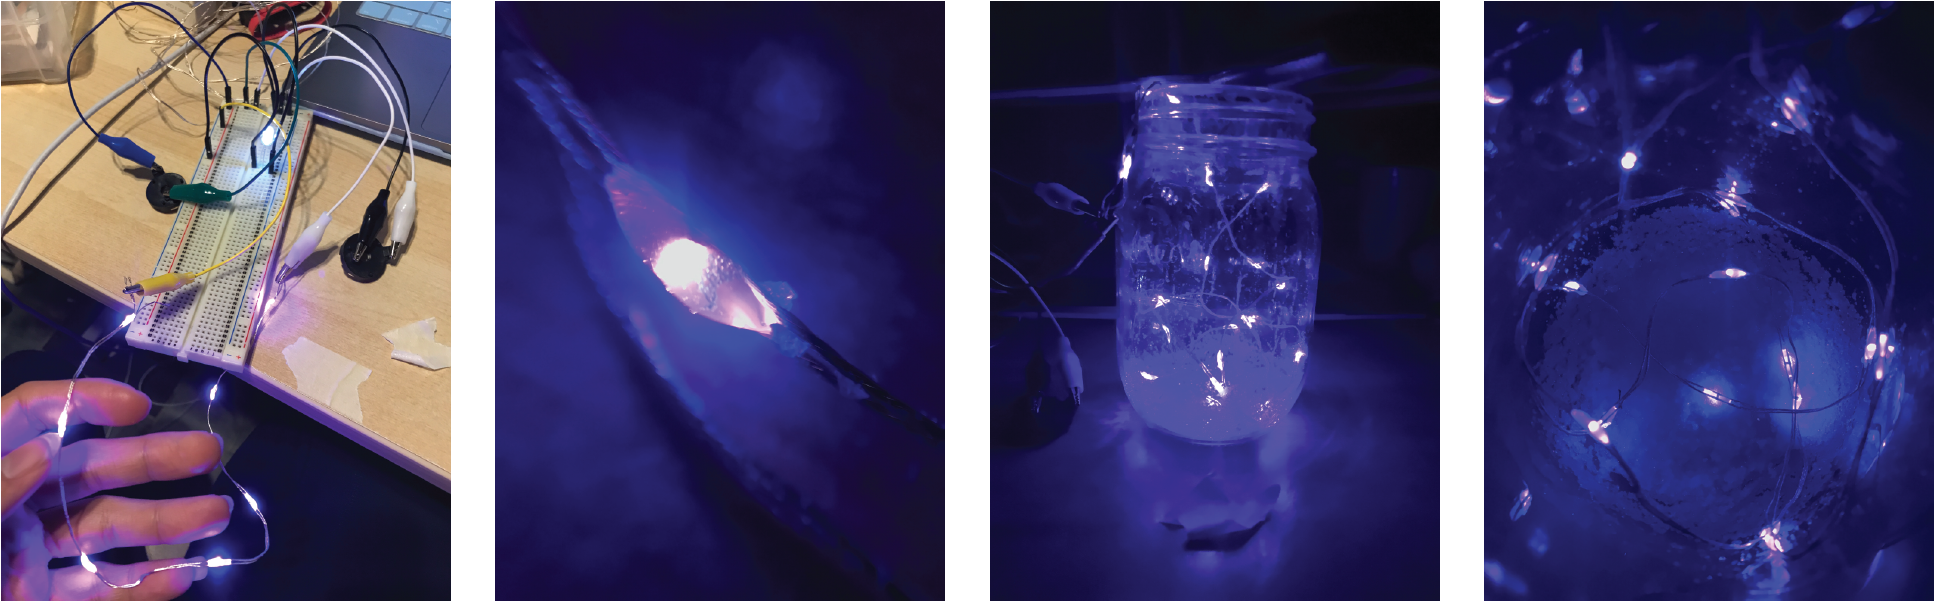
When I heard that this crystallization process could be used on neopixels, I thought I'd try it out on a LED string I previously bought from the Micro Center for Week 5. After testing with the other samples above, I took the rest of the alum solution, poured it into some old tupperware and put the entire string into it.
The good news: some tiny crystals formed along the string!
The bad news: the photo quality did not seem to be retained when transferring the photo into Illustrator for collage building...hmm..
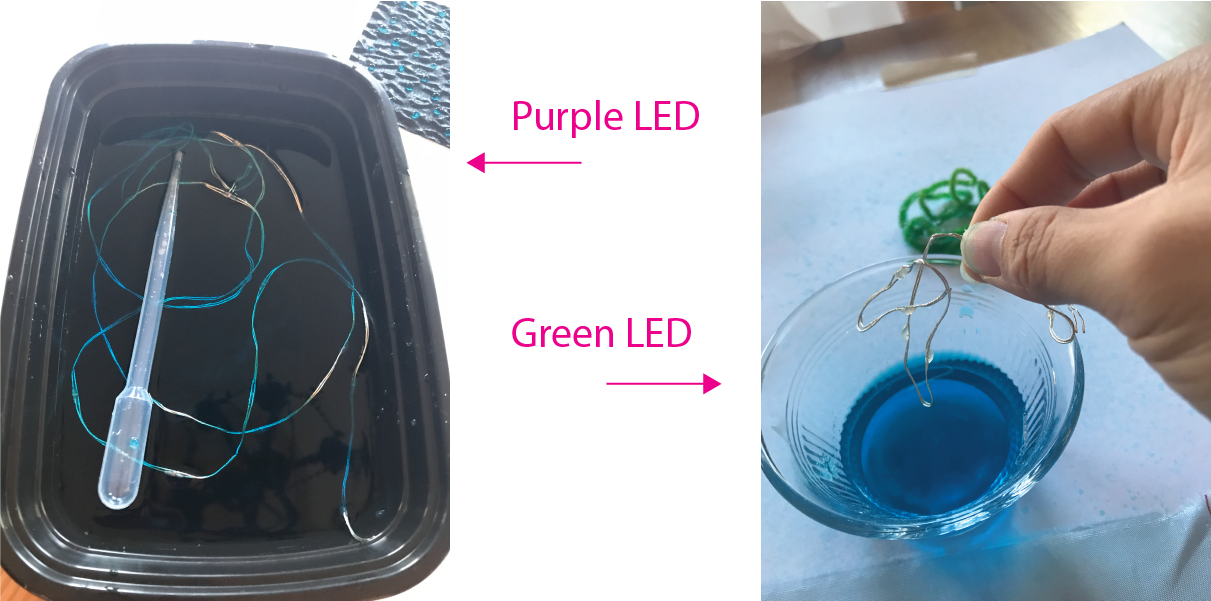
My second attempt was to crystallize yarn was using alum solution dyed with red but also braided with Superflex LED string.
I actually put this into the fridge for 2 hours to hopefully expedite the crystallizing process and create larger ones.
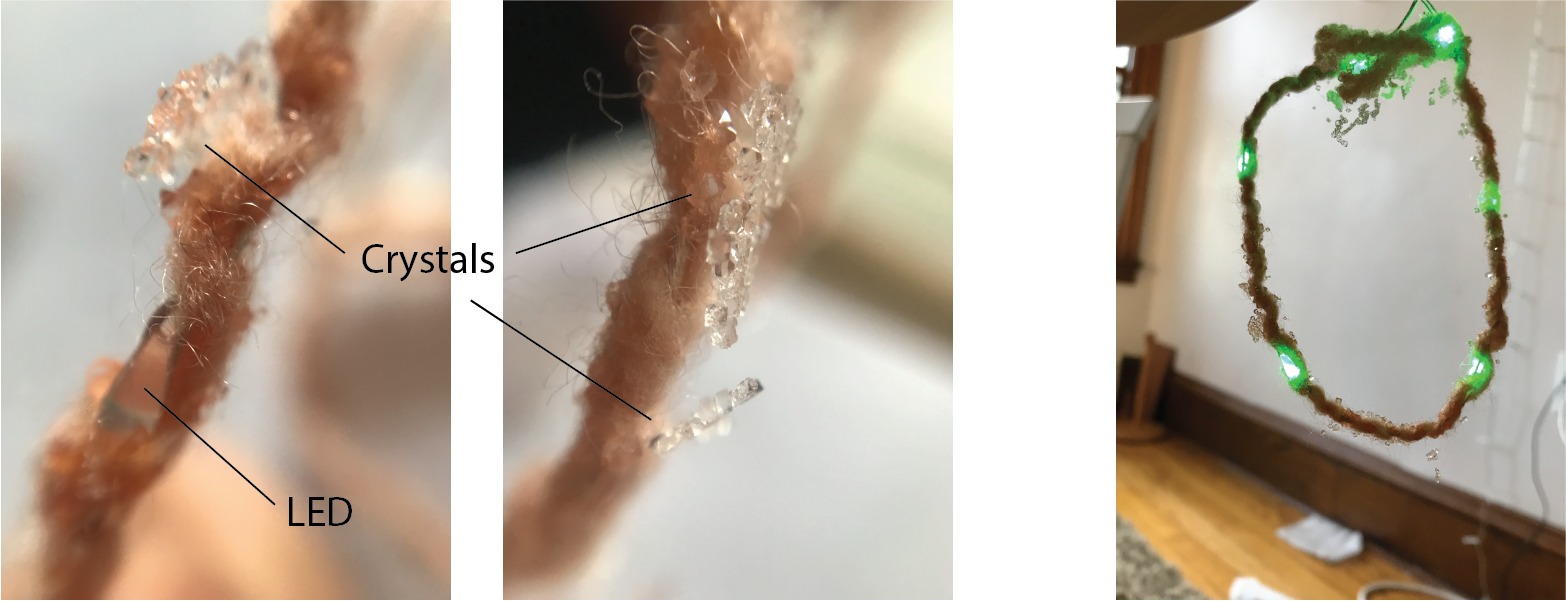
In the end I was also able to turn the LEDs on!
Note: I also tried this braid by hanging it over a solution with the ends of the yarn sticking into the solution to cause a capillary effect, but unfortunately it didn't climb up very high at all (maybe ⅛" above the surface of the solution) so no crystals were made throughout the yarn.
Leather Molding
Jan 26, 2022
For this section I am growing kombucha leather and am hoping that the extraction will become the product for this assignment. Once the leather is washed and dried, I plan to take a part of it and create an engrave pattern on it using a 3D printed mold.
Latest Update: Apr 26, 2022
Althought the kombucha leather was formed, the dried product was too thin and fragile to be engraved with a mold...see "Week 6: Final Results"
3D Printed Textile
Using a 3D printer, I made a swatch of links that collectively behaved as a free-flowing 2D "fabric". Disclaimer: I used a file from Thingiverse to get a better idea of the final product and get a tangible feel for the final product before eventually designing my own pattern
Problem Areas
Lighting the LED String
Problem
For what felt like the longest time, I could not figure out how to get the LED string to light up when connected to either a 3V, 6V (2x3V coin batteries in series) or 9V battery.
Solution
After playing around with the wiring and trying multiple batteries, I realized the real solution was cleaning the ends off of the LED string to be connected to the alligator clips. I did this by taking a lighter and quickly burning off the coating of the wire to expose the inner layers. Safety Note: I did this outside because the fumes smelled extremely bad and were probably very toxic lol
Photo Editing Issue
Problem
When dragging my purple LED photos into Illustrator the photo quality seemed to go drastically down, along with the saturation
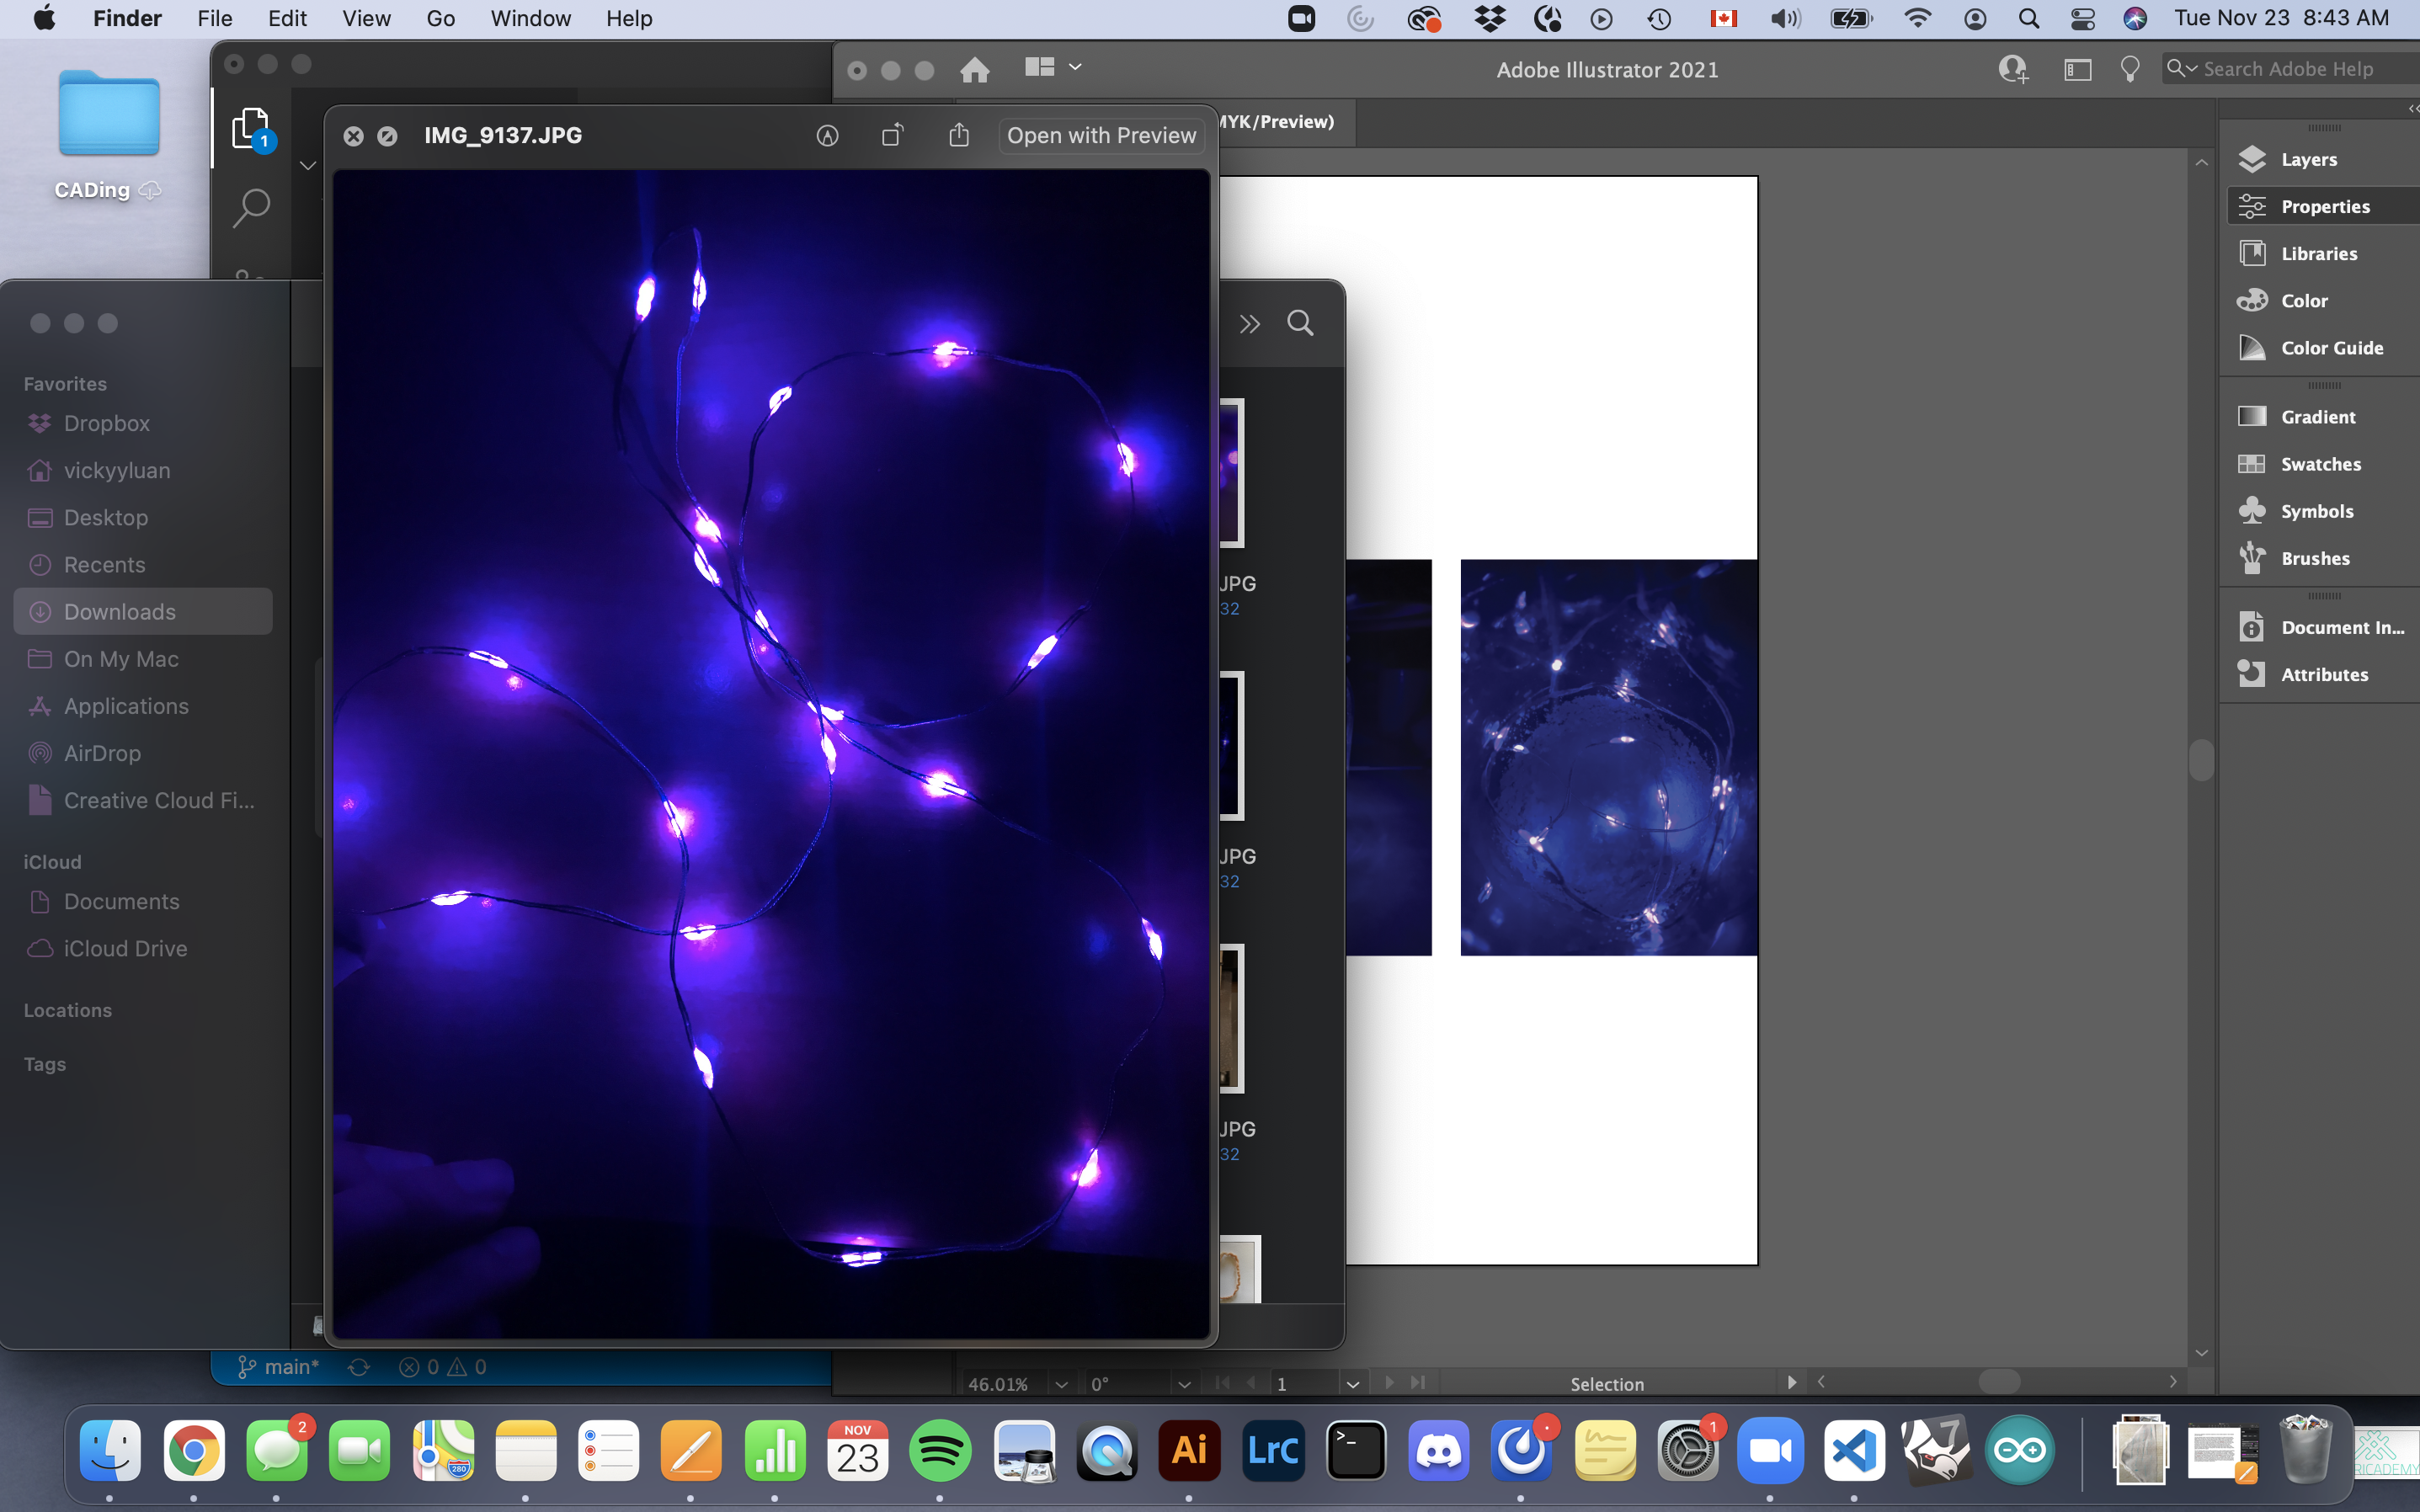
Solution
...not sure to be honest. It must be how the program reconfigures the pixels and saturation of the image.
Other Resources and Sources of Inspiration
Felipe Fiallo, Fabricademy BCN 2019
Youtube (Loes Bogers) - borax crystals
Youtube (Loes Bogers) - alum crystals on silk
Youtube: how to emboss leather
Thingiverse: 3d printed textile