WEEK 12 - SOFT ROBOTICS
Last Update: Jan 26, 2022
December 6-12, 2021
This week I learned how to integrate 3D printing techniques on top of fabric and using modelling software (Rhino, Grasshopper) to program patterns for the 3D printing.
Keywords: silicone rubber, oomoo 30, ecoflex, smooth-on, 3D printing, vinyl cutting, air, pump, Creality Ender 3, Silhouette, software, valve, inflatable, inflation, iron, mold, cure, gripper
Quick Summary
 Tools/Resources Learned:
- Creality Ender 3 - an open-source 3d printer with amazing printing precision and affordable price
- Ultimaker Cura - an open source slicing application for 3D printers
- [Smooth-On Silicone Pouring and Curing]
 Tools Refined:
- Rhino 3D- 7 Version 7.13 Evaluation - A 3D CAD and graphics program
- Visual Studio Code: a source code editor I'm now using to document and edit my documentation website locally on my desktop
 What I still want to learn better:
- integrating soft robots in my own fashion designs
Research and Inspiration
My hero for this week was Adriana Cabrera who was our tutorial instructor and lecturer. All the resources she provided gave me so much support and understanding of how to execute the process of making a soft robot.
In particular, I was intrigued by the Octobot
I was also inspired by one of my good friend's research on soft robots and her collaboration with her lab on creating a soft robot version of Dart, a creature from the TV Show Stranger Things.
Vinyl Cut Patterns
Silhouette Machine Set Up
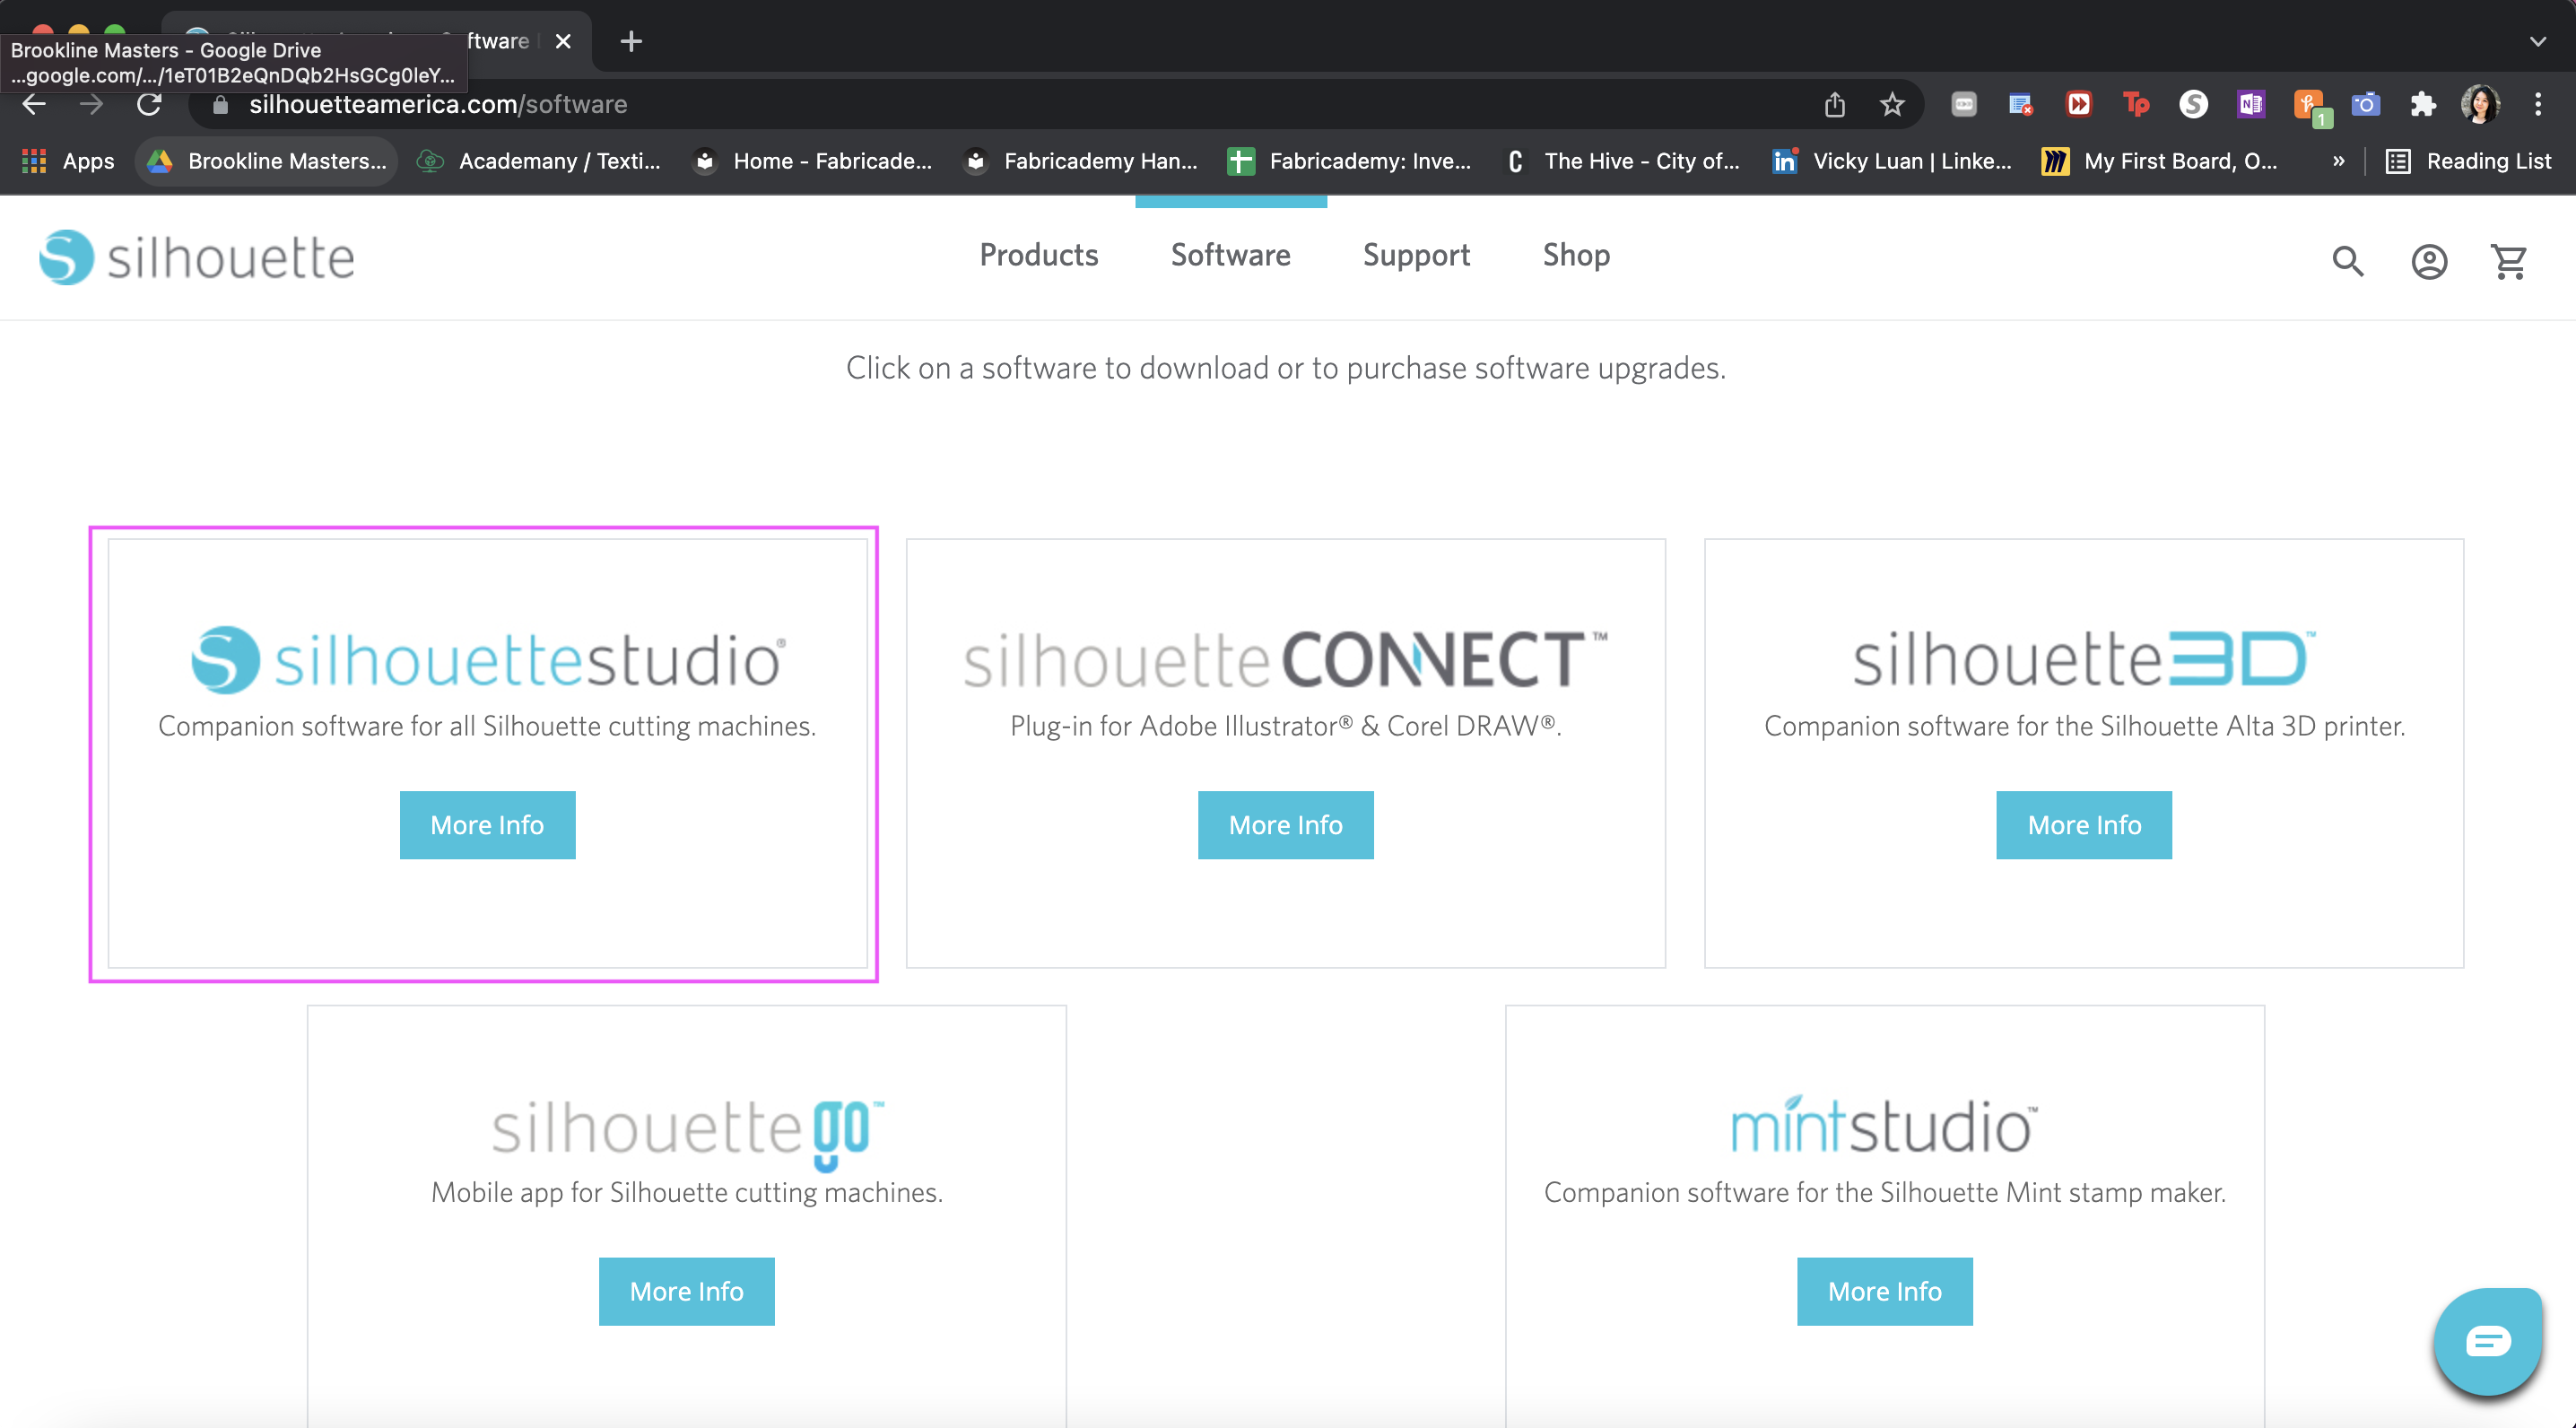
Besides obtaining the Silhouette Cameo machine, I had to download the software program for the machine as well. I went online to silhouetteamerica.com and visited their software page. Bear in mind to go to the Silhouette Studio page.
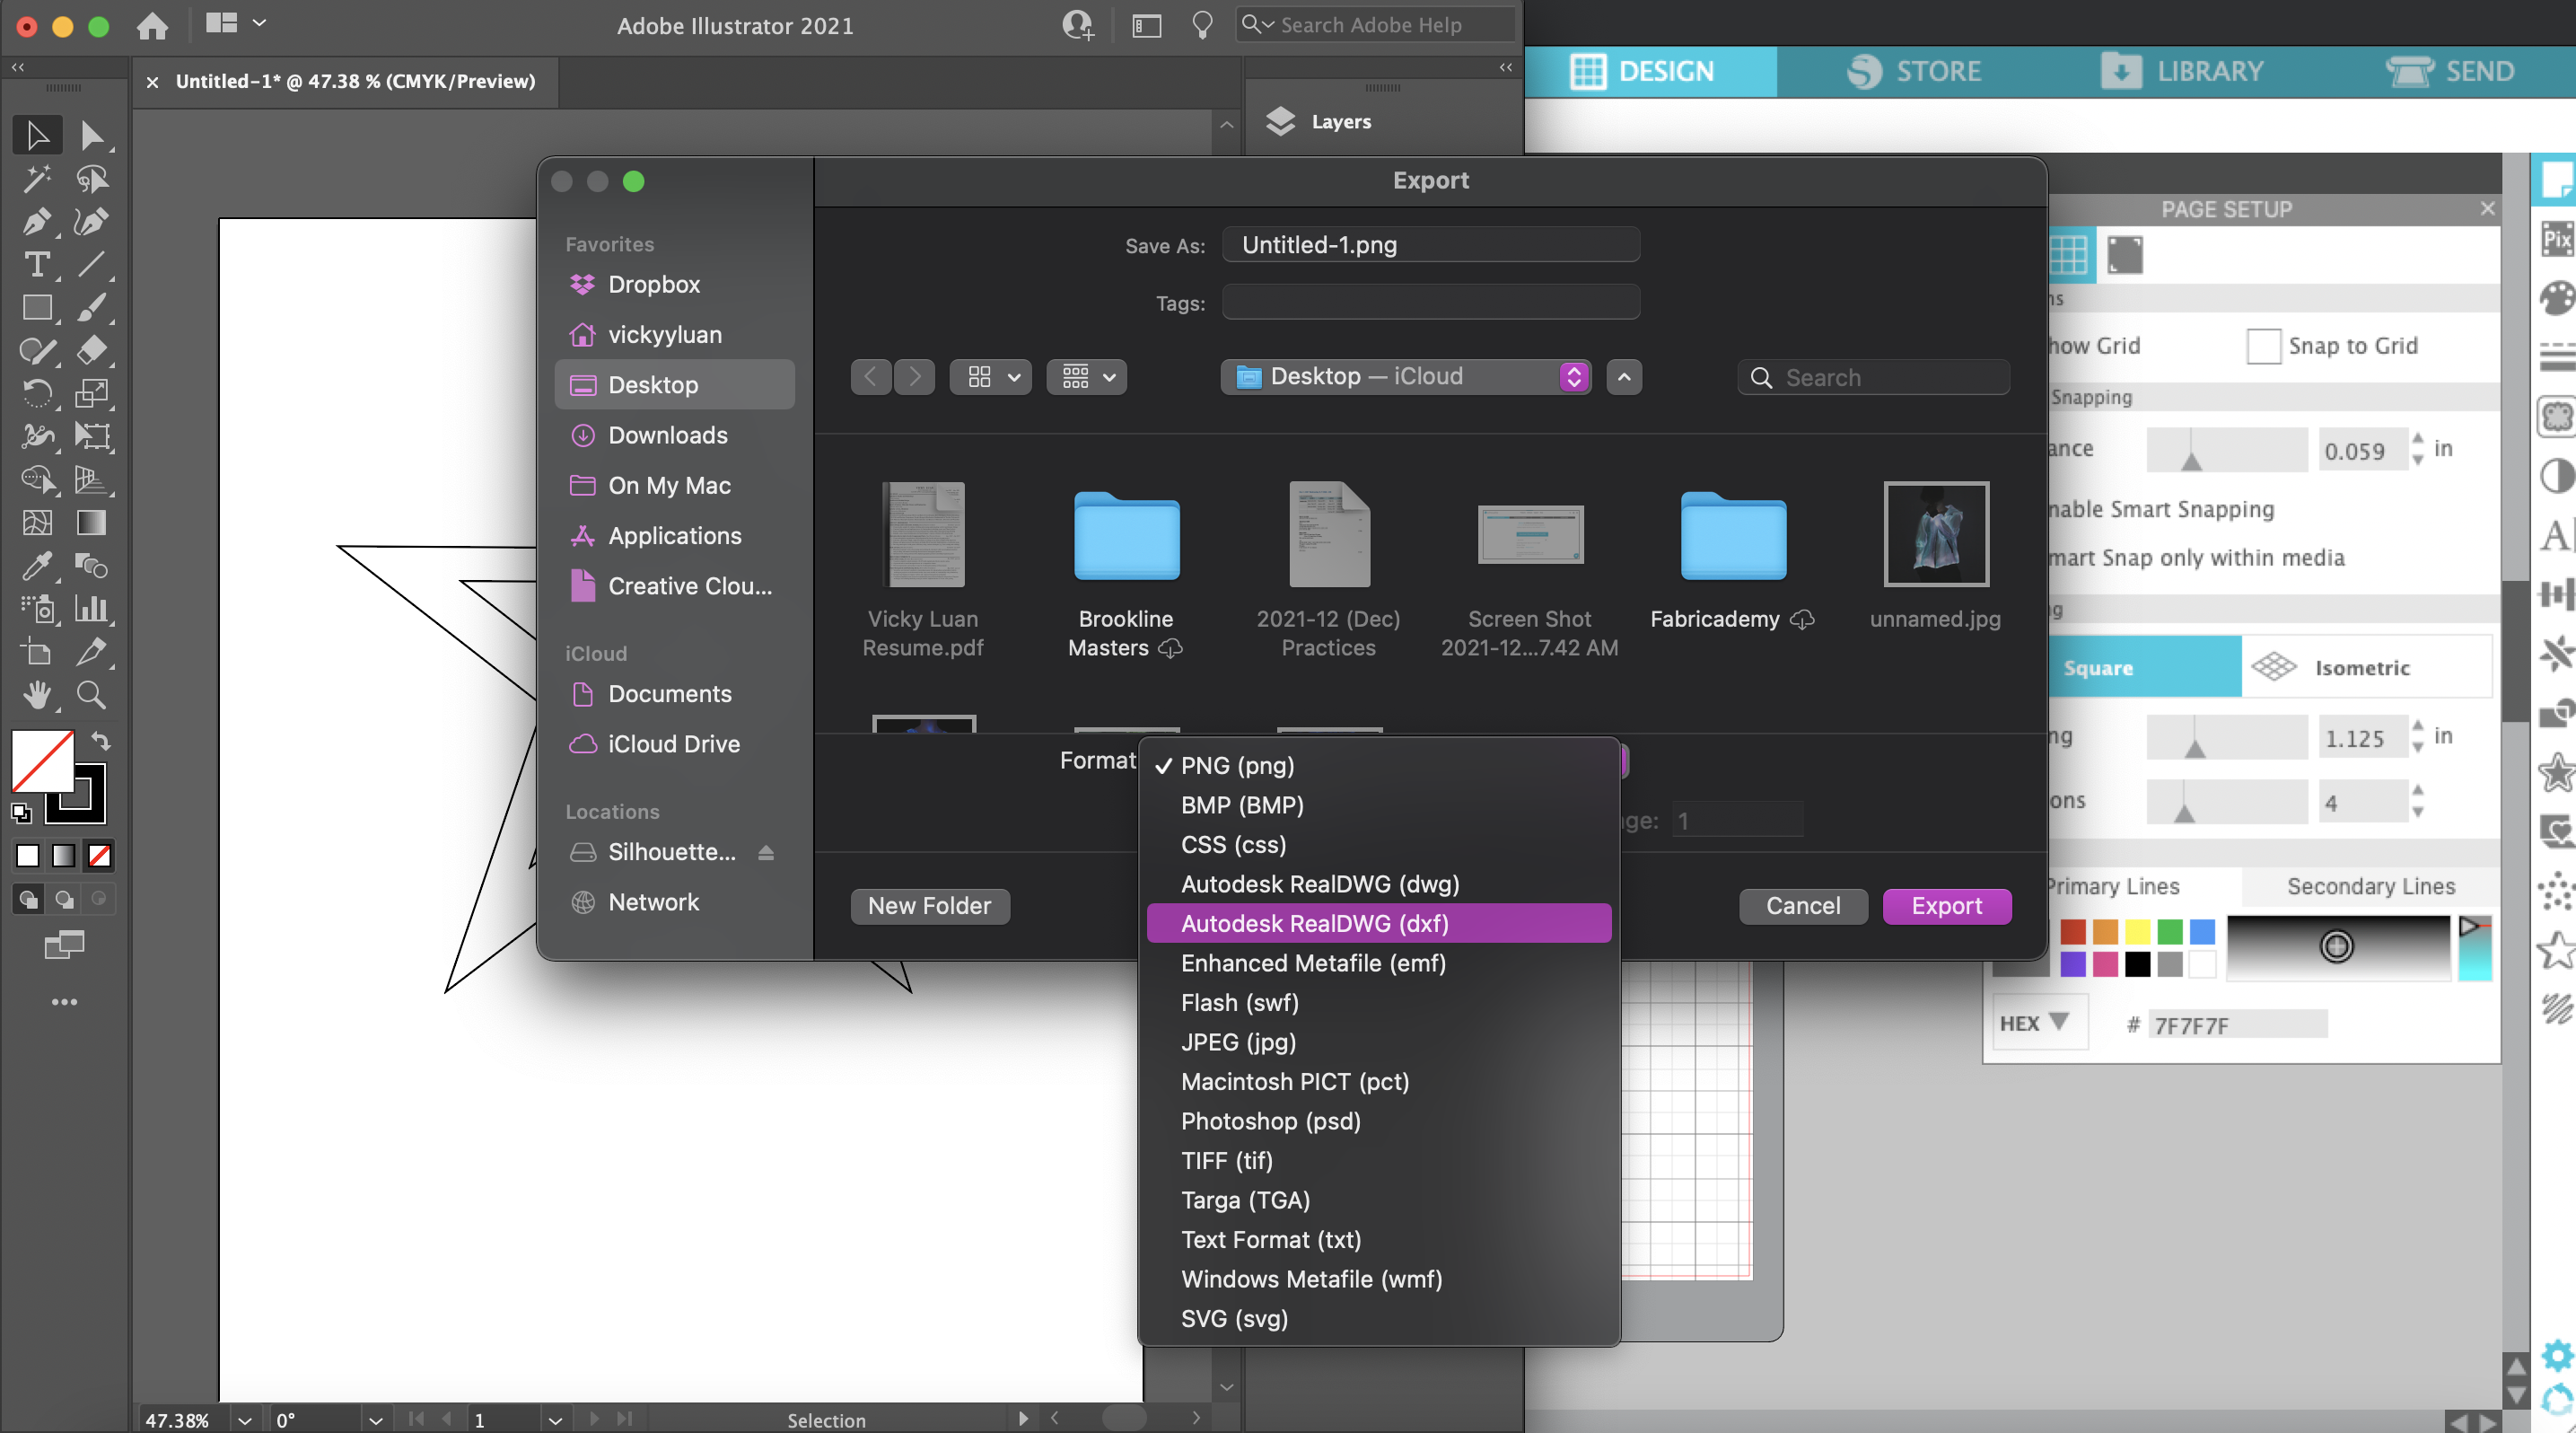
Another thing to keep in mind when using this software is that the file required for upload in the software is Autodesk RealDWG (.dxf)
For example, when exporting from Adobe Illustrator:
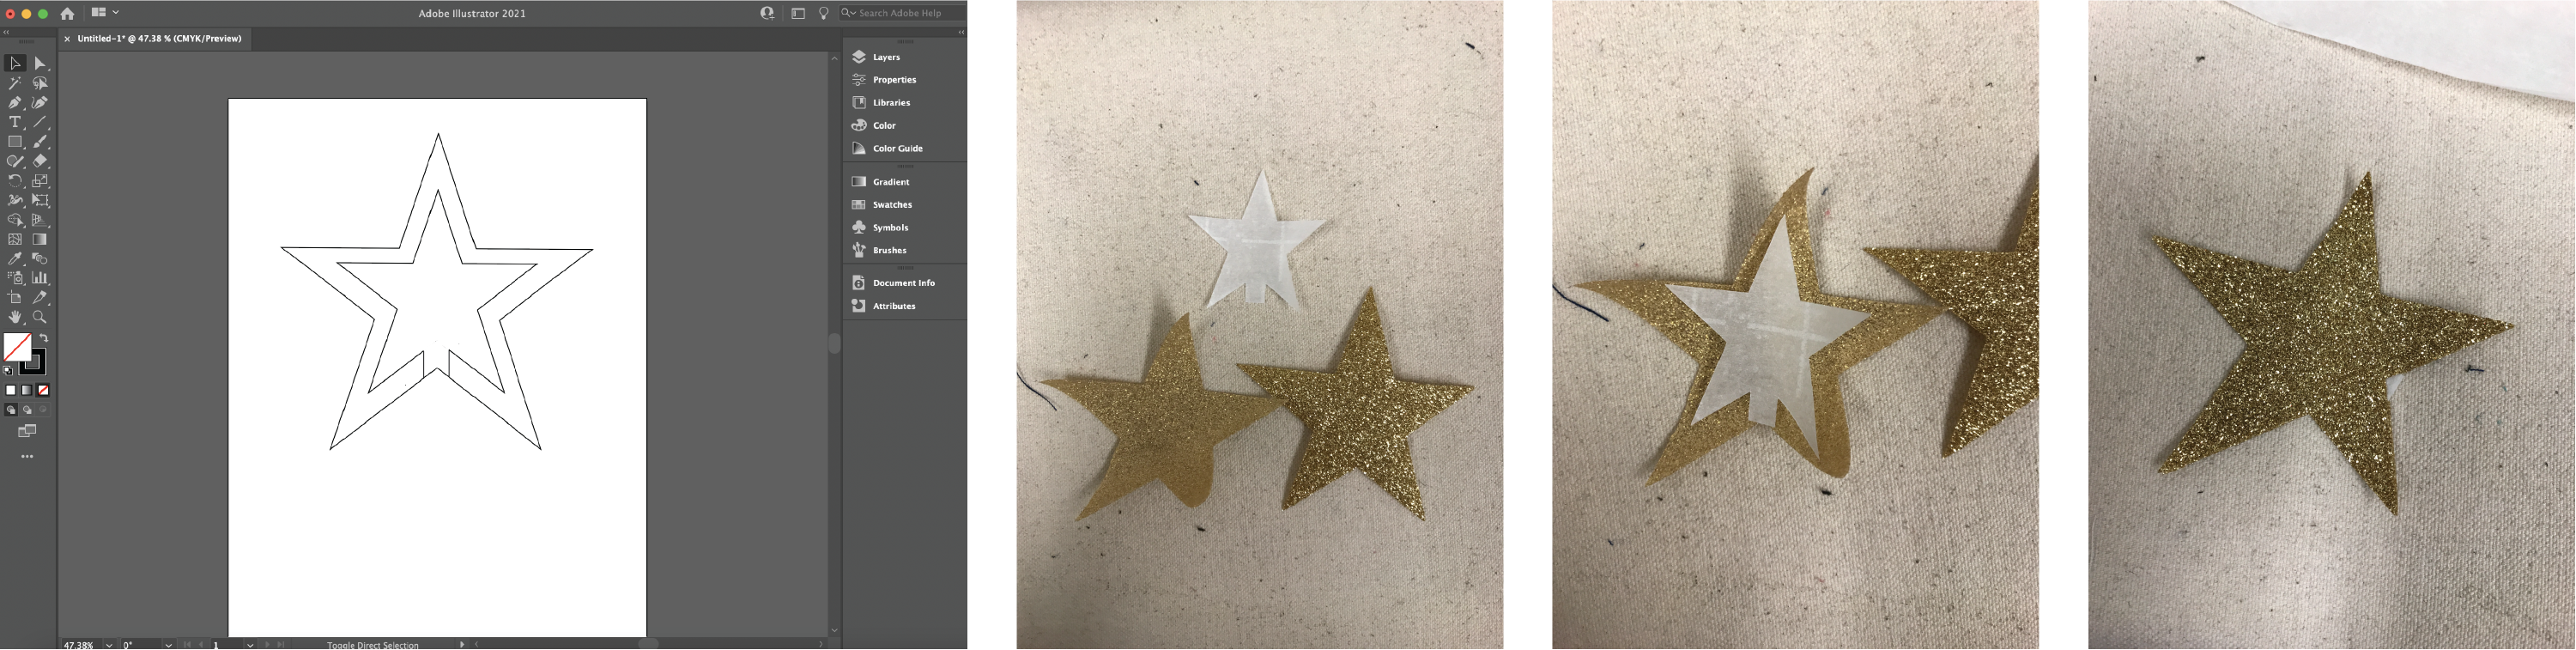
Pattern 1: Single Star
Because it was my first time using Silhouette, I tested out the program and machine with one simple test: a star.
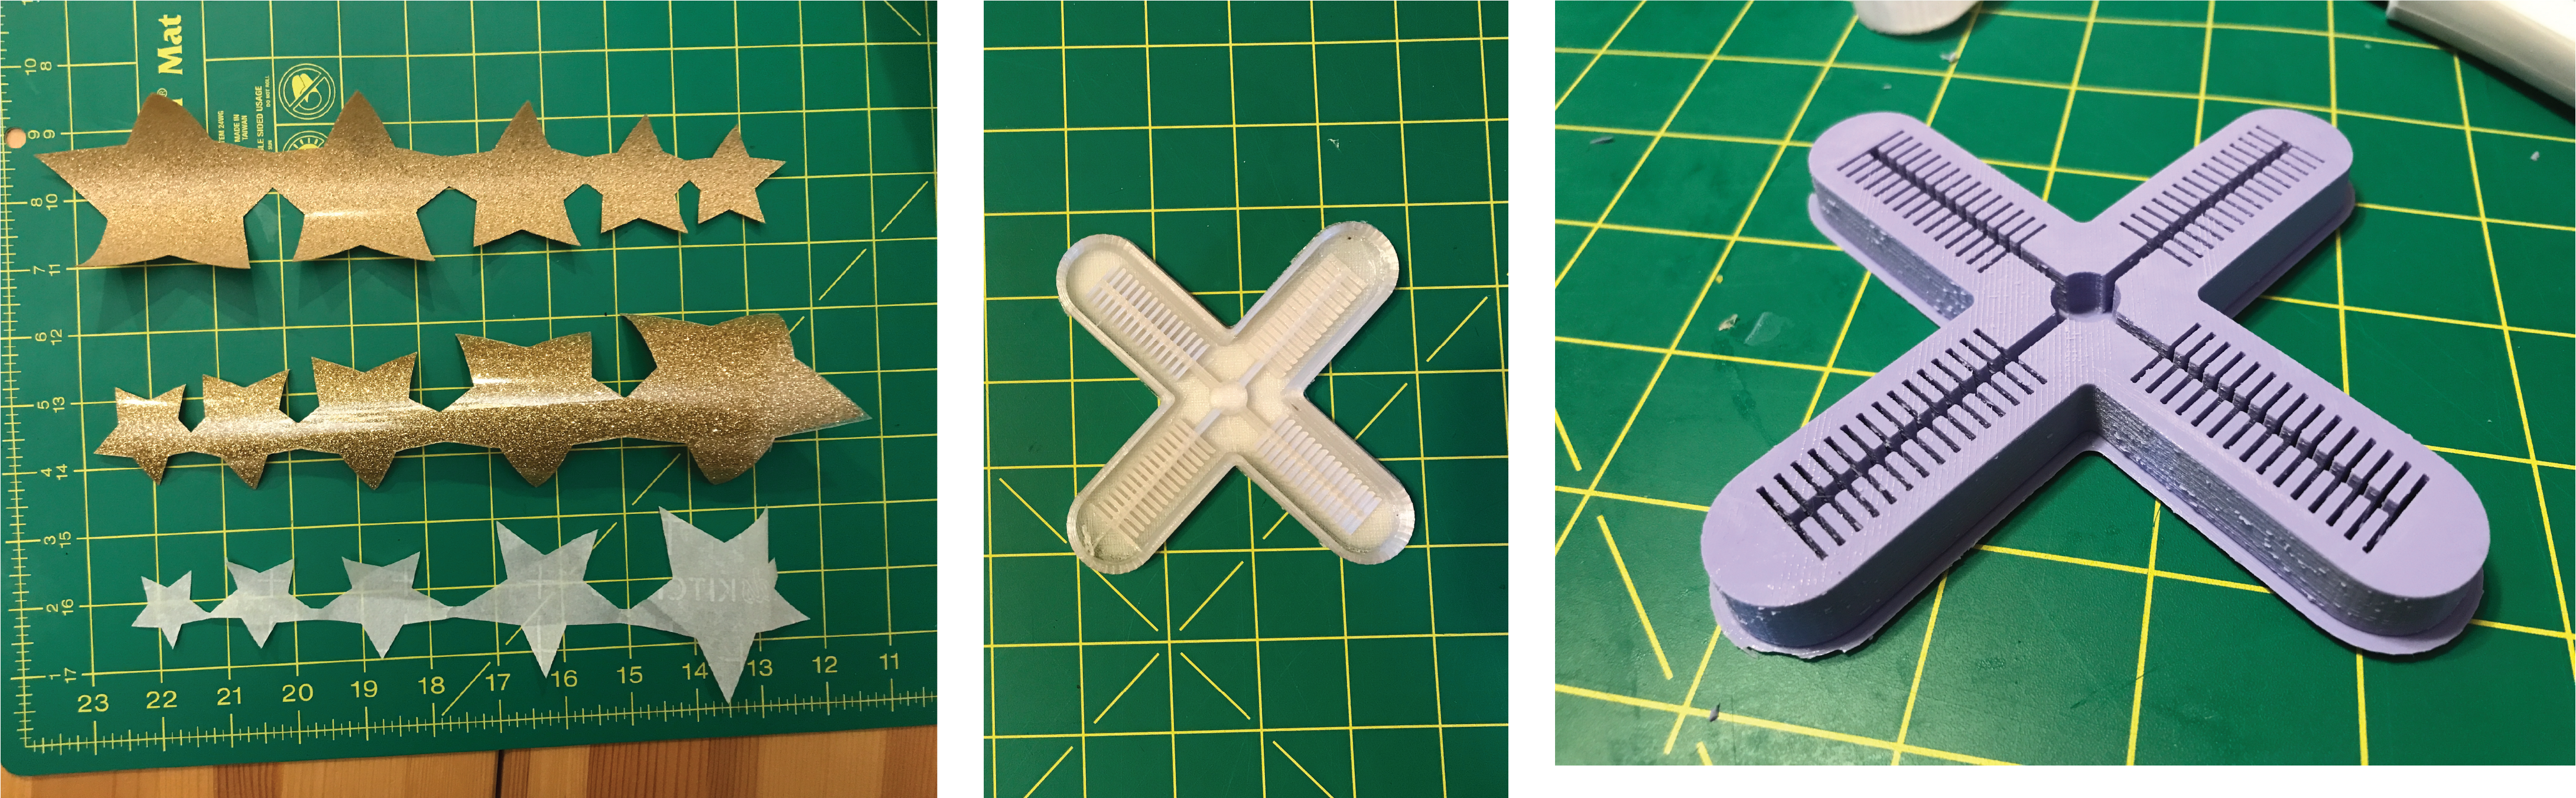
Pattern 2: Stars in a Line
The second design was to connect multiple stars in a line and see if they could curl
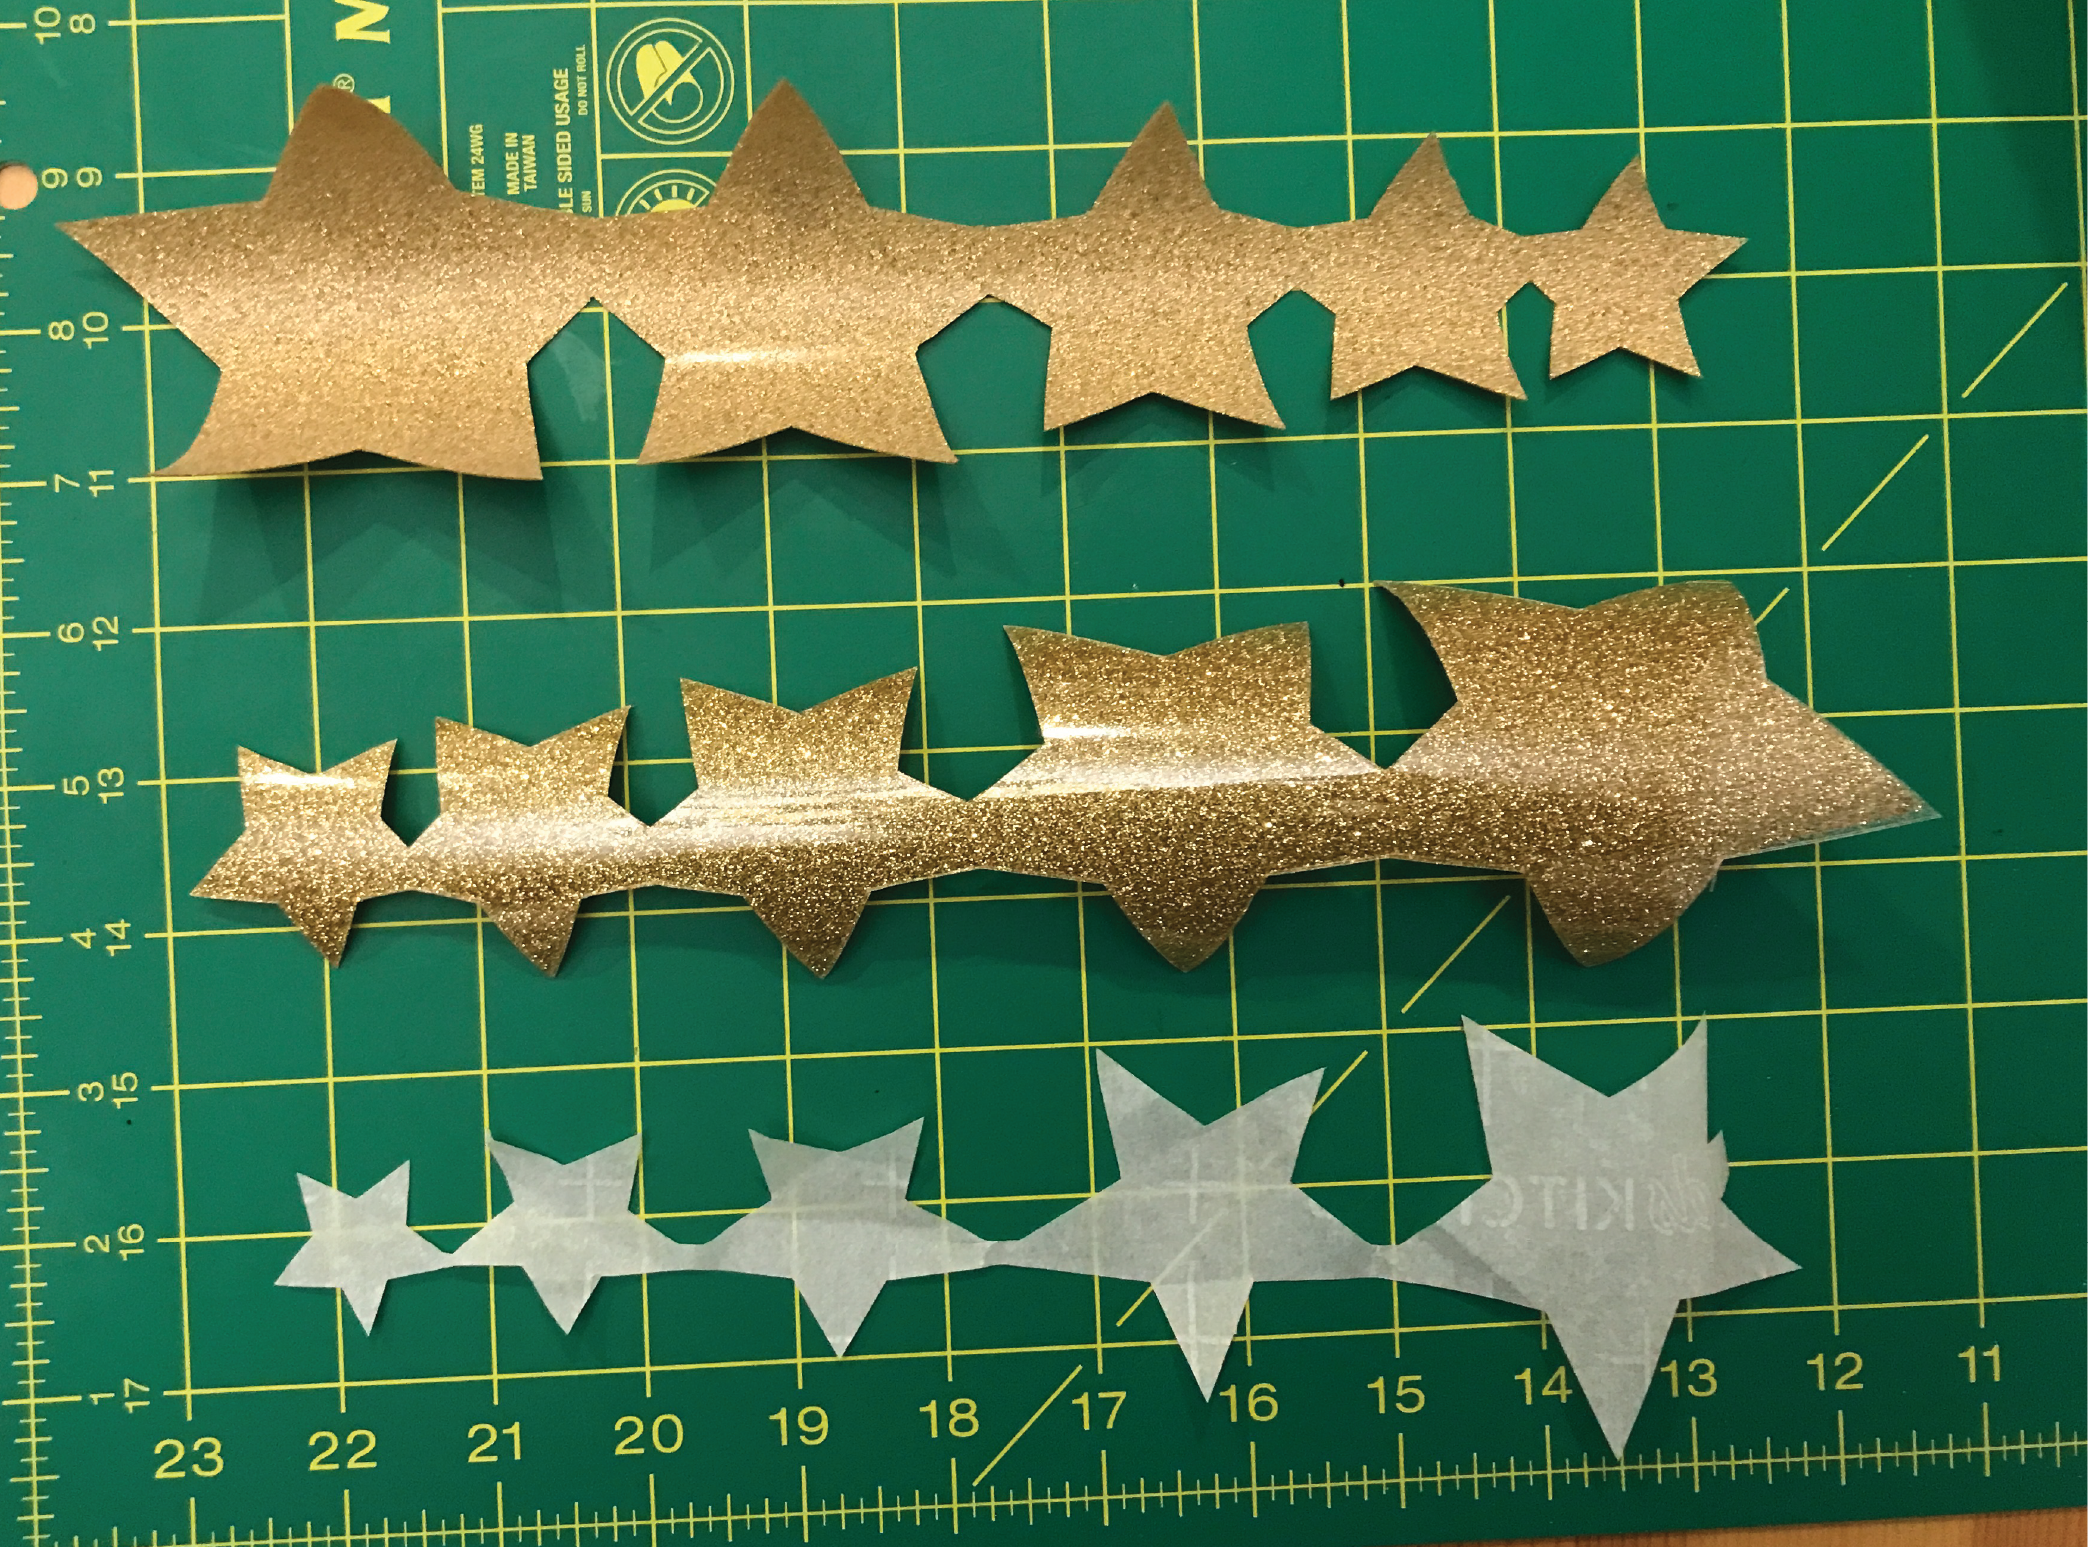
Unfortunately this didn't really work due to some air leakage as well as not enough air given. Even when I tried blowing through it, only the first star inflated but it would deflate rather quickly.
Pattern 3: Human Spine
The third design I had in mind was to create a human silhouette and have the human spine be the air space.
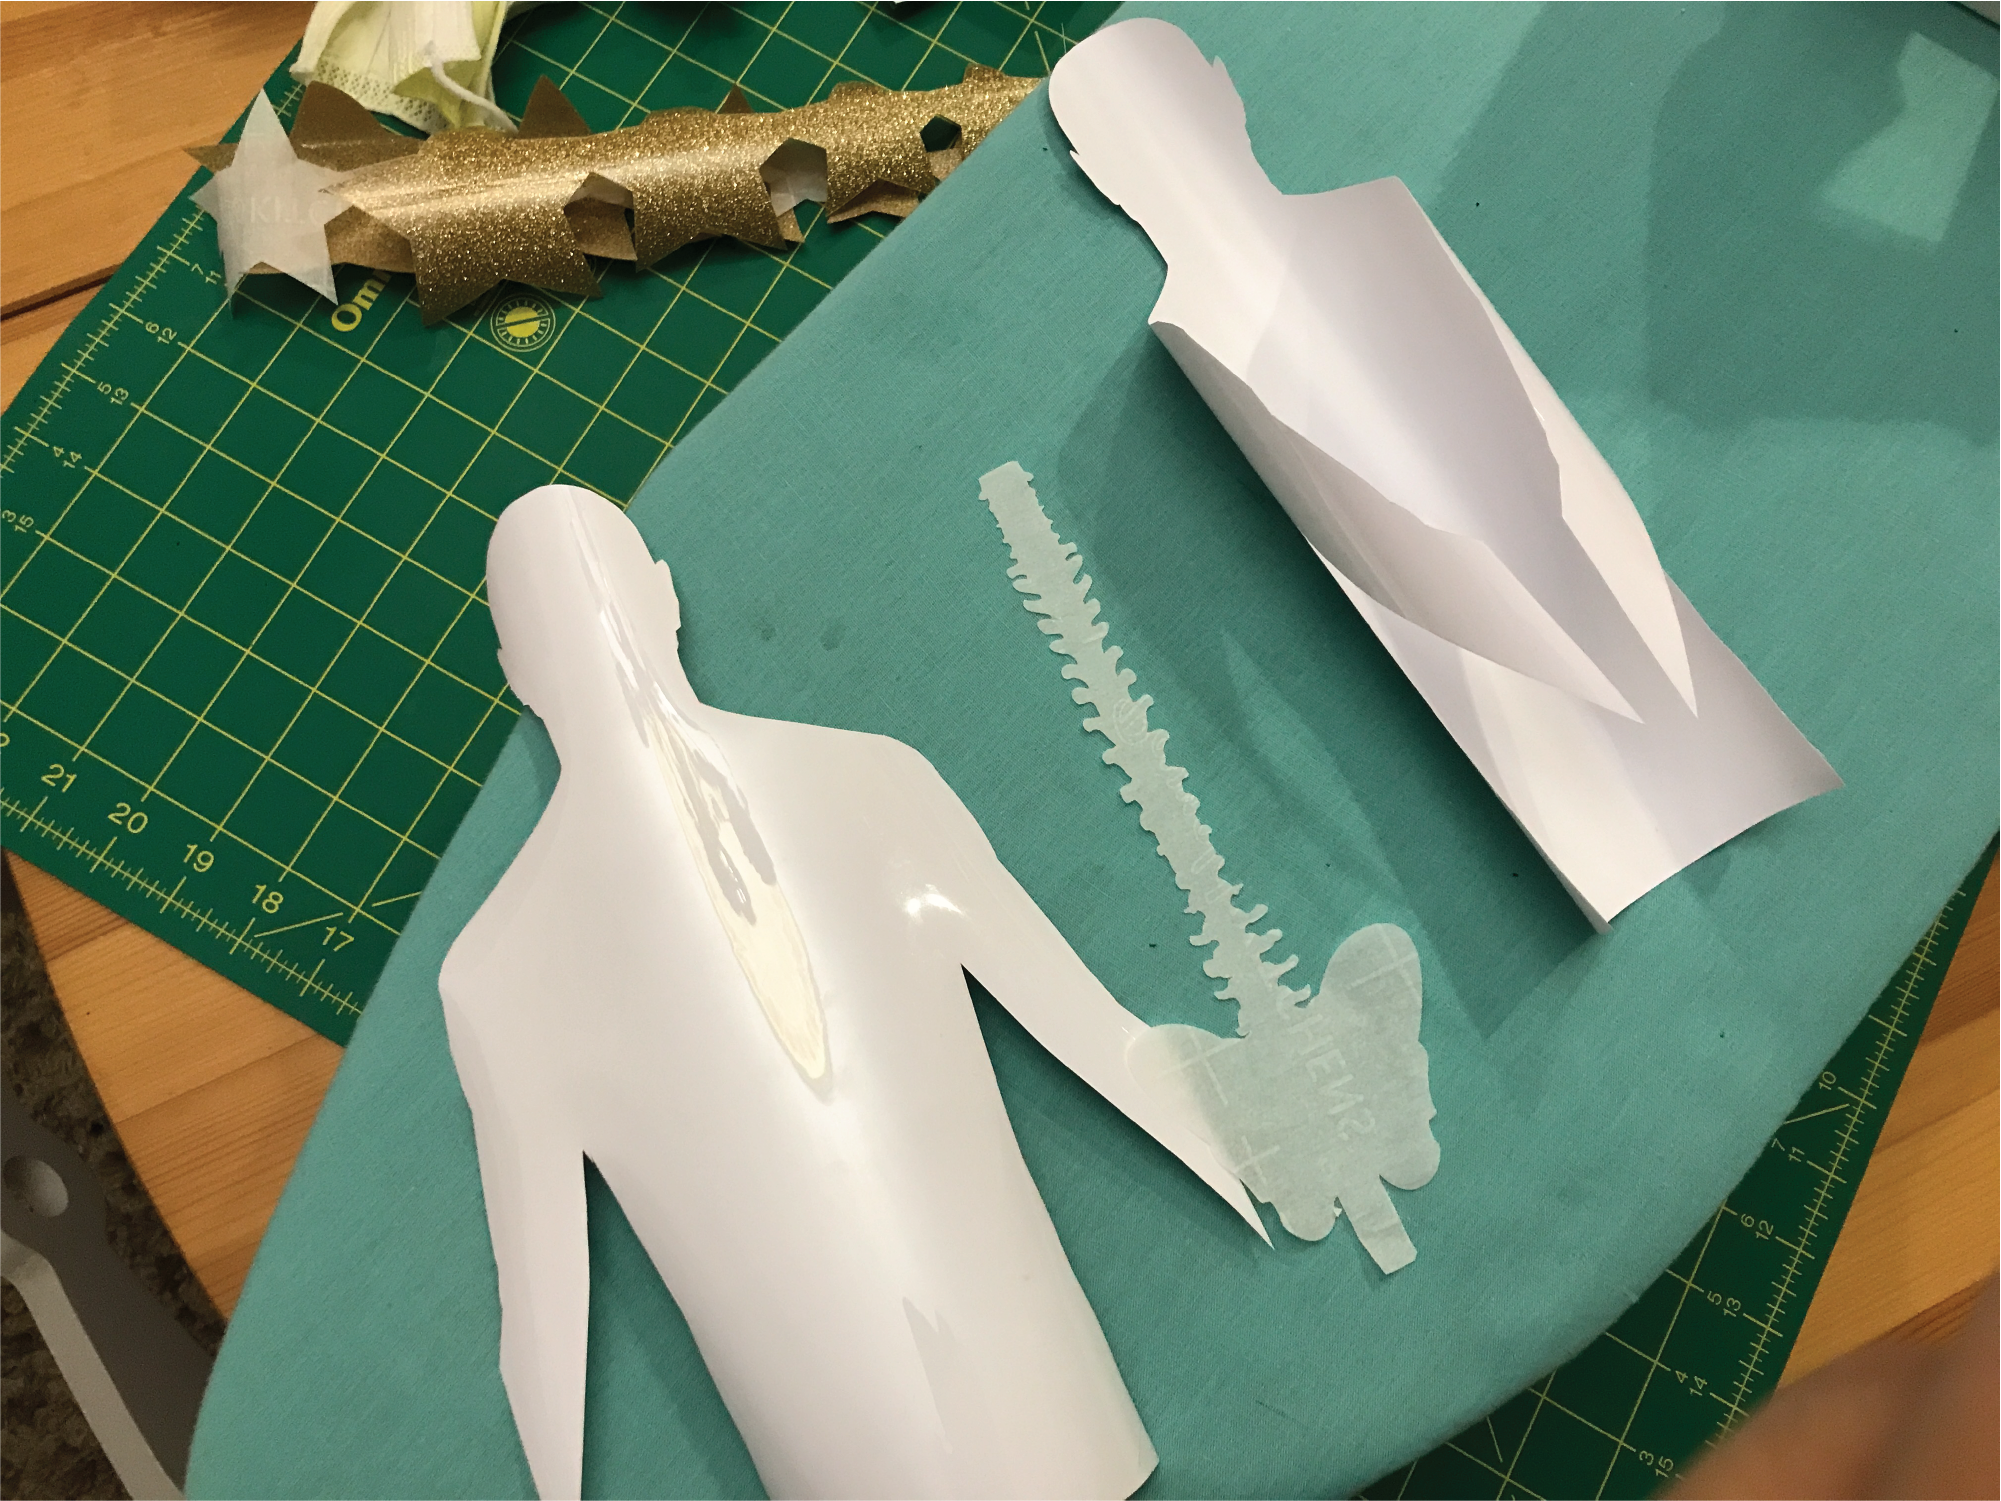
Although I didn't capture footage of it, this design worked moderately. I used my own breath to blow air into the design, which did inflate the spine but not to the top. There was no other reaction to the assembly other than slight inflation.
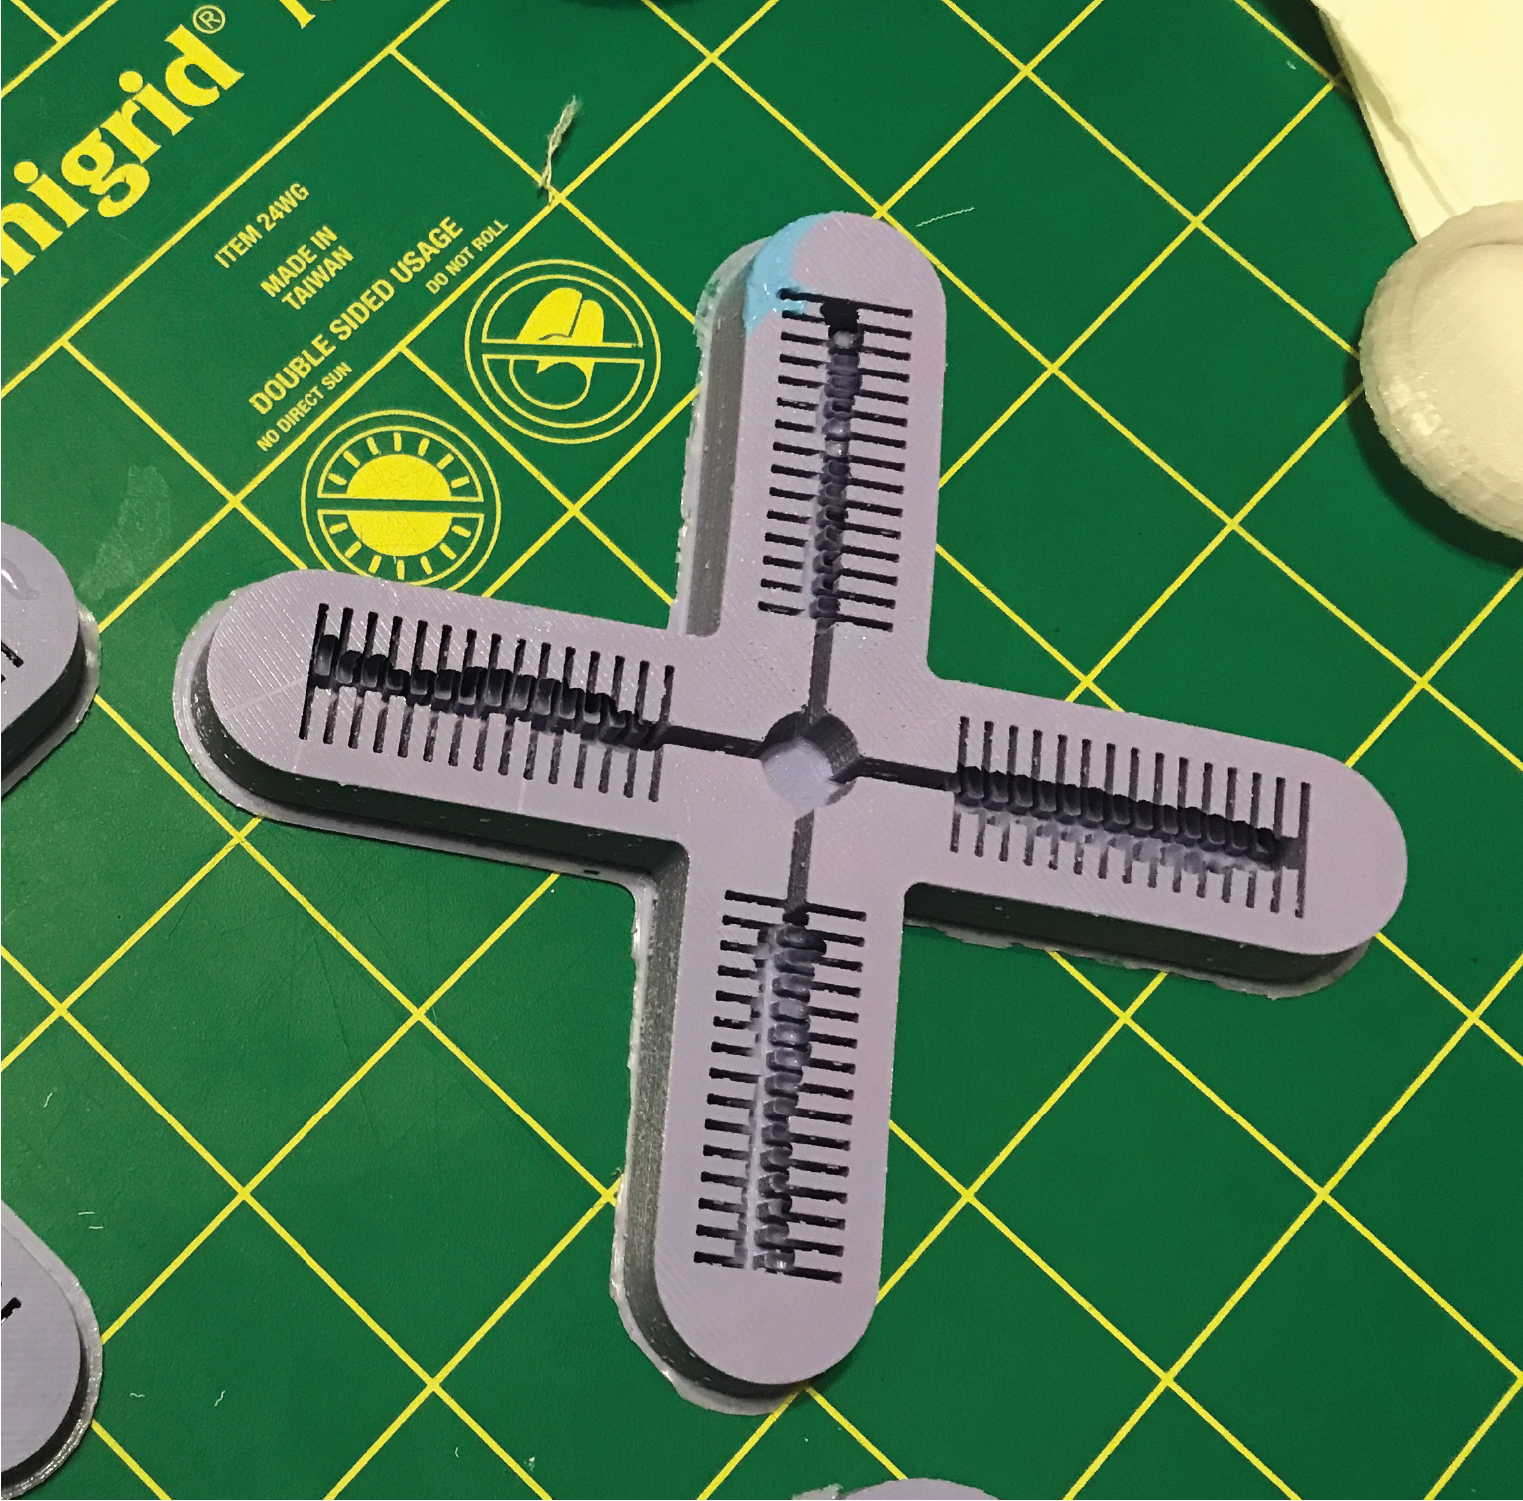
Silicone 4-Leg Gripper
Open Source Models
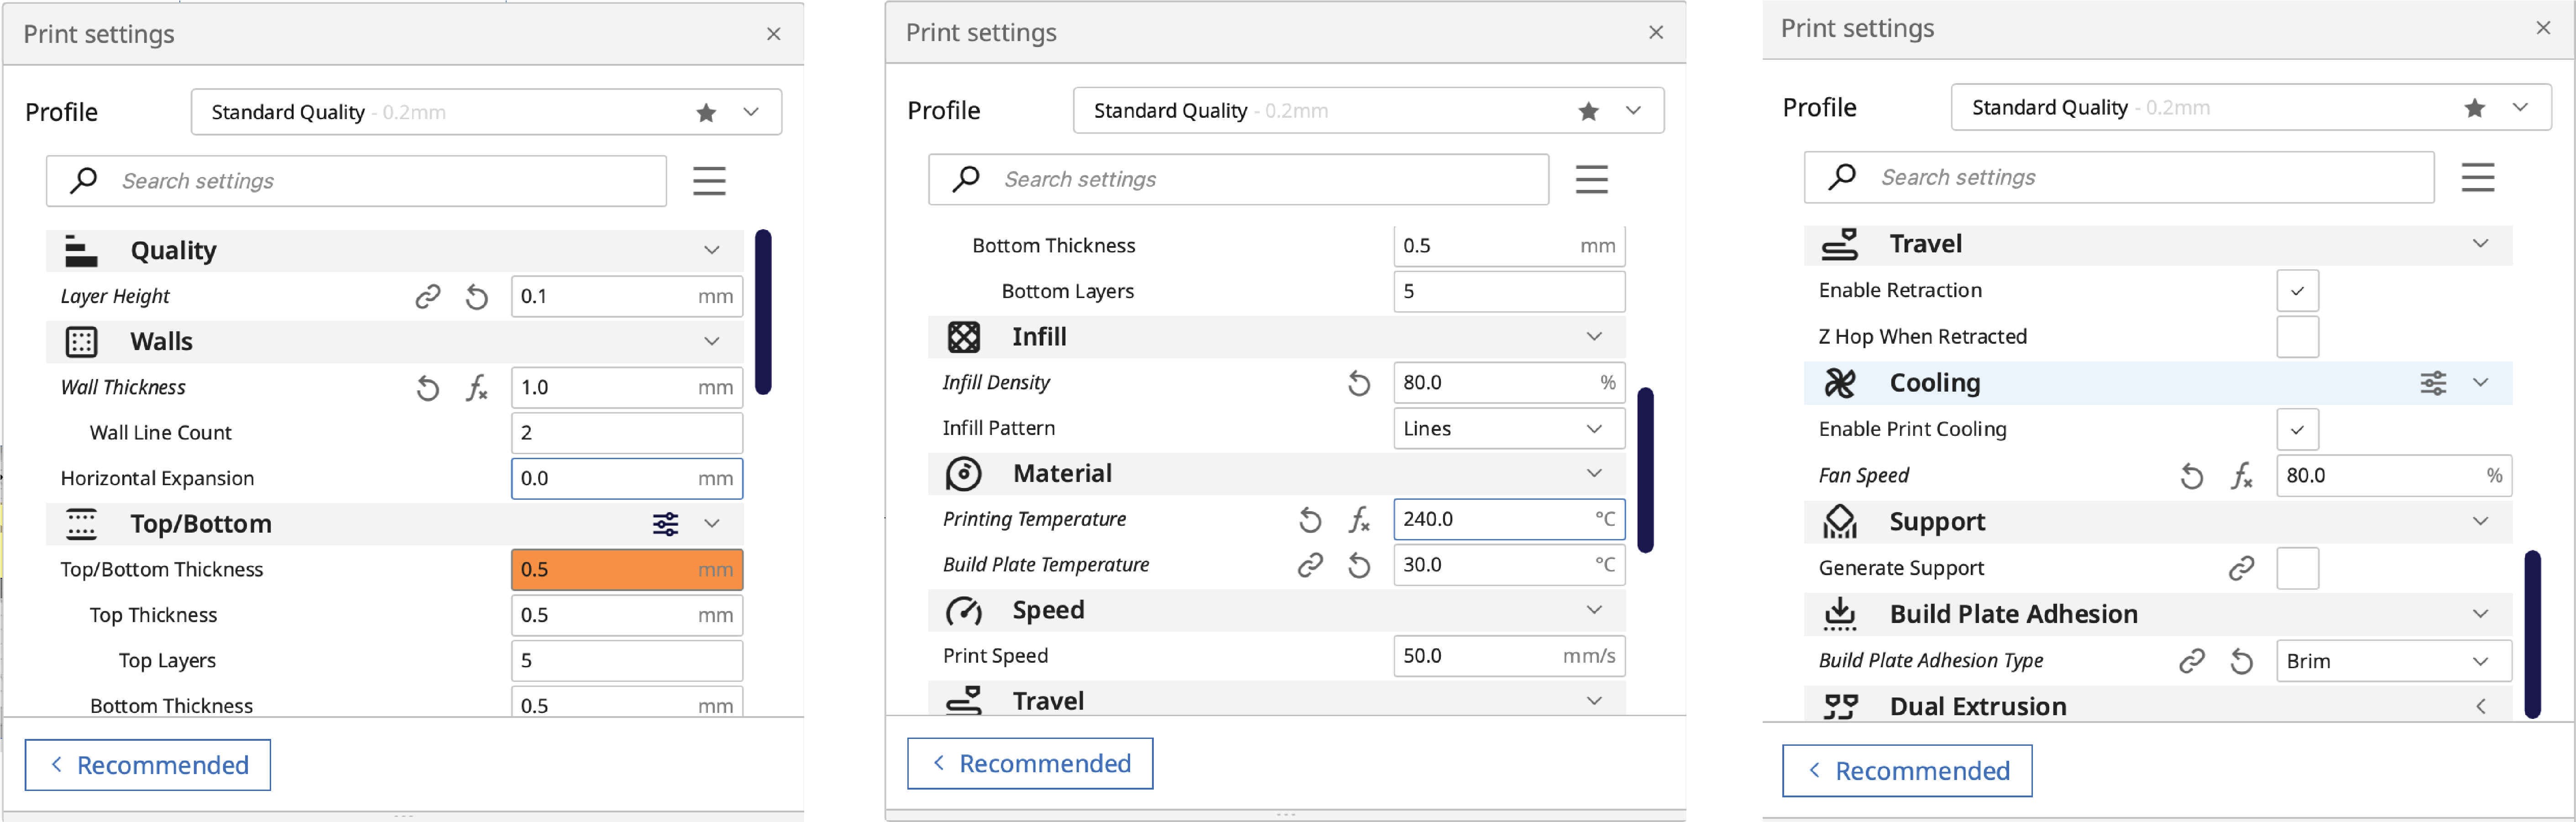
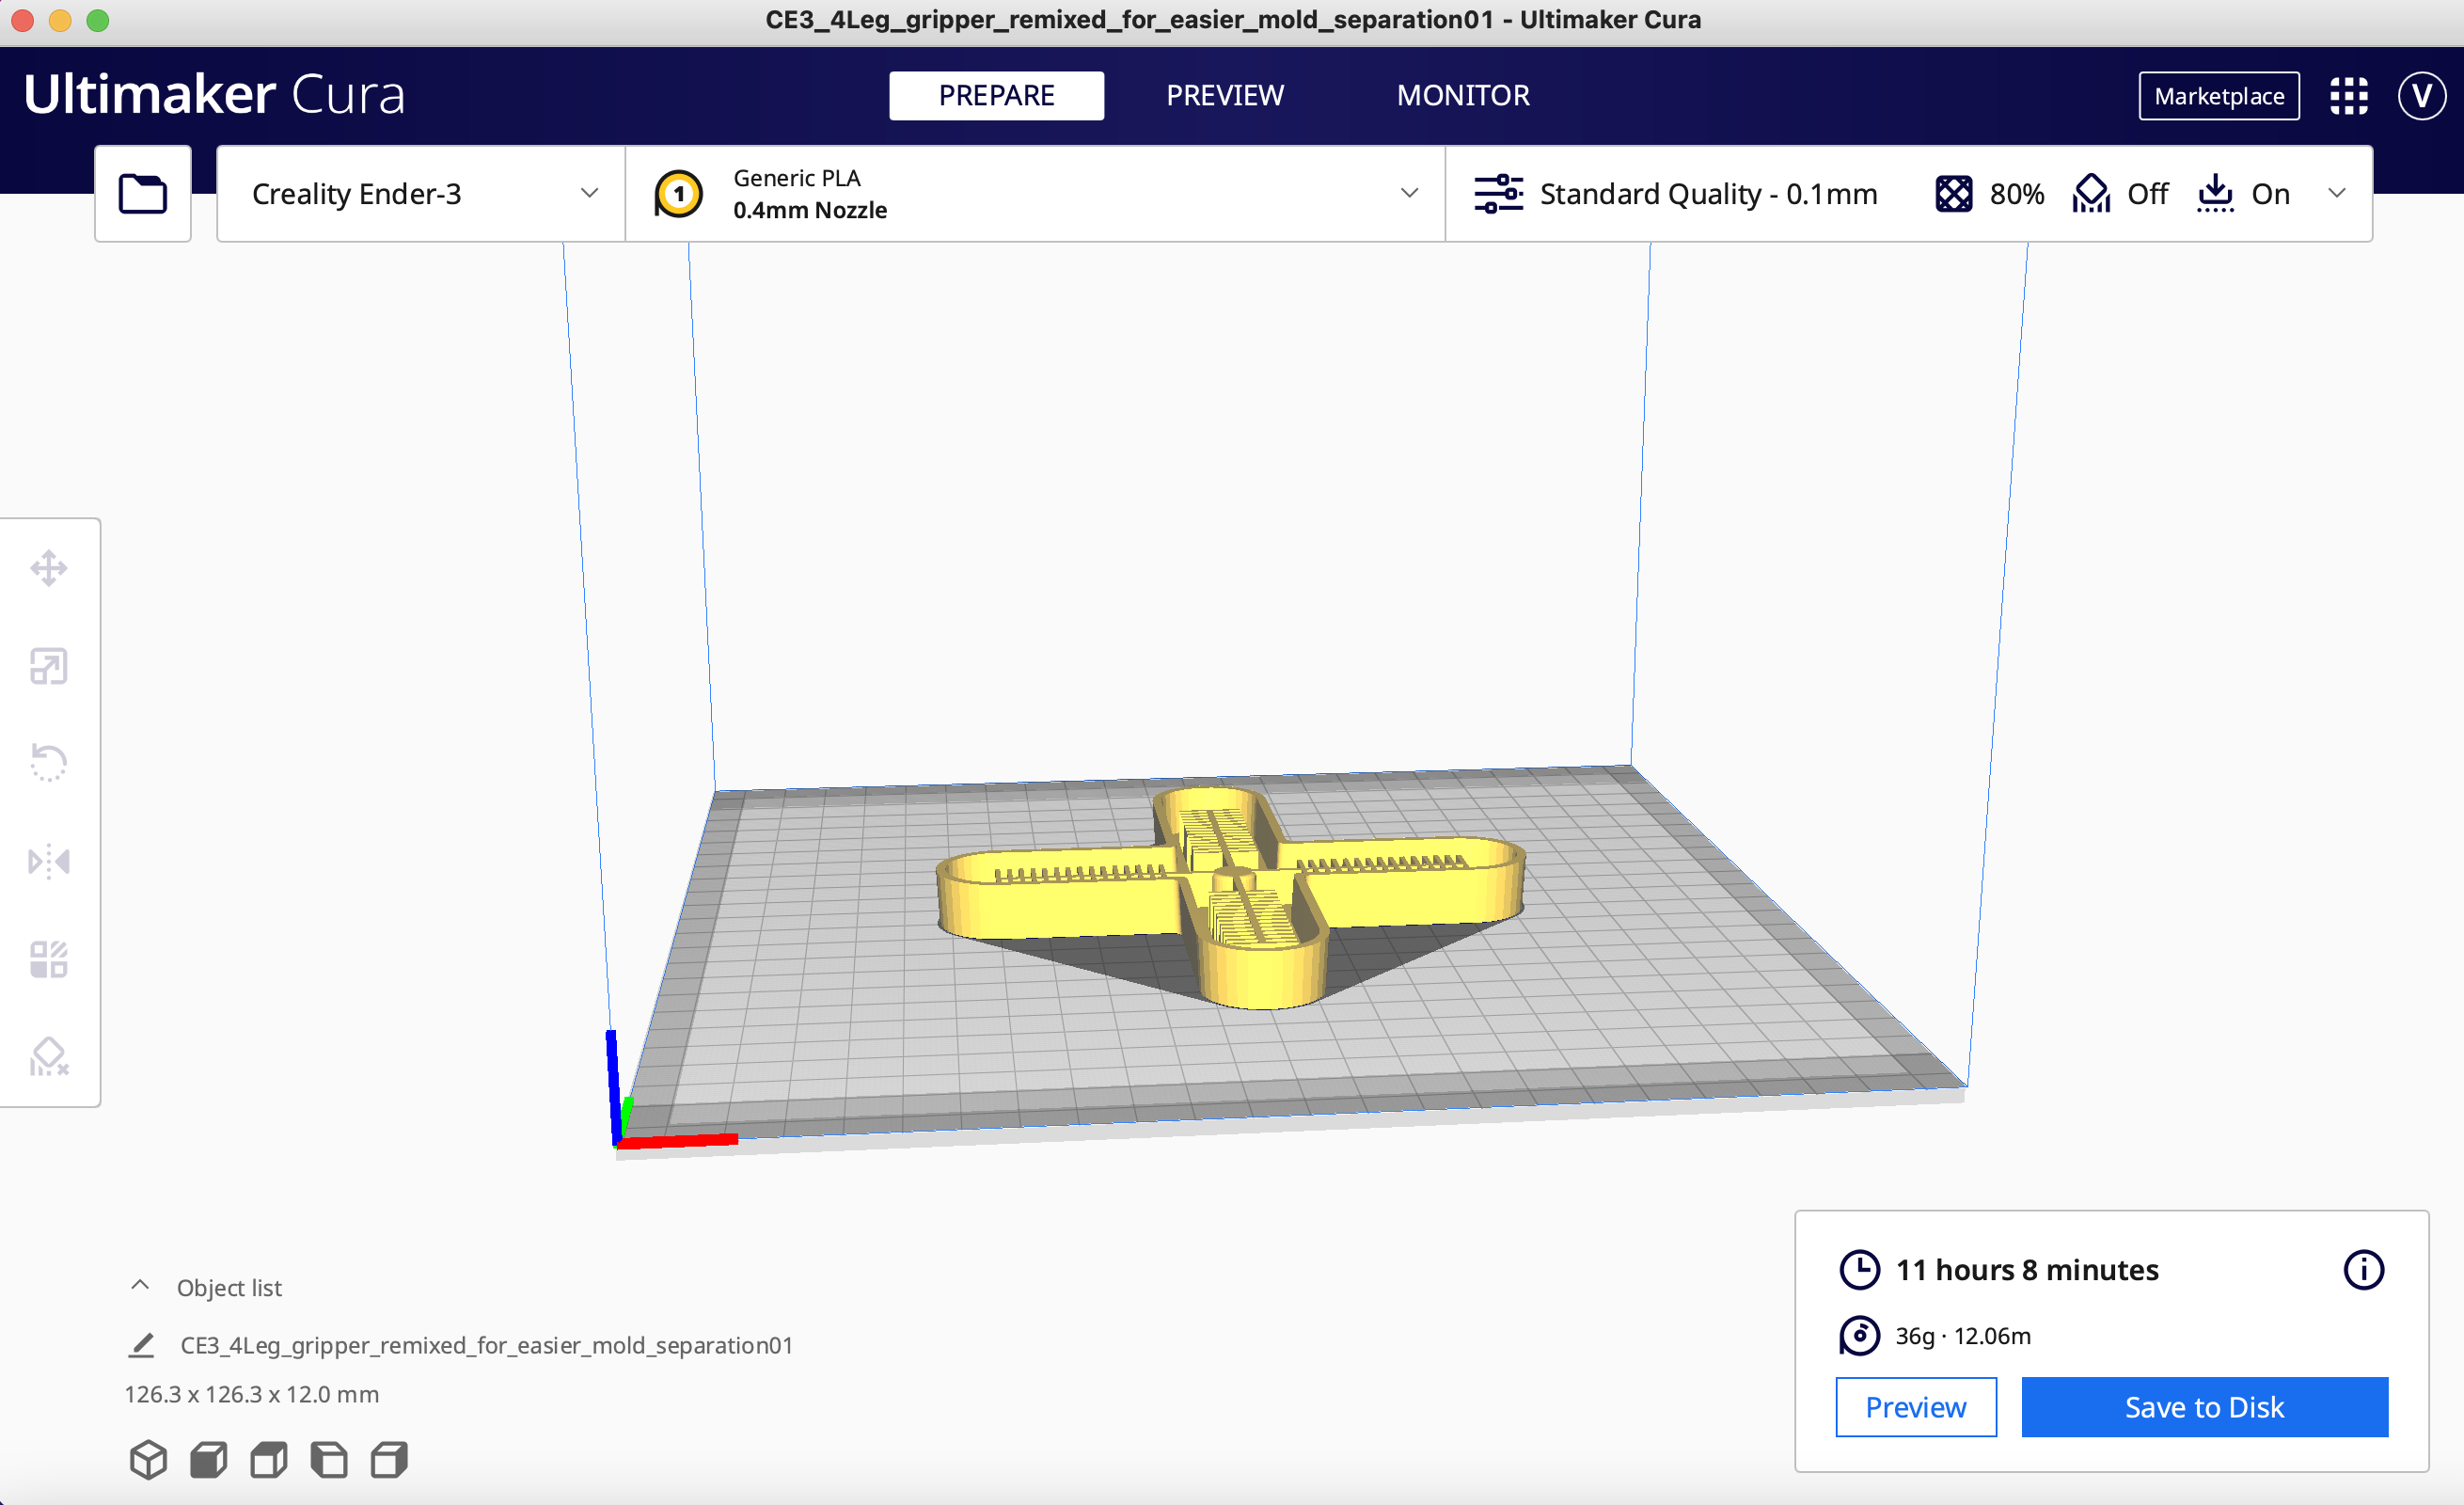
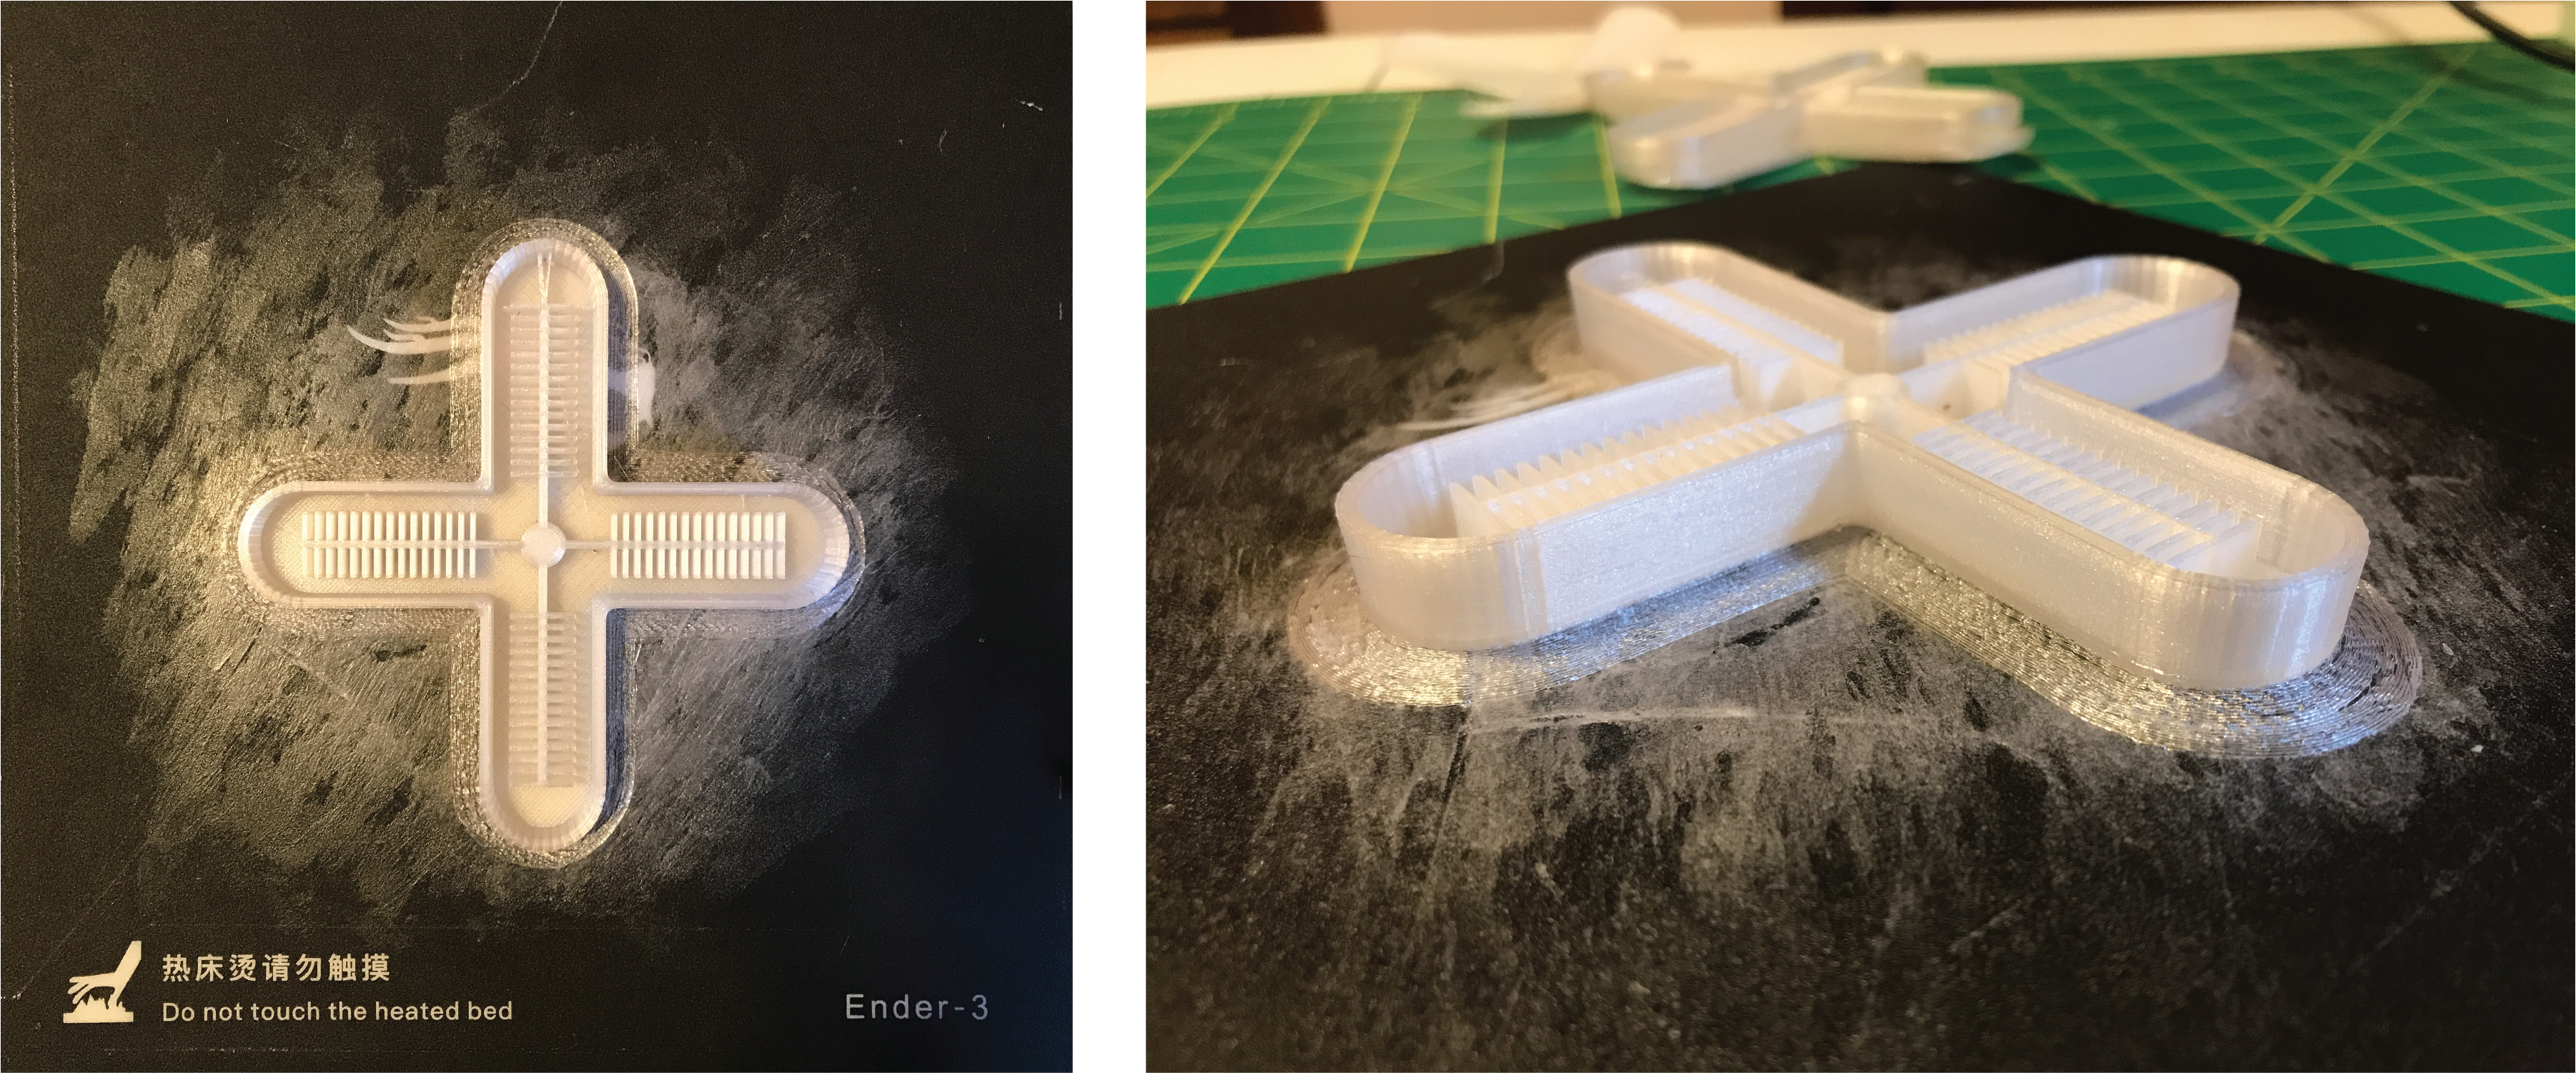
For the sake of time and making sure that the 3D printer I was using was successfully repaired, I downloaded the mold model from Thingiverse - shoutout to @Jimbotron and then used Ultimaker Cura to convert it into a .gcode using the following settings:
After inputting the settings and clicking on "Slice", the print time was estimated to be approx. 11 hours
3D Printing Mold
The printing of this mold took some time because the first two attempts failed due to either warping or a slight shift in the print. But third time's the charm right? The mold successfully printed on the third attempt with the following settings:
Printer: Creality Ender 3
Bed Treatments: Added Scotch Glue(stick) to center area where print was focused on

Tune & Control
    Speed: 80
    Nozzle Temp: 240 -> gradually increased to 250 deg F after 5% of print
    Bed Temp: 30 -> gradually increased to 50 deg F after 5% of print
    Fan: 85
    Flow: 100
    Babystep Z: 1.199

Motion > Velocity
    Vx = 330
    Vy = 330
    Vz = 12
    VE = 120

Motion > Acceleration
    Accel = 500
    A-retract = 500
    A-travel = 1200

Motion > Jerk
    Vx = 1
    Vy = 1
    Vz = +000.19
    Ve = 2

Motion > Steps
    X = 80.00
    Y = 80.00
    Z = 400.00
    E = 93.00
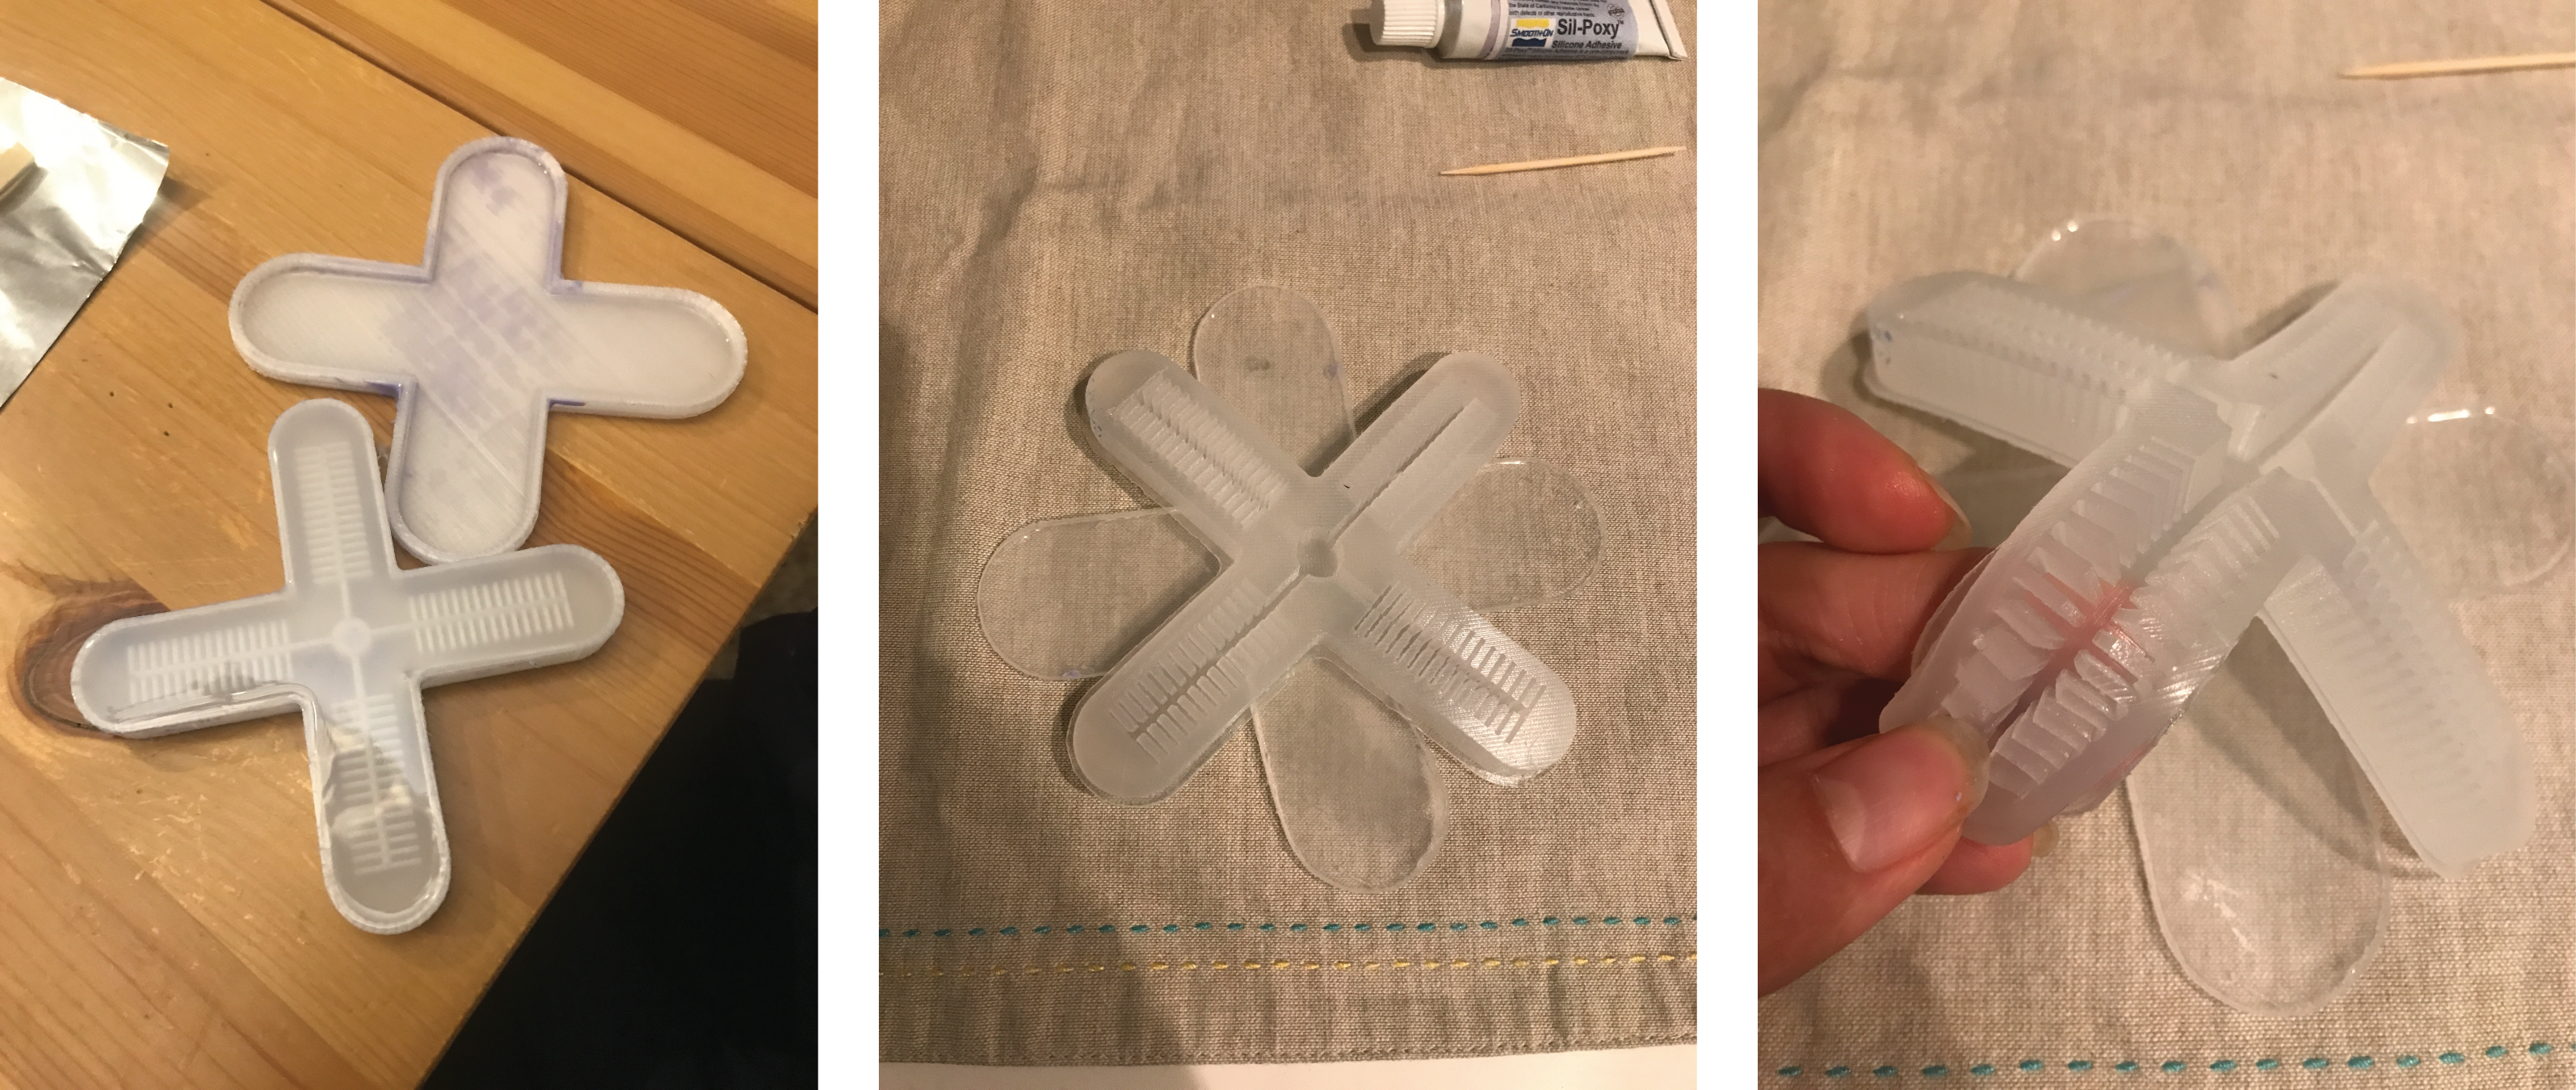
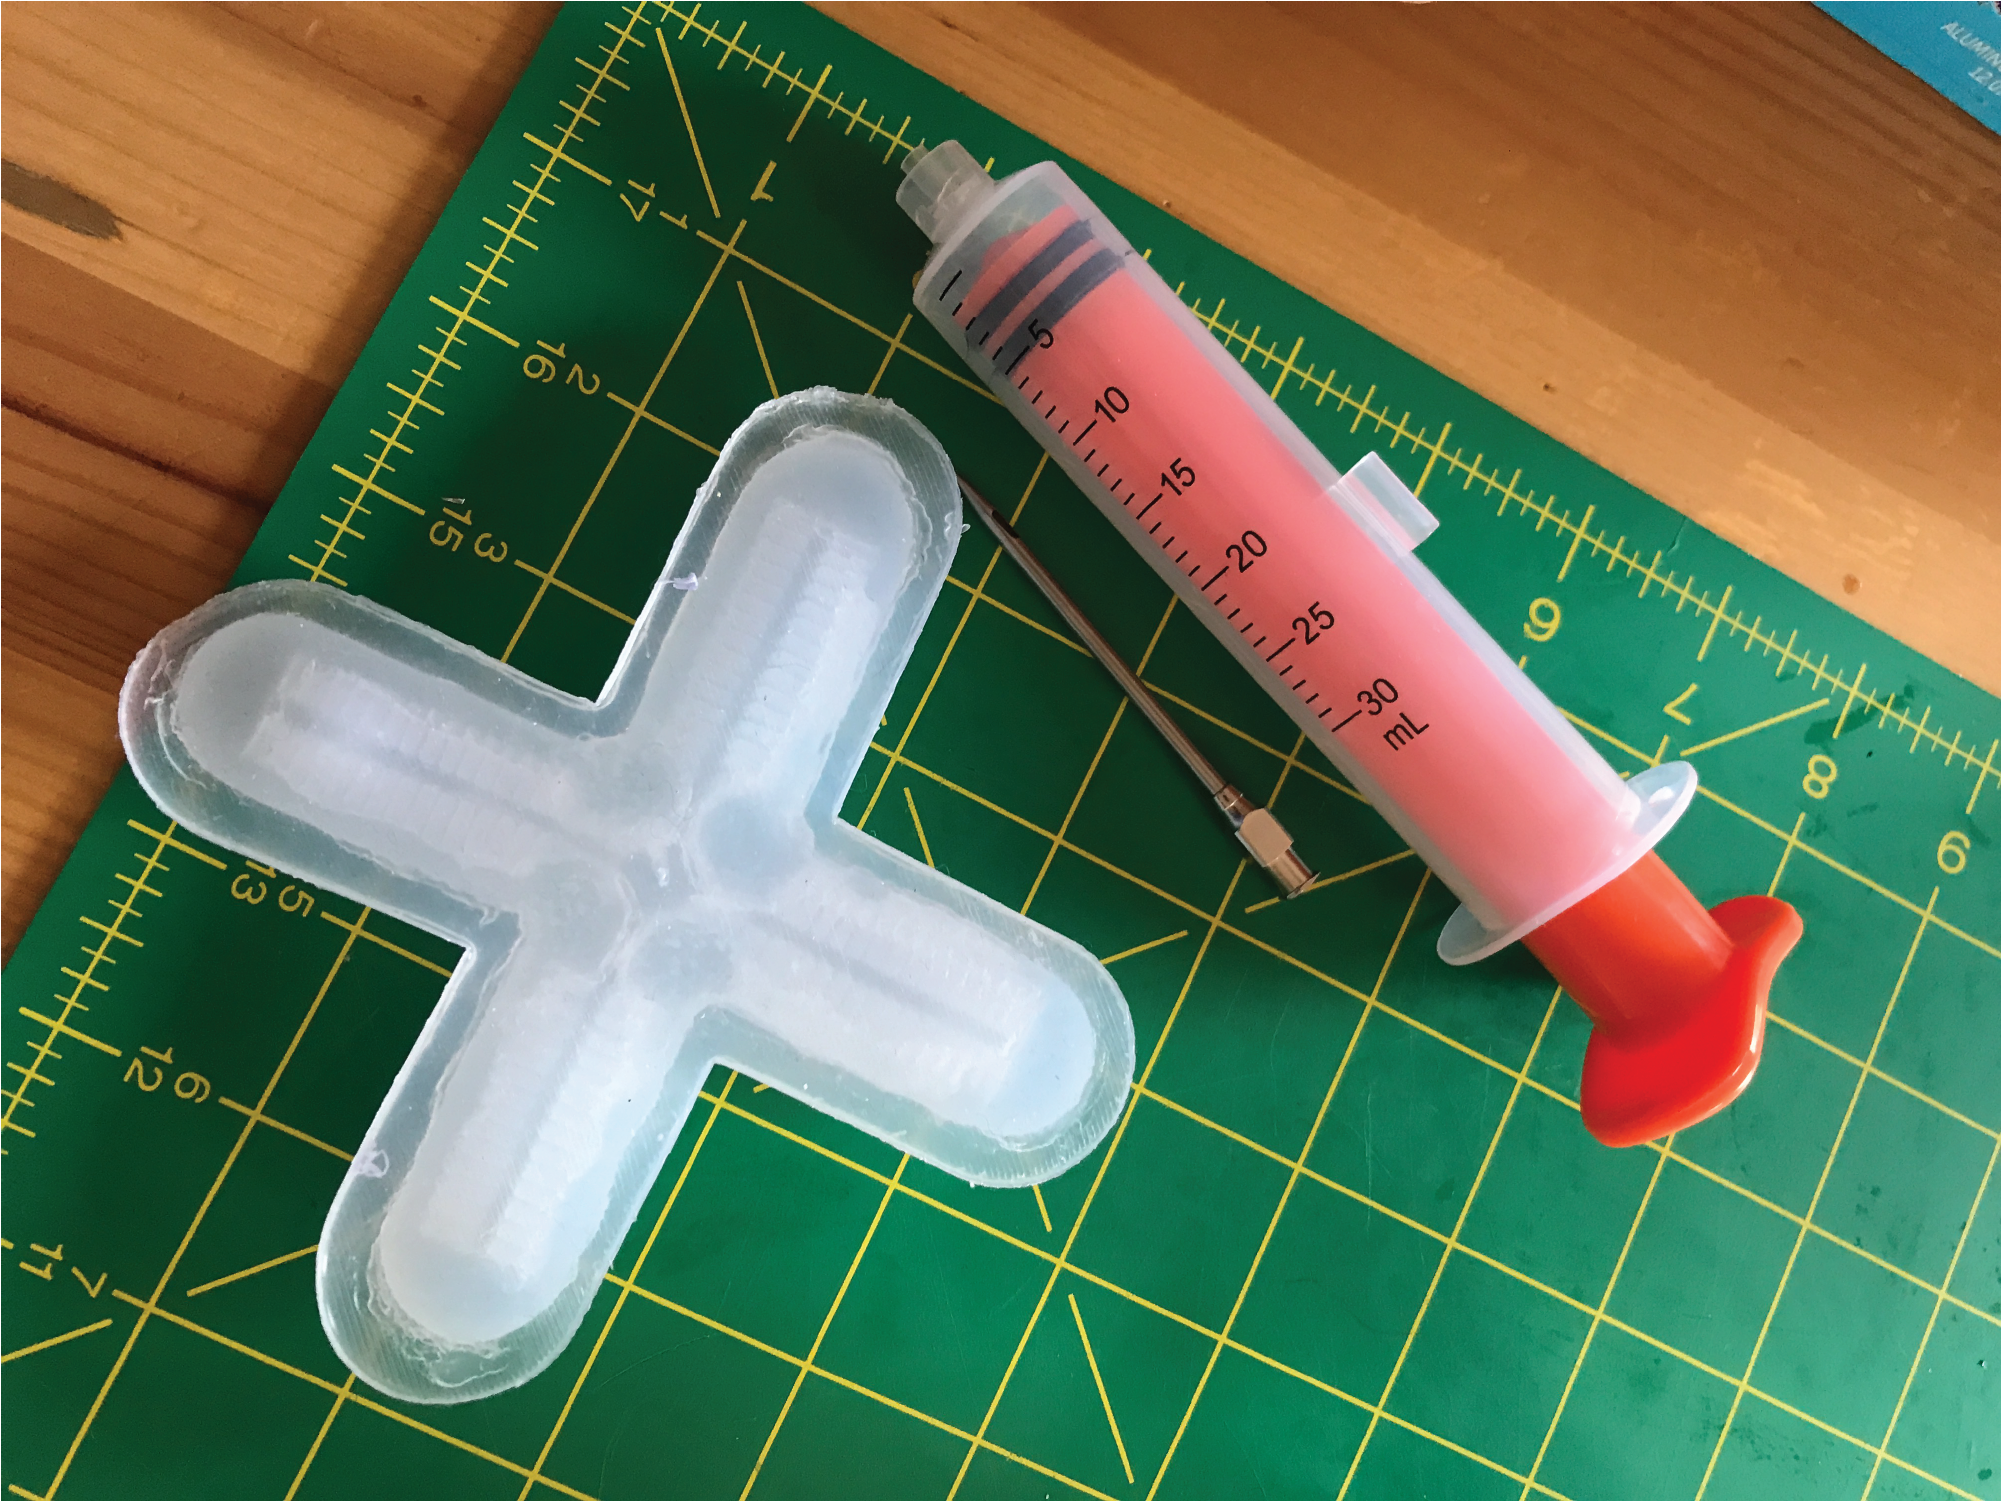
Silicone Pour and Cure
I used Oomoo 3 silicone rubber by Smooth-On and mixed the two parts together before pouring the mixture into the 3D printed mold.
The rubber then cured for 6 hours (start time: 6PM - end: midnight).
It wasn't until a few days later that I forgot to add a cover to this part so I took a sheet of aluminum foil and spread on silicone mix onto it until it was very very thin (approx. 0.3 inch max). Curing time: 6 hours.
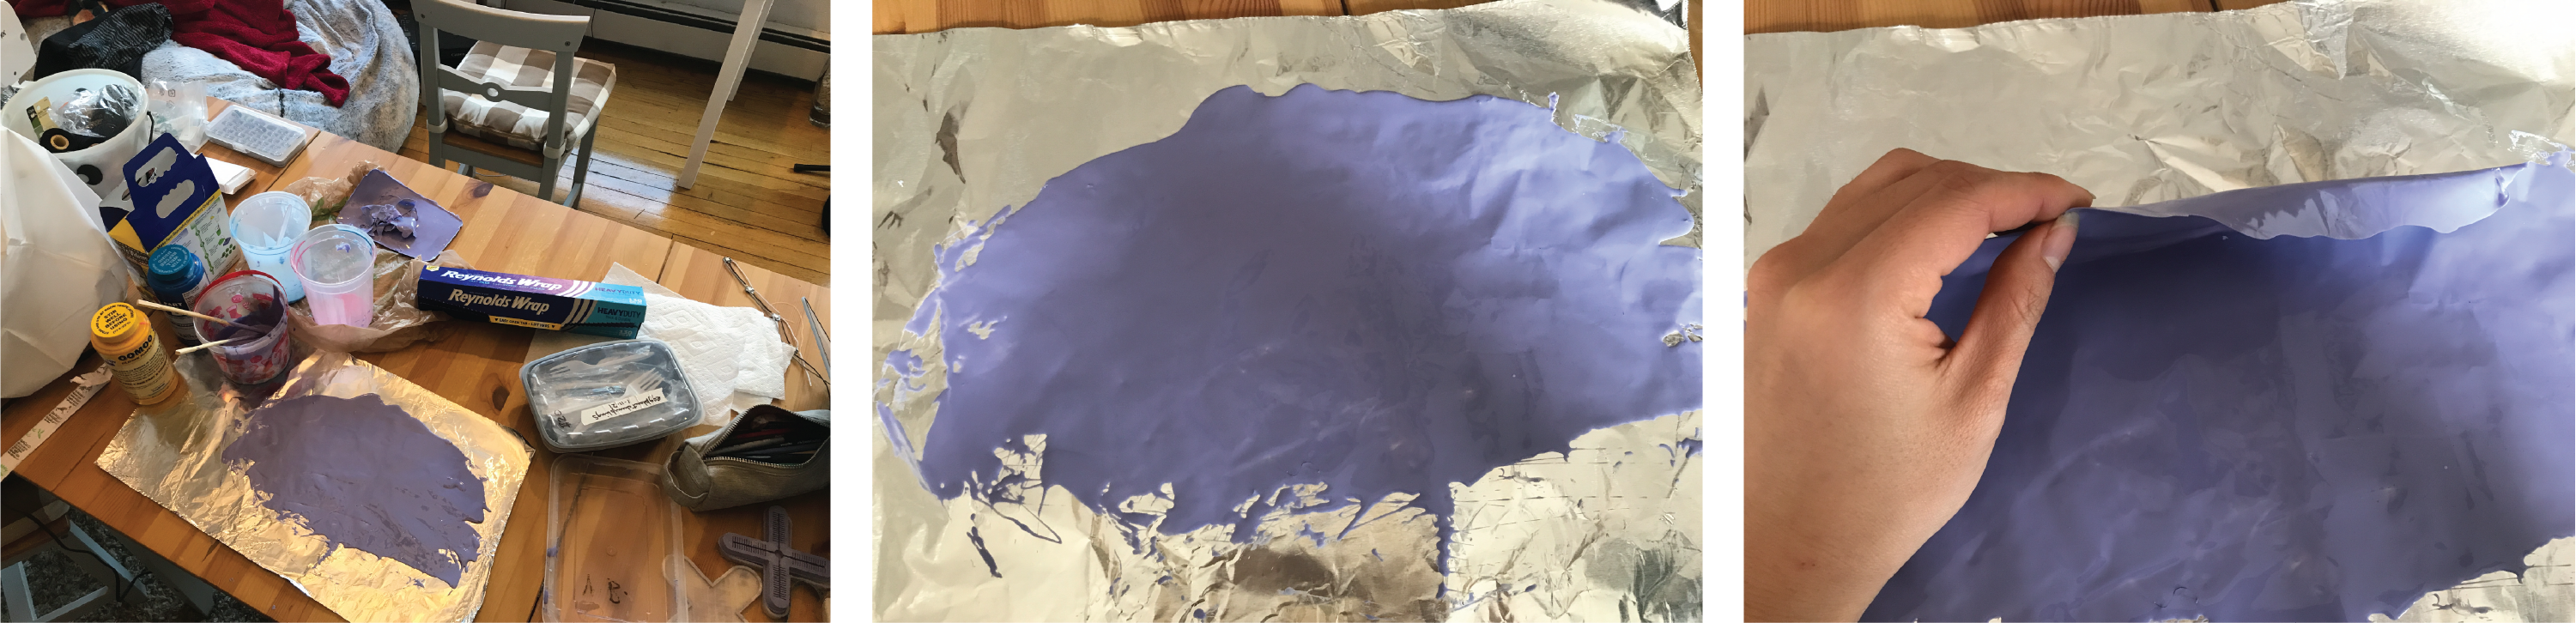
Silly me forgot to put the first part on top of this cover while it was curing so to attach them, I used Silpoxy.
January 26 Update After a meeting with Nuria, I learned that I should have used the Ecoflex silicone rubber instead of the Oomoo so another trial was attempted. Updates to come soon
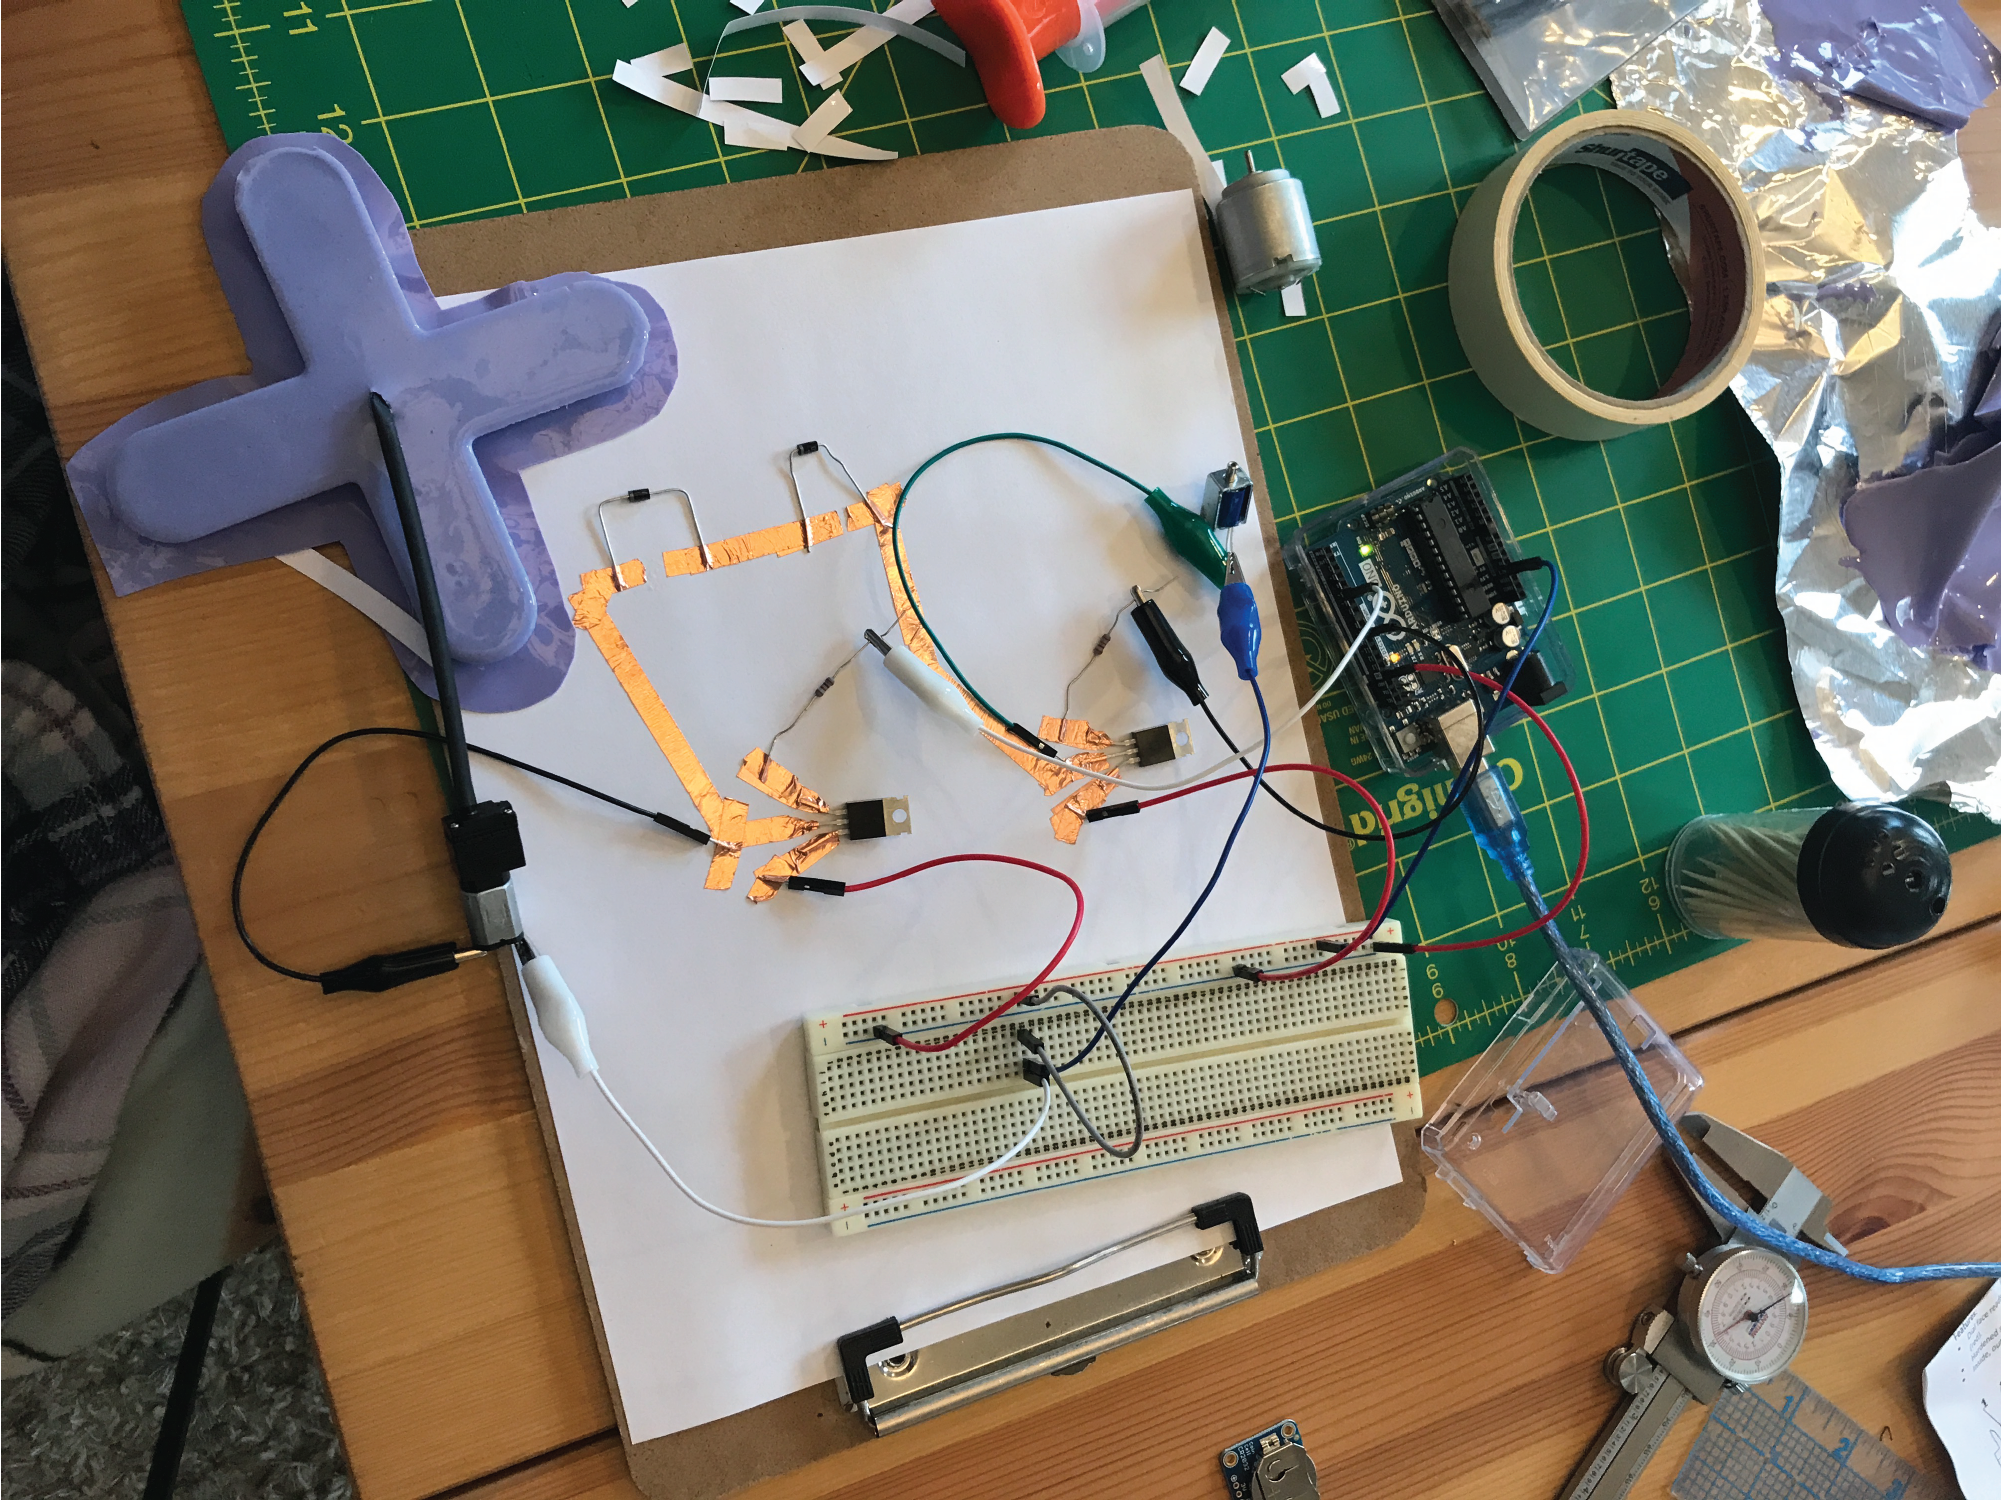
Automated Air Pump
Following the tutorial video made by Adriana, I created a very rough version of her circuit, but with the following modifications:
- Arduino instead of Adafruit Playground
- 2.1K Ohm resistors instead of 2.2K Ohm
- connected one pump into soft robot instead of two
I modified one of the template codes from Arduino IDE via File > Examples > 01.Basics > Blink and uploaded it into the Arduino
/*
  Blink

// the setup function runs once when you press reset or power the board
void setup() {
  // initialize digital pin LED_BUILTIN as an output.
  pinMode(5, OUTPUT);
  pinMode(9, OUTPUT);
}

// the loop function runs over and over again forever
void loop() {
  digitalWrite(5, HIGH);
  digitalWrite(9, HIGH); // turn the LED on (HIGH is the voltage level)
  delay(1000);                       // wait for a second
  digitalWrite(5, LOW);
  digitalWrite(9, LOW);// turn the LED off by making the voltage LOW
  delay(1000);                       // wait for a second
}
Final Result
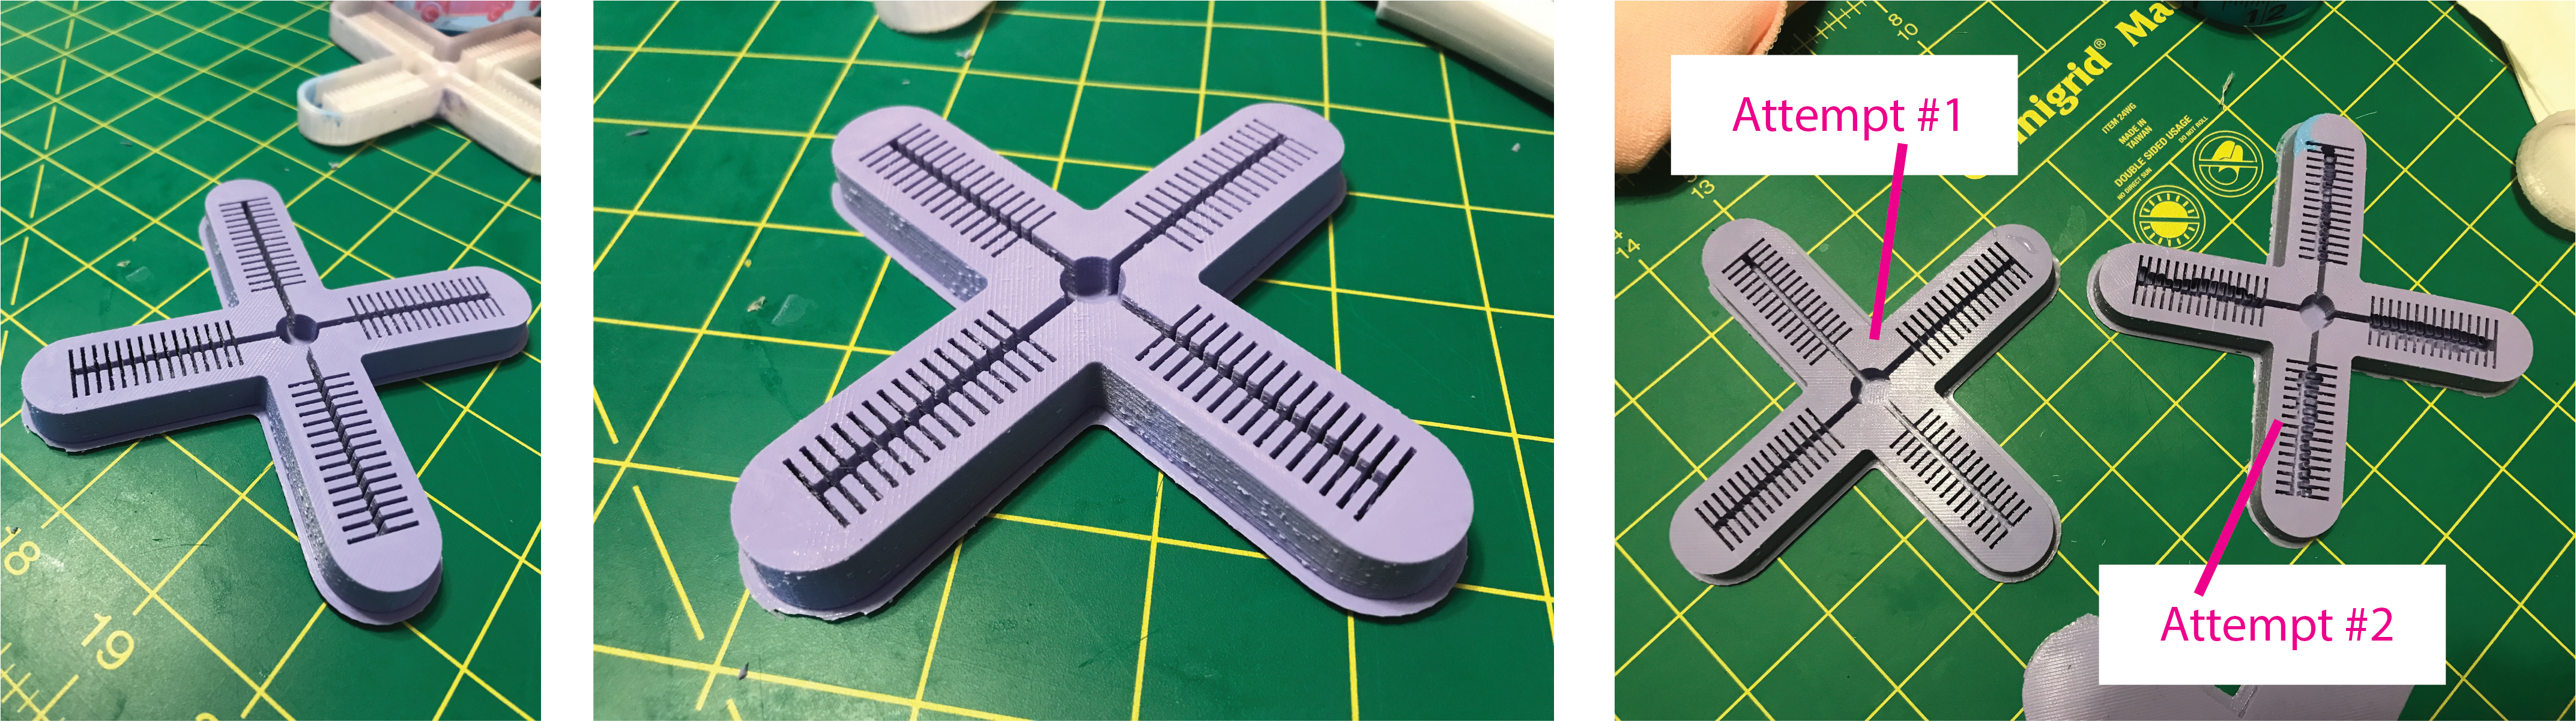
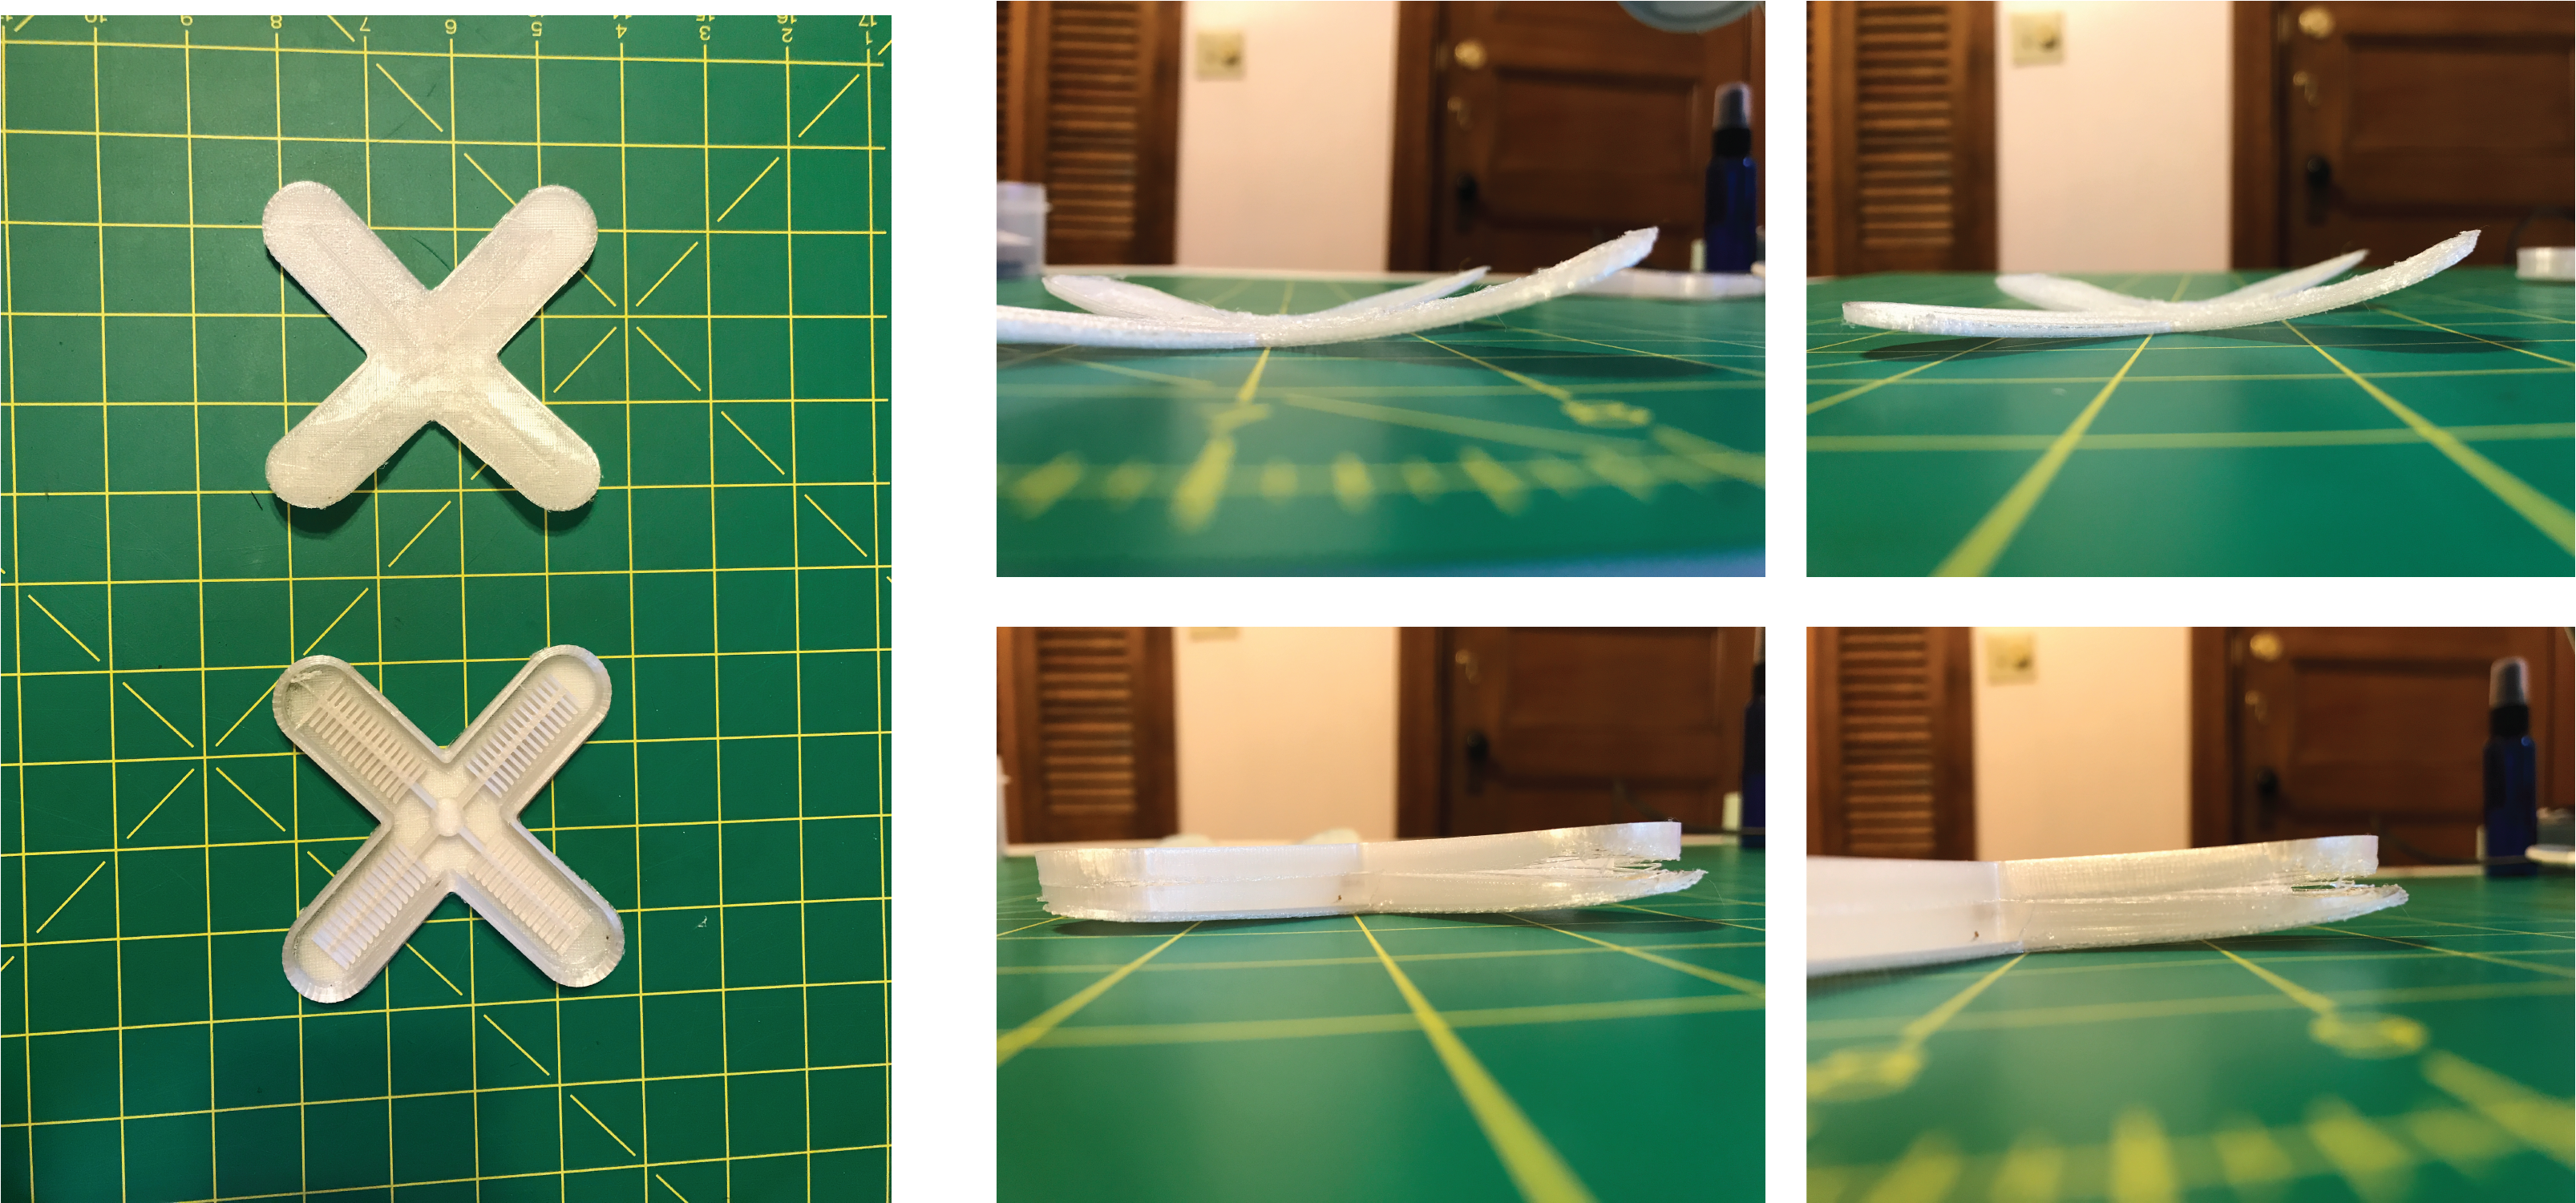
Attempt 1 with Oomoo
With the Oomoo silicone rubber, the soft robot barely worked. Air did come through but I believe that with how stiff and dense the silicone rubber was in the main part, the air did not have space to really push. OR the valve I used did not pump enough air/pressure through.
Attempt 2 with Ecoflex
After mixing the two parts of Ecoflex and casting it in the same mold as above, we got a much more favorable result.
I also forgot to cast the cover part later though, and instead casted it at the same time as the main leg part so I used Silpoxy again to close the two which took 12min to cure.
I'm very glad to say that the final result was a success!... mostly. I had to use my own lungs to inflate the robot as I couldn't make a successful circuit nor get enough air pressure. Anyway here it is in semi-action!
Download Links
Stars in Line (.ai)
Stars in Line (.dxf)
Spine of a Human (.ai)
Spine of a Human (.dxf)
4-Leg Gripper (.stl)
4-Leg Gripper (.gcode)
Problem Areas
Print Warping
Problem
For the first couple of prints, the edges of the legs began to warp and curve up above the surface of the bed.
Solution
Inspired by All3DP and a Ultimaker Support Forum, there were several things I did to alleviate this:
- turned up the temperature of the room from 65 deg F to 70 deg F
- increased the temperature of the bed from 30 deg F to 50 deg F gradually over the first 5% of the print (roughly 2 hours)
- changed the bed adhesion from Skirt to Brim
All of these solutions put together was intended to keep the material adhered to the bed for longer and more stable. The temperature changes helped maintain the material integrity so it didn't shrink from the cold.
Inaccurate Silicone Curing
Problem
Surprisingly (and luckily?) it was my 2nd attempt to cure a 4-leg gripper that failed. The part had bigger gaps in the legs and did not accurately transfer the "bones" of it.
Solution
Thinking back to my first attempt, I think I poured the silicone slower and directly onto the lowest point of the mold, rather than directly onto the "bones" of the mold and hoping it'll pour down correctly and fill the gaps.
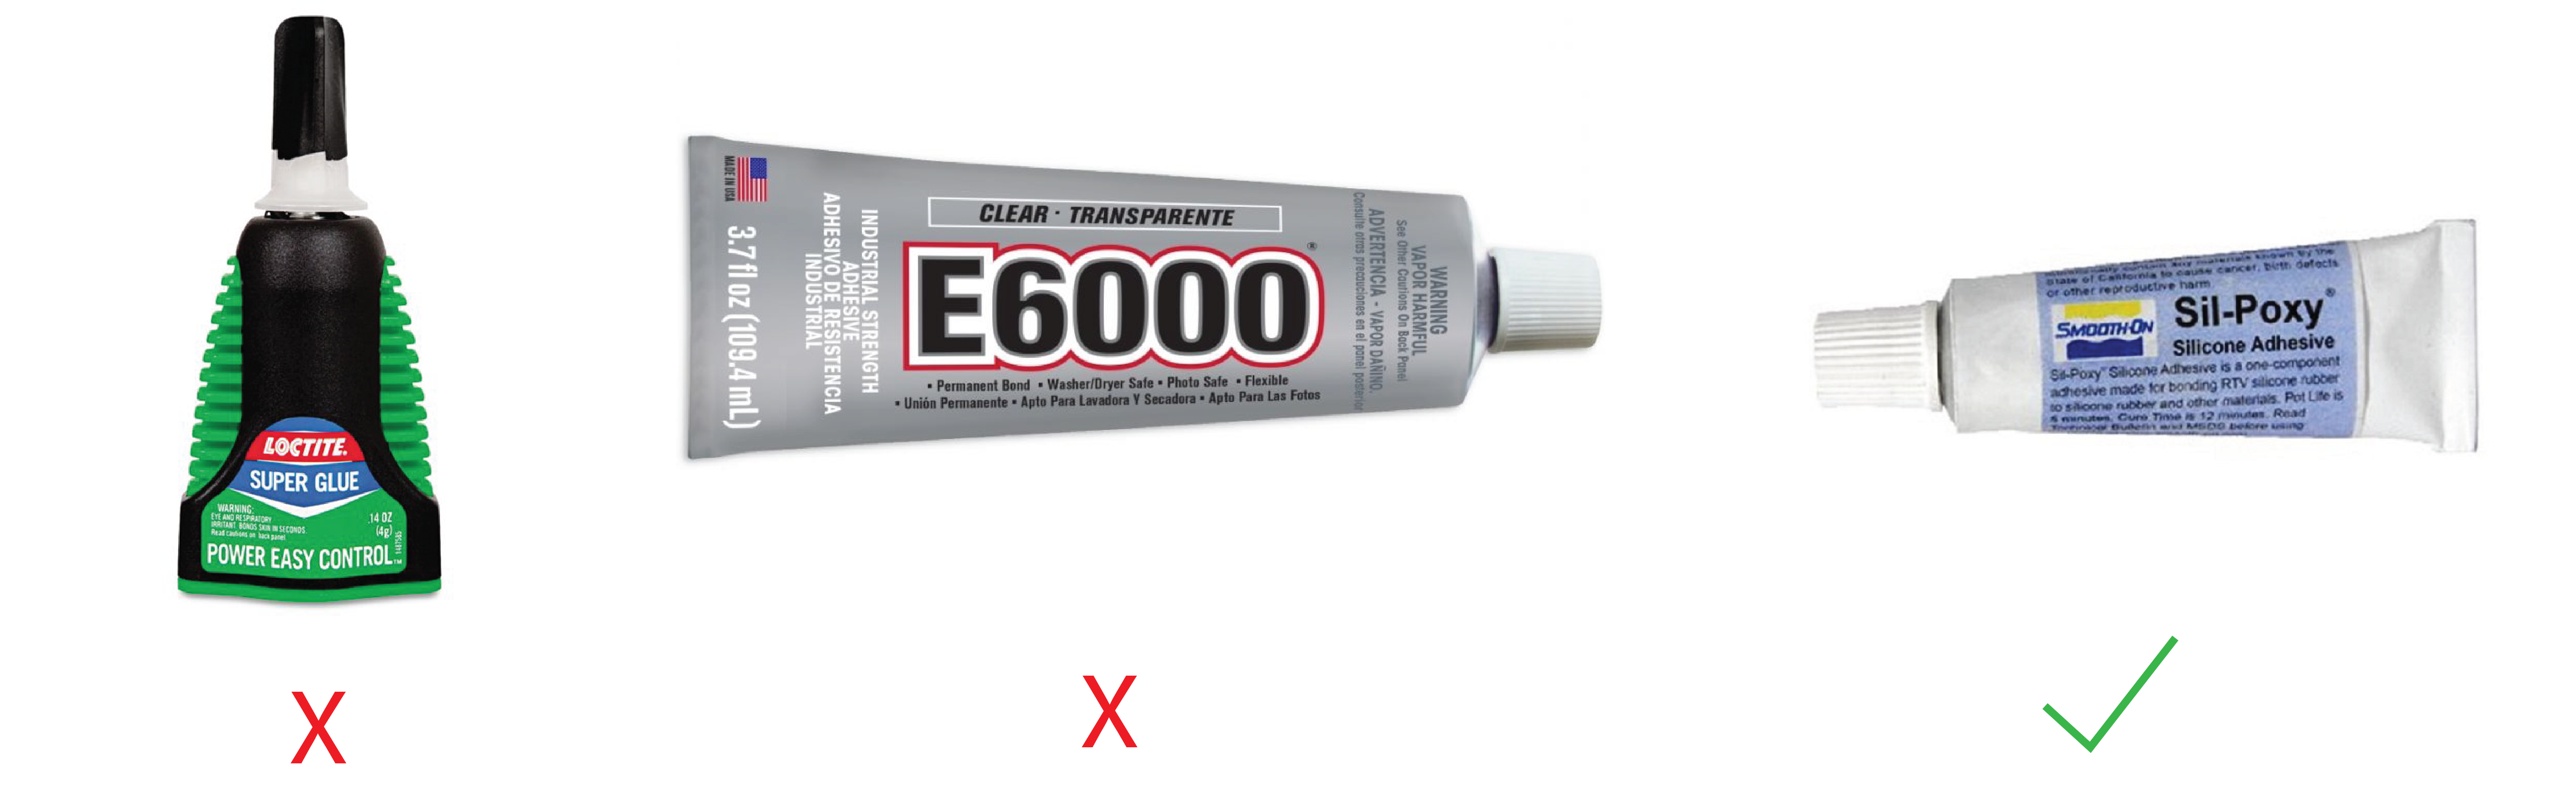
Gluing Silicone
Problem
Attaching two parts of cured silicone together is very challenging with just adhesive products.
Solution 1
Attach one cured part to the second part while the latter is still curing. Silicone helps silicone attach.
Solution 2
If you do need an adhesive, I highly recommend Silpoxy - after trying two others that failed on me.
Other Sources and Resources of Inspiration
- Adriana Cabrera - Documentation
- Tutorial Part 2
- Inflatables tutorial slides
- Adriana Cabrera - Circuit Reference
- From Soft Robotics to Biobotics
- [MotorSkins]
- Thingiverse
- Ultimaker Support: Plate Adhesion Settings
- All3DP: 3D Print Warp Solutions