10. Open Source Hardware - CNC Drawing Machine
Our Trailer for our week made by Ray
Inspiration
Project Overview
A CNC (Computer Numerical Control) milling machine is designed for precision machining of solid materials, typically metal, wood, or plastic. It utilizes computer-controlled movements and rotary cutting tools to shape and cut the material into precise shapes and patterns. The primary function of a CNC milling machine is to remove material from a workpiece to achieve a desired shape, size, or finish. The machine follows programmed instructions, in the form of a G-code, to control the movements of the cutting tool in three or more axes. CNC milling machines are widely used in manufacturing and prototyping for their accuracy, repeatability, and efficiency in producing complex parts.
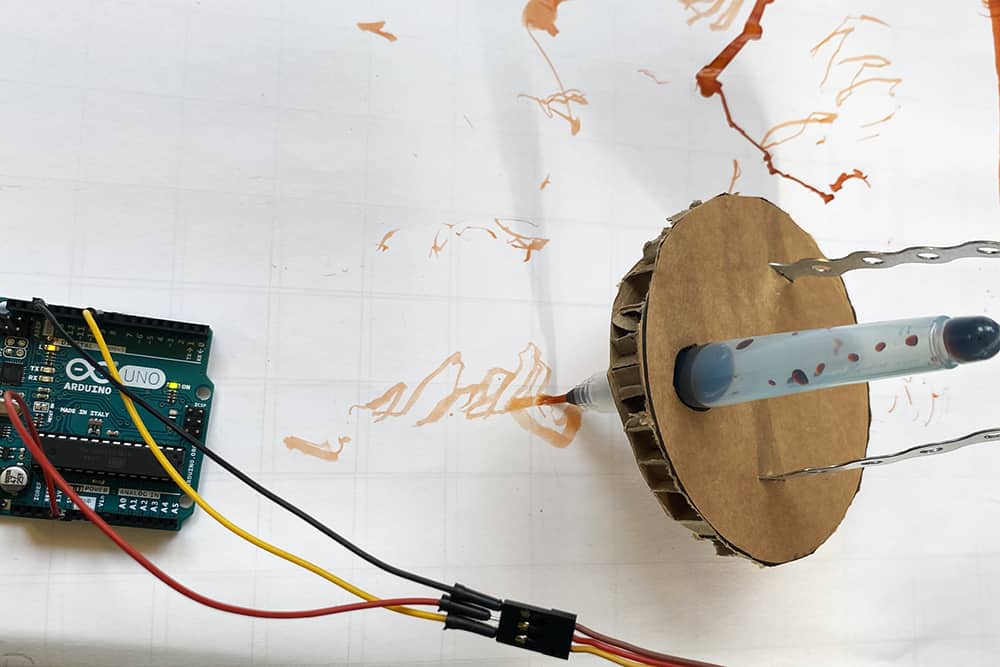
During Open Source Hardweek, the Amsterdam node repurposed a CNC milling machine into an avant-garde plotter for painting - an idea by Michelle Vossen. Through a clever hack, we transformed the machine's functionality by replacing the milling bit with a custom brush holder powered by Arduino. We experimented with diverse Rhino designs encoded in G-code. This transformation allowed for the exploration of a variety of brushes, varying in size and type, alongside an array of inks. The result is quite a cool experiment in art and innovation.
Project write up from Machteld
Bill of Materials
Project Process
To make this big project more achievable, we divided up the tasks based on our own interests and made a schedule for iterations throughout the week.
- Hardware = Stephanie Johnson & Aslı Aydın Aksan
- Electronics = Riley Cox & Michelle Vossen
- Brush Design = Jiawen Gong & Ray Formilli
- Ink / Surface = Ray Formilli & Jiawen Gong
- Working with the CNC machine / shopbot code generation / design files = Aslı Aydın Aksan & Jiawen Gong
- Documentary = Ray Formilli & Machteld Zee
- Project Management = Machteld Zee & Michelle Vossen
About the CNC
In Henk's tutorial on CNC milling machines, he emphasizes the importance of understanding and mitigating potential risks associated with their operation. These risks include the possibility of fire, such as when the milling bit encounters metal on the sacrificial layer, leading to sparks that can be directed into the ventilation system. Additionally, caution is advised to prevent accidents like hair getting caught in the milling bit or ensuring that hands and fingers are kept at a safe distance.
Before starting work, Henk recommends wearing safety glasses and ensuring the cleanliness of the machine's bed (sacrificial layer), with the removal of any nails or screws. Given that the CNC milling machine operates based on precise instructions, users are reminded to think through each step carefully and never leave the machine unattended during operation. Monitoring the machine's sounds is crucial as unusual noises may signal potential issues.
Henk provides practical safety measures, including the use of a space bar to pause milling, and a 'panic button' to shut down the machine in emergencies. Considering the high-speed rotation of the milling bit at 18,000 times per minute, users are urged to exercise caution and choose the appropriate milling bit for specific effects and limitations.
The tutorial covers the homing process for the machine in the x, y, and z axes, distinguishing between machine home and job home. Adjusting the milling bit's height (Z-axis) is highlighted, either using page up or page down commands or by entering values directly into the properties. Henk advises conducting a test run in the air before actual milling, saving the instructions as G-code, and subsequently loading the relevant part file for precise and controlled machining.
CNC safety instructions by Machteld
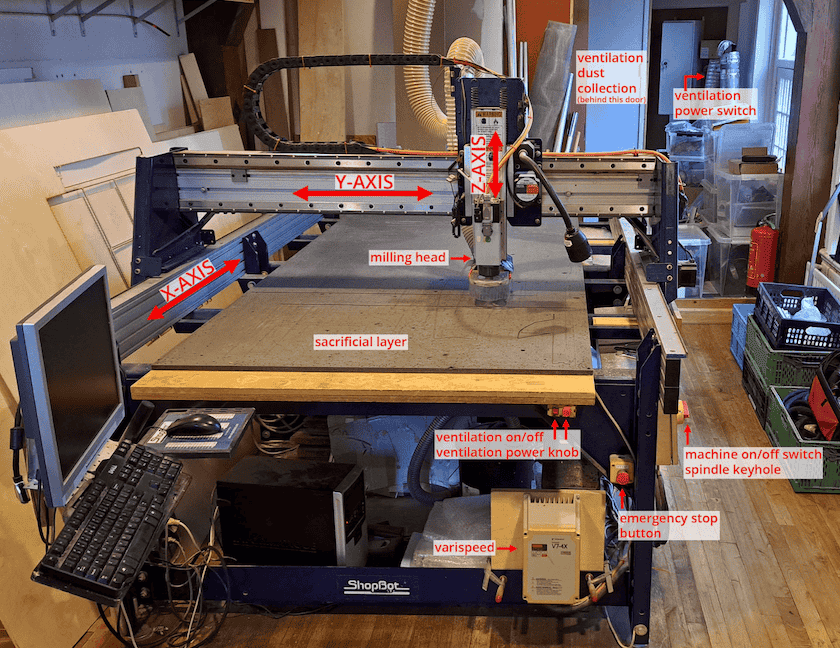
CNC Image by Asli
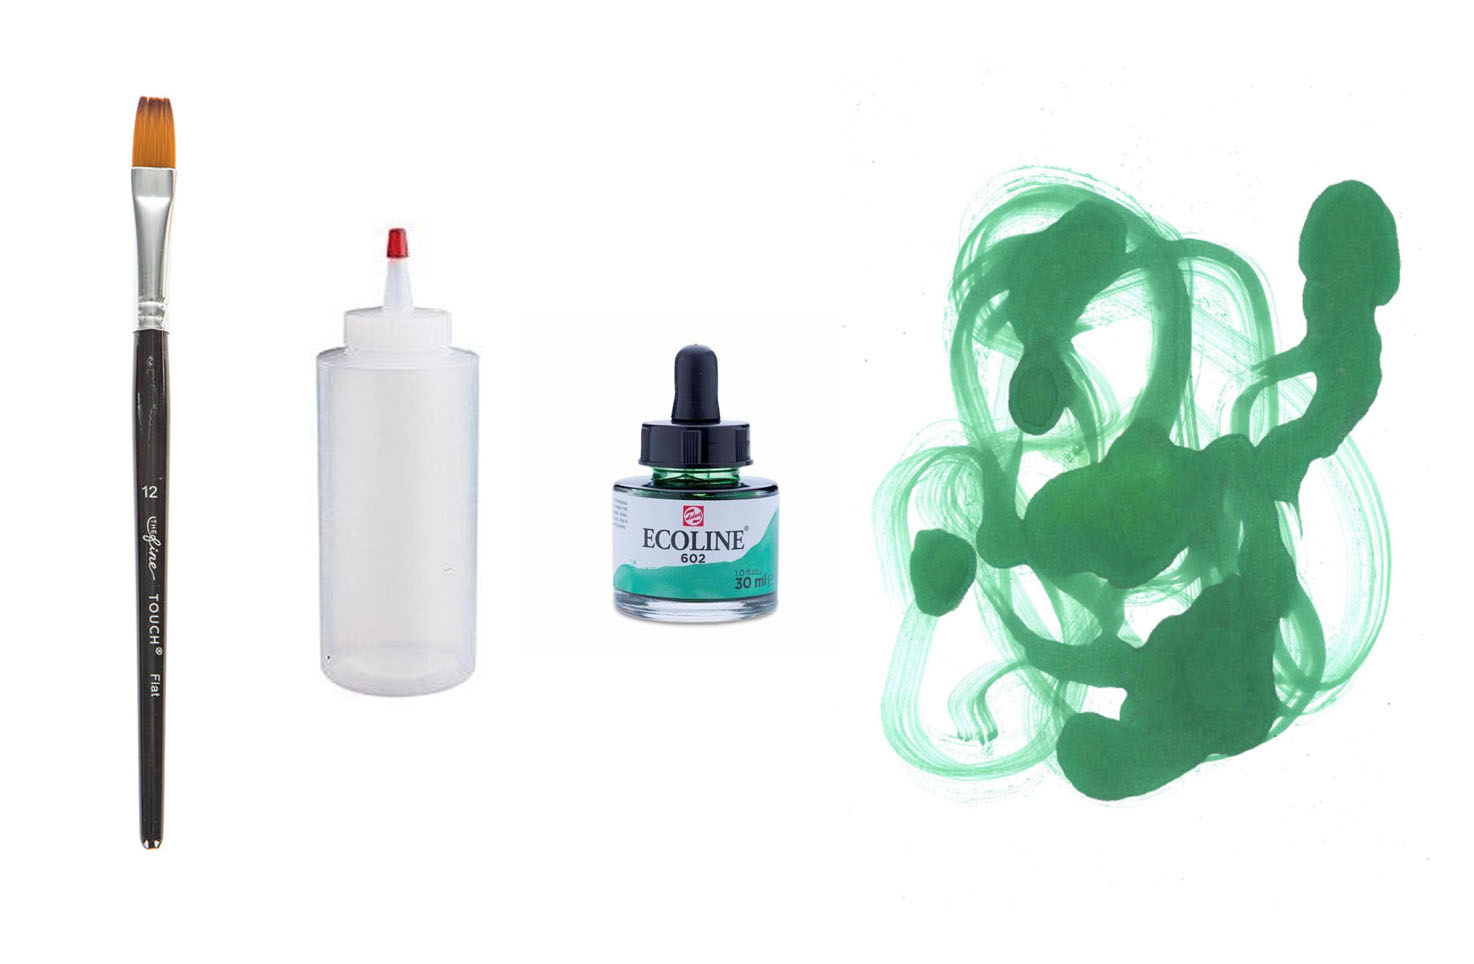
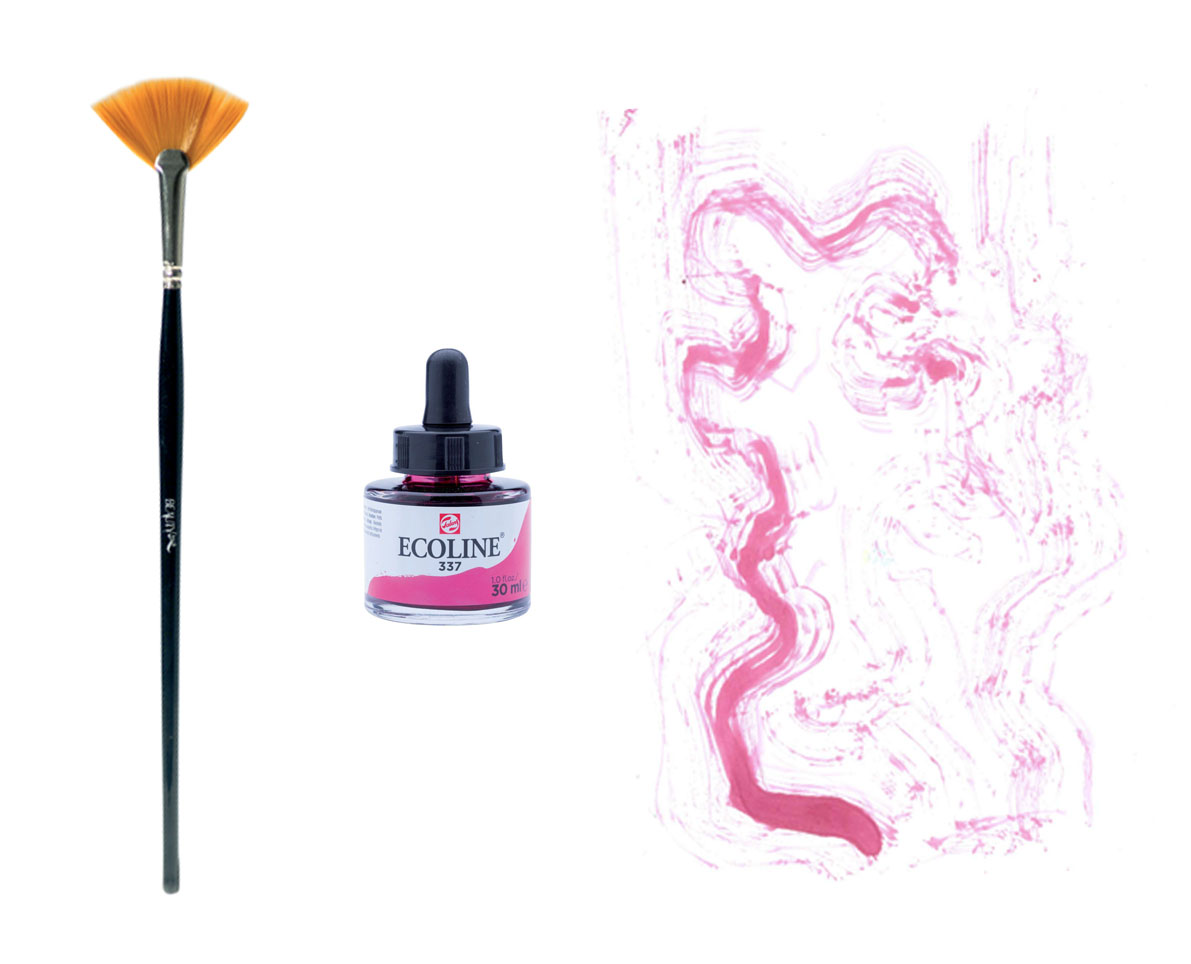
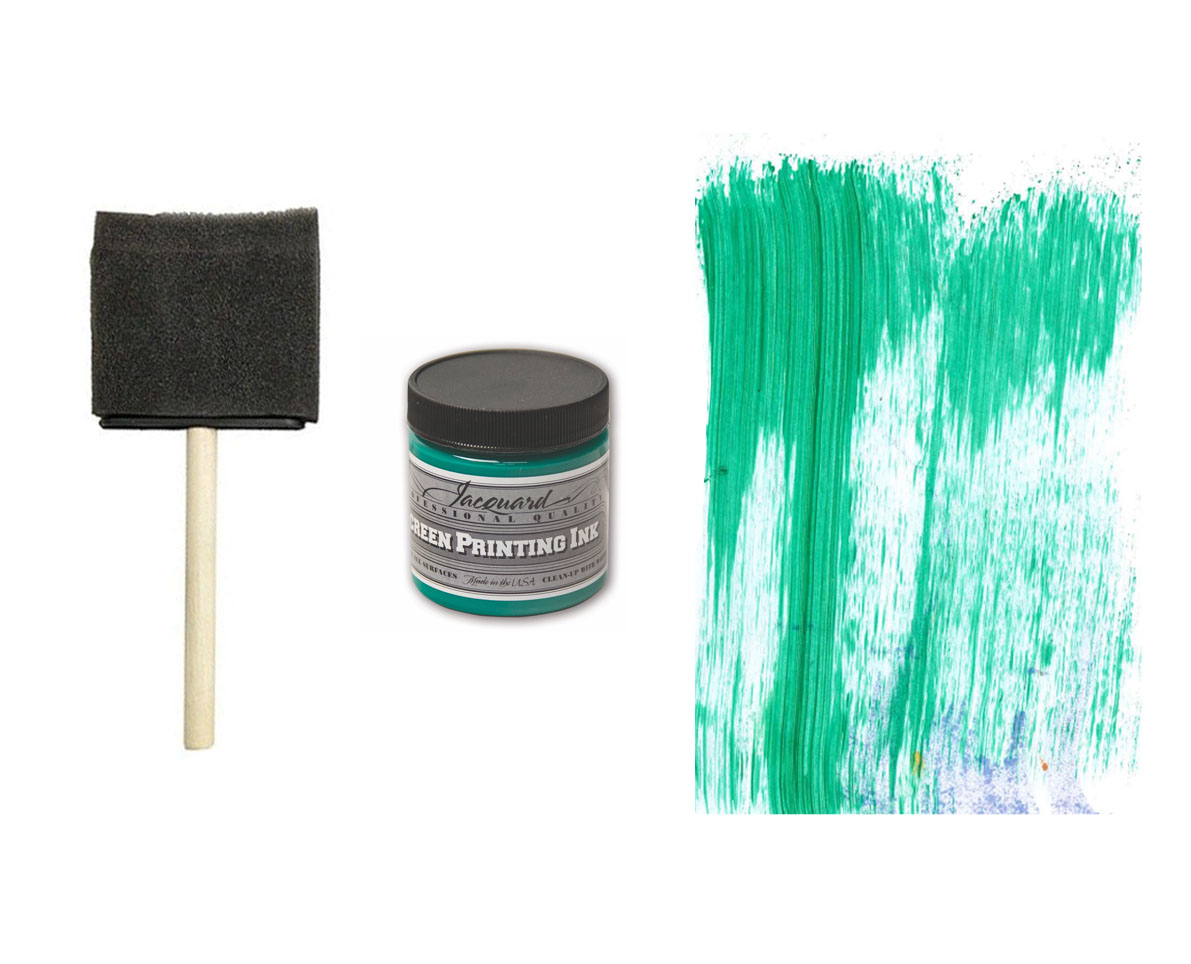
Brush and Mark-making Research
Jiawen and Ray did amazing research into mark making using different brushes and materials. All images below are from Jiawen
1ST
Brush+Squeeze Bottle+Ecoline on Paper
2ND
Brush+Pipette+Ecoline on Paper

3RD
Brush+Ecoline on Paper
SPONGES
1ST
Sponge+Screen Printing Ink on Paper
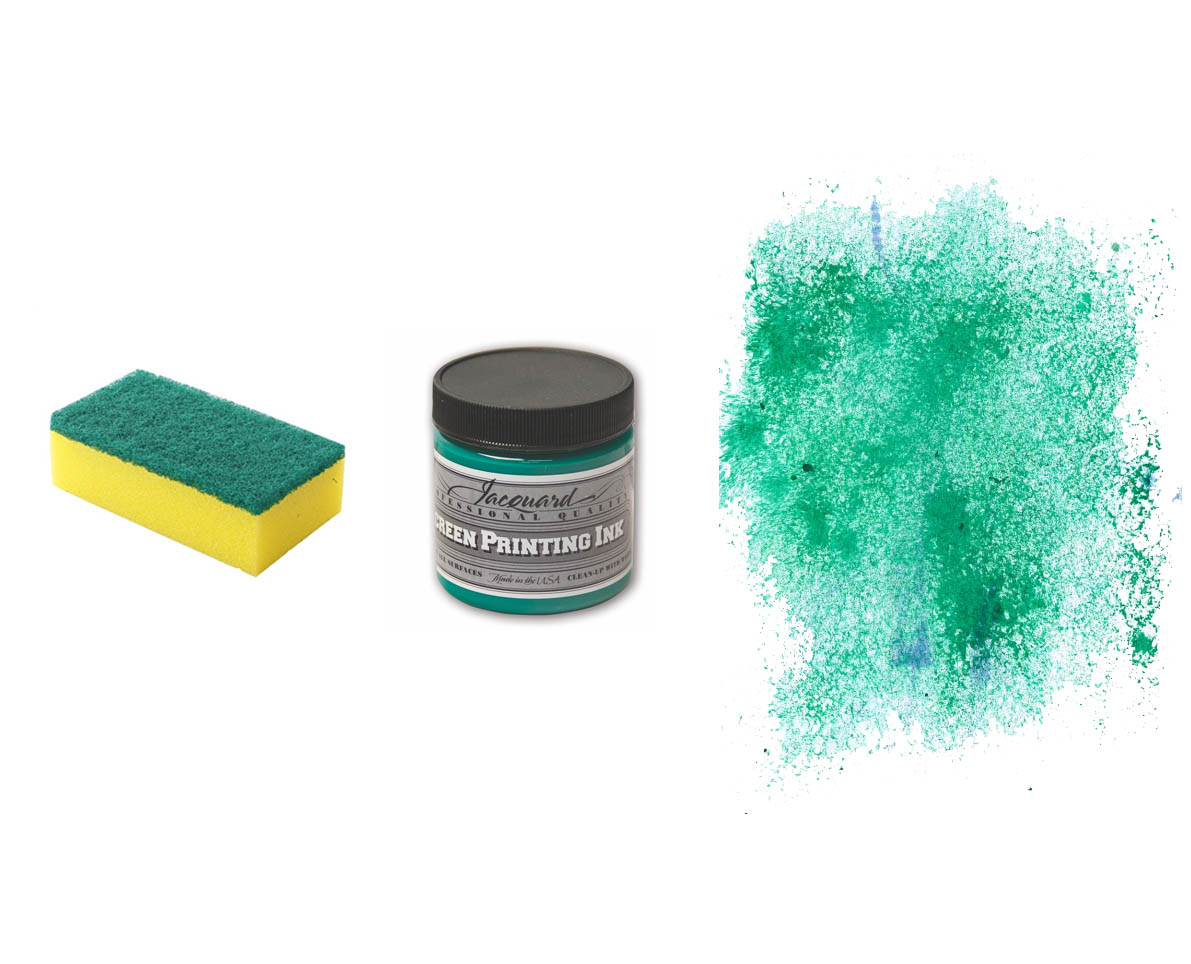
2ND
Sponge+Screen Printing Ink on Paper

3RD
Sponge+Screen Printing Ink on Paper
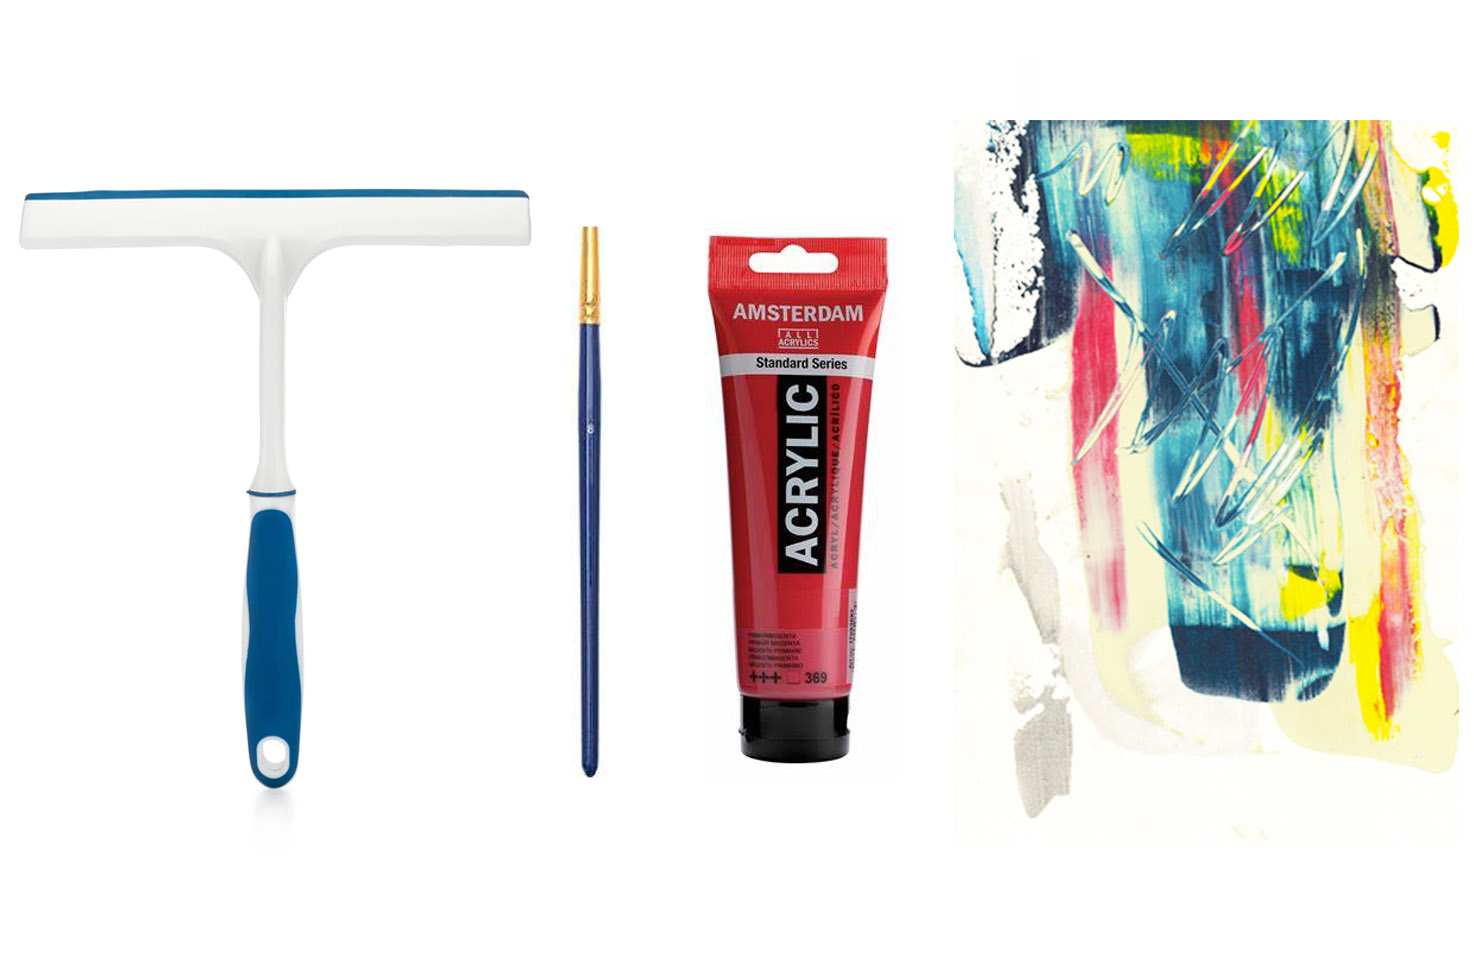
SQUEEGEE
1ST
Squeegee+Masking Tape+Acrylic Paint on Canvas by Ray
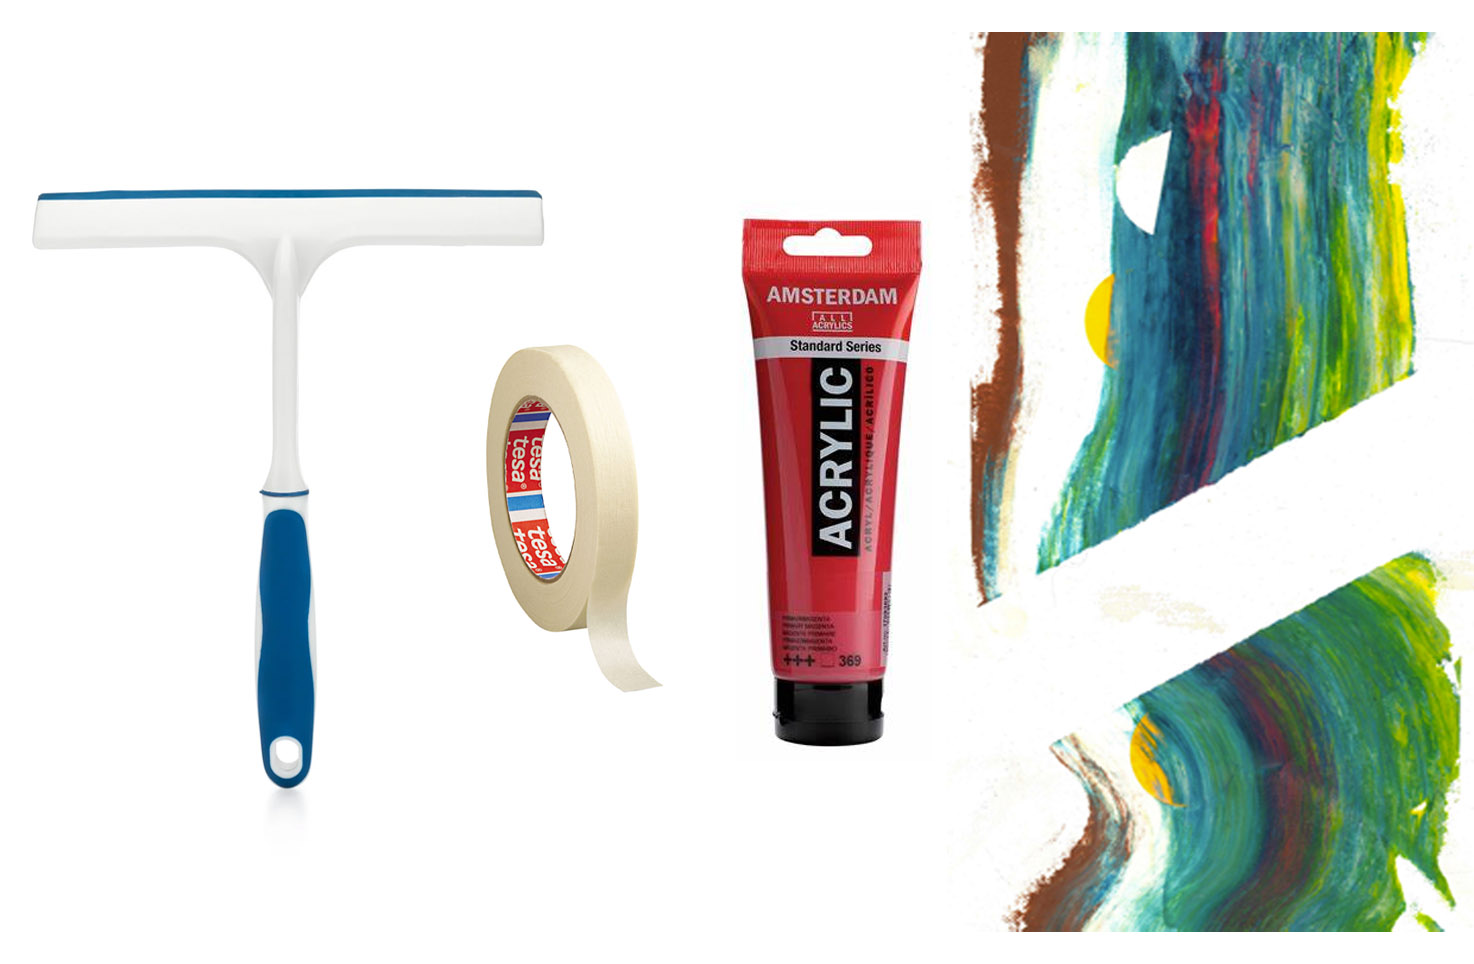
2ND
Squeegee+Brush Stick+Acrylic Paint on Canvas by Ray
MOLOTOWS
1ST
Molotow+Ecoline on Paper
2ND
Molotow+Ecoline on Paper by Riley
ROLLER
1ST
Roller+Ecoline on Paper

HAIRBRUSHES
1ST
Hair Brush by Ray+Screen Printing Ink on Paper
2ND
Hair Brush+Ecoline on Paper by Ray

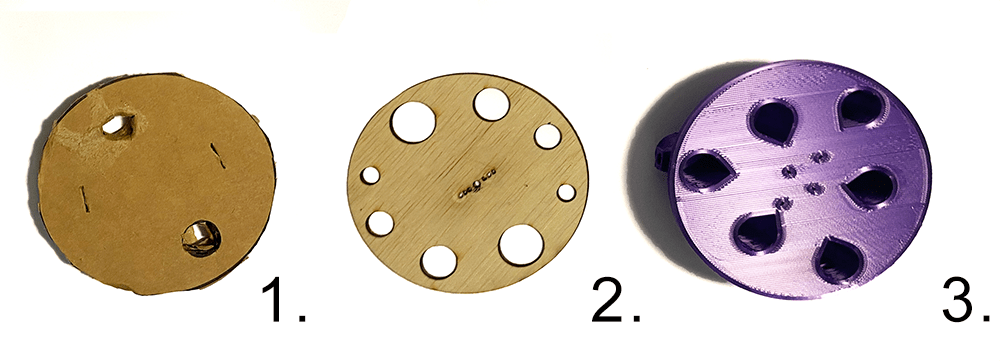
Brush Attachments
Stephanie was tasked with making out attachments for the machine. We had to figure out how to add a holder to the machine to grip brushes instead of the drill bit it usually uses to carve. All images/text from this section is from her page
-
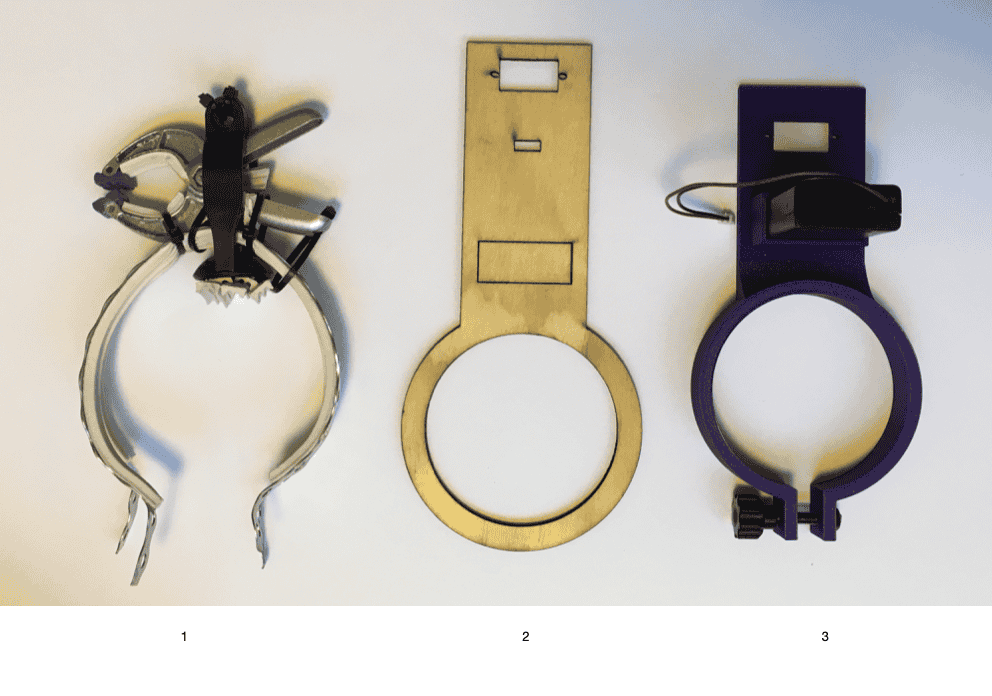
First attachment: Assemblage with clip. Multi holder for pens / brushes etc universal
-
Second attachment: Laser Cut Attachment for Servo Motor
-
Third attachment: 3D printed Attachment for Servo Motor and Pen Holder

Second iteration of holder to attach to servo motor adapted & 3D printed.
Changes consisded of
-
Overall closer to machine head (motor closer to attachment to make secure)
-
Shelf to fit battery pack
-
Slide to give strenght to circular grip
-
Circular grip made with pieces coming out that then screw together = tight fit on machine drill head
Made in conjunction with fitment to pen holder for servo motor
Modular Attachment to Servo Motor, Brsuh Holder and CNC attachment

Uni brush holder design 3D printed design for anyone to download and use
Servo Motors and Electronic addons
To add an extra variable to our CNC hacking adventure, we decided to make an adapter to add a servo motor to the brush attachment allowing for extra movement and more complex mark-making. I haven't worked with servo motors before so I was really excited to get to play around with them.
Servo motors are actuators that allow for precise control of position/angle.

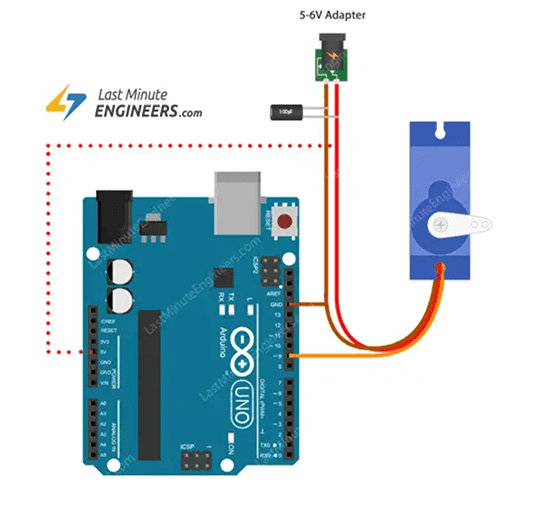
This tutorial was also really helpful in getting started powering and programing a motor.
I first uploaded a the swipe example code for servo motors. I powered the motor through the arduino uno attached to my computer through a usb for prototyping.
/* Sweep
 by BARRAGAN <http://barraganstudio.com>
 This example code is in the public domain.

 modified 8 Nov 2013
 by Scott Fitzgerald
 https://www.arduino.cc/en/Tutorial/LibraryExamples/Sweep
*/

#include <Servo.h>

Servo myservo;  // create servo object to control a servo
// twelve servo objects can be created on most boards

int pos = 0;    // variable to store the servo position

void setup() {
  myservo.attach(9);  // attaches the servo on pin 9 to the servo object
}

void loop() {
  for (pos = 0; pos <= 180; pos += 1) { // goes from 0 degrees to 180 degrees
    // in steps of 1 degree
    myservo.write(pos);              // tell servo to go to position in variable 'pos'
    delay(15);                       // waits 15 ms for the servo to reach the position
  }
  for (pos = 180; pos >= 0; pos -= 1) { // goes from 180 degrees to 0 degrees
    myservo.write(pos);              // tell servo to go to position in variable 'pos'
    delay(15);                       // waits 15 ms for the servo to reach the position
  }
}
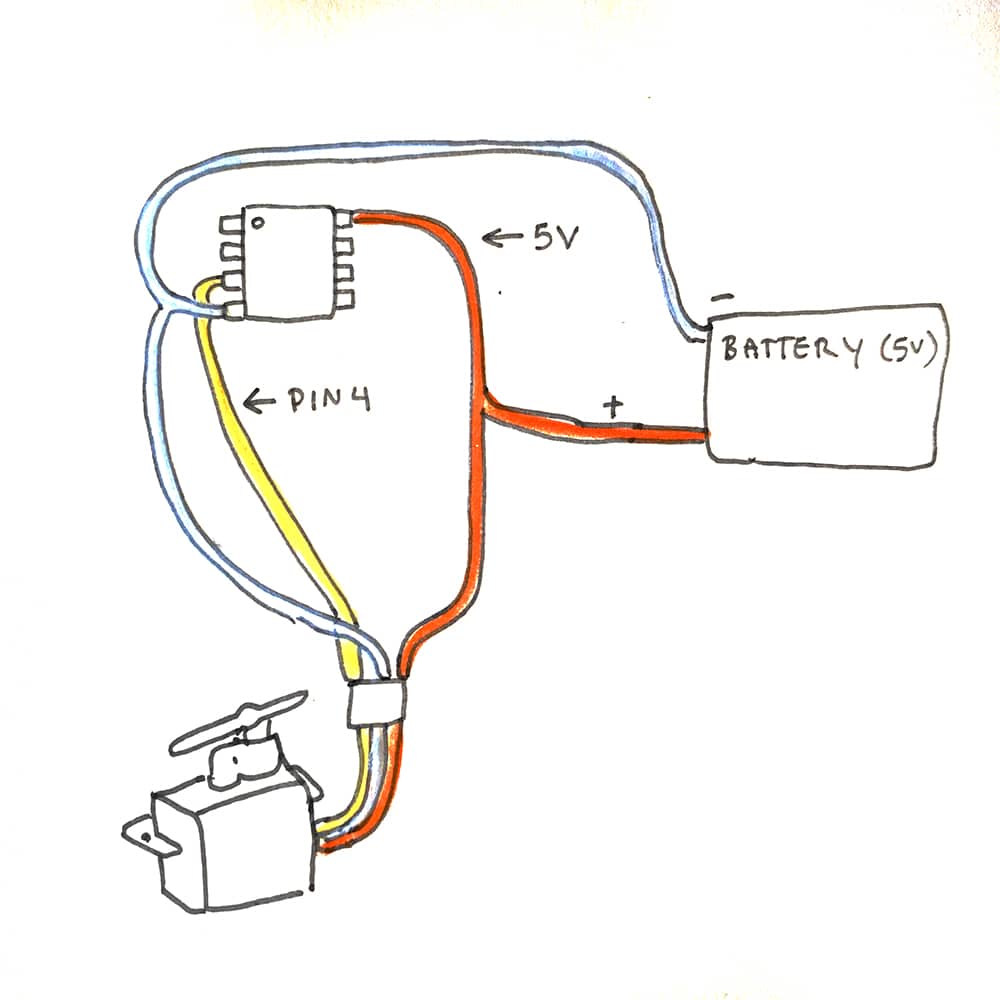
To reduce bulk, I programmed an ATtiny 85 to attach to the motor. This could be powered by a battery pack and is much smaller that the Arduino Uno I did my prototyping on.
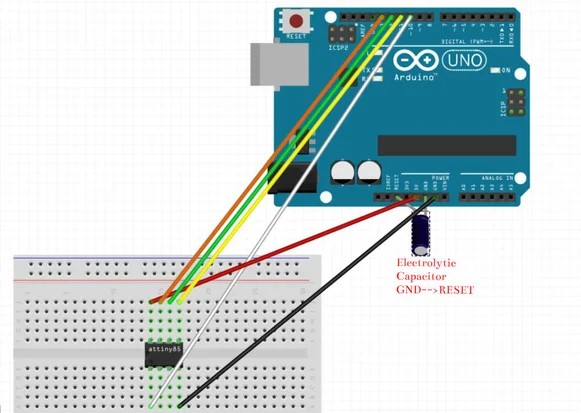
For a more indepth tutorial on programming an ATtiny go here
I uploaded this code because the typically servo libraries I used on the Arduino Uno are not compatable.
void setup() {
pinMode(4, OUTPUT);
}

void loop() {
// keep sending 0 position for about 400ms
for(int i = 0; i<20; ++i) {
    digitalWrite(4, HIGH);
    delayMicroseconds(1000);
    digitalWrite(4, LOW);
    delay(19);
}

// keep sending second position for about 400ms
for(int i = 0; i<20; ++i) {
    digitalWrite(4, HIGH);
    delayMicroseconds(2000);
    digitalWrite(4, LOW);
    delay(18);
}
}
After I had it working on the breadboard I soldered it together
** TIP Make sure this is soldered to the correct pin! it is easy to loose track since they are not marked on the ATtiny
Motor attachments
Now that I had my motor running I wanted to see what it would do in terms of mark-making. As a super quick prototype I taped the motor to the end of a piece of plywood. I attached a bent piece of perforated steel strapping to hold a pen at a 90° angle.
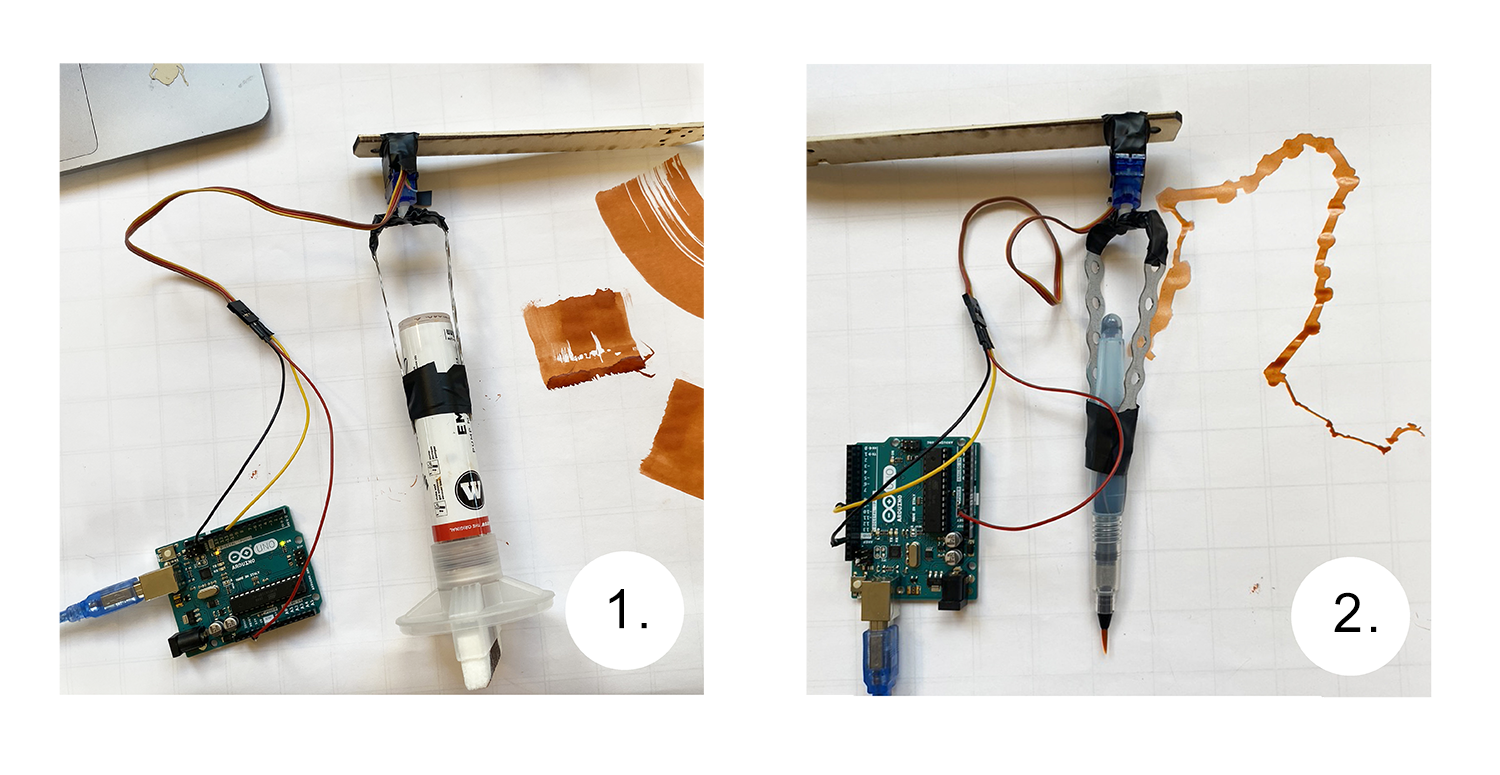
Trial 1 - I first tried with a thick, rectangular ended molotow marker. I thought this would make an interesting mark on a rotating axis. However the marker was too heavy and needed too much pressure applied on the paper for the motor to achieve much movement,
Trial 2 - I attached a watercolor brush to the end next because I knew it required very little pressure to make a mark. This actually worked pretty well for a first prototype! The brush was super lightweight and required almost no pressure. However it didn't make a very exciting mark turning on its own axis. I wanted to make another quick iteration of the brush holder that instead held the brush away from the central axis of rotation.
Pen holder 1
I made a quick cardboard cut out to hold the watercolor marker and let it rotate on a wider axis. It actually worked pretty well but because it was not on a fully even plane, it did not maintain full brush contact with the paper throughout the weeping motion.
The watercolor brush worked fairly well because of how little pressure was needed to make a mark. However when I tested with other brushes they would create too much resistance and not allow the holder to rotate.
Brush holder moving before touching paper
Brush holder after touching paper
I also tried some tests with paint brushes dipped in ink because they required very little applied pressure to make marks.

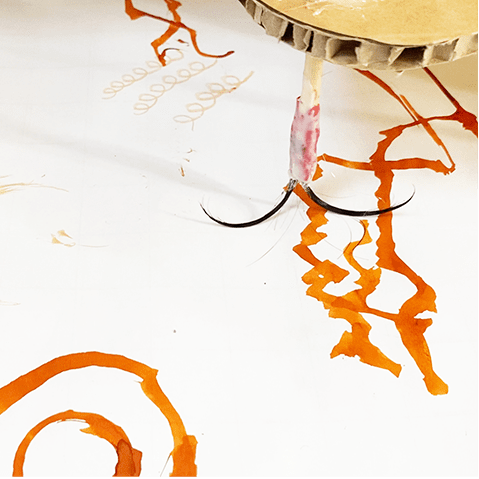
Conclusion: The cardboard was a good, quick first prototype but didn't have much strength or support to move the brushes/markers. Also because the surface was not perfectly straight the marks were not even in points of pressure. For the next iteration I wanted to make something that could fit more closely to the motor so that it could rotate with more weight attached and use a stronger material.
For the second iteration, Jiawen designed a laser cut version to cut out of wood. In the center there are small holes that allow for screws to attach directly to the servo motor. This is much more secure compared to the cardboard version. On the perimeter of the circle there is a series of different sized holes that allow for different brush sizes to fit in.
Servo motor
The movement was a lot better! Because the pen holder ws closer to the motor, it moved with much more strength. The holes did not fit the pens exactly through so the markers were a bit irregular and created by dragging the pen.
We tested this iteration with the CNC. It made a pretty wonky, funny drawing but did work. The pen wasn't gripped tight so it was dragged around in a irregular way on top of the sweeping motion applied from the motor movement. We could tell though that brush holder wasn't tightly attached to the motor because it didn't have much strength behind its movement.
Pen holder 3
Our final motor/pen holder was 3D printed for precise measurements. It had multiple spaces to fit pens allowing for multiple pens to fit at the same time. Screws fit into each of the holes for the pens so it can be tightened to grip each pen/brush. There is also holes in the top that allow it to be screwed into the motor.
Servo Brush Module Design by Michelle Vossen
Results
From Stephanie's documentation of this week
_1 Result on paper
__2 Digital File Design
Hardware was used from a previous year & pen was not fully secure
| Hardware | Brush | Medium | Extras |
|---|---|---|---|
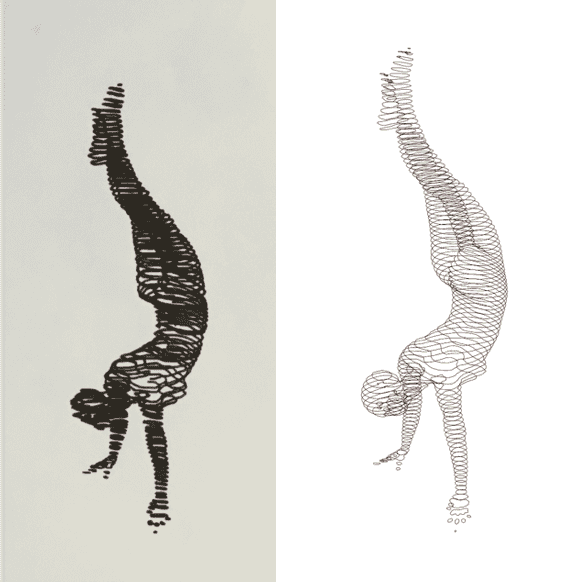
| Previous Year | Felt tip Pen | Paper | Rhino File 2D Figure |
| Hardware | Brush | Medium | Extras |
|---|---|---|---|
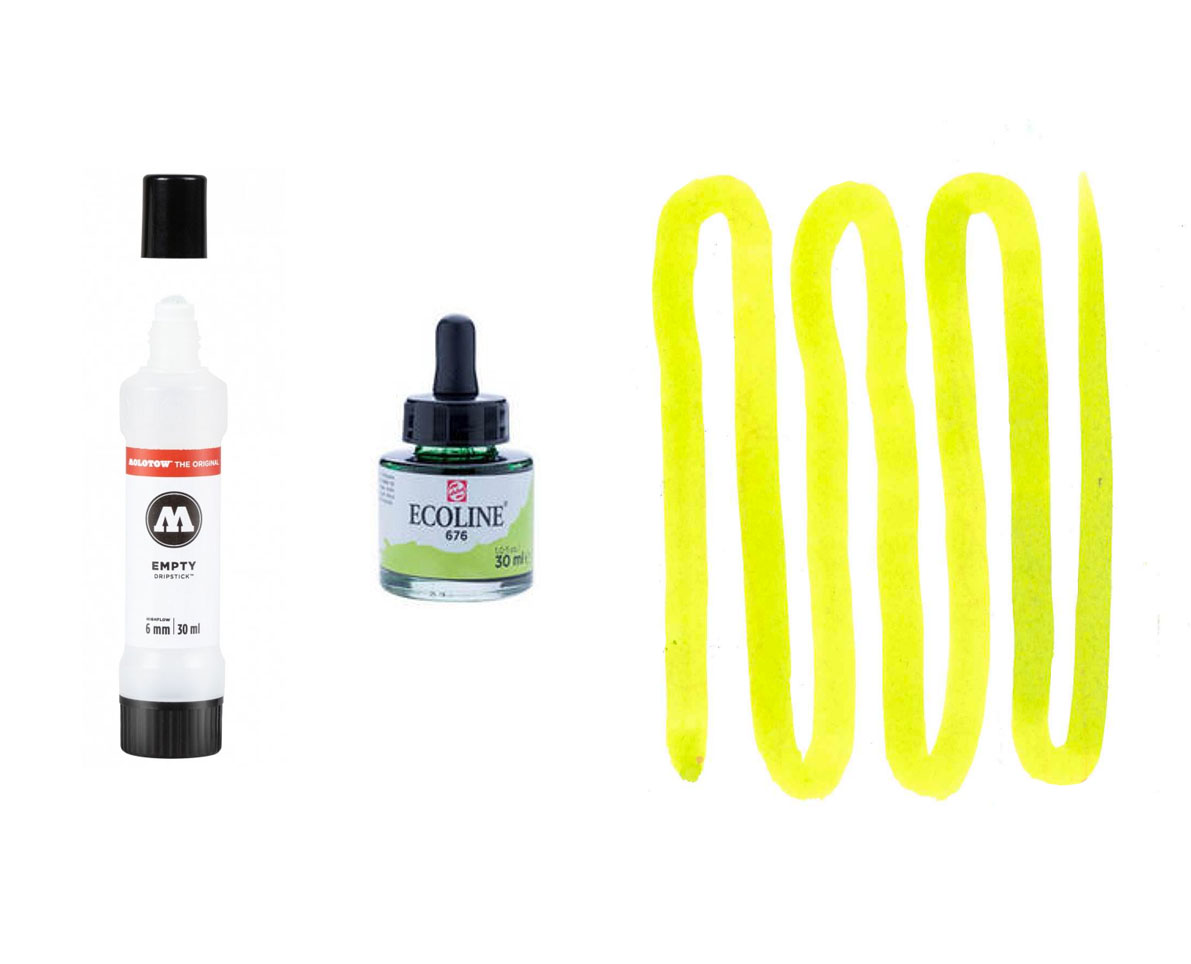
| 1st iteration | Molotow Dripstick Squeezer | Green ecoline ink on Paper | Overlapping lines |

| Hardware | Brush | Medium | Extras |
|---|---|---|---|
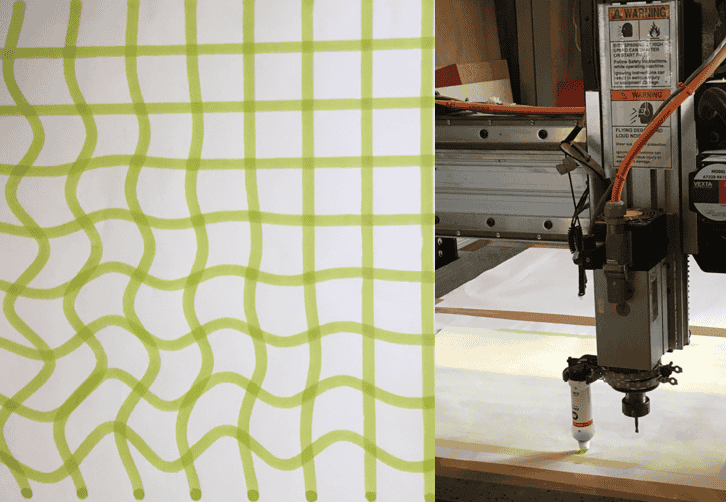
| 1st iteration | Sponge brush (adapted + cut in places) | Blue screen print ink on Paper | Brush aligned to Y-Axis |

| Hardware | Brush | Medium | Extras |
|---|---|---|---|
| 1st iteration | Sponge brush (adapted + cut in places) | Blue screen print ink on Paper | Brush aligned to X-Axis |
| Hardware | Brush | Medium | Extras |
|---|---|---|---|
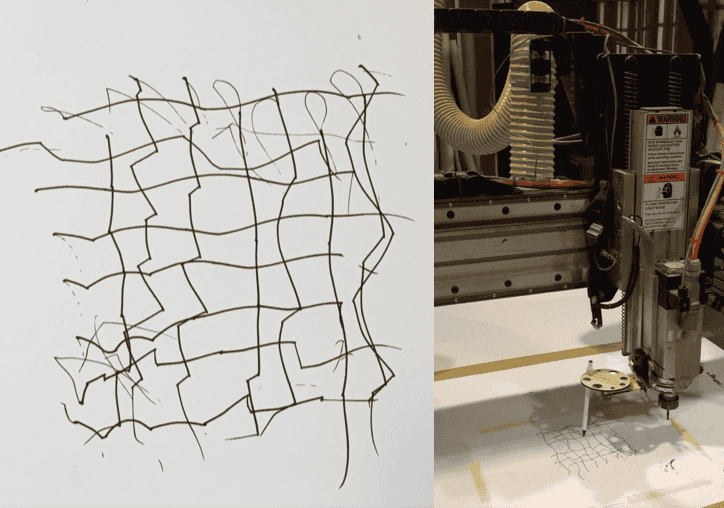
| 2nd iteration with hole pen holder (not secure = wild lines) | Felt tip Pen | Paper | Added Servo motor |

| Hardware | Brush | Medium | Extras |
|---|---|---|---|
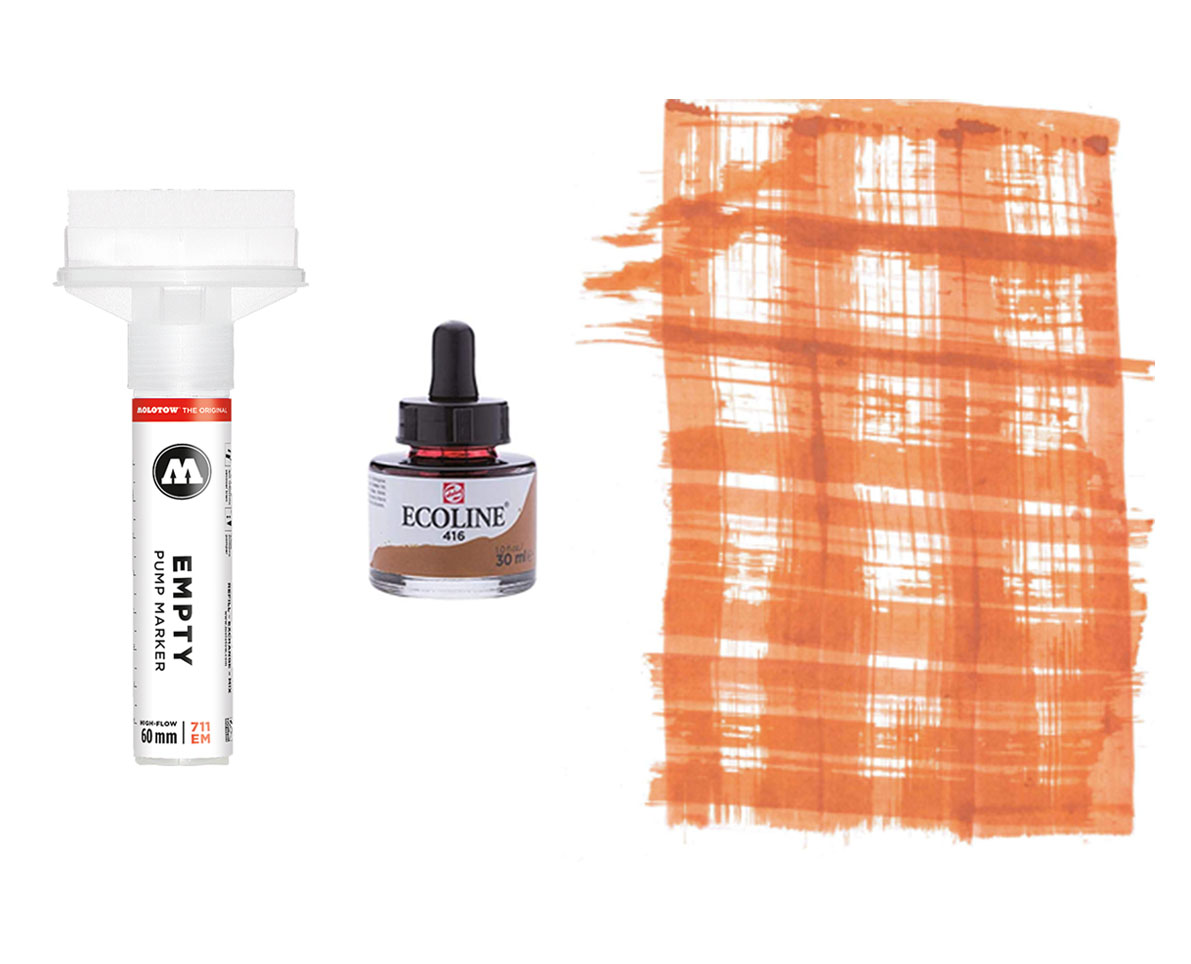
| 1st iteration | Drip Brush with Ink Reservoir | Orange ecoline ink on Paper | Rhino File Text |
Henk'S Angels 2023
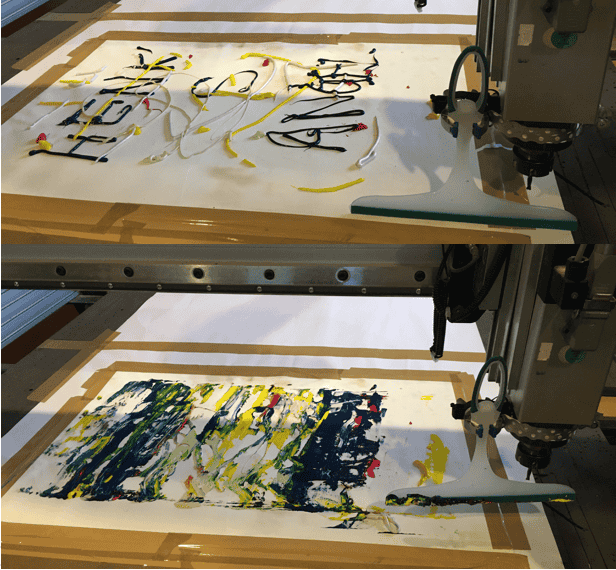
| 1st iteration | Squeegee | Acrylic paint on primed (gessoed) cotton | Jackson Pollock splatter meets squeegee |


Sunrise No.3 2023
| Hardware | Brush | Medium | Extras |
|---|---|---|---|
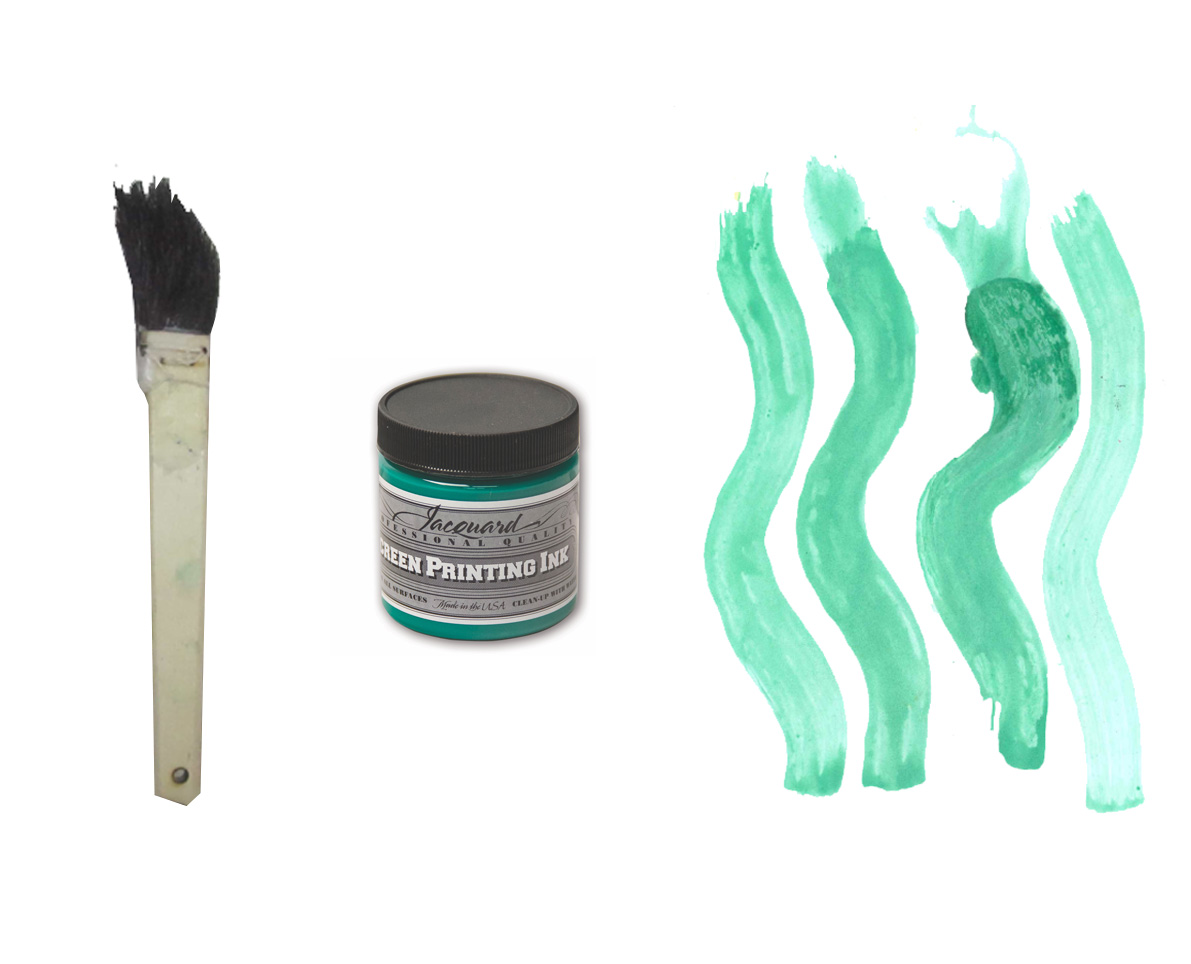
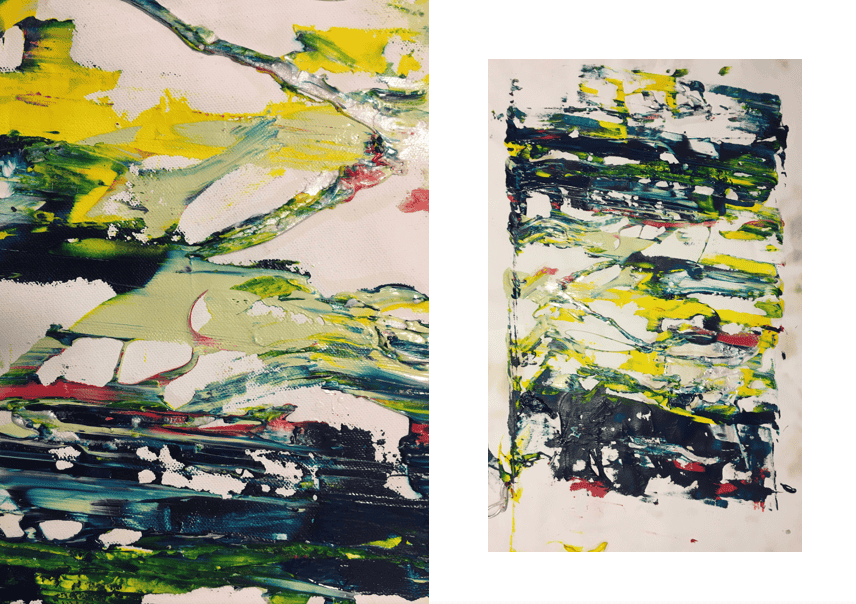
| 1st iteration | Large flat brush | Acrylic paint on primed (gessoed) cotton | Collaboration between brush, paint, surface and machine |

| Hardware | Brush | Medium | Extras |
|---|---|---|---|
| 3rd iteration | Drip Brush with Ink Reservoir | Orange ecoline ink on Paper | Servo motor movement + CNC movement |

Finale -The Final Performance 2023
| Hardware | Brush | Medium | Extras |
|---|---|---|---|
| 1st & 3rd iteration | Flat brush + upside down pen nib holder | Acrylic paint on primed (gessoed) cotton | Combination of brush painting and motor scratching |