E- vow project is a project which focusses on making weddings and vow taking ceremonies more special therefore, it is an initiative to redefine and redesign the symbol of bond during wedding vows i.e Palla's, a piece of cloth which represents the bond between the bride and groom during vows. It is a combination of organic design, natural colours and biomimicry inspired pattern.


BACKGROUND
Marraige has been one of the universal social instituition that has been established by the human society and works as a cornerstone of the same. Marraige has same meaning but different rituals, tradtions, ceremonies in different cultures. Marraige is almost unavoidable for an average Indian and there is a deep rooted, long standing and widepread tradition in Indian culture for marraiges. Beginning of this sacred relationship starts from the special day , as we all know "The Wedding Day". Marriage refers to the relationship, the long term sharing of two lives. Wedding refers to the specific ceremony that unites two people in marriage. Main focus of my project is "The Wedding Day".
In Indian culture, wedding day is considered most auspicious day of life where families spent millions and billions to bless the coupleand mark togetherness. This significance of marraige has also increased the significance of the Wedding day and the money spent on this day in pleasing guests and celebrating it. Here is an article Indian Weddings: A billion Dollar Industry. There are various reasons to the changing trends and new versions of wedding day. Presently,Indian weddings are all about creating a phenomenon where the elite weddings can be seen not simply as series of ostentatious events but a phenomenon for much effort and money is put into creating an experience. The journey begins right from the wedding invitations, where simple paper invitations are giving way to outrageously luxurious ones: the most recent being a box inlaid with LCD screens, playing a Bollywood-style video message. Then moving to Wedding venues, Wedding decor etc. India is a country of different cultures and therefore has different religions and different ways of marraiges.
The craze for Indian weddings
MOTIVATION AND INSPIRATION
Indian weddings has been far away from technology except few things like wedding decors, arrangements etc. I want to try an subtle way of integrating technology to tradition by adding value and not by interfering. Therefore, Technology with traditions is my first motivation to design this project.

Design of my product is based on four vows taken around the holy book in Indian weddings. Therefore, it consists of Four patches.
And the blue flowing water effect is an inspiration from peacocks. Blue color with the effect of flowing and to the center of the piece without looking like LED is the major challenge.
I really appreciate this dress but I didnt like the dot effect on dress which are basicall LED strips visible. After watching this, I was determined to show neopixels effect as flowing light than showing source of light.
Design has been inspired by peacocks, "Peacock, the national bird of India is a symbol of grace, joy, beauty and love. With its majestic crest of feathers, the male of the species is more beautiful than the female. Spreading its beautiful bronze-green tail, it attracts every onlookers attention. Capturing the ethereal beauty is this Mad in India diary for the true-blue nature lovers." as mentioned by Mad in India
When it comes to choosing a mate, the peahen is the boss
CONCEPT
E- Vow is a product redefining bond, love and togetherness which are the most relevant terms for a wedding. Its combination of multiple aspects. You can see my GANTT CHART how I planned and executed my final product. HEY HERE

1. Peacock inspired Design:The design has taken its inspiration from peacocks in terms of the theme, color, shape, pattern and symbol of love.The center of the Palla is an symbol of 4 rounds of vows taken arod the holy book.
2. Bio dyeingBiodyeing into a peaceful blue
3. Beautiful Pleating : Fabric Manipulation
4. Digital FabricationVoronoi Laser etching and cutting
5. Textile scaffold:Soft to hard
6. E-Textiles 1: Serene view of Lght flowing from hearts to each other
7. E-Textiles 2Pulse sensor to share the most private information among each other
DESIGN
Designing took me longer than I thought. I knew I wanted a pattern to support my concept, so I decided to follow the patterns on peacock , they were influencing my ideas throughout the design process. initially I started by wrking on the hard neck piece for wedding palla cnnecting groom and bride but it didnt fit well in the concept, you can check that out in Textile Scaffold
I started designing my cncept on Skechup using Viz,Viz adds parametric modeling to SketchUp. All your modeling history is retained, you won't need to redo all the work anymore.You can try by intsalling its trial from here VIZ
via GIPHY
Viz is Sketchup's not so elegant nor optiminal answer to Grasshopper.I just wanted to give this a shot too as it was much talked about during Trimble's recent Basecamp in San Diago which I attended online. But Alas, inspite of it seeming much easier than grasshopper, its somehow not lightweight and does not optimally utilise the PC's GPU. It tends to crash and hang and so I did make a voronoi but the sheer processing time on a 32 Gb ram driven i7 still seemed less for VIZ.
I was trying making Voronoi pattern by following this tutorial, but it too me long due to no shorcuts in the software as well as less options.
I stopped here, and continued my design without Viz. I continued on SKetchup, played, enhanced and modified it on Meshmixer, to see trials if it can be made better.
The process started with meshmixing a few designs I generated together into a single mesh.
The next step involved mirroring so as to get a perfect symmetry.
Here you can see a perfectly symmetric yet organically growing design meshed into a single triangular mesh.
I moved my3D model to Scan2CAD because my 3D file was not to be 3D printed but laser cut which requires 2D vector drawing instead of 3D stl. Since it is difficult to loft without giving errors, I took a screenshot of plan view which is a jpg and used scan2cad to convert that jpg to a vector that the laser cutter can understand.
I initially got good vectorisation results only to realise that I am unable to export the vectors due to my trial having ended.
Luckily a newwer version of SCAN2CAD's launch made a new trial period possible.
Here I simultaneously kept Photoshop open as I needed to Layer out seperately the parts I wanted to have etched. So basicaly, We needed a raster image(for etching) and vector image (for cutting) both on scale and perfectly aligned in RD works to get my fabrication results I wanted.
The image on the right is my first result, The one in the middle is the 'to be etched' design's one of the many iterations on scale and one on the left is a combination of CUT and etch.
Shown above is the original concept's material choices. I took out silicon as the it was not possible to avoid the fabricabsorbing the silicons without ruining the fabric.
E VOW: "Redefining Bond" by nishtha on Sketchfab
MATERIAL AND DEVELOPMENT
The first step to my project afterhaving a clue about the concept was to find material. I went through different materials like chiffon, saturn, silk, cotton, synthetic.


 By TAEG NISHIMOTO


I divided my design into layers where I needed:
I began by selecting the right color scheme for the Palla, so above are the trials for the same where Blue attracted me because pink and red are too common in the wedding being considered the bride color. Though we dont use black and white in indian weddings,but now in modern times people are open using any colour but still not White or BLack or fadded colors.
After selecting colors, in above picture I started measuring the amount of fabrics I need for different layers.Also, I read a very nice articles on Pleating and smocking and it said to hav cloth of 2 times the size your need. I actually end up making a larger piece and i had to cut alot of my hardwork out after introducing the Groom's back concept.
1. Light blue base : First started by washing the cloth and soaking it in alum for sometime and then used Indigo ready made powder avaiable unbranded in our local market. This has been dyed using Indigo.
Seen above is my Dyeing the 5-6 metre long fabric with blue indigo in the traditional way.
Above shown are two concepts I really wanted to try but for my first iteration, I will use simple pleats. a Better iteration of this final project will utilise the pleats shown above.
Here I am measuring and marking my fabric, which I am supposed to do in laser cutter but due to busy laser work.
I started pleating as you can see above, wherein I used 4 dot system where I had to pick first dot and match with the third of the above one.
I had to hold the shape of a cylinder of my Light blue piece so I bought Bukram,which is basically a stiff cotton fabric, I got one which can stick by ironing, I tested it and then used it on my pieceafter pleating. I messed up things while sticthing the cylinder the inner side, had toopen the whole piece and stitch it again.
Here is the Pleating Video
Final pleating SHOT
When width was too much for the cylindr, after calculating the circumference of the cylider required , i cut my piece as per my measurements which was, Circumference is 32 cms.
Above image is the front, stitching the cylinder below.
The white sheet is theBukram (stiff cotton) tomake sure when i fold my Light blue fabric, it take cylinderical shape.
Figuring out the color of my thread to make sure it looks like a design when assebmling or if Thread is visible, ended up choosing dark blue.
My whole cylinder was so around 3.5 metres, Had to cut it short into 1.5 metre.
2. Dark blue : Laser etched and cut velvet cloth used for showing Lavaans.
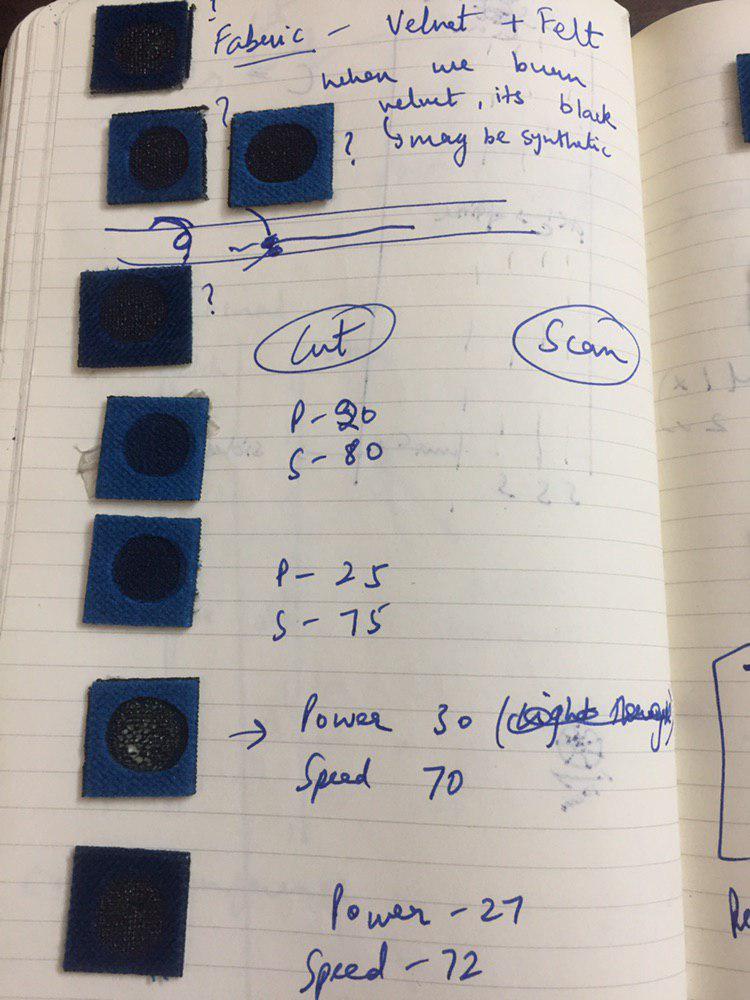
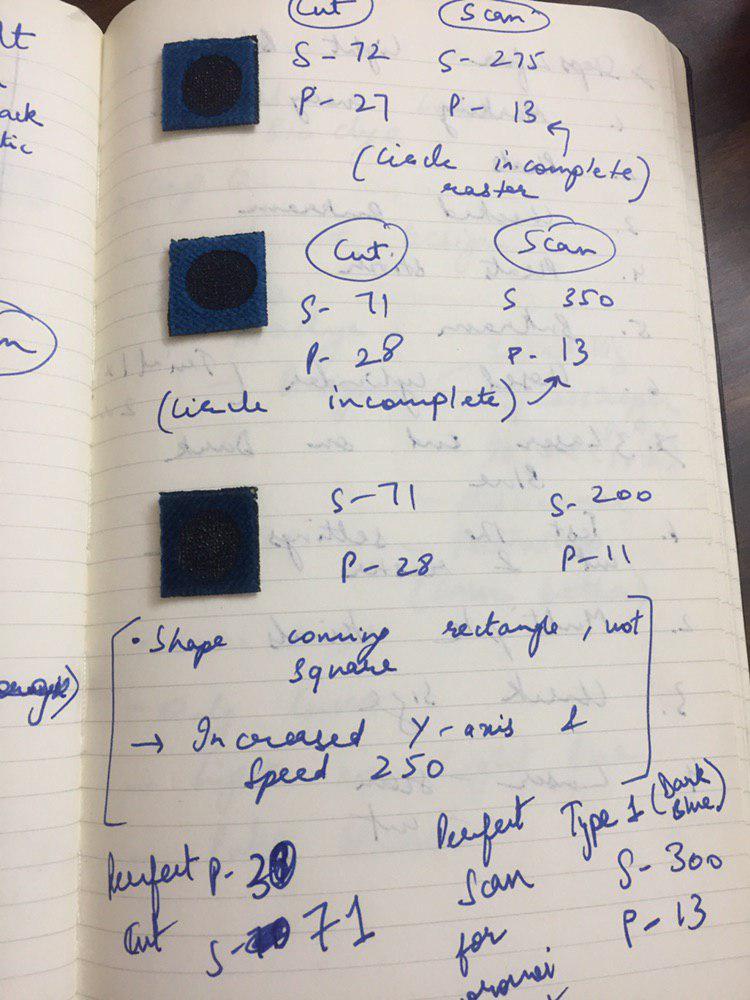
Testing the material with right power and speed.
I tried the cut and etch on my Dark blue piece, if you see closely on my quick notes done while working,I loved the second lst one, which had bit burnt holes as I wanted to show light blue in backgound but again, its burnt so it can tear further on stretching.
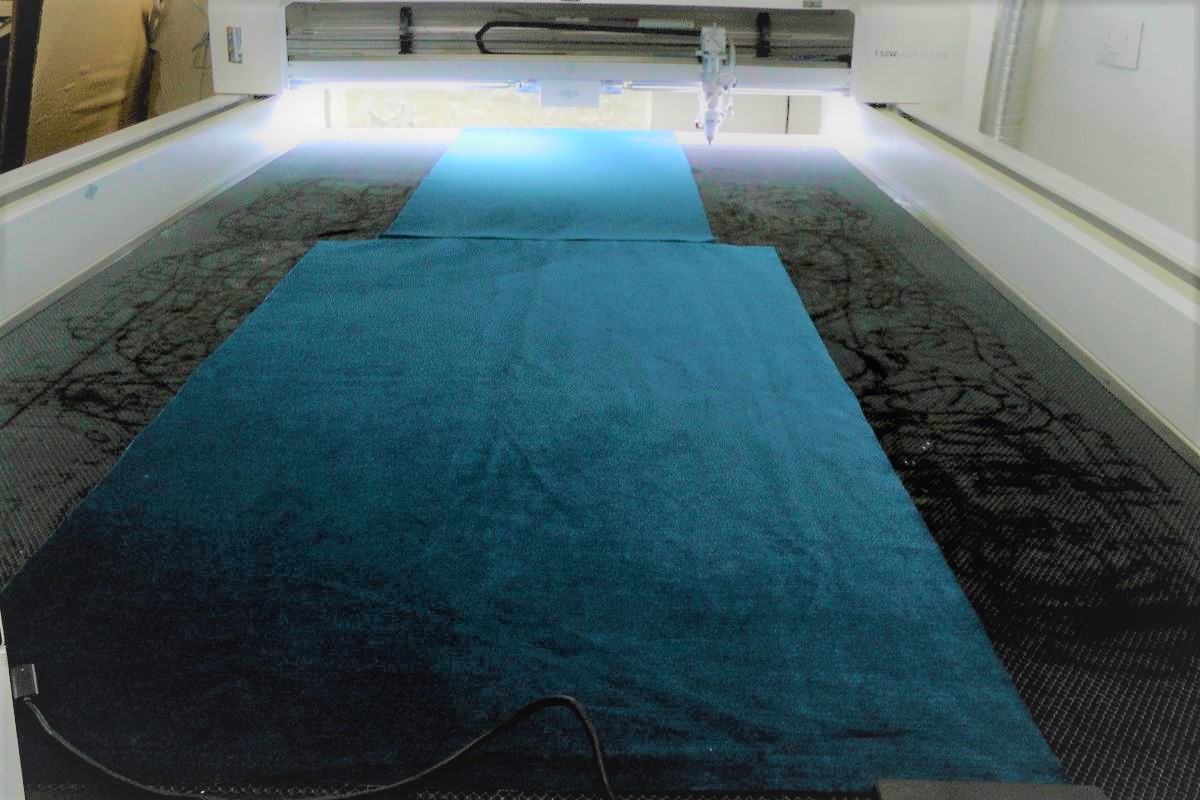
We hd different laser bed , so we first had to switch laser bed to honeycomb. (why) "When your artwork is very dense or we are cutting a less rigid material such as paper or fabric we need to use the honeycomb bed to keep it evenly flat as the pieces are cut. Due to the nature of repeat cutting, residue from the materials will build up over time on the aluminium honeycomb bed and the heat from the laser can cause these residues to transfer back onto the material being cut."
Rastering is Speed-300 and Power-13, its showing 3 hours . 49 minutes ut was a 9 hour cut. full attention of 9 hours on laser.
Below is the cut with speed-71 and Power-30, cutting took 2 hours and 30 minutes.
Safet measures for LAser cutter:
-Only operate the machine while an instructor is in the room.
-Never leave the laser cutter unattended.
-Only cut materials approved by your instructor.
-Use safety glasses when watching laser.
-Clean up debris in the laser cutter.
-Identify the fire extinguisher and fire blanket.
Detailed measures can be found here LASER SAFETY
After the cutting and etching, I partially assembled it around my light blue fabric. Frankly, I was so happy to see this colour combination turn out well :P
Just folding it and checking if my idea of hardening the center part is required or not. but it did, It should look like externally holding the cylinder.
3. Shaping: Textile Scaffolding using resin for giving shape.
A series of experimentation in fabrics behavior towards light, the Misha series, labelled #1 to #4 consists of four ingeniously designed table lamps. Square pieces of white fabric dipped in fabric hardener are hung from their edges. Then from certain key points the fabric is pulled up and weights are placed in the resulting creases. This is now left to dry and harden as a structure. This is now taken and placed upside down and places in a plastic tube containing a bulb with metal wires.
Important things required for this process.
-Protective Gloves
-A craft or Popsicle stick
-Small disposable mixing cup
Put on your gloves and remove the caps and mix Resin and hardner in 2:1 and mix it thoroughly in the mixing cup.
Apply it on the back of the fabric and spread it. Here I am using plastic bottles to lay the pieces down and test if they take a still shape of the mold created through plastic bottles.
It was great to see that pieces took the shape and were stiff , so when kepton flat, they were in the air like a statue.. Great
Now I am doing the same on my Palla, here it is important to notice that its only the center Four Voronois which are hard, Rest of the Piece still soft. The part which would be hanging between the Groom and bride is hard cylinder.
Left it for 12 hours initially with test pieces and main piece was left for 24 hours.
PERFECT !!!
IMPORTANT THINGS TO REMEMBER: - Do not touch resin without gloves, while drying it releases fumes even while mixing, be careful with that. Dont inhale.
- Ratio should be perfect. Mine was 2:1
- I didnt wanted to waste resin so I did in parts but continously.
-Corners of the Voronoi were important to have good amount of resin as they will hold it togetehr in the air, eventually it will help cylinders support.
4. Electronics: So I started my Final project with electronics to see if i will be able to incorporte it in my final project. So I began by working on Pulse sensor.
It worked well with Arduino, wwas able to have readings. Tried it with Vibration motor, worke well except I was not able to control vibration motor based on pulses. SO I moved on working with neopixels. I tried various Iterations where I worked with Neopixels directly intsalled on Palla. Then Fabric led strip but all these were so bright and Iwas looking for "Water flowing effect" like running water , well diffused. uh, this image can bring my imagination right.
This is most important where neopixels signify the bond flowing to the center and pulse sensor and vibration motor shares information with each other.
But its not as easy it sounds, I might just show one single code bt it took me long time to fix this as per my idea.
Installing libraries on Arduino IDE, after i tried pulse sensor , vibration motor and neopixels on Arduino. I moved on to Arduino Pro mini.
Innstalling libraries for neopixels. The most helpful link for beginning with Neopixels was THIS
Well, when while working on this I came through issues besides coding, that was getting hold of vibration motor. I broke almost 3 vibration motor through the end then I triedthis and it worked.
Same with pulse sensor, I used both side Velcro tape to attach Vibration motor to hand and pulse sensor on to the finger. I have small hands so asked someone to help me give a bit bigger size.
So now after all trials, I planned to use Arduino pro mini, and to support I made this support board to hold capacitor and resistors required for Vibration motor.
Power requirements
20mA (1/3 of 60mA) * 72 (Neopixels)=1440mA
1440/1000=1.44 A
1.44A is partial neopixels glowing in sequence
Reducable to 600-700mA on using 1000u capacitor
60mA * 72 (Neopixels)=4320mA
4320/1000=4.32 A
4.32A is all neopixels glowing together
Therefore 3.7V, 600mA LIPO would be sufficient
Assembly
Below is the final Assembly, willbe updating a video with the couple using the product soon.
