2. Digital bodies
Class Notes
September 29th 2020 by Anastasia Pistofidou
Throughout our history we observe that the human body and its representation are of high importance in arts, sciences, medicine, psychology, etc.
A fashion designer uses the human figure as his white paper to produce his masterpiece. In the same way authors were using pencil and paper, then typewriter, keyboard and currently voice dictation, the tools of the fashion designer evolved through time.
On the way of enabling mass customization, the fashion industry is claiming for new tools that can scan and fabricate unique digitally tailored garments. How can one have access to a digital tailor that responds to his specific needs?
This class introduces new digital tools that complement hand tools in order to design, represent, make and modify the human figure that can then be used as a canvas for creation. A challenge to fashion designers to step away from the simple copy of the human figure as support of his work and start his creative process from its very beginning : the design of the canvas itself.
During this class we had an overview of tools and softwares that can be used for designing and prototyping our ideas.
Program outline
References of the representation of the human figure in art
The mannequin in haute couture
Human proportions
Measuring the body
Digital fabrication techniques : waffle, stucking, triangulation, radial, bending, kurf patterns
Scanning
Laser cutting
3D printing
CNC milling
Vacuum forming
Materials
3D Scanning
3D Modeling
Assignment
I am particularly thrilled with this week assignment and class, as the body, its forms, and its representation is a topic of my interest. I did my thesis investigation about body, identity and dressing; I have also been investigating about body social construction, specifically through gender, and about the political dimension of body representation.
Research
Bibliography
I started searching for bibliography and found some very interesting articles about human body and disciplines such as art, design and architecture.
- Le Corbusier and fascism: Looking at architecture iself. Study of human body proportions for the development of Modulor system
- Human engineering: The constraining mensurations of Joe and Josephine
- El cuerpo diseñado
I also found two articles that specially caught my attention, because they show the political dimension of the representation of the human body.
The first one is an article published by two anthropologists in 1996 called Toward Decolonizing Gender: Female Vision in the Upper Paleolithic about the so-called "Venus" of the Palaeolithic. According to the authors, the Venuses are the first three-dimensional representations of the human body found in the European Upper Palaeolithic: statuettes of feminized, naked bodies, about 15 cm, found in different parts of Central Europe. It is estimated that they were created between 27000 and 21000 BC, with materials such as stones, bone, ivory. According to the authors, although there is no consensus about why they were created or what they were used for, they have been generally interpreted as fertility symbols or amulets because they all present "exaggerated sexual attributes": large breasts, prominent buttocks, hips and thighs. However, Leroy McDermott and Catherine Hodge McCoid propose another hypothesis: these figures were created as a form of self-representation, by the women themselves. To this end, they conducted research that included a series of comparative photographs. This approach reverses the classic-modern roles where the artist is usually the man, and the woman is usually what is represented, and she becomes the creator from her own vision of her body.
On the other hand, reading a recommended article in class Old Media, Digitized, Make New Forms I found another article called Transgender Digital Embodiments: Questions of the Transgender Body in the 21st Century. Both readings lead me to think about the possibilities that digital media gives us to produce our own bodies, from the point of view of the representation but also the possibility of manufacturing body extensions, prostheses and elements that transform us, shape us.
Artist
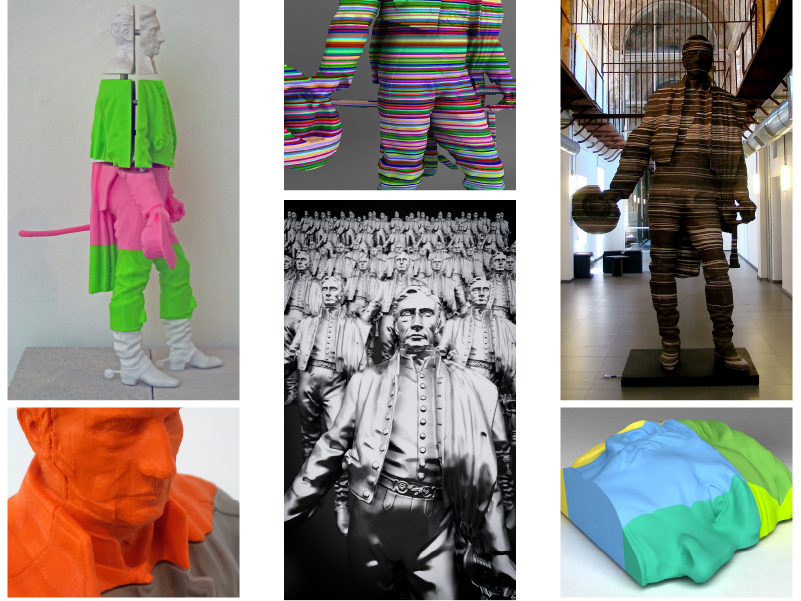
I also did some research in artists that work with body

Artists from Uruguay
Regarding human body representation, 3D scanning and digital fabrication technologies, there are two very interesting projects from Uruguayan artist:
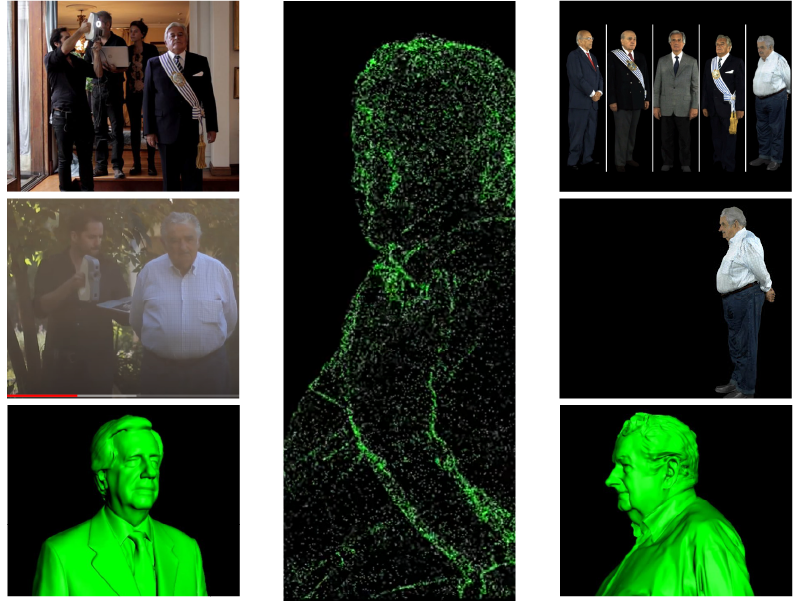
The last one, made by Fernando Foglino, was developed togheter with FabLab MVD
Process
Step 1: Generating a body figure
3D Scanning
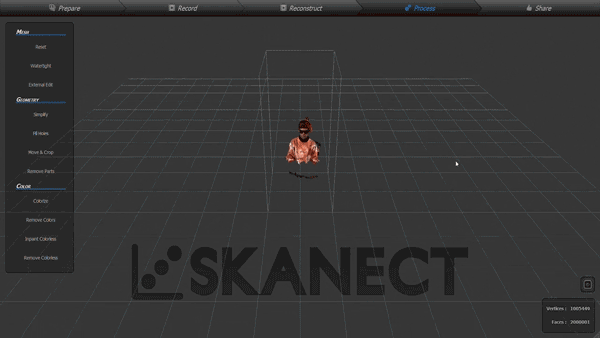
We had a tutorial on how to use different technologies to make 3D scans, for instance, with a Kinect, or using Skanect software and 3D Systems Sense Scanner.
In FabLab MVD photogrammetry scanning technologies are commonly used to scan landscapes. There is also a small 3D scanner, MakerBot Digitizer Desktop 3D Scanner, and a Kinect. However, I have never used any of these technologies yet.
I downloaded Skanect software, installed Xbox 360 Kinect drivers, and started doing tests. I had lots of fun scanning myself (I even scanned myself drinking mate), but the results were not as good as I expected. I will continue to investigate!
MakeHuman
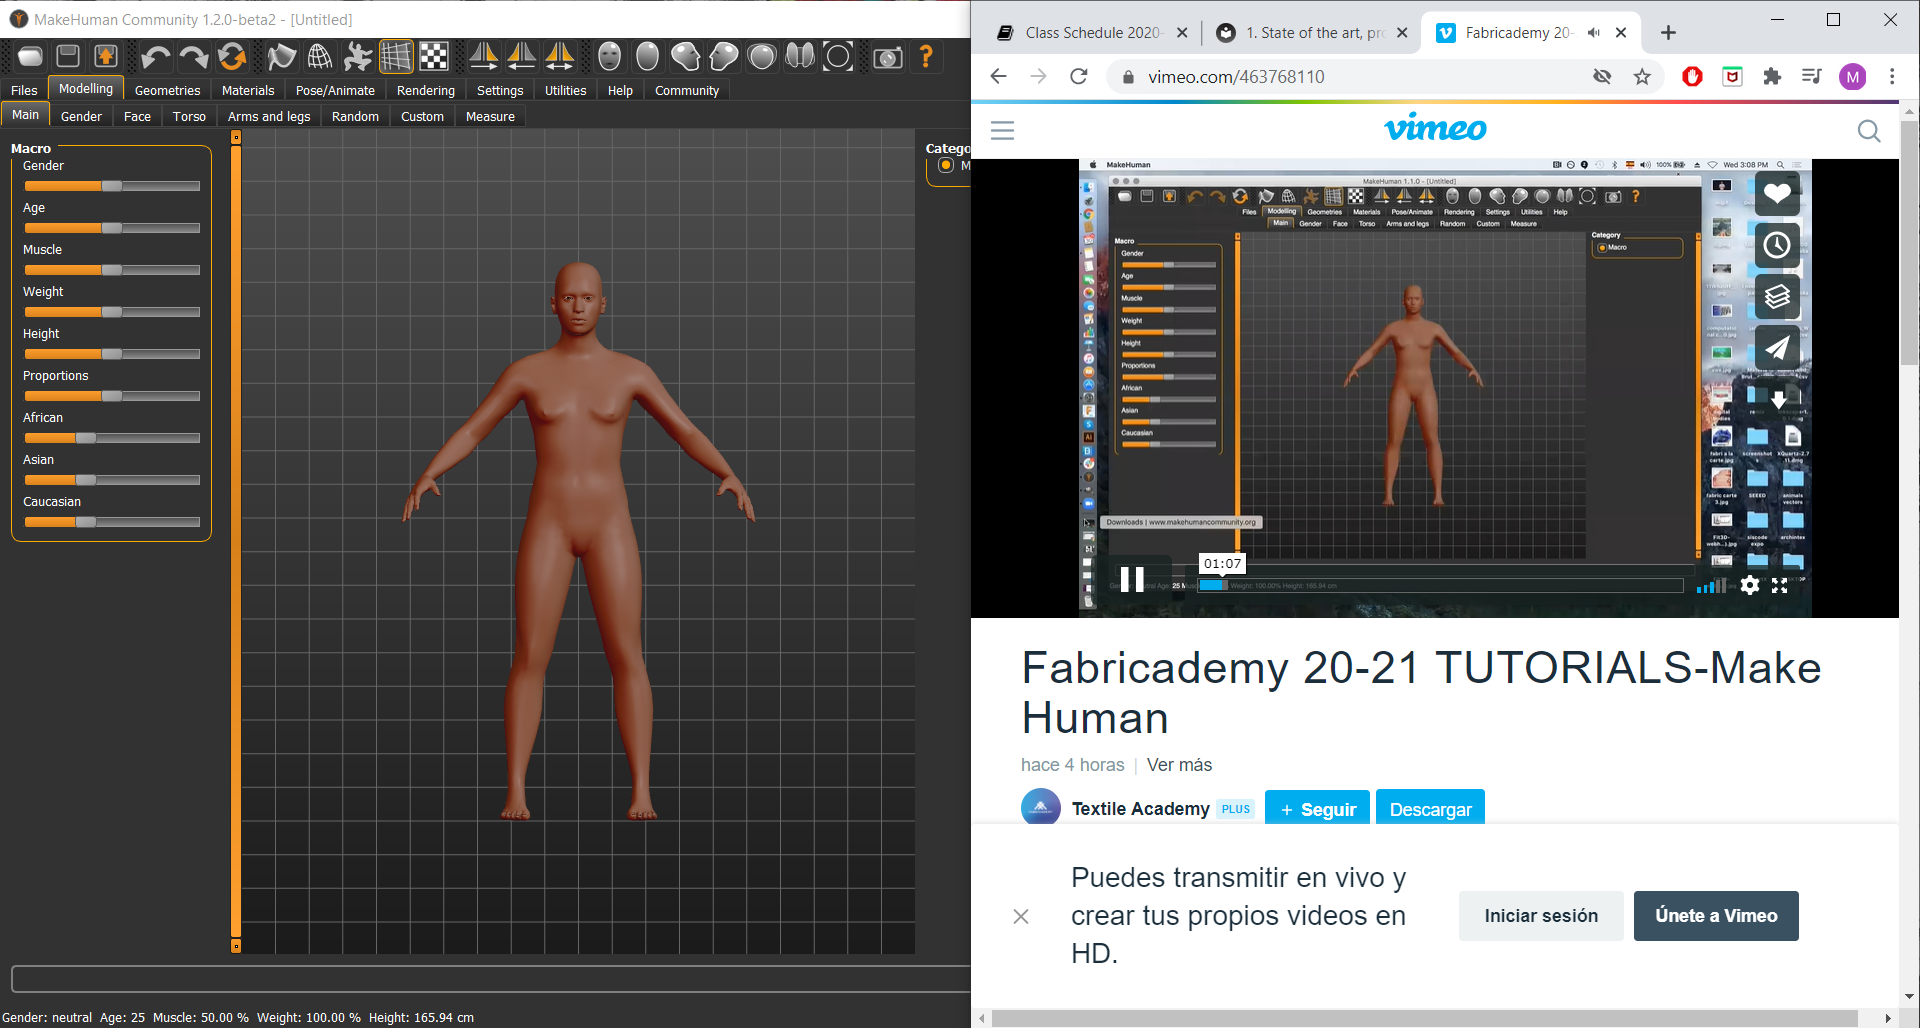
We also had a tutorial on how to create human figures using MakeHuman. Although I had tried this program in the past, in this class I learned new tools and new possibilities. I even downloaded a new pose, which I finally used in my 3D model.
For this exercise, and based on reflections raised by this week's research, I tried to make a curvy body, with measurements bigger than the ones of the traditional mannequin. During my training as a fashion designer I was taught that the standard size for pattern making is 44, and all the mannequins available at the university, and on the market, are that size, which is quite surprising as most of the people have bigger bodies, with different measurements and shapes. If clothing design is, as Andrea Saltzman says, a redesign of the body, it is time to work with measurements and shapes of real people, and not with normative bodies with impossible shapes. After I created my model, I exported it as a .obj.
Step 2: Editing digital body
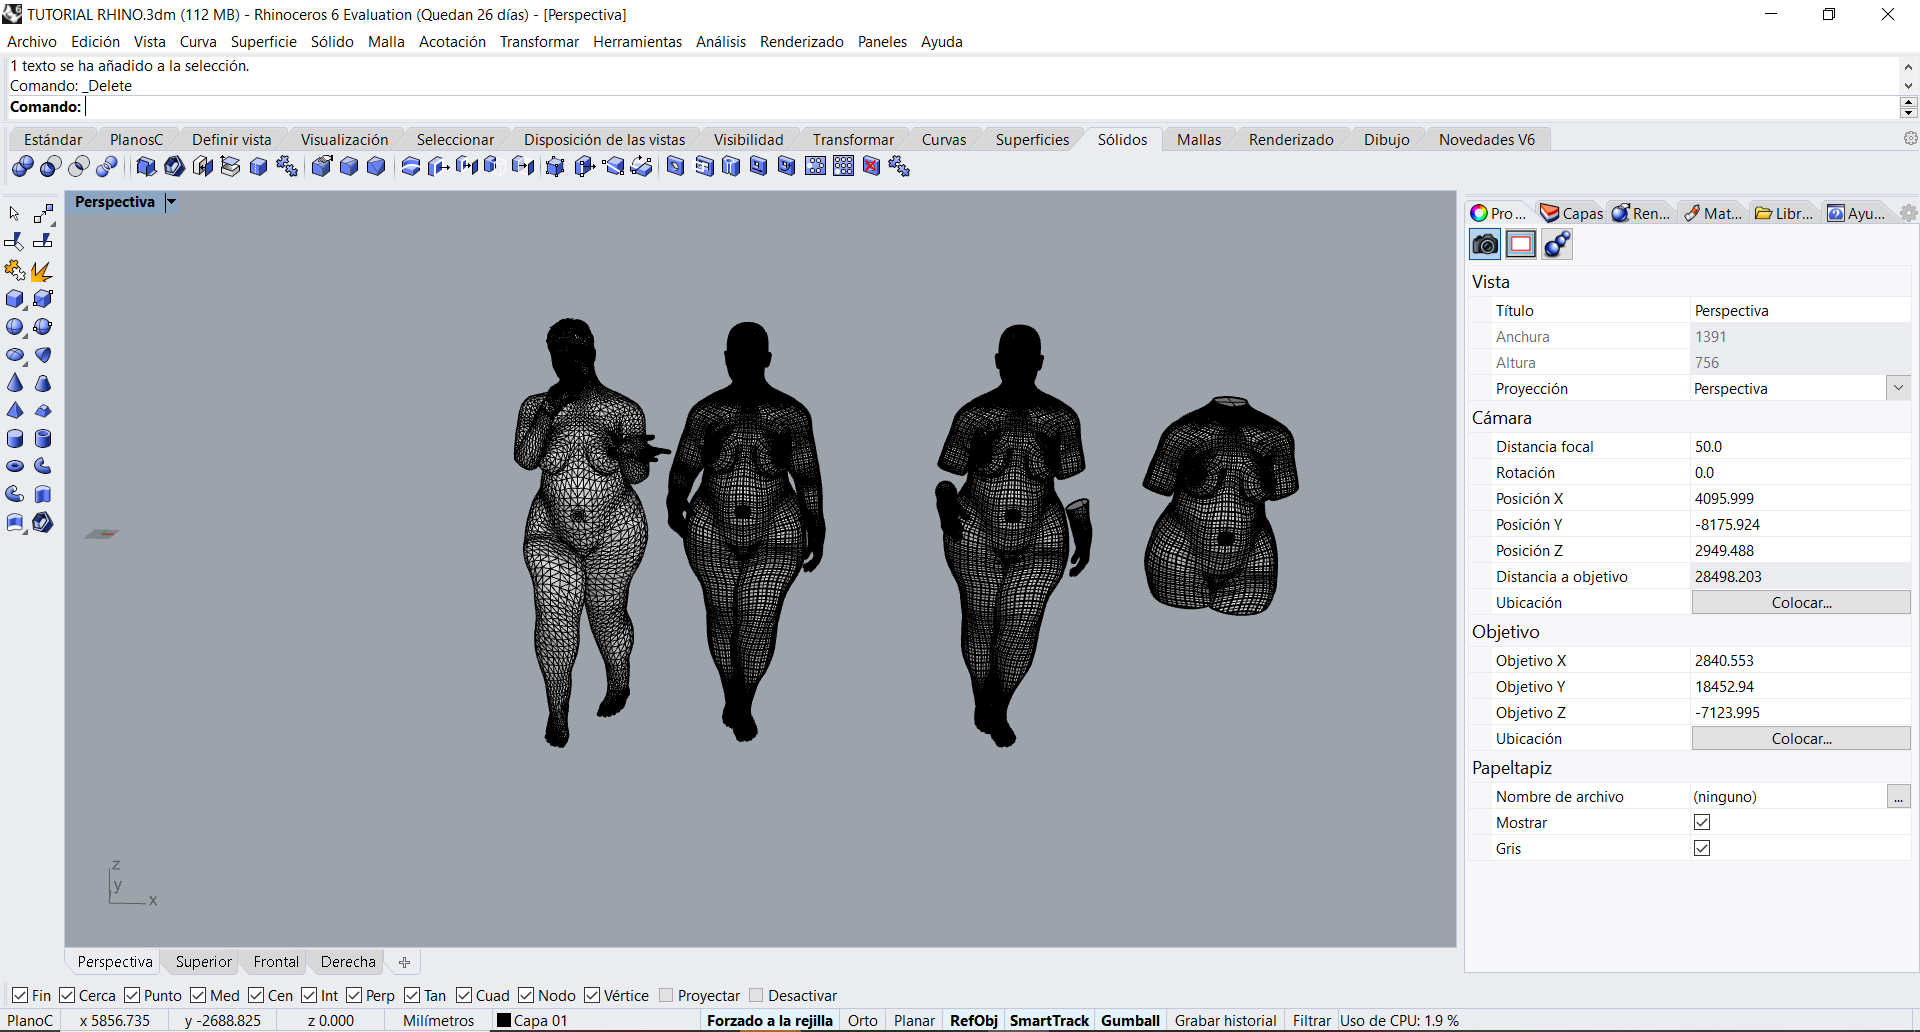
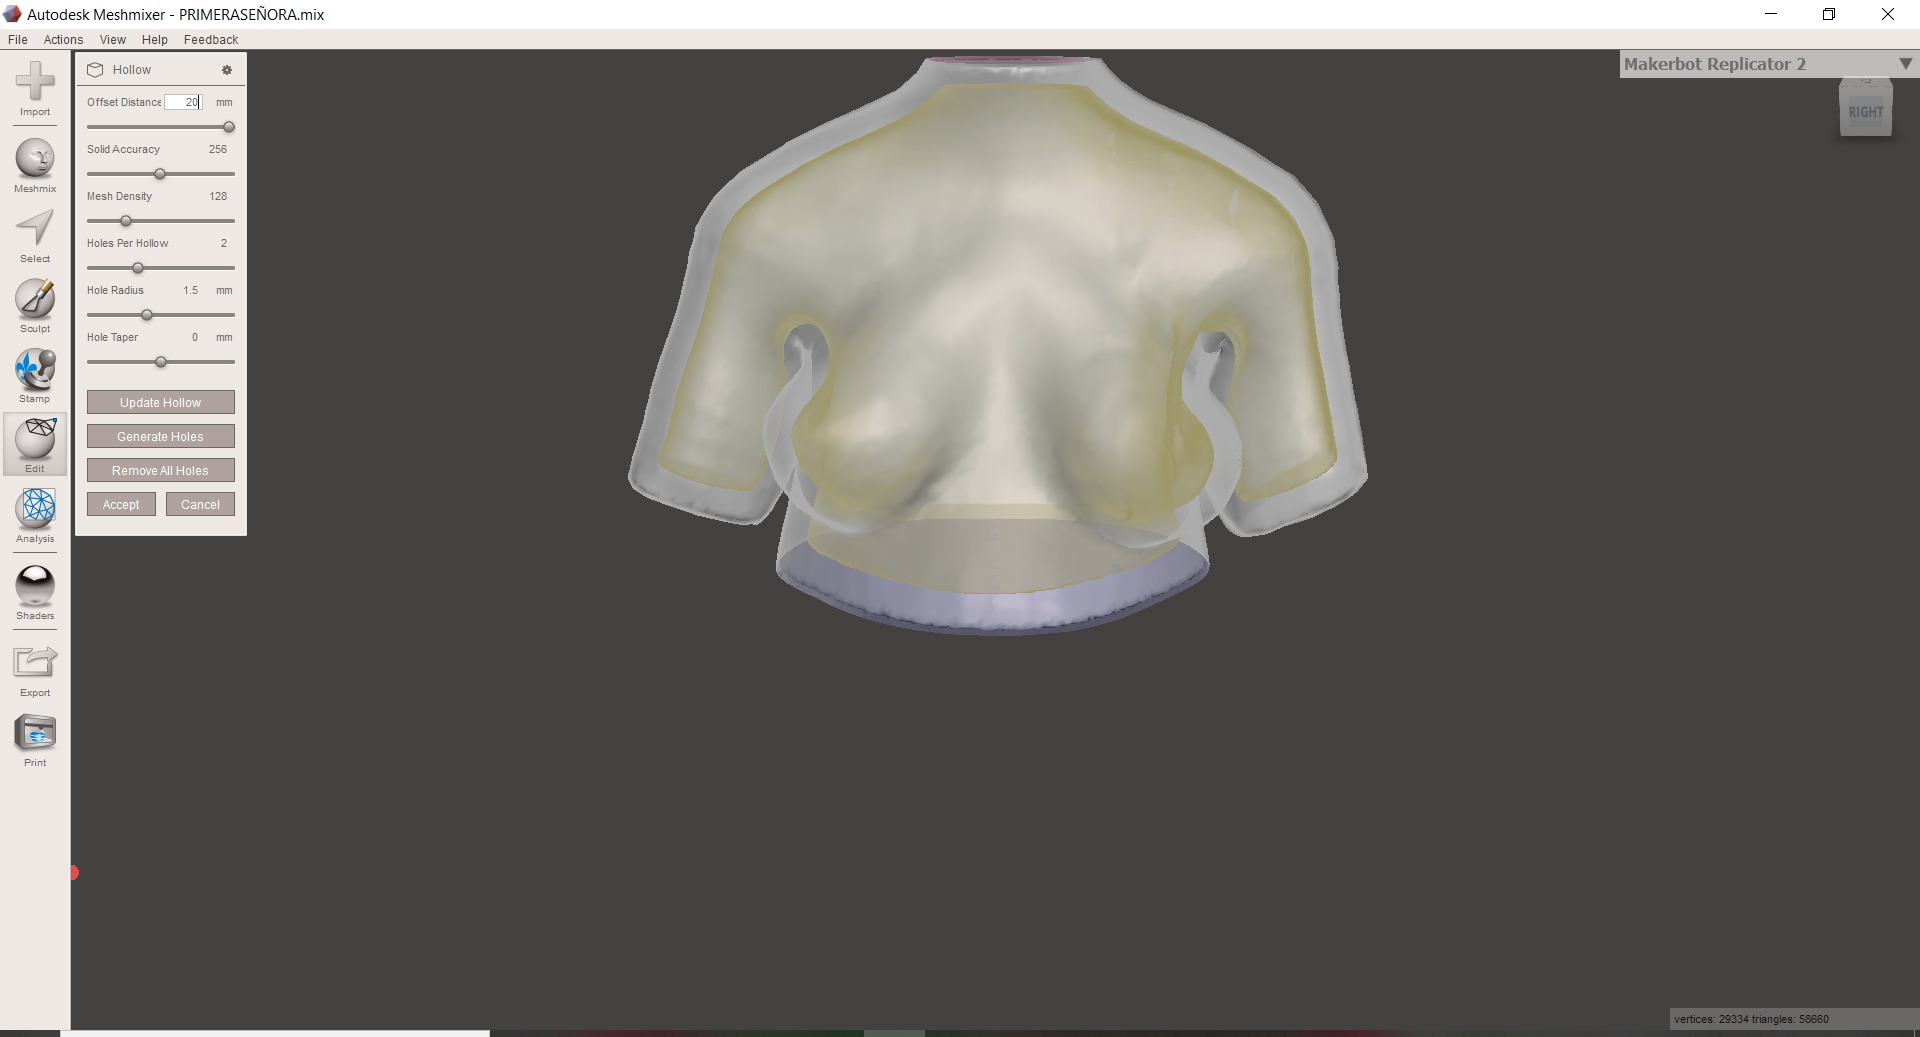
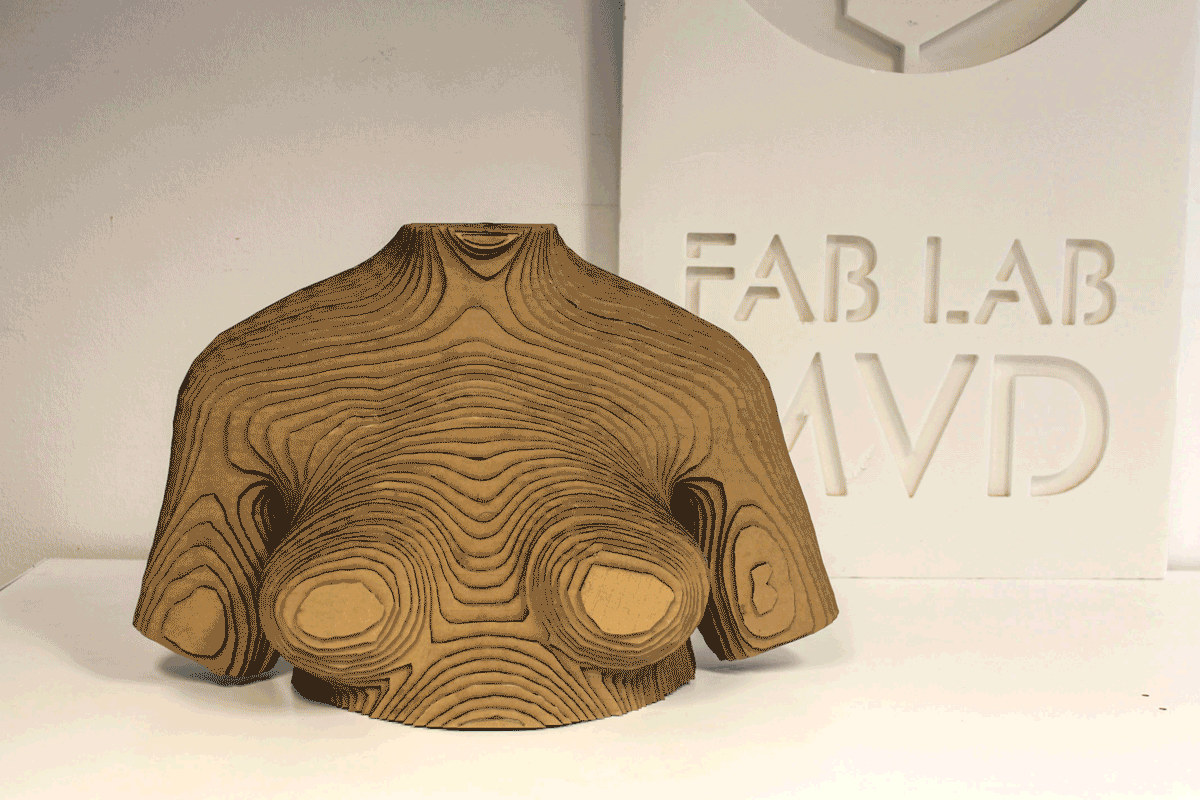
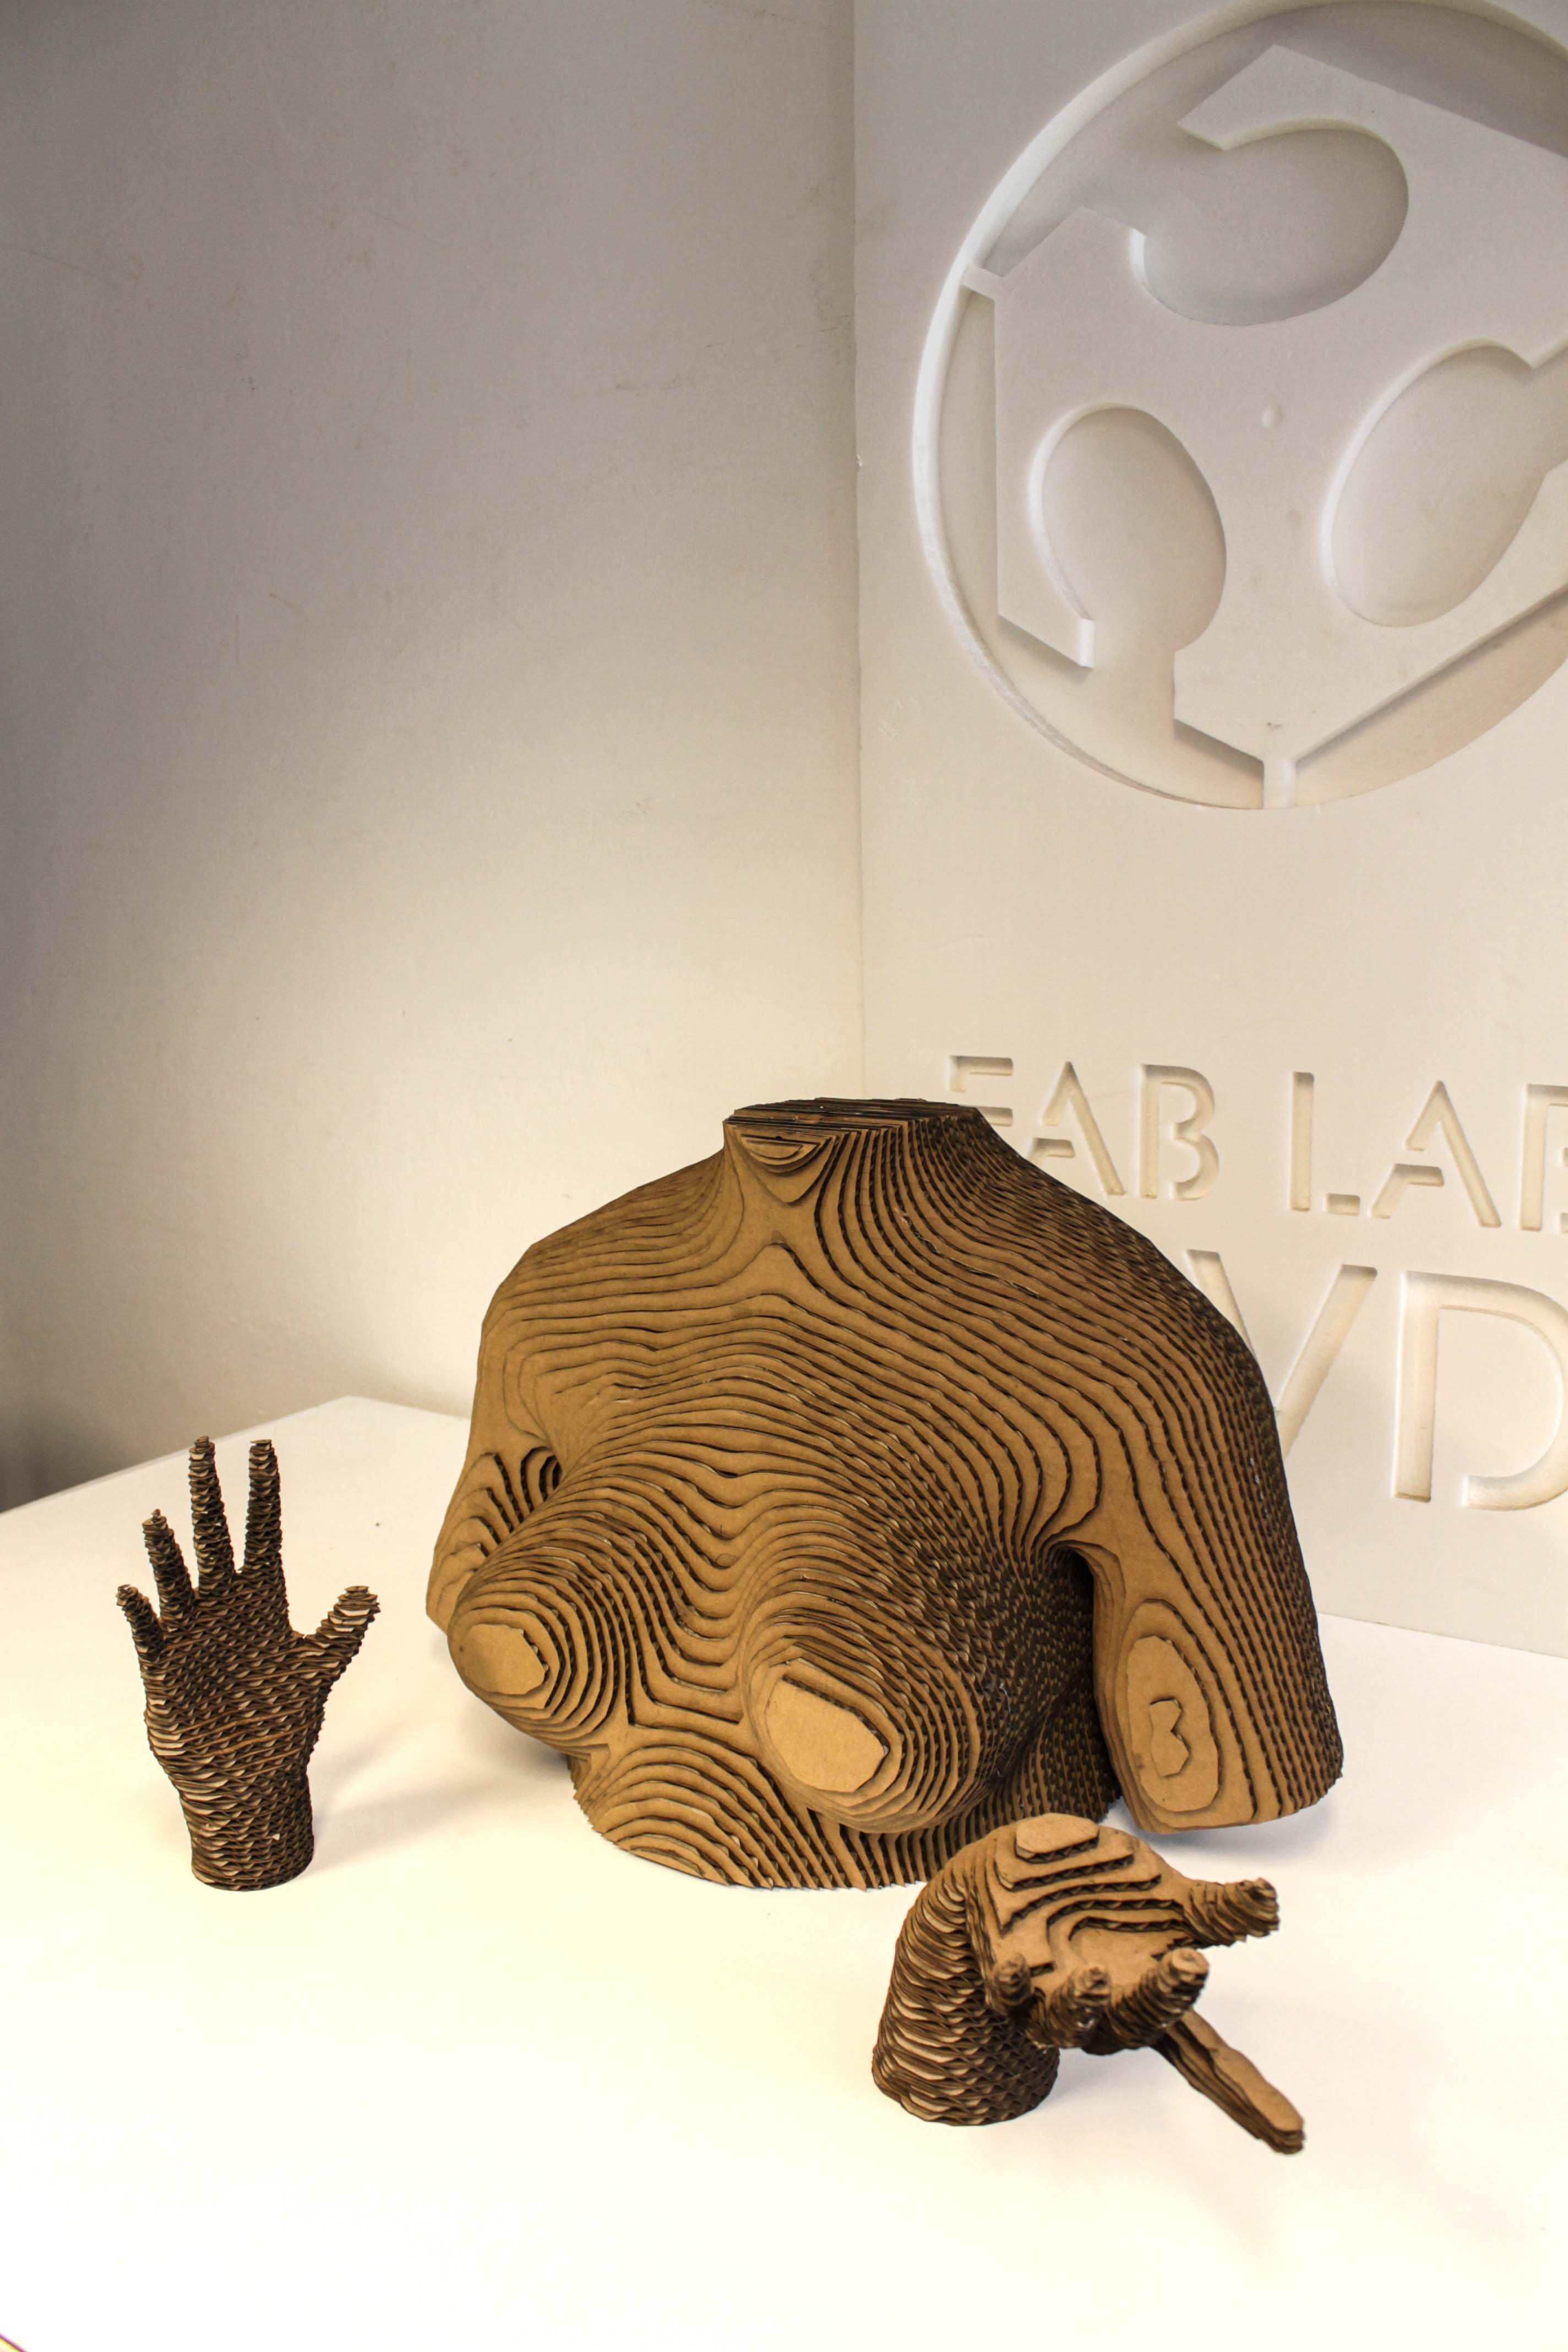
Once the 3D model body was ready, I cut it using Rhino, and then I did some final retouching using Meshmixer. I decided that I wanted to make a bust, and both hands of my model in 1:1 scale.
Using the MeshMixer, I made the bust hollow to make the prototype lighter, and also it saves material.
Step 3 : Digital Fabrication: Preparing files
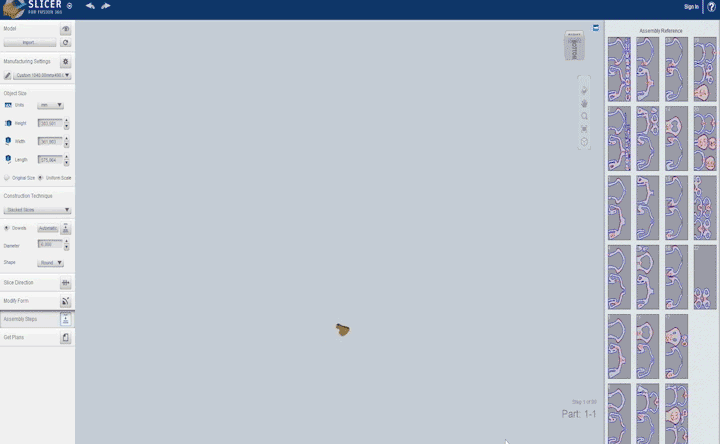
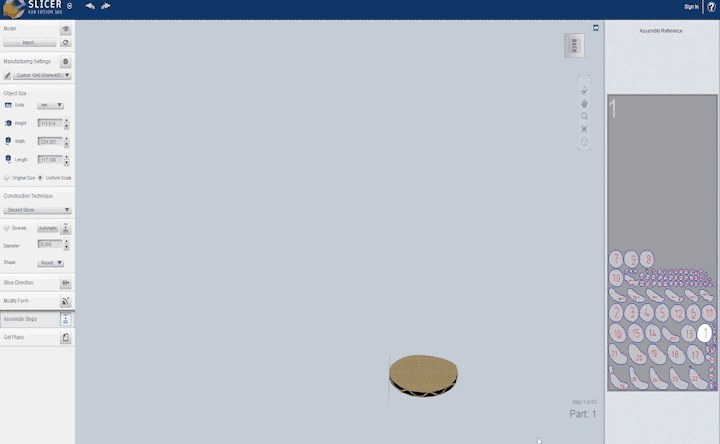
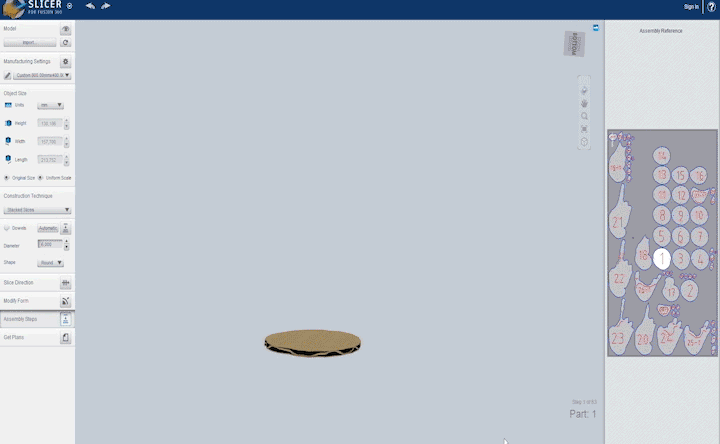
Finally, my model was ready to slice! In class we learnt how to use Slicer 360, a very powerful tool for digital fabrication. I had already used this program so it was not that complicated.
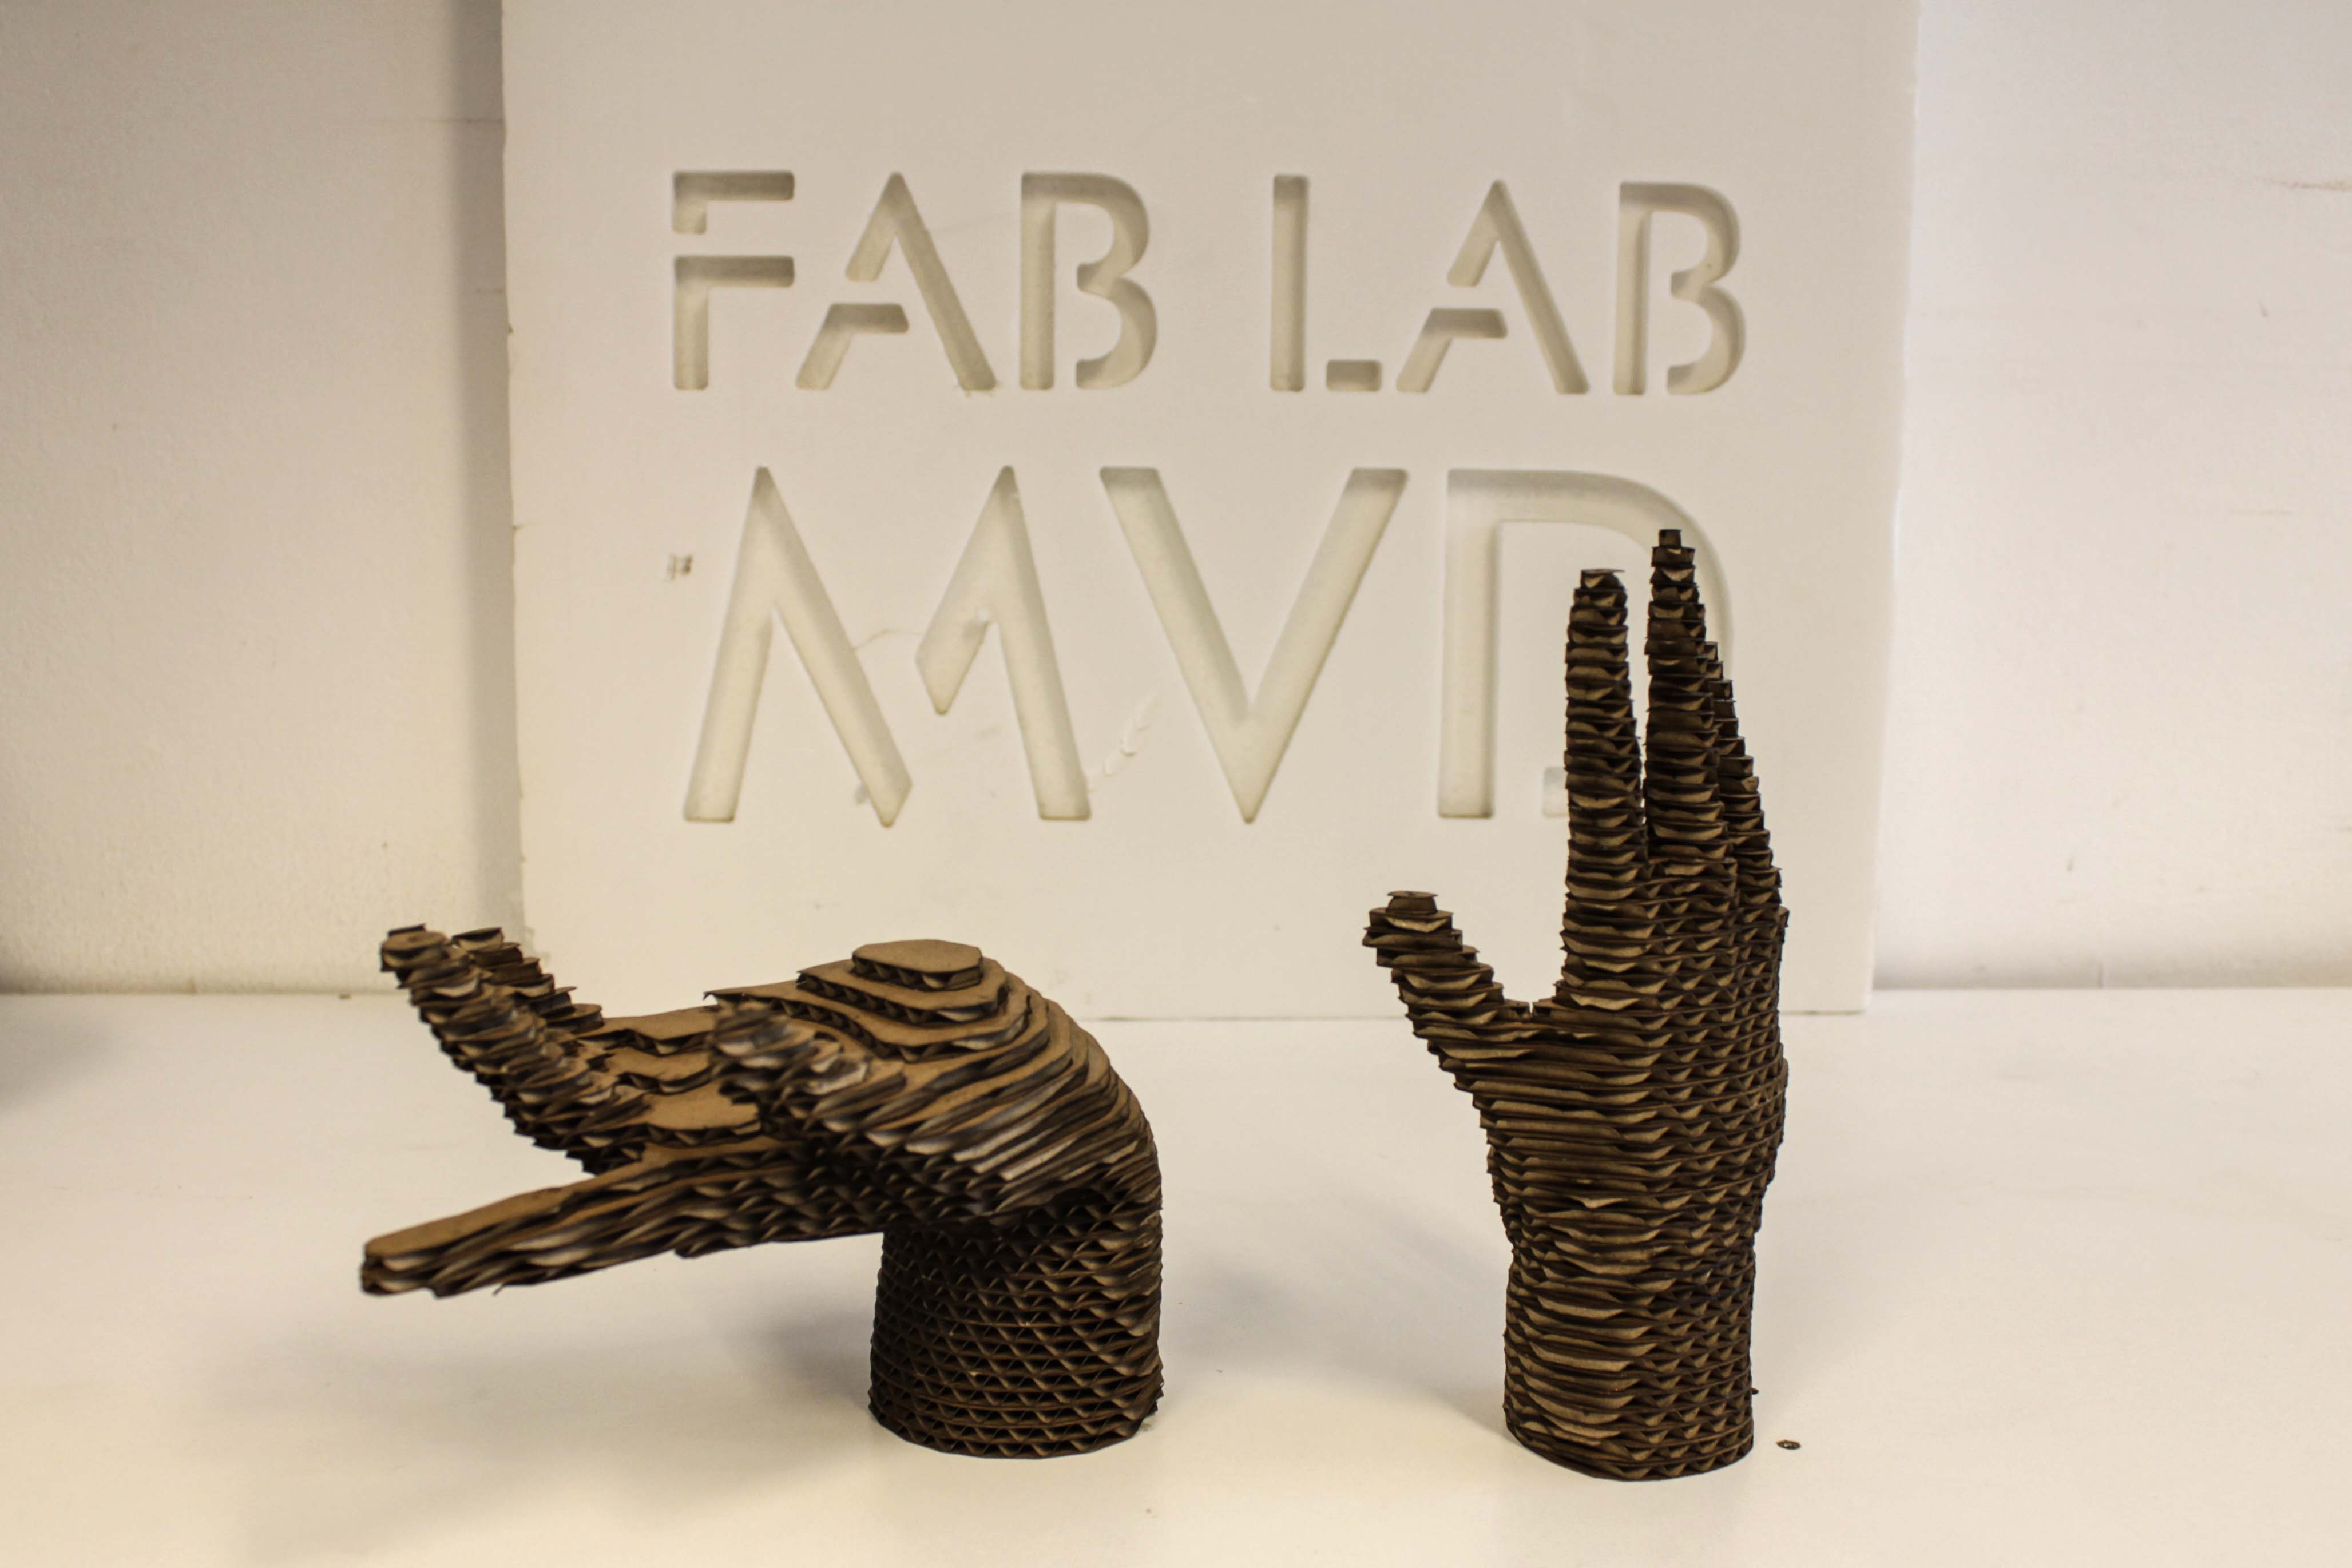
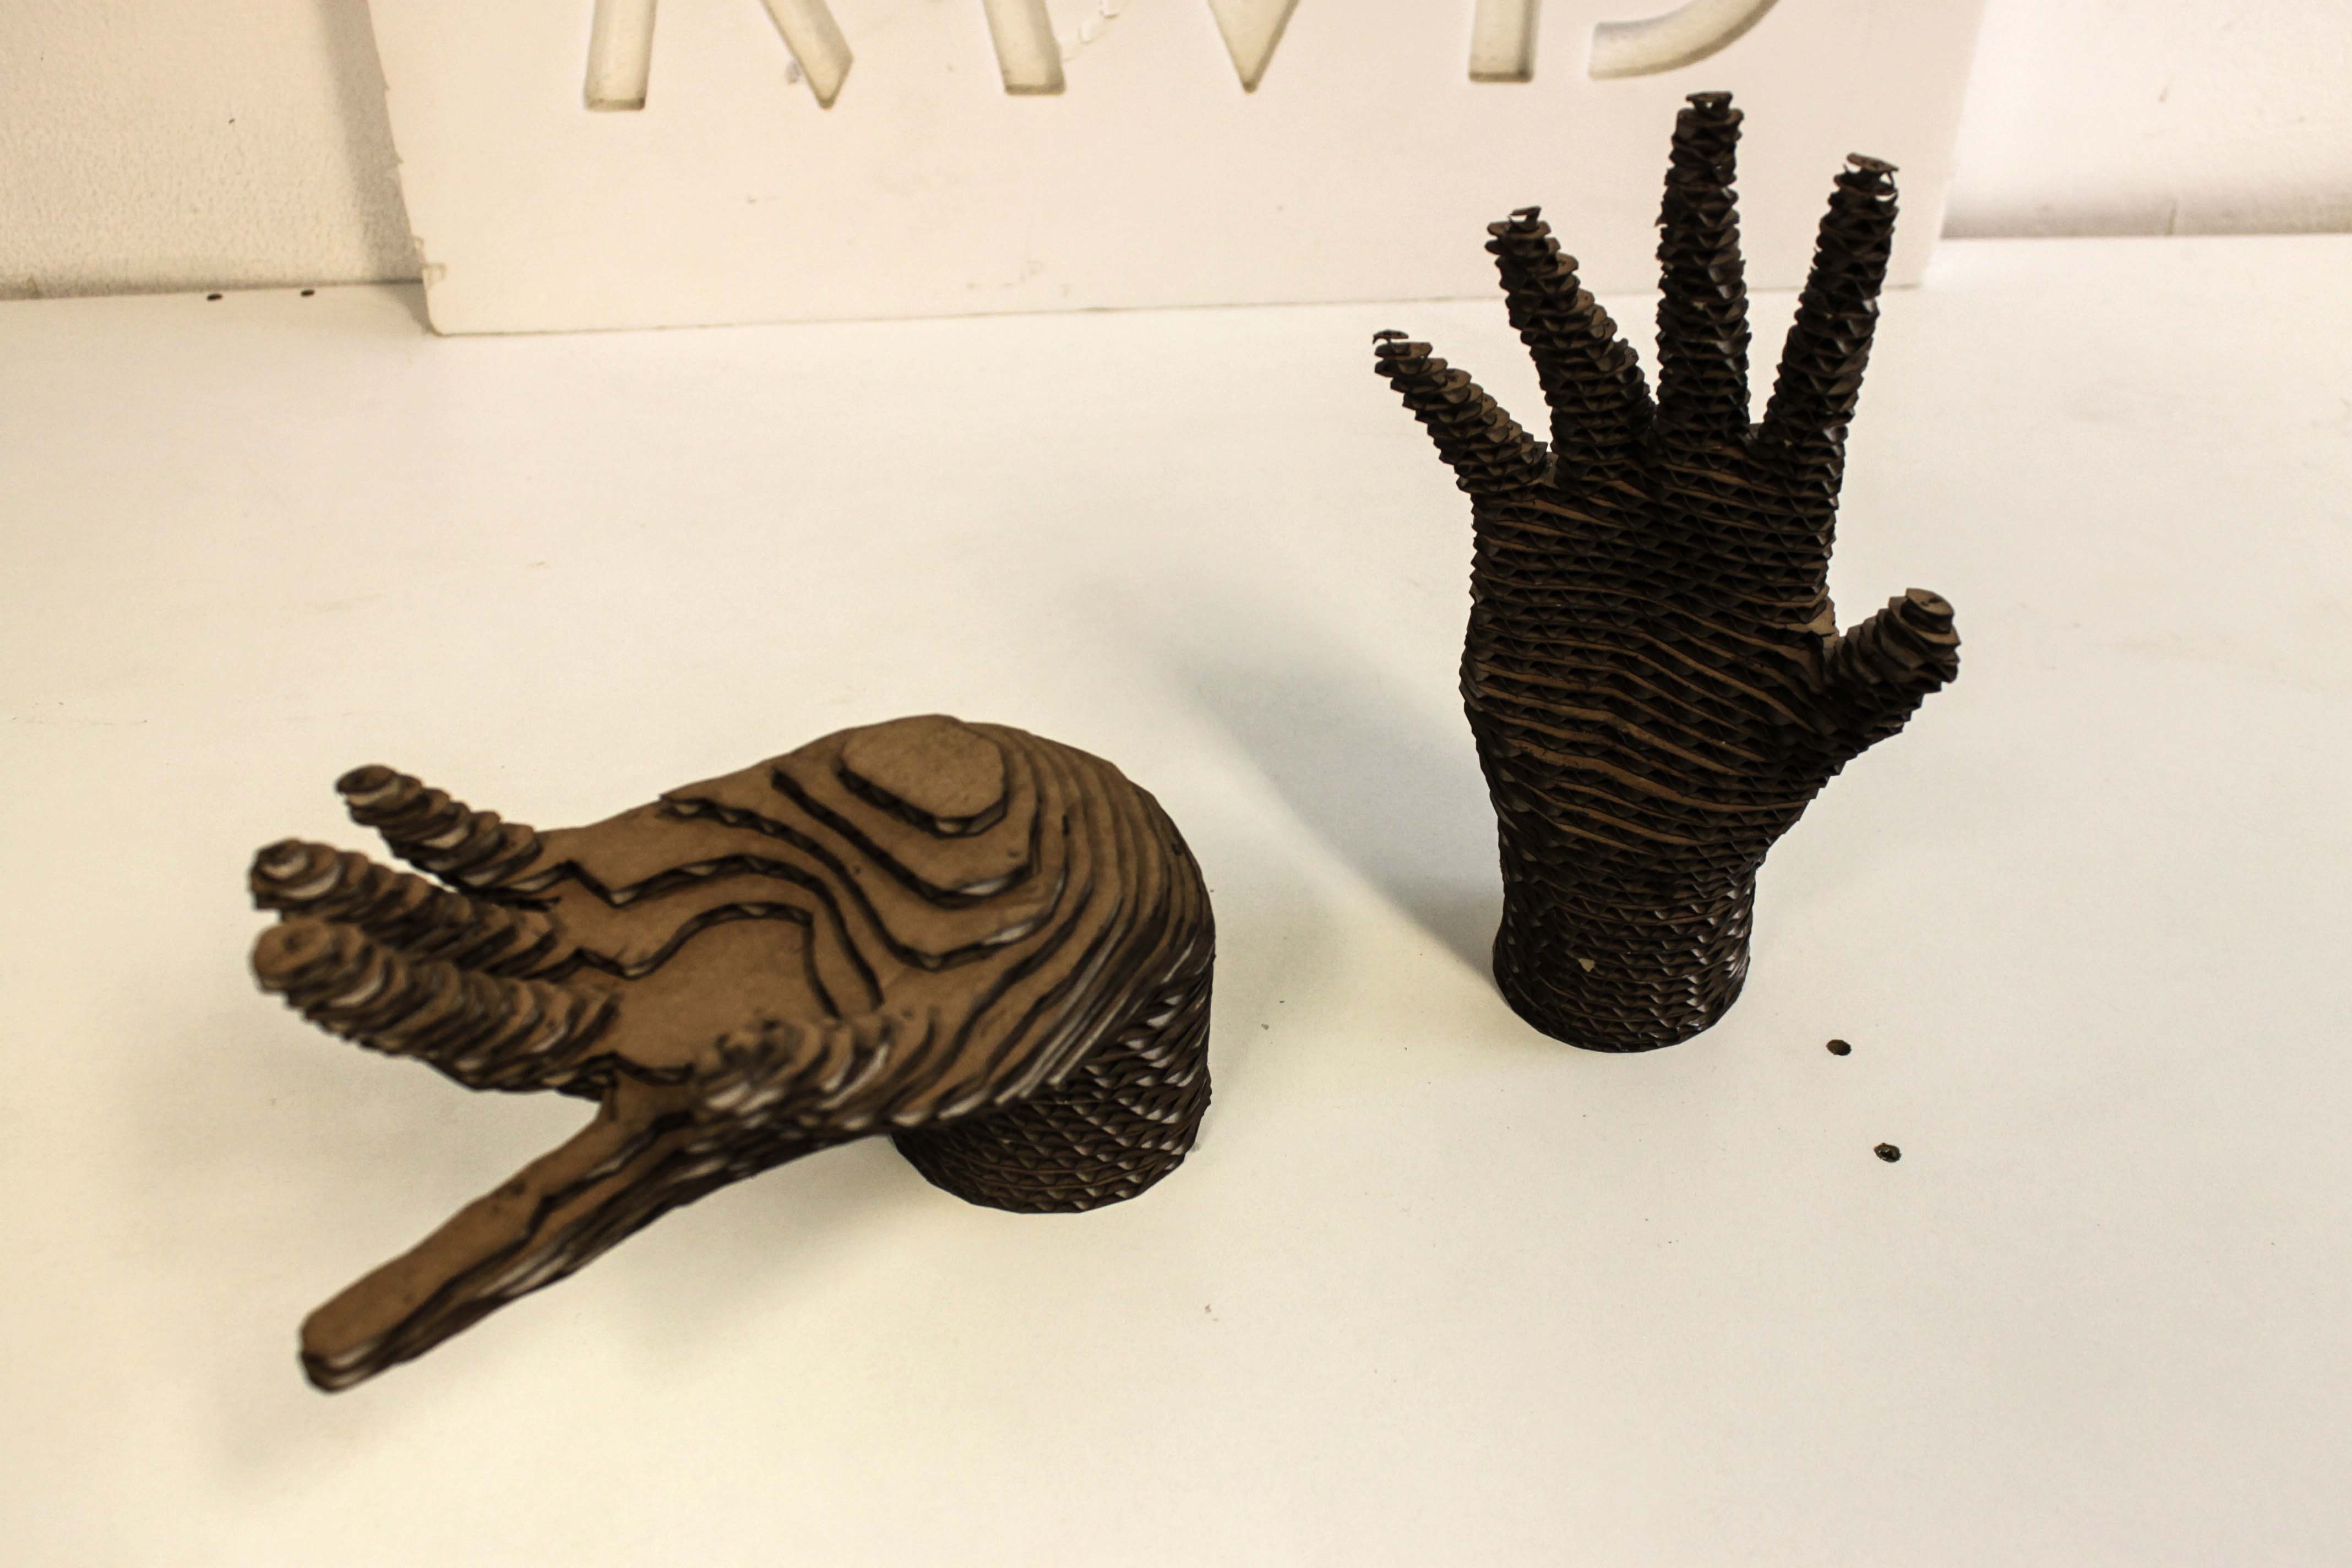
There are different techniques to transform a 3D objetc in 2D slices, such as “Stacked Slices”, “Interlocked Slices”, “Curves”, “Radial Slices” and “Folded Panels”. I decided to use the Stacked Slices techniques, because at the lab we receive donations of cardboard boxes that are discarded from a printer, so we have a lot of material, and it is always a good idea to give them a new use.
In addition to choosing the technique, you must also configure the material you are going to work with in the program, as well as the axes for slicing.
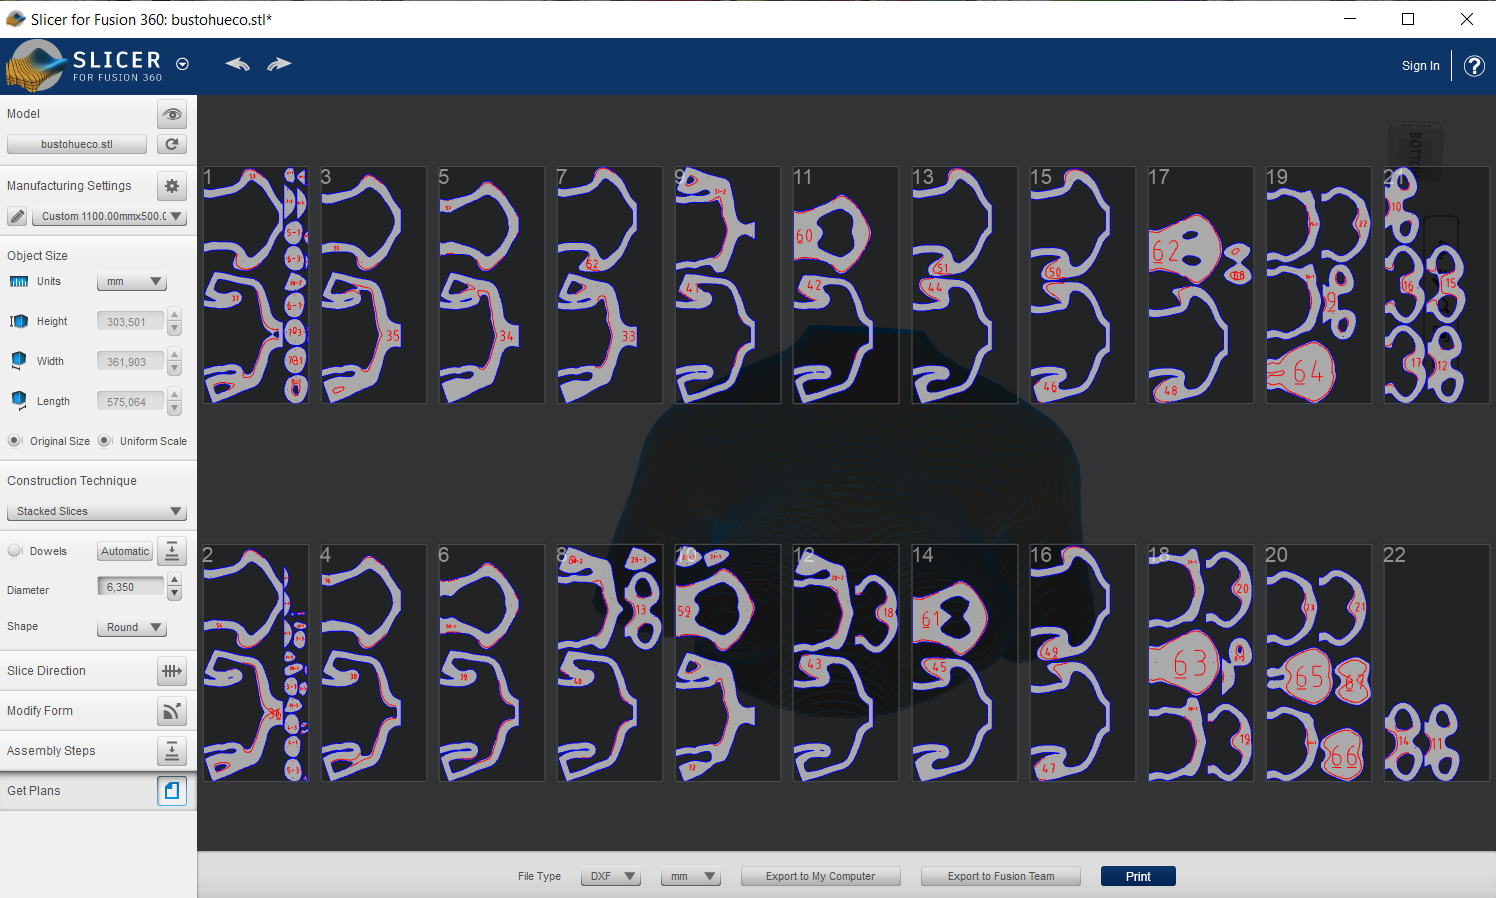
After exporting the files, I prepared them in Corel Draw, changing the color and width of the strokes, and rearrenging pieces. To process the files for laser cutting, we use a plug in for Corel.
Once the files are ready, all that remains is to start cutting!
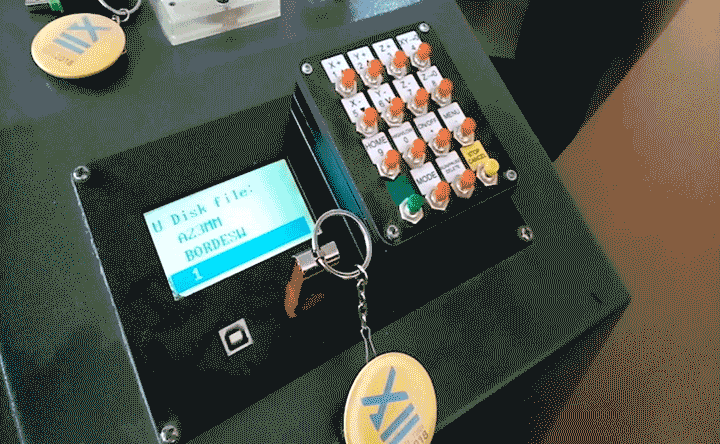
Step 4 : Lasercutting
The laser cutting machine is one of the digital fabrication technologies available in most FabLabs. This equipment uses laser to slice, cut and engrave different materials such as paper, cardboard, plywood, fabric and acrylic. According to the type of material and its thickness you need to configure the speed and power of the laser beam.
How does it work? The ligh-power laser beam is generated inside a CO2 tube, mixtured with other gases; then it is reflected by a mirror system up to reach the nozzle, containing a focus lens that concentrates the light beams. The nozzle has to be at a certain distance (Focal length) from the material.
The values I used to cut 4.5mm corrugated cardboard are:
Power: 50%
Cutting speed: 1250 mm/m
Engraving speed: 4000 mm/m
Step 5 : Assembling Process
I had some troubles assembling the hands, as the pieces were so small that I could not use dowels, so I only had a few marks to use as reference when gluing each slice. So, from this experience, I think that maybe this is not the best technique to make hands prototypes
Gallery

3D Models
I uploaded my 3D model to Sketchfab and added a little glossy finish by following the next steps:
-Go to Edit 3D settings.
-Go to Scene tab and choose PBR Renderer option. In that section you can also change the background. I selected a Color background (#00FF76).
-Go to Material Tab. In PBR MAPS Section, for Workflow choose Metalness (if you want a glossy look), and in Base Color you can choose whatever color you want (I used #FF0064). In Roughness/glossiness, choose glossiness and move the slicer to the max.
-After you finish, just press Save View and thats it!
Files
All the files made in this assignment can be downloaded here, including the 3D model of Voguing Woman, the hollow bust and the files of the sectioned parts made in Slicer 360 in pdf format.