5. E-textiles
October 20th, 2020 by Liza Stark
Embending electronic into textiles. Hard tech-Soft World. Electrical and electronic components such as microcontrollers, sensors and actuators are integrated to allow textiles, garments and wearables to react, send information or interact with the environment. In recent years, the field of e-textiles has experienced significant growth.
In this class we learned how to produce soft circuits, sensors and actuators; and how to embed them in garments, soft objects or wearables. We also studied soft-hard connections. Moreover, we discovered necessary materials, components, tools and explored existing projects
Research
To start with this week assignment I searched for bibliography and works and projects of designer, artists and professionals related with E-textiles.
Artesanal Tecnológica Encomienda Sonora
Artesanal tecnológica is a interdisciplinary collective that works as laboratory, experimenting on dialogues between textiles, handcraft techniques and digital technologies.
Based on a research carried out by different textile collectives, regarding conciliation through textile and digital practices, manual work, and women's stories, different prototypes were generated.
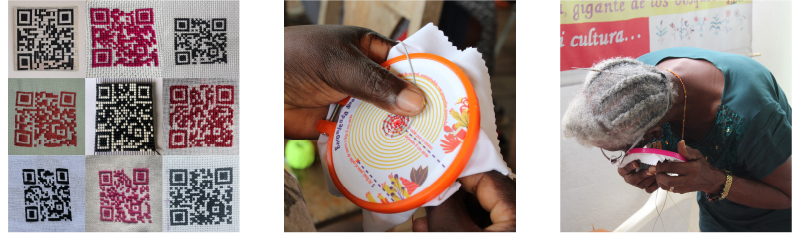
Encomienda sonora is a project based on one of these prototypes and it is an invitation to think about the bodies that listen and about the importance of sharing the stories. It is a textile speaker embroidery made with a spiral tape wire, a small amplifier and magnets, which are connected by a audio to a cell phone or computer, connecting women's messages from different communities of Colombia: women recording stories and share them through a network, and women who embroider their own speakers to listen to other stories, and record their own.
Dora Bartilotti Veracruz, Mexico, 1988
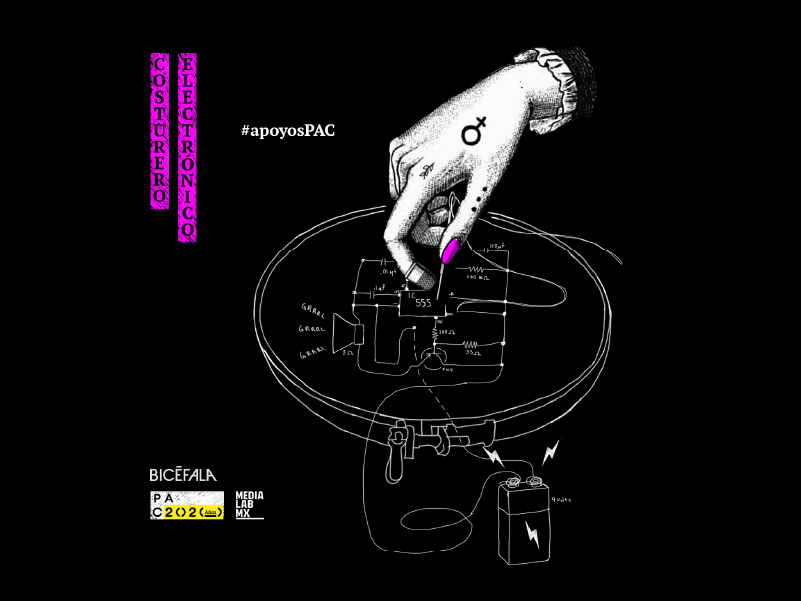

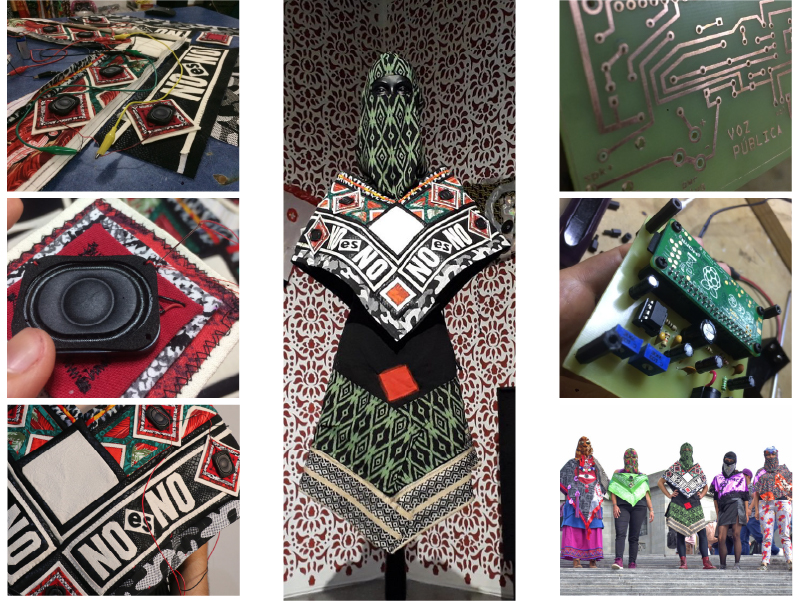
Multimedia artist, originally from Veracruz, currently resides and develops her projects in Mexico City. Her production seeks to generate critical dialogues between art, design, pedagogy and technology, mainly through participatory practices and processes, collaboration and coexistence. She currently explores the materialities of fabric and electronics as tactical means for feminist activism and collective action.
La Jaquer EsCool - Rebelión textil from Platohedro on Vimeo.
Useful links
Process
An introduction to e-textile
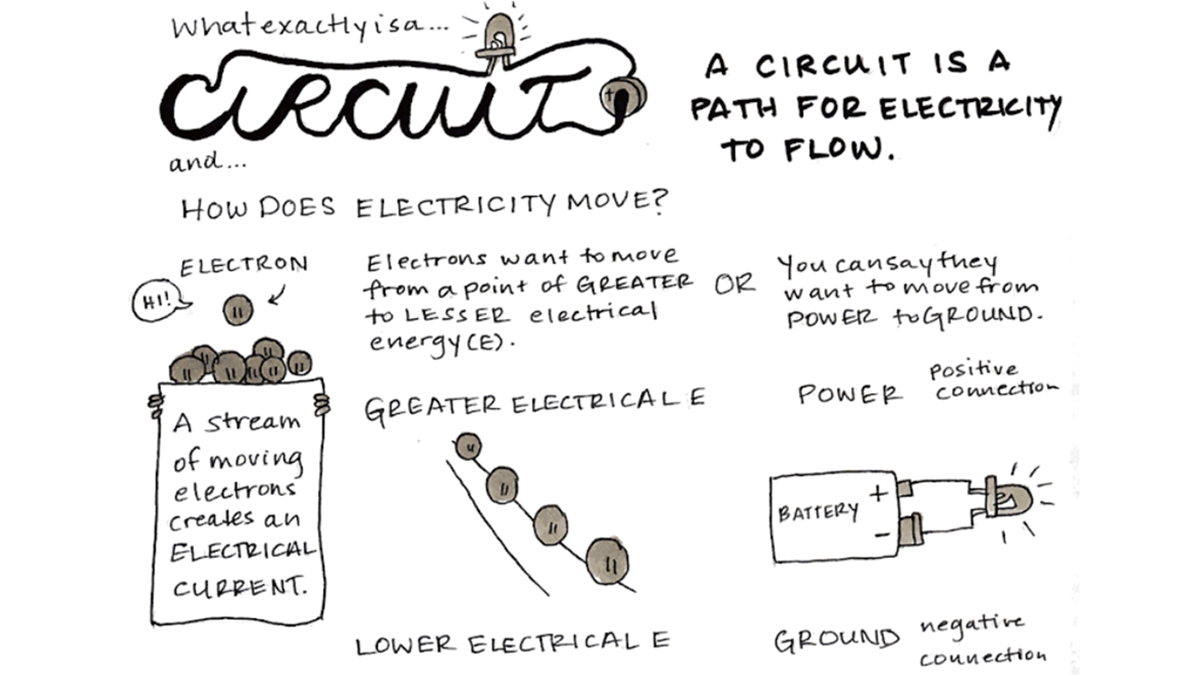
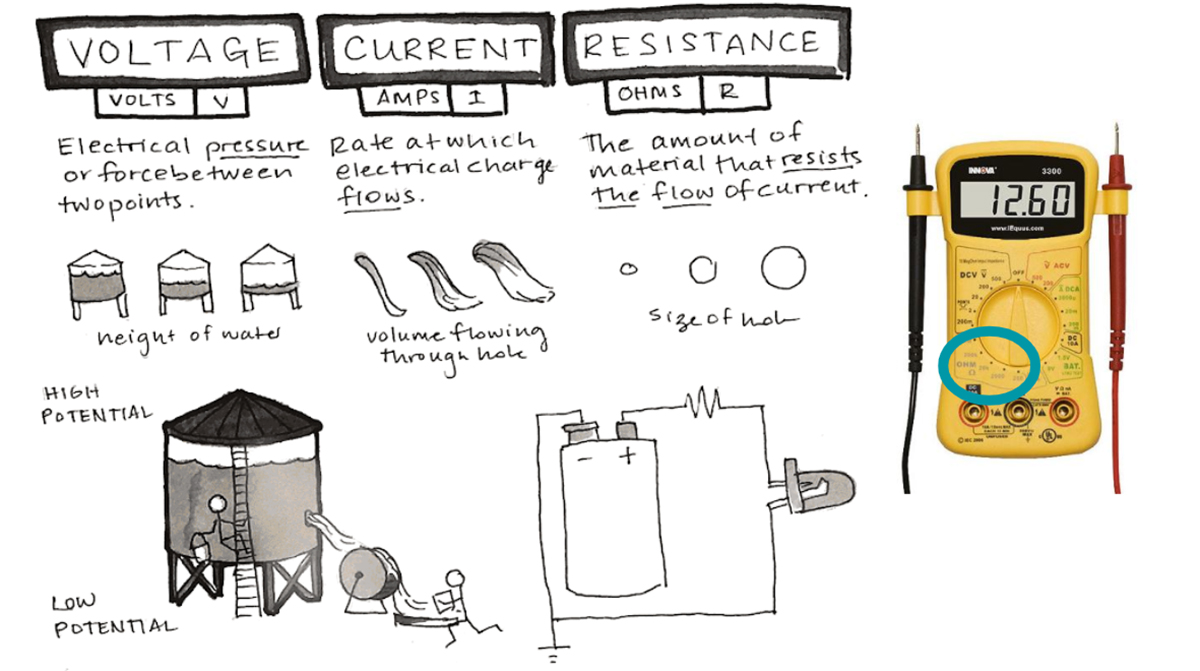
We had Global lecture by Liza Stark who introduced us to the universe of E-textile and gave us a very interesting insight into various projects. She explained how does electricity works, what is a circuit and what are the different elements that are part of an electrical circuit.
 Liza Stark Lecture Notes
Then, during the week we had some hands-on tutorials with Emma Pareschi, which were extremely really good, since it introduced us step by step to the world of the electronics, from the most basic concepts to a little bit more complex notions and tools.
Conductive materials and electrical components
First thing we talked about was necessary supplies and tools to get started. Emma taught us how to use the multimeter, a very important tool to work with electronics.
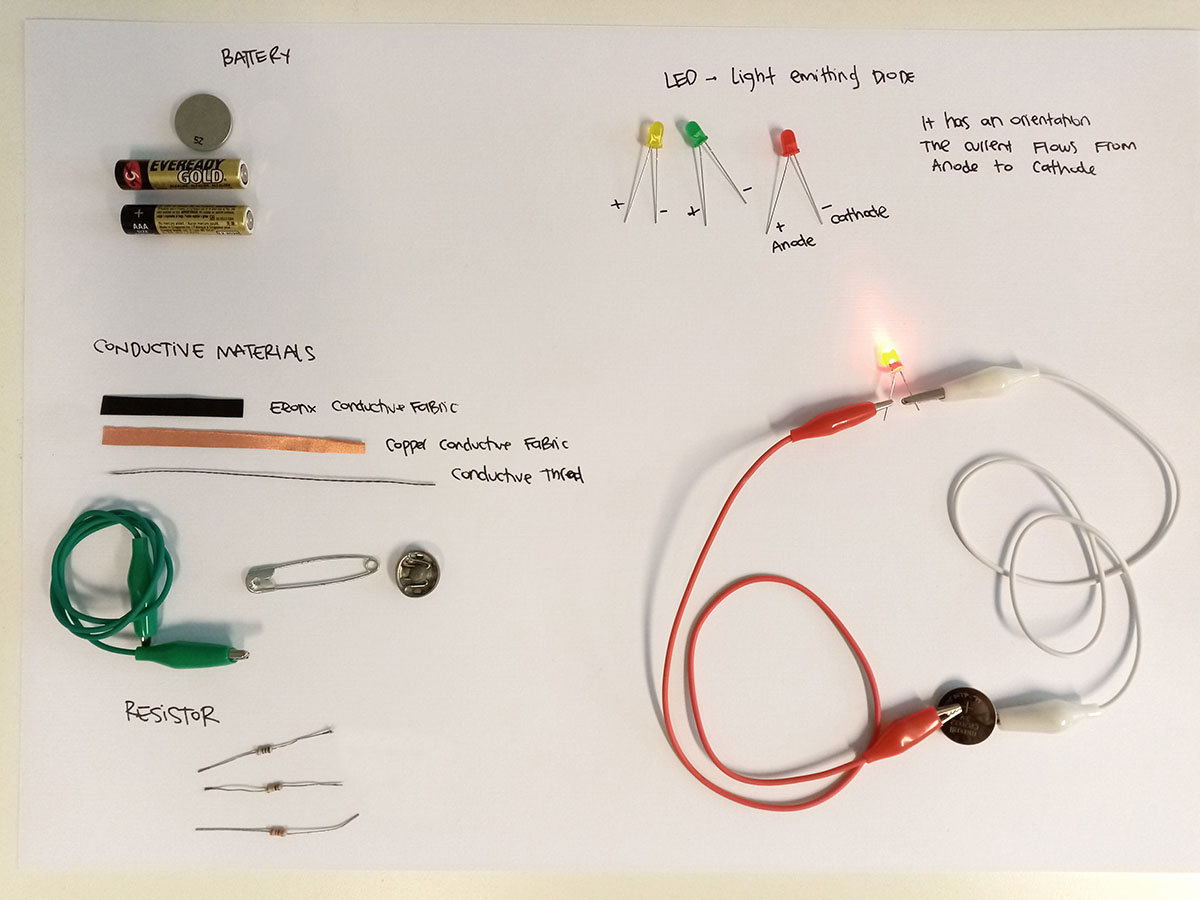 Electronical components and tools from FabLab MVD
Soft Circuit
A circuit is a path for electricity to flow, a close loop in which electrons can travel in. Different components play a different role in the system of the circuit.
Then we had an introduction in schematic, a diagram representation of the elements of a system using an abstract, graphic symbol language rather than realistic pictures.

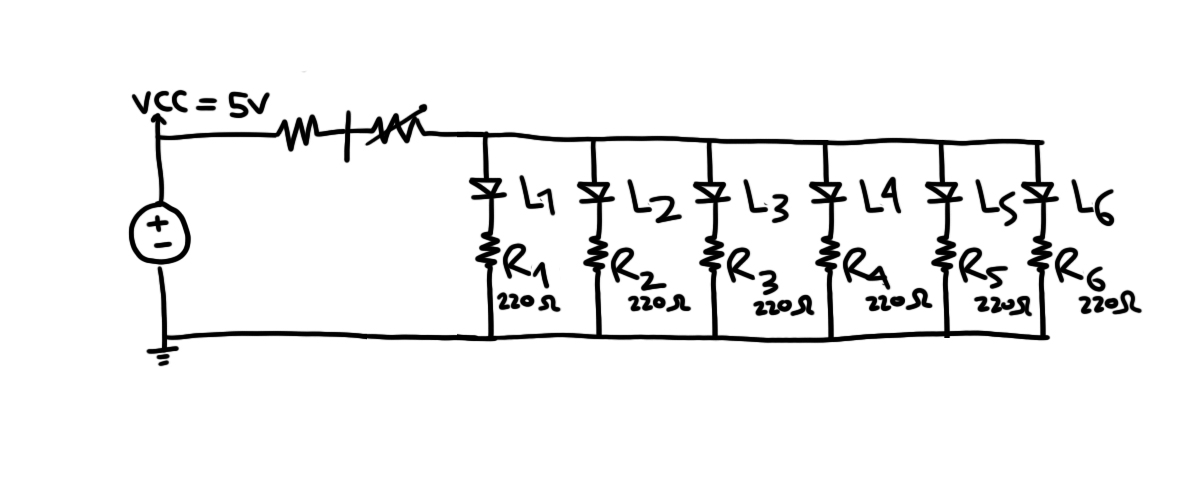 Parallel Led Circuit Schematic
Soft sensor
Sensors collect information or data, that enters a system.
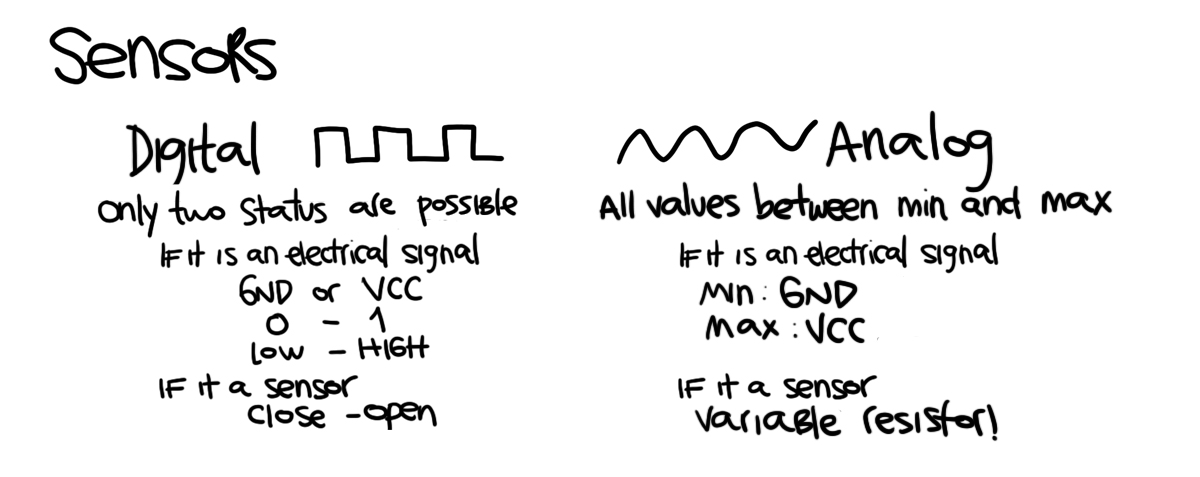
Digital
Switches A switch is a break in a circuit. Since the circuit is not complete, no electricity can flow to the components.
Quick prototype:
Textile Swithces:
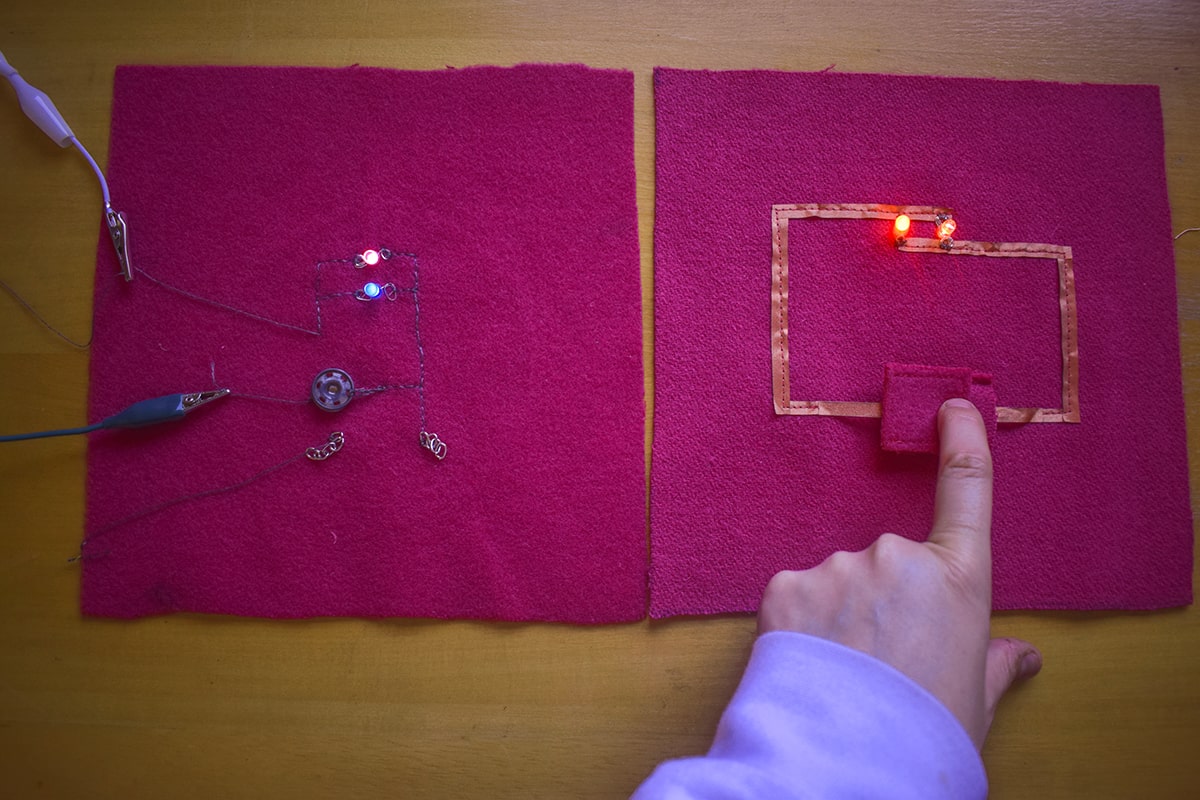
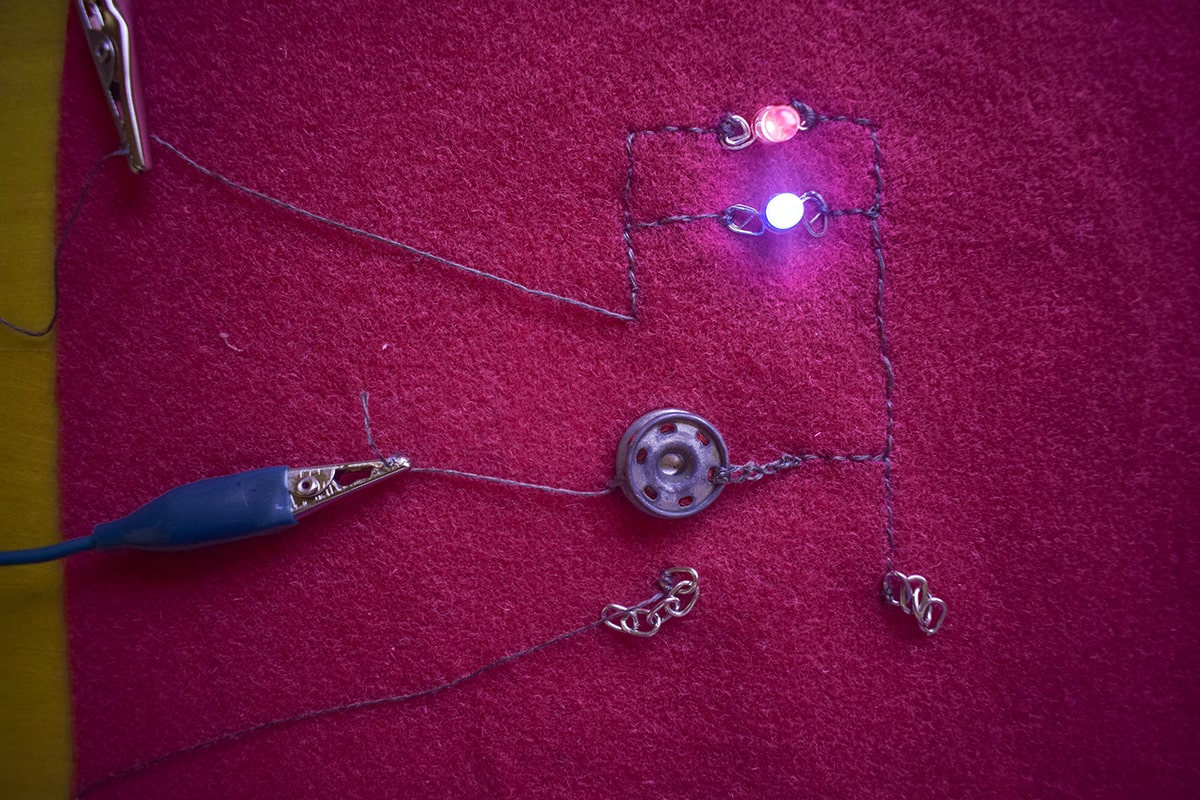 Toggle Switch - Press two pieces of conductive material together. These stay open in one position and colsed in the other
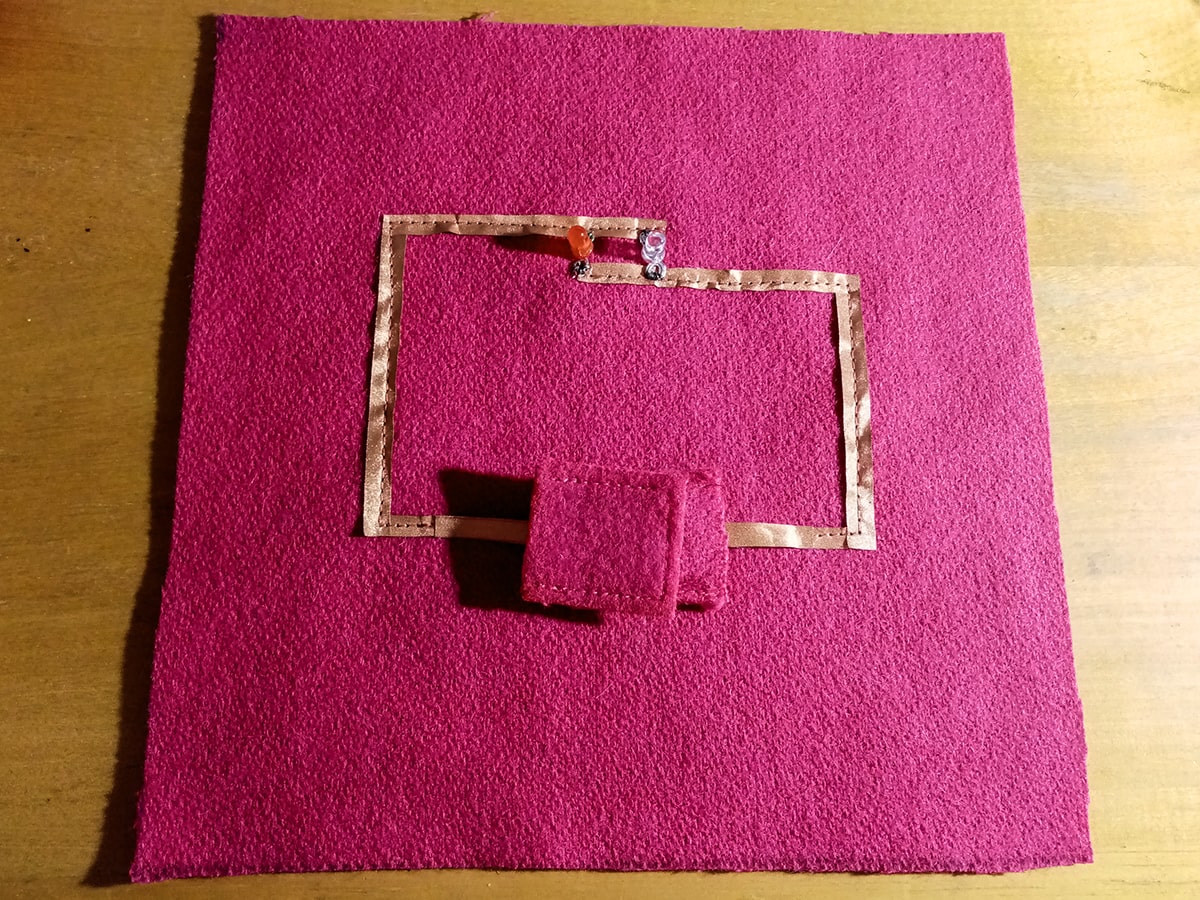
 A momentary switch stay open as long as you hold them by pressing conductive materials into contact
Analog
Analog sensors use resistance to get a broader range of values. By varying resistance of your imput -allowing more or less current to get through- you can change the output. That is why they are also called variable resistors
Quick prototype:
Fabric Analog Sensors:
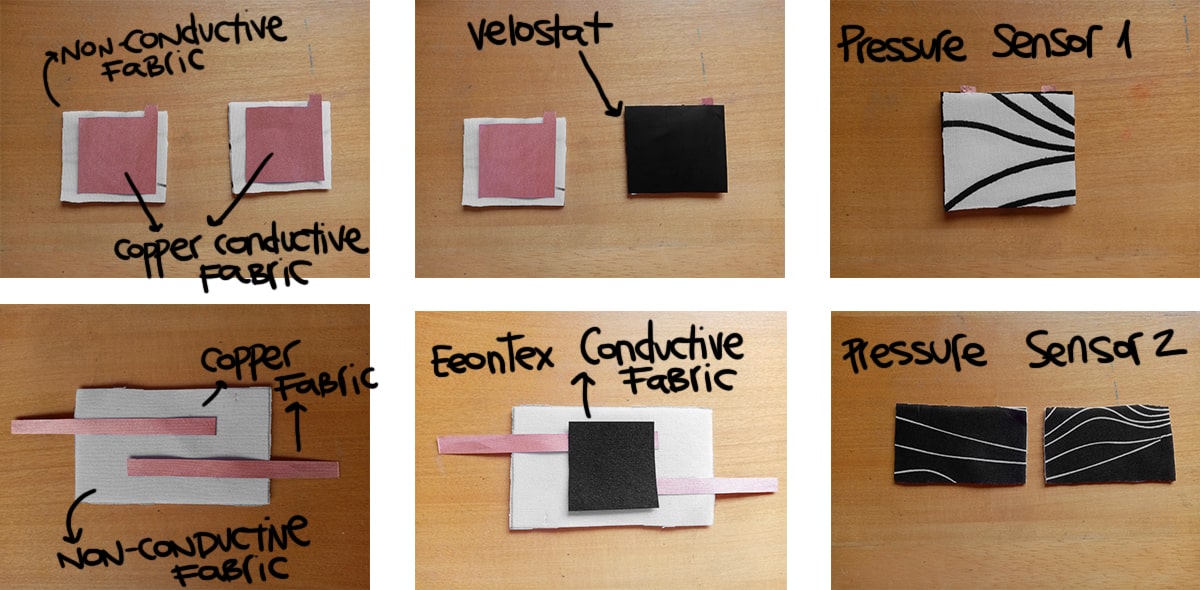
Preassure sensor 1: Velostat+CopperFabric
 Contact: Some materials are pressure sensitive, so will decrease in resistance when pressure is applied to them. In this case the pressure sensitive material used was Velostat
Preassure sensor 2: EeonTex+CopperFabric
 Contact: When pressed, the resistance decreases allowing more electricity to flow through the circuit. In this case the pressure sensitive material used was EeonTex
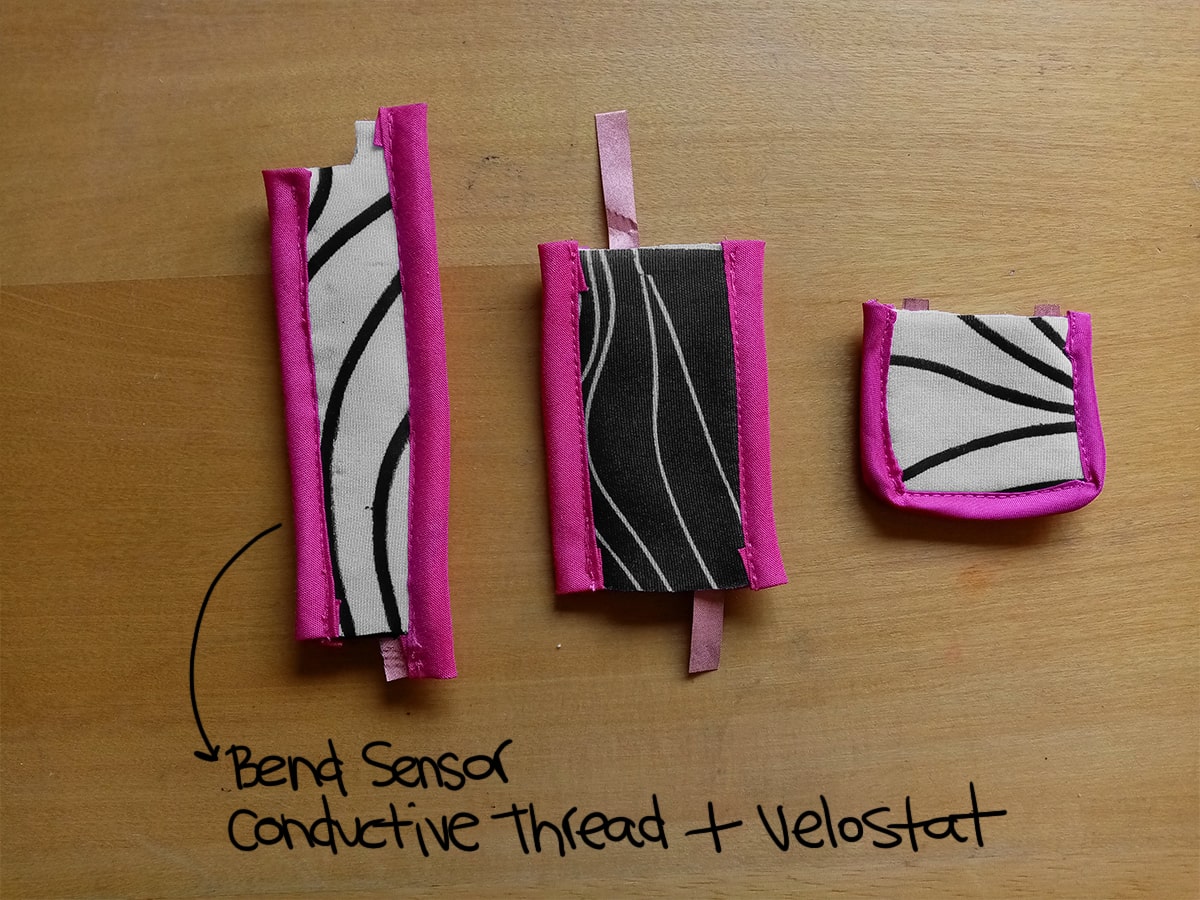
Bend Sensor: Velostat+ConductiveThread
 Bend Sensor. Resistance decreases as bent and more contact is made.
Programming
We can program sensor behavior to achive different results, using microcontrollers.
The sensors take the information from the physical world. That information is then processed by microcontrollers that control output in the physical world.
In this week, we learned how to use Arduino Uno, an open-source electronic prototyping platform. Arduino is both a hardware and a software.
We also learned how to use breadboards to prototype our circuit first, along with jumper wires and crocodile clips.
Tutorials
In Emma's tutorial, first thing we tryed was making a led blink
Pressure sensor
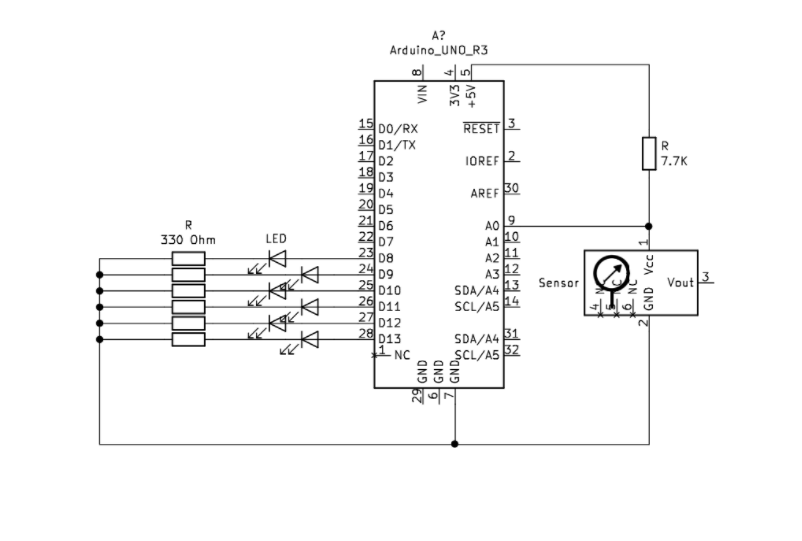
Then, we tryed using our analog sensors as a voltage divider. Resistance changes are translated in voltage changes, for the Arduino to read it. The sensors we constructed measure changes in resistance. But, as the Arduino is all digital, it can't read changes in resistance, but it can read changes in voltage.
This means we can send Arduino a change in voltage, wich can be used to generate different outputs
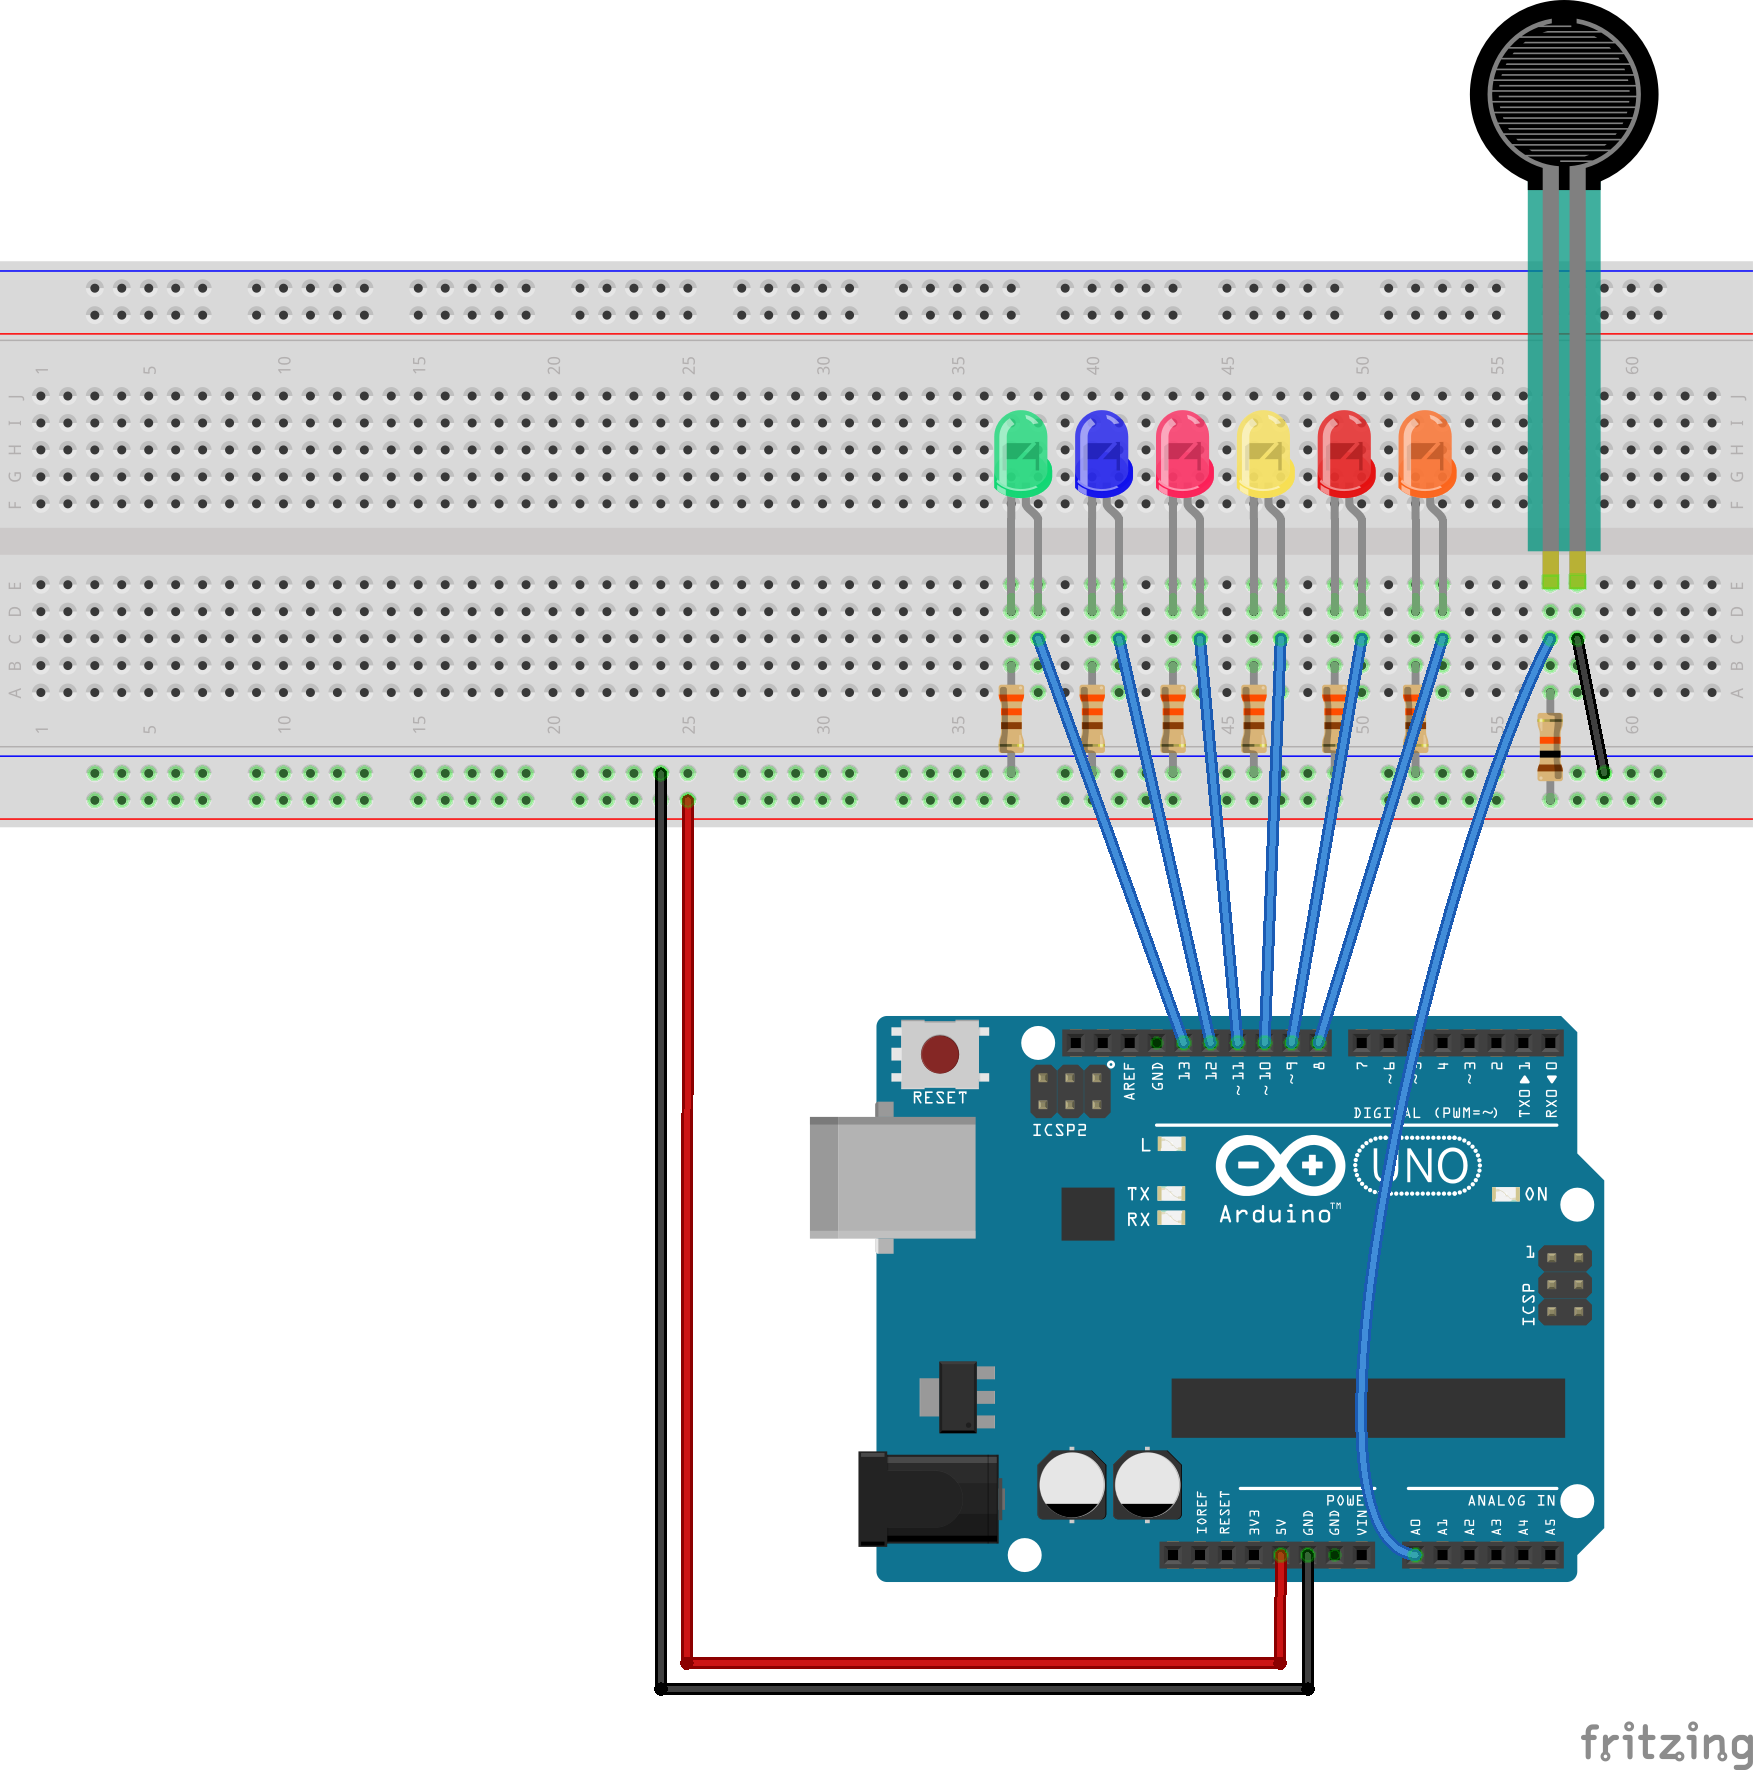
By connecting our sensor to the Arduino we controlled a LED. After trying this exercice in the tutorial I then did some experiments by adding more LEDS to different pins and then changing the code.
Circuit
Schematic
Output
Programming
Pressure Sensor Code
/*ANALOG SENSOR READ
/*Emma Pareschi, modified by me
 * with this sketch we read the analog sensor connected to pin analog_sensor_pin, and turn leds on depending on the analog_sensor_value
 */

int analog_sensor_pin = A0;
int analog_sensor_value = 0;
int led_pin8 = 8;
int led_pin9 = 9;
int led_pin10 = 10;
int led_pin11 = 11;
int led_pin12 = 12;
int led_pin13 = 13;

void setup() {
  pinMode(A0, INPUT);
  Serial.begin(9600);
  pinMode(led_pin8, OUTPUT);
  pinMode(led_pin9, OUTPUT);
  pinMode(led_pin10, OUTPUT);
  pinMode(led_pin11, OUTPUT);
  pinMode(led_pin12, OUTPUT);
  pinMode(led_pin13, OUTPUT);
 }

void loop() {
  analog_sensor_value = analogRead(analog_sensor_pin);

  analog_sensor_value = map(analog_sensor_value, 230, 130, 0, 255);
  analog_sensor_value = constrain(analog_sensor_value, 0, 255);

  Serial.println(analog_sensor_value); //
  delay(100);

     if (analog_sensor_value > 5 && analog_sensor_value < 50 ) {
      digitalWrite(led_pin8, HIGH);
     }
     else {
      digitalWrite(led_pin8, LOW);
     }

      if (analog_sensor_value > 50 && analog_sensor_value < 100) {
      digitalWrite(led_pin9, HIGH);
      }
      else {
      digitalWrite(led_pin9, LOW);
     }

      if (analog_sensor_value > 100 && analog_sensor_value < 150) {
     digitalWrite(led_pin10, HIGH);
      }
      else {
      digitalWrite(led_pin10, LOW);
     }

      if (analog_sensor_value > 150 && analog_sensor_value < 200) {
      digitalWrite(led_pin11, HIGH);
      }
      else {
      digitalWrite(led_pin11, LOW);
     }

      if (analog_sensor_value > 200 && analog_sensor_value < 225) {
      digitalWrite(led_pin12, HIGH);
      }
      else {
      digitalWrite(led_pin12, LOW);
     }

       if (analog_sensor_value > 225 && analog_sensor_value < 250) {
       digitalWrite(led_pin13, HIGH);
       }
       else {
      digitalWrite(led_pin13, LOW);
     }
}
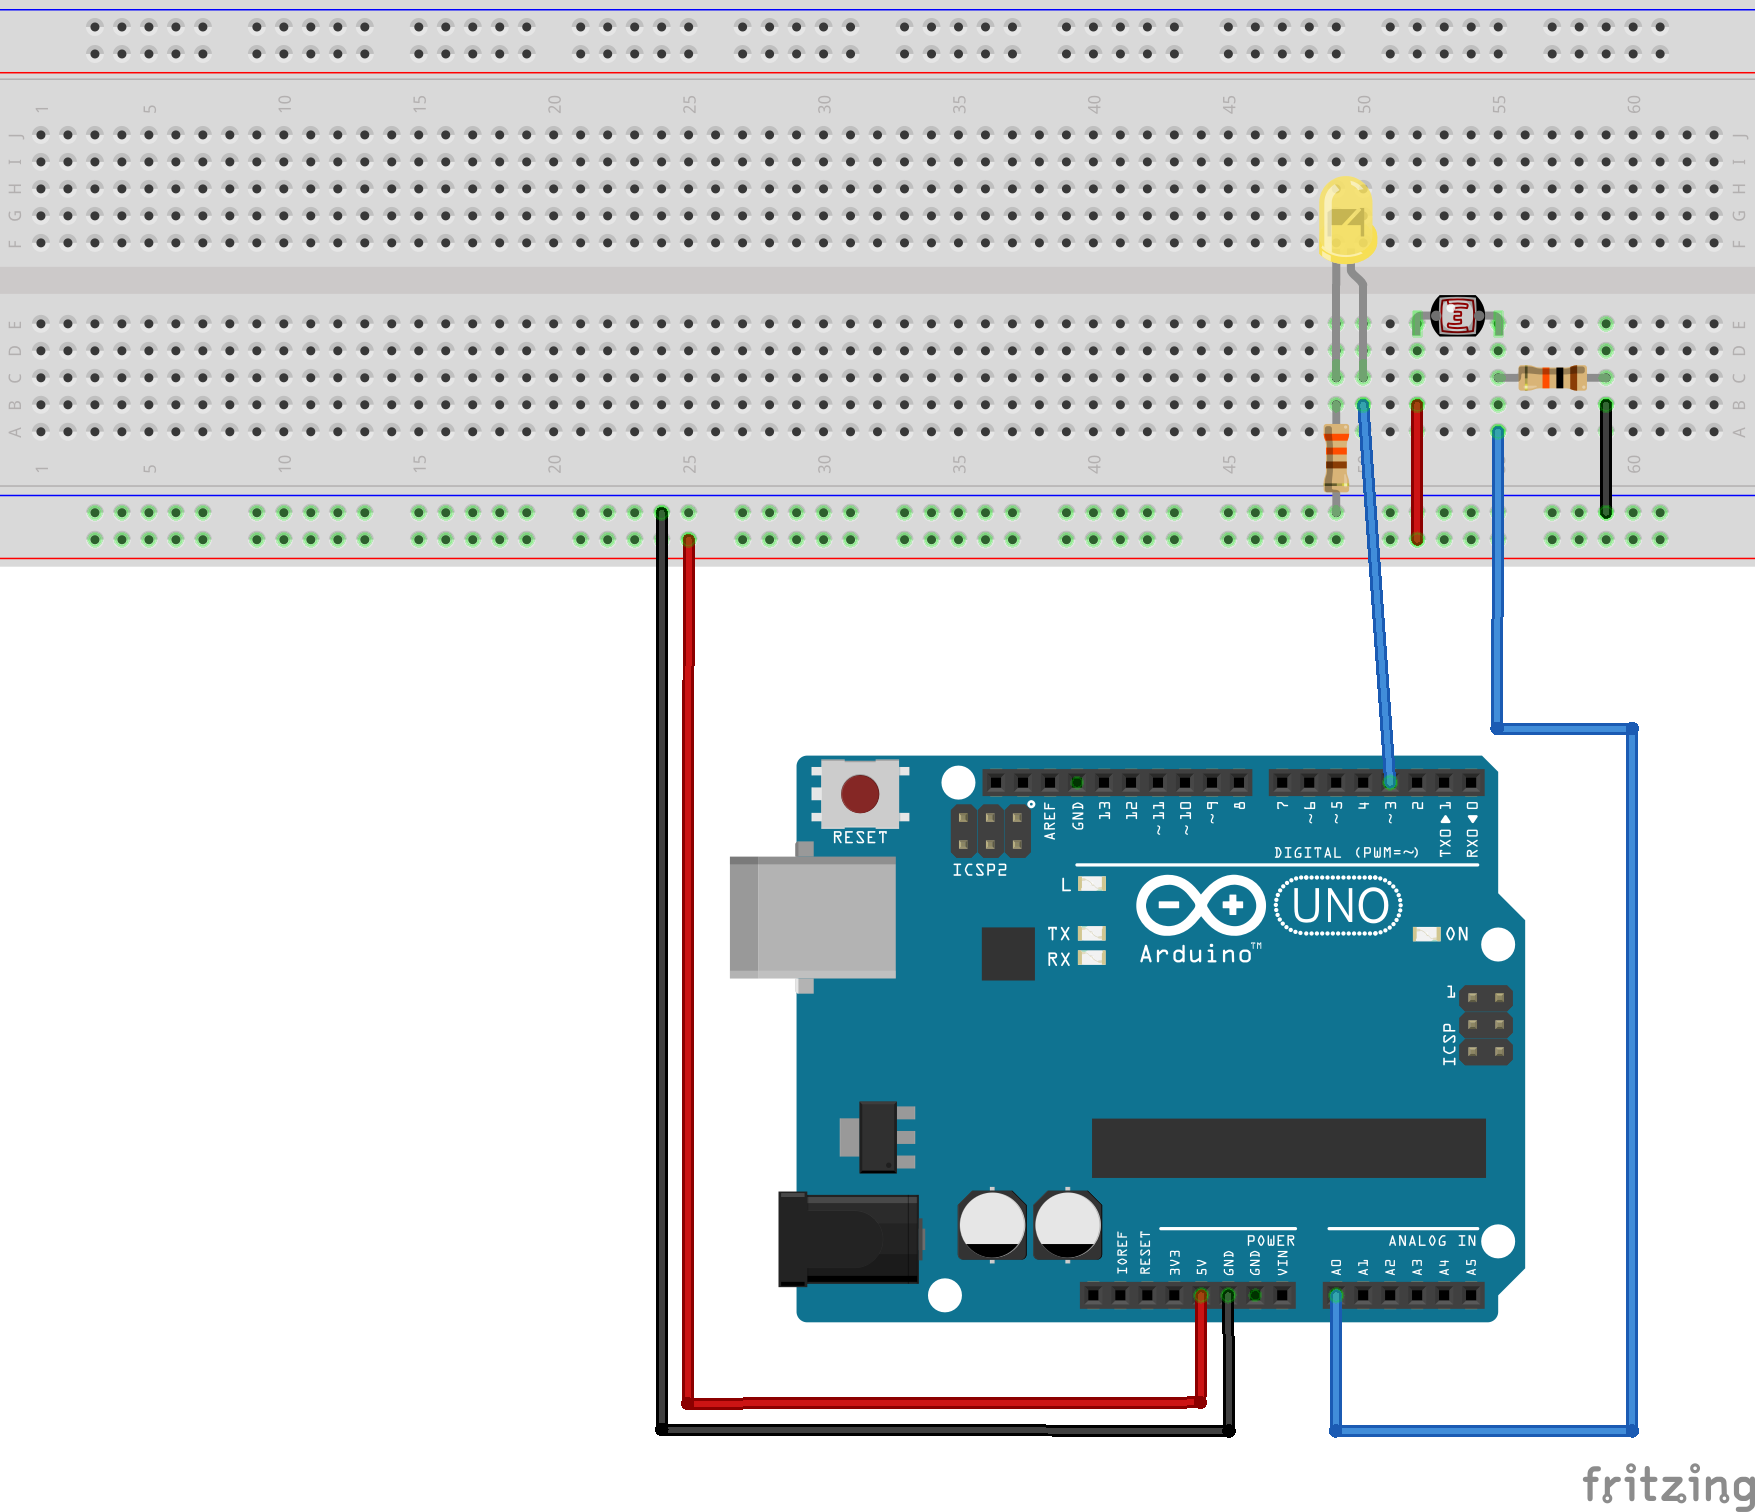
Photoresistor
Then I made a circuit using a photoresistor, that meassured the light of the environment, to turn a LED on and off.
Circuit
Output
/*LIGHT SENSOR ARDUINO
 * Created by ArduinoGetStarted.com
 *
 * This example code is in the public domain
 *
 * Tutorial page: https://arduinogetstarted.com/tutorials/arduino-light-sensor-triggers-led
 */

// constants won't change
const int LIGHT_SENSOR_PIN = A0; // Arduino pin connected to light sensor's  pin
const int LED_PIN          = 3;  // Arduino pin connected to LED's pin
const int ANALOG_THRESHOLD = 500;

// variables will change:
int analogValue;

void setup() {
  pinMode(LED_PIN, OUTPUT); // set arduino pin to output mode
}

void loop() {
  analogValue = analogRead(LIGHT_SENSOR_PIN); // read the input on analog pin

  if(analogValue < ANALOG_THRESHOLD)
    digitalWrite(LED_PIN, HIGH); // turn on LED
  else
    digitalWrite(LED_PIN, LOW);  // turn off LED
    }
Assignment
Finally, I decided to integrate a pressure analog sensor, and the output used above (leds controlled by preassure) in a swatch.
Inspiration
 Björk meets Gilda ♥
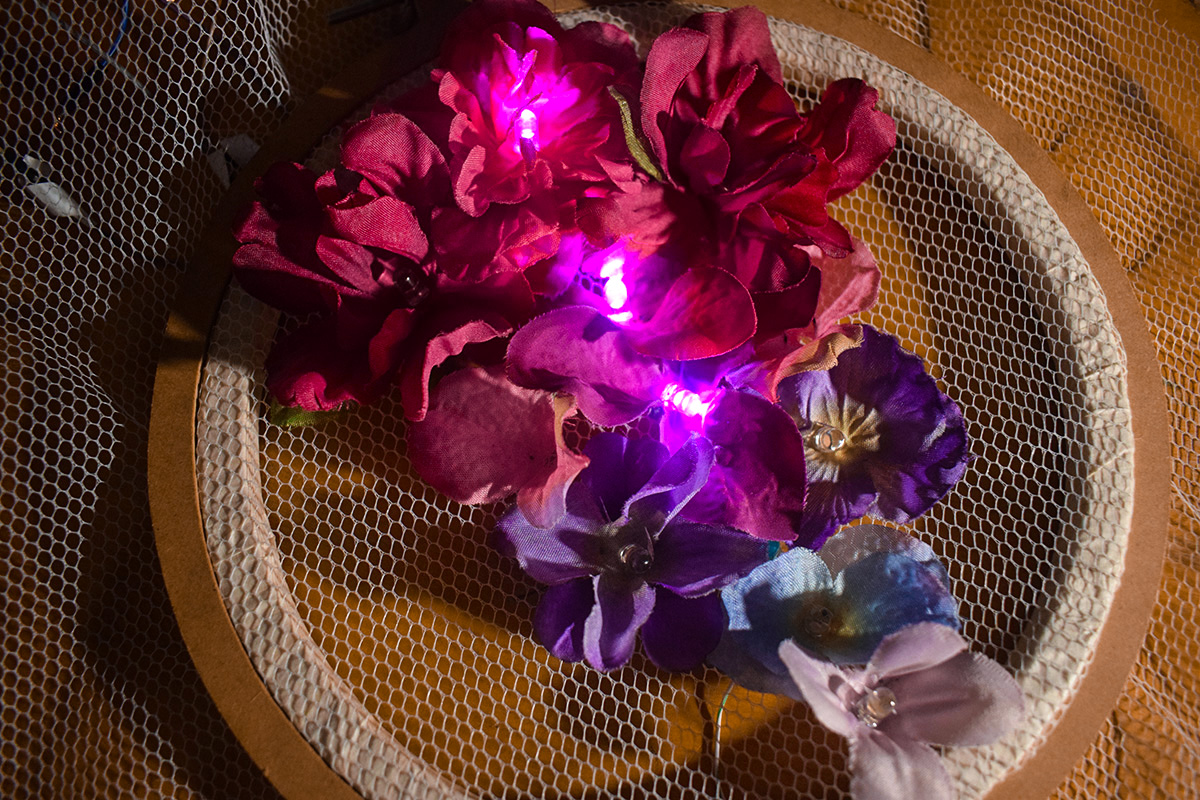
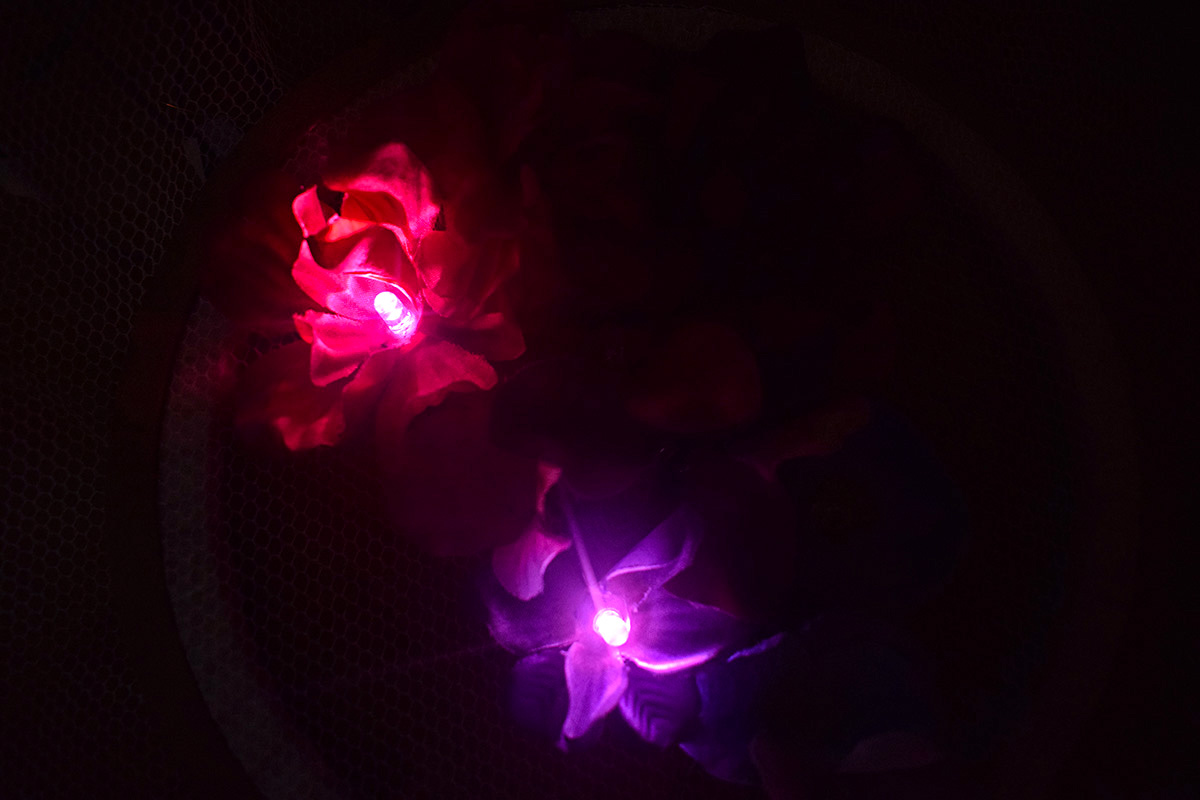
On an embroidery frame, I embroidered artificial flowers on tulle, and integrated a series of violet LED lights, connected in parallel.
Once I managed to sew the leds in parallel, I had to figure out how to connect the swatch to the sensor and the arduino.
This was the hardest part, because, for some reason the sewing with the conductive thread was not good, the current was not circulating properly and the circuit was very unstable.
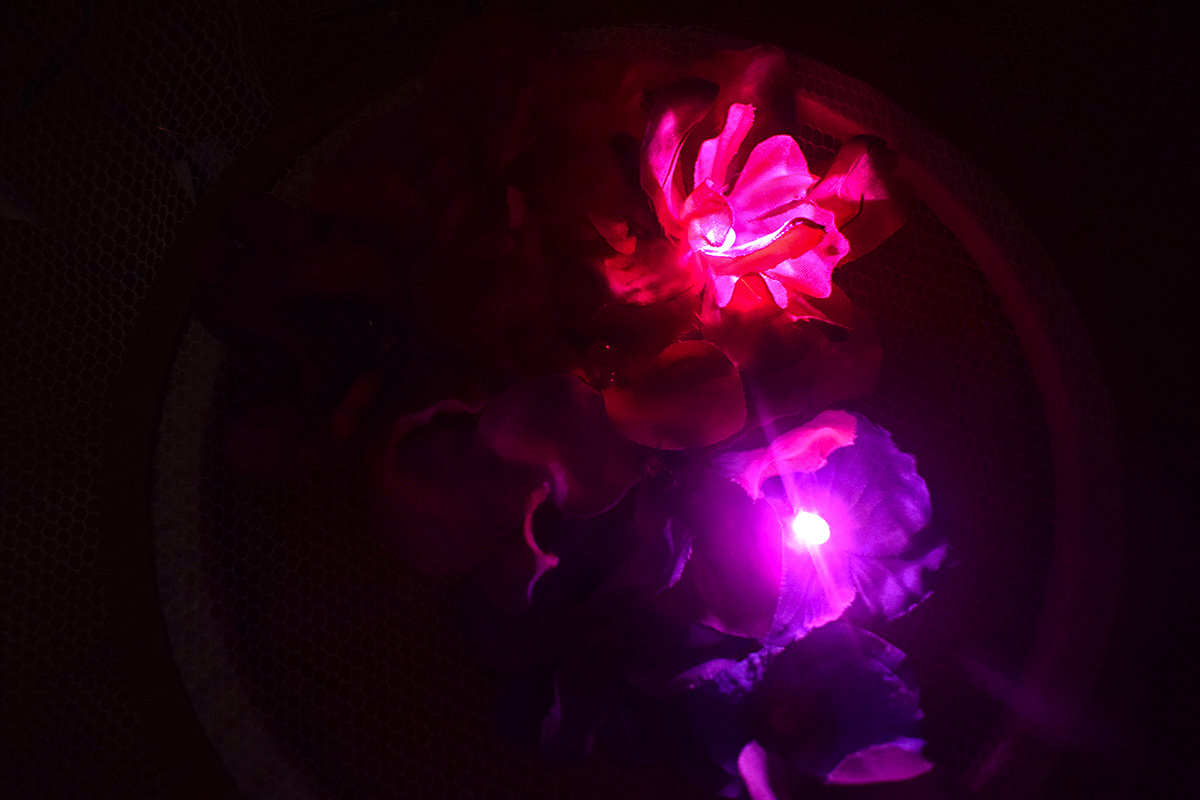
After several failed attempts, using crocodile clips and jumper wires, I built a circuit using the swatch with the flowers and leds, the pressure sensor, the protoboard, and the arduino. Finally, using the code I had tested before, I managed to make each strip of leds turn on depending on the pressure applied to the sensor.
My original idea was to add red and blue LEDs, and also try the photoresistor instead of using the pressure sensor, butI had so many complications that I was a little frustrated.
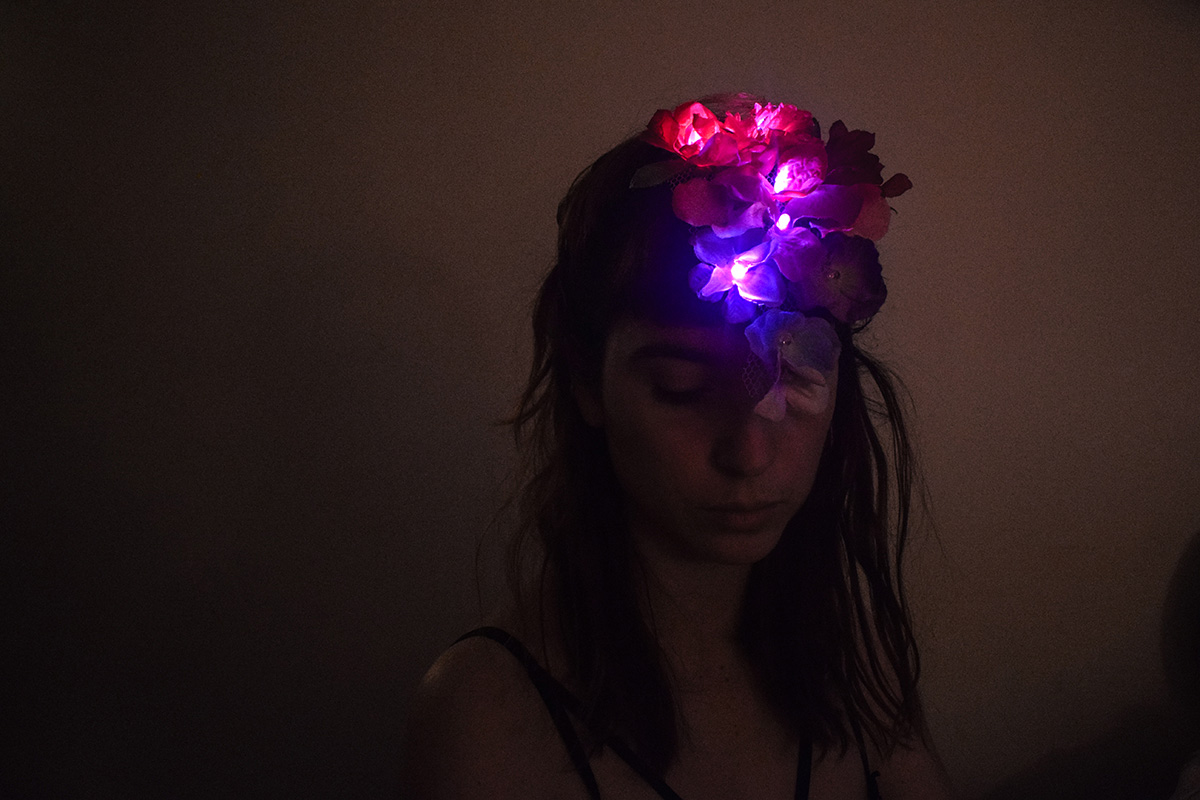
So I decided to leave it like that for this instance, and keep investigating in the future. Since my inspiration was masks and headdresses, I cut the tulle, disassembled the circuit, and made a new one, by simply connecting the leds to a 3V battery, using a conductive thread, and placed the swatch over my head.
Although the result was not exactly as I expected, and although many complications arose that I did not expect, I feel that a door was opened to further research, as I am very interested in playing with interactive pieces of clothing that have their own light, but also that respond to the light of the environment.
Gallery


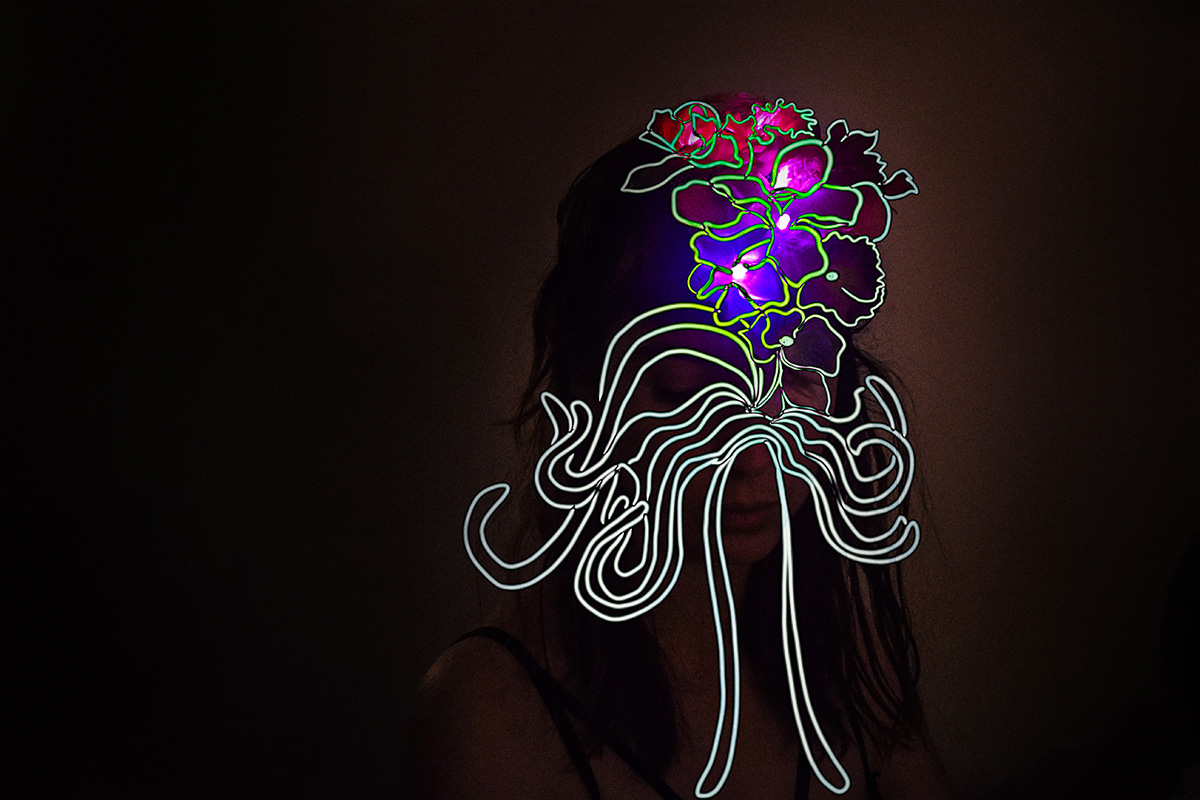 Editing, James Merry's masks style♥

 Using a video of the swatch, I had some fun editing and making visuals, which I then projected onto the prototype.
Improvements to consider in the future
I chose to work with tulle, since it is a fabric that is used a lot to make headdresses and accessories, because of its transparency, and it serves as a base for making embroidery. However, I consider that it was not a good choice to make a soft circuit.
On the other hand, I think that instead of using only hand-stitched conductive thread, it would have been better to make the connections with copper conductive fabric and a conductive thread seam made with the sewing machine (as the one I made in one of the switch swatches)
Furthermore, Ângela Barbour, my remote instructor suggested me to try using RGB LEDs and changing the color by changing the pressure on the analog sensor, which I thought was a very good idea and I would like to try it in the future. Unfortunately for this occasion I did not have enough RGB LEDs to do the test.